
PSR-S950 - Arranger keyboard YAMAHA - Free user manual and instructions
Find the device manual for free PSR-S950 YAMAHA in PDF.


User questions about PSR-S950 YAMAHA
0 question about this device. Answer the ones you know or ask your own.
Ask a new question about this device
Download the instructions for your Arranger keyboard in PDF format for free! Find your manual PSR-S950 - YAMAHA and take your electronic device back in hand. On this page are published all the documents necessary for the use of your device. PSR-S950 by YAMAHA.
USER MANUAL PSR-S950 YAMAHA
Thank you for purchasing this Yamaha Digital Workstation!
We recommend that you read this manual carefully so that you can fully take advantage of the advanced and convenient functions of the instrument.
We also recommend that you keep this manual in a safe and handy place for future reference.
Before using the instrument, be sure to read "PRECAUTIONS" on pages 4 – 5.
Included Accessories 6
Formats 6
About the Manuals....7
Welcome to Digital Workstation 8
Panel Controls and Terminals 10
Starting Up 14
Turning the Power On and Playing the Keyboard......14
Adjusting the Contrast of the Display (S750)
(PSR-S750 only)....16
Changing the Display Language 16
Displaying the Version Number 17
Playing the Demos....17
Basic Operations 18
Display-based Controls....18
Messages Shown in the Display 21
Instant Selection of the Displays — Direct Access......21
Main Display Configuration....22
File Selection Display Configuration .....24
File Management 26
Entering Characters....30
Resetting to the Factory-programmed Settings....31
Data Backup ....31
1 Voices – Playing the keyboard – 32
Playing Preset Voices ....32
Expanding Voices ....36
Transposing the Pitch of the Keyboard....38
Using the Wheels 39
Applying Voice Effects....39
Creating Your Original Organ Flutes Voices....41
2 Styles – Playing Rhythm and Accompaniment – 43
Playing a Style with the Auto Accompaniment......43
Chords 45
Operating Style Playback....46
Calling up Appropriate Panel Settings for the
Current Style (Repertoire) 48
Calling up Appropriate Panel Settings for the
Current Style (One Touch Setting) 49
Calling up Optimum Styles for Your Performance
(Style Recommender) 50
Turning Style Parts On/Off and Changing Voices......52
Adjusting the Volume Balance Between the Style
and Keyboard ....53
3 Songs – Playing, Practicing and Recording Songs – 54
Playback of Songs 54
Displaying Music Notation (Score)......56
Displaying Lyrics (Text)....57
Turning Song Channels On/Off 57
Practicing the Right-hand Part with Guide Functions ....58
Repeat Playback....59
Recording Your Performance....60
4 USB Audio - Playback and Recording Audio Files - 64
Playing Back Audio Files 64
Recording Your Performance as Audio 67
5 Multi Pads - Adding Musical Phrases to Your Performance - 69
Playing the Multi Pads....69
Using the Multi Pad Synchro Start Function .....70
Using Chord Match....70
Using WAVE Files for the Multi Pads 71
6 Music Finder - Calling Up Ideal Panel Setups for Your Performance - 73
Selecting a Record (Your Desired Music Genre) .....75
Finding Your Desired Record (Panel Settings) via
Search....76
Registering a Song, Audio or Style File 77
7 Registration Memory - Saving and Recalling Custom Panel Setups - 79
Registering Your Panel Setups 79
Saving the Registration Memory as a Bank file 80
Recalling a Registered Panel Setup 81
8 Microphone - Adding Vocal Harmony Effects to Your Singing - S950 82
Connecting a Microphone 82
Applying the Vocal Harmony Effects to Your Voice......83
9 Mixing Console – Editing the Volume and Tonal Balance – 86
Basic Procedure 86
10 Connections - Using Your Instrument with Other Devices - 88
Connecting a Microphone or Guitar S950 ([MIC/LINE IN] jack)....88
Connecting Audio Devices (OUTPUT [L/L+R]/[R] jacks, [AUX IN] jack) ....89
Connecting a Separate TV Monitor S950 ([VIDEO OUT] jack)....90
Connecting a Footswitch/Foot Controller ([FOOT PEDAL] jacks)....91
Connecting a USB Flash Memory ([USB TO DEVICE] terminal)....92
Connecting to a Computer ([USB TO HOST] terminal) .93
Connecting External MIDI Devices (MIDI [IN]/[OUT] terminals)....94
11 Utility – Making Global Settings – 95
Basic Procedure 95
Troubleshooting 96
Specifications 99
Index 101
SPECIAL MESSAGE SECTION
This product utilizes batteries or an external power supply (adapter). DO NOT connect this product to any power supply or adapter other than one described in the manual, on the name plate, or specifically recommended by Yamaha.
WARNING: Do not place this product in a position where anyone could walk on, trip over, or roll anything over power or connecting cords of any kind. The use of an extension cord is not recommended! If you must use an extension cord, the minimum wire size for a 25' cord (or less) is 18 AWG. NOTE: The smaller the AWG number, the larger the current handling capacity. For longer extension cords, consult a local electrician.
This product should be used only with the components supplied or; a cart, rack, or stand that is recommended by Yamaha. If a cart, etc., is used, please observe all safety markings and instructions that accompany the accessory product.
SPECIFICATIONS SUBJECT TO CHANGE:
The information contained in this manual is believed to be correct at the time of printing. However, Yamaha reserves the right to change or modify any of the specifications without notice or obligation to update existing units.
This product, either alone or in combination with an amplifier and headphones or speaker/s, may be capable of producing sound levels that could cause permanent hearing loss. DO NOT operate for long periods of time at a high volume level or at a level that is uncomfortable. If you experience any hearing loss or ringing in the ears, you should consult an audiologist.
IMPORTANT: The louder the sound, the shorter the time period before damage occurs.
Some Yamaha products may have benches and/or accessory mounting fixtures that are either supplied with the product or as optional accessories. Some of these items are designed to be dealer assembled or installed. Please make sure that benches are stable and any optional fixtures (where applicable) are well secured BEFORE using.
Benches supplied by Yamaha are designed for seating only. No other uses are recommended.
NOTICE:
Service charges incurred due to a lack of knowledge relating to how a function or effect works (when the unit is operating as designed) are not covered by the manufacturer's warranty, and are therefore the owners responsibility. Please study this manual carefully and consult your dealer before requesting service.
ENVIRONMENTAL ISSUES:
Yamaha strives to produce products that are both user safe and environmentally friendly. We sincerely believe that our products and the production methods used to produce them, meet these goals. In keeping with both the letter and the spirit of the law, we want you to be aware of the following:
Battery Notice:
This product MAY contain a small non-rechargeable battery which (if applicable) is soldered in place. The average life span of this type of battery is approximately five years. When replacement becomes necessary, contact a qualified service representative to perform the replacement.
This product may also use “household” type batteries. Some of these may be rechargeable. Make sure that the battery being charged is a rechargeable type and that the charger is intended for the battery being charged.
When installing batteries, never mix old batteries with new ones, and never mix different types of batteries. Batteries MUST be installed correctly. Mismatches or incorrect installation may result in overheating and battery case rupture.
Warning:
Do not attempt to disassemble, or incinerate any battery. Keep all batteries away from children. Dispose of used batteries promptly and as regulated by the laws in your area. Note: Check with any retailer of household type batteries in your area for battery disposal information.
Disposal Notice:
Should this product become damaged beyond repair, or for some reason its useful life is considered to be at an end, please observe all local, state, and federal regulations that relate to the disposal of products that contain lead, batteries, plastics, etc. If your dealer is unable to assist you, please contact Yamaha directly.
NAME PLATE LOCATION:
The name plate is located on the bottom of the product. The model number, serial number, power requirements, etc., are located on this plate. You should record the model number, serial number, and the date of purchase in the spaces provided below and retain this manual as a permanent record of your purchase.
Model
Serial No.
Purchase Date
92-BP (bottom)
PLEASE KEEP THIS MANUAL
PRECAUTIONS
PLEASE READ CAREFULLY BEFORE PROCEEDING
Please keep this manual in a safe and handy place for future reference.

WARNING
Always follow the basic precautions listed below to avoid the possibility of serious injury or even death from electrical shock, short-circuiting, damages, fire or other hazards. These precautions include, but are not limited to, the following:
Power supply/AC power adaptor
- Do not place the power cord near heat sources such as heaters or radiators. Also, do not excessively bend or otherwise damage the cord, or place heavy objects on it.
- Only use the voltage specified as correct for the instrument. The required voltage is printed on the name plate of the instrument.
- Use the specified adaptor (page 100) only. Using the wrong adaptor can result in damage to the instrument or overheating.
- Check the electric plug periodically and remove any dirt or dust which may have accumulated on it.
Do not open
- This instrument contains no user-serviceable parts. Do not open the instrument or attempt to disassemble or modify the internal components in any way. If it should appear to be malfunctioning, discontinue use immediately and have it inspected by qualified Yamaha service personnel.
Water warning
- Do not expose the instrument to rain, use it near water or in damp or wet conditions, place on it any containers (such as vases, bottles or glasses) containing liquids which might spill into any openings. If any liquid such as water seeps into the instrument, turn off the power immediately and unplug the power cord from the AC outlet. Then have the instrument inspected by qualified Yamaha service personnel.
- Never insert or remove an electric plug with wet hands.
Fire warning
- Do not put burning items, such as candles, on the unit. A burning item may fall over and cause a fire.
If you notice any abnormality
- When one of the following problems occur, immediately turn off the power switch and disconnect the electric plug from the outlet. Then have the device inspected by Yamaha service personnel.
- The power cord or plug becomes frayed or damaged.
- It emits unusual smells or smoke.
- Some object has been dropped into the instrument.
- There is a sudden loss of sound during use of the instrument.

CAUTION
Always follow the basic precautions listed below to avoid the possibility of physical injury to you or others, or damage to the instrument or other property. These precautions include, but are not limited to, the following:
Power supply/AC power adaptor
- Do not connect the instrument to an electrical outlet using a multiple-connector. Doing so can result in lower sound quality, or possibly cause overheating in the outlet.
- When removing the electric plug from the instrument or an outlet, always hold the plug itself and not the cord. Pulling by the cord can damage it.
- Remove the electric plug from the outlet when the instrument is not to be used for extended periods of time, or during electrical storms.
Location
- Do not place the instrument in an unstable position where it might accidentally fall over.
- Do not place objects in front of the instrument's air vent, since this may prevent adequate ventilation of the internal components, and possibly result in the instrument overheating.
- Before moving the instrument, remove all connected cables, to prevent damage to the cables or injury to anyone who might trip over them.
- When setting up the product, make sure that the AC outlet you are using is easily accessible. If some trouble or malfunction occurs, immediately turn off the power switch and disconnect the plug from the outlet. Even when the power switch is turned off, electricity is still flowing to the product at the minimum level. When you are not using the product for a long time, make sure to unplug the power cord from the wall AC outlet.
- Use only the stand specified for the instrument. When attaching the stand or rack, use the provided screws only. Failure to do so could cause damage to the internal components or result in the instrument falling over.
Connections
- Before connecting the instrument to other electronic components, turn off the power for all components. Before turning the power on or off for all components, set all volume levels to minimum.
- Be sure to set the volumes of all components at their minimum levels and gradually raise the volume controls while playing the instrument to set the desired listening level.
Handling caution
- Do not insert a finger or hand in any gaps on the instrument.
- Never insert or drop paper, metallic, or other objects into the gaps on the panel. This could cause physical injury to you or others, damage to the instrument or other property, or operational failure.
- Do not rest your weight on, or place heavy objects on the instrument, and do not use excessive force on the buttons, switches or connectors.
- Do not use the instrument/device or headphones for a long period of time at a high or uncomfortable volume level, since this can cause permanent hearing loss. If you experience any hearing loss or ringing in the ears, consult a physician.
Yamaha cannot be held responsible for damage caused by improper use or modifications to the instrument, or data that is lost or destroyed.
Always turn the power off when the instrument is not in use.
Even when the [⏻] (Standby/On) switch is in standby status (display is off), electricity is still flowing to the instrument at the minimum level.
When you are not using the instrument for a long time, make sure you unplug the power cord from the wall AC outlet.
NOTICE
To avoid the possibility of malfunction/ damage to the product, damage to data, or damage to other property, follow the notices below.
■ Handling and Maintenance
- Do not use the instrument in the vicinity of a TV, radio, stereo equipment, mobile phone, or other electric devices. Otherwise, the instrument, TV, or radio may generate noise.
- Do not expose the instrument to excessive dust or vibrations, or extreme cold or heat (such as in direct sunlight, near a heater, or in a car during the day) to prevent the possibility of panel disfiguration, damage to the internal components or unstable operation. (Verified operating temperature range: 5^-40^ , or 41^-104^ .)
- Do not place vinyl, plastic or rubber objects on the instrument, since this might discolor the panel or keyboard.
- When cleaning the instrument, use a soft cloth. Do not use paint thinners, solvents, cleaning fluids, or chemical-impregnated wiping cloths.
■ Saving data
- The edited Songs/Styles/Voices/Multi Pads and MIDI settings are lost when you turn off the power of the instrument without saving. Save the edited data to the instrument (USER tab display) or a USB flash memory (USB tab display); see page 24. Moreover, it is safer to save the data to a USB flash memory, because the data in the USER tab display may be lost due to malfunction or incorrect operation. To protect against data loss through USB flash memory damage, we recommend that you save your important data onto two USB flash memories.
- Data other than above (edited Songs/Styles/Voices/Multi Pads and MIDI settings) is automatically stored, when you change the settings in a display page and then exit from that page. However, the data is lost if you turn off the power without properly exiting from the relevant display.
Information
■ About copyrights
- Copying of the commercially available musical data including but not limited to MIDI data and/or audio data is strictly prohibited except for your personal use.
- This product incorporates and bundles computer programs and contents in which Yamaha owns copyrights or with respect to which it has license to use others' copyrights. Such copyrighted materials include, without limitation, all computer software, style files, MIDI files, WAVE data, musical scores and sound recordings. Any unauthorized use of such programs and contents outside of personal use is not permitted under relevant laws. Any violation of copyright has legal consequences. DON'T MAKE, DISTRIBUTE OR USE ILLEGAL COPIES.
■ About functions/data bundled with the instrument
- Some of the preset songs have been edited for length or arrangement, and may not be exactly the same as the original.
- This device is capable of using various types/formats of music data by optimizing them to the proper format music data for use with the device in advance. As a result, this device may not play them back precisely as their producers or composers originally intended.
- The bitmap fonts used in this instrument have been provided by and are the property of Ricoh Co., Ltd.
- (PSR-S950) MPEG Layer-3 audio coding technology licensed from Fraunhofer IIS and Thomson.

- Owner's Manual
• Online Member Product Registration
You will need the PRODUCT ID on the sheet in order to fill out the User Registration form. - Music Rest
- AC Power Adaptor
This may not be included depending on your particular area. Please check with your Yamaha dealer.
Formats
The instrument is compatible with the following formats.

“GM (General MIDI)” is one of the most common Voice allocation formats. “GM System Level 2” is a standard specification that enhances the original “GM” and improves Song data compatibility. It provides for increased polyphony, greater Voice selection, expanded Voice parameters, and integrated effect processing.

XG is a major enhancement of the GM System Level 1 format, and was developed by Yamaha specifically to provide more Voices and variations, as well as greater expressive control over Voices and effects, and to ensure compatibility of data well into the future.

GS was developed by the Roland Corporation. In the same way as Yamaha XG, GS is a major enhancement of the GM specifically to provide more Voices and Drum kits and their variations, as well as greater expressive control over Voices and effects.

The Yamaha XF format enhances the SMF (Standard MIDI File) standard with greater functionality and open-ended expandability for the future. This instrument is capable of displaying lyrics when an XF file containing lyric data is played.

“SFF (Style File Format)” is an original Style file format by Yamaha which uses a unique conversion system to provide high-quality automatic accompaniment based on a wide range of chord types. “SFF GE (Guitar Edition)” is an enhanced format of SFF, which features improved note transposition for guitar tracks.
The followings are the titles, credits and copyright notices for the songs pre-installed in this instrument:
(PSR-S950, PSR-S750)
Beauty And The Beast
from Walt Disney's BEAUTY AND THE BEAST
Lyrics by Howard Ashman
Music by Alan Menken
©1991 Walt Disney Music Company and Wonderland Music Company, Inc.
All Rights Reserved Used by Permission
(PSR-S950)
Achy Breaky Heart (Don't Tell My Heart)
Words and Music by Don Von Tress
Copyright ©1991 UNIVERSAL - MILLHOUSE MUSIC
All Rights Reserved Used by Permission
(PSR-S750)
Can't Help Falling In Love
from the Paramount Picture BLUE HAWAII
Words and Music by George David Weiss, Hugo Peretti and Luigi Creatore
Copyright ©1961; Renewed 1989 Gladys Music (ASCAP)
Worldwide Rights for Gladys Music Administered by Cherry Lane Music Publishing Company, Inc.
International Copyright Secured All Rights Reserved
This instrument has the following document and instructional materials.
■ Included Document

Owner's Manual (this book)
Provides overall explanations of the PSR-S950/S750 basic functions. See “How to use this Owner’s Manual” below.
■ Online Materials (PDF)

Reference Manual (only in English, French, German and Spanish)
Explains advanced features of the instrument, not explained in the Owner's Manual. For example, you can learn how to create original Styles, Songs or Multi Pads, or find detailed explanations of specific parameters.

Data List
Contains various important preset content lists such as Voices, Styles, Effects, as well as MIDI-related information.

Computer-related Operations
Includes instructions on connecting this instrument to a computer, and operations related to transferring song data.

MIDI Basics (only in English, French, German and Spanish)
If you want to know more about MIDI and how to use it, refer to this introductory book.
To obtain these materials, access the Yamaha Manual Library, enter “PSR-S950,” “PSR-S750” or “MIDI Basics” to the Model Name box, then click [SEARCH].
Yamaha Manual Library http://www.yamaha.co.jp/manual/
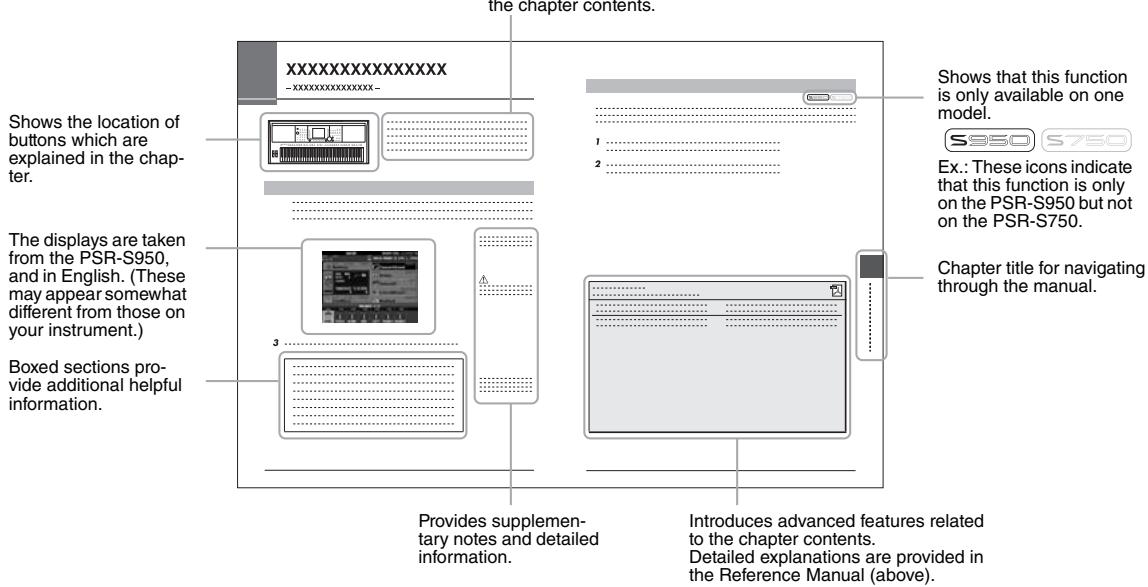
How to use this Owner's Manual
text_image
the chapter contents. Shows the location of buttons which are explained in the chapter. The displays are taken from the PSR-S950, and in English. (These may appear somewhat different from those on your instrument.) Boxed sections provide additional helpful information. Provides supplementary notes and detailed information. Introduces advanced features related to the chapter contents. Detailed explanations are provided in the Reference Manual (above). Shows that this function is only available on one model. S950 S750 Ex.: These icons indicate that this function is only on the PSR-S950 but not on the PSR-S750. Chapter title for navigating through the manual.- The illustrations and LCD screens as shown in this manual are for instructional purposes only, and may appear somewhat different from those on your instrument.
- The company names and product names in this manual are the trademarks or registered trademarks of their respective companies.
Welcome to Digital Workstation
Explore the Demos Starting Up
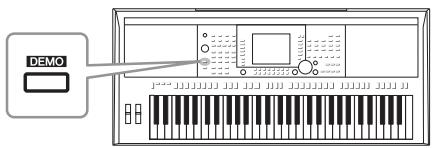
The Demos showcase the variety of stunning Voices and Styles on the instrument, and give you hands-on experience using it.
text_image
DEMOPlay a Wide Variety of Instrument Voices
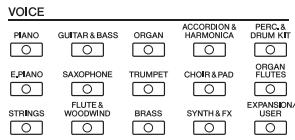
The instrument gives you not only various realistic piano Voices, but also features an exceptionally wide variety of authentic instruments, both acoustic and electronic.
Chapter 1 Voices
text_image
VOICE PIANO GUITAR & BASS ORGAN ACCORDION & HARMONICA PERC. & DRUM KIT E.PIANO SAXOPHONE TRUMPET CHORI & PAD ORGAN FLUTES STRINGS FLUTE & WOODWIND BRASS SYNTH & FX EXPANSION/ USER
natural_image
Illustration of a grand piano with musical instruments and a microphone, no text or symbols present.Perform Along with a Backing Band
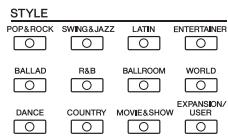
Playing a chord with your left hand automatically plays the auto accompaniment backing (Style function). Select an accompaniment style — such as pop, jazz, Latin, and various other music genres in the world — and let the instrument be your backing band!
Chapter 2 Styles
text_image
STYLE POP&ROCK SWING&JAZZ LATIN ENTERTAINER BALLAD R&B BALLROOM WORLD DANCE COUNTRY MOVIE&SHOW EXPANSION/ USER
natural_image
Illustration of three musicians playing brass and trumpet (no text or symbols)Play Along with Song Data
Chapter 3 Songs
Playing Back Songs ......page 54
Play along with a Song data, and fill out your solo performance with the sounds of an entire band or orchestra. Enjoy a wide variety of songs — commercially available music data and preset songs.
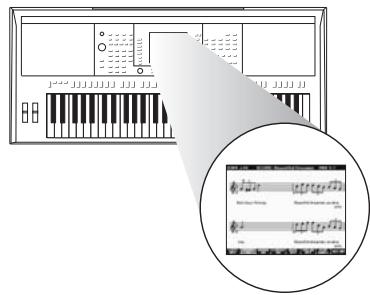
Displaying Music Score ......page 56
While playing back a Song, you can have the music score (notation) automatically shown on the display — an exceptionally convenient tool for learning and practicing pieces.
Recording Your Performance ......page 60
The instrument lets you easily record your own performance and save it to internal memory or a USB flash memory. The instrument also lets you listen back to your performance, and further edit it or utilize it for your music production.
text_image
Diagram of a music instrument with piano keyboard and waveform display, showing playback control interface and audio track outputAudio Playing and Recording from USB Flash Memory
Chapter 4 USB Audio
Audio files (WAVE or MP3*) saved to USB flash memory can be played back on the instrument. Moreover, you can record your performance as audio file (WAVE) to a USB flash memory device. On the PSR-S950, you can connect a microphone to the instrument and enjoy recording your singing along with the keyboard performance.
* The MP3 format is supported only by the PSR-S950.
On the PSR-S950 only, there are also a variety of advanced, convenient audio playback and processing functions. These include Repeat Mode, for specifying how audio files will be repeatedly played back, and an A-B Repeat function, for repeating a specific section in a audio song. Time Stretch lets you slow down or speed up an audio file without changing the pitch, while Pitch Shift lets you change the pitch of the audio without affecting the time. Moreover, a Vocal Cancel function effectively attenuates the vocals which may be positioned in the center of a file, allowing you to sing “karaoke” style with just instrumental backing.
text_image
Diagram illustrating audio recording setup with file folder, USB device, and keyboard interfaceAdd Phrases and Rhythms to Your Performance
Chapter 5 Multi Pads
You can add spice to your performance with special short phrases and rhythms, simply by tapping the Multi Pads. Multi Pads also have an Audio Link function that allows you to create your own audio data (sound effects, vocal phrases, and so on), and trigger them from the Pads as you perform.
natural_image
Abstract musical notation with treble clef, notes, and slurs on a wavy background (no text or symbols)Call Up the Ideal Voice and Style for Each Song
Chapter 6 Music Finder
The convenient Music Finder function lets you call up the ideal panel settings including the most suitable Voice, Style, effects, etc. for each song, by selecting a “Record,” music genre or song title. Moreover, by registering Songs, audio and Style files saved in various places into Music Finder, the instrument can call up these Songs, audio and Style files easily from the song title.
Add Vocal Harmony Effects to Your Singing (PSR-S950)
Chapter 8 Microphone
The instrument also lets you directly connect a microphone and use a variety of sophisticated processing tools specifically designed for vocals. These include an amazing Vocal Harmony function, which automatically produces backup vocal harmonies for lead vocals that you sing into a microphone. You can even change the gender of the harmony voices — for example, letting you add female backup to your own male voice (or vice versa) — or use the Vocal Doubler to make your single voice sound like many.
natural_image
Illustration of a singer performing music with musical notes and a keyboard (no text or symbols)Panel Controls and Terminals
■ Top Panel
text_image
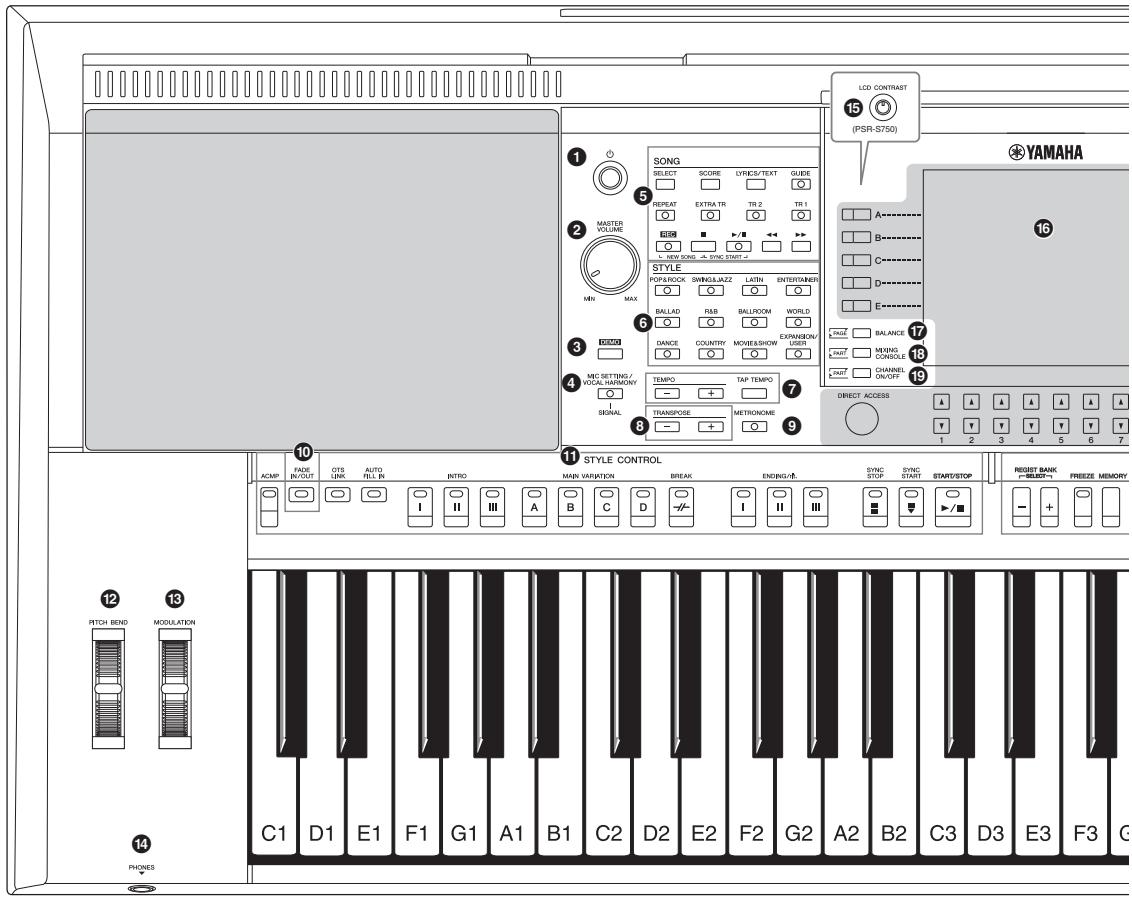
LCD CONTRAST (PSR-S750) YAMAHA 15 16 17 18 19 10 11 STYLE CONTROL 10 11 ACTMP FADE OTS AUTO MAIN VARIATION BREAK ENDING/34 SYNC SYNC START/STOP RESET BANK FREEZE MEMORY ACMP OUTC LINK TEL IN I II III A B C D I II III STOP START/STOP ITCH BEND MODULATION C1 D1 E1 F1 G1 A1 B1 C2 D2 E2 F2 G2 A2 B2 C3 D3 E3 F3 G PHONES1 [⏻] (Standby/On) switch ......Page 14
Turns on the instrument's power or sets to standby.
② [MASTER VOLUME] dial ....Page 14
Adjusts the overall volume.
③ [DEMO] button....Page 17
Calls up the display for selecting a Demo.
④ [MIC SETTING/VOCAL HARMONY] button (PSR-S950)......Page 83
Calls up the display for adding various effects to the Micro-phone input.
⑤ SONG buttons......Page 54
Selects a Song and controls Song playback.
⑥ STYLE category selection buttons ......Page 43
Selects a Style category.
⑦ [TAP TEMPO]/TEMPO buttons ......Page 47
Controls the tempo for Style, Song and Metronome playback.
⑧ TRANSPOSE buttons....Page 38
Transposes the entire pitch of the instrument in semitone steps.
⑨ [METRONOME] button
Turns the metronome on or off.
10 [FADE IN/OUT] button....Page 47
Controls fade in/out of Style/Song playback.
11 STYLE CONTROL buttons......Page 46
Controls Style playback.
12 [PITCH BEND] wheel......Page 39
Bends the pitch of the keyboard played sound up or down.
13 [MODULATION] wheel ...... Page 39
Applies a vibrato effect.
14 [PHONES] jack ...... Page 13
For connecting a pair of headphones.
15 [LCD CONTRAST] knob (PSR-S750) ...... Page 16
Adjusts the LCD contrast.
16 LCD and related controls ...... Page 18
⑰ [BALANCE] button......Page 53
Calls up settings for the volume balance among the parts.
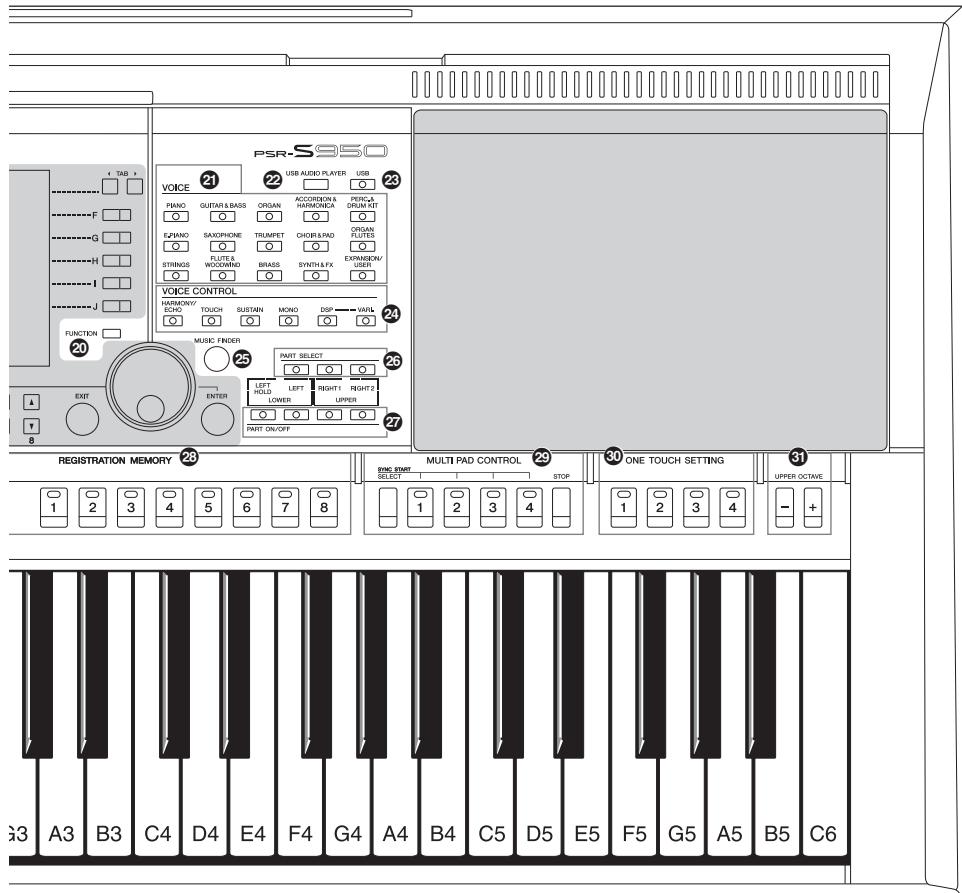
text_image
PSR-S950 VOICE 21 USB AUDIO PLAYER USB 23 PIANO GUITAR & BASS ORGAN ACCORDENIA HARMONICA FORGA DRUM MT EPIANO SAXCRONE TRUMPET CHORB & PAD ORGAN FLUTES STRINGS FLUTER WOODWIND BRASS SYNTH & FX EXPANSION/ VOICE CONTROL HARMONY/ ECHO TOUCH SUSTAIN MONO DSP VARS 24 MUSIC FINGER PART SELECT 25 ENTER LEFT RIGHT1 LEFT RIGHT2 RIGHT2 LOWER UPPER 26 PART OK/OFF 27 REGISTRATION MEMORY 28 MULTI PAD CONTROL 29 ONE TOUCH SETTING 30 SYNC EDIT SELECT 1 2 3 4 STOP 1 2 3 4 UPPER OCTAVE G3 A3 B3 C4 D4 E4 F4 G4 A4 B4 C5 D5 E5 F5 G5 A5 B5 C618 [MIXING CONSOLE] button ......Page 86
Calls up various settings for the keyboard, Style and Song parts.
19 [CHANNEL ON/OFF] button......Pages 52, 57
Calls up settings for turning Style/Song channels on or off.
20 [FUNCTION] button
(See Reference Manual on website.)
Lets you make advanced settings and create your original Styles, Songs and Multi Pads.
21 VOICE category selection buttons......Page 32
Selects a Voice.
22 [USB AUDIO PLAYER] button......page 64
Calls up the display for playing back audio files and recording your performance in audio format.
23 [USB] button ......page 24
Calls up the display for selecting a file in the USB flash memory.
24 VOICE CONTROL buttons ...... Page 39
Applies various effects to the keyboard performance.
25 [MUSIC FINDER] button...... page 75
Calls up ideal panel setups for your performance.
26 PART SELECT buttons ...... Page 35
Selects a keyboard part.
27 PART ON/OFF buttons Page 35
Turns the keyboard part on or off.
28 REGISTRATION MEMORY buttons ...... Page 79
Registers and recalls panel setups.
29 MULTI PAD CONTROL buttons ...... Page 69
Selects and plays a rhythmic or melodic Multi Pad phrase.
30 ONE TOUCH SETTING buttons......Page 49
Calls up the appropriate panel settings for the Style.
31 UPPER OCTAVE buttons ...... Page 38
Shifts the pitch of the keyboard in octave steps.
text_image
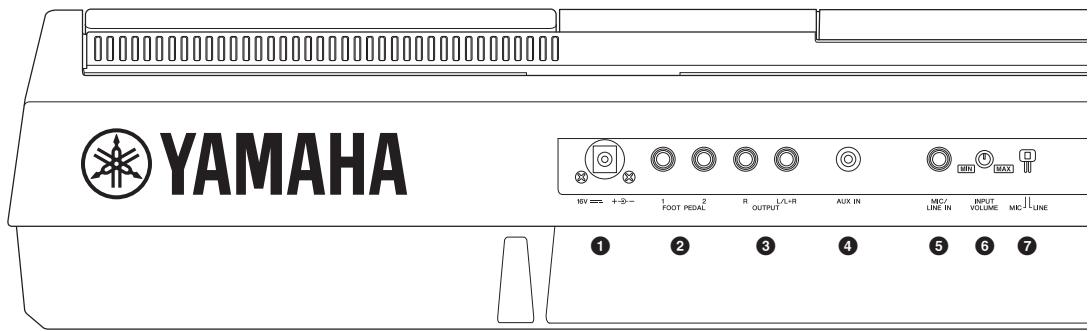
YAMAHA M6V ≈ 3. +→→ 1 FOOT PEDAL 2 R OUTPUT L/L+R AUX IN MIC/ LINE IN INPUT VOLUME MIC/ LINE ① ② ③ ④ ⑤ ⑥ ⑦① DC IN jack ......Page 14
For connecting the power adaptor.
② [FOOT PEDAL] jacks....Page 91
For connecting Footswitches and/or Foot controllers.
3 OUTPUT [L/L+R]/[R] jacks ......Page 89
For connecting external audio devices.
④ [AUX IN] jack......Page 89
For connecting an external audio device, such as a portable audio player.
⑤ [MIC/LINE IN] jack (PSR-S950)...... Page 88
For connecting a microphone or guitar.
⑥ [INPUT VOLUME] knob (PSR-S950)...... page 83
For adjusting the input level of the [MIC/LINE IN] jack.
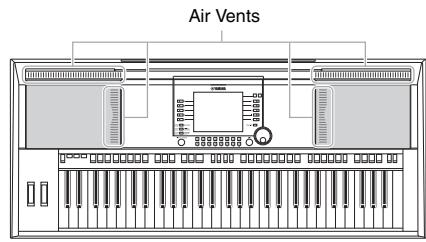
Air Vents
NOTICE
This instrument has special air vents in the top panel and rear panel. Do not place objects where they might block the air vent, since this may prevent adequate ventilation of the internal components, and possibly result in the instrument overheating.
text_image
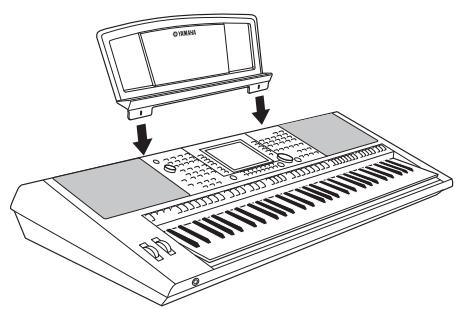
Air VentsAttaching the Music Rest
The instrument is supplied with a music rest that can be attached to the instrument by inserting it into the slot at the rear of the top panel.
text_image
Diagram showing a computer interface with an LCD screen and keyboard, indicating sound or audio signal processing.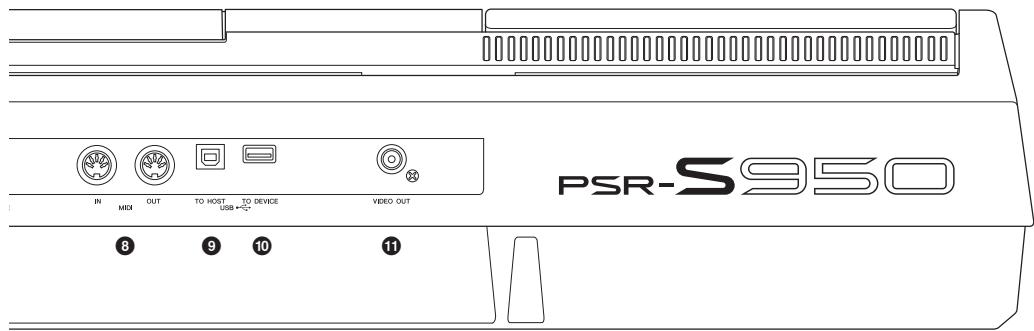
text_image
PSR-S950 IN MEDI OUT TO HOST TO DEVICE VIDEO OUT USB + 8 9 10 11⑦ [MIC LINE] switch (PSR-S950)......Page 88
For switching between “MIC” and “LINE” for proper use of the [MIC/LINE IN] jack.
⑧ MIDI [IN]/[OUT] terminals......Page 94
For connecting external MIDI devices.
⑨ [USB TO HOST] terminal......Page 93
For connecting to a computer.
⑩ [USB TO DEVICE] terminal......Page 92
For connecting a USB flash memory.
⑪ [VIDEO OUT] jack (PSR-S950) ...... Page 90
For connecting to a television or video monitor.
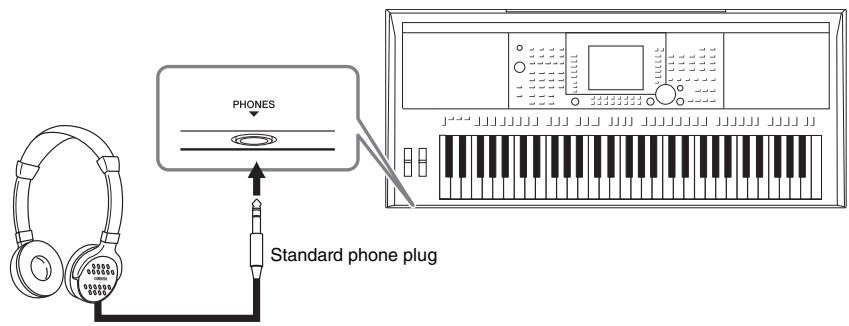
Using the Headphones
Connect a pair of headphones to the [PHONES] jack. The internal stereo speaker system is automatically shut off when a pair of headphones is plugged into the [PHONES] jack.
text_image
PHONES Standard phone plug
CAUTION
Do not listen with the headphones at high volume for long periods of time. Doing so may cause hearing loss.
Turning the Power On and Playing the Keyboard
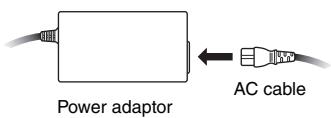
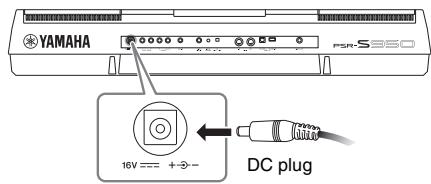
1 Connect the power adaptor.
First connect one end of the AC cable to the power adaptor, then connect the power adaptor's DC plug to the instrument's DC IN jack on the rear panel. Finally, connect the other end (normal AC plug) to the electrical outlet.
1-1
text_image
Power adaptor AC cable1-2
text_image
YAMAHA PSR-S350 16V --- + - DC plug1-3
text_image
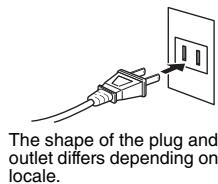
The shape of the plug and outlet differs depending on locale.
WARNING
Use the specified adaptor (page 100) only. The use of an incompatible adaptor may cause irreparable damage to the PSR-S950/S750, and may even pose a serious shock hazard! ALWAYS UNPLUG THE AC POWER ADAPTOR FROM THE AC OUTLET WHEN THE PSR-S950/S750 IS NOT IN USE.
2 Press the [⏻] (Standby/On) switch to turn the power on.
The main display appears.
![YAMAHA PSR-S950 - Press the [⏻] (Standby/On) switch to turn the power on. - 1](/content/2019/11/115210/images/47559890175ea60c46afb5ca396f5e69c64a3825c7a690bbe4e7b06a0d549044.jpg)
text_image
Diagram showing a hand pressing a button on a keyboard, with a control panel and mouse keyboard visible.NOTE
Before the main display appears, turning the power off, operating the buttons and playing the keyboard cannot be done.
3 While playing the keyboard, use the [MASTER VOLUME] dial to adjust the volume to an appropriate level.
![YAMAHA PSR-S950 - While playing the keyboard, use the [MASTER VOLUME] dial to adjust the volume to an appropriate level. - 1](/content/2019/11/115210/images/741e4c9fd7c905557ab0f467be210603024e3df751ff59ffa4e28425ee954b1a.jpg)
![YAMAHA PSR-S950 - While playing the keyboard, use the [MASTER VOLUME] dial to adjust the volume to an appropriate level. - 2](/content/2019/11/115210/images/84c0518f62f54e9ae0be16a9f7d69f64cea36c4faba5a4f67e28575943a3d691.jpg)
![YAMAHA PSR-S950 - While playing the keyboard, use the [MASTER VOLUME] dial to adjust the volume to an appropriate level. - 3](/content/2019/11/115210/images/5d76885f1c72bcf131eea212284315c2c51aca7fa165edbd6c686e22bac2962c.jpg)
NEXT PAGE
4 After you use the instrument, press the [⏻] (Standby/On) switch to turn the power off. While recording or editing, or while messages are displayed:
The power cannot be turned off even if you press the [⏻] (Standby/On) switch.
If you need to force-quit the instrument in such a situation, press and hold the [①] (Standby/On) switch for longer than three seconds.
![YAMAHA PSR-S950 - After you use the instrument, press the [⏻] (Standby/On) switch to turn the power off. While recording or editing, or while messages are displayed: - 1](/content/2019/11/115210/images/7c2d9f661f5aafdb58b4afd52f6db223b72bce87b24dfba5700db0a7733b6573.jpg)
CAUTION
Even when the instrument is turned off, electricity is still flowing to the instrument at a minimum level. When not using the instrument for an extended period of time, be sure to unplug the AC power adaptor from the wall AC outlet.
NOTICE
If you force-quit the instrument during recording or editing, the data might be lost, and the instrument and external devices might be damaged.
Setting the Auto Power Off function
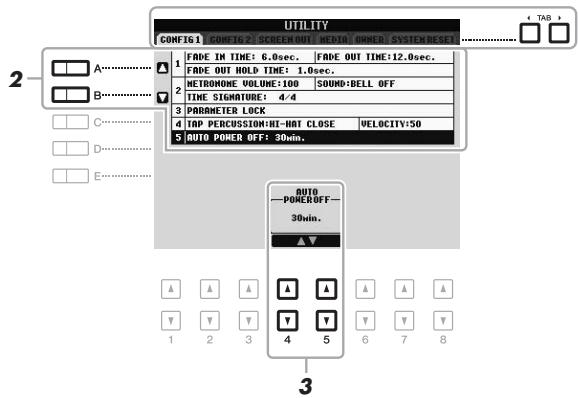
To prevent unnecessary power consumption, this instrument features an Auto Power Off function that automatically turns the power off if the instrument is not operated for a specified period of time. The amount of time that elapses before the power is automatically turned off can be set as described below (default setting: 30 min.). The setting is retained even if the power is turned off.
1 Call up the operation display.
[FUNCTION] → [I] UTILITY → TAB [◀][▶] CONFIG 1
text_image
UTILITY CONFIG1 COMEIG 2 SCREEN OUT MEDI ONER SYSTEM RESET FADE IN TIME: 6.0sec. | FADE OUT TIME:12.0sec. FADE OUT HOLD TIME: 1.0sec. METROMONE VOLUME:100 | SOUND:BELL OFF TIME SIGNATURE: 4/4 PARAMETER LOCK TAP PERCUSSION:HI-HAT CLOSE | VELOCITY:50 AUTO POWER OFF: 30min. AUTO —PODEROFF— 30min. ▲▼ ▲▲▲▲▲▲▲▲ ▼▼▼▼▼▼▼▼▼▼▼▼▼▼▼▼▼▼▼▼▼▼▼▼▼▼▼▼▼▼▼▼▼▼▼▼▼▼▼▼▼▼▼▼▼▼▼▼▼▼▼▼▼▼▼▼▼▼▼▼▼▼▼▼▼▼▼▼▼▼▼▼▼▼▼▼▼▼▼▼▼▼▼▼▼▼▼▼▼▼▼▼▼▼▼▼▼▼▼▼▲▼ 1 2 3 4 5 6 7 8 1 A...... ▲ B...... ▼ C...... □ D...... □ E...... □ 3NOTE
Throughout this manual, arrows are used in the instructions, indicating in shorthand the process of calling up certain displays and functions.
NOTICE
- Depending on the instrument status, the power may not turn off automatically, even after the elapse of the specified period of time. Always turn off the power manually when the instrument is not in use.
- The data which is not saved to the USER or USB drive will be lost if the power automatically turns off. Make sure to save your data before the power turns off.
2 Use the [A]/[B] buttons to select "5. AUTO POWER OFF."
3 Press the [4 ▲▼]/[5 ▲▼] buttons to set the value.
If you do not want to turn the power off automatically (disable the Auto Power Off), select OFF.
NOTE
The setting time is approximate.
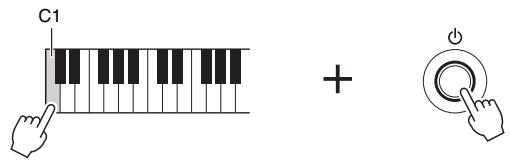
Disabling Auto Power Off (simple method)
Turn the power on while holding down the lowest key (C1) on the keyboard. An “Auto power off disabled” message appears briefly and Auto Power Off is disabled.
text_image
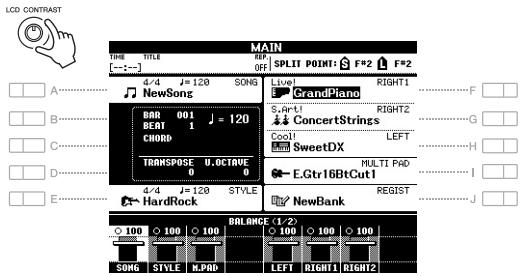
C1 +Adjusting the Contrast of the Display (PSR-S750 only)

You can adjust the contrast of the display by turning the [LCD CONTRAST] knob located to the left of the display.
text_image
LCD CONTRAST MAIN TIME TITLE OFF SPLIT POINT: F*2 F*2 A....../- NewSong Live! GrandPiano B....../- BRR 001 J = 120 BEAT 1 CHORD S.4pt1 RIGHT2 ConcertStrings Cool! LEFT C....../- TRANSPOSE U.0CTAVE 0 0 E....../- 4/4 J=120 STYLE HardRock E.Gtr16BtCut1 REGIST NewBank BALANCE (1/2) SONG STYLE H.PRO LEFT RIGHT1 RIGHT2NOTE
Since the color display of the PSR-S950 has a high level of visibility, no contrast adjustment function is necessary.
Changing the Display Language
This determines the language used in the display for messages.
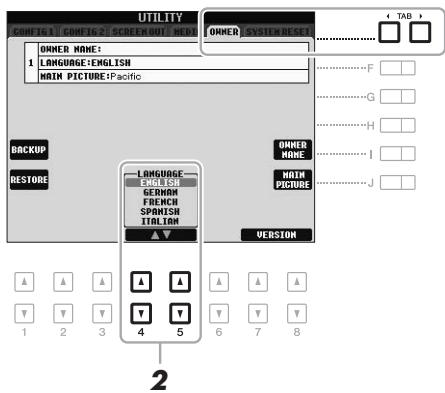
1 Call up the operation display.
[FUNCTION] → [I] UTILITY → TAB [◀][▶] OWNER
text_image
UTILITY CONFIG 1 CONFIG 2 SCREEN FREE OWNER NAME: LANGUAGE:ENGLISH MAIN PICTURE:Pacific BACKUP RESTORE LANGUAGE TURGER GERMAN FRENCH SPORISH ITALIAN ▲▼ VERSION 4 5 TAB F G H I J 1 2 3 4 5 6 7 82 Use the [4 ▲▼]/[5 ▲▼] buttons to select the desired language.
Displaying the Version Number
You can check the version number of this instrument.
1 Call up the operation display.
2 Use the [7 ]/[8 ] (VERSION) buttons to display the version number.
3 Press the [8 ▲▼] (EXIT) button (or the panel [EXIT] button) to return to the original display.
$$ [ \text { FUNCTION } ] \rightarrow [ \text { I } ] \text { UTILITY } \rightarrow \text { TAB } [ \blacktriangleleft ] [ \blacktriangleright ] \text { OWNER } $$
Playing the Demos
The Demos provide helpful, easy-to-understand introductions to the features and functions as well as sound demonstrations.
1 Press the [DEMO] button to call up the Demo display.
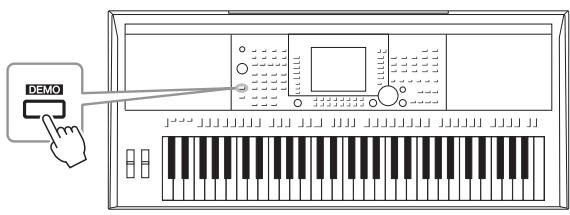
text_image
DEMO2 Press one of the [A] – [E] and [J] buttons to show a specific Demo.
Pressing one of the [F] – [I] buttons plays back the overview Demo continuously, calling up the various displays in sequence.
The sub menus are shown at the bottom of the display. Press one of the [A] – [J] buttons corresponding to the sub menu.
3 Press the [EXIT] button several times to exit from the Demo display.
NOTE
To return to the higher level menu, press the [EXIT] button.
Display-based Controls
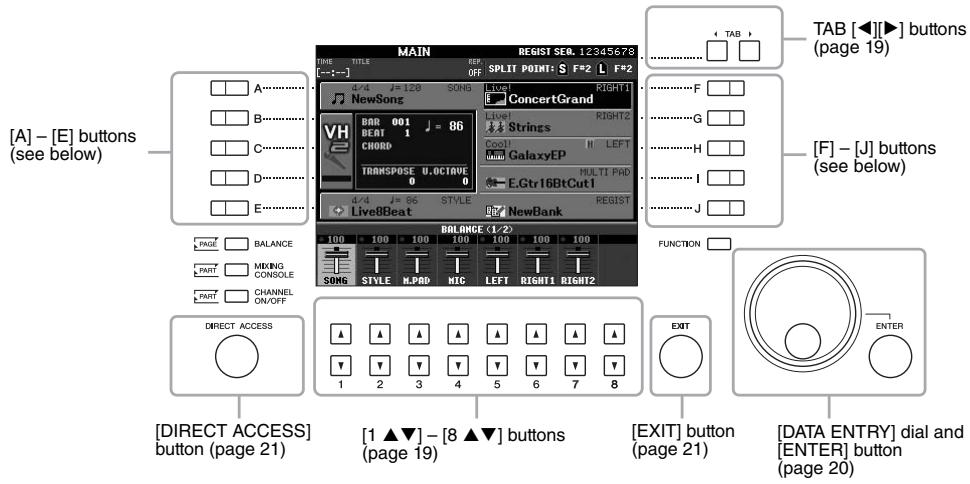
The LCD provides comprehensive at-a-glance information on all current settings. The displayed menu can be selected or changed by the controls around the LCD.
text_image
[A] - [E] buttons (see below) MAIN REGIST SEL. 12345678 THE TITLE REF. OFF SPLIT POINT: S F*2 L F*2 4/4 J=120 SONG 4/4 J=120 SONG 4/4 J=120 SONG 4/4 J=120 SONG 4/4 J=120 SONG 4/4 J=120 SONG 4/4 J=120 SONG 4/4 J=120 SONG 4/4 J=120 SONG 4/4 J=120 SONG NEWSON ConcertGrand BAR 001 J = 86 BEAT 1 CHARD TRANSPOSE U.OCTIQUE 0 4/4 J=86 STYLE LiveBBeat BALANCE (1/2) 100 100 100 100 100 100 100 SONG STYLE H.PAD MTC LEFT RIGHT1 RIGHT2 TAB [◀][▶] buttons (page 19) F G H I J [F] - [J] buttons (see below) FUNCTION [DIRECT ACCESS] button (page 21) [1 ▲▼] - [8 ▲▼] buttons (page 19) [EXIT] button (page 21) [DATA ENTRY] dial and [ENTER] button (page 20)[A] - [J] buttons
The [A] - [J] buttons are used to select the corresponding menu.
- Example 1
![YAMAHA PSR-S950 - [A] - [J] buttons - 1](/content/2019/11/115210/images/f1bf87bac5e6a7ddea65f6eeafa53cc4b47d376069d2b7b42e4f929c6ac957c5.jpg)
flowchart
graph TD
    A[" "] --> B[" "]
    B --> C[" "]
    C --> D[" "]
    D --> E[" "]
    E --> F[" "]
    F --> G[" "]
    G --> H[" "]
    H --> I[" "]
    I --> J[" "]
    J --> K[" "]
    K --> L[" "]
    L --> M[" "]
    M --> N[" "]
    N --> O[" "]
    O --> P[" "]
    P --> Q[" "]
    Q --> R[" "]
    R --> S[" "]
    S --> T[" "]
    T --> U[" "]
    U --> V[" "]
    V --> W[" "]
    W --> X[" "]
    X --> Y[" "]
    Y --> Z[" "]
    Z --> AA[" "]
    AA --> AB[" "]
    AB --> AC[" "]
    AC --> AD[" "]
    AD --> AE[" "]
    AE --> AF[" "]
    AF --> AG[" "]
    AG --> AH[" "]
    AH --> AI[" "]
    AI --> AJ[" "]
    AJ --> AK[" "]
    AK --> AL[" "]
    AL --> AM[" "]
    AM --> AN[" "]
    AN --> AO[" "]
    AO --> AP[" "]
    AP --> AQ[" "]
    AQ --> AR[" "]
    AR --> AS[" "]
    AS --> AT[" "]
    AT --> AU[" "]
    AU --> AV[" "]
    AV --> AW[" "]
    AW --> AX[" "]
    AX --> AY[" "]
• Example 2
![YAMAHA PSR-S950 - [A] - [J] buttons - 2](/content/2019/11/115210/images/8252ea73646a85cb10758e54f2927b91c4b4d10d0d35bdbf5d439e098344d1b8.jpg)
text_image
SONG SETTING Talking Lights Rev Key Karlo-Key Your Tempo GUIDE MODE Long playback pauses and waits for you to play the correct note. Playback continues when he correct note is played. F G C D E CHANNEL SETTING TRACK2-TRACK1 ON SET OFF 1 OFF 2 OFF SINGLE ALL RANDOM REPEAT MODE ON OFF PHRASE MARK REPEAT H I J A] and [B] buttons are used to be the cursor up or down. The [H] and [I] buttons are used to select the corresponding parameter.These buttons are used mainly to change the pages of displays that have “tabs” at the top.
![YAMAHA PSR-S950 - [A] - [J] buttons - 3](/content/2019/11/115210/images/a569c4fae8d3a2babc7f9488aac13dd25dcdd4801c043cc77056cee176b4d986.jpg)
text_image
VOICE(RIGHT1) PREST Live! ConcertGrand Live! MIDIGrand Live! PopGrand Live! MIDIGrandPad Live! RockPiano Live! MIDIGrandSyn Live! AmbientPiano Live! PianoOrchestra Live! CocktailPiano S.Art! Harpsichord Piano P1 P2 VOICE SET INFO. UP- NAME COPY POSTE DELETE CODE FALSE DEMO TAB[1 ▲▼] - [8 ▲▼] buttons
The [1 ] - [8 ] buttons are used to make selections or adjust settings (up or down correspondingly) for functions shown directly above them.
![YAMAHA PSR-S950 - [1 ▲▼] - [8 ▲▼] buttons - 1](/content/2019/11/115210/images/41016512f31fbe590e9a0d568ed8ac51c1b88629350c638dfc6cded884ebe92e.jpg)
text_image
VOICE(RIGHT1) PRESET MISER RESET Live! ConcertGrand Live! PopGrand Live! RockPiano Live! AmbientPiano Live! CocktailPiano Live! MIDIGrand MIDIGrandPad Live! MIDIGrandSyn Live! PianoOrchestra Live! Harpsichord Piano P1 P2 VOICE SET INFO UP- LOGIC DATA COMPUTS DATA COMPUTS DATA COMPUTS DATA COMPUTS DATA COMPUTS DATA COMPUTS DATA COMPUTS DATA COMPUTS DATA COMPUTS DATA COMPUTS DATA COMPUTS DATA COMPUTS DATA COMPUTS DATA COMPUTS DATA COMPUTS DATA COMPUTS DATA COMPUTS DATA CONCE COMPTA COMPTB COMPTC COMPTD COMPTE COMPTF COMPTG COMPTH COMPTI COMPTJ COMPTK COMPTL COMPTM COMPTN COMPTO COMPTP COMPTQ COMPTR COMPTS COMPTU COMPTV COMPTW COMPTX COMPTY COMPTZ COMPTZ COMPTZ COMPTZ COMPTZ COMPTZ COMPTZ COMPTZ COMPTZ COMPTZ COMPTZ COMPTZ COMPTZ COMPTZ COMPTZ COMPTZ COMPTZ COMPTZ COMPTZ COMPTZ COMPTZ COMPTZ COMPTZ COMPTZ COMPTZ COMPT2 COMPT3 COMPT4 COMPT5 COMPT6 COMPT7 COMPT8 COMPT9 COMPT10 COMPT11 COMPT12 COMPT13 COMPT14 COMPT15 COMPT16 COMPT17 COMPT18 COMPT19 COMPT20 COMPT21 COMPT22 COMPT23 COMPT24 COMPT25 COMPT26 COMPT27 COMPT28 COMPT29 COMPT30 COMPT31 COMPT32 COMPT33 COMPT34 COMPT35 COMPT36 COMPT37 COMPT38 COMPT39 COMPT40 COMPT41 COMPT42 COMPT43 COMPT44 COMPT45 COMPT46 COMPT47 COMPT48 COMPT49 COMPT50For menus that appear in this section of the display, use the [1 ] - [8 ] buttons.
![YAMAHA PSR-S950 - [1 ▲▼] - [8 ▲▼] buttons - 2](/content/2019/11/115210/images/a9eff9620874bd1d29b05f9381d8a3c06d8fd3b5afb25d086e22497a2c332420.jpg)
text_image
HARMONY/ECHO TYPE STANDARD DUET STANDARD TRI0 FULL CHORD ROCK DUET COUNTRY DUET COUNTRY TRI0 BLOCK 4-HAY CLOSE1 4-HAY CLOSE2 4-HAY OPEN 1+S OCTOVE STROM MULTI ASSIGN ECHO TREMOLO TRILL VOLUME 86 SPEED 4 AUTO 6 MULTI 8 R1 12 ON 3.2 TOUCH LIMIT 0 ▲ ▲ ▲ ▲ ▲ ▲ ▲ ▲ ▲ ▲ ▲ ▲ ▲ ▲ ▲ ▲ ▲ ▲ ▲ ▲ ▲ ▲ ▲ ▲ ▲ ▲ ▲ ▲ ▲ ▲ ▲ ▲ ▲ ▲ ▲ ▲ ▲ ▲ ▲ ▲ ▲ ▲ ▲ ▲ ▲ ▲ ▲ ▲ ▲ ▲ ▲ △ 1 2 3 4 5 6 7 8 For list menus that appear, use the [1 ▲▼] – [8 ▲▼] buttons to select the desired item.For parameters that appear in slider (or knob) form, use the [1 ] - [8 ] buttons to adjust the value.
Depending on the selected LCD, the [DATA ENTRY] dial can be used in the following two ways.
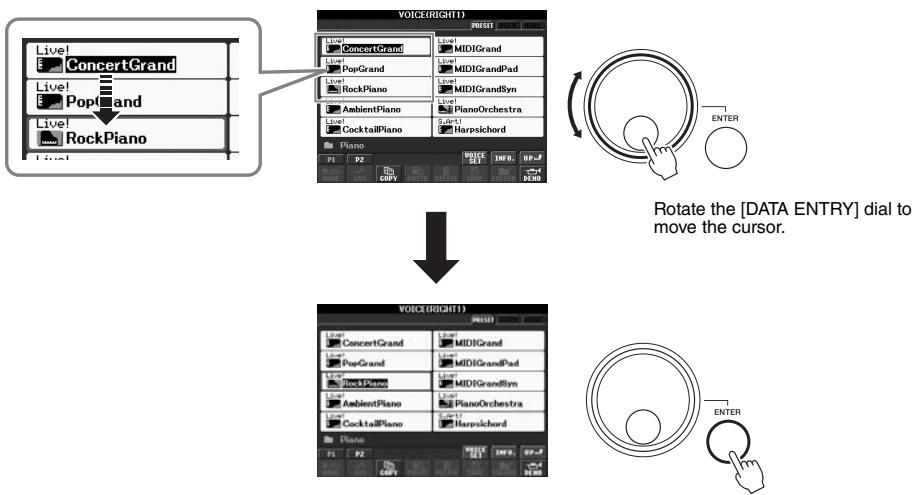
- Selecting files (including Voices, Styles and Songs)
When one of the File Selection displays (page 24) is shown, you can use the [DATA ENTRY] dial and the [ENTER] button to select a file (Voices, Styles, Songs, and others).
flowchart
graph TD
    A["Live1 ConcertGrand"] --> B["Live2 PopGrand"]
    B --> C["Live3 RockPiano"]
    C --> D["Live4 AmbientPiano"]
    D --> E["Live5 CocktailPiano"]
    E --> F["Live6 PianoOrchestra"]
    F --> G["ROT FOR CAPS"]
    G --> H["ROT FOR DATA ENTRY"]
    H --> I["ROT FOR DATA INPUT"]

    subgraph Input
        J["Live1 ConcertGrand"] --> K["Live2 PopGrand"] --> L["Live3 RockPiano"] --> M["Live4 AmbientPiano"] --> N["Live5 CocktailPiano"] --> O["ROT FOR CAPS"]
    end

    subgraph Data
        P["ROT FOR DATA INPUT"] --> Q["ROT FOR DATA OUTPUT"]
    end

    style A fill:#f9f,stroke:#333
    style B fill:#f9f,stroke:#333
    style C fill:#f9f,stroke:#333
    style D fill:#f9f,stroke:#333
    style E fill:#f9f,stroke:#333
    style F fill:#f9f,stroke:#333
    style G fill:#f9f,stroke:#333
    style H fill:#f9f,stroke:#333
    style I fill:#f9f,stroke:#333
Press the [ENTER] button to actually select the highlighted file.
- Adjusting the parameter values
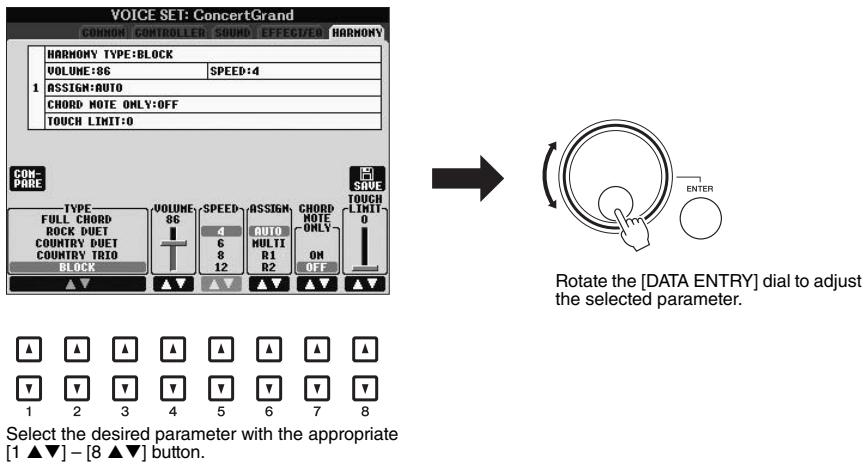
You can conveniently use the [DATA ENTRY] dial in tandem with the [1 ] - [8 ] buttons to adjust parameters indicated in the display.
text_image
VOICE SET: ConcertGrand HARMONY TYPE:BLOCK VOLUME:86 SPEED:4 1 ASSIGN:AUTO CHORD NOTE ONLY:OFF TOUCH LIMIT:0 COM- PARE TYPE FULL CHORD ROCK DUET COUNTRY DUET COUNTRY TRIO BLOCK VOLUME 86 SPEED 4 6 8 12 ASSIGN AUTO MULTI R1 R2 CHORD NOTE ONLY ON OFF SAVE TOUCH LIMIT 0 1 2 3 4 5 6 7 8 Select the desired parameter with the appropriate [1 ▲▼] - [8 ▲▼] button. Rotate the [DATA ENTRY] dial to adjust the selected parameter.This convenient technique also works well with pop-up parameters such as Tempo and Transpose. Simply press the appropriate button (ex., TEMPO [+]), then rotate the [DATA ENTRY] dial to set the value, then press [ENTER] to close the window.
Pressing the [EXIT] button returns you to the previously indicated display. Pressing the [EXIT] button several times returns to the default Main display (page 22).
Messages Shown in the Display
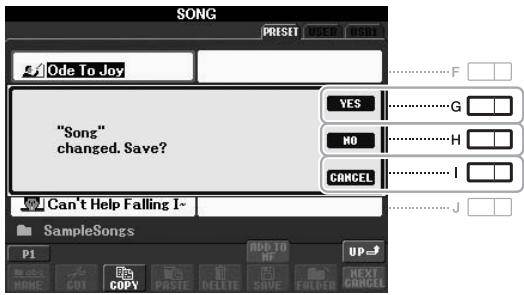
A message (information or confirmation dialog) sometimes appears on the screen to facilitate operation. When the message appears, simply press the appropriate button.
text_image
SONG Preset USER USB1 Ode To Joy "Song" changed. Save? YES G NO H CANCEL I Can't Help Falling I~ SampleSongs P1 ADD TO MI UP NAME CUT COPY POSTE DELETE SAVE VALIDEN NEXT CHANGEInstant Selection of the Displays — Direct Access
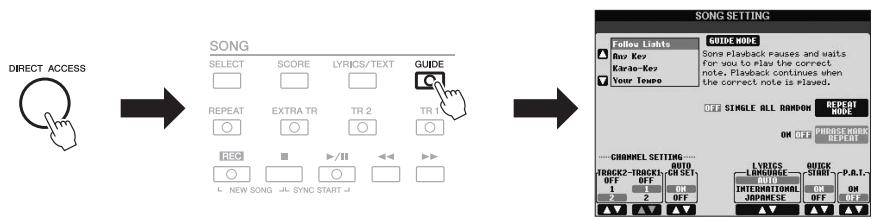
With the convenient Direct Access function, you can instantly call up the desired display — with just a single additional button press.
1 Press the [DIRECT ACCESS] button.
A message appears in the display prompting you to press the appropriate button.
2 Press the button (or move the wheel or connected pedal) corresponding to the desired setting display to instantly call up that display.
For example, pressing the [GUIDE] button calls up the display in which the Guide mode can be set.
flowchart
graph LR
    A["DIRECT ACCESS"] --> B["SONG"]
    B --> C["SELECT SCORE LYRICS/TEXT GUIDE"]
    C --> D["REPEAT EXTRA TR TR 2 TR 1"]
    D --> E["REC III >/II <"]
    E --> F["L. NEW SONG >. SYNC START"]
    F --> G["SONG SETTING"]
    G --> H["Follow Lights GUIDE MODE"]
    H --> I["Buy Key"]
    H --> J["Karao-Key"]
    H --> K["Your Tempo"]
    G --> L["OFF SINGLE ALL RAMON REPEAT MODE"]
    L --> M["ON OFF HOUSE WORK REPORT"]
    M --> N["CHANNEL SETTING AUTO TRACK2-TRACK1-CH SET 1 ON 2 ON 3 ON 4 ON"]
    N --> O["LYRICS LANGUAGE QUICK START-P.R.I. INTERMODIAL JAPANESE OFF ON OFF"]
Refer to the Data List for a list of the displays that can be called up with the Direct Access function. The Data List is available at the Yamaha website. (See page 7.)
Main Display Configuration
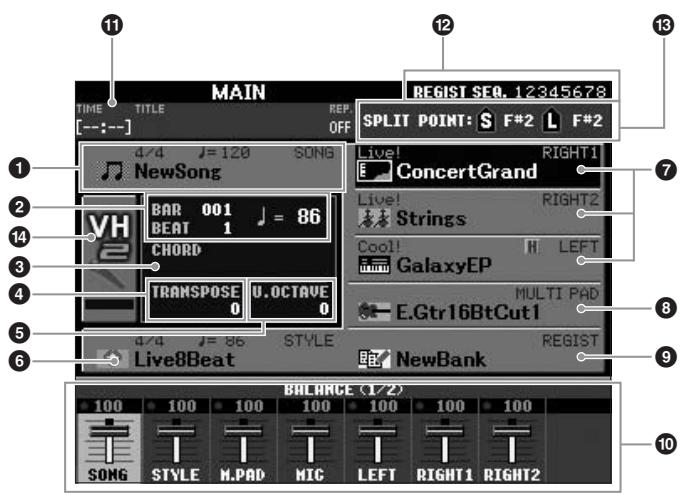
The display that appears when the power is turned on is the Main display. The Main display shows the current basic settings such as the currently selected Voice and Style, allowing you to see them at a single glance. The Main display is the one you'll usually see when you play the keyboard.
text_image
MAIN TIME TITLE REP [--:--] OFF REGIST SEQ. 12345678 SPLIT POINT: S F*2 L F*2 1 2 3 4 5 6 7 8 9 10 11 12 13 1 2 3 4 5 6 7 8 9 10 NewSong BAR 001 J = 86 BEAT 1 CHORD TRANSPOSE U.OCTAVE 0 0 4/4 J = 86 STYLE Live8Beat BALANCE (1/2) 100 100 100 100 100 100 100 SONG STYLE M.PAD MIC LEFT RIGHT1 RIGHT2 Live! RIGHT1 ConcertGrand Live! RIGHT2 Strings Cool! H LEFT GalaxyEP MULTI PAD E.Gtr16BtCut1 REGIST NewBankNOTE
Here's a convenient way to return to the Main display from any other display: Simply press the [DIRECT ACCESS] button, then the [EXIT] button.
① Song name and related information
Displays the currently selected Song name, time signature and tempo. Pressing the [A] button calls up the Song Selection display (page 54).
② Bar/Beat/Tempo
Displays the current position (bar/beat/tempo) in Style playback or Song playback.
③ Current chord name
When the [ACMP] button is set to on, the chord specified in the chord section of the keyboard will be displayed. When the Song containing the chord data is played, the current chord name will be displayed.
4 Transpose
Displays the amount of transposition in semitone units (page 38).
⑤ Upper Octave
Displays the amount that the octave value is shifted (page 38).
⑥ Style name and related information
Displays the currently selected Style name, time signature and tempo. Pressing the [E] button calls up the Style Selection display (page 43).
⑦ Voice name
Displays the Voice names currently selected for RIGHT 1, RIGHT 2 and LEFT parts (page 35). Pressing one of the [F] – [H] buttons calls up the Voice Selection display for each part.
8 Multi Pad Bank name
Displays the names of the selected Multi Pad Bank. Pressing the [I] button calls up the Multi Pad Bank Selection display (page 69).
NOTE
When the Left Hold function (page 35) is on, an “H” indication appears next to the part name.
⑨ Registration Memory Bank name
Displays the currently selected Registration Memory Bank name and Registration Memory number. Pressing the [J] button calls up the Registration Memory Bank Selection display (page 80).
10 Volume Balance
Displays the volume balance among the parts in two pages. Adjust the volume balance among the parts by using the [1 ] - [8 ] buttons (page 53).
⑪ USB Audio information
Displays information for the selected audio file (elapsed playback time, file name and repeat mode). When the recording of USB Audio is in standby, a “REC WAIT” indication appears. While recording, “REC” appears.
12 Registration Sequence
Indicates the sequence order of the Registration Memory (page 79) numbers, which can be called up via the TAB [◀][▶] buttons or the pedal. For instructions on programming the sequence, refer to the Reference Manual on the website.
13 Split Point
Displays the Split Point positions (page 35).
14 MIC Input level indicator (PSR-S950)
When a microphone is connected, this indicates the input level. Adjust the level with the [INPUT VOLUME] knob so that the indicator lights in green or yellow (but not in red). For details on the [INPUT VOLUME], refer to page 83. Pressing the [B]/[C]/[D] buttons calls up the Vocal Harmony Type Selection display.
NOTE
If the Volume Balance display is not shown, press the [BALANCE] button to show the Volume Balance display.
File Selection Display Configuration
The File Selection display is for selecting Voice, Styles, and other data. The File Selection display appears when you press one of the VOICE or STYLE category selection buttons, SONG [SELECT] button, etc.
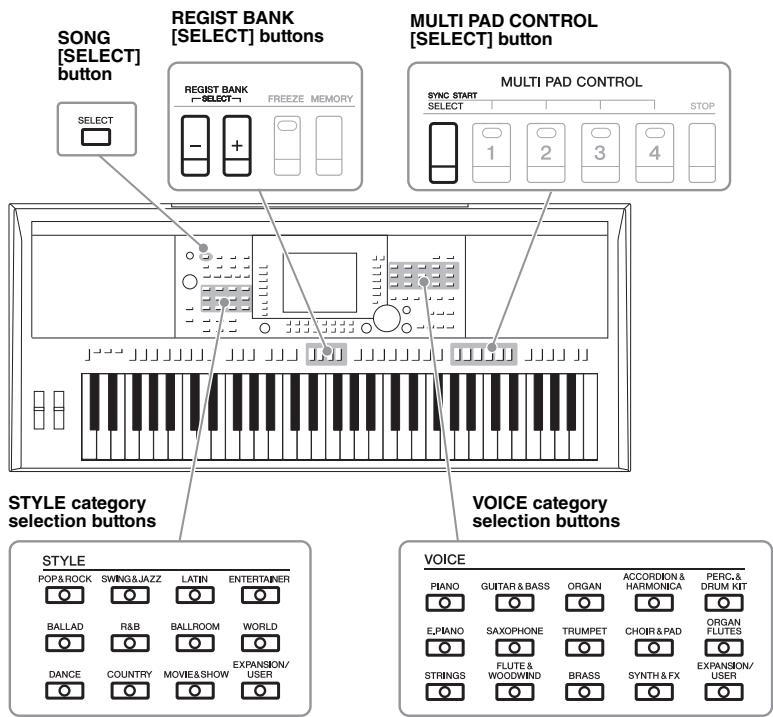
text_image
SONG [SELECT] button REGIST BANK [SELECT] buttons REGIST BANK [SELECT] FREEZE MEMORY MULTI PAD CONTROL [SELECT] button SYNC START SELECT 1 2 3 4 STOP MULTI PAD CONTROL STYLE category selection buttons VOICE category selection buttons STYLE POP&ROCK SWING&JAZZ LATIN ENTERTAINER BALLAD R&B BALLROOM WORLD DANCE COUNTRY MOVIE&SHOW EXPANSION/ USER VOICE PIANO GUITAR & BASS ORGAN ACCORDION & HARMONICA PERC& DRUM KIT E,PIANO SAXOPHONE TRUMPET CHORP & PAD ORGAN FLUTS EXPANSION/ WOODWIND BRASS SYNTH & FX USER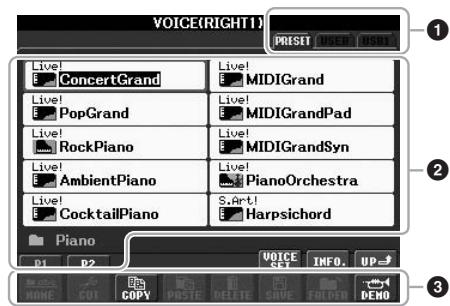
text_image
VOICE(RIGHT1) PRESET USER INSERT Live! ConcertGrand Live! PopGrand Live! RockPiano Live! AmbientPiano Live! CocktailPiano Live! MIDIGrand Live! MIDIGrandPad Live! MIDIGrandSyn Live! PianoOrchestra S.Art! Harpsichord Piano D1 D2 VOICE INFO. UP= HOME COPY POSTER FREE CUBE FILTER DEMO① Location (drive) of data
PRESET Location where pre-programmed (preset) data is stored.
USER Location where recorded or edited data is saved. Installed Expansion Voices or Styles are also saved here in the Expansion folder.
USB Location where data on USB flash memory is saved. This appears only when USB flash memory is connected to the [USB TO DEVICE] terminal (page 92).
NOTE
By pressing the [USB] button, you can also access the files of Voice, Styles, and other data which are saved in the USB flash memory. [USB] → [A] SONG/[B] AUDIO/[C] STYLE/[F] VOICE(RIGHT1)/[G] MULTI PAD/[H] REGIST.
② Selectable data (files)
The files that can be selected on this display are shown. If more than 10 files exist, the page numbers (P1, P2 ...) are shown below the files. Pressing the corresponding button changes the display page. When other pages follow, the “Next” button appears, and for the previous page, the “Prev.” button appears.
③ File/folder operation menu
You can save and manage your data files (copy, move, delete, etc.) from this menu. For detailed instructions, refer to pages 26 – 29.
NOTE
The data, both pre-programmed and your own original, are saved as "files."
NOTE
The number of pages shown varies depending on the Selection display.
Closing the current folder and calling up the next highest level folder
In the PRESET display, several data (files) are contained together in a folder. You can also organize your original data in the USER/USB display by creating several new folders (page 27).
To close the current folder and call up the next highest level folder, press the [8 ] (UP) button.
Example: PRESET Voice Selection display
The PRESET Voice files are categorized and contained in appropriate folders.
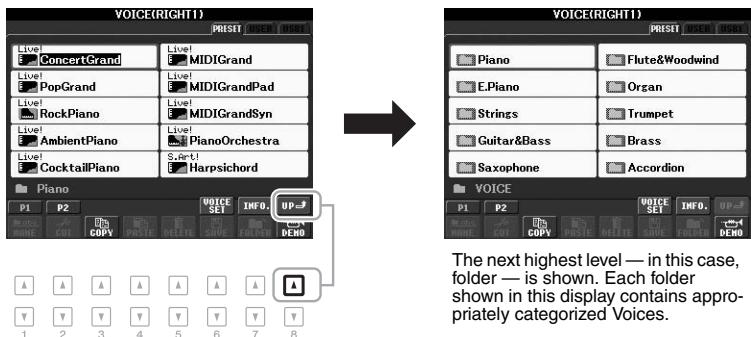
text_image
VOICE(RIGHT1) PRISET Live! ConcertGrand Live! PopGrand Live! RockPiano Live! AmbientPiano Live! CocktailPiano PIANO P2 COPY INFO. UP... DEMO Voice(RIGHT1) PRISET Piano Flute&Woodwind E.Piano Organ Strings Trumpet Guitar&Bass Brass Saxophone Accordion P1 P2 COPY INFO. UPI DEMO The next highest level — in this case, folder — is shown. Each folder shown in this display contains appropriately categorized Voices.This display shows the Voice files in a folder.
File Management
You can save your original data (such as Songs you've recorded and Voices you've edited) as a file to internal memory (User drive) or a USB flash memory. If you've saved a lot of files, it may be difficult to find the desired file quickly. To make it easier to find the files you want, you can organize your files in folders, rename the files, delete unnecessary files, etc. These operations are done in the File Selection display.
IMPORTANT
- Saving files or creating new folders cannot be done in the PRESET tab or the Expansion folder (installed Expansion Pack) in the USER tab.
- Files in the PRESET tab and the Expansion folder in the USER tab cannot be renamed/moved/deleted.
- Files in the Expansion folder in the USER tab cannot be copied.
NOTE
Before using a USB flash memory, be sure to read "Connecting a USB Flash Memory" on page 92.
Saving a File
This operation lets you save your original data (such as Songs you've recorded and Voices you've edited) as a file.
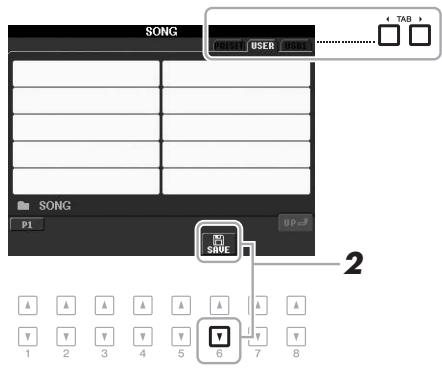
In the File Selection display, select the appropriate tab (USER or USB) to which you want to save the data by using the TAB [◀][▶] buttons.
text_image
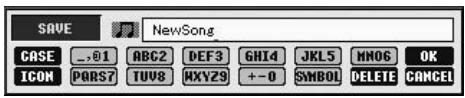
SONG P1 UP=3 2 + TAB > CUST USER SONG SAVE A A A A A A A A Y Y Y Y Y Y 1 2 3 4 5 6 7 82 Press the [6 ▼] (SAVE) button.
The naming display is called up.
text_image
SAVE NewSong CASE _.,@1 ABC2 DEF3 GHI4 JKL5 MNO6 OK ICON PARS7 TUV8 MXYZ9 +-0 SYMBOL DELETE CANCELNOTE
If you want to cancel the Save operation, press the [8 ▼] (CANCEL) button.
3 Enter the file name (page 30).
Even if you skip this step, you can rename the file at any time after saving it (page 28).
4 Press the [8 ▲] (OK) button to save the file.
The saved file will be automatically located at the appropriate position among the files in alphabetical order.
This operation lets you create new folders. Folders can be created, named and organized as desired, making it easier to find and select your original data.
In the File Selection display, select the appropriate tab (USER or USB) to which you want to create a new folder by using the TAB [◀][▶] buttons.
If you want to create a new folder within an existing folder, select the folder here first.
![YAMAHA PSR-S950 - In the File Selection display, select the appropriate tab (USER or USB) to which you want to create a new folder by using the TAB [◀][▶] buttons. - 1](/content/2019/11/115210/images/1aeac69bd912d2b407a2004e5cff2762ddf77c40e656a189282bfc30304f28c2.jpg)
text_image
SONG P1 RDO-TO UP SOME CUT GDPY PROTE DELETE SAVE FOLDER 2 7 82 Press the [7 ▼] (FOLDER) button.
The naming display for a new folder is called up.
![YAMAHA PSR-S950 - Press the [7 ▼] (FOLDER) button. - 1](/content/2019/11/115210/images/1686b80963cc627740c3ff9a8f2124eca38be155930788ec570381074f584002.jpg)
text_image
NEW FOLDER NewFolder CASE _01 ABC2 DEF3 GHI4 JKL5 MM06 OK PARS7 TUV8 MXYZ9 +-0 SYMBOL DELETE GANCEL3 Input the name of the new folder (see page 30).
NOTE
The maximum number of files/folders which can be saved in a folder is 500.
NOTE
In the USER tab display, folder directories can contain up to four levels. The maximum total number of files/folders which can be saved differs depending on the file size and the length of the file/folder names.
NOTE
If you want to cancel to create a new folder, press the [8 ▼] (CANCEL) button.
NOTICE
Name the folder to something other than “Expansion.” Otherwise, all data contained in the “Expansion” folder will be lost when an Expansion Pack is installed.
This operation lets you rename files/folders.
In the File Selection display, select the appropriate tab (USER or USB) which contains the file/folder you want to rename by using the TAB [◀][▶] buttons.
2 Press the [1 ▼] (NAME) button.
The pop-up window for the Rename operation appears at the bottom of the display.

text_image
ADD TO UP NAME 1 2 3 4 5 6 7 8 CREATE SELECT a file or folder. OK CANCEL3 Press one of the [A] – [J] buttons corresponding to the desired file/folder.
4 Press the [7 ▼] (OK) button to confirm the file/folder selection.
The naming display is called up.
5 Input the name (characters) of the selected file or folder (page 30).
The renamed file/folder appears on the display at the appropriate position among the files in alphabetical order.
NOTE
To cancel the Rename operation, press the [8 ▼] (CANCEL) button.
NOTICE
Name the folder to something other than “Expansion.” Otherwise, all files contained in the “Expansion” folder will be lost when an Expansion Pack is installed.
Copying or Moving Files
This operation lets you copy or cut a file (or files) and paste it/them to another location (folder). You can also copy folders (but not move them) by using the same procedure.
In the File Selection display, select the appropriate tab (USER or USB) which contains the file/folder you want to copy by using the TAB [◀][▶] buttons.
2 Press the [3 ▼] (COPY) button to copy or [2 ▼] (CUT) to move.
The pop-up window for the Copy/Cut operation appears at the bottom of the display.
NOTE
- Protected Songs which are saved to the User drive are marked by a "Prot. 1" indication at the upper left side of the file names and cannot be copied/moved to USB flash memories.
- Commercially available song data may be copy protected to prevent illegal copying.

flowchart
graph TD
    A["MAN"] --> B["CUT"]
    B --> C["COPY"]
    C --> D["DELETE"]
    D --> E["SIVE"]
    E --> F["FOLDER"]
    F --> G["UP-"]

    H["1"] --> I["2"]
    I --> J["3"]
    J --> K["4"]
    K --> L["5"]
    L --> M["6"]
    M --> N["7"]
    N --> O["8"]

    P["CUT Select files. ALL OK CANCEL"] --> Q["Next Step"]

NEXT PAGE
3 Press one of the [A] – [J] buttons corresponding to the desired file/folder.
To cancel the selection, press the same [A] - [J] button again.
Press the [6 ] (ALL) button to select all files/folders indicated on the current display including the other pages. To cancel the selection, press the [6 ] (ALL OFF) button again.
4 Press the [7 ▼] (OK) button to confirm the file/folder selection.
5 Select the destination tab (USER or USB) to paste the file/folder, by using the TAB [◀][▶] buttons.
If necessary, select the destination folder by using the [A] - [J] buttons.
6 Press the [4 ▼] (PASTE) button to paste the file/folder selected in step 3.
The pasted file/folder appears on the display at the appropriate position among the files in alphabetical order.
NOTE
To cancel the Copy operation, press the [8 ▼] (CANCEL) button.
Deleting Files/Folders
This operation lets you delete individual or multiple files/folders.
In the File Selection display, select the appropriate tab (USER or USB) which contains the file/folder you want to delete by using the TAB [◀][▶] buttons.
2 Press the [5 ▼] (DELETE) button.
The pop-up window for the Delete operation appears at the bottom of the display.

flowchart
graph LR
    A["Start"] --> B{Delete}
    B -->|Yes| C["Select files/folders. ALL OK CANCEL"]
    B -->|No| D["OK"]
    C --> E["Final Edit"]
    D --> F["Final Cancel"]
3 Press one of the [A] – [J] buttons corresponding to the desired file/folder.
To cancel the selection, press the same [A] - [J] button again.
Press the [6 ] (ALL) button to select all files/folders indicated on the current display including the other pages. To cancel the selection, press the [6 ] (ALL OFF) button again.
4 Press the [7 ▼] (OK) button to confirm the file/folder selection.
5 Follow the on-display instructions.
- YES Delete the file/folder
- YES ALL Delete all selected files/folders
- NO Leave the file/folder as is without deleting
- CANCEL Cancel the Delete operation
NOTE
To cancel the Delete operation, press the [8 ▼] (CANCEL) button.
Entering Characters
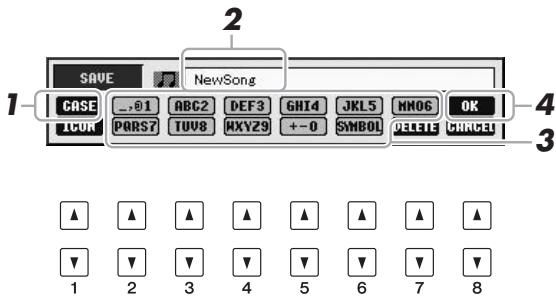
The instructions that follow show you how to enter characters for naming your files/folders, inputting keywords to search for the appropriate panel settings (Music Finder), etc. Entering characters should be done in the display shown below.
text_image
2 SAVE NewSong CASE _01 ABC2 DEF3 GHI4 JKL5 MNO6 OK ICUR PARS7 TUV8 MXYZ9 +-0 SYMBOL 01313 CHRG31 4 3 ▲ ▲ ▲ ▲ ▲ ▲ ▲ ▲ ▲ ▼ ▼ ▼ ▼ ▼ ▼ ▼ ▼ ▼ 1 2 3 4 5 6 7 8Several different characters are assigned to each button, and the characters change each time you press the button.
1 Change the type of character by pressing the [1 ▲] button.
- CASE
Capital letters, numbers, marks
- case
Lowercase letters, numbers, marks
2 Use the [DATA ENTRY] dial to move the cursor to the desired position.
3 Press the [2 ▲▼] – [6 ▲▼] and [7 ▲] buttons, corresponding to the character you wish to enter.
To actually enter the selected character, move the cursor or press another letter-input button. Alternately, you can wait for a short time and the character will be entered automatically.
For details on entering characters, refer to “Other character-entry operations” below.
4 Press the [8 ▲] (OK) button to actually enter the new name and return to the previous display.
NOTE
When inputting lyrics in the Song Creator function, you may also enter Japanese characters (kana and kanji).
NOTE
The following marks cannot be entered for a file/folder name.
$$ \backslash : ^ {*}? ^ {"} < > | $$
NOTE
The file name can contain up to 41 characters and the folder name can contain up to 50 characters.
NOTE
To cancel the character-entering operation, press the [8 ▼] (CANCEL) button.
Other character-entry operations
- Deleting characters
Move the cursor to the character you wish to delete by using the [DATA ENTRY] dial, and press the [7 ] (DELETE) button. To delete all characters on the line at once, press and hold the [7 ] (DELETE) button.
- Entering marks or space
- Press the [6 ▼] (SYMBOL) button to call up the mark list.
- Use the [DATA ENTRY] dial to move the cursor to the desired mark or space, then press the [8 ] (OK) button.
- Selecting custom icons for files (shown at left of file name)
- Press the [1 ▼] (ICON) button to call up the ICON SELECT display.
- Select the icon by using the [A] – [J] buttons, [3 ▲▼] – [5 ▲▼] buttons or [DATA ENTRY] dial. The ICON display includes several pages. Press the TAB [◀][▶] buttons to select different pages.
- Press the [8 ▲] (OK) button to apply the selected icon.
NOTE
To cancel the operation, press the [8 ▼] (CANCEL) button.
Resetting to the Factory-programmed Settings
While holding the C6 key (right-most key on the keyboard), turn the power switch on. This resets all settings to the factory default.

text_image
C6 +You can also reset a specified setting to the factory default value. Call up the operation display: [FUNCTION] → [I] UTILITY → TAB [◀][▶] SYSTEM RESET. For details, refer to the Reference Manual on the website, Chapter 11.
Data Backup
This procedure backs up all data saved in USER drive (except Protected Songs and Expansion Voices/Styles) and all settings of the instrument to a USB flash memory. Yamaha recommends that you back up important data to a USB flash memory since the data in the instrument may be lost on occasion through malfunction or incorrect operation.
1 Connect the backup USB flash memory (destination).
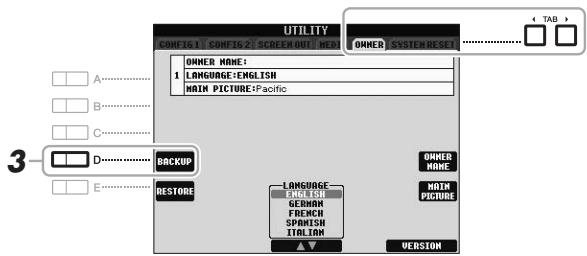
2 Call up the operation display.
[FUNCTION] → [I] UTILITY → TAB [◀][▶] OWNER
text_image
UTILITY COMMENTS AND CONFIG 2'S CREAM (OUT, RED) OWNER: ENGLISH RESET 1 OWNER NAME: LANGUAGE-ENGLISH MAIN PICTURE:Pacific BACKUP RESTORE LANGUAGE-ENGLISH GERMAN FRENCHI SPANISH ITALIAN OWNER NAME MAIN PICTURE 3 - D - E VERSION3 Press the [D] (BACKUP) button to save the data to the USB flash memory.
You can also back up a specified setting. Call up the operation display:
[FUNCTION] → [I] UTILITY → TAB [◀][▶] SYSTEM RESET. For details,
refer to the Reference Manual on the website, Chapter 11.
Restoring the Data:
You can restore the data by pressing the [E] (RESTORE) button in the Owner page of the UTILITY display. When the operation is complete, the instrument will be restarted automatically.
NOTICE
Move the Protected Songs which are saved to the USER display before restoring. If the Songs are not moved, the operation deletes the data.
NOTE
Before using a USB flash memory, be sure to read “Connecting a USB Flash Memory” on page 92.
NOTE
Completing the backup/restore operation may take a few minutes.
NOTE
To save the Song, Style, Multi Pad, Registration Memory Bank and Voice independently, execute the Copy operation (page 28) from the File Selection display.
text_image
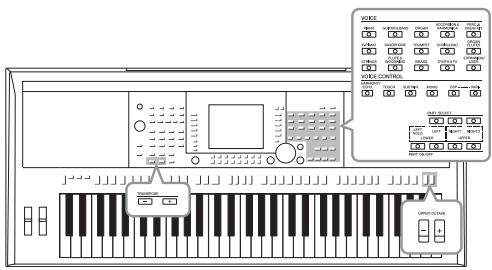
Diagram of a keyboard interface with voice control panel and labeled buttons, showing input/output ports and control buttons.The instrument features a wide variety of exceptionally realistic instrumental Voices, including piano, guitar, strings, brass, wind instruments and more.
Playing Preset Voices
Selecting a Voice (RIGHT 1) and playing the keyboard
1 Press the PART SELECT [RIGHT 1] button.
![YAMAHA PSR-S950 - Press the PART SELECT [RIGHT 1] button. - 1](/content/2019/11/115210/images/19dc30ea16a6511ed86d7944300608ce4a30f05a8a33fcb50d32db21de399a69.jpg)
text_image
PART SELECT LEFT HOLD LEFT LOWER RIGHT1 UPPER PART ON/OFF 2IMPORTANT
For information on the keyboard parts (Right 1, Right 2 and Left), see page 35.
2 Press the PART ON/OFF [RIGHT1] button to turn on the Right 1 part.
3 Press one of the VOICE category selection buttons to select a Voice category and call up the Voice Selection display.
text_image
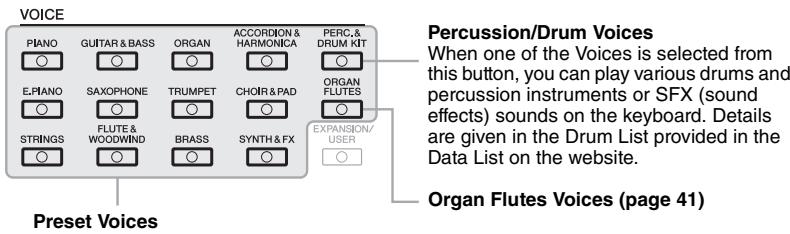
VOICE Piano GUITAR & BASS ORGAN ACCORDION & HARMONICA PERC & DRUM KIT E.PIANO SAXOPHONE TRUMPET CHOR & PAD ORGAN STRINGS FLUTE & WOODWIND BRASS SYNTH & FX EXPANSION/ USER Preset Voices Percussion/Drum Voices When one of the Voices is selected from this button, you can play various drums and percussion instruments or SFX (sound effects) sounds on the keyboard. Details are given in the Drum List provided in the Data List on the website. Organ Flutes Voices (page 41)NOTE
The [EXPANSION/USER] button is used for calling up Custom Voices (your original Voices created with the Voice Set function) or Expansion Voices (additionally installed Voices). For details on Expansion Voices, refer to the section "Expanding Voices" (page 36).
The preset Voices are categorized and contained in appropriate folders. Voice category selection buttons on the panel correspond to the categories of the preset Voices. For example, press the [STRINGS] button to display various strings Voices.

NEXT PAGE
4 Press one of the [A] – [J] buttons to select the desired Voice.
To call up the other display pages, press one of the [1 ] - [5 ] buttons or press the same VOICE button again.
![YAMAHA PSR-S950 - Press one of the [A] – [J] buttons to select the desired Voice. - 1](/content/2019/11/115210/images/ae7b09053653d86d0d7d8095fb9d4bd6946faaedb875fe0410c8da5f5699198f.jpg)
text_image
VOICE(RIGHT1) PRISSET S. Art1 ConcertStrings Sweet1 Violin A B C D E Live StudioStrings Live Live Strings Live MovieStrings Live TremoloStrings Live Live Live Live Live Live Live Live Live Live Live Live Live Live Live Live Live Live Live Live Live Live Live Live Live Live Live Live Live Live Live Live Live Live Live Live Live Live Live Live Live Live Live Live Live Live Live Live Live Live MovieStrings Live MovieStrings Live MovieStrings Live MovieStrings Live MovieStrings Live MovieStrings Live MovieStrings Live MovieStrings Live MovieStrings Live MovieStrings Live MovieStrings Live MovieStrings Live MovieStrings Live MovieStrings Live MovieStrings Live MovieStrings Live MovieStrings Live MovieStrings Live MovieStrings Live MovieStrings Live Movie ORDERSHARPERAERIAELEMEAERIAELEMEAERIAELEMEAERIAELEMEAERIAELEMEAERIAELEMEAERIAELEMEAERIAELEMEAERIAELEMEAERIAELEMEAERIAELEMEAERIAELEMEAERIAELEMEAERIAELEMEAERIAELEMEAERIAELEMEAERIAELEMEAERIAEELEMEAERIAELEMEAERIAELEMEAERIAELEMEAERIAELEMEAERIAELEMEAERIAELEMEAERIAELEMEAERIAELEMEAERIAELEMEAERIAELEMEAERIAELEMEAERIAELEMEAERIAELEMEAERIAELEMEAERIAELEMEAERIAELEMEAEELEMEAERIAELEMEAERIAELEMEAERIAELEMEAERIAELEMEAERIAELEMEAERIAELEMEAERIAELEMEAERIAELEMEAERIAELEMEAERIAELEMEAERIAELEMEAERIAELEMEAERIAELEMEAERIAELEMEAERIAELEMEAERIAELEMEAECELEMEAERIEAEELEMEAERIEAEELEMEAERIEAEELEMEAERIEAEELEMEAERIEAEELEMEAERIEAEELEMEAERIEAEELEMEAERIEAEELEMEAERIEAEELEMEAERIEAEELEMEAERIEAEELEMEAERIEAEELEMEAERIEAEELEMEAERIEAEELEMEAECELEMEAECELEMEAECELEMEAECELEMEAECELEMEAECELEMEAECELEMEAECELEMEAECELEMEAECELEMEAECELEMEAECELEMEAECELEMEAECELEMEAECELEMEAECELEMEAECELEMEAECELEMEAECELEMEAECELEMEAECELEMEAECELEMEAECELEMEAECELEMEAECELEMEAECTREEMEAETREEMEAETREEMEAETREEMEAETREEMEAETREEMEAETREEMEAETREEMEAETREEMEAETREEMEAETREEMEAETREEMEAETREEMEAETREEMEAETREEMEAETREEMEAETREEMEAETREEMEAETREEMEAETREEMEAETREEMEAETREEMEAETREEMEAETREEMEAETREEMEAETREEMEAATREEMEAETREEMEAETREEMEAETREEMEAETREEMEAETREEMEAETREEMEAETREEMEAETREEMEAETREEMEAETREEMEAETREEMEAETREEMEAETREEMEAETREEMEAETREEMEAETREEMEAETREEMEAETREEMEAETREEMEAETREEMEAETREEMEAETREEMEAETREEMEAETREEMEAetREEMEAETREEMEAETREEMEAETREEMEAETREEMEAETREEMEAETREEMEAETREEMEAETREEMEAETREEMEAETREEMEAETREEMEAETREEMEAETREEMEAETREEMEAETREEMEAETREEMEAETREEMEAETREEMEAETREEMEAETREEMEAETREEMEAETREEMEAETREEMEAETREEMEANOTE
If you pressed the [ORGAN FLUTES] button in step 2, press the [I] (PRE-SET) button before proceeding to step 3.
NOTE
The Voice type and its defining characteristics are indicated above the Preset Voice name. For details on the characteristics, refer to the Reference Manual on the website.
NOTE
You can call up the information for the selected Voice by pressing the [7 ▲] (INFO.) button. (Some Voices do not have an information display.) To close the information display, press the [EXIT] button.
To listen to the demo phrases for each Voice
Press the [8 ] (DEMO) button to start the Demo for the selected Voice. To stop the demo, press the [8 ] button again.
5 Play the keyboard.
Recalling your favorite Voices easily
The sheer number of Voices may seem overwhelming at first. By copying your favorite Preset Voices to the USER drive, you can quickly and easily recall them as needed.
- Copy your favorite Voice from the Preset drive to the User drive. Refer to page 28 for details on the copy operation.
- Press the [EXPANSION/USER] button to call up the User drive of the Voice Selection display, then press one of the [A] – [J] buttons to select the desired Voice.
Playing Two Voices Simultaneously
1 Select a Voice for the Right 1 part (page 32).
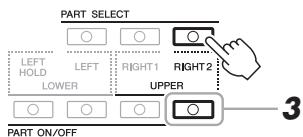
2 Press the PART SELECT [RIGHT 2] button.
text_image
PART SELECT LEFT HOLD LOWER PART ON/OFF LEFT RIGHT1 RIGHT2 UPPER 33 Press the PART ON/OFF [RIGHT 2] button to turn on the Right 2 part.

NEXT PAGE
4 Press one of the VOICE category selection buttons to call up the Voice Selection display for the Right 2 part.
5 Press one of the [A] – [J] buttons to select the desired Voice.
6 Play the keyboard.
The Voice selected for RIGHT 1 and the Voice selected here are sounded simultaneously in a layer.
NOTE
You can save the settings to Registration Memory. See page 79.
Playing Different Voices with your Left and Right Hands
1 Make sure that the PART ON/OFF [RIGHT 1] and/or [RIGHT 2] buttons are turned on.
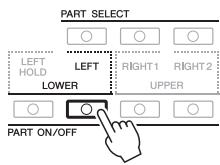
2 Press the PART ON/OFF [LEFT] button to turn it on.
text_image
PART SELECT LEFT HOLD LEFT LOWER RIGHT1 RIGHT2 UPPER PART ON/OFF3 Press one of the VOICE category selection buttons to call up the Voice Selection display for the Left part.
4 Press one of the [A] – [J] buttons to select the desired Voice.
5 Play the keyboard.
The notes you play with your left hand sound one Voice (LEFT Voice selected above), while the notes you play with your right sound a different Voice or Voices (RIGHT 1 and/or 2 Voices).
NOTE
You can save the settings to Registration Memory. See page 79.
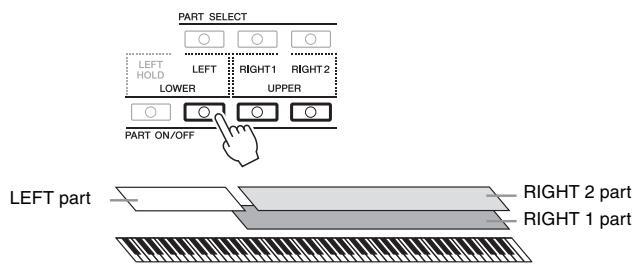
text_image
PART SELECT LEFT HOLD LEFT RIGHT1 RIGHT2 LOWER UPPER PART ON/OFF LEFT part RIGHT 2 part RIGHT 1 partKeyboard Parts
Voices can be assigned independently to each of the three keyboard parts: Right 1, Right 2 and Left. You can combine these parts by using the PART ON/OFF buttons to create a rich, ensemble sound.
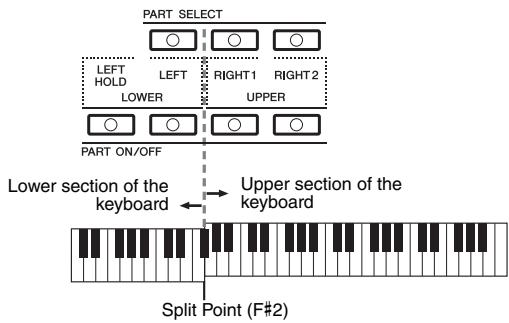
text_image
PART SELECT LEFT HOLD LEFT RIGHT1 RIGHT2 LOWER UPPER PART ON/OFF Lower section of the keyboard Upper section of the keyboard Split Point (F#2)When the LEFT part is off, the RIGHT 1 and 2 Voices can be played over the entire keyboard. When the LEFT part is on, keys lower than F#2 (the Split Point) are set for playing the LEFT part and those higher than the Split Point are set for playing the RIGHT 1 and 2 parts.
You can confirm the currently selected part by checking which lamp of the PART SELECT buttons is lit. To select the desired keyboard part, press the corresponding part button.
NOTE
To change the Split Point, press: [FUNCTION] → [C] STYLE SETTING/SPLIT POINT/CHORD FINGERING → TAB [◀][▶] SPLIT POINT. For more information, refer to the Reference Manual on the website, chapter 2.
Holding the LEFT part Voice (Left Hold)
By turning on the PART ON/OFF [LEFT HOLD] button, the LEFT part Voice is held even when the keys are released, desirable in some performance styles. Non-decaying Voices such as strings are held continuously, while decay-type Voices such as piano decay more slowly (as if the sustain pedal has been pressed).
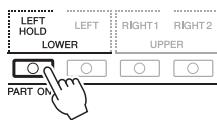
Voice Characteristics
The Voice type and its defining characteristics are indicated above the Voice name — S.Art!, MegaVoice, Live!, Cool!, Sweet!, etc. For detailed explanation, refer to the Reference Manual.
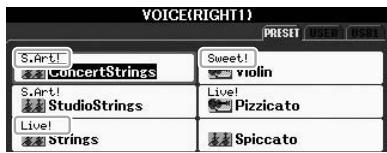
text_image
VOICE(RIGHT1) S.Art! ConcertStrings S.Art! StudioStrings Live! strings Sweet! violin Live! Pizzicato SpiccatoExpanding Voices
Installing an Expansion Pack lets you add a variety of optional Voices and Styles to each Expansion category. The installed Voices and Styles can be selected like Preset Voices and Styles, allowing you to expand your music performance and creation possibilities.
For information on obtaining Expansion Packs, refer to the PSR-S950 or PSR-S750 page at the Yamaha website (http://www.yamaha.com/). Depending on your locale, Expansion Packs may be available for expanding Voices and Styles unique or native to your particular area.
Installing an Expansion Pack
1 Connect the USB flash memory which contains the Expansion Pack file to the [USB TO DEVICE] terminal of the instrument.
2 Call up the operation display.
[FUNCTION] → [J] EXPANSION PACK INSTALLATION → TAB [◀][▶] USB
3 Use the [A] – [J] buttons to select the desired Expansion Pack file.
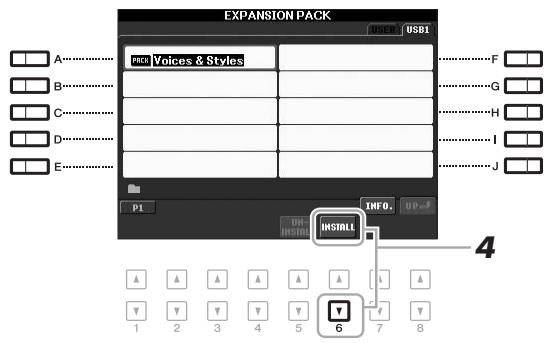
text_image
EXPANSION PACK USER USB1 A…………… Pick Voices & Styles B…………… C…………… D…………… E…………… P1 INFO. UP UN INSTALL 4 6 1 2 3 4 5 7 8NOTICE
This instrument allows you to install only one Expansion Pack. Installing an Expansion Pack will erase all the previously existing Expansion Pack data in the instrument. Make sure to keep a copy of the Expansion Pack data in a USB flash memory for future use.
NOTE
Before using a USB flash memory, be sure to read “Connecting a USB Flash Memory” on page 92.
NOTE
You can call up the information for the selected Expansion Pack by pressing the [7 ▲] (INFO.) button. To close the information display, press the [EXIT] button.
4 Press the [6 ▼] (INSTALL) button to install the data to the instrument.
Follow the on-display instructions.
5 Press the [F] (YES) button when the message indicating completion of the install operation appears.
The instrument will be restarted automatically.
6 Press the [EXPANSION/USER] button in the VOICE or STYLE category selection buttons to see if the Expansion Pack data has been installed successfully.
Expansion Voices or Styles can be found in the Expansion folder of the USER tab display.
NOTICE
The instrument will be restarted when installation is completed. Save all the data currently being edited beforehand, otherwise the data will be lost.
NOTE
If a message appears indicating that the drive does not have enough free space, move the files in the USER tab to the USB tab, then try installing again. Refer to page 28 for details on the Move operations.
Song, Style or Registration Memory containing Expansion Voices or Styles
Song, Style or Registration Memory containing any Expansion Voices or Styles will not sound properly or cannot be called up, if the Expansion Pack data does not exist in the instrument.
We recommend that you write down the name of the Expansion Pack when you create the data (Song, Style or Registration Memory) using Expansion Voices or Styles, so that you can easily find and install the Expansion Pack when necessary.
Uninstalling an Expansion Pack
This operation deletes all the installed Expansion Voices or Styles.
1 Call up the operation display then select an Expansion Pack file.
[FUNCTION] → [J] EXPANSION PACK INSTALLATION → TAB [◀][▶] USER
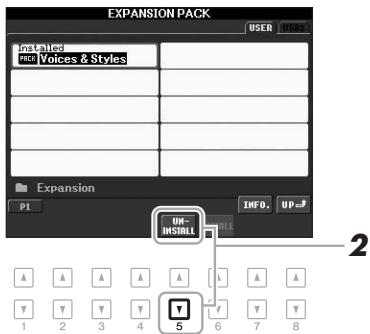
text_image
EXPANSION PACK USER INSIDE Installed PACS Voices & Styles Expansion P1 INFO. UP... UN- INSTALL 2 A A A A L A A Y Y Y Y T 5 6 7 82 Press the [5 ▼] (UNINSTALL) button to uninstall the Expansion Pack.
Follow the on-display instructions.
3 Press the [F] (YES) button when the message indicating completion of the uninstall operation appears.
The instrument will be restarted automatically.
NOTICE
The instrument will be restarted when the uninstallation operation is completed. Save all data currently being edited beforehand, otherwise the data will be lost.
Transposing the Pitch of the Keyboard
The TRANSPOSE [-]/[+] buttons transpose the overall pitch of the instrument (the keyboard sound, Style playback, Song playback, and so on) in semitone steps. Press the [+] and [-] buttons simultaneously to instantly reset the transpose value to 0.
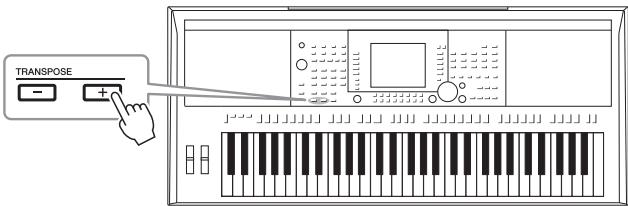
text_image
TRANSPOSEThe UPPER OCTAVE [-]/[+] buttons allow the pitch of the RIGHT 1 and 2 parts to be shifted up or down by one octave. Press the [+] and [-] buttons simultaneously to instantly reset the octave value to 0.
NOTE
The Transpose functions do not affect the Drum Kit or SFX Kit Voices.
NOTE
You can also adjust the pitch for each part in the Mixing Console display called up via [MIXING CONSOLE] → TAB [◀][▶] TUNE → [1 ▲▼] – [3 ▲▼] TRANSPOSE.
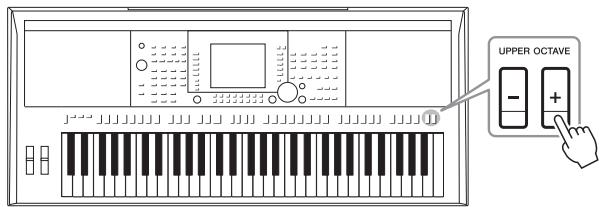
text_image
UPPER OCTAVEFine-tuning the pitch of the entire instrument
Although the entire pitch of this instrument is set to 440.0 Hz by default, you can fine-tune the pitch from
[FUNCTION] → [A] MASTER TUNE/SCALE TUNE → TAB [◀][▶] MASTER TUNE.
You can also adjust the pitch for each part (keyboard parts, Style parts and Song parts) on the TUNE page of the Mixing Console display (page 86).
For details, refer to the Reference Manual on the website.
Fine-tuning the pitch for each note individually
Although the scale of this instrument is set to Equal Temperament by default, you can change the scale or fine-tune the pitch for each note from [FUNCTION] → [A] MASTER TUNE/SCALE TUNE → TAB [◀][▶] SCALE TUNE.
For details, refer to the Reference Manual on the website.
Using the Pitch Bend Wheel
Use the PITCH BEND wheel to bend notes up (roll the wheel away from you) or down (roll the wheel toward you) while playing the keyboard. The Pitch Bend is applied to all the keyboard parts (RIGHT 1, 2 and LEFT). The PITCH BEND wheel is self-centering and will automatically return to normal pitch when released.
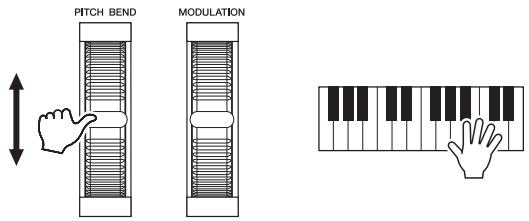
text_image
PITCH BEND MODULATIONThe maximum pitch bend range can be changed on the Mixing Console display: [MIXING CONSOLE] → TAB [◀][▶] TUNE → [H] PITCH BEND RANGE.
Using the Modulation Wheel
The Modulation function applies a vibrato effect to notes played on the keyboard. By default, this is applied to the keyboard parts (RIGHT 1, 2 and LEFT). Moving the MODULATION wheel down (toward you) decreases the depth of the effect, while moving it up (away from you) increases it.
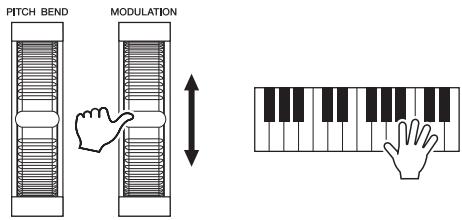
text_image
PITCH BEND MODULATIONYou can set whether the effects caused by the MODULATION Wheel will be applied or not to each of the keyboard part: [FUNCTION] → [D] CONTROLLER → TAB [◀][▶] KEYBOARD/PANEL → [A]/[B] 2 MODULATION WHEEL.
NOTE
The effects caused by using the PITCH BEND Wheel are not applied to the rhythm parts of the Style.
NOTE
Depending on the selected Voice, the MODULATION wheel effect is not applied to the rhythm parts of the Style.
NOTE
To avoid accidentally applying modulation, make sure the MODULATION Wheel is set at minimum (down) position before you start playing.
NOTE
The effects caused by using the MOD-ULATION wheel may not be applied to the LEFT part during Style playback depending on the Style setting.
Applying Voice Effects
You can apply some effects to the keyboard performance. The effects can be turned on or off by using the following buttons.

text_image
VOICE CONTROL HARMONY/ ECHO TOUCH SUSTAIN MONO DSP ...... VARL These three effect systems are applied to the currently selected keyboard part (RIGHT 1, 2, or LEFT).• HARMONY/ECHO
The Harmony/Echo effects are applied to the right-hand Voices. Refer to “Applying Harmony to Your Right-hand Melody” on page 40.
- TOUCH
This button turns the touch response of the keyboard on or off. When off, the same volume is produced no matter how strongly or softly you play the keyboard.
- SUSTAIN
When this Sustain function is on, all notes played on the keyboard with right-hand part (RIGHT 1 and 2) have a longer sustain.
• MONO
When this button is on, the part's Voice is played monophonically (only one note at a time). Using the MONO mode lets you play single, lead sounds (such as brass instruments) more realistically. It also lets you expressively control the Portamento effect (depending on the selected Voice) by playing legato.
When this button is off, the part's Voice played polyphonically.
- DSP/DSP VARI.
With the digital effects built into the instrument, you can add ambience and depth to your music in a variety of ways — such as adding reverb that makes you sound like you are playing in a concert hall.
The [DSP] button is used to turn the DSP (Digital Signal Processor) effect on or off for the currently selected keyboard part.
Although many of the Voices have been automatically set to play the certain DSP types to match the particular Voice, you can change the type. On the Voice Selection display, select [6 ▲] (VOICE SET) → TAB [◀][▶] EFFECT/EQ → [A]/[B] 2 DSP. For details, refer to the Reference Manual on the website.
The [DSP VARI.] button is used to change between variations of the DSP effect. You could use this while you play, for example, to change the rotating speed (slow/fast) of the rotary speaker effect.
NOTE
Portamento is a function that creates a smooth transition in pitch from the first note played on the keyboard to the next.
Applying Harmony to Your Right-hand Melody (HARMONY/ECHO)
Among the Voice Effects, Harmony is one of the most impressive. When the Harmony/Echo is on, the Harmony effect is applied to the right-hand Voices depending on the chord played with your left hand.
1 Turn the [HARMONY/ECHO] button on.
2 Turn on both the [ACMP] button and [SYNC START] button (page 43) and make sure that the RIGHT 1 part is on (page 32).
3 Play a chord with your left hand to start the Style (page 44) and play some notes in the right-hand range of the keyboard.
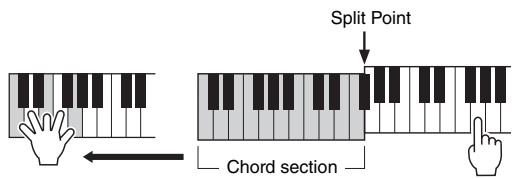
text_image
Split Point Chord sectionIn this example, harmony notes in the scale of C major (the chord played in the left hand) are automatically added to the notes played in the right-hand range of the keyboard.
You can also use the Harmony effect with the Style stopped. Simply hold down a chord with your left hand and play a melody with your right.
Although many of the Voices have been automatically set to play the certain Harmony/Echo types to match the particular Voice, you can change the type via [FUNCTION] → [G] (HARMONY/ECHO). For details, refer to the Reference Manual on the website.
NOTE
Depending on the harmony/echo type, harmony will be applied even when the [ACMP] button is off.
Creating Your Original Organ Flutes Voices
You can create original Organ Flutes Voices by editing the Preset Organ Flutes Voices. Just as on a traditional organ, the original Voices can be created by increasing and decreasing the levels of the flute footages. The created Voices can be saved and called up anytime.
1 Press the [ORGAN FLUTES] button.
The FOOTAGE Page of the Voice Set display of the Organ Flutes Voice is called up.
![YAMAHA PSR-S950 - Press the [ORGAN FLUTES] button. - 1](/content/2019/11/115210/images/3b32e8cf1ff12bede625e0100a4d4b0dd53959cc3987f6ef0e32e4bccefdcd95.jpg)
The term “footage” is a reference to the sound generation of traditional pipe organs, in which the sound is produced by pipes of different lengths (in feet).
2 Use the [1 ] - [8 ] buttons to adjust the footage settings.
The footage settings determine the basic sound of the Organ Flutes.
The [1 ▲▼] buttons control two footages: 16' and 5 1/3'. Pressing the [D] button switches between these two footages.
For details on the VOLUME/ATTACK Page and EFFECT/EQ Page, see the Reference Manual on the website.
![YAMAHA PSR-S950 - Use the [1 ] - [8 ] buttons to adjust the footage settings. - 1](/content/2019/11/115210/images/b55d14de66180be0b748a8577a71750d363e3f0a2b7f91299bdbd79720a8f68d.jpg)
text_image
VOICE SET: C FOOTAGE ORGAN TYPE SINE VENTRASE ROTARY SP SPEED SLOW FAST ORGAN Flutes ONLINE/ROTAGE EFFECTIVE OFF OFF F ON ON G DEPTH 1 3 H 16°=5 1/3" PRESETS I E 16° 5/3' 8' 4' 2 2/3' 2' 1 3/5' 1 1/3' T' A A A A A A A A Y Y Y Y Y Y 1 2 3 4 5 6 7 8If you want, you can select the Organ type, change the Rotary Speaker speed and adjust the Vibrato setting, by using the [A] – [C] and [F] – [H] buttons.
| [A]/[B] | ORGAN TYPE | Specifies the type of organ tone generation to be simulated. Sine produces a clean, clear sound and Vintage produces a gritty, slightly distorted sound. |
| [C] | ROTARY SP SPEED | Alternately switches between the slow and fast rotary speaker speeds when a rotary speaker effect is selected for the Organ Flutes (DSP TYPE parameter in the EFFECT/EQ Page), and the VOICE CONTROL [DSP] button is turned on. |
| [F]/[G] | VIBRATO | Alternately turns the vibrato effect for the Organ Flutes Voice ON or OFF. |
| [H] | VIBRATO DEPTH | Sets the Vibrato depth to one of three levels: 1 (low), 2 (mid), or 3 (high). |
| [I] | PRESETS | Opens the File Selection display of the Organ Flutes Voices for selecting a preset Organ Flutes Voice. |
3 Press the [I] (PRESETS) button to call up the Organ Flutes Voice Selection display.
Pressing the [6 ▲] button returns you to the Voice Set display.
4 Save your Organ Flutes Voice by following the procedure on page 26.
NOTICE
The settings will be lost if you select another Voice or turn the power to the instrument off without executing the Save operation.
Advanced FeaturesRefer to the Reference Manual on the website, Chapter 1.  | |
| Selecting GM/XG or other Voices from the panel: | Voice Selection display → [8 ▲](UP) → [2 ▲] (P2) |
| Effect-related settings | |
| • Setting the touch sensitivity of the keyboard: | [FUNCTION] → [D] CONTROLLER → TAB [◀][▶] KEY-BOARD/PANEL |
| • Selecting the Harmony/Echo type: | [FUNCTION] → [G] HARMONY/ECHO |
| Pitch-related settings | |
| • Fine-tuning the pitch of the entire instrument: | [FUNCTION] → [A] MASTER TUNE/SCALE TUNE → TAB [◀][▶] MASTER TUNE |
| • Scale Tuning: | [FUNCTION] → [A] MASTER TUNE/SCALE TUNE → TAB [◀][▶] SCALE TUNE |
| • Changing the part assignment of the TRANSPOSE buttons: | [FUNCTION] → [D] CONTROLLER → TAB [◀][▶] KEY-BOARD/PANEL → [A]/[B] 3 TRANSPOSE ASSIGN |
| Editing Voices (Voice Set): | Voice Selection display → [6 ▲] (VOICE SET) |
| Disabling automatic selection of Voice Sets (effects, etc.): | [FUNCTION] → [E] REGIST SEQUENCE/FREEZE/VOICE SET → TAB [◀][▶] VOICE SET |
| Editing Organ Flutes parameters: | [ORGAN FLUTES] → TAB [◀][▶] VOLUME/ATTACK or EFFECT/EQ |
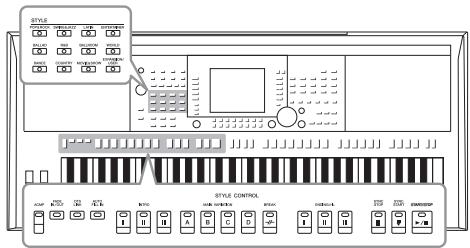
text_image
STYLE STRAW 10000000000000000000000000000000000000000000000000000000000000000000000000000000000000 STYLE CONTROL STRAW 10000000000000000000000000000000000000000000000000000 STRAW 12567843256784325678432567843256784325678432567843256784325678432567843256784325678432567843256784325678432The instrument features a variety of accompaniment and rhythmic backing patterns (called “Styles”) in a variety of different musical genres including pop, jazz, and many others. The Style features Auto Accompaniment, letting you produce automatic accompaniment playback simply by playing “chords” with your left hand. This lets you automatically recreate the sound of a full band or orchestra — even if you’re playing by yourself.
Playing a Style with the Auto Accompaniment
1 Press one of the STYLE category selection buttons to call up the Style Selection display.
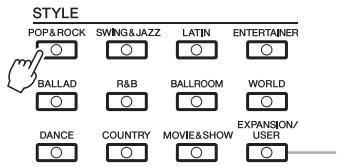
text_image
STYLE POP&ROCK SWING&JAZZ LATIN ENTERTAINER BALLAD R&B BALLROOM WORLD DANCE COUNTRY MOVIE&SHOW EXPANSION/ USERThe [EXPANSION/USER] button can be used to easily recall your favorite Styles and call up Expansion Styles (additionally installed Styles). The operations of both are the same as the [EXPANSION/USER] button in the VOICE category selection buttons. For instructions, refer to the section “Recalling your favorite Voices easily” (page 33) and “Expanding Voices” (page 36).
2 Press one of the [A] – [J] buttons to select the desired Style.
Pressing one of the [1 ] - [4 ] buttons or pressing the same STYLE button again can call up the other display page.
![YAMAHA PSR-S950 - Press one of the [A] – [J] buttons to select the desired Style. - 1](/content/2019/11/115210/images/fb70eda43eb20699107629a366995f2f3027a14924d5de18fdbc321d4049a330.jpg)
text_image
STYLE +Audio j=138 (194) Pro HardRock j=120 60sSuperGroup j=145 (204) Pro BritRockPop j=124 +Audio j=121 Pro Live8Beat j=86 RetroSoul j=120 Pro Classic8Beat j=103 80sPowerRock j=117 Pro Cool8Beat j=100 80sPopRock j=117 Pro Cool8Beat j=100 80sGuitarPop j=117 Pro Cool8Beat j=100 PopRock P1 P2 P3 NEXT REPER TIME ACC TO MF OTS INFO. OP MAY COPY COPY PRINT SMO GND RECONE F G H I J3 Press the [ACMP] button to turn on the Auto Accompaniment.
![YAMAHA PSR-S950 - Press the [ACMP] button to turn on the Auto Accompaniment. - 1](/content/2019/11/115210/images/cd5f0732219f6d440c9e666ef2a6cc4040e3b9c2b7ad15b9d67d1379d36fcb91.jpg)
text_image
ACMP FADE IN/OUT OTS LINK AUTO FILL INThe specific left-hand section of the keyboard (page 35) becomes the Chord section, and chords played in this section are automatically detected and used as a basis for fully automatic accompaniment with the selected Style.
4 Press the [SYNC START] button to enable synchronized start.
![YAMAHA PSR-S950 - Press the [SYNC START] button to enable synchronized start. - 1](/content/2019/11/115210/images/1333b928eb171ab740ac869e7a58822d5f7ecca1cd9ed94040c6cba6a1a73336.jpg)
5 As soon as you play a chord with your left hand, the selected Style starts.
Try playing chords with your left hand and play melody with your right hand.
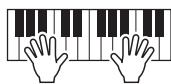
NOTE
For information on chords and Chord Fingering Type, see page 45.
NOTE
You can transpose the Style (accompa-niment). See page 38.
6 Press the [START/STOP] button to stop Style playback.
![YAMAHA PSR-S950 - Press the [START/STOP] button to stop Style playback. - 1](/content/2019/11/115210/images/7a22be2c8c08bee73b3d8c4e071a3d83d3b89f0b6663268a5d9a055dfa1c5c27.jpg)
text_image
SYNC STOP SYNC START START/STOPAudio Styles (PSR-S950 only)
The +Audio Styles have been specially produced by adding audio recordings of studio musicians playing in various recording studios worldwide. This adds all the natural feel, ambience and warmth to the drums and percussion of the Style, giving your performance greater expressive potential. Specifically, it retains the subtle nuances and grooves that are difficult to reproduce using the preset drum/percussion kit. Yamaha Time Stretch Technology allows the audio to follow your tempo changes without changing pitch, so everything stays in perfect sync.
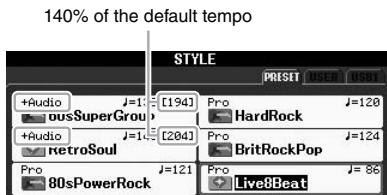
text_image
140% of the default tempo STYLE +Audio J=1 [194] Pro HardRock +Audio J=1 [204] Pro BritRockPop +etroSoul Pro 80sPowerRock J=121 Pro Live8BeatNOTE
- If the tempo is set to over 140% of the default, the audio part is muted.
- Keep in mind that the Audio Styles may take more time to load than others, and that they may have certain restrictions and differ in the specific functions that can be handled.
In addition to Audio Styles, various other types of Style Characteristics are available. For details, refer to the Reference Manual on the website.
Chords
For users who are unfamiliar with chords, this handy chart features common chords for your quick reference. Since there are many useful chords and many different ways to use them musically, refer to commercially available chord books for further details.
★ Indicates the root note.
| Major | Minor | Seventh | Minor Seventh | Major Seventh |
C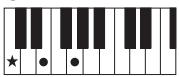 | Cm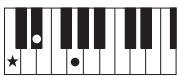 | C_7  | Cm_7 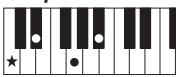 | CM_7 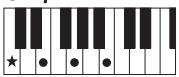 |
D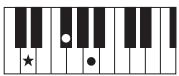 | Dm | D_7  | Dm_7  | DM_7  |
E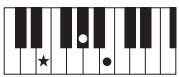 | Em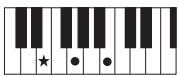 | E_7 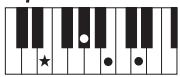 | Em_7 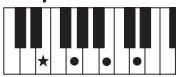 | EM_7 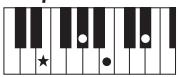 |
F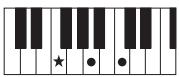 | Fm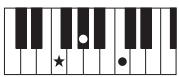 | F_7 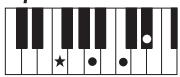 | Fm_7 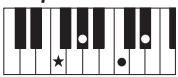 | FM_7 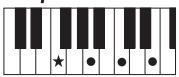 |
G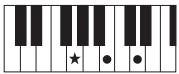 | Gm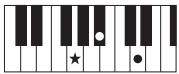 | G_7 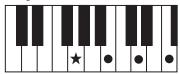 | Gm_7  | GM_7 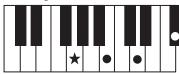 |
A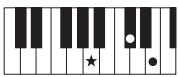 | Am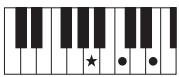 | A_7 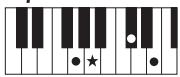 | Am_7 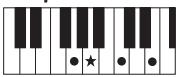 | AM_7 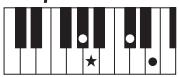 |
B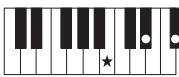 | Bm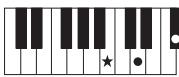 | B_7 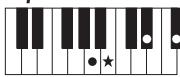 | Bm_7 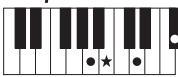 | BM_7 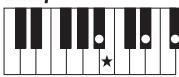 |
Changing the Chord Fingering Type
By changing the chord fingering type, you can automatically produce appropriate accompaniment even if you don't press all of the notes which comprise a chord. Chord fingering type can be changed from: [FUNCTION] → [C] STYLE SETTING/SPLIT POINT/CHORD FINGERING → TAB [◀][▶] CHORD FINGERING.
Following types can be selected, for example.
- Single Finger
This method lets you easily play chords in the accompaniment range of the keyboard using only one, two or three fingers.
C
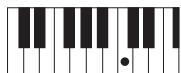
Major chord
Press the root key only.
Cm
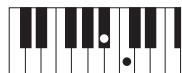
Minor chord
Simultaneously press the root key and a black key to its left.
C7
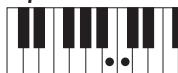
Seventh chord
Simultaneously press the root key and a white key to its left.
Cm7
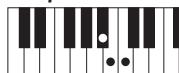
Minor seventh chord
Simultaneously press the root key and both a white and black key to its left.
- AI Full Keyboard
Playing just about anything, anywhere on the keyboard using both hands – like playing the piano – produces appropriate accompaniment. You don’t have to worry about specifying the chords. (Depending on the song arrangement, AI Full Keyboard may not always produce appropriate accompaniment.)
For other types, refer to the Reference Manual on the website.
To Start/Stop Playing
- [START/STOP] button
The rhythm channels start playing back as soon as the [START/STOP] button is pressed. To stop playback, press the button again.
- [SYNC START] button
This puts Style playback in standby. When [ACMP] is on, the Style starts playing back by playing a chord with your left hand, and when [ACMP] is off, the Style (only rhythm channels) starts playing back by pressing any note on the keyboard. During Style playback, pressing this button stops playing and puts the playback in standby.
- [SYNC STOP] button
This is effective only when the [ACMP] button is on. By pressing this button to enable Sync Stop, the Style plays back only when you play keys in the chord section of the keyboard.
START/STOP
![YAMAHA PSR-S950 - - [SYNC STOP] button - 1](/content/2019/11/115210/images/dbf38d545cd6ec65bc4c292910f13c95bbb2e4219db4103731fdba3132841aed.jpg)
SYNC START
![YAMAHA PSR-S950 - - [SYNC STOP] button - 2](/content/2019/11/115210/images/6bb9acf28ea7e5082ba94c9d2e5e4e6d96c519bee6d25a54a45ede64edbf76de.jpg)
SYNC STOP
![YAMAHA PSR-S950 - - [SYNC STOP] button - 3](/content/2019/11/115210/images/7b9c881b512530eb9292dcf4e62f0dc0f1f8899d0d3a8fad3492e4469443523c.jpg)
NOTE
When the fingering mode is set to "Full Keyboard" or "AI Full Keyboard," Synchro Stop cannot be turned on. To change the fingering mode: [FUNCTION] → [C] STYLE SETTING/SPLIT POINT/CHORD FINGERING → TAB [◀][▶] CHORD FINGERING.
- INTRO [I] – [III] buttons
The instrument features three different Intro sections to add an introduction to your performance. After pressing one of the INTRO [I] – [III] buttons, start playback. When the Intro finishes playing, the Style playback automatically shifts to the Main section.
- ENDING/rit. [I] – [III] buttons
The instrument features three different Ending sections to add an ending to your performance. When you press one of the ENDING [I] – [III] buttons while Style is playing back, the Style will automatically stop after the ending is played. You can have the ending gradually slow down (ritardando) by pressing the same ENDING button once again, while the ending is playing.
![YAMAHA PSR-S950 - - ENDING/rit. [I] – [III] buttons - 1](/content/2019/11/115210/images/9ab3c40d2babb33e74da27d2a7dea4a097786016297aee1d9f02e63a8f06bea6.jpg)
ENDING/rlt.
![YAMAHA PSR-S950 - - ENDING/rit. [I] – [III] buttons - 2](/content/2019/11/115210/images/8dfdcb02c5ba5e24655d82c26c3f08d2f408ae5be4e245ceeec54baad11d1a9a.jpg)
NOTE
If you press the ENDING/rit. [I] button when the Style is playing, a fill-in automatically plays before the ENDING/rit [I].
About the lamp status of the section buttons (INTRO/MAIN VARIATION/BREAK/ENDING)
- Red: The section is currently selected.
- Red (flashing): The section will be played next, following the currently selected section.
* The Main [A] – [D] buttons also flash red during fill-in playback. - Green: The section contains data but is not currently selected.
- Off: The section contains no data and cannot be played.
Each Style features four different Main sections, four Fill-in sections and a Break section. By using these sections effectively, you can easily make your performance sound more dynamic and professional. The section can be freely changed while the Style is playing back.
- MAIN VARIATION [A] – [D] buttons
Press one of the MAIN VARIATION [A] – [D] buttons to select the desired Main section (the button lights in red). Each is an accompaniment pattern of a few measures and it plays indefinitely. Pressing the selected MAIN VARIATION button again plays an appropriate fill-in pattern to spice up the rhythm and break the repetition.
AUTO FILL function
When the [AUTO FILL IN] button is turned on, pressing any of the Main [A] – [D] buttons as you play automatically plays a fill-in section.
AUTO FILL IN

- [BREAK] button
This lets you add dynamic breaks in the rhythm of the accompaniment. Press the [BREAK] button during Style playback. When the one-measure Break pattern finishes playing, the Style playback automatically shifts to the Main section.
![YAMAHA PSR-S950 - - [BREAK] button - 1](/content/2019/11/115210/images/6d34b88dfba43fe4afccf00e83a8ef0aab6f7b428dedd333c70903ca39d32043.jpg)
text_image
MAIN VARIATION A B C DPress the selected Main section (lit in red) again.
![YAMAHA PSR-S950 - - [BREAK] button - 2](/content/2019/11/115210/images/3ba06b4b13f9c19917e58b366e338b6690059f0497dc1c710c5b4413117b1fba.jpg)
![YAMAHA PSR-S950 - - [BREAK] button - 3](/content/2019/11/115210/images/debbe9f7ede58138713f02582c758f91df20fe3b324f6c55df392e57a4dc9a73.jpg)
![YAMAHA PSR-S950 - - [BREAK] button - 4](/content/2019/11/115210/images/e4e8843919a5e1155eaa383d702dad3a3430f929233773dee4a81318f7ba0aef.jpg)
The fill-in of the selected Main section plays (flashes in red).
![YAMAHA PSR-S950 - - [BREAK] button - 5](/content/2019/11/115210/images/c20a0c64e432872014cf3cbe1e52776d171fe689e42727e2296f942a464d349e.jpg)
Adjusting the Tempo
- TEMPO [-]/[+] buttons
By pressing the TEMPO [-] or [+] button, you can decrease/increase the tempo over a range of 5 – 500. While the TEMPO pop-up is shown on the display, you can also use the [DATA ENTRY] dial to adjust the value.
NOTE
This operation is common for Song playback (page 54).

text_image
TEMPO - + → TEMPO +Audio: 194 max.) In the case of Audio Styles (page 44), the tempo of 140% of the default is shown under the current tempo.Pressing the TEMPO [-]/[+] buttons simultaneously resets the tempo to the default value.
• [TAP TEMPO] button
During Style playback, you can change the tempo by tapping the [TAP TEMPO] button twice at the desired tempo.
When the Style is stopped, tapping the [TAP TEMPO] button (four times for a 4/4 time signature) starts Style playback at the tempo you tapped.
TAP TEMPO
![YAMAHA PSR-S950 - • [TAP TEMPO] button - 1](/content/2019/11/115210/images/24253f9691fcacdbb210a6e2fee70483496da2f4152b73ed5f21026b1e94c9fb.jpg)
Fading In/Out
- [FADE IN/OUT] button
This produces smooth fade-ins and fade-outs when starting/stopping playback. Press the [FADE IN/OUT] button when playback is stopped and press the [START/STOP] button to start playback with a fade in. To stop playback with a fade out, press the [FADE IN/OUT] button during playback.
FADE IN/OUT
![YAMAHA PSR-S950 - - [FADE IN/OUT] button - 1](/content/2019/11/115210/images/4922c37ebddca06203ff2413d107d0461104843f1f50a896aff600ee5805768b.jpg)
NOTE
This operation also applies to Song playback (page 54).
Calling up Appropriate Panel Settings for the Current Style (Repertoire)
The convenient Repertoire function automatically calls up the most appropriate panel settings for the currently selected Style.
We recommend that you import Music Finder Records before using the Repertoire function (page 73).
1 Select the desired Style from the Style Selection display (steps 1 – 2 on page 43).
2 Press the [5 ▲] (REPERTOIRE) button.
Various appropriate panel settings matching the selected Style will be shown in the display.
NOTE
The settings shown here are Music Finder Records. You can choose additional settings by using the Music Finder feature (page 73).
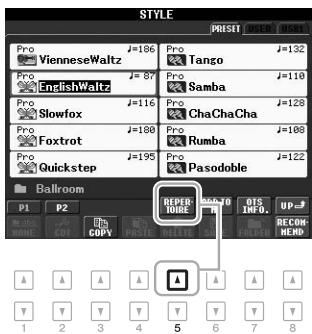
text_image
STYLE PRO VienneseWaltz Pro EnglishWaltz Pro Slowfox Pro Foxtrot Pro Quickstep Pro Tango Pro Samba Pro ChaChaCha Pro Rumba Pro Pasodoble Ballroom P1 P2 CUT COPY REPER NUMBER OFF: INFO. UP # RECOM- HERD 1 2 3 4 5 6 7 8
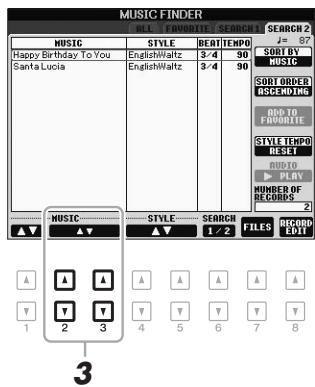
text_image
MUSIC FINDER BLUE ▲ COMPOSITE SEARCH 1 SEARCH 2 Happy Birthday To You EnglishWaltz 3/4 90 Santa Lucia EnglishWaltz 3/4 90 MUSIC STYLE SEARCH ▲▼ ▲▼ 1 / 2 FILES RECORD EDIT SORT BY MUSIC SORT ORDER ASCENDING ADD TO FUTUERIE STYLE ENPO DISHI AUDIO PLAY NUMBER OF BELOURS 2 ▲▼ ▲▼ A A A A A A A ▽ ▼ ▼ ▼ ▼ ▼ ▼ 1 2 3 4 5 6 7 83 Use the [2 ] - [3 ] buttons to select the desired panel setting.
NOTE
Depending on the particular selected Style, there may not be any panel settings in the Repertoire function.
Calling up Appropriate Panel Settings for the Current Style (One Touch Setting)
One Touch Setting is a powerful and convenient feature that automatically calls up the most appropriate panel settings (Voices or effects, etc.) for the currently selected Style, with the touch of a single button. If you’ve already decided which Style you wish to use, you can have One Touch Setting automatically select the appropriate Voice for you.
1 Select a Style (steps 1 - 2 on page 43).
2 Press one of the ONE TOUCH SETTING [1] – [4] buttons.
Not only does this instantly call up all the settings (Voices, effects, etc.) that match the current Style, it also automatically turns on [ACMP] and [SYNC START], so that you can immediately start playing the Style.
![YAMAHA PSR-S950 - Press one of the ONE TOUCH SETTING [1] – [4] buttons. - 1](/content/2019/11/115210/images/1c49a0a3223546a13334ba9058a4ff385de35a682c7cc29ec87a28a9982a4ee0.jpg)
text_image
ONE TOUCH SETTING 1 2 3 43 As soon as you play a chord with your left hand, the selected Style starts.
Each Style has four One Touch Setting setups. Press other ONE TOUCH SETTING [1] – [4] buttons to try out other setups.
NOTE
You can also create your own One Touch Setting setups. For details, refer to the Reference Manual on the website.
Automatically changing One Touch Settings with the Main sections
The convenient OTS (One Touch Setting) Link function lets you automatically have One Touch Settings change when you select a different Main section (A - D). The Main sections A, B, C and D correspond to One Touch Settings 1, 2, 3 and 4 respectively. To use the OTS Link function, turn the [OTS LINK] button on.
NOTE
By the OTS LINK TIMING function, you can change the timing in which the One Touch Settings change along with MAIN VARIATION [A] – [D] changes. Refer to the Reference Manual on the website.
You can check the information of the One Touch Setting [1] - [4] assigned to the currently selected Style.
1 In the Style Selection display, press the [7 ▲] (OTS INFO.) button to call up the Information display.
![YAMAHA PSR-S950 - In the Style Selection display, press the [7 ▲] (OTS INFO.) button to call up the Information display. - 1](/content/2019/11/115210/images/ef37419a227a19eee2d2c50cc03b7608dfa97d8e0a7b958939097b9b51c625a3.jpg)
flowchart
graph LR
    A["STYLE"] --> B["OIS INFORMATION"]
    B --> C["PRO 4/4 J=86 Live8Beat"]
    B --> D["PRO 1 PopGrand R1 SingleCollClean"]
    B --> E["PRO 3 SaltcaseEP R2 SparkleStack"]
    B --> F["PRO 4 Cornet R2 AccentBrass"]
    style A fill:#f9f,stroke:#333
    style B fill:#ccf,stroke:#333
NOTE
You can also call up the Information display by pressing the [DIRECT ACCESS] button then pressing one of the ONE TOUCH SETTING [1] – [4] buttons.
2 Press the [F] (CLOSE) button to close the Information display.
Calling up Optimum Styles for Your Performance (Style Recommender)
This convenient function “recommends” optimum Styles for the song you want to perform, based on the rhythm you play for one or two measures.
In the Style selection display (page 43), press the [8 ▼] (RECOMMEND) button to call up the STYLE RECOMMENDER display.
The keyboard is divided by B1 key into two sections as below.
![YAMAHA PSR-S950 - In the Style selection display (page 43), press the [8 ▼] (RECOMMEND) button to call up the STYLE RECOMMENDER display. - 1](/content/2019/11/115210/images/aaca8ced659dc68f0b4e2aeea1a00d758ed583a2e70135f2631ccaba175e9fe8.jpg)
text_image
HI-HAT SMARE KICK DRUM B1 PIANOThe Drum instruments (Kick, Snare and Hi-Hat) are assigned to the left of the B1 key while the Piano sound is assigned to the right.
![YAMAHA PSR-S950 - In the Style selection display (page 43), press the [8 ▼] (RECOMMEND) button to call up the STYLE RECOMMENDER display. - 2](/content/2019/11/115210/images/246a9aac1bab672a13e37560c7dfac33fd5f5ccbea7968520b2dac820839a923.jpg)
NEXT PAGE
2 Use the Style Recommender function to find the Style.
2-1 Press the [J] (START) button sets the instrument to standby, waiting for your playing, and simultaneously turns on the metronome. Pressing the [J] button toggles between START and CANCEL.
Adjusting the tempo and beat of the metronome
The tempo can be adjusted by the TEMPO [-]/[+] buttons, and the beat can be set by pressing the [E] (METRONOME) button in the STYLE RECOMMENDER display.
NOTE
To cancel the operation, press the [J] (CANCEL) buttons.
2-2 Play the rhythm you have in mind on the Drum or Piano section for one or two measures along with the metronome.
The timing at which you play the keys is analyzed over several seconds, then playback of the most recommended Style starts. In addition, the candidates of the other recommended Styles are listed in the display.
- Example 1: Play the following rhythm on the Piano section.

text_image
c : :Bossa Nova or similar Styles may be listed in the display.
- Example 2: Play the following rhythm on the Drum section.
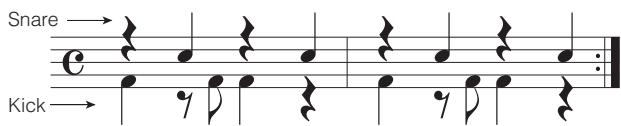
text_image
Snare → C Kick →An 8-Beat rhythm or similar Styles may be listed in the display.
3 Select the desired Style from the list by using the [1 ▲▼] - [6 ▲▼] buttons.
Listen to the Styles by changing the sections (page 47), playing the chord on the Piano section and adjusting the tempo (page 47).
If the Style called up doesn't match the song you want to play, press the [J] (RETRY) buttons, then return to step 2-2.
4 When you've found a Style you're satisfied with, press the [7 ▲▼]/[8 ▲▼] (OK) button to exit from the Style Recommender display.
The Voices assigned to the keyboard return to the Voices for Right 1, 2 and Left as before.
5 Play the keyboard along with the Style you just found.
NOTE
The instrument only analyzes the timing of your keyboard play. Tempo, pitches and note length are ignored.
Turning Style Parts On/Off and Changing Voices
A Style contains the following channels below. You can add variations and change the feeling of a Style by selectively turning channels on/off as the Style plays.
Style channels
- RHY1/2 (Rhythm 1/2): These are the basic parts of the Style, containing the drum and percussion rhythm patterns.
- BASS: The bass part uses various appropriate instrument sounds to match the Style.
- CHD1/2 (Chord 1/2): These are rhythmic chord backing parts, commonly used with piano or guitar Voices.
- PAD: This part is used for sustained instruments such as strings, organ, choir, etc.
- PHR1/2 (Phrase1/2): These parts are used for punchy brass stabs, arpeggiated chords, and other extras that make the accompaniment more interesting.
(PSR-S950)
• AUDIO: This is an audio part of the Audio Style (page 44).
1 Press the [CHANNEL ON/OFF] button several times to call up the CHANNEL ON/OFF (STYLE) displays. (The PSR-S750 has only one display.)
On the PSR-S950, pressing the [CHANNEL ON/OFF] button again calls up the second CHANNEL ON/OFF page (STYLE 2/2).
![YAMAHA PSR-S950 - Press the [CHANNEL ON/OFF] button several times to call up the CHANNEL ON/OFF (STYLE) displays. (The PSR-S750 has only one display.) - 1](/content/2019/11/115210/images/4d2df826faa727c2f5ed97428581f07f8f54b5051cfea68e225f4f21873e66a9.jpg)
text_image
PAGE BALANCE PART MIXING CONSOLE PART CHANNEL ON/OFF CHANNEL ON/OFF (STYLE 1/2) RHY1 RHY2 BASS CHD1 CHD2 PXD PHR1 PHR2 ON ON ON ON ON ON ON ON 1 2 3 4 5 6 7 8 22 Press the [1 ] - [8 ] buttons to turn the channels on or off.
To listen to only one channel by itself, hold down the appropriate button for the channel to set the channel to SOLO. To cancel SOLO, simply press the appropriate channel button again.
NOTE
You can save the settings here to Registration Memory. See page 79.
Changing the Voice for each channel
If necessary, press the [1 ] - [8 ] buttons to change the Voice for the corresponding channel.
The Voice Selection display is called up from which you can select the Voice to be used for the channel. See page 32.
NOTE
The Audio channel does not have a Voice and, hence, cannot be changed.
3 Press the [EXIT] button to close the CHANNEL ON/OFF display.
NOTE
When the Main display is shown, the CHANNEL ON/OFF display cannot be closed.
Adjusting the Volume Balance Between the Style and Keyboard
You can adjust the volume balance between Style playback and the sound you play on the keyboard.
1 Press the [BALANCE] button to call up the BALANCE (1/2) display.
![YAMAHA PSR-S950 - Press the [BALANCE] button to call up the BALANCE (1/2) display. - 1](/content/2019/11/115210/images/41ef6c4a5d923367ad472f30be0e9465ae4fd3d69e3c7919ce06c8944fff7b3a.jpg)
text_image
PAGE BALANCE PART I G PART CHANNEL ON/OFF BALANCE (1/2) 100 100 90 100 60 100 90 SON6 STYLE M.PAD MIC LEFT RIGHT1 RIGHT2 ▲ ▲ ▲ ▲ ▲ ▲ ▲ 1 2 3 4 5 6 7 22 Adjust the Style volume by using the [2 ▲▼] buttons and the keyboard volume by using the [5 ▲▼] – [7 ▲▼] buttons.
Using the [1 ] - [7 ] buttons, you can adjust the volume of Song, Style, Multi Pad, MIC (for the PSR-S950) and keyboard parts.
3 Press the [EXIT] button to close the BALANCE display.
NOTE
When the Main display is shown, the BALANCE display cannot be closed.
NOTE
In the Mixing Console display, you can adjust the volume for each Style part. See page 87.
Advanced FeaturesRefer to the Reference Manual on the website, Chapter 2.  | |
| Selecting the Chord Fingering type: | [FUNCTION] → [C] STYLE SETTING/SPLIT POINT/CHORD FINGERING → TAB [◀][▶] CHORD FINGERING |
| Style playback related settings: | [FUNCTION] → [C] STYLE SETTING/SPLIT POINT/CHORD FINGERING → TAB [◀][▶] STYLE SETTING |
| Split Point settings: | [FUNCTION] → [C] STYLE SETTING/SPLIT POINT/CHORD FINGERING → TAB [◀][▶] SPLIT POINT |
| Memorizing the Original One Touch Setting: | [MEMORY] + ONE TOUCH SETTING [1] – [4] |
| Creating/Editing Styles (Style Creator): | [FUNCTION] → [F] DIGITAL REC MENU → [B] STYLE CREATOR |
| Realtime Recording: | → TAB [◀][▶] BASIC |
| Step Recording: | → TAB [◀][▶] EDIT → [G] STEP REC |
| Style Assembly: | → TAB [◀][▶] ASSEMBLY |
| Editing the rhythmic feel: | → TAB [◀][▶] GROOVE |
| Editing data for each channel: | → TAB [◀][▶] CHANNEL |
| Making Style File Format settings: | → TAB [◀][▶] PARAMETER |
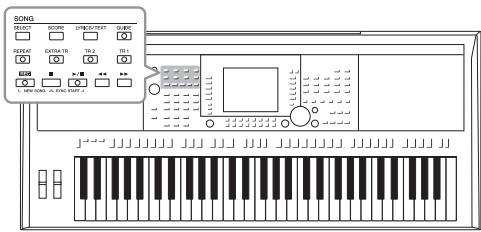
text_image
SONG SELECT SCORE OFICS/FAAT GUIDE REPEAT GTRM TO T0.2 T0.1 L: 100 MHz 3A VINS COMP 2For the PSR-S950/S750, “Song” refers to the MIDI songs which include preset songs, commercially available MIDI format files, etc. Not only can you play back a Song and listen to it, but you can also play the keyboard along with Song playback and record your own performance as a Song.
Playback of Songs
You can play back the following types of Songs.
- Preset Songs (in the PRESET Page of the Song Selection display)
- Your own recorded Songs (see page 60 for instructions on recording)
- Commercially available Song data: SMF (Standard MIDI File)
NOTE
For instructions on the playback of audio songs (files), see page 64.
NOTE
For information on compatible data formats, refer to page 6.
1 Press the SONG [SELECT] button to call up the Song Selection display.
![YAMAHA PSR-S950 - Press the SONG [SELECT] button to call up the Song Selection display. - 1](/content/2019/11/115210/images/bd20c6d5012ffedd17ed66a59d6a3312d879cc878ead7692c5e6b8d6ba67195c.jpg)
flowchart
graph LR
    A["SONG SELECT"] --> B["SCORE"]
    B --> C["LYRICS/TEXT"]
    C --> D["GUIDE"]
    D --> E["REPE"]
    E --> F["EXTRA TR"]
    F --> G["TR 2"]
    G --> H["TR 1"]
    H --> I["REC"]
    I --> J["<<"]
    J --> K[">>/>>"]
    K --> L["<<"]
    L --> M[">>"]
    M --> N["NEW SONG"]
    N --> O["LSync START"]

    P["SONG"] --> Q["SampleSongs"]
    Q --> R["2"]
    S["SONG"] --> T["P1"]
    T --> U["OK TO RF"]
    U --> V["UP=0.0000"]
    V --> W["COPY"]
    W --> X["PRINT"]
    X --> Y["TIME"]
    Y --> Z["TEXT SONG"]
2 Press the TAB [◀][▶] buttons to select the location of the desired Song.
If you want to playback Song in the USB flash memory, connect the USB flash memory containing MIDI Song data to the [USB TO DEVICE] terminal beforehand.
NOTE
Before using a USB flash memory, be sure to read “Connecting a USB Flash Memory” on page 92.
3 Select the desired Song by using the [A] - [J] buttons.
You can also select a Song by using the [DATA ENTRY] dial, then press the [ENTER] button to execute.
NOTE
You can instantly jump back to the Main display by double-clicking on one of the [A] – [J] buttons.

NEXT PAGE
4 Press the SONG [▶/■] (PLAY/PAUSE) button to start playback.
![YAMAHA PSR-S950 - Press the SONG [▶/■] (PLAY/PAUSE) button to start playback. - 1](/content/2019/11/115210/images/263ce43093c18b1c35892a828cccae34efedae9170101631b04916fbf75cf1c5.jpg)
Queuing the next Song for playback
While a Song is playing back, you can queue up the next Song for playback. This is convenient for chaining it to the next Song smoothly during live performance. Select the Song you want to play next in the Song Selection display, while a Song is playing back. The “NEXT” indication appears at the upper right of the corresponding Song name. To cancel this setting, press the [8 ] (NEXT CANCEL) button.
5 Press the SONG [■] (STOP) button to stop playback.
![YAMAHA PSR-S950 - Press the SONG [■] (STOP) button to stop playback. - 1](/content/2019/11/115210/images/e4d6090cc046b2a378ae6da259772695d650f962723c8d3ef6d7014890bb196b.jpg)
Operations During Playback
SONG
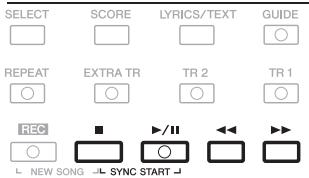
text_image
SELECT SCORE LYRICS/TEXT GUIDE REPEAT EXTRA TR TR 2 TR 1 REC ■ ▶/II ◀◀ ▶◀ NEW SONG SYNC START- Synchro Start ...... You can start playback as soon as you start playing the keyboard. While playback is stopped, hold down the SONG [■] (STOP) button and press the [▶/■] (PLAY/PAUSE) button. To cancel the Synchro Start function, hold down the SONG [■] (STOP) button and press the [▶/■] (PLAY/PAUSE) button once again.
- Pause ....Press the [▶/■■] (PLAY/PAUSE) button. Pressing it again resumes Song playback from the current position.
- Rewind/Fast Forward ....Press the [◀◀] (REW) or [▶▶] (FF) button once to move back/forward one measure. Hold the [◀◀] (REW) or [▶▶] (FF) button to scroll backward/forward continuously.
NOTE
You can adjust the Song volume balance between the Song and Keyboard. See page 53. In the Mixing Console display, you can adjust the volume for each Song part. See page 87.
NOTE
You can also turn specific part(s) on or off. See page 57.

NEXT PAGE
Pressing the [◀◀] (REW) or [▶▶] (FF) button calls up a pop-up window showing the current measure number (or Phrase Mark number) in the display.
While the Song Position pop-up is shown on the display, you can also use the [DATA ENTRY] dial to adjust the value.
For Songs not containing Phrase Marks
NOTE
Phrase Mark is a pre-programmed marker in certain Song data, which indicates a specific location in the Song.
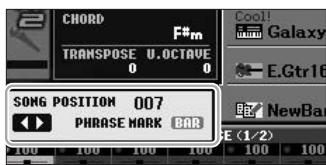
text_image
CHORD F*m TRANSPOSE U.OCTAVE 0 0 SONG POSITION 007 PHRASE MARK BAR 100 100 100 100 Cool! Galaxy E.Gtr16 NewBar SE (1/2)For Songs containing Phrase Marks You can switch between BAR and PHRASE MARK by pressing the [E] button.
- Adjusting the Tempo
Same procedure as with Style tempo. See page 47.
- Fading In/Out
Same procedure as with Style. See page 47.
NOTE
You can transpose the Song playback. See page 38.
Displaying Music Notation (Score)
You can view the music notation (score) of the selected Song. We suggest that you read through the music notation before starting to practice.
1 Select a Song (steps 1 - 3 on page 54).
2 Press the [SCORE] button to call up the Score display.
You can look through the entire notation by using the TAB [◀][▶] buttons when the Song playback is stopped.
Upon starting playback, the “ball” bounces along through the score, indicating the current position.
![YAMAHA PSR-S950 - Press the [SCORE] button to call up the Score display. - 1](/content/2019/11/115210/images/38628f07c0f792686102112e46a0b21e5b415b29b79be6a8966838febf54f82e.jpg)
text_image
SONG SELECT SCORE LYRICS/TEXT GUIDE → TEMP 2-63 SCORE: Beautiful Dreamer PAGE 1-6 F INTRODUCTION F 6m7/F Beautiful dreamer, wake unto me, LEFT OFF RIGHT ON CHORD ON LYRICS ON HOT OFF GOOD OFF SLIZE SMALL SET UPYou can change the displayed notation style by using the [1 ] - [8 ] buttons. For details, refer to the Reference manual on the website.
NOTE
The instrument can display the music notation of your recorded Songs.
NOTE
The instrument cannot display the music notation of commercially-available music data excepting those data that specifically allow score display.
NOTE
The displayed notation is generated by the instrument based on the Song data. As a result, it may not be exactly the same as commercially available sheet music of the same song — especially when displaying notation of complicated passages or many short notes.
Displaying Lyrics (Text)
When the selected Song contains lyrics data, you can view it on the instrument's display during playback. Even if the Song doesn't contain lyrics data, you can view the lyrics on the display by loading the text file (.txt) created on a computer via USB flash memory. Displaying text enables various useful possibilities, such as the showing of lyrics, chord names, and text notes.
1 Select a Song (steps 1 - 3 on page 54).
2 Press the [LYRICS/TEXT] button to call up the Lyrics display.
When the Song data contains lyrics data, the lyrics are shown on the display. You can look through the entire lyrics by using the TAB [◀][▶] buttons when the Song playback is stopped. As Song playback starts, the color of the lyrics changes, indicating the current position.
![YAMAHA PSR-S950 - Press the [LYRICS/TEXT] button to call up the Lyrics display. - 1](/content/2019/11/115210/images/5597cefe019d84543150c6f95a9804403fb38cd84295b4483955be207f48597c.jpg)
text_image
SONG SELECT SCORE LYRICS/TEXT GUIDE #69 BAR:001 LYRICS Beautiful Dreamer Words by Stephen Foster Music by Stephen Foster Beautiful Dreamer (g) 2012 Yamaha Corporation TEXT TEXT FILE BACK GROUNDWhen you want to view the text file created on your computer, press the [5 ]/[6 ] (TEXT FILE) button to select the desired text file, then press the [1 ] (TEXT) button to display the selected file.
For more information about the Lyrics display, refer to the Reference manual on the website.
NOTE
Information about Text File selection can be memorized to the Registration Memory (page 79).
NOTE
(PSR-S950) The Lyrics (text) can be displayed on an external monitor. See page 90.
Turning Song Channels On/Off
A Song consists of 16 separate channels. You can independently turn each channel of the selected Song playback on or off.
1 Press the [CHANNEL ON/OFF] button several times to call up the CHANNEL ON/OFF (SONG) display.
![YAMAHA PSR-S950 - Press the [CHANNEL ON/OFF] button several times to call up the CHANNEL ON/OFF (SONG) display. - 1](/content/2019/11/115210/images/26d4774cd2e6666b83f00ecd9349c90d1651447e408ce1cee27f68f4ed8ae553.jpg)
2 Use the [1 ] - [8 ] button to turn each channel on or off.
If you want to play back only one particular channel (solo playback), press and hold down one of the [1 ] - [8 ] buttons to set the desired channel to SOLO. Only the selected channel is turned on and others are off. To cancel solo playback, press the same button again.
Practicing the Right-hand Part with Guide Functions
You can mute the right-hand part to try practicing the part. Here, the explanations apply when you practice the right-hand part with Follow Lights of the Guide functions. In the Score display, Follow Lights indicates the notes you should play. You can also practice at your own pace — since the accompaniment waits for you to play the notes correctly.
1 Select a Song and call up the Score display (page 56).
2 Turn the [GUIDE] button on.
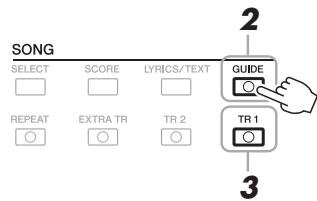
text_image
SONG SELECT SCORE LYRICS/TEXT REPEAT EXTRA TR TR 2 GUIDE TR 1 2 33 Press the SONG [TR 1] button to mute the right-hand part.
The indicator of the [TR 1] button goes out. You can now play that part by yourself.
4 Press the SONG [▶/■] (PLAY/PAUSE) button to start playback.
IMPORTANT
Usually, CH 1 is assigned to [TR 1] button, CH 2 is assigned to [TR 2] button, and CH 3 – 16 are assigned to the [EXTRA TR] button.
Practice the muted part while viewing the Score display.
After your practice, turn the [GUIDE] button off.
Other guide functions
There are additional functions in the Guide features, for practicing the timing of playing the keys (Any Key), for Karaoke or for practicing a song at your own pace (Your Tempo).
[FUNCTION] → [B] SONG SETTING → [A]/[B] GUIDE MODE
For more information, refer to the Reference Manual on the website.
Repeat Playback
The Song Repeat functions can be used to repeatedly play back a Song or a specific range of measures in a Song. This is useful for repeated practicing of difficult-to-play phrases.
To repeat a Song, turn the [REPEAT] button on and playback the desired Song. Turning the [REPEAT] button off cancels Repeat playback.
NOTE
You can play multiple Songs repeatedly: [FUNCTION] → [B] SONG SETTING → [H] REPEAT MODE.
Specifying a Range of Measures and Playing them Back Repeatedly (A-B Repeat)
1 Select a Song (steps 1 - 3 on page 54).
2 Press the SONG [▶/■] (PLAY/PAUSE) button to start playback.
3 Specify the repeat range.
Press the [REPEAT] button at the starting point (A) of the range to be repeated. Press the [REPEAT] button again at the ending point (B). After an automatic lead-in (to help guide you into the phrase), the range from Point A to Point B is played back repeatedly.
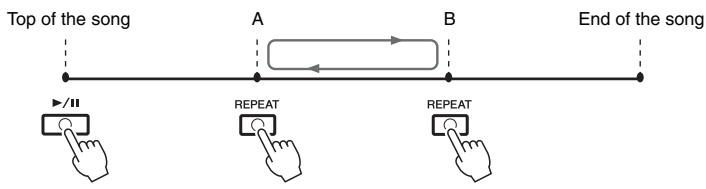
flowchart
graph LR
    A["Top of the song"] --> B["A"]
    B --> C["B"]
    C --> D["End of the song"]
    subgraph Top
        E["▶/11"] --> F["REPEAT"]
        G["REPEAT"] --> H["REPEAT"]
    end
    subgraph Middle
        I["REPEAT"] --> J["REPEAT"]
        K["REPEAT"] --> L["REPEAT"]
    end
    subgraph End
        M["REPEAT"] --> N["REPEAT"]
        O["REPEAT"] --> P["REPEAT"]
    end
NOTE
Specifying only Point A results in repeat playback between Point A and the end of the Song.
NOTE
When you want to repeat from the top of the song to the middle of the song:
1 Press the [REPEAT] button, then start Song playback.
2 Press the [REPEAT] button again at the ending point (B).
4 To stop playback, press the SONG [■] (STOP) button.
The Song position will return to Point A.
5 Press the [REPEAT] button to turn off Repeat playback.
Specifying the repeat range while Songs are stopped
- Press the [▶▶] (FF) button to advance to the Point A location.
- Press the [REPEAT] button to specify Point A.
- Press the [▶▶] (FF) button to advance to the Point B location.
- Press the [REPEAT] button again to specify Point B.
Recording Your Performance
You can record your own performances and save them as a Song file to the USER drive or USB flash memory. Two different recording methods are available: Quick recording which lets you conveniently and quickly record your performance, and Multi Track recording which lets you record several different parts to multiple channels. And since the recorded data is MIDI, you can easily edit your Songs, too.
Quick Recording ......see section below
You can record all parts of your performance at once or a specific part (right-hand, lefthand or Style playback). This is also an effective practice tool, allowing you to easily compare your own performance to the original song you are practicing.
Multi Track Recording ......page 62
With this method, you can record data to each channel independently, one by one. You can also freely change the channel/part assignments with the Multi Track recording.
If you want to record on a USB flash memory, read “Connecting a USB Flash Memory” (page 92) then follow the instructions below after connecting the USB flash memory to the [USB TO DEVICE] terminal.
NOTE
Audio data (the rhythm channels created via the audio data of Audio Style, Audio Link Multi Pad and audio songs) cannot be recorded to the MIDI Songs.
NOTE
For instructions on the recording of audio songs (files), see page 67.
Quick Recording
Before starting recording, make the desired panel settings for your keyboard performance — selecting a Voice, Style, etc.
1 Press the SONG [REC] button and the [■] (STOP) button simultaneously.
![YAMAHA PSR-S950 - Press the SONG [REC] button and the [■] (STOP) button simultaneously. - 1](/content/2019/11/115210/images/51b784cfff5fe35cb29b3b671fa450d12fa720a219c172453b3c5e56080a44b6.jpg)
A blank Song for recording is automatically set.
2 Press the SONG [REC] button.
![YAMAHA PSR-S950 - Press the SONG [REC] button. - 1](/content/2019/11/115210/images/163f159184b4f578fe83ed8ea0c340f6f09f7dc5d7a7941ec644da3bed00dddc.jpg)
NOTE
To cancel the recording, press the [■] (STOP) button.
Recording a specific part
In place of step 2, pressing the SONG [TR1] (or [TR2]) button while holding the [REC] button enables you to record only the right-hand (or left-hand) part.
Pressing the [EXTRA TR] button while holding the [REC] button enables recording of only Style playback.

NEXT PAGE
3 Start recording.
Recording begins automatically as soon as you play a note on the keyboard, start Style playback or start Multi Pad playback.
4 Press the SONG [■] (STOP) button to stop recording.
![YAMAHA PSR-S950 - Press the SONG [■] (STOP) button to stop recording. - 1](/content/2019/11/115210/images/1ca398a68a0a3cf03b1c51a6b101586bb18865a6c11940f9f3c2dbde0e648261.jpg)
5 Press the SONG [▶/■] (PLAY/PAUSE) button to play back the recorded performance.
![YAMAHA PSR-S950 - Press the SONG [▶/■] (PLAY/PAUSE) button to play back the recorded performance. - 1](/content/2019/11/115210/images/951ed0a11e154fd4c549f29715e4c78e67fd986b1c8df8fcf2b18ae8a516f53f.jpg)
6 Save the recorded performance as a Song.
The recorded Song can be saved in the Song Selection display.
6-1 Press the SONG [SELECT] button to call up the Song Selection display.
6-2 Select the appropriate tab (USER or USB) to which you want to save the Song by using the TAB [◀][▶] buttons.
6-3 Press the [6 ▼] (SAVE) button. The naming display is called up.
6-4 Enter the file name (page 30).
6-5 Press the [8 ▲] (OK) button to save the file.
NOTE
When recording without Style play-back, turning the [METRONOME] on makes your recording sessions much more efficient. The Metronome tempo can be adjusted by the TEMPO [-]/[+] buttons.
IMPORTANT
For Quick Recording, each part will be recorded to the following channels.
Keyboard parts: Ch. 1-3
Multi Pad parts: Ch. 5-8
Style parts: Ch. 9-16
NOTE
For details on the saving operation, refer to "Saving a File" on page 26.
NOTICE
The recorded Song will be lost if you change to another Song or you turn the power off without executing the Save operation.
NOTE
If you want to cancel the Save operation, press the [8 ▼] (CANCEL) button.
Before starting recording, make the desired panel settings for your keyboard performance — selecting a Voice, Style, etc.
1 Press the SONG [REC] button and the [■] (STOP) button simultaneously.
A blank Song for recording is automatically set.
2 While holding down the SONG [REC] button, press the [1 ] - [8 ] buttons to set the desired channels to “REC.”
If you want to record the Right 1 part to channel 1, for example, press the [1 ▲] button while holding down the [REC] button to set the channel 1 to “REC.”
Then use the [C]/[D] buttons to select "RIGHT 1" in step 3.
![YAMAHA PSR-S950 - While holding down the SONG [REC] button, press the [1 ] - [8 ] buttons to set the desired channels to “REC.” - 1](/content/2019/11/115210/images/122971f63c89e2f701cb78c487f526124a383268dd3f8ff4182cbc0ed4a48b19.jpg)
text_image
MAIN REGIST SEQ. 12345678 SOME TITLE REF OFF SPLIT POINT: S F#2 L F#2 4x4 J= B6 SONG LTC A...B... NewSongs RARB 001 J = B6 ConcertGrand BAR 1 Reverb Strings Cool GalaxyEP MULTI PAD PROTCHID 0 RIGHT1 RIGHT2 LEFT M.PAD1 M.PAD2 USE U.OCTAVE 0 0 E.Gtr16BtCut1 86 STYLE LiveBeat NewBank CHANNEL ON/OFF (SONG) 1 2 3 4 5 6 7 8 REG ON ON ON ON ON ON ON ON 9 10 11 12 13 14 15 16 ON ON ON ON ON ON ON ON ON A A A A A A A A A A 1 2 3 4 5 6 7 83 Use the [C]/[D] buttons to assign the desired part for the channel to be recorded.
4 Start recording.
Recording begins automatically as soon as you play a note on the keyboard, start Style playback or start Multi Pad playback.
NOTE
To cancel the recording, press the [■] (STOP) button.
5 Press the SONG [■] (STOP) button to stop recording.
6 Press the SONG [▶/■] (PLAY/PAUSE) button to play back the recorded performance.
7 Re-select other channels and record other parts by repeating the steps 2 to 6.

NEXT PAGE
8 Save the recorded performance as a Song.
The recorded Song can be saved in the Song Selection display.
8-1 Press the SONG [SELECT] button to call up the Song Selection display.
8-2 Select the appropriate tab (USER or USB) to which you want to save the Song by using the TAB [◀][▶] buttons.
8-3 Press the [6 ▼] (SAVE) button. The naming display is called up.
8-4 Enter the file name (page 30).
8-5 Press the [8 ▲] (OK) button to save the file.
NOTE
For details on saving, refer to "Saving a File" on page 26.
NOTICE
The recorded Song will be lost if you change to another Song or you turn the power off without executing the Save operation.
NOTE
If you want to cancel the Save operation, press the [8 ▼] (CANCEL) button.
Advanced FeaturesRefer to the Reference Manual on the website, Chapter 3.  | |
| Editing Music Notation settings: | [SCORE] → [1 ▲▼] - [8 ▲▼] buttons |
| Editing Lyrics/Text display settings: | [LYRICS/TEXT] → [1 ▲▼] - [8 ▲▼] buttons |
| Using the Auto Accompaniment features with Song Playback: | [ACMP] → STYLE CONTROL [SYNC START] → SONG [■] + [▶/■] → STYLE CONTROL [START/STOP] |
| Song Playback related parameters: | [FUNCTION] → [B] SONG SETTING |
| • Keyboard and vocal practice using the Guide function: | → [A]/[B] GUIDE MODE |
| • Playing backing parts with the Performance Assistant Technology: | → [8 ▲▼] P.A.T. |
| Creating/Editing Songs (Song Creator): | [FUNCTION] → [F] DIGITAL REC MENU → [A] SONG CREATOR |
| • Recording melodies (Step Recording): | → TAB [◀][▶] 1-16 |
| • Recording chords (Step Recording): | → TAB [◀][▶] CHORD |
| • Re-recording a specific section — Punch In/Out: | → TAB [◀][▶] REC MODE |
| • Editing channel events: | → TAB [◀][▶] CHANNEL |
| • Editing chord events, notes, System Exclusive events and lyrics: | → TAB [◀][▶] CHORD, 1-16, SYS/EX. or LYRICS |
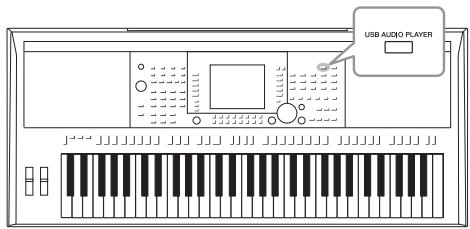
text_image
USB AUDIO PLAYERThe convenient USB Audio function allows you to play back audio files (WAVE or MP3) saved to a USB flash memory device — directly from the instrument. Moreover, since you can record your performances and recordings as audio files (.wav) to a USB flash memory device, it is possible to play back the files on computer, share them with your friends, and record your own CDs to enjoy as well.
Playing Back Audio Files
Try playing back audio files from USB flash memory on this instrument.
File formats that can be played back
| .wav | 44.1 kHz sample rate, 16 bit resolution, stereo | PSR-S950PSR-S750 |
| .mp3 | MPEG-1 Audio Layer-3: 44.1/48.0 kHz sample rate, 64 – 320 kbps and variable bit rate, mono/stereo | PSR-S950 |
NOTE
The audio files take a slightly longer time to load than other files.
NOTE
While selecting the desired WAVE file in the Audio Link function (step 6 on page 71), the [USB AUDIO PLAYER] button does not function.
NOTE
For instructions on the playback of MIDI songs, see page 54.
NOTE
DRM (Digital Rights Management) protected files cannot be played back.
1 Connect the USB flash memory containing the audio files to the [USB TO DEVICE] terminal.
2 Press the [USB AUDIO PLAYER] button to call up the USB AUDIO PLAYER display.
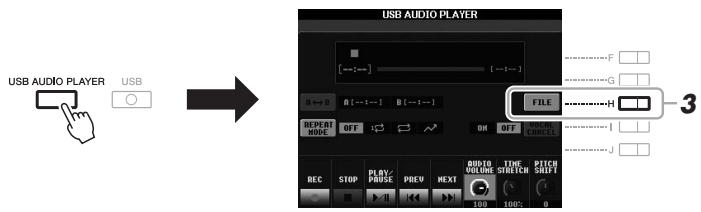
text_image
USB AUDIO PLAYER USB USB AUDIO PLAYER [---:---] [---:---] F G FILE REPERT MODE OFF ON OFF CONTROL CHECKER REC STOP PLAY PHASE PREV NEXT 0010 HIGH THIPT STRET PITCH SHIFT 100 100% 0 3NOTE
Before using a USB flash memory, be sure to read “Connecting a USB Flash Memory” on page 92.
3 Press the [H] (FILE) button to display the audio files saved to the connected USB flash memory.

NEXT PAGE
4 Press one of the [A] – [J] buttons corresponding to the file you want to listen to.
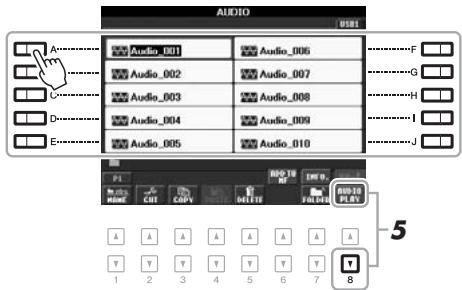
text_image
AUDIO A....Audio_001 Audio_006 F C....Audio_002 Audio_007 G D....Audio_003 Audio_008 H E....Audio_004 Audio_009 I P1 MODE IN END OUT OFF: 1 CM/100% CAT CAPS DETTE FOLDEN PLAY 5 T Y T Y T Y T 1 2 3 4 5 6 7 85 Press the [8 ▼] (AUDIO PLAY) button to start playback.
The display automatically returns to the USB AUDIO PLAYER display.
6 To stop playback, press the [2 ▲▼] (STOP) button.
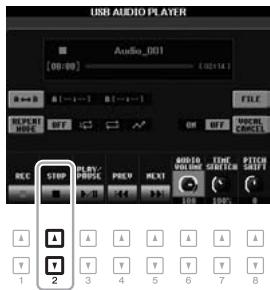
text_image
USB AUDIO PLAYER Audio_001 [00:00] —— [00:14] OFF ON OFF VOCER CANCEL RESPONSE OFF OFF OFF OFF OFF STEP PLAY/ PROJ. PREV. NEXT AUDIO VOLUME TIME SWITCH PITCH SHIFT A A A A A A A Y Y Y Y Y Y Y 1 2 3 4 5 6 7 8NOTICE
Never attempt to disconnect the USB flash memory or turn the power off during playback. Doing so may corrupt the USB flash memory data.
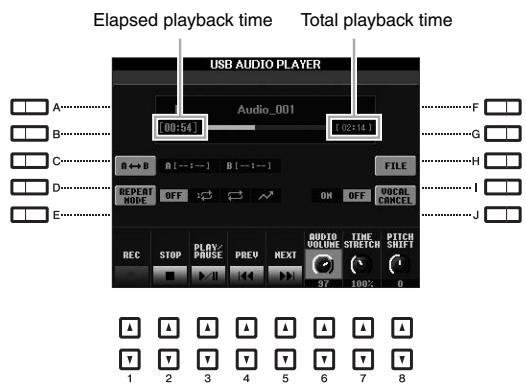
text_image
Elapsed playback time USB AUDIO PLAYER Total playback time Audio_001 [00:54] [02:14] A B C D E REPEAT MODE OFF FILE H I J REC STOP PLAY/ PRASE PREV NEXT QUDIO VOLUME TIME STRETCH PITCH SHIFT 97 100% 0 1 2 3 4 5 6 7 8Basic Operations via the number [▲▼] buttons
| [3 ▲▼] | PLAY/PAUSE | Starts or pauses playback at the current position. |
| [2 ▲▼] | STOP | Stops playback. |
| [4 ▲▼] | PREV. | Pressing this changes the file to the previous one; holding it moves continuously back through the current file (in seconds). |
| [5 ▲▼] | NEXT | Pressing this changes the file to the next one; holding it moves continuously forward through the current file (in seconds). |
| [6 ▲▼](PSR-S950) | AUDIO VOLUME | Adjusts the volume of the current audio file. |
| [8 ▲▼](PSR-S750) |
A-B Repeat Playback via the [C] (A↔B) button
The specified section (between the A and B points) can be played back repeatedly.
- To set the A point, press the [C] button when playback reaches to the desired point.
The time set as the A point is shown in at “A [--::--]” in the display, and is indicated by the first wedge mark in the playback progress bar.
- To set the B point, press the [C] button again when playback reaches to the desired point.
The time set as the B point is shown in at “B [--:--]” in the display, and is indicated by the second wedge mark in the playback progress bar.
The specified A-B section of the audio file will now play back repeatedly.
- To cancel Repeat playback, press the [C] button again.
Repeat Playback mode via the [D] (REPEAT MODE) button
- OFF OFF
Plays through the selected file, then stops.
• 1 SINGLE
Plays through the selected file repeatedly.
• ALL
Continues playback through all the files in the current folder repeatedly.
• RANDOM
Randomly and repeatedly plays back all files in the current folder.
![YAMAHA PSR-S950 - Repeat Playback mode via the [D] (REPEAT MODE) button - 1](/content/2019/11/115210/images/db58380154b8c1202b227ee33633d2f6a1f7361201dd7b8538dfd44f64046cab.jpg)
NEXT PAGE
Advanced Features only for PSR-S950
| [7] | TIME STRETCH | Adjusts the playback speed by stretching/compressing the audio, compared to an original speed of 100%. Higher values result in a faster tempo.NOTEThe value can be adjusted from 70% to 140%.Time Stretch cannot be applied to MP3 files of 48.0 kHz sample rate. |
| [8] | PITCH SHIFT | Shifts the key in semitones.NOTEPitch Shift cannot be applied to MP3 files of 48.0 kHz sample rate. |
| [H] | VOCAL CANCEL | Cancels or attenuates the center position of the stereo sound.This lets you sing “karaoke” style with just instrumental backing, since the vocal sound is usually at the center of the stereo image in most recordings. |
Adjusting the Volume Balance Between the Song (MIDI) and Audio Song
Pressing the [BALANCE] button once or twice calls up the BALANCE (2/2) display. In this display, you can adjust the volume balance between the Song (MIDI) and Audio Song by using the [2 ] - [3 ] buttons. When this is set to CENTER, the levels of the Song and Audio Song are equal. To instantly reset the balance to CENTER, press the [2 ] and [3 ] buttons simultaneously.

text_image
PAGE BALANCE PART G C OLE PART CHANNEL ON/OFF BALANCE (2/2) 100 CENTER 100 127 SONG RUD10 KBDRecording Your Performance as Audio
Try recording your performance as audio data (WAVE file) to a USB flash memory.
Sounds that can be recorded:
- Sounds that are generated via all the keyboard parts, Song parts, Style parts, and Multi Pad parts.
- Sounds of the portable audio player that are input via the [AUX IN] jack.
- (PSR-S950) Sounds that are input via the [MIC/LINE IN] jack, such as a microphone, guitar or other audio devices.
Maximum amount of recording time:
- 80 minutes per recording, though this may differ depending on the capacity of the USB flash memory.
NOTE
Before using a USB flash memory, be sure to read "Connecting a USB Flash Memory" on page 92.
NOTE
Data that cannot be recorded includes: Audio Styles, Songs protected by copyright (such as Preset Songs), Audio Link Multi Pads and the metronome sound.
NOTE
For instructions on MIDI recording, see page 60.
The recorded data using this function is saved as:
- Stereo WAVE data
• 44.1 kHz sample rate/16 bit resolution
1 Connect the USB flash memory to the [USB TO DEVICE] terminal.
![YAMAHA PSR-S950 - Connect the USB flash memory to the [USB TO DEVICE] terminal. - 1](/content/2019/11/115210/images/d0e0265a10300a51b3a7330d2d883e0c01324691d41faf45af9fee98213bd05a.jpg)
NEXT PAGE
2 Set the desired Voice, etc. which you want to use for your performance.
3 Press the [USB AUDIO PLAYER] button to call up the USB AUDIO PLAYER display.
![YAMAHA PSR-S950 - Connect the USB flash memory to the [USB TO DEVICE] terminal. - 2](/content/2019/11/115210/images/4a2d7212088912e2a2d9f3bd9fa2b77ceee98905de46301c20f167da85dedd1e.jpg)
NOTE
The USB flash memory of "USB1" is selected as the recording destination when multiple USB flash memories are connected.
4 Press the [1 ▲▼] (REC) button to enter recording standby.
The [PLAY/PAUSE] button flashes.
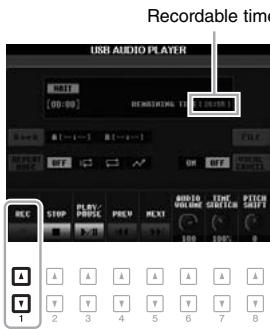
text_image
Recordable time USB AUDIO PLAYER MINT (00:00) RENDITIONAL TIME OFF ON OFF REC STOP PLAY/PRIME PRU MULT AUDIO GOLDING TIME GRETTER PITCH 1 2 3 4 5 6 7 85 Start recording by pressing the [3 ▲▼] (PLAY/PAUSE) button, then start your performance.
The elapsed recording time is shown in the display while recording.
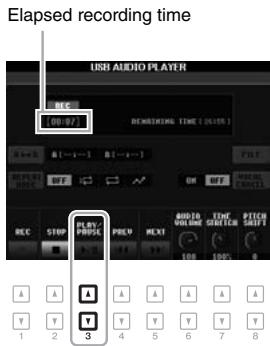
text_image
Elapsed recording time USB AUDIO PLAYER REC [00:07] BEHINDING TIME [2018] OFF ON OFF MOUNT 3 A A A A A A T Y T Y T Y 1 2 3 4 5 6 7 8NOTICE
Never attempt to disconnect the USB flash memory or turn the power off during recording. Doing so may corrupt the USB flash memory data or the recording data.
6 Stop recording by pressing the [2 ▲▼] (STOP) button.
Recorded data is automatically saved to the USB flash memory as a file with the name automatically set.
7 Press the [3 ▲▼] (PLAY/PAUSE) button to play back the recorded performance.
To see the file of the recorded performance in the File Selection display, press the [H] (FILE) button.
NOTE
The recording operation continues, even if you close the USB AUDIO PLAYER display by pushing the [EXIT] button. Press the [USB AUDIO PLAYER] button to call up the USB AUDIO PLAYER display again, then stop the recording by pressing the [2 ▲▼] (STOP) button.
NOTE
Even if you make a mistake in your performance, you cannot overwrite an existing file. Delete the recorded file on the File Selection display, then record your performance again.
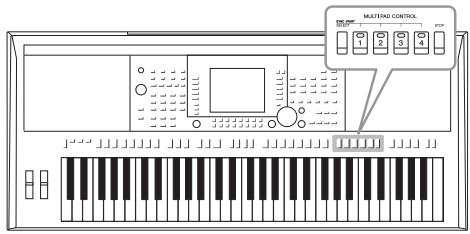
text_image
MASTERING CONTROL 0.0000 0.0001 0.0002 0.0003 0.0004 0.0005 0.0006 0.0007 0.0008 0.0009 0.0010 0.0011 0.0012 0.0013 0.0014 0.0015 0.0016 0.0017 0.0018 0.0019 0.0020 0.0021 0.0022 0.0023 0.0024 0.0025 0.0026 0.0027 0.0028 0.0029 0.0030 0.0031 0.0032 0.0033 0.0034 0.0035 0.0036 0.0037 0.0038 0.0039 0.0040 0.0041 0.0042 0.0043 0.0044 0.0045 0.0046 0.0047 0.0048 0.0049 0.0050 MATERIALS CONTROLThe Multi Pads can be used to play a number of short pre-recorded rhythmic and melodic sequences that can be used to add impact and variety to your keyboard performances. Multi Pads are grouped in Banks of four each. The instrument features a variety of Multi Pad Banks in a variety of different musical genres. Moreover, the Multi Pad Audio Link function allows you to create a new pad with your WAVE data (Audio data) to play back during your performance.
Playing the Multi Pads
1 Press the MULTI PAD CONTROL [SELECT] button to call up the Multi Pad Bank Selection display, then select the desired bank.
Select pages using the [1 ] - [6 ] buttons that correspond to “P1, P2...” in the display or pressing the MULTI PAD CONTROL [SELECT] button repeatedly, then use the [A] - [J] buttons to select the desired bank.
![YAMAHA PSR-S950 - Press the MULTI PAD CONTROL [SELECT] button to call up the Multi Pad Bank Selection display, then select the desired bank. - 1](/content/2019/11/115210/images/4445c658d6c86037b1f1af81973c0530d0dcf160c913fab40f36e59626d6d8e9.jpg)
flowchart
graph TD
    A["SYNC START SELECT"] --> B["1"]
    A --> C["2"]
    A --> D["3"]
    A --> E["4"]
    A --> F["STOP"]
    G["MULTI PAD"] --> H["A: E.Ctr168tCut1"]
    G --> I["B: E.Ctr168tCut2"]
    G --> J["C: E.Ctr168tCut3"]
    G --> K["D: FunkyCtr168t1"]
    G --> L["E: FunkyCtr168t2"]
    M["MULTI PAD"] --> N["P1 P2 P3 P4 P5 NEXT"]
    M --> O["EDT1"]
    P["Multi Pad"] --> Q["F - F"]
    P --> R["G - G"]
    P --> S["H - H"]
    P --> T["I - I"]
    P --> U["J - J"]
2 Press any of the MULTI PAD CONTROL [1] – [4] buttons to play a Multi Pad phrase.
The corresponding phrase (in this case, for Pad 1) starts playing back in its entirety at the currently set tempo. You can even play two or more Multi Pads at the same time.
![YAMAHA PSR-S950 - Press any of the MULTI PAD CONTROL [1] – [4] buttons to play a Multi Pad phrase. - 1](/content/2019/11/115210/images/a7d3e2f32fc4e6079c322288a329e4045d40dde29b8e32c25c6cab0787faf7ae.jpg)
text_image
SYNC ST SELECT MULTI PAD CONTROL 1 2 3 4 STOP 3NOTE
There are two types of Multi Pad data. Some types will play back once and stop when they reach to the end. Others will be played back repeatedly (loop).
NOTE
Pressing the pad during its playback will stop playing and begin playing from the top again.
3 Press the [STOP] button to stop playback of the Multi Pad(s).
If you want to stop specific pads, simultaneously hold down the [STOP] button and press the pad(s) you wish to stop.
About the color of the Multi Pads
- Green: Indicates that the corresponding pad contains data (phrase).
- Red: Indicates that the corresponding pad is playing back.
- Red (flashing): Indicates that the corresponding pad is in standby (Synchro Start).
Using the Multi Pad Synchro Start Function
You can start the Multi Pad playback by playing any key or by starting Style playback.
1 While holding the MULTI PAD CONTROL [SELECT] button, press the desired button or buttons from [1] – [4] .
The corresponding buttons flash, indicating the Standby status. To cancel this status, execute the same operation, or press only the [STOP] button to cancel the Standby status of all Pads.
![YAMAHA PSR-S950 - While holding the MULTI PAD CONTROL [SELECT] button, press the desired button or buttons from [1] – [4] . - 1](/content/2019/11/115210/images/562029fd18e33c44b7ba10bfbf13b50f593ce9b3a631cafa6d1c6669d82a6338.jpg)
flowchart
graph TD
    A["Hand Icon"] --> B["Select"]
    B --> C["Step 1: Sync Start"]
    B --> D["Step 2: Select"]
    B --> E["Step 3: Select"]
    B --> F["Step 4: Select"]
    B --> G["Stop"]
2 Start playback of the Multi Pad.
- When [ACMP] is off, press any note, or play back a Style.
- When [ACMP] is on, play a chord with your left hand, or play back a Style.
- When two or more Multi Pads are pressed in step 1, press any of them to start playback of them simultaneously.
If you execute step 1 during playback of Style or Song:
To start playback of the corresponding Pad at the top of the next bar, press any note (when [ACMP] is off) or play a chord with your left hand (when [ACMP] is on).
Using Chord Match
Many of the Multi Pad phrases are melodic or chordal and you can have these phrases automatically change chords along with the chords you play with your left hand. When the [ACMP] is on or LEFT part is on, simply play a chord with your left hand and press any of the Multi Pads — Chord Match changes the pitch to match the chords you play. Keep in mind that some Multi Pads are not affected by Chord Match.

text_image
Chord Section + MULTI PAD CONTROL SYNC START SELECT 1 2 3 4 STOPIn this example, the phrase for Pad 1 will be transposed into F major before playing back. Try out other various chord types while playing the Multi Pads.
Using WAVE Files for the Multi Pads
You can use WAVE files, created via the USB Audio function (page 67) or commercially-available ones for the Multi Pad playback. To do this, you need to create an Audio Link Multi Pad by linking the WAVE files to each of the Multi Pads.
NOTE
Audio Link Multi Pads are neither created nor played back during playback, recording standby or recording of audio files. For details on the audio files, see page 64.
Creating an Audio Link Multi Pad
1 Prepare the WAVE files in the USB flash memory.
2 Connect the USB flash memory to the [USB TO DEVICE] terminal.
3 Press the MULTI PAD CONTROL [SELECT] button to call up the Multi Pad Bank Selection display.
4 Press the [7 ▲] (AUDIO LINK) button to call up the Multi Pad Audio Link display.
NOTE
You will need to press the [C] (NEW BANK) button in the Multi Pad Audio Link display to create an Audio Pad, if an Audio Link Multi Pad has been selected when you pressed the [7 ▲] (AUDIO LINK) button. Otherwise, you are simply re-selecting the link in the selected Audio Link Multi Pad.
NOTE
A WAVE file cannot be linked to a MIDI Multi Pad.
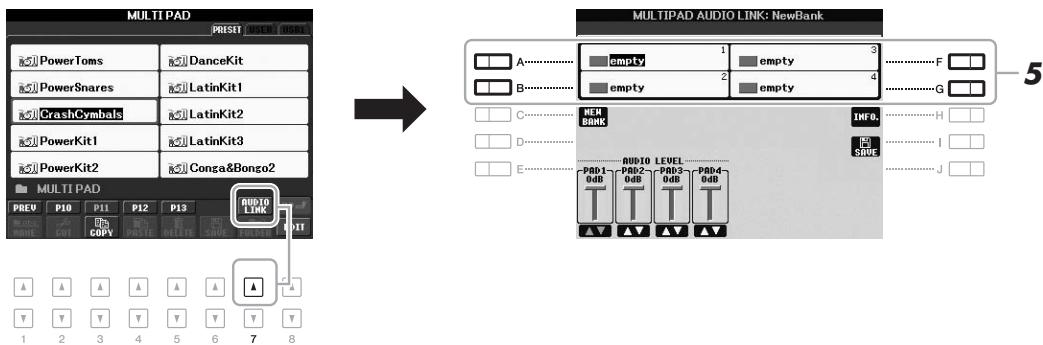
flowchart
graph TD
    A["Multi PAD"] --> B["PREV P10 P11 P12 P13 COPY COPY MULTI PAD"]
    B --> C["1 2 3 4 5"]
    C --> D["1 2 3 4 5"]
    D --> E["DATA INPUT: A, B, C, D, E"]
    E --> F["OUTPUT: NEWBANK"]
    F --> G["1 2 3 4 5"]
5 Select the desired Pad by pressing any of the [A], [B], [F] and [G] buttons.
The WAVE display appears.
6 Select the desired WAVE file by using the [A] - [J] buttons.
To confirm the information of the selected WAVE file:
Press the [7 ▲] (INFO.) button to call up the information window. You can confirm the information (file name, title name, time and sample rate, etc.). Press the [F] (OK) button to close it.
7 Press the [EXIT] button to return to the Multi Pad Audio Link display.

NEXT PAGE
8 If desired, adjust the level of each WAVE file by using the [1 ] - [4 ] buttons.
You can adjust the volume while playing a Multi Pad phrase by pressing the corresponding MULTI PAD CONTROL [1] – [4] buttons.
To confirm the path of the selected WAVE file:
Press the [H] (INFO.) button to call up the information window. Press the [F] (OK) button to close it.
9 If you want to link other WAVE files to other pads, repeat steps 5 to 8.
10 Save the settings as a Multi Pad Bank.
Press the [I] (SAVE) button to call up the Multi Pad Bank Selection display, then execute the Save operation. The Link and Volume settings will be saved.
11 Press the [EXIT] button to exit from the Multi Pad Audio Link display.
The newly created Audio Link Multi Pad is marked with “Audio Link” at the upper left of the file name.
If you want to change the Link setting:
Select the desired Audio Link Multi Pad, then execute the same operations as steps 4 to 11.
NOTICE
The setting will be lost if you select another Audio Link Multi Pad or turn the power to the instrument off without executing the Save operation.
Playing the Audio Link Multi Pads
You can play the Multi Pad to which the WAVE file is assigned by selecting them in the USER or USB page of the Multi Pad Bank Selection display. Although you can play via the same operations in page 69, note the following limitations.
- Make sure to connect the USB flash memory including the corresponding WAVE files.
• Automatic repeat playback is not available. - Only one Pad can be played back at once.
- Chord Match cannot be applied.
NOTE
Audio files (WAVE files) take a slightly longer time than MIDI files to load.
NOTE
When the link to the WAVE file is cut (for example, when not connecting the USB flash memory which includes the corresponding WAVE files, etc.), a "Not Found!" is indicated above the Pad name.
NOTE
The lamp is off when the corresponding pad contains no data (phrase).
| Advanced FeaturesRefer to the Reference Manual on the website, Chapter 5. | |
| Multi Pad creating (Multi Pad Creator): | [FUNCTION] → [F] DIGITAL REC MENU → [C] MULTI PAD CREATOR |
| Multi Pad editing: | Multi Pad Bank Selection display → [8 ▼] (EDIT) |
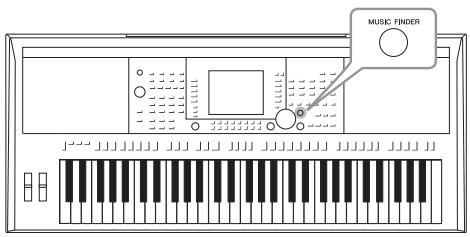
text_image
MUSIC FINDERThis feature lets you call up the panel settings ideal for your performance simply by selecting a “Record,” music genre or song title. If you want to play in a certain genre of music but don't know which Style and Voice settings would be appropriate, use this convenient function.
Moreover, by registering the Song, audio and Style file saved in various locations into Music Finder, the instrument can easily call up the desired Song, audio and Style file from the corresponding Record.
Loading panel settings (Records)
As a factory default, some sample records (panel settings) are provided in the Music Finder. By downloading many panel settings from the Yamaha website and loading them to the instrument, you can use the Music Finder function more conveniently and effectively. Before using the Music Finder function, we recommend that you load the panel settings by following the instructions below.
- Download the Music Finder panel settings file from the website to the USB flash memory. http://download.yamaha.com/
- Connect the USB flash memory which contains the panel settings file to the [USB TO DEVICE] terminal of the instrument.
- Press the [MUSIC FINDER] button to call up the MUSIC FINDER display.
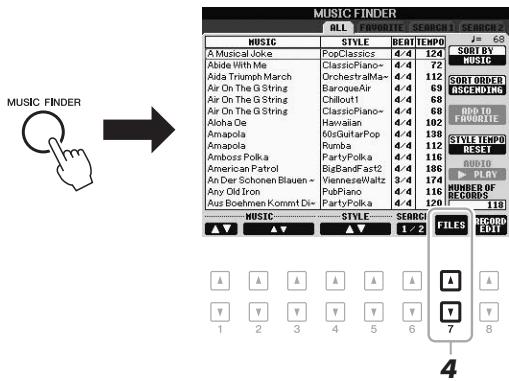
text_image
MUSIC FINDER ALL FROUITE | SEARCH1 | SEARCH J= 63 MUSIC STYLE MEORT ENPO A Musical Joke Pop Classics 4/4 124 Abide With Me Classic Piano+ 4/4 72 Aida Triumph March OrchestralMa- 4/4 112 Air On The G String BaroqueAir 4/4 69 Air On The G String Chillout! 4/4 68 Air On The G String Classic Piano- 4/4 60 Aloha De Hawaiian 4/4 102 Amapola 60 GuitarPop 4/4 138 Amapola Rumba 4/4 112 Amboss Polka PartyPolka 4/4 116 American Patrol BigBandFast2 4/4 186 An Der Schonen Blauen VienneseWaltz 3/4 174 Any Old Iron PubPiano 4/4 116 Aus Boehmen Konmit Di PartyPolka 4/4 120 MUSIC STYLE SEORC ▲ ▼ ▲ ▼ ▲ ▼ 1 / 2 SORT BY MUSIC SORT ORDER BSCENDING ADD TO FROUITE STYLE ITEMS RECORD PLAY NUMBER OF RECORDS TWO 1 T W 7 8 4- Press the [7 ▲▼] (FILES) button to call up the File Selection display.
NOTE
Before using a USB flash memory, be sure to read “Connecting a USB Flash Memory” on page 92.
NOTICE
Loading the panel settings to the instrument automatically overwrites all your records (panel settings, Song, audio and Style files shown in the MUSIC FINDER display). Make sure that all important data has been saved to the USER or USB in the File Section display (as described in step 4 above).
- Use the TAB [◀][▶] buttons to call up the USB display containing the panel settings file downloaded from the website.
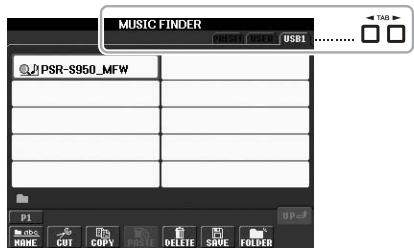
text_image
MUSIC FINDER PSEN1 USB1 ...... PSR-S950_MFW P1 HKEYS GND CUT COPY WRITE DELETE SAVE FOLDER- Press the button which corresponds to the file to display the message for selecting REPLACE/APPEND of the panel settings.
- Press the [F] (REPLACE) button to delete all records currently in the instrument and replace them with the records of the selected file. Press the [G] (YES) button at the confirmation prompt.
- Press the [F] (YES) button in the message display (indicating completion of the replace operation) to call up the MUSIC FINDER display. By checking the number of records in the MUSIC FINDER display, you can confirm the record has been replaced.
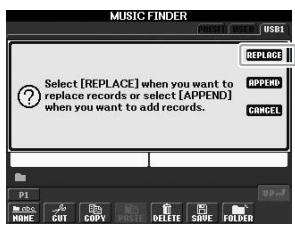
text_image
MUSIC FINDER RESET ORDER PSB1 REPLACE RePLACE APPEND CANCEL Select [REPLACE] when you want to replace records or select [APPEND] when you want to add records. P1 HKEYS HOME CUT COPY DELETE SAVE FOLDER
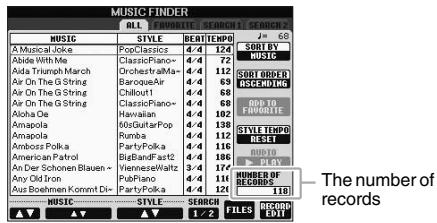
text_image
MUSIC FINDER RLC FAVORITE: SEARCH 1: SEARCH 2 J = 68 MUSIC STYLE BEAT/THPO A Musical Joke PopClassics 4-4 124 SORT BY Abide With Me ClassicPiano- 4-4 72 MUSO Aida Triunch March Orchestra/Ma- 4-4 112 SHIFT ORDER Air On The G String BaroqueAir 4-4 69 RECORDING Air On The G String Chillout 4-4 68 ROD TO Air On The G String ClassicPiano- 4-4 68 COMPLETE Aloha Die Hawaiian 4-4 102 Amapola KidGuitarPop 4-4 139 STYLE TEMP Amapola Rumba 4-4 112 BUDID Amboss Polka PartyPolka 4-4 116 BUDID American Patrol BigBandFast 4-4 106 PLAY An Der Schonen Blauen - YennessWaltz 3-4 174 PLAY Any Old Iron PubPlano 4-4 111 NUMBER OF Aus Boehmen Kommt Di- PartyPolka 4-4 121 RECORDS The number of records MUSIC STYLE SEARCH 1 / 2 FILES RECORD EDITNOTE
Even after replacing the Music Finder records, you can reset them to their original factory settings by selecting the "MusicFinderPreset" file in PRE-SET display of step 5.
Selecting a Record (Your Desired Music Genre)
1 Press the [MUSIC FINDER] button to call up the MUSIC FINDER display.
In the ALL display, all the records are shown.
Shows the song title and information of the Style assigned to the panel settings.
![YAMAHA PSR-S950 - Press the [MUSIC FINDER] button to call up the MUSIC FINDER display. - 1](/content/2019/11/115210/images/e139e2b7cb2a929f1de3e52b6073eab2f3c23ffb2aa26da2830dc268ecd7efdd.jpg)
text_image
MUSIC FINDER 011 COMPOSITE GENERAL SCROLL MUSIC STYLE BERT/TEMP A Musical Joke PopClassics 4/4 124 Abide With Me ClassicPiano- 4/4 72 Aida Triumph March OrchestraMa- 4/4 112 Air On The G String BaroqueAir 4/4 69 Air On The G String Chillout1 4/4 68 Air On The G String ClassicPiano- 4/4 68 Aloha Die Hawaiian 4/4 102 Amapola 60sGuitarPop 4/4 138 Amapola Rumba 4/4 112 Ambooz Polka PartyPolka 4/4 116 American Patrol BigBandFast2 4/4 186 An Der Schonen Blauen- ViemezseWaltz 4/4 174 Any Old Iron PubPiano 4/4 116 Aus Boehnen Kommt Div PartyPolka 4/4 120 SORT BY MUSIC SORT ORDER ASCENDING RIP TO COMPLETE TYPICAL ITEMS RESET RUN TO PLAY UNDER OF ORDER 1182 Use the [2 ▲▼]/[3 ▲▼] buttons to select the desired Panel Settings.
You can also use the [DATA ENTRY] dial and the [ENTER] button.
Not only does this select the desired Panel Settings, it also automatically turns on [ACMP] and [SYNC START].
Sorting the records
Press the [F] (SORT BY) button to sort the records by MUSIC, STYLE, BEAT and TEMPO. Press the [G] (SORT ORDER) button to change the order of the records (ascending or descending).
When sorting records by MUSIC, you can use the [1 ] button to skip up or down through the songs alphabetically. When sorting records by STYLE, you can use the [4 ]/[5 ] button to skip up or down through the Styles alphabetically. Simultaneously press the [] and [] buttons to move the cursor to the first record.
3 Play chords in the left-hand section (page 35) of the keyboard to start the Style.
NOTE
If you want to avoid changing the Tempo during Style playback when selecting another record, set the Style Tempo function to LOCK or HOLD by pressing the [I] (STYLE TEMPO) button in the Music Finder display. Setting to LOCK can also avoid inadvertent changing of the Tempo while Style playback is stopped and another record is selected.
Finding Your Desired Record (Panel Settings) via Search
You can search the records by specifying a song name or keyword, using the Search function of the Music Finder.
1 From the ALL page of the MUSIC FINDER display, press the [6 ▲] (SEARCH 1) button to call up the Search display.
![YAMAHA PSR-S950 - From the ALL page of the MUSIC FINDER display, press the [6 ▲] (SEARCH 1) button to call up the Search display. - 1](/content/2019/11/115210/images/33d44535655075a845f95a03bda2e328f3bf113620d35e8133eefedcc3c611b2.jpg)
text_image
MUSIC FINDER RLL - LEMONIE - SEARCH 1 / SEARCH MUSIC STYLE BEAT A Musical Joke PopClassics 4/4 124 Abide With Me ClassicPiano- 4/4 72 Aida Triumph March OrchestraMa- 4/4 112 Air On The G String BaroqueAir 4/4 69 Air On The G String Chillout1 4/4 58 Air On The G String ClassicPiano- 4/4 68 Alola Da Hawaiian 4/4 102 Amapola 60sGuitarPop 4/4 138 Amapola Rumba 4/4 112 Amboss Polka PartyPolka 4/4 116 American Patrol BigBansFast2 4/4 106 An Der Schonen Blauen - VienneWaltz 3/4 174 Any Old Iroo PubPiano 4/4 174 Aus Boehmen Komment Div- PartyPolka 4/4 120 MUSIC STYLE SEARCH 1 / 2 SORT BY MUSIC SORT ORDER ASCENDING ADD TO FROMOUTLE STYLE ENHIND RESET AUDIO PLAY NUMBER OF RECORDS 1TB FLES RECORD EDIT![YAMAHA PSR-S950 - From the ALL page of the MUSIC FINDER display, press the [6 ▲] (SEARCH 1) button to call up the Search display. - 2](/content/2019/11/115210/images/176eaf7cc1efc3da7c63d5909108a1b8a822ddf53a69becc8c8994a7b9c02287.jpg)
![YAMAHA PSR-S950 - From the ALL page of the MUSIC FINDER display, press the [6 ▲] (SEARCH 1) button to call up the Search display. - 3](/content/2019/11/115210/images/2ff38b8151d1c16ca6eee51d086248a866db5210494c59fe46208f4f13ce44d6.jpg)
text_image
MUSIC FINDER SEARCH 1 HUSIC Clerbr KEYWORD Clerbr STYLE Clerbr BEEI GNY 2/4 3/4 4/4 6/8 OTHER SEARCH AREA ALL FAVORITE SEARCH1 SEARCH2 TENPO GENRE FROM ~ TO ANY All Time Hits Ballad ALL CLEAR ▲▼ ▲▼ START SEARCH CANCEL2 Enter the search criteria.
| [A] | MUSIC | Searches by song name. Pressing the [A] button calls up the pop-up window to enter the song name. To clear the entered Music, press the [F] (CLEAR) button. |
| [B] | KEYWORD | Searches by keyword. Pressing the [B] button calls up the pop-up window to enter the keyword. To clear the entered Keyword, press the [G] (CLEAR) button. |
| [C] | STYLE | Searches by Style. Pressing the [C] button calls up the Style Selection display. After selecting the desired Style, press the [EXIT] button to return back to the Search display. To clear the entered Style, press the [H] (CLEAR) button. |
| [D] | BEAT | Specifies the time signature for the search. All beat settings are included in the search if you select ANY. |
| [E] | SEARCH AREA | Selects a specific location (the tab of the upper part of the MUSIC FINDER display) for searching. |
| [1 ▲▼] | ALL CLEAR | Clears all entered search criteria. |
| [3 ▲▼] | TEMPO FROM | Sets a tempo range to which the search will be limited. |
| [4 ▲▼] | TEMPO TO | |
| [5 ▲▼]/[6 ▲▼] | GENRE | Selects the desired music genre. |
NOTE
For instructions on entering characters, refer to page 30.
NOTE
You can search several different Keywords simultaneously by inserting a separator (comma) between each.
NOTE
If you select a beat of 2/4 or 6/8, a Style suitable for performing a song in 2/4 and 6/8 beat can be searched, but the actual Style is created by using a 4/4 beat.
To cancel searching, press the [8 ▼] (CANCEL) button.
3 Press the [8 ▲] (START SEARCH) button to start the search.
The Search 1 display appears, showing the results of the search.
NOTE
If you wish to search another criteria, press the [6 ▼] (SEARCH 2) button in the Music Finder display. The search result is displayed in the SEARCH 2 display.
Registering a Song, Audio or Style File
By registering Song, audio or Style files in various locations (Preset, User and USB) into Music Finder, the instrument can call up the file easily from the song title.
1 Call up the file.
For Song or Style files:
1-1 Press the SONG [SELECT] or one of the STYLE category selection buttons to display the File Selection display.
1-2 Press the TAB [◀][▶] buttons to select the location of the desired file.
For audio files:
1-1 Press the [USB AUDIO PLAYER] button to call up the USB AUDIO PLAYER display.
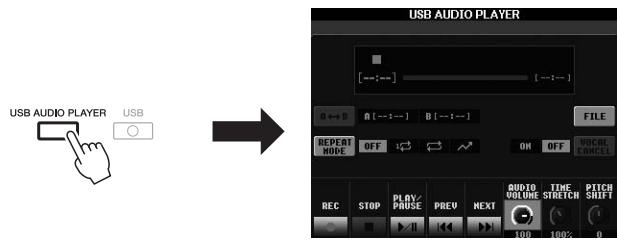
text_image
USB AUDIO PLAYER USB USB AUDIO PLAYER [---:---] [---:---] A ← B A [---:---] B [---:---] FILE REPEAT MODE OFF ON OFF VOCB CANCE REC STOP PLAY/PRUSE PREV NEXT AUDIO VOLUME TIME STRETCH PITCH SHIFT 100 100% 01-2 Press the [H] (FILE) button to display audio files in the connected USB flash memory.
2 Press the [A] – [J] button corresponding to the desired file.
![YAMAHA PSR-S950 - Press the [A] – [J] button corresponding to the desired file. - 1](/content/2019/11/115210/images/2a1ec2cec54f18a522591929cf85f2789286900bae13e8301613ca2b50e39f8a.jpg)
text_image
AUDIO USB1 A............ Audio_001 ... Audio_006 B............ Audio_002 ... Audio_007 C............ Audio_003 ... Audio_008 D............ Audio_004 ... Audio_009 E............ Audio_005 ... Audio_010 P1 TITLE HOME CUT COPY ORDER AUDIO NF 0.1 DPJF ORDER PER AUDIO PLAY 3 1 2 3 4 5 6 7 83 Press the [6 ▲] (ADD TO MF) button to register the selected file to Music Finder.
The display automatically changes to the Music Finder Record Edit display.
![YAMAHA PSR-S950 - Press the [6 ▲] (ADD TO MF) button to register the selected file to Music Finder. - 1](/content/2019/11/115210/images/93fc8c4160102fe2c91a42b3f3aa3d66dd60c2738781ba065eb7d79b4dcf6318.jpg)
NEXT PAGE
NOTE
If you want to register files in the USB flash memory, connect the USB flash memory containing the data to the [USB TO DEVICE] terminal.
NOTE
Before using a USB flash memory, be sure to read “Connecting a USB Flash Memory” on page 92.
4 Press the [8 ▲] (OK) button to execute the registration.
Press the [8 ▼] (CANCEL) button to cancel the registration.
5 Confirm that the registered file name is shown in the MUSIC column while (SONG), (AUDIO) or the Style name is shown in the Style column.
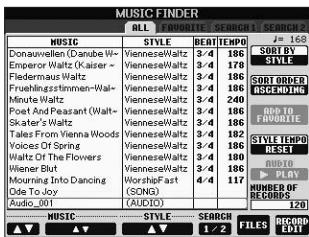
text_image
MUSIC FINDER ALL FONORTEI SEARCH2 | SEARCH2 MUSIC STYLE REACT | TEMPO | J = 168 Donauwollen (Danube W- Emperor Waltz (Kaiser - Fiedermann Waltz Vienneswaltz 3/4 186 Friedenstimmeln (Walt- Minute Waltz Vienneswaltz 3/4 186 Poet And Peasant (Walt- Skater's Waltz Vienneswaltz 3/4 186 Tales From Vienna Wood- Voices Of Spring Vienneswaltz 3/4 186 Waltz Of The Flowers Vienneswaltz 3/4 186 Wiener Blut Vienneswaltz 3/4 186 Mourning Into Dancing WorshipFast 4-4 117 Ode To Joy (SONS) 120 AUDIO MUSIC STYLE SEARCH 1 / 2 | FILES | RECORD EDITRecalling the Registered File from Music Finder
You can recall the registered files in the same way as done in the “Selecting a Record (Your Desired Music Genre)” (page 75) and “Finding Your Desired Record (Panel Settings) via Search” (page 76).
- To play back the recalled Song file, press the SONG [▶/■■] (PLAY/PAUSE) button in the SONG buttons or start playing the keyboard after selecting the SONG record. You can stop playback by pressing the SONG [■] (STOP) button.
- To play back the recalled audio file, press the [J] (▶ PLAY) button in the MUSIC FINDER display after selecting the AUDIO record. You can stop playback by pressing the [J] (■ STOP) button in the MUSIC FINDER display.
- To play a Style, start playing chords with your left hand and play a melody with your right hand. You can stop playback by pressing the STYLE CONTROL [START/STOP] button.
NOTE
If you want to play back the files in the USB flash memory, connect the USB flash memory containing the data to the [USB TO DEVICE] terminal beforehand.
NOTE
When searching Song or audio (page 76), it is necessary to set the search criteria as follows.
STYLE: Blank
BEAT: ANY
TEMPO: “----” - “----”
Advanced FeaturesRefer to the Reference Manual on the website, Chapter 6.  | |
| Creating a set of favorite Records: | [MUSIC FINDER] → TAB [◀][▶] ALL → [H] ADD TO FAVOR-ITE |
| Editing Records: | [MUSIC FINDER] → [8 ▲▼] (RECORD EDIT) |
| Saving the Record as a single file: | [MUSIC FINDER] → [7 ▲▼] (FILES) |
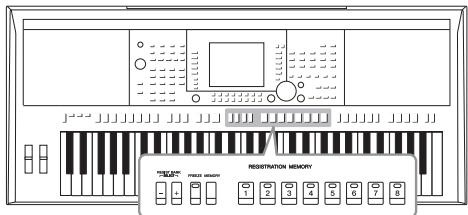
text_image
REGISTRATION MEMORY 1 2 3 4 5 6 7 8 - - + - PRICE MEMORYThe Registration Memory function allows you to save (or “register”) virtually all panel settings to a Registration Memory button, and then instantly recall your custom panel settings by simply pressing a single button. The registered settings for eight Registration Memory buttons should be saved as a single Bank (file).
Registering Your Panel Setups
1 Set up the panel controls (such as Voice, Style, effects, and so on) as desired.
2 Press the [MEMORY] button in the REGISTRATION MEMORY section.
The display for selecting the items to be registered appears.
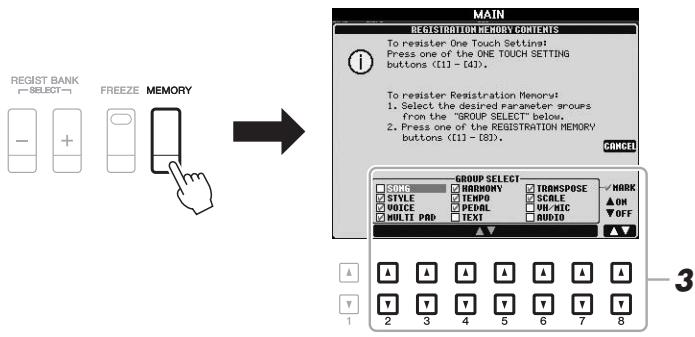
text_image
REGIST BANK SELECT FREEZE MEMORY MAIN RESISTATION MEMORY CONSUS To register One Touch Setting Press one of the ONE TOUCH SETTING buttons (11) - [43]. To register Registration Memory: 1. Select the desired parameter groups from the "GROUP SELECT" below. 2. Press one of the REGISTRATION MEMORY buttons (11) - [83]. CANCEL GROUP SELECT SONG HARmony TRANSPOSE ▼ MARK STYLE TEMPO SCALE ▲ ON PEPAL VUL-NIC ▼ OFF MULTI PAD TEXT AUDIO ▼ A A A A A A A ▼ 2 3 4 5 6 7 8 1 2 3 4 5 6 7 8 3NOTE
Refer to the Registration section of the "Parameter Chart" in the Data List for information on the parameters that are contained in each item. The Data List is available at the Yamaha website (See page 7).
3 Determine the items you want to register.
Select the desired item by using the [2 ] - [7 ] buttons, then enter or remove the checkmark by using the [8 ] (MARK ON)/[8 ▼] (MARK OFF) buttons.
To cancel the operation, press the [I] (CANCEL) button.

NEXT PAGE
4 Press one of the REGISTRATION MEMORY [1] – [8] buttons to which you wish to memorize the panel setup.
REGISTRATION MEMORY
![YAMAHA PSR-S950 - Press one of the REGISTRATION MEMORY [1] – [8] buttons to which you wish to memorize the panel setup. - 1](/content/2019/11/115210/images/954ae67c22a720051f213e73f1d27b917b31311fbdf96c9eb01dc5c22f17cda0.jpg)
text_image
1 2 3 4 5 6 7 8The memorized button becomes red, which indicates the number button contains data and its number is selected.
NOTICE
If you select the button whose lamp is lit in red or green here, the panel setup previously memorized to the button will be erased and replaced by the new settings.
About the lamp status
• Red: Data registered and currently selected
- Green: Data registered but not currently selected
- Off: No data registered
5 Register various panel setups to other buttons by repeating steps 1 - 4.
The registered panel setups can be recalled by simply pressing the desired number button.
NOTE
The panel setups registered in the numbered buttons are maintained even when you turn off the power. If you want to delete all the eight current panel setups, turn the power on while holding the B5 key (right-most B key on the keyboard).
Saving the Registration Memory as a Bank file
You can save all eight registered panel setups as a single Registration Memory Bank file.
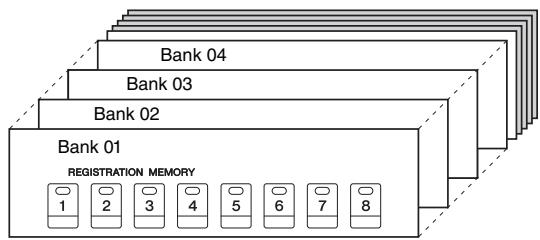
flowchart
graph TD
    A["Bank 01"] --> B["Registration Memory"]
    C["Bank 02"] --> B
    D["Bank 03"] --> B
    E["Bank 04"] --> B
    B --> F["1"]
    B --> G["2"]
    B --> H["3"]
    B --> I["4"]
    B --> J["5"]
    B --> K["6"]
    B --> L["7"]
    B --> M["8"]
1 Press the REGIST BANK [+] and [-] buttons simultaneously to call up the Registration Bank Selection Display.
![YAMAHA PSR-S950 - Press the REGIST BANK [+] and [-] buttons simultaneously to call up the Registration Bank Selection Display. - 1](/content/2019/11/115210/images/7a7ab9ae632d34c734df9e35545a2022f95c9b2efc0f500e9386893a6730c07c.jpg)
text_image
REGIST BANK SELECT FREEZE MEMORY REGISTRATION BANK USER USB1 P1 INFO. UP- SIVE RDER EDIT 2 1 2 3 4 5 6 7 82 Press the [6 ▼] (SAVE) button to save the Bank file.
For instructions on saving, refer to page 26.
Recalling a Registered Panel Setup
The saved Registration Memory Bank files can be recalled by using the REGIST BANK [-]/[+] buttons or the following procedure.
1 Press the REGIST BANK [+] and [-] buttons simultaneously to call up the REGISTRATION BANK Selection Display.
2 Press one of the [A] – [J] buttons to select a Bank.
You can also use the REGIST BANK [-]/[+] buttons, or the [DATA ENTRY] dial and the [ENTER] button to select a Bank.
3 Press one of the green-lit numbered buttons ([1] - [8]) in the Registration Memory section.
NOTE
When recalling the setups including file selection of Song, Style, text, etc. from a USB flash memory, make sure that the appropriate USB flash memory including the registered Song/Style is connected into the [USB TO DEVICE] terminal.
NOTE
Turning the [FREEZE] button on disables recall of specific item(s). To use this function, you need to select the item(s) not to be recalled by accessing [FUNCTION] → [E] REGIST SEQUENCE/FREEZE/VOICE SET → TAB [◀][▶] FREEZE.
Confirming the Registration Memory Information
You can call up the information display to confirm which Voices and Style are memorized to the [1] – [8] buttons of a Registration Memory Bank.
- Simultaneously press the REGIST BANK [+] and [-] buttons to call up the Registration Bank Selection display, then use the [A] – [J] buttons to select the desired Bank.
NOTE
If a certain Voice part is set to off, the Voice name for corresponding part is shown in gray (on the PSR-S950); on the PSR-S750, the Voice part name for the corresponding part is shown in gray.
- Press the [7 ▲] (INFO.) button to call up the information display.
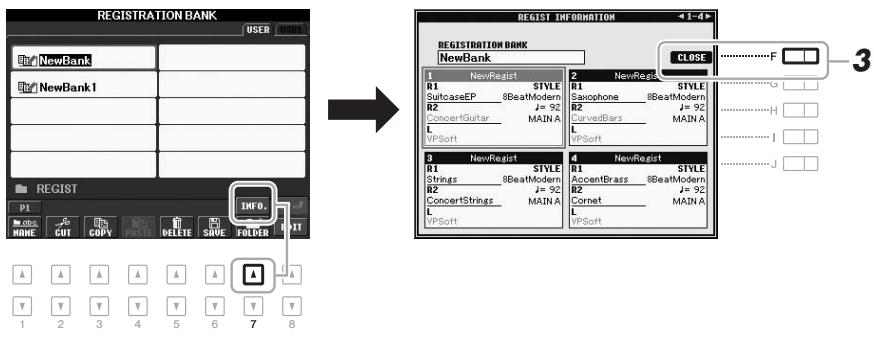
text_image
REGISTRATION BANK USER NewBank NewBank1 REGIST INFORMATION 41-42 1 NewRegist R1 STYLE SuitcaseEP 8BeatModern R2 I = 92 ConcertGuitar MAIN A L VPSoft 2 NewRegist R1 STYLE Saxophone 8BeatModern R2 I = 92 CurvedBars MAIN A L VPSoft 3 NewRegist R1 STYLE Strings 8BeatModern R2 I = 92 ConcertStrings MAIN A L VPSoft 4 NewRegist R1 STYLE AccentBrass 8BeatModern R2 I = 92 Cornet MAIN A L VPSoft 5 CLOSE F 3By using the TAB [◀][▶] buttons, you can switch between the two information display pages: information for the Registration Memory [1] – [4] buttons and information for the [5] – [8] buttons.
NOTE
If a certain Voice part is set to off, the Voice name for corresponding part is shown in gray (on the PSR-S950); on the PSR-S750, the Voice part name for the corresponding part is shown in gray.
- Press the [F] (CLOSE) button to close the information display.
Advanced FeaturesRefer to the Reference Manual on the website, Chapter 7.  | |
| Disabling recall of specific items: | [FUNCTION] → [E] REGIST SEQUENCE/FREEZE/VOICE SET → TAB [◀][▶] FREEZE |
| Calling up Registration Memory numbers in order: | [FUNCTION] → [E] REGIST SEQUENCE/FREEZE/VOICE SET → TAB [◀][▶] REGISTRATION SEQUENCE |

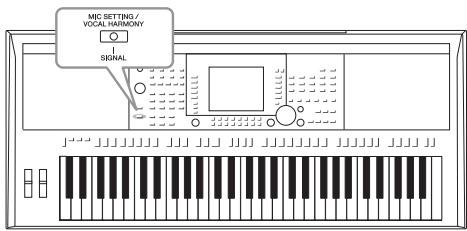
text_image
MIC SETTING/ VOCAL HARMONY SIGNALBy connecting a microphone to the [MIC/LINE IN] jack (standard 1/4" phone jack), you can enjoy singing along with your keyboard performance or with Song playback. The instrument outputs your vocals through the built-in speakers. Moreover, you can automatically apply various Vocal Harmony effects to your voice as you sing.
Connecting a Microphone
1 Before turning on the power of the instrument, set the [INPUT VOLUME] knob to the minimum position.
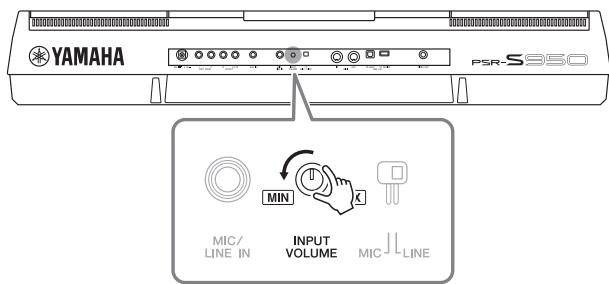
text_image
YAMAHA PSR-S850 MIN INPUT VOLUME MIC LINE IN MIC LINENOTE
Make sure you have a conventional dynamic microphone.
NOTE
Always set the [INPUT VOLUME] knob to minimum when nothing is connected to the [MIC/LINE IN] jack. Since the [MIC/LINE IN] jack is highly sensitive, it may pick up and produce noise even when nothing is connected.
2 Connect the microphone to the [MIC/LINE IN] jack.
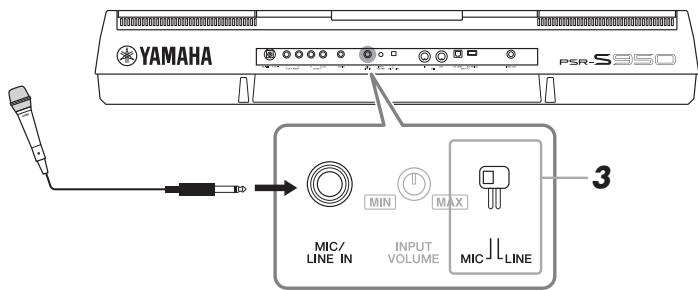
text_image
YAMAHA PSR-S950 MIN MAX MIC/ LINE IN INPUT VOLUME MIC LINE 33 Set the [LINE MIC] switch to "MIC."
4 Turn on the power of the instrument.

NEXT PAGE
5 (If necessary, turn on the microphone.) Adjust the [INPUT VOLUME] knob while singing into the microphone.
Adjust the control while checking the SIGNAL lamp. Make sure to adjust the control so the lamp lights in green. Make sure that the lamp does not light in orange or red, since this indicates that the input level is too high.
![YAMAHA PSR-S950 - (If necessary, turn on the microphone.) Adjust the [INPUT VOLUME] knob while singing into the microphone. - 1](/content/2019/11/115210/images/350a4a4864e6a65744c1de8e8cd8edd7fbd36985be6f7a00b9bfdf263843fa4f.jpg)
text_image
MIC SETTING / VOCAL HARMONY SIGNAL Make sure lamp does not light in orange or red.6 At the bottom of the Main display, adjust the balance of the microphone sound (MIC) with the instrument sound (page 53).
Disconnecting the microphone
- Set the [INPUT VOLUME] knob to the minimum position.
- Disconnect the microphone from the [MIC/LINE IN] jack.
Applying the Vocal Harmony Effects to Your Voice
This section covers the Vocal Harmony Effects that can be applied to your voice via the microphone connected in the previous instructions.
1 Press the [MIC SETTING/VOCAL HARMONY] button to call up the Mic Setting/Vocal Harmony display.
![YAMAHA PSR-S950 - Press the [MIC SETTING/VOCAL HARMONY] button to call up the Mic Setting/Vocal Harmony display. - 1](/content/2019/11/115210/images/5daea2d52bb56e7b1d2b70d60cc4e516021d8de5b919ef9b86ddf93493c38aee.jpg)
flowchart
graph TD
    A["MIC SETTING / VOCAL HARMONY"] --> B["SIGNAL"]
    B --> C["Type SELECT"]
    C --> D["MIC SETTING"]
    D --> E["INPUT LEVEL"]
    E --> F["ON"]
    E --> G["TALK"]
    E --> H["OFF"]
    E --> I["OR"]
    style C fill:#f9f,stroke:#333
    style D fill:#ccf,stroke:#333
    style E fill:#cfc,stroke:#333
2 Press the [D]/[E] (TYPE SELECT) buttons to call up the Vocal Harmony Selection display.
3 Select a Vocal Harmony type by using the [A] - [J] buttons.
To call up the other display pages for further selections, press one of the [1 ▲] – [5 ▲] buttons.
![YAMAHA PSR-S950 - Select a Vocal Harmony type by using the [A] - [J] buttons. - 1](/content/2019/11/115210/images/2c4c9f618e34ffde07c81c9b2d46c1fc3423fcaf4eb04f23f7954f58680165dd.jpg)
NEXT PAGE
On the display, you can confirm that one of the three icons shown below is assigned to each Vocal Harmony Type. Each of these icons indicates the Harmony mode.
| Icon | Mode | Descriptions |
![YAMAHA PSR-S950 - Select a Vocal Harmony type by using the [A] - [J] buttons. - 2](/content/2019/11/115210/images/85d7d06be50664f9c01ff12c06c754175e9c23e54911637dcab3b60c5b7817f8.jpg) (Microphone) (Microphone) | Chordal | The harmony notes are determined by the chords you play in the chord section (with [ACMP] turned on), the left hand section (with [ACMP] turned off and [LEFT] turned on) or the chord data of a Song. |
![YAMAHA PSR-S950 - Select a Vocal Harmony type by using the [A] - [J] buttons. - 3](/content/2019/11/115210/images/4d278fe61fbc888462f98f9e4852be700d7a75a2498a2041aa285b6e28d3bccd.jpg) (Microphone with FX) (Microphone with FX) | The harmony notes are determined in the same way as in Microphone above. However, effects such as Vocal Doubler and PokerPhaser are applied. Harmony may or may not be applied depending on the selected type. (If harmony is not applied, the [I] (HARMONY) button in the Mic Setting/Vocal Harmony display is set to OFF. | |
![YAMAHA PSR-S950 - Select a Vocal Harmony type by using the [A] - [J] buttons. - 4](/content/2019/11/115210/images/81a808805ebcd28af4aee1139e786ead01970d78e1050993c3e508cda118fafa.jpg) (Microphone and keyboard) (Microphone and keyboard) | Vocoder | The microphone sound is output via the notes you play on the keyboard or via the Song play-back notes. |
| VocoderMono | Same as the Vocoder basically. In this mode, only single-note melodies or lines can be played back (with last-note priority). |
4 Follow the steps below, depending on which Type (and mode) you selected.
If you selected the Chordal Vocal Harmony Type:
4-1 Turn the [ACMP] button on.
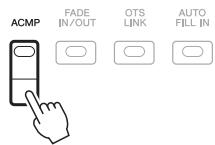
text_image
ACMP FADE IN/OUT OTS LINK AUTO FILL IN4-2 Play chords with your left hand, or play back the Song which contains chord data.
Vocal harmonies based on the chords are applied to your singing.
If you selected the Vocoder or Vocoder Mono Vocal Harmony Type:
4-1 Call up the SETUP window in the display by pressing the [8 ▲] button.
NOTE
If you selected a Type having an "FX" icon, your voice will be processed with effects, but may not have harmonies applied.
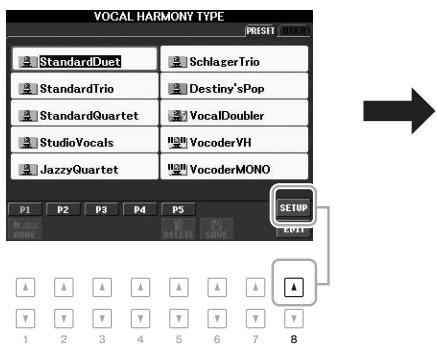
flowchart
graph TD
    A["StandardDuet"] --> B["SchlagerTrio"]
    C["StandardTrio"] --> D["Destiny'sPop"]
    E["StandardQuartet"] --> F["VocalDoubler"]
    G["StudioVocals"] --> H["VocoderVH"]
    I["JazzyQuartet"] --> J["VocoderMONO"]
    K["P1 P2 P3 P4 P5"] --> L["SETUP"]
    M["1 2 3 4 5 6 7 8"] --> N["OK"]
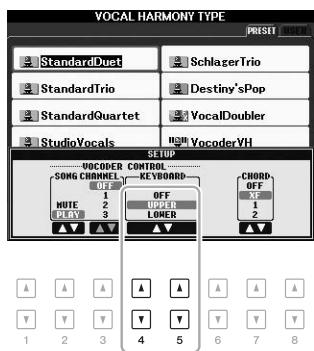
text_image
VOCAL HARMONY TYPE PRESET StandardDue1 SchlagerTrio StandardTrio Destiny'sPop StandardQuartet VocalDoubler StudioVocals HIGH VocoderVH SETUP VOCOER CONTROL SONG CHANNELS - KEYBOARD OFF 1 OFF MUTE 2 LINDER PLAY 3 LOWER ▲▼ ▲▼ ▲▼ CHORD- OFF 1 2 3 4 5 6 7 84-2
4-2 Use the [4 ]/[5 ] buttons to change the Keyboard setting (OFF, UPPER, LOWER), if necessary.
Select UPPER to have the Vocoder effect applied by your right-hand-played part, LOWER to have it applied by your left-hand-played part, and OFF not to have any Vocoder effect by your keyboard playing. For more information on the Keyboard setting to control the Vocoder effect, refer to the Reference manual on the website.
4-3 Play melodies on the keyboard or play back a Song, and sing into the microphone. You'll notice that you don't actually have to sing pitched notes. The microphone sound is output via the notes or note you play on the keyboard or Song playback.
NOTE
For Vocoder, the effect is applied to a maximum of three notes of the chord you play; for Vocoder-Mono, the effect is only applied to a single note (last note played).
Using the Talk function
Turning the Talk function on by pressing the [G] (TALK) button in the Mic Setting display lets you temporarily cancel the microphone effects or vocal harmony. This is useful when you want to talk between songs during a performance.
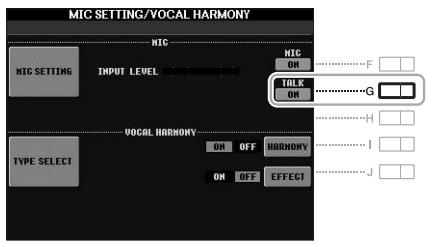
text_image
MIC SETTING/VOCAL HARMONY MIC MIC SETTING INPUT LEVEL TOLK ON G TYPE SELECT ON OFF HARMONY ON OFF EFFECTYou can also change the Talk settings to suit your preferences. For details, refer to the Reference Manual.
| Advanced FeaturesRefer to the Reference Manual on the website, Chapter 8. [YDSX] | |
| Setting up the Vocal Harmony Control parameters: | [MIC SETTING/VOCAL HARMONY] → [D]/[E] (TYPE SELECT) → [8 ▲] (SETUP) |
| Editing the Vocal Harmony Types:• Editing the Overview tab parameters:• Editing the Part tab parameters:• Editing the Detail tab parameters: | [MIC SETTING/VOCAL HARMONY] → [D]/[E] (TYPE SELECT → (select a Vocal Harmony type) → [8 ▼] (EDIT) → TAB [◀][▶] OVERVIEW→ TAB [◀][▶] PART→ TAB [◀][▶] DETAIL |
| Microphone (Vocal/Talk) settings: | [MIC SETTING/VOCAL HARMONY] → [A]/[B] (MIC SETTING) → TAB[◀][▶] VOCAL/TALK |
| Saving the Microphone settings: | [MIC SETTING/VOCAL HARMONY] → [A]/[B] (MIC SETTING) → [H] (USER MEMORY) → [6 ▼] (SAVE) |
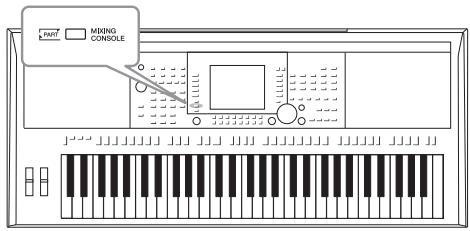
text_image
PART & PART MIXING CONSOLEThe Mixing Console gives you intuitive control over various sonic aspects of the keyboard parts and Song/Style channels, including volume balance and the timbre of the sounds.
Basic Procedure
1 Press the [MIXING CONSOLE] button to call up the MIXING CONSOLE display.
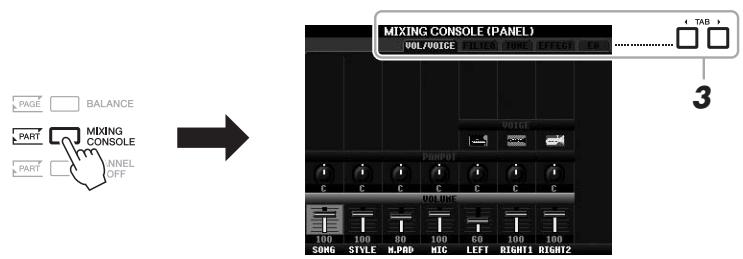
text_image
MIXING CONSOLE (PANEL) VOL/VOICE TAB 3 PAGE BALANCE PART MIXING CONSOLE PART OFF VOL DNE 100 100 80 100 60 100 100 SONG STYLE M.PAD MIG LEFT RIGHT1 RIGHT22 Press the [MIXING CONSOLE] button repeatedly to call up the MIXING CONSOLE display for the relevant parts.
The part name is indicated at the top of the display.
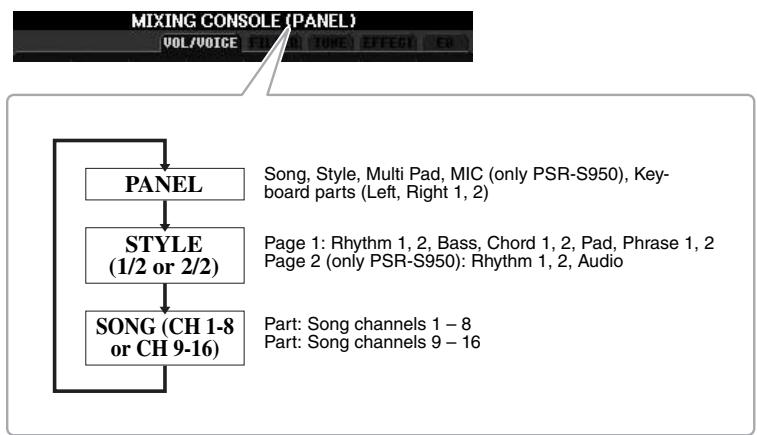
flowchart
graph TD
    A["MIXING CONSOLE (PANEL)"] --> B["PANEL"]
    B --> C["STYLE (1/2 or 2/2)"]
    C --> D["SONG (CH 1-8 or CH 9-16)"]
    D --> E["Part: Song channels 1 – 8\nPart: Song channels 9 – 16"]
    A --> F["Song, Style, Multi Pad, MIC (only PSR-S950), Keyboard parts (Left, Right 1, 2)"]
    C --> G["Page 1: Rhythm 1, 2, Bass, Chord 1, 2, Pad, Phrase 1, 2\nPage 2 (only PSR-S950): Rhythm 1, 2, Audio"]
NOTE
You can switch between the Pages and Parts of STYLE and SONG by pressing the [A] (PART) button.
3 Use the TAB [◀][▶] buttons to call up the desired page.
For details about each display Page, refer to the Reference Manual on the website.
• VOL/VOICE: Changes the Voice for each part and adjusts panning and volume for each part.
- FILTER: Adjusts the Harmonic Content (resonance) and sound brightness.
- TUNE: Pitch-related settings (tuning, transpose, etc.).
- EFFECT: Selects the effect type and adjusts the effect depth for each part.
- EQ: Adjusts equalization parameters to correct the tone or timbre of the sound.
4 Use the [A] - [J] buttons to select a parameter, then use the [1 ▲▼] - [8 ▲▼] buttons to set the value for each part.
5 Save your MIXING CONSOLE settings.
• To save the PANEL display settings:
Register them to Registration Memory (page 79).
• To save the STYLE display settings:
Save them as Style data.
- Call up the operation display.
[FUNCTION] → [F] DIGITAL REC MENU → [B] STYLE CREATOR - Press the [EXIT] button to close the REC CHANNEL display.
- Press the [I] (SAVE) button to call up the Style Selection display for saving your data, then save it (page 26).
• To save the SONG display settings:
First register the edited settings as part of the Song data (SETUP), then save the Song.
- Call up the operation display.
[FUNCTION] [F] DIGITAL REC MENU [A] SONG CREATOR - Use the TAB [◀][▶] buttons to select the CHANNEL Page.
- Use the [A]/[B] buttons to select "SETUP."
- Press the [D] (EXECUTE) button.
- Press the [I] button to call up the Song Selection display for saving your data, then save it (page 26).
NOTE
If you simultaneously hold down one of the [A] - [J] buttons and use the [1 ▲▼] - [8 ▲▼] buttons (or the DATA ENTRY dial), you can instantly set the same parameter value to all other parts.
| Advanced FeaturesRefer to the Reference Manual on the website, Chapter 9. | |
| Editing VOL/VOICE parameters: | [MIXING CONSOLE] → TAB [◀][▶] VOL/VOICE |
| Editing FILTER parameters: | [MIXING CONSOLE] → TAB [◀][▶] FILTER |
| Editing TUNE parameters: | [MIXING CONSOLE] → TAB [◀][▶] TUNE |
| Changing an Effect type: | [MIXING CONSOLE] → TAB [◀][▶] EFFECT → [F] TYPE |
| Editing EQ parameters: | [MIXING CONSOLE] → TAB [◀][▶] EQ |
This chapter covers the terminals and jacks of this instrument. For details on the locations of these connectors, refer to “Panel Controls and Terminals” on pages 12 – 13.

CAUTION
Before connecting the instrument to other electronic components, turn off the power of all the components. Also, before turning any components on or off, make sure to set all volume levels to minimum (0). Otherwise, damage to the components, electrical shock, or even permanent hearing loss may occur.
Connecting a Microphone or Guitar ([MIC/LINE IN] jack)
![YAMAHA PSR-S950 - Connecting a Microphone or Guitar ([MIC/LINE IN] jack) - 1](/content/2019/11/115210/images/479f6ebd0ed8c0a0835279fcff1d9abea0661abbbf932ba5c406bd35bc18cbad.jpg)
![YAMAHA PSR-S950 - Connecting a Microphone or Guitar ([MIC/LINE IN] jack) - 2](/content/2019/11/115210/images/42b7ad072a5b5313377395bf6a1693531b49cb9d1f75de1fac359e1520045199.jpg)
text_image
YAMAHA PSR-S850 MIN MAX MIC/ LINE IN INPUT VOLUME MIC LINETo the [MIC/LINE IN] jack (standard 1/4" phone jack), you can connect a microphone, guitar, or other various equipment. For instructions on connecting a microphone, refer to page 82.
Note that you need to select “MIC” or “LINE IN” depending on the connected equipment. When the output level of the connected equipment (such as a microphone, guitar, bass) is low, set the [MIC LINE] switch to “MIC.” When the output level of the connected equipment (such as a synthesizer, keyboard, CD player) is high, set the [MIC LINE] switch to “LINE.”
Connecting Audio Devices (OUTPUT [L/L+R]/[R] jacks, [AUX IN] jack)
Using an External Stereo System for Playback
You can connect a stereo system to amplify the instrument's sound by using the OUTPUT [L/L+R]/[R] jacks. When using the PSR-S950, the microphone or guitar sound connected to the instrument's [MIC/LINE IN] jack is output at the same time.
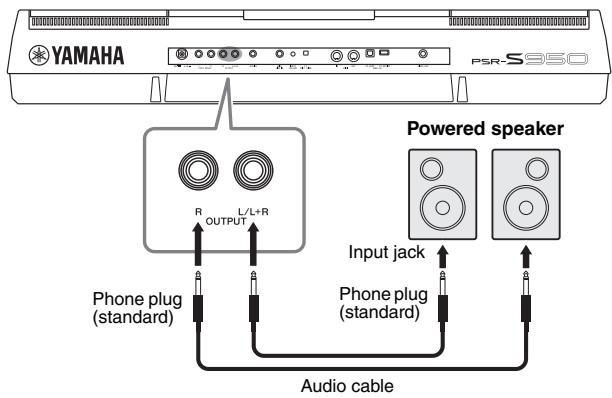
text_image
YAMAHA PSR-S550 R OUTPUT L/L+R Phone plug (standard) Audio cable Powered speaker Input jack Phone plug (standard)When these are connected, you can use the instrument's [MASTER VOLUME] dial to adjust the volume of the sound output to the external device.
NOTE
Use audio cables and adaptor plugs having no (zero) resistance.
NOTE
Use only the [L/L+R] jack for connection with a monaural device.
NOTICE
When the instrument's sound is output to an external device, first turn on the power to the instrument, then to the external device. Reverse this order when you turn the power off. Otherwise, damage to the instrument and external device may occur. Because this instrument's power may automatically be turned off due to the Auto Power Off function (page 15), turn off the power to the external device, or disable the Auto Power Off when you do not intend to operate the instrument for a while.
NOTICE
Do not route the output from the [OUTPUT] jacks to the [AUX IN] jack. If you make this connection, the signal input at the [AUX IN] jack is output from the [OUTPUT] jacks. These connections could result in a feedback loop that will make normal performance impossible, and may even damage the equipment.
Playing a Portable Audio Player with the Built-in Speakers
You can connect the headphone jack of a portable audio player to the instrument's [AUX IN] jack, letting you hear the sound of that portable audio player through the built-in speakers of the instrument.
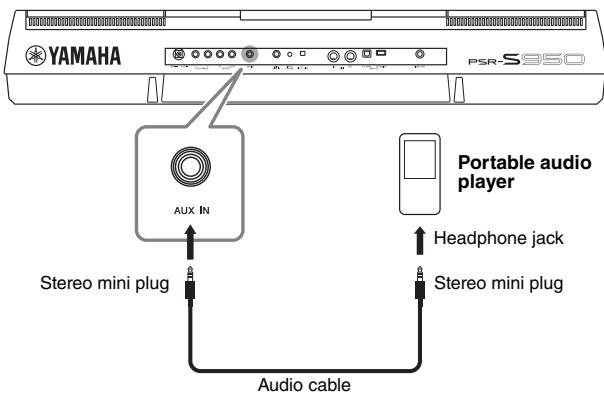
text_image
YAMAHA PSR-S950 Portable audio player Aux IN Stereo mini plug Headphone jack Stereo mini plug Audio cableNOTICE
When the sound of an external device is output to the instrument, first turn on the power to the external device, then to the instrument. Reverse this order when you turn the power off. Otherwise, damage to the instrument and external device may occur.
NOTE
The instrument's [MASTER VOLUME] setting affects the input signal from the [AUX IN] jack.
Connecting a Separate TV Monitor ([VIDEO OUT] jack)
![YAMAHA PSR-S950 - Connecting a Separate TV Monitor ([VIDEO OUT] jack) - 1](/content/2019/11/115210/images/b399ebb6b05e03c4c92cd66f6094b9d54e13e1d5594da11ffb1ef8a1a032f550.jpg)
You can connect the instrument directly to an external TV monitor for displaying the lyrics and chords of your song data on a large screen.
![YAMAHA PSR-S950 - Connecting a Separate TV Monitor ([VIDEO OUT] jack) - 2](/content/2019/11/115210/images/232c47c4bc30fc9e0c54b7f318ce530f9f8dbbb0fbc995cdaf8325290d959751.jpg)
text_image
YAMAHA PSR-S950 VIDEO OUT Video cable RCA pin plug VIDEO INCAUTION
Avoid looking at the television or video monitor for prolonged periods of time since doing so could damage your eyesight. Take frequent breaks and focus your eyes on distant objects to avoid eye-strain.
Screen Out Settings
1 Call up the operation display.
[FUNCTION] → [I] UTILITY → TAB [◀][▶] SCREEN OUT
2 Set the monitor type and screen contents.
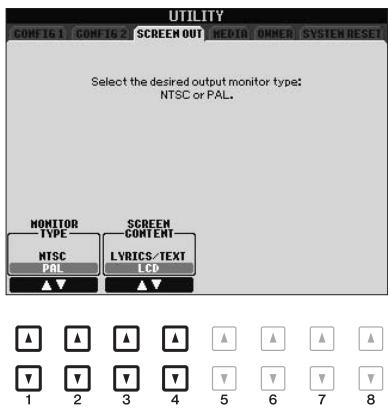
text_image
UTILITY CONFIG 1 CONFIG 2 SCREEN OUT MEDIA OWNER SYSTEM RESET Select the desired output monitor type: NTSC or PAL. MONITOR TYPE NTSC PAL SCREEN CONTENT LYRICS/TEXT LCD ▲▼ ▲▼ 1 2 3 4 5 6 7 8| [1 ▲▼]/[2 ▲▼] | MONITOR TYPE | Selects the desired output monitor type (NTSC or PAL) to correspond to the standard used by your video equipment. NOTEThe instrument's default setting for the external TV monitor signal is “PAL.” Depending on your particular locale, the standard may be different and the setting should be changed accordingly. (For example, NTSC is generally used in North America.) Check the standard used by your TV monitor, and if it is not PAL, change the setting to “NTSC.” |
| [3 ▲▼]/[4 ▲▼] | SCREEN CONTENT | Determines the contents of the Video Out signal.LYRICS/TEXT: Only the lyrics of the Song or text files are output, regardless of the display that is called up on the instrument.LCD: The currently selected display is output. |
Connecting a Footswitch/Foot Controller ([FOOT PEDAL] jacks)
Optional footswitches (Yamaha FC4 or FC5) and an optional Foot controller (Yamaha FC7) can be connected to one of the FOOT PEDAL jacks. A footswitch can be used for switching functions on and off, while a foot controller controls continuous parameter such as volume.
Default functions
| FOOT PEDAL 1 | Switches sustain on or off. Use an FC4 or FC5 footswitch. |
| FOOT PEDAL 2 | Controls the Super Articulation Voices (page 35). Use an FC4 or FC5 footswitch. |
![YAMAHA PSR-S950 - Connecting a Footswitch/Foot Controller ([FOOT PEDAL] jacks) - 1](/content/2019/11/115210/images/777a3d524f2e60818a0cc3dab1ca8a7c6bd5c4a28c587d02a8b90a549cc362ea.jpg)
text_image
YAMAHA 1 FOOT PEDAL 2 350 FC4 FC5 FC7NOTE
Do not connect or disconnect the pedal when the power is on.
By assigning the function for each foot switch/controller, you can conveniently control sustain and volume with either pedal jack or control many other functions by pedal.
• Example: Controlling Song Start/Stop by footswitch
Connect a footswitch (FC4 or FC5) to one of the FOOT PEDAL jacks.
To assign the function to the connected pedal, select “SONG PLAY/PAUSE” in the operation display: [FUNCTION] → [D] CONTROLLER → TAB [◀][▶] FOOT PEDAL.
| Advanced FeaturesRefer to the Reference Manual on the website, Chapter 10. |  | |
| Assigning specific functions to each foot pedal: | [FUNCTION] → [D] CONTROLLER → TAB [◀][▶] FOOT PEDAL | |
Connecting a USB Flash Memory ([USB TO DEVICE] terminal)
By connecting a USB flash memory to the instrument's [USB TO DEVICE] terminal, you can save data you've created to the device.
Precautions when using the [USB TO DEVICE] terminal
When connecting a USB device to the terminal, be sure to handle the USB device with care. Follow the important precautions below.
NOTE
For more information about the handling of USB devices, refer to the owner's manual of the USB device.
Compatible USB devices
- USB flash memory
- USB hub
The instrument does not necessarily support all commercially available USB devices. Yamaha cannot guarantee operation of USB devices that you purchase. Before purchasing a USB device for use with this instrument, please visit the following web page:
http://download.yamaha.com/
NOTE
Other USB devices such as a computer keyboard or mouse cannot be used.
Connecting USB device
- When connecting a USB device to the [USB TO DEVICE] terminal, make sure that the connector on the device is appropriate and that it is connected in the proper direction.
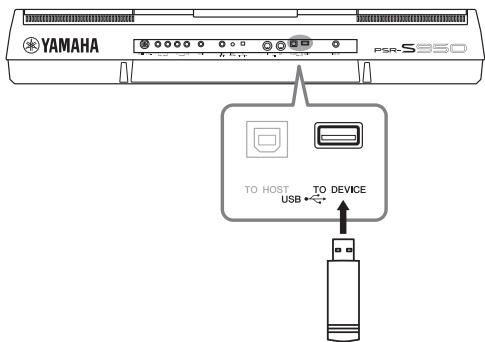
text_image
YAMAHA PSR-S350 TO HOST TO DEVICE USBNOTICE
- Avoid connecting or disconnecting the USB storage device during playback/recording, file management (such as Save, Copy, Delete and Format operations) or accessing the USB storage device. Failure to do so may result in "freezing" of the operation of the instrument or corruption of the USB storage device and the data.
- When connecting then disconnecting the USB storage device (and vice versa), make sure to wait a few seconds between the two operations.
NOTE
- If you intend to connect two USB flash memories at the same time to a terminal, you should use a USB hub device. The USB hub must be self-powered (with its own power source) and the power must be on. Only one USB hub can be used. If an error message appears while using the USB hub, disconnect the hub from the instrument, then turn on the power of the instrument and re-connect the USB hub.
- When connecting a USB cable, make sure that the length is less than 3 meters.
• (PSR-S950) The instrument supports USB 1.1 and 2.0. - (PSR-S750) Though the instrument supports the USB 1.1 standard, you can connect and use a USB 2.0 storage device with the instrument.
Using USB Flash Memories
By connecting the instrument to a USB flash memory, you can save data you've created to the connected USB flash memory, as well as read data from the connected USB flash memory.
Maximum number of USB flash memories allowed
Up to two USB flash memories can be simultaneously connected to the [USB TO DEVICE] terminal. (If necessary, use a USB hub. The number of USB flash memories that can be used simultaneously with the instrument even when a USB hub is used is a maximum of two.)
Formatting USB flash memory
When a USB flash memory is connected, a message may appear prompting you to format the USB flash memory. If so, execute the Format operation (page 93).
NOTICE
The format operation overwrites any previously existing data. Make sure that the USB flash memory you are formatting does not contain important data. Proceed with caution, especially when connecting multiple USB flash memories.
To protect your data (write-protect)
To prevent important data from being inadvertently erased, apply the write-protect provided with each USB flash memory. If you are saving data to the USB flash memory, make sure to disable write-protect.
Turning off the instrument
When turning off the instrument, make sure that the instrument is NOT accessing the USB flash memory by playback/recording or file management (such as during Save, Copy, Delete and Format operations). Failure to do so may corrupt the USB flash memory and the data.
When a USB flash memory is connected, a message may appear prompting you to format the USB flash memory. If so, execute the format operation.
1 Connect a USB flash memory for formatting into the [USB TO DEVICE].
2 Call up the operation display.
[FUNCTION] → [I] UTILITY → TAB [◀][▶] MEDIA
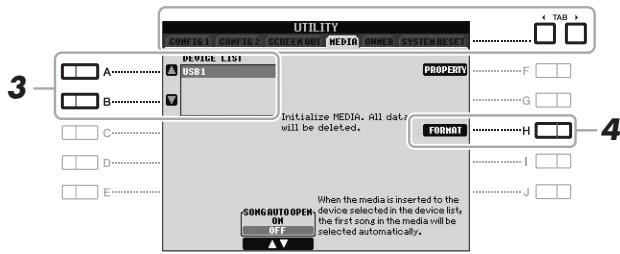
text_image
UTILITY CONFIG 1 | CONFIG 2 | SCREENOUT | MEDIA | NUMBER | SYSTEM RESET TAD > A............. B............ C........... D........... E........... DESIGN LIST USB1 PROPERY F G Initialize MEDIA. All data will be deleted. FORMAT H I J SOMG AUTO OPEN ON OFF When the media is inserted to the device selected in the device list, the first song in the media will be selected automatically.NOTICE
The format operation deletes any previously existing data. Make sure that the USB flash memory you are formatting does not contain important data. Proceed with caution, especially when connecting multiple USB flash memories.
NOTE
Playback of Style, Song and Multi Pads is stopped to enable execution of the format operation.
3 Press the [A]/[B] buttons to select the USB flash memory to be formatted from the device list.
The indications USB 1 and USB 2 will be displayed depending on the number of the connected devices.
4 Press the [H] (FORMAT) button to format the USB flash memory.
Confirming the remaining memory
You can check the remaining memory of the connected USB flash memory by pressing the [F] (PROPERTY) button.
Connecting to a Computer ([USB TO HOST] terminal)
By connecting a computer to the [USB TO HOST] terminal, you can transfer data between the instrument and the computer via MIDI. For details on using a computer with this instrument, refer to the “Computer-related Operations” on the Yamaha website (page 7).
![YAMAHA PSR-S950 - Connecting to a Computer ([USB TO HOST] terminal) - 1](/content/2019/11/115210/images/5fa7f806fdb40640986c0957f97dc861bfc71c9d38a64ef83fa884456914a5b3.jpg)
text_image
YAMAHA PSR-S850 USB TO HOST USB TO DEVICE USB cableNOTE
- The instrument will begin transmission a short time after the USB connection is made.
- When using a USB cable to connect the instrument to your computer, make the connection directly without passing through a USB hub.
- For information on setting up your sequence software, refer to the owner's manual of the relevant software.
NOTICE
Use an AB type USB cable of less than 3 meters. USB 3.0 cables cannot be used.
Connecting External MIDI Devices (MIDI [IN]/[OUT] terminals)
Use the MIDI [IN]/[OUT] terminals and standard MIDI cables to connect external MIDI devices (keyboard, sequencer, etc.).
- MIDI IN
Receives MIDI messages from another MIDI device.
- MIDI OUT
Transmits MIDI messages generated by the instrument to another MIDI device.
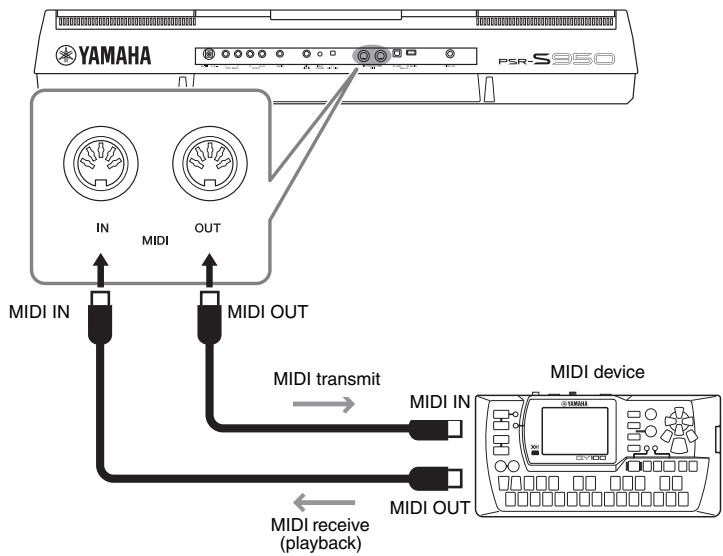
text_image
YAMAHA PSR-S950 IN MIDI OUT MIDI IN MIDI OUT MIDI transmit MIDI device MIDI IN MIDI OUT MIDI receive (playback)For detailed information about the instrument's MIDI settings, refer to the Reference Manual.
NOTE
For a general overview of MIDI and how you can effectively use it, refer to "MIDI Basics" which is downloadable from Yamaha website (page 7).
Advanced Features
Refer to the Reference Manual on the website, Chapter 10.

MIDI settings:
[FUNCTION] → [I] MIDI → [8 ▼] (EDIT)
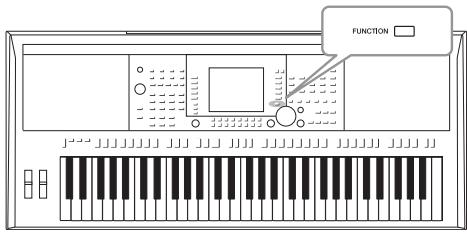
text_image
FUNCTIONThe Utility section in the Function menu provides a variety of convenient tools and settings for the instrument. These include general settings that affect the entire instrument, as well as detailed settings for specific functions. Also included are data reset functions and storage media control, such as media formatting.
Basic Procedure
1 Call up the operation display.
[FUNCTION] [I] UTILITY
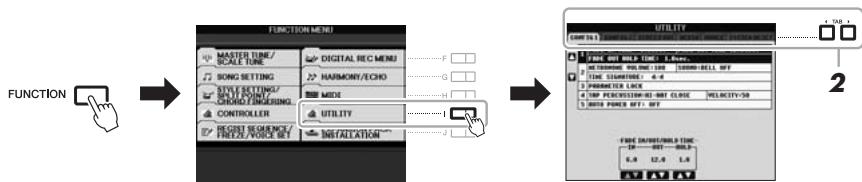
flowchart
graph LR
    A["FUNCTION"] --> B["FUNCTION MENU"]
    B --> C["FORM 1"]
    C --> D["2"]
    D --> E["2"]
    E --> F["2"]
    F --> G["2"]
    G --> H["2"]
    H --> I["2"]
    I --> J["2"]
    J --> K["2"]
    K --> L["2"]
    L --> M["2"]
    M --> N["2"]
    N --> O["2"]
    O --> P["2"]
    P --> Q["2"]
    Q --> R["2"]
    R --> S["2"]
    S --> T["2"]
    T --> U["2"]
    U --> V["2"]
    V --> W["2"]
    W --> X["2"]
    X --> Y["2"]
    Y --> Z["2"]
    Z --> AA["2"]
    AA --> AB["2"]
    AB --> AC["2"]
    AC --> AD["2"]
    AD --> AE["2"]
    AE --> AF["2"]
    AF --> AG["2"]
    AG --> AH["2"]
    AH --> AI["2"]
    AI --> AJ["2"]
    AJ --> AK["2"]
    AK --> AL["2"]
    AL --> AM["2"]
    AM --> AN["2"]
    AN --> AO["2"]
    AO --> AP["2"]
    AP --> AQ["2"]
    AQ --> AR["2"]
    AR --> AS["2"]
    AS --> AT["2"]
    AT --> AU["2"]
    AU --> AV["2"]
    AV --> AW["2"]
    AW --> AX["2"]
    AX --> AY["2"]
2 Use the TAB [◀][▶] buttons to call up desired page.
- CONFIG 1
General settings such as Fade in/out time, Metronome sound, Parameter lock, Tap Tempo sound, Auto Power Off.
- CONFIG 2
General settings such as displayed items for Voice/Style selection display, pop-up display time, etc.
• SCREEN OUT (PSR-S950)
Monitor type and display content settings which are necessary when connecting a TV monitor (page 90).
• MEDIA
Settings related to a connected USB flash memory, such as formatting (page 93) and confirmation of memory size.
- OWNER
Settings of Owner name, Message language (page 16) and background of the Main display. Parameter setting backup/restore operations (page 31) can also be done in this page.
- SYSTEM RESET
Resets the settings of the instrument.
3 If necessary, use the [A]/[B] buttons to select the desired parameter.
4 Change the settings by using the [1 ] - [8 ] buttons or execute the operation by using the [D] - [J] buttons.
For details of the Utility settings, refer to the Reference Manual on the website.
| Overall | |
| A click or pop is heard when the power is turned on or off. | Electrical current is being applied to the instrument. This is normal. |
| Noise is heard from the instrument's speakers. | Noise may be heard if a mobile phone is used near the instrument or if the phone is ringing. Turn off the mobile phone, or use it further away from the instrument. |
| There is a slight difference in sound quality among different notes played on the keyboard. | This is normal and is a result of the instrument's sampling system. |
| Some Voices have a looping sound. | |
| Some noise or vibrato is noticeable at higher pitches, depending upon the Voice. | |
| The overall volume is too low or no sound is heard. | The master volume may be set too low. Set it to an appropriate level with the [MASTER VOLUME] dial. |
| All keyboard parts are set to off. Use the PART ON/OFF [RIGHT 1]/[RIGHT 2]/[LEFT] button to turn it on. | |
| The volume of the individual parts may be set too low. Raise the volume in the BALANCE display (page 53). | |
| Make sure the desired channel is set to ON (pages 52, 57). | |
| Headphones are connected, disabling the speaker output. Unplug the headphones. | |
| The [FADE IN/OUT] button is on, muting the sound. Press the [FADE IN/OUT] button to turn the function off. | |
| The sound is distorted or noisy. | The volume may be turned up too high. Make sure all relevant vol-ume settings are appropriate. |
| This may be caused by certain effects or filter settings. Check the effect or filter settings and change them accordingly, referring to the Reference Manual. | |
| Not all simultaneously played notes sound. | You are probably exceeding the maximum polyphony (page 99) of the instrument. When the maximum polyphony is exceeded, the earliest played notes will stop sounding, letting the latest played notes sound. |
| The keyboard volume is lower than the Song/Style playback vol-ume. | The volume of the keyboard parts may be set too low. Raise the volume in the BALANCE display (page 53). |
| The Main display does not appear even when turning the power on. | This may occur if a USB flash memory has been installed to the instrument. Installation of some USB flash memories may result a long interval between turning the power on and appearance of the Main display. To avoid this, turn the power on after disconnecting the device. |
| Some characters of the file/folder name are garbled. | The language settings have been changed. Set the appropriate language for the file/folder name (page 16). |
| An existing file is not shown. | The file extension (.MID, etc.) may have been changed or deleted. Manually rename the file, adding the appropriate extension, on a computer. |
| Data files with names of more than 50 characters cannot be han-dled by the instrument. Rename the file, reducing the number of characters to 50 or less. | |
| When the power is turned on, the message “The USB storage devices cannot be authenticated” appears. | If a protected Expansion Pack is installed to the instrument, in order to use the Voices or Styles contained in the Expansion Pack you need to connect the USB flash memory which was used for installing. Connect the proper USB flash memory to the instrument and turn the power to the instrument on again. |
| Voice | |
| The Voice selected from the Voice Selection display does not sound. | Check whether or not the selected part is turned on (page 35). If necessary, press the appropriate PART ON/OFF button to turn the part on. |
| A strange “flanging” or “doubling” sound occurs. The sound is slightly different each time the keys are played. | The RIGHT 1 and RIGHT 2 parts are set to “ON,” and both parts are set to play the same Voice. Turn off the RIGHT 2 part or change the Voice of one of the parts. |
| Some Voices will jump an octave in pitch when played in the upper or lower registers. | This is normal. Some Voices have a pitch limit which, when reached, causes this type of pitch shift. |
| Style | |
| The Style does not start even when the [START/STOP] button is pressed. | The Rhythm channel of the selected Style may not contain any data. Turn the [ACMP] button on and play left-hand section on the keyboard to sound the accompaniment part of the Style. |
| Only the rhythm channel plays. | Make sure the Auto Accompaniment function is turned on; press the [ACMP] button. |
| You may be playing keys in the right hand range of the keyboard. Make sure to play keys in the chord range of the keyboard. | |
| Styles in a USB flash memory cannot be selected. | If the size of the Style data is large (about 120 KB or greater), the Style cannot be selected because the data is too large to be handled by the instrument. |
| Song | |
| Songs cannot be selected. | This may be because the language settings have been changed. Set the appropriate language for the Song file name. |
| If the size of the Song data is large (about 300 KB or greater), the Song cannot be selected because the data is too large to be handled by the instrument. | |
| Song playback does not start. | The Song has been stopped at the end of the Song data. Return to the beginning of the Song by pressing the SONG [■] (STOP) button. |
| Song playback stops before the Song is finished. | The Guide function is turned on. (In this case, playback is “waiting” for the correct key to be played.) Press the [GUIDE] button to turn off the guide function. |
| The measure number is different from that of the score in the Song Position display, shown by pressing the [◀](REW)/[▶](FF) buttons. | This happens when playing back music data for which a specific, fixed tempo is set. |
| When playing back a Song, some channels do not play. | Playback of these channels may be set to “OFF.” Turn playback on for those channels that are set to “OFF” (page 57). |
| The tempo, beat, measure and music notation is not displayed correctly. | Some Song data for the instrument has been recorded with special “free tempo” settings. For such Song data, the tempo, beat, measure and music notation will not be displayed correctly. |
| USB Audio function | |
| The message “This drive is busy now.” appeared, and then the recording was aborted. | Make sure to use a compatible USB flash memory (page 92). |
| Make sure that the USB flash memory has enough memory (page 68). | |
| If you are using a USB flash memory to which data has already been recorded, check first that no important data remains on the device, then format it (page 93) and try recording again. | |
| Audio files cannot be selected. | The file format may not be compatible with the instrument. The compatible formats are: MP3 and WAVE (PSR-S950), WAVE (PSR-S750). The DRM protected files cannot be played back. |
| Recorded file is played back at a different volume compared to when it was recorded. | The audio playback volume has been changed. Setting the volume value to 100 plays back the file at the same volume as when it was recorded (page 67). |
| Mixing Console | |
| The sound seems strange or different than expected when changing a rhythm Voice (drum kit, etc.) of the Style or Song from the Mixer. | When changing the rhythm/percussion Voices (drum kits, etc.) of the Style and Song from the VOICE parameter, the detailed settings related to the drum voice are reset, and in some cases you may be unable to restore the original sound. In the case of Song playback, you can restore the original sound by returning to the beginning of the Song and playing back from that point. In the case of Style play, you can restore the original sound by selecting the same Style again. |
| Microphone/Vocal Harmony (PSR-S950) | |
| The microphone input signal cannot be recorded. | The microphone input signal cannot be recorded by Song recording. Use the USB Audio function (page 67). |
| Harmony can be heard in addition to the microphone sound. | Vocal Harmony is set to “ON.” Turn Vocal Harmony off (page 83). |
| The Vocal Harmony effect sounds distorted or out-of-tune. | Your vocal microphone may be picking up extraneous sounds, such as the Style sound from the instrument. In particular, bass sounds can cause mistracking of the Vocal Harmony. To remedy this:Sing as closely to the microphone as possible.Use a unidirectional microphone.Turn down the Master volume, Style volume, or Song volume control (page 14, 53). |
| Foot Pedal | |
| The on/off setting of the footswitch connected to the FOOT PEDAL jack is reversed. | Turn the instrument's power off, then turn it on again without pressing the footswitch. |
| [AUX IN] jack | |
| Sound input to the [AUX IN] jack is interrupted. | The output volume of the external device connected to this instrument is too low. Increase the output volume of the external device. The volume level reproduced via this instrument can be adjusted by using the [MASTER VOLUME] dial. |
| PSR-S950 | PSR-S750 | |||
| Size and Weight | Width x Height x Depth (without Music Rest) | 1,002 x 148 x 437 mm (39 7/16" x 5 13/16" x 17 3/16") | ||
| Weight (without Music Rest) | 11.5 kg (25 lbs., 6 oz.) | 11 kg (24 lbs., 4 oz.) | ||
| Interface | Keyboard | Number of Keys | 61 | |
| Type | Organ | |||
| Touch Response | Hard 2, Hard 1, Medium, Soft 1, Soft 2 | |||
| Controllers | Pitch Bend Wheel | Yes | ||
| Modulation Wheel | Yes | |||
| Display | Type | 5.7 inch color LCD(320 x 240 dots TFT QVGA) | 5.7 inch B/W LCD(320 x 240 dots STN QVGA) | |
| Contrast | — | Yes | ||
| Language | English, German, French, Spanish, Italian | |||
| Panel | Language | English | ||
| Voices | Tone Generation | Tone Generation Technology | AWM Stereo Sampling | |
| Polyphony | Number of Polyphony (Max.) | 128 | ||
| Preset | Number of Voices | 786 + 33 Drum/SFX Kits + 480 XG + GM2 + GS (for GS Song Playback) | 678 + 28 Drum/SFX Kits + 480 XG + GM2 + GS (for GS Song Playback) | |
| Featured Voices | 62 Super Articulation, 23 Mega Voices, 27 Sweet!, 64 Cool!, 39 Live!, 20 Organ Flutes! | 38 Super Articulation, 18 Mega Voices, 24 Sweet!, 46 Cool!, 29 Live!, 10 Organ Flutes! | ||
| Expandability | Expansion Voice | Yes (approx. 64 MB max.) | ||
| Editing | Voice Set | |||
| Compatibility | XG, XF, GS, GM, GM2 | |||
| Part | Right 1, Right 2, Left | |||
| Styles | Preset | Number of Styles | 408 | 325 |
| Featured Styles | 25 +Audio, 1 FreePlay, 350 Pro, 32 Session | 295 Pro, 30 Session | ||
| Fingering | Single Finger, Fingered, Fingered On Bass, Multi Finger, AI Fingered, Full Keyboard, AI Full Keyboard | |||
| Style Control | INTRO x 3, MAIN VARIATION x 4, FILL x 4, BREAK, ENDING x 3 | |||
| Compatibility | Style File Format, Style File Format GE | |||
| Expandability | Expansion Style | Yes | ||
| Expansion Audio Style | Yes (approx. 64 MB max.) | — | ||
| Other Features | Music Finder (Max.) | 2,500 Records | 1,200 Records | |
| One Touch Setting (OTS) | 4 for each Style | |||
| Songs | Preset | Number of Songs | 5 | |
| Recording | Number of Songs | Unlimited (depending on USB flash memory capacity) | ||
| Number of Tracks | 16 | |||
| Data Capacity | approx. 300 KB/Song | |||
| Recording Function | Quick Recording, Multi Recording, Step Recording | |||
| Data Format | Playback | SMF (Format 0 & 1), XF | ||
| Recording | SMF (Format 0) | |||
| Multi Pads | Preset | Number of Multi Pad Banks | 126 banks x 4 Pads | 123 banks x 4 Pads |
| Audio | Audio Link | Yes | ||
| Functions | Voices | Voice Creator | Yes | |
| Harmony/Echo | Yes | |||
| Panel Sustain | Yes | |||
| Mono/Poly | Yes | |||
| Voice Information | Yes | |||
| Styles | Style Creator | Yes | ||
| Style Recommender | Yes | |||
| OTS Information | Yes | |||
| Songs | Song Creator | Yes | ||
| Score Display Function | Yes | |||
| Lyrics Display Function | Yes | |||
| Lesson/Guide | Follow Lights, Any Key, Karao-Key, Your Tempo | |||
| Performance Assistant Technology (P.A.T.) | Yes | |||
| Multi Pads | Multi Pad Creator | Yes | ||
| Functions | Registration Memory | Number of Buttons | 8 presets/bank(unlimited number of banks, depending on USB flash memory capacity) | |
| Control | Registration Sequence, Freeze | |||
| USB Audio | Recording | .wav | ||
| Playback | .wav.mp3 | .wav | ||
| Time Stretch | Yes | — | ||
| Pitch Shift | Yes | — | ||
| Vocal Cancel | Yes | — | ||
| Demo/Help | Demonstration | Yes | ||
| Overall Controls | Metronome | Yes | ||
| Tempo | 5-500, Tap Tempo | |||
| Transpose | -12-0-+12 | |||
| Tuning | 414.8-440-466.8 Hz | |||
| Octave Button | Yes | |||
| Scale Type | 9 Presets | |||
| Miscellaneous | Text Display Function | Yes | ||
| Wallpaper Customization | Main, Lyrics | — | ||
| Direct Access | Yes | |||
| Effects | Reverb | 44 Presets + 3 User | ||
| Chorus | 106 Presets + 3 User | 71 Presets + 3 User | ||
| DSP | DSP 1: 295 Presets + 3 User,DSP 2-4: 295 Presets + 10 User | DSP 1: 295 Presets + 3 User,DSP 2-4: 128 Presets + 10 User | ||
| Master EQ | 5 Presets + 2 User | |||
| Part EQ | 28 Parts (Right 1, Right 2, Left, Multi Pad, Style x 8, Song x 16) | |||
| Mic Effects | Noise Gate x 1, Compressor x 1,3Band EQ x 1 | — | ||
| Vocal Harmony | Number of Presets | 44 | — | |
| Number of User Settings | 60 | — | ||
| Vocal Effect | 23 | — | ||
| Storage | Internal Memory | approx. 6.7 MB | approx. 1.9 MB | |
| Internal Memory (for Expansion Pack) | approx. 64 MB | |||
| External Drives | USB Flash Memory, etc. (via USB TO DEVICE) | |||
| Connections | DC IN | 16 V | ||
| Microphone | Yes | — | ||
| AUX IN | Yes | |||
| Headphones | Yes | |||
| OUTPUT | R, L/L+R | |||
| VIDEO OUT | Yes | — | ||
| FOOT PEDAL | (optional) Switch or Volume x 2 | |||
| USB TO DEVICE | Yes | |||
| USB TO HOST | Yes | |||
| MIDI | In/Out | |||
| Amplifiers and Speakers | Amplifiers | 15 W x 2 | ||
| Speakers | 13 cm + 2.5 cm dome tweeter (x 2) | 13 cm + 5 cm (x 2) | ||
| Pedals | Assignable Functions | Volume, Sustain, Sostenuto, Soft, Glide, S. Articulation, Song Play/Pause,Style Start/Stop, etc. | ||
| Power Supply | AC Power Adaptor | PA-300C or an equivalent recommended by Yamaha | ||
| Power Consumption | 16 W | 13 W | ||
| Auto Power Off Function | Yes | |||
| Included Accessories | Owner's ManualOnline Member Product RegistrationYou will need the PRODUCT ID on the sheet in order to fill out the UserRegistration form.Music RestAC Power Adaptor (PA-300C or an equivalent recommended by Yamaha)This may not be included depending on your particular area. Please checkwith your Yamaha dealer. | |||
| Optional Accessories | AC Power Adaptor | PA-300C or an equivalent recommended by Yamaha | ||
| Headphones | HPE-160 | |||
| USB-MIDI Interface | UX-16 | |||
| Footswitches | FC4/FC5 | |||
| Foot controller | FC7 | |||
| Keyboard Stand | L-6/L-7(The exterior size of the PSR-S950/S750 is beyond the limits as described inthe L-6 Assembly Instructions. However, we have determined through teststhat the stand can be safely used for the instrument.) | |||
* Specifications and descriptions in this owner's manual are for information purposes only. Yamaha Corp. reserves the right to change or modify products or specifications at any time without prior notice. Since specifications, equipment or options may not be the same in every locale, please check with your Yamaha dealer.
Symbols
+Audio....44
Numerics
1-16 (Song Creator) 63
A
A-B Repeat....59, 66
AC Power Adaptor 14, 100
Accompaniment 43
Adaptor 14
ADD TO FAVORITE 78
ADD TO MF 77
AI Full Keyboard 45
Air Vents 12
ASSEMBLY (Style Creator)......53
Audio 64
Audio Link 71
Audio Style 44
Audio Volume 66
Auto Accompaniment......43
Auto Fill....47
Auto Power Off 15
B
Backup 31
Balance 53,67
Bar....22,56
BASIC (Style Creator)......53
BASS (Style Channel)....52
Beat 22
Break (Style)......47
C
CENTER (Volume Balance)......67
CHANNEL 53, 57, 63
Character entry 30
CHD1/2 (Style Channel)....52
CHORD 45,63
CHORD FINGERING 45, 53
Chord Match 70
Chordal 84
Computer 93
Computer-related Operations ...... 7
CONFIG 1/2 95
Contrast 16
COPY (File) 28
CUT (File) 28
D
Data List....7
DELETE (Delete) 29
Demo 17,33
Direct Access 21
Drum Voice 32
DSP 40
E
EDIT (Vocal Harmony) 85
EFFECT 39,87
EFFECT/EQ 42
Ending section 46
EQ 87
Expansion Pack 36
F
Factory-programmed Settings...... 31
Fading In/Out 47
Fast Forward 55
File 25, 26
File Selection Display 24
Fill-in section 47
FILTER 87
FOLDER (File) 27
Foot Controller 91
Footage 41
Footswitch....91
Force-quit.... 15
Format....64, 93
FREEZE 81
G
GM 6,42
GROOVE (Style Creator) 53
GS....6
Guide 58
GUIDE MODE....58
Guitar 88
H
Harmonic Content...... 87
Harmony/Echo 39
Headphones 13
|
Icon.... 30
INFO. 33, 36, 71, 81
Input Level 23,83
Input Volume 23,82
Intro section 46
K
Keyboard Part.... 35
KEYBOARD/PANEL 39,42
L
Lamp Status.... 46, 80
Language 16
Left Hold 35
Left part 34, 35
Lyrics 57,90
M
Main Display 22
Main section 47
MASTER TUNE 38,42
MEDIA....93
MegaVoice 35
Message 21
Metronome.... 61
Microphone 82
MIDI Basics....7
Mixing Console......86
MONITOR TYPE 90
MONO 40
MP3 64
Multi Pad 69
Multi Pad Creator 72
Multi Track Recording 62
Music Finder......73
Music Notation 56
Music Rest....12
N
NAME (File) 28
NEXT (Song Playback)....55
NEXT CANCEL....55
0
One Touch Setting (OTS)......49
Organ Flutes Voice....41
ORGAN TYPE....41
OTS INFO....50
OTS Link....49
OTS Link Timing 49
OWNER 16,31
P
P.A.T (Performance Assistant Technology) 63
PAD (Style Channel)....52
Panel Setting 73
PARAMETER (Style Creator)......53
PASTE (File) 29
Pause 55
Percussion Voice....32
Performance Assistant Technology (P.A.T)....63
PHR1/2 (Style Channel)....52
Phrase Mark 56
Pitch 38, 87
PITCH BEND RANGE....39
Pitch Shift 67
Portable Audio Player....89
Power Adaptor 14
PRESET (File Selection Display) .....24
Protected Song 67
Q
Quick Recording 60
R
REC 23
REC MODE (Song Creator) ...... 63
REC WAIT 23
RECOMMEND....50
Record (Music Finder)....73, 75
RECORD EDIT 78
Recording (Audio) 67
Recording (Song) 60
Reference Manual....7
REGIST BANK 80
Registration Memory 80
REGISTRATION SEQUENCE......81
Repeat 59,66
REPERTOIRE 48
RESTORE 31
Rewind 55
RHY1/2 (Style Channel) 52
Right 1-2 parts ......32, 33, 35
ROTARY SP SPEED 41
s
S.Art! (Super Articulation Voice) ..... 35
SAVE (File) 26
SCALE TUNE 38,42
Score......56
SCREEN CONTENT 90
SCREEN OUT 90
SEARCH (Music Finder) 76
SETUP (Vocal Harmony)...... 84
SFF/SFF GE....6
Single Finger 45
SMF (Standard MIDI File) 54
SOLO 52
Song....54
Song Creator....63
SONG SETTING 63
Speaker....13, 89
Split Point 35, 53
Standard MIDI File (SMF) 54
STEP REC 53
Style 43
Style Creator 53
Style File Format (SFF)......6
Style Recommender 50
STYLE SETTING 53
SUSTAIN 40
Synchro Start ....44, 46, 55, 70
Synchro Stop 46
SYS/EX. (Song Creator).... 63
SYSTEM RESET 31, 95
T
Talk 85
Tempo.... 47
Text 57,90
Time Stretch.... 44, 67
Touch Response...... 40
Transpose.... 38
TUNE 87
TV Monitor....90
TYPE SELECT 83
U
UP (File) 25
USB (File Selection Display)...... 24
USB Audio 64
USB Flash Memory 92
USER (File Selection Display)...... 24
UTILITY 95
V
Version Number...... 17
Vibrato 39,41
Vocal Cancel 67
Vocal Harmony (VH)...... 82
Vocoder 84
Vocoder Mono 84
Voice.... 32
VOICE SET...... 42
VOL/VOICE 87
Volume....14, 53, 66, 67
VOLUME/ATTACK 42
W
WAVE....64, 67, 71
X
XF....6
XG....6,42
Important Notice: Guarantee Information for customers in European Economic Area (EEA) and Switzerland
| Tärkeä ilmoitus: Takuutiedot Euroopan talousalueen (ETA)* ja Sveitsin asiakkailleTämän Yamaha-tuotteen sekä ETA-alueen ja Sveitsin takuuta koskevat yksityiskohtaiset tiedot saatte alla olevasta nettiosoit-teesta. (Tulostettava tiedosto saatavissa sivustollamme.) Voitte myös ottaa yhteyttä paikalliseen Yamaha-edustajaan.*ETA: Euroopan talousalue | Suomi |
| Ważne: Warunki gwarancyjne obowiązujące w EOG* i SzwajcariiAby dowiedzieć się więcej na temat warunków gwarancyjnych tego produktu firmy Yamaha i serwisu gwarancyjnego w całym EOG* i Szwajcarii, należy odwiedzić wskazaną poniżej stronę internetową (Plik gotowy do wydruku znajduje się na naszej stronie internetowej) lub skontaktować się z przedstawicielstwem firmy Yamaha w swoim kraju. * EOG — Europejski Obszar Gospodarczy | Polski |
| Duležité oznámení: Záruční informace pro zákazniky v EHS* a ve ŠvýcarskuPodrobné záruční informace o tomto produktu Yamaha a záručním servisu v celém EHS* a ve Švýcarsku naleznete na niže uvedené webové adrese (soubor k tisku je dostupný na našich webových stránkách) nebo se můžete obrátit na zastoupení firmy Yamaha ve své zemi. * EHS: Evropsky hospodářský prostor | Česky |
| Fontos figyelmeztetés: Garancia-információk az EGT* területén és Svájcban élő vásárlók számáraA jelen Yamaha termékre vonatkozó részletes garancia-információk, valamint az EGT*-re és Svájcra kiterjedő garanciális szolgáltatás tekintetében keresse fel webhelyünket az alábbi címen (a webhelyen nyomtatható fájlt is talál), vagy pedig lépjen kapcsolatba az országában můködő Yamaha képviseleti irodával. * EGT: Európai Gazdasági Terség | Magyar |
| Oluline márkus: Garantiiteave Euroopa Majanduspiirkonna (EMP)* ja Šveitsi klientideleTäpsema teabe saamiseks selle Yamaha toote garantii ning kogu Euroopa Majanduspiirkonna ja Šveitsi garantiiteeninduse kohta, külastage palun veebisaiti alljärgneval aadressil (meie saidil on saadaval prinditav fail) või põörduge Teie regiooni Yamaha esinduse poole. * EMP: Euroopa Majanduspiirkond | Eesti keel |
| Svarīgs paziņojums: garantijas informācija klientiem EEZ* un ŠveicēLai sarņemtu detalizētu garantijas informāciju par šo Yamaha produktu, kā arī garantijas apkalpošanu EEZ* un Šveicē, lūdzu, apmeklējiet zemāk norādīto tīmekļa vietnes adresi (tīmekļa vietnē ir pieejams drukājams fails) vai sazinieties ar jūsu valsti apkalpojošo Yamaha pārstāvniecību. * EEZ: Eiropas Ekonomikas zona | Latviešu |
| Dèmesio: informacija dėl garantijos pirkėjams EEE* ir ŠveicarijojeJei reikia išsamios informacijos apie ŝi „Yamaha“ produktą ir jo techninę priežiūrą visoje EEE* ir Šveicarijoje, apsilankykite mūsų svetainėje toliau nurodytu adresu (svetainėje yra spausdintinas failas) arba kreipkitės į „Yamaha“ atstovybę savo šaliai.*EEE – Europos ekonominė erdvė | Lietuvių kalba |
| Dôležité upozornenie: Informácie o záruke pre zákazníkov v EHP* a ŠvajčiarskuPodrobné informácie o záruke týkajúce sa tohto produktu od spoločnosti Yamaha a garančnom servise v EHP* a Švajčiarsku nájdete na webovej stránke uvedenej nižšie (na našej webovej stránke je k dispozícii súbor na tlač) alebo sa obrătte na zástupcu spoločnosti Yamaha vo svojej krajine. * EHP: Európsky hospodářsky priestor | Slovenčina |
| Pomembno obvestilo: Informacije o garanciji za kupce v EGP* in ŠviciZa podrobnejše informacije o tem Yamahinem izdelku ter garancijskem servisu v celotnem EGP in Švici, obiščite spletno mesto, ki je navedeno spodaj (natisljiva datoteka je na voljo na našem spletnem mestu), ali se obrnite na Yamahinega predstavnika v svoji državi. * EGP: Evropski gospodarski prostor | Slovenščina |
| Важно съобщение: Информация за гаранцията за клиенти в ЕИП* и ШвейцарияЗа подробна информация за гаранцията за този продукт на Yamaha и гаранционното обслужване в паневропейската зона на ЕИП* и Швейцария или посетете посочения по-долу уеб сайт (на нашия учеб сайт има файл за печат), или се свържете с представителния офис на Yamaha bÿв вашата страна. * ЕИП: Европейско ikonomическо пространство | Български език |
| Notificare importantă: Informații despre garanție pentru clienții din SEE* și ElvețiaPentru informații detaliate privind acest produs Yamaha și serviciul de garanție Pan-SEE* și Elveția, vizitați site-ul la adresa de mai jos (fișierul imprimabil este disponibil pe site-ul nostru) sau contactați biroul reprezentanței Yamaha din țara dumneavoastră .* SEE: Spațiul Economic European | Limba română |
| Important Notice: Guarantee Information for customers in EEA* and SwitzerlandFor detailed guarantee information about this Yamaha product, and Pan-EEA* and Switzerland warranty service, please either visit the website address below (Printable file is available at our website) or contact the Yamaha representative office for your country. * EEA: European Economic Area | English |
| Wichtiger Hinweis: Garantie-Information für Kunden in der EWR* und der SchweizFür nähere Garantie-Information über dieses Produkt von Yamaha, sowie über den Pan-EWR*- und Schweizer Garantieservice, besuchen Sie bitte entweder die folgend angegebene Internetadresse (eine druckfähige Version befindet sich auch auf unserer Webseite), oder wenden Sie sich an den für Ihr Land zuständigen Yamaha-Vertrieb. *EWR: Europäischer Wirtschaftsraum | Deutsch |
| Remarque importante: informations de garantie pour les clients de l'EEE et la SuissePour des informations plus détaillées sur la garantie de ce produit Yamaha et sur le service de garantie applicable dans l'ensemble de l'EEE ainsi qu'en Suisse, consultez notre site Web à l'adresse ci-dessous (le fichier imprimable est disponible sur notre site Web) ou contactez directement Yamaha dans votre pays de résidence. * EEE : Espace Economique Européen | Français |
| Belangrijke mededeling: Garantie-informatie voor klanten in de EER* en ZwitzerlandVoor gedetailleerde garantie-informatie over dit Yamaha-product en de garantieservice in heel de EER* en Zwitzerland, gaat u naar de onderstaande website (u vind een afdrukbaar bestand op onze website) of neemt u contact op met de vertegenwoordiging van Yamaha in uw land. * EER: Europese Economische Ruimte | Nederlands |
| Aviso importante: información sobre la garantia para los clientes del EEE* y SuizaPara una información detallada sobre este producto Yamaha y sobre el soporte de garantía en la zona EEE* y Suiza, visite la dirección web que se incluye más abajo (la version del archivo para imprimir esta disponible en nuestro sitio web) o póngase en contacto con el representante de Yamaha en su país. * EEE: Espacio Económico Europeo | Español |
| Avviso importante: informazioni sulla garanzia per i clienti residenti nell'EEA* e in SvizzeraPer informazioni dettagliate sulla garanzia relativa a questo prodotto Yamaha e l'assistenza in garanzia nei paesi EEA* e in Svizzera, potete consultare il sito Web all'indirizzo riportato di seguito (è disponibile il file in formato stampabile) oppure contattare l'ufficio di rappresentanza locale della Yamaha. * EEA: Area Economica Europea | Italiano |
| Aviso importante: informações sobre as garantias para clientes da AEE* e da SuíçaPara obter uma informação pormenorizada sobre este produto da Yamaha e sobre o serviço de garantia na AEE* e na Suíça, visite o site a seguir (o arquivo para impressão está disponível no nosso site) ou entre em contato com o escritório de representação da Yamaha no seu país. * AEE: Área Econômica Européia | Português |
| Σημαντική σημείωση: Πληροφορίες εγγύησης για τους πελάτες στον ΕΟΧ* και ΕλβετίαΓια λεπτομερείς πληροφορίες εγγύησης σχετικά με το παρόν προϊόν της Yamaha και την κάλυψη εγγύησης σε όλες τις χώρες του ΕΟΧ και την Ελβετία, επισκεφτείτε την παρακάτω ιστοσελίδα (Εκτυπώσιμη μορφή είναι διαθέσιμη στην ιστοσελίδα μας) ή απευθυνθείτε στην αντιπροσωπεία της Yamaha στη χώρα σας. * ΕΟΧ: Ευρωπαϊκός Οικονομικός Χώρος | Ελληνικά |
| Viktigt: Garantiinformation för kunder i EES-området* och SchweizFör detaljerad information om denna Yamahaprodukt samt garantiservice i hela EES-området* och Schweiz kan du antingen besöka nedanstående webbadress (en utskriftsvänlig fil finns på webbplatsen) eller kontakta Yamahas officiella representant i ditt land. * EES: Europeiska Ekonomiska Samarbetsområdet | Svenska |
| Viktig merknad: Garantiinformasjon for kunder i E∅S* og SveitsDetaljert garantiinformasjon om dette Yamaha-produktet og garantiservice for hele E∅S-området* og Sveits kan fås enten ved å besøke nettadressen nedenfor (utskriftversjon finnes på våre nettsider) eller kontakte kontakte Yamaha-kontoret i landet der du bor. *E∅S: Det europeiske økonomiske samarbeidsområdet | Norsk |
| Vigtig oplysning: Garantioplysninger til kunder i E∅O* og SchweizDe kan finde detaljerede garantioplysninger om dette Yamaha-produkt og den fælles garantiserviceordning for E∅O* (og Schweiz) ved at besøge det websted, der er angivet nedenfor (der findes en fil, som kan udskrives, på vores websted), eller ved at kontakte Yamahas nationale repräsentationskontor i det land, hvor De bor. * E∅O: Det Europæiske ∅konomiske Område | Dansk |
http://europe.yamaha.com/warranty/
OBSERVERA!
The model number, serial number, power requirements, etc., may be found on or near the name plate, which is at the bottom of the unit. You should note this serial number in the space provided below and retain this manual as a permanent record of your purchase to aid identification in the event of theft.
Model No.
Serial No.
(bottom_en_01)
Information for Users on Collection and Disposal of Old Equipment

This symbol on the products, packaging, and/or accompanying documents means that used electrical and electronic products should not be mixed with general household waste.
For proper treatment, recovery and recycling of old products, please take them to applicable collection points, in accordance with your national legislation and the Directives 2002/96/EC.
By disposing of these products correctly, you will help to save valuable resources and prevent any potential negative effects on human health and the environment which could otherwise arise from inappropriate waste handling.
For more information about collection and recycling of old products, please contact your local municipality, your waste disposal service or the point of sale where you purchased the items.
[For business users in the European Union]
If you wish to discard electrical and electronic equipment, please contact your dealer or supplier for further information.
[Information on Disposal in other Countries outside the European Union]
This symbol is only valid in the European Union. If you wish to discard these items, please contact your local authorities or dealer and ask for the correct method of disposal.
(weee_eu)
This product, when installed as indicated in the instructions contained in this manual, meets FCC requirements. Modifications not expressly approved by Yamaha may void your authority, granted by the FCC, to use the product.
- IMPORTANT: When connecting this product to accessories and/or another product use only high quality shielded cables. Cable/s supplied with this product MUST be used. Follow all installation instructions. Failure to follow instructions could void your FCC authorization to use this product in the USA.
- NOTE: This product has been tested and found to comply with the requirements listed in FCC Regulations, Part 15 for Class "B" digital devices. Compliance with these requirements provides a reasonable level of assurance that your use of this product in a residential environment will not result in harmful interference with other electronic devices. This equipment generates/uses radio frequencies and, if not installed and used according to the instructions found in the users manual, may cause interference harmful to the operation of other electronic devices. Compliance with FCC regulations does
not guarantee that interference will not occur in all installations. If this product is found to be the source of interference, which can be determined by turning the unit "OFF" and "ON", please try to eliminate the problem by using one of the following measures:
Relocate either this product or the device that is being affected by the interference.
Utilize power outlets that are on different branch (circuit breaker or fuse) circuits or install AC line filter/s.
In the case of radio or TV interference, relocate/reorient the antenna. If the antenna lead-in is 300 ohm ribbon lead, change the lead-in to co-axial type cable.
If these corrective measures do not produce satisfactory results, please contact the local retailer authorized to distribute this type of product. If you can not locate the appropriate retailer, please contact Yamaha Corporation of America, Electronic Service Division, 6600 Orangethorpe Ave, Buena Park, CA90620
The above statements apply ONLY to those products distributed by Yamaha Corporation of America or its subsidiaries.
* This applies only to products distributed by YAMAHA CORPORATION OF AMERICA.
(class B)
COMPLIANCE INFORMATION STATEMENT (DECLARATION OF CONFORMITY PROCEDURE)
Responsible Party : Yamaha Corporation of America
Address : 6600 Orangethorpe Ave., Buena Park, Calif.
90620
Telephone : 714-522-9011
Type of Equipment : Digita Keyboard
Model Name : PSR-S950/S750
This device complies with Part 15 of the FCC Rules.
Operation is subject to the following two conditions:
1) this device may not cause harmful interference, and
2) this device must accept any interference received including interference that may cause undesired operation.
See user manual instructions if interference to radio reception is suspected.
* This applies only to products distributed by YAMAHA CORPORATION OF AMERICA.
(FCC DoC)
IMPORTANT NOTICE FOR THE UNITED KINGDOM
Connecting the Plug and Cord
IMPORTANT. The wires in this mains lead are coloured in accordance with the following code:
BLUE : NEUTRAL
BROWN : LIVE
As the colours of the wires in the mains lead of this apparatus may not correspond with the coloured makings identifying the terminals in your plug proceed as follows:
The wire which is coloured BLUE must be connected to the terminal which is marked with the letter N or coloured BLACK.
The wire which is coloured BROWN must be connected to the terminal which is marked with the letter L or coloured RED.
Making sure that neither core is connected to the earth terminal of the three pin plug.
(2 wires)

YAMAHA
1-YEAR LIMITED WARRANTY
ON ARRANGER WORKSTATION KEYBOARDS
Thank you for selecting a Yamaha product. Yamaha products are designed and manufactured to provide a high level of defect-free performance. Yamaha Corporation of America (“Yamaha”) is proud of the experience and craftsmanship that goes into each and every Yamaha product. Yamaha sells its products through a network of reputable, specially authorized dealers and is pleased to offer you, the Original Owner, the following Limited Warranty, which applies only to products that have been (1) directly purchased from Yamaha’s authorized dealers in the fifty states of the USA and District of Columbia (the “Warranted Area”) and (2) used exclusively in the Warranted Area. Yamaha suggests that you read the Limited Warranty thoroughly, and invites you to contact your authorized Yamaha dealer or Yamaha Customer Service if you have any questions.
Coverage: Yamaha will, at its option, repair or replace the product covered by this warranty if it becomes defective, malfunctions or otherwise fails to conform with this warranty under normal use and service during the term of this warranty, without charge for labor or materials. Repairs may be performed using new or refurbished parts that meet or exceed Yamaha specifications for new parts. If Yamaha elects to replace the product, the replacement may be a reconditioned unit. You will be responsible for any installation or removal charges and for any initial shipping charges if the product(s) must be shipped for warranty service. However, Yamaha will pay the return shipping charges to any destination within the USA if the repairs are covered by the warranty. This warranty does not cover (a) damage, deterioration or malfunction resulting from accident, negligence, misuse, abuse, improper installation or operation or failure to follow instructions according to the Owner's Manual for this product; any shipment of the product (claims must be presented to the carrier); repair or attempted repair by anyone other than Yamaha or an authorized Yamaha Service Center; (b) any unit which has been altered or on which the serial number has been defaced, modified or removed; (c) normal wear and any periodic maintenance; (d) deterioration due to perspiration, corrosive atmosphere or other external causes such as extremes in temperature or humidity; (e) damages attributable to power line surge or related electrical abnormalities, lightning damage or acts of God; or (f) RFI/EMI (Interference/noise) caused by improper grounding or the improper use of either certified or uncertified equipment, if applicable. Any evidence of alteration, erasing or forgery of proof-of-purchase documents will cause this warranty to be void. This warranty covers only the Original Owner and is not transferable.
In Order to Obtain Warranty Service: Warranty service will only be provided for defective products within the Warranted Area. Contact your local authorized Yamaha dealer who will advise you of the procedures to be followed. If this is not successful, contact Yamaha at the address, telephone number or website shown below. Yamaha may request that you send the defective product to a local authorized Yamaha Servicer or authorize return of the defective product to Yamaha for repair. If you are uncertain as to whether a dealer has been authorized by Yamaha, please contact Yamaha's Service Department at the number shown below, or check Yamaha's website at www.Yamaha.com. Product(s) shipped for service should be packed securely and must be accompanied by a detailed explanation of the problem(s) requiring service, together with the original or a machine reproduction of the bill of sale or other dated, proof-of-purchase document describing the product, as evidence of warranty coverage. Should any product submitted for warranty service be found ineligible therefore, an estimate of repair cost will be furnished and the repair will be accomplished only if requested by you and upon receipt of payment or acceptable arrangement for payment.
Limitation of Implied Warranties and Exclusion of Damages: ANY IMPLIED WARRANTIES, INCLUDING WARRANTIES OF MERCHANTABILITY AND FITNESS FOR A PARTICULAR PURPOSE SHALL BE LIMITED IN DURATION TO THE APPLICABLE PERIOD OF TIME SET FORTH ABOVE. YAMAHA SHALL NOT BE RESPONSIBLE FOR INCIDENTAL OR CONSEQUENTIAL DAMAGES OR FOR DAMAGES BASED UPON INCONVENIENCE, LOSS OF USE, DAMAGE TO ANY OTHER EQUIPMENT OR OTHER ITEMS AT THE SITE OF USE OR INTERRUPTION OF PERFORMANCES OR ANY CONSEQUENCES. YAMAHA'S LIABILITY FOR ANY DEFECTIVE PRODUCT IS LIMITED TO REPAIR OR REPLACEMENT OF THE PRODUCT, AT YAMAHA'S OPTION. SOME STATES DO NOT ALLOW LIMITATIONS ON HOW LONG AN IMPLIED WARRANTY LASTS OR THE EXCLUSION OR LIMITATION OF INCIDENTAL OR CONSEQUENTIAL DAMAGES, SO THE ABOVE LIMITATION OR EXCLUSION MAY NOT APPLY TO YOU. This Warranty gives you specific legal rights, and you may also have other rights which vary from state to state. This is the only express warranty applicable to the product specified herein; Yamaha neither assumes nor authorizes anyone to assume for it any other express warranty.
If you have any questions about service received or if you need assistance in locating an authorized Yamaha Servicer, please contact:

YAMAHA
CUSTOMER SERVICE
Yamaha Corporation of America
6600 Orangethorpe Avenue, Buena Park, California 90620-1373
Telephone: 800-854-1569
www.yamaha.com
Do not return any product to the above address without a written Return Authorization issued by Yamaha.
©2012 Yamaha Corporation of America.
For details of products, please contact your nearest Yamaha representative or the authorized distributor listed below.
Yamaha Canada Music Ltd.
135 Milner Avenue, Scarborough, Ontario,
M1S 3R1, Canada
Tel: 416-298-1311
U.S.A.
Yamaha Corporation of America
6600 Orangethorpe Ave., Buena Park, Calif. 90620,
U.S.A
Tel: 714-522-9011
CENTRAL & SOUTH AMERICA
MEXICO
PANAMA AND OTHER LATIN
AMERICAN COUNTRIES/
CARIBBEAN COUNTRIES
Yamaha Music Latin America, S.A.
Sherbourne Drive, Tilbrook, Milton Keynes,
MK7 8BL, England
Tel: 01908-366700
GERMANY
Yamaha Music Europe GmbH
Siemensstraße 22-34, 25462 Rellingen, Germany
Tel: 04101-3030
Branch Switzerland in Zürich
Seefeldstrasse 94, 8008 Zürich, Switzerland
Tel: 044-387-8080
AUSTRIA
Yamaha Music Europe GmbH Branch Austria
Schleiergasse 20, A-1100 Wien, Austria
Tel: 01-60203900
CZECH REPUBLIC/HUNGARY/
ROMANIA/SLOVAKIA/SLOVENIA
Yamaha Music Europe GmbH
Branch Austria (Central Eastern Europe Office)
Schleiergasse 20, A-1100 Wien, Austria
Tel: 01-602039025
POLAND/LITHUANIA/LATVIA/ESTONIA
Yamaha Music Europe GmbH
Branch Poland Office
Yamaha Music Europe GmbH, Branch Italy
Viale Italia 88, 20020 Lainate (Milano), Italy
Tel: 02-935-771
SPAIN/PORTUGAL
Yamaha Music Europe GmbH Ibérica, Sucursal
en España
Ctra. de la Coruna km. 17, 200, 28230
Las Rozas (Madrid), Spain
Tel: 91-639-8888
GREECE
Philippos Nakas S.A. The Music House
147 Skiathou Street, 112-55 Athens, Greece
Tel: 01-228 2160
SWEDEN
Yamaha Music Europe GmbH Germany filial
Scandinavia
J. A. Wettergrens Gata 1, Box 30053
S-400 43 Göteborg, Sweden
Tel: 031 89 34 00
DENMARK
Yamaha Music Europe GmbH, Tyskland – filial
Denmark
Generatorvej 6A, DK-2730 Herlev, Denmark
Tel: 44 92 49 00
FINLAND
F-Musiikki Oy
Kluuvikatu 6, P.O. Box 260,
SF-00101 Helsinki, Finland
Tel: 09 618511
NORWAY
Yamaha Music Europe GmbH Germany -
Norwegian Branch
Grini Næringspark 1, N-1345 ∅sterås, Norway
Tel: 67 16 77 70
ICELAND
Skifan HF
Skeifan 17 P.O. Box 8120, IS-128 Reykjavik, Iceland
Tel: 525 5000
RUSSIA
Yamaha Music (Russia)
Room 37, bld. 7, Kievskaya street, Moscow,
121059, Russia
Tel: 495 626 5005
OTHER EUROPEAN COUNTRIES
Yamaha Music Europe GmbH
Siemensstraße 22-34, 25462 Rellingen, Germany
Tel: +49-4101-3030
AFRICA
Yamaha Corporation,
Asia-Pacific Sales & Marketing Group
Nakazawa-cho 10-1, Naka-ku, Hamamatsu,
Japan 430-8650
Tel: +81-53-460-2313
MIDDLE EAST
TURKEY/CYPRUS
Yamaha Music Europe GmbH
Siemensstraße 22-34, 25462 Rellingen, Germany
Tel: 04101-3030
OTHER COUNTRIES
Yamaha Music Gulf FZE
LOB 16-513, P.O.Box 17328, Jubel Ali,
Dubai, United Arab Emirates
Tel: +971-4-881-5868
ASIA
THE PEOPLE'S REPUBLIC OF CHINA
Yamaha Music & Electronics (China) Co.,Ltd.
2F, Yunhedasha, 1818 Xinzha-lu, Jingan-qu,
Shanghai, China
Tel: 021-6247-2211
HONG KONG
Tom Lee Music Co., Ltd.
11/F., Silvercord Tower 1, 30 Canton Road,
Tsimshatsui, Kowloon, Hong Kong
Tel: 2737-7688
INDIA
Yamaha Music India Pvt. Ltd.
Spazedge building, Ground Floor, Tower A, Sector
47, Gurgaon- Sohna Road, Gurgaon, Haryana, India
Tel: 0124-485-3300
INDONESIA
PT. Yamaha Musik Indonesia (Distributor)
PT. Nusantik
Gedung Yamaha Music Center, Jalan Jend. Gatot
Subroto Kav. 4, Jakarta 12930, Indonesia
Tel: 021-520-2577
KOREA
Yamaha Music Korea Ltd.
8F, 9F, Dongsung Bldg. 158-9 Samsung-Dong,
Kangnam-Gu, Seoul, Korea
Tel: 02-3467-3300
MALAYSIA
Yamaha Music (Malaysia) Sdn., Bhd.
Lot 8, Jalan Perbandaran, 47301 Kelana Jaya,
Petaling Jaya, Selangor, Malaysia
Tel: 03-78030900
PHILIPPINES
Yupangco Music Corporation
339 Gil J. Puyat Avenue, P.O. Box 885 MCPO,
Makati, Metro Manila, Philippines
Tel: 819-7551
SINGAPORE
Yamaha Music (Asia) PRIVATE LIMITED
Blk 202 Hougang Street 21, #02-00,
Singapore 530202, Singapore
Tel: 6747-4374
TAIWAN
Yamaha KHS Music Co., Ltd.
3F, #6, Sec.2, Nan Jing E. Rd. Taipei.
Taiwan 104, R.O.C.
Tel: 02-2511-8688
THAILAND
Siam Music Yamaha Co., Ltd.
4, 6, 15 and 16th floor, Siam Motors Building,
891/1 Rama 1 Road, Wangmai,
Pathumwan, Bangkok 10330, Thailand
Tel: 02-215-2622
OTHER ASIAN COUNTRIES
Yamaha Corporation,
Asia-Pacific Sales & Marketing Group
Nakazawa-cho 10-1, Naka-ku, Hamamatsu,
Japan 430-8650
Tel: +81-53-460-2313
OCEANIA
AUSTRALIA
Yamaha Music Australia Pty. Ltd.
Level 1, 99 Queensbridge Street, Southbank,
Victoria 3006, Australia
Tel: 3-9693-5111
NEW ZEALAND
Music Works LTD
P.O.BOX 6246 Wellesley, Auckland 4680,
New Zealand
Tel: 9-634-0099
COUNTRIES AND TRUST
TERRITORIES IN PACIFIC OCEAN
Yamaha Corporation,
Asia-Pacific Sales & Marketing Group
Nakazawa-cho 10-1, Naka-ku, Hamamatsu,
Japan 430-8650
Tel: +81-53-460-2313

YAMAHA
Yamaha Global Site
http://www.yamaha.com/
Yamaha Manual Library
© 2012 Yamaha Corporation
205POZC*.*-01A0
Printed in Indonesia
ZA70190