402-607 - Lighting Anslut - Free user manual and instructions
Find the device manual for free 402-607 Anslut in PDF.


| Product Type | LED Desk Lamp |
| Model | 402-607 |
| Brand | Anslut |
| Dimensions (L x W x H) | 45 x 15 x 50 cm |
| Weight | 1.2 kg |
| Power Supply | AC 220-240V, 50/60 Hz |
| Power Consumption | 12 W |
| Light Source | Integrated LED (non-replaceable) |
| Color Temperature | 3000K - 6500K (adjustable) |
| Brightness | Up to 800 lumens |
| Dimmable | Yes, stepless dimming |
| Material | Aluminum and ABS plastic |
| Protection Class | Class II (double insulated) |
| IP Rating | IP20 (indoor use only) |
| Main Functions | Adjustable arm, touch control, memory function |
| Cleaning | Wipe with dry cloth; do not use liquid cleaners |
| Safety | Do not cover; keep away from moisture; for indoor use |
| Spare Parts | Not available; LED module integrated |
| Warranty | 2 years |
Frequently Asked Questions - 402-607 Anslut
User questions about 402-607 Anslut
0 question about this device. Answer the ones you know or ask your own.
Ask a new question about this device
Download the instructions for your Lighting in PDF format for free! Find your manual 402-607 - Anslut and take your electronic device back in hand. On this page are published all the documents necessary for the use of your device. 402-607 by Anslut.
USER MANUAL 402-607 Anslut
natural_image
White circular recessed light fixture with a cylindrical top and side arm (no text or symbols visible)SE Bruksanvisning för downlight LED
NO Bruksanvisning for downlight LED
PL Instrukcja obsługi lampy punktowa LED
EN User Instructions for downlight LED
SE - Bruksanvisning i original
NO - Bruksanvisning i original
EN - Operating instructions in original
Date of production: 2014-07-03
© Jula AB
SVENSKA....5
SÄKERHETSANVISNINGAR....5
Symboler 5
TEKNISKA DATA....5
MONTERING....5
SAFETY INSTRUCTIONS....21
Symbols 21
TECHNICAL DATA 21
ASSEMBLY....21
Further requirements for bathroom installation 22
Installation order 23
MAINTENANCE 24
Cleaning 24
SÄKERHETSANVISNINGAR
natural_image
Illustration of hands using a ruler and pen to measure a surface (no text or symbols)
natural_image
Diagram of a mechanical device with a central hub and a circular top component (no text or symbols)
natural_image
Two circular diagrams showing a hand holding a puzzle piece and a wire being connected to a switch (no text or symbols present)


natural_image
Simple diagram with two concentric ovals above a horizontal line, labeled '5' in top-left corner (no text or symbols within the diagram itself)UNDERHÅLL
RENGÖRING
natural_image
Simple line drawing of a trash bin with diagonal lines crossing it, no text or symbols present.Värna om miljön!
- Produktet skal bare monteres innfelt i takhimling.
- Strømkretsen må være beskyttet med en 10 A-sikring.
- Produktet skal kobles til en krets med overspenningsvern med en reststrøm på maksimalt 30 mA.
MONTERINGSRESULTAT

natural_image
Illustration of hands using a ruler and pen to measure a surface (no text or symbols)
natural_image
Diagram of a mechanical device with a handle and base, no visible text or symbols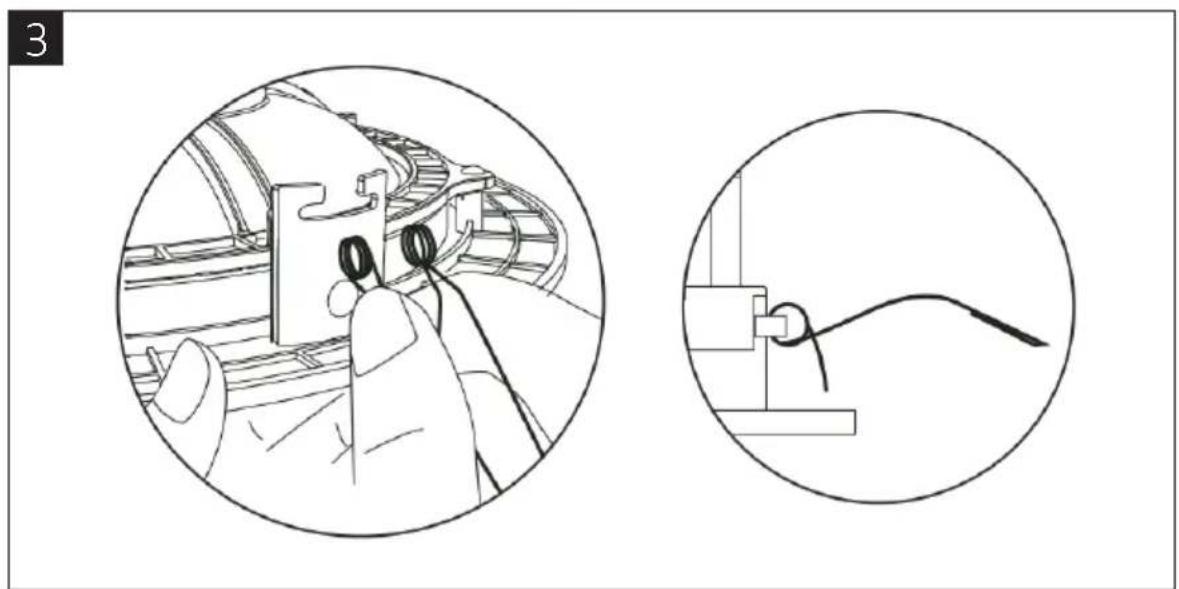
natural_image
Two circular diagrams showing a hand holding a small component and a wire being connected to a switch (no text or symbols present)4

natural_image
Technical illustration showing hands assembling a circular component with wires, alongside a close-up of the internal circuit board (no text or symbols)5

natural_image
Diagram of a mechanical assembly with a suspended component and directional arrow (no text or symbols)
natural_image
Pure mechanical diagram showing a device with a curved pipe and directional arrow, no text or symbols present.5

VEDLIKEHoLD
RENGjøRING
natural_image
Symbol of a trash bin with no visible text or labelsVerne om miljøet!
natural_image
Illustration of hands using a ruler to measure a small object on a line, with no visible text or symbols.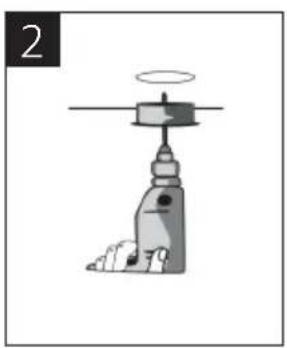
natural_image
Diagram of a mechanical device with a lever and base, no visible text or symbols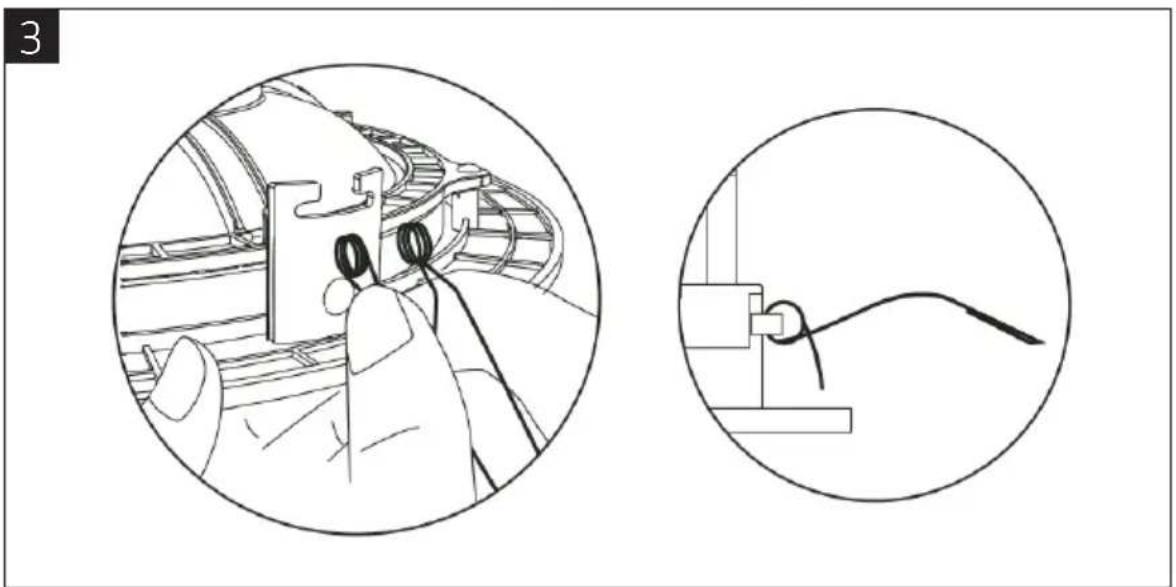
natural_image
Two technical diagrams showing hands connecting a mechanical component to a wire, with no visible text or symbols.4

natural_image
Technical illustration showing hands installing a circular component with wires, alongside a close-up of the electrical terminal block (no text or symbols)5

natural_image
Diagram of a mechanical assembly with a suspended component and directional arrow (no text or symbols)
natural_image
Pure mechanical diagram showing a lever mechanism with no text or symbols5

KoNSERWACjA
CZySZCZENIE
natural_image
Pure electrical circuit lines without any symbolsDBAJ O ŚRODOWISKO!
Read the operating instructions carefully before use!
Please retain for future reference.
WARNING! In order to meet applicable standards, we recommend that a qualified electrician carry out the installation of this fitting.
• Always follow the electrical specifications on the product label.
- The product is for indoor use only.
SYMBOLS
 | Class I equipment |
 | Class II equipment |
 | Light fittings may not be covered with heat-insulated materials. |
TECHNICAL DATA
External diameter 230 mm
Internal diameter 200 mm
Luminous flux 1100 lm
Enclosure class IP20
Nominal voltage
ASSEMBLY
WARNING!
Before installation:
• Always shut off the power!
- For the class I product, the earthing connection must be established during installation.
- The lamp must never be covered with an insulating mat or similar material.
- All cables must be kept away from the lamp so that they are not exposed to the bulb's high temperature.
• Repairs must be carried out by a technician and original spare parts must be used.
• Faulty repairs can lead to serious risks.
- The lamps can only be connected to the secondary cable on the driver which accompanies this kit.
- The driver must be installed in a ventilated area and at a large distance from heat sources.
• The driver can only be used for the supplied lamps.
- Use the supplied fixing screws to mount the driver.
- The cables and the driver included in this kit may not be modified.
- The driver is protected against short-circuiting and overloading.
- In the case of a short-circuit or overload, the driver shuts off the power supply.
- The driver will begin to work again once the problem has been solved.
- The light source of the product is non-changeable light diodes(LED). Never try to disassemble the product, as the light diodes can cause damage to the eyes.
fURTHER REQUIREMENTS for BATHROOM INSTALLATION
- Check the product's rating label to find out what free space is needed for installation.
- Minimal distances for installation are provided in the drawing.

Recommended areas for bathroom installation
- Grey-coloured areas: Installation prohibited. Other areas: Installation permitted.


- The product must only be installed built into to indoor ceilings.
- The electrical circuit must be protected with a 10 A fuse.
- The product must be connected to a circuit equipped with overload protection with a maximum residual current of 30 mA.
INSTALLATION ORDER

natural_image
Illustration of hands using a ruler to measure a small object on a line, with no text or symbols present.
natural_image
Illustration of a mechanical device with a central hub and a circular top component (no text or symbols)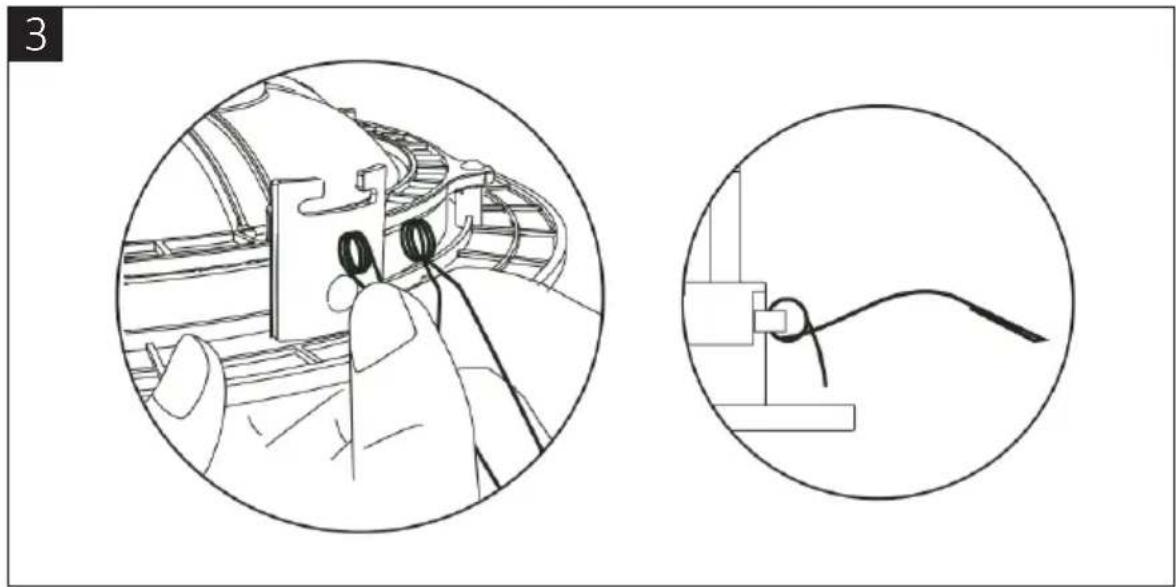
natural_image
Two circular diagrams showing a hand holding a component and a cable being inserted, with no visible text or symbols.

natural_image
Simple diagram with two concentric ovals above a horizontal line, labeled '5' in top-left corner (no text or symbols within the diagram itself)mAINTENANCE
CLEANING
- Clean using a soft cloth (it can be somewhat moist if needed).
- Do not use alcohol, solvents or any similar cleaning agents.
- Wait until the product is completely dry before the main power is reconnected.
Jula reserves the right to make changes. In the event of problems, please contact our service department. www.jula.com

natural_image
Symbol of a trash bin crossed with no text or labels, representing environmental restriction (no text present)Care for the environment!
Must not be discarded with household waste!
This product contains electrical or electronic components that should be recycled.
Leave the product for recycling at the designated station e.g. the clocal authority's recycling station.
- SVENSKA....5
- SÄKERHETSANVISNINGAR....5
- TEKNISKA DATA....5
- MONTERING....5
- SAFETY INSTRUCTIONS....21
- TECHNICAL DATA 21
- ASSEMBLY....21
- SÄKERHETSANVISNINGAR
- UNDERHÅLL
- RENGÖRING
- Värna om miljön!
- MONTERINGSRESULTAT
- VEDLIKEHoLD
- RENGjøRING
- Verne om miljøet!
- KoNSERWACjA
- CZySZCZENIE
- DBAJ O ŚRODOWISKO!
- Read the operating instructions carefully before use!
- TECHNICAL DATA
- ASSEMBLY
- WARNING!
- fURTHER REQUIREMENTS for BATHROOM INSTALLATION
- Recommended areas for bathroom installation
- INSTALLATION ORDER
- mAINTENANCE
- CLEANING
- Care for the environment!
Brand : Anslut
Model : 402-607
Category : Lighting