541330 - Radio Sunwind - Free user manual and instructions
Find the device manual for free 541330 Sunwind in PDF.


| Product Type | Radio |
| Brand | Sunwind |
| Model | 541330 |
| Dimensions (Approx.) | 200 x 120 x 60 mm |
| Weight (Approx.) | 500 g |
| Power Supply | Batteries (e.g., 2x AA) or AC adapter (not included) |
| Frequency Bands | AM/FM |
| Controls | Volume knob, tuning knob, on/off switch |
| Speaker | Built-in mono speaker |
| Headphone Jack | Yes (3.5 mm) |
| Antenna | Telescopic (FM), built-in ferrite (AM) |
| Display | Analog tuning dial |
| Battery Life (Est.) | ~30 hours (with alkaline batteries) |
| Operating Temperature | 0°C to 40°C |
| Housing Material | Plastic |
| Cleaning Instructions | Wipe with a soft, dry cloth |
| Safety Precautions | Do not expose to water or moisture; remove batteries if not used for long periods |
| Spare Parts Availability | Contact Sunwind for spare parts |
| Repairability | Refer to qualified service personnel |
| Manual Languages | EN, FI, NO, SV |
Frequently Asked Questions - 541330 Sunwind
User questions about 541330 Sunwind
0 question about this device. Answer the ones you know or ask your own.
Ask a new question about this device
Download the instructions for your Radio in PDF format for free! Find your manual 541330 - Sunwind and take your electronic device back in hand. On this page are published all the documents necessary for the use of your device. 541330 by Sunwind.
USER MANUAL 541330 Sunwind
Control methods
The buttons
Charging
Charging the radio

On/Off/Standby
Turning on the radio
Planet Rock Connecting...
Planet Rock Now Playing
If you select a station that does not have a stored channel, you will see the message "Preset Empty" on the display. Then select another station.
Preset Empty
DAB Menu
DRC
Options: Scan Setting> System >Audio Setting.
Scanning settings
Valgmuligheter: Update Any > Update From DAB > Update From FM > No Update
Control methods
The buttons
Check the power adapter
Charging the radio
89.05MHz Battery charging
89.05MHz Battery 18
On/Off/Standby
Turn on the radio

DRC
Options: Off > Low > High
Options: Scan Setting > System > Audio Setting.

Options: Update Any > Update From DAB >
Update From FM > No Update
Alarm
Monitoring methods
The buttons
Charging
Charging the radio
89.05MHz Battery charging
89.05MHz Battery 18

DRC


General information & Safety Instructions
Battery Care
To get the best out of the battery, fully charge and use until flat for the first 5-6 times. Then use until flat and fully charge at least once a month.
Prolonged storage without charge may cause damage to the battery and result in poor to no charge. It is recommended you fully charge the battery every 6 months for long term storage to keep the battery in good condition.
This radio is powered by an internal 2600mAh rechargeable lithium battery.
Do not dispose of batteries in your household waste.
Please contact your local authority for details on safe disposal. Do not expose this radio to damp or moist conditions.

Never throw batteries into a fire or expose to excessive heat sources. If batteries are swallowed, please seek immediate medical attention. Always ensure correct +/- battery polarity when installing batteries. Do not recharge non-rechargeable batteries.

Equipment, which is marked with the WEEE logo (as shown on the left), should not be thrown away with your household waste. Contact your local authority waste disposal department, as they will be able to provide details of the recycling options available in your area.
Electrical and electronic equipment (WEEE) contains materials, parts and substances, which can be dangerous to the environment and harmful to human health if the waste of electrical and electronic equipment (WEEE) is not disposed of correctly.
Contents & Features
Contents
- 1x Portable DAB+/DAB /FM Radio
- 1x Charge Cable
- 1x Lanyard
Features
- DAB+/DAB receiver (174MHz - 240MHz)
- FM receiver (87.5MHz - 108.00MHz)
- Stores 10 FM presets
- Stores 10 DAB+/DAB presets
- Built-in rechargeable 3.7V/2600mAh battery
- Up to 15 hours play time
- 3W Speaker with enhanced bass
- Auto adjusting clock
- LCD backlight display
- Dimmable Display
- Telescopic aerial
- Inactive Standby
- 3.5mm headphone port
- Micro USB Charge Port
- On/Off/Standby
Controls & Layout

Control Method
Buttons
All the buttons are just a quick press to use unless stated in a process described in this guide.

The general navigation and selection is done with the buttons of 'TUNE'. Press 'TUNE+' or 'TUNE-' to cycle through options and press the button of 'SELECT' to select a displayed option.
Fitting The Lanyard
The radio is provided with a lanyard. To fit the lanyard. Thread it through the mounting hole at the top left of the radio located on the back, then thread the clip through the loop to secure it in place.

Checking The Adaptor
READ BEFORE USE
Adaptor information
Before using a USB main adaptor, please check the "Output" information on the plug face label. For this device, 5V/1A or 5V/1000mA is the maximum output required to charge the battery. Using a different output can damage the battery and/or product and void the warranty.
Please note:
Tablets and some large smart phones use 2.1A or 2100mA outputs and above, and these are not suitable for this product.
Mains Wall Socket USB Ports
DO NOT use the USB outlets on a mains wall socket. This will harm the battery and/or product and void the warranty.

Charging
Charging The Radio
Using a 5V/1A USB mains adaptor or a PC or Laptop USB port, connect the charge cable to the USB power output and the micro USB end to the charge port on the radio. It can take approximately
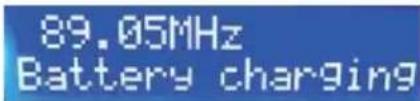
4 hours to fully charge the battery. The Screen of Submenu of 'INFO' will show "Battery charging" when charging. Shows the percentage of power when not charging.
Please note: There is no display on the screen when the product was charged in the shutdown status. Please press 'INFO' button to check the battery information after starting up.
You can use the radio whilst it is being charged.

On/Off/Standby
Turning The Radio On
Press the (⏻) button once to turn the radio on or to wake it out of standby mode.
Turning The Radio Off
Press and hold the ⏻ button until the screen shows 'Bye Bye' and turns itself off.
Standby Mode
Press the Ⓐ button once to put the radio into standby mode.
Please Note:
The date and time is automatically set once the radio is turned on and it is receiving a DAB or DAB+ signal.
DAB+/DAB
The DAB mentioned in our specification is the same as DAB+.
DAB Mode
Once the radio is turned on it is usually in DAB mode. If it is not, press the 'MODE' button to change the radio to DAB.
Tune In A Station
All the available stations are displayed in alphabetical order in the station list. To select a station can press the number button on the top of the radio or press the button 'PRESET' and 'TUNE+/ TUNE-' to cycle though the available stations and press the button 'SELECT' to tune in the station displayed on the screen.

If you have moved to a different location, have poor audio or bad interference it is advisable to rescan the available stations. To do this press the 'SCAN' button to refresh the station list.

The number on the right of the scanning screen is the total number of available stations found and added to the station list. Once the radio has completed the scan it will automatically tune into the first alphabetically listed station.
Storing A Preset
Once a station has been tuned in, if you want to save it in the quick preset bank (Button 1, 2, 3 or 4, which can be found on the top of the device), press and hold the preferred button for 3 seconds until the 'stored message' is displayed on the LCD
Preset 1 stored
If you need to save more than 4 presets, press and hold the 'Preset' button for 3 seconds, then use the 'Tune+/-' buttons to cycle through the available preset slots. Once you have found the desired slot, press the 'Select/ Snooze' button to save the station to that preset number.
The radio has a total of 20 preset slots (10 for DAB and 10 for FM). This includes the 4 'Quick Access' buttons.
Recall a preset
To recall saved presets 1, 2, 3 or 4, simply press the required 'Quick Access' button on the top of the device. To recall presets 5 to 10, simply press the 'Preset' button and then use the 'Tune+/-' buttons to scroll through the desired preset station, Press the 'Select/ Snooze' button to select that station.


If you select a slot that has nothing stored in it, it will display as 'Preset Empty'.
Preset Empty
DAB Menu
There are a few options and features available under the DAB menu. To access these press 'MENU' once. Pressing the button 'TUNE+/ TUNE-' you can through the available options then press down on the 'SELECT' to select it.
Options: Full Scan > System > Prune > ORG > Manual Tune
Press the 'MENU' button again to exit the DAB menu.
Full Scan
To retune the radio and refresh the station list, press 'MENU' then press the 'TUNE+/TUNE-' to select 'Full Scan' to start the scan.


The number on the right of the scanning screen is the total number of available stations found and added to the station list. Once the radio has completed the scan it will automatically tune into the first alphabetically listed station. This is the same as pressing 'SCAN'.
Prune
If the radio is only receiving a partial signal but it is strong enough to register in the station list, it will be displayed with a '?' at the front
of the station name. You can remove these stations from the list with the prune option. To do this, first tune the station in with the '?' prefix, then press 'MENU'. Use the 'TUNE+/TUNE-' button to navigate and select 'Prune'. Then select 'Yes' to remove the station.


DRC
DRC, or Dynamic Range Compression, is a feature that some DAB stations use to even out the audio levels between the quiet and loud segments of a broadcast. To use this function, press 'MENU', then use the 'TUNE+/TUNE-' button to navigate and select 'DRC'.

Options: Off > Low > High
Low is a small amount of compression, and high will even the volume as much as possible. Use the 'TUNE+/TUNE-' button to change and select an option.
Once selected, press 'MENU' to return to the radio.
Manual Tune
It is possible to manually tune the DAB function of the radio. To do this, you will need to press the 'MENU' button and use the 'TUNE+/TUNE-' button to navigate and select 'Manual Tune'.
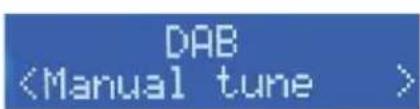

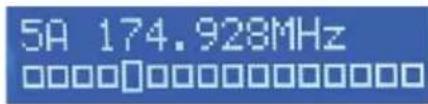
The first screen on this option is the current frequency of the station being played. You can cycle through the other stations using the 'TUNE+/TUNE-' button. Select a frequency to adjust by pressing 'TUNE+/TUNE-'. Once you see the screen with the boxes, you can adjust and confirm the selected frequency with the 'TUNE+/TUNE-' button. Press 'MENU' to return to the radio.
FM
FM Mode
Once the radio is turned on, it is usually in DAB mode. Press the 'MODE' button to change the radio to FM.
Tune In A Station
Use the 'TUNE+/TUNE-' button to cycle through the FM band. The band will adjust in increments of 0.05 MHz. It is possible to auto scan for the next available signal by pressing the 'TUNE+/TUNE-' button for a couple of seconds. Press the 'TUNE+/TUNE-' button in the opposite direction to stop the auto scan.
![89.00MHz [No RadioText]](/content/2026/05/1098820/images/f8c10f6a728fb2ba67711c1ef5587a5f6cf92ac9dc22f524b4ab38a3604ec0b3.jpg)
If the signal is strong enough, the frequency will change to the name of the station as it is receiving FM radio text information.
Please Note:
Auto scan is affected by the scan settings (all stations/strong stations).
Storing A Preset
Once a station has been tuned in, if you want to save it in the quick preset bank (Button 1, 2, 3 or 4, which can be found on the top of the device), press and hold the preferred button for 3 seconds until the 'stored message' is displayed on the LCD.
Preset 1 stored
If you need to save more than 4 presets, press and hold the 'Preset' button for 3 seconds, then use the 'Tune+/-' buttons to cycle through the available preset slots. Once you have found the desired slot, press the 'Select/Snooze' button to save the station to that preset number.
The radio has a total of 20 preset slots (10 for DAB and 10 for FM). This includes the 4 'Quick Access' buttons.
Recall A Preset
To recall saved presets 1, 2, 3 or 4, simply press the required 'Quick Access' button on the top of the device. To recall presets 5 to 10, simply press the 'Preset' button and then use the 'Tune+/-' buttons to scroll through the desired preset station. Press the 'Select/Snooze' button to select that station. If you select a slot that has nothing stored in it, it will display as 'Preset Empty'.
![89.00MHz P1 [No RadioText.]](/content/2026/05/1098820/images/4380c9377124715229cc31ff235224cbf9e9048fee8588f7d24dfa626d902f82.jpg)

FM Menu
There are a few options and features available under the FM menu. To access these, press the 'MENU' button for three seconds. Using the 'TUNE+/TUNE-' button you can cycle through the available options, then press down on the 'SELECT' to select it.
Options: Scan Setting> System >Audio Setting
Press the 'MENU' button again to exit the FM menu.
Scan Setting
This option changes the way the auto scan finds stations via a filter. The default for this option is 'All Stations' but you can change this to 'Strong Stations'. To do this press 'MENU' and use the 'TUNE+/ TUNE- ' button to navigate and select 'Scan Settings '. Use the 'TUNE+/TUNE-' button again to change between the options and press it to select.
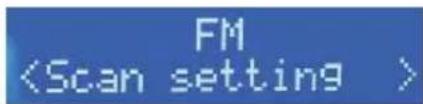
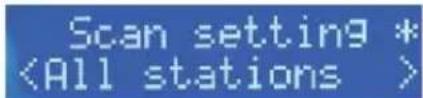

The asterisk in the top right corner indicates the currently used setting for the auto scan.
Audio Setting
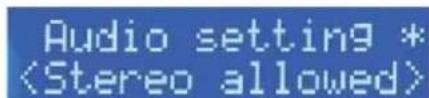
The audio settings will allow a stereo radio signal to be used where available or convert that signal to a mono audio output. To change the settings press 'MENU' and use the 'TUNE+ / TUNE-' button to navigate and select 'Audio Settings'.

Use the 'TUNE+ / TUNE- ' button to change between the two options and press the 'TUNE+ / TUNE- ' button to select one. The asterisk in the top right corner indicates the currently selected setting .
System
System Settings
The radio has a few features and functions that can be changed under the 'System' menu.
Options: Time > Alarm > Sleep > SW Version > Factory Reset > Language > Inactive Standby > Backlight
To access these options press 'MENU' in any mode and use the 'TUNE+ / TUNE' button to navigate and select 'System'.
Time - Set Date Format
Change the presented format of the date with this option .
Once in the Time sub menu list, use the 'TUNE+/TUNE-' button to navigate and select this feature.

Select the update source by using the 'TUNE+/TUNE-' button and pressing it to select the chosen format.
Options: 00-MM-YYYY > MM-00-YYYY
An asterisk will show in the right corner on the currently selected option. Press 'MENU' a few times to exit this menu option to the radio.
Time - Set Time Format
Change the presented format of the time with this option.
Once in the Time sub menu list, use the 'TUNE+/TUNE-' button to navigate and select this feature.

Time
From here you can set the date and time manually, update it from different sources, change the time format and the date format.
Use the 'TUNE+/TUNE-' button to navigate and select 'Time' from the system menu.

In this sub menu you can choose from the following:
- Set Time/Date
- Auto Update
- Set 12/24 Hour
- Set Date Format
Once in the Time sub menu list, use the 'TUNE+/TUNE-' button to navigate and select to set the required option.
Time - Set Time/Date
Manually set the date and time with this option.
The process is controlled by using the 'TUNE+/TUNE-' button to cycle through the available options/values and pressing the 'TUNE+/TUNE-' button to confirm the option/value selected.
Process flow:
Time: Hour > Minutes Date: Day > Month > Year
The date format will change depending on the current selected date format.
Select the time display format by using the 'TUNE+/TUNE-' button and pressing it to select the chosen format.
Options: Set 24 hour > Set 12 hour
An asterisk will show in the right corner on the currently selected option. Press 'MENU' a few times to exit this menu option to the radio.
Time - Auto Update
With this option you can auto update the time and date information from a DAB or FM signal. Once in the Time sub menu list, use the
'TUNE+ /TUNE-' button to navigate and select this feature.

Select the update source by using the 'TUNE+/TUNE-' button to cycle through the available options and press it to confirm.
Options: Update Any > Update From DAB > Update From FM > No Update
Press 'Menu' a few times to exit this menu option to the radio.
Alarm
Press and hold the INFO/ MENU button to select System. Use the 'TUNE+/TUNE-' button to navigate and select 'Alarm' to select the setting of Alarm1 / Alarm2's On time / Duration / Source / Bell mode (Once / Weekends / Weekdays / Daily).
Alarm 1 Setup
Alarm 2 Setup
When the alarm sounds, press the SELECT/SNOOZE button to make a snooze selection.
Press 'On/Off' once to turn off the alarm, press again to return to the radio.
Sleep
You can put the radio on standby after a certain time. Once you have arrived, Sleep from the system, choose from the following options:
Option: Off > 15 > 30 > 45 > 60 > 90 (values in minutes)
Use the 'TUNE+/TUNE-' button to cycle and select an option from the list.

Press the 'MENU' button to go back.
SW Version
This option will display the current version of firmware in use.
Use the 'TUNE+/TUNE-' button to navigate and select 'SW Version' to view the firmware details.


Press 'MENU' a couple of times to return to the radio.
Factory Reset
This option will reset the radio and erase all presets stored.
To reset the radio, use the 'TUNE+/TUNE-' button to cycle through the system menu and press it to select 'Factory Reset'.
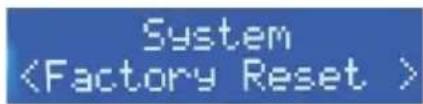

On the 'Factory Reset?' screen, use the 'TUNE+/TUNE-' button to select the required 'yes' or 'no' option and press it to confirm the action.
The radio will then reset itself and begin to scan for stations.
Language
This option will change the language the menus are displayed in. Use the 'TUNE+/TUNE-' button to navigate and select 'Language' to access the available languages.

Use the 'TUNE+/TUNE-' button to cycle through and press it to select your chosen language.
Options: English > Norwegian > Swedish > Finnish
Press 'Menu' a few times to exit this menu option to the radio.
Inactive Standby
This option will turn the radio off after a preselected amount of time. To set this feature, use the 'TUNE+/TUNE-' button to navigate and select 'Inactive Standby' from the system menu.
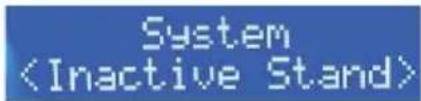
Use the 'TUNE+/TUNE-' button to cycle and select an option from the list.
Option: Off > 6 > 5 > 4 > 2 (values in hours)
Press the 'MENU' button to go back.
Backlight
This option will change the light intensity of the display in use and dimmed as well as the time it takes to dim. Use the 'TUNE+/TUNE-' button to navigate and select 'Backlight' from the 'System' menu.

There are three options that can be changed once backlight has been selected: Time Out, Dim Level, and On Level.
Backlight - Time Out
This option will change the duration it takes before the screen will dim. Use the 'TUNE+ / TUNE-' button to navigate and select 'Time Out' from the 'Backlight' menu.

Use the 'TUNE+ / TUNE-' button again to cycle and select one of the following options available.
Options: On > 180 > 120 > 90 > 60 > 45 > 30 > 20 > 10
(Values in seconds)
Press the 'MENU' button to go back.
Backlight - Dim Level
This option will change the dimness level of the screen. Use the 'TUNE+/TUNE-' button to navigate and select 'Dim Level' from the 'Backlight' menu.

Use the 'TUNE+/TUNE-' button again to cycle and select one of the following options available.
Options: High > Low > Medium
Press the 'MENU' button to go back.
Backlight - On Level
This option will change the brightness level of the active screen. Use the 'TUNE+/TUNE-' button to navigate and select 'On Level' from the 'Backlight' menu.

Use the 'TUNE+/TUNE-' button again to cycle and select one of the
Options: High > Low > Medium
Press the 'MENU' button to go back.
Info
Information Details
When listening in DAB or FM mode you can cycle through the available information from the broadcasting service and the radio by pressing the 'Info' button repeatedly.
The Information cycle:
DAB
- Now Playing
- Signal Strength Music genre • National/Local designation
- MHz Frequency
- Signal Errors • Kbps data transfer rate
- Battery level Time Date
FM
- Now Playing
- Station Name
- Music genre
- Mono/Stereo
- Battery level
- Time
- Date
Specification
Portable DAB/DAB+ /FM Radio
General
Size: 156mm x 90mm x 32mm (approximately)
Weight: 290g
Ports: Micro USB port
3.5mm Headphone Port
Radio
Solution: Frontier
Frequency Range: 174MHz - 240MHz
FM Frequency Range: 87.5MHz -108MHz
Aerial Type: Telescopic antenna
Preset Storage: 10 DAB/DAB+ and 10 FM
Display: LCD
Battery
Battery Type: Internal Rechargeable Li-ion
Battery Capacity: 2600mAh
Charge Time: Approximately 4 hours
Charging Requirements Min: 4.5V/500mA
Charging Requirements Max: 5V/1A
Charging Port Type: Micro USB port
Playtime: Up to 15 hours
SUNWIND
ENJOY your spare time
Sunwind Gylling AS
Rudssletta 71-75, 1351 Rud, Norway
Tlf: 67 17 13 70
www.sunwind.no
Sunwind Gylling AB

- CONTROL METHODS
- THE BUTTONS
- CHARGING
- CHARGING THE RADIO
- ON/OFF/STANDBY
- TURNING ON THE RADIO
- PLANET ROCK CONNECTING
- PLANET ROCK NOW PLAYING
- PRESET EMPTY
- DAB MENU
- DRC
- SCANNING SETTINGS
- CHECK THE POWER ADAPTER
- TURN ON THE RADIO
- ALARM
- MONITORING METHODS
- GENERAL INFORMATION & SAFETY INSTRUCTIONS
- BATTERY CARE
- CONTENTS & FEATURES
- CONTENTS
- FEATURES
- CONTROLS & LAYOUT
- CONTROL METHOD
- BUTTONS
- FITTING THE LANYARD
- CHECKING THE ADAPTOR
- READ BEFORE USE
- ADAPTOR INFORMATION
- PLEASE NOTE
- MAINS WALL SOCKET USB PORTS
- TURNING THE RADIO ON
- TURNING THE RADIO OFF
- STANDBY MODE
- DAB+/DAB
- DAB MODE
- TUNE IN A STATION
- STORING A PRESET
- RECALL A PRESET
- FULL SCAN
- PRUNE
- MANUAL TUNE
- FM
- FM MODE
- FM MENU
- SCAN SETTING
- AUDIO SETTING
- SYSTEM
- SYSTEM SETTINGS
- TIME - SET DATE FORMAT
- TIME - SET TIME FORMAT
- TIME
- TIME - SET TIME/DATE
- TIME - AUTO UPDATE
- SLEEP
- SW VERSION
- FACTORY RESET
- LANGUAGE
- INACTIVE STANDBY
- BACKLIGHT
- BACKLIGHT - TIME OUT
- BACKLIGHT - DIM LEVEL
- BACKLIGHT - ON LEVEL
- INFO
- INFORMATION DETAILS
- DAB
- SPECIFICATION
- GENERAL
- RADIO
- BATTERY
- SUNWIND
- ENJOY YOUR SPARE TIME
Brand : Sunwind
Model : 541330
Category : Radio