
TK-3230DX - Radio KENWOOD - Free user manual and instructions
Find the device manual for free TK-3230DX KENWOOD in PDF.


| Product Type | Two-Way Radio |
| Brand | Kenwood |
| Model | TK-3230DX |
| Category | Portable Radio |
| Dimensions (H x W x D) | Approx. 117 x 56 x 33 mm |
| Weight | Approx. 180 g (with battery) |
| Power Supply | Rechargeable Lithium-Ion Battery (KNB-45L) |
| Frequency Range | UHF: 406-470 MHz |
| Number of Channels | 128 |
| RF Output Power | 5 Watts |
| Battery Life | Approx. 12 hours (typical usage) |
| Key Features | CTCSS/DCS, Voice Scrambler, Scan, Priority Scan, Time-out Timer, Battery Save, Low Battery Alert |
| Water/Dust Resistance | IP54 (splash and dust resistant) |
| Cleaning and Maintenance | Wipe with a soft, dry cloth; do not use solvents |
| Accessories Compatibility | Battery, antenna, belt clip, charger, earphone |
| Repairability | Service by authorized Kenwood technician; spare parts available |
| Regulatory Compliance | FCC ID, IC certification |
Frequently Asked Questions - TK-3230DX KENWOOD
User questions about TK-3230DX KENWOOD
0 question about this device. Answer the ones you know or ask your own.
Ask a new question about this device
Download the instructions for your Radio in PDF format for free! Find your manual TK-3230DX - KENWOOD and take your electronic device back in hand. On this page are published all the documents necessary for the use of your device. TK-3230DX by KENWOOD.
USER MANUAL TK-3230DX KENWOOD
JVCKENWOOD Corporation
THANK YOU
We are grateful for your purchase of this KENWOOD product and welcome you to the Business Radio Service (BRS).
CONTENTS
FEATURES......4
OPERATING CONDITIONS....4
NOTICES TO THE USER .... 5
FCC LICENSE INFORMATION ....6
PRECAUTIONS....7
UNPACKING AND CHECKING EQUIPMENT ....12
SUPPLIED ACCESSORIES....12
PREPARATION....12
INSTALLING/ REMOVING THE BATTERY PACK ....12
CHARGING THE BATTERY PACK 13
INSTALLING THE BELT CLIP 14
INSTALLING THE OPTIONAL SPEAKER/ MICROPHONE (OR HEADSET) 14
ORIENTATION....15
DISPLAY 16
QUIET TALK/ DIGITAL QUIET TALK ....18
PRIVACY TALK 21
TRANSMIT POWER 21
COMPANDER 22
MONITOR....22
LOCK FUNCTION ......23
KEY LOCK 23
SUPER LOCK 23
SETTING MODE ....24
CHANNEL FREQUENCY SETUP ....26
SCAN....27
REVERT CHANNEL 28
SQUELCH LEVEL 28
VOICE OPERATED TRANSMISSION (VOX) ......29
VOX OPERATION....29
VOX Gain Level 29
VOX Delay Time ....30
Transmit Inhibit While Receiving 30
VOX Proceed Tone 31
FleetSync: ALPHANUMERIC 2-WAY PAGING FUNCTION ....32
CALL KEY SETUP 32
CALL ALERT TONE 33
Call Alert Side Tone ....33
SELCALL (SELECTIVE CALLING) 34
Making a Selcall ....36
Receiving a Selcall 37
Data Transmit Modulation Delay Time 38
PTT ID 38
PTT ID Side Tone 39
Mute Hold Time ....39
Caller ID Display 40
BACKGROUND OPERATIONS ....40
DISPLAY BACKLIGHT 40
MIC SENSE 41
TIME-OUT TIMER 41
BATTERY SAVER 42
BATTERY LEVEL INDICATOR 43
INCOMING CALL NOTIFICATION 44
BUSY CHANNEL LOCKOUT (BCL) 44
BEEP TONE 45
MODE RESET TIMER 45
SELECTABLE POWER ON TONE 46
RESETTING THE TRANSCEIVER ....46
TROUBLESHOOTING GUIDE ......47
SPECIFICATIONS 48
FEATURES
- Lightweight and compact design using a lithium-ion battery pack, with a sturdy, polycarbonate body and a spring-loaded belt clip.
- 219 tone/code settings for each channel, allowing you to ignore unwanted calls.
- Privacy Talk scrambles all your voice messages, giving you complete privacy for your conversations.
- FleetSync operation, allowing a variety of call types.
- Automatic battery power saver, providing you with longer battery usage.
- Battery power level indicator with low battery power warning.
- Key lock and Super Lock prevent you from accidentally changing your transceiver settings.
- Ten different calling alert tones allows you to identify yourself to your group before you begin speaking.
- Hands free operation when using an optional headset.
- Selectable Power ON Tone.
OPERATING CONDITIONS
| Open locations (no obstructions) Up to | 5 miles (8 km) |
| Residential areas (near buildings) Up to | 1.5 miles (2.4 km) |
| In steel/ concrete reinforced buildings | Up to 225,000 ft 2 (20,900 m 2 ) |
| In high rises Up to 17 fl oors |
Note:
◆ The listed ranges are based on fi eld testing and may vary with your operating conditions.
Firmware Copyrights
The title to and ownership of copyrights for fi rmware embedded in KENWOOD product memories are reserved for JVC KENWOOD Corporation.
NOTICES TO THE USER
◆ Refer service to qualified technicians only.
Safety: It is important that the operator is aware of, and understands, hazards common to the operation of any transceiver.
One or more of the following statements may be applicable:
FCC WARNING
This equipment generates or uses radio frequency energy. Changes or modifications to this equipment may cause harmful interference unless the modifications are expressly approved by the party responsible/JVC KENWOOD. The user could lose the authority to operate this equipment if an unauthorized change or modification is made.
INFORMATION TO THE DIGITAL DEVICE USER REQUIRED BY THE FCC
This equipment has been tested and found to comply with the limits for a Class B digital device, pursuant to Part 15 of the FCC Rules. These limits are designed to provide reasonable protection against harmful interference in a residential installation.
This equipment generates, uses and can generate radio frequency energy and, if not installed and used in accordance with the instructions, may cause harmful interference to radio communications. However, there is no guarantee that the interference will not occur in a particular installation. If this equipment does cause harmful interference to radio or television reception, which can be determined by turning the equipment off and on, the user is encouraged to try to correct the interference by one or more of the following measures:
- Reorient or relocate the receiving antenna.
- Increase the separation between the equipment and receiver.
- Connect the equipment to an outlet on a circuit different from that to which the receiver is connected.
- Consult the dealer for technical assistance.
FCC LICENSE INFORMATION
Your KENWOOD transceiver operates on communications frequencies which are subject to FCC (Federal Communications Commission) Rules & Regulations. FCC Rules require that all operators using Private Land Mobile radio frequencies obtain a radio license before operating their equipment. Application for license must be made on FCC form 601, schedules D and H, and Remittance form 159.
FAX: Forms can be obtained by fax from the FCC Fax-On-Demand system. Call 1-202-418-0177 from your fax machine and request document number 000601 for the form, schedules, and instructions.
MAIL: Forms can be ordered by telephone, and will be sent to you by first class mail. Call the FCC Forms Hotline at 1-800-418-FORM (1-800-418-3676).
INTERNET: Form 601 and instructions can be downloaded from the FCC Forms website at http://www.fcc.gov/formpage.html
Before fi lling out your Form 601 application Technical Data section, you must decide on which frequencies you will operate. See the frequency charts on page 26.
QUESTIONS? Call the FCC for license application questions at 1-888-CALL-FCC (1-888-225-5322).

ATTENTION:
The RBRC Recycle seal found on KENWOOD lithium-ion (Li-ion) battery packs indicates KENWOOD's voluntary participation in an industry program to collect and recycle Li-ion batteries after their operating life has expired. The RBRC program is an alternative to disposing Li-ion batteries with your regular refuse or in municipal waste streams, which is illegal in some areas.
For information on Li-ion battery recycling in your area, call (toll free) 1-800-8-BATTERY (1-800-822-8837). KENWOOD's involvement in this program is part of our commitment to preserve our environment and conserve our natural resources.
PRECAUTIONS
- Do not charge the transceiver and battery pack when they are wet.
- Ensure that there are no metallic items located between the transceiver and the battery pack.
- Do not use options not specified by KENWOOD.
- If the die-cast chassis or other transceiver part is damaged, do not touch the damaged parts.
- If a headset or headphone is connected to the transceiver, reduce the transceiver volume. Pay attention to the volume level when turning the squelch off.
- Do not place the microphone cable around your neck while near machinery that may catch the cable.
- Do not place the transceiver on unstable surfaces.
- Ensure that the end of the antenna does not touch your eyes.
- When the transceiver is used for long transmissions, the radiator and chassis will become hot. Do not touch these locations when replacing the battery pack.
- Do not immerse the transceiver in water.
- Always switch the transceiver power off before installing optional accessories.
- To dispose of batteries, be sure to comply with the laws and regulations in your country or region.

WARNING
Turn the transceiver power off in the following locations:
- In explosive atmospheres (infl ammable gas, dust particles, metallic powders, grain powders, etc.).
- While taking on fuel or while parked at gasoline service stations.
• Near explosives or blasting sites. - In aircraft. (Any use of the transceiver must follow the instructions and regulations provided by the airline crew.)
- Where restrictions or warnings are posted regarding the use of radio devices, including but not limited to medical facilities.
• Near persons using pacemakers.

CAUTION
- Do not disassemble or modify the transceiver for any reason.
- Do not place the transceiver on or near airbag equipment while the vehicle is running. When the airbag inflates, the transceiver may be ejected and strike the driver or passengers.
- If an abnormal odor or smoke is detected coming from the transceiver, switch the transceiver power off immediately, remove the battery pack from the transceiver, and contact your KENWOOD dealer.
- Use of the transceiver while you are driving may be against traffic laws. Please check and observe the vehicle regulations in your area.
- Do not expose the transceiver to extremely hot or cold conditions.
- Do not carry the battery pack with metal objects, as they may short the battery terminals.
- Danger of explosion if the battery is incorrectly replaced; replace only with the same type.
- When attaching a commercial strap to the transceiver, ensure that the strap is durable. In addition, do not swing the transceiver around by the strap; you may inadvertently strike and injure another person with the transceiver.
- If a commercially available neck strap is used, take care not to let the strap get caught on nearby machine.
- When operating the transceiver in areas where the air is dry, it is easy to build up an electric charge (static electricity). When using an earphone accessory in such conditions, it is possible for the transceiver to send an electric shock through the earphone and to your ear. We recommend you use only a speaker/microphone in these conditions, to avoid electric shocks.
- Do not expose the transceiver to long periods of direct sunlight, nor place it near heating appliances.
Information concerning the battery pack:
The battery pack includes fl ammable objects such as organic solvent. Mishandling may cause the battery to rupture producing fl ames or extreme heat, deteriorate, or cause other forms of damage to the battery. Please observe the following prohibitive matters.

DANGER
- Do not disassemble or reconstruct battery!
The battery pack has a safety function and protection circuit to avoid danger. If they suffer serious damage, the battery may generate heat or smoke, rupture, or burst into flame.
- Do not short-circuit the battery!
Do not join the + and – terminals using any form of metal (such as a paper clip or wire). Do not carry or store the battery pack in containers holding metal objects (such as wires, chain-necklaces or hairpins). If the battery pack is short-circuited, excessive current will flow and the battery may generate heat or smoke, rupture, or burst into flame. It will also cause metal objects to heat up.
- Do not incinerate or apply heat to the battery!
If the insulator is melted, the gas release vent or safety function is damaged, or the electrolyte is ignited, the battery may generate heat or smoke, rupture, or burst into flame.
- Do not leave the battery near fi re, stoves, or other heat generators (areas reaching over 80°C/ 176°F)!
If the polymer separator is melted due to high temperature, an internal short-circuit may occur in the individual cells and the battery may generate heat or smoke, rupture, or burst into flame.
- Do not immerse the battery in water or get it wet by other means!
If the battery's protection circuit is damaged, the battery may charge at extreme current (or voltage) and an abnormal chemical reaction may occur. The battery may generate heat or smoke, rupture, or burst into flame.
- Do not charge the battery near fi re or under direct sunlight!
If the battery's protection circuit is damaged, the battery may charge at extreme current (or voltage) and an abnormal chemical reaction may occur. The battery may generate heat or smoke, rupture, or burst into flame.

DANGER
- Use only the specified charger and observe charging requirements!
If the battery is charged in unspecified conditions (under high temperature over the regulated value, excessive high voltage or current over regulated value, or with a remodeled charger), it may overcharge or an abnormal chemical reaction may occur. The battery may generate heat or smoke, rupture, or burst into flame.
- Do not pierce the battery with any object, strike it with an instrument, or step on it!
This may break or deform the battery, causing a short-circuit. The battery may generate heat or smoke, rupture, or burst into flame.
- Do not jar or throw the battery!
An impact may cause the battery to leak, generate heat or smoke, rupture, and/or burst into flame. If the battery's protection circuit is damaged, the battery may charge at an abnormal current (or voltage), and an abnormal chemical reaction may occur. The battery may generate heat or smoke, rupture, or burst into flame.
- Do not use the battery pack if it is damaged in any way!
The battery may generate heat or smoke, rupture, or burst into flame.
- Do not solder directly onto the battery!
If the insulator is melted or the gas release vent or safety function is damaged, the battery may generate heat or smoke, rupture, or burst into flame.
- Do not reverse the battery polarity (and terminals)!
When charging a reversed battery, an abnormal chemical reaction may occur. In some cases, an unexpected large amount of current may flow upon discharging. The battery may generate heat or smoke, rupture, or burst into flame.
- Do not reverse-charge or reverse-connect the battery!
The battery pack has positive and negative poles. If the battery pack does not smoothly connect with a charger or operating equipment, do not force it; check the polarity of the battery. If the battery pack is reverse-connected to the charger, it will be reverse-charged and an abnormal chemical reaction may occur. The battery may generate heat or smoke, rupture, or burst into flame.

DANGER
- Do not touch a ruptured and leaking battery!
If the electrolyte liquid from the battery gets into your eyes, wash your eyes with fresh water as soon as possible, without rubbing your eyes. Go to the hospital immediately. If left untreated, it may cause eye-problems.

WARNING
- Do not charge the battery for longer than the specified time!
If the battery pack has not finished charging even after the regulated time has passed, stop it. The battery may generate heat or smoke, rupture, or burst into flame.
- Do not place the battery pack into a microwave or high pressure container!
The battery may generate heat or smoke, rupture, or burst into flame.
- Keep ruptured and leaking battery packs away from fi re!
If the battery pack is leaking (or the battery emits a bad odor), immediately remove it from fl ammable areas. Electrolyte leaking from battery can easily catch on fi re and may cause the battery to generate smoke or burst into fl ame.
- Do not use an abnormal battery!
If the battery pack emits a bad odor, appears to have different coloring, is deformed, or seems abnormal for any other reason, remove it from the charger or operating equipment and do not use it. The battery may generate heat or smoke, rupture, or burst into flame.
UNPACKING AND CHECKING EQUIPMENT
Carefully unpack the transceiver. If any of the items listed below are missing or damaged, fi le a claim with the carrier immediately.
SUPPLIED ACCESSORIES
- Battery charger/ AC adapter (KSC-37S) ....1
- Li-ion Battery pack (KNB-46L) ....1
- Belt clip (KBH-14) .... 1
- Screw (M3 x 8 mm) ....2
- Warranty card ....1
- Instruction manual ....1
PREPARATION
INSTALLING/ REMOVING THE BATTERY PACK

CAUTION
◆ Do not short the battery terminals or dispose of the battery by fire.
◆ Never attempt to remove the casing from the battery pack.

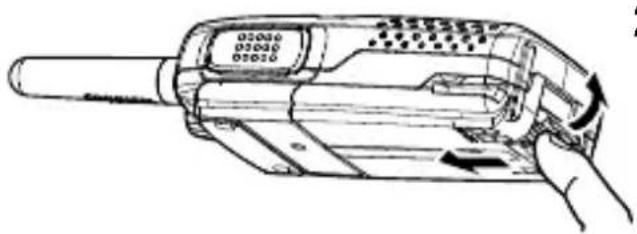
natural_image
Technical line drawing of a handheld device with internal components and directional arrows (no text or symbols)1 Match the guides of the battery pack with the corresponding grooves on the upper rear of the transceiver, then firmly press the battery pack to lock it in place.
2 To remove the battery pack, lift the safety catch on the base of the transceiver, then press the release latch underneath the safety catch.
CHARGING THE BATTERY PACK
The battery pack is not charged at the factory; charge it before use.
Average battery pack life:
Battery Saver on: 18 hours
Battery Saver off: 14 hours
- Average times are calculated using 5% transmit time, 5% receive time, and 90% standby time.
ATTENTION:
◆ Always switch OFF a transceiver equipped with a battery pack before inserting the transceiver into the charger.
1 Plug the AC adapter cable into the jack located on the rear of the charger.
2 Plug the AC adapter into an AC outlet.
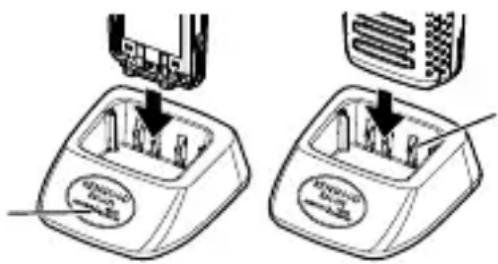
3 Slide a battery pack or a transceiver equipped with a battery pack into the charging slot of the charger.
- Make sure the metal contacts of the battery pack mate securely with the charger metal terminals.
- The indicator lights red and charging begins.
Indicator
natural_image
Two technical diagrams showing a device with labeled ports and arrows indicating assembly or connection (no text or symbols present)Charger metal terminals
4 When charging is completed, the indicator fl ashing green. Remove the battery pack or the transceiver from the charging slot of the charger.
- It takes approximately 2.5 hours to charge the battery pack.
- When the charger will not be used for a long time, unplug the AC adapter from the AC outlet.
Note:
- When the indicator blinks red, the battery pack is either defective or the battery pack contacts are not properly mated with those of the charger.
◆ The ambient temperature should be between 41irc F and 104irc F ( 5irc C and 40irc C) while charging is in progress. Charging outside this range may not fully charge the battery.
◆ The battery pack life is over when its operating time decreases even though it is fully and correctly charged. Replace the battery pack.
INSTALLING THE BELT CLIP

natural_image
Technical line drawing of a handheld electronic device with attached components (no text or symbols)If necessary, attach the belt clip using the two supplied M3 x 8 mm screws.
INSTALLING THE OPTIONAL SPEAKER/ MICROPHONE (OR HEADSET)
natural_image
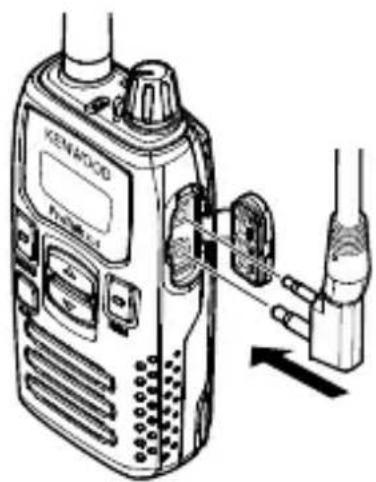
Line drawing of a walkie-talkie with attached plug and belt (no text or symbols)1 Open the SP/MIC tabs on the side of the transceiver.
2 Insert the accessory's plugs into the SP/MIC jacks.
3 When you remove the accessory from the transceiver, be sure to cover the SP/MIC jacks with the attached tabs, in order to keep dust and dirt away from the contacts.
ORIENTATION

① Power switch/ Volume control
Turn clockwise to switch ON the transceiver. To switch OFF the transceiver, turn counterclockwise until a click sounds. Rotate to adjust the volume level.
② LED indicator
Indicates the transceiver status.
③ PTT (Push to Talk) switch
Press and hold, then speak into the microphone to transmit.
④ MENU key
Press to perform various functions. Press and hold while switching the power ON to enter Setting Mode.
⑤ CAL key
Press before making a call to alert the other party members, or press to select a unit ID to make a call.
⑥ MON key
Press to monitor the current channel for activity.
⑦ ▲ keys
Press to change the operating channel, to select a menu in Setting Mode, and to perform other functions.
⑧ SP/MIC jacks
Insert the speaker/ microphone or headset plug into this jack.
DISPLAY

| Icon Description | |
| VOX | Appears when VOX is activated. |
| LOW | Appears when using low transmit power. |
| DQT | Appears when the channel is set up with a DQT code. |
| SEL | Appears when making or receiving a selcall. |
 | Displays the approximate battery power remaining. Blinks when the battery power is low, while transmitting. |
| PRIVACY | Appears when Privacy Talk is activated. |
| CID | Appears when the Caller's ID is displayed. |
 | Displays the channel number along with its QT/DQT setting (if any). Also displays various menus and menu settings. |
| Appears when compander is activated. | |
| [DGBY] | Appears while monitoring a channel. |
 | Appears when the transceiver keys have been locked. |
Switch the Power ON
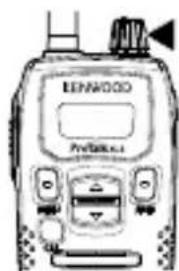
Switch the transceiver power ON by turning the Power switch/ Volume control clockwise.
- A confirmation tone sounds, the LCD lights up momentarily, then the current channel number is displayed.


To switch the transceiver power OFF, turn the Power switch/ Volume control fully counterclockwise, until a click sounds.
Adjust the Volume
Set your desired volume level by rotating the Power switch/ Volume control.
- Clockwise increases the volume and counterclockwise decreases the volume.
Note:
◆ To adjust the volume using background noise as a reference, use the Monitor function {page 22}.
Select a Channel
Select a channel by pressing the ▲ or ▶ key.

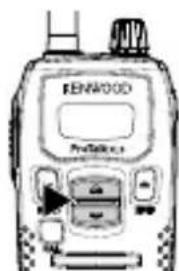
- A confirmation tone sounds each time you press the ▲ or ▼key.
- When you receive a call on your selected channel, you will hear audio from the speaker and the LED will light green.
- To use a signaling code, refer to “QUIET TALK/DIGITAL QUIET TALK” {page 18}.
Make a Call
1 Press the MON key to make sure the channel is not in use {page 22}.

2 Press and release the CAL key to alert the other parties that you are beginning a call.
- A call alert tone will sound on the other party's transceiver.
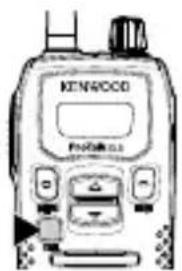
3 Press and hold the PTT switch, then speak into the speaker area to transmit.
• The LED lights red while transmitting.
- For best sound quality, speak into the speaker area in your normal speaking voice while holding the transceiver approximately 1.5 inches (3 to 4 cm) from your mouth.

4 Release the PTT switch when you have finished speaking.
QUIET TALK/ DIGITAL QUIET TALK
QT (Quiet Talk) and DQT (Digital Quiet Talk) are functions that reject signals from undesired parties that are using the same channel as you. You will hear audio from the speaker only when you receive a signal that contains a tone or code matching the one set up on the channel you are using. Likewise, when you transmit on a channel set up with QT or DQT, the receiving station must have a matching tone or code in order to hear your signal.
You can select a tone or code for each channel. There are 45 QT tones and 174 DQT codes. After changing the QT/ DQT setting, confirm that the other members in your group have selected the same tone or code.
| QT No. | QT Frq. | QT No. | QT Frq. | QT No. | QT Frq. | QT No. | QT Frq. |
| 1 | 67.0 Hz | 13 | 103.5 Hz | 25 | 156.7 Hz | 37 | 241.8 Hz |
| 2 | 71.9 Hz | 14 | 107.2 Hz | 26 | 162.2 Hz | 38 | 250.3 Hz |
| 3 | 74.4 Hz | 15 | 110.9 Hz | 27 | 167.9 Hz | 39 | 69.3 Hz |
| 4 | 77.0 Hz | 16 | 114.8 Hz | 28 | 173.8 Hz | 40 | 67.0 Hz |
| 5 | 79.7 Hz | 17 | 118.8 Hz | 29 | 179.9 Hz | 41 | 67.0 Hz |
| 6 | 82.5 Hz | 18 | 123.0 Hz | 30 | 186.2 Hz | 42 | 67.0 Hz |
| 7 | 85.4 Hz | 19 | 127.3 Hz | 31 | 192.8 Hz | 43 | 67.0 Hz |
| 8 | 88.5 Hz | 20 | 131.8 Hz | 32 | 203.5 Hz | 44 | 67.0 Hz |
| 9 | 91.5 Hz | 21 | 136.5 Hz | 33 | 210.7 Hz | 45 | 67.0 Hz |
| 10 | 94.8 Hz | 22 | 141.3 Hz | 34 | 218.1 Hz | oF | OFF |
| 11 97.4 Hz 23 146.2 Hz 35 225.7 Hz | |||||||
| 12 100.0 Hz 24 151.4 Hz 36 233.6 Hz | |||||||
| DQT No. | DQT Code | DQT No. | DQT Code | DQT No. | DQT Code | DQT No. | DQT Code | DQT No. | DQT Code |
| 1 | D023N | 21 | D134N | 41 | D306N | 61 | D503N | 81 | D734N |
| 2 | D025N | 22 | D143N | 42 | D311N | 62 | D506N | 82 | D743N |
| 3 | D026N | 23 | D152N | 43 | D315N | 63 | D516N | 83 | D754N |
| 4 | D031N | 24 | D155N | 44 | D331N | 64 | D532N | 84 | D645N |
| 5 | D032N | 25 | D156N | 45 | D343N | 65 | D546N | 85 | D023I |
| 6 | D043N | 26 | D162N | 46 | D346N | 66 | D565N | 86 | D025I |
| 7 | D047N | 27 | D165N | 47 | D351N | 67 | D606N | 87 | D026I |
| 8 | D051N | 28 | D172N | 48 | D364N | 68 | D612N | 88 | D031I |
| 9 | D054N | 29 | D174N | 49 | D365N | 69 | D624N | 89 | D032I |
| 10 | D065N | 30 | D205N | 50 | D371N | 70 | D627N | 90 | D043I |
| 11 | D071N | 31 | D223N | 51 | D411N | 71 | D631N | 91 | D047I |
| 12 | D072N | 32 | D226N | 52 | D412N | 72 | D632N | 92 | D051I |
| 13 | D073N | 33 | D243N | 53 | D413N | 73 | D654N | 93 | D054I |
| 14 | D074N | 34 | D244N | 54 | D423N | 74 | D662N | 94 | D065I |
| 15 | D114N | 35 | D245N | 55 | D431N | 75 | D664N | 95 | D071I |
| 16 | D115N | 36 | D251N | 56 | D432N | 76 | D703N | 96 | D072I |
| 17 | D116N | 37 | D261N | 57 | D445N | 77 | D712N | 97 | D073I |
| 18 | D125N | 38 | D263N | 58 | D464N | 78 | D723N | 98 | D074I |
| 19 | D131N | 39 | D265N | 59 | D465N | 79 | D731N | 99 | D114I |
| 20 | D132N | 40 | D271N | 60 | D466N | 80 | D732N | 100 (A0) | D115I |
| 101 (A1) | D116I 1 | 16 (b6) D2 | 26I | 131 (d1) | D351I 14 | 6 (E6) D5 | 06I 16I | (G1) D712I | |
| 102 (A2) | D125I | 117 (b7) | D243I | 132 (d2) | D364I | 147 (E7) | D516I | 162 (G2) | D723I |
| 103 (A3) | D131I | 118 (b8) | D244I | 133 (d3) | D365I | 148 (E8) | D532I | 163 (G3) | D731I |
| 104 (A4) | D132I | 119 (b9) | D245I | 134 (d4) | D371I | 149 (E9) | D546I | 164 (G4) | D732I |
| 105 (A5) | D134I | 120 (C0) | D251I | 135 (d5) | D411I | 150 (F0) | D565I | 165 (G5) | D734I |
| 106 (A6) | D143I | 121 (C1) | D261I | 136 (d6) | D412I | 151 (F1) | D606I | 166 (G6) | D743I |
| 107 (A7) | D152I | 122 (C2) | D263I | 137 (d7) | D413I | 152 (F2) | D612I | 167 (G7) | D754I |
| 108 (A8) | D155I | 123 (C3) | D265I | 138 (d8) | D423I | 153 (F3) | D624I | 168 (G8) | D645I |
| 109 (A9) | D156I | 124 (C4) | D271I | 139 (d9) | D431I | 154 (F4) | D627I | 169 (G9) | D023N |
| 110 (b0) | D162I | 125 (C5) | D306I | 140 (E0) | D432I | 155 (F5) | D631I | 170 (H0) | D023N |
| 111 (b1) | D165I | 126 (C6) | D311I | 141 (E1) | D445I | 156 (F6) | D632I | 171 (H1) | D023N |
| 112 (b2) | D172I | 127 (C7) | D315I | 142 (E2) | D464I | 157 (F7) | D654I | 172 (H2) | D023N |
| 113 (b3) | D174I | 128 (C8) | D331I | 143 (E3) | D465I | 158 (F8) | D662I | 173 (H3) | D023N |
| 114 (b4) | D205I | 129 (C9) | D343I | 144 (E4) | D466I | 159 (F9) | D664I | 174 (H4) | D023N |
| 115 (b5) | D223I | 130 (d0) | D346I | 145 (E5) | D503I | 160 (G0) | D703I | oF | OFF |
1 Press the MENU key.
- The current setting blinks.
2 Press the ▲ or ▼ key to select your desired value.
- The values range from 1 to 45 for QT tones, then proceed to 1 to 174 for DQT codes. When selecting a DQT code, the DQT appears on the display.
- Select “F” to turn off both QT and DQT.

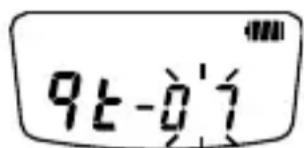

3 Press the MENU key 4 times, or press the PTT, MON, or CAL key or wait for mode reset timer to elapse {page 45} to confirm the selection and return to operating mode.
- In channel display, if DQT No. is 100 or more, the first 2 digits will be replaced by alphabet.

PRIVACY TALK
Whereas the QT and DQT functions allow you to ignore unwanted calls, Privacy Talk allows you to hold a conversation in complete privacy. When this function is activated, any other party that is listening to your channel will be unable to understand your conversation.
1 Press the MENU key 2 times.
- The PRIVACON appears on the display and blinks.
2 Press the ▲ or ▼ key to select “o n” (privacy on) or “o F” (privacy off).
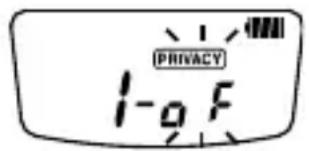

3 Press the MENU key 3 times, or press the PTT, MON, or CAL key or wait for mode reset timer to elapse {page 45} to confirm the selection and return to operating mode.
TRANSMIT POWER
You can adjust the transmit power on all channels. Selecting low power will allow longer use of the battery pack. Selecting high power will allow you to transmit further, in case the other party is too far away for low power usage.
To change the transmit power:
1 Press the MENU key 3 times.
- The current setting blinks.
2 Press the ▲ or ▼ key to select “ i a” (low power) or “ H i” (high power).
- The LOW icon appears on the display when low power is selected.
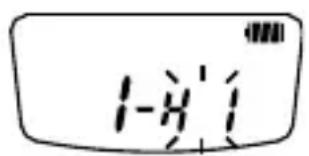
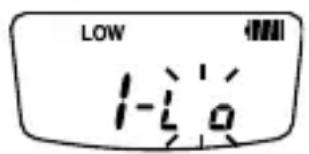
3 Press the MENU key 2 times, or press the PTT, MON, or CAL key or wait for mode reset timer to elapse {page 45} to confirm the selection and return to operating mode.
COMPANDER
The compander (compressor/expander) allows higher clarity of signals, avoiding excessive noise and interference. When activated, transmitted signals are compressed before being sent and received signals are expanded when they arrive.
1 Press the MENU key 4 times.
- The current setting blinks.
2 Press the ▲ or ▼ key to select “ P-oF ” (compander off) or “ P-o,n ” (compander on).
![[P-0:F]](/content/2026/05/1074982/images/2627b02c2c4740ea6ed0e25f1fc6abc61f37a46026c3bebd2711c9f9aeb4979e.jpg)
![[P-9.9]](/content/2026/05/1074982/images/d1bc85b5623cbbad57bd87c077facc941759b22c330772d270662ee5b2b98d40.jpg)
3 Press the MENU key 1 time, or press the PTT, MON, or CAL key or wait for mode reset timer to elapse {page 45} to confirm the selection and return to operating mode.
MONITOR
When no signals are present, the squelch on the transceiver automatically mutes the speaker so you will not hear background noise. Using the MON key, you can open the squelch to unmute the speaker. This allows you to:
- confirm the channel activity so you don't make a call while another party is using the same channel
- adjust the volume level without having to wait for a call
- listen to an intermittent call (due to a weak signal) without it continuously cutting out
To manually open the squelch, press and hold the MON key.
- When squelch is open, the icon appears on the display and the LED lights green.
To return to normal operation, release the MON key.
KEY LOCK
You can lock the MENU, ▲ and keys to prevent accidentally changing the operating mode and channel settings. The Power switch/ Volume control and PTT, CAL*, and MON still function normally.
* The CAL key functions normally only if it has been set up as Call Alert {page 32}.
Press and hold the MENU key for 3 seconds to lock or unlock the transceiver keys.
- The 🔒 icon appears on the display when the transceiver keys are locked. No icon appears when they are unlocked.

SUPER LOCK
You can lock the MENU, CAL*, and/or keys, and disable the Setting Mode. The Power switch/ Volume control, PTT and MON still function normally.
* The CAL key will not be locked only if it has been set up as Selcall {page 32}.
To select the super lock setting:
1 With the transceiver power OFF, press and hold the PTT switch and the CAL key while turning the transceiver power ON (for 1 second).
2 Press the ▲ or ▼ key to select “ SL-P ” (MENU, CAL, ▲, and ▼ keys locked), “ SL-C ” (MENU and CAL keys locked), or “ SL-oF ” (super lock off).
3 Press the MENU, PTT, MON, or CAL key to exit Super Lock Setting Mode.
- The icon appears on the display when the transceiver keys are locked. No icon appears when they are unlocked.


SETTING MODE
Many functions on this transceiver are selected or configured through the Menu instead of physical controls.
1 With the transceiver power OFF, press and hold the MENU key while turning the transceiver power ON (for 1 second).
2 Press the▲ or ▼key to select your desired Setting menu.
3 Press the MENU key then press ▲ or ▼ to select your desired value for the Setting menu.
4 Press the MENU key to exit the selection.
5 Press the PTT, MON, or CAL key to exit Setting Mode.
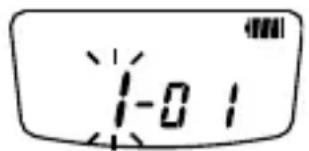
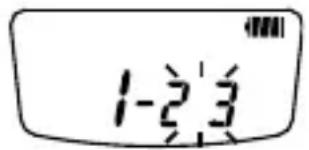
Setting Menu
| Display | Name Settings Default | Ref. Pg | ||
| 1 | Channel 1 Frequency Setting | 01 ~ 99 02 26 | ||
| 2 | Channel 2 Frequency Setting | 01 ~ 99 08 26 | ||
| 3 | Channel 3 Frequency Setting | 01 ~ 99 09 26 | ||
| 4 | Channel 4 Frequency Setting | 01 ~ 99 10 26 | ||
| 5 | Channel 5 Frequency Setting | 01 ~ 99 11 26 | ||
| 6 | Channel 6 Frequency Setting | 01 ~ 99 12 26 | ||
| oP | Optional Signaling | OFF/ FS (FleetSync) | OFF 34 | |
| IR1 | Individual Selcall Alert | OFF/ 1 ~ 10 9 37 | ||
| GR1 | Group Selcall Alert | OFF/ 1 ~ 10 | 10 37 | |
| ET2 | Incoming Call Notification | OFF/ ON (Tone) OFF | 44 | |
| IL | Call Key | CA (Call Alert)/ SC (Selcall)/ OFF | CA | 32 |
| CR3 | Call Alert Tone | Type 1 ~ 10 | 1 | 33 |
| ES | Call Alert Side Tone OF | FF/ ON ON 33 | ||
| Pt | PTT ID | OFF/ bo (BOT)/ 01~32 (List 1 ~ 32) | OFF 38 | |
| St | PTT ID Side Tone OFF | ON ON 39 | ||
| dt | Data Transmit Modulation Delay Time | 0/ 5 (500)/ 10 (1000)/ 15 (1500)/ 20 (2000 ms) | 500 ms 38 | |
| Hd | Mute Hold Time | OFF/ 5 (500)/ 10 (1000)/ 15 (1500)/ 20 (2000)/ 25 (2500 ms) | OFF 39 | |
| CI | Caller ID Display OFF/ | ON OFF 40 | ||
| rt | Mode Reset Timer OFF | 10/ 30 sec 10 sec 45 | ||
| to | Time-out Timer 3/ 10 min | 3 min 41 | ||
| bl | Busy Channel Lockout | OFF/ ON OFF 44 | ||
| Lt | Backlight | OFF/ ON/ A (Auto) | Auto | 40 |
| bt | Battery Level Indicator | OFF/ ON ON 43 | ||
| bS | Battery Saver OFF/ ON | OFF 42 | ||
| bP | Beep Tone | OFF/ ON ON 45 | ||
| SC | Scan Function | OFF/ ON OFF 27 | ||
| Sq | Squelch Level | 0/ 1/ 2 | 1 | 28 |
| SE | Mic Sense | no (Normal)/ HI (High) | Normal | 41 |
| Gl | VOX Gain Level | OFF/ 1 ~ 5 | OFF 30 | |
| dy4 | VOX Delay Time | 0.1/ 0.3/ 0.5/ 1.0/ 1.5/ 3.0 sec | 1.0 sec 30 | |
| tl4 | Transmit Inhibit while Receiving | OFF/ ON OFF 31 | ||
| Pd4 | VOX Proceed Tone | OFF/ ON OFF 31 | ||
| Po | Selectable Power ON Tone | Type 1 ~ 3 | Type 1 46 |
1 Menus IR and GR are not available if the oP menu is set to OFF.
2 Menu [t] is not available if the oP menu is set to FleetSync.
3 Menu [R] is not available if the [L] menu is set to OFF or Selcall.
4 Menus dy, t 1, and Pd are not available if the G1 menu is set to OFF.
You can change the default frequency of each channel.
1 Enter the Setting Mode {page 24}.
2 Press the▲ or ▼key to select a channel.
- The current frequency table number appears beside the channel number.
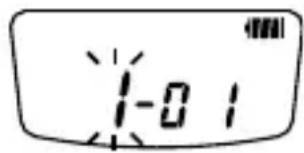
3 Press the MENU key then press ▲ or ▼ to select the frequency table number for the channel.

4 Press the MENU key to exit the selection, then repeat steps 2 and 3 to set additional channels.
| Table No. | Frq. (MHz) | Table No. | Frq. (MHz) | Table No. | Frq. (MHz) | Table No. | Frq. (MHz) |
| 1 | 464.5000 | 26 | 462.8375 | 51 | 467.8875 | 76 | 452.7625 |
| 2 (CH 1) | 464.5500 27 | 462. | 8625 52 467. | 9125 | 77 452.8625 | ||
| 3 | 467.7625 | 28 | 462.8875 | 53 | 469.4875 | 78 | 456.1875 |
| 4 | 467.8125 29 | 462. | 9125 54 469. | 5125 | 79 456.2375 | ||
| 5 | 467.8500 | 30 | 464.4875 | 55 | 469.5375 | 80 | 456.2875 |
| 6 | 467.8750 31 | 464. | 5125 56 469. | 5625 | 81 468.2125 | ||
| 7 | 467.9000 | 32 | 464.5375 | 57 | 462.1875 | 82 | 468.2625 |
| 8 (CH 2) | 467.9250 33 | 464. | 5625 58 462. | 4625 | 83 468.3125 | ||
| 9 (CH 3) | 461.0375 34 | 466. | 0375 59 462. | 4875 | 84 468.3625 | ||
| 10 (CH 4) | 461.0625 35 | 466. | 0625 60 462. | 5125 | 85 468.4125 | ||
| 11 (CH 5) | 461.0875 36 | 466. | 0875 61 467. | 1875 | 86 468.4625 | ||
| 12 (CH 6) | 461.1125 37 | 466. | 1125 62 467. | 4625 | 87 468.5125 | ||
| 13 | 461.1375 | 38 | 466.1375 | 63 | 467.4875 | 88 | 468.5625 |
| 14 | 461.1625 | 39 | 466.1625 | 64 | 467.5125 | 89 | 468.6125 |
| 15 | 461.1875 | 40 | 466.1875 | 65 | 451.1875 | 90 | 468.6625 |
| 16 | 461.2125 | 41 | 466.2125 | 66 | 451.2375 | 91 | 456.3375 |
| 17 | 461.2375 | 42 | 466.2375 | 67 | 451.2875 | 92 | 456.4375 |
| 18 | 461.2625 | 43 | 466.2625 | 68 | 451.3375 | 93 | 456.5375 |
| 19 | 461.2875 | 44 | 466.2875 | 69 | 451.4375 | 94 | 456.6375 |
| 20 | 461.3125 | 45 | 466.3125 | 70 | 451.5375 | 95 | 457.3125 |
| 21 | 461.3375 | 46 | 466.3375 | 71 | 451.6375 | 96 | 457.4125 |
| 22 | 461.3625 | 47 | 466.3625 | 72 | 452.3125 | 97 | 457.5125 |
| 23 | 462.7625 | 48 | 467.7875 | 73 | 452.5375 | 98 | 457.7625 |
| 24 | 462.7875 | 49 | 467.8375 | 74 | 452.4125 | 99 | 457.8625 |
| 25 462 | 8125 50 467 | 8625 | 75 452.5125 |
- The marked CH numbers are the default channel settings.
SCAN
Scan is useful for monitoring signals on the transceiver channels. When scanning, the transceiver checks for a signal on each channel and only stops if a signal is present.
If the QT/DQT matches, the transceiver stops at the channel and opens the squelch so you can listen to the call. If the QT/DQT does not match, the call is ignored and scanning continues.
Before you can use the scan function, ensure that it is activated. You can turn the scan function (the ability to perform scan) ON or OFF in Setting Mode.
1 Enter the Setting Mode {page 24}.
2 Press the▲ or ▼key to select “ ”5C
3 Press the MENU key then press ▲ or ▼ to select “ SE-oF ” (scan function disabled) or “ SE-oO ” (scan function enabled).


- If you select “ 5, you will no longer be able to perform scan by pressing and holding the ▲ey.
To begin scanning:
1 Press and hold the ▲ key for 1 second.
- "5" appears on the display.
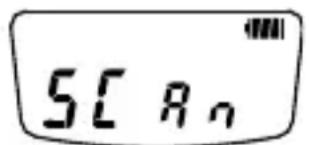
2 When a signal is detected and the QT/ DQT matches, the channel number appears on the display and blinks.
3 When the signal is no longer present, the transceiver waits for 5 seconds before scanning continues.
- If a new signal appears before the 5 seconds elapse, the transceiver will remain on the channel until the new signal is no longer present, at which time it will again wait for 5 seconds before continuing.
4 To end the scan at any time, press and hold the ▲key for 1 second.
- The transceiver returns to the channel you were using before you started scanning.
REVERT CHANNEL
The revert channel is the channel from which you start scanning. So, for example, if you are on channel 1 when you begin to scan, your revert channel is channel 1.
During scan, pressing the PTT switch will automatically select the transceiver's revert channel (in the above example, channel 1) and you will begin transmitting. However, if you are currently paused on another channel after having received a signal (for example, channel 2), pressing the PTT switch will allow you to transmit on that channel, rather than returning to the revert channel. Scanning will resume after 5 seconds, unless a signal is present on the channel.
SQUELCH LEVEL
You can adjust the default squelch level of the transceiver.
1 Enter the Setting Mode {page 24}.
2 Press the▲ or ▼key to select “ ”59
3 Press the MENU key then press ▲ or ▼ to select “59-8” (open), “59(default setting), or “59-2” (tight).

Using the VOX feature, you can operate the transceiver hands-free. In order to use this feature, however, you must use an optional headset; VOX will not function with the built-in microphone. For best operation conditions, we recommend you use an optional headset with both an ear piece and a microphone on a boom that rests in front of your mouth.
VOX OPERATION
1 Set up a VOX gain level from 1 to 5 {below}.
2 To transmit, speak into the headset microphone.
- You do not need to press the PTT switch; the transceiver automatically detects your voice and begins transmitting. The LED lights red.
3 To stop transmitting, stop speaking.
- Transmission will continue momentarily after you stop speaking. You can select the delay time as described on page 30.
4 To exit VOX mode, set the VOX gain level {below} to "GL-OF" (VOX function off).
VOX Gain Level
With VOX activated, your voice level will determine when you transmit. Due to the automatic switching between transmission and reception, we recommend you set the VOX gain level such that it will not activate when in an area with excessive ambient noise.
1 Enter the Setting Mode {page 24}.
2 Press the▲ or ▼key to select “ ”GL
3 Press the MENU key then press ▲ or ▼ to select “ GL-oF ” (VOX function off) or “ GL-1 ” (VOX gain level 1) to “ GL-5 ” (VOX gain level 5).
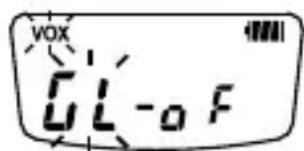
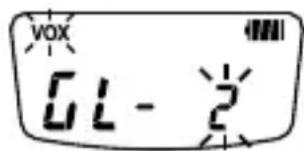
- While adjusting the VOX Gain level, speak into the microphone. When an appropriate level is reached, the LED lights orange.
- Setting the VOX gain level to OFF deactivates VOX. In order to transmit with VOX turned off, you must use the PTT switch.
VOX Delay Time
If the transceiver returns to receive mode too quickly after you stop speaking, the end of your message may not be transmitted. To avoid this, select an appropriate delay time that allows your entire message to be transmitted. However, do not make the delay overly long.
1 Enter the Setting Mode {page 24}.
2 Press the▲ or ▼key to select “ ”dy
3 Press the MENU key then press ▲ or ▼ to select “dy-0.1” (0.1 sec.), “dy-0.3 sec.), “dy-0.5” (0.5 sec.), “dy-(1 sec.), “ ” dy-1.5 (1.5 sec.), or “dy-3.0” (3 sec.).

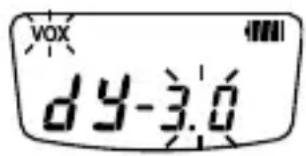
- While adjusting the VOX Delay Time, speak into the microphone to simulate transmitting. The LED lights orange while speaking, but no signal is transmitted at this time.
Transmit Inhibit While Receiving
While using VOX, you can set the transceiver to detect when the channel is in use (in place of using the Monitor function). With this function turned on, VOX will not allow you to transmit while the channel is being used. You can transmit only when the channel is free. Setting up the proceed tone function {page 31} will notify you when the channel is free.
1 Enter the Setting Mode {page 24}.
2 Press the▲ or ▼key to select “ ”

3 Press the MENU key then press ▲ or ▼ to select “t 1-a n” (transmit inhibit while receiving on) or “t 1-a f” (transmit inhibit while receiving off).

VOX Proceed Tone
You can set the transceiver to sound an alert tone when you are able to transmit (transmission is no longer inhibited).
1 Enter the Setting Mode {page 24}.
2 Press the▲ or ▼key to select “ ”Pd
3 Press the MENU key then press ▲ or ▼ to select “ Pd-a ” (VOX proceed tone on) or “ Pd-a F” (VOX proceed tone off).

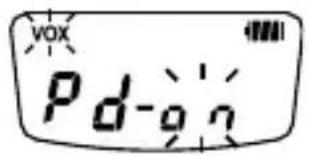
- You can speak into the microphone at this time to simulate transmitting. The LED lights orange while speaking if your voice is at an appropriate level, but no signal is transmitted at this time.
FleetSync: ALPHANUMERIC 2-WAY PAGING FUNCTION
FleetSync is an Alphanumeric 2-way Paging Function, and is a protocol owned by JVC KENWOOD Corporation. Each transceiver has a unique ID which is used to decode signals from other callers.
CALL KEY SETUP
You can set up the transceiver CAL key to perform 1 of 2 functions, or you can turn the CAL key off (unused):
Call Alert: Pressing the CAL key before making a call will send your call alert tone to your party members, identifying yourself before speaking.
Selcall: Press the CAL key then select from a list of IDs to make calls to specific transceivers.
To set up the CAL key:
1 Enter the Setting Mode {page 24}.
2 Press the▲ or ▼key to select “ ”[L]
3 Press the MENU key then press ▲ or ▼ to select “[L-CA]” (call alert), “[L]-(selcall), or “[L-oF]” (off).
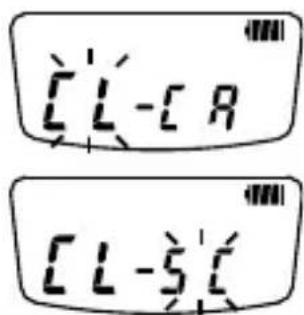
CALL ALERT TONE
Call alert tones are used to identify yourself to your party members. You can set up a call alert tone to one of 10 types. If each party member uses a different call alert tone, it is easy to know who is making the call. Pressing the CAL key before making a call will send your call alert tone to your party members.
To set up your own call alert tone:
1 Enter the Setting Mode {page 24}.
2 Press the▲ or ▼key to select " "[R
3 Press the MENU key then press ▲ or ▼ to select “[R-1]” (call alert tone 1) to “[R-10] (call alert tone 10).

• Each time you press or to select a call alert tone, the new tone sounds.
Call Alert Side Tone
When the CAL key is pressed, the call alert tone will sound through your own speaker as well.
To turn the Call Alert Side Tone on or off, on your own transceiver:
1 Enter the Setting Mode {page 24}.
2 Press the ▲ or ▼ key to select " [5".
3 Press the MENU key then press ▲ or ▼ to select “[S-α]” (Call Alert Side Tone is on) or “[S-αF]” (Call Alert Side Tone is off).
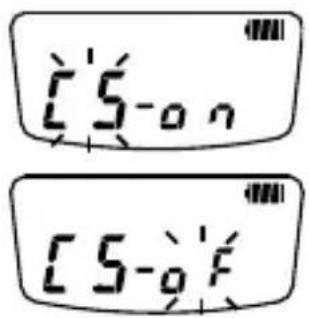
SELCALL (SELECTIVE CALLING)
A Selcall is a voice call to a particular station or group of stations. Each transceiver is set up with an individual ID number for use with selcalls.
There are several types of Selcalls available: Individual, Group, and Broadcast.
- Individual Calls are calls made to individual parties.
- Group Calls are calls made to all parties within a group.
- Broadcast Calls are calls made to all parties in all groups.
The default status of the transceiver does not allow you to make a Selcall. Use the following procedures to set up your transceiver to allow Selcalls:
Step 1: Activate the FleetSync Optional Signaling
1 Enter the Setting Mode {page 24}.
2 Press the▲ or ▼key to select “ ”(Optional Signaling).
3 Press the MENU key then press or to select “”F5 (FleetSync).
- After setting the Optional Signaling to FleetSync, you will no longer be able to receive calls except selcalls.
Step 2: Set up the CAL key
1 Enter the Setting Mode {page 24}.
2 Press the▲ or ▼key to select “ ”[t]
3 Press the MENU key then press or to select " [L-5c (selcall).
Step 3: Set up your own ID (ID List Setting Mode for Selcall)
1 With the transceiver power OFF, press and hold the CAL key while turning the transceiver power ON (for 1 second).
- A beep will sound and the transceiver will enter ID List Setting Mode.
2 Press the ▲ or ▼ key to select a list ID number.


3 Press the MENU key then press ▲ or ▼ to select “ad” (own ID).
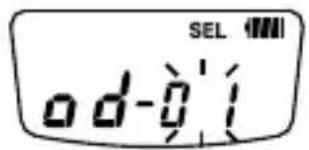
- The default own ID setting is 01.
- When setting up your own ID, make sure that each member within your group sets up a unique ID number for their own ID. If an own ID number is duplicated, that transceiver cannot perform individual calls to other transceivers with the same own ID.
"Id" represents an Individual Call ID.
“GP” represents a Group Call ID.
“RL” represents a Broadcast Call ID.
“ad” represents your own ID number.
“--” clears the selected ID data.
4 Press the MENU key to confirm the selection.
5 Press the PTT, MON, or CAL key to return to normal operation.
6 Set up your group ID number by repeating steps 1 to 5, above. In step 3, select “GP” (group ID) instead of “”
- Ensure that all of your group members set up the same group ID.
7 You can also set up a broadcast ID number ("RL") which is used to make calls to all members of several groups.
- Ensure that all members of all groups set up the same broadcast ID.
Making a Selcall
Following are details on how to make individual, group, and broadcast calls. Refer to the diagram below for the examples provided herein.

flowchart
graph TD
    subgraph Rx
        A["Group 07: GP-07 AL-15"] -->|od-02| B["Group 12: GP-12 AL-15"]
        C["Group 12: GP-12 AL-15"] -->|od-04| D["Group 12: GP-12 AL-15"]
        E["Group 12: GP-12 AL-15"] -->|od-05| F["Group 12: GP-12 AL-15"]
        G["Group 12: GP-12 AL-15"] -->|od-06| H["Group 12: GP-12 AL-15"]
    end
    subgraph Tx
        I["Group 07: GP-07 AL-15"] --> J["Id-05 GP-12 AL-15"]
        K["Tx: Id-05 GP-12 AL-15"] --> L["Id-05 GP-12 AL-15"]
        M["Tx: Individual Calls: Id-05"] --> N["Group Calls: GP-12"]
    end
    B --> D
    D --> F
    F --> H
    H --> N
    style Rx fill:#f9f,stroke:#333
    style Tx fill:#ccf,stroke:#333
Note:
- When QT/DQT is set to the receiving side, the call side QT/DQT settings must be set up the same as the receiving side settings.
◆ During Scan the CAL key does not operate.
Individual Calls:
For example, transceiver A is calling transceiver E.
1 Press the CAL key.
2 Press the▲ or ▼key to select an individual ID number (Id-05 in this example).
- “Id” (individual call) represents a single station.
3 Press the PTT switch to transmit the selected ID.
- When a call is received, “ I” appears on the display, along with the caller’s ID number.
Group Calls:
For example, transceiver A is calling transceivers D, E, and F.
1 Press the CAL key.
2 Press the▲ or ▼key to select a group ID number (GP-12 in this example).
- “GP (group call) represents a group of stations.
3 Press the PTT switch to transmit the selected group ID.
- When a call is received, “ G” appears on the display, along with the caller’s ID number.
Broadcast Calls:
For example, transceiver A is calling transceivers B \~ F.
1 Press the CAL key.
2 Press the▲ or ▼key to select a broadcast ID number (AL-15 in this example).
“RL” (broadcast call) represents all stations.
3 Press the PTT switch to transmit the selected broadcast ID.
- When a call is received, “ R lappears on the display, along with the caller’s ID number.
Note:
◆ If Optional Signaling (menu “oP”) has been set to “FS”(FleetSync), you can also set up an Individual Selcall Alert type (menu “IR”) and Group Selcall Alert type (menu “GA”). Individual and Group Selcall Alert types range from “oF” (off) and “” (type 1) to “” (type 10).
Receiving a Selcall
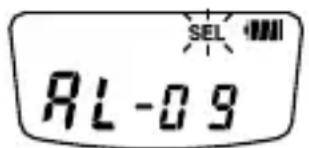
When a selcall is received, the SEL icon and "Id", "GP" or "RL" appears on the display along with the caller's ID number.


Press the PTT switch and speak into the speaker area to respond to the call, then continue the call as normal. When the call is finished, press the CAL key to return to operating mode.
Data Transmit Modulation Delay Time
This function normally operates fi ne using the default setting, so it is not necessary to adjust the value. However, there are certain operating environments that will not allow the use of FleetSync (Selcall) functions, such as Scan mode. When you encounter such an environment, readjust the delay time to a longer time by following the procedures.
To set up a data transmit modulation delay time:
1 Enter the Setting Mode {page 24}.
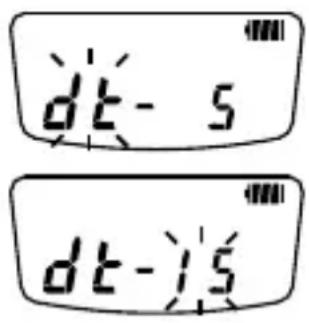
2 Press the▲ or ▼key to select “ ”dt
3 Press the MENU key then press ▲ or ▼ to select “dt-0” (0 ms), “dt” (500 ms), “dt-10” (1000 ms), “dt” (1500 ms), or “dt-20” (2000 ms).
PTT ID
The transceiver can send a PTT ID signal when pressing the PTT switch (beginning of transmission) or when pressing and releasing (beginning of transmission and end of transmission) the PTT switch.
1 Enter the Setting Mode {page 24}.
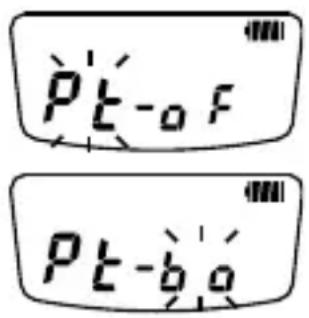
2 Press the▲ or ▼key to select “ ” t
3 Press the MENU key then press ▲ or ▼ to select “ Pt-oF ” (PTT ID is off), “ Pt-bo (send your own PTT ID at the beginning of transmission), or “ Pt-g1 ” to “ Pt (send selected list ID number PTT ID at the beginning and end of transmission).
Note:
◆ Transceiver's individual ID number is not available for selection as PTT ID.
PTT ID Side Tone
When the PTT switch is pressed and/or released, a tone will sound through your own speaker when the PTT ID is transmitted.
To turn the PTT ID Side Tone on or off:
1 Enter the Setting Mode {page 24}.
2 Press the▲ or ▼key to select “ ”5t
3 Press the MENU key then press ▲ or ▼ to select “5t-on” (PTT ID Side Tone is on) or “5t-off” (PTT ID Side Tone is off).

Mute Hold Time
Mute Hold Time keeps the speaker muted for a brief moment, after a signal has been received. This prevents interference with the PTT ID signal.
To set the hold time:
1 Enter the Setting Mode {page 24}.
2 Press the ▲ or ▼ key to select "Hd".
3 Press the MENU key then press ▲ or ▼ to select “Hd-oF” (hold time is off), “Hd”-(500 ms), “Hd-10” (1000 ms), “Hd”-(1500 ms), “Hd-20” (2000 ms), or “Hd”-(2500 ms).

Caller ID Display
When the transceiver receives a PTT ID signal, the caller ID of that signal appears on the display, along with the CID icon, so you know who is making the call.
1 Enter the Setting Mode {page 24}.
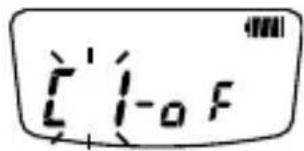
2 Press the▲ or ▼key to select " " [ ]
3 Press the MENU key then press ▲ or ▼ to select
“[1-a]” (Caller ID Display is on) or “[1-a]” (Caller ID Display is off).
![[ 1-9.2 ]](/content/2026/05/1074982/images/3a49c8759dfe96169d139333aa03d0d9422cc45aec5aa44f4645358b5e3d1990.jpg)
You can set the display backlight to remain off, remain on, or turn on when you press any key other than the PTT switch (auto). When set to auto, the backlight remains on for 5 seconds after pressing a key, before turning off again.
To select the backlight setting:
1 Enter the Setting Mode {page 24}.
2 Press the▲ or ▼key to select “ ”
3 Press the MENU key then press ▲ or ▼ to select “ Lt-oF ” (backlight off), “ Lt-oN (backlight on), or “ Lt-a ” (backlight auto).


MIC SENSE
You can adjust the sensitivity level of the transceiver microphone.
To select the mic sense:
1 Enter the Setting Mode {page 24}.
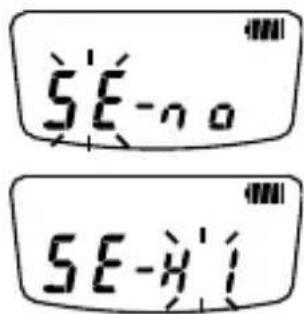
2 Press the▲ or ▼key to select “ ”SE
3 Press the MENU key then press ▲ or ▼ to select “SE-no” (normal) or “SE-(high).
TIME-OUT TIMER
The Time-out Timer prevents you from using a channel for a extended durations. This function is useful, for example, when you accidentally keep the PTT switch pressed. Additionally, by limiting the amount of time you can continuously transmit, this feature helps you save on battery power consumption.
If you continuously transmit for 3 minutes (default value), the transceiver will stop transmitting and a tone will sound. To stop the tone, release the PTT switch. You can press the PTT switch again to resume transmitting.
To change the default value of 3 minutes:
1 Enter the Setting Mode {page 24}.
2 Press the▲ or ▼key to select “ ”to
3 Press the MENU key then press ▲ or ▼ to select “t o- 3” (3 minutes) or “t o-(10 minutes).

This transceiver is also equipped with a pre-alert tone which sounds 10 seconds before the Time-out Timer expires. This will allow you time to finish your message before the transceiver automatically stops transmitting.
BATTERY SAVER
This transceiver has been designed to give you the most out of your battery power. The battery saver function decreases the amount of power used when a signal is not being received and no operations are being performed.
While using the transceiver, battery saver will automatically switch ON after 5 seconds have elapsed with no operations or received calls. Operating the transceiver or receiving a call will switch this feature OFF until 5 seconds of non-operation occurs again.
To turn this function on or off:
1 Enter the Setting Mode {page 24}.
2 Press the▲ or ▼key to select “ ”b5
3 Press the MENU key then press ▲ or ▼ to select “bS-α” (battery saver on) or “bS-αF (battery saver off).


Note:
◆ While the Battery Saver is operating, the LED may flash green when receiving a QT/DQT signal which does not match the QT/DQT tone/code set up in your transceiver.
BATTERY LEVEL INDICATOR
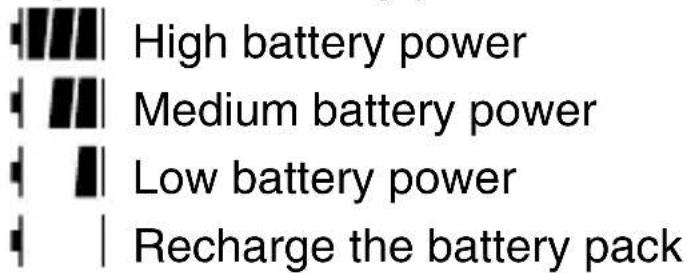
When turned ON, the battery level indicator on the display lets you know approximately how much battery life is remaining. When turned OFF, the battery level indicator will not be displayed.
When the battery voltage becomes too low while transmitting, the transceiver stops transmitting, a tone sounds, and the LED blinks red until you release the PTT switch. Recharge or replace the battery pack at this time.
To turn this function on or off:
1 Enter the Setting Mode {page 24}.
2 Press the▲ or ▼key to select “ ”bt
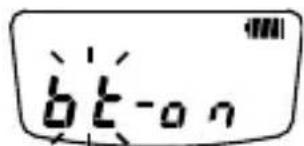
3 Press the MENU key then press ▲ or ▼ to select “bt-on” (battery level indicator on) or “bt-off” (battery level indicator off).

Note:
◆ To use Incoming Call Notification, you must set up a QT tone or a DQT code {page 18}.
Incoming Call Notification is used to inform you of when a call is being received. When activated, a tone is emitted when a busy signal is received and the QT/ DQT signaling matches.
- The tone will sound for 15 seconds before turning off.
- While the tone sounds, you will not hear any audio from the speaker. Press any key to turn the tone off and listen to the received call.
After the call is fi nished, the transceiver will wait for 10 seconds before resetting. If you receive a new call within those 10 seconds, the tone will not sound. If no call is received within 10 seconds, Incoming Call Notifi cation will reset so that the next time a call is received, the tone will sound again.
To turn Incoming Call Notification on or off:
1 Enter the Setting Mode {page 24}.
2 Press the▲ or ▼key to select “ ”[t
3 Press the MENU key then press ▲ or ▼ to select “[t-aF” (incoming call notifi cation off), or “[t-an” (incoming call notifi cation on).

BUSY CHANNEL LOCKOUT (BCL)
This function is used in order to prevent transmitting on a channel that somebody else is currently using. When turned ON, a beep sounds when you press the PTT switch while another party is using the channel, and you cannot transmit.
To turn BCL on or off:
1 Enter the Setting Mode {page 24}.
2 Press the▲ or ▼ key to select “ ”bl
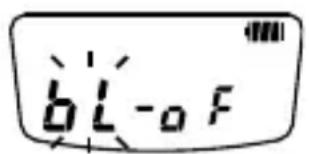
3 Press the MENU key then press ▲ or ▼ to select “bI-on” (BCL on) or “bI-d(BCL off).

BEEP TONE
When you press a key, a beep will emit from the transceiver.
To turn the beep tone on or off:
1 Enter the Setting Mode {page 24}.
2 Press the▲ or ▼key to select “ ”bP
3 Press the MENU key then press ▲ or ▼ to select “bP-αn” (beep tone on) or “bP-αF (beep tone off).


MODE RESET TIMER
This function returns the transceiver to the channel display after a preset timer expires while in Setting mode or ID List mode.
To set the mode reset timer:
1 Enter the Setting Mode {page 24}.
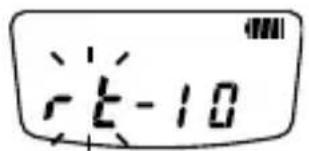
2 Press the▲ or ▼key to select“ ”c t
3 Press the MENU key then press ▲ or ▼ to select “r t-o F” (timer off), “r t-(10 seconds), “r t-30” (30 seconds).

SELECTABLE POWER ON TONE
You can set up a tone to sound during power on to one of 3 types.
To set the power on tone type:
1 Enter the Setting Mode {page 24}.
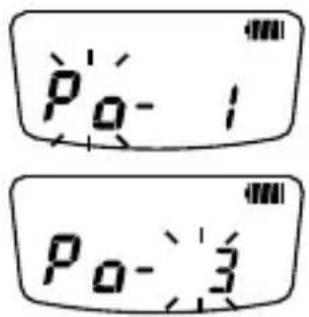
2 Press the▲ or ▼key to select “ ”P o
3 Press the MENU key then press ▲ or ▼ to select “ Pa-1 ” (type 1), “ Pa ” (type 2), “ Pa-3 ” (type 3).
RESETTING THE TRANSCEIVER
At some point in time, you may desire to reset the transceiver settings to their default values. (Default values are listed on pages 24 \~ 25.)
To reset the transceiver:
1 With the transceiver power OFF, press and hold the ▲, ▼ and MON keys while turning the transceiver power ON.

- “rξ (reset) will appear on the display.
2 Release the ▲, ▼, and MON keys.
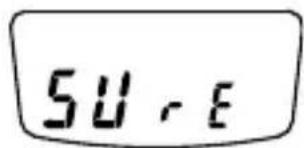
- The confirmation message “5”(sure) will appear on the display.
3 Press the PTT switch to reset the transceiver.
- Press any other key to cancel the reset.
Note:
◆ Reset will function even if Super Lock has been activated.
TROUBLESHOOTING GUIDE
| Problem Solution | |
| Cannot turn the transceiver power ON. | The battery pack may be dead. Recharge or replace the battery pack.The battery pack may not be installed correctly. Remove the battery pack and install it again. |
| Battery power dies shortly after charging. | The battery pack life is fi nished. Replace the battery pack with a new one. |
| Cannot talk to or hear other members in your group. | Make sure you are using the same frequency and QT/DQT setting as the other group members.Other group members may be using Privacy Talk. Turn on your transceiver's Privacy Talk.Other group members may be too far away. Make sure you are within range of the other transceivers. |
| Other voices (besides group members) are present on the channel. | Change the QT/DQT settings. Make sure all group members change the settings on their transceivers to match the new QT/DQT setting. |
| You cannot make a selcall. | Verify and set your transceiver ID (Own, Group, All). |
| You cannot receive calls except selcalls.You cannot transmit even by pressing the PTT switch. | Optional Signaling is set to "FS (FleetSync)". Change the setting to "oF (OFF)". |
| The transceiver is malfunctioning for no apparent reason. | Reset the transceiver as described on page 46. |
SPECIFICATIONS
| RF output power | High 1.5 W | |
| Low 500 mW | ||
| Audio output power 100 mW | ||
| Frequency stability ±2.5 ppm | ||
| Operating voltage 3.7 V | ||
| Dimensions (W x D x H)(projections not included) | 52 x 29.6 x 103.5 mm(2.05 x 1.17 x 4.07 in) | |
| Weight (with KNB-46L) 155 g (5.5 oz) | ||
KENWOOD
TK-3230DX
TRANSCEPTOR FM UHF
JVCKENWOOD Corporation
MUCHAS GRACIAS
QUIET TALK/ DIGITAL QUIET TALK ....18
natural_image
Technical line drawing of a mechanical tool or connector assembly (no visible text or symbols)natural_image
Technical line drawing of a handheld device with internal components and directional arrows (no text or symbols)natural_image
Line drawing of a car with attached sensors and a 'COCONES' logo (no text or symbols on the diagram itself)
QUIET TALK/ DIGITAL QUIET TALK


TONO DE AVISO DE LLAMADA

Nota:
![[t-0,7]](/content/2026/05/1074982/images/83beb9db7df8fda17c5edaf5e2f6f4fbdb4feb5e0eae492f9ce01bb3c7713c81.jpg)
BLOQUEO DE CANAL OCUPADO (BCL)
To reset the transceiver:


- THANK YOU
- CONTENTS
- FEATURES......4
- NOTICES TO THE USER .... 5
- UNPACKING AND CHECKING EQUIPMENT ....12
- PREPARATION....12
- ORIENTATION....15
- QUIET TALK/ DIGITAL QUIET TALK ....18
- PRIVACY TALK 21
- TRANSMIT POWER 21
- COMPANDER 22
- MONITOR....22
- LOCK FUNCTION ......23
- SETTING MODE ....24
- CHANNEL FREQUENCY SETUP ....26
- SCAN....27
- SQUELCH LEVEL 28
- VOICE OPERATED TRANSMISSION (VOX) ......29
- FleetSync: ALPHANUMERIC 2-WAY PAGING FUNCTION ....32
- BACKGROUND OPERATIONS ....40
- RESETTING THE TRANSCEIVER ....46
- TROUBLESHOOTING GUIDE ......47
- SPECIFICATIONS 48
- FEATURES
- Note:
- Firmware Copyrights
- NOTICES TO THE USER
- FCC WARNING
- INFORMATION TO THE DIGITAL DEVICE USER REQUIRED BY THE FCC
- FCC LICENSE INFORMATION
- ATTENTION:
- PRECAUTIONS
- WARNING
- CAUTION
- Information concerning the battery pack:
- DANGER
- - Do not touch a ruptured and leaking battery!
- - Do not charge the battery for longer than the specified time!
- - Do not place the battery pack into a microwave or high pressure container!
- - Keep ruptured and leaking battery packs away from fi re!
- - Do not use an abnormal battery!
- UNPACKING AND CHECKING EQUIPMENT
- SUPPLIED ACCESSORIES
- PREPARATION
- INSTALLING/ REMOVING THE BATTERY PACK
- CHARGING THE BATTERY PACK
- Average battery pack life:
- INSTALLING THE BELT CLIP
- INSTALLING THE OPTIONAL SPEAKER/ MICROPHONE (OR HEADSET)
- ORIENTATION
- ⑦ ▲ keys
- ⑧ SP/MIC jacks
- DISPLAY
- Switch the Power ON
- Adjust the Volume
- Select a Channel
- Make a Call
- QUIET TALK/ DIGITAL QUIET TALK
- PRIVACY TALK
- TRANSMIT POWER
- COMPANDER
- MONITOR
- KEY LOCK
- SUPER LOCK
- SETTING MODE
- SCAN
- To begin scanning:
- REVERT CHANNEL
- SQUELCH LEVEL
- VOX OPERATION
- VOX Gain Level
- VOX Delay Time
- Transmit Inhibit While Receiving
- VOX Proceed Tone
- FleetSync: ALPHANUMERIC 2-WAY PAGING FUNCTION
- CALL KEY SETUP
- CALL ALERT TONE
- Call Alert Side Tone
- SELCALL (SELECTIVE CALLING)
- Making a Selcall
- Individual Calls:
- Group Calls:
- Broadcast Calls:
- Receiving a Selcall
- Data Transmit Modulation Delay Time
- PTT ID
- PTT ID Side Tone
- Mute Hold Time
- Caller ID Display
- MIC SENSE
- TIME-OUT TIMER
- BATTERY SAVER
- BATTERY LEVEL INDICATOR
- BUSY CHANNEL LOCKOUT (BCL)
- BEEP TONE
- MODE RESET TIMER
- SELECTABLE POWER ON TONE
- RESETTING THE TRANSCEIVER
- SPECIFICATIONS
- KENWOOD
- TK-3230DX
- MUCHAS GRACIAS
- TONO DE AVISO DE LLAMADA
- Nota:
- BLOQUEO DE CANAL OCUPADO (BCL)
Brand : KENWOOD
Model : TK-3230DX
Category : Radio