
7391 245 - Cooker Foster - Free user manual and instructions
Find the device manual for free 7391 245 Foster in PDF.


| Product type | Cooker |
| Brand | Foster |
| Model | 7391 245 |
| Dimensions (W x H x D) | 90 x 85 x 60 cm |
| Weight | 55 kg |
| Power supply | Mixed: gas (hob) and electric (oven) |
| Cooking type | Gas for hob, electric for oven |
| Number of burners | 4 |
| Oven - Type | Traditional electric |
| Oven - Capacity | 70 L |
| Oven features | Convection, grill, interior light, timer |
| Cleaning | By pyrolysis |
| Safety | Auto shut-off, child lock, gas safety (gas cut-off if flame goes out) |
| Repairability index | 8.2 / 10 |
| Energy class | A |
| Noise level | 48 dB |
| Included accessories | Drip tray, grid, gas nozzle |
| Maintenance | Clean burners after each use, use a mild detergent for the oven |
| Warranty | 2 years |
Frequently Asked Questions - 7391 245 Foster
User questions about 7391 245 Foster
0 question about this device. Answer the ones you know or ask your own.
Ask a new question about this device
Download the instructions for your Cooker in PDF format for free! Find your manual 7391 245 - Foster and take your electronic device back in hand. On this page are published all the documents necessary for the use of your device. 7391 245 by Foster.
USER MANUAL 7391 245 Foster
| I | ISTRUZIONI DI MONTAGGIO E D'USO |
| DE | MONTAGE- UND GEBRAUCHSANWEISUNG |
| GB | INSTRUCTIONS ON MOUNTING AND USE |
| F | PRESCRIPTIONS DE MONTAGE ET MODE D'EMPLOI |
| SP | MONTAJE Y MODO DE EMPLEO |
Attenzione
natural_image
Illustration of a frying pan with a red-handled magnet above it, showing magnetic field lines (no text or symbols)natural_image
Symbol of a trash bin crossed with diagonal lines, no text or numbers presentnatural_image
Illustration of a cooking pan with two test tubes, showing red liquid being added to the lid (no text or symbols)It is highly important that this instructions manual be kept with the product, for any future consultation. If the appliance is sold or transferred to another person, ensure the manual is provided with it, to allowing the new user to be updated on operation of the hood and the relevant warnings. These warnings were drafted for your safety and for the safety of others. Therefore we ask you to read them carefully before installing and using the appliance. Also consult the drawings on the initial pages with the alphanumerical references outlined on the explanation text. Strictly comply with the instructions outlined in this manual. No liability can be held for any problems, damage or fires caused by the appliance deriving from non-compliance with the instructions outlined in this manual. The installation and electrical connection must be made by a specialist technician. The supplier company does not respond to any warranty for damages deriving from wrong installation or wrong use of the appliance. Never modify or try to modify the features of this appliance.
The hob must always be used within the limits of normal domestic use, not for professional use, to prepare and keep food warm. Any other use is not permitted.
When on, the appliance must always be supervised.
This appliance can be used by children from 8 years of age upwards and by people with reduced physical, sensory or mental capabilities, or with lack of experience and know-how provided they are adequately supervised or have been trained in use of the appliance in a safe manner and they realise the related dangers.
Children must not play with the appliance.
Use the control locking device to prevent children from inadvertently switching on the appliance or changing its functions. When on, the appliance must always be supervised.
Do not control the hob using an external timer.
When on, the appliance must always be supervised.
Ensure any children in the home cannot knock hot saucepans or frying pans to the ground. Turn the handles of saucepans and frying pans to one side, on the work surface so they are over the countertop to prevent risk of burns.
For safety purposes, the hob must only be used having been fitted.
Before proceeding with fitting, check the hob for any visible damage. Never operate a damaged appliance, it may be a health risk.
Cleaning and maintenance operations must not be carried out by children without supervision. If the power supply cable should get damaged, it must only be replaced by a support centre or qualified staff.
Fitting and electrical connection of the appliance to the mains can only be carried out by specialist staff. Electrical safety is only guaranteed if the hob is connected to a regular ground connection. If in doubt, ask a qualified electrician to check the system. Do not connect the hob to the mains with extensions or power strips, because they do not guarantee the necessary safety (e.g. risk of overheating).
Before connecting the hob, you need to compare the connection data (voltage and frequency), on the plate, with those of the electrical mains.
These data must perfectly match, otherwise the equipment could get damaged. If in doubt, contact an electrician.
To carry out installation and maintenance works, as well as repairs, disconnect the appliance from the electrical mains.
Comply with all the standards for air release.
ATTENTION: If the surface is cracked, switch off the appliance to avoid possible electric shock.
Never open the shell of the appliance. Possible contact with powered parts or modifying the electrical or mechanical structures can cause functioning anomalies.
The induction hob must never be used as a countertop. The rough bottoms of containers can scratch the hob.
Always keep the cooking zones and the bottom of the containers perfectly dry.
The electrical system must have a switch upstream of the appliance that guarantees omnipolar disconnection with opening of the contacts by at least 3mm.
ATTENTION: The safety devices on the hob must only be those designed by the manufacturer of the cooking appliance or those indicated in the instructions by the manufacturer of the appliance as suitable for use or safety devices on the hob built-into the appliance. Use of inadequate safety devices can cause accidents.
Danger of fire
Too hot oil or grease can quickly catch fire.
Do not leave overheated oil or grease unsupervised.
If the oil or grease should catch fire, do not use water to extinguish it. Extinguish the flames with a lid or a plate with a fire blanket. Switch off the hob. In any case, do not place any flammable objects on the hob.
ATTENTION: Risk of fire: do not leave objects on hobs.
Danger of burns
ATTENTION: This appliance and its accessible parts become very hot during use. Pay attention and avoid touching the hot parts.
Keep out of reach of children under 8 years of age, if not continuously supervised.
Do not place objects on the induction hob such as knives, forks, spoons or lids because they can catch fire.
Do not leave closed containers, for example, in tins, on the cooking zones. The excess pressure generated could cause the container to explode.
Protecting the environment
Disposal of the packing material
The cardboard box and packing materials protect the appliance during shipping.
They have been designed to be biodegradable and recyclable.
Ensure that any plastic wrappings, bags, etc. are disposed of safely and kept out of the reach of children. Danger of suffocation!
Disposal of your old appliance
The European Directive 2002/96/EC on Waste Electrical and Electronic Equipment (WEEE), requires that old household electrical appliances must not be disposed of in the normal unsorted municipal waste stream. Old appliances must be collected separately in order to optimise the recovery and recycling of the materials they contain and reduce the impact on human health and the environment. The crossed-out dustbin symbol on the product reminds you of your obligation regarding separated waste collection. Consumers should contact their local public service or their local dealer for more information on the correct disposal of exhausted household appliances.

Energy-saving advice
• Always place a fitting lid on cookware. Cooking with an uncovered pan will result in a increase in energy use. Use a glass lid to provide visibility and avoid having to lift the lid.
- Use cookware equipped with a solid, flat bottom. Curved pan bases increase energy consumption.
- The diameter of the pan base must match the size of the element. If not, energy may be wasted. Note: The manufacturer normally indicates the pan's upper diameter. This is normally greater than the diameter of the pan's base.
- Choose cookware of a size suited to the amount of food you are going to cook. A large pan that is only half full will use a lot of energy.
- Use a small amount of water when cooking. This saves energy, and vegetables retain a larger percentage of their vitamins and minerals.
- Select a lower power level.
Examples of cooking power setting
(the values below are indicative)
| 1 to 2 | MeltingReheating | Sauces, butter, chocolate, gelatineDishes prepared beforehand |
| 2 to 3 | SimmeringDefrosting | Rice, pudding, sugar syrupDried vegetables, fish, frozen products |
| 3 to 4 | Steam | Vegetables, fish, meat |
| 4 to 5 | Water | Steamed potatoes, soups, pasta,fresh vegetables |
| 6 to 7 | Medium cookingSimmering | Meat, lever, eggs, sausagesGoulash, roulade, tripe |
| 7 to 8 | Cooking | Potatoes, fritters, wafers |
| 9 | Frying, roostingBoiling water | Steaks, omelettes, fried dishesWater |
| P | Frying, roostingBoiling water | scallops, steaksBoiling significant quantities of water |
Induction cooking
Advantages of induction cooking
When cooking with induction, heat is generated directly in the base of the pan.
This provides many benefits for you:
- Time saving when boiling and frying. Cookware is heated directly.
• Less energy is consumed. - Easy cleaning and maintenance. Spilled food does not burn onto the cooktop so quickly.
- Controlled supply of heat and increased safety. The burner reacts immediately to any power change, so heating can be dosed precisely. Heating is interrupted when you remove the cookware from the burner even if the burner is still switched on.
induction cooking
Correct cookware positioning
| INCORRECT | CORRECT |
 | 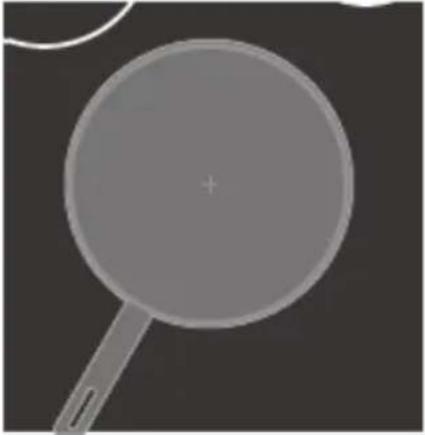 |
| Cookware not centered on Cooking Zone surface. | Cookware centered correctly on Cooking Zone surface. |
 |  |
| Curved or warped pan bottoms or sides. | Flat pan bottom & straight sides. |
 |  |
| Pan does not meet the minimum size required for the Cooking Zone. | Pan size meets or exceeds the recommended minimum size for the Cooking Zone. |
 | 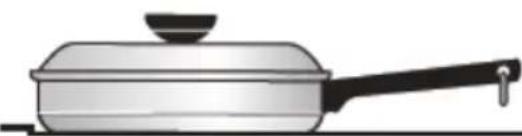 |
| Pan bottom rests on cooktop trim or does not rest completely on the cooktop surface. | Pan rests completely on the Cooktop surface. |
 |  |
| Heavy handle tilts pan. | Pan is properly balanced. |
Adequate containers
Only ferromagnetic containers are suitable for induction cooking; in particular, the following are suitable: enamelled steel, cast iron, special dishes for induction in stainless steel.
Only use saucepans and frying pans with a smooth base. Do not insert any type of object between the bottom of the saucepan and the glass ceramic surface, for example adaptors.
| Cooking zone Plate dimensions Recommended maximum diameter | ||
| 1 210x190mm 200mm* | ||
| 2 210x190mm 200mm* | ||
| 3 210x190mm 200mm* | ||
| 4 210x190mm 200mm* | ||
* the recommended maximum diameter is the diameter of the cooking zone; you can use sauce-pans with wider diameters, but the heat will diffuse on these in a less uniform manner.
To find out if the containers are suitable, check if they attract a magnet.
There are other special containers for induction whose base is not completely ferromagnetic. In this case, only the magnetisable zone is heated, therefore the heat may not be evenly distributed.

natural_image
Illustration of a pot with a red-handled arm underneath, showing magnetic field lines (no text or symbols)Inadequate containers
Never use containers in; normal fine steel, glass, terracotta, copper and aluminium. Do not position any empty containers on the cooking zone. Damage may be caused.
Do not position any hot container on the control panel, in the zones with indicator lights or on the frame of the hob. Damage may be caused.
Danger of faults
Saucepans with liquids completely evaporated can cause damage to the glass ceramic surface, for which the manufacturer cannot be held in any way liable.
The appliance is equipped with a cooling fan. If the fitted hob has a drawer underneath, a consistent distance must be guaranteed between the content of the drawer and the lower part of the appliance, to avoid compromising ventilation.
If a drawer is placed under the hob, do not keep small objects or sheets or paper in it which, if extracted, could break the fan and affect cooling of the appliance, or flammable or metal objects, which could become incandescent or catch fire.
The countertop must be flat and horizontal. Trimming the furniture must be carried out before installing the appliance. Eliminate chips to avoid compromising operation of electrical components.
Considering ventilation of the hob, the following is necessary:
-if the hob is installed over a drawer, leave 40 mm distance between the drawer and the upper part of the countertop (Fig.1).
If the hob is assembled behind the door of a press, operate only leaving the door open.
Close the door of the press only when the appliance and the residual heat indicator lights are off.
If the appliance is fitted over an oven or an electric cooker equipped with a pyrolytic system, it should not be operated while the pyrolytic procedure is in progress, since the overheating safety switch could activate on the hob.
The hob must not be installed over dishwashers, since the steam released from the dishwasher could cause poor operation of the electronic circuit of the hob.
Do not use any steam appliance, since the steam can reach the powered parts and cause a short circuit.
Any intervention or repairs on the appliance within the warranty period must only be carried out by technical support authorised by the manufacturer; on the contrary, the warranty becomes immediately invalid and expires. For subsequent problems, no warranty will be recognised in any way by the manufacturer.
Replace any faulty or defective parts with original spare parts; only such parts guarantee compliance with safety standards.
Warning for people with pacemakers; remember the appliance generates an electromagnetic field in its immediate vicinity.
The possibility of pacemaker operation being affected is very remote. If in doubt, contact the manufacturer of the pacemaker or your doctor.
After use, switch off the hob using the control device and do not rely on the saucepan detector.
Warning: do not pour any type of liquid in the extractor hood slots.
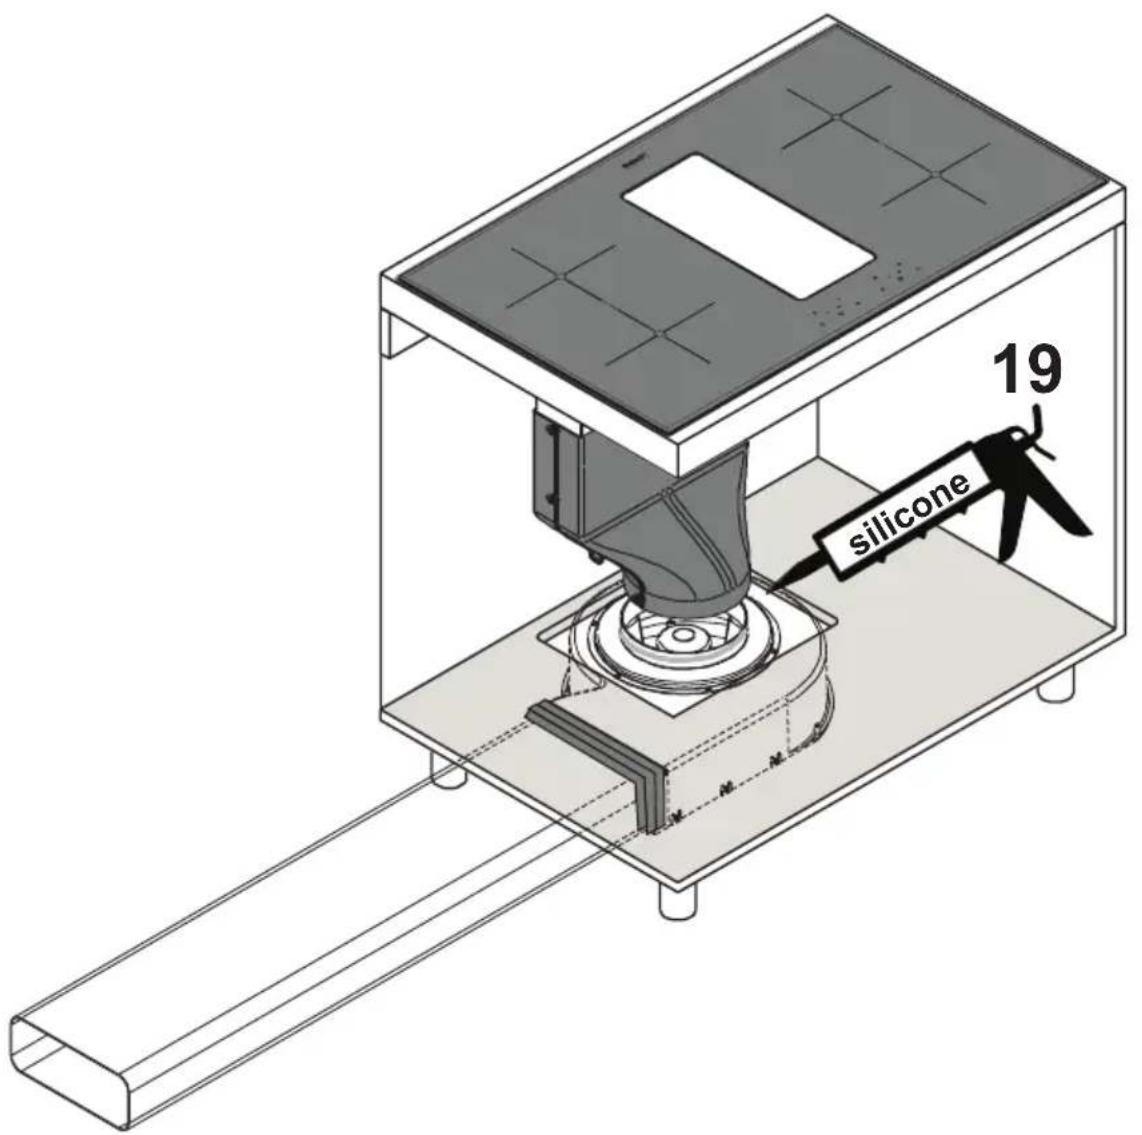
Warning: you are advised to seal the tubing joints with silicone or adhesive tape, on the extractor tubes and the joints connecting the various parts together.
In the event of installation in filtrating mode, pay particular attention to the position of the smoke extractor zone to avoid possible turbulence, to avoid interfering with extraction or with the hob.
For installation in filtrating mode, position the tubing inside the skirting of the furniture, ensuring air extraction outwards from it using a specific grid, to avoid humidity building up inside.
The liquid collection tray should be frequently emptied.
This tray is designed to contain approx. 1 litre of water; if liquid leaks or falls on the device, immediately switch it off and proceed to empty the tray. If liquid falling on the hob is greater than the quantity the tray can contain, switch off the device and immediately contact the support service.
Noise
Induction can generate slight noise; this can vary based on the material, the type of saucepan and the power selected.
When the hob is frequently used, the cooling fan switches on to protect the life of the electronics, generating a buzzing sound; it is perfectly normal.
First use
Clean with a damp cloth and dry the hob before using it for the first time.
You are advised to dry the appliance after cleaning it with a damp cloth to avoid limescale residue. When the appliance is switched on for the first time, odours can generate or smoke can form. The odour will reduce with use, until it disappears completely. Odours or possible smoke are not a sign of wrong connection or possible damage to the appliance and are not dangerous for health.
Attention
natural_image
Simple line drawing of a trash bin with crossed lines indicating no waste or restriction (no text or symbols)natural_image
Illustration of a frying pan with a red-handled U-shaped magnet above it, showing magnetic polarity (no text or symbols)natural_image
Symbol of a trash bin crossed with a diagonal line, no text or numbers presentnatural_image
Illustration of a frying pan with a red-handled magnet, showing magnetic field lines (no text or symbols)natural_image
Technical line drawing of a multi-tiered industrial storage unit with heat exchangers and cooling fins (no text or symbols)Technical drawing

The hood is supplied with an air release to discharge fumes outwards through "EXTRACTION". If cooking fumes and vapour, cannot be released outwards, a "FILTERING" hood can be used by assembling an active carbon filter.
Extraction can be installed in 2 different ways, to best adapt to the shape of the kitchen; choose the most suitable assembly type for your furniture.
Installation version 1
Installation version 1
natural_image
Technical line drawing of a mechanical device with a central component and mounting base (no text or symbols)
Installation Version 1
Installation version 1
Installation version 1
Installation version 2
Installation version 2
natural_image
Technical line drawing of a mechanical assembly with no visible text or symbols
Installation Version 2
Installation version 2
Installation version 2
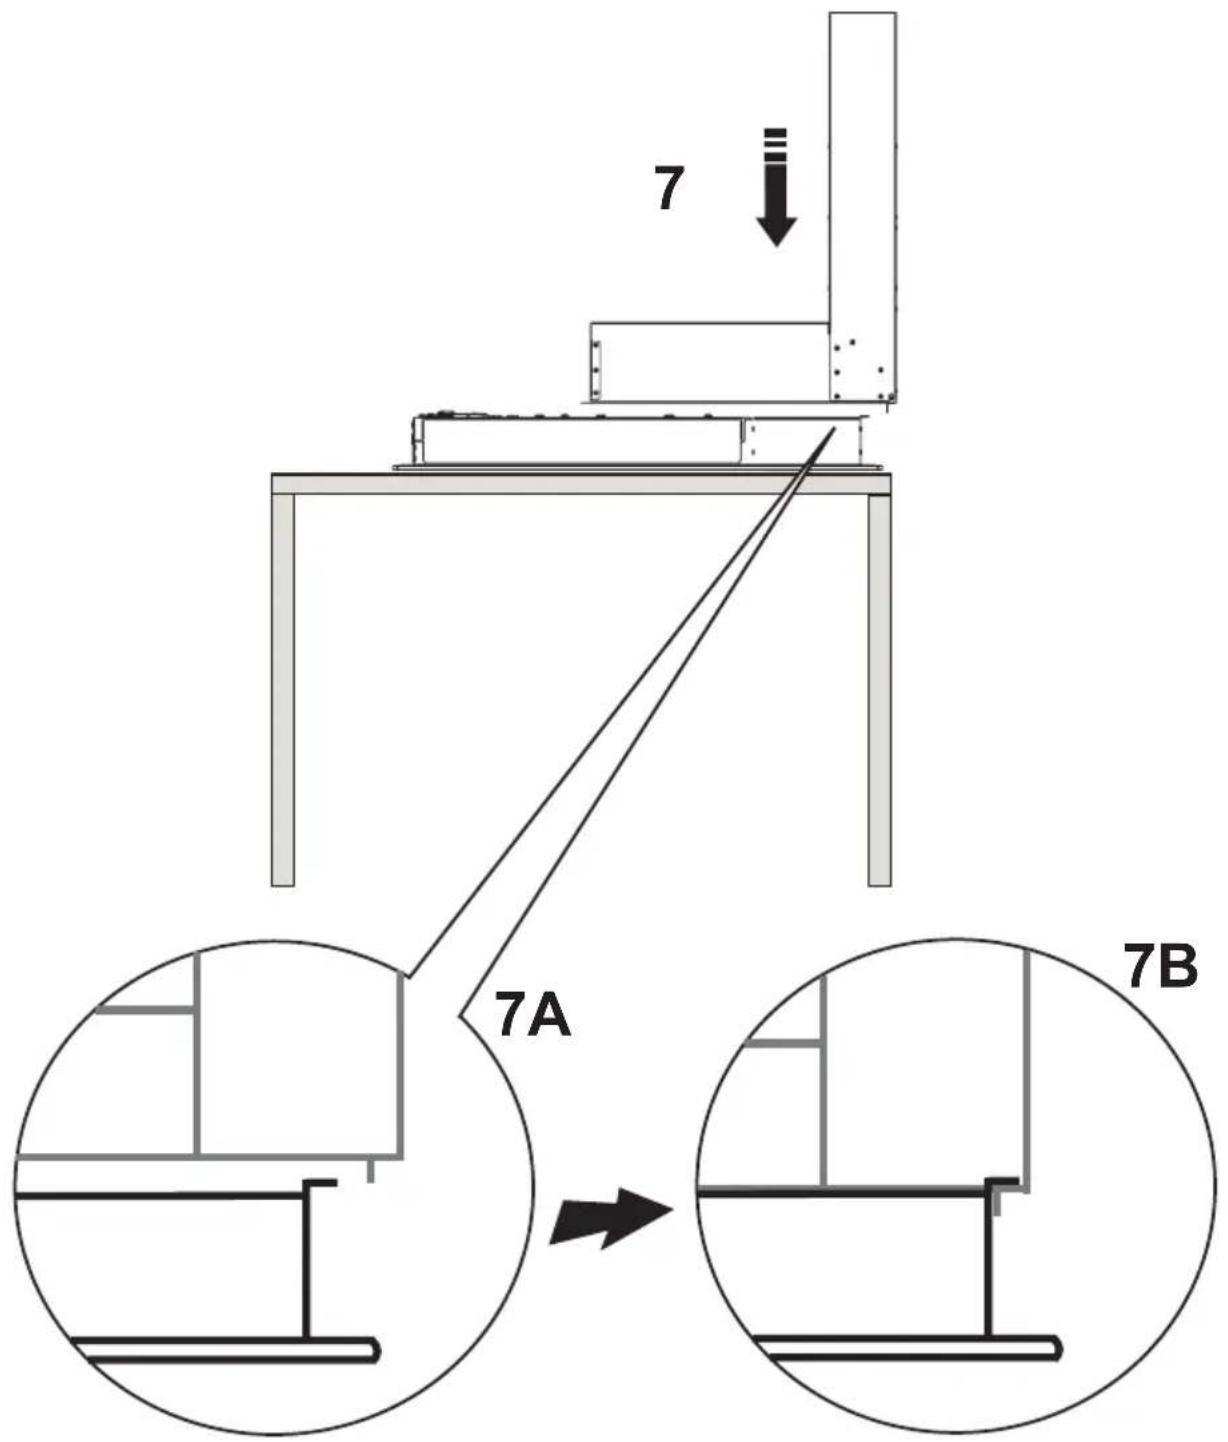
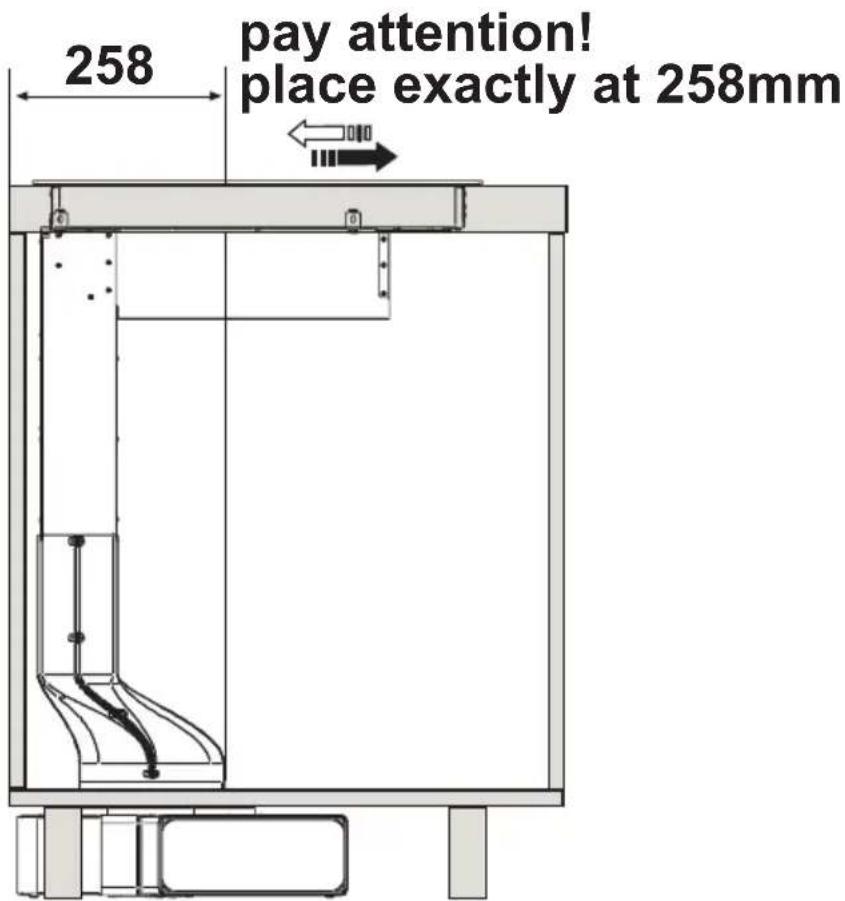
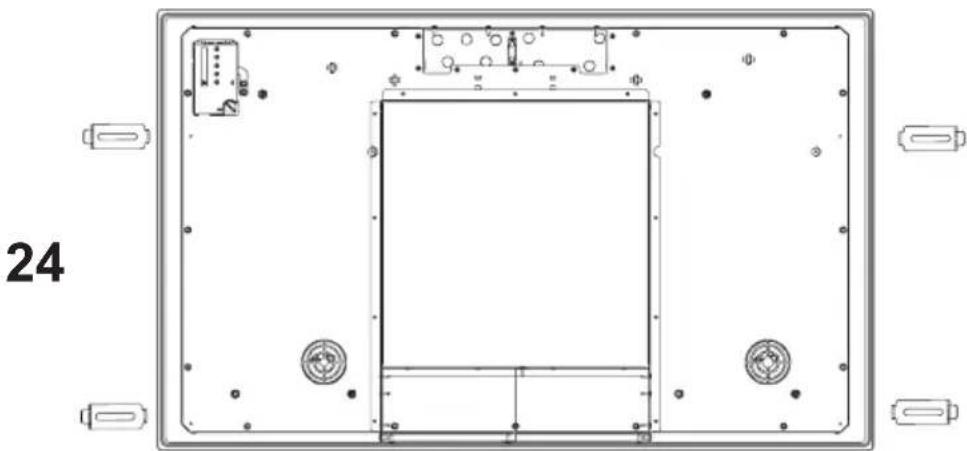
Here, the assembly instructions are valid for each of the 2 installation methods; pay attention to orientation of the motor and the joint according to the type of installation chosen.

X>140mm


natural_image
Technical line drawing of a mechanical assembly with a central component and surrounding components (no text or symbols)


natural_image
Technical line drawing of a mechanical device with a labeled component '17' (no text or symbols on the diagram itself)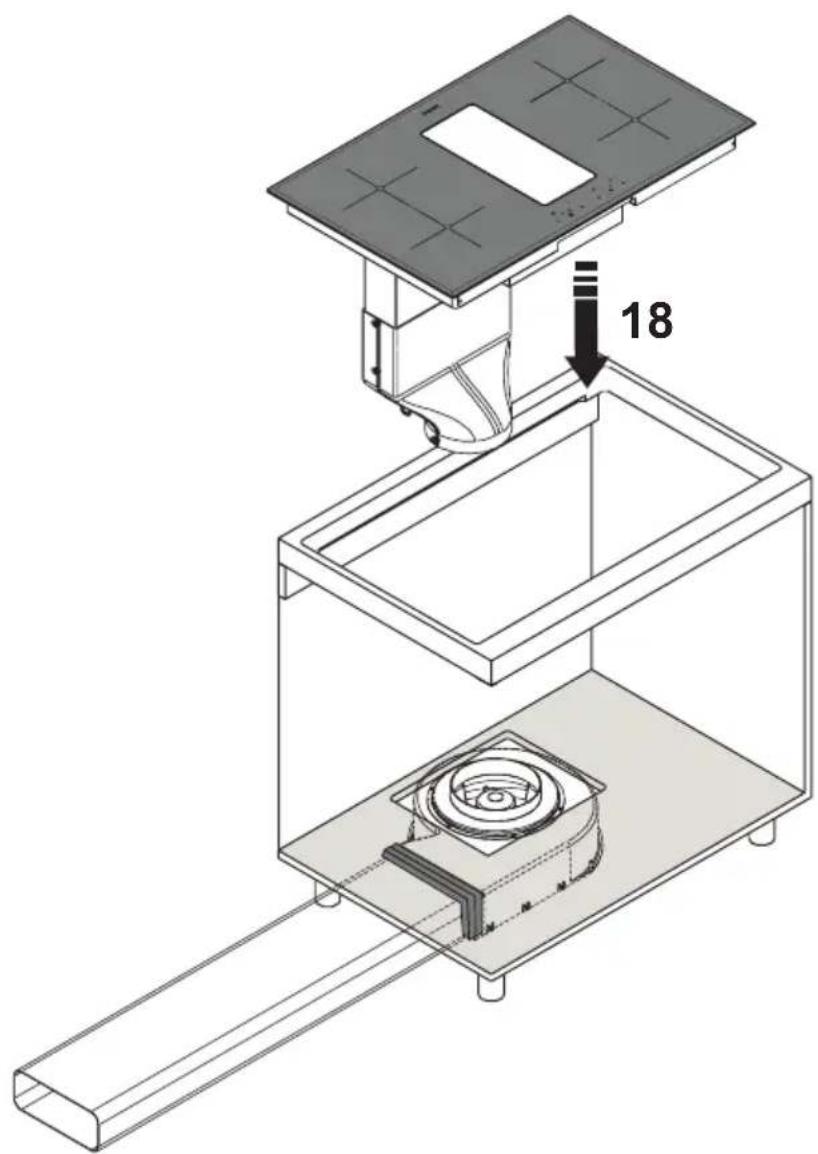


natural_image
Technical line drawing of a mechanical device with labeled component '22' (no text or symbols beyond label)23

natural_image
Technical line drawing of a rectangular electronic device with mounting holes and internal components (no text or symbols)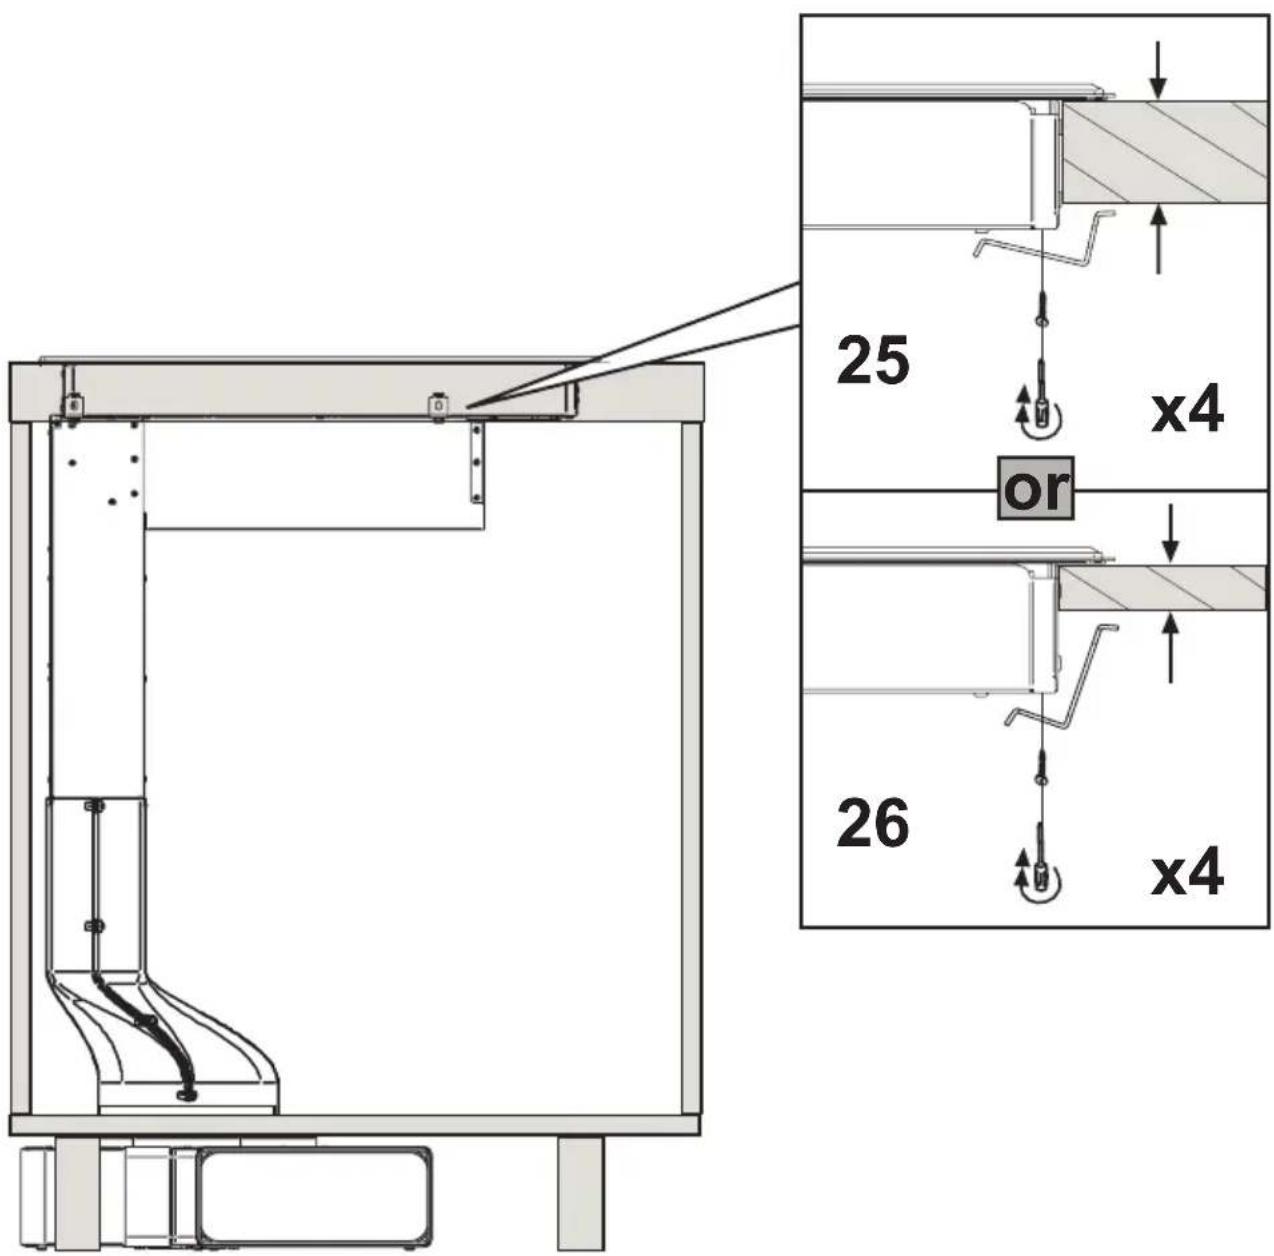

exhaustion mode

flowchart
graph TD
    A["1"] --> B["Process Block"]
    C["1"] --> D["Output Box"]
    style A fill:#f9f,stroke:#333
    style C fill:#bbf,stroke:#333
    style D fill:#dfd,stroke:#333
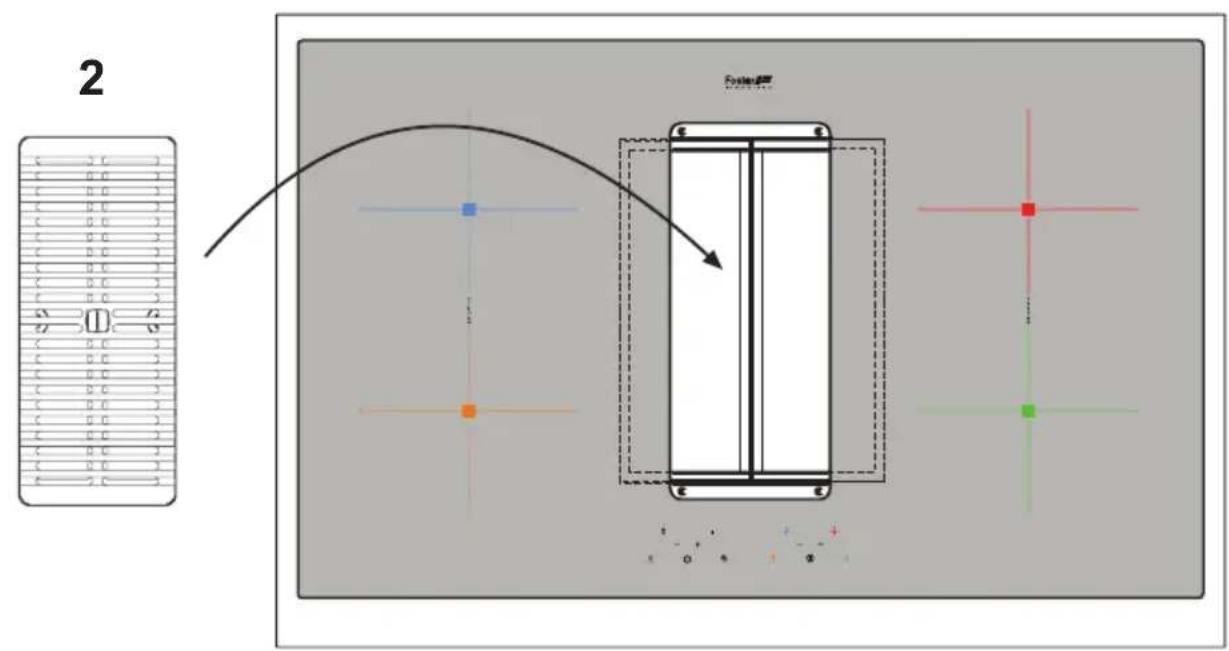
exhaustion mode

recirculation mode

flowchart
graph TD
    A["1"] --> B["Central Display"]
    C["2"] --> B
    B --> D["Output 1: Blue dot, Orange dot, Green dot"]
    B --> E["Output 2: Red dot, Green dot"]
    style A fill:#f9f,stroke:#333
    style C fill:#f9f,stroke:#333
    style B fill:#ccf,stroke:#333

recirculation mode
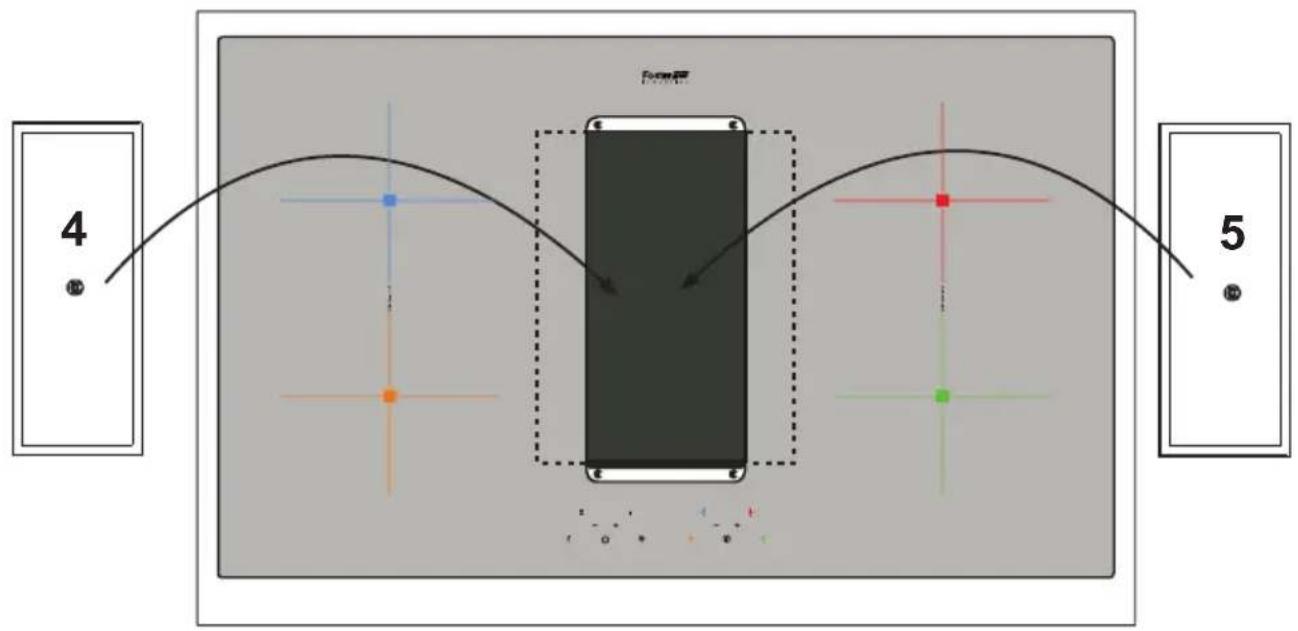
flowchart
graph TD
    A["4"] --> B["Form12"]
    B --> C["5"]
    style B fill:#000,stroke:#000,color:#fff
    style C fill:#fff,stroke:#000
    style A fill:#fff,stroke:#000
    style B fill:#000,stroke:#000,color:#fff
    style C fill:#fff,stroke:#000

7
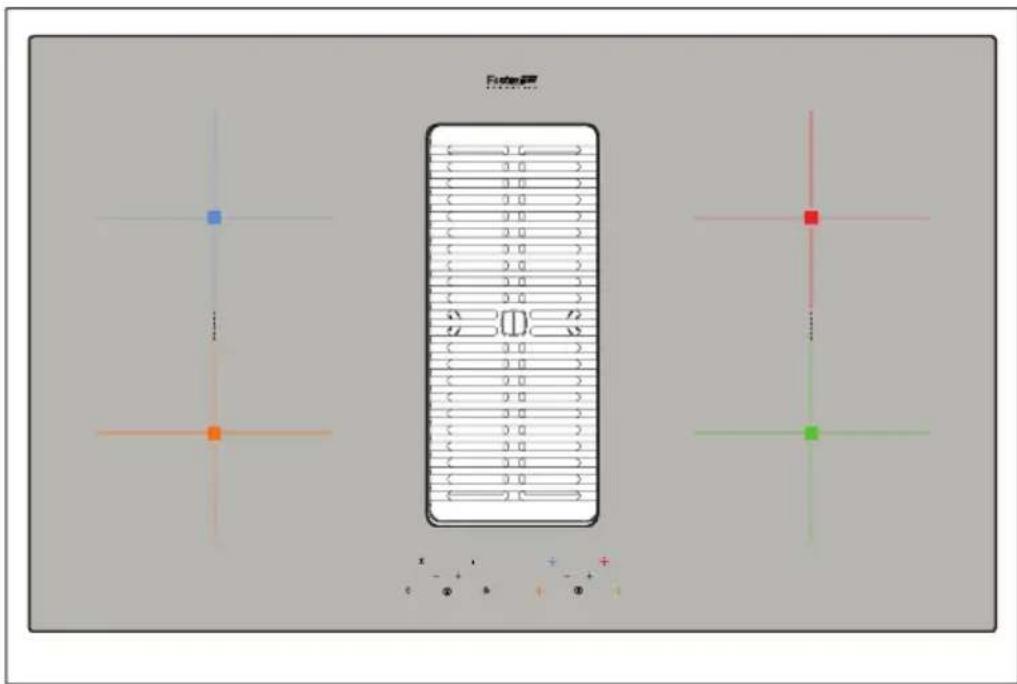
Zone 2
2,1 Kw, Booster 3 Kw

natural_image
Pure geometric lines intersecting at center with no text or symbolsZone 1
1,6 Kw, Booster 1,85 Kw
Foster Industries

natural_image
Empty rectangular frame with rounded corners (no text or symbols)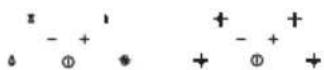
Zone 3
2,1 Kw, Booster 3 Kw

natural_image
Pure geometric lines forming a cross pattern with two black square markers at the intersection (no text or symbols)Zone 4
1,6 Kw, Booster 1,85 Kw
Hob absorption: 7.4 kW max.
induction cable: H05V2V2-F 4x2.5 mm2
extraction cable: Ho5vv-f 3x075 mm2 "IEC coupling"
The power supply cables must be positioned so they do not come in contact with the hot parts of the hob.
It is forbidden to elongate or shorten any connection cable.
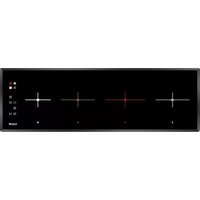
The product is equipped with electronic sensors that react to touch.
Firstly switch on the hob and then the desired cooking zone.
Switching on the hob
Press the ① power key for at least 2 seconds.
The entire display switches on. If no other command is given, the hob will switch off after a few seconds for safety reasons.
Activation of the desired cooking zones
Touch the key relevant to the zone of interest.
The display shows 0, use + or - to select the desired power that ranges from 1 to P

P: indicates the Booster function and is present on each cooking zone. To activate it, you need to use the + key until reaching power 9, and pressing the key again. This function will stay on for 5 minutes, after which the system will re-position itself on power 9.
You are advised to use this function to bring water more quickly to the boil.
Pot Detection
If suitable saucepans are not positioned or recognised in the various cooking zones, the pot detection function will indicate this lack with the symbol "u"
Then position a saucepan, of adequate diameter and materials, on the cooking zone, as indicated in the adequate containers paragraph.
The cooking zone will automatically switch off after 10 minutes if no saucepan is recognised.
Switching off the hob and residual heat indication
Touch the power key. Ⓘ
The main switch indicator light and the indicator lights for the cooking zones switch off. The hob is off. The residual heat indicator light displayed with H on each cooking zone stays on until these zones are not sufficiently cooled.
Attention risk of burns
Do not touch the cooking zone displaying this indication (H).
If a cooking zone stays on for too long at the same power level, the appliance will automatically switch it off and the residual heat H indication appears.
Switch back on as usual to re-enable the Cooking zone function.
The following table outlines the maximum non-stop operating time for each power level:
| Power operation | limit in minutes |
| 1 520 | |
| 2 402 | |
| 3 318 | |
| 4 260 | |
| 5 212 | |
| 6 170 | |
| 7 139 | |
| 8 113 | |
| 9 | 90 |
| P | 5 |
End cooking programming
The timer function can be set from 1 to 99 minutes on each cooking zone.
To activate the time: select the cooking zone and then set the desired power level, then simultaneously press keys + and -, then use + or - to set the desired minutes.
A 2-minute acoustic signal will indicate the end of the minutes set and the cooking zone will automatically switch off.
Minutes counter
The countdown function can be set from 1 to 99 minutes, but contrary to the timer it does not switch off the cooking zone.
The end of the minutes set will be given by an acoustic signal.
With the hob on: without selecting a cooking zone, simultaneously press keys + and -, then use + or - to set the desired minutes.
Once set, it continues to work also having switched off the hob until the minutes set end.
Child-Lock
The hob is equipped with a safety lock to avoid inadvertent switch on by children. It can only be activated if the cooking zones are not selected.
To activate: touch the power key, simultaneously touch the key indicating the cooking zone on the bottom right and the - key, and press the key again indicating the cooking zone on the bottom right.
Once the Child Lock function is on, the symbol L appears on the display.
To disable: touch the power key, simultaneously touch the key indicating the cooking zone on the bottom right and the - key; press the - key again.
Bridge mode
The Bridge function allows use of two cooking zones simultaneously as if they were one, allowing use of fairly big saucepans to cover two adjoining cooking zones.
To activate this function, simultaneously select two adjoining cooking zones; on one of the two the symbol (n) appears while on the other, the cooking power is displayed which must be set using the + and - keys.
To disable the Bridge function, simultaneously press a second time the keys in the two cooking zones.
Overflow detector
If liquids overflow onto the control zone of the hob, it will automatically switch off any function of the hob (except the minutes counter). To switch the hob back on, firstly clean the control panel.
Hob
The hob must always be cleaned after each use. Leave the appliance to cool before cleaning it.
Before cleaning the glass ceramic surface, you are advised to activate the child lock so the hob does not accidentally activate (see Child Lock function).
Only use cleaning products designed for glass ceramic hobs. Comply with the instructions outlined on the packaging of each product.
Do not use the following products for cleaning. They could damage glass ceramic surfaces.
-limescale products or products to eliminate stains and/or rust,
-washing-up liquid and/or dishwasher detergents,
-glass detergents,
-detergents containing soda, ammonia, acids or chloride
-any abrasive detergent, sponge or brush
-solvents
-dirt erasers
-sharp objects
-products for cleaning ovens or grills
-any steam appliance, since the steam can reach the powered parts and cause a short circuit.
To avoid damaging the frame of the hob, comply with the following instructions:
Only use hot water with a little soap
Do not ever use sharp tools or abrasive products
Do not use a scraper on the glass.
Possible dirt residue should be eliminated with the glass scraper. Pay attention not to injure yourself with the scraper.
If sugar or food containing sugar, plastic or tinfoil should fall on the hot hob, you are advised to switch it off. Immediately eliminate any substances from the cooking zone, even if the hob is still hot, using the scraper, otherwise allowing it to cool could damage the glass ceramic.
(Attention: danger of getting burned!!!) Lastly, clean the cooking zone when it has cooled.
Signalling on the hob can get worn due to use of abrasive or aggressive detergents, steel pads or the bottom of saucepans. Avoid use of these cleaning products. In any case, this does not compromise correct operation of the product in any way.
Attention: all the problems outlined in this paragraph are solely of an aesthetic nature and do not influence correct operation of the equipment in any way. They cannot be restored under warranty.
Extractor zone
Grease filter;
it must be cleaned once a month, with non-aggressive detergents, manually or in a dishwasher at low temperature and a short cycle.
Washing in a dishwasher, the metal grease filter can become opaque, but its filtering features do not change in any way.
Carbon filter (only for filtering version):
The active carbon filters F can be washed in a dishwasher once, after which they have to be replaced. The active carbon filters must however be replaced every 6 months.
They withhold unpleasant odours from cooking.

This appliance allows you to choose the operating mode (extraction or filtering) according to installation.
On first start-up for approx. a minute, the display shows which mode is active.
Filtrating: the display indicates the letter C and the filters reset key flashes quickly.
Extraction: the display indicates the letter C and the filters reset key is off.
During this phase, you can change the mode by pressing key F
A beep confirms the program change.
When the time available is up, the program exits this mode and goes in standby or pressing the key B motor on/off
To reference the operating mode selection, disable and re-enable voltage to the appliance.
Note: in filtering mode, on switching off the appliance, extraction remains on for 20 minutes at minimum speed, to allow evaporation of any condensate forming during the cooking phases and the display flashes the symbol ☐
B: Motor on/off key: on touching, the key starts the motor, if off it causes it to switch off. Using the "+" and "-" keys, you can vary the extraction speed (power). In extraction mode, the 5 ^th and 6 ^th are timed.
C:Extraction (power) speed decrease key: touching the key decreases the extraction speed of the hood.
D:Extraction (power) speed increase key: touching the key increases the extraction speed of the hood.
G: Filters reset key: touching the key resets the metal grease filter saturation warning.
After 30 hours of operation of the hood, symbol F will change to symbol G, flashing to indicate the need to clean the metal grease filters. This alarm inhibits operation of the extraction until reset to enable emptying of the water collection tray. (operation to carry out as needed and however compulsory for each filter reset).
F: Filters reset key: Active only in filtering mode: After 120 hours of operation of the hood, the symbol F will change to C, flashing to indicate the need to clean/replace the active carbon filters; the carbon filters can be washed in a dishwasher once, after which they must be replaced.
In extraction mode, the carbon filters alarm is disabled
A:Timer key: on touching the key, whatever the extraction speed selected, the timer function activates. On first touch, the duration of the timer will be 5 minutes (indicated by a single flash of the key), on second touch, 10 minutes (double flashing) and on third touch 20 minutes (triple flashing). Timer key flashing will continue for the entire duration of the function. A fourth press of the key will disable the timer function.
E: Intensive key: on touching the key, the motor passes directly to first intensive ( 5^th speed, timed for approx. 8 minutes); a second press of the key enables the second intensive ( 6^th speed, timed for approx. 6 minutes).
Speed timing is only on in extraction mode.
HOB ERRORS TABLE
These errors appear on the hob display.
| Error code Description | Possible causes Solution | ||
| C, E, C flashing, E flashing or symbol - | If the display of a cooking zone displays one of these symbols, something has happened or is happening to the basic system configurations. | Problems or changes to basic system configurations detected. | Contact the authorised technical support centre specifying the error code. |
| E2 Excessive temperature of cooking zone. | Saucepan heating. Cool | the system, if necessary reducing power or removing the saucepan.* | |
| E3 Malfunctioning due to use of saucepans in inappropriate material. | Saucepans in inappropriate material or possible loss of magnetic properties as temperature rises. | Use saucepans in appropriate material or replace them.* | |
| E4, E5, E6, E7, E8, E9, EA, EC, EH, | Hardware anomalies Hardw are errors detected | Contact the authorised technical support centre specifying the error code. | |
| No display / Function Voltage or touch control error. | Faulty electrical connection or part anomaly. | Contact the authorised technical support centre specifying the error code. | |
| Er31, Er47, Er22, Er20, or segments of the display which switch on in cycles. | Touch control anomaly Error detected on touch control | Contact the authorised technical support centre specifying the error code. | |
| Er 03 or √ | Continuous activation of one of the keys, the control switches off after 10 seconds. | Liquid or saucepan on control zone | Dry or clean the glass or remove the saucepan from the control zone. |
| Power returns to level 0 A | Anomaly detected on hardware component. | Contact the authorised technical support centre specifying the error code. | |
| L No error! | Child Lock on | Disable Child Lock with reference to the specific paragraph. | |
| u | Saucepan not detected | There are no saucepans in the zone----Saucepans are unsuitable----The diameter of the frying pan bottom is too small for the zone----The saucepans do not cover the cross | Place a saucepan on the zone----Use suitable saucepans. Refer to the "induction cooking" chapter----Use correctly sized saucepans. Refer to the "induction cooking" chapter.----Ensure the cross is completely covered |
* If the error persists, contact the authorised technical support centre, specifying the error code.
Reducing environmental impact
To reduce energy consumption, we recommend you always use the lowest suction speed among those suitable for the cooking mode currently active, avoid leaving the appliance running for more than 15 minutes after burner shutdown and switch off the lights if you leave the cooking area. / Per contenere i consumi dell'elettrodomestico si raccomanda di utilizzare sempre velocità di aspirazione più bassa tra quelle adeguate al tipo di cottura in corso, di non lasciare il dispositivo in funzione per più di 15 minuti dopo lo spegnimento dei fuochi, e di spegnere sempre le luci se ci si allontana dall'area di cottura. / Pour contenir les consommations de l'électroménager, il est conseiller de toujours utiliser la vitesse d'aspiration la plus basse parmi celles les plus adaptées au type de cuisson en cours, de ne pas laisser le dispositif en fonction pour plus de 15 minutes après l'arrêt des feux et de toujours éteindre les lumières si le consommaleur s'éloigne de la zone de cuisson. / Um den Verbrauch des Haushaltsgeräts so gering wie möglich zu halten, empfiehlt es sich, immer dla geringste der für die Kochart geeignaten Absauggeschwindigkeiten zu benutzen, das Gerät nicht länger als 15 Minuten nach dem Ausschalten der Kochfelder in Betrieb zu lassen und die Beleuchtung immer auszuschalten, wenn man sich von dem Kochbereich entfernt. / Para reducir el consumo del electrodoméstico, se recomienda utilizar sempre la velocidad de aspiración más baja entre las adecuadas al tipo de cocción en curso, no dejar el dispositivo en funcionamiento durante más de 15 minutos después de apagar el fuego y, apagar siempre las luces, si nos alejamos del área de cocción. / Para conter o consumo do electrodoméstico, recomenda- se utilizar sempre velocidade de aspiração mais baixa entre aquelas adequadas ao tipo de cozimento, não deixar o dispositivo a funcionar por mais de 15 minutos depois de apagar o fogo e desligar sempre as luzes ao se afastar da área de cozimento. / Om het verbruk van het apparaat te beperken, is het raadzaam om steeds een lagere zuigsnelheid dan vereist in te schakelen, het apparaat na het doven van de branders niet langer dan 15 minuten te laten werken en steeds de lichten uit te schakelen als de kookzone wordt verlaten. / Per contenere i consumi dell'elettrodoméstico si raccomanda di utilizzare sempre velocità di aspirazione più bassa tra quelle adeguate al tipo di cottura in corso, di non lasciare il dispositivo in funzione per più di 15 minuti dopo lo spegnimento dei fuochi, e di spegnere sempre le luci se ci si allontana dall'area di cottura. For at reducere det elektriske husholdningsapparals forbrug anbefales det allid at bruge lavere udsugningshastighed blandt dem, der er egnet til den igangværende type madlavning, og ikke at lade apparatet være i drift i mere end 15 minutter efter at have slukket for kogeplademe, samt altid at slukke lysene, når du er væk fra madlavningsområdet. / Για τον έλεγχο της κατανάλωσης της ηλεκτρικής συσκευης καλο βα ήταν αυτή να χρησιμοποιείαι στις χαμηλότερε δυνατές στροφές ανορρόφησης, με βάση πόντα τον τύτο γαγειρέματος που βρίσκεται κάθε φορά σε εξέλιξη, να μην αρήνετε τη συσκευή κα λειουργεί για περισότερα από 15 λεπτα μετά από to ορήγιμο της εστίας και να σβήνετε πάντα το φωτιμού οτον απομακρύνεστο απ την περιοχή μαγειρέματος. / Az elektromos háztartási készülék fogyasztásának a vissza fogása érdekében javasolt mindig az adott főzési tipusnak megfelelő legalacsonyabb elszívási sebességet beállitani, a tüzely helekpcsolása után a készüléket 15 percen belül kikapcsolini, a főzöhely elhagyásakor pedig mindig lekapcsolini a lámpakát. / За намаляная потреблението на электродомажинискят уред, σε препорчьва винаги да се използва по-никса скорост на засмуване, от подходящата за вида на извършваното готвене, да не се оставя уреда включен за повече от 15 минути след изключване на огъня, и винаги да се изключват лампите, при отдалечаване от зоната на готвене. / Pro snížení spotreby domáčiho spotrebiće doporučujeme vždy použivat tu nejnižiši z rychlosti odsávání odpovidajícich aktuálnimu typu vaření, nikdy nenechávat zařizen zapnuté déle než 15 minut po vypnutí hořákú a piň opuštění prostoru vaření vždy vypinat světla. / Sædme voolutarbimise vähendamiseks soovitame kasutada alati tokuvalmistamisele sobivat köige madalamat sissetömbekürst, et seade ei jäaks pärast plidi välajälulitamist tööle üle 15 minutiks ning kustutada seadme tuled alati, kui tokuvalmistamise kohast eemaldute. / Kodinkoneiden sähkönkulutksen vähentämiseksi on suositeltavaa käyttää aina alhaisinta imunopeutta, joka soveltuu menellään olevaan kypsennykseen. Älä jäta laitetta päälle yli 15 minuutiksi lekkien sammutamisen jälkeen ja sammuta valot aina kunpolostut keittoaalueita. / Kako bl smanjili potrošnju uređaja uvijek se preporuča uporaba najniže brizne za usisavanje, među onim brzinama koje su primjerene vrsti kuhanja, da ne ostavljate uređaj i funkciji duže od 15 minuta nakon isključivanja štednjaka i da uvijek isključite svjetla kada niste u blzini područja kuhanja. / Siekiant apriboti butitinio prietaiso saṇaudas, rekomenduojama visada naudoti mažiausią iš gaminimo tipu tinkamu traukimo greličiu, nepalikti veikti ilglau nei 15 minučių po viryklės išjungimo ir nimeutant tollau nuo virimo tertorijos, visada išjungiti apšvietmą. / Iai samazinātu elektroierices patērinų, ieteicams vienmėr izmantot sūkšanas atrumu mazāku par gatavošanai piemėrotajiem; neatstät ierici dariblá ilgak par 15 minutes pęc plits izslęsgānas, un vienmėr izlsędziet aggaismojumu, kad neuzturieties tuvumą. / Biex tnaqqas il-konsum tai-apparat tad-dar huwa rakkommandat li jintuža dejiem velocità ta’ gibid itkar baxx minn dak xierqa ghat-tip ta’ tisjir li jkun qed isir, li apparat ma jithallix jahdmem għali iktar minn 15-il minuta wara li jintefghu l-ištufi, u li jintefa dejem id-dawi jekw ihewed ikun ser jer saq “boghod miz-zona tattisjir. / Aby zmniejszyć pobór mory urządzenia, należy zawsze stosować predkość sssania niższą niż predkości odpowiednie dla danego rodzaju gotowania, nie pozostawić urządzenia w stanie uruchomionym na dłużej niż 15 minut po wyłączeniu palników, zawsze wyłączać światła w przypadku opuszczania obszaru gotowania. / Pentru a reduce consumul energetic al aparatului, vá recomendamās să il folositi âgånd intotedeauna viteza de aspirare cea mai mică dintre cele adecivate tipului de preparare activat, să nu läsați aparatul in functiune mai mult de 15 minute după ce s-au stins arzătoarele, și să inchideļi intotedeauna luminile dacă părăsīli zona de gàtit. / För att reducera hushållsapparatens strömförbrukning, rekommenderar vi att alltid tilämpa den lögsta fläkthastigheten, bland dem som är lämpliga för typen av págående tillagning, att inte läta apparaten vara i funktion i mer än15 minuter efter att ha stängt av gaslágoma och att alltid släcka ljuset när du avlägsnar ding från tillagningsområdet. / Za účelom znížene spotreby domáčich spotrebičov sa odporuča použivat vždy najnižšiu rýchlost vysávania medzi tými, ktorė sú k dispozícili medzi tými vhodnymi pre typ varenia a nenechávajte zarladenie v prevádzke viac než 15 minút po vypnutí svetiel a vy vždy vypnite svetla, ked sa oddalite od priestoru varenia. / Zamanjišo porabo kuhinjske nape je príporočljivo, da vedno uporabljate najnižjo hitrost odzračevanja men tlistimi, ki ustrezajo intenzivnosti kuhanja, da naprave ne pusitte vključene več kot 15 minut po končanem kuhanju ter da vedno izklopite osvetljavo na napi, če se med kuhanjem oddaljite od kuhlne površine.
XXXXX- Ed. 05/2017
via M.S. Ottone, 18/20
42041 Brescello (RE) - Italy
AFLIASPIRACF Ed.11-09-17
@
- Attenzione
- Danger of fire
- Danger of burns
- Protecting the environment
- Disposal of your old appliance
- Energy-saving advice
- Examples of cooking power setting
- Induction cooking
- Advantages of induction cooking
- Correct cookware positioning
- Adequate containers
- Inadequate containers
- Danger of faults
- Noise
- First use
- Attention
- Technical drawing
- exhaustion mode
- Switching on the hob
- Activation of the desired cooking zones
- Pot Detection
- Switching off the hob and residual heat indication
- Attention risk of burns
- End cooking programming
- Minutes counter
- Child-Lock
- Bridge mode
- Overflow detector
- Hob
- Extractor zone
- Grease filter;
- Carbon filter (only for filtering version):
- In extraction mode, the carbon filters alarm is disabled
- HOB ERRORS TABLE
Brand : Foster
Model : 7391 245
Category : Cooker