SLSFE28PS - Safe SereneLife - Free user manual and instructions
Find the device manual for free SLSFE28PS SereneLife in PDF.

| Product Type | Electronic Safe |
| Brand | SereneLife |
| Model | SLSFE28PS |
| Capacity | 28 Liters |
| Exterior Dimensions (H x W x D) | 28 x 28 x 28 cm |
| Weight | 10 kg |
| Color | Black |
| Material | Heavy-duty steel |
| Locking Mechanism | Digital keypad with backup key |
| Power Source | 4 AA batteries (keypad) |
| Number of Emergency Override Keys | 2 |
| Security Alarm | 3 incorrect entries trigger alarm |
| Security Features | Solid steel construction, pry-resistant hinges, anti-tip bolt |
| Mounting | Includes mounting hardware for floor or wall |
| Usage | Home, office, hotel |
| Assembled | Yes |
| Warranty | 1 year limited |
Frequently Asked Questions - SLSFE28PS SereneLife
User questions about SLSFE28PS SereneLife
0 question about this device. Answer the ones you know or ask your own.
Ask a new question about this device
Download the instructions for your Safe in PDF format for free! Find your manual SLSFE28PS - SereneLife and take your electronic device back in hand. On this page are published all the documents necessary for the use of your device. SLSFE28PS by SereneLife.
USER MANUAL SLSFE28PS SereneLife
natural_image
Black rectangular electronic device with a small display and three buttons on top (no visible text or symbols)SLSFE26PS
natural_image
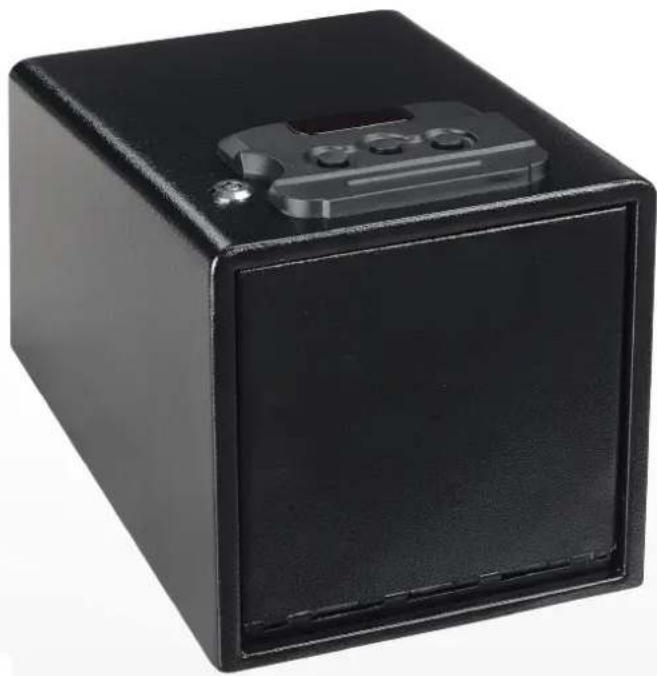
Black rectangular metal safe box with a small electronic device on top (no visible text or symbols)SLSFE28PS
PISTOL SAFE
USER MANUAL
natural_image
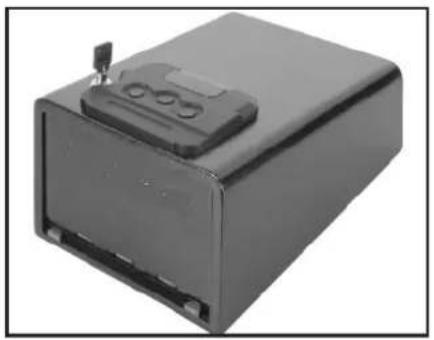
Exterior view of a black rectangular electronic device with a lid and mounting bracket (no visible text or symbols)
text_image
1 2 3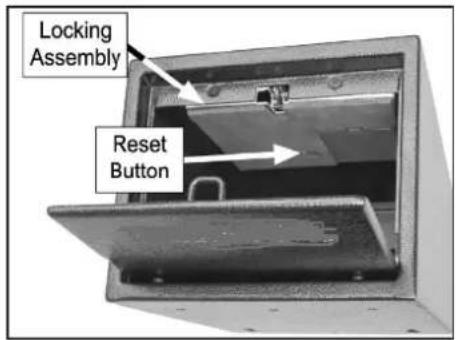
text_image
Locking Assembly Reset ButtonFigure 2. Keypad Figure 1. PiFigLoafe & 4. Battery compartment located in locking assembly
Opening Safe
The safe can be opened in two ways- using either the included key, or by entering the correct code into the keypad.
Perform the following steps for the initial setup of your safe. At any time, the override key can be used to open the safe door (NEVER STORE OVERRIDE KEY IN SAFE)
To prepare safe for use:
- Use override key to open door.
- Install batteries
- Enter default factory code: 1-2-3
Note: If code was entered correctly, green light will flash for two seconds and the spring-loaded door will open swiftly.
Note: If code was entered incorrectly, red light on keypad will flash for three seconds.
Adding/Changing Batteries
- Place safe on its side, and locate the battery compartment on locking assembly shown in figure 3.
- Remove battery compartment cover, install 4*AA batteries into battery compartment, and re-install battery compartment cover.
- Position safe upright. Push reset button.
NOTE: If batteries are installed properly, green light on keypad will illuminate, followed by a red light.
- Close safe door.
Changing Digital Lock Safe
After the successful completion of each step, the safe will beep the indicated number of times and flash the indicated color.
To change digital lock code:
- Open door using current code or override key.
- Press and hold reset button (see Figure 4)
On bottom of locking assembly for three seconds. Two beeps sound and green light flashes.
- Enter new 3-to 8-digital code. Codes less than eight digits long require you to push reset button to finalize the input. Otherwise, once the eighth digit is pressed the code will automatically be accepted. A yellow light will flash if the code is changed successfully.
NOTE: If five beeps sound and red light flashes, it means
the procedure was unsuccessful. Repeat Steps 2-3.
- Re-enter a new 3- to 8-digit code. Codes less than eight digits long require you to push reset button to finalize input. Otherwise, once the eighth digit is pressed the code will automatically be accepted. Green light will flash if code is accepted.
- If five beeps sound and red light flashes, procedure was unsuccessful, repeat Steps 2-4.
- Close door and test new code.
NOTICE
Keep these instructions with included combination and override keys in a separate secure location from safe. Misplacing override keys and forgetting the combination will render the safe unusable.
Invalid Entry Wait Period
- If you enter an invalid code three consecutive times, the digital lock begins a two-minute wait period. At the end of wait period the safe can be accessed normally.
-
While in wait period
-
The digital lock will flash all three lights together if code entry attempt is made.
• The digital keypad will not accept input. - Removal of the battery stops the countdown but will not reset the wait period.
• Override key can be used to access safe.
Silent Mode
This safe features a silent mode that mutes the beeps heard when buttons are pushed on the keypad. The indicator lights will still flash in silent mode.
To enable silent mode:
- Push and hold button 1 on the keypad until all three lights illuminate.
- Enter code to test that beeps are inaudible.
To disable silent mode:
- Push and hold button 1 on the keypad until all three light illuminate.
- Enter code to test that beeps are audible.
text_image
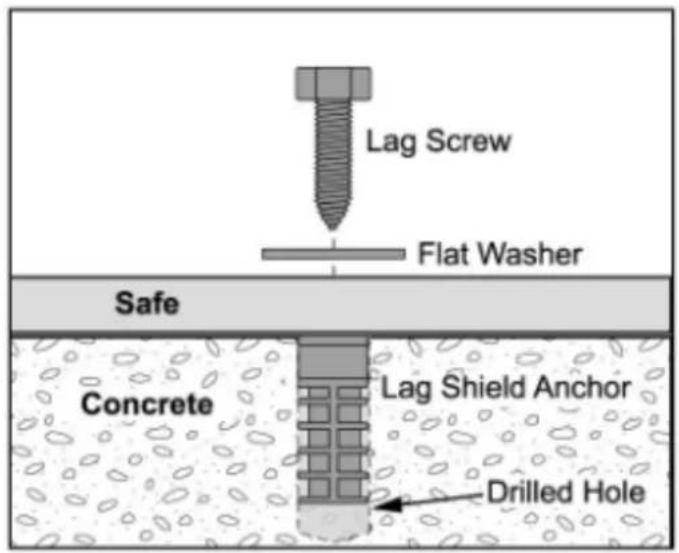
Lag Screw Flat Washer Safe Concrete Lag Shield Anchor Drilled Hole
text_image
Lag Screw Flat Washer Safe FloorFigure 6. Bolting to wood floors Figure 5. Anchoring to concrete floors.
Maintenance
Clean the surface of the safe with a slightly damp cloth.
If the hinges develop a squeak, apply one or two drops of light machine oil to hinge contact points.
If the digital lock's yellow light flashed, this indicates the AA batteries are low, please replace the batteries immediately. Otherwise, replace once per year.
Anchoring Your Safe
Anchoring the safe to an immovable surface makes theft of the entire safe extremely difficult. The safe can be anchored to any surface, but wood and concrete are the most common.
Before anchoring the safe, the shelf and foam padding must be removed to expose the anchoring holes in the bottom of the safe. Mark through the mounting holes before drilling.
The following are the most common scenarios for mounting your safe. However, since the safe can be mounted to numerous surfaces, use discretion to determine the best mounting method.
text_image
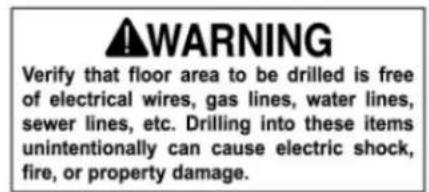
WARNING Verify that floor area to be drilled is free of electrical wires, gas lines, water lines, sewer lines, etc. Drilling into these items unintentionally can cause electric shock, fire, or property damage.Anchoring to Concrete Floors
Lag shield anchors are generally recommended because they mount flush with the floor and allow the safe to be bolted down with a lag screw and flat washer. Ensuring that the lag shield anchors are flush with the floor aids in the ease of movement at a later time.
Installation of lag shield anchors requires you to drill holes into the concrete. Drilling into concrete properly requires a hammer drill with an appropriate-sized concrete drill bit.
To ensure strong and successful anchoring to concrete:
- Drill holes in one pass and avoid raising the bit up and down to clear the dust, which may cause the holes to become slightly over-sized.
- Drill holes1/2"-1" deeper than the length of the lag shield to allow room for the bottom of the screw and any remaining dust.
• Vacuum dust from holes before installing lag shields.
Bolting to Wood Floors
Lag screws and flat washers are typically used to bolt safes to wood floors (or floors with a wood sub-floor).
Installation of lag screws works best if holes are pre-drilled to accommodate the lag screws. A standard hand-held power drill with the appropriate-sized wood drill bit is required to complete the job.
To ensure strong and successful anchoring to wood:
- Pre-drill holes at the correct size for the lag screws. The correct pre-drill size is always smaller than the lag screw size. (For example, a 7/32" bit is used to pre-drill holes for a 3/8" lag screw)
• Use at least a 2" long lag screw. - For additional strength, fasten at least two of the screws into floor joists.