Storm V50 - Smartphone E-Boda - Free user manual and instructions
Find the device manual for free Storm V50 E-Boda in PDF.


| Product Type | Smartphone |
| Brand | E-Boda |
| Model | Storm V50 |
| Operating System | Android |
| SIM Card Slots | Dual SIM (miniSIM + microSIM) |
| microSD Card Slot | Yes |
| Battery Type | Removable Li-ion |
| Charger | Included power adapter (AC) |
| Connectivity | WiFi 802.11, Data (3G/EDGE/GPRS) |
| Network | GSM, WCDMA (3G) |
| Call Features | Call log, reject with busy message |
| Messaging | SMS, MMS |
| Gmail, POP3, SMTP | |
| Web Browser | Yes, via WiFi or Data |
| Music Player | Yes, plays from microSD |
| App Store | Android Market (Google Play) |
| Display | Touchscreen (capacitive) |
| Languages Supported | Multiple (English, Romanian, etc.) |
| Safety Certifications | CE, RoHS |
| Warranty | Refer to warranty card included |
Frequently Asked Questions - Storm V50 E-Boda
User questions about Storm V50 E-Boda
0 question about this device. Answer the ones you know or ask your own.
Ask a new question about this device
Download the instructions for your Smartphone in PDF format for free! Find your manual Storm V50 - E-Boda and take your electronic device back in hand. On this page are published all the documents necessary for the use of your device. Storm V50 by E-Boda.
USER MANUAL Storm V50 E-Boda
-
Introduceti cartela microSIM in slotul 2 cu contactele aurite in jos si coltul taiat in stanga.
-
Introduceti cartela miniSIM in slotul 1 cu contactele aurite in jos si coltul taiat in dreapta.
-
Puteti insera un card microSD in slotul dedicate cu contactele aurite in jos.
-
Reinserati bateria.
-
Pentru a atasa carcasa, aliniati-o in partea de sus a telefonului si apasati in parti si la baza pana face click si se aseaza in loc.
natural_image
Line drawing of a smartphone with a USB plug inserted, showing a red arrow indicating the next plug (no text or symbols present)natural_image
Colorful paint palettes in bowls with a red arrow pointing to a small inset image (no text or symbols visible)Jurnal apeluri
Configurare cont de Email
1- Gmail
Crearea unui cont de email
Director General Eailia Bureva


Charge the Baery or Connect to a Computer 30
Lock and Unlock the Screen 33
Make it Yours 34
Add Widgets and More Icons to Home Screen 35
Add widgets and icons to home screen.... 35
Rearrange or remove widgets and icons on your Home screen ....35
Enter Launcher 36
Open and Switch Applicaons 36
Switch to Recently Used Applicaon.... 36
Make a Call....37
Call Log....38
Reject a Call by Sending a Busy Message 39
Add a Contact....39
Voice and Data Services....40
Send and Receive Message(s)...... 42
Browse the Web....44
Enjoy Music....45
Download Applicaons from Android Market 46
Email Account Conguraon 47
Manage Applicaons/ Move to SD card 50
Maintenance & Safety 51
Get Started
Inserting your miniSIM, microSim and MicroSD cards
Important: Use standard microSIM and miniSIM only.
-
With your inger, open the back cover from the bottom. Gently detach the back cover from the bottom and sides to remove it.
-
Remove the battery irst before inserting the miniSIM or microSIM.

- With the microSIM card's gold contacts facing down and its cut-off corner facing left, insert it into
the microSIM card slot and push it completely inside the slot.
-
With the miniSIM card's gold contacts facing down and its cut-off corner facing right, insert it into the miniSIM card slot and push it completely inside the slot.
-
You can insert your microSD card into the storage card slot with its gold contacts facing down and push it in until it clicks into place.
-
Reinsert the battery.
-
To replace the back cover, align it onto the top part of the phone, and press the sides and the bottom part of the cover to lock it into place.
Charge the battery
The battery in your phone hasn't been charged yet. Please use the supplied power adapter to do a full charge before you start using you phone. Also, please don't try to take your phone apart. (If you do, it may invalidate your warranty.)
Charge the Battery or Connect to a Computer
You can charge your battery using the charger or connect the USB cable (supplied with this phone) to the computer.

natural_image
Line drawing of a smartphone with a USB cable inserted, showing a red arrow indicating the next plug (no text or symbols present)Lock and Unlock the Screen
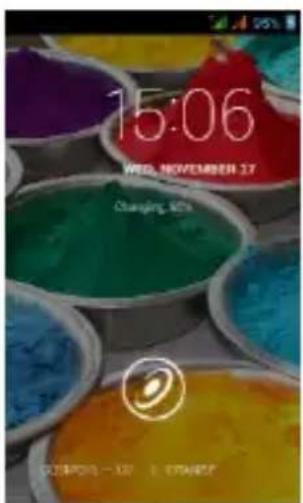
Press power button to enter Sleep mode and meanwhile the screen will be locked; press power button again to wake up and then drag the lock to the right side to unlock.

Make it Yours
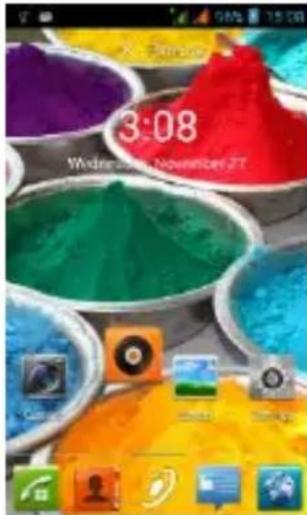
1) Home screen: It is your starting point to access all the features on your phone. It displays application icons, widgets, shortcuts, and other features.
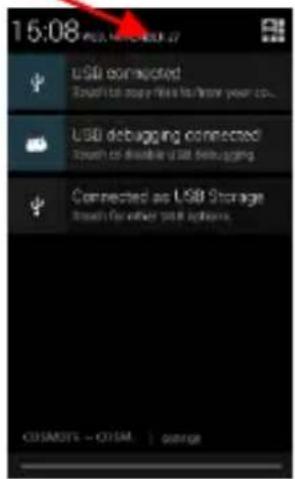
2) Notification Bar: At the top of the screen, the Status bar displays the time, status, and notifications. If there is a new message, missed call or something in the notification bar, you can drag it down to open notification panel and click the desired one to have a view. When you finished, you can close it by dragging the panel up or pressing "Back".
3) Launcher: Touch the Launcher icon at the bottom of the screen to view all installed applications.
Home screen
Notification Bar


Launcher
Add Widgets and More Icons to Home Screen
Add widgets and icons to home screen
Enter Launcher and long press and hold an application till the app displays on the home screen, and then release your inger hold.
Rearrange or remove widgets and icons on your Home screen
a). Long press and hold the widget or icon you want to move. Once “Remove” appears, don't release your hold on the icon and drag the widget or icon to a new location on the screen. b. Press and hold on icon for several seconds, and drag the widgets or icon to remove!
Enter Launcher
Open and Switch Applications
The Launcher holds icons for all of the applications on your phone, including any application that you downloaded from Android Market or other sources. On the Home screen, touch the Launcher Icon to open the main menu.
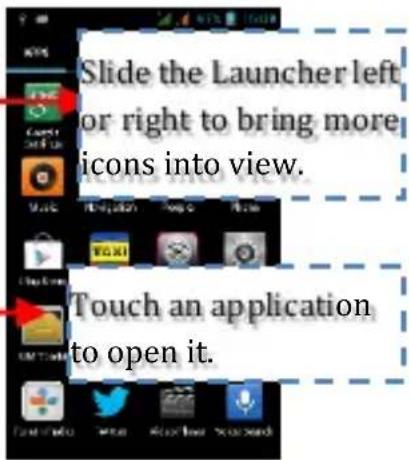
Press Home icon or Back icon to close the Launcher.
Switch to Recently Used Application
Press and hold the car for a few seconds.

Make a Call
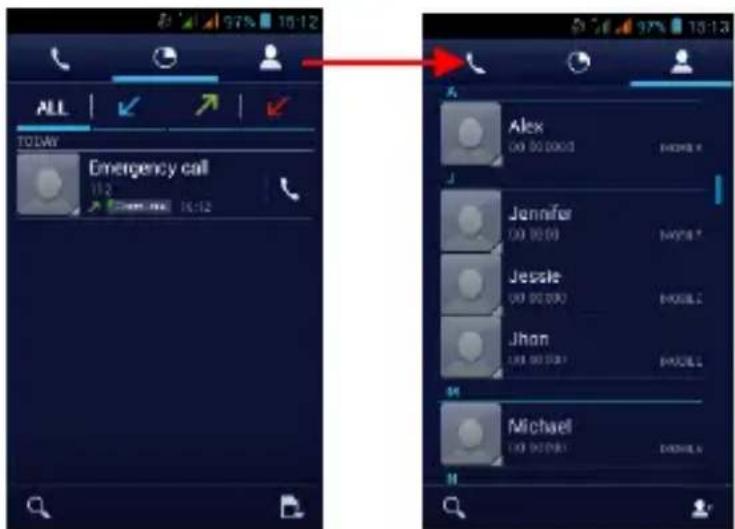
On the start screen choose and enter a complete phone number to make a call.

Slide the screen to right
Slide the screen to right
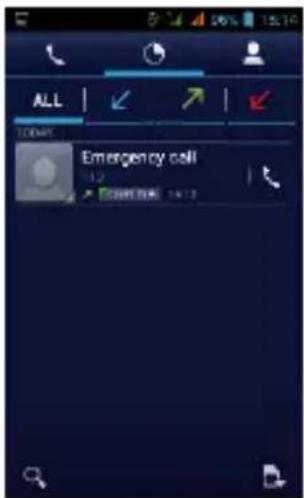
Call Log
In call log options, you can Make a call, add new contact and send message etc.

Reject a Call by Sending a Busy Message
While there is an incoming call, you are inconvenient to accept the call, and then you can send a busy message for rejecting the call.
Drag the circle up to , some busy messages will show on the screen, short tap any of them to send out.
Add a Contact
Tap 📁 and enter Contacts and then add a contact (see igure below.)
Tap " [icon] " to add a new contact to Phone or SIM card.

Voice and Data Services
SIMs:
3- It is necessary to clearly know what services you have attributed for each SIM,
4- After the SIMs have been installed and the telephone was started, it is necessary that from Settings → SIM management to assign the services correctly:
e- Voice Call can be assigned to any SIM,
f- Video Call shall be assigned only to the SIM with 3G data,
g- Messages can be assigned to any SIM.
h- Data Connexion shall be assigned only to the SIM with 3G data and usually it is configured as well as Video Call.
Table of accepted SIM cards and services according to operators from Romania on May 9, 2013:
Note:
3- If you have an ongoing call on one of the SIMs, the other will be disconnected from the network and you will not be able to receive calls on this one until you finish the initial call. If the calls you are about to receive are very important we recommend to redirect calls from one SIM to the other and to activate the Waiting Call.
4- There is the possibility that mobile phone operators to change working frequencies in this case, the table above may no longer be valid.
5- APN Settings
If data service is not activated automatically after introducing the card and starting the telephone, you should manually set the APN (Access Point Name) details. These settings can be found on the official page of each mobile phone operator.
Send and Receive Message(s)
Enter Messaging, and then compose new message. You touch a text field where you want to enter text, to open the keyboard.

a. When you are composing a new text message, you can select text for cutting or copying. The selected text is highlighted in blue. Touch the text field or portion that contains text (see the below figure). You can select all contexts, copy, cut and paste.
b. When a new message comes, you can read by dragging notification panel and click the message, or entering Message to read it directly.

- Long press one of the all message threads; you can delete the message thread.
- Short press a message in a message conversation window.

- Touch Forward in the menu that opens.
- Add a contact.
- Touch Send icon to send the message.
Browse the Web
Switch on Data connection or WiFi
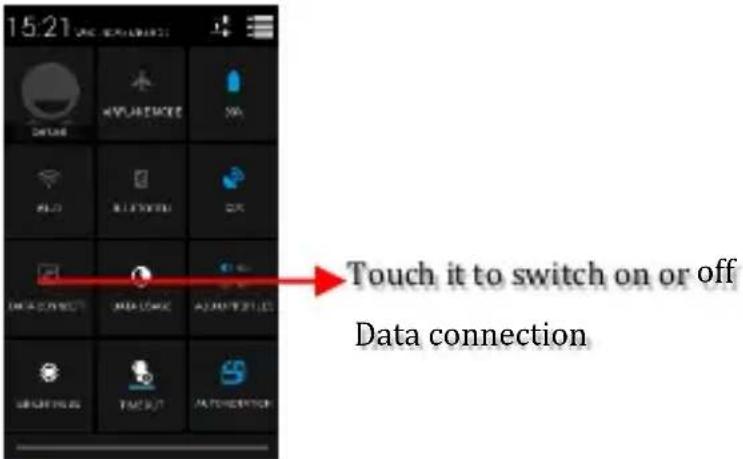
Tips: To browse the web, you need switch on Data connection.
If there is WiFi around, you can switch on WiFi to use it browse the web. Some may need password.
Enjoy Music
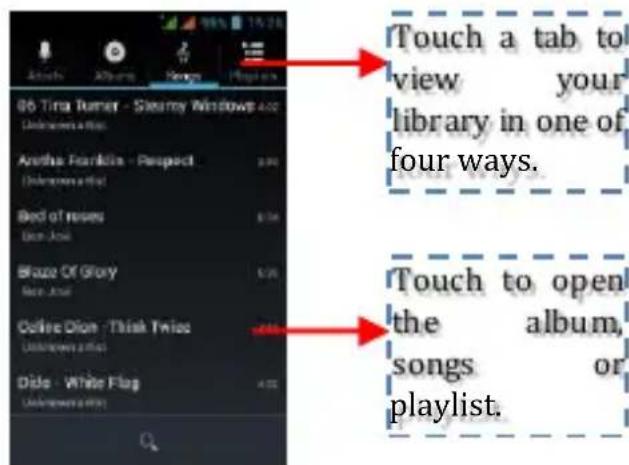
When you copy music to your Micro SD card, the Music player searches the device for music iles and builds a catalogue of your music, based on information about each ile that is stored in the ile itself.

Download Applicaons from Android Market
a. Add a Google account

b. Enter Android Market (Play Store) and download apps.

Email Account Configuration
3- Gmail
Creating an email account
Select Gmail and follow the indicated steps. You can activate or edit extended email accounts or you can create a new email account.
Select Gmail and the Google account setting interface will appear. Then select Next/Create account/Introduce the name, surname and email address.
Google servers establish if the name can be used, and if it can be used, a new interface appears, requesting the introduction of the desired passwords. Afterwards, the strength of the password will be analysed, and the users who do not comply with requests will be asked to introduce again another password.
If the registration of a new Gmail account was made successfully, a message will be automatically created for testing.
Email account loading
Open Gmail, skip the introduction screen, and load the interface.
Introduce the name, password and then load.
Email account initialization will notify that the authentication was done successfully, all Google accounts will be synchronized.
Creating and sending emails
When you wish to create and email, select Email > Create Email. Introduce the address (recipient), subject and content. Press Menu to access Add Cc/Bcc, select Send or Cancel.
Receiving Emails
When receiving a new email you will be notified by an audio tone and an icon in the status bar. Slide the status bar downward, access the new mail, press Menu > Refresh to view all new unread mails.
Deleting Emails
When you select an email account, in order to delete it, you need to return to factory settings. When you set a second email account, press Menu to delete it.
Note: many functions depend on the Gmail account, for example: Electronic Market, Google Talk, Synchroniser, Contacts and Calendar.
4- Another email account
Setting an Email account
Introduce the correct address and password, access Settings > set the right port and POP server, then verify the server settings automatically.
Set the correct SMTP server, verify the mail server settings for sending and receiving, then introduce the name of the specified account and the name displayed for outgoing emails and then save.
Creating and sending emails
When you want to send an email, select Email>Create email. Introduce the address (recipient), subject and content of the email. Press Menu to access Add Cc/Bcc, select send, cancel or save as draft.
Manage Applicaons/ Move to SD card
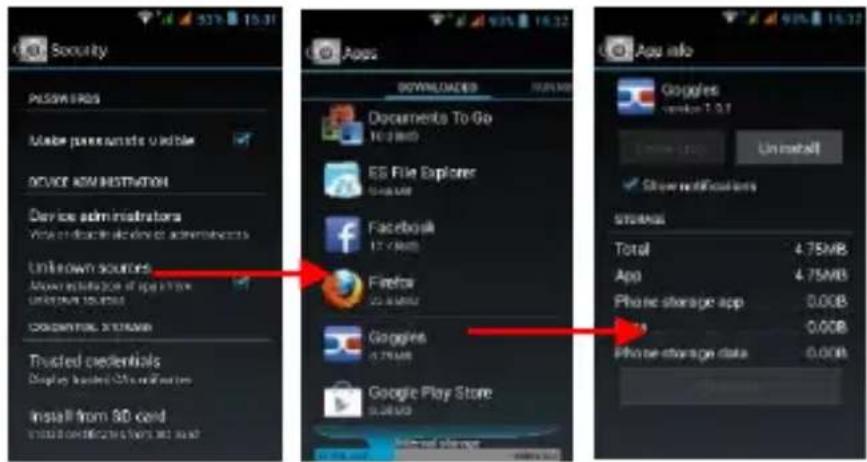
Enter Setting >Apps, then manage the applications. As you install downloaded Apps, you need switch on "Unknown sources" in Security settings.
Maintenance & Safety
Please read and observe the following information for safe and proper use of your phone and to prevent damage. Also, keep the user guide in an accessible place at all the times after reading it.
5. After sales service
Kindly refer to the Warranty Card provided in the sales package box.
6. Charger and Adapter Safety
Charger and adapter are designed for indoor use only.
7. Battery Information and Care
- Please do not disassemble the rear cover of the mobile phone, since the battery is inbuilt.
- Recharge the battery after long periods of non-use to maximize battery life.
○ Battery life will vary due to usage patterns and environmental conditions. - The self-protection function of the battery cuts the power of the phone when its operation is in an abnormal status. In this case, remove the battery from the phone, reinsert it, and turn the phone on.
8. General Notice
- Do not place items containing magnetic components such as a credit card, phone card, bank book, or subway ticket near your phone. The magnetism of the phone may damage the data stored in the magnetic strip.
- Talking on your phone for long period of time may reduce call quality due to heat generated during use.
When the phone is not used for a long period time, store it in a safe place with the power cord
unplugged.
○ Using the phone in proximity to receiving equipment (i.e. TV or Radio) may cause interference to the phone.
- Do not immerse your phone in water. If this happens, remove the battery and take it to an Authorized Service Centre.
o Do not paint your phone.
The data saved in your phone might be deleted due to careless use, repair of the phone, or upgrade of the software. Please backup your important phone numbers. (Ring tones, text messages, voice messages, picture, and videos could also be deleted.) The manufacturer is not liable for damage due to the loss of data.
- Do not turn your phone on or off when the phone is close to your ear.
The suitable temperature for the phone and accessories is -10°C\~45°C.
- When charging, please place the phone in an environment that has a normal room temperature and good ventilation. It is recommended to charge the phone in an environment with a temperature under 40°C. Please ensure to use only the charger offered by the manufacturer. Using unauthorized charger may cause danger and violate the authorization of the phone and the guarantee article.
○ Dispose of used batteries according to the instructions.
○ Excessive sound pressure from earphones and headphones can cause hearing loss.
Warning: Company will not bear any responsibility for any incompliance with the above guidelines or improper use of the mobile phone. Our company keeps the right to make modifications to any of the content here in this
user guide without public announcement in advance. The content of this manual may vary from the actual content displayed in the device. In such case, the latter shall govern.
DECLARATIE DE CONFORMITATE nr. 1035-EBD
Director General Eailia Bureva

CE marking is a mandatory conformity mark for products placed on market in the European Economic Area. CE Marking on a product ensures that the product complies with the essential
requirements of the applicable EC directives.

This product is marked with the distinctive symbol for electrical and electronic waste selective sorting. This symbol indicates that the product must be accepted by a selective waste
collection system, in accordance with the EU 2002/96/EC directive, so it can be recycled or dismantled to reduce the impact on the environment.
Attention! Electronic products that are not sorted selectively may affect the environment and people's health, as they may contain dangerous substances.
BATTERIES:
Attention!
It is forbidden to dispose the batteries to the garbage.
Handle used batteries to recycling centres.
Misuse of batteries may cause leaks or corrosion.
Do not place batteries in the wrong direction.
It is dangerous to load/hit/open or short-circuit the batteries.
Do not leave used batteries in the product.
If you do not use the product for a longer period of time, remove the batteries. Change the batteries when the product does not work properly.
If the batteries caused a leak within the product, clean the liquid and replace the batteries.
The batteries included in the package do not contain heavy metals.

ROHS (Restriction on Hazardous Substances). This directive is a regulation that was implemented on 01 July 2006 and refers to restrictions
on the marketing of products and electrical and electronic equipment containing hazardous substances such as lead, hexavalent chromium, cadmium, brominated biphenyl (PBB), polybrominated diphenyl ethers (PBDE).
Съдържание
Начало....58
Поставяне на SIM......Error! Bookmark not dened.
natural_image
Line drawing of a smartphone with two connected USB connectors and a red directional arrow indicating compression (no text or symbols)Персонализиране
Гласови услуги и Данни
SIM картите:
Imported in China, in anul 2014.
Director General Emilia Barvea

natural_image
Symbol of a trash bin with crossed lines indicating no waste or discharge (no text or labels)natural_image
Line drawing of a smartphone with a USB cable inserted, showing a red arrow indicating the next plug (no text or symbols present)natural_image
Colorful paint powder samples in bowls with a red arrow pointing to one (no text or symbols visible)Director General Eailia Bureva


- Jurnal apeluri
- Configurare cont de Email
- 1- Gmail
- Get Started
- Inserting your miniSIM, microSim and MicroSD cards
- Charge the battery
- Charge the Battery or Connect to a Computer
- Lock and Unlock the Screen
- Make it Yours
- Add Widgets and More Icons to Home Screen
- Add widgets and icons to home screen
- Rearrange or remove widgets and icons on your Home screen
- Enter Launcher
- Open and Switch Applications
- Switch to Recently Used Application
- Make a Call
- Call Log
- Reject a Call by Sending a Busy Message
- Add a Contact
- Voice and Data Services
- Note:
- Send and Receive Message(s)
- Browse the Web
- Enjoy Music
- Download Applicaons from Android Market
- Email Account Configuration
- 3- Gmail
- 4- Another email account
- Manage Applicaons/ Move to SD card
- Maintenance & Safety
- After sales service
- Charger and Adapter Safety
- Battery Information and Care
- General Notice
- unplugged.
- DECLARATIE DE CONFORMITATE nr. 1035-EBD
- BATTERIES:
- Съдържание
- Персонализиране
- Гласови услуги и Данни
Brand : E-Boda
Model : Storm V50
Category : Smartphone