RS4501 - Car radio Manta - Free user manual and instructions
Find the device manual for free RS4501 Manta in PDF.


| Product Type | Car Stereo |
| Brand | Manta |
| Model | RS4501 |
| Dimensions (approx.) | 178 x 50 x 150 mm (1-DIN) |
| Weight | ~1 kg |
| Power Supply | 12V DC (negative ground) |
| Radio Bands | AM/FM |
| Disc Playback | CD, CD-R, CD-RW |
| Audio Input | USB, Aux (3.5mm) |
| Audio Output | 4 x 50W (max power) |
| Remote Control | Included (wired or infrared) |
| Display | LCD with backlight |
| Equalizer | Preset EQ modes (Rock, Pop, Classic, etc.) |
| Clock | 12/24 hour display |
| Bluetooth | Not confirmed (assume none) |
| Maintenance | Clean with a soft, dry cloth; avoid liquids |
| Safety | Designed for 12V vehicle electrical system only |
| Spare Parts | Contact Manta customer service for replacements |
| Repair | Refer to authorized service center; no user-serviceable parts inside |
| Manual | Free PDF download available at notice-facile.com |
Frequently Asked Questions - RS4501 Manta
User questions about RS4501 Manta
0 question about this device. Answer the ones you know or ask your own.
Ask a new question about this device
Download the instructions for your Car radio in PDF format for free! Find your manual RS4501 - Manta and take your electronic device back in hand. On this page are published all the documents necessary for the use of your device. RS4501 by Manta.
USER MANUAL RS4501 Manta
Obstuga SD/MMC/USB 4
Notes on installation....11
Wiring Diagram....11
Location of the Control....12
SD/MMC/USB operation....12
Basic Operation 13
Basic Operation....13
Radio Operation ....14
Remote Control Operation....16
Remote Control Operation....16
Specification 16
Installation 17
natural_image
Line drawing of a hand inserting a component into a device panel (no text or symbols)2. Wybór ścieżki:
natural_image
Simple line drawing of a rectangular object with a small protrusion and directional arrows, labeled with number 1 (no text or symbols on the object itself)natural_image
Simple line drawing of a rectangular object with a small circular symbol on the right side (no text or labels)natural_image
Simple line drawing of a rectangular object with a small protrusion on the right side (no text or symbols)natural_image
Technical line drawing of a mechanical component with no visible text or symbolsCzyszczenie złączy
Notes on installation
-The unit is designed for 12V DC, negative groud operation system only. Before installing the unit, make sure your vehicle is connected to DC 12V negative ground electrical system.
The negative battery terminal must be disconnected - before making Connectons, which can reduce damaging the unit due to short circuit.
- Be sure to connect the color coded leads correctly according to the diagram. Incorrect connections may cause the unit malfunction or damage the vehicle's electrical system.
-Be sure to connect the speaker (-) loads to the speaker (-) terminal. Never connect the left and right channel speaker cables each other or to the vehicle body.
-Do not block vents or radiator panels. Blocking them will cause heat to build up inside and may result in fire.
After the completion of the installation and begin to play the unit (including replacing the battery), please press the RESET button on the front panel with pointed objects (such as ball-point pen) to set the unit to initial status.
Wiring Diagram
Standard Connect (Identify by color)
-
Antenna Receptacle
-
Line Out (R)
-
Line Out (L)
-
Screw Holes
-
Output Socket (male)
-
Output Socket (famale)
-
Fuse Holder (15A)
-
Fuse Holder (0,5A)

USER'S MANUAL
Location of the Control
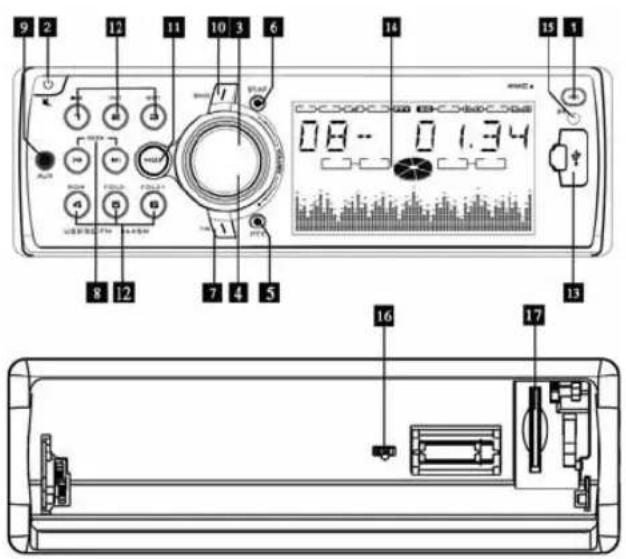
- Release Button
- Power/Mute Switch
- Volume Control
- Setting the Sound Characteristics (SEL)
- PTY
- ST/MONO/AF Selector
- TA
- Tuning/Selecting Tracks
- AUX IN
- Band Selector
- Mode Switch
- Number buttons
- USB port
- LCD Display
- Remote control Sender
- Reset button
- SD Card port
SD/MMC/USB operation
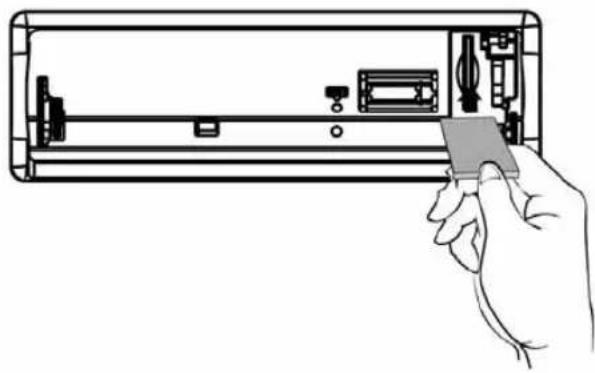
- To enjoy music from SD/MMC/USB, please insert SD/MMC card and USB to SD/MMC,/USB port, the unit starts to play automatically.
Inserting card method
natural_image
Line drawing of a hand inserting a card into a device casing (no text or symbols)Inserting USB method

- Selecting tracks:
Press "AMS" button enter into selecting mode. Please see below picture:

Please refer to below example to select your desired track.
When want to choose the 452nd track.
Press AMS button enter into selecting mode. Please see below picture:
Then press SEL button enter into below mode.
Rotate VOLUME button until number 2 display on LCD.
Then press SEL button to confirm. Rotate VOLUME button until number 5 display on LCD.
USER'S MANUAL
Then press SEL button to confirm. Rotate VOLUME button until number 4 display on LCD.
Basic Operation
Pause the playback

- During playback press 12 „PAUSE” button to suspend the playback.
Note: You can also press 12 „” button to resume play-back during stop playing mode.
Scanning tracks automatically

- During playback, press „2 INT" button, one of the number button 12 to play the first 10 seconds of each track from USB/SD MMC, the Display will show „INT, track number and elapsed time" (see the picture), which indicates INT functions already activated.
Press „2 INT“ button once more to revert normal playback.
Playing Tacks Repeatedly

- Press 12 „3 RPT" button to perform repeat playing function when you need to repeat playing the track you like.
Press „3 RPT" button at the first time to repeat playing the same track. „RPT" appears, which indicates repeat playing one track starts.
Press „3 RPT" button again to stop repeat.
Basic Operation
Playing Tracks in random order
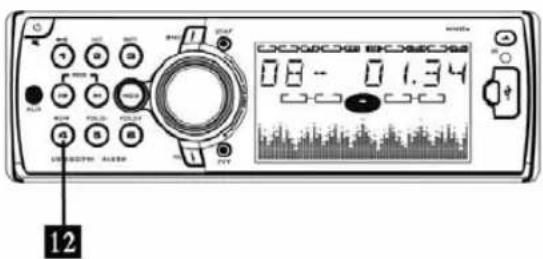
- During playback, press 12 „4 RDM" button, and „RDM" appears on the display, which indicates RDM function is carried out. The unit plays any track at random. Press RDM once more to return to normal playback mode.
Selecting folder

- During USB/ SD MMC playing mode, if there are folders, press 12 „5 FD-“ / „6 FD+“ to select folder downward/upward.
Turning the Unit On/Off

- Press 2 „PWR” button to turn on the unit, and long press it until 3 seconds to turn off it.
Int turn on mode, press 2 „PWR” button to turn on MUTE function, and press it again to turn off MUTE function.
Vol/Bass/Tre/Bal (L-R)/Fad (F-R) Selector

- Rotate 3 „VOLUME CONTROL” button to increase and decrease sound level.
- Repeatedly press 4 „SEL“ button to select the desired mode in the following order:

flowchart
graph LR
    A["→ VOL"] --> B["→ BAS"]
    B --> C["→ TRE"]
    C --> D["← BAL"]
    D --> E["← FAD"]
Note:
After selecting the desired mode, you can adjust the current level by rotating the 3 „VOL“ knob.
Mode Selector
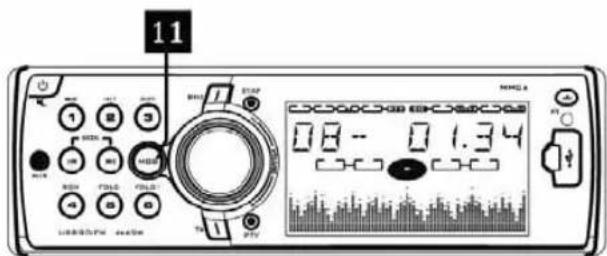
- Press 11 „MOD" button to select (radio mode) R - USB - SD - AUX - R mode.
Sensor

- Receptor for the remote commander (for remote control version only.
Note: This windows is used for the unit with remote control function. Without this function, you should ignore the operation contents about remote control function.
Radio Operation
Band Selector
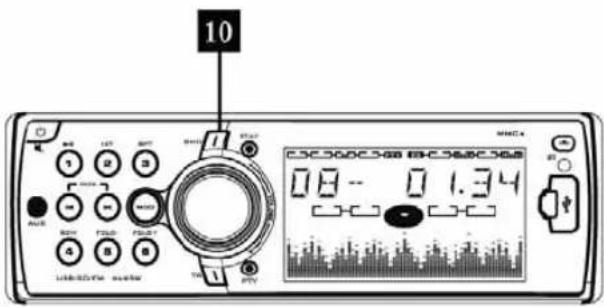
- Press 10 „BND” button repeatedly to select bands in the following order”

flowchart
graph LR
    A["→ FM1"] --> B["→ FM2"] --> C["→ FM3"]
Manual/Automatic Tuning

- Manual Tuning: press 8 „I<< or >>I„ button continuously to select a station upward or downward respectively.
USER'S MANUAL
Automatic Tuning: press and hold 8 „I<< or >>I“, button for more then 3 seconds, the radio automatically searches a station.
MO/ST/TA Selector

- Press 6 „ST/AF" button to select MONO model or STEREO mode.
MONO is not displayed on LCD, which means it is in STEREO mode.
Long press 6 „ST/AF" button to turn ON/OFF AF function.
PTY
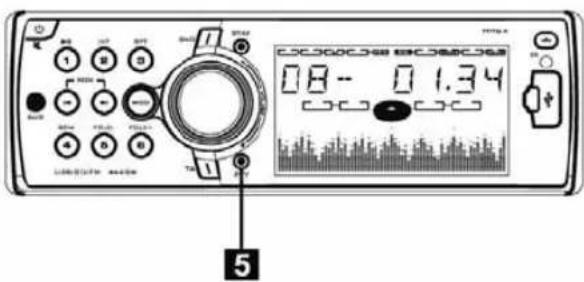
- Press 5 „PTY” button to turn ON/OFF PTY function.
Scanning/Memorizing Stations Automatically

- Press 8 „AMS" button to scan and listen each station 10 seconds which respectively stored in 15 (1-6) number buttons.
Press the corresponding number button or AMS button to play your desired station.
Press and hold 8 „AMS” button for more then 3 seconds to activate automatically memory storing function. The radio automatically selects a station and has it stored in any one of the number buttons 15 (1-6).
Note: The unit can be stored up to 6 stations for each band. Regarding the function of number buttons, refer to 15 number buttons for details.
Number Buttons
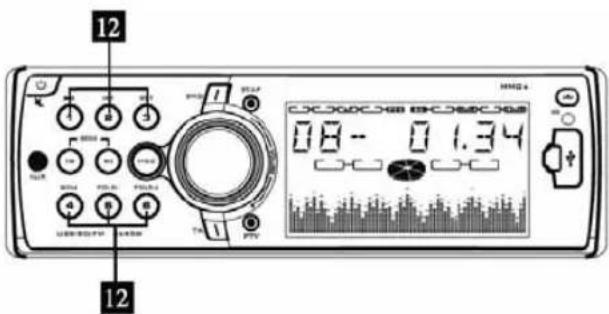
- Number buttons can help you store your favorite station by pressing any one of the number buttons. You can follow the steps as below:
Press and hold any number button 12 (1-6) until „CH“ appears in the LCD display when receiving a station. And now the station is already stored in the corresponding number button.
You can store up to 18 FM stations.
TA

Remote Control Operation

- Power/Mute Switch
- TA Button
- SCAN Button
- Volume Control
- RDM Playing
- ST/AF Button
- Folder-/Folder +
- Tuning/Selecting Tracks
- AMS/PSCAN/SEARCH
- PTY Button
- Band Switch
- Pause/Play Button
- SEL Button
- Reapeat Playing
- MOD Button
- DSP Button
- INTRO Button
- LOUD Button
Remote Control Operation
Replacing the Battery
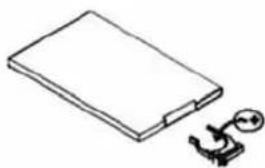
When the range of the operation of the card remote control becomes short or no functions while operating. Replace the battery with a new button cell. Make sure the battery polarity before replace.
- Pull out the Battery Holder while pressing the stopper (1).

natural_image
Simple line drawing of a rectangular object with a small protrusion and label '1' (no text or symbols on the object itself)- Put the buton-type battery (+) mark upward into the Battery Holder..
natural_image
Simple line drawing of a rectangular object with a small mechanical component attached (no text or symbols)- Insert the Battery Holder into the Remote Control.

natural_image
Simple line drawing of a rectangular object with a small inset showing a circular component (no text or symbols)Note: Some models are not equipped with remote control, you should ignore the contents about remote control.
Specification
General
Power Requirements: 14.1 V DC
Load Impedance: 4Ω
Max. Power Output: 4 x45W
Tone Controls: ±8 dB (low 100 Hz, high 10 kHz)
Dimensions: 132 x 178 x 50 (D x W x H)
Mounting Dimensions: 169x182x53 (D x W x H)
Weight: 0,75 kg
USB Play Section
Signal-to-noise Ratio: 65dB
Separation: 60dB (1kHz)
Distoration: 0,1%
FM Tuner Section
Tuning Range: 87,5-108 MHz
If Range: 10,7 MHz
Usable sensitivity (-30dB): 15dB
Signal-to-noise Ratio: 60dB
Stereo Separation: 30dB (1KHz)
Frequency Response: 30-15000Hz
USER'S MANUAL
Installation
Parts List (the numbers in the list are keyed to those in instructions).

Mounting Example (1)
1 Put in the mounting sleeve. Put in the mounting sleeve. | 2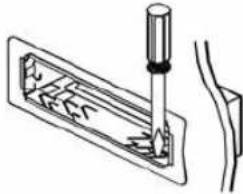 Bend these claws outward for a tight fit, if necessary. Bend these claws outward for a tight fit, if necessary. |
3 | 4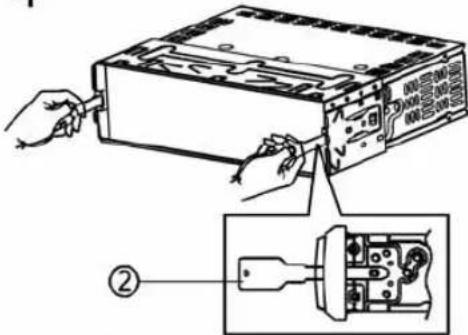 Dismounting the unit,energize to pull out the unit after insert the key on both sides. Dismounting the unit,energize to pull out the unit after insert the key on both sides. |
USER'S MANUAL
Mounting Example
Put notch A (Shown as picture) onto shaft B. And then slightly press into the right side.

Detaching the Front Panel
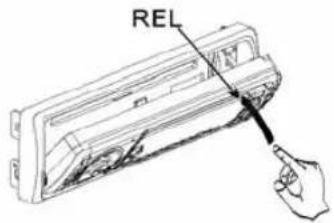
Press REL button in the upper right corner, and then the front panel will be folded down.
When the front panel was turned down to a position of 45[], hold and slide the front panel to left, and then pull it out.

natural_image
Line drawing of a device casing with internal components and a hand holding a cable (no text or symbols)Cleaning the Connector
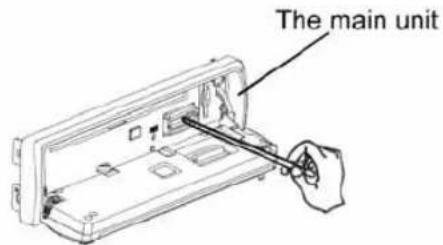
If the connector between the main unit and the front panel is dirty, it may result the unit in abnormal working condition. To avoid such problem happening, please detach the front panel, and clean the connector with an alcohol swab. Gently clean and avoid damaging the connector.

natural_image
Line drawing of a device with a hand holding a screwdriver inserted into a casing (no text or symbols)The backside of the front panel
NOTE: For safekeeping, always shut down the generator and take out the key from the ignition before cleaning. And never keep your finger or any metal device in touch with the connector directly.
natural_image
Line drawing of a hand inserting a card into a device casing (no text or symbols)2. Выбор дорожки:
natural_image
Simple line drawing of a rectangular object with a small circular symbol attached to its side (no text or symbols present)natural_image
Simple line drawing of a rectangular object with a separate small mechanical component attached (no text or symbols)Внимание:
Пример монтажа (1)

natural_image
Technical line drawing of a mechanical component or housing (no text or symbols visible)Очистка соединений
Brand : Manta
Model : RS4501
Category : Car radio