Leisure 520W - Video projector Vankyo - Free user manual and instructions
Find the device manual for free Leisure 520W Vankyo in PDF.

| Product Type | Video Projector |
| Brand | Vankyo |
| Model | Leisure 520W |
| Display Technology | LCD |
| Native Resolution | 1920 x 1080 (1080p) |
| Brightness | 5000 Lux (LED Lumens) |
| Contrast Ratio | 2000:1 |
| Lamp Life | Up to 55,000 hours |
| Keystone Correction | ±15° Vertical |
| Projection Size | 40 – 200 inches |
| Connectivity | HDMI, USB, VGA, AV, 3.5mm Audio Out |
| Built-in Speaker | 3W Mono |
| Power Supply | AC 100-240V, 50/60Hz |
| Power Consumption | 65W (Max) |
| Dimensions | 9.3 x 7.1 x 3.1 inches (23.6 x 18.0 x 7.9 cm) |
| Weight | 2.2 lbs (1.0 kg) |
| Mounting | Ceiling mount compatible (not included) |
| Noise Level | < 30 dB (Eco mode) |
| Supported Input | 480p, 720p, 1080p, 4K (downscaled) |
| Package Contents | Projector, Power Cord, HDMI Cable, AV Cable, Remote Control, User Manual |
| Warranty | 1 Year Limited Warranty |
Frequently Asked Questions - Leisure 520W Vankyo
User questions about Leisure 520W Vankyo
0 question about this device. Answer the ones you know or ask your own.
Ask a new question about this device
Download the instructions for your Video projector in PDF format for free! Find your manual Leisure 520W - Vankyo and take your electronic device back in hand. On this page are published all the documents necessary for the use of your device. Leisure 520W by Vankyo.
USER MANUAL Leisure 520W Vankyo
natural_image
Line drawing of a Vankyo air purifier device with control knobs and buttons (no text or symbols on the device itself)LEISURE 520W
USER MANUAL
Please read this manual throughly before using and keep it for future reference.
PACKING LIST
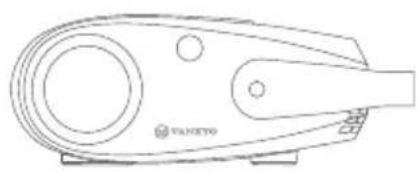
natural_image
Line drawing of a mechanical device with circular and triangular features (no text or symbols)LEISURE 520W
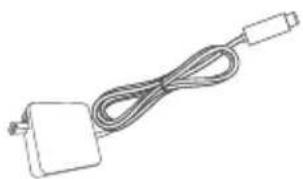
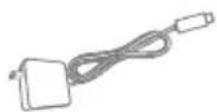
natural_image
Simple line drawing of a cable with a connector (no text or symbols)Adapter
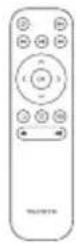
Remote
(Batteries Not Included)
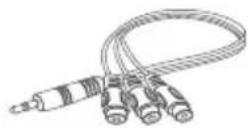
AV Cable
User Manual
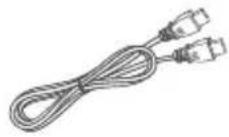
HD Cable
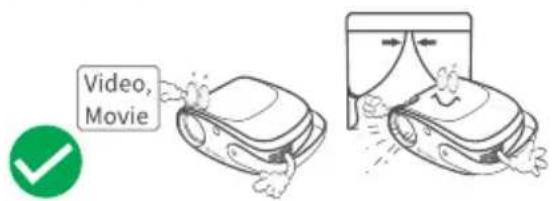
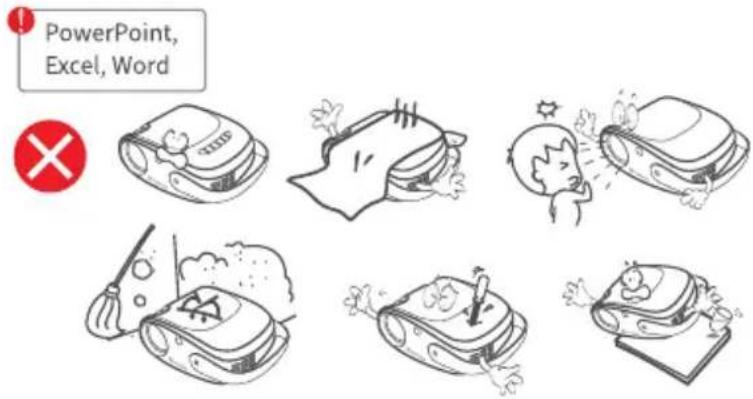
NOTICE
Recommended
natural_image
Illustration of two identical cartoon-style vehicles connected by a cable, with no visible text or symbols.NOT Recommended

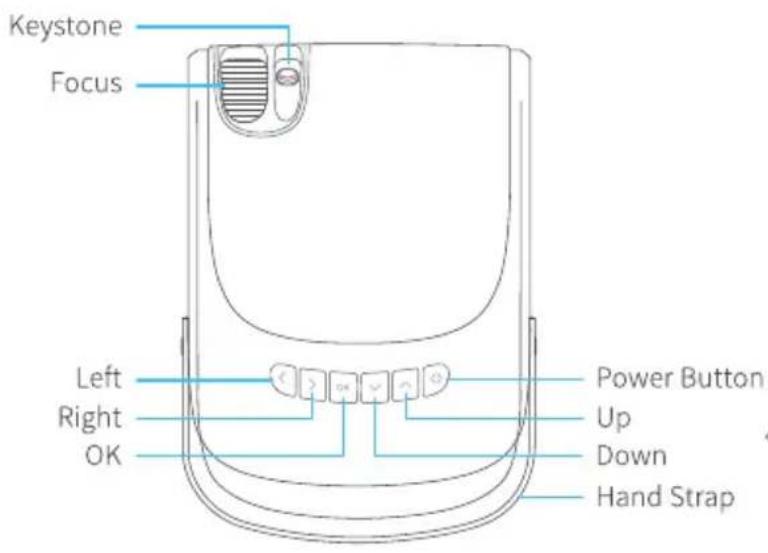
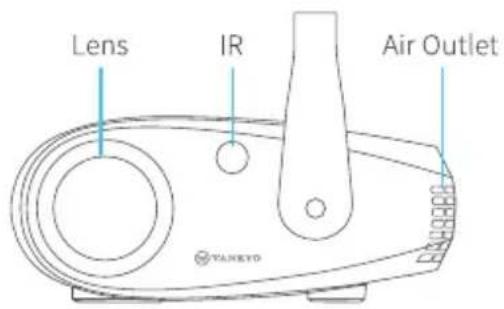
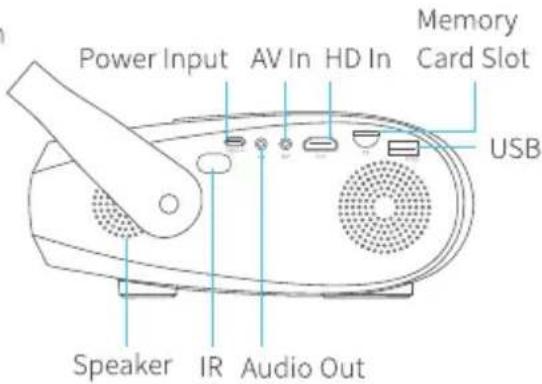
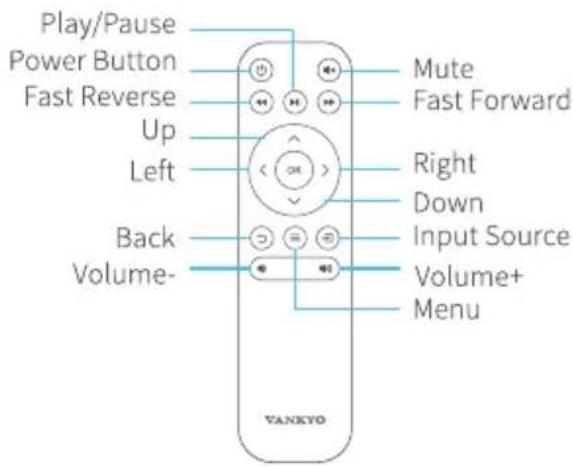
PRODUCT OVERVIEW

support@ivankyo.com
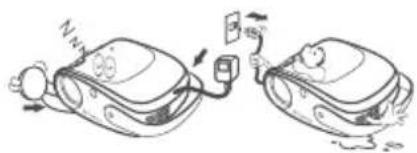
QUICK START
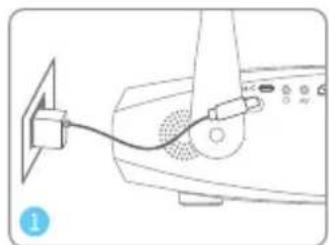
natural_image
Diagram of a device with a cable and connector, no visible text or symbolsPlug the power cord into an outlet.
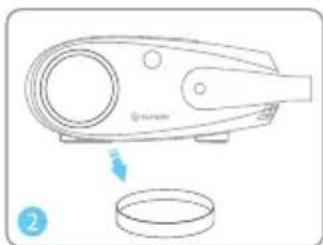
natural_image
Line drawing of a handheld device with a circular component and a circular base, no text or symbols presentTake off the lens cover.
Connect your device to the projector correctly.

Press the Power Button to turn on the projector.
natural_image
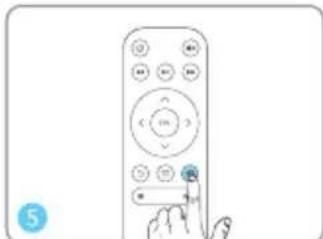
Line drawing of a remote control with a hand pressing a button (no text or symbols)Select the correct input source to project your device.
natural_image
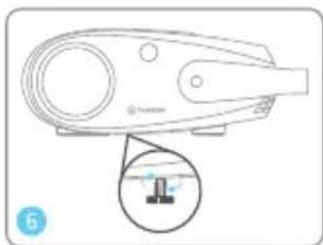
Line drawing of a handheld device with a magnified inset showing a small component (no text or symbols)Adjust the kickstand accordingly.
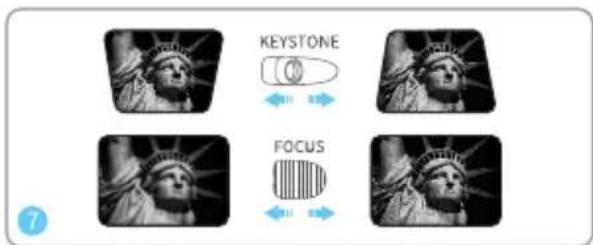
Adjust the focus ring and keystone to get the best image performance.
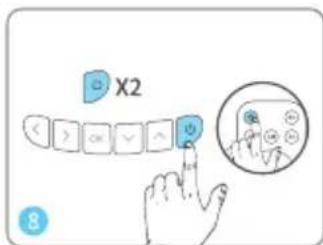
Press the Power Button twice to turn off the projector.

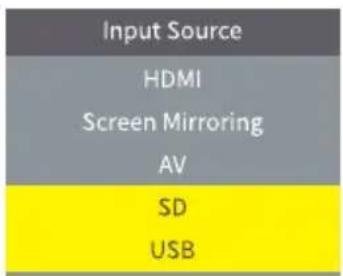
INPUT SOURCE
Press ⓞ on the remote to enter the interface of Input Source.
A. Screen Mirroring
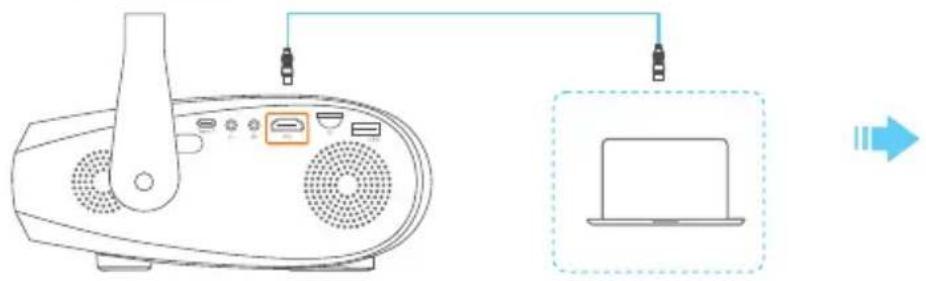
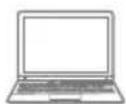
B.HD Connection
natural_image
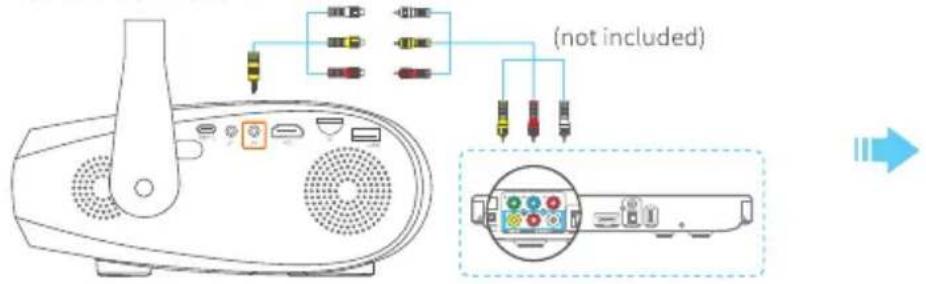
Diagram showing a device connected to a laptop via cable, with no visible text or symbolsC. AV Connection
Input Source
HDMI
Screen Mirroring
AV
SD
USB
Input Source
HDMI
Screen Mirroring
AV
SD
USB
Input Source
HDMI
Screen Mirroring
AV
SD
USB

support@ivankyo.com
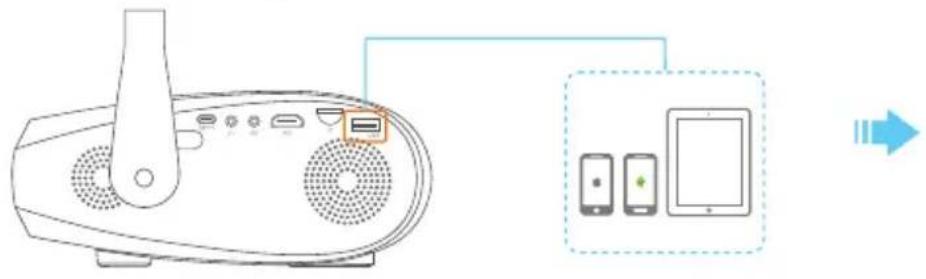
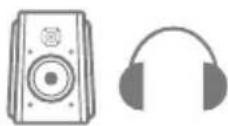
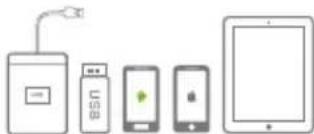
D. Multimedia Connection
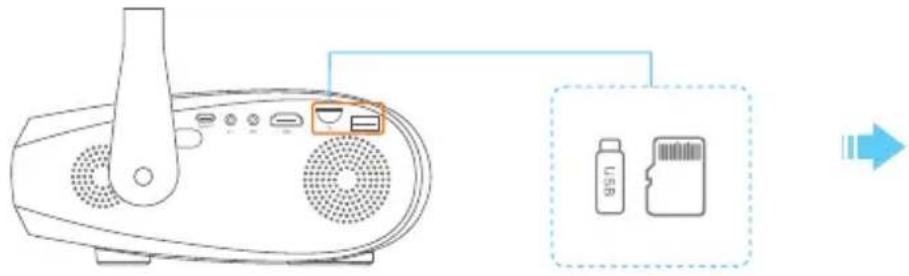

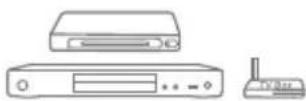
PROJECTOR CONNECTIONS
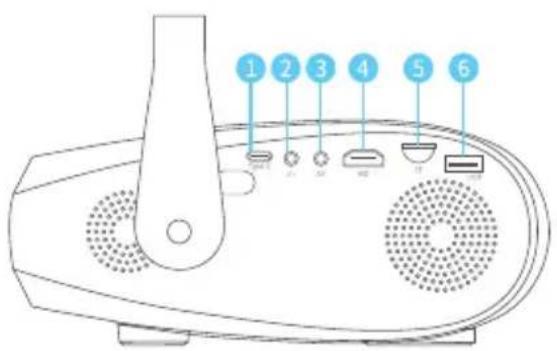
1
②
3


4
5

6
flowchart
graph LR
    A["Device 1"] -->|USB| B["Device 2"]
    B --> C["Device 3"]
    C --> D["Device 4"]
    D --> E["Table Product"]


SCREEN MIRRORING
i Important:
Before screen mirroring, please press the Ⓤ button on the remote to enter the interface of Input Source and select Screen Mirroring.
2 Press OK button on the projector/remote to switch the interfaces between Screen Mirroring for iOS System and Screen Mirroring for Android System.
Screen Mirroring through Wireless Connection
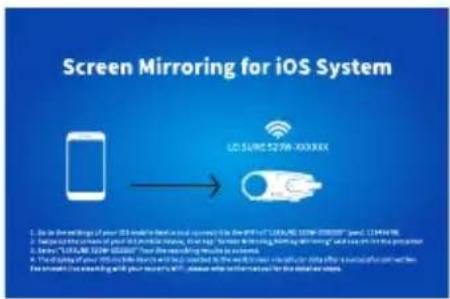
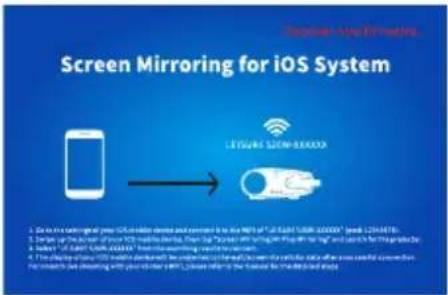
For iOS System
• Streaming with cellular data
1 Turn on the projector, select Screen Mirroring as the input source to enter the interface of Screen Mirroring for iOS System.
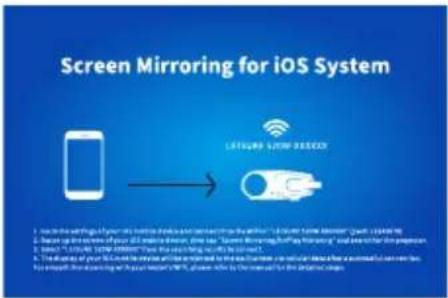
2 Go to the settings of your iOS mobile device and connect it to the WiFi of LEISURE520W-XXXXXX (pwd: 12345678).
3 Activate Screen Mirroring/AirPlay Mirroring on your iOS device and search for the projector.

support@ivankyo.com
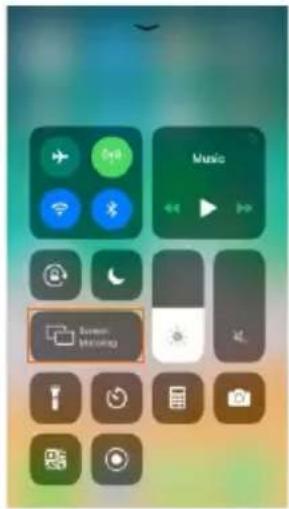
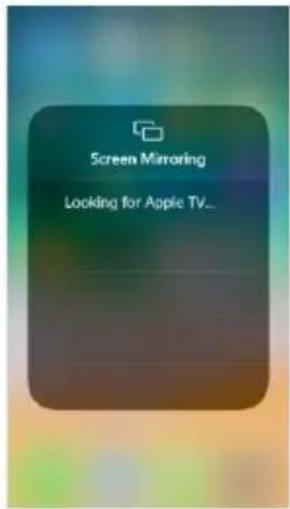
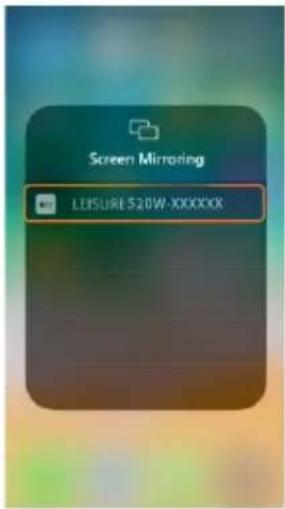
4 Select LEISURE520W-XXXXXX from the searching results to connect.
5 The display of your iOS mobile device will be projected to the wall/screen via cellular data after a successful connection.
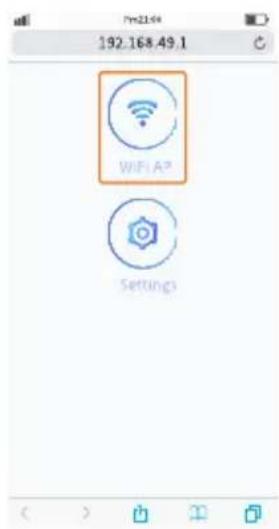
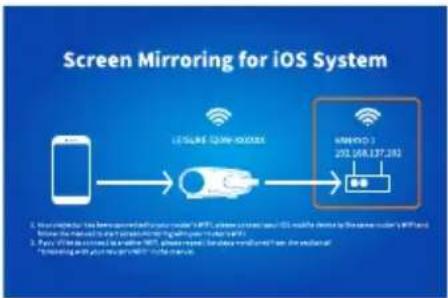
• Streaming with your router's WiFi
1 Turn on the projector, select Screen Mirroring as the input source to enter the interface of Screen Mirroring for iOS System.


2 Go to the settings of your iOS mobile device and connect it to the WiFi of LEISURE520W-XXXXXX (pwd: 12345678).
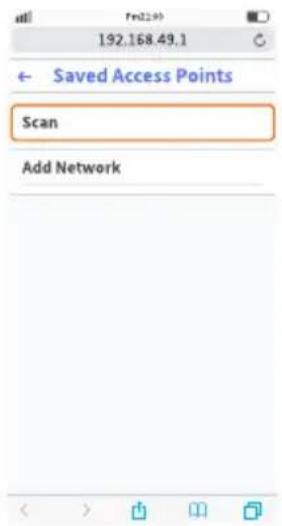
3 Visit http://192.168.49.1 from a browser on your mobile device, tap WiFi AP > Scan, select your router's WiFi and enter the right password, then tap Connect to continue.
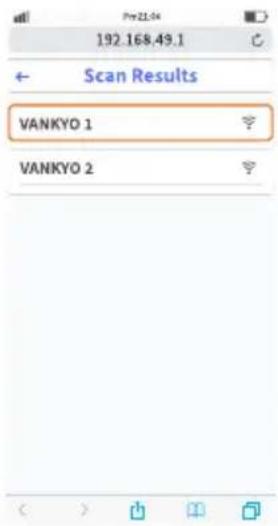
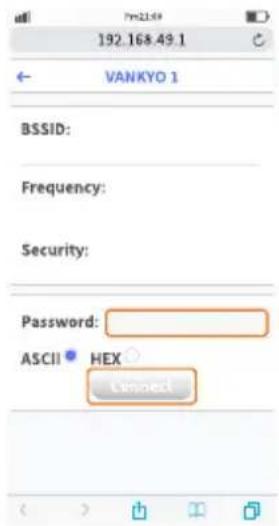
4 Your router's WiFi will be displayed on interface of Screen Mirroring for iOS System after a successful connection.
flowchart
graph LR
    A["Mobile Device"] --> B["User Interface"]
    B --> C["Network 1: 292.208.137.292"]
    style A fill:#f9f,stroke:#333
    style B fill:#ccf,stroke:#333
    style C fill:#cfc,stroke:#333

support@ivankyo.com

5 Get back to the WiFi setting of your iOS mobile device, then connect it to the same router's WiFi.
6 Activate Screen Mirroring on your iOS device and search for the projector, then select LEISURE520W-XXXXXX from the searching results to connect.
7 The live streaming content from your iOS mobile device will be projected to the wall/screen through WiFi connection.

Tip:
If you'd like to connect to another router's WiFi, please repeat the procedures mentioned in the section of Streaming with your router's WiFi.
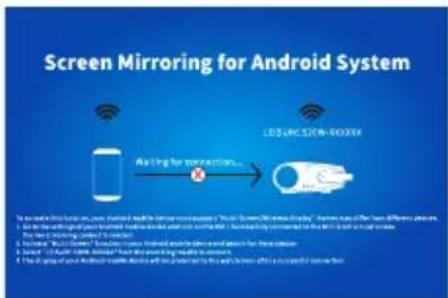
For Android System
To activate this function, your Android device must support Multi-Screen/Wireless display. Names may differ from different devices.
1 Turn on the projector, select Screen Mirroring as the Input Source, then press OK button on the projector/remote to switch to the interface of Screen Mirroring for Android System.

EN
2 Activate Multi-Screen function on your Android device and search for the projector.
3 Select LEISURE520W-XXXXXX from the searching results to connect.
4 Your Android device display will be projected to the wall/screen after a successful connection.
Important Tips for Wireless Connection
1 The fluency of screen mirroring with wireless connection will be affected by the network environment. A bandwidth of 100Mbit or more is recommended when using screen mirroring.
② Make sure your mobile device is close to the projector when using wireless connection. A distance within 3.3ft is recommended.
3 Some mobile devices may not support screen mirroring due to the compatibility.
4 If the projected image freezes when you switch the screen mirroring interfaces, please long press OK button for 5 seconds on the projector/remote to do a reset, and the reset process will complete in 2 minutes, please wait patiently.
\* Upgrade the Firmware Version of Screen Mirroring
When there is a newer version, you will see Discover new firmware... on the projected screen, please press OK button on the remote and follow the steps to upgrade the firmware version of screen mirroring as needed.

support@ivankyo.com

Notes:
1 Make sure the projector is connected to WIFI and DO NOT power off during updating.
2 It takes around 6-8 minutes for the update completes, please wait patiently.
3 The screen mirroring system will restart once the upgrade is completed.
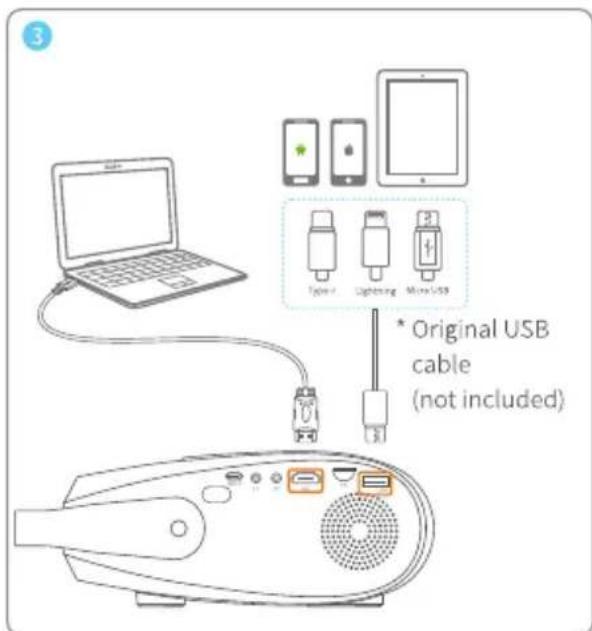
Screen Mirroring with the Original USB Cable
For iOS System
1 Turn on the projector, select Screen Mirroring as the input source to enter the interface of Screen Mirroring for iOS System.
2 Connect your iOS mobile device to the USB port of the projector with the ORIGINAL lightning cable.
3 Select Trust in the pop-up window of Trust This Computer.
Trust This Computer?
Your settings and data will be accessible from this computer when connected wirelessly or using a cable.
Trust
Don't Trust
4 The display of your iOS mobile device will be projected to the wall/screen after a while.


Tip:
If the projection fails, please unplug the lightning cable from the projector and repeat the steps mentioned above.
For Android System
1 Turn on the projector, select Screen Mirroring as the input source, then press the OK button on the projector/remote to switch to the interface of Screen Mirroring for Android System.
2 Go to the settings of your mobile device, find Developer options and turn on USB debugging.

Tips:
The steps to turn on Developer options vary from different models of Android device. You may check it from Internet or contact us for the detailed steps. We take Samsung Galaxy S8+ as an example.
* Go to settings of your Android device, then tap About phone > Software information > Build number.
* Continuously tap on Build number for several times until it shows Developer mode had been turned on.
* Get back to the settings of your mobile device, it will show Developer options.
3 Connect your Android mobile device to the USB port of the projector with the ORIGINAL USB cable.
4 Tap OK when your Android mobile device pops out the windows of Allow USB debugging?, then your Android device will be projected to the wall/screen.
Allow USB debugging?
USB debugging is intended for development purposes only. It can be used to copy data between your computer and your device, install application, and read log data.
CANCEL


support@ivankyo.com


Notes:
The USB cable MUST be the ORIGINAL cable or the cable which can transfer the data, otherwise screen mirroring may fail. You can plug the cable into your laptop to check the availability of transferring the data.
2 Some mobile devices may not support screen mirroring due to the compatibility.
3 Some Android mobile devices may only transfer the display without audio due to the protocol restrictions.
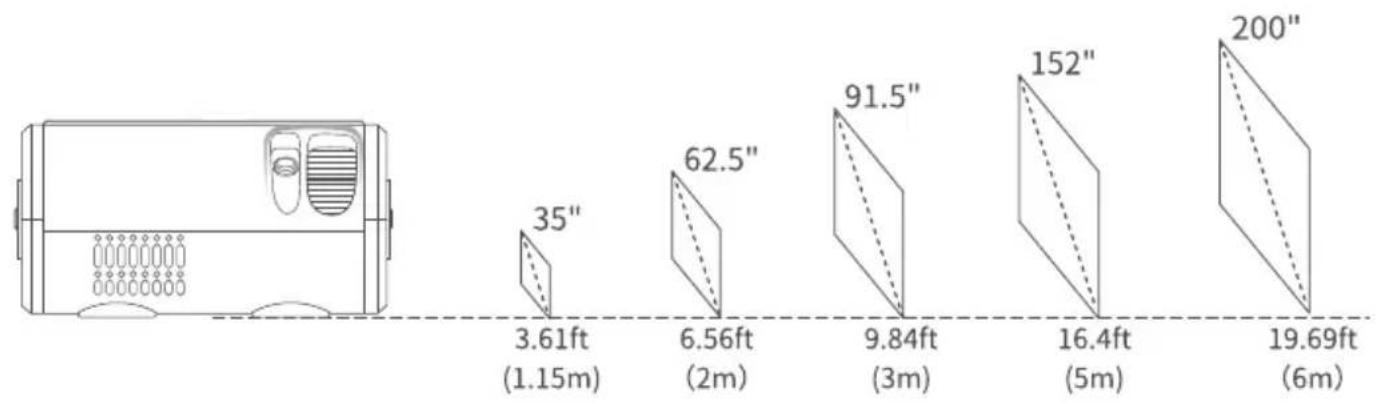
PROJECTION DISTANCE&SIZE
bar
| Height (ft) | Width (m) | | :--- | :--- | | 3.61 | 1.15 | | 6.56 | 2 | | 9.84 | 3 | | 16.4 | 5 | | 19.69 | 6 |The recommended projection distance varies with different projection contents. Please adjust the distance between the wall/screen and the projector properly as needed.
Ambient darkness will improve the clarity of the projected images.

SPECIFICATION
| Display Technology | LCD | Light Source | LED |
| Resolution | Native 1280 x 720 | Input Signal | 576i、720P、1080i、1080P |
| Installation Type | Front/Rear/Ceiling | Aspect Ratio | 4:3/16:9/Auto |
| Focus | Manual | Keystone | Manual±15° |
| Speaker | 3W/4Ohm | Input | DC 21V 3A |
| Unit Dimension | 199 x 154 x85mm(7.83 x 6.06 x3.35inches) | Unit Net Weight | 1.1kg(2.43lb) |
| Photo Format Supported | BMP/JPG/PNG/GIF/JPEG | Audio Format Supported | AAC/MP2/MP3/PCM/FLAC/WMA |
| Video Format Supported | AVI/MP4/MKV/FLV/MOV/RMVB/MPEG2/MPEG1/3GP/H.264/XVID | Ports | HD In x1/USB x1/ Audio Out x1/Type-C x1/AV In x1/Memory Card Slot x1 |
| Mounting Screw | 1/4" | Number of Screw | 1 |
TROUBLESHOOTING GUIDE
The content from Hulu, Netflix, and similar services can not be mirrored or cast.
* Due to the copyright restriction from Hulu, Netflix, and similar services, the contents MAY NOT be mirrored or cast.
2 What should I do if I want to watch the content from Hulu, Netflix, and similar services via the projector?
* Make sure remote points at IR receiver directly.
* Please prepare a Fire TV stick, Roku stick or Chromecast(not included), then connect it to the projector to watch the content.
3 Blurry Image
* Adjust focus ring/keystone.
* Projector and screen/wall must be in effective distance.
4 Remote Unresponsive
* Make sure remote points at IR receiver directly.
* Do not cover IR receiver.
* Try a new pair of AAA batteries.
5 Upside Down Images
* Go to Menu > PICTURE > Projection Mode to flip the projection image.
6 Factory Reset
* Go to Menu > OPTION > Restore Factory Default to restore the projector to default settings.

FCC Statement
Any Changes or modifications not expressly approved by the party responsible for compliance could void the user's authority to operate the equipment. This device complies with part 15 of the FCC Rules. Operation is subject to the following two conditions:
(1) This device may not cause harmful interference, and
(2) this device must accept any interference received, including interference that may cause undesired operation.
NOTE: This equipment has been tested and found to comply with the limits for a Class B digital device, pursuant to part 15 of the FCC Rules. These limits are designed to provide reasonable protection against harmful interference in a residential installation. This equipment generates, uses and can radiate radio frequency energy and, if not installed and used in accordance with the instructions, may cause harmful interference to radio communications. However, there is no guarantee that interference will not occur in a particular installation. If this equipment does cause harmful interference to radio or television reception, which can be determined by turning the equipment off and on, the user is encouraged to try to correct the interference by one or more of the following measures:
—Reorient or relocate the receiving antenna.
—Increase the separation between the equipment and receiver.
—Connect the equipment into an outlet on a circuit different from that to which the receiver is connected.
—Consult the dealer or an experienced radio/TV technician for help.
This equipment complies with FCC radiation exposure limits set forth for an uncontrolled environment. This equipment should be installed and operated with minimum distance 20cm between the radiator& your body. This transmitter must not be co-located or operating in conjunction with any other antenna or transmitter.
ISEDC Warning
This device complies with Industry Canada licence-exempt RSS standard(s). Operation is subject to the following two conditions:
(1) this device may not cause interference, and
(2) this device must accept any interference, including interference that may cause undesired operation of the device.
Le présent appareil est conforme aux CNR d'Industrie Canada applicables aux appareils radio exempts de licence. L'exploitation est autorisée aux deux conditions suivantes:


The device is compliance with RF exposure guidelines, users can obtain Canadian information on RF exposure and compliance. The minimum distance from body to use the device is 20cm.
To avoid replacement of a battery with an incorrect type.
Don't disposal of a battery into fire or a hot oven, or mechanically crush or cut a Battery.
Don't leave a battery in an extremely high temperature surrounding environment.
To avoid battery subjected to extremely low air pressure.
The mains plug is used as the disconnect device, the disconnect device shall remain readily operable.

The symbol indicates DC voltage
RECYCLING
This product bears the selective sorting symbol for Waste electrical and electronic equipment (WEEE).
This means that this product must be handled pursuant to European directive 2012/19/EU in order to be recycled or dismantled to minimize its impact on the environment. User has the choice to give his product to a competent recycling organization or to the retailer when he buys a new electrical or electronic equipment.
This product can be used across EU member states.
EU Compliance Statement: Shenzhen VanTop Technology & Innovation Co., Ltd. hereby declares that this device is in compliance with the essential requirements and other relevant provisions of the Directive 2014/53/EU.
A copy of the EU Declaration of Conformity is available online at https://doc.vantop.com/.

For indoor use only
support.uk@ivankyo.com 17
VANKYO SUPPORT
North America
support@ivankyo.com
United Kingdom
support.uk@ivankyo.com

www.ivankyo.com

@VankyoOfficial

VANKYO
- LEISURE 520W
- USER MANUAL
- PACKING LIST
- NOTICE
- QUICK START
- INPUT SOURCE
- PROJECTOR CONNECTIONS
- SCREEN MIRRORING
- Screen Mirroring through Wireless Connection
- For iOS System
- Tip:
- For Android System
- EN
- \* Upgrade the Firmware Version of Screen Mirroring
- Notes:
- Screen Mirroring with the Original USB Cable
- Trust This Computer?
- Tips:
- Allow USB debugging?
- TROUBLESHOOTING GUIDE
- FCC Statement
- ISEDC Warning
- RECYCLING
- VANKYO SUPPORT
Brand : Vankyo
Model : Leisure 520W
Category : Video projector