Burger 101 - Video projector Vankyo - Free user manual and instructions
Find the device manual for free Burger 101 Vankyo in PDF.

| Product Type | Video Projector |
| Brand | Vankyo |
| Model | Burger 101 |
| Display Technology | LCD |
| Native Resolution | 800x480 (supports 1080p) |
| Brightness | 1500 Lumens |
| Contrast Ratio | 1000:1 |
| Lamp Life | Up to 40,000 hours |
| Projection Size | 36-180 inches |
| Throw Ratio | 1.4:1 |
| Keystone Correction | ±15° Manual |
| Connectivity | HDMI, USB, AV, VGA, Micro SD, Audio Out |
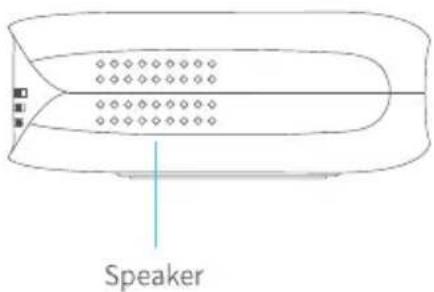
| Built-in Speaker | 3W x 2 |
| Dimensions (L x W x H) | 8.7 x 6.0 x 2.8 inches |
| Weight | 1.5 lbs |
| Power Supply | AC 100-240V, 50/60Hz (DC 12V/2A) |
| Power Consumption | 36W |
| Supported Languages | English, French, Spanish, German, etc. |
| Cleaning Instructions | Wipe with soft dry cloth; do not use liquid cleaners |
| Safety Features | Overheat protection; auto shutdown |
| Spare Parts Availability | Replacement lamp and remote available |
| General Notes | Portable design for home entertainment |
Frequently Asked Questions - Burger 101 Vankyo
User questions about Burger 101 Vankyo
0 question about this device. Answer the ones you know or ask your own.
Ask a new question about this device
Download the instructions for your Video projector in PDF format for free! Find your manual Burger 101 - Vankyo and take your electronic device back in hand. On this page are published all the documents necessary for the use of your device. Burger 101 by Vankyo.
USER MANUAL Burger 101 Vankyo
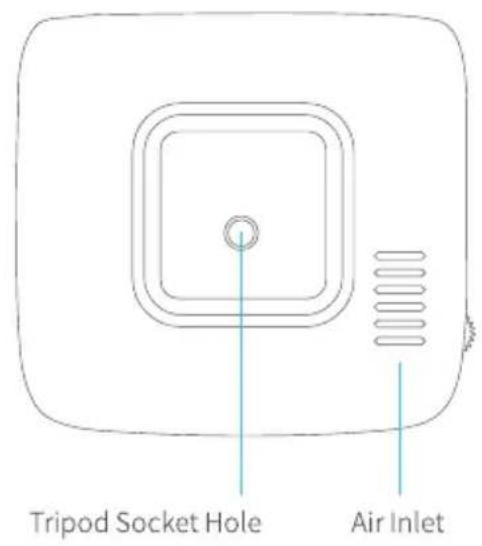
natural_image
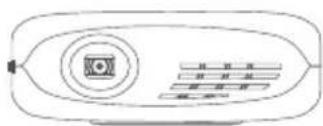
Line drawing of a device casing with circular and rectangular components, no text or symbols presentBURGER 101
USER MANUAL
Please read this manual throughly before using this product and keep it for future reference.
PACKING LIST
natural_image
Line drawing of a portable electronic device with a circular button and four horizontal buttons (no text or symbols)BURGER 101
Remote
(Batteries Not Included)
Carrying Bag

User Manual
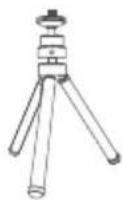
Tripod
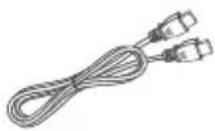
HDMI Cable
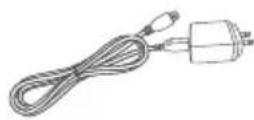
Adapter
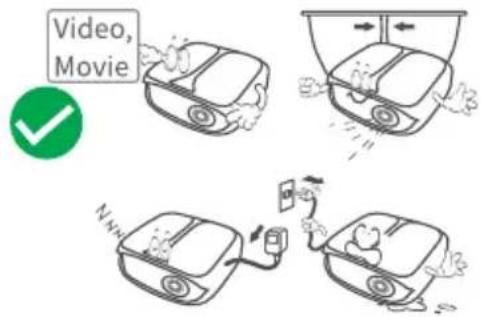
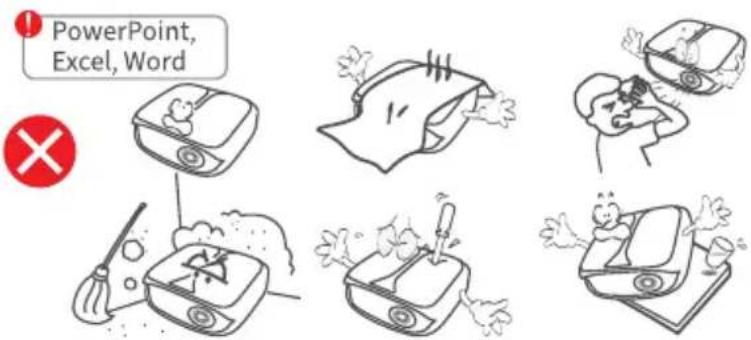
NOTICE
Recommended
NOT Recommended
FN
FUNCTION OVERVIEW

FN
GETTING STARTED
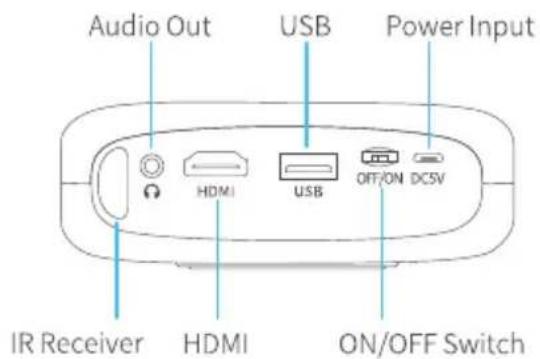
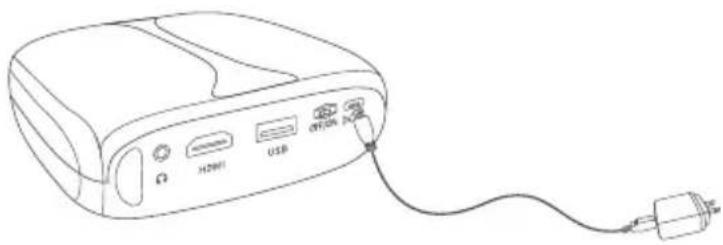
1. Turn On
① Plug the power cable into the projector and the socket.
natural_image
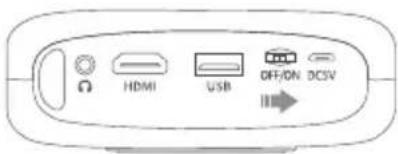
Line drawing of a portable electronic device with ports labeled H290I, USB, and AC/DC (no text or symbols beyond labels)② Switch the ON/OFF Switch to ON.
③ Press the Power button to turn the projector on.
2. Turn Off
① Press the Power button once, then select Confirm to turn off the projector.
② Switch off the ON/OFF Switch to OFF.
3. Battery
This projector is equipped with the built-in Li-ion rechargeable battery which can provide power supply to other mobile devices through the USB port when needed.
EN
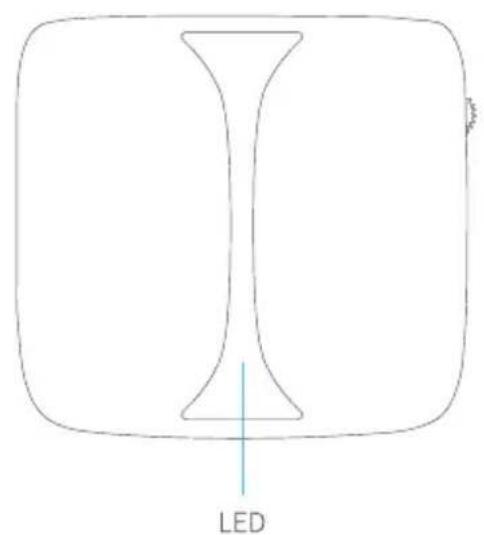
4. Charging
Fully Charged: LED Off
Charging: Blue LED
IMPORTANT:
* To avoid turning on the projector accidentally which may lead to electrical fires, switch the ON/OFF Switch to OFF.
* Do not use it as a projector and power bank at the same time.
* Always connect your projector to power or charge it timely when the battery is low.
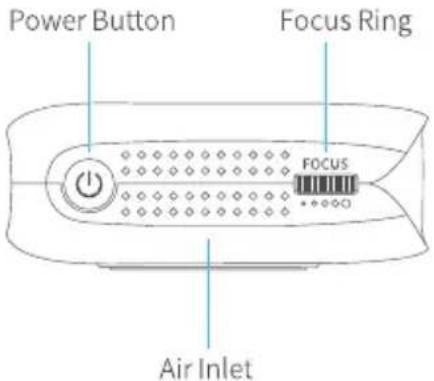
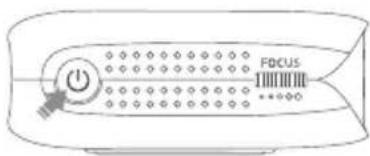
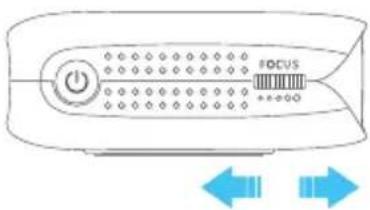
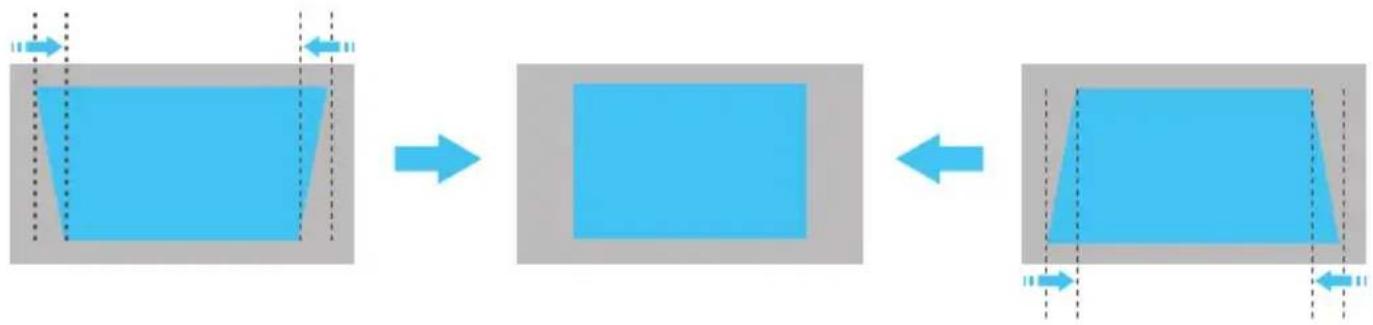
FOCUS AND KEYSTONE
Slightly adjust the focus ring on the projector to get the best image.
natural_image
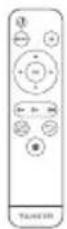
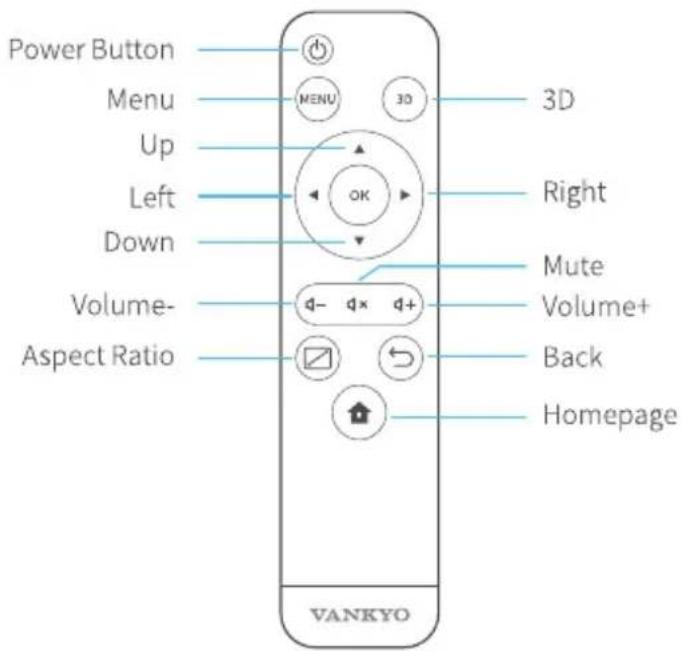
Illustration of a remote control device with power button and navigation bar (no text or symbols)The projector supports automatic vertical Keystone correction within a degree of ±40.
flowchart
graph LR
    A["Blue rectangle with dashed lines and arrows"] --> B["Gray rectangle"]
    B --> C["Blue rectangle with dashed lines and arrows"]
05
support.uk@ivankyo.com
FN
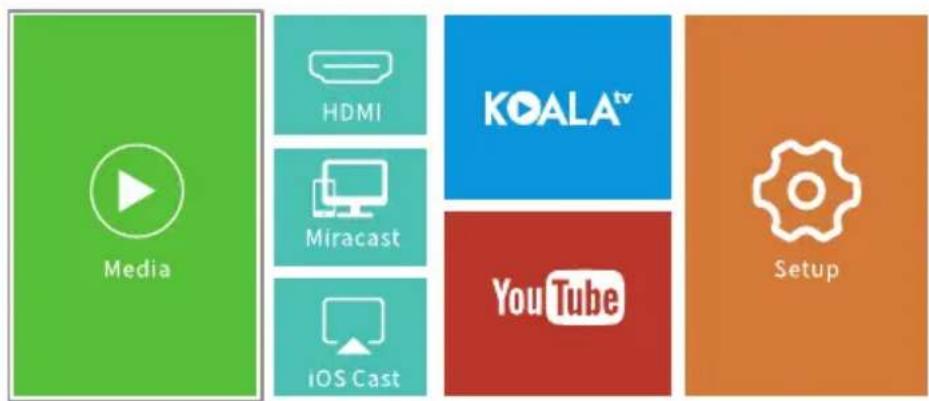
WIFI CONNECTION
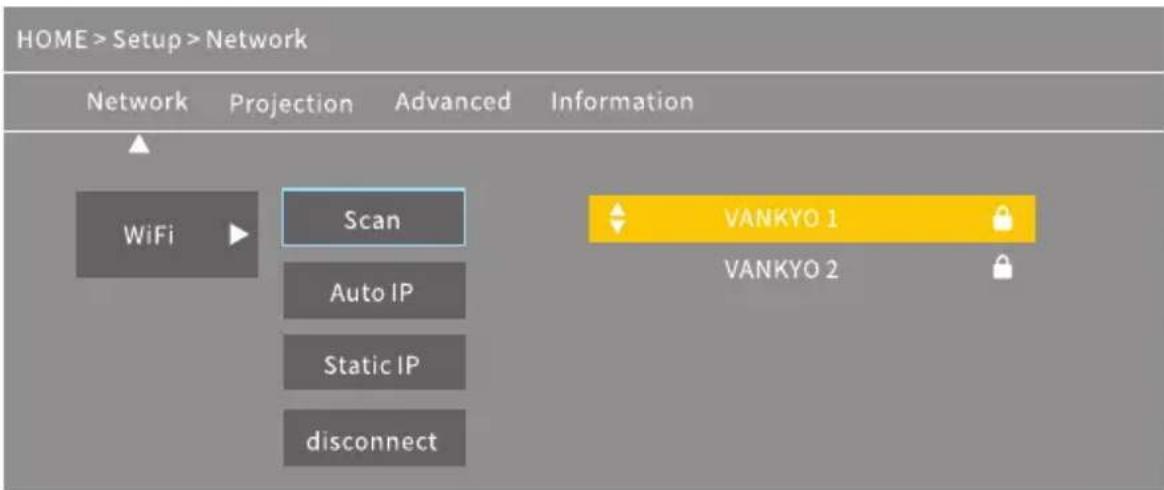
- Go to Homepage > Setup > Network > WiFi, then select Scan to display the WIFI list.
- Press the Up/Down button to select your WIFI, then press the OK button to continue.
- Enter the correct password, then select Confirm to get Internet connection.
MULTIMEDIA CONNECTION
Projecting from a USB Disk
- Turn on the projector and insert your USB disk into the USB port.
- Go to Homepage to select Media, it will display an interface for projecting from a USB Disk.
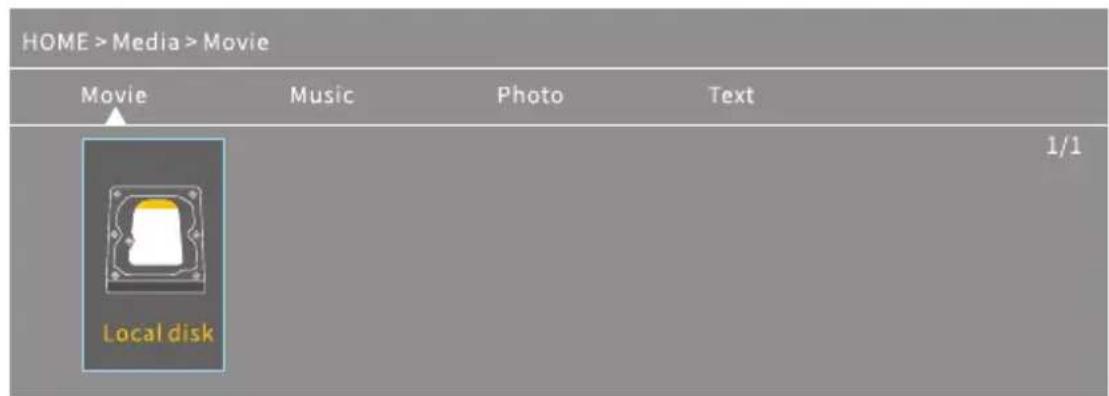
- Select the category of the file you would like to project accordingly.
* To play the video, select Movie, then find your video file and play it by pressing the OK button. To watch 3D video, please press the 3D button on the remote when playing it (3D video source is required and 3D glasses are not included).
* To play the audio file, select Music to find your audio file. Select it first by pressing the OK button, then select the Play option to start playing.
* To project photo, select Photo, then find your photo and play it by pressing the OK button.
* To project text, select Text, then find your text file and open it by pressing the OK button.
FN
Different File Formats Supported
Text Format Supported: TXT
Image Format Supported: JPG/JPEG/BMP/PNG
Audio Format Supported: MP1/MP2/MP3/WMA/WAV/OGG/FLAC/AAC/M4A
Video Format Supported: MPEG1/MPEG2/MPEG4/H.264/MVC/H.263/DAT/MPG/VOB/TS/AVI/MKV/MP4/MOV/3GP/FLV
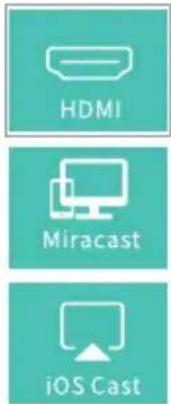
Projecting from HDMI Input Connection
- Turn on the projector, then connect the projector to your device with the provided HDMI cable.
- Go to Homepage, then select HDMI to project the contents from your device to the screen/wall.


Play Videos in KOALA and YouTube
Go to Homepage > KOALA/YouTube to play videos after the projector is connected to your WIFI.
Tip:
Press the Menu button on the remote to get back to the Home Page of KOALA/YouTube.
SCREEN MIRRORING
For iOS System
- Connect your iOS device and the projector to the same WIFI network.
- Go to Homepage > iOS Cast to display the following interface.
FN
- Swipe your iOS device up, then tap Screen Mirroring/AirPlay Mirroring and search for the projector.
- Select ZYCast-xxxx(icast) from the searching list.
- Your iOS device display will be projected on the wall/screen.
For Android system
To activate this function, please make sure your android device supports Multi-screen/Wireless display. Names may differ from different Android devices.
- Turn the WIFI to ON status in the settings of your Android device. To make a smoother streaming, please do not connect to any WIFI on your projector.
- Go to Homepage > Miracast to enter the following interface.
Miracast
To connect Android Mobile/Pad Device with Projector Based on WiFi-Display Technology
Projector


Pad

Mobile
- On your Android Mobile/Pad, open the settings menu.
- Access your display settings or screen-mirroring
-
Select your Miracast receiver: ZYCast-xxxx(mcast).
-
Activate Multi-Screen function in your Android device and search for the projector.
- Select ZYCast-xxxx(mcast) from the searching list.
- Your Android device display will be projected on the wall/screen.
SCREEN CASTING (For iOS System Only)
- Connect your iOS device and the projector to the same WIFI network.
- Select Setup on the homepage, enter Advanced > iOS Play Mode, then press the right button on the remote to select screen casting HD/SD.
- Go to Homepage > iOS Cast on the projector.
- Launch a video player on your iOS device and select a video to play.
- Tap 📄 > Airplay&Bluetooth devices > ZYCast-XXXX(icast) to cast the video on your iOS device to the wall/screen via the projector.

Tips:
① Once the video is casted to the wall/screen, you can close the app and do other things without interrupting the video as long as your iOS device is still connected.
② Always connect your projector to power.
11
support.uk@ivankyo.com
FN
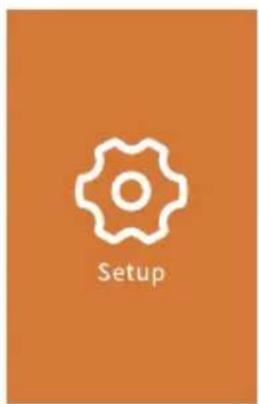
SETTINGS
Go to Homepage > Setup to adjust the settings of your projector.
Network
Connect the projector to your WIFI.
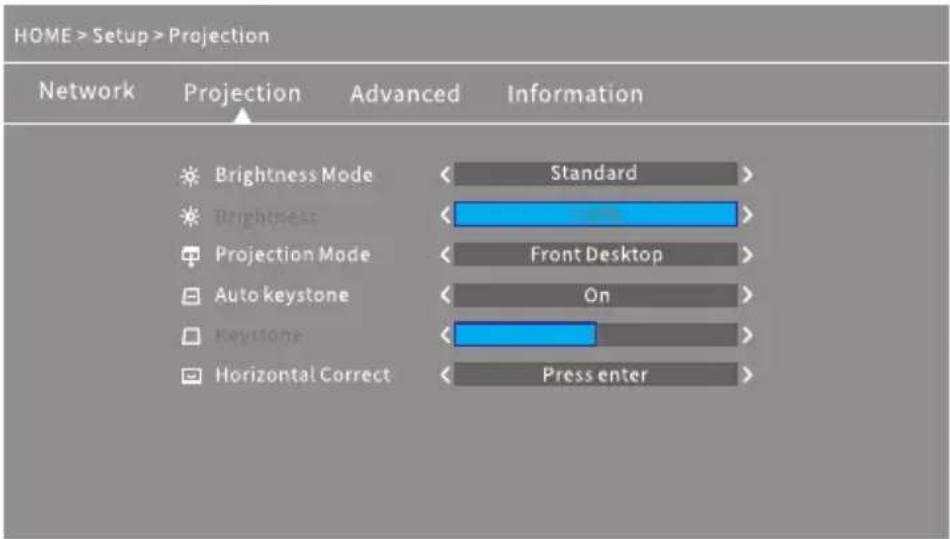
Projection
Set up brightness mode, brightness level, projection mode, Keystone configurations etc..
Advanced
Change language, select boot source, set up sleep timer, select iOS Play Mode, update firmware, make a factory restore, etc.
Information
Check the memory, software version, etc.
SPECIFICATIONS
| Adapter Input | AC100V-240V, 50/60Hz |
| Adapter Output | DC 5V=3A |
| Ports | USB Port*1/HDMI In*1/Audio Out*1/DC In*1 |
| Operating System | Linux |
| WIFI | 2.4G |
| RAM/ROM | 256MB/2G bits |
| CPU | Mstar V66 |
| Battery Capacity | 5200mAh (Rechargeable Li-ion battery) |
| Display Technology | DLP |
| Light Source | LED |
| Resolution | Native 854 x 480 |
| Projection Distance/Size | 0.8-3M/30-110inches |
| Projection Mode | Front/Rear/Ceiling |
| Aspect Ratio | 4:3/16:9 |
| Keystone | Auto/Manual ±40° |
| Focus | Manual |
EN
TROUBLESHOOTING GUIDE
- The content on my iPhone can't be mirrored on the projected screen.
* Make sure your iPhone is connected to the same 2.4G network as your projector.
* Go to Setup > Information > Software Version to check the version of your projector, then contact support@ivankyo.com for further assistance.
- The projector cannot be turned on when I press the power button.
* Connect the projector to the socket with a power cord to check whether the built-in battery is empty.
* Make sure you switch the ON/OFF Switch to ON.
- The projected image freezes or the projector is not responsive.
* Go to Setup > Advanced to make a factory reset.
- 3D effect is not working as expected.
* The 3D active shutter glasses are required.
* Make sure the 3D video is in the format of side-by-side or top and bottom.
* Make sure to press the 3D button on the remote.
- My USB disk or hard drive can not be read.
* Make sure the format of your USB disk or hard drive is FAT32 or NTFS.
* The max. storage of the USB disk should be less than 64GB.
FCC Statement
Any Changes or modifications not expressly approved by the party responsible for compliance could void the user's authority to operate the equipment. This device complies with part 15 of the FCC Rules. Operation is subject to the following two conditions:
(1) This device may not cause harmful interference, and
(2) this device must accept any interference received, including interference that may cause undesired operation.
NOTE: This equipment has been tested and found to comply with the limits for a Class B digital device, pursuant to part 15 of the FCC Rules. These limits are designed to provide reasonable protection against harmful interference in a residential installation. This equipment generates, uses and can radiate radio frequency energy and, if not installed and used in accordance with the instructions, may cause harmful interference to radio communications. However, there is no guarantee that interference will not occur in a particular installation. If this equipment does cause harmful interference to radio or television reception, which can be determined by turning the equipment off and on, the user is encouraged to try to correct the interference by one or more of the following measures:
—Reorient or relocate the receiving antenna.
—Increase the separation between the equipment and receiver.
—Connect the equipment into an outlet on a circuit different from that to which the receiver is connected.
—Consult the dealer or an experienced radio/TV technician for help.
This equipment complies with FCC radiation exposure limits set forth for an uncontrolled environment. This equipment should be installed and operated with minimum distance 20cm between the radiator& your body.
This transmitter must not be co-located or operating in conjunction with any other antenna or transmitter.
ISEDC Warning
This device complies with Industry Canada licence-exempt RSS standard(s). Operation is subject to the following two conditions:
(1) this device may not cause interference, and
(2) this device must accept any interference, including interference that may cause undesired operation of the device.
FN
The device is compliance with RF exposure guidelines, users can obtain Canadian information on RF exposure and compliance. The minimum distance from body to use the device is 20cm.
RISK OF EXPLOSION IF BATTERY IS REPLACED BY AN INCORRECT TYPE DISPOSE OF USED BATTERIES ACCORDING TO THE INSTRUCTIONS

The symbol indicates DC voltage

RECYCLING
This product bears the selective sorting symbol for Waste electrical and electronic equipment (WEEE). This means that this product must be handled pursuant to European directive 2012/19/EU in order to be recycled or dismantled to minimize its impact on the environment.
This product can be used across EU member states.
VANKYO SUPPORT
North America support@ivankyo.com
United Kingdom support.uk@ivankyo.com

www.ivankyo.com

@VankyoOfficial

VANKYO
- BURGER 101
- USER MANUAL
- PACKING LIST
- NOTICE
- FN
- GETTING STARTED
- Turn On
- Turn Off
- Battery
- Charging
- IMPORTANT:
- FOCUS AND KEYSTONE
- WIFI CONNECTION
- MULTIMEDIA CONNECTION
- Projecting from a USB Disk
- Projecting from HDMI Input Connection
- Play Videos in KOALA and YouTube
- SCREEN MIRRORING
- For iOS System
- For Android system
- Miracast
- SCREEN CASTING (For iOS System Only)
- Tips:
- SETTINGS
- Network
- Projection
- Advanced
- Information
- EN
- TROUBLESHOOTING GUIDE
- FCC Statement
- ISEDC Warning
- VANKYO SUPPORT
Brand : Vankyo
Model : Burger 101
Category : Video projector