RAJADA III 60CM BR - Range hood Kunft - Free user manual and instructions
Find the device manual for free RAJADA III 60CM BR Kunft in PDF.


| Product Type | Range Hood |
| Brand | Kunft |
| Model | RAJADA III 60CM BR |
| Width | 60 cm |
| Mounting Type | Under-cabinet |
| Extraction Rate | 620 m³/h |
| Noise Level | 55 dB (max speed) |
| Number of Speeds | 3 |
| Control Type | Electronic push buttons |
| Lighting | LED, 2 x 2 W |
| Filtration | Aluminum grease filters (dishwasher safe) |
| Energy Class | A |
| Voltage | 220-240 V ~ 50/60 Hz |
| Motor Power | 200 W |
| Duct Diameter | 150 mm |
| Recirculation Mode | Yes (charcoal filter not included) |
| Net Weight | 12 kg |
| Dimensions (HxWxD) | 61 x 60 x 50 cm |
| Warranty | 2 years |
Frequently Asked Questions - RAJADA III 60CM BR Kunft
User questions about RAJADA III 60CM BR Kunft
0 question about this device. Answer the ones you know or ask your own.
Ask a new question about this device
Download the instructions for your Range hood in PDF format for free! Find your manual RAJADA III 60CM BR - Kunft and take your electronic device back in hand. On this page are published all the documents necessary for the use of your device. RAJADA III 60CM BR by Kunft.
USER MANUAL RAJADA III 60CM BR Kunft
natural_image
Line drawing of a rectangular electronic device with a textured top and side slots (no text or symbols)Cooker Hood
Model: KUNFT RAJADA III 60CM BR
KUNFT
220-240V\~50Hz
KUNFT RAJADA III 60CM BR
180W Total
M MOTOR: 1X100W
2X40W


Instruction Manual
Dear client,
We thank you for purchasing this product.
This appliance was submitted to several laboratorial tests, which certify its quality. To simplify the use of this appliance, this instruction manual has been provided. The instructions must ensure a quick and safe use.
Please read carefully the instructions and safety measures described in this manual.
We wish our clients great satisfaction in using their new appliance.
Index
1. Safety Instructions....5
1.1. Power Energy 6
1.2. Power Cord and Other Cables....6
1.3. Humidity and Water 6
1.4. Cleaning....7
1.5. General Precautions ...... 7
2. Utilization and Functioning .... 8
2.1. Installation Instructions 8
2.2. Air Ventilation Settings.... 10
2.3. Operation....10
2.4. Changing the Light.... 11
- Maintenance....12
- Aftermarket....12
- Environment Conservation .... 13
1. Safety Instructions
 | ATTENTION |  |
| Risk of Electric ShockDo Not Open | ||
| Attention: to avoid the risk of electric shock, do not remove the cover. The interior does not contain any parts that may be repaired by the user. Ask for assistance to qualified personnel. | ||
Important Warnings
Before using your appliance, read carefully this instruction manual and keep it in a safe place, as you may need it for future consultations.
Before you start your appliance, and to ensure a correct use, do not use it if:
- It has fallen on the ground;
- You notice any evidence of damage;
- Any anomaly occurs during its operation;
To avoid hazards and deterioration of your appliance by an incorrect use, it is advisable to read the instructions carefully and attentively.
Your appliance must not be used to other ends than the ones foreseen in the instructions manual. Your safety is only guaranteed in a household use and not for commercial use. The incorrect use will not be covered and automatically cancels the right to warranty.
Assistance
Be sure that, in case of malfunction, you take your appliance to a qualified technician for assistance.
This appliance can be used by children from 8 years old and above and persons with reduced physical, sensory or mental capabilities or lack of experience and knowledge if they have been given instruction concerning use of the appliance in a safe way and understand the hazards involved. Children shall not play with the appliance. Cleaning and maintenance shall not be made by children without supervision.
- These instructions are also available on www.suporteworten.pt
1.1. Power Energy
Make sure the voltage of the electric network is compatible with the one of the appliance. If it does not match, consult the vendor or Customer Support Service.
1.2. Power Cord and Other Cables
Do not roll up or pull the cord to disconnect the appliance, and do not use to twine the appliance. Keep the cord far from warm surfaces.
Never use the appliance if it has a damaged cable or socket, or if it is not working properly.
In case of damage of the power cord, do not use your appliance. Take it to technical assistance for its replacement.
1.3. Humidity and Water
Do not use your appliance in humid places. Do not let your appliance to catch water under any circumstance, as it may be dangerous. TO AVOID FIRE HAZARD OR ELECTRIC SHOCK DO NOT EXPOSE YOUR APPLIANCE TO HUMIDITY OR WATER. Do not place your appliance under water (for example for washing).
1.4. Cleaning
Before cleaning, always ensure that you have switched your cooker hood off. Do not use abrasive detergent for it will damage the hood.
Clean the cooker hood according to the instruction manual and keep the cooker hood away from the danger of burning.
The cooker hood and its filter mesh should be cleaned regularly in order to keep it in good working order.
1.5. General Precautions
- Carefully read the following important information regarding installation safety and maintenance.
- Keep this information booklet accessible for further consultations.
- The appliance has been designed as an exhausting version (external exhaust) or as a filter version (internal air recycling) cooker hood.
- Take care when the cooker hood is operating simultaneously with an open fireplace or burner that depends on the environment and are supplied by other than electrical energy, as the cooker hood removes the air from the environment which a burner or fireplace need for combustion.
- Provide adequate ventilation in the environment for a safe operation of the cooker hood.
- Follow the local laws applicable for external air evacuation.
- Your cooker hood is for domestic use only; it is not suitable for barbecue, roast shop or other commercial use.
- Any installation work must be carried out by a qualified electrician or competent person.
- Do not use fire for drying your cooker hood.
- If there is any fault with your cooker hood, please call the service department appointed by the agent for servicing.
- Please keep the room draughty when your cooker hood and gas hob are working.
- In order to get the most out of your cooker hood, please read the instruction manual before installing and using, and keep it in a safe place.
- Ensure that you could get our guarantee for your cooker hood, please provide the warranty card and purchase receipt, or the guarantee will not be offered.
- Accessible parts may become hot when used with cooking appliances.
- Observe the warning in the instruction sheet concerning the operation of the appliance when air is discharged from the room.
- Do not check the filters with the hood working.
- Do not touch the lamps after a prolonged use of the appliance.
- No flambé food must be cooked underneath the hood.
- The use of an unprotected flame is dangerous for the filters and could cause a fire.
- Watch the fried food constantly in order to avoid the cooking oil to flare up.
- Before performing any maintenance operation, disconnect the hood from the mains.
2. Utilization and Functioning
2.1. Installation Instructions
Method A:
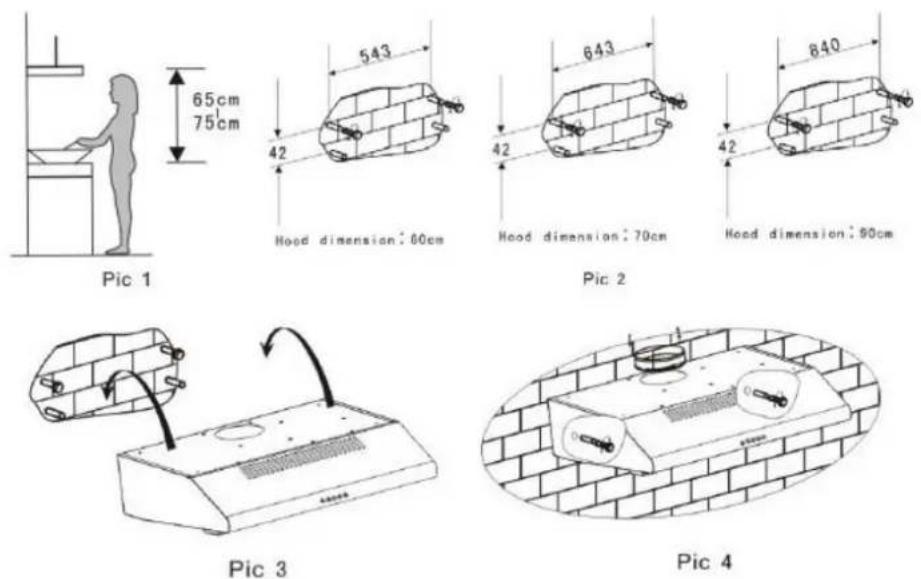
1) The cooker hood should be placed at a distance of 65-75cm from the cooking surface for best effect (See Pic 1).
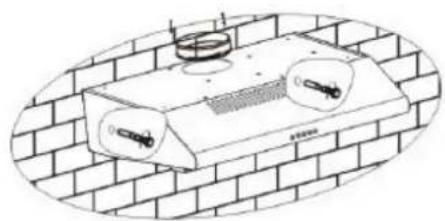
2) To install onto the wall, drill 4 holes with 8mm on a suitable place according with the centre distance of hole in the back of the cooker hood (See Pic 2).
3) Insert the anchors into the holes.
4) Insert the screws into the anchors and tighten them.
5) Put up the cooker hood onto the fixed screws (See Pic 3).
6) Insert the safety screws into the rest anchors and tighten them to fix the body well on the wall (See Pic 4).
7) Put the one way valve onto the cooker hood.
Method B (See Pic 5):
1) Drill 4 holes with 6mm at the bottom of the hanging cupboard
2) Put the one way valve on the air outlet of cooker hood, then install the cooker hood on the bottom of the cupboard, tighten the cooker hood with enclosed 4 screws.
3) Install the adjusted board on the bottom of the hood in order to keep out the gap between hood back and cupboard.

60cm

70cm

90cm
Pic 5
Note: There are 2 methods for ventilation, “horizontal ventilation” and “vertical ventilation”. Please pay attention to the ventilation method when installing. Horizontal ventilation (See Pic 6A): Please use the cover to seal the outlet on the top, then the air can be vented from the back.
Vertical ventilation (See Pic 6B): Please use the cover to seal the outlet on the back, then the air can be vented from the top.

natural_image
Simple line drawing of a rectangular box with two circular holes and two arrows pointing to the top section (no text or symbols)A

natural_image
Simple line drawing of a rectangular box with a circular component and an arrow indicating direction (no text or symbols)B
Pic 6
2.2. Air Ventilation Settings
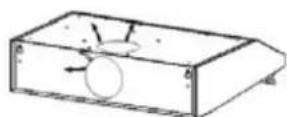
Outdoor air ventilation: Turn the adjuster to outdoor position (Pic 7A), install the outlet, turn on the cooker hood, then the air will be vented from the outside outlet.
Indoor air ventilation: Turn the adjuster to indoor position (Pic 7B), install the outlet cover, turn on the cooker hood, then the air can be vented from the inside outlet.

natural_image
Technical line drawing of a mechanical device with two circular components and a central component (no text or symbols)A

Pic 7
C
2.3. Operation
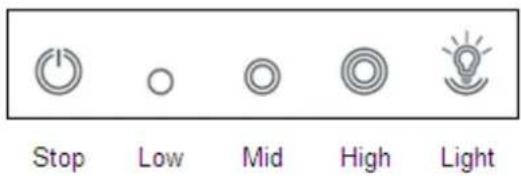
How to use the control panel (See Pic 8):
a. Press the button "Stop", the motor will stopped.
b. Press the button "Low", the motor will run at low speed.
c. Press the button "Mid", the motor will run at medium speed.
d. Press the button "High", the motor will run at high speed.
e. Press the button "Light", both lights start shining .Press the button again; the lights will be switched off.
Pic 8
2.4. Changing the Light
■ Before changing the lights, ensure that the appliance is not live (i.e., ensure that you have switched it off at the wall switch).
- Press the handle on the Aluminum filter towards the rear part of the unit until it is released from the front housing and remove it by pressing downwards.
- Change the incandescent bulb using only Max. 40W E14 olive-shaped bulb.
- Replace the Aluminum filter to the original position.
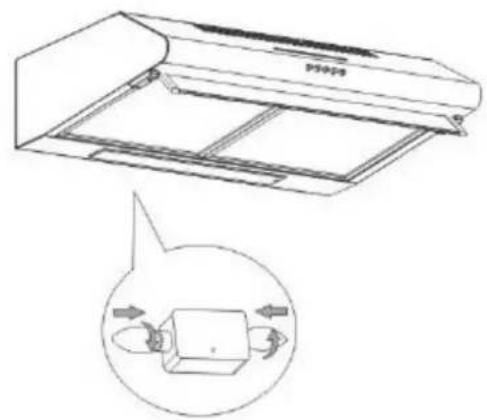
Pic 9
3. Maintenance
Changing and cleaning the filter:
Removing the filters as the instruction in Picture 10;
- You can clean the filter as below measure:
- Soak them for about 3 minute in hot water (40-50 degrees) with a grease loosening detergent then brush it gently with a soft brush. Please do not apply too much pressure to avoid damaging it.
-
It can be put into a dishwasher with detergent, set the temperature at around 60 degrees.
-
Please do not use abrasive detergent for it will damage the hood;
■ Make sure that the hood is shut off before cleaning;

natural_image
Diagram of a airflow or cooling system inside a fan or duct (no text or symbols)Pic 10
4. Aftermarket
Kunft has designed this appliance in order to guarantee the maximum reliability.
However, if a problem occurs, by following the procedures suggested in this section you may be able to determine its cause.
Do not attempt to open the appliance – there is a risk of electrical shock.
If you are not able to solve the problem, please contact your seller or manufacturer.
All users must be familiarized with this section. Knowing what could go wrong can help you avoid the occurrence of problems.
WARNING: any attempt of fixing the appliance without contacting the manufacturer will nullify the warranty.
In case the problem persists, take your appliance to an aftermarket section of any Worten, Modelo or Continente store in order to solve the problem.
Worten Equipamentos para o Lar ensures for a period of 2 years, counting from the date of purchase of this appliance, a warranty against any found manufacturing defect. The warranty supposes a correct use and maintenance of the appliance, namely according to the instructions expressed in this manual. In case otherwise identified, the malfunctions will not be under the warranty.
The repairing of electrical appliances must only be made by qualified technicians, as otherwise there may occur future complications on the appliances.
To avoid unnecessary risks, in case there are any malfunctions on the wires or on another type of components, repairing must be made on the specialized locations of technical assistance, as appropriate tools are needed.
5. Environment Conservation
Aiming to protect the environment, we try to reduce to a maximum the volume of the packages which are confined to three easy separation materials: cardboard, paper and plastic.
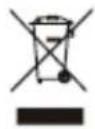
The appliance is made of recyclable material, once disassembled by a specialized company. Follow the local legislation concerning recycling of all materials.
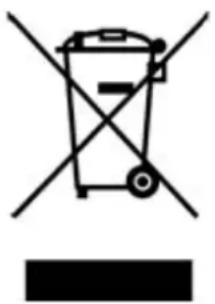
natural_image
Symbol of a trash bin crossed with no text or numbers, representing environmental restriction (no text present)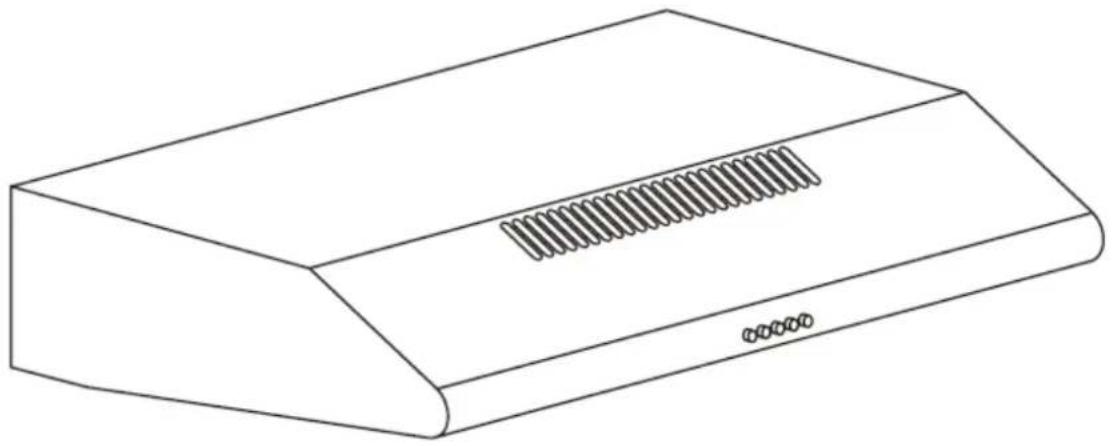
natural_image
Line drawing of a rectangular electronic device with a textured top and side connectors (no text or symbols)Campana de Cocina
Modelo: KUNFT RAJADA III 60CM BR
KUNFT
220-240V\~50Hz
KUNFT RAJADA III 60CM BR
180W Total

MOTOR: 1X100W

2X40W


natural_image
Diagram of a kitchen fan with heat exchanger and cooling unit (no text or symbols)Imagen 3
natural_image
Technical line drawing of a ceiling-mounted air duct mounted on a brick wall (no text or symbols)Imagen 4
60cm

70cm

90cm
Imagen 5
natural_image
Simple line drawing of a rectangular box with two circular holes and two side handles, no text or symbols present.A

natural_image
Simple line drawing of a rectangular box with a circular component and two arrows indicating direction (no text or symbols)B
Imagen 6
natural_image
Technical line drawing of a mechanical device with two circular components and a central valve (no text or symbols)A

C

B
↓ 1

D
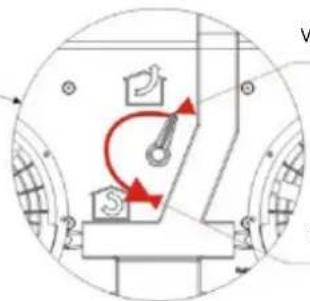
Imagen 8
natural_image
Line drawing of a kitchen air conditioner unit with airflow arrows indicating cooling or ventilation (no text or symbols)Imagen 10
4. Postventa
natural_image
Symbol of a trash bin crossed out by two diagonal lines (no text or labels)
natural_image
Line drawing of a rectangular electronic device with a textured top and side slots (no text or symbols)Exaustor
Modelo: KUNFT RAJADA III 60CM BR
KUNFT
220-240V\~50Hz
KUNFT RAJADA III 60CM BR
180W Total

MOTOR: 1X100W

2X40W


2.4. Mudar as Lâmpadas 39
60cm

70cm

90cm
Imagem 5
natural_image
Simple line drawing of a rectangular box with two circular holes and mounting feet (no text or symbols)A

natural_image
Simple line drawing of a rectangular box with two circular components and a handle, no text or symbols present.B
Imagem 6
natural_image
Simple line drawing of a double-burn air conditioner unit with two fans and a red indicator light (no text or symbols)A

B

Imagem 8
2.4. Mudar as Lâmpadas
natural_image
Technical line drawing of a ceiling fan with internal components and a magnified inset showing airflow or mechanical interaction (no text or symbols)Imagem 9
3. Manutenção
natural_image
Line drawing of a kitchen air conditioner unit with airflow arrows indicating internal flow (no text or symbols)Imagem 10
4. Pós-Venda
natural_image
Symbol of a trash bin crossed with two crossed lines, no text or numbers present- Cooker Hood
- KUNFT
- Instruction Manual
- Index
- Safety Instructions....5
- Utilization and Functioning .... 8
- Safety Instructions
- Important Warnings
- Assistance
- Power Energy
- Power Cord and Other Cables
- Humidity and Water
- Cleaning
- General Precautions
- Utilization and Functioning
- Installation Instructions
- Method A:
- Method B (See Pic 5):
- Air Ventilation Settings
- Operation
- Changing the Light
- Maintenance
- Aftermarket
- Environment Conservation
- Campana de Cocina
- Postventa
- Exaustor
- Mudar as Lâmpadas
- Manutenção
- Pós-Venda
Brand : Kunft
Model : RAJADA III 60CM BR
Category : Range hood