
EMP-S3 - Video projector EPSON - Free user manual and instructions
Find the device manual for free EMP-S3 EPSON in PDF.
| Product type | Video projector |
| Brand | EPSON |
| Model | EMP-S3 |
| Display technology | 3LCD |
| Native resolution | SVGA (800 x 600 pixels) |
| Brightness | 1600 ANSI lumens |
| Contrast ratio | 500:1 |
| Maximum screen size | 300 inches (610 x 460 cm) |
| Projection distance | 87 cm to 1212 cm (depending on zoom) |
| Lamp type | UHE 170W |
| Lamp life | 2000 hours (normal mode) |
| Power supply | AC 100-240V, 50/60 Hz |
| Power consumption | 260 W (projection mode) |
| Dimensions (W x D x H) | 327 x 232 x 83 mm |
| Weight | 2.7 kg |
| Keystone correction | Vertical ±30° (20° in 16:9 mode) |
| Zoom | Manual 1:1.35 |
| Focus | Manual |
| Special features | Direct Power ON, Source Search, quick power off |
| Video inputs | Composite, S-Video, Component (Y Cb/Pb Cr/Pr), VGA (computer) |
| Audio output | Headphone jack (mini-jack) |
| Noise level | 35 dB (economy mode) |
| Maintenance | Cleaning air filter, lamp replacement |
| Spare parts | Replacement lamp (ELPLP20), air filter (ELPAF17) |
| Safety | Do not use vertically, avoid blocking air intakes |
Frequently Asked Questions - EMP-S3 EPSON
User questions about EMP-S3 EPSON
0 question about this device. Answer the ones you know or ask your own.
Ask a new question about this device
Download the instructions for your Video projector in PDF format for free! Find your manual EMP-S3 - EPSON and take your electronic device back in hand. On this page are published all the documents necessary for the use of your device. EMP-S3 by EPSON.
USER MANUAL EMP-S3 EPSON
■ Turning on and Projecting
■ Connecting to Visual Equipment
● Problems/Indicator summary
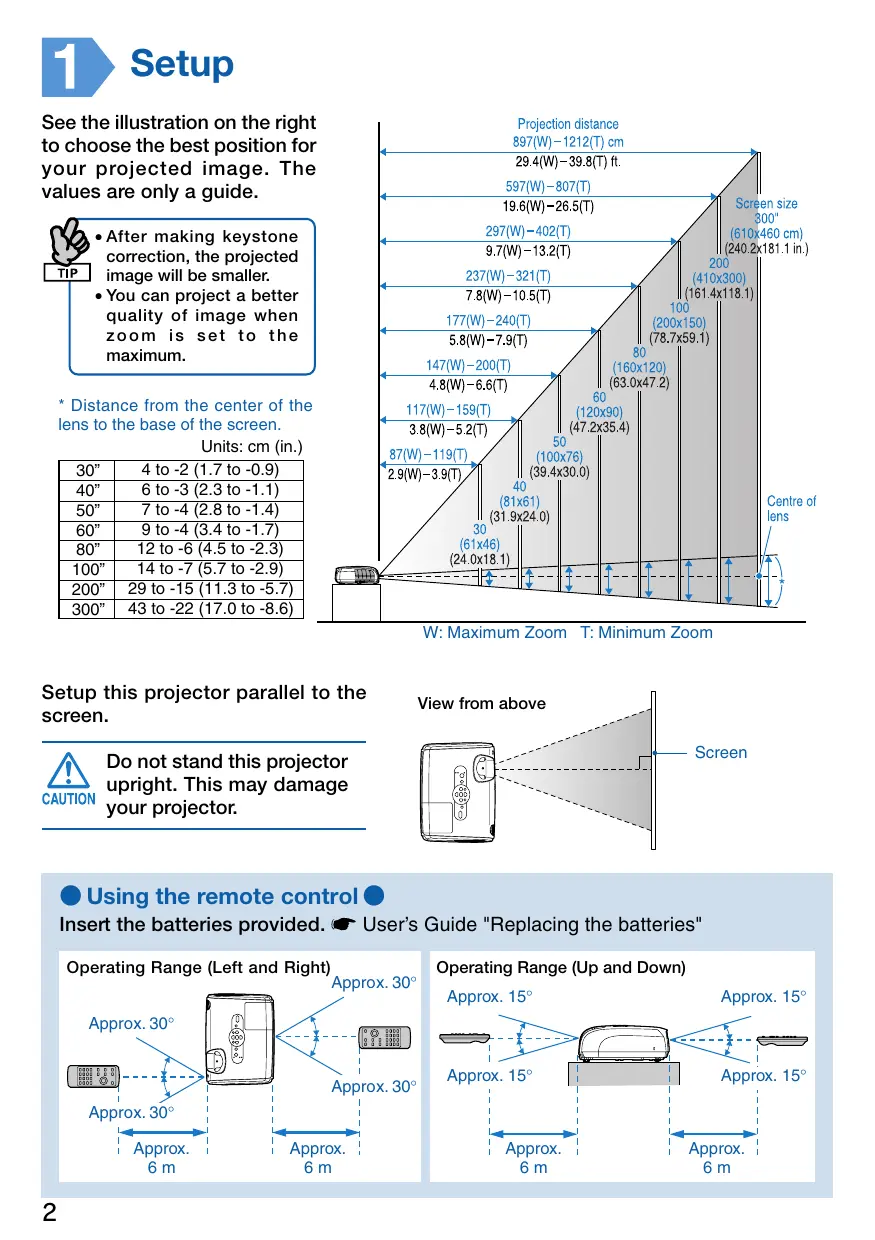
See the illustration on the right to choose the best position for your projected image. The values are only a guide.

• After making keystone correction, the projected image will be smaller.
- You can project a better quality of image when zoom is set to the maximum.
* Distance from the center of the lens to the base of the screen.
Units: cm (in.)
| 30” | 4 to -2 (1.7 to -0.9) |
| 40” | 6 to -3 (2.3 to -1.1) |
| 50” | 7 to -4 (2.8 to -1.4) |
| 60” | 9 to -4 (3.4 to -1.7) |
| 80” | 12 to -6 (4.5 to -2.3) |
| 100” | 14 to -7 (5.7 to -2.9) |
| 200” | 29 to -15 (11.3 to -5.7) |
| 300” | 43 to -22 (17.0 to -8.6) |
other
| Projection Distance (cm) | Screen Size (in.) | | ------------------------ | ----------------- | | 897(W) - 1212(T) | 610x460 | | 597(W) - 807(T) | 240.2x181.1 | | 297(W) - 402(T) | | | 237(W) - 321(T) | | | 177(W) - 240(T) | | | 147(W) - 200(T) | | | 117(W) - 159(T) | | | 87(W) - 119(T) | | | 30 | (61x46) | | 40 | (81x61) | | 50 | (100x76) | | 60 | (120x90) | | 80 | (160x120) | | Screen size (300" | | | Screen size (610x460 cm) | | | Screen size (240.2x181.1 in.) | | | Centre of lens (24.0x18.1) | | | Screen size (610x460 cm) | | | Screen size (240.2x181.1 in.) | | | Screen size (610x460 cm) | | | Screen size (240.2x181.1 in.) | | | Screen size (610x460 cm) | | | Screen size (240.2x181.1 in.) | | | Screen size (610x460 cm) | | | Screen size (239.8x181.1 in.) | | | Screen size (610x460 cm) | | | Screen size (240.2x181.1 in.) | | | Screen size (610x460 cm) | | | Screen size (240.2x181.1 in.) | | | Screen size (610x460 cm) + Screen size (300" | | | Screen size (240.2x181.1 in.) | | | Screen size (610x460 cm) + Screen size (300" | | | Screen size (240.2x181.1 in.) | | | Screen size (610x460 cm) + Screen size (300" | | | Screen size (610x460 cm) + Screen size (300" | | | Screen size (610x460 cm) + Screen size (300" | | | Screen size (610x460 cm) + Screen size (300" | | | Screen size (610x460 cm) + Screen size (240.2x181.1 in.) | | | Screen size (610x460 cm) + Screen size (300" | | | Screen size (610x460 cm) + Screen size (300" | | | Screen size (610x460 cm) + Screen size (300" | | | Screen sizes: 300" or 300" | | | Screen sizes: 300" or 300" | | | Screen sizes: 300" or 300" | | | Screen sizes: 300" or 300" | | | Screen sizes: 300" or 300" | | | Screen sizes: 300" or 300" | | | Projections: Projection distance | Projection distance | | Projections: Projection distance | Screen size: 300" | Screen size: 300" | Screen size: 300" | Screen size: 300" | Screen size: 300" | Screen size: 300" | Screen size: 300" | Screen size: 300" | Screen size: 300" | Screen size: 300" | Screen size: 300" | Screen size: 300" | Screen size: 300" | Screen size: 300" | Screen size: 300" | Screen size: 300" | Screen size: 300" | Screen size: 300" | Screen size: 300" | Screen size: 359.7 | | Screen size: 359.7 | | Screen size: 359.7 | | Screen size: 359.7 | | Screen size: 359.7 | | Screen size: 359.7 | | Screen size: 359.7 | | Screen size: 359.7 | | Screen size: 359.7 | | Screen size: 497.7 | | Screen size: 497.7 | | Screen size: 497.7 | | Screen size: 497.7 | | Screen size: 497.7 | | Screen size: 497.7 | | Screen size: 497.7 | | Screen size: 497.7 | | Screen size: 497.7 |W: Maximum Zoom T: Minimum Zoom
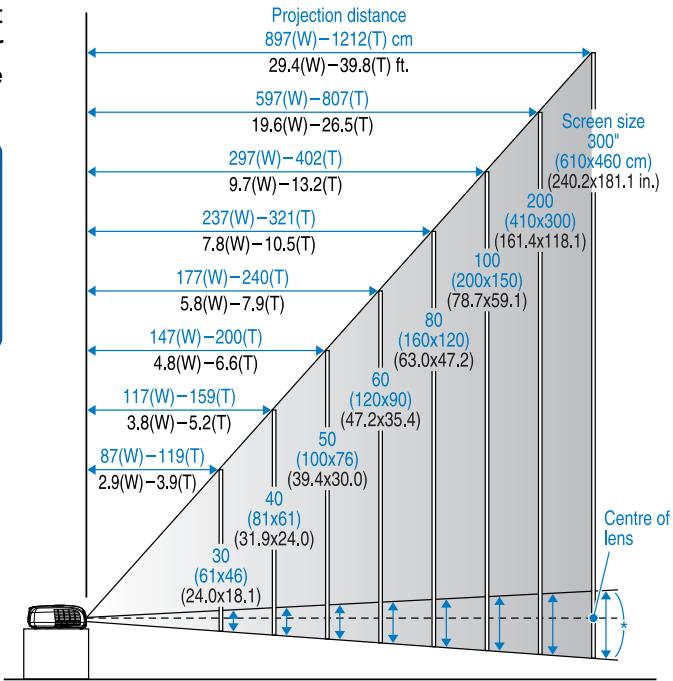
Setup this projector parallel to the screen.

Do not stand this projector upright. This may damage your projector.
text_image
View from above ScreenUsing the remote control
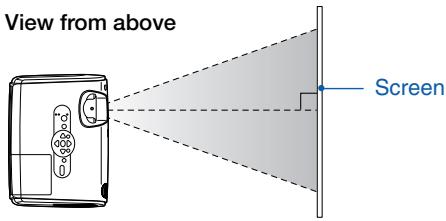
Insert the batteries provided. 📋 User's Guide "Replacing the batteries"
Operating Range (Left and Right)
text_image
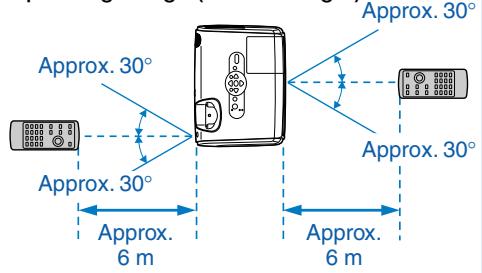
Approx. 30° Approx. 30° Approx. 6 m Approx. 6 m Approx. 30° Approx. 30°Operating Range (Up and Down)
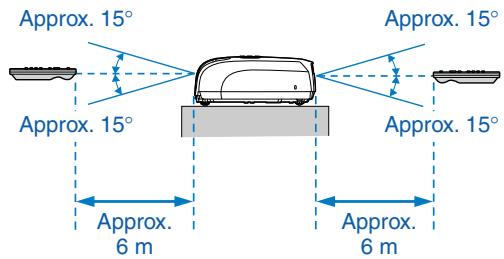
text_image
Approx. 15° Approx. 15° Approx. 15° Approx. 6 m Approx. 6 m Approx. 15° Approx. 15° Approx. 15°2
Connecting to Visual Equipment

- Turn off connected equipment. Damage may result if you try to connect when the power is on.
- Do not try to force a cable connector to fit a port with a different shape. This may damage your projector.

- When the source has an unusual connection, use the cable provided with the source or commercially available cables.
- If you use a 2RCA (L/R) stereo min-jack audio cable, make sure it is labelled "No resistance".
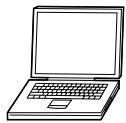
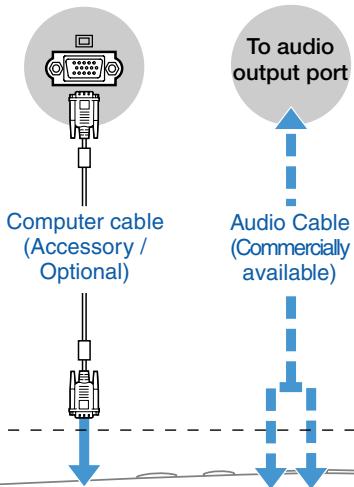
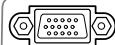
Connecting to a Computer
text_image
Computer cable (Accessory / Optional) To audio output port Audio Cable (Commercially available)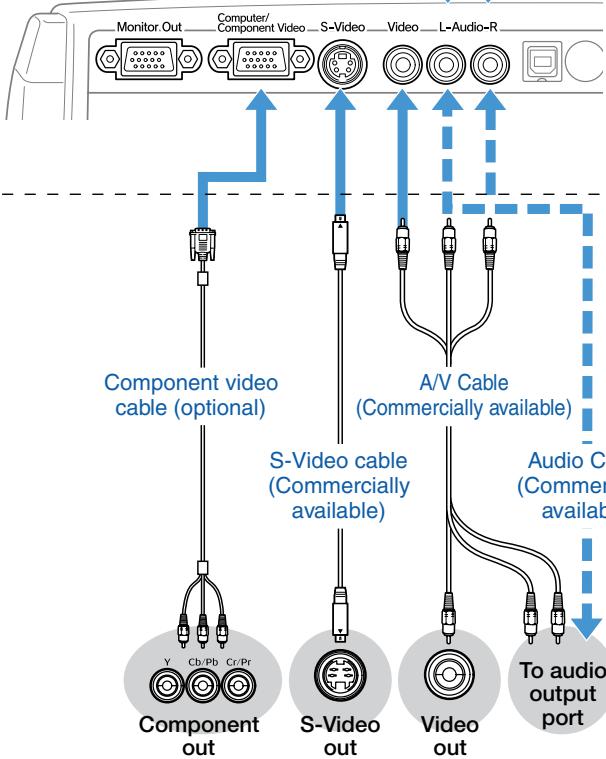
flowchart
graph TD
    A["Monitor Out"] --> B["Computer/Component Video"]
    B --> C["S-Video"]
    C --> D["Video"]
    D --> E["L-Audio-R"]
    F["Component video cable (optional)"] --> G["Component out"]
    H["S-Video cable (Commercially available)"] --> I["S-Video out"]
    J["A/V Cable (Commercially available)"] --> K["Video out"]
    L["Audio Cable (Commercially available)"] --> M["To audio output port"]
Connecting to a Video Source

DVD players, VHS players, satellite tuners, RGB converters, video distribution
machines, and so on. * The port names may vary depending on the equipment.
3
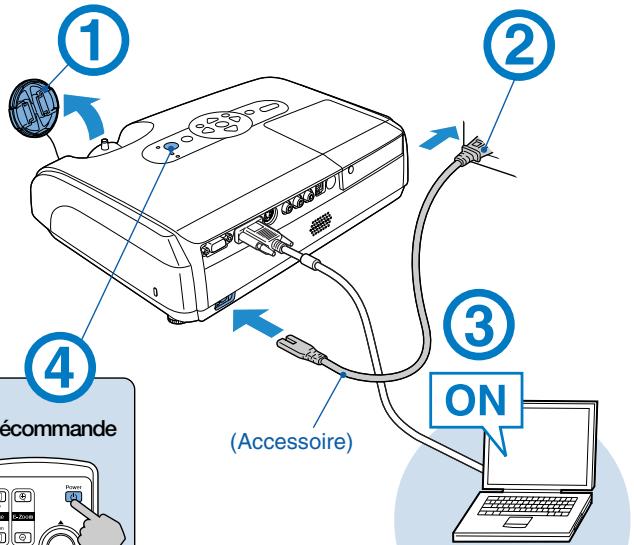
Turning on and Projecting

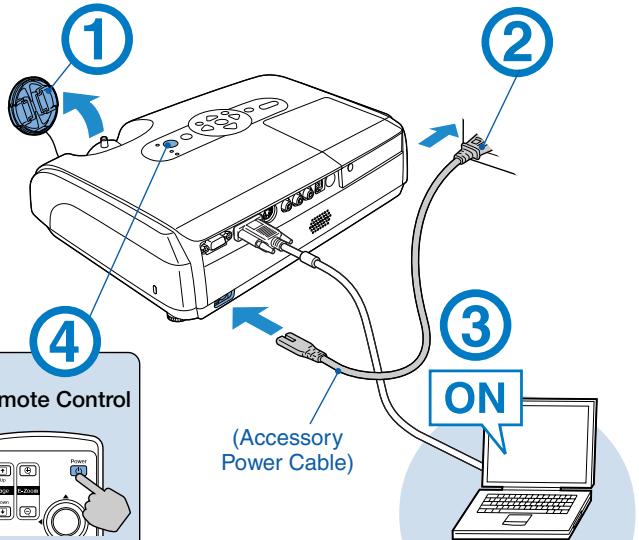
TIP
- When using the "Direct Power ON" feature, the power turns on when the power cable is connected.
- When using above an altitude of about 1500 m, set the "Fan Speed" to "High".
User's Guide "Extended Menu"
Beep
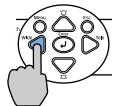
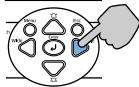
Control Panel
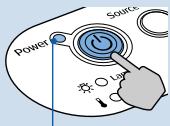
text_image
Power Source LayPower Indicator
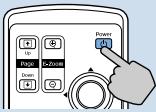
Remote Control
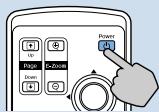
text_image
① ② ③ ON ④ (Accessory Power Cable) Remote Control* For video equipment, press "play" to start playback.
Reading the Indicators

Lit

Flashing
Orange
Standby

Press ⏻ to start projecting.
In this mode, you can unplug the power cable.
Green
Warming up

Wait for a short time (about 30 seconds).
In this mode pressing ⏻ has no effect.
Green
Projecting

Do not unplug the power cable.
No image is projected
For notebooks and computers with liquid
crystal displays
Change the computer's output source. Hold down the Fn key and press the appropriate Fo key (the one usually labelled □/□). After changing the setting, wait a few seconds for projection to start.
Computer's "User's Guide"
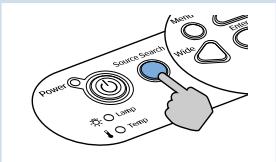
* If the image is not projected, press Source Search
For video equipment
Start playback then
press Source Search
| Examples | |
| NEC | |
| Panasonic | |
| SOTEC | |
| HP | |
| TOSHIBA | |
| IBM | |
| SONY | |
| DELL | |
| FUJITSU | |
| Macintosh | Set mirror setting or display detection. |
text_image
Power Source Search Menu Wipe Lamp Temp●Adjusting Position and Focus ●
(Setting up for the first time or after moving)
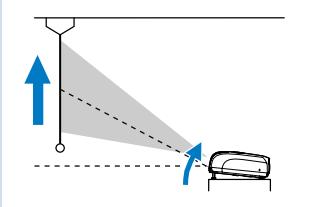
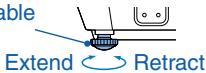
■ Raising the Projection Position (Adjusting the front foot)
text_image
Diagram illustrating light reflection with labeled components and directional arrows, likely from a physics or optics context.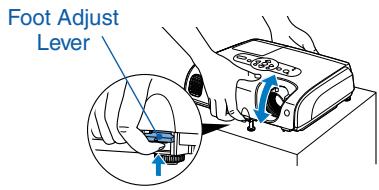
text_image
Foot Adjust Lever
When moving the projector, make sure the front foot is retracted.
▶ Correcting Keystone Distortion
You can adjust the vertical tilt to a maximum of about 30^ * ( 20^ when projecting a component video image with a ratio of 16:9).
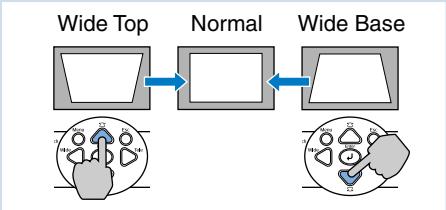
flowchart
graph LR
    A["Wide Top"] --> B["Normal"]
    B --> C["Wide Base"]
* The greater the angle of tilt, the harder the image is to focus. Setup the projector at a lower angle of tilt.
You can adjust the front foot to raise the projection angle up to a maximum of 10^ .

- You can also make keystone corrections from the configuration menu.
User's Guide "Settings Menu"
- Hold down △ and press ∇ for more than one second to reset the correction value to the default setting.
- Adjust the horizontal tilt by turning the left rear foot.
Rear Adjustable
Foot
■ Adjusting Focus

flowchart
graph LR
    A["User Group"] <--> B["User Group"]
    C["Computer Mouse"] -->|Rotation| D["Computer Mouse"]

After keystone correction and sharpness adjustments, the image may be unfocused.
■ Adjusting Projection Size
Enlarge
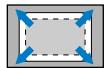
Reduce
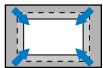
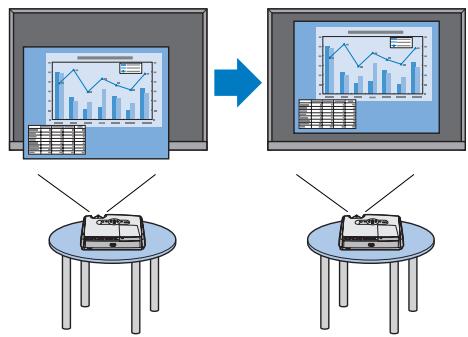
If keystone correction or zoom adjustments are performed, the "Image Shift" adjustment screen is displayed. ⚙️ User's Guide "Adjusting the Projection Position (Image Shift)"
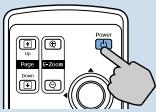
● Turning the Projector off ●
① Turn off all connected equipment.
② Press ⏻ twice on the remote control or control panel.
③ After the confirmation buzzer beeps twice, unplug the power cable.
Electricity is consumed if only the projector's power is turned off.
④ Attach the lens cover.
1
Installation
natural_image
Illustration of a D-sub connector with a GND cable (no text or symbols)natural_image
Diagram showing a device with two blue arrows pointing downward, indicating force or movement (no text or symbols present)Computer/
S-Video
_Video
L-Audio-R
.Monitor.Out
Component Video


text_image
Power Source LowVoyant Power
Télécommande
text_image
Power Source Search Mens, Wide Temp i o Lamp o Temptext_image
Diagram illustrating light reflection with labeled incident and reflected rays, showing a device positioned near the mirror.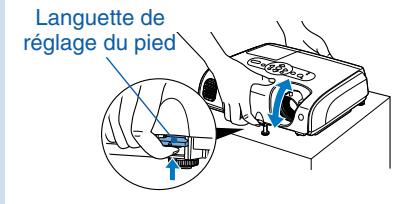
flowchart
graph LR
    A["Haut large"] --> B["Normal"]
    B --> C["Bas large"]
text_image
Diagram showing a control panel with directional arrows and a hand interacting with a rotary knob, labeled with Chinese characters.natural_image
Three technical illustrations of electronic devices: a front-mounted box, a flat-screen monitor, and a handheld device (no text or symbols visible)text_image
Power Source LayPoweranzeige
Fernbedienung
text_image
Diagram illustrating light reflection with labeled incident and reflected rays, showing a device positioned near the mirror.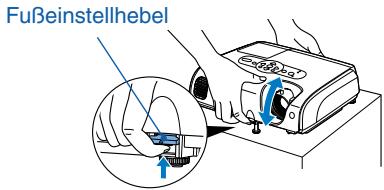
flowchart
graph LR
    A["User icon"] <--> B["User icon"]
    C["Computer mouse with rotation arrow"] --> D["Computer mouse"]

text_image
Circa 30° Circa 30° Circa 6 m Circa 30° Circa 30° Circa 6 mtext_image
Circa 15° Circa 15° Circa 15° Circa 6 m Circa 6 m Circa 15° Circa 15°
natural_image
Diagram of a GND connector with pinout and cable (no text or symbols)natural_image
Diagram showing a mechanical device with downward arrows indicating motion or force, no text or symbols presentComputer/Componer
S-Video
_Video
L-Audio-R
Monitor.Out


text_image
Y Cb/Pb Cr/PrComponent Out
text_image
Power Source LaySpia Power

Lettura delle spie

Accesa

Lampeggiante
Arancione Standby

text_image
Power Source/Search Menu Web Time Loop Temptext_image
Diagram illustrating light reflection with labeled incident and reflected rays, showing a device positioned near the mirror.
geo
| Dimension | Width (W) | Height (T) | | ----------------- | --------- | ---------- | | Top Section | 897 | 1212 | | Middle Section | 597 | 807 | | Bottom Section | 297 | 402 | | Right Section | 237 | 321 | | Left Section | 177 | 240 | | Center Section | 147 | 200 | | Right Section | 117 | 159 | | Bottom Section | 87 | 119 | | Left Section | 30 | 61 | | Middle Section | 40 | 81 | | Right Section | 50 | 100 | | Bottom Section | -2(T) | -46 | | Center Section | -3(T) | -61 | | Left Section | -4(T) | -71 | | Middle Section | -4(T) | -91 | | Right Section | -6(T) | -121 | | Bottom Section | -7(T) | -141 | | Center Section | -15(T) | -291 | | Left Section | -22(T) | -43 | The label 'Centro de la lente' indicates the location of the center section. There are no additional data series in this image.text_image
Aprox. 30° Aprox. 30° Aprox. 6 m Aprox. 6 m Aprox. 30° Aprox. 30°text_image
Aprox. 15° Aprox. 15° Aprox. 15° Aprox. 6 m Aprox. 6 m2
text_image
Power Source Lowtext_image
Power Source Search Menu Wide Inner Lamp Temp itext_image
Diagram illustrating light reflection with labeled incident and reflected rays, showing a device positioned near the mirror.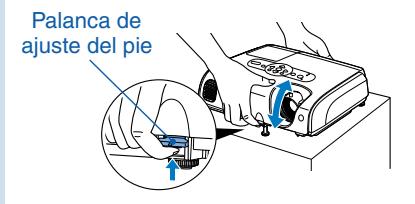
text_image
Palanca de ajuste del pie
| RedRedRed | Problem | Unplug the projector and contact your dealer.* |
| RedORed | Fan/Sensor problem | |
| RedORed | Overheating Unplug this projector and wait for 5 minutes. | Check the following.*the projector is not too close to the wall.the air filters are not blocked. |
| RedOOrange | High-speed cooling |
| General Lamp Problem Remove the lamp and check if it is broken. If it is not broken, reinsert it.*If it is broken, contact your dealer. | |
| Lamp replacement notificationChange the lamp. If you continue to use the lamp, it may explode. |
* If the problem is not corrected after checking the points above, unplug the projector and contact your dealer.
text_image
Illustration showing two scenes of people analyzing a large data table with numerical values and a lightbulb, suggesting a concept or problem.A/V Mute
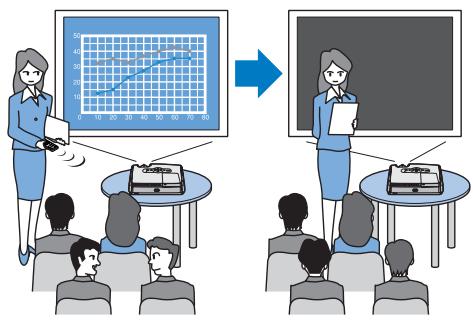
text_image
Illustration showing a teacher presenting a line chart to students, with a presentation slide and a blackboard in the background.Pointer
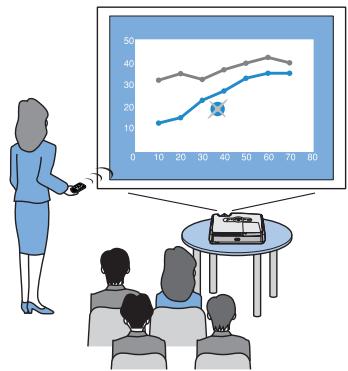
text_image
Illustration of a presenter presenting a presentation with a line chart showing trends over time, viewed from an audience.Image Shift
flowchart
graph TD
    A["Computer monitor with charts and bar graphs"] --> B["Computer monitor displaying charts and bars"]
    C["Device with antenna"] --> D["Device with antenna"]