
KID-55CD - CD Player ROADSTAR - Free user manual and instructions
Find the device manual for free KID-55CD ROADSTAR in PDF.


| Product Type | Portable CD Player |
| Brand | Roadstar |
| Model | KID-55CD |
| Dimensions (approx.) | 140 x 140 x 28 mm |
| Weight | 320 g (without batteries) |
| Power Supply | 2 x AA batteries or AC adapter (3V, not included) |
| Audio Output | 3.5 mm headphone jack |
| Supported Disc Formats | CD, CD-R, CD-RW |
| Anti-Skip Protection | Yes (up to 60 seconds) |
| Playback Modes | Play, Pause, Skip, Repeat, Shuffle |
| Display | LCD with track number and time |
| Controls | Play/Pause, Stop, Volume, Skip, Hold |
| Battery Life (approx.) | Up to 8 hours (depending on use) |
| Cleaning | Clean the laser lens with a soft cloth; avoid dust |
| Safety | Class 1 Laser Product; do not open the casing |
| Spare Parts | Batteries, AC adapter, earphones (optional) |
| Repairability | Contact Roadstar service center; no user-serviceable parts |
| Package Contents | CD Player, earphones, belt clip, user manual |
Frequently Asked Questions - KID-55CD ROADSTAR
User questions about KID-55CD ROADSTAR
0 question about this device. Answer the ones you know or ask your own.
Ask a new question about this device
Download the instructions for your CD Player in PDF format for free! Find your manual KID-55CD - ROADSTAR and take your electronic device back in hand. On this page are published all the documents necessary for the use of your device. KID-55CD by ROADSTAR.
USER MANUAL KID-55CD ROADSTAR
- Your new unit was manufactured and assembled under strict ROADSTAR quality control. Thank-you for purchasing our product for your music enjoyment. Before operating the unit, please read this instruction manual carefully. Keep it also handy for further future references.
English En
sh
WARNINGS


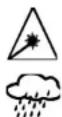


The exclamation point within the triangle is a warning sign alerting the user of important instructions accompanying the product.
The lightening flash with arrowhead symbol within the triangle is a warning sign alerting the user of "dangerous voltage" inside the unit.
To reduce the risk of electric shock, do not remove the cover. No user serviceable parts inside the unit. Refer all servicing toqualified personnel.
This unit employs a laser. Only a qualified service person should remove the cover or attempt to service this device, due to possible eye injury.
Invisible laser radiation when the unit is opened or interlocks defeated. Avoid exposure to laser beam. Use of controls, adjustments or procedures other than those specified herein may result in hazardous radiation exposure.
This unit must not be exposed to moisture or rain.
This unit should be positioned so that it is properly ventilated. Avoid placing it, for example, close to curtains, on the carpet or in a built-in installation such as a bookcase.
Do not expose this unit to direct sunlight or heat radiating sources.
Make sure all batteries are inserted according to the proper polarity. Do not mix old batteries with new ones.
If the unit is not used for a long period of time (more than 1 month), remove all batteries from their compartment to avoid possible leaking.
Playability of self-made CDs on Roadstar CD drive mechanisms.
CD-R/CD-RW In CD-DA can be played back. However it can occur, due to differences in the quality of the media as well as the characteristics of the recording, that individual self-made CDs cannot be read. This does not indicate an incorrect function of the playback unit in these cases.
2
KID-55CD
Portable CD player with 2 microphones
INSTRUCTION MANUAL
Please read this instruction manual carefully and familiarize yourself with your new Radio/CD/USB Player before using it for the first time. Please retain this manual for future reference.
LOCATION OF CONTROLS
- POWER ON/OFF / MUSIC VOLUME - switches power supply and adjusts volume of music.
- MIC VOLUME - adjusts volume of microphones.
- DC 9V - 9V DC input jack.
4, MIC ON/OFF- microphone ON/OFF switches. - PROGRAM - programs tracks and reviews the program
- MICROPHONE - sing-a-long microphones
- PROGRAM INDICATOR – indicates programming operation.
8.SKIP/SEARCH - skips to the beginning of a current track /previous / later track - searches backwards of forwards within a track / CD. - SOUND LEVEL INDICATOR – indicates sound level.
10.LED DISPLAY - show CD track number - OPEN - open CD compartment door
- POWER INDICATOR- indicates the power is on.
- PLAY/PAUSE - starts or pauses CD playing.
- PLAY/PAUSE INDICATOR - indicates playing or pause operation
- STOP - stops CD playing & erase a CD programmer
- REPEAT INDICATOR - indicates repeat play operation.
- REPEAT - repeats a track / CD programmer / entire CD.
- HEADPHONES - headphones jack
CONNECTING TO POWER (AC Power adapter not included)
Before switching on make sure that the voltage of your electricity supply is the same as that indicated on the rating plate.
For your own safety read the following instructions carefully before attempting to connect this unit to the mains.
English En
sb
POWER SUPPLY
- Remove the stereo carefully from the box, retaining the packaging for future use.
- Please read this instruction book carefully before operating this unit.
Using AC adapter (not included) Note: The transformer is not a toy.
Make sure the local voltage corresponds to the adapter's voltage.
- Use adapter of dc 9V/1000mA output with the negative pole to the center pin.
- Connect the adapter to the dc 9V input jack of the CD player and to the wall socket.
Specification of adapter:
Input Voltage: AC100-240V 50/60Hz
Output Voltage: DC 9V 1000mA

$$ d. c. 9 V = - 9 W $$
$$ + - ⓒ - - $$
CAUTION:
When using optional AC adapter, it must comply with the specifications of CEE publication 15. Charging unit to be used with toy should be regularly examined for potential hazard as damage to the cable or cord, plug, enclosure of other parts and that, in the event of such damage, the toy must not be used. Transformers used with the toy are to be regularly examined for damage to the cord, plug, enclosure of other parts and that, in the event of such damage, the toy must not be used with this transformer until the damage has been repaired.
- Warning! Not suitable for children under 36 months. Electric shock hazard.
•The toy shall only be used with a transformer for toys.
•The transformer is not a toy.
• Toys liable to be cleaned with liquid are to be disconnected from the transformer before cleaning.
•The toy is not to be connected to more than the recommended number of power supplies.
Battery Operation
Using Batteries (not included)
Unscrew and remove the battery door.
Insert 6 "C" size / UM-2 / R14 batteries
(not included) - alkaline batteries recom-
mended, with the correct polarities as indicated.
Replace the battery door and screws.

natural_image
Hand holding a white alarm clock with cartoon eyes and legs (no visible text or symbols)4
•Non-rechargeable batteries are not to be recharged.
- Exhausted batteries are to be removed from the toy.
•The supply terminals are not to be short-circuited.
- Do not mix old and new batteries.
- Do not mix alkaline, standard (carbon-zinc) or rechargeable (nickel-cadmium) batteries.
- Do not use rechargeable batteries.
- Only batteries of the same of equivalent type as recommended are to be used.
- Batteries are to be inserted with the correct polarity.
- Replacement of batteries must be done by adult.
- Rechargeable batteries are to be removed from the toy before being charged
•Rechargeable batteries are only to be charged under adult supervision
- To remove a disc from its storage case, press down on the centre of the case and lift the disc out, holding it carefully by the edges.
- Fingerprints and dust should be carefully wiped off the disc's recorded surface with a soft cloth. Unlike conventional records, compact discs have no grooves to collect dust and microscopic debris so gently wiping with a soft cloth should remove most particles. Wipe in a straight line from the inside to the outside of the disc. Small dust particles and light stains will have absolutely no effect on reproduction quality.
- Never use chemicals such as record sprays, antistatic sprays, benzine, or thinners to clean compact discs. These chemicals can irreparably damage the disc's surface.
- Discs should be returned to their cases after use. This avoids serious scratches that could cause the Laser pickup to skip.
- Do not expose discs to direct sunlight, high humidity, or high temperatures for extended periods. Long exposure to high temperatures can warp the disc.
- Do not stick paper or write anything with a ballpoint pen on the label side of the disc.
Playing a CD
- Open the CD door by pressing OPEN.

natural_image
Hand placing a white plastic bag into a small pot (no text or symbols visible)English En
s5
- Insert an audio CD with the printed side facing out.

natural_image
Close-up of a white plastic bag with handles and legs, no visible text or symbols- Close the CD door.
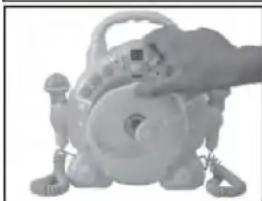
natural_image
White plastic mechanical device with a handle and base mount (no visible text or symbols)- Press PLAY/PAUSE to start playing.
- To pause playing press PLAY/PAUSE, press PLAY/PAUSE again to resume playing.
•To stop CD playing, press STOP
Selecting a different track
Press SKIP/SEARCH once or repeatedly until the desired track number appears in the LED DISPLAY
Finding a section I interval within a track
- Press and hold down SKIP/SEARCH.
- When you recognize the passage / interval you want, release SKIP/SEARCH in order to continue playing.
Repeat playing
- To repeat the current track, press REPEAT once and the REPEAT INDICATOR will flash.
- To repeat the entire CD/program, press REPEAT again and the REPEAT INDICATOR will light up. To return to normal playing, press REPEAT again.
Programming track numbers
Program in the stop status to select and store your CD tracks in the desired sequence. Up to 20 tracks can be stored in the memory.
6
- Press PROGRAM to start.
- Use the SKIP/SEARCH to select your desired track number.
- Press PROGRAM to store.
- Repeat the above two steps to select and store all desired tracks.
- Press PLAY/PAUSE to start playing your CD program.
Reviewing the program
In the stop status, press PROGRAM repeatedly, the LED DISPLAY shows the track numbers you stored in sequence.
Erasing a program
- You can erase the program by pressing STOP once in the program status or by pressing STOP twice in the program playing status.
Use of Microphone with / without CD playing
- Switch microphones to the ON position.
- Adjust the volume to the desired level by tuning MIC VOLUME.
- Speak or sing in normal voice about 1 inch from microphone.
Using headphones (not included)
- Connect the headphones into the HEADPHONES jack on the CD player.
- Adjust the volume to the desired level by tuning POWER ON/OFF / MUSIC VOLUME.
CAUTION
- Abnormal operation may occur when the batteries become weak (The symbol "no" will be found in the LED display). For normal operation, please always use new batteries and replace the exhausted batteries immediately.
- Feed back may occur when the microphones placed too close to the player. It is necessary to move the microphones appropriately away from the player body.
- Old and new or different type of batteries should not be used in combination.
- Remove batteries if they are exhausted or if the set will not be used for a long time.
- Do not touch the lens of the CD player.
- Do not attempt to disassemble the CD player as laser rays from the optical pickup are dangerous to the eyes.
- Do not expose the set, batteries of CDs to humidity, rain, sand or overheating.
- Do not play with your earphones at a high volume.
• Always press STOP button to make sure the unit is completely stopped before
turning "POWER ON/OFF", anti-clockwise to turn off. - Do not attempt to open the CD door during CD playing.
•Always keep the CD door closed to prevent the lens from contamination by dust.
English En
sh
- Never write on a CD or attach any stickers on it.
- Do not use and irregular or seriously scratched CD.
•To take a CD out of its box, press the center spindle while lifting the CD. - Always pick up the CD by the edge and return the CD to its box after use to avoid scratching and dust.
- To clean a CD, wipe in a straight line from the center towards the edge using a soft Lint-free cloth. Do not use any cleaning detergent.
- Sudden changes in the surrounding temperature can cause condensing steam on the lens of CD player. Playing a CD is then not possible. Do not attempt to clean the lens but leave the set in a warm environment until the moisture evaporates.

SPECIFICATIONS
Power Supply
Batteries: 6 x 1,5V "C" UM2/R14
General
Headphones: 3.5mm stereo jack plug, 32 Ohm
Output Power 1 x 1 Watt
CD Player
Pick Up: 3-Beam. Semiconductor Laser
Encoding: 16-Bit Linear
Note: Specifications and the design are subject to possible modifications without notice due to improvement.
8


Correct Disposal of This Product
(Waste Electrical & Electronic Equipment)
This marking shown on the product or its literature, indicates that it should not be disposed with other household wastes at the end of its working life. To prevent possible harm to the environment or human health from uncontrolled waste disposal, please separate this from other types of wastes and recycle it responsibly to promote the sustainable reuse of material resources.
Household users should contact either the retailer where they purchased this product, or their local government office, for details of where and how they can take this item for environmentally safe recycling.
Business users should contact their supplier and check the terms and conditions of the purchase contract. This product should not be mixed with other commercial wastes for disposal.
SICHERHEITSHINWEISE

natural_image
White alarm clock with cartoon eyes and a hand adjusting its handle (no visible text or symbols)natural_image
Hand holding a white plastic pump device with handles and legs (no visible text or symbols)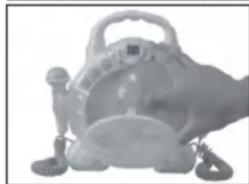
natural_image
Monochrome image of a white plastic bag with a handle and small figurine, no visible text or symbols.natural_image
Illustration of a hand holding a small white object resembling a stylized animal or device (no text or symbols visible)
- English En
- sh
- WARNINGS
- Playability of self-made CDs on Roadstar CD drive mechanisms.
- 2
- KID-55CD
- INSTRUCTION MANUAL
- LOCATION OF CONTROLS
- CONNECTING TO POWER (AC Power adapter not included)
- sb
- POWER SUPPLY
- Using AC adapter (not included) Note: The transformer is not a toy.
- CAUTION:
- Battery Operation
- 4
- Playing a CD
- s5
- Selecting a different track
- Finding a section I interval within a track
- Repeat playing
- Programming track numbers
- 6
- Reviewing the program
- Erasing a program
- Use of Microphone with / without CD playing
- Using headphones (not included)
- CAUTION
- SPECIFICATIONS
- General
- CD Player
- 8
- Correct Disposal of This Product
- (Waste Electrical & Electronic Equipment)
- SICHERHEITSHINWEISE
Brand : ROADSTAR
Model : KID-55CD
Category : CD Player