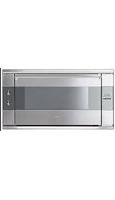
USER MANUAL SE20XMFR8 SMEG
1 INSTRUCTIONS FOR USE.... 32
2 SAFETY PRECAUTIONS.... 34
3 INSTRUCTIONS FOR SAFETY AND USE 36
4 INSTALLATION 37
5 DESCRIPTION OF CONTROLS 39
6 USING THE OVEN 45
7 AVAILABLE ACCESSORIES 47
8 COOKING HINTS 48
9 CLEANING AND MAINTENANCE 54
10 EXTRAORDINARY MAINTENANCE 56

INSTRUCTIONS FOR THE USER: these contain user advice, the description of the controls and the correct procedures for cleaning and maintenance of the appliance.

INSTRUCTIONS FOR THE INSTALLER: these are intended for the qualified technician who must install the appliance, set it functioning and carry out an inspection test.

Further information about the products can be found at www.smeg.com
1. INSTRUCTIONS FOR USE

This manual is an integral part of the appliance and must therefore be kept in its entirety and in an accessible place for the whole working life of the appliance.
We recommend reading this manual and all the information it contains carefully before using the appliance. Installation must be carried out by qualified personnel in accordance with the standards in force. This appliance is intended for domestic use and conforms to the EEC directives currently in force. The appliance has been built to carry out the following function: cooking food; all other uses are considered unsuitable.
The manufacturer declines all responsibility for uses other than those indicated.
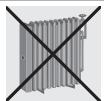
This appliance has been manufactured to cook food, do not use the appliance to heat rooms.

This appliance is marked according to European directive 2002/96/EC on Waste Electrical and Electronic Equipment (WEEE).
This directive defines the standards for the collection and recycling of waste electrical and electronic equipment applicable throughout the European union.

Do not obstruct ventilation openings and heat dispersal slots.

Do not rest any weight or sit on the open door of the appliance.

The identification plate bearing the technical data, serial number and brand name is visibly positioned on the appliance.
Do not remove this plate for any reason.
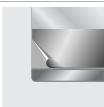
Before the appliance is put into operation, all protective films applied inside or outside must be removed.

Take care that no objects are stuck in the door of the oven.
Instructions for safety and use

The appliance becomes very hot during use. Suitable heat-proof gloves should be worn for all operations.

Do not use metallic sponges or sharp scrapers: they will damage the surface.
Use ordinary non-abrasive products, with the aid of wooden or plastic utensils if necessary. Rinse thoroughly and dry with a soft cloth or chamois leather.
Do not allow residues of sugary foods (such as jam) to set inside the oven. If left to set for too long, they might damage the enamel lining of the oven.
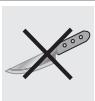


Do not use plastic kitchenware or containers. The high temperatures inside the oven could melt the plastic, damaging the appliance.

Do not use sealed tins or containers in the appliance. Overpressure may occur inside the containers during cooking, creating a danger of explosion.

Do not leave the appliance unattended during cooking operations where fats or oils could be released.
Fats and oils may catch fire.

Do not cover the bottom of the oven with aluminium or tin foil sheets during cooking and do not place pans or trays on it to avoid damage to the enamelled surface.
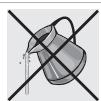
If the surfaces are still very hot during cooking, do not pour water directly onto the trays. The steam could cause severe burns and damage enamelled surfaces.

All cooking operations must take place with the door closed.
2. SAFETY PRECAUTIONS
Consult the installation instructions for safety standards on electrical or gas appliances and for ventilation functions.
In your interests and for your safety the law requires that the installation and servicing of all electrical and gas appliances be carried out by qualified personnel in accordance with the standards in force.
Our approved installers guarantee a satisfactory job.
Gas or electrical appliances must always be uninstalled by suitably skilled people.

Before connecting the appliance to the power grid, check the data on the plate against the data for the grid itself.

Before carrying out installation/maintenance work, make sure that the appliance is disconnected from the power grid.

When linking up to the power supply network by plug:
The plug to be connected to the power supply cable and its socket must be of the same type and conform to the standards in force.
The socket must be accessible after the appliance has been built in. Never disconnect the plug by pulling on the cable.

If the power supply cable is damaged, contact the technical support service immediately and they will replace it.

The appliance must be connected to earth in compliance with electrical system safety standards.

Immediately after installation, carry out a quick test on the appliance following the instructions provided later in this manual. Should the appliance not function, disconnect it from the power supply and call the nearest technical assistance centre.
Never attempt to repair the appliance.

Do not use or leave flammable materials near the appliance or in the food warming compartment.

The appliance becomes very hot during use. Take care never to touch the heating elements inside the oven.
Instructions for safety and use

This appliance must not be used by people (including children) of reduced physical and mental capacity, or lacking in experience in the use of electrical appliances, unless they are supervised or instructed by adults who are responsible for their safety.

Do not let children go near the appliance when it is in operation or play with it at any time.

Do not insert pointed metal objects (cutlery or utensils) into the slots in the appliance.

If the appliance is installed on caravans or boats, it must not be used to heat rooms.

Do not use steam jets for cleaning the appliance.
The steam could reach the electronics, damaging them and causing short-circuits.

Do not modify this appliance.

Do not spray any spray products near the household appliance while it is in operation.
Do not use spray products while the product is still hot.

The manufacturer declines all responsibility for damage to persons or things caused by non-observance of the above prescriptions or by interference with any part of the appliance or by the use of non-original spare parts.
3. INSTRUCTIONS FOR SAFETY AND USE
3.1 Our environmental care

Pursuant to Directives 2002/95/EC, 2002/96/EC, 2003/108/EC, relating to the reduction of the use of hazardous substances in electrical and electronic appliances, as well as to the disposal of refuse, the crossed out bin symbol on the appliance indicates that the product, at the end of its useful life, must be collected separately from other refuse. Therefore, the user must consign the product that has reached the end of its working life to the appropriate selective collection centres for electrical and electronic refuse, or deliver it back to the retailer when purchasing an equivalent product, on a one for one basis. Adequate selective collection for the subsequent forwarding of the decommissioned product to recycling, treatment and ecologically compatible disposal contributes to avoiding possible negative effects on the environment and on health and promotes the recycling of the materials of which the appliance consists. The illicit disposal of the product by the user results in the application of administrative sanctions.
The product does not contain substances in quantities sufficient to be considered hazardous to health and the environment, in accordance with current European directives.
3.2 Your environmental care
Our product's packaging is made of non-polluting materials, therefore compatible with the environment and recyclable. Please help by disposing of the packaging correctly. You can obtain the addresses of collection, recycling and disposal centres from your retailer or from the competent local organisations.

Do not discard the packaging or any part of it, or leave it unattended. It can constitute a suffocation hazard for children, especially the plastic bags.
Your old appliance also needs to be disposed of correctly.
Important: hand over your appliance to the local agency authorised for the collection of household appliances no longer in use. Correct disposal enables intelligent recovery of valuable materials.
Before disposing of your appliance it is important to remove doors and leave shelves in the same position as for use, to ensure that children cannot accidentally become trapped inside during play. It is also necessary to cut the connecting cable to the power supply network, removing it along with the plug.
4. INSTALLATION
4.1 Electrical connection

Make sure the voltage and the cross-section of the power cord match the specifications indicated on the identification plate positioned on the frame of the oven door. Do not remove this plate for any reason.

The appliance must be earthed in compliance with electrical system safety regulations.

If a plug and socket connection is being used, make sure that the plug and socket are compatible. Avoid use of adapters and shunts as these could cause overheating and risk of burns.

If a fixed connection is being used, fit the power line with an omnipolar circuit breaker with a contact opening gap equal to or greater than 3 mm, in an easily accessible position close to the appliance.

For operation on 220-240V\~: use a H05RR-F / H05V2V2-F type three-core cable (3 x 1.5 mm²).
The cable end to be connected to the appliance must be provided with a ground wire (yellow-green) at least 20 mm longer.


The manufacturer declines all responsibility for damage to persons or things caused by non-observance of the above prescriptions or by interference with any part of the appliance.
4.2 Positioning the oven
The oven is designed for mounting into any piece of furniture as long as it is heat-resistant. Proceed according to the dimensions shown in Figures 1 and 2.

Fasten using the 4 screws at the corners “C” of the oven door frame, after having removed the side panels fastened by screws “A” and by supports “B” as shown in figure 3. To refit the side panels, ensure the pins inside them are correctly fitted into the supports “B”, then tighten the screws “A”.


Never use the oven door to lever the oven into place when fitting.
Avoid exerting too much pressure on the oven door when open.

5. DESCRIPTION OF CONTROLS
5.1 Front panel
All the oven controls are grouped together on the front panel.

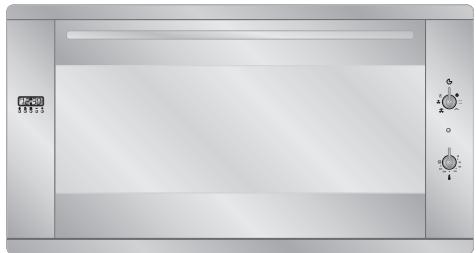

FUNCTION SELECTOR KNOB
Turn the knob in either direction to select a function from the following:


FUNCTIONS (on some models only)

NO FUNCTION SELECTED
UPPER AND LOWER HEATING ELEMENTS
LOWER HEATING ELEMENT
WIDE GRILL ELEMENT

GRILL ELEMENT + VENTILATION
UPPER AND LOWER HEATING
ELEMENTS + VENTILATION
DEFROSTING (NO HEATING ELEMENT ENABLED)
Instructions for the user
FUNCTIONS (on some models only)

NO FUNCTION SELECTED

GRILL ELEMENT + VENTILATION

UPPER AND LOWER HEATING ELEMENTS

UPPER AND LOWER HEATING
ELEMENTS + VENTILATION

LOWER HEATING ELEMENT

DEFROSTING (NO HEATING ELEMENT ENABLED)

WIDE GRILL ELEMENT
FUNCTIONS (on some models only)

NO FUNCTION SELECTED

CIRCULAR HEATING ELEMENT + VENTILATION + LOWER HEATING ELEMENT

UPPER AND LOWER HEATING ELEMENTS

CIRCULAR HEATING ELEMENT + VENTILATION

WIDE GRILL ELEMENT

UPPER AND LOWER HEATING ELEMENTS + VENTILATION

SMALL GRILL ELEMENT

LOWER HEATING ELEMENT + VENTILATION

GRILL ELEMENT + VENTILATION
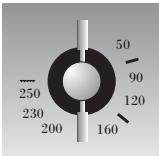
THERMOSTAT KNOB
The cooking temperature is selected by turning the knob clockwise to the required setting, between 50° C and 250° C.


THERMOSTAT LIGHT
The indicator light comes on to indicate that the oven is heating up. When it goes out, the preset heating temperature has been reached.
When the light flashes regularly, it means that the temperature inside the oven is kept constantly on the set level.

5.2 Electronic programmer (on some models only)

LIST OF FUNCTIONS

TIMER KEY
COOKING DURATION KEY
END OF COOKING KEY
VALUE DECREASE KEY
VALUE INCREASE KEY
5.2.1 Setting the time
When the oven is used for the first time, or after an electricity supply failure, the display flashes at regular intervals, showing 0.00. Press the 📄 and 🔒 keys together, and at the same time press the value adjustment keys + or —: this will increase or decrease the setting by one minute for each pressure.

Before each programmer setting, activate the required function and temperature.
5.2.2 Semi-automatic cooking
This function only switches the oven off automatically at the end of the cooking time.
Press the 🔊 key and the display will light up showing the figures 0:00; keep it pressed, and at the same time use the value modification keys + or — to set the cooking duration.
When the key is released, the count of the programmed cooking duration will start and the display will show the current time together with the symbols A and .
5.2.3 Automatic cooking
This function switches the oven on and off in fully automatic mode.
Press the 🚗 key and the display will light up showing the figures 0:00; keep it pressed, and at the same time use the value modification keys + or — to set the cooking duration.
Press the ⚫ key and the display will show the sum of the current time plus the cooking duration: keep it pressed, and at the same time use the value modification keys + or — to adjust the end of cooking time.
When the ⚪ key is released, the programmed count will start and the display will show the current time together with the symbols A and 📄.

After making the setting, press the 📄 key to view the remaining cooking time; press the 🌐 key to view the cooking end time.
The logic prevents the setting of incompatible values (e.g. the programmer will not accept a cooking end time with a duration which is too long for its value).
5.2.4 End of cooking
At the end of cooking the oven will switch off automatically and simultaneously a buzzer will start to sound intermittently. After the buzzer has been deactivated, the display will return to show the current time together with the 🎯 symbol to indicate that the oven has returned to manual use mode.
5.2.5 Adjusting the buzzer volume
The buzzer volume can be varied (3 settings) while it is in operation by pressing —.
5.2.6 Stopping the buzzer
The buzzer stops automatically after seven minutes. It can be stopped manually by pressing the 🎯 and 🌘 keys together.
5.2.7 Timer
The programmer can also be used as an ordinary timer. Press the 🔒 key and the display will show the figures 0:00; keep it pressed and simultaneously press the value modification keys + or —. When the 🔒 key is released, the programmed count will start and the display will show the current time and the symbol 🔒.

After the setting, to display the time left press the ⏰ key.
In timer mode, the oven operation will not be cut out at the end of the set time.
5.2.8 Deleting the set data
With the program set, hold down the key of the function to be deleted, while at the same time pressing the value modification keys + or — the value 0:00 can be reached. The programmer will interpret deletion of the duration as the end of cooking.
5.2.9 Modifying the set data
The set cooking data can be modified at any time by holding down the key of the function for modification and at the same time pressing the value modification keys + or - .
5.3 Clock + cooking end timer (on some models only)

Allows to select manual cooking and the timer or to set the cooking time.

Knob A must always be turned CLOCKWISE.

Enable the required function and cooking temperature before setting the cooking time.
5.3.1 Setting the time
To set the correct time, PULL OUT knob A and turn it clockwise.
5.3.2 Manual cooking
For manual cooking, turn knob A clockwise until pointer B is aligned with 📊.
5.3.3 Timed cooking
To set the cooking time, turn knob A clockwise to the required length of time (maximum 180 minutes).
5.3.4 End of cooking
The oven will switch off automatically and simultaneously a buzzer will start to sound.
5.3.5 Stopping the buzzer
To switch off the buzzer, turn knob A clockwise until pointer B is aligned with ☒.
6. USING THE OVEN

Before operating the oven, make sure the timer is on “Manual cooking”. (See paragraph 3.3.2.)
6.1 Warnings and general advice
Before using the oven for the first time, pre-heat it to maximum temperature (250°C) for long enough to burn off any oily residues left by the manufacturing process, which might contaminate foods with unpleasant odours.

During cooking, do not cover the bottom of the oven with aluminium or tin foil and do not place pans or oven trays on it as this may damage the enamel coating. If you wish to use greaseproof paper, position it so that it does not interfere with the hot air circulation inside the oven.

To prevent any steam in the oven from causing problems, open the door in two stages: keep it half open (5 cm approx.) for 4-5 seconds and then fully open. If you need to access the food, always leave the door open for as short a time as possible to prevent the temperature in the oven from falling and ruining the food.

6.2 Cooling system
The oven is equipped with a cooling system which automatically comes on a few minutes after the oven is turned on.
The fans cause a steady outflow of air from above the door which may continue for a brief period of time even after the oven has been turned off.

6.3 Inside light
To turn on the oven light in models with static oven, turn the thermostat knob clockwise to the first setting aligned with the lamp symbol (☀️). The light will remain on throughout the entire oven operation.
7. AVAILABLE ACCESSORIES
The oven features 4 runners for positioning trays and racks at different heights.


Some models are not provided with all accessories.
Rack: useful for holding cooking containers.
Tray rack: for placing on top of a tray for cooking foods which may drip.
Oven tray: useful for collecting fat from foods placed on the rack above.
Baking tray: useful for baking cakes, pizza and oven desserts.
Rotisserie rod: useful for cooking chicken, sausages and all foods which require uniform cooking over their entire surface.
Main oven rotisserie frame: to be fitted into the holes provided in the oven tray.


Accessories available on request
Original accessories may be ordered from any Authorised Service Centre.
Instructions for the user
8. COOKING HINTS

We recommend preheating the oven using a fan-assisted function at 30/40°C above the cooking temperature. This considerably shortens cooking times and reduces power consumption, as well as giving better cooking results.

Keep the oven door closed during cooking.
8.1 Traditional cooking

FUNCTION SELECTOR

THERMOSTAT
5 0 ÷ 2 5 0 ^ ° C

This traditional cooking method, in which heat comes from above and below, is suitable for cooking food on a single shelf.
You have to pre-heat the oven until the set temperature is reached. Place the food in the oven only after the thermostat indicator light has turned off. Put frozen meat in immediately, without waiting for it to defrost. The only precaution you need to take is to select a temperature about 20° C lower and a cooking time about 1/4 longer than you would for fresh meat.
8.2 Hot-air cooking


This system is suitable for cooking on several shelves, including different types of food (fish, meat etc.), without flavours and odours mingling. The air circulation in the oven ensures uniform heating.

Multiple cooking is possible as long as the different types of food require the same cooking temperature.
8.3 Grill cooking


Permits rapid browning of foods. For short-term cooking of small quantities, place the rack in the fourth runner from the bottom. For long-term cooking and grills, put the rack in the lowest runner in accordance with the size of the pieces.
Instructions for the user
8.4 Hot-air grilling
|  |
| FUNCTION SELECTOR |  |
| THERMOSTAT | 200 |

Ensures uniform heating with greater heat penetration into the food. Food will be lightly browned on the outside and remain soft inside.
Keep the oven door closed during cooking. Heating up time must not exceed 60 minutes.
8.5 Defrosting
 |
| FUNCTION SELECTOR |  |
| THERMOSTAT IN POSITION | 0 |

The movement of air ensured by the fan causes the food to defrost faster. The air circulating inside the oven is at room temperature.

Defrosting at room temperature has the advantage of not altering the taste and appearance of the food.
8.6 Rotisserie cooking

FUNCTION SELECTOR


THERMOSTAT IN POSITION
200
Prepare the rotisserie rod with the food, tightening the screws A of the prongs. Fit the frames B into the holes of the drip tray F. Position the rotisserie rod so that the pulley E is still in the guides on the cavity of frame B on the right side. Insert the drip tray into the oven as far as it will go until the tip of the rod is in line with the hole C. Now rock the frames B to insert the tip of the rod into the drive connection C of the rotisserie motor on the side of the oven. Pour a little water in the drip tray to prevent smoke from forming.
Keep the oven door closed during cooking. Heating up time must not exceed 60 minutes.

Regular flashing of the thermostat indicator light during cooking is normal and indicates that the temperature is being maintained constant inside the oven.



CAUTION: the frames B must be fitted as shown in the figure to the side.

8.7 Table of recommended cooking settings
Cooking times, especially for meat, vary according to the thickness, quality of the food and to consumer taste. Cooking times are given for a pre-heated oven.
TRADITIONAL COOKING


| RUNNER POSITIONFROM BOTTOM | TEMPERATURE(°C) | TIMEIN MINUTES (*) |
| FIRST COURSES |
| OVEN-BAKED PASTA | 2 | 200 | 30-35 |
| MEATS |
| ROAST VEAL | 2 | 200 | 60-65 |
| ROAST PORK | 2 | 225 | 70-75 |
| CHICKEN | 2 | 200 | 60-65 |
| DUCK | 2 | 200 | 120-125 |
| RABBIT | 2 | 200 | 90-95 |
| FISH | 2 | 200 | ACCORDING TODIMENSIONS |
| PIZZA | 2 | 250 | 15-20 |
| DESSERTS |
| MERINGUES | 2 | 125 | 55-60 |
| BISCUITS | 2 | 200 | 20-25 |
| SHORT PASTRY | 1 | 200 | 25-30 |
| RING CAKE | 2 | 175 | 35-45 |
| FRUIT CAKE | 1 | 200 | 30-35 |
GRILLING


| RUNNER POSITION FROM BOTTOM | TIME IN MINUTES |
| | FOR EACH SURFACE |
| TOAST | 3 | 5 |
| CHICKEN | 3 | 30 |
| FISH | 3 | 18 |
| TOMATOES OR COURGETTES | 3 | 8 |
HOT-AIR COOKING


| RUNNER POSITIONFROM BOTTOM | TEMPERATURE(°C) | TIMEIN MINUTES (*) |
| FIRST COURSES |
| OVEN-BAKED PASTA | 2 | 175 | 30-35 |
| MEATS |
| ROAST VEAL | 2 | 175 | 60-65 |
| ROAST PORK | 2 | 200 | 70-75 |
| CHICKEN | 2 | 200 | 60-65 |
| DUCK | 2 | 175 | 120-125 |
| RABBIT | 2 | 175 | 90-95 |
| FISH | 2 | 175 | ACCORDING TODIMENSIONS |
| PIZZA | 2 | 225 | 15-20 |
| DESSERTS |
| MERINGUES | 2 | 125 | 55-60 |
| BISCUITS | 2 | 175 | 20-25 |
| SHORT PASTRY | 1 | 175 | 25-30 |
| RING CAKE | 2 | 175 | 35-45 |
| FRUIT CAKE | 1 | 175 | 30-35 |
9. CLEANING AND MAINTENANCE

Do not use a steam jet for cleaning the appliance.

Before any intervention that requires access to live parts, disconnect the appliance from the power supply.
9.1 Cleaning stainless steel

To keep stainless steel in good condition it should be cleaned regularly after use. Let it cool first.
9.1.1 Ordinary daily cleaning
To clean and preserve stainless steel surfaces, always use only specific products that do not contain abrasives or chlorine-based acids.
How to use: pour the product onto a damp cloth and wipe the surface, rinse thoroughly and dry with a soft cloth or chamois leather.
9.1.2 Food stains or residues
Do not use metallic sponges or sharp scrapers: they will damage the surface.
Use ordinary non-abrasive products for steel, with the aid of wooden or plastic utensils if necessary.
Rinse thoroughly and dry with a soft cloth or chamois leather.
Do not allow residues of sugary foods (such as jam) to set inside the oven. If left to set for too long, they might damage the enamel lining of the oven.

9.2 Cleaning the oven

For the best oven upkeep, clean it regularly after having allowed it to cool. Take out all removable parts.

- Clean the oven rack and side runners with warm water and non-abrasive detergent. Rinse and dry.
- For easier cleaning, the door can be removed (see point 8.2)
- The oven should be operated at the maximum heat setting for 15/20 minutes after use of specific products, to burn off the residues left inside the oven.
9.3 Door glass
The glass in the door should always be kept thoroughly clean. Use absorbent kitchen roll; in case of stubborn dirt remove with a damp sponge and an ordinary detergent.

Do not use metallic sponges or sharp scrapers: they will damage the surface.
10. EXTRAORDINARY MAINTENANCE
The oven may require extraordinary maintenance or replacement of parts subject to wear such as seals, bulbs, and so on. The following instructions describe how to carry out these minor maintenance operations.

Before any intervention that requires access to live parts, disconnect the appliance from the power supply.
10.1 Replacing the light bulb
Remove the bulb protector A by turning it anti-clockwise and change bulb B (in the 8-function model with front glass panel change the halogen bulb C) with a similar one. Re-fit bulb protector A.


Use only oven bulbs (T 300°C).
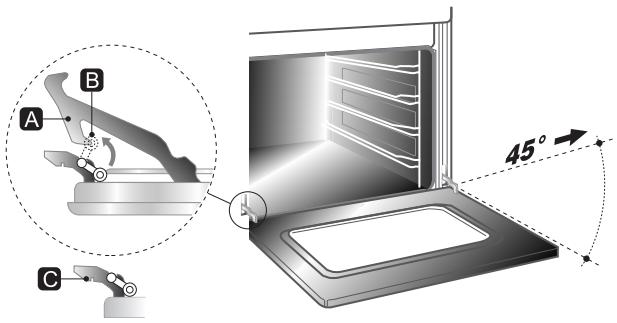
10.2 Removing the door
Lift the levers B until they touch the hinges A and take hold of the two sides of the doors with both hands close to the hinges. Raise the door to an angle of about 45° and remove it. To reassemble, fit the hinges A into their grooves, then lower the door into place, ensuring that it remains fitted into the grooves C, then release the levers B.
10.3 Oven door seals
To permit thorough cleaning of the oven, the seal may be removed. Before removing the seal, take off the oven door as described above. Once the door has been taken off, lift the tabs at the corners as shown in the figure.
When cleaning is completed replace the seal, holding the longest side horizontally, and insert the tabs into their respective holes, starting with the top ones.