
Optigrill Start - Electric grill OBH NORDICA - Free user manual and instructions
Find the device manual for free Optigrill Start OBH NORDICA in PDF.


| Product Type | Electric Contact Grill |
| Model | GO7P08S0 |
| Brand | OBH Nordica |
| Control Panel | Digital display with On/Off, OK/START, - and + buttons |
| Automatic Cooking Programs | 3 programs: Red Meat, Burger, Chicken with selectable doneness levels (Rare, Medium Well, Well Done) |
| Manual Mode | Adjustable temperature from 120°C to 270°C in 10°C increments, with timer |
| Cooking Plates | Removable, non-stick, dishwasher safe |
| Drip Tray | Removable, dishwasher safe |
| Keep Warm Function | Automatic activation after Well Done level reached |
| Preheating | Required before each cooking cycle; indicated by flashing thermometer and lines |
| Safety Features | Auto shut-off if left open or idle; overheat protection (error codes E01-E05) |
| Max Food Thickness | 4 cm (1.5 inches) |
| Cleaning | Plates and drip tray dishwasher safe; body wipe with damp cloth; no abrasive cleaners |
| Certifications | CE marked |
| Warranty | Information available at www.obhnordica.com |
Frequently Asked Questions - Optigrill Start OBH NORDICA
User questions about Optigrill Start OBH NORDICA
0 question about this device. Answer the ones you know or ask your own.
Ask a new question about this device
Download the instructions for your Electric grill in PDF format for free! Find your manual Optigrill Start - OBH NORDICA and take your electronic device back in hand. On this page are published all the documents necessary for the use of your device. Optigrill Start by OBH NORDICA.
USER MANUAL Optigrill Start OBH NORDICA
OptiGrill Start
Intelligent Contact Grill
Bruksanvisning - Svenska......sida 04 - 16
natural_image
Black and white photo of a standard electric grill grater with a digital display (no visible text or symbols)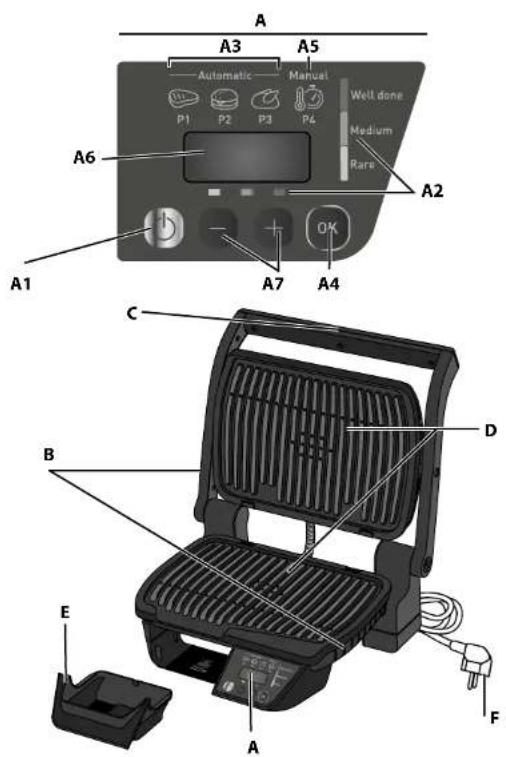
TACK FÖR ATT DU HAR KÖPT DEN HÄR APPARATEN. LÄS IGENOM BROSCHYREN MED SÄKERHETSINFORMATION OCH BRUKSANVISNING INNAN DU ANVÄNDER PRODUKTEN FÖR FÖRSTA GÅNGEN.
Beskrivning
A Kontrollpanel B Bas
A1 På-/av-knapp C Handtag
| Program | Tillagningsnivå | ||
| Blodig Medium well Well done | |||
| Rött kött | X X X | ||
| Burgare | X X X | ||
| Fågel | X | ||
OBH Nordica TYPE GO7P08S0
KLARG∅RING AF APPARATET
1 Opstilling

1

2

OBH Nordica TYPE GO7P08S0

R∅DT KJ∅TT HAMBURGER KYLLING
OBH Nordica TYPE GO7P08S0
CE

The Ground Truth image displays a single, solid horizontal line. According to Rule 2 (UNDERSCORE & LINE RULES), this is a stylistic or background line, not a placeholder underscore. Therefore, the OCR result must ignore it and output nothing or only meaningful text. The provided OCR content is "____", which consists of four underscores. This is an incorrect interpretation of the line as a placeholder, violating the rule that stylistic lines must be ignored. The OCR has hallucinated underscores where none should exist based on the GT's visual context. Hence, the OCR result is inconsistent with the Ground Truth.
OBH Nordica TYPE GO7P08S0

THANK YOU FOR BUYING THIS APPLIANCE. PLEASE READ THE "USE & SAFETY INSTRUCTIONS" BOOKLET CAREFULLY BEFORE FIRST USE.
Description
A Control panel B Body
A1 On/off button C Handle
A2 For automatic programs: cooking level D Cooking plates
A3 3 Automatic cooking programs E Drip tray
A4 OK/START F Power cord
A5 Manual mode: T° and time adjustable
A6 Monitoring screen
A7 - and + buttons
Guide of automatic cooking programs

RED MEAT BURGER CHICKEN
Select this
cooking
program if you
want to cook red meat.
Select this
cooking
program if you
want to cook burgers.

Select this
cooking
program if you
want to cook poultry.
Yellow : Rare Orange : Medium well Red : Well done
Guide of manual cooking programs

Manual mode:
Traditional grill for manual operation with different
temperature settings (from 120°C to 270°C) and time.
PREPARING THE APPLIANCE
1 Setting

1
2

1 Remove all packaging materials, stickers and accessories from the inside and the outside of the appliance.
2 Before using for the first time, thoroughly clean the plates with warm water and a little dishwashing liquid, rinse and dry thoroughly.
3-4 Position the removable drip tray at the front of the appliance and push it completely until "clip"
- Position the up and bottom plates until "clip"

3

4
2 Preparation

5

6

7

8

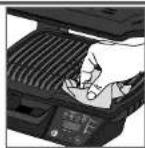
5 For the best results you may wipe the cooking plates using a paper towel dipped in a little cooking oil, to improve the non-stick release.
Ensure that the bottom cooking plate and the upper cooking plate are correctly positioned in the product before the pre-heating phase begins.
6 Remove any surplus oil using a clean kitchen paper towel.
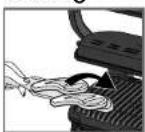
7 Connect the appliance to an outlet. (note the cord should be fully unwound).
8 Press the On/Off button.
3a - AUTOMATIC cooking with 3 automatic programs
Automatic cooking - select a program and preheat before cooking:

9 Ensure there is no food between the plates.
3 automatic cooking programs:

Select this cooking program if you want to cook red meat.

Select this cooking program if you want to cook burgers.

Select this cooking program if you want to cook poultry.
If you are uncertain about what cooking mode to use for other foods because it is not listed above, please refer to the "Cooking table for out of program food".

10
11
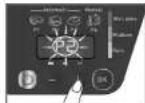
On pictograms, the example taken is « P2 ».

12
13 14
10 Press ON/OFF.
11 Press the "-" and "+" buttons until you reach the desired program (P1, P2, P3). Ensure that there is no food inside the grill.
12 When you have selected the wishing one then press the × OK/START × button.
NB: if you have selected the wrong program, return to stage 8.
13 The selected program stays displayed at the top of the screen.
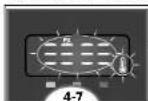
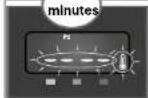
The appliance begins to preheat. The preheating phase is indicating on the screen by thermometer flashes, and by 3 lines moving up and down.
You must wait until the end of preheating, before opening the grill and adding food to it. Wait for 4-7 minutes.
14 When the pre-heating is complete, a melody is displayed with the follow screen: the
thermometer stop flashing. The thermometer light stays on during all the cooking process to indicate that the appliance is heating and hot.
Comments: At the end of pre-heating, if the appliance remains closed, the safety system will turn off the appliance.
Cooking
15 16



19
20


21

15-16 After pre-heating, the appliance is ready for use. Open the grill and place the food on the cooking plate. Close the appliance to start the cooking cycle.
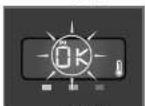
17 Note: for thinly-cut food, after close the device, the button « OK » is blinking. Press « OK » to enable the appliance to recognize the food to be cooked and launch the cooking program.
Comments: if the appliance remains open for too long, the safety system will turn off the appliance automatically.
18 The appliance automatically adjusts the cooking cycle (time and temperature) according to the food thickness and quantity.
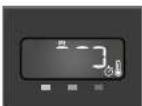
19 The display shows the cooking time required until the desired cooking level. The indicator "Rare" is flashing to indicate that the rare cooking level is in progress.
Note: To see the time of cooking related to every cooking level, navigate with the "-" and "+" bouttons
Please note, especially on meat, it is normal that cooking result vary depending on type, quality and origin of food.
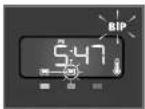
20 For each reached level of cooking, a beep is heard and the indicator becomes lighted fixed once the level of cooking is reached (for the best results do not open or move your food during the cooking process).
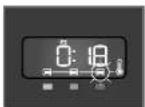
A beep sound with several long beeps and counting time at 0:00 indicates the desired level of cooking you have chosen is reached.
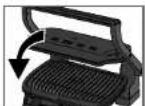
21 If food is left in the grill, the time is continued until it reaches the well-cooked level. The light cooking indicator blinks until it is reached and the indicator "Remove the food" displayed
visible in the left of the screen.
Open the appliance and remove food when the desired cooking level is reached. The wall done cooking level indicator becomes fixed and you hear a bip once it is reached,
22-23 Close the grill. The control panel changes to "Program selection" with P1 blinking. Restart to n°9 for a new cooking cycle in automatic mode.
Comment: the security system will turn off automatically if no program selection is made.
Comments

24 25

27

24 - 25 - 26 If you want to cook food to different personal tastes, open the grill and remove the food when it has reached the desired level and then close the grill and continue cooking the other food. The program will continue its cooking cycle until it reaches the 'well done' level.
27 Keep warm function
The appliance will automatically go on the keep warm setting after having reached the "well done" level. If food is left on the grill it will continue to cook, while the cooking plates are cooling.
Comment: the safety system will turn the appliance off automatically after a certain amount of time.

26

Second cooking
Cooking more food
If you want to cook a second batch of food, please pre-heat the appliance again (starting from point 9 in automatic mode or point 28) even if you want to cook the same type of food.
How to cook another batch of food:
After finishing your first batch of food:
-
Make sure the appliance is closed with no food inside.
-
Select the appropriate cooking mode/program (this step is necessary even if you decide to pick the same cooking mode than for the previous batch of food).
-
Press the "OK" button to start preheating. The preheat indicator (thermometer + bar graph) flashes throughout the preheating phase. You must wait until the thermometer and 3 lines stop flashing, before opening the grill and adding food to it. Wait a few minutes. This step is mandatory even if the device seems hot.
-
When the preheating is complete, a beep sounds, the thermometer and 3 lines stop flashing. The thermometer remains on during cooking to indicate that the appliance is heating up.
-
After the preheating, the appliance is ready for use. Open the grill and place the food inside the appliance.
Important:
- Please note that any new batch of food, the pre-heating phase is mandatory.
Remember to always have the grill closed and no food inside in order for the preheating to effectively function.
- Then wait for the pre-heating to be complete before opening the grill and place the food inside.
N.B.: if the new pre-heating cycle is carried out immediately after the end of the preceding cycle, the pre-heating time will be reduced.
3b - MANUAL cooking with manual mode
Manual cooking - select a temperature and preheat before cooking:

If you select Manual mode, you have manual control of the cooking time. This manual mode includes temperature control of 10 °C, from 120 °C to 270 °C.
If you are uncertain about what cooking mode to use for other foods because it is not listed above, please refer to the "Cooking table for out of program food" page 12.

28

29

29

30
Cooking


31 32
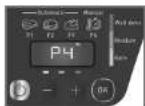
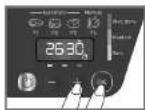
28 Press the "-" and "+" buttons to select program P4. When the P4 program is reached, press the "OK / START" button.
NB: If you have selected the wrong program, return to stage 8.
Press the "-" and "+" buttons to select the cooking temperature. Confirm by pressing "OK / START".
29 Press the "-" and "+" buttons to select the Timing. Confirm by pressing "OK / START".
Note: You can start the heating with time at 0:00. You can change the Timing at any time using "-" and "+" If there is no food in the grill, preheating begins. The preheating indicator (thermometer + bar graph) flashes throughout the preheating phase.
Warning: Even when the timer is on 0:00, the appliance continue to preheat.
Wait for 4-7 minutes. If you have placed food in the Grill, cooking starts directly, as well as the countdown of the selected time.
Otherwise, you must wait until the thermometer and 3 lines stop flashing, before opening the grill and adding food.
30 When the pre-heating is complete a melody is displayed, the thermometer and the 3 lines stop flashing, the timing falshing.
The thermometer remains on during the cooking to indicate that the appliance is heating up
31 - 32 After pre-heating, the appliance is ready for use. Open the grill and place the food on the cooking plate
Comments: if the appliance remains open for too long, the safety system will turn off the appliance automatically.
Cooking

33
3435
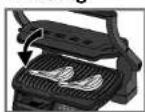
33 Close the appliance to start the cooking cycle. Note: For very thin fonds, place the
Note: For very thin foods, close the appliance and wait for the display to show "OK". Then press "OK" to allow the appliance to recognize the food and start the cooking cycle.
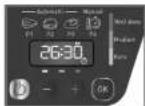
34 The display shows the setpoint temperature, alternately with the time count.
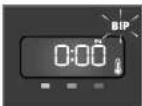
35 When the timer reaches 0, a sound is playing. Press OK to stop the alert sound. The appliance continues to heat.
36 Press the on/off button to turn off the appliance.

36
Comments


37

38

39

40
37Note: You can change the T° and the
Timing at any time by using "-" and "+" when displayed on the screen.
Regularly check the cooking by opening lightly the grill. Please note, especially on meat, it is normal that cooking result vary depending on type, quality and origin of food. Warning: Even when the timer is on 0:00, the appliance continues to heat.
38 - 39 Open the appliance and remove your food when the desired cooking is got.
40 Close the appliance without food on plate. The control panel will light up and set itself to 'choice of program' mode.
Restart to n°28 for a new cooking cycle in manual mode. Comment: the security system will turn off automatically if no program selection is made.
4 Cooling

41 42

43

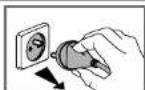
41 Press the on/off button to turn off the appliance.
42 Unplug grill from wall outlet.
43 Allow to cool for at least 2 hours.
To avoid accidental burns, allow grill to cool thoroughly before cleaning.
5 Cleaning and maintenance
44
45

46
47

48
49
50
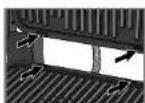
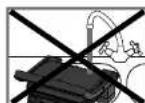
44 Before cleaning, unlock and remove the plates to avoid damaging the cooking surface. The drip tray and the cooking plates are dishwasher safe.
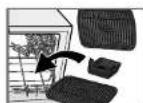
45 The appliance and its cord cannot be placed in
the dishwasher. The heating elements, visible and accessible parts, should not be cleaned after removing the plates. If they are very dirty, wait until the appliance has completely cooled down and clean them with a dry cloth. If you do not want to clean them in a dishwasher, you can use warm water and a little dishwashing liquid to clean the cooking plates, then rinse thoroughly to remove any residue. By recovering water in your towel
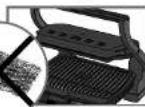
46 Do not use metallic scouring pads, steel wool or any abrasive cleaners to clean any part of your grill, only use nylon or non-metallic cleaning pads.
Empty the drip tray and wash in warm water and a little dishwashing liquid, dry thoroughly using a paper towel.
47 To clean the grill cover, wipe with a warm, wet sponge and dry with a soft, dry cloth.
48 Do not immerse the body of grill in water or any other liquid.
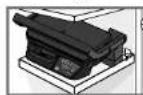
49 Always make sure grill is clean and dry before storing.
50 Any other servicing should be performed by an authorized service representative.
Trooble shooting
| Problem Cause Solution | ||
The screen switches to: visual display with ER + BIP. SIP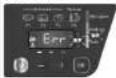 | Preheating not respected.Switching "ON" of the appliance or starting an automatic cooking cycle with food between plates. The manual mode is automatically activated. | - Choose the temperature setting by pressing "1" and "2" buttons and then press OK.Allow to cook, but you must monitor the cooking (manual mode). Temperature can be adjusted by "1" and "2" buttons.- Switch off and open completely the appliance, remove the food, close the appliance property, select a cooking program and press OK. Wait until end of reheating (Preheating Indicator Lighted fit). |
The screen switches to: visual display with ER + BIP. SIP | Preheating time not completely done. Grill has been opened and food inserted on plate before end of preheating. | Allow to cook, but you must monitor the cooking because it is in manual mode.Temperature can be adjusted by button, orOpen the appliance, remove the food, close the appliance property and wait until end of preheating (Preheating Indicator Lighted fit).Unplug the appliance and wait few minutes.Plug again your appliance and switch ON. |
| D'07 & D'10 | The appliance has been kept open for too long while cooking.The appliance has been idle too long after the end of preheating or keep warm.Appliance failure. | Unplug the product and contact your customer service. |
The display remains on the preheating with other well-food.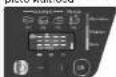 | Your food is thicker than 1.5 inches. | Food must not be thicker than 1.5 inches.Completely open the grill then close it. |
The display shows "OK" | You have not completely opened the grill to place the food.Not sensing the food. The food thickness too thin, "OK" is flashing. | Confirm the start of the cooking by pressing the "OK/START" button. |
| E'01 to E'05 | Appliance failure:Appliance stored or used in a room that is too cold.Appliance over heating. | Unplug the appliance and wait few minutes.Plug again your appliance and switch ON.If the problem persists, contact your Customer service. |
Tip, especially for meat: the cooking results on the preset programs may vary depending on origin, cut and quality of the food being cooked, the programs have been set and tested for good quality food. Similarly, the thickness of the meat has to be taken into account during cooking; you cannot cook food that is thicker than 4 cm.
Cooking Guide (automatic programs)
| Dedicated program | Cooking level | ||
| Rare Medium well Well-done | |||
| Red meat | X X X | ||
| Burger | X X X | ||
| Poultry | X | ||
Cooking Guide (including Manual Mode)
| Food | Cooking program | Cooking level | |
| BreadMeat & Poultry | Slices of bread, toasted sandwiches mediumBurger: (after pre-cooking the meat) medium | ||
| Marinated chicken breast | well done | ||
| Duck breast rare | |||
| Manual mode | Grilled vegetables and fruits (need to be of same cut and thickness) | Manual | temperatures control of 10°C, from 120°C to 270°C. |
Manual Mode in Grill position
| from 180°C to 200°C | from 220°C to 240°C | from 250°C to 270°C | |
| POTATOES | x | ||
| ZUCCHINI / SQUASH | x | ||
| EGGPLANT | x | ||
| TOMATOES | x | ||
| ASPARAGUS | x | ||
| MUSHROOMS | x | ||
| ONIONS | x | ||
| BROCOLI | x | ||
| BABY CARROTS | x | ||
| FENNEL | x | ||
| SWEET POTATOES | x | ||
| APPLE SLICES | x | ||
| PINEAPPLE | x | ||
| PEACH | x |

Environment protection first!
①Your appliance contains valuable materials which can be recovered or recycled.
Leave it at a local civic waste collection point.
Information about your warranty is available at www.obhnordica.com
TEFAL - OBH Nordica Group AB
Löfströms Allé 5
172 66 Sundbyberg
Phone 08-629 25 00
www.obhnordica.com
Technical data
OBH Nordica TYPE GO7P08S0

These instructions are subject to alterations or improvements.

Scan the QR code to receive our latest offers.


- OptiGrill Start
- Intelligent Contact Grill
- Beskrivning
- KLARG∅RING AF APPARATET
- R∅DT KJ∅TT HAMBURGER KYLLING
- CE
- Description
- Guide of automatic cooking programs
- RED MEAT BURGER CHICKEN
- Guide of manual cooking programs
- PREPARING THE APPLIANCE
- 3a - AUTOMATIC cooking with 3 automatic programs
- automatic cooking programs:
- Keep warm function
- Second cooking
- Cooking more food
- How to cook another batch of food:
- Important:
- 3b - MANUAL cooking with manual mode
- Manual cooking - select a temperature and preheat before cooking:
Brand : OBH NORDICA
Model : Optigrill Start
Category : Electric grill