
Ryan - Beard trimmer Eta - Free user manual and instructions
Find the device manual for free Ryan Eta in PDF.


| Product Type | Beard Trimmer / Multi-Purpose Clipper 5 in 1 |
| Brand | Eta |
| Model | Ryan (eta 6345) |
| Dimensions (H x L x W) | 36 x 159 x 40 mm (with wide blade, without attachments) |
| Total Weight | 0.12 kg |
| Trimmer Weight | 0.085 kg |
| Power Supply | Rechargeable Li-ion battery; Charging adapter: Input 100-240V AC, 50/60 Hz; Output 5.0V DC, 1.0A |
| Charging Time | Approximately 1 hour |
| Operating Time (full charge) | Approx. 90 minutes with big cutting attachment; longer with smaller attachments |
| Noise Level | 69 dB(A) re 1pW |
| Protection Class | III (appliance), II (adapter) |
| Cutting Attachments Included | B1 (big cutting), B2 (small cutting), B3 (nose/ear), B4 (shaving), B5 (thin mini) |
| Comb Attachments Included | C1a (1-10 mm), C1b (11-20 mm), C2 (1-5 mm) |
| Other Accessories Included | Dock/stand, charging adapter, cleaning brush, blade oil, comb |
| Cleaning and Maintenance | Clean blades with brush; rinse attachments under water after removal; dry thoroughly; oil blades periodically with included oil |
| Water Resistance | Not waterproof; do not immerse; do not use on wet hair |
| Safety Features | Automatic shut-off when blocked; overcharge protection; do not use near water |
| Warranty | 24 months (does not cover battery capacity decrease due to use or age) |
Frequently Asked Questions - Ryan Eta
User questions about Ryan Eta
0 question about this device. Answer the ones you know or ask your own.
Ask a new question about this device
Download the instructions for your Beard trimmer in PDF format for free! Find your manual Ryan - Eta and take your electronic device back in hand. On this page are published all the documents necessary for the use of your device. Ryan by Eta.
USER MANUAL Ryan Eta
Multi-purpose clipper 5 in 1 • USER MANUAL

21-28
natural_image
Black and white photo of a Ryan eather machine tool with comb and power button (no text or symbols visible on main body)RYAN
flowchart
graph TD
    A["Step 1: Hand grip"] --> B["Step 2: Cut or press"]
    B --> C["Step 3: Dissection with tool"]
    C --> D["Step 4: Click action"]
    D --> E["Step 5: Dissection with tool"]
    E --> F["Step 6: Close or open hands"]
GB The pictures are only illustrative, the supplied accessory and appliance may differ.
II. DDESCRIPTION OF THE APPLIANCE AND ITS ACCESSORIES (FIG. 1) 23
III. INSTRUCTIONS FOR USE 23
IV. MAINTENANCE 26
V. ENVIRONMENTAL PROTECTION 27
VI. TECHNICAL DATA 27
HU I. ÁLTALÁNOS BIZTONSÁGI ELŐÍRÁSOK
Multi-purpose clipper 5 in 1
eta 6345
RYAN
INSTRUCTIONS FOR USE
Dear customer, thank you for purchasing our product. Please read the operating instructions carefully before putting the appliance into operation and keep these instructions including the warranty, the receipt and, if possible, the box with the internal packing.
I. GENERAL SAFETY INSTRUCTIONS

- Consider the instructions for use as a part of the appliance and pass them on to any other user of the appliance.
- Check whether the data on the type label correspond with the voltage in your socket.
- This appliance can be used by children aged from 8 years and above and persons with reduced physical, sensory or mental capabilities or lack of experience and knowledge if they have been given supervision or instruction concerning use of the appliance in a safe way and understand the hazards involved. Children shall not play with the appliance. Cleaning and user maintenance shall not be made by children without supervision. Children younger than 8 years must be kept out of reach of the appliance and its charger.
- Before replacing accessories or accessible parts, which move during operation, before assembly and disassembly, before cleaning or maintenance, turn off the appliance and disconnect it from the mains by pulling the charger from the power socket!
- If the power cord of the charger is corrupted, it has to be replaced by the manufacturer, its service technician or a similarly qualified person so as to prevent dangerous situations.
- Never use the appliance if its power cord or charger is damaged, if it does not work properly, if it fell down and was damaged and it is leaking. In this case take the appliance to a special service to check its safety and proper function.
- For additional protection we recommend installation of current protection (RCD) with the nominal release current not exceeding 30 ~mA . Ask a control technician or an electrician for advice.
- Always unplug the appliance from charger if you leave it unattended and before assembly, disassembly or cleaning.
- The appliance is intended for use in households only and for similar use! It is not designed for use in hair salons or for other commercial use!
- Do not put or take out the plug to or from a socket with wet hands!
- Do not let the appliance in operation without supervision!
- Never immerse the appliance, the charging dock or the adaptor in water or other liquids (not even partly) and never wash in running water!
- Use only the accessories designed for this type. Do not use damaged adapters.
- Never tuck the appliance or the accessories into any body holes, (does not apply to B3) - The trimmer and the stand with the plugged adapter must not be used at places where it could fall into a bath tub, a wash basin or a swimming pool. If the trimmer fell to water anyway, do not take it out! First of all, unplug the adapter from the socket and only then remove the trimmer. In this case take the appliance to a special service to check its safety and proper function.
- Be careful in using the appliance without a set adapter, the blades are sharp.
- Do not use the appliance while having a bath, having a shower or taking a sauna and for trimming wet or artificial hair. Keep the appliance dry.
- The appliance is not intended for styling animal hairs.
- Never charge the appliance in direct sunlight or close to heat sources and if the temperature is below 10^ C or above 40^ C . If the appliance is fully loaded (all the control lights are permanently on), unplug the charging device.
- In case the cutting lath or one of the cutting attachments gets blocked, the appliance must be turned off immediately and the cause removed.
- Check regularly, if the blades are not damaged or deformed.
- Do not attempt to repair the appliance yourself.
- Keep the special oil bundled with the device out of reach of children, persons insane. Heed the instructions written on the package when handling!
- It is not allowed to alter the surface of the appliance in any way (e.g. sticker, foil etc.)!
- Do not use the appliance if the razor strip has been damaged, has visible fissures or if the strip is torn.
- The appliance gets hot when charging which is absolutely normal.
- Charge the battery in temperature close to room temperature.
- Do not dispose the battery into fire. There is a risk of explosion!
- Do not charge a battery which is leaking electrolyte.
- Electrolyte leaking from a battery is caused by overloading the appliance or using it in extremely high temperatures. If you spill electrolyte on yourself, wash the area with water and soap and rinse with lemon juice with vinegar. If the liquid got into your eyes, wash the eye with fresh water for several minutes and find medical help immediately.
- Do not expose the battery to temperatures higher than 50^ to prevent damaging the battery.
- Do not put the trimmer on hot heat sources (e. g. oven, stove, radiator, etc.)
- If the appliance was stored at lower temperatures, acclimatize it first, by which you remove stiffness of the lubricating fat in bearings and mechanical resistance of the plastic parts will be maintained.
- Also, do not put the trimmer in the on position on soft surfaces (e.g. bed, towels, sheets, carpet); the surfaces or the appliance could get damaged.
- The power cord of the adapter must not be damaged with sharp or hot objects, open fire and it must not be sunk into water.
- If you need to use the extension cord, it has to be uncorrupted and it has to comply with the valid standards.
- The adaptor supplied with this appliance is intended for this appliance only, do not use it for other purposes. Also, use only the supplied adaptor with this appliance, do not use any other adaptor for charging (e.g. from another appliance).
- Never use the appliance for any other purpose than for the intended purpose described in these instructions for use!
- During normal operation, the accumulator batteries are not taken out. Take out the batteries only if the appliance is to be disposed (see par. V. ENVIRONMENTAL PROTECTION).
- Do not insert the tip B3 further than 5 ~mm into the ear as this could caused damage to the eardrum (nor in the nose).
- All text in other languages and pictures shown on the packaging, or the product itself, are translated and explained at the end of this language mutation.
- WARNING: There is a risk of injury in case of incorrect use (not in accordance with the manual) of the appliance.
- The producer is not responsible for any loss caused by improper handling of the appliance and its accessories (e.g. injury, appliance damage, fire, etc.) and its guarantee for the appliance does not apply in the case of non-compliance with the safety instructions above.
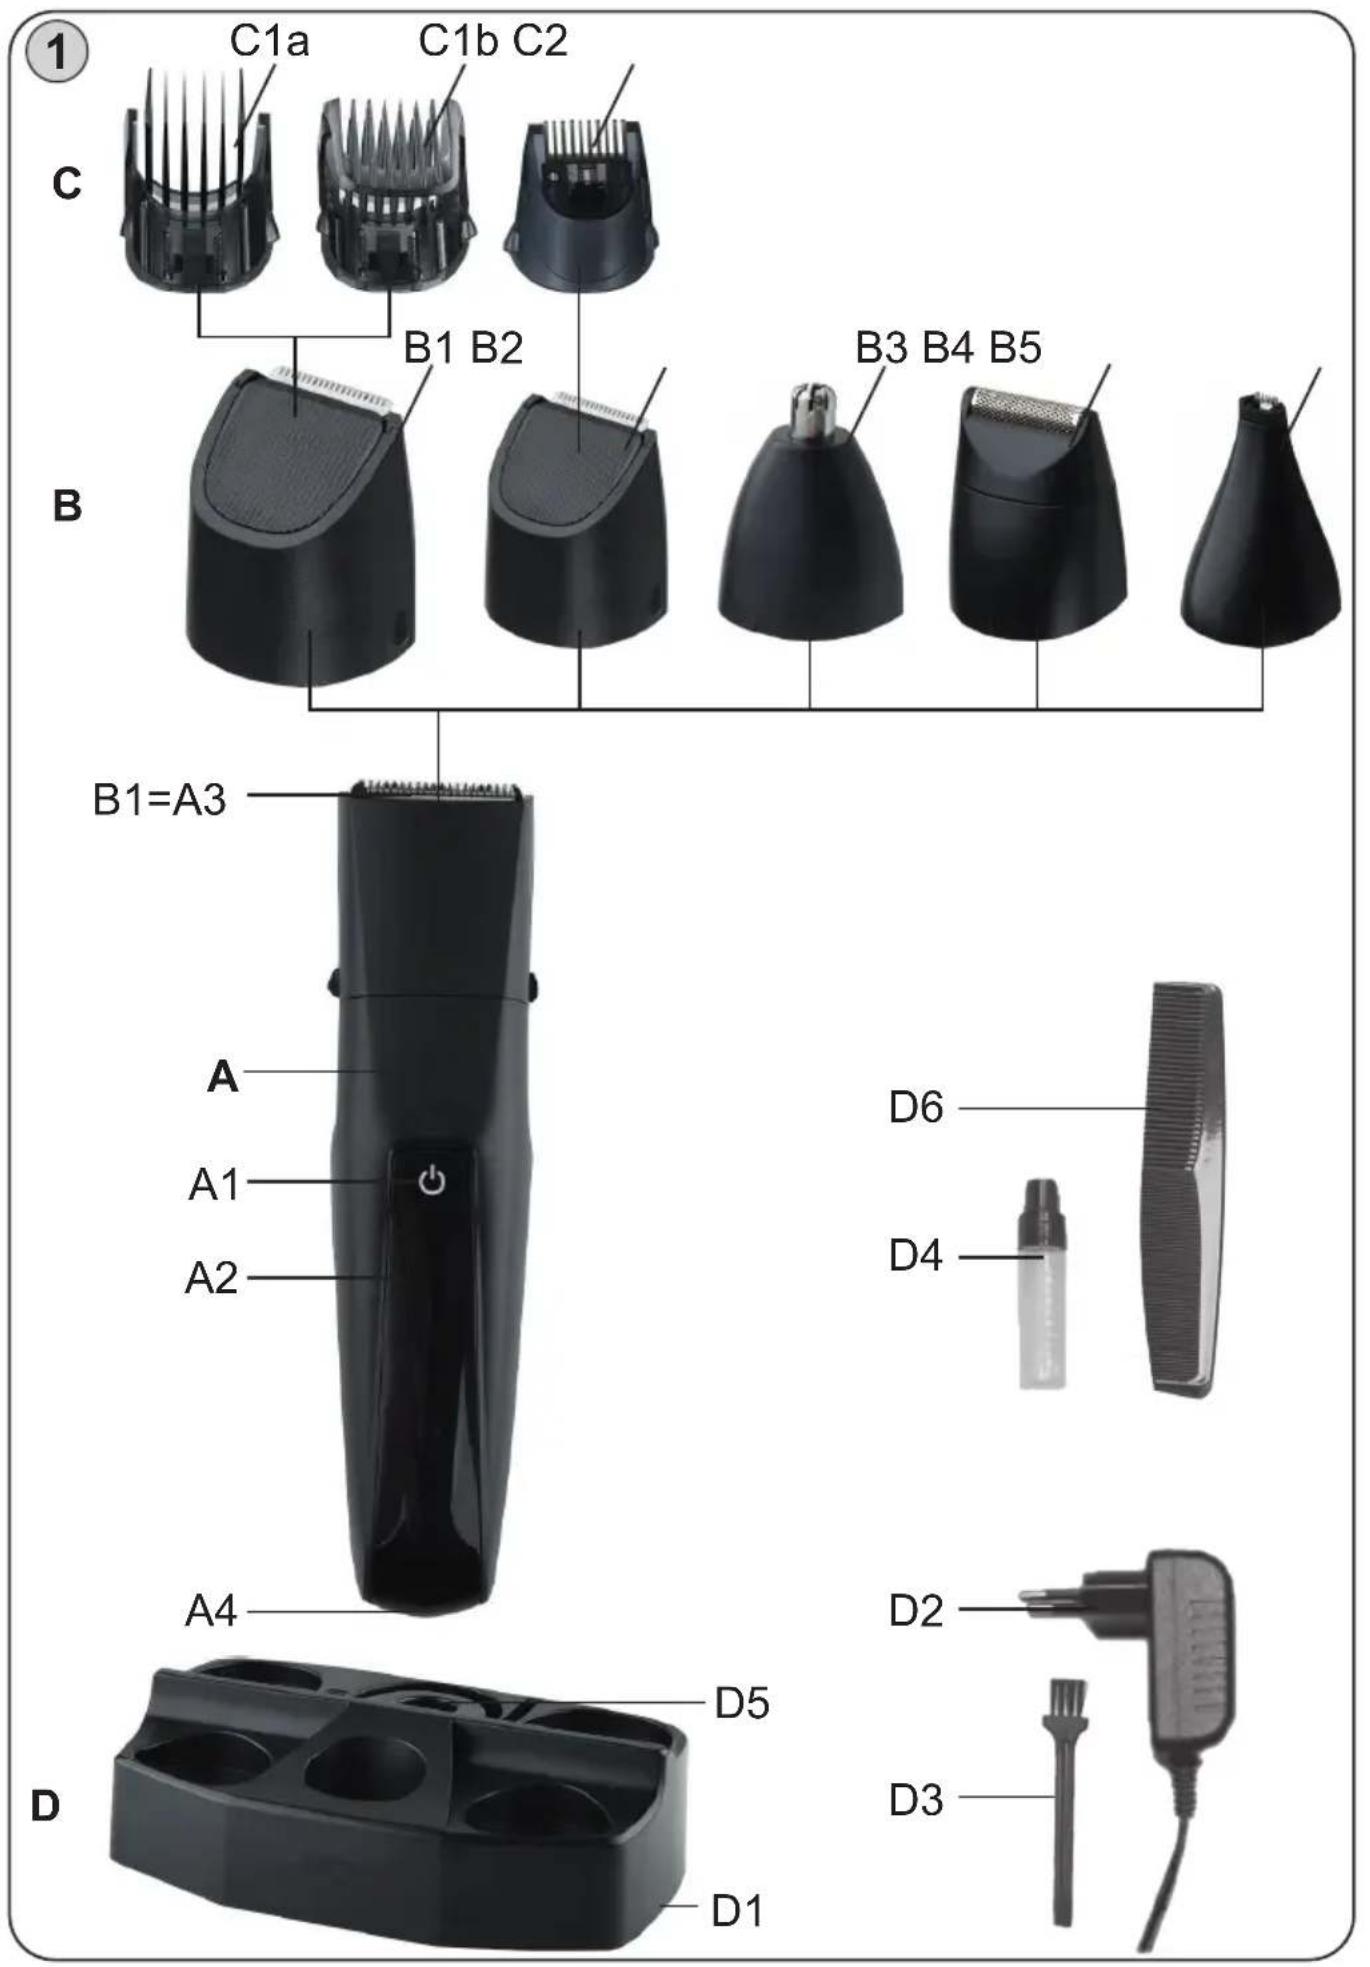
II. DDESCRIPTION OF THE APPLIANCE AND ITS ACCESSORIES (fig. 1)
A - trimmer
A1 - switch 0/I A3 - blades
A2 – display/indicator light A4 – socket for charging
B - attachments
B1 – big cutting attachment B4 – shaving attachment
B2 – small cutting attachment B5 – thin mini-attachment
B3 – Attachment for trimming hairs in nose and ear
C - comb attachments
C1a/b - comb attachments for the big cutting attachment B1 (1 - 10 mm / 11 - 20 mm)
C2 - comb attachments for the small cutting attachment B2 (1 - 5 mm)
D - attachment
D1 – dock D4 – Blade lubrication oil
D2 - charging adapter D5 - socket for charging
D3 - brush D6 - comb
III. INSTRUCTIONS FOR USE
Before you can use the appliance, its batteries must be charged. The operation time for one charge depends on the attachment used and workload. The time with the big cutting attachment is around 90 minutes. With the smaller attachments, this time is significantly longer.
To Charge/Recharge
- Fully charge Clipper before using for the first time or after non-use for a long period of time.
- Battery performance is best if you recharge only when the battery is (almost)completely empty.
- Charging or recharging at temperatures below 10^ or higher than 40^ adversely affects lifespan of the battery.
- Continuously recharging Clipper will reduce lifespan of battery.
1) Be certain Clipper is OFF.
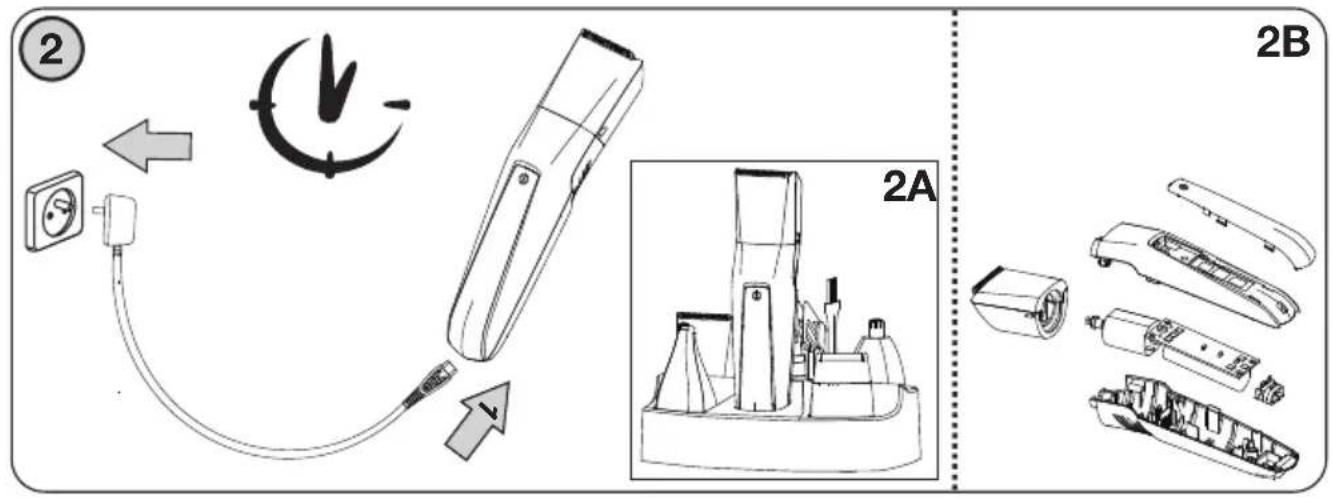
2) Charging: plug the connector into the socket A4 or into the dock and accessory holder (see pic. 2), where you place the trimmer (socket D5).
3) Plug charging plug into any 230 V AC outlet. Use only the cord provided
4) It will take approximately 1 hour to fully charge the Clipper.
5) Do not exceed the set time of charging! On the trimmer A, charging is indicated by the bottom indicator the symbol A2 on continuously; when fully charged, this indicator the battery symbolis on continuously.
6) After charging, unplug the adaptor from the mains first and only then unplug the connector from the appliance.
Optimize the working life of the battery
- Do not charge for more than 1 hour.
- Do not keep cord permanently plugged in.
- The appliance heats up during charging or operation, which is normal.
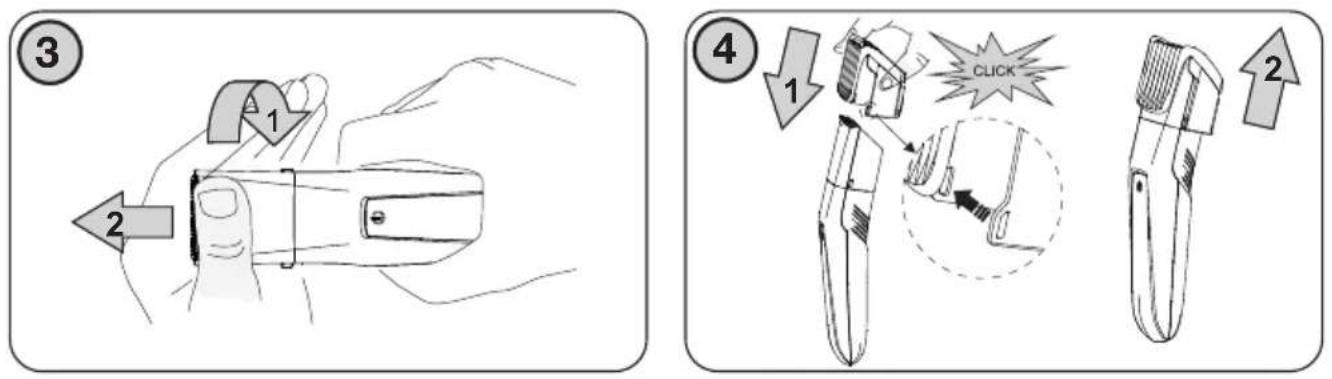
First select the attachment you want to use for cutting purposes. You have 5 different cutting attachments with different uses to choose from. All these cutting attachments (B1, B2, B3, B4, B5) are put on the appliance in the same manner. Follow instructions on pic. 3. When removing the attachment, proceed reversely. Press lightly on the fixed attachment from the front part of the attachment. This will release it, you can now remove it.
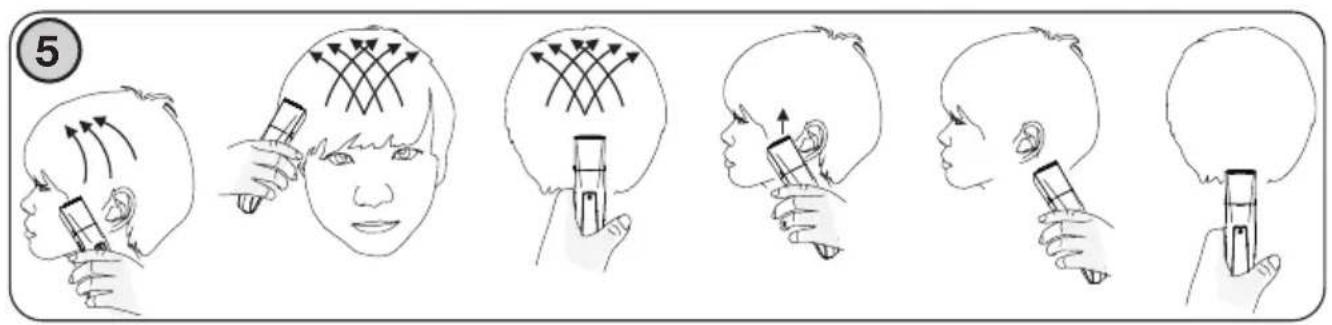
Cutting attachments B1 and B2 can be used with comb attachments with various length of cutting. All these comb attachments C are put on in the same manner (follow the instructions on pic. 4). When removing the comb attachment, proceed reversely (pic. 4).
Hair clipping (pic. 5).
- The trimmer can be operated from the outlet with the adaptor connected or only from the charged battery. In case an attachment B gets blocked (or the blades A3), the appliance must be turned off immediately and the cause of the block removed.
- The trimmer turns on and off with a switch A1. Turn the trimmer on only after all the attachments have been properly placed and you are ready for trimming. Turn the trimmer off immediately after use.
- We recommended oiling the blades with the oil D4 attached before first use.
- Before you start clipping, make sure that the head of the person whose hair you are cutting is at the same level as your chest so that all parts of his/ her head are clearly visible and within easy reach.
- Only use the clipper on dry hair.
- Do not use on freshly washed hair.
- Before you begin, comb the hair in the direction of growth.
- To achieve optimal clipping results, always move the clipper slowly through the hair against the direction of hair growth.
- When the appliance is in operation, the symbols light is blue, when the battery power reaches minimum, the indicator to 10x flashing blue. It is a signal to charge the battery.
Clipping with hair comb attachment
You may use 3 kinds of comb attachments C for trimming, depending on the attachment (B1, B2) used.
1) Choose one of the two cutting attachments (B1, B2), on which you may then put on the comb attachments C arbitrarily, depending on the desired haircut length. Put this attachment on properly.
2) Put on the desired comb attachment C depending on the chosen size of the attachment. Then you can turn on the appliance. Two of the C1a/b attachments has variable size of the cut (1 - 20 mm).
3) If you are trimming for the first time, begin by trimming with an attachment of max. length to prevent too short of a cut.
When you have familiarized yourself with the settings, use attachments C2 with lower length. The C2 attachment has variable size of the cut (1 - 5 mm).
4) Make sure that the flat part of the comb is always in full contact with the scalp to obtain an even result.
5) Move the clipper slowly over the crown from different directions to achieve an even result.
6) Always move the clipper against the direction of hair growth.
7) Make overlapping passes over the head to ensure that all hair that should be cut has been cut.
8) Turn the Clipper off and remove the hair comb often to blow and/or shake out hair that has accumulated.
Contouring without the hair clipping comb attachment
Choose the appropriate attachment B1 or B2 depending on your desired length of cut.
For more precise styling and trimming you may use the narrow mini-attachment B5.
1) Remove the hair comb (if it is attached). Be careful when you are clipping without comb attachment as when the clipper is turned on it will trim every hair it touches.
2) Tilt the clipper in such a way that only one edge of the trimming attachment touches the hair ends when you shape the contours around the ears.
3) To contour the nape of the neck or hairline, turn the clipper and hold it with the trimming attachment pointing downwards.
4) To contour the sideburns, turn the clipper and hold it with the trimming attachment pointing downwards.
Trimming Nose Hair
1) Make sure nasal passages are clean.
2) Place nose, ear attachment B3 on Clipper.
3) Switch the Clipper on and insert the tip of the attachment into one nostril.
4) Slowly move the tip in and out while turning it around at the same time in order to remove unwanted hair. For best results, make sure the side of the tip is firm against skin. This will reduce the tickling effect that can occur during trimming of nose hair.
5) Turn off Clipper. Wipe attachment clean after each use.
CAUTION
Do Not insert the tip more than 5 mm into your nostril.
!
Trimming Ear Hair
1) Clean outer area of ear and ear canal. Make sure it is free of wax.
2) Nose, ear attachment B3 should be on the Clipper.
3) Switch the Clipper on and move the tip softly around the edge of ear to remove hairs extending beyond the outer ear.
4) Carefully insert the tip into outer ear canal.
5) Turn off Clipper. Wipe attachment clean after each use.
CAUTION
Do not insert the tip further than 5 mm into the ear as this could caused damage to the eardrum.
!
Shaving With Micro Shaver Attachment
1) Put on the shaving attachment B4 on the appliance.
2) Use the narrow micro shaver to shave along contoured edges to remove any stubble while creating a smooth welldefined beard line. Before using the micro shaver, always check it for wear and damage. If the micro shaver shows signs of wear or damage, do not use it as injury may occur. Do not use the micro shaver until it has been replaced. Gently press the micro shaver onto the skin. Do not press too hard.
Trimming facial hair
Choose the appropriate attachment B1 or B2 depending on your desired length of cut.
1) Wet facial hair slightly and brush it before trimming.
2) Mark a facial hair line with the trimmer and cut off the hairs exceeding this line from the outer perimeter.
3) If you want to achieve an even trim of facial hair, use one of the attachments C or trim carefully the ends by small pieces over the brush in such a way that the brush moves through the hair upwards. Repeat the process in the whole facial hair area.
4) After trimming shave the parts around the beard in a usual way.
5) For more precise styling and trimming you may use the narrow mini-attachment B5.
Trimming a mustache
Choose the appropriate attachment B1 or B2 depending on your desired length of cut.
1) Wet mustache slightly and brush it before trimming.
2) Trim carefully over a brush to achieve an even cut of the mustache. If you prefer using your finger as a guide, proceed accordingly.
3) For more precise styling and trimming you may use the narrow mini-attachment B5.
IV. MAINTENANCE
Turn off the appliance before each maintenance, or unplug the adapter from the electric socket! Do not use rough and aggressive detergents! Wipe the trimmer surface with a wet soft cloth.
Cleaning blades
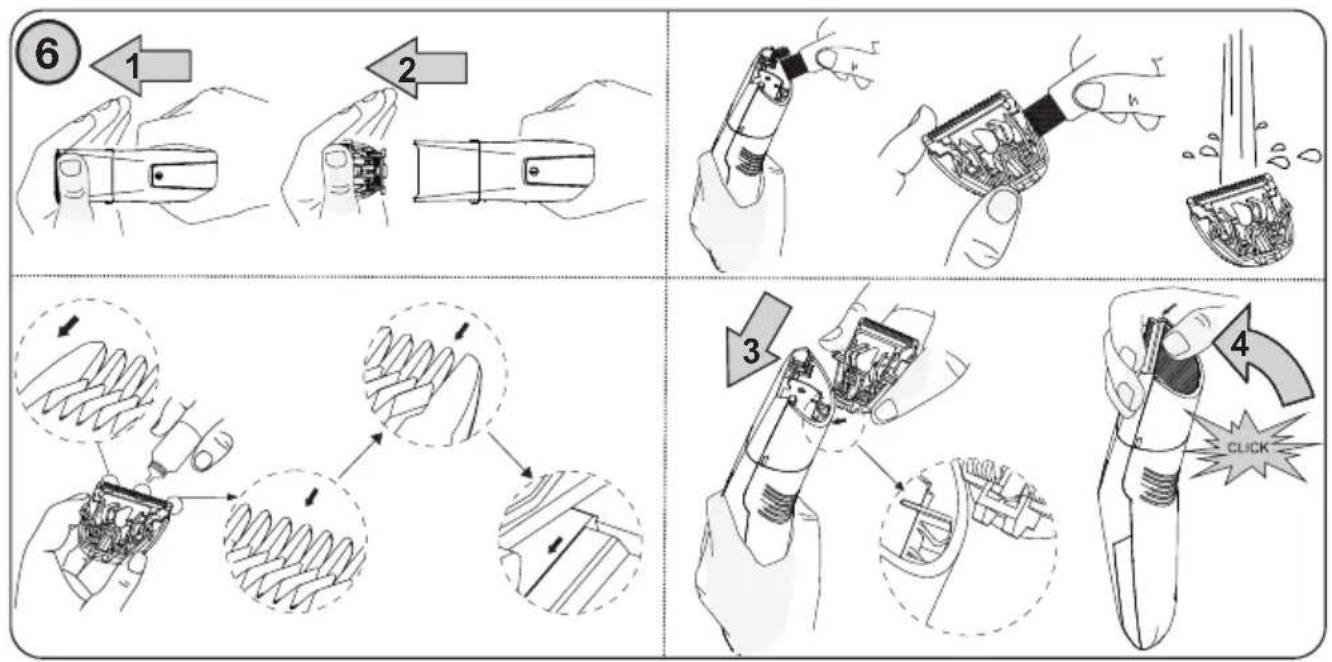
Clean the all blades B with the brush attached. If the blades are very dirty, you can remove the whole cutting attachment and clean it under running water. After drying it thoroughly, put the attachment with the blades back on the trimmer reversely. In order to keep the trimmer in a perfect condition, you have to lubricate the list with blades using one or two drops of oil for sewing machines (figure 6). Do not use hair oil, petroleum jelly or oil mixed with petrol or any other solvent because after evaporation the solid parts of the lubricant could slow down operation of the blades. Insert the trimming head to the trimmer properly, turn on the trimmer and then turn it off and wipe out the excessive oil from the blades.
Storage
Put the trimmer with the accessories back to the original package at a dry and dust free place, out of reach of children and incapacitated people. You can use the accessory stand for this purpose (see pic. 2A).
V. ENVIRONMENTAL PROTECTION
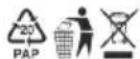
If dimensions permit, all pieces have printed symbols of materials used for production of packing, components and accessories as well as recycling symbols. The symbols on the product or documentation means the electric or electronic parts used in the appliance may not be disposed off together with communal waste. Hand over the electric or electronic part to a waste collection yard for free disposal. Proper disposal of the product will help preserving valuable natural resources and preventing potential negative impacts on environment and human health that would otherwise result from improper waste disposal. For more details, please contact your local authorities or collection yard. Fines may be imposed for improper disposal of this type of waste pursuant to national directives. The appliance is equipped with rechargeable Li ion batteries with long life. For environmental protection it is necessary to dismantle discharged batteries (see pic. 2B) after the end of life of the appliance. Dispose of the batteries in a suitable and safe way through the special collection networks. Never dispose of the batteries by burning!
VI. TECHNICAL DATA
Voltage (V) shown on the type label of the appliance
Overall weight (kg) 0.12
Trimmer weight (kg) 0.085
Appliance Protection Class III.
Dimensions (H x L x W) 36 x 159 x 40 (with a wide blade without attachments)
Noise level: Acoustic noise level of 69 db (A) re 1pW.
| Charging adapter | |
| Manufacturer's name or trademark,business registration number and address | ETA |
| Model identifier KT05W050100EUD | |
| Input voltage 100-240 V (AC) | |
| Input frequency 50/60 Hz | |
| Output voltage 5,0 V (DC) | |
| Output current 1,0 A | |
| Output power 5,0 W | |
| Average efficiency in active mode | 115 V, 60 Hz: 74,73 %; 230 V, 50 Hz: 74,62 % |
| Low load efficiency (10%) | 115 V, 60 Hz: 72,46 %; 230 V, 50 Hz: 67,43 % |
| Power consumption without load | 115 V, 60 Hz: 0,056 W; 230 V, 50 Hz: 0,08 W |
| Appliance protection class | II. |
Guarantee of 24 months does not apply to decrease in the accumulator's effective capacity caused by its use or age. Effective capacity gradually decreases depending on the method of use of the accumulator.
The manufacturer reserves the right to change the technical specifications and accessories for the respective models. Expert service must do the large maintenance or to intervene into inside parts of the appliance! Non-observance of the instructions of the manufacturer cancels the right for guarantee repair!
WARNINGS AND SYMBOLS USED ON THE APPLIANCE, PACKAGING OR IN THE INSTRUCTIONS MANUAL:
HOUSEHOLD USE ONLY; DO NOT IMMERSE IN WATER OR OTHER LIQUIDS;

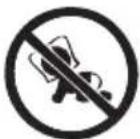
TO AVOID DANGER OF SUFFOCATION, KEEP THIS PLASTIC BAG AWAY FROM BABIES AND CHILDREN. DO NOT USE THIS BAG IN CRIBS, BEDS, CARRIAGES OR PLAYPENS. THIS BAG IS NOT A TOY.
Oil: Warning, Avoid contact with eyes, Do not drink, Keep away from children or mental capabilities.
The ⚠ symbol indicates a WARNING.
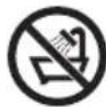
Do not use the appliance close to bath tubs, showers, bash basins or other water containers.
USUWANIE WŁOSÓW Z NOSA


- Multi-purpose clipper 5 in 1
- eta 6345
- RYAN
- INSTRUCTIONS FOR USE
- GENERAL SAFETY INSTRUCTIONS
- DDESCRIPTION OF THE APPLIANCE AND ITS ACCESSORIES (fig. 1)
- INSTRUCTIONS FOR USE
- Trimming Nose Hair
- CAUTION
- Trimming Ear Hair
- Trimming facial hair
- Trimming a mustache
- MAINTENANCE
- Cleaning blades
- Storage
- ENVIRONMENTAL PROTECTION
- TECHNICAL DATA
- USUWANIE WŁOSÓW Z NOSA
Brand : Eta
Model : Ryan
Category : Beard trimmer