
IAN 114435 - Weather Station AURIOL - Free user manual and instructions
Find the device manual for free IAN 114435 AURIOL in PDF.


| Product Type | Weather station with indoor and outdoor monitoring |
| Model Number | IAN 114435 |
| Brand | Auriol |
| Main Unit Dimensions | Approx. 150 × 100 × 50 mm |
| Outdoor Sensor Dimensions | Approx. 100 × 50 × 30 mm |
| Main Unit Weight | approx. 200 g (without batteries) |
| Outdoor Sensor Weight | approx. 60 g (without batteries) |
| Power Supply Main Unit | 2 × 1.5V AA batteries (not included) or USB power adapter (5V DC, optional) |
| Power Supply Outdoor Sensor | 2 × 1.5V AAA batteries (not included) |
| Wireless Frequency | 433 MHz |
| Transmission Range | Up to 100 m (open field) |
| Temperature Measurement Range (Indoor) | 0°C to 50°C (32°F to 122°F) |
| Temperature Measurement Range (Outdoor) | -20°C to 60°C (-4°F to 140°F) |
| Humidity Measurement Range | 20% to 99% RH |
| Barometric Pressure Range | 800 to 1100 hPa (with weather forecast trend) |
| Clock and Calendar | Radio-controlled DCF77 (or manual setting) with date display |
| Alarm Function | Single alarm with snooze function |
| Display Features | LCD with backlight (adjustable brightness) |
| Supported Sensors (max.) | Up to 3 outdoor sensors (sold separately) |
| Cleaning and Maintenance | Wipe with a soft, dry cloth. Do not use abrasive cleaners or solvents. |
| Safety Precautions | Keep away from direct sunlight, moisture, and extreme temperatures. Replace batteries promptly when low. |
| Spare Parts / Repairability | Batteries (user-replaceable). No other spare parts available; device not designed for repair. |
| Manufacturer | Auriol / distributed by Lidl |
| Manual Languages | Multiple languages (DE, EN, ES, IT, PT, etc.) available at notice-facile.com |
Frequently Asked Questions - IAN 114435 AURIOL
User questions about IAN 114435 AURIOL
0 question about this device. Answer the ones you know or ask your own.
Ask a new question about this device
Download the instructions for your Weather Station in PDF format for free! Find your manual IAN 114435 - AURIOL and take your electronic device back in hand. On this page are published all the documents necessary for the use of your device. IAN 114435 by AURIOL.
USER MANUAL IAN 114435 AURIOL
ESTACIÓN METEOROLÓGICA / STAZIONE METEOROLOGICA RADIOCONTROLLATA PREMIUM
ES
Operation and Safety Notes
IAN1 14435
GB / MT Operation and Safety Notes Page 64
natural_image
Technical line drawing of a mechanical device with no visible text or symbols
natural_image
Technical line drawing of a square-shaped device with internal mesh structure and mounting feet (no text or symbols)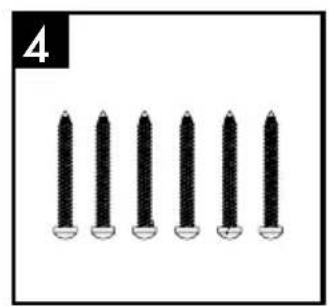
natural_image
Six black screwdrivers arranged in a row, no text or symbols visible
natural_image
Six identical cylindrical objects with internal diamond patterns arranged in a row (no text or symbols visible)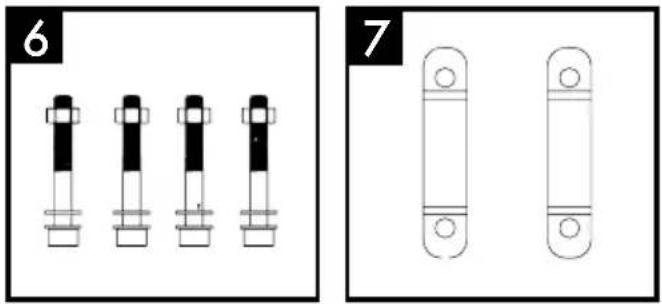
natural_image
Two schematic diagrams labeled 6 and 7 showing vertical cylindrical components with mounting holes (no text or symbols present)natural_image
Line drawing of a front-mounted electronic device with ports and cables, showing no text or symbolsColgador

natural_image
Diagram of a device rear panel with connectors and ports, no text or symbols presentnatural_image
Diagram of a device rear panel with ventilation slots and indicator lights (no text or labels)Anemómetro:
natural_image
Technical line drawing of a mechanical component with mounting holes and a central pin (no text or symbols)
natural_image
Technical line drawing of a mechanical component with mounting holes and internal structure (no text or symbols)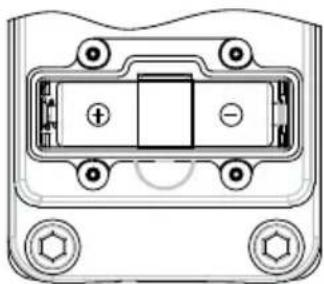
natural_image
Technical diagram of a mechanical or electronic component with no visible text, numbers, or symbolsPluviómetro:
natural_image
Technical line drawing of a mechanical component with mounting holes and a labeled posterior view (no text or symbols beyond label)natural_image
Technical line drawing of a mechanical device with mounting brackets and internal components (no text or symbols)other
| Metric | Value | | :--- | :--- | | Pressure (°C) | 188.8 | | MAX (°E) | 88 | | HEAT INDEX (°E) | 188.8 | | DEW POINT (°E) | 188.8 | | MAX MIN (°E) | 188.8 | | Zone (°E) | 38.88 | | ALARM (°E) | 38.88 | | Wind Speed (AVERAGE GUST) | 188.8 | | Wind Average (AVERAGE GUST) | 188.8 | | Wind Average (AVERAGE GUST) | 188.8 | | Wind Average (AVERAGE GUST) | 188.8 | | Wind Average (AVERAGE GUST) | 188.8 | | Wind Average (AVERAGE GUST) | 188.8 | | Wind Average (AVERAGE GUST) | 188.8 | RAINFALL DAILY MONTHLY WEEKLY TOTAL | 188.8 | | Rainfall (mm) | -6 to -1 | | Daily Monthly Weekly Total (mm) | 0 to 10000000000000000000000000000000000000000000000000000000000000000000000000000000000000000000000000000 | | Wind Speed (m/s/knots) | 188.8 | | Wind Average (mph/knots) | 188.8 | | Wind Average (mph/knots) | 188.8 | | Wind Average (mph/knots) | 188.8 | | Wind Average (mph/knots) | 188.8 | | Wind Average (mph/knots) | 188.8 | | Wind Average (mph/knots) | 188.8 | | Wind Current (in Hz) | -6 to -5 | | Wind Current (in Hz) | -5 to -4 | | Wind Current (in Hz) | -4 to -3 | | Wind Current (in Hz) | -3 to -2 | | Wind Current (in Hz) | -2 to -1 | | Wind Current (in Hz) | -1 to 0 | The chart displays a single column of values for the same metric: Pressure, Sea Level Pressure, Zone, and Rainfall. The values are in mm for each metric.natural_image
Technical line drawing of a mechanical device with no visible text or symbolsflowchart
graph LR
    A["1. Speed Average 0.0 m/h"] --> B["2. Speed Average 0.0 mgh"]
    B --> C["3. Speed Average 0.0 m/s"]
    D["4. Speed Average 0.0 km/s"] --> E["5. Speed Average 0.0 km/h"]
    E --> F["6. Speed Average 0.0 km/h"]
N = Norte
NE = Noreste
E = Este
SE = Sudeste
S = Sur
SW = Sudoeste
W = Oeste
NW = Noroeste
natural_image
Technical line drawing of a mechanical device with internal components and mounting brackets (no text or symbols)
natural_image
Technical line drawing of a square-shaped electronic component with mounting feet (no text or symbols)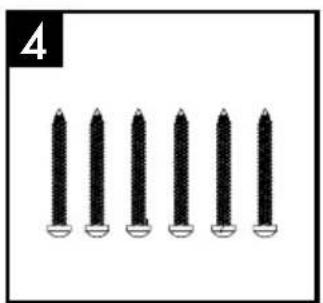
natural_image
Six identical black screwdrivers arranged in a row, no text or symbols visible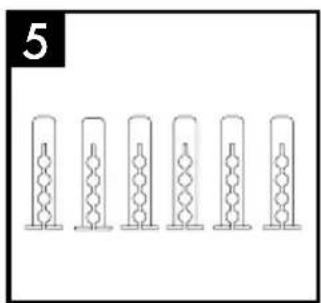
natural_image
Five identical vertical cylindrical objects with internal zigzag patterns, arranged horizontally (no text or symbols)
natural_image
Two schematic diagrams labeled 6 and 7 showing vertical cylindrical components with mounting holes, no text or symbols present.natural_image
Diagram of a TV rack with an antenna and socket, showing no text or symbolsnatural_image
Diagram of a device rear panel with ports and indicator lights (no text or labels)Anemometro:
natural_image
Technical line drawings of three views of a device housing with mounting holes and internal compartments (no text or symbols)Udometro:
natural_image
Technical line drawing of a mechanical device with mounting brackets and internal components (no text or symbols)
other
| Metric | Value | | :--- | :--- | | CHI IN | 188.8°E MAX 98% | | HEAT INDEX DEW POINT MAX MIN | 188.8°E | | ZONE ALARM | 38.88 | | RAINFALL DAILY MONTHLY WEEKLY TOTAL | 8888 in mm | | SPEED AVERAGE GUST ALARM HI MAX NH | 188.8 | | BEAUTORT mph m/s km/h knots Wind Chill ALARM Lo | 188°E MAX MIN |
radar
| Direction | Speed | Average Gust | | --------- | ----- | ------------ | | ALARM | 188.8 | Beaufort | | CHW | 188.0 | ICE |
natural_image
Technical line drawing of a mechanical assembly with no visible text or symbolsflowchart
graph LR
    A["Top Block: Speed Average 0.0 m/s"] --> B["Bottom Block: Speed Average 0.0 m/s"]
    B --> C["Output 0.0 m/s"]
    D["Bottom Block: Speed Average 0.0 m/s"] --> E["Output 0.0 m/s"]
    E --> F["Output 0.0 m/s"]
$$ \begin{array}{l} N = N o r d \ N E = N o r d - e s t \ E = E s t \ S E = S u d - e s t \ S = S u d \ S W = S u d - o v e s t \ W = O v e s t \ N W = E s t \ \end{array} $$
natural_image
Row of simple weather icons including sun, cloud, moon, and cloud with different line styles (no text or symbols)bar
DAILY MONTHLY WEEKLY TOTAL | Rainfall (mm) | Value | | :--- | :--- | | -5 | 8888 | | -4 | 8888 | | -3 | 8888 | | -2 | 8888 | | -1 | 8888 | | 0 | 8888 | The chart displays a single bar for the total weekly rainfall of 8888 mm, with an upward arrow indicating the increase from the previous month. The x-axis represents the rainfall amount in millimeters.natural_image
Technical line drawing of a mechanical device with no visible text or symbols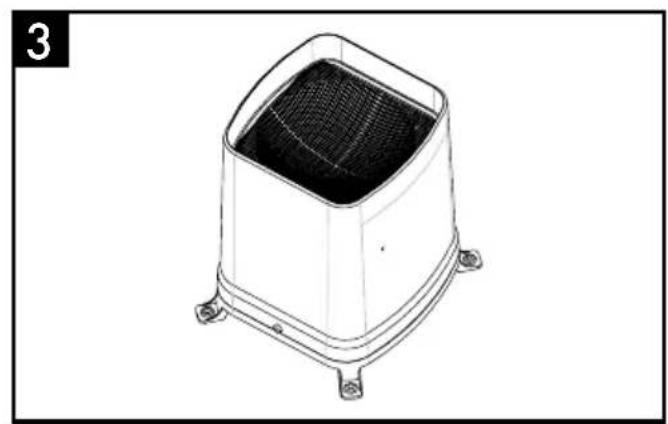
natural_image
Technical line drawing of a square-shaped device with a mesh grille and mounting feet (no text or symbols)
natural_image
Six black screwdrivers arranged in a row, no text or symbols visible
natural_image
Five identical cylindrical objects with internal diamond patterns arranged in a row (no text or symbols visible)
natural_image
Four identical cylindrical mechanical components with black and white segments, arranged horizontally (no text or symbols visible)
natural_image
Two vertical rectangular objects with circular ends, no text or symbols presentnatural_image
Line drawing of a front-mounted electronic device with ports and cables, showing no text or symbols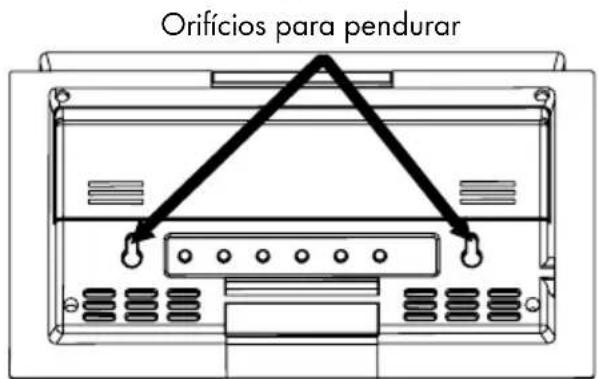
natural_image
Diagram of a device rear panel with labeled ports and connectors (no text or symbols)Anemómetro:
natural_image
Technical line drawing of a mechanical component with mounting holes and a central pin (no text or symbols)natural_image
Technical line drawing of a mechanical component with mounting holes and internal structure (no text or symbols)
natural_image
Technical diagram of a mechanical or electronic component with no visible text, numbers, or symbolsPluviómetro:
natural_image
Technical line drawing of a mechanical device with mounting flanges and internal components (no text or symbols)natural_image
Technical line drawing of a mechanical assembly with no visible text or symbols11.3 Registo automático do anemómetro e do pluviómetro na estação meteorológica
flowchart
graph LR
    A["0.0 mph"] --> B["W→Speed AVERAGE 0.0 mph"]
    B --> C["W→Speed AVERAGE 0.0 mph"]
    C --> D["0.0 insta"]
    D --> E["W→Speed AVERAGE 0"]
    E --> F["Deafort"]
17. Ajustar o alarme de vento
Prima a tecla ▲ ou a tecla ▼ para configurar o valor desejado.
21. Ajustar a unidade da temperatura
Hora Data Dia da semana
22.2 Fuso horário
natural_image
Row of eight weather icons including sun, cloud, moon, and rain (no text or symbols)- General information......Page 65
- Intended use Page 65
- Technical data Page 65
- Safety information ......Page 66
- Scope of delivery ......Page 66
- Definition of terms....Page 67
- Functions Page 67
- Commissioning Page 68
- Inserting and replacing batteries....Page 70
- Device overview....Page 71
- Preparing the wind gauge and rain gauge and registering on the weather station.....Page 73
11.1 Calibrating the wind gauge....Page 73
11.2 Preparing the rain gauge....Page 73
11.3 Automatic wind gauge and rain gauge registration on the weather station....Page 73
11.4 Manual wind gauge and rain gauge registration on the weather station....Page 73 - Weather station basic settings......Page 74
12.1 Setting Page 74
12.2 DCF-77 synchronisation....Page 75
12.3 Setting the time zone....Page 75 - Alarm function Page 76
- Setting the air pressure unit....Page 76
- Air pressure adjustment....Page 76
- Setting the wind speed unit....Page 77
- Setting the wind alarm....Page 77
- Setting the wind chill alarm....Page 77
- Switching the Wind Alarm and the Wind Chill Alarm on and off....Page 78
- Setting the rain gauge unit....Page 78
- Setting the temperature unit....Page 78
- Display Page 78
22.1 Date and time....Page 79
22.2 Time zone....Page 79
22.3 Temperature and air humidity indoors/outdoors....Page 79
22.4 Displaying Heat Index and Dew Point....Page 79
22.5 Rainfall quantity....Page 79
22.6 Ice/frost alarm....Page 80
22.7 Wind direction....Page 80
22.8 Wind speed....Page 80
22.9 Air pressure change....Page 81
22.10 Minimum and maximum values....Page 81
22.11 Weather forecast......Page 81
22.12 Weather trend Page 81 - Maintenance Page 81
23.1 Battery charge indicator Page 81
23.2 Rain gauge leaf filter....Page 82 - Troubleshooting errors in the measuring results Page 82
- Cleaning Page 82
- Disposal Page 82
Premium weather station
1. General information
ATTENTION! READ OPERATING INSTRUCTIONS BEFORE USE! KEEP OPERATING INSTRUCTIONS IN A SAFE PLACE! THIS PRODUCT IS NOT A TOY! KEEP OUT OF REACH OF CHILDREN.
Read the operating instructions carefully and use the product as described in the instructions to avoid injury and damage. We accept no responsibility for damage resulting from inappropriate use and failure to comply with the safety instructions.
Symbols used in these instructions:

WARNS OF RISK OF INJURY!
The word DANGER warns of possible risks of severe or fatal injury.
The word CAUTION warns of possible risks of minor injury or damage.

POINTS TO FURTHER INFORMATION!
2. Intended use
The weather station informs you of the current weather conditions and provides a weather forecast. The weather station is equipped with a rain gauge, wind gauge, barometer, radio clock and calendar. Only for personal use. Not for commercial use.
3. Technical data
Measuring Range:
Room Temperature: 0.0 °C to +50.0 °C,
Resolution: 0.1 °C
32.0 °F to 122.0 °F,
Resolution: 0.1 °F
Outside Temperature: -20.0 °C to +60.0 °C
Resolution: 0.1 °C
-4.0 °F to +140.0 °F
Resolution: 0.1 °F
Air humidity: 20 to 99 %
Resolution 1 %
Air pressure: 850 mb to 1050 mb
850hPa to 1050hPa
25.1 inHg to 31 inHg
(mercury column in inches)
Wind speed: 0–30 m/s
0-108km/h
0-67 mph
0-58.3 knot
0-11 Beaufort
Rainfall measurement: 0-9999 mm
0-393.66 inch
Outdoor sensor range: 25 m (open area)
Exceeded range of measurement:
The following displays can be expected outside of the range of measurement:
Readings below the measurement values:
- Room temperature below 0 °C: LL.L
- Outdoor temperature below -50 °C: LL.L
- Air humidity below 20 %: 20 %
- Air pressure below 850 hPa: 850 hPa
- Heat Index below 14 °C: LL.L
- Dew Point below 0 °C: LL.L
- Wind Chill below -90 °C: LL.L
Values above the measurement values:
- Room temperature above 50 °C: HH.H
- Outdoor temperature above 70 °C: HH.H
- Air humidity above 99 %: 99 %
- Air pressure above 1050 hPa: 1050 hPa
- Heat Index above 60 °C: HH.H
- Dew Point above 60 °C: HH.H
- Wind Chill above 60 °C: HH.H
- Rainfall quantity above 9999 mm: HHH
- Wind speed above 50 m/s: 50 m/s

WARNING!
The display becomes increasingly less clear in temperatures under approximately -20^ . Depending on the type of battery, power limitations are to be
expected at low temperatures (normally as of -20 °C). Do not place the weather station or the external sensor in direct sunlight.

CAUTION!
At temperatures above 60 °C (also depending on the type of battery), the battery acid may leak.
Power Supply:
Weather station: 6 x 1.5 V battery, type AA
Wind gauge: 2 x 1.5 V battery, type AA
Rain gauge: 2 x 1.5 V battery, type AA
Operating life with full batteries: approx. 90 operating days.

WARNING!
Herewith OWIM GmbH & Co. KG, Stiftsbergstraße 1, D-74167 Neckarsulm, declares that the article Premium weather station · model number: H13726, Version: 07 / 2015, fulfills the basic requirement and the other relevant requirements of 1999 / 5 / EC.

The declaration of conformity can be found under www.owim.com.
4. Safety information

■ Swallowing batteries could be fatal. Keep batteries and the weather station out of the reach of children. Consult a doctor immediately if a battery is swallowed.

DANGER OF INJURY!
■ Remove the batteries from the device when empty.
■ Never short-circuit the connection poles.
This appliance can be used by children aged from 8 years and above and persons with reduced physical, sensory or mental capabilities or lack of experience and knowledge if they have been given supervision or instruction concerning use of the appliance in a safe way and understand the hazards involved. Children shall not play with the appliance. Cleaning and user maintenance shall not be made by children without supervision.

CAUTION - MATERIAL DAMAGE!
■ Only use the specified battery type.
■ Ensure correct polarity.
- Check the batteries regularly for leaks.
If the device is not used for long periods of time, remove the batteries.
- Do not immerse the weather station or the external sensor in water or other liquids.
■ Follow the instructions for cleaning and storage in this manual.
5. Scope of delivery


natural_image
Technical line drawing of a mechanical device with internal components and mounting brackets (no text or symbols)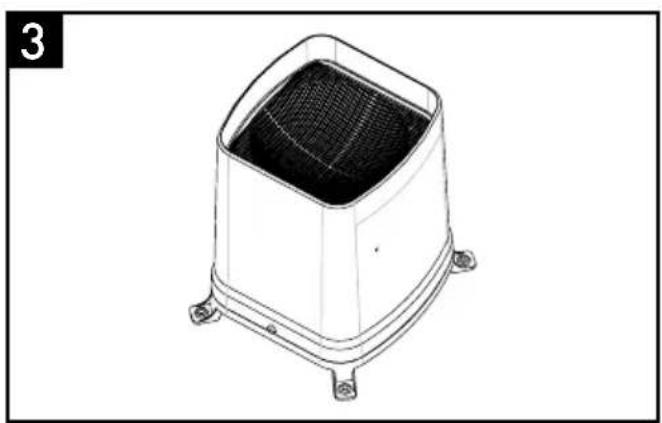
natural_image
Technical line drawing of a square-shaped industrial component with internal mesh structure and mounting feet (no text or symbols)
natural_image
Six black screwdrivers arranged in a row, no text or symbols visible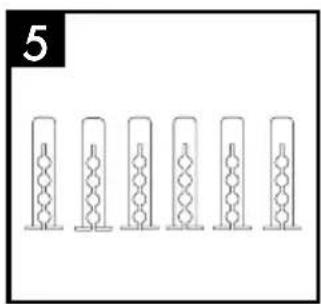
natural_image
Five identical vertical cylindrical objects with internal rings, arranged horizontally (no text or symbols)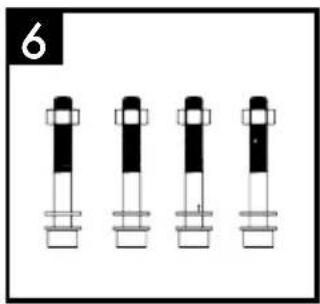
natural_image
Four identical cylindrical mechanical components with black and white segments, arranged horizontally (no text or symbols visible)
natural_image
Two vertical cylindrical objects with circular ends, no text or symbols present1 1 weather station with stand
2 1 wind gauge with integrated temperature and air humidity sensor
3 1 rain gauge with leaf filter
4 6 screws suitable for ∅ 5 mm dowels
5 6 dowels ∅ 5 mm
6 4 hexagonal socket head bolt M6 including 4 nuts and 8 washers
7 2 mounting clamps for wind gauge
6. Definition of terms
Dew Point:
The dew point (Dew Point) refers to the point at which the air releases water vapour in the form of fog and / or condensate.
Example: if the air is cooled down constantly and the air humidity stays the same, the relative air humidity increases to 100 %. This means that the dew point has been reached and the cooled air contains the maximum possible water vapour at this temperature.
Heat Index:
The heat index (Heat Index) is the air temperature felt on the human body taking into consideration the measured air temperature and the air humidity.
Wind Chill:
The wind chill (Wind Chill) refers to the difference between the measured (air temperature) and the temperature felt on the human body, which depends on the wind speed. The wind chill is the measurement used for wind-dependant cooling of an object. Humans feel this wind chill particularly on the face. As wind chill can only be calculated for temperatures close to or under the 0 °C limit, it is mostly replaced by the heat index for higher temperatures (Heat Index).
7. Functions
Weather station:
- Radio-controlled DCF-77 time signal reception with time display, time-zone setting
- Date display
- Alarm clock with snooze function
- Room temperature and interior humidity display with storage of the minimum and maximum measurement values
- Outside temperature and outside humidity display with storage of the minimum and maximum measured values
- Barometric pressure display
- Weather trend display
- Battery status display (weather station, wind gauge and rain gauge)
- Wind direction display
Functions/Commissioning
- Wind speed with wind alarm
- Dew point display (Dew Point)
- Ice/frost alert
- Precipitation display
- Wind speed and wind direction display
- Wind chill display (Wind Chill)
- Can be mounted standing or hanging
- For indoor use only
Wind gauge:
- Transmits the wind speed, temperature and humidity to the weather station on 434 MHz frequency
- Assembled on a mast of approx. 25-31 mm
- Can only be assembled in areas free from buildings, walls or other obstructions, as the measurement values will otherwise be impaired.
Rain gauge:
- Transmits rainfall quantity to the weather station on 434 MHz frequency
- Easy to stand or mount with screws on an even surface
- It is best to stand or mount the rain gauge in an areas which are not protected from rain.

CAUTION!
Comply with the following safety instructions when using the wind gauge and rain gauge:
- Never immerse the measuring devices in water or other liquids
- Never place the measuring devices in ovens or microwaves
- Never expose the measuring devices to temperatures below -20 °C or above 60 °C
- Keep the measuring device away from chemicals
8. Commissioning

WARNING!
Familiarize yourself with the weather station, wind gauge and rain gauge before assembly. The operating
instructions are easier to understand if you are holding the devices in your hand while reading them.
Setting up the weather station:
The weather station comes with a pre-assembled stand, making it easy to set up the weather station in the desired position.
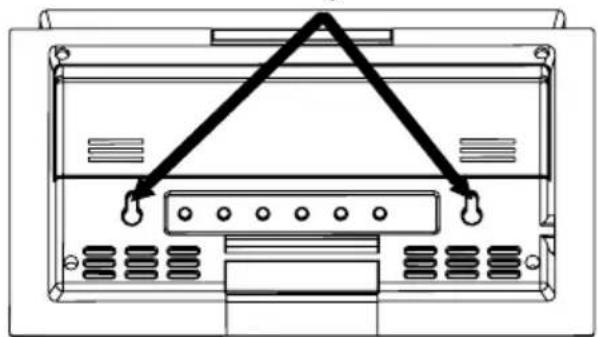
Weather station – wall mounting:
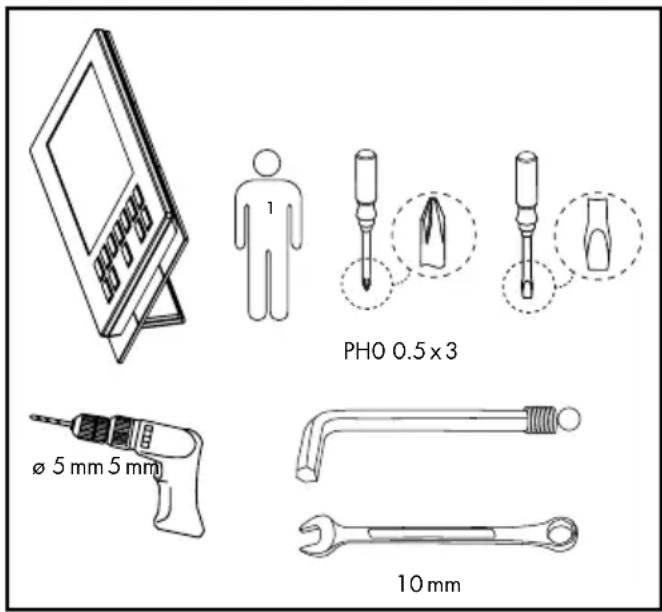
- Mark the drill holes (horizontal distance approximately 11.3 cm) for the weather station and make sure that no electrical or water lines will be damaged before drilling the holes ( 5 mm).
- Push the dowel into the drilled hole until it is flush with the wall.
- Screw the supplied screws into the dowels, allowing them to protrude slightly for the weather station to be hung on.
The pre-assembled stand can be removed from the weather station. Fold the stand downwards and pull it out of the slot. To attach again, follow the same procedure in reverse order.

natural_image
Line drawing of a front panel with buttons and ventilation slots, showing internal components and directional arrows (no text or symbols)Hanger

natural_image
Diagram of a TV or audio device back panel with no visible text or symbolsWind gauge assembly:
Choose a suitable location for your wind gauge.
- The wind gauge must be set up outdoors.
- The wind must be able to access the wind gauge from all sides to enable the wind force and wind direction to be measured accurately.
- Ensure that the vane and the wind wheel are not blocked to guarantee accurate measurements.
- The wind gauge must be assembled within the signal transmission range. Walls reduce the transmission range. Check the signal reception on the weather station before final assembly.
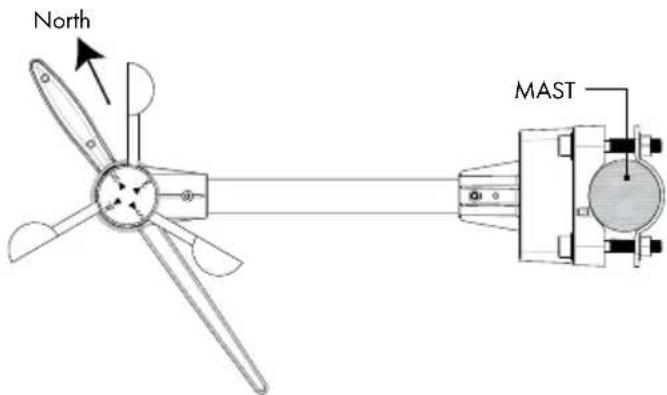
Ideally, the wind gauge should be mounted on a mast or roof of a house, where the wind can act directly on the wind gauge.
A mast is required with a diameter of approx. 25–31 mm (not included) which stands stable and vertical. Mount the wind gauge as shown below with the hexagonal socket head bolt, washers, mounting screws and nuts provided. After assembly, ensure that the wind gauge is positioned horizontally with a stable hold.
The wind gauge must be positioned horizontally to guarantee accurate measurements.

Setting up the rain gauge:
Choose a suitable location for the rain gauge.
- The rain gauge must be positioned outdoors. The device must not be impaired by objects and obstructions. Do not position under trees or next to walls.
- The rain must be able to fall on the rain gauge without obstructions to achieve an accurate rainfall measurement.
- Ensure that rain water does not accumulate under the rain gauge. It must be able to flow off freely.
- The rain gauge must be assembled within the range of the signal transmission. Walls reduce the transmission range. Check the signal reception on the weather station before final assembly.
When you have found a suitable position, ensure that the surface is completely horizontal to guarantee accurate rainfall measurement.
The rain gauge can simply be stood in the desired position or fixed with the screws provided.
- Mark the drill holes using the rain gauge before drilling the holes (ø 5 mm), ensure that no electrical cables or water pipes can be damaged.
- Push the supplied dowel into the drilled hole until it is flush with the wall.
- Fix the rain gauge with the screws provided.
9. Inserting and replacing batteries
Put the batteries first into the outdoor sensor (wind gauge / rain gauge), then into the weather station.
Weather station:
- Open the battery compartment on the rear of the weather station in the direction of the arrow.
- Insert the batteries (6 x 1.5 V type AA) ensuring correct polarity. When one of the two battery rows is full, a beep sounds.
- Place the battery compartment cover on the battery compartment to close. Push the battery compartment cover in the opposite direction to the arrows until it engages.

natural_image
Diagram of a device rear panel with ventilation slots and indicator lights (no text or labels)Wind gauge:
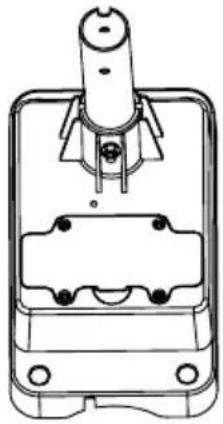
- The wind gauge must be recalibrated when using it for the first time as well as every time the battery is replaced. Please refer to section 11.1. To open the battery compartment, loosen the 4 cross-head screws on the battery compartment cover.
- Lift off the battery compartment cover.
- Insert the batteries (2 x 1.5 V type AA) ensuring correct polarity. Ensure that the black strap lies under the batteries. This strap can be used to remove the batteries when they need to be replaced.
- Place the battery compartment lid on the battery compartment again. Ensure that the sealing ring on the battery compartment is positioned correctly in the recess. Only then is the battery compartment waterproof.
- Tighten the 4 screws on the battery compartment cover again.
natural_image
Technical line drawing of a mechanical component with no visible text or symbols
natural_image
Technical line drawing of a mechanical component with mounting holes and internal structure (no text or symbols)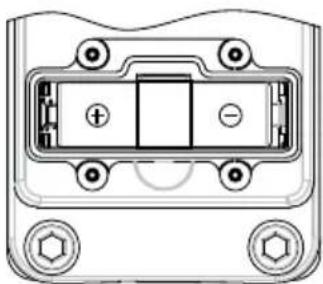
natural_image
Technical diagram of a battery pack with no visible text or symbolsRain gauge:
- Use a slotted screwdriver to loosen the 2 adjacent fastening screws on the housing of the rain gauge.
- Lift the housing carefully off the base of the device.
- To open the battery compartment, loosen the 4 cross-head screws on the battery compartment cover.
- Lift off the battery compartment cover.
- Insert the batteries (2 x 1.5 V type AA) ensuring correct polarity.
- Place the battery compartment lid on the battery compartment again. Ensure that the sealing ring on the battery compartment is positioned correctly in the recess. Only then is the battery compartment waterproof.
- Tighten the 4 screws on the battery compartment cover again.
- Place the housing carefully over the base of the device.
- Fix the housing onto the base of the device again with fastening screws.


natural_image
Technical line drawing of an industrial machine or control unit with internal components and mounting base (no text or symbols)Socket for 6V DC adaptor (adaptor not included)

10. Device overview
Weather Station:
Weather forecast and air pressure
Temperature display and air humidity indoors/outdoors

other
| Metric | Value | | :--- | :--- | | CHD IN | 188.9°E MAX 88% | | HEAT INDEX DEW POINT MAX MIN | 188.8°E | | ZONE ALARM (PM) | 38:88 (0.22) | | RAINFALL (in mm) | 8888 (in mm) | | DAILY MONTHLY WEEKLY TOTAL (in mm) | 8888 (in mm) |Wind speed, wind direction and rainfall quantity
Time and alarm
Buttons - front side
| Button Press | once Press for | ap-prox. 3 sec. |
| RAIN/CLEAR | Precipitationquantity day/week/month/total | Delete data |
| WIND Average | wind speed (AVER-AGE) and gusts of wind (GUST) | |
| PRESSURE Air | pressure unit modification(inHg, mb or hPa) | Air pressure adjustment |
| CHANNEL/SEARCH | Channel selec-tion (inside, out-side or alternate) | Search for transmitter sensors |
| HEAT INDEX | Switch display between temper-ature felt by humans (Heat Index) and dew point (Dew Point) | |
| DEW POINT | ||
| CLOCK Switch | display between local time, date and day of the week | Set date and time |
| ALARM Display | and active/deactivate alarm time | Set alarm time |
| RAIN HISTORY | Current precipitation display and precipitation display for the last 6 days / weeks/months | |
| WIND ALARM | Display of Wind Alarm and Wind Chill Alarm | |
| MEMORY Display | play of automatically saved min. and max. values for temperature, air humidity, dew temperature (Dew Point), temperature felt by humans (Heat Index), wind chill (Wind Chill) and wind speed | |
| ▲ Settings | forwards | Settings fast-forwards |
| ▼ Settings back | Settings rewind |
Buttons - back side
| Button Press once Press for | ap-prox. 3 sec |
| WIND AL ⬆ | Switch the Wind Alarm and Wind Chill Alarm on and off |
| Button Press | once Press for | ap-prox. 3 sec. |
| WIND UNIT Set | the windspeed unit(Beaufort, mph,m/s, km/h or knots) | |
| RAIN UNIT Set | the rainfallquantity measurement unit(mm or inch) | |
| Search for the DCF-77 transmission signal | ||
| ZONE Switch | betweenlocal time andworld time | Set world time |
| C/F Switch from °Cto °F | ||
| SNOOZE /LIGHT | Snooze function/backgroundlighting | |
Wind gauge:
Housing with built-in temperature gauge and air humidity gauge
Vane with built-in compas

Device overview / Preparing the wind gauge and rain gauge and registering ...

11. Preparing the wind gauge and rain gauge and registering on the weather station
11.1 Calibrating the wind gauge
The wind gauge must be recalibrated when using it for the first time as well as every time the battery is replaced. Follow the procedure outlined below:
- Before inserting the battery, point the vane north.
- Be sure the wind wheel and vane are not turning.
- Insert the batteries, ensuring correct polarity (see the instructions listed under Point 9. Inserting and replacing batteries / Wind gauge).
- The transmission signal LED lights up briefly. The wind gauge is now calibrated.
11.2 Preparing the rain gauge
- Insert the batteries in the rain gauge (see the instructions listed under Point 9. Inserting and replacing batteries/Rain gauge).
- Remove the transport protection which holds the rain rocker.

natural_image
Technical line drawing of a mechanical device with no visible text or symbols11.3 Automatic wind gauge and rain gauge registration on the weather station
After inserting batteries in the wind gauge and the rain gauge, insert batteries in the weather station (see the instructions listed under Point 9. Inserting and replacing batteries / Weather station).
The weather station searches automatically for the transmission signals from the wind gauge and rain gauge. The process takes approx. 4 minutes.
11.4 Manual wind gauge and rain gauge registration on the weather station
After the batteries have been replaced in the wind gauge and rain gauges, they must be registered again on the weather station. After replacing the batteries and calibrating the wind gauge, press the CHANNEL / SEARCH button on the weather station for approx. 5 seconds. The entry is confirmed with a confirmation tone. The measurement value displays now flash on the wind gauge and rain gauge displays. The process can take up to 4 minutes
12. Weather station basic settings
12.1 Setting
- 12/24 hour format
- Time
- Date format
- Date
Jump to the next menu item with the CLOCK button. Press ▲ and ▼ to make the settings. If none of the setting buttons has been pressed for approx. 60 seconds, the weather station returns automatically to the time display.
12/24 hour format:
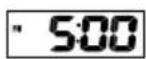
While in the time display, press the CLOCK button for approximately 3 seconds to access the setting mode. 24 h flashes on the display. Press ▲ and ▼ to switch between 24 h and 12 h display. AM / PM is displayed to the left of the time in 12 h display mode.


Hours:
Press the CLOCK button to set the hour. The hours now flash on the display. Use ▲ and ▼ to set the hour.

Minutes:
Press the CLOCK button again to set the minutes. The minutes now flash on the display. Use ▲ and ▼ to set the minutes.

Year:
Press the CLOCK button a second time to set the year. The year now appears on the display. Use ▲ and ▼ to set the year.

Date format:
Press the CLOCK button again to set the month format. The letters D (D = Day) and M (M = Month) flash in the date on the display. Use ▲ and ▼ to set the date format.

Month:
Press the CLOCK button again to set the month. The month now flashes on the display. Press ▲ and ▼ to set the month.

Day:
Press the CLOCK button again to set the day. The date now flashes on the display. Press ▲ and ▼ to set the day.

Press the CLOCK button again to return to the time display.
12.2 DCF-77 synchronisation
This functions sets the time and date automatically. Press ⬆ to activate the synchronisation for radio-controlled DCF-77 time information.
Press ♂ and the ♂ symbol appears on the display. When the transmission signal is received, a ♂ symbol appears. If no radio waves appear, no DCF 77 reception is available in this location. If the reception is stable, the ♂ symbol is shown continuously on the display after approx. 3–5 minutes.
Press again to deactivate the DCF-77 synchronisation.

WARNING!
The displays for time and date in Central Europe are transferred via DCF-77 radio signals. The transmitter is close to Frankfurt and transmits on a transmission radius of approximately 1500 km. If your weather station receives this signal, it is not necessary to switch to and from daylight savings time.
The reception quality can be restricted by the geographical location (e.g. deep valleys) or structural conditions (e.g. behind concrete walls).
Electromagnetic fields can also have a negative influence on signal (DCF) reception. Position the weather station and the external sensor in a suitable location. Follow the instructions listed under "DCF-77 synchronisation" to switch on the transmission signal again.
12.3 Setting the time zone
You can switch between local time and the selected zone time while the time is displayed. The time zones are divided into 24 zones. You can select a time zone from +12 hours to -12 hours.
Setting the time zone:
Press and hold the ZONE button for approximately 3 seconds. A confirmation signal sounds and 0 flashes on the display.

Press ▲ and ▼ to set the time zone. You can select a time zone from +12 hours to -12 hours.

Press the ZONE button to return to the time display. If no setting button is pressed for 60 seconds while in the time zone setting mode, the weather station automatically returns to the time display.
You can use the ZONE button to display the selected time zone. ZONE appears next to the time. By pressing the ZONE button again, you are returned to your local time.


WARNING!
When setting the time zone, use the following specifications:
Set -1 Hr.:
Atlantic, Great Britain, Ireland, Iceland, Portugal
Set 0 Hrs.:
Albania, Belgium, Bosnia-Herzegovina, Denmark, Germany, France, Gibraltar, Italy, Croatia, Liechtenstein, Luxembourg, Malta, Macedonia, Monaco, The Netherlands, Norway, Austria, Poland, San Marino, Sweden, Switzerland, Serbia, Slovakia, Slovenia, Spain (with the exception of the Canary Islands), Czech Republic, Hungary
... / Alarm function / Setting the air pressure unit / Air pressure adjustment
Set +1 Hr.:
Bulgaria, Estonia, Finland, Greece, Latvia, Lithuania, Moldova, Romania, Turkey, Ukraine, Cyprus
All other time zones can be found in your Atlas or on the Internet.
13. Alarm function
To set the alarm time, press and hold the ALARM button for 3 seconds while the time is displayed. When the confirmation signal has sounded, ALARM appears on the display and the hours flash.

Use ▲ and ▼ to set the hours.
Press the ALARM button again to jump to the minute setting. The minutes flash in the display.

Use ▲ and ▼ to set the minutes. Press the ALARM button to return to the time display.
The alarm function is activated and appears next to the time.

Deactivating the alarm function:
Press the ALARM button twice while the time is displayed until ▲ disappears.

Press the ALARM button again to reactivate the alarm function. Press the CLOCK button to return to the time display.
If no button is pressed for approximately 20 seconds while the switch is being made, the weather station automatically returns to the time display.
Switching the alarm signal off:
The alarm signal sounds for approx. 2 minutes and flashes on the display. The alarm can be turned off prematurely by pressing the ALARM button.

Snooze function:
Press the SNOOZE / LIGHT button to pause the alarm signal for approx. 10 minutes. During this period, flashes above the time display.

The alarm signal then sounds again for approximately 2 minutes. You can interrupt the alarm signal again with the SNOOZE / LIGHT button or switch it off with the ALARM button.
14. Setting the air pressure unit
Press the PRESSURE button to switch between the units hPA (Hectopascal), mb (Millibar) and inHg (Mercury column in inches).

15. Air pressure adjustment
When batteries have been inserted in the weather station, an air pressure of 1013 hPa appears on the display. This value is pre-set. You can adjust the air pressure to suit your current location. First find out
... / Setting the wind ... / Setting the Wind Alarm / Setting the Wind Chill Alarm
the current air pressure value, e.g. from the newspaper or Internet.
Hold the PRESSURE button down for approx. 3 seconds until you hear a confirmation tone. The air pressure value now flashes on the display. Use ▲ or ▼ to set the desired value. Press the PRESSURE button to return to the standard display. The standard display will also appear automatically if no setting button is pressed for approx. 1 minute.

16. Setting the wind speed unit
The wind speed can be displayed in 5 different units.
- km / h (kilometres per hour)
- mph (miles per hour)
- m / s (meters per second)
- knots
- Beaufort
Press the WIND UNIT button on the rear side of the weather station to switch between the different units.
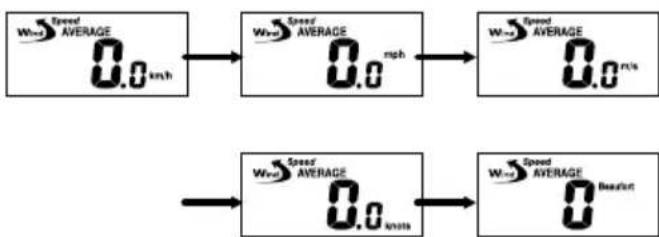
flowchart
graph LR
    A["0.0 km/h"] --> B["0.0 mph"]
    B --> C["0.0 m/s"]
    D["0.0 knots"] --> E["0.0 m/s"]
    E --> F["0.0 knots"]
17. Setting the wind alarm
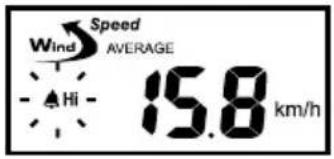
A wind alarm can be set for gusts (maximum speed for the last 10 minutes). Press the WIND ALARM button until ALARM and GUST appears on the display.

Hold the WIND ALARM button down for approx. 3 seconds until a confirmation tone sounds and the value flashes.

Use ▲ or ▼ to set the desired value. Press the WIND ALARM button to confirm the entry and ▲Hi appears on left next to the wind speed.
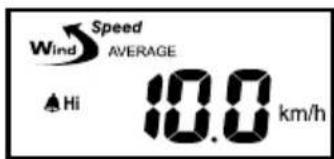
The wind alarm is now activated. Press WIND AL to deactivate the wind alarm again. Press WIND AL until disappears.
If a gust of wind reaches or exceeds the set value, a warning signal sounds for approx. 1 minute and Hi flashes in the display.
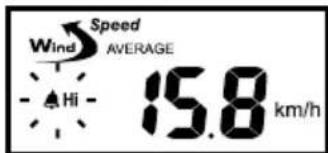
Press WIND ALARM to stop the alarm tone prematurely. ▲Hi flashes until the gusts of wind (over the last 10 minutes) fall below the set limit value again.
18. Setting the wind chill alarm
A Wind Chill Alarm can also be set. Press the WIND ALARM button until ALARM appears next to the Wind Chill temperature.
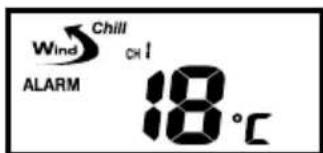
Hold the WIND ALARM button down for approx. 3 seconds until a confirmation tone sounds and the value flashes.

Use ▲ or ▼ to set the desired value. Press the WIND ALARM to confirm the entry, which then appears on left next to the Wind Chill temperature ▲Lo

The Wind Chill Alarm is now activated. Press the WIND AL ▲ button to deactivate the Wind Chill Alarm. Press WIND AL ▲ until ▲ disappears.
If the Wind Chill Temperature reaches or falls below the set value, a warning signal sounds for approx. 1 minute and ▲Lo flashes in the display.

Press WIND ALARM to stop the alarm tone prematurely. ▲Lo flashes until the Wind Chill Temperature rises above the limit value again.
19. Switching the Wind Alarm and the Wind Chill Alarm on and off
Press the WIND AL button to switch the wind alarm and Wind Chill Alarm on and off. If the alarm is switched on, the relevant alarm symbol Hi / Lo appears.
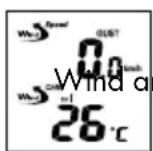
and Wind Chill Alarm off

arm on

hill Alarm on
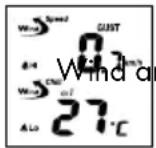
nd Wind Chill Alarm on
20. Setting the rain gauge unit
You can choose between displaying the rainfall quantity in mm (millimetres) or in (inches). Press the RAIN UNIT button on the rear side of the weather station. Each time the button is pressed, the unit on the display changes.


21. Setting the temperature unit
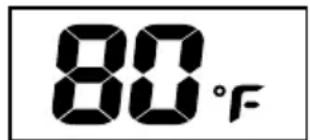
The temperatures can be displayed in °C (Grad Celsius) or in °F (Grad Fahrenheit). Press the C / F button on the rear of the weather station to switch between the two units. Each time the button is pressed, the unit on the display changes.

22. Display
Background illumination:
Press the SNOOZE / LIGHT button to switch on the background illumination. After approx. 10 seconds, the background illumination switches off automatically.
22.1 Date and time
Press the CLOCK button to switch between the time, date and day of the week. If no button has been pressed for a period of approximately 20 seconds, the time display appears automatically.

Time Date Day of the week
22.2 Time zone
You can use the ZONE button to display the selected time zone. ZONE appears next to the time. By pressing the ZONE button again, you are returned to your local time.

22.3 Temperature and air humidity indoors/outdoors
Press the CHANNEL / SEARCH button to display the temperature and air humidity for indoors or outdoors. The values for indoors and outdoors can also be displayed alternately. Then, ⬆ appears on the display.

22.4 Displaying Heat Index and Dew Point
Press the HEAT INDEX; DEW POINT button to switch between the Heat Index and Dew Point.

22.5 Rainfall quantity
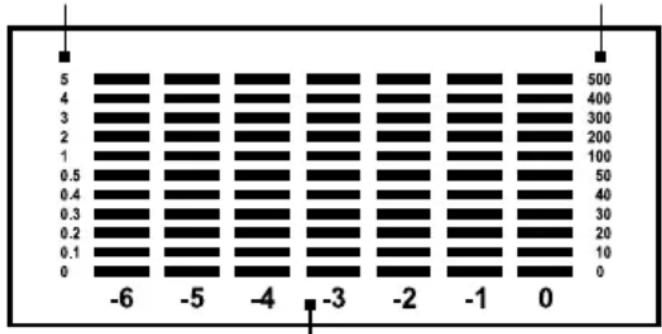
The weather station has an automatic memory for the amount of rainfall. The rainfall quantity can be displayed in different chronicles either as a digital value or in diagram form:
Digital value:

Diagram:
Unit in inches Unit in millimetres
bar
| Value | |---| | 5 | | 4 | | 3 | | 2 | | 1 | | 0.5 | | 0.4 | | 0.3 | | 0.2 | | 0.1 | | 0 | -6 -5 -4 -3 -2 -1 0 500 400 300 200 100 50 40 30 20 10 0The rainfall over the past days / weeks / months from the current time (0) up to 6 days / weeks / months earlier (-6)
Press the RAIN / CLEAR button to switch between the following rainfall quantity displays:
- Total rainfall quantity
- Rainfall quantity each day
- Rainfall quantity each week
- Rainfall quantity each month
The current value is displayed. A diagram is shown under this value containing the relevant history of the last 6 units.

Overall quantity

Quantity each day

Quantity each week
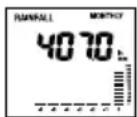
Quantity each month
Detailed information can be displayed on the history.
Example:
Press the RAIN / CLEAR until the rainfall quantity is shown. The value shown represents the rainfall quantity for the current day. Underneath this value,
Display
a diagram is shown containing the rainfall quantity for the current day and the past 6 days.

bar
RAINFALL DAILY | Rainfall (mm) | Value | | :--- | :--- | | -6 | | | -5 | | | -4 | | | -3 | | | -2 | | | -1 | | | 0 | 250.2 | | 1 | | | 2 | | | 3 | | | 4 | | | 5 | | | 6 | | | 7 | | | 8 | | | 9 | | | 10 | | | 11 | | | 12 | | | 13 | | | 14 | | | 15 | | | 16 | | | 17 | | | 18 | | | 19 | | | 20 | | | 21 | | | 22 | | | 23 | | | 24 | | | 25 | | | 26 | | | 27 | | | 28 | | | 29 | | | 30 | | | 31 | | | 32 | | | 33 | | | 34 | | | 35 | | | 36 | | | 37 | | | 38 | | | 39 | | | 40 | | | 41 | | | 42 | | | 43 | | | 44 | | | 45 | | | 46 | | | 47 | | | 48 | | | 49 | | | 50 | | | 51 | | | 52 | | | 53 | | | 54 | | | 55 | | | 56 | | | 57 | | | 58 | | | 59 | | | 60 | | | 61 | | | 62 | | | 63 | | | 64 | | | 65 | | | 66 | | | 67 | | | 68 | | | 69 | | | 70 | | | 71 | | | 72 | | | 73 | | | 74 | | | 75 | | | 76 | | | 77 | | | 78 | | | 79 | | | 80 | | | 81 | | | 82 | | | 83 | | | 84 | | | 85 | | | 86 | | | 87 | | | 88 | | | 89 | | | 90 | | | 91 | | | 92 | | | 93 | | | 94 | | | 95 | | | 96 | | | 97 | | | 98 | | | 99 | | | 100 |Press the RAIN HISTORY button to view the details. Every time the button is pressed, the display moves forward by one day.
Below, you will find a display for the past 2 days:
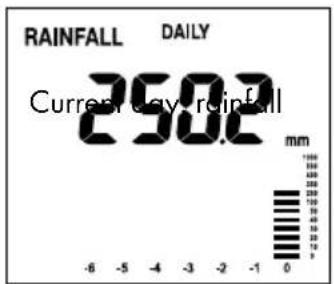
quantity 250.2 mm with bar display at 0

1 day earlier: rainfall quantity 0.0 mm with bar display at -1

quantity 156.7 mm with bar display at -2
You can display the history for weekly and monthly quantities using the same procedure.
There is no history for the total amount (TOTAL).
22.6 Ice/frost alarm
As soon as the outdoor temperature falls below 4 °C, the frost alarm symbol appears on the display. This warns of possible ground frost.

22.7 Wind direction
The wind gauge automatically shows the average wind direction for the last 2 minutes.
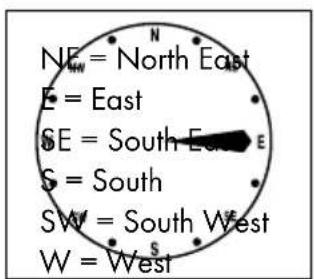
N = North
NW = North West
22.8 Wind speed
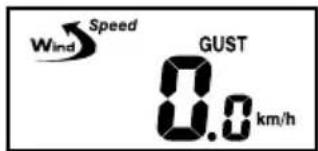
The weather station shows the average wind speed (AVERAGE) for the last 2 minutes and the maximum speed for gusts of wind (GUST) in the last 10 minutes. Press the WIND button to switch between the two displays.

22.9 Air pressure change
The weather station shows the changes in air pressure over the last 6 hours.

bar
| pH | inHg | -6 | -3 | -2 | -1 | 0 | hPa | |---|---|---|---|---|---|---|---| | >+0.12 | - | - | - | - | - | +4 | - | | +0.06 | - | - | - | - | - | +2 | - | | 0 | - | - | - | - | - | 0 | - | | -0.06 | - | - | - | - | - | -2 | - | | <-0.12 | - | - | - | - | - | -4 | - | | inHg | Hr | hPa | hPa | hPa | hPa | hPa | hPa |Hour trend
22.10 Minimum and maximum values
Use the MEMORY button to display saved minimum and maximum values.

22.11 Weather forecast
The weather station can predict the weather for the next 12–24 hours. The weather prediction function is based on the change in air pressure and is up to 75 % accurate. Since the weather can never be predicted with 100 % correctness, the manufacturer cannot be held responsible for incorrect weather predictions.

natural_image
Weather icons including sun, clouds, and raindrops (no text or symbols)Sunny Mainly sunny Rain StormsCloudy
22.12 Weather trend
The weather trend is also shown in addition to the weather forecast. There is an arrow for increasing, stable and decreasing.
23. Maintenance
23.1 Battery charge indicator
If the battery is empty, the symbol appears in the display. There is a separate symbol for the weather station, the wind gauge and the rain gauge.

If the indoors temperature is displayed, the battery charge indicator applies for weather station. If the outside temperature is shown, the battery charge indicator applies for the wind gauge.

Battery charge indicator for the rain gauge
Replace the batteries as soon as ▶ appears in the display. If the batteries are weak or empty, it is impossible to guarantee accurate measurement results. The procedure for replacing the batteries is outlined under point 9. Inserting and replacing batteries.
23.2 Rain gauge leaf filter
Remove foliage and any other objects which collect in the leaf filter of the rain gauge regularly. Only then can precise rain measurement be guaranteed.
24. Troubleshooting errors in the measuring results
WARNING! The weather station and the outside sensor contain sensitive electronic components. Radio waves transmitted e.g. from mobile telephones walkie talkies, radios, remote controls or microwaves may influence the functionality of the weather station and the outside sensor and lead to imprecise measurements. It is therefore important to maintain as great a distance as possible between the weather station and the external sensor and devices which send out radio waves. Electrostatic charge can also influence the measuring results. In this case, reset the weather station and the external sensor. This is done by removing the batteries and inserting them again after approximately 5 seconds.
NOTE! All saved data is lost.
Obstacles such as concrete walls can also cause that the reception is disturbed. In this case, change the location (eg near a window). Please take note that the external sensor should always be set up within max. 25 meters (open space) from the base station. The specified range is the free-field range and means that no obstacle should be between the remote sensor and the base station. A "visual contact" between remote sensor and base station often improves the transmission.
Cold (outdoor temperatures below 0^ C) can reduce the battery power of the outdoor sensor and thereby negatively impair the radio transmission.
Another factor that may cause harmful interference, are dead or weak batteries in the outdoor sensor. Replace them by new ones.
If your weather station is not working correctly, please remove the batteries for a short while and then replace them.
25. Cleaning
Only clean the device with a damp cloth. Never immerse the weather station, wind gauge or rain gauge in water.
26. Disposal
Disposing of the devices:

Never dispose of the devices in normal household waste. The devices should be disposed of via an authorized waste disposal company or your local waste disposal organization. The valid regulations must be complied with. If in doubt, contact your waste disposal organization.
Disposing of batteries:
Dispose of the batteries before disposing of the device. Old batteries should not be disposed of in household waste. Return your used batteries to your dealer or the designated returns point.
Disposing of packaging:

Dispose of all packaging material in an environmentally friendly manner.
CE IP44
Premium-Wetterstation
1. Allgemeine Information
natural_image
Technical line drawing of a mechanical device with no visible text or symbols
natural_image
Technical line drawing of a square-shaped electronic component with mounting feet (no text or symbols)
natural_image
Six black screwdrivers arranged in a row, no text or symbols visible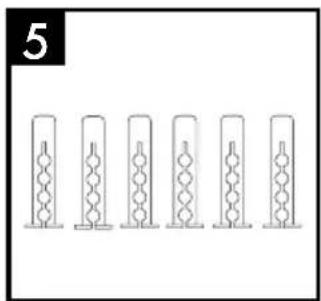
natural_image
Five identical cylindrical objects with internal rings, arranged horizontally (no text or symbols)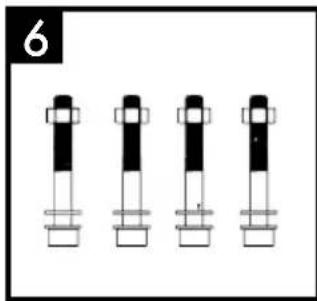
natural_image
Four identical cylindrical mechanical components with black and white segments, arranged horizontally (no text or symbols)
natural_image
Two vertical rectangular objects with circular ends, no text or symbols presentWandmontage Wetterstation:
natural_image
Line drawing of a front-mounted electronic device with ports and cables, showing no text or symbolsAufhänger
natural_image
Diagram of a TV or audio device back panel with no visible text or symbolsMontage Windmesser:
natural_image
Diagram of a device rear panel with ports and connectors (no text or symbols)Windmesser:
natural_image
Technical line drawing of a mechanical component with mounting holes and a central pin (no text or symbols)
natural_image
Technical line drawing of a mechanical component with mounting holes and internal structure (no text or symbols)
natural_image
Technical line drawing of a mechanical component with mounting holes and internal compartments (no text or symbols)Regenmesser:
natural_image
Technical line drawing of a mechanical device with mounting flanges and internal components (no text or symbols)other
| Metric | Value | | :--- | :--- | | CH IN | 188.8°E MAX 88% | | HEAT INDEX DEW POINT MAX MIN | 188.8°E | | ZONE ALARM | 38:88 D Zz | | RAINFALL | 88.88 DAILY MONTHLY WEEKLY TOTAL in mm | | SPEED WINS AVERAGE GUST ALARM Hi MAX WWind CH ALARM Lo | 188.8°E MAX MIN | | SEA LEVEL PRESSURE 2888 In hgh mb hPa | 0 | | SEAL POWER PRESSURE 0-1-2-1 | 0 |22.5 Regenmenge
N = Norden
NW = Nordwesten
natural_image
Weather icons including sun, clouds, and raindrops (no text or symbols)bar
DAILY MONTHLY | Rainfall (mm) | Daily Monthly Total (mm) | | :--- | :--- | | -6 | 10.0 | | -5 | 12.0 | | -4 | 15.0 | | -3 | 18.0 | | -2 | 22.0 | | -1 | 28.0 | | 0 | 35.0 | The chart displays a single bar for the total weekly rainfall of 88.8 mm, with an upward arrow indicating the increase from the previous month to the year's end. The minimum and maximum values are both 10.0 mm and 35.0 mm respectively. Error bars are shown on each bar.


- ESTACIÓN METEOROLÓGICA / STAZIONE METEOROLOGICA RADIOCONTROLLATA PREMIUM
- Anemómetro:
- Pluviómetro:
- Anemometro:
- Udometro:
- Registo automático do anemómetro e do pluviómetro na estação meteorológica
- Ajustar o alarme de vento
- Ajustar a unidade da temperatura
- Fuso horário
- Premium weather station
- General information
- Symbols used in these instructions:
- WARNS OF RISK OF INJURY!
- POINTS TO FURTHER INFORMATION!
- Intended use
- Technical data
- Measuring Range:
- Exceeded range of measurement:
- Readings below the measurement values:
- Values above the measurement values:
- WARNING!
- CAUTION!
- Power Supply:
- Safety information
- DANGER OF INJURY!
- CAUTION - MATERIAL DAMAGE!
- Scope of delivery
- Definition of terms
- Dew Point:
- Heat Index:
- Wind Chill:
- Functions
- Weather station:
- Functions/Commissioning
- Wind gauge:
- Rain gauge:
- Comply with the following safety instructions when using the wind gauge and rain gauge:
- Commissioning
- Setting up the weather station:
- Weather station – wall mounting:
- Wind gauge assembly:
- Setting up the rain gauge:
- Inserting and replacing batteries
- Put the batteries first into the outdoor sensor (wind gauge / rain gauge), then into the weather station.
- Device overview
- Preparing the wind gauge and rain gauge and registering on the weather station
- Calibrating the wind gauge
- Preparing the rain gauge
- Automatic wind gauge and rain gauge registration on the weather station
- Manual wind gauge and rain gauge registration on the weather station
- Weather station basic settings
- Setting
- 12/24 hour format:
- Hours:
- Minutes:
- Year:
- Date format:
- Month:
- Day:
- DCF-77 synchronisation
- Setting the time zone
- Setting the time zone:
- When setting the time zone, use the following specifications:
- Set -1 Hr.:
- Set 0 Hrs.:
- Set +1 Hr.:
- Alarm function
- Deactivating the alarm function:
- Switching the alarm signal off:
- Snooze function:
- Setting the air pressure unit
- Air pressure adjustment
- Setting the wind speed unit
- Setting the wind alarm
- Setting the wind chill alarm
- Switching the Wind Alarm and the Wind Chill Alarm on and off
- Setting the rain gauge unit
- Setting the temperature unit
- Display
- Background illumination:
- Date and time
- Time zone
- Temperature and air humidity indoors/outdoors
- Displaying Heat Index and Dew Point
- Rainfall quantity
- Diagram:
- Example:
- Display
- Ice/frost alarm
- Wind direction
- Wind speed
- Air pressure change
- Minimum and maximum values
- Weather forecast
- Weather trend
- Maintenance
- Battery charge indicator
- Rain gauge leaf filter
- Troubleshooting errors in the measuring results
- Cleaning
- Disposal
- Disposing of the devices:
- Disposing of batteries:
- Disposing of packaging:
- CE IP44
- Premium-Wetterstation
- Allgemeine Information
- Wandmontage Wetterstation:
- Montage Windmesser:
- Windmesser:
- Regenmesser:
- Regenmenge
Brand : AURIOL
Model : IAN 114435
Category : Weather Station