
PC-5050 - Bread maker Concept - Free user manual and instructions
Find the device manual for free PC-5050 Concept in PDF.


| Product Type | Bread Maker |
| Brand | Concept |
| Model | PC-5050 |
| Dimensions (W x H x D) | 30 x 35 x 25 cm |
| Weight | 5 kg |
| Power Supply | 220-240 V, 50/60 Hz, 600 W |
| Maximum Bread Weight | 900 g (2 lb) |
| Number of Programs | 12 |
| Programs | Basic, Whole Wheat, French, Gluten-Free, Dough, Jam, Cake, etc. |
| Crust Control | 3 settings: Light, Medium, Dark |
| Delay Timer | Up to 15 hours |
| Keep Warm Function | Up to 1 hour |
| Display | LCD with backlight |
| Baking Pan | Non-stick, removable |
| Dough Kneading | Automatic with kneading paddle |
| Viewing Window | Yes, transparent lid |
| Safety Features | Overheat protection, automatic shut-off |
| Cleaning | Removable parts dishwasher safe (pan, paddle) |
| Accessories Included | Measuring cup, measuring spoon, kneading paddle |
| Spare Parts Availability | Through Concept service centers |
| Manual Languages | English, German, French, Spanish, etc. |
Frequently Asked Questions - PC-5050 Concept
User questions about PC-5050 Concept
0 question about this device. Answer the ones you know or ask your own.
Ask a new question about this device
Download the instructions for your Bread maker in PDF format for free! Find your manual PC-5050 - Concept and take your electronic device back in hand. On this page are published all the documents necessary for the use of your device. PC-5050 by Concept.
USER MANUAL PC-5050 Concept
natural_image
Concept microwave oven with digital display and control buttons (no visible text or symbols on main body)PC5050
CZ LV EN DESK PL
PODĚKOVÁNÍ
natural_image
Exterior view of a modern kitchen appliance with handle and side legs (no text or symbols visible)Obr. 1
natural_image
Close-up of a black plastic container with a handle and lid, partially open to the side of an engine (no visible text or symbols)Obr. 2
LIGHT – světlá,
MEDIUM – střední,
DARK - tmavá.
natural_image
Exterior view of a modern kitchen appliance with handle and side legs (no text or symbols visible)Obr. 1
natural_image
Close-up of a black plastic container with a handle and lid, partially open to the side of an engine (no visible text or symbols)Obr. 2
- Tlačidlom BARVA zvolte požadované prepečenie kôrky chleba:
LIGHT – svetlá,
MEDIUM – stredná,
DARK – tmavá.
natural_image
Exterior view of a modern kitchen appliance with handle and side legs (no text or symbols visible)Rys. 1
natural_image
Close-up of a black appliance with a handle and lid, mounted on an open base (no visible text or symbols)Rys. 2
natural_image
Exterior view of a modern kitchen appliance with handle and side legs (no text or symbols visible)Att. 1
natural_image
Close-up of a black plastic container with a handle and lid, partially open to the side of an engine (no visible text or symbols)Att. 2
Thank you for purchasing a Concept product. We hope you will be satisfied with our product throughout its service life.
Please study the entire Operating Manual carefully before you start using the product. Keep the manual in a safe place for future reference. Make sure that any persons handling the vacuum cleaner are also familiar with this Operating Manual.
| TECHNICAL PARAMETERS | |
| Voltage 220-240 V ~ 50 Hz | |
| Power input 800 W | |
IMPORTANT SAFETY PRECAUTIONS:
- Use the unit only as described in this operating manual.
- Remove all the packaging and marketing materials from the unit before the first use.
• Make sure the mains voltage corresponds to the values on the rating plate. Use grounded wall outlets only. - Do not leave the unit unattended while it is turned on or even only plugged into the wall outlet.
- Place the unit only on a stable and heat-resistant surface, out of reach of other heat sources.
- Do not cover the unit. There is a risk of overheating.
- Do not move a unit that is switched on or has hot contents in it.
- Do not touch hot surfaces. Use the handles and buttons.
- Unplug the appliance from the wall outlet when not in use.
- When disconnecting the unit from the wall outlet, never pull the power cord. Grasp the plug and disconnect it by pulling.
- Do not allow children or unskilled people to handle the unit. Use the unit out of the reach of these individuals.
- Persons with limited movement capacities, reduced sensory perception, insufficient mental capacity or those who are unaware of the proper handling should use the product only under the supervision of a responsible, aware person.
• Take extra care when using the unit near children. - Don't let anyone use the unit as a toy.
• Make sure the power cord does not hang over the working area, and that children cannot reach it. - Do not use the product outdoors or on wet surfaces. Electric shock hazard!
- Use only accessories recommended by the manufacturer.
- Never use an appliance with a damaged power cord or plug. Contact an authorized service center immediately to have defective components repaired or replaced.
- Do not pull or move the product by grasping the power cord.
- Keep the unit away from heat sources, such as radiators, ovens etc. Do not expose the unit to direct sunlight or moisture.
- Do not touch the unit with wet or damp hands.
- Turn off the product and disconnect the plug from the mains outlet before installing accessories, performing maintenance, or in the case of any failure.
- Do not touch the moving parts during operation of the unit.
- Do not switch the unit on without correctly mounted accessories, or without basic materials in it.
- Never hit the baking pan to release finished loaf.
- The unit is suitable for domestic use only. It is not designed for commercial operation.
- Do not immerse the power cord, plug, or appliance into water or any other liquid.
- Check the appliance and power cord for damage regularly. Do not use a damaged unit.
- Turn the unit off, unplug the power cord from the wall outlet, and let the unit cool before cleaning and after use.
- Do not repair the appliance yourself. Contact an authorized service center.
Failure to follow the manufacturer's instructions may lead to refusal of warranty repair.
- This appliance is not intended for use by persons (including children) with reduced physical, sensory or mental capabilities, or lack of experience and knowledge, unless they have been given supervision or instruction concerning use of the appliances by a person responsible for their safety.
- Children should be supervised to ensure that they do not play with the appliance.
PRODUCT DESCRIPTION
- Lid
- Baking pan
- Lid holder
- Lid peephole
- Control panel
- Body of the unit
- Kneading blade
- Baking pan holder
- Baguette Baking Pan
Accessories
A Measuring cup (teaspoon and table spoon)
B Measuring bowl
C Hook
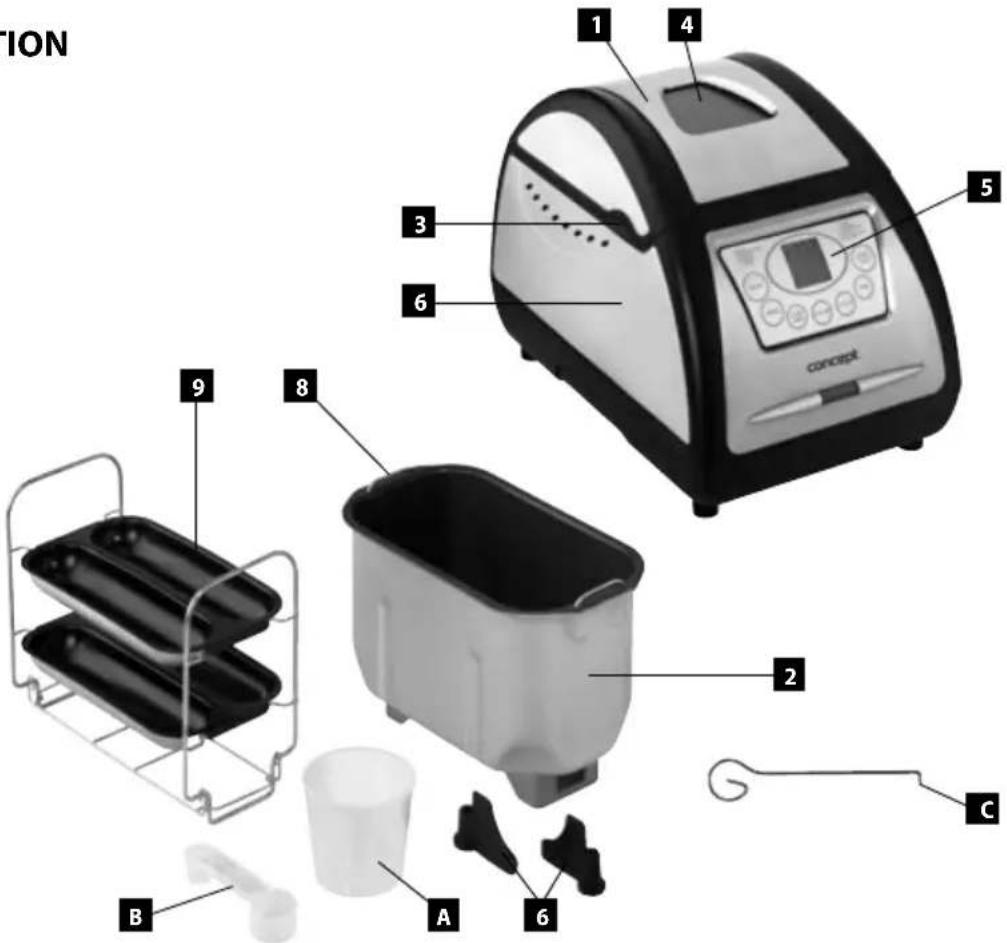
DESCRIPTION OF CONTROL PANEL
1. DISPLAY
Basic Display Settings
After turning the breadmaker on, the default setting (i.e. programme KLASIK, program no 1, preparation time 3:00, MEDIUM crust colour, size LARGER) appears on the display. The display lights up and you will hear a sound signal (one beep).
Note: When in use, the display shows the progress of the programme. Timer countdowns as the programme advances. During the hour-long warming programme, 0:00 remains displayed (with colon between the digits flashing). Once the warming is completed, the set time (colon between the digits no longer flashes) appears on the display.
2. START / STOP Button
Use this button to start and stop the programme. Press it until you hear a sound signal (a short beep) and after about 3 sec the mixing/kneading function starts running (does not apply to programme 7 and 10).
Press and hold the button for about 3 seconds until you hear a long beep, and the programme terminates. This applies also if you want to stop the 60-min-long warming of the breadmaker.
3. PAUZA (PAUSE) button
Press the PAUZA button until you hear a sound signal (a short beep) and the breadmaker comes to a halt. When you press the button again, the programme resumes operation.
4. BARVA (COLOUR) button
Use the button to select the required crust colour of the loaf (LIGHT, MEDIUM, DARK). The symbol and message on the display (LIGHT, MEDIUM, DARK) shows the selected colour of the bread. Does not apply for programme 7-MARMELÁDA and 8-TĚSTO.
5. VELIKOST (SIZE) button
Use the button to set the required loaf weight in the programmes (LARGER 1,250 grams, SMALL 900 grams).
6. MENU button
Use this button to set the required program. The number on the display shows the selected programme and its pre-set baking time. Use the BARVA button to set how brown you want the bread to be and the VELIKOST button to set its weight.
Note: By adjusting these parameters you will also automatically change (reduce / increase) the baking time.
7. ČAS (TIME) button
Use the button to set the time required to bake the bread. Delayed start cannot be used on Programme 10-PEČENÍ. The hours and minutes after which the baking process should start must be added to the relevant default time for the specific programme.
Extra time is added to the baking time, ie the display will show the time in which the selected programme will end. The maximum delay time that can be set is 13 hours.
Example: It is 8:30pm and the bread is to be ready the next morning at 7:00am, ie in 10 hours and 30 minutes. Press the ČAS button to display SET READY TIME, and then hold the ČAS button until you see 7:00 and the display says NEXT DAY, ie the time between the presence (8:30pm) and when you want the baguette to be ready. Confirm the setting by pressing START/STOP. The selected time is set in 10-minute intervals.
Warning:
Use the timer only with recipes you have been successful with before, and do not change them anymore.
Excessive dough may overflow and stick to the heating element.
When placing ingredients in the baking pan, always first pour the liquid, then add flour, and lastly dry yeast. The yeast must not come into contact with liquid before the programme starts as it would begin to work prematurely, and the dough - bread - would later sink during baking.
When working with timer never use perishable ingredients such as fresh milk, eggs, fruit, yogurt, cheese, onion, etc. as they could go off overnight.
Use the breadmaker only in rooms with temperature above 18 °C. Yeast only starts to work at 17 °C and more.
If you placed the breadmaker in a cooler room, the dough may not rise properly.
8. CYKLUS (CYCLE) button
Use the button to shift between the individual stages of programme 12 DOMÁCÍ and to set the clock.
LIST OF PROGRAMS
- KLASIK – Baking white, whole-wheat and rye bread (kneading, rising, baking).
- CELOZRNNÝ – Whole-grain bread (kneading, rising, baking). We don't recommend using the delayed ON function.
- TOUSTOVÝ – French bread with a longer rising time (kneading, rising, baking). The result is an airy loaf with a crunchy crust.
-
RYCHLY – Baking white, whole-wheat and rye bread (kneading, rising, baking). The shorter rising time makes the crumb thicker.
-
SLADKÝ – Sweet yeast loaf (kneading, rising, baking). Used for dough with a higher fat and sugar content. Ground coconut, raisins, dried fruit etc. can be added to the dough.
-
DORT – Sweet yeast loaf (kneading, rising, baking). Used for dough with a higher fat and sugar content. Baking soda or baking powder is used for rising.
-
MARMELÁDA - Jams, preserves, and stewed fruit.
-
TĚSTO – Making dough for rolls, buns, pizzas etc. (kneading, rising)
-
SUPER RYCHLY – Fast baking of bread with thick crumb (kneading, rising, baking).
-
PEČENÍ - Baking. Can be used to bake finished dough, or to prolong the baking of finished bread.
-
BEZLEPKOVÝ – Special bread without gluten (kneading, rising, baking). Use rice, pinole, potato or buckwheat flour.
-
DOMÁCÍ - The programme is designed for individual setting of all the stages of the baking process. The time setting range in the individual phases (i.e. kneading KNEAD1, KNEAD2, rising RISE1, RISE2, RISE3, baking, warming) is described in the programme phase chart. The loaf size cannot be set in this mode. Programming steps:
a) Press the CYCLUS button and the display shows a text (eg KNEAD1),
b) Use the ČAS button to set the duration of the cycle (see the „programme phases“ chart),
c) Afterwards confirm by pressing CYCLUS,
d) Repeat the procedure until you set all the stages of the baking process,
e) To start the set programme, press the START/STOP button twice,
PROGRAMME PHASES CHART
| FÁZEPŘÍPRAVY | PROGRAM | |||||||||
| 1. KLASIK 2. CELO | ZRNNÝ 3. TOUSTOVÝ 4. RY | CHLÝ 5. SLADKÝ 6. DORT | ||||||||
| 1,125 kg 0 | 9 kg 1,125 kg | 0,9 kg 1,125 kg | 0,9 kg 1,125 kg | 25 kg 0,9 kg | ||||||
| 3:00 hod | 2:55 hod | 3:40 hod | 3:32 hod | 3:50 hod | 3:40 hod | 2:10 hod | 2:50 hod | 2:45 hod | 1:50 hod | |
| KNEADING 1 | 10 | 10 | 10 | 9 | 18 | 16 | 10 | 10 | 10 | 6 |
| RISE 1 | 20 | 20 | 25 | 25 | 40 | 40 | 10 | 5 | 5 | 5 |
| KNEADING 2 | 15 | 15 | 20 | 18 | 22 | 19 | 10 | 20 | 20 | 10 |
| RISE 2 | 25 | 25 | 35 | 35 | 30 | 30 | - | 33 | 32 | 9 |
| RISE 3 | 45 | 45 | 65 | 65 | 50 | 50 | 30 | 40 | 40 | - |
| PEČENÍ | 65 | 65 | 65 | 60 | 70 | 65 | 70 | 62 | 58 | 80 |
| KEEP WARM | 60 | 60 | 60 | 60 | 60 | 60 | 60 | 60 | 60 | 60 |
| FÁZEPŘÍPRAVY | PROGRAM | |||||
| 7. MARMELÁDA 8. TĚSTO 9. SUPER RYCHLÝ 10. PEČENÍ 11. BEZLEPKOVÝ 12. DOMÁCÍ | ||||||
| 1:20 hod 1:30 hod | 0,9 kg | 0:10 – 1:00 hod 2:50 | hod 0:36 – 6:54 hod | |||
| 0:59 hod | ||||||
| KNEADING 1 | - | 20 | 10 | - | 10 | 6-14 |
| RISE 1 | 15 | - | - | - | 5 | 20-60 |
| KNEADING 2 | - | - | - | - | 10 | 5-20 |
| RISE 2 | - | 30 | - | - | 30 | 5-120 |
| RISE 3 | 45 | 40 | 9 | - | 45 | 0-120 |
| PEČENÍ | 20 | - | 40 | 10-60 | 70 | 0-80 |
| KEEP WARM | - | - | 60 | 60 | 60 | 0-60 |
OPERATING INSTRUCTIONS
NOTE
Always disconnect the plug from the mains outlet prior to mounting or removing accessories!
Prior to using a new unit, wipe the surface with a wet cloth and wash the removable accessories in warm water for hygienic reasons. Smear the inner surface of the baking pan with oil or fat. Then turn on the unit without ingredients in baking mode (PEČENÍ) for 10 minutes (see the Operating Instructions below). Wash the internal parts again.
The recommended room temperature for baking is 15 - 34 °C.
Do not use more than 900 g of flour, and more than 3 teaspoons of baking powder for baking.
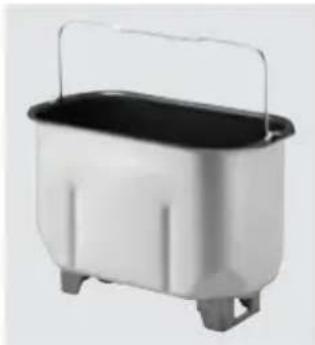
- Insert the baking pan (Fig. 1) in the baking space.
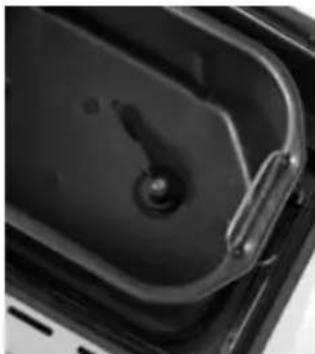
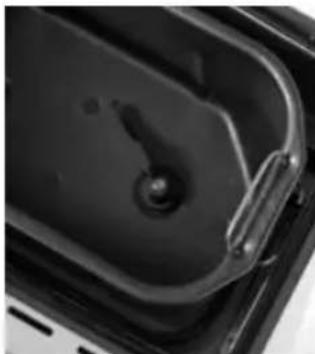
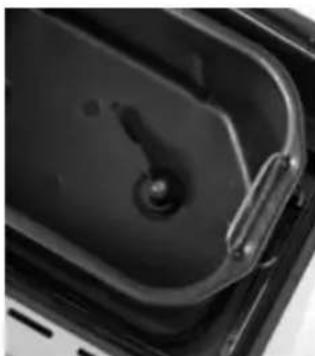
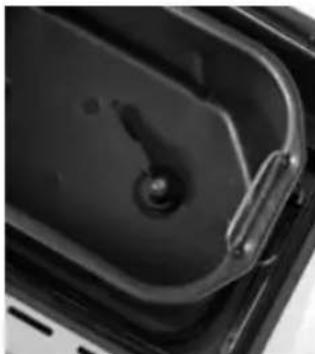
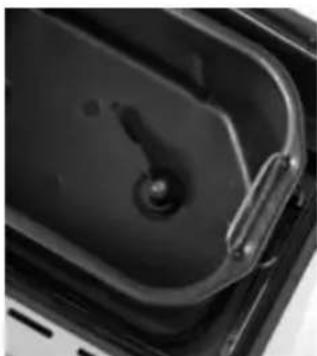
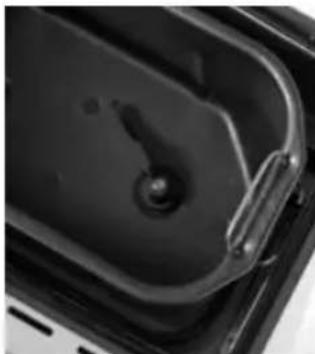
- Put the kneading blade on the spindle at the bottom (Fig. 2).
-
Put the ingredients in the pan. Put in the liquids first (water, oil, milk, eggs), then the loose ingredients (flour, instant mixtures etc.), and finally yeast, baking soda or baking powder. Make sure the yeast does not come into contact with salt or liquids before baking. It would reduce the effect during rising.
-
Close the lid.
-
Insert the plug into the mains outlet. You will hear a beeping sound. 1 3:00 will be displayed (program 1, time of baking 3 hours 00 minutes), the loaf weight indicator is set to 1,250 g, and the crust finish indicator is set to MEDIUM. The colon between the digits 3 and 00 is not blinking, i.e. the program is not running.
-
Select the number of the required program using the MENU button (1-12).
-
The expected time of preparation will be displayed.
-
Select the required finish of the crust using the BARVA button:
LIGHT
MEDIUM
DARK
RAPID - faster baking.
- Set the approximate weight of the finished loaf using the VELIKOST button: SMALLER 900 g, LARGER 1250 g.
natural_image
Exterior view of a modern kitchen appliance with handle and side legs (no text or symbols visible)Fig. 1
natural_image
Close-up of a black appliance with a handle and lid, mounted on a metal frame (no visible text or symbols)Fig. 2
- Set delayed ON time using the arrow buttons START/STOP. This will be added to the preparation time, i.e. the time of completion of the selected program will be displayed. The maximum time that can be set is 13 hours.
Note: When using the delayed ON function, don't use perishable materials, e.g. eggs, fresh milk, fruit, onions. - Launch the preset program by pressing the START/STOP button. The blinking colon symbol will signal a running program. All the buttons apart from START/STOP will be blocked. You may stop a running program by a short push, and resume it by another push on the button. By holding the button you may reset the unit, and cancel the running program.
- With the KLASIK, TOUSTOVÝ, RÝCHLÝ, ČELOZRNNÝ, DORT, TĚSTO a MARMELÁDA programs the unit will pre-heat the baking pan first, until 25 °C is reached. The motor does not turn during this time.
- For programs KLASIK, TOUSTOVÝ, CELOZRNNÝ, SLADKÝ a BEZLEPKOVÝ in the stage of second kneading you will hear a beep signaling that cereals, nuts, fruit etc. can be added.
Note: Do not open the lid during baking; the dough could shrink. - After the program is complete, you will hear a signal, and the unit will switch to the KEEP WARM mode. This mode will last for 60 minutes.
- By pressing the START/STOP button for a longer time, you will stop the running program and switch the unit to the basic settings.
- Disconnect the cable from the socket.
- Let the pan and its contents cool before you try to remove the loaf. Then use a soft scraper and release the parts stuck to the baking pan.
- Open the lid, take the baking pan by the holder, and take it out. Use kitchen gloves (potholders) when removing the baking pan. Proceed with caution to avoid burning yourself.
- Turn the pan upside down, and put it on a kitchen Remove the finished loaf of bread. Use the supplied hook to remove the kneading blades from the loaf.
- Let the loaf cool for about 20 minutes before cutting. Use an electric slicer or serrated knife.
Note: In the event of a power outage when a program that is shorter than 10 minutes is running, the unit will continue automatically from the point of interruption. If the power outage is longer than 10 minutes, the unit will be reset. If the running program did not reach the rising stage, you may run the program again from the start. If the program is in a more advanced stage, we recommend throwing away the dough, using new ingredients and running the selected program again, from the start.
PREPARATION OF BAGUETTES
The appliance of the Concept PC5050 Bread Maker also features a „baguette baking pan.“ When using the appliance, proceed as follows:
- Assemble the wire construction and place both the baguette baking pans in it.
- Follow a suitable recipe to prepare the dough (for example, using programme 8-DOUGH).
- Work the risen dough well, rolling it into the appropriate baguette size / shape and place into the pan. In order to enhance the flavour, you may work (for example, sesame / flax / sunflower seeds, walnuts / hazelnuts, poppy seeds, pieces of cheese or bacon) into the dough. Cover the top of the baguette with a little bit of water, butter, oil, honey or whisked egg yolk so that it turns golden, or you can score the top of the baguette (slit it lengthwise / crosswise) with a sharp knife or shape in tips or ears with scissors.
- Take the baking pan out of the breadmaker and place the pan with the baguettes into the baking area, closing the lid.
- On the control panel, select programme 10-BAKING and the corresponding baking time of about 55 minutes.
- Press the START/STOP button to turn on the breadmaker.
Baguette baking tips:
Basic ingredients for baguettes (4 x 100 g):
280 g of wheat flour, 170 ml of water, 6 g of salt, 12 g of fresh or dry yeast
PRACTICAL ADVICE
Finished bread can be kept in a plastic bag for 3 days at room temperature, or for 10 days in the fridge.
Use water of a temperature of 35-50 °C for the SUPER RYCHLY program. The dough will not rise at a lower temperature; a higher temperature would kill the yeast, which may have a major effect on the result.
After the first kneading, unmixed remnants of flour or mixture may be left in the corners, which can cause lumps in the dough. After the first kneading is finished, open the lid, mix the trapped materials into the dough, close the lid and continue the preparation.
MARMELÁDA program – To achieve a good result, insert fruit that has been cut into small pieces.
Basic bread (Program No. 1)
750 g 1000 g 1250 g
Oil 1.5 tablespoon 2 tablespoons 2.5 tablespoons
Water 250 ml 330 ml 400 ml
Salt 1.5 teaspoons 1.5 teaspoons 2 teaspoons
| Sugar | 1 tablespoons | 1 tablespoons | 1.3 tablespoons |
| Powdered milk | 1.5 tablespoons | 2 tablespoons | 2.5 tablespoons |
| Flour | 450 g | 600 g | 780 g |
| Yeast | 1 teaspoons | 1.5 teaspoons | 2 teaspoons |
French bread (Program No. 2)
750 g 1000 g 1250 g
Water 270 ml 365 ml 440 ml
Salt 2 teaspoons 2 teaspoons 2.5 teaspoons
Flour 465 g 620 g 780 g
Yeast 1 teaspoons 1.5 teaspoons 1.5 teaspoons
Whole-grain bread (Program No. 3)
750 g 1000 g 1250 g
Oil 2 tablespoons 2.5 tablespoons 3 tablespoons
Water 290 ml 355 ml 450 ml
Salt 1.5 teaspoons 2 teaspoons 2.5 teaspoons
Sugar 2 teaspoons 2.5 teaspoons 3 teaspoons
Flour 200g 240 g 310 g
Whole-grain flour 300 g 365 g 430 g
Yeast 1 teaspoons 1.5 teaspoons 2 teaspoons
Sweet bread (Program No. 4)
750 g 1000 g 1250 g
Eggs 2 2 3
Butter 20 g 20 g 25 g
Milk 200 ml 220 ml 275 ml
Salt 1 teaspoons 1.5 teaspoons 1.5 teaspoons
Sugar 3 tablespoons 4 tablespoons 5 tablespoons
Flour 365 g 485 g 600 g
Yeast 1.5 teaspoons 2 teaspoons 2 teaspoons
Fast bread (Program No. 5)
| 750 g 1000 g 1250 g | |||
| Oil 1.5 tablespoons 1.5 tablespoons 2 tablespoons | |||
| Water (35 – 50 °C) 250 ml 360 ml 450 ml | |||
| Salt | 1 teaspoons | 1.5 teaspoons | 1.5 teaspoons |
| Sugar | 1 tablespoons | 1 tablespoons | 1 tablespoons |
| Powdered milk | 2.5 tablespoons | 2.5 tablespoons | 3 tablespoons |
| Flour | 380 | 565 g | 700 g |
| Yeast | 3 teaspoons | 3.5 teaspoons | 3.5 teaspoons |
Pizza dough (Program No. 6)
| 1,250 g |
| Olive oil 1 tablespoon |
| Water 570 ml |
| Salt 1.5 teaspoons |
| Flour 700 g |
| Yeast 1.5 teaspoons |
Irish butter milk bread (Program No. 8)
| 750 g 1000 g 1250 g | |||
| Butter milk | 280 ml 370 ml 460 ml | ||
| Eggs | 2 | 2 | 3 |
| Caraway seeds | 3 teaspoons | 1 tablespoons | 1 tablespoons |
| Flour | 380 g | 500 g | 620 g |
| Sugar | 115 g | 150 g | 165 g |
| Salt | 1/2 teaspoons | 3/4 teaspoons | 1 teaspoons |
| Baking soda | 1 tablespoons | 1 tablespoons | 1.5 tablespoon |
| Raisins | 100 ml 100 ml 120 ml | ||
Gluten-free bread (Program No. 9)
| 750 g 1000 g 1250 g | |||
| Oil | 3 tablespoons | 3.5 tablespoons | 4 tablespoons |
| Water | 180 ml 200 ml | 220 ml | |
| Honey | 80 ml 100 ml | 110 ml | |
| Vinegar | 1/2 teaspoon | 3/4 teaspoon | 1 teaspoon |
| Eggs | 1 | 2 | 2 |
| Salt | 1/3 teaspoon | 12 teaspoon | 2/3 teaspoon |
| Sugar | 3 teaspoon | 3.5 teaspoon | 4 teaspoon |
| Gluten-free flour | 270 g | 350 g | 430 g |
| Yeast | 1 teaspoon | 1 teaspoon | 1.5 teaspoon |
Sweet bread (Program No. 10)
| 750g | 1000g | 1250g | |
| Eggs | 2 | 2 | 3 |
| Butter | 20g | 20g | 25g |
| Milk | 200ml | 220ml | 275ml |
| Salt | 1 teaspoon | 1.5 teaspoon | 1.5 teaspoon |
| Sugar | 3 tablespoons | 4 tablespoons | 5 tablespoons |
| Flour | 365g | 485g | 600g |
| Baking powder | 2 teaspoon | 2.5 teaspoon | 3 teaspoon |
Fruit salads and preserves (Program No. 11)
| Strawberry, peach, apricot preserve preserve | Orange Apple-rhubarb fruit salad | ||
| Fruit | 580g | 500g | 750g |
| Sugar | 360g | 400g | 5 tablespoons |
| Pectin | 30g | 50g | |
| Lemon juice | from 1 lemon |
CLEANING AND MAINTENANCE
Turn the unit off, unplug the power cord from the wall outlet, and let the unit cool before cleaning and after use. The unit and its accessories can be cleaned with a wet cloth.
Wash the replaceable parts in tepid water with detergent and rinse in clean water.
Do not immerse the baking pan in liquids. Just wash the inside with warm water with detergent and then rinse with clean water. Clean the outer surfaces with a wet cloth.
Do not use steel wool, abrasive agents or solvents to clean the unit.
POSSIBLE PROBLEMS DURING BAKING
| Problem Cause | |
| Bread has risen too much. Use a lower volume of ingredients and keep the dosage ratio. | |
| Bread has risen too much, then collapsed. | Too little flour, too much yeast, too much water, or water is too hot. |
| Bread has not risen enough. | Too much flour, too little yeast, too much water, not enough sugar, poor quality of flour, water is too cold, unsuitable program. Keep the dosage ratio. |
| Crust is not well done. | Program has been suspended for too long, frequent opening of the lid, too much yeast, poor quality of flour, unsuitable program. |
| Crust is brown on the sides, but the crumb is not well done. | Too much water. |
| Sides and top of the loaf are dusted with flour. | Too much flour, not enough water. |
TROUBLESHOOTING
| Problem Cause Solution | ||
| Cause | Solution Check the plug connection. | |
| The mains outlet is not live. | Check for voltage, e.g. by connecting another appliance. | |
| The unit starts pre-heating when program is launched. | This is a normal function. This is not a defect. | |
| The ventilation grille emits smoke during baking. | Some ingredients or impurities are in the heater. | Disconnect the cable from the socket.Let the unit cool. Clean the heater. |
| Bread can hardly be removed. | Dirty kneading blade can't be taken from the spindle. | After you remove the loaf, pour water in the baking pan, let the kneading blade soak, then clean it. Before mounting, lubricate the spindle with edible oil or fat. |
| After pressing START/STOP button "H:HH" is displayed. | Temperature in the baking area is too high, e .g. after previous baking. | Disconnect the cable from the socket.Open the lid, remove the baking pan, and let the unit cool. |
| After pressing START/STOP button "L:LL" is displayed. | The surrounding temperature is too low. | Move the unit to a place where the temperature is 15 – 34 °C. |
| After pressing START/STOP button „E:E0" or „E:E1" is displayed. | Temperature sensor error | Have the unit checked by an authorized service center. |
| Motor moves after the program starts, but there is no kneading. | Incorrectly mounted baking pan or kneading blade. | Check the position of the baking pan and kneading blade. |
| Insufficiently risen bread when using the delayed ON function. | Yeast was in contact with the salt or water before the program started. | Make sure the yeast does not get in contact with the water or salt. |
SERVICE
Any larger maintenance or repairs requiring intervention into the internal parts of the product shall only be performed by an authorized service
ENVIRONMENTAL PROTECTION
- Packaging materials and obsolete appliances should be recycled.
- The transport box may be disposed of as sorted waste.
- Polyethylene bags shall be handed over for recycling.
Recycling the product at the end of its service life
The symbol affixed to the product or its packaging indicates that the product may not be disposed of as household waste. It must be taken to the collection facility authorized for recycling electric and electronic waste. By ensuring that this product is disposed of correctly, you will help prevent potential negative consequences for the environment and human health, which could otherwise be caused by inappropriate waste handling of this product. For more detailed information about the treatment, recovery and recycling of this product, please contact your local city office, your household waste disposal service or the shop where you purchased the product.
DANKSAGUNG
natural_image
Exterior view of a modern kitchen appliance with handle and side legs (no text or symbols visible)Abb. 1
natural_image
Close-up of a black plastic container with a handle and lid, partially open to the side of an engine (no visible text or symbols)Abb. 2
- PODĚKOVÁNÍ
- IMPORTANT SAFETY PRECAUTIONS:
- PRODUCT DESCRIPTION
- Accessories
- DESCRIPTION OF CONTROL PANEL
- DISPLAY
- Basic Display Settings
- START / STOP Button
- PAUZA (PAUSE) button
- BARVA (COLOUR) button
- VELIKOST (SIZE) button
- MENU button
- ČAS (TIME) button
- Warning:
- CYKLUS (CYCLE) button
- LIST OF PROGRAMS
- OPERATING INSTRUCTIONS
- NOTE
- PREPARATION OF BAGUETTES
- Baguette baking tips:
- Basic ingredients for baguettes (4 x 100 g):
- PRACTICAL ADVICE
- Basic bread (Program No. 1)
- French bread (Program No. 2)
- Whole-grain bread (Program No. 3)
- Sweet bread (Program No. 4)
- CLEANING AND MAINTENANCE
- SERVICE
- ENVIRONMENTAL PROTECTION
- Recycling the product at the end of its service life
- DANKSAGUNG
Brand : Concept
Model : PC-5050
Category : Bread maker