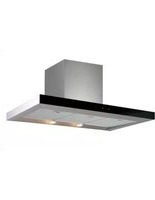
DESELENE90 - Range hood DELONGHI - Free user manual and instructions
Find the device manual for free DESELENE90 DELONGHI in PDF.


| Product Type | Range Hood |
| Brand | DeLonghi |
| Model | DESELENE90 |
| Width | 90 cm |
| Depth | 50 cm |
| Height (Min-Max) | 75-120 cm |
| Weight | Approx. 15 kg |
| Power Supply | 220-240 V, 50 Hz |
| Maximum Extraction Rate | 650 m³/h |
| Noise Level (Max) | 65 dB(A) |
| Number of Speeds | 3 + Boost |
| Lighting Type | LED |
| Number of Lights | 2 |
| Filter Type | Aluminum Grease Filter |
| Carbon Filter (Optional) | Yes (for recirculation mode) |
| Control Type | Electronic push buttons |
| Energy Class | A |
| Annual Energy Consumption | 45 kWh/year |
| Grease Filter Cleaning | Dishwasher safe or hand wash |
| Carbon Filter Replacement | Every 3-6 months |
| Ducting Diameter | 150 mm |
| Warranty | 2 years |
Frequently Asked Questions - DESELENE90 DELONGHI
User questions about DESELENE90 DELONGHI
0 question about this device. Answer the ones you know or ask your own.
Ask a new question about this device
Download the instructions for your Range hood in PDF format for free! Find your manual DESELENE90 - DELONGHI and take your electronic device back in hand. On this page are published all the documents necessary for the use of your device. DESELENE90 by DELONGHI.
USER MANUAL DESELENE90 DELONGHI
natural_image
Illustration of a handheld tool with screw and spring components, including a pin, screwdriver, and screwdriver (no text or symbols)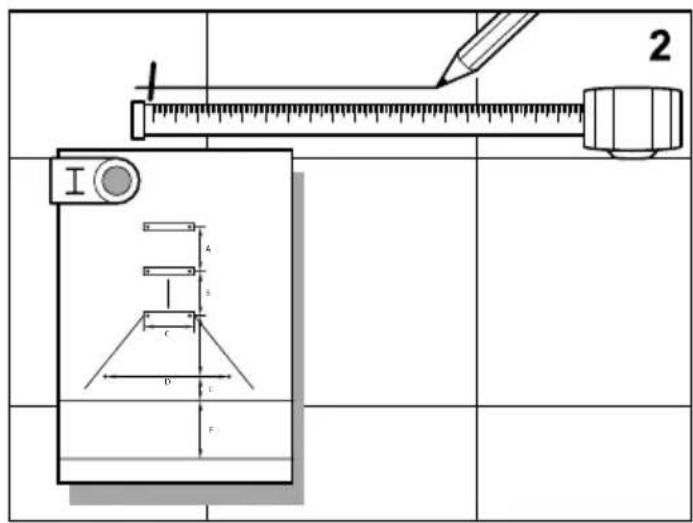
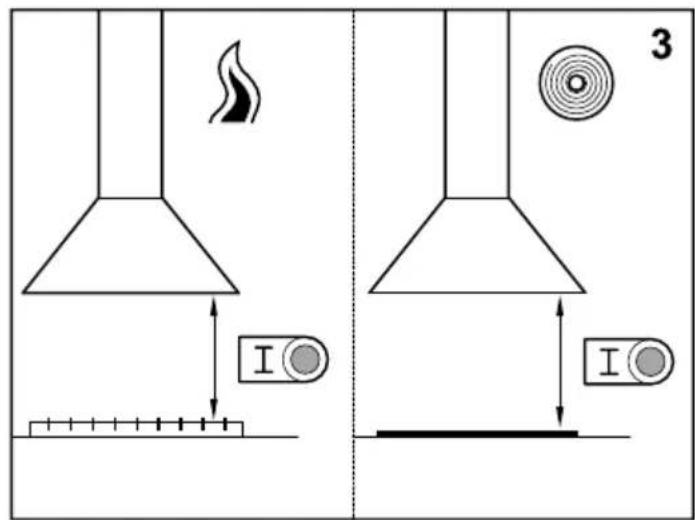
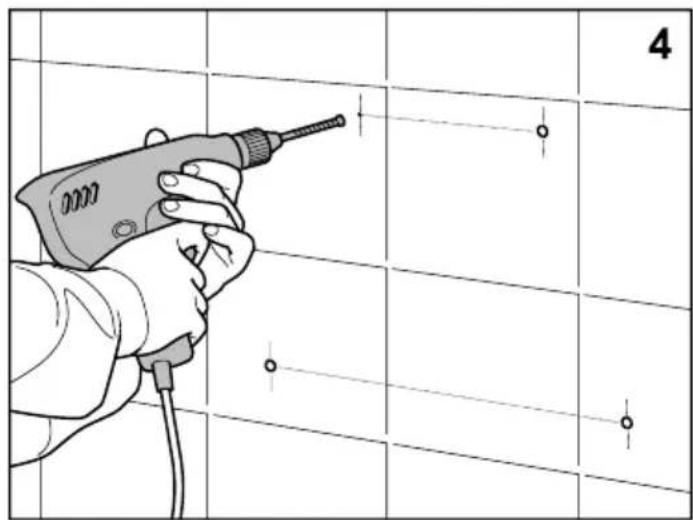
natural_image
Illustration of a hand using a power tool on a grid background, no text or symbols present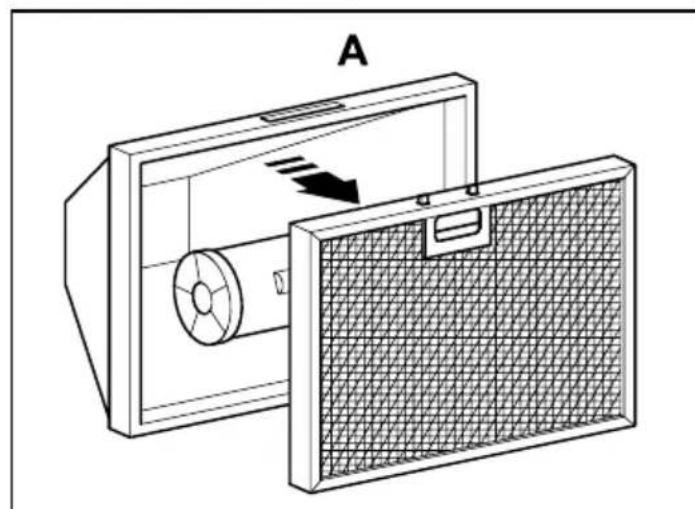
natural_image
Technical line drawing of a mechanical device with a fan and internal structure, labeled 'A' (no text or symbols on the diagram itself)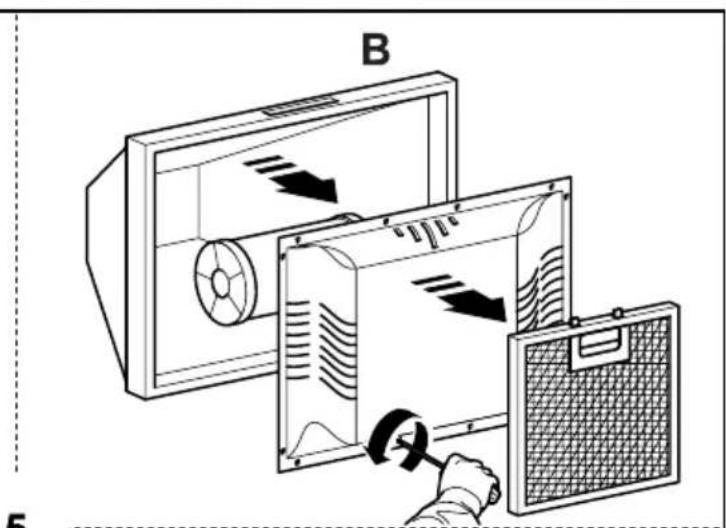
natural_image
Technical diagram of a mechanical assembly with a base, clamped components, and a wall-mounted cable (no text or symbols)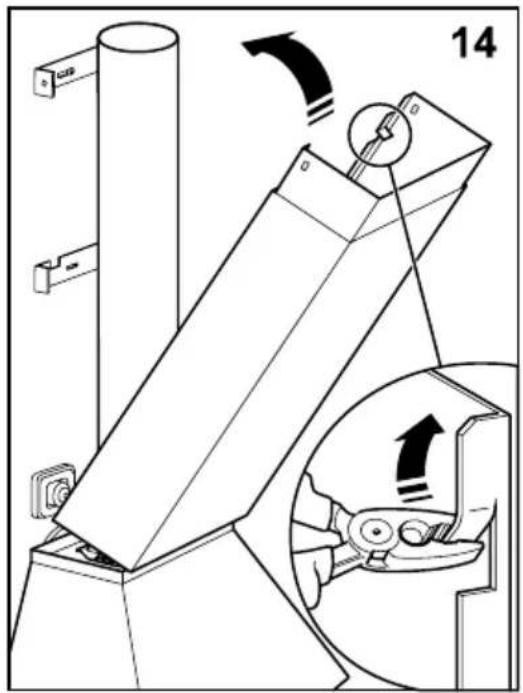
natural_image
Technical diagram of a mechanical device with directional arrows indicating motion or force (no text or symbols present)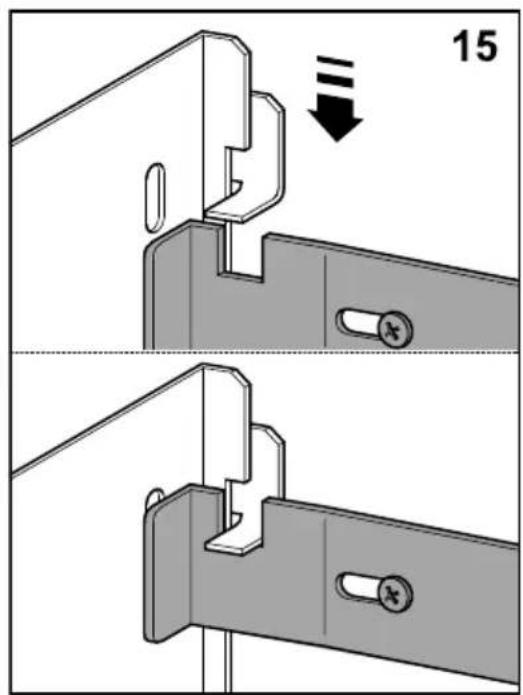
flowchart
graph TD
    A["1"] --> B["2"]
    B --> C["3"]
    C --> D["4"]
    D --> A
    style A fill:#f9f,stroke:#333
    style B fill:#ccf,stroke:#333
    style C fill:#cfc,stroke:#333
    style D fill:#fcc,stroke:#333
P1
flowchart
graph TD
    1["Component 1"] --> 2["Component 2"]
    1 --> 3["Component 3"]
    1 --> 4["Component 4"]
    2 --> 4
    3 --> 4
    4 --> 1


P3
P4
natural_image
Illustration of hands performing a mechanical operation with a rotating component (no text or symbols)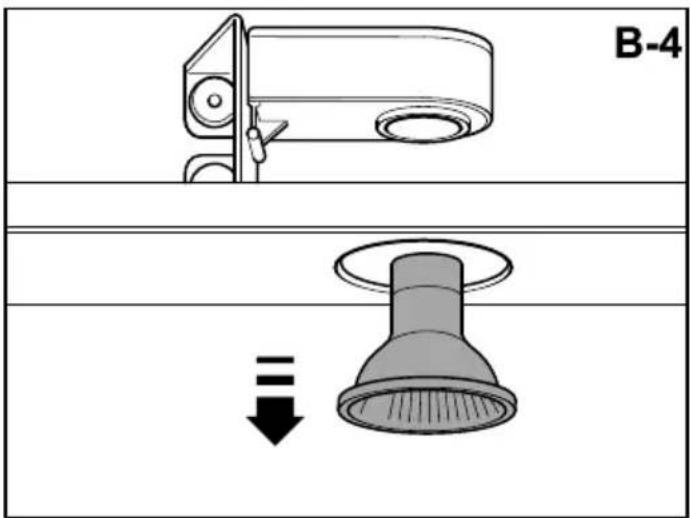
IMPORTANT
Never leave frying food unattended since grease can overheat and catch fire. The risk offire is even greater in the case of used oil.
Never use the hood in areas where devices with exhaust pipes connected to the outside-are already operating unless perfect ventilation can be guaranteed.
To avoid the possibility of fire, adhere strictly to all of the recommendations included here-and to the periodic cleaning of the grease filters.
The appliance is not intended for use by young children or infirm persons without supervision.
II Young children should be supervised to ensure that they do not play with the appliance.
III Exhaust air must not be discharged into a flue which is used for exhausting fumes from appliances burning gas or other fuels.
IV Applicable regulations concerning the discharge of exhaust air have to be fulfilled.
V If the supply cord of this equipment is damaged, it must only be replaced by theman ufacturer or its service agent or similarly qualified person in order to avoid a hazard.
VI No food must be flambé underneath the hood.
In the unlikely event of a breakdown, you will have access to professional help from De'Longhi by simply calling this number:
Australia: 1800 126 659
New Zealand: 0508 200 300
Thank you for buying our hood. Please read these instructions carefully for its optimum installation, use and maintenance.
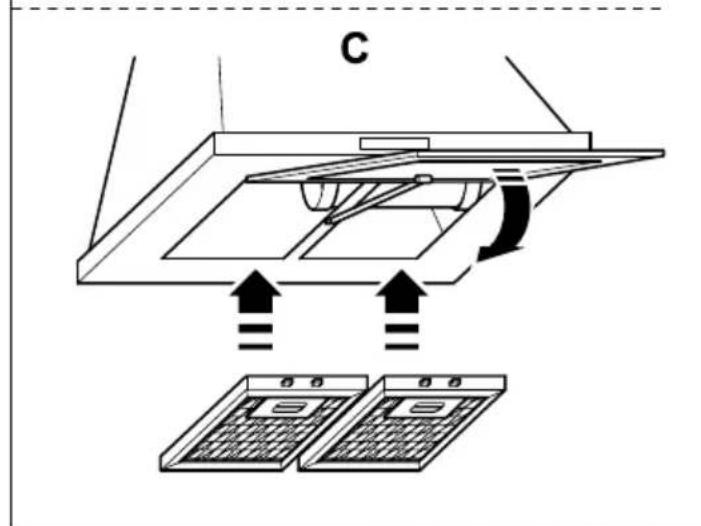
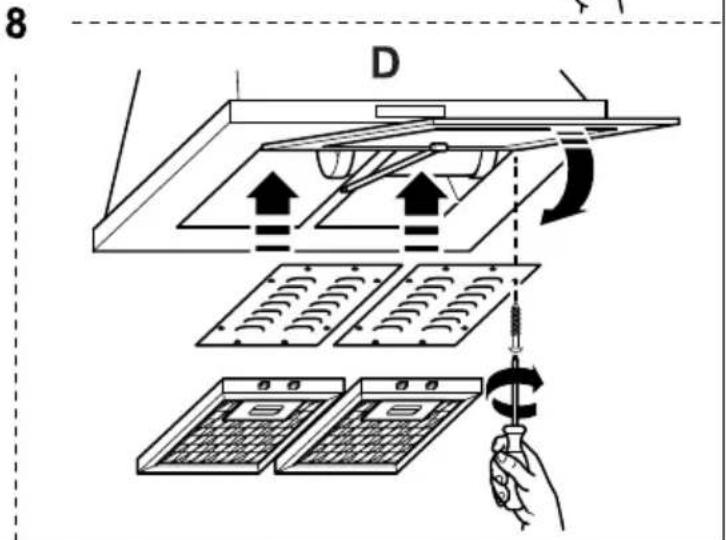
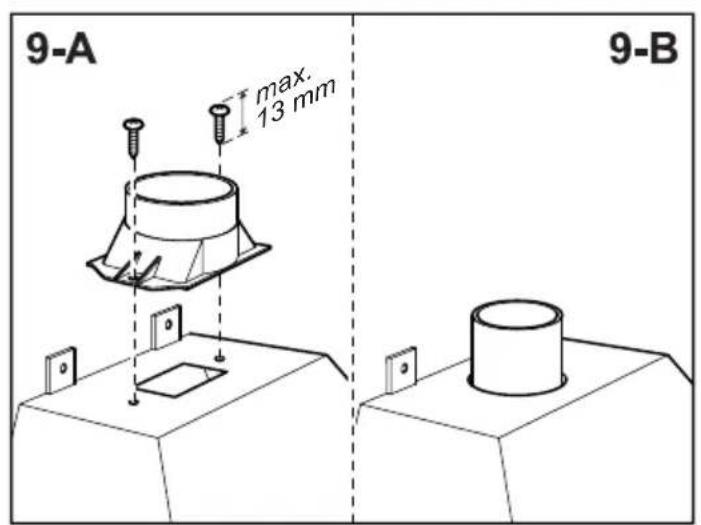
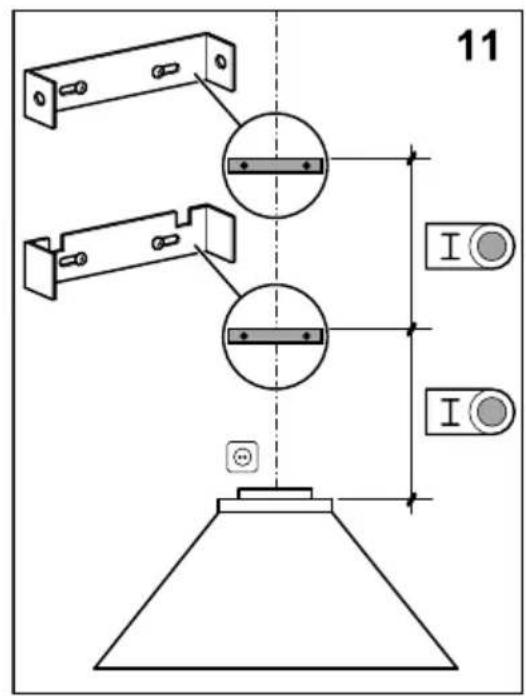
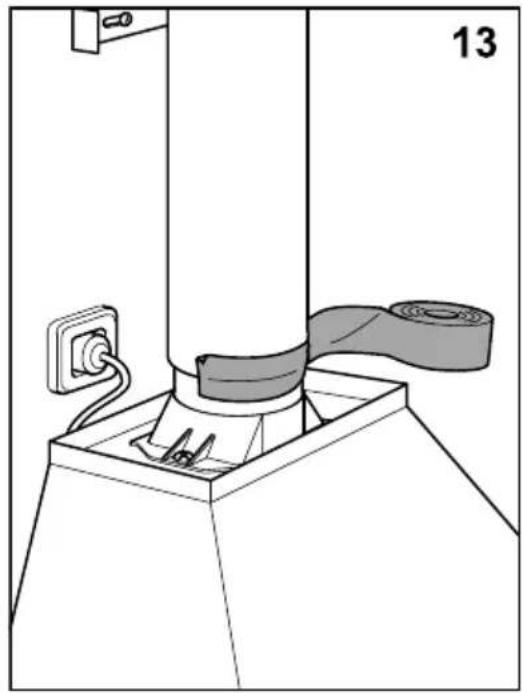
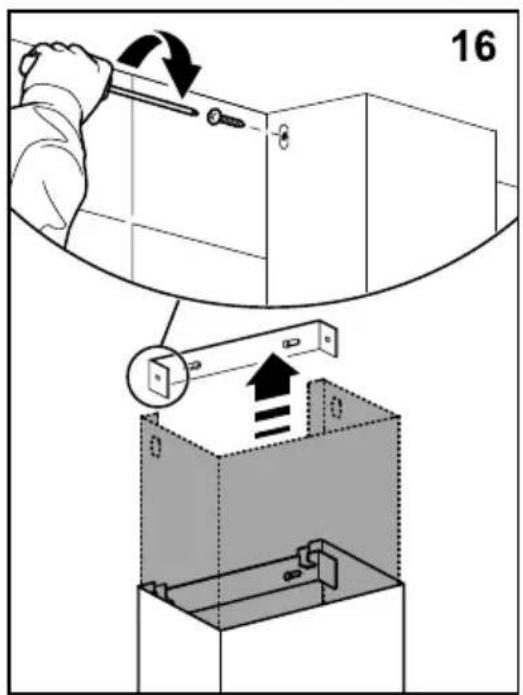
Notes: The figures mentioned in this manual are in the first pages.
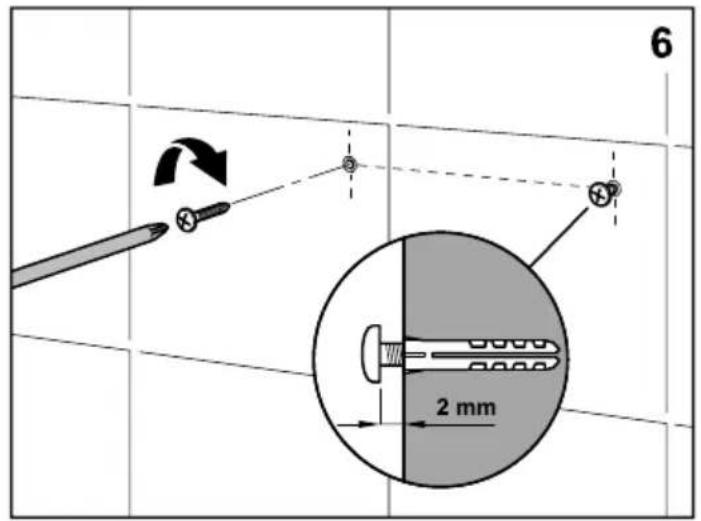
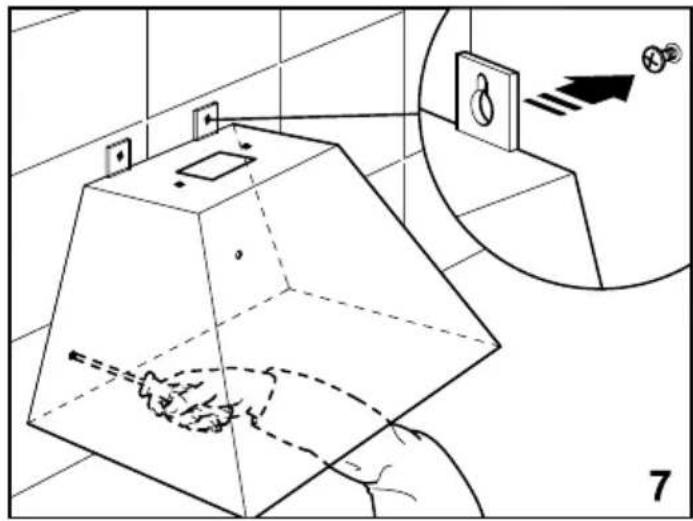
Hood installation on walls (look for the symbol in the figures)
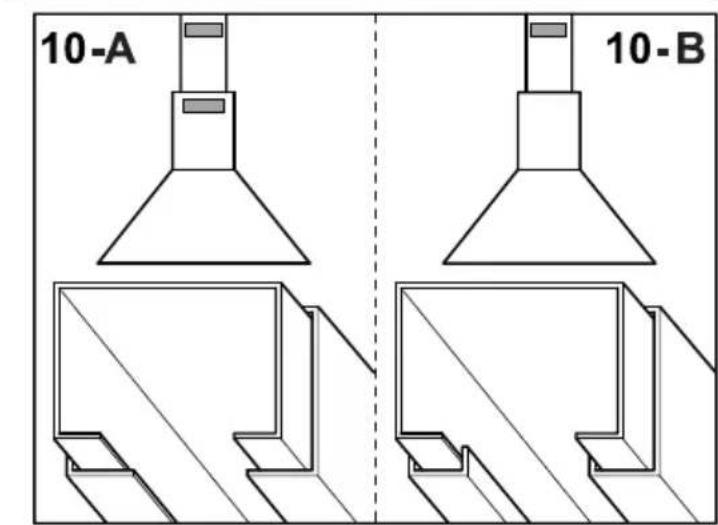
Warning: consult local regulations regarding fumes outlets. Do not connect the hood to a fume, ventilation or hot air duct. Confirm that room ventilation is appropriate with the local authorities. Make sure the maximum air extraction flow rate for the appliances in the room does not exceed 4 Pa (0.04 mbar). The room must have adequate ventilation if an extractor hood is used simultaneously with appliances that run on gas or other fuels. The evacuated air must be extracted through ducts that are used for evacuating fumes from appliances that run on gas or other fuels. Regulations regarding air extraction must be complied with.
Use a rigid PVC pipe with a min. ∅ 120 mm to evacuate fumes outside.
The above restrictions do not apply to hoods with no fumes outlet to outside (recirculation system with activated charcoal filter).
Install the hood in line with the instructions on the template install the hood in line with the instructions on the template provided.
For gas cooking appliances only: the minimum distance to the hood must be at least 65 cm.

Warning: Failure to install the screws or fixing device in accordance with these instructions may result in electrical hazards.
Connecting the hood to the grid
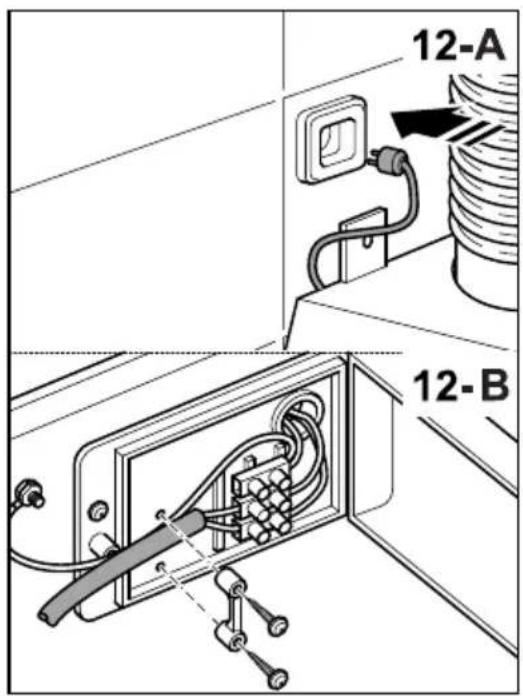
Warning: before connecting the hood: switch off the electricity supply and check that the supplied voltage and frequency coincide with that indicated on the appliance nameplate.
If the extractor hood has a plug, connect it to a power socket in line with applicable regulations, located in an accessible area.
If the hood does not have a plug, connect it directly to the electrical grid, protected by a separator device accessible for disconnection, in line with local regulations.
Use of the hood - Safety
Warning: the hood may stop working during an electrostatic discharge (e.g. lightning). This involves no risk of damage. Switch off the electricity supply to the hood and reconnect after one minute.
Do not allow the hood to be used by children or persons with reduced (physical, sensory or mental) capabilities or lack of experience and knowledge, unless they have been given instruction concerning use of the appliance by a person responsible for their safety.
Children should be supervised so that they do not play with the appliance.
To avoid the risk of fire, clean the metal filter regularly, permanently control pans containing hot oil and do not flambé food underneath the hood.
Do not use the hood if it shows signs of damage or imperfection. Contact an official distributor or authorised dealer.
Warning: Failure to install the screws in accordance with the installation instructions may result in
electrical hazards.
Accessible parts may heat up when using cooking appliances.
Use of the hood - Control panel (look for the symbol in the figures)
The different control panels are described below. Check the panel model installed on your hood and see the figure indicated in each case.
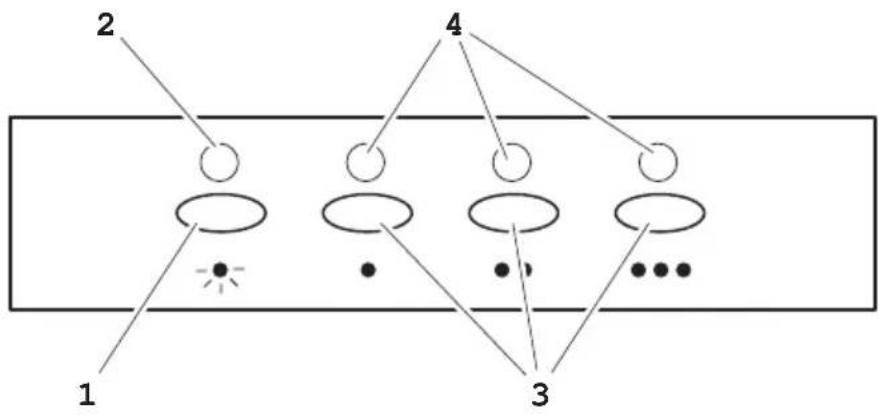
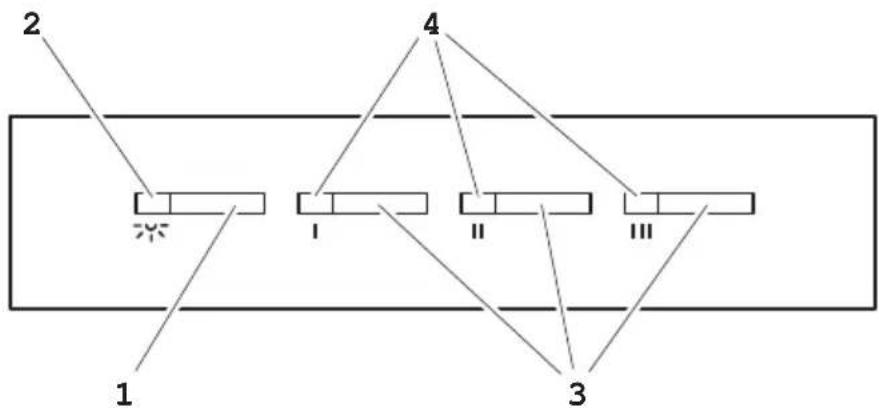
Panel with electronic button (Fig. P1)
1- Lighting on and off.
2- Lighting operating control pilot light.
3- Extractor fan speed - button: speed 1, 2 and 3 Press the current speed again to switch off the extractor fan.
4- Extractor fan operating speed control pilot light.
Timer: keep the chosen speed button pressed down for two seconds until the display flashes. The extractor fan stops after 15 min. and the lighting switches off. To cancel the timer: press the chosen speed button once.
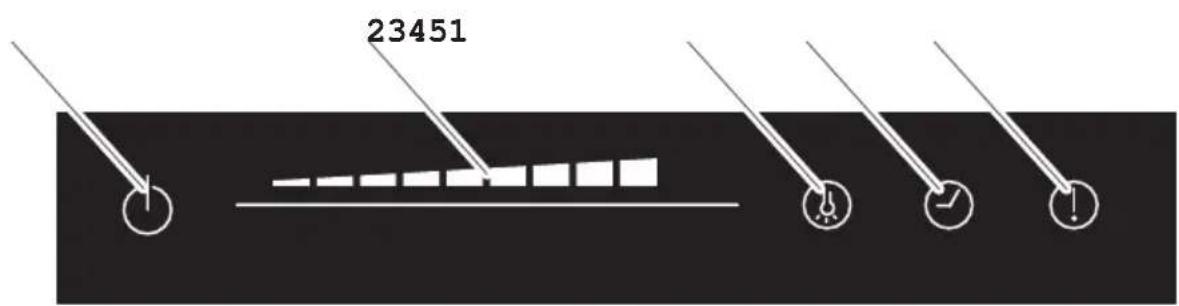
Four-speed panel - Digital display (Fig. P2)
1- Lighting on and off.
2- Extractor fan on and off.
3- Decrease extractor fan speed.
4- Extractor fan speed display panel.
5- Increase extractor fan speed.
6- Enable extractor fan turbo speed.
7- Enable and disable extractor fan limer.
Timer: the extractor fan works for 5 min. at the current speed and another 5 min. at each of the lower speeds until it stops and the lighting switches off.
Touch panel (Fig. P3)
1- Filter clean warning display/button. Warning of the need to replace the filter - press to deactivate once the filter has been cleaned or replaced.
2- Enable and disable extractor fan timer.
3- Lighting on and off. Keep pressed down to adjust the lighting intensity.
4- Extractor fan on and off.
5- Extractor fan speed - button: speed 1, 2 and 3/4
Timer: the extractor fan works for 5 min. at the current speed and another 5 min. at each of the lower speeds until it stops.
Sliding touch panel (Fig. P4)
1- Extractor fan on and off.
2- Sliding touch panel for extractor fan speed control. Also used in combination with button -3-.
3- Lighting on and off. Press the button and, while it is flashing, adjust the lighting intensity using the sliding touch panel -2-.
4- Enable and disable extractor fan timer.
5- Filter clean warning display/button. Warning of the need to replace the filter - press to deactivate once the filter has been cleaned or replaced.
Timer: the extractor fan works for 2 min. at the current speed and another 2 min. at each of the lower speeds until it stops and the lighting switches off.
Hood maintenance
Warning: always switch off the electricity supply before carrying out maintenance work on the hood. In the event of a fault, contact an official distributor or authorised dealer.
Exterior cleaning: use non-corrosive, liquid detergent and avoid the use of abrasive cleaning products.
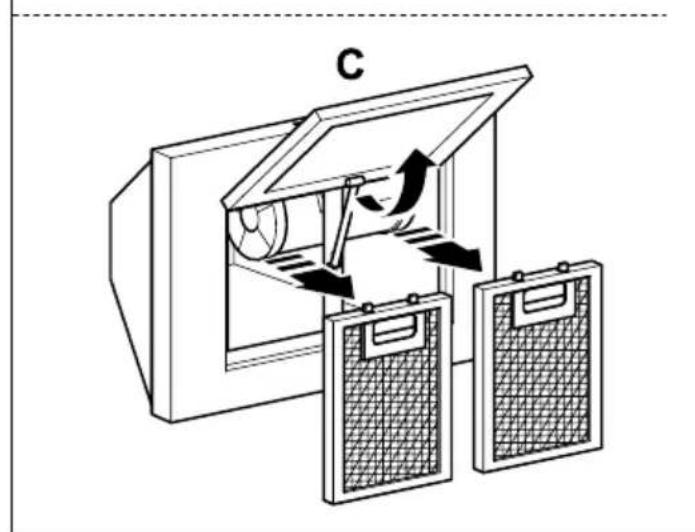
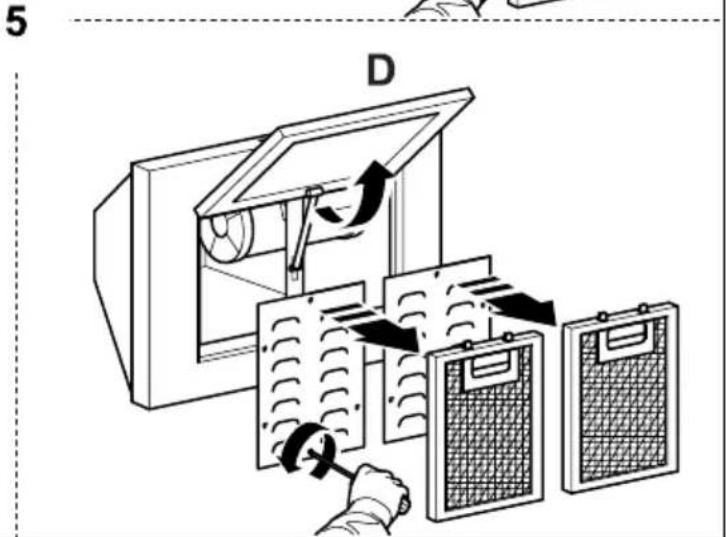
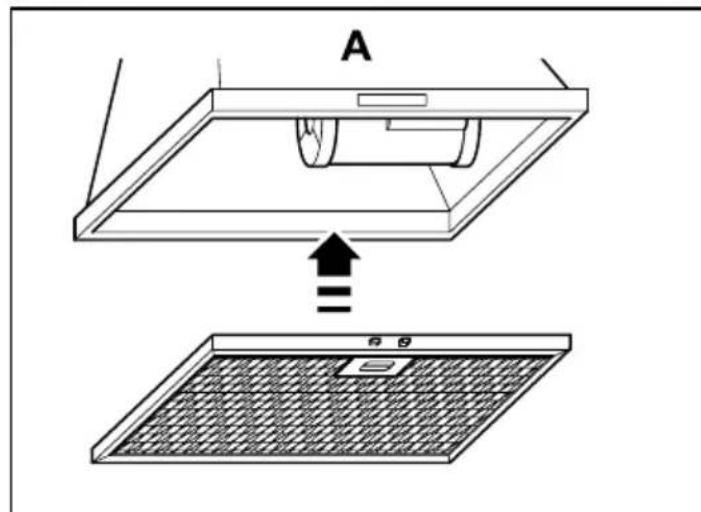
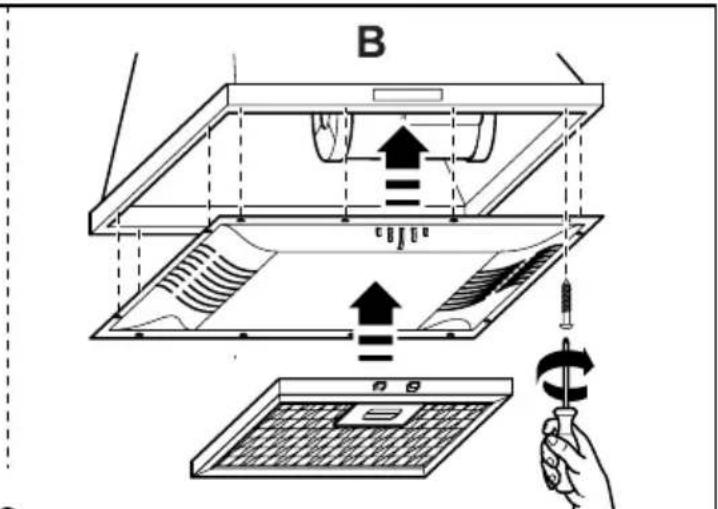
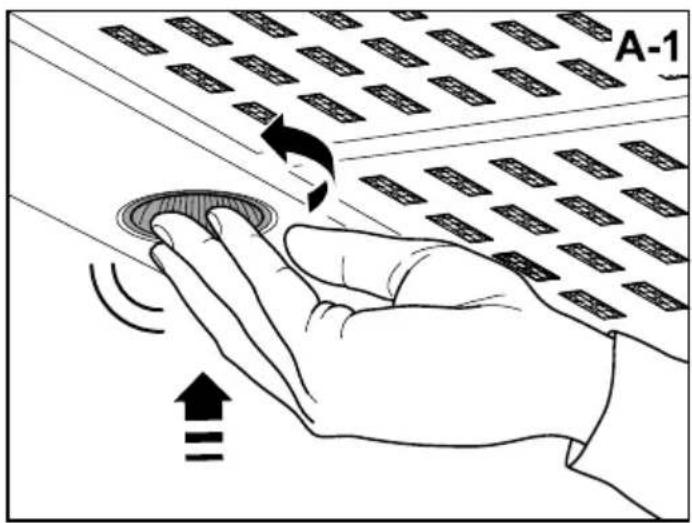
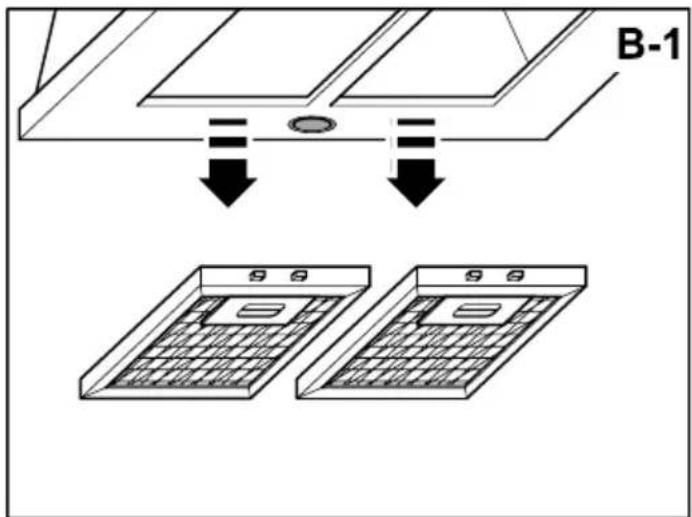
Grease filters: to avoid fires, clean thoroughly once a month or whenever the display pilot light indicates as such. To do so, remove the filters and wash with hot water and detergent. If using a dishwasher, position the filters vertically to prevent solid remains from depositing on them.
Activated charcoal filters: replace the every 3 months.
Important: increase the filter cleaning/replacement frequency if the hood is used for more than 2 hours a day. Always use genuine filters from the manufacturer.
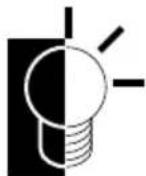
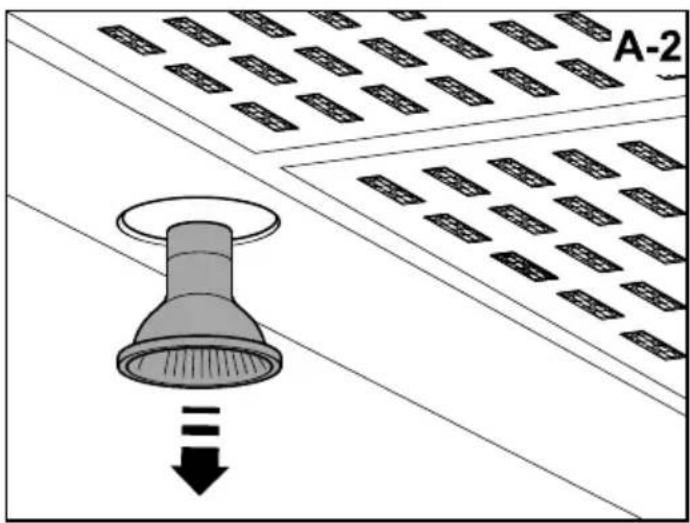
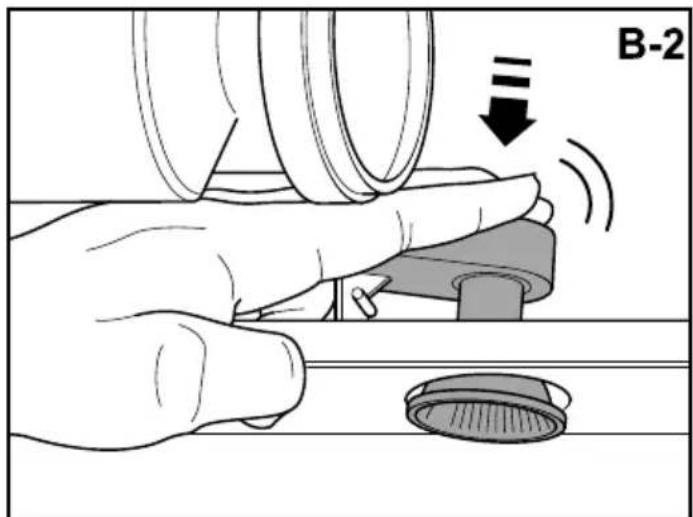
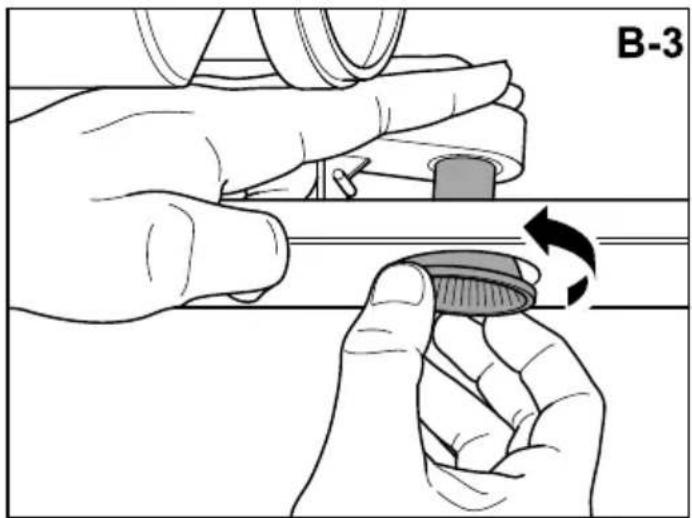
Bulb replacement (look for the symbol in the figures)
Warning: do not handle the bulbs until the electricity supply has been switched off and they have cooled.
Important: use new bulbs according to that indicated on the hood nameplate.
Use bulbs with an aluminium reflector to replace halogen bulbs. Do not use dichroic bulbs - risk of overheating.
Legal information
The manufacturer:
- Declares that this product meets all basic requirements regarding low-voltage electrical equipment established in Directive 2006/95/EC of 12 December 2006 and electro-magnetic compatibility established in Directive 2004/108/EC of 15 December 2004.
- Is not responsible for any failure to observe the instructions given in this manual and current safety regulations for the correct use of the equipment.
- R eserves the right to make any modifications to the equipment or this manual without prior notice.
Contact our official distributor should you require technical assistance or additional information on our products.

- IMPORTANT
- Hood installation on walls (look for the symbol in the figures)
- Connecting the hood to the grid
- Use of the hood - Safety
- Use of the hood - Control panel (look for the symbol in the figures)
- Panel with electronic button (Fig. P1)
- Four-speed panel - Digital display (Fig. P2)
- Touch panel (Fig. P3)
- Sliding touch panel (Fig. P4)
- Hood maintenance
- Bulb replacement (look for the symbol in the figures)
- Legal information
Brand : DELONGHI
Model : DESELENE90
Category : Range hood