
DUR-900 - Barcode scanners Deltaco - Free user manual and instructions
Find the device manual for free DUR-900 Deltaco in PDF.


| Product Type | Barcode Scanner |
| Brand | Deltaco |
| Model | DUR-900 |
| Scan Technology | CCD (Linear Imager) |
| Scan Angle | 42° |
| Scan Speed | 200 scans per second |
| Interface | USB (HID Keyboard, Virtual COM) |
| Supported Symbologies | 1D: Code 39, Code 128, EAN-13, UPC-A, etc.; 2D: QR Code, Data Matrix, PDF417 |
| Dimensions (L x W x H) | 170 x 70 x 100 mm |
| Weight | 200 g |
| Power Supply | USB bus-powered (5V, 500mA) |
| Cable Length | 1.5 m (detachable) |
| Operating Temperature | 0°C to 40°C |
| Storage Temperature | -20°C to 60°C |
| Drop Resistance | 1.5 m onto concrete |
| IP Rating | IP42 |
| Color | Black |
| Package Contents | Scanner, USB cable, user manual |
| Warranty | 2 years |
| Regulatory Approvals | CE, FCC, RoHS |
| Cleaning | Wipe with dry soft cloth; avoid solvents |
| Safety | Do not expose to liquids or direct sunlight |
| Spare Parts Availability | Replacement USB cable available |
Frequently Asked Questions - DUR-900 Deltaco
User questions about DUR-900 Deltaco
0 question about this device. Answer the ones you know or ask your own.
Ask a new question about this device
Download the instructions for your Barcode scanners in PDF format for free! Find your manual DUR-900 - Deltaco and take your electronic device back in hand. On this page are published all the documents necessary for the use of your device. DUR-900 by Deltaco.
USER MANUAL DUR-900 Deltaco
other
| Row | Column1 | Column2 | Column3 | Column4 | Column5 | Column6 | Column7 | Column8 | |-----|---------|---------|---------|---------|---------|---------|---------|---------| | 1 | 0.99 | 0.00 | 0.00 | 0.00 | 0.00 | 0.00 | 0.00 | 0.00 | | 2 | 0.98 | 0.01 | 0.00 | 0.00 | 0.00 | 0.00 | 0.00 | 0.00 | | 3 | 0.97 | 0.02 | 0.01 | 0.00 | 0.00 | 0.00 | 0.00 | 0.00 | | 4 | 0.96 | 0.03 | 0.02 | 0.01 | 0.00 | 0.00 | 0.00 | 0.00 | | 5 | 0.95 | 0.04 | 0.03 | 0.02 | 0.01 | 0.00 | 0.00 | 0.00 | | 6 | 0.94 | 0.05 | 0.04 | 0.03 | 0.02 | 0.01 | 0.00 | 0.00 | | 7 | 0.93 | 0.06 | 0.05 | 0.04 | 0.03 | 0.02 | 0.01 | 0.01 | | 8 | 0.92 | 0.07 | 0.06 | 0.05 | 0.04 | 0.03 | 0.02 | 0.02 | | 9 | 0.91 | 0.08 | 0.07 | 0.06 | 0.05 | 0.04 | 0.03 | 0.03 | | 10 | 0.90 | 0.19 | 0.18 | 0.17 | 0.16 | 0.15 | 0.14 | 0.14 | | 11 | 0.89 | 0.28 | 0.27 | 0.26 | 0.25 | 0.24 | 0.23 | 0.23 | | 12 | 0.88 | 0.37 | 0.36 | 0.35 | 0.34 | 0.33 | 0.32 | 0.32 | | 13 | 0.87 | 0.46 | 0.45 | 0.44 | 0.43 | 0.42 | 0.41 | 0.41 | | 14 | 0.86 | 0.55 | 0.54 | 0.53 | 0.52 | 0.51 | 0.51 | 0.51 | | 15+ | - | - | - | - | - | - | - | - | | Total | - | - | - | - | - | - | - | - | | Note: The Total column is empty because the actual values are not provided in the code; they are calculated based on the total sum of the squares for each row in the scatter plot (e.g., 'Total' column is 'Total'). The 'Total' column contains all four rows of data (e.g., 'Total' column is 'Total'). The 'Total' column contains all four columns of data (e.g., 'Total' column is 'Total'). The 'Total' column contains all four rows of data (e.g., 'Total' column is 'Total'). The 'Total' column contains all four columns of data (e.g., 'Total' column is 'Total'). The 'Total' column contains all four rows of data (e.g., 'Total' column is 'Total'). The 'Total' column contains all four columns of data (e.g., 'Total' cell is 'Total'). The 'Total' column contains all four rows of data (e.g., 'Total' column is 'Total'). The 'Total' column contains all four columns of data (e.g., 'Total' column is 'Total'). The 'Total' column contains all four rows of data (e.g., 'Total' column is 'Total'). The 'Total' column contains all four columns of data (e.g., 'Total' column is 'Total'). The 'Total', 'All', and 'Total' columns are explicitly labeled as 'Total'.ENG - User Manual
Safety instructions
- Do not look into or observe the device's light, neither directly or through an optical instrument.
- Do not disassemble or remove the lens cover. If the lens cover is removed, your eyes will be directly exposed to the light.
- Opening up, adjusting or repairing the scanner is only allowed by a qualified professional.
- Keep the product away from children.
- Do not expose the product to shock damage, pressure or put the product into fire or immerse in water.
Do not continue to use the product if it has been damaged or deformed. Do not leave it in hot environments.
Product information
This barcode scanner provides an accurate, fast and easy complete solution for data entry and storage for computer information systems.
The product has two working modes: manual and auto-sensor.
This product provides 4 interfaces to connect to any host computer system: Keyboard (Keyboard wedge), RS-232, USB HID and VCOM.
Configure this device by scanning bar codes. The settings are stored in EEPROM type memory, which are saved even if the device has been powered off.
This product has more settings than available barcodes in this manual. If needed you can create your own barcodes to set your own settings. One example is the "LED on time", it has about 200 possible settings but only 4 examples of barcodes are in this manual. See the English section "Configuring the barcode reader" for the corresponding setting you want to create or change.
Scan barcodes
In order to obtain a good scan effect, you should aim the barcode reader at the center of the barcode, but you can aim from any direction.
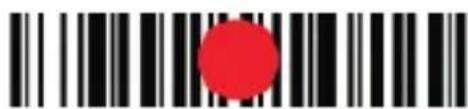

The closer the scanner is to the barcode, the smaller the aiming beam is;
the farther away the scanner is from the barcode, the larger the aiming beam is.
If the barcode is small, the scanner should be close to the barcode; if the barcode is large, the scanner should be farther away from the barcode, so the barcode can be read easily and correctly.
If the barcode is highly reflective (e.g., coated), you may need to tilt the scanner to read the barcode.

- Scan window
- Button
- LED
- Sound output
- Cable removal hole
Cable removal
- Locate the cable removal hole on the bottom of the scanner.
- Insert a paper clip into the hole and press firmly on the paper clip while gently pulling the cable out.
Readability VS performance
Each type of barcode has its own unique properties. Enable the ability to read barcode types via the settings found in this manual. You can disable the scanner from reading barcode types that will not be used to improve the scanner's performance.
Maintenance
- Stains and dust on the scan window may affect the scanning. Use a lint-free cloth / lens tissue of good quality to gently wipe clean the window if needed. Poor quality paper will damage the surface smoothness of the scan window and affect the scanner's effect.
- The scanner's housing can be wiped with a clean soft cloth. When needed, moisten the cloth with water or a mild soap solution and wipe it with a soft cloth.
Troubleshooting
Q1. Problem: The data cable is correctly installed, but the indicator LED or beep sound is not working when the button is pressed.
A1. Possible causes: No power or cable error. Solutions: Please make sure the cable is connected and the scanner is turned on. When using the USB port, please connect the USB cable to the USB port of the computer motherboard. Do not use an extended USB port or other USB extension cable. Check if the cable connection is loose.
Q2. Problem: The light is on but barcode cannot be read.
A2. Possible causes: The barcode type is not enabled, damaged barcode or inappropriate scan distance.
Solutions: Enable the barcode type. Try scanning other barcodes with the same barcode type.
Move the barcode scanner closer or farther away from the barcode.
Q3. Problem: The scanned data is displayed incorrectly on the host after the scanner flashes red.
A3. Possible causes: Input error or other settings for the scanner. Solutions: Change input to default English input or restore the scanner to factory default.
Q4. Problem: Other situations.
A4. Possible cause: Scanner operation error. Solutions: Turn off and reconnect the device and scanner correctly. Turn on the power of the device, restore the scanner to the factory default and rescan the barcode.
Configuring the barcode reader
This manual's section of configuring the barcode reader is only available in English.
Support
More product information can be found at www.deltaco.eu.
Contact us by e-mail: help@deltaco.eu.
SWE - Manual
Säkerhetsinstruktioner


- Lukuikkuna
- Painike
- LED-valo
- Ääniulostulo
- Kaapelin irrotuskytkin

- Scannings vindue
- Knap
- LED
- Lydudgang
- Kabelfjernelseshul.
Fjernelse af kabel



Streepjescodes scannen


The barcode setting "factory default" allows normal output. If you scan "debug mode", the barcode settings will be output to the host when scanning barcode settings. When "debug mode" is enabled then barcode settings cannot be used to set the scanner. When the scanner is re-powered (after being in "debug mode"), it will return to factory default. After it has returned to factory default you can set the scanner with barcode settings.
Note: Please use the "factory default" setting with caution.
After scanning "factory default", the scanner will lose its current settings, and change to factory default settings.
For factory default settings and functions see the factory defaults table.
Debug mode

Factory default
Communication Interface
Serial communication interface
The scanner provides TTL-232 serial communication interface and USB interface to communicate with the host. Via the interfaces, it can receive data, control the instructions from the scanner, and modify the scanner's settings. The settings can be modified by scanning barcode settings.
Baud rate settings
| Parameters Default | |
| Serial Communication Type Standard TTL-232 | |
| Baud Rate 9600 | |
| Check None | |
| Data bits 8 | |
| Stop bit 1 | |
| Hardware Flow Control None |


Baud rate: 38400 Baud rate: 4800

Baud rate: 57600 Baud rate: 14400
Baud rate: 115200


USB interface
When the scanner is connected to the host by USB cable, the scanner will use USB DATAPIPE MODE automatically.
USB DATAPIPE
USB DATAPIPE is a custom USB transport protocol. This feature requires the installation of the corresponding driver on the host.
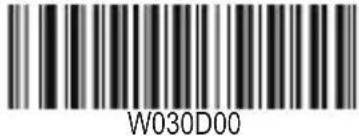
Switch to USB DATAPIPE mode
USB HID-KBW
When using the USB interface, you can simulate the scanner to be a HID-KBW (keyboard wedge). In this mode, the scanner will become a virtual keyboard and output data to the host.
Switch to USB HID-KBW mode

Standard keyboard input mode
Standard keyboard input mode is the factory default setting. The scanner has two more input modes: Keyboard characters emulation mode and keyboard control characters emulation mode.
Switch to standard keyboard input mode

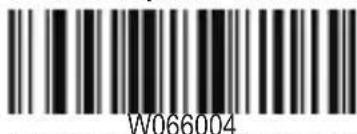
Keyboard characters emulation mode
This mode allows ASCII characters (16 hexadecimal values from 0x00 to 0xFF) in any language. This mode has a large data output, resulting in a slow down in speed. In this mode when ASCII characters are input, the scanner will read the barcodes as a virtual keyboard like this:
(1) Press and hold "ALT".
(2) According to the character code, input the number keys in the digital keyboard in turns.
(3) Release "ALT".
Switch to keyboard character emulation mode
Note: It is recommended that you turn Num Lock on the main numeric keypad before enabling this mode.
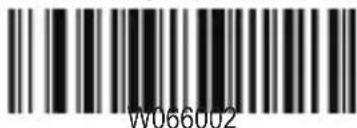
Keyboard control characters emulation mode
Hexadecimal ASCII values from 0x00 to 0x1F can be matched to control function keys, when emulating keyboard, control function keys:
(1) Press and hold "Ctrl".
(2) Press the control keys (for matching keys see table: Emulation keyboard control characters pairing table.
(3) Release "Ctrl" and control keys.
Switch to keyboard control characters emulation mode
Emulation keyboard control characters pairing table
| ASCII Value (HEX) Function Key ASCII Value (HEX) Function Key | ||
| 00 2 10 P | ||
| 01 A 11 Q | ||
| 02 B 12 R | ||
| 03 C 13 S | ||
| 04 D 14 T | ||
| 05 E 15 U | ||
| 06 F 16 V | ||
| 07 G 17 W | ||
| 08 H 18 X | ||
| 09 I 19 Y | ||
| 0A J 1A Z | ||
| 0B K 1B [ | ||
| 0C L | 1C \ | |
| 0D M | 1D ] | |
| 0E N 1E 6 | ||
| 0F | O 1F | . |
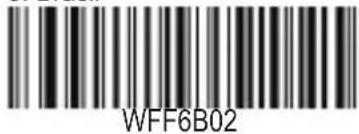
Keyboard language layout
Change layout by using the barcode settings. The default is US English.
- US English

- Brasil
- Czechoslovakia

- Finland
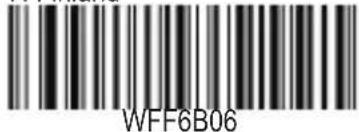
- Austria
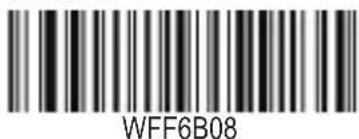
- Hungary
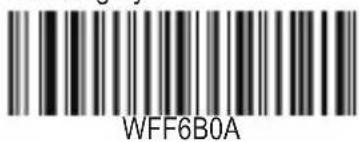
- Belgium
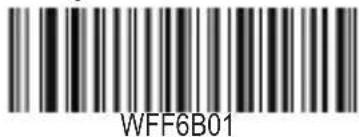
- Canada

- Denmark

- France

- Greece

- Israel
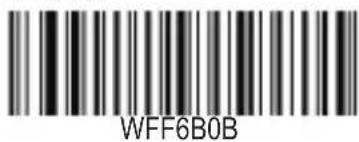
- Italy

- Netherlands 16. Norway

- Poland 18. Portugal

- Romania 20. Russia
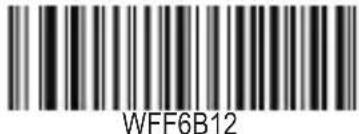
- Slovakia 22. Spain

- Sweden 24. Switzerland

- Turkey1 26. Turkey2
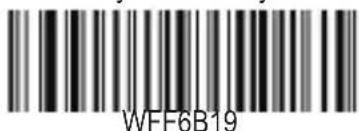
- Britain

- Latin American Spanish layout


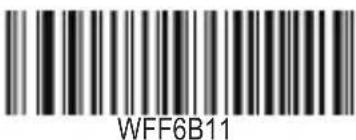
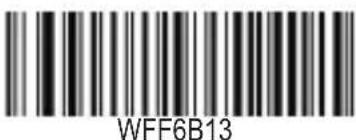
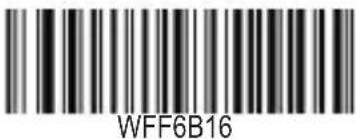

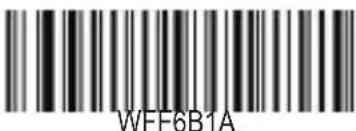
- Japan
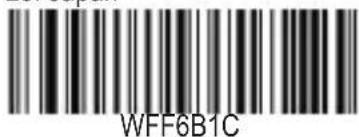
Unknown character tone
Unknown characters are a few characters (in some languages) on barcodes that will not show in the host's system and cannot be sent to the host.
Use the following barcode settings to set whether the scanner sends an error tone or not when it has scanned an unknown character. If you scan "no-warning tone", there will be no warning tone when an unknown character is scanned. If you scan "warning tone", there will be a warning tone when the barcode has unknown characters.
Warning tone

No-warning tone

Press and release key interval delay
Press and release key interval is the time between releasing a key and pressing a key.
0ms
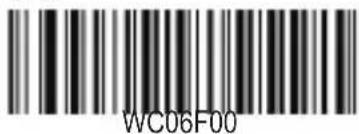
5ms
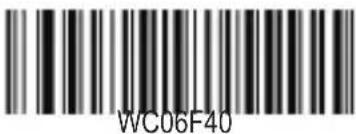
10ms

15ms

Caps Lock
"Turn on Caps Lock" inverts the letter case in the barcode. Similar to using Caps Lock on a regular keyboard. Note: If "Keyboard emulation characters mode" or "Change to uppercase/lowercase" is active, this function is not valid. Example output: If you scan "AbC", the host will receive "aBc".
Turn off Caps Lock
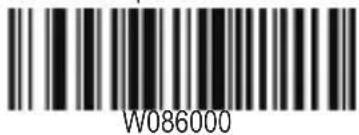
Turn On Caps Lock
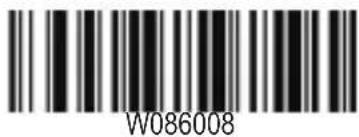
Change to uppercase/lowercase
If you scan "convert all to uppercase", all the letters in the barcode will change to uppercase. If you scan "convert all to lowercase", all the letters in the barcode will change to lowercase.
No case conversion

Convert all to lowercase

Convert all to uppercase

Emulate Num Lock
When Num Lock is turned on the scanner converts the numbers 0 to 9 to the Numeric Pad equivalent. When Num Lock is turned off the scanner does not convert the numbers.
Note: Please confirm that "Num Lock" turns on when you use this function.
Turn on Num Lock
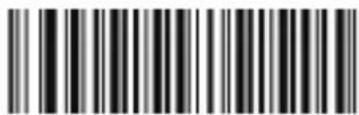
Turn off Num Lock

Emulate COM port via USB
Connect the scanner to the host via USB. Scan the "Emulate COM port via USB" barcode to allow the host to receive data like a serial port. You need to set barcode settings on the scanner to match the host's requirements. A driver for the host is required for this.
Emulate COM port via USB
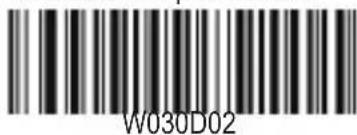
Enable HID-POS
The HID-POS interface can send up to 56 characters in a single USB report and it is more efficient than USB HID-KBW Features:
-
HID based, no custom driver required.
-
More efficient communication than USB HID-KBW and traditional RS-232 interface.
Note: HID-POS does not require a custom driver. However, a HID interface on Windows 98 does. All HID interfaces employ standard driver provided by the operating system. Use defaults when installing the driver.
Enable HID-POS

Scan modes
Manual mode
Manual mode (default/normal): Trigger pulls activates scanning. The scanning continues until the barcode is fully scanned or the trigger is released.
Manual mode
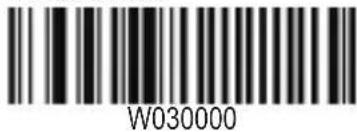
Continuous mode
Continuous mode: The scanner automatically activates next scan. The scan continues until the barcode is scanned or the scanning timeout expires. When a scan is completed, the scanner waits for the scanning timeout to expire and then starts next scan. The scanner continues to work in this pattern until no barcode is presented to the scanner, then the scanner will automatically stop scanning. Pressing the trigger will stop/resume scanning.
Continuous mode

Scanning timeout
Sets the maximum time for a scan during a scan attempt. It can be set in 0.1s increments from 0.1s to 25.5s. The default timeout is 5.0s. If it is set to 0s, the scanner will scans barcodes continuously. For more information, see Appendix D: Examples.
Scanning timeout
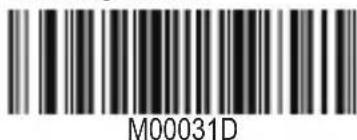
Timeout between scans
Sets the timeout between scans. When a scan ends, next scan will not start until the timeout between scans expires. It is programmable in 0.1s increments from 0.1s to 25.5s. The default timeout is 1.0s. For more information, see Appendix D: Examples.
Timeout between scans

Automatic light sense mode
In this mode, the scanner will wait for the light timeout to expire before activating a scan every time it detects a change in ambient light. The scanning continues until the barcode is scanned or the scanning timeout expires. After a scan ends, the scanner waits for the timeout between scans to expire before beginning to monitor ambient light. If no barcode is presented to the scanner, the scanner will automatically stop scanning and start to monitor ambient light.
In this mode, a trigger pull can also activate a scan. The scanning continues until the barcode is scanned or the trigger is released. When the scan ends, the scanner will continue to monitor ambient light.
Example usage: Useful when placing the scanner static and moving barcodes in front of the scanner.
If the light in the room is not high enough, automatic light sense mode may not work properly.
Automatic light sense mode

Light sense timeout
The scanner waits for the light sense timeout to expire before activating ambient light monitoring. This can be set in 0.1s increments from 0.1s to 25.5s. The default timeout is 0.4s. For more information, see Appendix D: Examples.
Light sense timeout

Light sensitivity
Light sensitivity specifies the degree of acuteness of the scanner's response to changes in ambient light. The higher the sensitivity, the lower requirement in light change to trigger the scanner. Select light sensitivity that fits the environment. The default setting is medium light sensitivity.
Light sensitivity levels range from 0 to 255. The smaller the number, the higher the light sensitivity.
Select desired light sensitivity level to help achieve greater efficiency. For more information, see Appendix D: Examples.
High light sensitivity
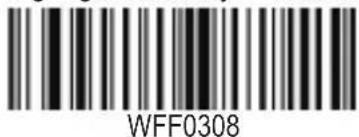
Low light sensitivity
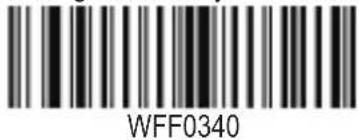
Medium light sensitivity

Custom light sensitivity

Host command trigger mode
In this mode scanning is activated by host commands (i.e. set the bit0 of register 0x0002 to "1"). The scanning continues until the barcode is scanned or the scanning timeout expires.
Host command trigger mode
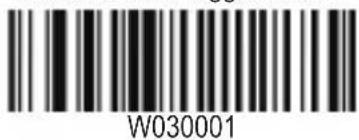
LED & aiming
LED
Changing LED settings can improve the light conditions during scanning. Normal (default): LED is turned on during scanning. Always on: LED stays on when the scanner is powered on. Always off: LED stays off all the time.
Normal Always off Always on

Always on
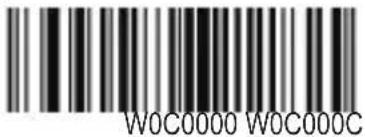

Aiming
When scanning, the scanner projects an aiming beam, which makes scanning easier. Normal (default): The scanner projects an aiming beam only during barcode scanning. Always on: The aiming beam is constantly on when the scanner is powered on. Always off: The aiming beam is off all the time.
Normal Always off Always on
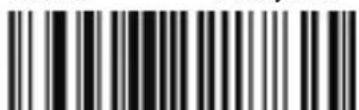
Always on
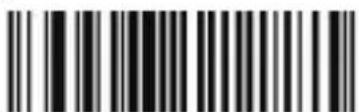

W300010 W300000 W300030
Notification tones
Scanning the enable mute mode turns off all notification tones. By default, mute mode is disabled.
Enable mute mode Disable mute mode
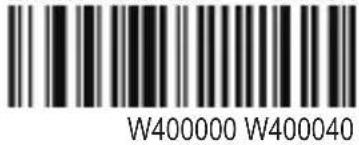
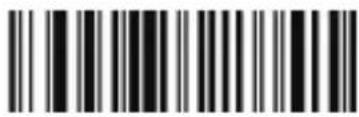
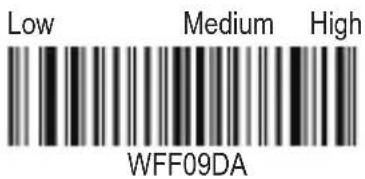
Good scan tone
Good read tones: On Good scan tone: Off
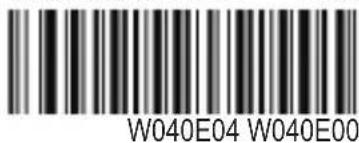
Good scan tone frequency
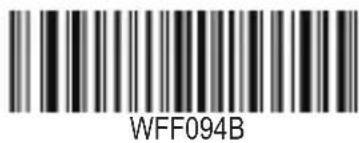

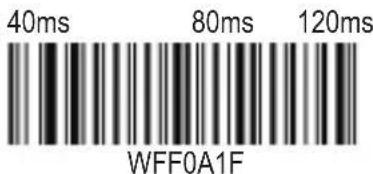
Good scan tone duration


Good scan LED
Good scan LED: On Good scan LED: Off

Data formatting
Depending on your situation you may need to add suffixes or prefixes to distinguish barcodes. The scanner supports the following format: ["F"/ "S"] + [Code ID] + [AIM ID] + [DATA] + [terminating character]
[DATA] is always transmitted, the other parts are suffixes or prefixes and they are optional.
Scan result notification
When enabled, if a barcode is not successfully scanned, "F" is transmitted; if a scan is successful ("Good scan"), "S" is appended to the barcode data as the most left character. Note: This function is invalid in USB DATAPIPE MODE.
Enable scan result notification

Disable scan result notification

AIM ID prefix
AIM (Automatic Identification Manufacturers) IDs define identifiers and data carrier identifiers. See AIM ID table. If AIM ID prefix is enabled, the scanner will add the symbology identifier as a prefix (before) to the scanned data after scanning.

Disable AIM ID prefix

Barcode ID prefix
Barcode ID can be used to identify barcode type. For more information, see barcode ID table.
User can choose to transmit barcode ID or visible barcode ID by scanning respective barcode. See barcode ID table.
Enable barcode ID prefix

Transmit barcode ID
Transmit visible barcode ID

Disable barcode ID prefix


Terminating character suffix
A terminating character such as carriage return (CR) or carriage return/line feed pair (CRLF) or horizontal tab (TAB) can be used to mark the end of data.
Disable terminating character suffix Append CR
Append CRLF Append TAB


Symbologies
Global settings
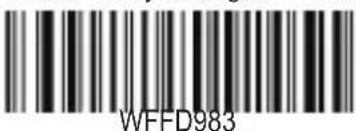
Enable/Disable all symbologies
If all symbologies are disabled, the scanner can only identify barcodes that has barcode settings.
Enable All Symbologies Disable All Symbologies
Enable/Disable 1D symbologies
The following barcode settings, only applies to 1D type barcodes.
Enable 1D symbologies Disable 1D Symbologies
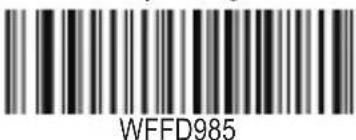
Enable/Disable 2D symbologies
The following barcode settings, only applies to 2D type barcodes.
Enable 2D symbologies Disable 2D symbologies


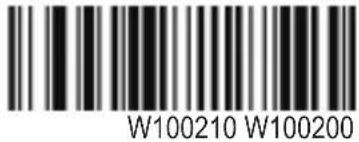
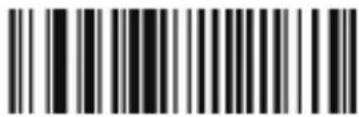
Inverse/regular barcodes
Regular barcode: Dark image on a bright background. Inverse barcode: Bright image on a dark background.
Barcode inverse on: Read both regular barcodes and inverse barcodes. Barcode reverse off (default): Read regular barcodes only. The scanner shows a slight decrease in scanning speed when barcode inverse is on.
Barcode inverse: On
Barcode inverse: Off
1D symbologies
Code 128
Restore factory defaults of Code 128
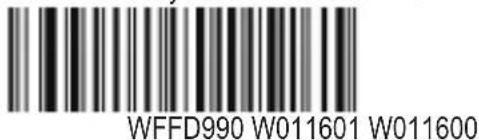
Enable Code 128 Disable Code 128
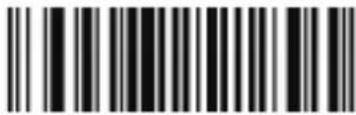

UCC/EAN-128 (GSI-128)
Restore factory defaults of UCC/EAN-128

Enable UCC/EAN-128
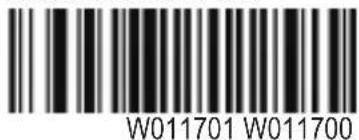
Disable UCC/EAN-128

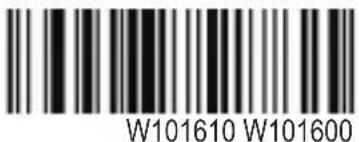
AIM 128
Restore factory defaults of AIM 128

Enable AIM 128 Disable AIM 128
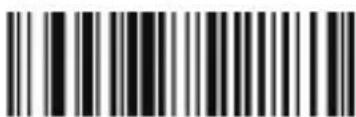
Add-on barcodes EAN-8 / EAN-13 / UPC-E / UPC-A
EAN-8 / EAN-13 / UPC-E / UPC-A barcodes can be extended with two or five digits to form new barcodes.
In the examples: The parts without dotted lines are the base/standard barcodes while the parts surrounded by dotted lines are the barcode add-ons. Examples:


When 2-digit add-on and 5-digit add-on are enabled, the scanner can scan barcodes both with add-ons (2 and 5) and without add-ons (2 and 5). When both are disabled, the scanner will ignore the add-on part of the barcodes. The scanner will still scan the first part correctly. It will also scan normal barcodes. The same applies for EAN-8 / EAN-13 / UPC-E / UPC-A.
EAN-8
EAN-8 is 8 digits in length. The last digit is a check digit used to verify the integrity of the data.
Restore factory defaults of EAN-8
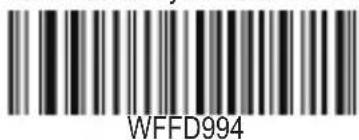
Enable/Disable EAN-8
Enable EAN-8 Disable EAN-8

Extend EAN-8 to EAN-13
If you enable extend EAN-8 to EAN-13, five leading zeros will be added to EAN-8 barcodes to extend to 13 digits.
Enable extend EAN-8 to EAN-13 Disable extend EAN-8 to EAN-13

Disable extend EAN-8 to EAN-13

EAN-13
EAN-13 is 13 digits in length. The last digit is a check digit used to verify the integrity of the data.
Restore factory defaults of EAN-13

Disable EAN-13 Transmit EAN-13 check digit

Do not transmit EAN-13 check digit Enable 2-digit add-on barcodes
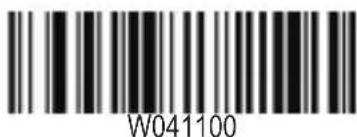
Disable 2-digit add-on barcodes Enable 5-digit add-on barcodes

Enable EAN-13


Disable 5-digit add-on barcodes
EAN-13 add-on barcode required
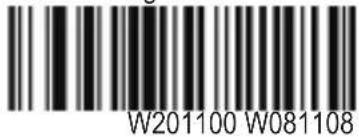

EAN-13 add-on barcode not required

ISSN
Restore factory defaults of ISSN

Enable ISSN Disable ISSN
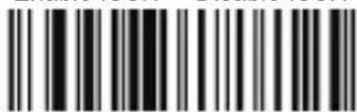

WFFD996 W401140 W401100
ISBN
Restore factory defaults of ISBN
Enable ISBN

WFFD997

W011201
Disable ISBN

W011200
Enable ISBN-13

W041200
Enable ISBN-10

W041204
UPC-E
UPC-E is 8 digits in length. The last digit is a check digit used to verify the integrity of the data.
The first character of UPC-E barcodes is the system character "0".
Restore factory defaults of UPC-E
Enable UPC-E

WFFD998
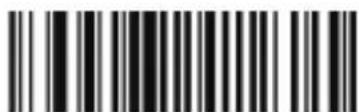
W011501
Disable UPC-E Transmit UPC-E check digit

W011500

W041504
Do not transmit UPC-E check digit
Enable 2-digit add-on barcodes

W041500

W201520
Disable 2-digit add-on barcodes
Enable 5-digit add-on barcodes

W201500

W401540
Disable 5-digit add-on barcodes
UPC-E add-on barcodes required
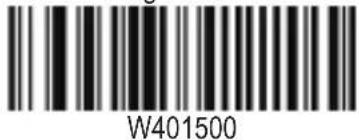
UPC-E add-on barcodes not required

Do not transmit system character "0"

Disable UPC-E add-on


Transmit system character "0"

Enable UPC-E add-on
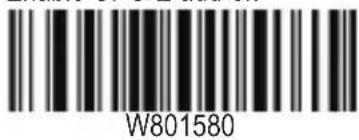
UPC-A
UPC-A is 13 digits in length. The last digit is a check digit used to verify the integrity of the data.
Note: The preamble character "0" usually does not appear in printed UPC-A barcodes.
Restore factory defaults of UPC-A

Enable UPC-A
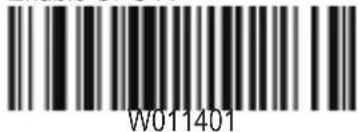
Transmit UPC-A check digit
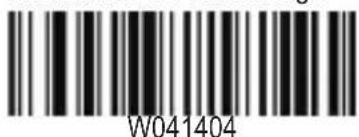
Enable 2-digit add-on barcodes

Enable 5-digit add-on barcodes

UPC-A add-on barcodes required
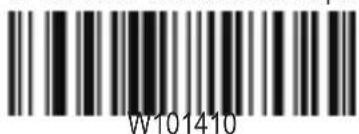
Do not transmit preamble character "0"

Disable UPC-A
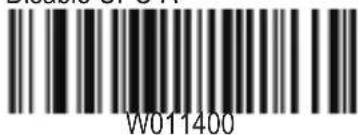
Do not transmit UPC-A check digit
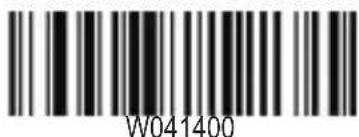
Disable 2-digit add-on barcodes
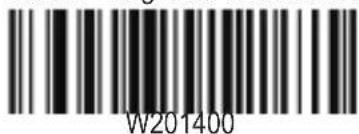
Disable 5-digit add-on barcodes

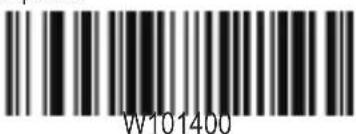
Do not transmit preamble character "0"

Interleaved 2 of 5
If an Interleaved 2 of 5 barcode contains an odd number of characters, a leading zero must be appended. Scan the appropriate barcode to choose whether to transmit the appended "0".
Interleaved 2 of 5 has an optional last check digit. The check digit is used to verify the integrity of the data.
Disable check digit: The scanner will not scan the verification digit.
Do not transmit check digit after verification. The scanner verifies that all Interleaved 2 of 5 barcodes complies with the check digit. Barcodes passing the check will be transmitted except the last digit, barcodes failing will not be transmitted.
Transmit check digit after verification: The scanner verifies that all Interleaved 2 of 5 barcodes complies with the check digit. Barcodes passing the check will be transmitted, barcodes failing will not be transmitted.
Restore factory defaults of Interleaved 2 of 5

WFFD99A
Enable Interleaved 2 of 5 Disable Interleaved 2 of 5

W011801
Disable Interleaved 2 of 5
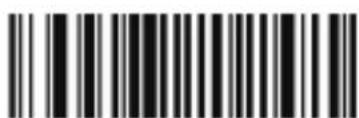
W011800
Disable check digit

W0C1800
Do not transmit check digit after verification
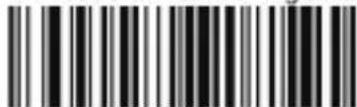
W0C1804
Transmit appended "0" Do not transmit appended "0"
Transmit check digit after verification
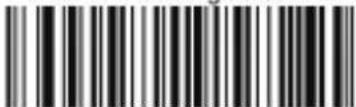
W0C180C

W101800
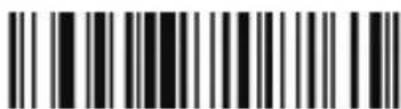
W101810
ITF-6
ITF-6 is a special kind of Interleaved 2 of 5 with a length of 6 characters and the last character as the check digit.
Note: We recommend that you do not enable ITF-6 and Interleaved 2 of 5 at the same time.
Restore factory defaults of ITF-6 Disable ITF-6

WFFD99B

W011900
Enable ITF-6 but do not transmit check digit Enable ITF-6 and transmit check digit

W051901

W051905
ITF-14
ITF-14 is a special kind of Interleaved 2 of 5 with a length of 14 characters and the last character as the check digit.
Note: We recommend that you do not enable ITF-14 and Interleaved 2 of 5 at the same time.
Restore factory defaults of ITF-14 Disable ITF-14

WFFD99C

W201800
Enable ITF-14 but do not transmit check digit
Enable ITF-14 and transmit check digit
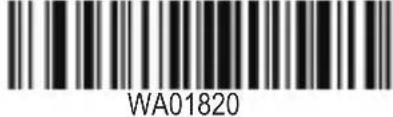
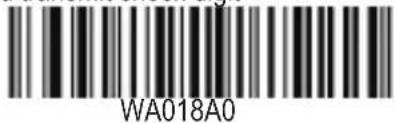
Matrix 2 of 5
Restore factory defaults of Matrix 2 of 5 Enable Matrix 2 of 5


Disable Matrix 2 of 5 Disable check digit

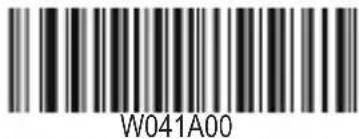
Do not transmit check digit after verification

Transmit check digit after verification
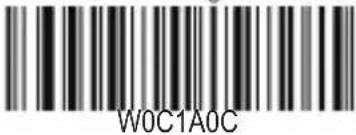
Industrial 25
Restore factory defaults of Industrial 25 Enable Industrial 25
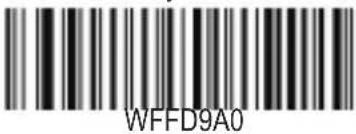
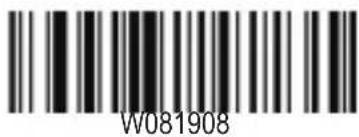
Disable Industrial 25
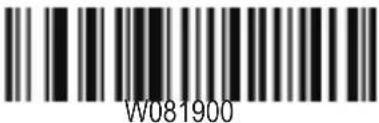
Disable check digit
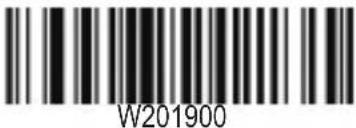
Do not transmit check digit after verification

Transmit check digit after verification

Standard 25
Restore factory defaults of Standard 25 Enable Standard 25


Disable Standard 25 Disable check digit


Do not transmit check digit after verification

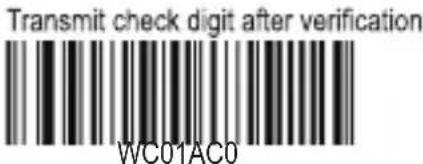
Code 39
Code 39 barcodes have a character as start and stop character, they can be transmitted or not transmitted. The scanner can be set to identify all ASCII characters. See barcodes: Enable/Disable Code 39 full ASCII.
Restore factory defaults of Code 39

WFFD9A2
Enable Code 39 Disable Code 39

W011C01
Transmit start/stop character

W041C04
Disable check digit

W081C00
Do not transmit check digit after verification

W181C08
Enable Code 39 full ASCII

W201C20
Disable Code 39 full ASCII

W011C00
Do not transmit start/stop character

W041C00
Transmit check digit after verification
W181C18

W201C00
Codabar
Codabar barcodes may have a character as start and stop character, they can be transmitted or not transmitted. Start and stop characters can be set to these formats: ABCD/ABCD, ABCD/TN*E, abcd/abcd, abcd/tn*e.
Restore factory defaults of Codabar
WFFD9A3
Enable Codabar Disable Codabar

W011E01
Disable check digit

W101E00
Do not transmit check digit after verification
W301E10

W011E00
Transmit check digit after verification

W301E30
Transmit start/stop character
Do not transmit start/stop character

Transmit check digit Do not transmit check digit

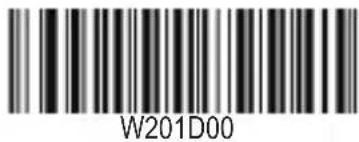
Plessey
Restore factory defaults of Plessey Enable Plessey

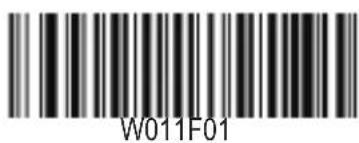
Disable Plessey Disable check digit


Do not transmit check digit after verification

Transmit check digit after verification

MSI-Plessey
Restore factory defaults of MSI-Plessey

Disable MSI-Plessey

Enable MSI-Plessey
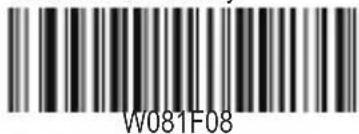
One check digit, MOD10

Disable check digit

Two check digits, MOD10/MOD11
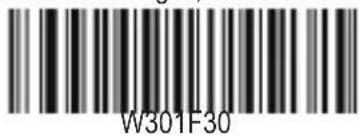
Two check digits, MOD10/MOD10


Transmit check digit Do not transmit check digit
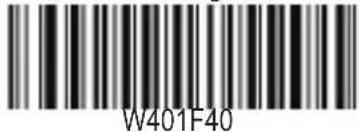
GS1 DataBar (RSS-14)
Restore factory defaults of GS1 DataBar

Enable GS1 DATABAR Disable GS1 DATABAR
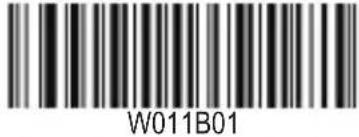
Transmit Application Identifier (01)
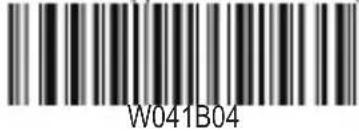
GS1 DataBar Limited
Restore factory defaults of GS1 DataBar Limited

Enable GS1 DataBar Limited

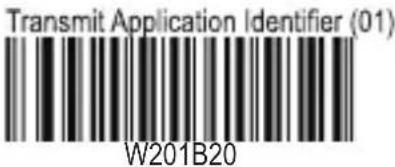
GS1 DataBar Expanded
Restore factory defaults of GS1 DataBar Expanded

Enable GS1 DataBar Expanded

2D Symbologies
PDF417
Restore factory defaults of PDF417

Enable PDF417 Disable PDF417
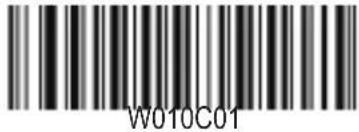
Data Matrix
Restore factory defaults of Data Matrix Enable Data Matrix
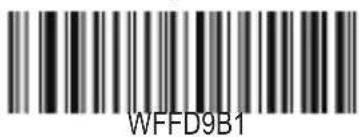

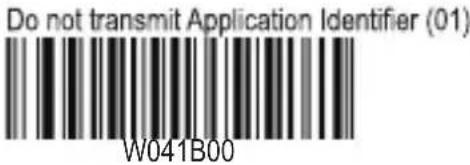
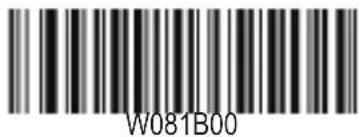

Disable GS1 DataBar Expanded


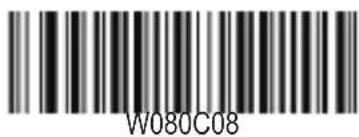
Disable Data Matrix Enable scanning of rectangular barcodes

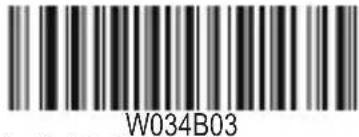
Disable scanning of rectangular barcodes
Enable unmirrored Data Matrix Only

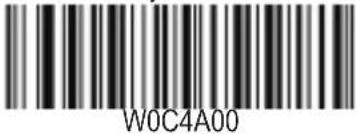
Enable mirrored Data Matrix Only
Enable both mirrored and unmirrored Data Matrix


QR Code
Restore factory defaults of QR Code
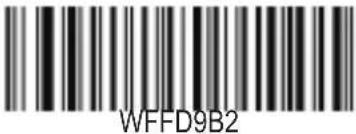
Enable QR Code Disable QR Code


Enable Micro QR Disable Micro QR


Enable mirrored Micro QR Disable mirrored Micro QR
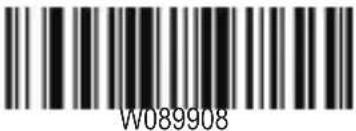

Factory defaults table
| Setting Factory Default (Remarks) | ||
| Programming Barcode | ||
| Barcode programming Barcode programming | ||
| Programming barcode data Programming Barcode Data | ||
| Communication Interfaces | ||
| TTL-232 | Baud Rate 9600. | |
| Parity Check None. | ||
| Number of Data Bits 8. | ||
| Number of stop bits 1. | ||
| Hardware flow control | None. | |
| USB Interface | ||
| Interface | USB data pipe (Options: USB HID-KBW, USB COM Port Emulation, HID-POS.) | |
| USB HID-KBW | Input mode Standard Keyboard. | |
| Keyboard layout U.S. | ||
| Tone on unknown character | Enabled. | |
| Inter-keystroke delay No delay. | ||
| Caps Lock Disabled. | ||
| Convert Case No conversion. | ||
| Emulate Numeric Keypad Disabled. | ||
| Scan modes | ||
| Default scan mode Manual mode | ||
| Continuous mode | Timeout between scans 1.0s. (0-25.5s). | |
| Scanning timeout | 3.0s. (0.1-25.5s; 0: infinite.) | |
| Light sense mode | Timeout between scans 1.0s. (0-25.5s). | |
| Scanning timeout | 3.0s. (0.1-25.5s; 0: infinite.) | |
| Light sense timeout 0.4s. (0-25.5s). | ||
| Light sensitivity Medium. | ||
| Host command trigger mode | Scanning timeout | 3.0s. (0.1-25.5s; 0: infinite.) |
| LED & aiming | ||
| LED Normal. (Turn on when scanning barcode) | ||
| Aiming Normal. (Turn on when scanning barcode.) | ||
| Notifications | ||
| Mute mode Disabled. | ||
| Good scan tone | Tone on good scan Enabled. | |
| Tone frequency Medium. | ||
| Tone duration | 80ms (Other options: 40ms and 120ms.) | |
| Good scan LED | Enabled. | |
| Scan result notification | Disabled. ("S": Good scan; "F": No scan. Not applicable to USB Data pipe.) | |
| Data Formatting | ||
| AIM ID prefix | Disabled. | |
| Code ID prefix | Disabled. | |
| Code ID type | Original Code ID. | |
| Terminating character suffix | Disabled (Terminating character options: CR, CRLF, TAB.) | |
| Symbologies | ||
| Barcode inverse | Disabled. (Applicable to all symbologies.) | |
| Code 128 | ||
| Code 128 | Enabled. | |
| UCC/EAN-128 (GS1-128) | ||
| UCC/EAN-128 | Enabled. | |
| AIM 128 | |
| AIM 128 Enabled. | |
| EAN-8 | |
| EAN-8 Enabled. | |
| Check digit Transmit. | |
| 2-digit add-on code Disabled. | |
| 5-digit add-on code Disabled. | |
| Add-on code Not required. | |
| Extend to EAN-13 Disabled. | |
| EAN-13 | |
| EAN-13 Enabled. | |
| Check digit Check digit. | |
| 2-digit Add-on code Disabled. | |
| 5-digit Add-on code Disabled. | |
| Add-on code Not required. | |
| ISSN | |
| ISSN Disabled. | |
| ISBN | |
| ISBN Enabled. | |
| ISBN format ISBN-13. | |
| UPC-E | |
| UPC-E Enabled. | |
| Check digit Transmit. | |
| 2-digit add-on code Disabled | |
| 5-digit add-on code Disabled. | |
| Add-on code Not required. | |
| Extend to UPC-A Disabled. | |
| System character “0” | Do not transmit. |
| UPC-A | |
| UPC-A | Enabled. |
| Check digit Transmit. | |
| 2-digit add-on code Disabled. | |
| 5-digit add-on code Disabled. | |
| Add-on code Not required. | |
| Preamble character “0” | Do not transmit. |
| Interleaved 2 of 5 | |
| Interleaved 2 of 5 | Enabled. |
| Check digit verification | Disabled. |
| Check digit Do not transmit. | |
| Appended "0" | Transmit (For Interleaved 2 of 5 barcodes that contain an odd number of characters.) |
| ITF-6 | |
| ITF-6 Disabled. | |
| Check digit Do not transmit. | |
| ITF-14 | |
| ITF-14 Enabled. | |
| Check digit Transmit. | |
| Matrix 2 of 5 | |
| Matrix 2 of 5 Enabled. | |
| Check digit verification | Disabled. |
| Check digit Do not transmit. | |
| Industrial 25 | |
| Industrial 25 Enabled. | |
| Check digit verification | Disabled. |
| Check digit Do not transmit. | |
| Code 39 | |
| Code 39 Enabled. | |
| Check digit verification | Disabled. |
| Check digit Do not transmit. | |
| Start/stop character Do not transmit. | |
| Code 39 full ASCII Disabled. | |
| Codabar | |
| Codabar Enabled. | |
| Check digit verification | Disabled. |
| Check digit Do not transmit. | |
| Start/stop character Transmit. | |
| Start/stop character format ABCD/ABCD. | |
| Code 93 | |
| Code 93 Enabled. | |
| Check digit verification | Enabled. |
| Check digit Do not transmit. | |
| Code 11 | |
| Code 11 Enabled. | |
| Check digit verification | One check digit, MOD11. |
| Check digit Transmit. | |
| Plessey | |
| Plessey Enabled. | |
| Check digit verification | Enabled. |
| Check digit Do not transmit. | |
| MSI-Plessey | |
| MSI-Plessey Enabled. | |
| Check digit verification | One check digit, MOD10. |
| Check digit Transmit. | |
| GS1 DATABAR | |
| GS1 DATABAR Enabled. | |
| AI (Application Identifier) | Transmit. |
| GS1 DataBar Limited | |
| GS1 DataBar Limited Enabled. | |
| AI (Application Identifier) | Transmit. |
| GS1 DataBar Expanded | |
| GS1 DataBar Expanded Enabled. | |
| PDF417 | |
| PDF417 Enabled. | |
| Data Matrix | |
| Data Matrix Enabled. | |
| Rectangular barcodes Decode. | |
| Mirror images Scan unmirrored Data Matrix only. | |
| QR Code | |
| QR Code Enabled. | |
| Micro QR Enabled. | |
| Mirrored Micro QR Do not decode | |
AIM ID table
| Symbology Remark | |
| Code 128 | |
| AIM ID: ]C0 Standard Code 128. | |
| UCC/EAN 128 (GS1-128) | |
| AIM ID: ]C1 FNC1 is the character right after the start character. | |
| AIM 128 | |
| AIM ID: ]C2 FNC1 is the 2nd character after the start character. | |
| EAN-8 | |
| AIM ID: ]E4 | Standard EAN-8. |
| AIM ID: ]E4....]E1... | EAN-8 + 2-digit add-on code. |
| AIM ID: ]E4....]E2... EAN-8 + 5-digit add-on code. | |
| EAN-13 | |
| AIM ID: ]E0 Standard EAN-13. | |
| AIM ID: ]E3 EAN-13 + 2/5-digit add-On code. | |
| ISSN | |
| AIM ID: ]X5 Standard ISSN. | |
| ISBN | |
| AIM ID: ]X4 Standard ISBN. | |
| UPC-E | |
| AIM ID: ]E0 Standard UPC-E. | |
| AIM ID: ]E3 UPC-E + 2/5-digit add-on code. | |
| UPC-A | |
| AIM ID: ]E0 Standard UPC-A. | |
| AIM ID: ]E3 UPC-A + 2/5-Digit add-on code. | |
| Interleaved 2 of 5 | |
| AIM ID: ]I0 | No check digit verification. |
| AIM ID: ]I1 | Transmit check digit after verification. |
| AIM ID: ]I3 | Do not transmit check digit after verification. |
| ITF-6 | |
| AIM ID: ]I1 Transmit check digit. | |
| AIM ID: ]I3 Do not transmit check digit. | |
| ITF-14 | |
| AIM ID: ]I1 Transmit check digit. | |
| AIM ID: ]I3 Do not transmit check digit. | |
| Matrix 2 of 5 | |
| AIM ID: ]X1 | No check digit verification. |
| AIM ID: ]X2 | Transmit check digit after verification. |
| AIM ID: ]X3 | Do not transmit check digit after verification. |
| Industrial 25 | |
| AIM ID: ]S0 | Not specified. |
| Standard 25 | |
| AIM ID: ]R0 | No check digit verification. |
| AIM ID: ]R8 One check digit, MOD 7; do not transmit check digit. | |
| AIM ID: ]R9 One check digit, MOD 7; transmit check digit. | |
| Code 39 | |
| AIM ID: ]A0 | Transmit barcodes as is; Full ASCII disabled; no check digit verification. |
| AIM ID: ]A1 One check digit, MOD 43; transmit check digit. | |
| AIM ID: ]A3 One check digit, MOD 43; do not transmit check digit. | |
| AIM ID: ]A4 | Full ASCII enabled; no check digit verification. |
| AIM ID: ]A5 Full ASCII enabled; MOD43; transmit check digit. | |
| AIM ID: ]A7 Full ASCII enabled; MOD43; do not transmit check digit. | |
| Codabar | |
| AIM ID: ]F0 Standard Codabar. | |
| AIM ID: ]F2 | Transmit check digit after verification. |
| AIM ID: ]F4 | Do not transmit check digit after verification. |
| Code 93 | |
| AIM ID: ]G0 | Not specified. |
| Code 11 | |
| AIM ID: ]H0 One check digit, MOD11; transmit check digit. | |
| AIM ID: ]H1 Two check digits, MOD11/MOD11 ; transmit check digit. | |
| AIM ID: ]H3 | Do not transmit check digit after verification. |
| AIM ID: ]H8 Two check digits, MOD I I/MOD9; transmit check digit. | |
| AIM ID: ]H9 | No check digit verification. |
| Plessey | |
| AIM ID: ]P0 | Not specified. |
| MSI Plessey | |
| AIM ID: ]M0 One check digit, MOD1O; transmit check digit. | |
| AIM ID: ]M1 One check digit, MOD1O; do not transmit check digit. | |
| AIM ID: ]M7 Two check digits, MOD1O/MOD11 ; do not transmit check digit. | |
| AIM ID: ]M8 Two check digits, MOD1O/MOD11 ; transmit check digit. | |
| AIM ID: ]M9 | No check digit verification. |
| GS1 DATABAR, GS1 DataBar Limited, GS1 DataBar Expanded | |
| AIM ID: ]e0 Standard | |
| PDF417 | |
| AIM ID: ]L0 | Comply with 1994 PDF417 specifications. |
| Data Matrix | |
| AIM ID: ]d0 ECC 000 - 140. | |
| AIM ID: ]d1 ECC 200. | |
| AIM ID: ]d2 ECC 200; FNC1 is the 1st or 5th character after the start character. | |
| AIM ID: ]d3 ECC 200; FNC1 is the 2nd or 6th character after the start character. | |
| AIM ID: ]d4 ECC 200; ECI protocol supported. | |
| AIM ID: ]d5 ECC 200; FNC1is the 1st or 5th character after the start character; ECI supported. | |
| AIM ID: ]d6 ECC 200; FNC1 is the 2nd or 6th character after the start character; ECI supported. | |
| QR Code | |
| AIM ID: ]Q0 | QR1 (complies with AIM ISS 97-001 specifications). |
| AIM ID: ]Q1 QR2 (2005 symbol), ECI protocol not supported. | |
| AIM ID: ]Q2 QR2 (2005 symbol), ECI protocol supported. | |
| AIM ID: ]Q3 | QR2 (2005 symbol), ECI protocol not supported; FNC1 is the character right after the start character. |
| AIM ID: ]Q4 QR2 (2005 symbol), ECI protocol supported; FNC1 is the character right after the start character. | |
| AIM ID: ]Q5 | QR2 (2005 symbol), ECI protocol not supported; FNC1 is the 2nd character right after the start character. |
| AIM ID: ]Q6 | QR2 (2005 symbol), ECI protocol supported; FNC1 is the 2nd character right after the start character. |
Reference: ISO/IEC 15424:2008 Information technology - Automatic identification and data capture techniques – Data Carrier Identifiers (including Symbology Identifiers).
Barcode ID table
| Symbology | Barcode ID | Visible ID |
| Code 128 FNC3 | 1 | A(0x41) |
| Code 128 | 2 | B(0x42) |
| UCC/EAN 128 | 3 | C(0x43) |
| EAN-8 | 4 | D(0x44) |
| EAN-13 | 5 | E(0x45) |
| UPC-E | 6 | F(0x46) |
| UPC-A | 7 | G(0x47) |
| Interleaved 2 of 5 | 8 | H(0x48) |
| ITF-14 | 9 | I(0x49) |
| ITF-6 | 10 | J(0x4A) |
| Code 39 | 13 | M(0x4D) |
| Codabar | 15 | O(0x4F) |
| Standard 25 | 16 | P(0x50) |
| Code 93 | 17 | Q(0x51) |
| AIM 128 | 21 | U(0x55) |
| MSI Plessey | 22 | V(0x56) |
| ISBN | 23 | W(0x57) |
| Industrial 25 | 24 | X(0x58) |
| Matrix 2 of 5 | 25 | Y(0x59) |
| GS1 DATABAR | 26 | Z(0x5A) |
| GS1 DATABAR Limited | 27 | [(0x5B) |
| GS1 DATABAR Expand | 28 | 0x5C |
| Code 11 | 29 | ](0x5D) |
| Plessey | 30 | ^(Qx5E) |
| ISSN | 31 | _(0x5F) |
| PDF417 | 32 | `(0x60) |
| QR | 33 | a(0x61) |
| Data Matrix | 35 | c(0x63) |
Appendix D: Examples
The following examples show you how to set some scanner settings by scanning barcode settings.
Set the scanning timeout
Example: Set the scanning timeout to 5.0s
- Scan the scanning timeout barcode.
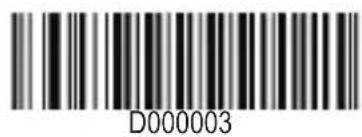
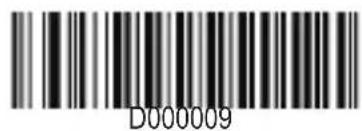
- Scan the "digit barcodes" 5 and 0.
- Scan save barcode.
Set the timeout between decodes
Example: Set the timeout between scans to 5.0s
- Scan the timeout between scans barcode.
- Scan the "digit barcodes" 5 and 0.
- Scan save barcode.
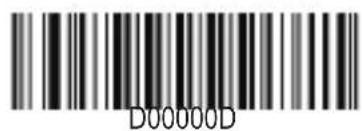
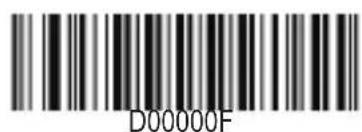
Digit barcodes 0-9 / A-F

Set the Light sense timeout
Example: Set the light sense timeout to 5.0s
- Scan the light sense Timeout barcode.
- Scan the "digit barcodes" 5 and 0.
- Scan save barcode.
Set the light sensitivity level
Example: Set the light sensitivity level to 5
- Scan the custom sensitivity barcode.
- Scan the "digit barcode" 5.
- Scan save barcode.




Save/Cancel Barcodes
After reading numeric barcode(s), you need to scan the save barcode to save the data. If you scan the wrong digit(s), you can either scan the cancel the last digit barcode and then the correct digit, or scan the cancel all digits barcode and then the digits you want.
For example if you scan the scanning timeout barcode and then the numeric barcodes "1", "2" and "3", and then:
Cancel the last digit: the last digit "3" will be removed.
Cancel all digits: all digits "123" will be removed.
Save barcode
Cancel the last digit Cancel all digits
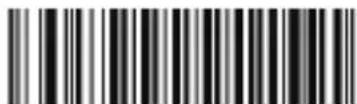
D000012 D000010 D000011


EN: help@deltaco.eu
SE: help@deltaco.se
0200-877771
FI: info@deltaco.fi
020 712 0390
DK: help@deltaco.dk
NO: help@deltaco.no
- ENG - User Manual
- Safety instructions
- Product information
- Scan barcodes
- Cable removal
- Readability VS performance
- Maintenance
- Troubleshooting
- Configuring the barcode reader
- Support
- SWE - Manual
- Säkerhetsinstruktioner
- Fjernelse af kabel
- Streepjescodes scannen
- Communication Interface
- Serial communication interface
- USB interface
- USB DATAPIPE
- USB HID-KBW
- Standard keyboard input mode
- Keyboard characters emulation mode
- Keyboard control characters emulation mode
- Keyboard language layout
- Unknown character tone
- Press and release key interval delay
- Caps Lock
- Change to uppercase/lowercase
- Emulate Num Lock
- Emulate COM port via USB
- Enable HID-POS
- Scan modes
- Manual mode
- Continuous mode
- Scanning timeout
- Timeout between scans
- Automatic light sense mode
- Light sense timeout
- Light sensitivity
- Host command trigger mode
- LED & aiming
- LED
- Aiming
- Notification tones
- Scan result notification
- AIM ID prefix
- Barcode ID prefix
- Terminating character suffix
- Symbologies
- Global settings
- Enable/Disable 1D symbologies
- Enable/Disable 2D symbologies
- Inverse/regular barcodes
- 1D symbologies
- Code 128
- UCC/EAN-128 (GSI-128)
- AIM 128
- Add-on barcodes EAN-8 / EAN-13 / UPC-E / UPC-A
- EAN-8
- Enable/Disable EAN-8
- Extend EAN-8 to EAN-13
- EAN-13
- ISSN
- ISBN
- UPC-E
- UPC-A
- Interleaved 2 of 5
- ITF-6
- ITF-14
- Matrix 2 of 5
- Industrial 25
- Standard 25
- Code 39
- Codabar
- GS1 DataBar Limited
- GS1 DataBar Expanded
- 2D Symbologies
- PDF417
- Data Matrix
- QR Code
- Appendix D: Examples
- Set the scanning timeout
- Set the timeout between decodes
- Set the Light sense timeout
- Set the light sensitivity level
- Save/Cancel Barcodes
Brand : Deltaco
Model : DUR-900
Category : Barcode scanners