
MAGENTA PLUS - Machine à café GAGGIA - Notice d'utilisation et mode d'emploi gratuit
Retrouvez gratuitement la notice de l'appareil MAGENTA PLUS GAGGIA au format PDF.

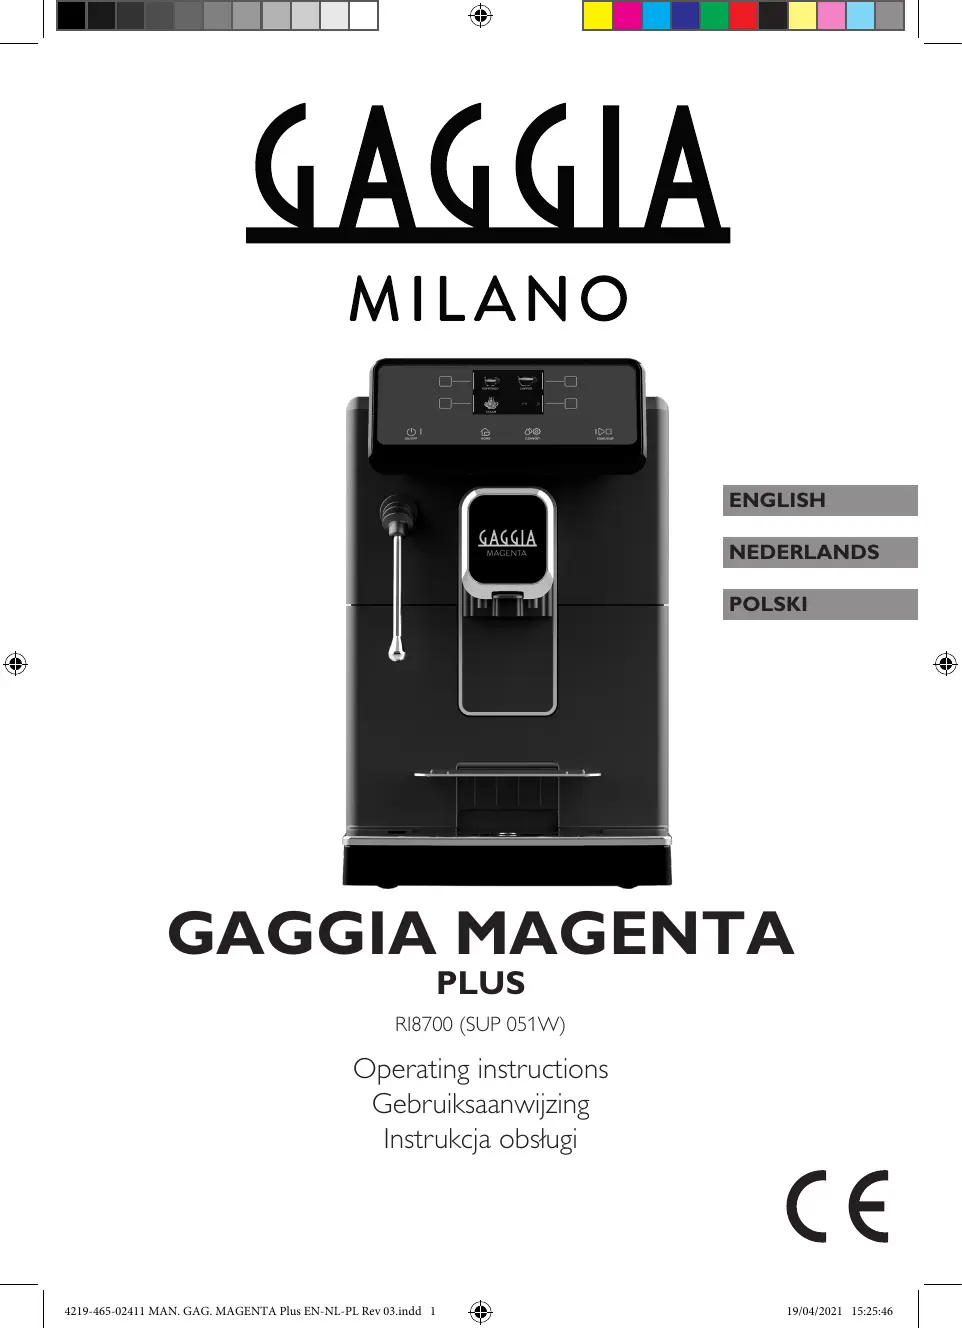


| Marque | Gaggia |
| Modèle | Magenta Plus (RI8700) |
| Type de produit | Machine à café automatique avec broyeur |
| Dimensions (L x P x H) | 224 x 357 x 435 mm |
| Poids | 7,6 kg |
| Alimentation | Voir plaque signalétique (230 V, 50 Hz) |
| Puissance nominale | Voir plaque signalétique |
| Capacité du réservoir d'eau | 1,8 L |
| Capacité du bac à grains | 250 g |
| Capacité du bac à marc | 15 galettes |
| Pression de la pompe | 15 bars |
| Type de chaudière | Inox |
| Fonctions principales | 5 boissons (Espresso, Lungo, Café, Americano, Eau chaude), mousseur à lait (vapeur ou Pannarello), broyeur à meules céramique, réglage du broyage, réglage de la température et de la longueur, filtre INTENZA+ |
| Entretien | Nettoyage hebdomadaire du groupe d'extraction (lavable à l'eau claire), vidange du bac à marc et de l'égouttoir, détartrage avec solution Gaggia, nettoyage du mousseur |
| Sécurité | Fusible thermique, arrêt automatique |
| Pièces détachées disponibles | Groupe d'extraction, mousseur, filtre INTENZA+, lubrifiant, pastilles de nettoyage |
| Réparabilité | Groupe d'extraction amovible, maintenance par l'utilisateur (nettoyage, détartrage) |
| Informations générales | Cafetière automatique de qualité professionnelle, interface intuitive, 5 boissons personnalisables, garantie sous conditions |
FOIRE AUX QUESTIONS - MAGENTA PLUS GAGGIA
Questions des utilisateurs sur MAGENTA PLUS GAGGIA
0 question sur cet appareil. Repondez a celles que vous connaissez ou posez la votre.
Poser une nouvelle question sur cet appareil
Téléchargez la notice de votre Machine à café au format PDF gratuitement ! Retrouvez votre notice MAGENTA PLUS - GAGGIA et reprennez votre appareil électronique en main. Sur cette page sont publiés tous les documents nécessaires à l'utilisation de votre appareil MAGENTA PLUS de la marque GAGGIA.
MODE D'EMPLOI MAGENTA PLUS GAGGIA
GAGGIA
MILANO
ENGLISH
NEDERLANDS
POLSKI
GAGGIA MAGENTA
PLUS
RI8700 (SUP 051W)
Operating instructions
Gebruiksaanwijzing
Instrukcja obstugi
CE
02
ENGLISH
Congratulations on your purchase of Gaggia Magenta!
This easy-to-use machine guarantees excellent results every day.
Thanks to the intuitive interface, you can choose among 5 beverages and customise them according to your preferences.
Before being packed, each of our high-quality machines undergoes rigorous testing in our laboratories in order to ensure its correct operation. Some coffee residue might be found in your machine, since real coffee is normally used during testing. However, this does not compromise the integrity of the product. Please be assured that this is a brand new machine.
In this user manual you will find all the information you need to install, use, clean and descale your machine. Before using it for the first time, please read carefully the safety manual provided separately and store it for future use.
NEDERLANDS
Van harte gelukgewenst met de aanschaf van uw Gaggia Magenta!
Met deze machine zal u op eenvoudige wijze steeds uitstekende resultaten verkrijgen.
Dankzij de intuitieve interface kan u kiezen uit 5 drankjes en deze maar uw voorkeur aanpassen.
Alvorens verpakt te worden, ondergaat elke machine strenge tests in once laboratoria om de hoge kwaliteit en correcte werkung ervan te garanderen. Er wordt ookijdens het testen koffie gebruikt, dus het is möglichk dat er wat residu achechterblickt. Dit doet geen afbreuk aan de integritweit van het product: het is een volledigarenduwe machine.
In deze handleiding zult u alle nods informatie vinden om uw machine te installereren, te gebruiken, schoon te makeen en te ontkalken. Lees de partirveiligheidsbrochure zorgvuldig door voordat u ze voor het eerst gebruikt en bewaar这家伙 voor toekomstig gebruik.
POLSKI
Gratuljemy zakupu urzadzenia Gaggia Magenta!
Dzieki temu urzadzeniu zawsze;będiesz cieszyc sie doskonałymi rezultatami, októ w tym przypadku nie trudno.
Intuicyjny interfejs pozwoli Ci na wybór spośród 5 napojów i dostosowanie ich do Twoich preferencji.
Przed zapakowaniem kaźde urzadzenia przechodzi szereg rygorystycznych testów w naszych laboratoriach, aby zapewnić ich wysoka jakość i prawidowej dziatanie.
Podczas odbioru urzadzenia testujemy je przy uzyciu kawy, dlatego moga pozostac w nim jej pozostaluosci. Nie wplywa to jak na integralność produktu: jest to urzadzenia calkowicie nowe.
W niniejszej instrukcji zawarto wszelkie informacje niedzedne do zainstalowania, uzytkowania, czyszczenia i odwapniania urzadzenia. Przed黢 goingierwszym uzyciem zapoznaj sie uwaznie z dostarczoną osobno broszur dotyczagu bezpieczentwa i zachowaj ja w razie potrzeby skorzystania z niece w przyszlosci.
First installation / Eerste installment / Pierwsza instalacja

Contents
Machine overview (Fig.2) 6
Steam wand version 6
Classic pannarello version 6
Control panel and display 7
Control panel overview (Fig. 1) 7
Multifunction buttons 7
First installation 8
Manual rinse cycle 8
Measuring water hardness 9
INTENZA+ water filter 9
Installing the INTENZA+ water filter 10
Replacing the INTENZA+ water filter 10
Types of beverage 11
Espresso tray 12
Coffee Brewing 12
Brewing coffee using coffee beans 12
Brewing coffee using pre-ground coffee 13
How to Froth Milk 14
Model with the classic pannarello 14
Model whith steam wand 14
Dispensing hot water 15
Customising beverages and saving settings (MEMO) 16
Beverage Customisation 16
Coffee grind settings 17
Cleaning and maintenance 18
Cleaning table 18
Cleaning the steam system 19
Cleaning the brew group 20
Lubricating the brew group 22
23
23
What to do if the descending process is interrupted 24
Other settings 25
Language 25
Water filter 25
Stand-by Time 25
Units 26
Water hardness 26
Beverage counter 26
Button sound 26
Factory settings 26
Error code key 27
Troubleshooting 28
GAGGIA accessories 31
Technical specifications 31

6 English
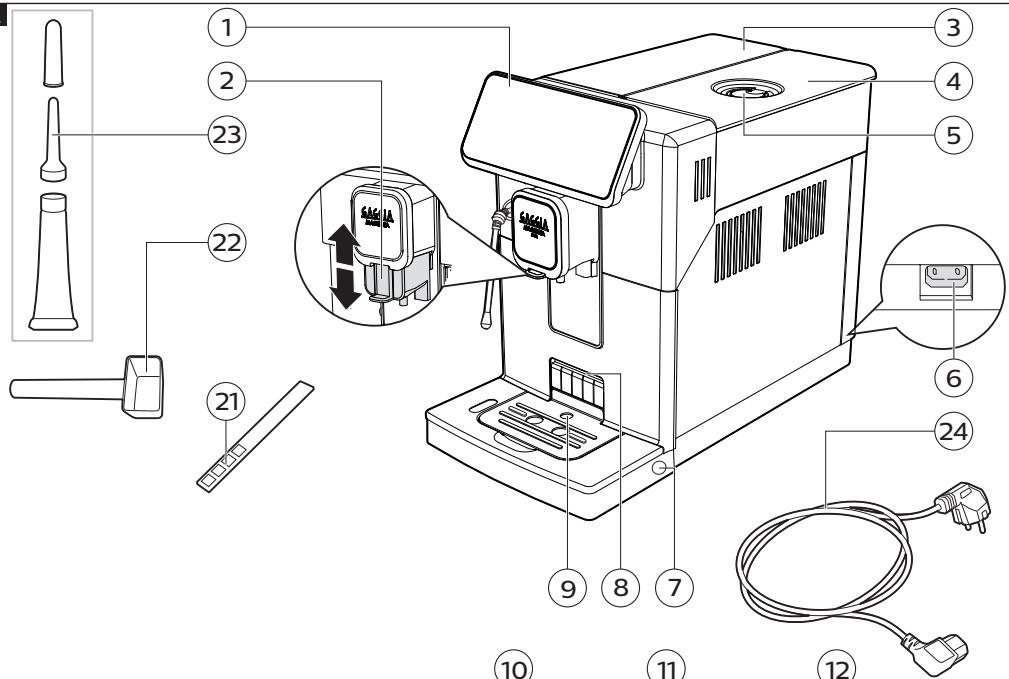
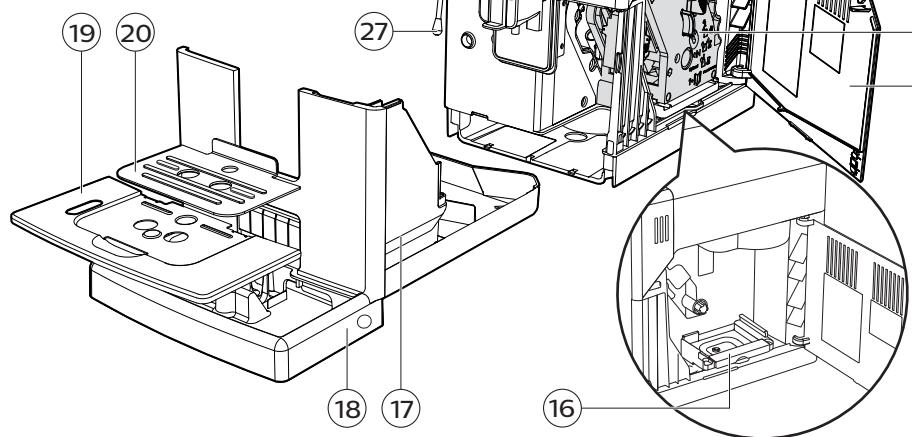
Machine overview (Fig.2)
| 1 | Control panel | 13 | Coffee bean container |
| 2 | Adjustable coffee dispensing spout | 14 | Brew group |
| 3 | Water tank lid | 15 | Service door |
| 4 | Coffee bean container lid | 16 | Coffee residues drawer |
| 5 | Pre-ground coffee compartment | 17 | Coffee pucks container |
| 6 | Power cord socket | 18 | Drip tray |
| 7 | Drip tray release buttons | 19 | Drip tray grid |
| 8 | Espresso tray insertion slot | 20 | Espresso tray |
| 9 | Full drip tray indicator | 21 | Water hardness tester |
| 10 | Water tank | 22 | Pre-ground coffee measuring scoop |
| 11 | Aroma lid | 23 | Lubricant |
| 12 | Coffee grinder adjustment knob | 24 | Power cord |
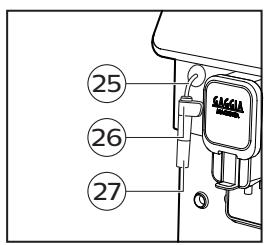
Steam wand version
| 25 | Steam wand handle | 27 | Steam wand nozzle |
| 26 | Steam wand |
Classic pannarello version
| 25 | Steam tube | 27 | Classic pannarello |
| 26 | Classic pannarello handle |
Control panel and display
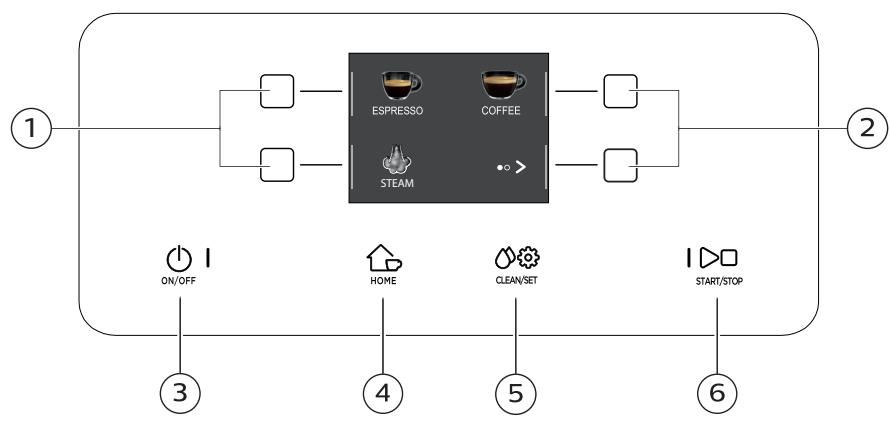
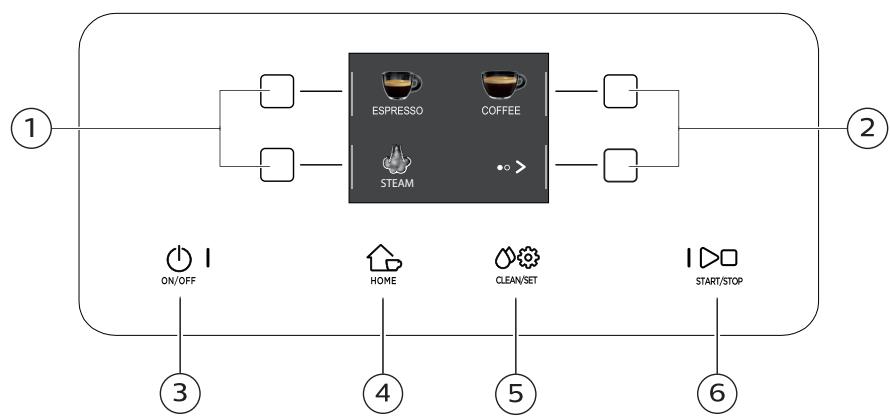
01
Control panel overview (Fig. 1)
| 1/2 | MULTIFUNCTION buttons | Select the function shown on the display. |
| 3 | ON/OFF button | To switch the machine on or off, by keeping the button pressed for a few seconds. |
| 4 | HOME button | To open the beverage menu. |
| 5 | CLEAN/SET button | To open the cleaning and settings menu. |
| 6 | START/STOP button | To start/stop the dispensing of the selected beverage, or to start/stop the procedure indicated on the display. |
Note: HOME and CLEAN/SET also work as ESC buttons. You can exit the screen by pressing one of the two buttons to go back to the main menu. This will not be possible if you have already accessed a function or a programme.
Multifunction buttons
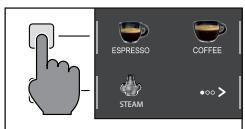
The multifunction buttons on the sides of the display are used to select the function or the beverage to which they refer at that time.
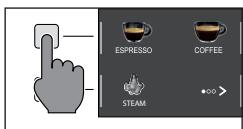
Note: To make the reading of this manual easier,<
First installation
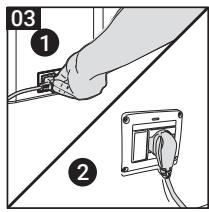
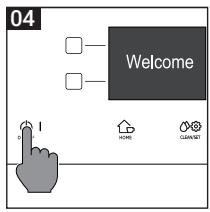
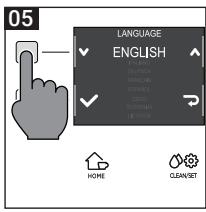
Before using the machine, it is essential to follow a few simple steps, clearly described in the explanatory drawings you found in the quick guide at the beginning of this instruction manual.
Note: for even tastier coffee, we recommend that you initially prepare 5 cups of coffee to allow the machine to self-adjust.
Manual rinse cycle
During the first installation or after a long period of machine inactivity, a manual rinse cycle must be carried out.
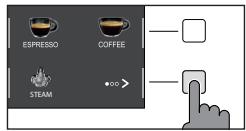
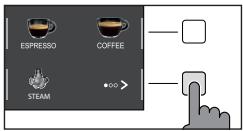
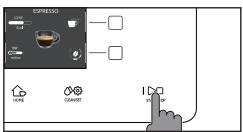
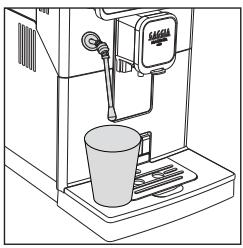
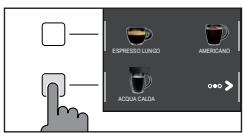
1 Place a container under the coffee dispensing spout, scroll through the different pages and select a "ESPRESSO LUNG".
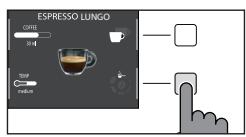
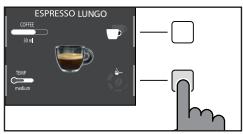
2 Press the " ) button until " ^+ " is selected, without adding pre-ground coffee.
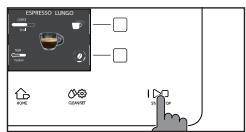
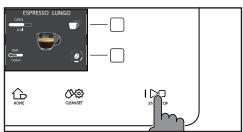
3 Press the START/STOP button to start dispensing. The machine will dispense hot water.
4 Empty the container and if present remove the classic pannarello from the steam tube.
5 Place the container under the steam wand and select " HOT WATER".
6 Press the START/STOP button to start dispensing.
7 Empty the container and repeat steps 5 to 7 until the water tank is empty.
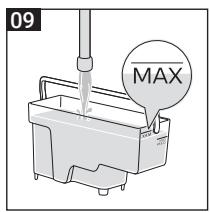
8 When finished, refill the water tank to the MAX level. The machine is now ready for use.
Measuring water hardness
You will need to set the water hardness when you install your machine.
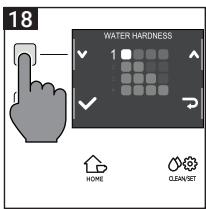
Take the water hardness measuring strip contained in the packaging and follow the steps shown on the display during the installation phase. To change the water hardness later, press the CLEAN/SET button, then select " SETTINGS", and once in the settings menu, please select "WATER HARDNESS".
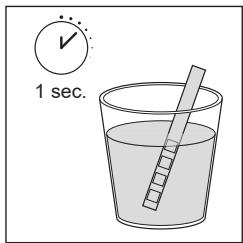
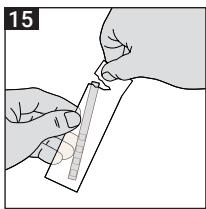
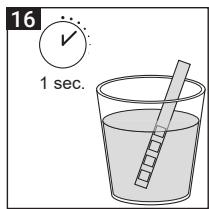
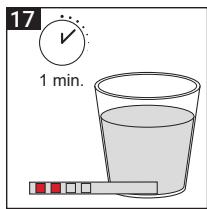
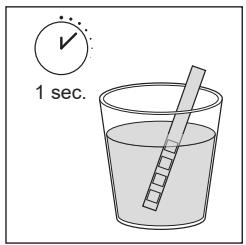
1 Immerse the water hardness measuring strip in a glass of water for 1 second. Remove the strip from the water and wait 1 minute.
2 Note how many squares turn red.
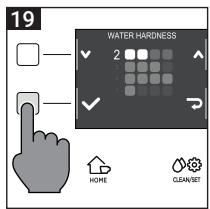
3 Use the green "✔" and "▲" buttons to select the water hardness according to the table below. Confirm the setting by pressing "✔".
| Small red squares | Value to set | Water hardness | INTENZA+ |
| ■□□□ | 1 | very soft water | A |
| ■□□□ | 2 | soft water | A |
| ■□□□ | 3 | hard water | B |
| ■□□□ | 4 | very hard water | C |
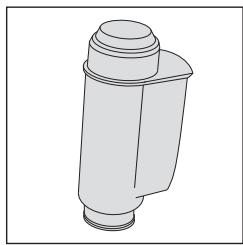
INTENZA+ water filter
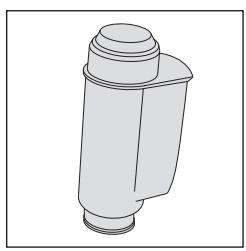
We recommend using the INTENZA+ water filter to limit limescale formation. This ensures a longer operating life of your machine and a better coffee aroma over time.
Water is an essential element in brewing coffee. Therefore, it is extremely important that water is always filtered adequately.
The INTENZA+ water filter prevents the formation of mineral deposits, improving the quality of the water.
10 English
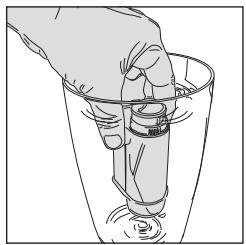
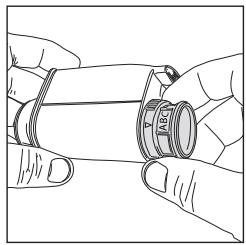
Installing the INTENZA+ water filter
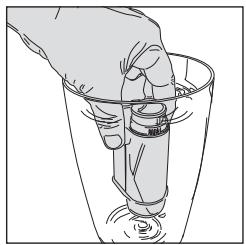
Immerse the INTENZA+ water filter in cold water, in a vertical position and with the opening facing upwards. Press both sides of the filter gently to let air bubbles out.
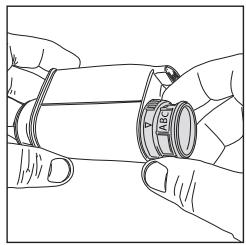
Remove the INTENZA+ water filter from the water. Set the machine according to the detected water hardness - see the "Measuring water hardness" chapter. On the filter base, please set one of the following:
A = soft water - 1 or 2 small squares
B = hard water (standard) - 3 small squares
C = very hard water - 4 small squares
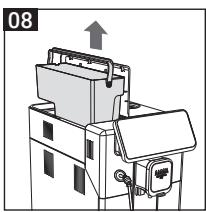
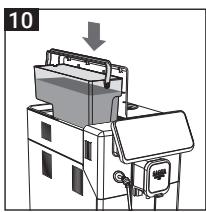
Place the INTENZA+ filter in the water tank, ensuring it is correctly positioned. Refill the water tank and place it back in its housing.
1 Press the CLEAN/SET button and then the " SETTINGS" button.
2 Select "WATER FILTER" and press the "√" button.
3 Select "ACTIVATE" and follow the instructions on the display to activate the filter correctly.
Note: you can pause the filter activation procedure by pressing the START/STOP button. To resume the filter activation procedure, press the START/STOP button again.
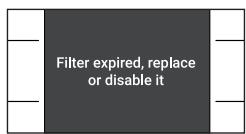
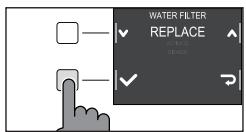
Replacing the INTENZA+ water filter
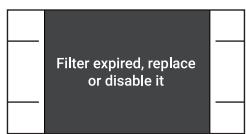
When the INTENZA+ water filter expires, the warning message appears on the display.
1 Replacement or deactivation can be executed by pressing the CLEAN/SET button and then the " SETTINGS" button.
2 Select "WATER FILTER" then press the "√" button.
3 Select "REPLACE" to change the filter or " DISABLE" if you do not intend to use the filter. Confirm with the "√" button.
Follow the instructions shown on the display to activate the filter.
Types of beverage
| Original recipe | Description | |
| Espresso | Coffee | The espresso is known around the globe as true Italian coffee. Served in a small cup, its unmistakable features are a full and intense aroma and a top layer of compact, natural "crema". It is the result of the pressurized hot water extraction process invented by Achille Gaggia in 1938. |
| Espresso lungo | Coffee | The long espresso is an espresso with a longer extraction time. It is more diluted, with a different aromatic intensity and a higher caffeine content. It is served in a medium-sized cup. |
| Coffee | Coffee | Coffee is a beverage prepared with more water than espresso. It has a lighter aroma and is served in a medium-large cup. |
| Americano | Coffee | The americano is a less intense long coffee, prepared with an espresso to which hot water is added. |
| Water | Hot water can be used to prepare hot teas, infusions and instant beverages. | |
Note: In the original recipes the beverages are all set to an average temperature and aroma intensity.
12 English
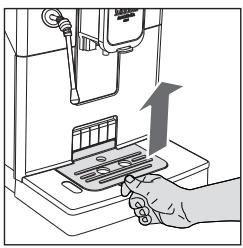

Espresso tray
This machine was designed to guarantee flawless results, from a traditional espresso to a number of different beverages. If you want to enjoy an Italian espresso with a delicious layer of its natural "crema" on top and as tradition dictates, we suggest your using of the "Espresso Tray" which is specifically designed for this purpose. This tray allows the use of traditional espresso cups, ensuring the perfect height for a compact, homogeneous "crema" and a splash-free brewing.
Lift the espresso tray off the grid of the drip tray and place it into the dedicated slot as shown in the drawing.
Coffee Brewing
Brewing coffee using coffee beans
Warning: only use coffee beans when making espresso. Do not put any pre-ground, unroasted, freeze-dried or instant coffee in the coffee bean container, as they may damage the machine.
Tip: Preheat the cups with hot water to enjoy a warmer coffee.
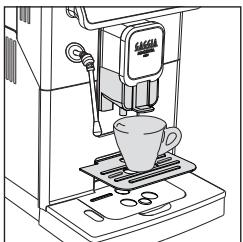
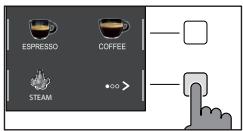
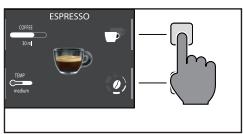
1 Upon positioning the espresso tray, place a cup under the coffee dispensing spout, raise or lower the coffee dispensing spout according to the size of the cup you are using.
Press the HOME button to access the beverage menu.
2 Browse the various pages to find and select the desired coffee.
3 Upon selection of your desired coffee, it is possible to prepare two cups at the same time- besides AMERICANO, using the " " button.
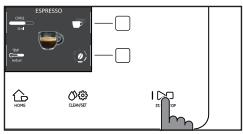
4 Finally, press the START/STOP button to start brewing.
Note: you can interrupt the brewing at any time by pressing the START/STOP button.
If you wish to customise the settings of a specific beverage, please refer to the "Beverage customisation" chapter.
Brewing coffee using pre-ground coffee
Use the measuring scoop provided to insert the correct dose in the pre-ground coffee compartment.
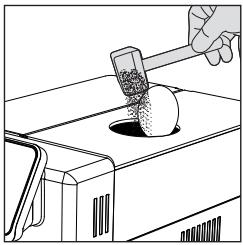
1 Lift the lid of the pre-ground coffee compartment and add a little less than one level scoop of pre-ground coffee.
Warning: do not insert anything other than pre-ground coffee, as it may damage the machine.
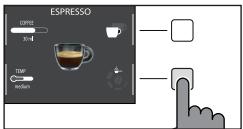
2 Place a cup under the coffee dispensing spout and select the desired beverage.
3 Press the " " button until " " is selected.
Note: The "pre-ground coffee" function excludes the possibility of brewing two cups of coffee at the same time, as well as the aroma setting. In fact, these are only possible with coffee beans.
4 Press the START/STOP button to start brewing the coffee.
If you wish to customise the settings of a specific beverage, please refer to the "Beverage customisation" chapter.
Note: you can interrupt the brewing at any time by pressing the START/STOP button.
14 English
How to Froth Milk
Tip: use cold milk (at a temperature of around 5^ ) with a protein content of at least 3% to ensure optimum results for the froth. You can use either whole milk or semi-skimmed milk. You can also use skimmed milk, soy milk or lactose-free milk.
Model with the classic pannarello
1 Fill 1/3 of a jug with milk
2 Press the HOME button to open the beverage menu.
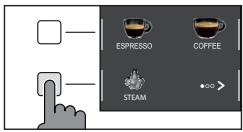
3 Insert the classic pannarello into the milk. From the beverage selection menu, select STEAM " and press the START/STOP button to start frothing.
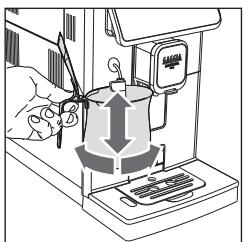
4 Froth the milk by gently swirling the carafe and moving it up and down.
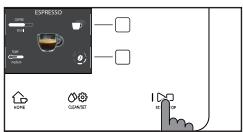
5 When the milk froth comes to the desired consistency. Press the START/STOP button to stop steam dispensing. Wait until dispensing stops completely before removing the carafe.
Note: After frothing milk, clean the circuit by dispensing a small quantity of hot water.
Model whith the steam wand
1 Fill 1/3 of a jug with milk.
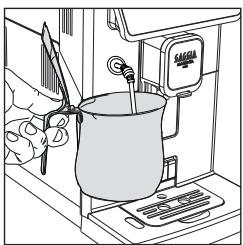
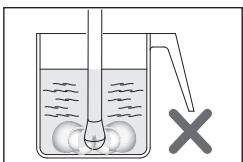
2 Place the steam nozzle just below the surface of the milk; if it has been inserted too deep, the milk will not be frothed; if it has not been inserted deep enough, big bubbles will be produced.
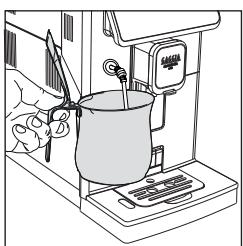
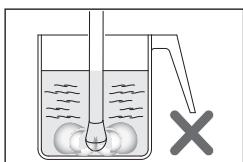
3 It is important to keep the nozzle not at the centre but close to the edge of the jug, with an appropriate angle to produce a stronger vortex.
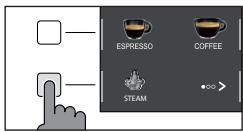
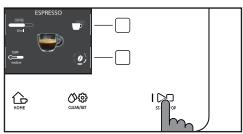
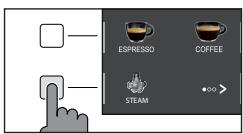
4 Press the HOME button to open the beverage menu. Select "STEAM" and press the START/STOP button to start frothing
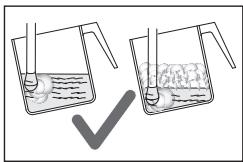
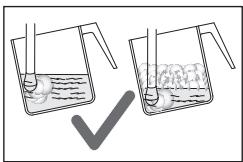
5 To froth the milk correctly, the steam nozzle must always be in contact with the milk and not with the froth.
Therefore, as the layer of froth increases, the jug must be slightly raised trying to keep the nozzle in contact with the milk, without touching the bottom of the jug.
Once the desired frothing has been achieved, the steam nozzle must be pushed further to heat the milk well.
6 When the milk froth comes to the desired consistency. Press the START/STOP
□ button to stop steam dispensing. Wait until dispensing stops completely before removing the jug.
Note: It is advisable to always keep a hand on the rounded part of the jug to feel the temperature increase of the milk.
Note: After frothing the milk, to make the froth more compact, it is advisable to lightly tap the jug on a flat surface and leave it to rest for at least 30 seconds. The milk will become more homogeneous.
Note: After frothing milk, clean the circuit by dispensing a small quantity of hot water. Be careful as hot water or steam sprays might be present.

Dispensing hot water
Warning: when the machine starts preparing hot water, the classic pannarello or steam wand (depending on the model) spout may spray steam and hot water.
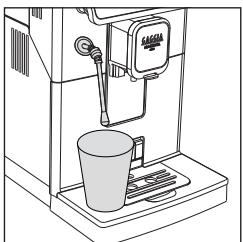

1 Place a container under the classic pannarello or steam wand (depending on the model).
2 Press the HOME button and using the " " button browse the various pages.
3 Press the "HOT WATER" button. Finally, press the START/STOP button to commence dispensing.
Note: you can interrupt dispensing at any time by pressing the START/STOP button.
If you wish to customise the settings of a specific beverage, please refer to the "Beverage Customisation" chapter.
Customising beverages and saving settings (MEMO)
This machine allows you to change the settings of a beverage according to your preferences and save them (MEMO), by overwriting the previous settings.
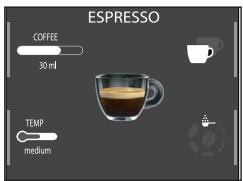
Beverage Customisation
1 Press the HOME button.
2 Select your beverage.
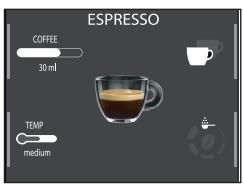
3 All the settings that can be adjusted and/or selected are displayed on the screen. Based on the type of beverage, you can adjust and/or select:
- coffee amount;
- coffee temperature;
- pre-ground coffee use;
- aroma intensity (only when using coffee beans);
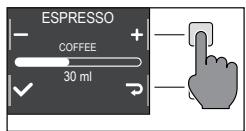
4 Once the "COFFEE" button has been pressed, use the green "+" and "--" buttons to select the desired amount.

Press "√" to confirm and return to the previous screen, where the new quantity will be displayed.
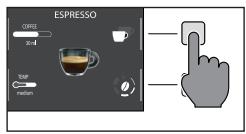
5 Press the "TEMP" button repeatedly to adjust the temperature of the beverage among the following options:
low;
medium;
- high;
6 Press " " button to brew two cups, or " " for a single cup. The picture of the beverage in the centre of the display will indicate the number of cups selected.
Note: this function is not available for beverages with milk, AMERICANO and HOT WATER.
8 To change the intensity of the aroma or select the pre-ground, press the "O" button. You can choose among 5 different degrees of intensity. Every time you press the "O" button, the aroma strength changes by one degree. The display shows the selected intensity or the selection of the pre-ground.
1 Very light
2 Light
3 Normal
4 Strong
5 Very strong
6 Pre-ground.
Note: the function Pre-ground allows the brewing of just one coffee at a time.

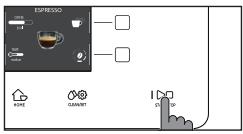
9 Once the beverage has been customised according to your preferences, you can proceed with dispensing it by pressing START/STOP button.
10 If you have changed any of the parameters listed above, you will be asked at the end of dispensing if you would like to save the recipe with the changes made.
Note: the new saved settings will overwrite those of the previous recipe.
Note: to return to the factory settings of the single recipes, you must re-enter and save the settings indicated in the "Beverage type" section.
Coffee grind settings
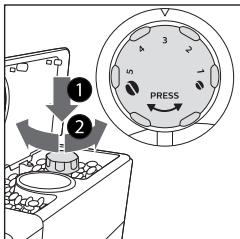
You can adjust the grind setting using the grinder adjustment knob on the coffee bean container. The ceramic coffee grinder guarantees a perfect and homogeneous grinding for the preparation of every cup of coffee. The aroma is thus preserved, ensuring the perfect flavour every time.
Note: you can only adjust the grind setting while the machine is grinding the coffee beans. The difference in taste will be perceived after brewing 2-3 cups of coffee.
Warning: to avoid damaging the coffee grinder, do not rotate the grinder adjustment knob more than one notch at a time.
1 Place a cup under the coffee dispensing spout.
2 Open the lid of the coffee bean container.
3 Prepare an espresso as described in the chapter "Brewing coffee with coffee beans".
4 While the machine is grinding coffee, press the grind settings adjustment knob in the bean container and turn it one notch at a time, to the left or right.
5 You can select from 5 different grinding settings. The smaller the notch, the stronger and richer the coffee.
Note:
- Coarse grind: lighter taste, for dark roasted coffee blends (3-5);
- Fine grind: stronger taste, for light roasted coffee blends (1-3);
Cleaning and maintenance
Regular cleaning and maintenance keep the machine in perfect condition and ensure perfect coffee flavour, a constant coffee flow and an excellent milk froth. Please refer to the following table to know when and how to clean the removable parts of the machine. Please read the specific chapter for further information.
Cleaning table
| Part description | When to clean | How to clean |
| Classic pannarello | After use | Remove the classic pannarello and rinse it under running water. |
| Weekly | Disassemble the classic pannarello and the rubber handle. Clean them under running water. | |
| Steam wand | After use | Clean the steam wand with a damp cloth. To clean it more thoroughly, you can unscrew the nozzle and wash it with running water. |
| Brew group | Weekly | Remove the brew group and clean it under running water. |
| Depending on usage | See the "Cleaning and lubricating the brew group" chapter. | |
| Monthly | Clean the brew group with the Gaggia coffee oil remover to remove any oily coffee residue | |
| Drip tray full | When the red mark appears from the drip tray grid. | Empty the drip tray and clean it under running water. |
| Coffee pucks container | Whenever the machine requires it | Empty the coffee pucks container and clean it under running water. Ensure that the machine is switched on during this procedure, otherwise the coffee pucks container will not reset. |
| Water tank | Weekly | Clean it under running water. |
| Pre-ground coffee compartment/coffee outlet duct | Weekly | Clean the upper part using the handle of a spoon, as shown below. |
| Espresso tray | Depending on usage | Remove the espresso tray and clean it with running water. You can also dishwasher it in the upper tray. |
Cleaning the steam system
Cleaning the classic pannarello
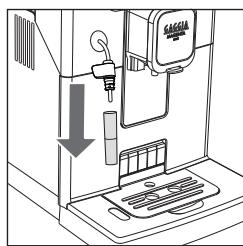
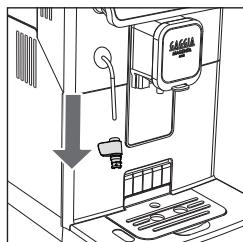
1 Remove the classic pannarello and the rubber handle from the steam tube and rinse them under running water.
2 Clean the steam tube with a damp cloth.
3 Reassemble the parts.
Cleaning the steam wand
1 Clean the steam wand with a damp cloth. To clean it more thoroughly, you can unscrew the nozzle and wash it with running water.
2 Press the HOME button. Select "STEAM" and press the START/STOP button.
Allowing the steam to escape for one or two seconds to clean the nozzle hole.

Cleaning the brew group
Warning: do not wash the brew group in the dishwasher and do not use dishwashing detergents, since they may cause the malfunctioning of the brew group and alter the coffee flavour.
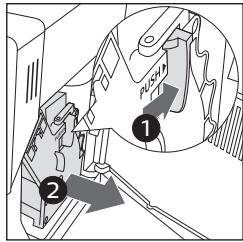
Removing the brew group
1 Turn off the machine and disconnect the power cord.
2 Remove the drip tray and the coffee pucks container.
3 Open the service door.
4 Press the PUSH lever (1) and pull the handle of the brew group (2) to remove it from the machine.
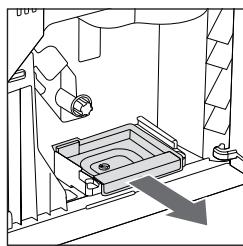
5 Remove the coffee residues drawer.
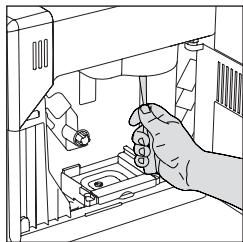
Cleaning the brew group under running water
1 Clean the coffee outlet duct thoroughly with a spoon handle or with another round-tipped kitchen utensil.
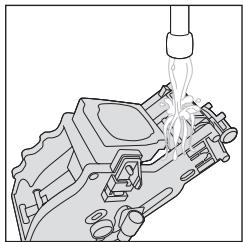
2 Rinse the brew group and the coffee residues drawer thoroughly with lukewarm water. Carefully wash the upper filter.
3 Let the brew group air dry.
Note: to avoid the build-up of fibres in its interior, do not dry the brew group with cloth.
Reinserting the brew group
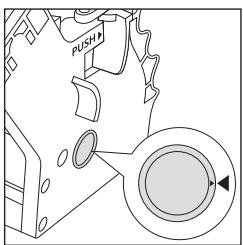
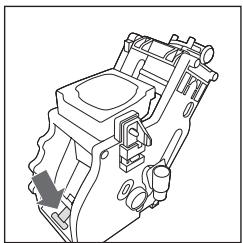
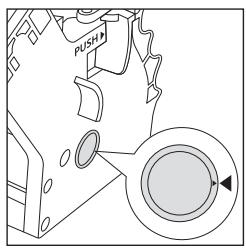
1 Before placing the brew group back into the machine, make sure that the two yellow reference marks on the side match. If this is not the case, perform the following step:
Make sure that the lever is in contact with the base of the brew group.
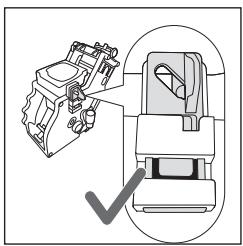
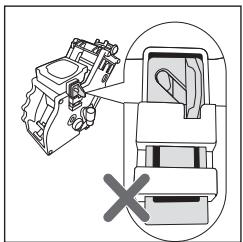
2 Make sure that the yellow locking hook of the brew group is in the right position.
To position the hook correctly, push it upwards to the highest possible position.
If the hook is still in the lower position, it means that it is not positioned correctly.
3 Reinsert the coffee residues drawer.
4 Reinsert the brew group into the machine along the side guides until it locks in the right position with a click.
Warning: do not press the PUSH lever.
5 Close the service door.
22 English
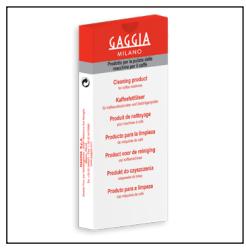
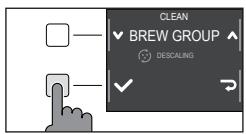
Cleaning the brew group with cleaning tablets for the removal of oily coffee residues
Warning: use only Gaggia cleaning tablets to remove oily coffee residues.
1 Place a container under the coffee dispensing spout.
2 Press the CLEAN/SET button and select the "CLEAN" button shown on the display.
3 Select "BREW GROUP CLEANING" and press the "√" button, then press START/STOP to start the cleaning procedure.
4 Follow the instructions shown on the display to clean the brew group correctly.
5 The procedure will take approximately 5 minutes. START/STOP can be used to pause and resume the procedure.
Lubricating the brew group
In order to ensure the perfect performance of the machine, it is necessary to lubricate the brew group. Refer to the following table for the frequency of lubrication.
| Frequency of use | Number of beverages prepared daily | Lubrication frequency |
| Low | 1-5 | Every 4 months |
| Regular | 6-10 | Every 2 months |
| High | >10 | Every month |
1 Turn off the appliance and disconnect the power cord.
2 Remove the brew group and rinse it using lukewarm water - see the "Cleaning the brew group under running water" chapter.
3 Apply a thin layer of the lubricant provided around the insertion pin on the lower part of the brew group.

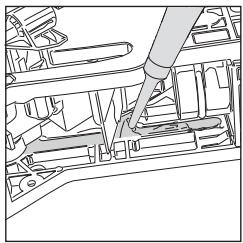
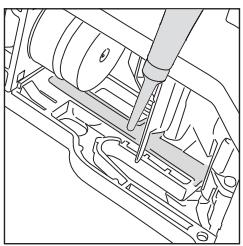
4 Apply a thin layer of lubricant to the guides, on both sides (see figure).
5 Reinsert the brew group - see the "Reinserting the brew group" chapter.
Note: you can use the lubricant tube multiple times.
Dscaling
Dscaling procedure
Dscaling needs to be carried out when the machine requires it.
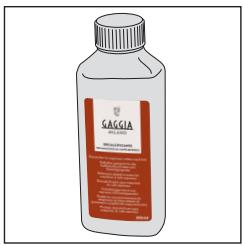
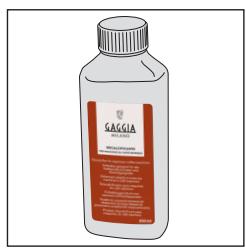
Use only Gaggia descending solution designed to guarantee the machine's excellent performance. The use of different products could damage the machine and leave residue in the water. Failure to descale the machine will void the warranty.
1 If present remove the classic pannarello.
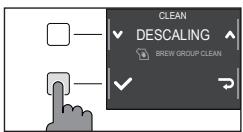
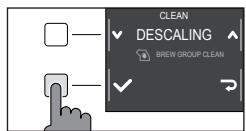
2 Press CLEAN/SET and select the "CLEAN" button shown on the display.
- Select "DESCALING" and after confirming with "✔" press the START/STOP button to start.
3 Remove the drip tray and the coffee pucks container, empty and place them all back into the machine.
4 Remove the water tank and empty it. Remove the INTENZA+ filter, if in place.
24 English
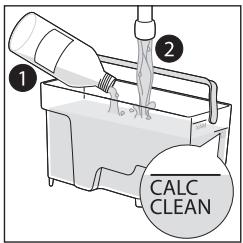
Pour the entire bottle of Gaggia descending solution into the water tank and fill the tank with water up to the CALC CLEAN level. Reinsert it into the machine.
6 Place a large recipient (1.5l) under the steam tube and the coffee dispensing spout.
7 Follow the instructions shown on the display to launch the descending procedure. This procedure lasts approximately 25 minutes and consists of a descending cycle and a rinse cycle, carried out with dispensing at regular intervals.
8 Once the descending cycle is complete, rinse the water circuit and tank by following the instructions shown on the display.
9 Position the INTENZA+ filter back into the water tank.
Note: it is possible to pause and resume the procedure at any time by pressing the START/STOP button.
Warning: when the descending procedure is active, the brew group cannot be removed. Wait for the descending process to end, then remove the brew group.
What to do if the descending process is interrupted
You can exit the descending procedure by keeping the ON/OFF button on the control panel, pressed for a few seconds. If the descending procedure is interrupted before its completion, proceed as follows:
1 Empty the water tank and wash it thoroughly.
2 Fill the water tank with running water up to the CALC CLEAN level mark, then switch the machine back on. The machine will warm up and perform an automatic rinse cycle.
3 Before preparing any beverages, carry out a manual rinse cycle as described in the dedicated chapter.
Note: if the procedure has not been completed, it will be necessary to carry out another descaling procedure as soon as possible.
Other settings
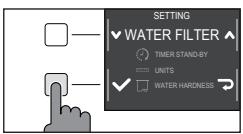
By pressing the CLEAN/SET button and selecting " SETTINGS" on the display, you can reset or modify some of the machine parameters including:
- Language.
Water filter. - Stand-by Time.
- Units.
Water hardness. - Beverage counter.
- Button sound
Factory settings.
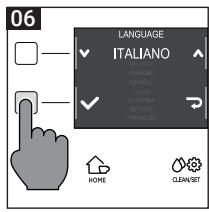
Language
When the language setting icon is selected, the list of available languages will be displayed.
Available languages
| ITALIAN | DANISH | CZECH |
| ENGLISH | GREEK | SLOVAKE |
| GERMAN | POLISH | LITHUANIAN |
| FRENCH | RUSSIAN | JAPANESE |
| SPANISH | ROMANIAN | KOREAN |
| PORTUGUESE | HUNGARIAN | CHINESE (TRADITIONAL) |
| DUTCH | BULGARIAN | CHINESE (SIMPLIFIED) |
Water filter
When "WATER FILTER" is selected, follow the instructions on the display and those described under the "Installing the INTENZA+ water filter" and "Replacing the INTENZA+ water filter" chapters.
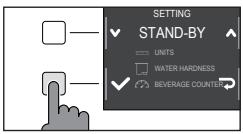
Stand-by Time
When "STAND-BY TIME" is selected, the timer can be set to:
- 15 min
- 30 min
- 60 min
- 180 min
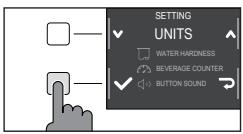
Units
By selecting "UNITS".
you can set the unit of measurement in "ml" or "oz".
Water hardness
With "WATER HARDNESS" selected, follow the instructions on the display and those described under the "Measuring water hardness" chapter.
Beverage counter
It is possible to display the number of cups of each beverage that have been dispensed since the first operation of the machine. These data cannot be reset.
Button sound
You can turn the button sound off by selecting " OFF " so as not to be disturbed.
Factory settings
You can reset the machine to factory default values. The machine will require a double confirmation before proceeding.

Error code key
The list below reports the error codes that the display can show, their meanings and how to solve the problem. If the indicated solutions are ineffective because the display continues to show the error code icon and the machine does not return to normal operation, or if other error codes are displayed, you must contact an authorized service center or distributors in your country.
The contact info is listed on www.gaggia.com and www.gaggia.it.
| Error code | Problem | Cause | Possible solution |
| 01 | The coffee grinder is clogged. | The coffee outlet duct is clogged. | Remove the power cord and remove the brew group. Clean the coffee outlet duct thoroughly using a spoon handle. Switch the appliance back on again. |
| 03 - 04 | A problem occurred in the brew group. | The brew group is dirty or not well lubricated. | Switch off the machine. Remove the brew group and clean it thoroughly. (Refer to the "Cleaning the Brew Group" chapter) |
| The brew group is not positioned correctly. | Switch off the machine. Remove the brew group and reinsert it. Ensure that the brew group is in the correct position before inserting it. Refer to the "Reinserting the brew group" chapter. | ||
| 05 | A problem occurred in the water circuit. | There is air in the water circuit. | Remove and reinsert the tank in the machine a couple of times. Make sure you insert the tank correctly in the machine. Check that the water tank seat is clean. |
| If you use an "INTENZA+" filter: pull out the filter from the water tank and shake it to remove the air from the filter. Then place the "INTENZA+" filter back into the water tank. | |||
| 14 | The machine is overheated. | There may be multiple causes. | Switch off the machine and switch it back on again after 30 minutes. Perform this operation 2 or 3 times. |
Troubleshooting
This chapter outlines the most common problems you may encounter while using the machine. If you are unable to solve the problem using the information provided below, visit the FAQ sections on www.gaggia.com or www.gaggia.it or contact the either the Customer Service Centre or the local distributors in your country.
| Problem | Cause | Solution |
| The machine does not switch on. | The machine is not connected. | Check that the power cord has been inserted correctly. |
| The on / off button was not pressed and held down long enough | Keep the on / off button pressed for a few seconds. | |
| The drip tray fills up quickly. | It is a normal phenomenon. The machine uses water to rinse the internal circuit and the brew group. Part of the water flows through the internal system directly into the drip tray. | Empty the drip tray when the red mark appears through the grid. We recommend your placing a cup under the dispensing spout to collect rinse water |
| The display continuously shows the "coffee pucks container full" icon. | The coffee pucks container has been emptied when the machine was off. | Always empty the coffee pucks container when the machine is on. If you empty the coffee pucks container when the machine is off, the coffee cycle counter does not reset. In this case, the display shows the icon even if the container is not full. |
| The coffee pucks container has been placed back too quickly. | Always wait about 5 seconds when you replace the coffee pucks container. This way, the counter will reset to zero. | |
| The machine requests to empty the coffee pucks container even if it is not full. | The machine has not reset the counter last time the coffee pucks container has been emptied. | Always wait about 5 seconds when you replace the coffee pucks container. This way, the coffee grounds counter will reset to zero. |
| Always empty the coffee pucks container when the machine is on. If you empty the coffee pucks container when the machine is off, the coffee cycle counter does not reset. | ||
| The coffee pucks container is too full and the "coffee pucks container full" icon, did not display. | The drip tray has been removed without emptying the coffee pucks container. | When you remove the drip tray, also empty the coffee pucks container even if it contains only a few coffee pucks. In this way the coffee grounds counter will be reset to zero, re-starting to correctly count the coffee pucks. |
| Impossible to remove the brew group. | The brew group is not in the correct position. | Close the service door. Switch the machine off and then back on. Wait for the display to show the ready message, then remove the brew group. |
| The brew group cannot be inserted. | The brew group is not in the correct position. | The brew group has not been positioned correctly before being placed back. Ensure that the lever is in contact with the base of the brew group and that the hook of the brew group is in its correct position. See the “Reinserting the brew group” chapter. |
| To reset the machine put the drip tray with the coffee pucks container back in place. Do not insert the brew group. Close the service door, then unplug the power cord and plug it back in. Then try to reinsert the brew group and switch on the machine. | ||
| The espresso is not creamy enough or it is watery. | The coffee grinder is set to a coarse grinding. | Adjust the coffee grinder to a finer setting. |
| The machine is performing its self-adjustment. | Dispense several cups of coffee so that the machine adjusts itself automatically. | |
| The coffee outlet duct is clogged. | Clean the coffee outlet duct with a spoon as described in the “Cleaning the brew group under running water” chapter. | |
| The brewed coffee is not hot enough. | The set temperature is too low. Check the menu settings. | Set the menu temperature to “MAX”. |
| The machine grinds the coffee beans, but no brewing happens. | The coffee grinder is set to a too fine grinding. | Adjust the coffee grinder to a coarser grinding. |
| The coffee dispensing spout is blocked. | Dispense a long coffee from pre-ground coffee but without actually adding pre-ground coffee. | |
| The nozzles of the coffee dispensing spout are blocked. | Clean the nozzles of the coffee dispensing spout with a small bottlebrush. | |
| The coffee comes out slowly or in drops. | The coffee grinder is set to a too fine grinding. | Adjust the coffee grinder to a coarser grinding. |
| The nozzles of the coffee dispensing spout are blocked. | Clean the nozzles of the coffee dispensing spout with a small bottlebrush. | |
| The machine circuit is clogged by limescale. | Descale the machine. |
30 English
| Problem | Cause | Solution |
| The milk does not froth. | The classic pannarello may be dirty.(model with classic pannarello) | Clean the classic pannarello as described in the chapter "Cleaning the classic pannarello". |
| Make sure that all the classic pannarello components have been correctly assembled | ||
| The steam wand nozzle is clogged.(model with steam wand) | Wash the steam nozzle with running water and clean the circuit by dispensing a small quantity of hot water | |
| The type of milk used is not suitable for foaming. | The amount and the quality of froth vary depending on the type of milk. | |
| The "INTENZA+" filter cannot be inserted. | Remove the air from the filter. | Let the air bubbles out of the filter. |
| The tank still contains some water. | Empty the water tank before installing the filter. | |
| The rubber seal is not inserted onto the "INTENZA+" filter. | Check the packaging and insert the seal onto the "INTENZA+" filter. | |
| You can not activate the "INTENZA+" filter. | Another filter is already active | The machine indicates the filter usage in percentage.However, if you want to activate a new filter before the one currently in use has expired, the latter must be disabled first as described in the section "Replacing INTENZA+ water filter" |
| There is some water under the machine. | The drip tray is too full and has spilled over. | Empty the drip tray when the mark appears though the tray. Always empty the drip tray before starting the descaling procedure. |
| The machine is in DEMO mode. | While switching on the machine, you pressed a combination of buttons (HOME - CLEAN/SET - HOME - CLEAN/SET). | Switch the machine off and on again, with the ON/OFF button on the control panel. |
GAGGIA accessories
Coffee and accessories are available through authorised centres (Italy), or distributors in your country.
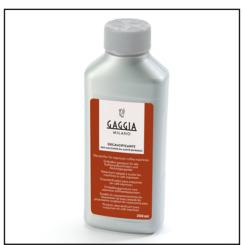
Dscaling product
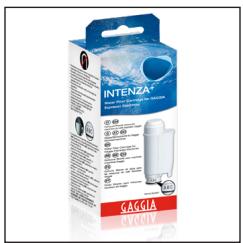
INTENZA+ water filter
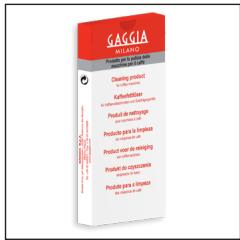
Coffee oil remover






Coffee range available in beans and powder: 100% Arabica / Intense / Decaffeinated
Technical specifications
| Nominal voltage - Power rating - Power supply | See data plate on the inside of the service door |
| Housing material | Thermoplastic type |
| Dimensions | 224 x 357 x 435 mm |
| Weight | 7,6 kg |
| Power cord length | 1200 mm |
| Control panel | Front panel |
| Water tank | 1.8 litres - Removable type |
| Coffee bean container capacity | 250 g |
| Coffee pucks container capacity | 15 |
| Pump pressure | 15 bar |
| Boiler | Stainless steel boiler |
| Safety devices | Thermal Fuse |

32 Netherlands
Inhoudsopgave
Overzicht van de machine (afb. 2) 33
Versie stoompijpje 33
Versie Klassieke Pannarello 33
Controlepaneel en display 34
Overzicht van het contropaneel (afb. 1) 34
Multifunctietoetsen 34
Eerste installment 35
Handmatige spoelcyclus 35
Meting van de waterhardheid 36
Waterfilter INTENZA+ 36
Installatie van het waterfilter INTENZA+ 37
Vervanging van het waterfilter INTENZA+ 37
Type drank 38
Espresso tray 39
Koffieafgiffe 39
Afgithe van koffie met koffiebonen 39
Afgithe van de koffie met voorgemalen koffie 40
Hoe melk opschuimen 41
Model met de Klassieke Pannarello 41
Model met stoompijpje 42
Afgithe van heet water 43
Aanpassing van de dranken en opslag van de instellenen (MEMO) 43
Aanpassing van de dranken 43
Aanpassing van de maalfijnheid 45
Reiniging en onderhoud 46
Reinigungstabel 46
Reiniging van het stoomsystem 47
Reiniging van de zetgroep 48
Invetten van de zetgroep 50
Ontkalking 51
Frequentie van de ontkalking 51
Wat te doen in geval van onderbreking van de ontkalkingsprocedure 52
Verschillende instellungen 53
Taal 53
Waterfilter 53
Stand-by tijd 53
Meeteenheid 54
Waterhardheid 54
Drankenteller 54
Toetsgeluid 54
Standaard instellingen 54
Betekenis van de foutdcodes 55
Oplossing van problemen 56
Accessoires GAGGIA 59
Technische gegevens 59

Overzicht van de machine (afb. 2)
| 1 | Controlepaneel | 13 | Koffiebonenreservoir |
| 2 | Afstelbare koffietuit | 14 | Zetgroep |
| 3 | Deksel van het waterreservoir | 15 | Servicedeur |
| 4 | Deksel van het koffiebonenreservoir | 16 | Koffieopvanglade |
| 5 | Compartment voorgemalen koffie | 17 | Koffieresidureservoir |
| 6 | Aansluiting voor voedingskabel | 18 | Lekbakje |
| 7 | Ontgrendelingsknoppen lekbakje | 19 | Rooster lekbakje |
| 8 | Gleufplaatsing Espresso tray | 20 | Espresso tray |
| 9 | Indicator lekbakje vol | 21 | Tester van de waterhardheid |
| 10 | Waterreservoir | 22 | Maatlepel voor voorgemalen koffie |
| 11 | Aromadeksel | 23 | Smeervet |
| 12 | Instelknop van de koffiemolen | 24 | Voedingskabel |
Versie stoompijpje
| 25 | Handgreep stoompijpje | 27 | Sputmond van het stoompijpje |
| 26 | Stoopijpje |
Versie Klassieke Pannarello
| 25 | Stoompijpje | 27 | Klassieke Pannarello |
| 26 | Handgreep Klassieke Pannarello |
Controlepaneel en display
01
Overzicht van het contrôlepaneel (afb. 1)
| 1/2 | MULTIFUNCTIETOETSEN | Om de op het display aangegeven functie te selecteren. |
| 3 | Toets ON/OFF | Om de machine aan of UIT te schakelen, door de toets enkele sekonden, ingedrukt te houden. |
| 4 | Toets HOME | Voor toegang tot het drankenmenu. |
| 5 | Toets CLEAN/SET | Voor toegang tot het menu van de reiniging en van de instelleningen. |
| 6 | Toets START/STOP | Om de afgifte van de geselecteerde drank te starten/stappen, of de op het display weergegeven procedure te starten/stappen. |
Opmerking: de toetsen HOME , CLEAN/SET , zich ook toetsen voor ESC. De schermen+knen verlaten worden door te drukken op een van deze tweet toetsen die terugkeren maar hun oorspronkelijke menu, behalte binnen een functie of programma.
Multifunctietoetsen
De multifunctionele toetsen aan de zijkanten van het display dienen om de functie of de drank te selecteren waarnaar ze op dat moment verwijzen.
Opmerking: om het lezen van deze handleiding te vergemakkelijken, waar u leest <
Eerste installment
Voordat u de machine gebrukt, is het van essentieel belang dat u een paar eenvoudige stappen volgt, duidelijk beschreiben in de beknopte handleiding aan het begin van deze handleiding met verklarende tekeningen.
Opmerking: om een nog hebelijkere koffie te verkrijgen, raden we u aan eerst 5 kopjes koffie te zetten zodate machine de zelf-afstelling kanuitvoeren.
Handmatige spoelcyclus
Tijdens de eerste installmentie of na een langeperiode van inactiviteit van de machine, moet het watercircuit gezuld worden, met de handmatige spoelcyclus.
1 Plaats een bak onder de koffietuit, blader door de verschillende paging's en selecteer een "ESPRESSO LUNG".
2 Druk op de toets " " tot selectie van " ", zonder voorgemalen koffie toe te voegen.
3 Druk op de toets START/STOP om de afgithe te starten, de machine begint heet water te verstrekken.
4 Ledig de houder en haal de Klassieke Pannarello, indien aanwezig,uit het stoompijpje.
5 Plaats een houder onder het stoompijpe en kies de drank " HEET WATER".
6 Druk op de toets START/STOP om de afgifte te starten.
7 Leeg de houder en herhaal de stappen van 5 tot 7, tot het waterreservoir leeg is.
8 Vul na beeindig het waterreservoir opnieuw tot het MAX niveau. De machine is nu maar voor gebruik.
Meting van de waterhardheid
Tijdens de eerste installmentie, moet de waterhardheid ingesteld worden. Neem het meetstrookje van de waterhardheid uit de verpakking en volg de stappen die op het display weergegeven wordenijdens de installmentiefase. Om de waterhardheid later te veranderen, drukt u op de toets CLEAN/SET 山 , selecteert u "INSTELLINGEN" en selecteert u eenmaal in het instillingenmenu "WATERHARDHEID".
1 Dompel de strook voor de meting van de waterhardheid gedurende 1 seconde in een glas water. Haal de strook uit het water en wacht 1 minuut.
2 Controller hooveel vierkantjes rood geworden zijn.
3 Gebruik de groene toetsen "✔" en "▲" om de waarde te kiezen van de hardheid die ingesteld要去 worden volgens de hierna volgende tabel, en bevestig dan met de toets "✔".
| Aantal rode vierkantjes | In te stellen waarde | Waterhardheid | INTENZA+ |
| ■□□□ | 1 | zeer zacht water | A |
| ■□□□ | 2 | zacht water | A |
| ■□□□ | 3 | hard water | B |
| ■□□□ | 4 | zeer hard water | C |
Waterfilter INTENZA+
Het is aangeraden het waterfilter INTENZA+ te installereren, om de vorming van kalksteen te beperken. Dit verzekert een langere duur van de machine en een better aroma van de koffie in de loop van de tijd.
Water is een heel belangrijk bestanddeel bij het zetten van koffie: waarom is het heel belangrijk dit.altijd professioneel te filtreren.
Het waterfilter INTENZA+ voorkomt de vorming van mineraalafzettingen, door de kwaliteit van het water te verbeteren.
Installatie van het waterfilter INTENZA+
Dompel het waterfilter INTENZA+ in verticale positie (met de opening maar boven) in koud water en druk zachtjes op de zijkanten om de luchtballetjes eruit te lately komen.
Verwijder het waterfilter INTENZA+uit het water en stel het in op basis van de gedetecteerde hardheid van het water (zie het hoofdstuk "Meting van de waterhardheid") en gespecifieerd aan de onderkant van het filter:
A = zacht water - komt overeen met 1 of 2 vakjes
B = hard water (standaard) - komt overeen met 3 vierkantjes
C = zeer hard water - komt overeen met 4 vierkantjes
Plaats het filter INTENZA+ in het waterreservoir en verzeker uervaan dat het correct geplaatst is. Vul het waterreservoir opnieuw en plaat het in het compartment.
1 Druk op de toets CLEAN/SET en verwolgens op de toets "INSTELLINGEN
2 Selecteer "FILTER VAN HET WATER " en druk op de toets " ✓".
3 Selecteer "ACTIVEREN" en volg de aanwijzingen op het display om het filter correct in te schakelen.
Opmerking: de activeringsprocedure van het filter kan onderbroken worden door te drukken op de knop START/STOP . Om de activeringsprocedure van het filter opnieuw te starten, drukt u opnieuw op de toets START/STOP
Vervanging van het waterfilter INTENZA+
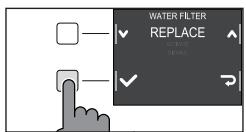
Wanneer het waterfilter INTENZA+ op is, verschijnt het waarschuwingsbericht op het display.
1 Vervang of schakel het filter UIT door te drukken op de toets CLEAN/SET en verwolgens op de toets "INSTELLINGEN".
2 Selecteer "FILTER VAN HET WATER " en druk op de toets " ✓".
3 Kies "VERVANGEN" om het filter te wisselen of "UITSCHAKELEN " indien u het filter Niet wenST te gebruiken. Bevestig met de toets " ✓".
Volg de aanwijzingen op het display om het filter correct in te schakelen.
Type drank
| Oorspronkelijk recept | Beschrijving | |
| Espresso | Koffie | 40 ml |
| Espresso lungo | Koffie | 80 ml |
| Koffie | Koffie | 120 ml |
| Americano | Koffie | 40 ml |
| Water | 110 ml | |
| Heet water | Water | 150 ml |
Opmerking: In de originele recepten zichn de drankjes allemaal ingesteld op een gemiddelde temperatuur en intensiteit van het aroma.
Espresso tray
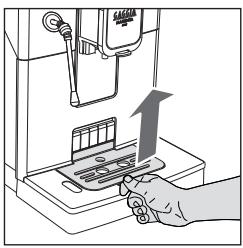
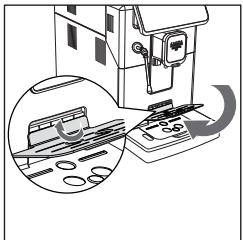
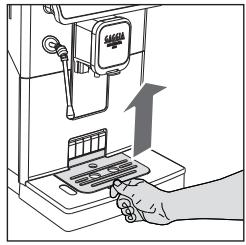
Deze machine is ontworpen om onberispelijke resultaten in het kopje te garanderen, van de traditionele espresso tot tal van andere beschikbare dranken. Als u een Italiaanse espresso wilt proeven Zoals de traditie vereist, met een heerlijke laag naturuurlijke room op het oppervlak, raden we aan de special ontworpen "Espresso tray" te gebruiken. Met dit vlak kunt u traditionele effressokopjes gebruiken, zodat de perfecte hoogte worden bereikt voor een compacte en homogene room en een afgifte zonder spatten.
Til de Espresso tray uit het rooster van het lekbakje en stek deze in de waarvoort bestemde gleuf, Zoals aangegeven in de tekening.
Koffieafgifte
Afgithe van koffie met koffiebonen
Let op: gelebruik enkel koffiebonen voor espresso. Plaats geen gemalen koffie, ongebrande koffie of oploskoffie in de koffiebonencontainer, waar dat deze de machine konnen beschaden.
Raad: verwarm de kopjes voor met heet water om een warmere koffie te krijgen.
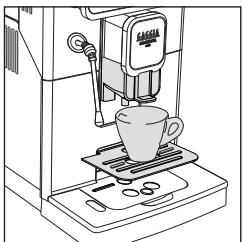
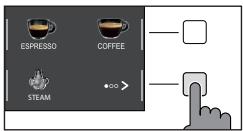
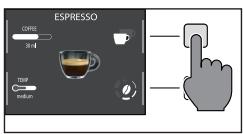
1 Plaats de Espresso tray, plaat een kopje onder de koffietuit, verplaats de koffietuit omhoog of omlaag, afhankelijk van het formaat van het gebruekte kopje.
Druk op de toets HOME voor toegang tot het drankenmenu.
2 Doorloop de verschillende paging's om de gewenste koffie te vinden en te selecteren.
3 Eens de gewenste koffie geseleed is, kan men aan de hand van de toets " " twee kopjes tegelijkertijd zetten, behalve de AMERICANO.
40 Nederlands
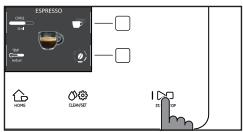
4 Druktenslotte op de toets START/STOP l om de afgithe te starten.
Opmerking: de afgifte kan op eender welt moment onderbroken worden, door op de toets START/STOP te drukken.
Indien u deinstallingen van de drank wenst aan te passen, zie dan hoofdstuk "Aanpassing van de dranken".
Afgithe van de koffie met voorgemalen koffie
Gebruik de speciale meegeleverde maatlepel en voeg de juiste dosis in het compartment voor voorgemalen koffie.
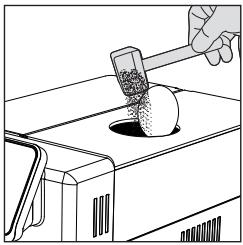
1 Open het deksel van het reservoir voor voorgemalen koffie, en voeg een afgestreken maatlepel voorgemalen koffie toe.
Let op: voeg geen andere stoffen in dan de voorgemalen koffie om de machine nicht te beschadigen.
2 Plaats een kopje onder de koffietuit en selecteer de gewenste drank.
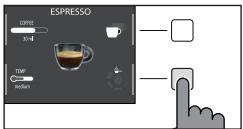
3 Druk op de toets 串 _ ^ , tot selectie van "
Opmerking: de functie "voorgemalen koffie" sluit de möglichkheid UIT om twee kopjes koffie tegetelijk te zetten en het aroma in te stellen, wat alleen möglichk is met koffiebonen.
4 Druk op de toets START/STOP om de koffieafgifte te starten.
Indien u deinstallingen van de drank wenst aan te passen, zie dan hoofdstuk "Aanpassing van de dranken".
Opmerking: de afgifte kan op eender welt moment onderbroken worden, door op de toets START/STOP te drukken.

Hoe melk opschuimen
Raad: gebruik koude melk (aan een temperatuur van ongeveer 5^ ) met een gehalte aan proteinen van minstens 3% om een optimaal resultaat te garanderen voor het schuim. U kan zowel volle als halfvolle melk gebruiken. U kan bovendien afgeroomde melk, sojamelk en lactosevrijne melk gebruiken.
Model met de Klassieke Pannarello
1 Vul een kan voor 1/3 met koudemelk.
2 Druk op de toets HOME om maar het drankenmenu te gaan.
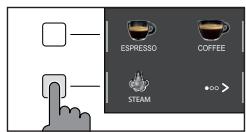
3 Plaats de Klassieke Pannarello in de melk. Selecteer, vanuit het drankenmenu "STOOM " en druk op de toets START/STOP
4 Schuim de melk op door de kan zachtjes aan met cirkelvormige bewegingen omhoog en omlaag te bewegen.
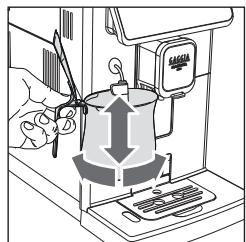
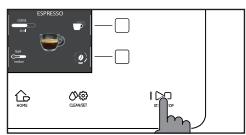
5 Wanner het melkschuim de gewenste consistentie bereikt. druk op de toets START/STOP om de stoomafgifte te onderbreken. Wacht voordat u de kan verwijdert, totdat de afgifte van de stoom volledig gestopt is.
Opmerking: Reinig het circuit na het opschuimen van melk, door eenkleine hoeveelheid heet water te verstrekken.
42 Netherlands
Model met stoompijpje
1 Vul een kan voor 1/3 met koude melk.
2 Plaats de spuitmond van het pijpje net onder de oppervlakte van de melk; als hij er te diep in zit, schuimt de melk Niet op; als hij Niet diep genoeg zit, ontstaan er grote bellen die meteen weer neerslaan.
3 Het is belangrijk om de spuitmond nicht in het midden, maar dicht bij de rand van de kan te honden, in een hoek waarmee een regelmatige draaistroom worden verkreten.
4 Druk op de toets HOME om maar het drankenmenu te gaan. Selecteer de toets "STOOM" en druk op de toets START/STOP om het opschuimen van de melk te halten beginnen.
5 Voor het juiste melkschuim要去 de spuitmond voor stoom alg in contact zijn met de melk en Niet met het schuim. Daarom要去, naarmate de schuimlaag toeneemt, de kan enigszins omhoog bewogen worden om de spuitmond in contact te honden met de melk, zonder de bodem van de kan te raken. Zodra de gewenste schuimdikte is verkreten,要去 het stoompijpje verder maar beneden worden geduwd om de melk goed te verwarmen.
6 Wanner het melkschuim de gewenste consistentie bereikt. druk op de toets START/STOP om de stoomafgifte te onderbreken. Wacht voordat u de kan verwijdert, totdat de afgifte van de stoom volledig gestopt is.
Opmerking: Het is aanbevolen om.altijd een hand op het bolle deel van de kan te houden om de temperatuurstijging van het Niet opgeschuiimde deel van de melk te voelen.
Opmerking: Om het melkschuim compacter te makesen, raadt men aan met de onderkant van de kan kort gegen een plat oppervlak te tikken en de kan daarna tenminste 30 seconde te latent staan. De melk wordt daardoor homogener.
Opmerking: Reinig het circuit elke keer na het opschuimen van melk, door eenkleine hoeveelheid heet water te verstrekken.
Afgithe van heet water
Let op: bij het begin van de bereiding kan, afhankelijk van het model, de Klassieke Pannarello of het stoompijpe stoom en heet water spuiten.
1 Plaats een houder onder de Klassieke Pannarello of het stoompijpje (al naargelang het model).
2 Druk op de toets HOME, doorloop de verschillende schermen met de groene toets , en selecteer het heet water.
3 Druk op de toets van het "HEET WATER". Druk verzolgens op de toets START/ STOP om de afgifte te starten.
Opmerking: de afgifte kan op eender welt moment onderbroken worden, door op de toets START/STOP te drukken.
Indien men de instellingen van de drank wenst aan te passen, zie dan hoofdstuk "Aanpassing van de dranken".
Aanpassing van de dranken en opsga van de instellingen (MEMO)
Met deze machine=kunt u deinstallingen van een drank aanpassen aan uw voorkeuren en deze opslaan (MEMO), door ze over de vorige instelleningen te overschrijven.
Aanpassing van de dranken
1 Druk op de toets HOME
2 Kies uw drank.
3 Op het scherm worden alle instellungen weergegeven die u kunt aanpassen en/ of selecteren op basis van uw voorkeuren. Al naargelang het type drank, kan u de volgende waarden afstellen of selecteren:
- het volume van de koffie;
- de temperatuur van de koffie;
- de afgifte van twee kopjes tegelijkkertijd;
- het gebruik van voorgemalen koffie;
- de intensiteit van het aroma (enkel bij gebruik van koffiebonen);

44 Netherlands
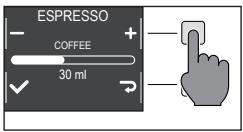
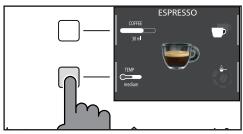
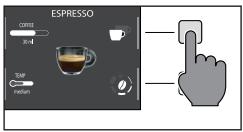
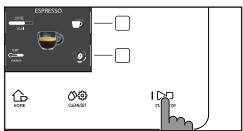
4 Na te toets " KOFFFIE " ingedrukt te hebben, gebruikt u de groene toetsen " + " en ", om het gewenste volume in te stellen.
Druk verwolgens op de knop " √ " om te bevestigen en terug te keren maar het vorige scherm, waar de(AP) ingestelde hoeveelheid weergegeven worden.
5 Druk de toets "TEMP""—"meerdere malen in om de temperatuur van de drank te wijzigem met de volgende opties:
laag;
gemidd.;
- hoog;
6 Druk op de toets " " om twee kopjes te zetten, of op de toets " " om slechts een kopje te zetten. Het beeld van de drank in het midden van het display geeft het gekozen+aantal kopjes weeer.
Opmerking: deze functie kan nicht gebrukt worden met de AMERICANO en met HEET WATER.
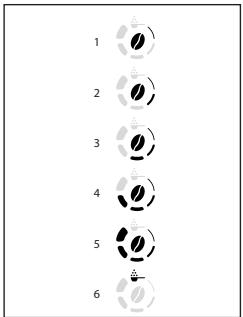
8 Druk op de toets " 0" om de intensiteit van het aroma te wijzigen of de voorgemalen koffie te selecteren. U kankiezen uit 5 verschillende intensiteitsniveaua. Bij elke druk op de toets " 0", wordt de intensiteit van het aroma met een graad gewijzigd. Het display toont de gekozen intensiteit of de selectie van voorgemalen koffie.
1 Zeer mild
2 Mild
3 Normaal
4 Sterk
5 Zeer sterk
6 Voorgemalen
Opmerking: met de functie Voorgemalen koffie kan men slechts een koffie per keer zetten.
9 Nadat u de drank aan uw smaak hebt aangepast, kutu deze verstrekken met START/STOP
10 Als u een van de bovenstaande parameters heeft gewijzigd, worden u aan het einde van de afgithe经营活动 of u het recept met de aangebrachte wijzigingen wilt opslaan.
Let op: de neue opgeslagen instellungen overschrijven die van het vorige recept.
Opmerking: om terug te kerenaar de fabrieksinstellingen van de afzonderlijke recepten, moet u de instellenen die aangegeven zijn in de paragraaf "Type drank" opnieuw invoeren en opslaan.
Aanpassing van de maalfijnheid
U=kunt de maalfijnheid aanpassen met de instelknop voor de maalfijnheid die zich in de koffiebonencontainer bevindt. De keramische koffiemolen garandeert een perfecte en homogene maling voor de bereiding van elk kopje koffie. Zo worden het aroma bewaard, om altijd een perfecte smaak te garanderen.
Opmerking: de maalfijnheid kan enkel afgesteld worden terwijl de machine de koffiebonen maalt. Het verschil in smaak za na de afgifte van 2-3 koffiekopjes geproofd worden.
Let op: om beschadiging van de koffiemolen te voorkomen, draai de selectieknop van de maalfijnheid Niet meer dan een klik per keer.
1 Plaats een kopje onder de koffietuit.
2 Open het deksel van het koffiebonenreservoir.
3 Zet een espresso zoals beschreiben in het hoofdstuk "Afgithe van een koffie met koffiebonen".
4 Terwijl de machine de koffie maalt, drukt u op de instelknop van de maalfijnheid in het koffiebonenreservoir en draait u deze met eén klik per keer maar links of rechts.
5 Er+zijn 5 verschillende graden van maalfijnheid beschikbaar waaruit men kan kiezen. Hoekleiner het streepe,des te sterker en rond de koffie.
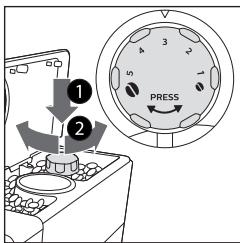
Opmerking:
- Grove maling: mildere smaak, voor koffiemelanges met donkere branding (3-5);
- Fijne maling: intensere smaak, voor Lichtgebrande koffiemelanges (1-3);
Reiniging en onderhoud
Regelmatige reiniging en onderhoud houden de machine in optimale staat en garanderen een constante, uiststekende koffie, constante toevoer en uiststekend melkschuim. Raadpleeg de onderstaande tabel om te weten wanner en hoe u alle verwijderbare delen van de machine要去 reinigen. Lees de desbetreffende hoofdstukken voor meer gedetailleerde informatie.
Reinigungstabel
| Beschrijving deel | Wonneer reinigen | Hoe reinigen |
| Klassieke Pannarello | Na gebruik | Verwijder de Klassieke Pannarello en spoel hem af onder stromend water. |
| Wekelijks | Verwijder de Klassieke Pannarello en de handgreep en reinig alle delen onder stromend water. | |
| Stoompijpe | Na gebruik | Reinig het stoompijpe met een vochtige doek. Voor een grondigere reiniging kunt u de spuitmond losschroeven en met stromend water spoelen. |
| Zetgroep | Wekelijks | Verwijder de zetgroep en reinig hem onder stromend water. |
| In functie van het type gebruik | Zie het hoofdstuk "Reinigung en smering van de zetgroep". | |
| Maandelijks | Reinig de zetgroep met de koffielieverwijdingstabetten Gaggia om de olieachtige resten van de koffie te verwijderen | |
| Lekbakje vol | Wanner de speciale rode indicator uit het rooster van het lekbakje komt | Leeg het lekbakje en reinig het onder stromend water. |
| Koffieresidreservoir | Wanner de machine dit vereist | Leeg het kofferesidreservoir en reinig het onder stromend water. Verzeker u ervan dat de machine ingeschakeld isijdens deze werkzaamheid, anders worden het kofferesidreservoir Niet op nul gezet. |
| Waterreservoir | Wekelijks | Reinig het onder stromend water. |
| Compartment van de voorgemalen koffie/ koffieleding | Wekelijks | Reinig het bovenste deel met de steel van een lepel zoals hierna aangegeven. |
Beschrijving deel
Wannerreinigen
Hoe reinigen
Espresso tray
In functie van het type gebruik
Verwijder de espresso tray, reinig.Deze met stromend water.U kan deze ook in de bovenste mand van de vaatwasser reinigen.
Reiniging van het stoomsystem
Reiniging van de Klassieke Pannarello
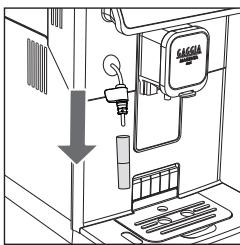
1 Verwijder de Klassieke Pannarello en het handgreep en spoel ze af onder stromend water.
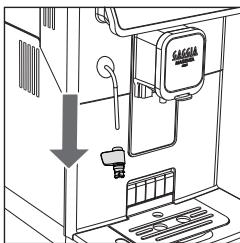
2 Reinig het stoompijpje met een vochtige doeck.
3 Assembleer alle delen opniew.
Reiniging van het stoompijpje
1 Reinig het stoompijpje met een vochtige doek. Voor een grondigere reiniging kunt u de spuitmond losschroeven en met stromend water spoelen.
2 Druk op de toets HOME om maar het drankenmenu te gaan. Selecteer de toets "STOOM" en druk op de toets START/STOP Laat de stoom gedurende een of twee seconden ontsnappen om de opening van de spuitmond vrij te make.

Reiniging van de zetgroep
Let op: reinig de zetgroep Niet in de vaatwasmachine en gebruik geen afwasmiddelen voor afwas- of reinigingsmiddelen, waar dit de zetgroep kan beschaden en de smaak van de koffie kan beinvloeden.
Verwijdering van de zetgroep
1 Schakel de machine uit en koppel de voedingskabel los.
2 Verwijder het lekbakje met het koffieresidureservoir.
3 Open de servicedeur.
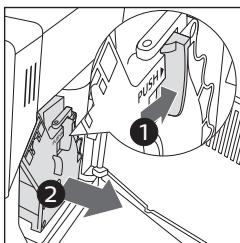
4 Druk op de PUSH-hendel (indrukken) (1) en trek aan de handgreep van de zetgroep (2) om deze uit de machine te halen.
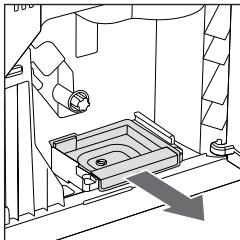
5 Verwijder de koffieopvanglade.
Reiniging van de zetgroep onder stromend water
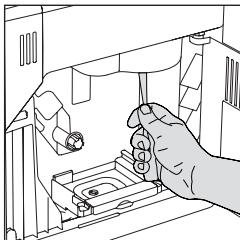
1 Reinig de koffieleiding grondig met de steel van een lepeltje of met een ander afgerond keukengereedschap.
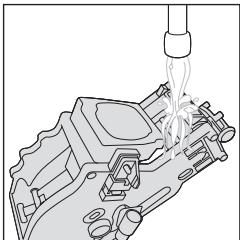
2 Spoel de zetgroep en de koffieopvanglade grondig met lauw water. Reinig het bovenste filter zorgvuldig.
3 Laat de zetgroep aan de lucht drogen.
Opmerking: droog de zetgroep Niet af met doeken om de ophoping van stofvezels erin te vermijden.
Herplaatsing van de zetgroep
1 Voordat u de zetgroep opnieuw in de machine plaatst, moet u ervoor zorgen dat de twee gele referentietekens aan de zichkant overeenkomen. Indien dit nicht zo is, doet u als volgt:
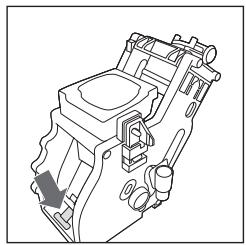
Zorg ervoor dat de hendel in aanraking komt met de basis van de zetgroep.
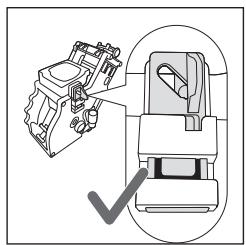
2 Verzeker uervaan dat de gele ontgrendelhaak van de zetgroep op de correcte positie is.
Om de haak correct teplaatsen, duwt u hem omhoog tot de maximaal bereikbare positie.
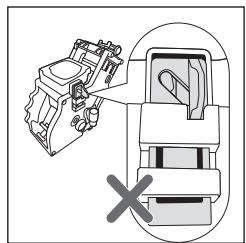
Indien de haak nog onderaan is, betekent dit dat hij Niet correct gespositioneer is.
3 Verwijder de koffieopvanglade.
4 Plaats de zetgroep opnieuw in de machine langs de geleiders aan derijkanten totdat.Deze met een klik op+zijn plaats blokkeert.
Let op: druk Niet op de hendel PUSH.
5 Sluit de servicedeur.
50 Netherlands
Reiniging van de zetgroep met tabletten om de olieachtige resten van de koffie te verwijderen
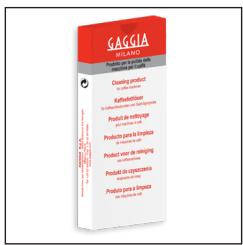
Let op: Gebruik voor het schoonmaken alleen Gaggia-tabletten om olieachtige resten van de koffie te verwijderen.
1 Plaats een houder onder de koffietuit.
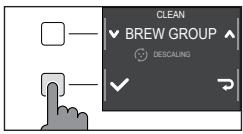
2 Druk op de toets CLEAN/SET en selecteer de toets " REINIGING " die op het display weergegeven worden.
3 Kies "REINIGING ZETGROEP" en druk op de toets "√", en druk verwolgens op de toets START/STOP ▷om de reinigingsprocedure te starten.
4 Volg de aanwijzingen op het display om de zetgroep correct te reinigen.
5 De procedure duurt onceveer 5 Minutes en u kan de toets START/STOP gebruiken om ze te onderbreken en verrolgens weeher verdter te latent gaan.

Invetten van de zetgroep
Om optimale machineprestaties te garanderen, moet de zetgroep gesmeerd worden. Raadpleeg de volgende tabel voor de freiorentie voor invetten.
| Frequentie van gezruik | Dagelijks,aantal bereide dranken | Frequentie voor invetten |
| Laag | 1-5 | Om de 4 maanden |
| Normaal | 6-10 | Om de 2 maanden |
| Hoog | >10 | Elke maand |
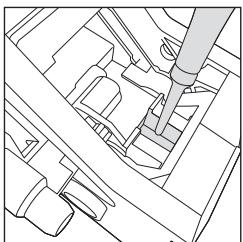
1 Schakel het apparaat uit en koppel de voedingskabel los.
2 Verwijder de zetgroep en spoel deze af met warm water (zie het hoofdstuk "Reiniging van de zetgroep onder stromend water").
3 Breng een dunne laag van het meegeleverde smeervet aan rond de pin die in de machine gestoken worden, onderaan de zetgroep.
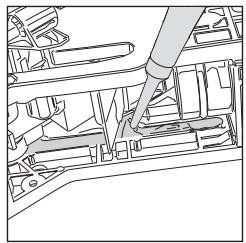
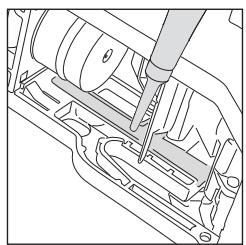
4 Breng een dunne laag smeervet aan op de geleiders, aan beiden kanten (zie afbeelding).
5 Plaats de zetgroep opnieuw (zie het hoofdstuk "Herplaatsing van de zetgroep").
Opmerking: u=knt de tube smeervet meertere keren hergebruiken.
Ontkalking
Frequentie van de ontkalking
Wanner de machine dit vereist, moet de ontkalking uitgevoerd worden.
Gebruik alleen de ontkalkingsoplossing van Gaggia die ontworpen is om optimale prestaties van de machine te garanderen. Het gebruik van andere producten zouschade aan de machine hun verroorzaken en resten in het water achechterlaten. Indien de ontkalking van de machine Niet uitgevoerd worden, vervalt de garantie.
1 Verwijder de Klassieke Pannarello, indien aanwezig.
2 Druk op de toets CLEAN/SET en selecteer de toets "REINIGING" die op het display weergegeven worden.
- Selecteer "ONTKALKING" en druk, na bevestiging met de toets "✔" op de toets START/STOP ▷om te starten.
3 Verwijder het lekbakje met het koffieresidureservoir, leeg ze enplaats ze terug in de machine.
4 Verwijder het waterreservoir en leeg het. Verwijder verrolgens, indien aanwezig, het filter INTENZA+.
52 Netherlands
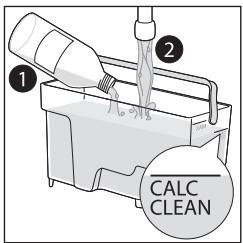
5 Giet de hele fles ontkalkingsoplossing Gaggia in het waterreservoir en vul met water tot u het niveau van CALC CLEAN bereikt. Plaats het verzolgens wee in de machine.
6 Plaats een große houder (1,5l) onder het stoompijpje en de koffietuit.
7 Volg de aanwijzingen die weergegeven worden op het display om de ontkalkingsprocedure te starten. Deze procedure duurt ongeveer 25 minutes en bestaat UIT een ontkalkingscylus en een spoelcylus, uitgevoerd met regelmatige afgiftes.
8 Als de ontkalkingscylclus is voltooid, moet u de réserve en het watercircuit spoelen volgens de instructies op het display.
9 Plaats het filter INTENZA+ weer in het waterreservoir.
Opmerking: de activeringsprocedure van het filter kan onderbroken worden door op de toets START/STOP te drukken.
Let op: wonneer de ontkalkingsprocedure actief is, is het nicht möglich om de zetgroep te verwijderen. Wacht tot het ontkalkingsproces voltooid is en verwijder dan de zetgroep.
Wat te doen in geval van onderbreking van de ontkalkingsprocedure
U kan de ontkalkingsprocedure verlaten door de ON/OFF toets op het contropaneel, enkele sekonden ingedrukt te houden. Als de ontkalkingsprocedure onderbroken worden voordat deze is voltooid, voert u het volgende UIT:
1 Leeg het waterreservoir en reinig het zorgvuldig.
2 Vul het waterreservoir met stromend water tot aan deindicatie van het CALC CLEAN niveau en schakel de machine opnieuw in. De machine worden voorverwarmd en voert een automatische spoelcylus UIT.
3 Voer, voordat u eender welke drank klaarmaakt, een handmatige spoelcclusuit zoals beschreiben in het betreffende hoofdstuk.
Opmerking: als de procedure Niet voltooid is, moet er zo snel möglichn nog een ontkalkingsprocedure uitgevoerd worden.
Verschillende instellingen
Door op de toets CLEAN/SET te drukken en "INSTELLINGEN" te selecteren op het display,+kunnen sommige machineparameters hersteld of gewijzigd worden, zoals:
- Taal.
Waterfilter. - Stand-by tijd.
- Meeteenheid.
Waterhardheid. - Drankenteller.
- Toetsgeluid
- Standaard instellingen.
Taal
Nadat het pictogram voor de taalinstelling geselecteerd is, worden de lijst met beschikbare talen geopend.
Beschikbare talen
| ITALIAANS | DEENS | TSJECHISCH |
| ENGELS | GRIKS | SLOWAAKS |
| DUITS | POOLS | LITUAANS |
| FRANS | RUSSISCH | JAPANS |
| SPAANS | ROEMEENS | KOREAANS |
| PORTUGUES | HONGAARS | CHINESE (TRADITIONEEL) |
| NEDERLANDS | BULGAARS | CHINESE (VEREENVoudIGD) |
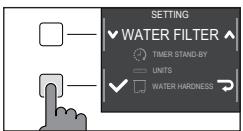
Waterfilter
Nadat "WATERFILTER" is geseleerd, volgt u de instructies op het display en zoals beschreiben in het hoofdstuk "Installatie waterfilter INTENZA+" en in het hoofdstuk "Vervangig waterfilter INTENZA+.
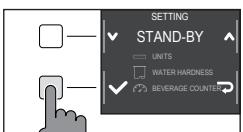
Stand-by hijd
Na "STAND-BY-TIJD" geselecteerd te hebben, kan de timer ingesteld worden op:
- 15 min.
- 30 min.
- 60 min.
- 180 min.
54 Netherlands
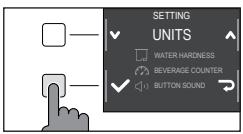
Meeteenheid
Door "MEETEENHEID" te selecteren:
kan men de meeteenheid instellen in "ml" of "once".
Waterhardheid
Nadat "WATERHARDHEID" is geselecteerd, volgt u de instructies op het display en zoals beschreiben in het hoofdstuk "Meting van de waterhardheid".
Drankenteller
Voor elke drank kan het aantal kopjes weergegeven worden dat afgegeven werden sinds de eerste keer dat de machine werk gebruikt. Deze geveens können nicht geseset worden.
Toetsgeluid
U kont het geluid van de toetsen uitschakelen door "OFF" te selecteren om nicht gestoord te worden.
Standaard instellingen
De machine kan weeer op de fabriekswaarden ingesteld worden. De machine zal een dubbele bevestiging vragen alvorens verder te gaan.
Betekenis van de foutcodes

Hieronder staan een aantal foutcodes die het display kan weergeven, hun betekenis en hoe het probleem op te losesten. Als de aangegeven oplossingen Niet werken en het display het pictogram van de foutcode blijft weergeven en de machine nicht correct werkt, of als er andere foutcodes worden weergegeven, moet u contact opnemen met een erkend servicecentrum of met de dealers in uw land. U vindt de contactgegevens op de website www.gaggia.com of www.gaggia.it.
| Foutcode | Probleem | Oorzaak | Mogelijk oplossing |
| 01 | De koffiemolen is geblokkeerd | De koffieleiding is geblokkeerd. | Verwijder de voedingskabel en verwijder de zetgroep. Reinig de koffieleding grondig met de steel van een lepel. Schakel het apparaat opnieuw in. |
| 03 - 04 | Er heeft zich een probleem voorgerdaan met de zetgroep. | De zetgroep is vuil of nicht goed gesmeerd. | Zet de machine uit. Verwijder de zetgroep en reinig hem zorgvuldig. (Raadpleeg het hoofdstuk "Reiniging van de zetgroep") |
| De zetgroep is nicht correct geplaatst. | Zet de machine uit. Verwijder de zetgroep enplaats hem terug. Verzeker u ervan dat de zetgroep op de juiste positie is alvorens deze teplaatsen. Raadpleeg het hoofdstuk "Herplaatsing van de zetgroep". | ||
| 05 | Er is een probleem in het watercircuit. | Er is lucht aanwezig in het watercircuit. | Haal het reservoir enkele keren uit de machine enplaats het opnieuw. Zorg ervoor dat het correct in de machine geplaatst worden. Controller of de ruimte van het waterreservoir schoon is. |
| Als u een "INTENZA+" filter gezruikt: verwijder het filter uit het waterreservoir en schud het om alle lucht uit het filter te verwijderen. Plaatservolgens het filter "INTENZA+" weir in het waterreservoir. | |||
| 14 | De machine is oververhit. | Er zijn meerere mogelijk oorzaken. | Schakel de machine uit en schakel ze na 30 minutes opnieuw in. Doe dit 2 of 3maal. |
Oplossing van problemen
Dit hoofdstuk vat de meest voorkomende problemen samen die u kutant aantreffen bij de machine. Als u het probleem Niet kut oplossen met de onderstaande informatie, ga dan maar www.gaggia.com of www.gaggia.it voor een lijst met veelgestelde vragen of neem contact op met het Customer Service Center of met de dealers in uw land.
| Probleem | Oorzaak | Oplossing |
| De machine gaat nicht aan. | De machine is Niet aangesloten. | Controleer of de voedingskabel correct ingestoken is. |
| De toets ON/OFF verbendt. | Houd de toets ON/OFF een pauar seconden ingedrukt. | |
| Het lekbakje is snel vol. | Dit is normala. De machine gebrukt water om het intern circuit en de zetgroep te spoelen. Een deel van het water stroomd door het interne systeme direct in het lekbakje. | Leeg het lekbakje wanner de rode indicator uit het rooster steekt. We raden aan een kopje onder de koffietuit teplaatsen om het spoolwater op te vangen |
| Het display geeft constant het pictogram "koffieresidreservoir vol"eer. | Het koffieresidreservoir verbledgegd wanner de machineuitgeschakeld was. | Leeg het koffieresidreservoir steeds wanner de machine ingeschakeld is. Indien het koffieresidreservoir geleegd worden wanner de machine uitgeschakeld is, wordt de teller van de koffiecycliet Niet op nul gezet. In dit geval toont het display het pictogram ook wanner het reservoir Niet vol is. |
| Het koffieresidreservoir verbendte snel teruggeplaatst. | Wacht steeds 5 seconden wanner het koffieresidreservoir zich weer op+zijnplaats zet. Zo stelt de teller zich weer in op nul. | |
| De machine vraagt u om het koffieresidreservoir leeg te make, ook als het reservoir Niet vol is. | De machine heeft de teller Niet geseset nadat het koffieresidreservoir de LASTste keer geleegd verbeld. | Wacht steeds 5 seconden wanner het koffieresidreservoir zich weer op+zijnplaats zet. Zo stelt de teller van het kofferesidu zich weer in op nul. |
| Leeg het koffieresidreservoir steeds wanner de machine ingeschakeld is. Indien het koffieresidreservoir geleegd worden wanner de machine uitgeschakeld is, wordt de teller van de koffiecycliet Niet op nul gezet. | ||
| Het koffieresidreservoir is te vol en het icoon "koffieresidreservoir vol"wordt Niet weergegeven. | Het lekbakje is verwijderd zonder het koffieresidreservoir te legen. | Wanner u het lekbakje verwijdert, maak dan ook het koffieresidreservoir leeg, ook als dit bijna leeg is. Zo stelt de teller van de kofferesidu zich weer in op nul en begint hij de kofferesidu opnieuw correct te tellen. |
| Onmogelijk de zetgroep te verwijderen. | De zetgroep bevindt zich nicht in de correcte positie. | Sluit de servicedeur. Schakel de machine uit en wat aan. Wacht tot het display de melding voor machine gereed weergeeft, verwijder dan de zetgroep. |
| De zetgroep kan nicht geplaatst worden. | De zetgroep befindt zich nicht in de correcte positie. | De zetgroep werk nicht in positie geplaatst alvorens hij terug gespositioneerd werk. Zorg ervoor dat de hendel contact maakt met de basis van de zetgroep en dat de haak van de zetgroep in de juiste positie staat. Zie het hoofdstuk "Herplaatsing van de zetgroep". |
| Om de machine waar in te stellen: herplaats het lekbakje met het koffieresidueservoir. Plaats de zetgroep Niet. Sluit de servicedeur, ontkoppel de voedingskabel enplaats deze opnieuw. Probeer dan opnieuw de zetgroep teplaatsen en schakel de machine opnieuw in. | ||
| De koffie heeft weinig room of is waterig. | De koffiemolen is ingesteld op een grove maling. | Stel de koffiemolen in op een fijnere maling. |
| De machine voert de zelfregulatie UIT. | Zet enkele koffiekopjes zodate de machine de zelfregulatie uitvoert. | |
| De koffieleiding is geblokkeerd. | Reinig de koffieleiding met een lepeltje zoals beschreiben in het hoofdstuk "Reiniging van de zetgroep onder stromend water". | |
| De koffie is nicht warm genoeg. | De temperatuur is te laag ingesteld. Ga deinstallingen van het menu na. | Stel de temperatuur van het menu in op "MAX". |
| De machine maalt de koffiebonen, maar er wordt geen koffie afgegeven. | De koffiemolen is ingesteld op een te fjne maling. | Stel de koffiemolen in op een grovere maling. |
| De koffietuit is verstopt. | Zet een voorgemalen slappe koffie, zonder de voorgemalen koffie toe te voegen. | |
| De koffietuinen zijn verstopt. | Reinig de koffietuiten met eenklein borsteltje. | |
| De koffie stroom langzaam of druppelsgewijs uit de machine | De koffiemolen is ingesteld op een te fjne maling. | Stel de koffiemolen in op een grovere maling. |
| De koffietuinen zijn verstopt. | Reinig de koffietuiten met eenklein borsteltje. | |
| Het circuit van de machine is door kalkaanslag geblokkeerd. | Voer de ontkalking uit. |
Nederlandds
| Probleem | Oorzaak | Oplossing |
| De melk maakt geen schuim. | De Klassieke Pannarello is vuil. (model met de Klassieke Pannarello) | Reinig de Klassieke Pannarello Zoals beschreiben in het hoofdstuk "Reiniging van de Klassieke Pannarello". |
| Verzeker u ervan dat alle onderden van de Klassieke Pannarello correct gemonteerd+zijn. | ||
| De spuitmond van het stoompijpe is verstopt. (model met stoompijpe) | Reinig de spuitmond met stromend water en reinig het circuit door eenkleine hoeveelheid heet water te verstrekken. | |
| Het gebruikte type melk is Niet geschikt om schuim te makeen. | Al naargelang het type melk,verkrijgt men een andere hoeveelheid en kwaliteit van schuim. | |
| Het filter "INTENZA+" kan nicht geplaatst worden. | U要去 de lucht uit het filter latengaan. | Laat de luchtbellen uit het filter komen. |
| Het reservoir bevat nog water. | Leeg het waterreservoir alvorens het filter te installeren. | |
| De rubberen afdichting is Niet op het filter "INTENZA+" geplaatst. | Controleer de verpakking en plaats de afdichting op het filter "INTENZA+. | |
| Het filter "INTENZA+" kan nicht ingeschakeld worden | Er is reeds een filter actief | De machine geeft het door het filter gebruikte percentage aan. Als men toch een neueu filter wilt activeren vòr de vervaldatum van het in gebruik zijnde filter, moet dit eerst gedeactiveerd worden zoals beschreiben in de paragraaf "Vervang van het INTENZA+ waterfilter" |
| Er is water onder de machine aanwezig. | Het lekbakje is te vol en is overgelopen. | Leeg het lekbakje wanner de indicator door het bakje steekt. Leeg altijd het lekbakje alvorens de ontkalkingsprocedure te starten. |
| Het apparaat bevindt zich in de DEMO-modus. | Bij het inschakelen van het apparaat, heeft U op een combinatie van knoppen gedrukt (HOME - CLEAN/SET - HOME - CLEAN/SET). | Schakel het apparaat uit en weein in met die ON/OFF toets op het contropaneel. |
Accessoires GAGGIA
De koffie en de accessoires zijn beschikbaar in de erkende centra (Italiè), of bij de dealers van uw land.

Ontkalkingsoplossing
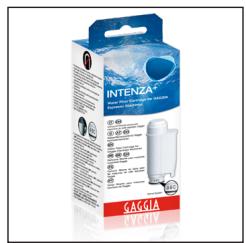
Waterfilter INTENZA+
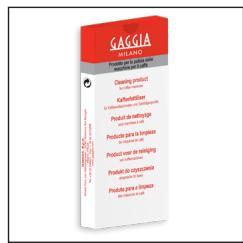
Koffieolieverwijderingstabletten





Beschikbaar assortment koffie in bonen en poeder: 100% Arabica / Intens / Cafeinevrij
Technische gegevens
| Nominale spanning - Nominaal vermogen - Voeding | Zieplaatje aan de binnenkant van de servicedeur |
| Materiala behuizing | Thermoplast |
| Afmetingen | 224 x 357 x 435 mm |
| Gewicht | 7,6 kg |
| Kabellenge | 1200 mm |
| Bedieningspaneel | Front |
| Waterreservoir | 1,8 liter - Uitneembaar |
| Inhoud koffiebonenreservoir | 250 g |
| Inhoud koffiediklade | 15 |
| Pompdruk | 15 bar |
| Waterketel | RVS ketel |
| Veiligheidsnrichtingen | Therozekering |

60 Polski
Spis tresci
Głowne elementy urzadzenia (Rys. 2) 61
Wersja z dysza pary 61
Wersja z przystawka Pannarello 61
Panel sterowania i wysshietlacz 62
Glowne elementy panelu sterowania (Rys. 1) 62
Przyciski wielofunkcyjne 62
Pierwsza instalacja 63
Ręczny cykł plukiania 63
Pomiar twardoSci wody 64
Filtr wody INTENZA+ 64
Instalacja filtrawody INTENZA+ 65
Wymiana filtra wody INTENZA+ 65
Rodzaje napojow 66
67
Parzenie kawy 67
Parzenie kawy na bazie kawy ziarnistej 67
Parzenie kawy na bazie kawy wstepnie zmielonej 68
Jak spienić mleko 69
Modelz przystawka Pannarello 69
Modelz dysza pary 70
Nalewaniegoracej wody 71
Indywidualne ustawenia napojów i zapisywanie ustawien (MEMO) 71
Indywidualne ustawienia napojow 71
Regulacja stopnia mielenia 73
Czyszczenie i konserwacja 74
74
Czyszczenie systemu pary 75
Czyszczenie bloku zaparzajacego 76
Smarowanie bloku zaparzajacego 78
Odwapnianie 79
Procedura odwapniania 79
Co robic w przypadku przerwania procedury odwapniania 80
Ustawienia rozne 81
Jęczyk 81
Filtr wody 81
Czas czuwania 81
Jednostki miary 82
Twardosc wody 82
Licznik napojów 82
Dzwiek przycisków 82
Ustawienia fabryczne 82
Znaczenia kodow blgodow 83
Rozwiazywanie problemów 84
Akcesoria GAGGIA 87
Dane techniczne 87

Głowne elementy urzadzenia (Rys. 2)
| 1 | Panel sterowania | 13 | Pojemnik na kawe ziarnista |
| 2 | Regulowy dozownik kawy | 14 | Blok zaparzajcy |
| 3 | Pokrywa zbiornika na wodę | 15 | Drzewiczki serwisowe |
| 4 | Pokrywa pojemnika na kawe ziarnista | 16 | Kasetka na resztki kawy |
| 5 | Pojemnik na kawe wstepnie zmielenoga | 17 | Pojemnik na fusy |
| 6 | Gniaźdo do kabla zasilajacjacego | 18 | Taca ociekowa |
| 7 | Przyciski zwalniąść tackość ociekowa | 19 | Kratka ociekowa |
| 8 | Szczelina na espresso tray | 20 | Espresso tray |
| 9 | Wskȩznik pięnej tacy ociekowej | 21 | Tester twardość wody |
| 10 | Zbiornik na wodę | 22 | Miarka do kawy wstepnie zmielonej |
| 11 | Pokrywka do utrzymania aromatu kaw | 23 | Smar |
| 12 | Pokrętło regulacje miłynka | 24 | Kabel zasilajczy |
Wersja z dysza pary
| 25 | Uchwyt dyszy pary | 27 | Wylot dyszy pary |
| 26 | Dysza pary |
Wersja z przystawka Pannarello
| 25 | Rurka wylotu pary | 27 | Przystawka Pannarello |
| 26 | Uchwyt przystawki Pannarello |
62 Polski
Panel sterowania i wyświetlacz
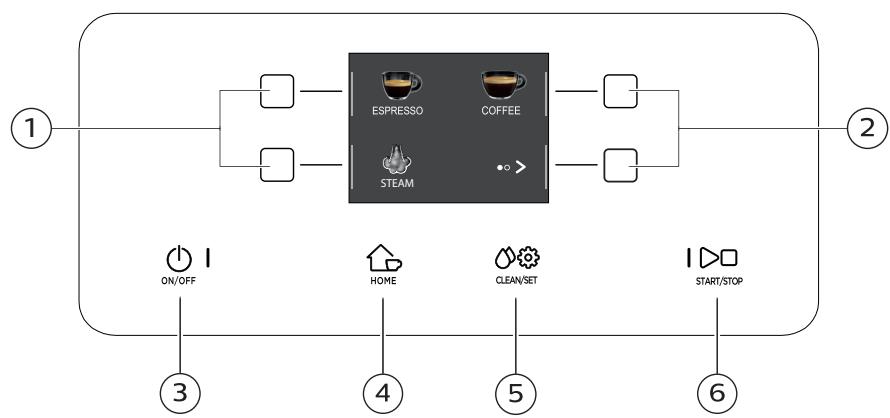
01
Głowne elementy panelu sterowania (Rys. 1)
| 1/2 | Przyciski WIELOFUNKCYJNE | Aby wybrać funkcję wskazaną na wyświetlaczu. |
| 3 | Przycisk ON/OFF | Aby wączyć lub wyłączyć urzemdenie,;naleź przytrzymać przyczysk przyez kilka sekund. |
| 4 | Przycisk HOME | Aby wejsć do menu napojów. |
| 5 | Przycisk CLEAN/SET | Aby wejsć do menu czyszczenia iustawiéń. |
| 6 | Przycisk START/STOP | Aby uruchomicź/zatrzymać;nalewaniewybranego napoju lub uruchomic/zatrzymać proceduţe wskazanova wyświetlaczu. |
Wazne: przyciski HOME, CLEAN/SET działaja równie są przyciski ESC. Można wyjsć z ekranów, naciskajć jedem z tych dwóch przycisków, które powoduź powróć do menu pouchtkowej. Nie jest to jederność,;będź w obrębie danej funkcjji lub programu.
Przyciski wielofunkcyjne
Przyciski wielofunkcyjne po bokach wyświetlacza są do wybierania funkcji lub napoju, do któraj odnoszo są one w danym momencie.
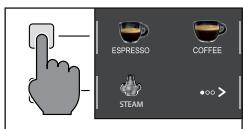
Wazne: aby ułowATIC czytanie ninejszej instrukcji, polecenie <
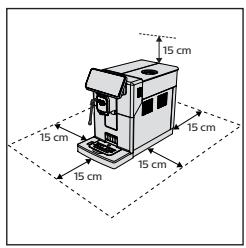
Pierwsza instalacja
Przed uzyciem urzadzenia nalezy przystrzegać kilku prostych wskazówek wyraźnie opisanych w skroconej instrukcji na początu niniejszego podręcznika, gdzie zamieszczono ilustracje objasniażcie.
Wañne: aby kawa smakowa lepiej, zalecamy przygotowanieśćtkowo 5 fližanek kawy, aby urzadzenia wykonało automatyczna regulacja.

Ręczny cykl plukania
Podczas pierwssszej instalacji lub po dlugim okresie niedzywania urzadzenia nalezy wykonac cykl plukania ręcznego.
1 Umieść pojemnik pod dozownikiem kawy, przywność poszȩgólne strony i wybrać „ESPRESSO LUNG".
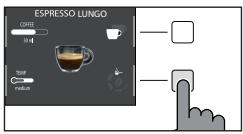
2 Nacisnac przycisk, a z do wybrania, bez dodawania kawy wstepnie zmielonej.
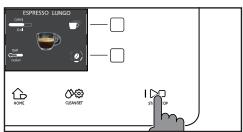
3 Nacisnac przycisk START/STOP l w celu rozpoczecia nalewania. Urzadzenia zacznie naewać goracwode.
4 Oproznić pojemnik i -性和 wystepuje - wyjad przystawkę Pannarello z turki wylotu pary.
5 Ustawic pojemnik pod urkag wylotu pary i wybrac napoj, "GORACA WODA".
6 Nacisnac przycisk START/STOP w celu Rozpoczecia nalewania.
7 Oproznić pojemnik i powtorzyc czynnosci z punktów od 5 do 7, dopóki zbiornik na wodeNie bedzie pusty.
8 Po zakoczenia napelnić ponownie zbiornik na wode do poziomu MAX. Urzadzenia jest gotowe do pracy.
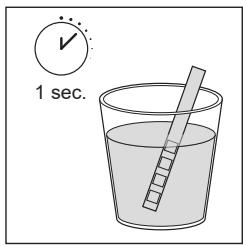
Pomiar twardosci wody
Podczas pierwszej instalacji naleź ustawic twardosć wody.
Wyjac z opakowania pasek testowy do pomiaru twardosci wody i postepować zgodnia z instrukcjami widnejęcymi na wyświetlaczu podczas fazy instalacji. Aby zmienić twardosci wody w innym momencie, naleź ynescź przyczisk CLEAN/SET
wybrać „USTAWIENIA" i w menu ustawien wybrać „TWARDOSĆ WODY".
1 Na 1 sekunde zanurzyć pasek testowy do pomiaru twardosci wody w szkiance z woda. Wyjać pasek testowy do pomiaru twardosci wody i poczekAAC 1 minute.
2 Sprawdzić, ile kwadracików zmienito kolor na czerwony.
3 Uzyc zielonych przycisków „✔" i „✔", aby wybrać wartosci twardosci do ustawienia zgodnia z poniższa tabela, a nastepnie potwierdzić za pomocapi przycisku „✔".
| Liczba czerwonych kwadracików | Wartosci do ustawienia | Twardosci wody | INTENZA+ |
| ■□□□ | 1 | woda bardzo miękka | A |
| ■□□□ | 2 | woda miękka | A |
| ■□□□ | 3 | woda twarda | B |
| ■□□□ | 4 | woda bardzo twarda | C |
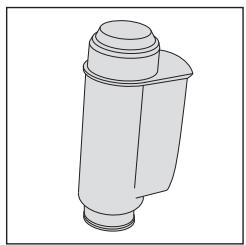
Filtr wody INTENZA+
Zaleca sie zainstalowanie filtra wody INTENZA+, aby ogranicyc tworzenie sie kamienia. Zapewni to dluszsa trwaosc urzadzenia i lepszy aromat kawy w miare upywu czasu.
Woda jest podstawowy składnikiem kazdej kawy. Bardzo wąznaj jest zatem jej odpowiednia filtracja, w profesjonalny spośob.
Filtr wody INTENZA+ zapobiega tworzeniu sie osadów mineralnych, poprawiajacność wody.
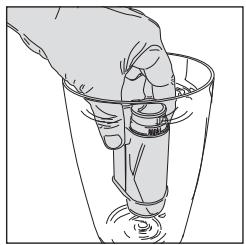
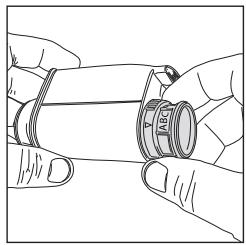
Instalacja filtra wody INTENZA+
Zanurzyć filtr wody INTENZA+ w zimnej wodzie w pozycji pionowej (otworem ku górze) i nacinność delikatnie na brzej, aby wypuplesć pecherzykigowietra.
Wyjac filtr wody INTENZA+ z wody i ustawic go zgodnie ze stwierdzona twardoscią wody (patrz Rozdziel „Pomiar twardosci wody") i okreslic przy podstawie filtra poziom twardosci:
A = woda.miękka - 1 lub 2 kwadraciki
B = woda twarda (standard) - 3 kwadraciki
C = woda bardzo twarda - 4 kwadraciki
Włoźyc filtr INTENZA+ do zbiornika na wode, upewniajac sie, ze włozony jest prawidławowo. Napelnić ponownie zbiornik na wode i włozyc go na sąjsce.
1 Nacisnac przycisk CLEAN/SET a nastepnie przycisk "USTAWIENIA".
2 Wybrać „FILTR WODY" i nacinność przycisk „√".
3 Wybrać „AKTYWUJ" i postepować zgodnia z instrukcjami widnejącymi na wyświetlaczu, aby uaktywnic prawidłowo filtr.
Wañne: Procedure aktywaci filtra., STOP ▷. Aby wznowic procedure aktywaci filtra, naležy ponownie nacisnám, przycisk START/STOP ▷.
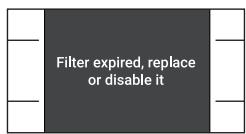
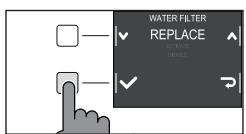
Wymiana filtra wody INTENZA+
Gdy filtr wody INTENZA+ zuzyje sie, na wyświetlaczu pojawi są komunikat ostrzejagawy.
1 Dokonać wymiany lub bezaktywacje, naciskajć przycisk CLEAN/SET , a nastepnie przycisk „USTAWIENIA".
2 Wybrać „FILTR WODY" i nacinność przycisk „√".
3 Wybrać „WYMIEN“, aby wymienić filtr lub „WYLACZ“, sąsi nie zamierza są uzywać filtra. Potwierdzić przycziskiem „√".
Postepowac zgodnie z instrukcjami na wyświetlaczu, aby prawidłowo uaktywnic filtr.

Rodzaje napojów
| Oryginalna receptura | Opis | ||
| Espresso | Kawa | 40 ml | Espresso znane jest na calym świecie jakowa „kawa we włoskim stylu". Serwowane jest w małej filizance, a"Myę typowymi cechami są bogaty i intensywny aromat oraz warstwa naturańje, zwartej pianki. Taki napój jest efektem procesu zaraparzania cieznieniowych z uzyciem goracej wody, krórego pomysłodawca byt w 1938 roku Achille Gaggia. |
| Duża kawa espresso | Kawa | 80 ml | Duża kawa espresso to espresso, krórego czas zaraparzania jest nieco dlustryszzy. Jest bardziej rozcieńca, cechuje są inną intensywność aromatu i wyȩSZA zawartoscią kofeiny. Serwowane jest w srednej filizance. |
| Kawa | Kawa | 120 ml | Kawa to napój przygotowywany z wieksza iloscia wody w porównaniu z espresso. Ma delikatniejszy aromat i serwowana jest w srednio-dużej filizance. |
| Kawa po amerykański | Kawa | 40 ml | Kawa po amerykański to mniej intensywna duża kawa, przygotowywana jak espresso, ale z dodatkiem goracej wody. |
| Woda | 110 ml | ||
| Goręca woda | Woda | 150 ml | Goręcej wodyość uzywać do szybkiego przygotowania herbaty, naparów ziołowych i innych napojów Rozpuszczalnych. |
Wazne: W oryginalnych recepturach wszystkie napoje są ustawione na srednia temperature i srednia intensywnosc aromatu.
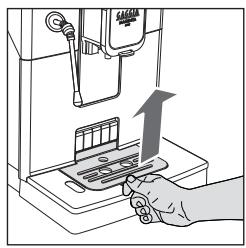
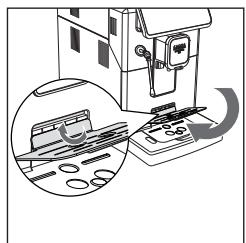
Espresso tray
Niniejsze urzadzenia zaprojektowano z myśla o przyrzadzaniu doskonale smakujacych napojów, od tradcyjngo espresso po licNZne inné dostepne napoje. Jesli pragniesz zasmakować wolskiego espresso zgodnie z tradycja przyrzadzania tego rodzaju napoju, z delikatna warstwa naturalnej piani na powierzchni, zachecamy Cię do korzystania ze spezialnie opracowanej podstawi „Espresso Tray". Podstawka ta pozwala na korzystanie z tradcyjnych filizanek do espresso, mischief zawsze pewnosć,źego poziom;będzie idealny,by powstała Jednolita, zwarta pianka iź przy seinen zaparzaniu otoczenia pozostanie nieskazitelnie czyste.
Podnieść Espresso Tray nad kratkę tacy ociekowej i wędzyc do przywidzianejsczeliny, jak pokazano na rysunku.
Parzenie kawy
Parzenie kawy na bazie kawy ziarnistej
Uwaga: uzywać wyłacznie kawy ziarnistej do espresso. Nie wsypywać do pojemnika na kawe zziornista kawy niedpalonej, kawy liofilizowanej lub rozpuszczalnej, poniewaź mogłyby one uszkodzic urzadzenia.
Wskazówka: aby kawa bya cieplejsza,-ninezy podgrzac flizanki goracwoda.
1 Ustawic Espresso Tray, umiecić filizanké pod dozownikiem kawy, podnieszć lub obnižć dozownik kawy w zaleznosci od Rozmiaru uzywanej filizanki. Nacisnac przycisk HOME aby wejsć do menu napojów.
2 Przewinac poszczegolne strony, aby znalec i wybrac zadany napoj.
3 Po wybraniu zădanego napoju:noza przygotowej dwie filizanki równoc三点 na pomocą przycisku „ ^ (nie dotyczy kawy po amerykański).

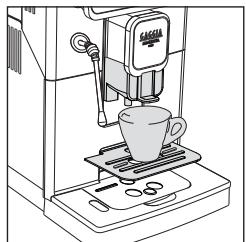
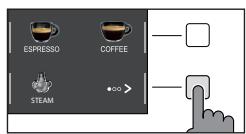
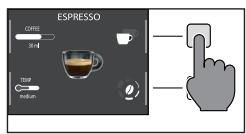

68 Polski
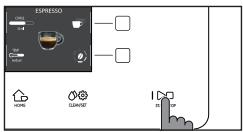
4 Nacisnac przycisk START/STOP l w celu Rozpoczecia nalewania.
Wañne: nalewanie möglich przerwać w dowolnym momencie, naciskajć przycisk START/STOP
Jesli zamierza sie dostosowo ustawenia napoju, nalezy sie zapoznać z rodziazem „Indywidualne ustawenia napojów".
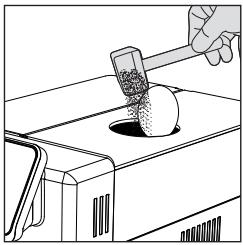
Parzenie kawy na bazie kawy wstepnie zmielonej
Za pomocę spezialnej dołaczonej miarki wsypȩ prawidłową doź do pojemnika na kawe wstepnie zmielona.
1 OtworzyćPokrywkepojemnika na kawe wstepnie zmielona i wsypac jederagna miarke kawy wstepnie zmielonej.
Uwaga: nie wsypywać innych substancji niz kawa wstepnie zmielona, abyNie uszkodzić urzadzenia.
2 Umiesci filizanke pod dozownikiem kawy i wybrac zadany napoj.
3 Naciskać przyczisk „( \bullet ),“ aź do wybrania „).
Wañne: funkća „kawy wstepnie zmielonej“ wykluczama最容易 parzenia dwóch filizanek kawy rónnoczesné, a takze ustawienia aromatu, co jest最容易 wyłacznie w przypadku kawy ziarnistej.
4 Nacisnac przycisk START/STOP ,aby uruchomico parzenie kawy.
Jesli zamierza sie dostosowo ustawenia napoju, nalezy sie zapoznać z rodziazem „Indywidualne ustawenia napojów".
Wañne: nalewanie möglich przerwać w dowolnym momencie, naciskajć przycisk START/STOP ▷□.
Jak spienić mleko
Wskazowka: uzywać zimnégo mleka (o temperaturze okło 5^ ) o zawartosci tłuszczu przyznajmiej 3% w celu zapewnienia optymalnej pianki. Można stosowania zarówno mleko pełnotluste, jak i mleko czȩciwo odṭluszczzone. Ponadto można stosowania mleko odṭluszczone, sojowe lub mleko bez laktozy.
Model z przystawka Pannarello
1 Wlac do dzbanka zimne mleko,do okoto 1/3 povemnosci.
2 Nacisnac przycisk HOME,aby wejsc do menu napojow.
3 Włoźć przystawkte Pannarello do mleka. W menu napojów wybrać „PARA" i nacinność przycisk START/STOP ▷□.
4 Spieniać mleko, przysemuwajc delikatnie dzbanek ruchami obrotowymi do góry i na dól.
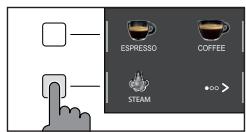
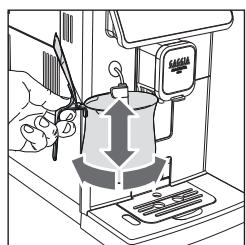
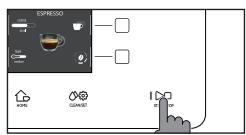
5 Gdy pianka mleka bedzie miała pożadano konsystencje, nacisné przycisk START/STOP ,aby przerwć dozowanie pary.
Przed wyjeciem dzbanka nalezy poczekac, az dozowanie pary calkowicie sie zakonczy.
Wañne: po spienieniu mleka nalezy wycyscić obwód, nalewajć niewielką iloscgoracej wody.

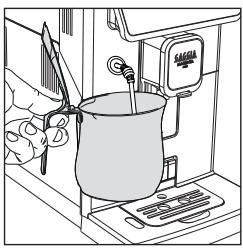
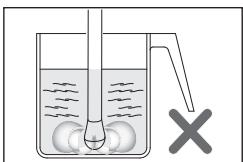
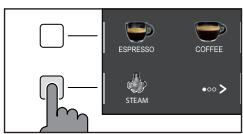
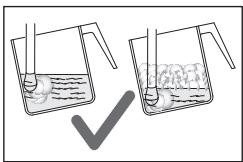
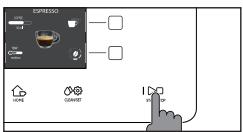
Model z dysza pary
1 Wlac do dzbanka zimne mleko,do okoto 1/3 pojemnosci.
2 Włoźyc wylot dyszy nieco poniżej powierzchni mleka; jestli bedzie zbyt glęboko, mleko nie spieni są; jestli bedzie zbytnio na zewnątrz, powstano duź pecherzegowietra, ktore szybko opadna.
3 Ważne jest, aby dysza nie znajdowa są na samymŚrodku, a blüzej krawędzi dzbanka, pod takim kątem, przy tkórum powstaje jegnstajny wir..
4 Nacisnac przycisk HOME aby wejsc do menu napojow. Wybrać przycisk "PARA" i nacisnac przycisk START/STOP ▷,aby Rozpoczć spienianie mleka.
5 Aby prawidłowo spienić mleko, dysza pary musi caly czas stykać sie z mlekiem, aNie z warstwa spieniona. Dlatego, gdy spieniona warstwa zwieksza swoja objętość, naleź uniesć delikatnie dzbanek, starȩjac sil utrzymać kontakt dyszy z mlekiem, nie dotykąćdna dzbanka. Po uzyskaniu pożadanej ilosci spienionego mleka dyszę pary naleź wsunȩ gȩbiej, aby dobrze podgrzac mleko.
6 Gdy pianka mleka bedzie miała poźadano konsystencje, nacisnć przycisk START/STOP aby przyerwać dozowanie pary. Przed wyjeciem dzbankaNaleź pożec国家标准, aź dozowanie pary calkowicie sie zakończy.
Wañne: zaleca sie zawsze trzymać dlon na wypuklej czȩci dzbanka, aby wyczuć wzrost temperatury tej czȩci mleka, która nie jest spieniona.
Wazne: Aby zagecić spienione mleko, zaleca sie delikatnie stukné dzbankiem o blat i pozostawić na co najmiej 30 sekund. Mleko staje sie wtedy bardziej jegnolite.
Wăźne: po spienieniu mleka naleź y wyczyść obwód, nalewȩć niewielka ilosc goracej wody.
Nalewanie goracej wody
Uwaga: gdy rozpoczyna sie przygotowanie, wazoleński od modelu, z przystawki Pannarello lub dyszy paryMZe pryskac para i goraca woda.
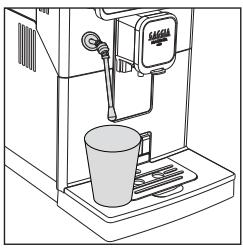
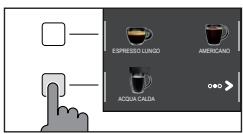
1 Ustawic pojemnik pod przystawka Pannarello lub dysza pary (w zaleznosci od modelu).
2 Nacisnac przycisk HOME, przywinać poszczególne ekrany za pomoczą zielonego przyciscu, i wybrać gorąca wode.
3 Nacisnac przycisk "GORACA WODA". Nastepnie nacisnac przycisk START/ STOP w celu Rozpoczecia nalewania.
Wañne: nalewanie można przerwać w dowolnym momencie, nacziskąć przycisk START/STOP ▷□.
Jesli zamierza sie dostosowo ustawienia napoju, nalezy sie zapoznać z rodz气体 „Indywidualne ustawienia napojów".

Indywidualne ustawenia napojów i zapisywanie ustawien (MEMO) ——
Niniejsze urzadzenie pozwala na zmianę ustawien napojwu wazoleński od własnych preferenci je oraz zapisanie ich (MEMO), nadpisujuć nimiwczesniejsze ustawietenia.
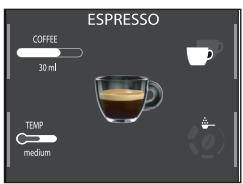
Indywidualne ustawienia napojów
1 Nacisnac przycisk HOME
2 Wybrać swoj napoj.
3 Na ekranie wyświetlane są wzystkie ustawuminium, króre można dostosowej i/ lub wybrać w zaleźnosci od wlasnych preferenciji. W zaleźnosci od typu napojmu矫na dostosowej i/lub wybrać:
- objętość kawy;
- temperature kawy;
- nalewanie do dwóch filizanek na raz;
- uzycie kawy wstepnie zmielonej;
- intensywnosc aromatu (tylko podczas uzywania kawy ziarnistej);
72 Polski
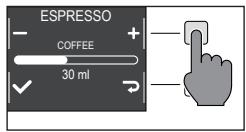
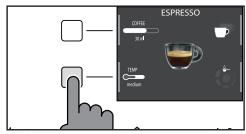

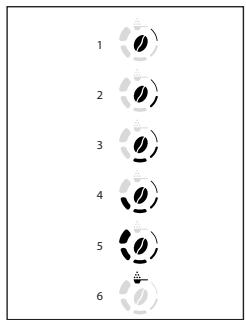
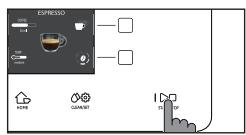
4 Po naciśćciu przycisku „KAWA“ „użyc zielonych przycisków „+“ i „-“, aby ustawić zędana objętość.
Nastepnie nacisć przyczisk „✔“, aby potwierdzić i powrócić do poprzedniago ekranu, na którm;będź wyświetlana nowa ustawiona ilosc.
5 Nacisnac kilkukrotnie przycisk „TEMP 一 ^ 一 ,abyzmienic temperature napoju, wybierajac spośród dostepnych opcj:
- niska;
- srednia;
- wysoka.
6 Nacisnac przycisk „", aby przygotowania dwie filizanki lub przycisk „", aby przygotowania tylko einzaj filizanke. Ilustracja napoju na srodku wyświetlacza wskawe licze wybranych filizanek.
Wazne: z funkcjji tej nie maya korzystać w przypadku opcji AMERICANO i GORACA WODA.
8 Aby zmienić intensywnosć aromatu lub wybrać kawe wstepmie zmielona, naleźny nacisnć przycisk „ Ⓞ“. Można wybrać spośród 5 roźnych poziomów intensywnosci. Przy kaźdorazowym nacisiąciu przycisku „ Ⓞ“ intensywnosć zmienia są o jeder poziom. Na wyświetlaczu widnieje wybrany poziom intensywnosci lub wybor kawy wstepmie zmielonej.
1 Bardzo lekki
2 Lekki
3 Regularny
4 Mocny
5 Bardzo mocny
6 Kawa wstepnie zmielona.
Wañne: funkcja Kawa wstepnie zmielona pozwala na zaparzenie tylko jedernej kawy na raz.
9 Po dostosowani napoju zgodnie z wlasnymi preferencjami smakwymi moins uruchomic jejego nalewanie, nacistajc przycisk START/STOP
10 W przypadku zmiany jakiegokolwiek parametu spośród wymienionych powyzej po zakończeniu nalewania pzapytanie, czy zamierza szapisać recepture z wpwadzonymi zmianami.
Uwaga: nowe zapisane ustawientia nadpisza te z poprzednej receptury.
Wañne: aby przywrócić fabrzcie ustawenia poszczegrólnych receptur,NSEy ponownie wpradowzić i zapisć ustawenia wskazane w punkcie „Rodzaj napoju".
Regulacja stopnia mielenia
Stopien mielenia można regulować za pomoczaPokretłdo regulacji stopnia mielenia w posta w pojemniku na kawe ziarnista. Mlynek ceramicczny zapewnia idealne i jegnolite mielenie ziaren niezbędnych przy przygotowywaniu kaźdej fliżanki kawy. Zachowywny jest wówczas aromat, któr zapewnia zawsze doskonały smak.
Wazne: stopiej mielenia要去 regulowac Jedynie wówczas, kiedy urzadzenia mieli kawe ziarnista. Roznicew smaku;będzie要去 dostrzech po zaparzeniu 2 - 3 fliżanek kawy.
Uwaga: aby uniknac uszkodzenia mlynka, nie nalezy obracać Pokretlem wyboru mielenia wiecej niz o jeder pozycje na raz.
1 Ustawic filizanké pod dozownikiem kawy.
2 OtworzycPokrywkopejemnika na kawe ziarnista.
3 Przygotowejpresso, jak opisano w rozdziale „Parzenie kawy na bazie kawy ziarnistej".
4 Gdy urzadzenie mieli kawe, nacinsqPokretlo regulaqi stopnia mielenia w pojemniku na kawe ziarnista i obracute je o jakno poTozenie na raz w sprawo lub w lewo.
5 Dosteptych jest 5 rożnych stopni mielenia. Im niższy wskaznik, tym smak kawy;będzie silniejszy i pełmiejszy.
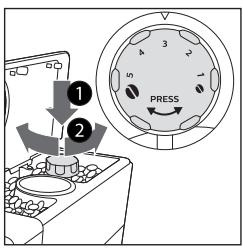
Wazne:
- Mielennie grube: lzejszy smak, przyznaczony do mieszanek ziaren kawy palonych w sposob ciemny (3-5);
- Mielenie drobine: bardziej intensywny smak, do mieszanek ziaren kawy palonych jasno (1-3);
74 Polski
Czyszczenie i konserwacja
Reguläre czyszczenei i konserwacja pozwalaja na urczymanie urzadzenia w optymalnym stanie i gwarantuju zawsze doskonały smak kawy, stały przywykawy oraz doskonało pianke mlecka. Zapoznać są z ponieszność tabela, aby dowiedzieć są, kiedy i jak czyszcie wzystkie wyjmowane czȩci urzadzenia. W celu uzyskania bardziej szczegołowych informacijni sązy przyȩzytać odpowiednia roździaly.
Tabela czyszczenia
| Opis czȩsci | Kiedy czȩscić | Jak czȩscić |
| Przystawka Pannarello | Po użyciu | Wyȩć przystawka Pannarello i przyplułość są pod bieść wodą. |
| Co tydzień | Wyȩć przystawka Pannarello i uzychty oraz wyczyȩscić wszystkie czȩsci pod bieść wodą. | |
| Dysza pary | Po użyciu | Wyczyȩscić dyszcę pary za pomoczą widgotnej sciereczki. W celu dokladyjszego oczyszczenia jejność odkrȩcić wylot i umyć go pod bieść wodą. |
| Blok zaparżajcy | Co tydzień | Wyȩć blok zaparżajcy i umyć go pod bieść wodą. |
| Wazoleżnosci od spoosobu uzytkowania | Patrz rozdzią „Czyszczenie i smarowania bloku zaparżAcego". | |
| Co miesić | Wyczyȩscić blok zaparżajcy za pomoczą pastylek odłuszczejacych Gaggia do usuwania oleistych pozost✕sci po kawie | |
| Taca ociekowa pełna | Kiedy spezialny czerwony wskaznik wystaje poza kratkę tacy ociekowej | Opróznic tace ociekowa i wyczyȩscić są pod bieść wodą. |
| Pojemnik na fusiy | Kiedy wymaga tego urzadzenia | Opróznic pewemnik na fusiy i wyczyȩscić go pod bieść wodą. Upewnić są, są podczas jeg czynnosci urzadzenia jest wączone, są zeciwnym razie pewemnik na fusiy nie zostanie zresetowyany. |
| Zbiornik na wodę | Co tydzień | Wyczyȩscić go pod bieść wodą. |
| Komora kawy wstepnie zmielonej/ przewód wylotowy kawy | Co tydzień | Wyczyȩscić górną czȩć uchwytem lyźki, są pokazano poniȩje. |
Opisczeci
Kiedyczyscic
Jakczyscic
Espresso tray
W zaleznosci od sposobu uzytkowania
Wyjac Espresso Tray i wczysci pod biezacagoda. Można równieź umyć ten element wzymwarce, w gornym koszu.
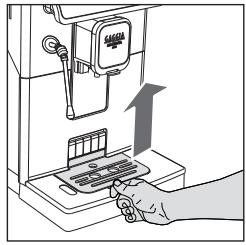
Czyszczenie systemu pary
Czyszczenie przystawski Pannarello
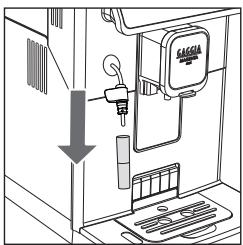
1 Wyjać przystawkę Pannarello oraz uchwyt i przejtukać je pod bieźąc woda.
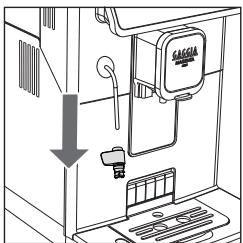
2 Wyczyscicurke wylotu pary za pomocagmiękkiej szmatki.
3 Zmontowac ze soba wzystkie czeci.
Czyszczenie dyszy pary
1 Wyczyscic dysz pary za pomocag wilgotnej sciereczki. W celu dokladyjszego oczyszczenia jej moza odkreci wylot i umy go pod biezac woda.
2 Nacisnac przycisk HOME aby wejsc do menu napojow. Wybrać przycisk "PARA" i nacisnac przycisk START/STOP ▷
Pozwolć parze wyydostawość są przy czego lub dwie sekundy, aby udrożnić otwor dyszy.

Czyszczenie bloku zaparzajęcego
Uwaga: nie myc bloku zaparzajęcego w zmywarce i nie uzywać pląnów do mycia naczn lub innych detergentów, poniewaź mogłyby one spowodowej nieprawidowej;dziefanie bloku zaparzajęcego, co mogłowby być odczuwalne w smaku kawy.
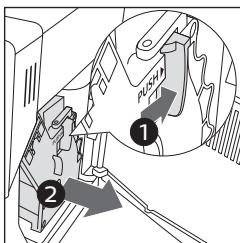
Wyjmowanie bloku zaparzajacego
1 Wylaczyc urzadzenie i odlaczyc kabelzasilajcy.
2 Wyjać tace ociekowa z pojemnikiem na fusy.
3 Otorzyc drzewiczki serwisowe.
4 Nacisná dzwignie PUSH (pchnij) (1) i pociagnć uchwyt bloku zaparzajçego (2), aby wyjac go z urzadzenia.
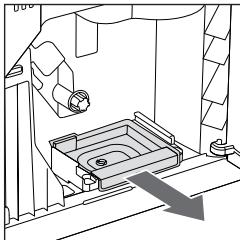
5 Wyjać kasetkę na resztki kawy.
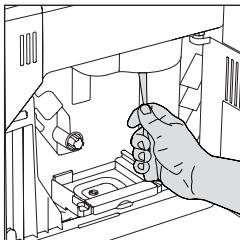
Czyszczenie bloku zaparzajęcgo pod bieźća woda
1 Wyczyscić dokladnie przywod wylotowy kawy uchwytem lyżeczki lub innym zaokraglonym przyrzadem kuchennym.
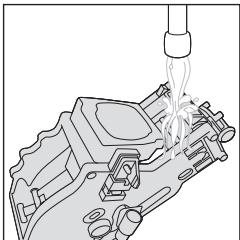
2 Przejukac obficie ciepla wod blok zaparzajcy i kasetkne na resztki kawy. Umyc dokladnie gorny filtr.
3 Pozostawic bloc zaparzajcy do samoczynego wyschniecia.
Wañne: nie suszyc bloku zaparzajęcego szmatkami, aby unikné nagromadzenia sie w是我的 wétrtu wókien.
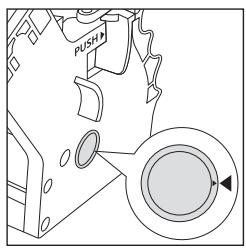
Władanie bloku zaparzajęcego na sąjeść
1 Przed wtozeniem bloku zaparzajacego do urzadzenia nalezy sie upewnico, ze dwa zoIte znaki odniesienia na czeci bocznej Pokrywaja sie. Gdyby tak nie bylo, nalezy:
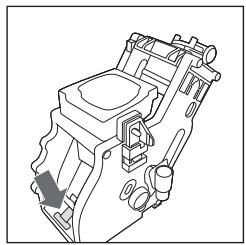
Upewnici, ze dzwignia styka sie z podstawa bloku zarapzajacego.
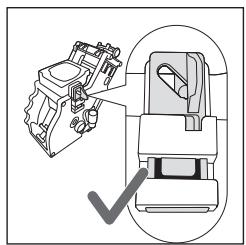
2 Upewnic sie, ze zófthy zaczep blokujacy bloku zaparzajćego znajduje sie w prawidowej pozycji.
Aby prawidłowo ustawic zaczep, naleź pchnić go do góry aź do maksymalnej OSIAGALnej pozycji.
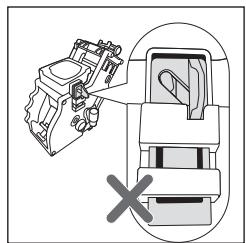
Jesli zaczep jest nadal w pozycji dolnej, oznacza to, ze nie jest on ustawiony prawidlowo.
3 Wlozyć na.), kasetkę na resztki kawy.
4 Włoźyc bloc zaporzacje do urzystzenia wzdędź prowadnic umieszczonych po bokach, dopóki nie zestanie on zablokowej w poźycji, o czym;będzie swiadczy klikniść.
Uwaga: nie naciskać dzwigni PUSH.
5 Zamknac drzwickzki serwisowe.
Czyszczenie bloku zaporzajęcego za pomocapi pastylek do usuwania oleistych pozkostość po kawie
Uwaga: do czyszczenia stosowac wyłucznie pastylki Gaggia do usuwania oleistych pozostañosci po kawie.
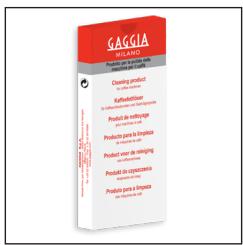
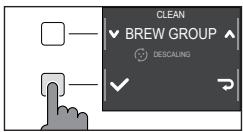
1 Umiescić pojemnik pod dozownikiem kawy.
2 Nacisnac przycisk CLEAN/SET i wybrać widoczny na wyświetlaczu przycisk „CZYSZCZENIE".
3 Wybrać „CZYSZCZ. BLOKU ZAP" i nacznę przycisk „✓", a nastepnie nacznę przyczysk START/STOP >□ w celu roźpoczȩcia procedury czyszczzenia.
4 Postepowac zgodnie z instrukcjami na wyswietlaczu, aby prawidlowo wczysci bloc zakarzajacy.
5 Procedura ta potrwa okofo 5 minut, a zeby ja zwiesic i uruchomic ponownie,UNCTIUPROCTIO
Smarowanie bloku zaparzajęcego
Aby zapewnic opymalne dzialanie urzadzenia, nalezy smarowa bloc zaraprzacy.
Z czestotliwość smarowaniaość są zaopnoć w ponieszciej tabeli.
| Częstotiwość uzytkowania | Liczbabapojjów przyrzadzanych codziennie | Cȩstotiwość smarowania |
| Niska | 1 - 5 | Co 4 miesiȩce |
| Normalna | 6 - 10 | Co 2 miesiȩce |
| Wysoka | >10 | Co miesiȩc |
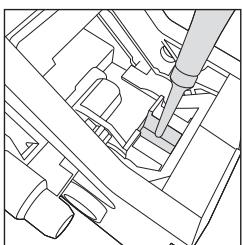
1 Wylączyć urzadzenia i odźczyć kabel zasilajść.
2 Wyjć bloc zarpaczamy i przytepluktć go letnia woda (patrz rozdziaf „Czyszczenie bloku zarpaczȩcego pod bieźća wod”).
3 Nanieszć cienka warstwo smaru z wyposaźenia wokót sworznia wpwadzajacego w czeci dolnej bloku zarparzajacego.

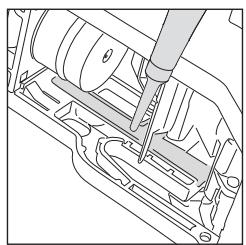
4 Naniesc cienka warstw smaru na prowadnice, po obu stronach (patrz rysunek).
5 Włoźyc bloc zakarzajczy na sąjeść (patrz rozdzią „Wkładanie bloku zaporzajćego na sąjeść").
Wazne: tubki ze smarem mozna uzywać kilkukrotnie.
Odwapnianie
Procedura odwapniania
Gdy wymaga tego urzadzenie, nalezy wykonac和他的 odwapnienie.
Stosować wyłączie rozwów odwapniajacency Gaggia, kędy opracowano w celu zapewniania optymalné gośdania urzadzenia. Stosowanie innych produktów są spowodowy uzzkodzenia urzadzenia i obecnność ich resztek w wodzie. Brak odwapniania urzadzenia spowoduje utrata gwarancji.
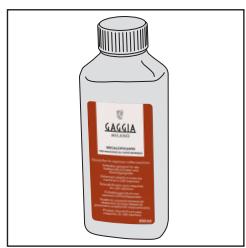
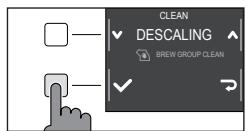
1 Jesli wystepuje, wyjac przystawke Pannarello.
2 Nacisnac przycisk CLEAN/SET i wybrać widoczny na wyświetlaczu przycisk „CZYSZCZENIE".
- Wybrać „ODWAPNIANIE" i - po potwierdzeniu przyciskiem „✓“ - nacinność przycisk START/STOP ▷□, aby uruchomic ten proces.
3 Wyjać tace ociekowa z pojemnikiem na fusiy, opróznic je i umieść ponownie w urzadzeniu.
4 Wyjac i opróznico zbiornik na wode. Nastepnie wyjac filtr INTENZA+, jestli wystepuje.
80 Polski
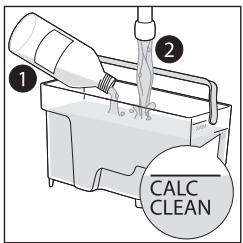
5 Wlac cala butelke roztworu odwapniajacego Gaggia do zbiornika na wode, a nastepnie wypebnic go woda az do poziomu CALC CLEAN. Nastepnie wlozyc go z powrotem do urzadzenia.
6 Umieść duzy pijemnik (1,5 l) pod rurka wylotu pary i dozensnikiem kawy.
7 Postepowac zgodnie z instrukcjami na wyswietlaczu, aby uruchomic procedure odwapniania. Procedure ta trwa oko 25 minut, a polega na cyklu odwapniania i cyklu plukania, podczas ktorych w regularnych odstepach czasu nastepuje wylewanie wody.
8 Po ukończeniu cyklu odwapniania nalezy przypełukac zbiornik i obwó d wody, postepujac zgodnie z instrukcjami na wyświetlaczu.
9 Wlozyć ponownie filtr INTENZA+ do zbiornika na wode.
Wazne: procedure是用来w dowolnym momencie przerwać i wzniewic ponownie, naciskajc przycisk START/STOP ▷□.
Uwaga: gdy aktywna jest procedura odwapniania, nie:noyna wyjmować bloku zaparzajęcego. Poczekáć na zakończenie procesu odwapniania, a sątpnie wyjadć blok zaparzajćy.
Co robić w przyypadku przerwania procedury odwapniania
Z procesu odwapniania można wyjsć przytrzymujuc przyzek kilka sekund przycisk ON/OFF na panelu sterowania. Gdyby procedura odwapniania została przerwana przyd ukończeniem jej, naleź:
1 Opróznic zbiornik na wode i dokladnie go umyć.
2 Napelnić zbiornik na wode bieźąc wód do poziomu CALC CLEAN i ponownie uruchomic urzadzenia. Urzadzenia rozgrzeje są wykona automatyczny cykl płukania.
3 Przed przyrzadzeniem jakiegokolwiek napoju nalezy wykonac ręczny cykl plukania, jak opisano w odpowiednim roździale.
Wazne: jestli procedura nie została doprowadzona do końca, sąwiwie jak najszybciej konieczne;będzie wykonanie kolejnej procedury odwapnia.
Ustawenia rożne
Po naciśćci przycisku CLEAN/SET i wybraniu „USTAWIENIA" na wyświetlaczu bedzie przywróci lub zmieńcie niedźore parametry urzadzenia, takie jak:
jezyk;
- filtr wody;
- czas czuwania;
- Jednostki miary;
-twardosc wody;
- licznik napojów;
- dzwiek przycisków;
- ustawienia fabryczne.
Język
Po wybraniukonyustawianjajezykowotworzysieiistadostepnychjezykow.
Dostepej jezyki
| POLSKI | DUÑSKI | CZESKI |
| ANGIELSKI | GRECKI | SLOWACKI |
| NIEMIECKI | POLSKI | LITEWSKI |
| FRANCUSKI | ROSYJSKI | JAPOŚNSKI |
| HISZPAÑSKI | RUMUÑSKI | KOREANSKI |
| PORTUGALSKI | WęGIERSKI | CHÍNSKI (TRADYCYJNY) |
| NIDERLANDZKI | BUŁGARSKI | CHÍNSKI (UPROSZCZONY) |
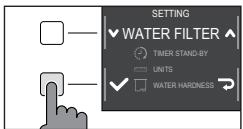
Filtr wody
Po wybraniu opcji „FILTR WODY" postepowac zgodnie z instrukcjami na wyświetlaczu i z opisem w rozdziale „Instalacja filtra wody INTENZA+“ oraz w roździale „Wymiana filtra wody INTENZA+".
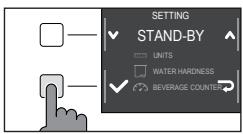
Czas czuwania
Po wybraniu opci „CZAS CZUWANIA"doğan ustawić regulator czasowy na:
- 15 min
- 30 min
- 60 min
- 180 min
82 Polski
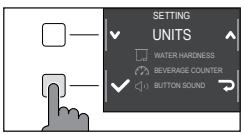
Jednostki miary
Wybierajc opcje „JEDNOSTKI MIARY":
można ustawić jegnstęmiary w „ml“ lub „uncjach".
Twardosc wody
Po wybraniu opcji „TWARDOSÇ WODY" postepowac zgodnie z instrukcjami na wyswietlaczu i z opisem w rozdziale „Pomiar twardosci wody".
Licznik napojów
Dla kaczdego napoju moins wyświetcie licze bfilizanek od momentu pierwszego uruchomienia urzadzenia. Danych tych nie moins zresetować.
Dzwiek przycisków
Ješli przyszkadz dzwiek przycisków,doğan go wyłaczyc, nacistkajac "OFF".
Ustawenia fabryczne
Ustawienia urzadzenia przywróci do wartosci fabrycznych. Urzadzenia zaȩda podwojné potwierdzenia, zanim;będzie można przyzejść dalej.
Znaczenia kodów będów

Ponizej wymieniono niedtore kody bledow, jak moga sie pojawiac na wyswietlaczu, ich znaczenia oraz instrukcje rozwiazania problemow. Jesli wskazane rozwiazania okaza sie nieskuteczne, poniewa z na wyswietlaczu nadal bedzie wyswietlana ikona kodu bledu i urzadzenia nie zacznie dzialać prawidtowo, lub gdyby pojawity sie innate kody bledu, nalezy sie skontaktowa z autoryzowanym centrum obstugi klienla lub z dystrybutorami w swoim kraju. Dane podano na stronie www.gaggia.com lub www.gaggia.it.
| Kod bjędu | Problem | Przyczyna | Mozliwe rozw)ianzie | ||
| 01 | Młynek jest zablokowy. | Przewód wylotowy kawy jest zablokowy. | Wyȩć kabel zasilajacy i bloc zarabz)—y. Wyczy)—cić dokladnie przywoły wylotowy kawy uchwym tyszki. Ponommie w)—z)—y.—z.—urz)—dzenie. | ||
| 03 - 04 | Wystapi)—problem z blokiem zarapz)—cym. | Blok zarapz)—j)—cy jest zabrudzony lub nieprawid)—o nasmarowy. | W)—z)—y.—z.—urz)—dzenie. Wy)—c—y.—z.—urz)—dzenie. Wy)—c—y.—z.—urz)—dzenie. Wy)—c—y.—z.—urz)—dzenie. Wy)—c—y.—z.—urz)—dzenie. Wy)—c—y.—z.—urz)—dzenie. Wy)—c—y.—z.—urz)—dzenie. Wy)—c—y.—z.—urz)—dzenies. | ||
| Blok zarapz)—j)—cy jest ustawiony prawl)—o.—w)—o.—y.—o.—s—we—we—we—we—we—we—we—we—we—we—we—we—we—we—we—we—we—we—we—we—we—we—we—we—we—we—we—we—we—we—we—we—we—we—we—we—we—we—we—we—we—we—we—we—we—we—we—we—we—we—we—we—we—we—we—we—we—we—we—we—we—we—we—we—we—we—we—we—we—we—we—we—we—we—we—we—we—we—we—we—we—we—we—we—we—we—we—we—we—we—we—we—we—we—we—we—we—we—we—we”—z)—y.—z.—urz)—dzenie. | |||||
| W)—z)—y.—z.—urz)—dzenie. Wy)—c—y.—z.—urz)—dzenie. Wy)—c—y.—z.—urz)—dzenie. Wy)—c—y.—z.—urz)—dzenie. Wy)—c—y.—z.—urz)—dzenie. Wy)—c—y.—z.—urz)—dzenie. Wy)—c—y.—z.—uwr)—dzenie. Wy)—c—y.—z.—urz)—dzenie. Wy)—c—y.—z.—urz)—dzenie. Wy)—c—y.—z.—urz)—dzenie. Wy)—c—y.—z.—urz)—dzenie. Wy)—c—y.—z.—urz)—dzenie. Wy)—c—y.—z.—urz)—dzenie. Wy)—c— y.—z.—urz)—dzenie. Wy)—c—y.—z.—urz)—dzenie. Wy)—c—y.—z.—urz)—dzenie. Wy)—c—y.—z.—urz)—dzenie. Wy)—c—y.—z.—urz)—dzenie. Wy)—c—y.—z.—urz)—dzenie. Wy)—c—y.—z.—urz)—dzenie. 05 | Wystapi)—problem w obwodzie wody. | W obwodzie wody znajduje sąpowitrze. | Wy)—i)—z)—y.—z.—pɔnownie zbiornik do urz)—dzenia, kilkukrotnie. Upewnić są z—who"—u"—do urz)—dzenia. Spraw)—c,—z.—komora zbiornika na wode jest cz)—sta. | ||
| W)—z)—y.—z.—urz)—dzenia z.—fliura „INTENZA+“: wy)—c—flitr ze zbiornika na wode i potr)—z.—mim, aby us)—z.—flitra ca)—powitrze. NatestPNie w)—z)—y.—z.—pɔnownie filtr „INTENZA+“ do zbiornika na wode. | |||||
| 14 | Urz)—dzenie jest przygrzane. | PrzyczynMZ—ebyczne | Wy)—z)—y.—z.—urz)—dzenie i)—z)—y.—z.—pɔnownie po 30 minutach. Wy)—c—t)—cz)—no.—2 lub 3 razy. |
84 Polski
Rozwiȩzywanie problemów
W niniejszym rozdziale podsumowano njczestsze problemy, jakie moga wystepować w tym urzadzeniu. Jesli problemu nie uda sie Rozwiacja, korzystajac z podanych poniżej informaciji, naleź wejsć na strone www.gaggia.com lub www. gaggia.it, aby zapoznać są czego zadowanymiptyaniami lub skont⁺tować są z Centrum obś⁺gi klienä będź dystrybutorami w swoim kraju.
| Problem | Przyczyna | Rozwiązanie |
| Urȩdzenia nie wącza sie. | Urȩdzenia nie jest podȩczone. | Sprawdzić,czy kabel zasilajćy jest wȩźony prawnów. |
| Przycisk on/off niem nożwary wystarczȩco naciȩtnę. | Trzymać przycisk on/off naciȩtnę przy bez kila sekund. | |
| Taca ociekowa szybko sie zapiétrnia. | Jest to zupelnie normalne zjawisko. Urȩdzenia wykorzystuje wodę do przyplukiwania obwodu wewétrnzego i bloku zaporzȩcego. C摩擦y wody przyȩpywa przy bez system wewétrNZy bezpośrednio do tacy ociekowej. | Opróznic touc ociekowa,kiedy czerwony wskaznik zacznie wystȩć poza krátke. W celu zbierania wody pochodźćj z procesu pluktania zalecamy ustawuminium pod dozownikiem filizanki. |
| Na wyȩwtlaczu stale widnieje ikona „pełnégo pojemnika na fusi". | Pojemnik na fusi zostaw oprozniorny,kiedy urȩdzenia bylo węćzzone. | Oprózniać zawsze pojemnik na fusi, gdy urȩdzenia jest wȩćzzone. Ješli pojemnik na fusi jest oprozniany, gdy urȩdzenia jest wȩćzzone, wtedy licznik cyklic kawy nie zeruju sie. Wówczas na wyȩwtlaczu widoczna jest wospomniana ikona, nawet ješli pojemnik nie jest pełny. |
| Pojemnik na fusi zostaw ustawiony zbyt szybko. | Poczekić zawsze okola 5 sekund,kiedy ustawia sie na sątecu pojemnik na fusi. Wówczas licznik wyzeruju sie. | |
| Urȩdzenia zȩda oproznienia pojemnika na fusi, chocíaż pojemnik ten nie jest pełny. | Urȩdzenia nie wyzerwoły licznika przy ostatnim oproznienu pojemnika na fusi. | Poczekić zawsze okola 5 sekund,kiedy ustawia sie na sątecu pojemnik na fusi. Wówczas licznik fúsów wyzeruju sie. |
| Oprózniać zawsze pojemnik na fusi, gdy urȩdzenia jest wȩćzzone. Ješli pojemnik na fusi jest oprozniany, gdy urȩdzenia jest wȩćzzone, wtedy licznik cyklic kawy nie zeruju sie. | ||
| Pojemnik na fusi jest zbyt pełny i nie jest wyȩwtlana ikona „pełnégo pojemnika na fusi". | Tace ociekowa wyȩto, nie oprozniąć pojemnika na fusi. | Podczas wyjmowania tacy ociekowej nalezy oproznić rowniez pojemnik na fusi, nawet ješli jest sprawie pusty. W ten spośob spość pojemnik na fusi;będzie mią wustawieniach zerowy poziom i ponownie zacznie prawnów zliczenia fusi kawy. |
| Niemożliwe wyjecie bloku zaporzȩçego. | Blok zaporzȩçfty znejduje sie wNieprawidławym położiu. | Zamknć drzewczki serwisowe. Wyȩćcyć i wȩćcyć polonniewe urȩdzenia. Poczekić, aż na wyȩwtlaczu pojawie sie komunikat informujczy o gotowość urȩdzenia, a nastepnie wyȩć bloc zaporzȩçć. |
| Problem | Przyczyna | Rozwiȩzanie |
| Nie sąna wędźyc bloku zaporzȩćego. | Blok zarapazȩćny znejduje są wieprawidłowym połozenia. | Blok zarapazȩćny nie zostawl ustawiony prawnodlowo na swoim sącie. Upewnić są, ze dzwignia styka są z podstaw bloku zarapazȩćgo i ze haczyk bloku zarapazȩćgo znejduje są w sprawidłowym połozenia. Patrz rozdziel „Wkładanie bloku zarapazȩćgo na sącie". |
| Aby ponownie ustawić ur.§źdenie, danezy wędźć na sącie tace ociekowa z pojemnikiem na fusy. Nie wóladyć bloku zarapazȩćgo. Zamknąć drzewiczki serwisowe, od.§źć kabel zasilania i pod.§źć go ponownie. Nastepnie spreßowć wędźć na sącie blok zarapazȩć y ponownie uruchomici ur.§źdenie. | ||
| Kawa ma moły pianki lub jest wodnista. | Młynek jest ustawIONy na grube mielenie. | Wyregulować młynek na mielenie drobniejsze. |
| Urzadzenia wykonuje proceduure automatycznej regulaci. | Przyrzadzić kilka filizANEk kawy, aby ur.§źdenie wyregulowo są udatyczne. | |
| Przewód wylotowy kawy jest zablokownik. | WycZYScić przywód wylotowy kawy za pomoczą zymiński, jak opisano w roździale „Czyszczenersie bloku zarapazȩćgo pod bieZNACOWI". | |
| Kawa nie jest wystarczȩćo ciepla. | Ustawiona temperatura jest zbyt niska. Sprawdzić ustawienia menu. | Ustawić temperaturé w menu na „MAX". |
| Urzadzenia mieli kawe ziarnista, ale kawa nie jest dozowana. | Młynek jest ustawIONy na zbyt drobne mielenie. | Wyregulować młynek na mielenie grubsze. |
| Dozownik kawy jest zatkany. | ZaropZYc duża kawy wstepnie zmielona, bez dodawania kawy wstepnie zmielonej. | |
| Dysze dozownikka kawy są zatkane. | WycZYScić dysze dozownikka kawy wyciorkiem. | |
| Kawa wypływa powoli lub kropelkami. | Młynek jest ustawIONy na zbyt drobne mielenie. | Wyregulować młynek na mielenie grubsze. |
| Dysze dozownikka kawy są zatkane. | WycZYScić dysze dozownikka kawy wyciorkiem. | |
| Obwód ur.§źdenia jest zablokownik z powodu osadów kamienza. | Wykonac odwapniaie. |
86 Polski
| Problem | Przyczyna | Rozwiązanie |
| Mleko nie spienia są. | Przystawka Pannarello jest zabrudzona. (model z przystawka Pannarello) | WyczyScić przystawka Pannarello, jak opisano w rozdziele „Czyszczenie przystawki Pannarello". |
| Upewnić są, ze wszystkie componenty przystawski Pannarello zostymi zamontowane prawnów. | ||
| Wylot dyszy party jest zablokowy. (model z dysza pary) | Umyć dyszcę pod bieść wodą i wyczyscić obwód, dozuć niewielność ilość gośćj wody. | |
| Uzyty rodzaj mleka nie nadaje są do spieniania. | Wazolechność od rodzaju mleka ilość i gość powstajność pianki mogość好吗)? | |
| Nie da są wędźyc filtrra „INTENZA+”. | Naleź usunȩcgowity powietrze z filtrra. | Poczeczą, są pęcherzyki powietrza wydostaną są z filtrra. |
| Zbiornik zawiera jesteczowe wodę. | Opróznic zbiornik na wodę przyced zaintalowaniem filtrra. | |
| Gumowa uzciełka jest nałowzone na filtr „INTENZA+”. | Sprawdzić opakowanie i nałowźć uzȩczelność na filtr „INTENZA+”. | |
| Nie要去 ukrptywnicy filtrra „INTENZA+”. | JestJużaktrywny filtr. | Urzadzenia wskazuje wykorzystanie filtrra w procentach. Jeśli zamierza są mimo to aktywowej nowy filtr, przystręgość filtra uzywanego, ten ostatni są zaopnej sąpierwu zdezkatywość, jak opisano w punkcie „Wymiana filtrwa wody INTENZA+”. |
| Pod urzadzeniem znejduje są woda. | Taca ociekowa była zbyt piñe i woda wylata są. | Opróznic tace ociekowa, kiedy wskaznik zacznie wystȩłość poza tace. Zawsze oprózniać pewemnik przy uruchomieniem procedury odwapniania. |
| Ekspres jest w trybie DEMO. | Podczas wączania urzadzenia zostroi zacniąta kombinacja przycisków (HOME - CLEAN/SET - HOME - CLEAN/SET). | Naleź ekspres wączyć i wączyć ponownie przyciskiem ON/OFF na panelu sterowania. |
Akcesoria GAGGIA
Kawa i akcesoria dostepne są w autoryzowanych salonach (Włochy) lub u dystrybutorów w poszczególnych krajach.
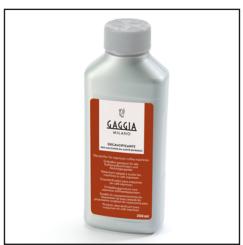
Odwapniacz
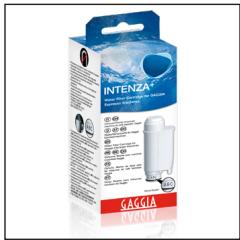
Filtr wody INTENZA+
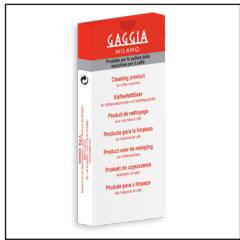
Pastylki odftusczajace





Gama kawy ziarnistej i zmielonej: 100% Arabica / Intenso / Bezkofeinowa
Dane techniczne
| Napiȩcie nominale - Moc nominalna - Zasilanie | Patrz tabliczka umieszczona po wewétrznaj stronie drzwiczek serwisowych |
| Material obudowy | Tworzywo termoplastyczne |
| Wymiary | 224 x 357 x 435 mm |
| Masa | 7,6 kg |
| Długość kabla | 1200 mm |
| Panel sterowania | Przedni |
| Zbiornik na wodę | 1,8 litra - wyjmownik |
| Pojemnosć pojemnika na kawe ziarnista | 250 g |
| Pojemnosć pojemnika na fusy | 15 |
| C)iśnienie pompny | 15 barów |
| Bojler | Bojler ze stali niedzewnej |
| Urzejdenia zabezmieczajAce | Bezmiecznik termiczny |

GAGGIA S.p.A. reserves the right to make any necessary modification.
GAGGIA S.p.a. behoudt zich hetrecht voor om alle wijzigingen die zij moodzakelijkacht aan te brengen.
GAGGIA S.p.a. zastrzega soste sprawo do wpwadzania dowolnych zmian.

COD 421946502411 -Rev.03-19/04/21
GAGGIA S.p.A.
Sede Amministrativa/AdminISTRATIVE Office
Via Torretta, 240
40041 Gaggio Montano - Bologna - Italia
+39 0534 771111 / Fax +39 0534 31025
Capitale Sociale Euro 104.000 i.v.
REA MI1387376 - R.I. Cod.Fisc. 02069680367
Part. IVA : IT-13054780153
www.gaggia.it
www.gaggia.com
GAGGLA
MILANO


- GAGGIA
- GAGGIA MAGENTA
- ENGLISH
- NEDERLANDS
- POLSKI
- First installation / Eerste installment / Pierwsza instalacja
- Contents
- English
- Machine overview (Fig.2)
- Steam wand version
- Classic pannarello version
- Control panel and display
- Control panel overview (Fig. 1)
- Multifunction buttons
- First installation
- Manual rinse cycle
- Measuring water hardness
- INTENZA+ water filter
- English
- Installing the INTENZA+ water filter
- Replacing the INTENZA+ water filter
- Types of beverage
- English
- Espresso tray
- Coffee Brewing
- Brewing coffee using coffee beans
- Brewing coffee using pre-ground coffee
- English
- How to Froth Milk
- Model with the classic pannarello
- Model whith the steam wand
- Dispensing hot water
- Customising beverages and saving settings (MEMO)
- Beverage Customisation
- Coffee grind settings
- Note:
- Cleaning and maintenance
- Cleaning the steam system
- Cleaning the classic pannarello
- Cleaning the steam wand
- Cleaning the brew group
- Removing the brew group
- Cleaning the brew group under running water
- Reinserting the brew group
- English
- Cleaning the brew group with cleaning tablets for the removal of oily coffee residues
- Lubricating the brew group
- Dscaling
- Dscaling procedure
- English
- What to do if the descending process is interrupted
- Other settings
- Language
- Water filter
- Stand-by Time
- Units
- Water hardness
- Beverage counter
- Button sound
- Factory settings
- Error code key
- Troubleshooting
- GAGGIA accessories
- Technical specifications
- Netherlands
- Inhoudsopgave
- Overzicht van de machine (afb. 2)
- Versie stoompijpje
- Versie Klassieke Pannarello
- Controlepaneel en display
- Overzicht van het contrôlepaneel (afb. 1)
- Multifunctietoetsen
- Eerste installment
- Handmatige spoelcyclus
- Meting van de waterhardheid
- Waterfilter INTENZA+
- Installatie van het waterfilter INTENZA+
- Vervanging van het waterfilter INTENZA+
- Type drank
- Koffieafgifte
- Afgithe van koffie met koffiebonen
- Nederlands
- Afgithe van de koffie met voorgemalen koffie
- Hoe melk opschuimen
- Model met de Klassieke Pannarello
- Netherlands
- Model met stoompijpje
- Afgithe van heet water
- Aanpassing van de dranken en opsga van de instellingen (MEMO)
- Aanpassing van de dranken
- Netherlands
- Aanpassing van de maalfijnheid
- Opmerking:
- Reiniging en onderhoud
- Beschrijving deel
- Wannerreinigen
- Hoe reinigen
- Reiniging van het stoomsystem
- Reiniging van de Klassieke Pannarello
- Reiniging van het stoompijpje
- Reiniging van de zetgroep
- Verwijdering van de zetgroep
- Reiniging van de zetgroep onder stromend water
- Herplaatsing van de zetgroep
- Netherlands
- Reiniging van de zetgroep met tabletten om de olieachtige resten van de koffie te verwijderen
- Invetten van de zetgroep
- Ontkalking
- Frequentie van de ontkalking
- Netherlands
- Wat te doen in geval van onderbreking van de ontkalkingsprocedure
- Verschillende instellingen
- Taal
- Waterfilter
- Stand-by hijd
- Netherlands
- Meeteenheid
- Waterhardheid
- Drankenteller
- Toetsgeluid
- Standaard instellingen
- Betekenis van de foutcodes
- Oplossing van problemen
- Accessoires GAGGIA
- Technische gegevens
- Polski
- Spis tresci
- Głowne elementy urzadzenia (Rys. 2)
- Wersja z dysza pary
- Wersja z przystawka Pannarello
- Polski
- Panel sterowania i wyświetlacz
- Głowne elementy panelu sterowania (Rys. 1)
- Przyciski wielofunkcyjne
- Pierwsza instalacja
- Ręczny cykl plukania
- Pomiar twardosci wody
- Filtr wody INTENZA+
- Instalacja filtra wody INTENZA+
- Wymiana filtra wody INTENZA+
- Rodzaje napojów
- Parzenie kawy
- Parzenie kawy na bazie kawy ziarnistej
- Polski
- Parzenie kawy na bazie kawy wstepnie zmielonej
- Jak spienić mleko
- Model z przystawka Pannarello
- Model z dysza pary
- Nalewanie goracej wody
- Indywidualne ustawenia napojów i zapisywanie ustawien (MEMO) ——
- Indywidualne ustawienia napojów
- Polski
- Regulacja stopnia mielenia
- Wazne:
- Polski
- Czyszczenie i konserwacja
- Opisczeci
- Kiedyczyscic
- Jakczyscic
- Czyszczenie systemu pary
- Czyszczenie przystawski Pannarello
- Czyszczenie dyszy pary
- Czyszczenie bloku zaparzajęcego
- Wyjmowanie bloku zaparzajacego
- Czyszczenie bloku zaparzajęcgo pod bieźća woda
- Władanie bloku zaparzajęcego na sąjeść
- Czyszczenie bloku zaporzajęcego za pomocapi pastylek do usuwania oleistych pozkostość po kawie
- Smarowanie bloku zaparzajęcego
- Odwapnianie
- Procedura odwapniania
- Polski
- Co robić w przyypadku przerwania procedury odwapniania
- Ustawenia rożne
- Język
- Filtr wody
- Czas czuwania
- Polski
- Jednostki miary
- Twardosc wody
- Licznik napojów
- Dzwiek przycisków
- Ustawenia fabryczne
- Znaczenia kodów będów
- Polski
- Rozwiȩzywanie problemów
- Akcesoria GAGGIA
- Dane techniczne
- GAGGIA S.p.A.
- Sede Amministrativa/AdminISTRATIVE Office
Marque : GAGGIA
Modèle : MAGENTA PLUS
Catégorie : Machine à café