
RTS III - Appareil photo reflex CONTAX - Notice d'utilisation et mode d'emploi gratuit
Retrouvez gratuitement la notice de l'appareil RTS III CONTAX au format PDF.

| Type de produit | Appareil photo reflex 35 mm à obturateur plan focal |
| Dimensions | 156 × 121 × 66 mm (L × H × P) |
| Poids | 1150 g (sans pile) |
| Alimentation | 6 piles alcalines 1,5 V (AA) ou 6 accumulateurs Ni-Cd 1,2 V (AA) ou 1 pile lithium 6 V (2CR5) |
| Monture d'objectif | Contax/Yashica MM |
| Vitesses d'obturation | Auto : 1/8000 à 32 s ; Manuel : 1/8000 à 4 s, B, X (1/125 et 1/250 s) |
| Modes d'exposition | Priorité diaphragme (Av), priorité vitesse (Tv), manuel (M), pose B, flash TTL, flash TTL avec pré-éclair |
| Système de mesure | TTL pondérée centrale (EV 0~21) ou spot (EV 3~21) (ISO 100, f/1,4) |
| Sensibilité film | Automatique DX : ISO 25~5000 ; Manuel : ISO 6~6400 |
| Modes d'entraînement | Vue par vue (S), continu bas (CL ~3 img/s), continu haut (CH ~5 img/s), retardateur (2 ou 10 s), exposition multiple |
| Flash intégré | Non, griffe accessoire avec contact TTL et synchronisation X |
| Viseur | Pentaprisme à hauteur d'œil, champ 100%, grossissement 0,74x (50 mm), correction dioptrique intégrée (+1 à -3 D) |
| Écran de visée | Strier horizontal/microprisme (FV-1), interchangeable (FV-2 à FV-5 en option) |
| Chargement film | Automatique, amorce repérée orange, compteur remise à zéro automatique |
| Remontoir film | Motorisé, fin de film avec amorce hors cartouche, possibilité de rembobinage en cours de pellicule |
| Fonctions spéciales | Système RTV (maintien du film par aspiration), mémorisation AE, bracketing automatique (A.B.C.), pré-éclair TTL, miroir relevable |
| Dateur intégré | Oui, dans le dos amovible, impression entre les vues, pile lithium CR2025 |
| Entretien et nettoyage | Ne pas toucher le rideau d'obturation ; utiliser une soufflette et une brosse douce pour le capteur et l'objectif ; éviter l'humidité et la chaleur ; nettoyer l'extérieur avec un chiffon doux |
| Sécurité | Circuit de protection du micro-ordinateur ; retirer les piles en cas d'inutilisation prolongée ; ne pas jeter les piles au feu |
| Pièces détachées et réparabilité | Écrans de visée interchangeables, verres correcteurs dioptriques de type FM, courroie, œilleton, télécommandes mécaniques et électriques |
| Informations générales | Fabriqué par Kyocera Corporation, Japon ; notice en plusieurs langues ; usage avec objectifs Carl Zeiss recommandé |
FOIRE AUX QUESTIONS - RTS III CONTAX
Questions des utilisateurs sur RTS III CONTAX
0 question sur cet appareil. Repondez a celles que vous connaissez ou posez la votre.
Poser une nouvelle question sur cet appareil
Téléchargez la notice de votre Appareil photo reflex au format PDF gratuitement ! Retrouvez votre notice RTS III - CONTAX et reprennez votre appareil électronique en main. Sur cette page sont publiés tous les documents nécessaires à l'utilisation de votre appareil RTS III de la marque CONTAX.
MODE D'EMPLOI RTS III CONTAX
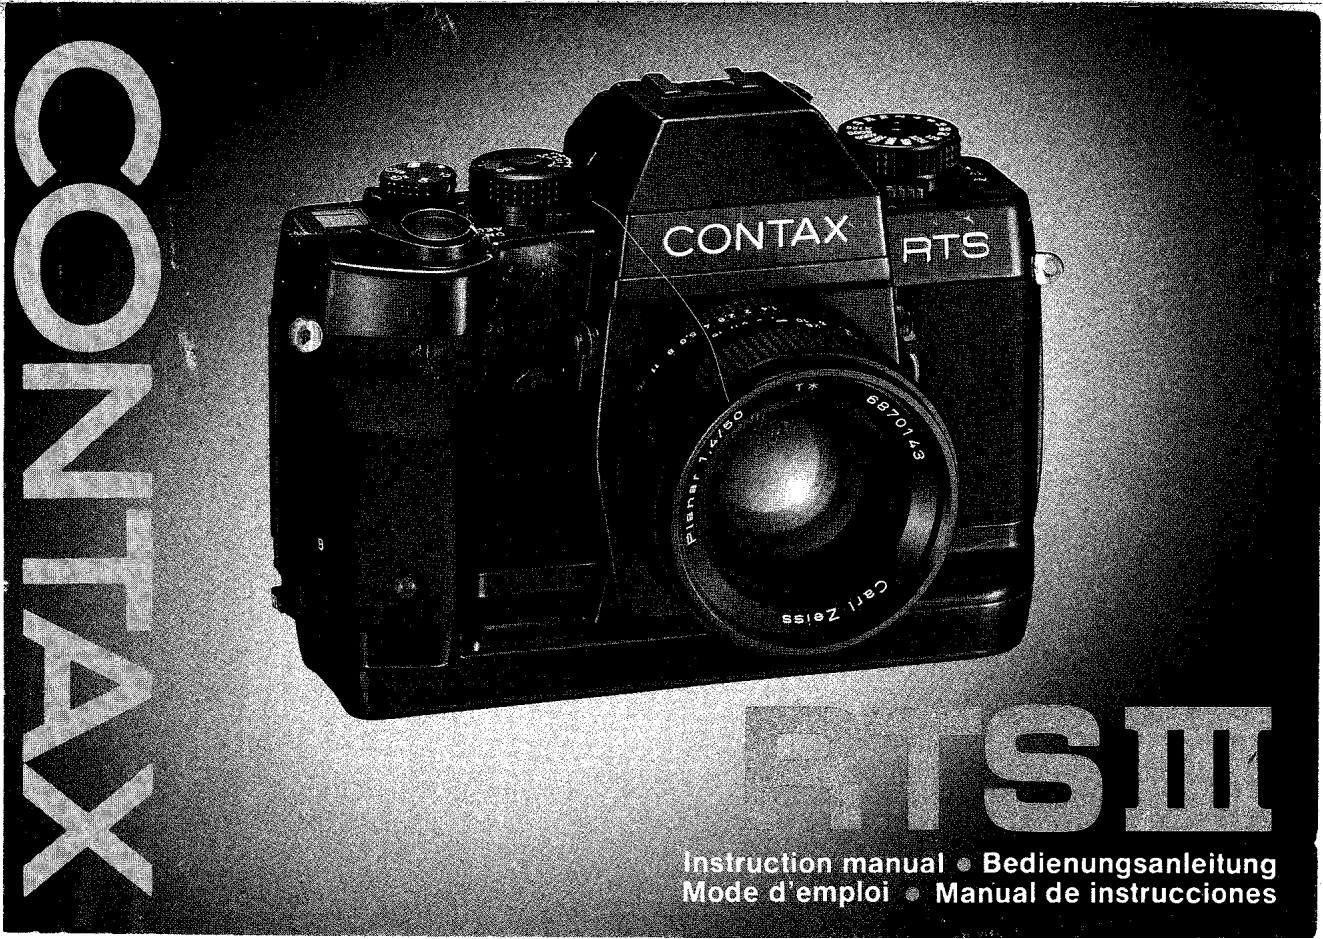
Thank you for your purchase of a Contax RTS III. Based on the "Real Time" concept of the Contax RTS series, this Contax camera of the highest class offers, in addition, more sophisticated features such as ultrafast 1/8000 sec. shutter speed, RTV (Real Time Vacuum) system, TTL pre-flash capability, and narrow-area spot metering.
To make full advantage of its functions and capabilities, please read this manual carefully through before using the camera so that you can understand them well and use it correctly.
This manual uses a multi-mode Planar T* 50mm F1.4 (MM) lens equipped on the camera for explaining its operating procedures. However, you can also use it in the same way as described in this manual when it is equipped with other multi-mode Carl Zeiss interchangeable lenses.
Wir danken Ihnen, daß Sie sich für die Contax RTS III entschieden haben.
Auf der Grundlage des Echtzeitkonzeptes der Contax RTS-Serie bietet Ohnen diese Contax-Kamera der hochsten Güteklasse zusätzliche fortschrittliche Merkmale, u.a. eine ultrakurze Verschlußzeit von 1/8000 Sek., ein RTV-System (Real Time Vacuum), TTL-Vorblitz-Lichtmessung und Engbereichs-Spotmessung.itte lessen Sie diese Bedienungsanleitung vor Inbetriebnahme der Kamera aufmerksam durch, damit Sie mit allen Funktionen vertraut werden und optimalen Gebrauch von ihren Mänglichkeiten machen konnen.
Die Erklarungen dieser Bedienungsanleitung gehen davon aus, daß ein Mehrbetriebsarten-Objektiv (MM) Planar T* f1,4/50 mm an der Kamera angesetzt ist, noch gelten die gleichen Bedienungsverfahren auch für alle anderen Mehrbetriebsarten-Wechselobjektive von Carl Zeiss.
Name of Parts 8
Basic Steps 12
Basic Operation Before Shooting
Mounting and Dismounting the Lens 18
Loading the Batteries 20
- Camera Functions and Applied Techniques
Selecting the Exposure Mode 58 Aperture-priority Auto Exposure 62 Shutter-speed-priority Auto Exposure 64 Manual Exposure 72 Bulb Exposure 74 Metering System 78 Exposure Compensation 82 < 1> Using the Exposure Compensation Dial 82 < 2> Using the AE Lock 86 < 3> Using the A.B.C. Mode (Automatic Bracketing Control) 90 Depth of Field 96 Using the Self-timer 100 Multiple Exposure 102 Flash Photography 104 Mirror-up Lever/Release Socket 122 Infrared Compensation Mark 124 Printing the Date or Time 126 Camera Care and Precautions 130 Dedicated Accessories 134 Specifications 142  Exposure Compensation Dial Film Speed Window Shutter Release Drive Mode Selector Dial Display Panel Main Switch A.B.C. Lever Strap Lug Exposure Check Button Cable Release Socket for Bulb Exposure Rewind Lever Vertical-position Shutter Release Lock Vertical-position Shutter Release Self-timer LED Accessory Shoe Dedicated-flash Contact Direct X-contact Diopter Adjuster Shutter Speed Dial Shutter Speed Dial Lock Release Button Exposure Mode Selector Lever Aperture Stop-down Button Metering Mode Selector Lever Lens Index Screen Release Claw Mirror Up Lever Lens Release Button   Viewfinder Eyepiece Eyepiece Ring Release Socket Sync Terminal Exposure Mode Lock Release Button Film Check Window Camera Back Release Knob Dating-unit Battery Compartment Cover Eyepiece Shutter Lever Tripod Socket Shutter Curtain Film Mounting Spindle DX Contact Film Chamber Data-back Contact Eyecup Pre-flash Lever Date Set Button Date Select Button Date Mode Button Date Display window Battery Compartment Cover Locking Knob Sprocket Spool Film Pressure Plate RTV Suction SlitBasic Steps/Grundlegendes Verfahrens Etapes de base/Pasos basics
 1 Load the batteries. 1 Legen Sie die Batterien ein. 1 Mettez les piles en place. 1 Cargue las pilas.  2 Set the main switch to "ON". 2 Schalten Sie den Hauptschalter ein ('ON'). 2 Placez le commutateur principal sur "ON". 2 Ajuste el interruptor principal en "ON".  3 Set the film speed to "DX" with the exposure compensation dial. 3 Stellen Sie die Filmmempfindlichkeit mit dem Belichtungskorrekturring auf "DX" ein. 3 Reglez la sensibilité du film sur "DX" avec le cadran de compensation d'exposition. 3 Ajuste la velocidad de lapellicula a "DX" con el aro de compensacion de exposacion.  4 Load film, pull out its tip as far as the orange "mark and place it on the spool. 4 Legen Sie den Film ein, ziehen Sie den Filmanfang bis zur orangefarbenen Marke "aus der Patrone und legen Sieihn auf die Filmtransportrolle. Chargez un film, extraire son amorce jusqu'à la marque orange " et place-le sur la bobine. 4 Cargue la pellicula, tire hacía fuera de su punta hasta la marca naranja “...” y colóquela en el carre.  5 Set the drive mode Selector Dial to "S", "CL" or "CH". 5 Stellen Sie den Filmtransport-Wahlring auf "S", "CL" oder "CH". 5 Reglez le cadran de selection de mode d'entrainment sur "S", "CL" ou "CH". 5 Ajuste el aro del selector del modo motorizzato a "S", "CL" o "CH".  #
Aperture-priority auto exposure
(see page 62)Belichtungsautomatik mit Blendenvorwahl
(Siehe Seite 63.)Exposition automatique à priorité au diaphragme
(voir page 63)Exposión automatica con prioridad de abertura
(vea la pagina 63)  6 Set the exposure mode selector lever to "Av". 6 Stellen Sie den Belichtungs-betriebsarten-Wahlschieber auf "Av". 6 Placez le levier de selection de mode d'exposition sur "Av". 6 Ajuste la palanca del selector del modo de exposión a "Av"  7 Set the aperture and shoot. 7 Stellen Sie das Objektiv auf den gewürschten Blendenwert ein und machen Sie die Aufnahme. 7 Reglez le diaphragme et déclenchez. 7 Ajuste la abertura y dispare.Shutter-speed-priority auto exposure
(with MM type lenses only) (see page 64)Belichtungsautomatik mit Verschlußzeitenvorwahr
(nur bei Verwendung von Objektiven mit MM-Anschluß) (Siehe Seite 65.)Exposition automatique a priorite à la vitesse
(avec objectifs de type MM seulement) (voir page 65)Exposión automatica con predominada de velocidad del obturador
(sólo con objetivo del tipo MM) (vea la páginca 65)T
 6 Set the exposure mode selector lever to "Tv" and set the lens to its minimum aperture (green). 6 Stellen Sie den Belichtungs-betriebsarten-Wahlschieber auf "Tv" und dass Objektiv auf denkleinsten Blendenvert ein. 6 Placez le levier de selection de mode d'exposition sur "Tv" et reglez l'objet sur son ouverture maximum (vert). 6 Ajuste la palanca del selector del modo de exposión a "Tv" y ajuste el objetivo a su abertura minima (verde).  7 Set the shutter speed and shoot. 7 Stellen Sie die gewünschte Verschlußzeit ein und machen Sie die Aufnahme. 7 Reglez la vitesse d'obturation et déclenchez. 7 Ajuste la velocidad del obturador y dispare.Shutter-speed-priority auto exposure
(with MM type lenses only) (see page 64)Belichtungsautomatik mit Verschlußzeitenvorwahr
(nur bei Verwendung von Objektiven mit MM-Anschluß) (Siehe Seite 65.)Exposition automatique a priorite à la vitesse
(avec objectifs de type MM seulement) (voir page 65)Exposión automatica conprioridad de velocidad delobturator
(sólo con objetivo del tipo MM) (vea la páginca 65)    6 Set the exposure mode selector lever to "Tv" and set the lens to its minimum aperture (green). 6 Stellen Sie den Belichtungs-betriebsarten Wahlschieber auf "Tv" und das Objektiv auf denkleinsten Blendenvert ein. 6 Placez le levier de selection de mode d'exposition sur "Tv' et reglez l'objetif sur son ouverture maximum (vert). 6 Ajuste la palianca del selector del modo de exposacion a "Tv" y ajuste el objetivo a su abertura minima (verde). 7 Set the shutter speed and shoot. 7 Stellen Sie die gewünschte Verschlußzeit ein und machen Sie die Aufnahme. 7 Reglez la vitesse d'obturation et déclenchez. 7 Ajuste la velocidad del obturador y dispare.Attach the Strap
(standard accessory) Attach the strap as shown in the illustration. Anbringen des Tragriemens (Standardzubohor) Bringen Sie den Tragriemen wie in der Abbildung gezeigt an. Fixation de la courrole ( accessories standard) Fixez la courroie comme indiquedans I'llustration. Unión de la correa (accesorio estandard) Una la corea como se muestra en la ilustracion. Attaching the Eyecup F-4
(standard accessory) ① Remove the eyepiece ring by turning it as shown. ② Attach the Eyecup to the eyepiece and fix the eyepiece ring again in place by screwing it in.Anbringen der Augenmuschel F-4 (Standardzubehör)
① Drehen Sie den Okulrarring wie gezeigt, umihn zu externen. ② Bringen Sie die Augenmuschel am Okular an und schrauben Sie den Okulrarring wieder ein.Fixation de I'oeilleton F-4 (accessoire standard)
① Retirez la bague de l'oeilleton en la tournant comme indiqued. Fixez l'oculaire sur I'oeilleton et fixez la bague de I'oeilleton de nouveau en place en la vissant.Unión del marco del ocular F-4 (accessorio standard)
Extraja el anillo del ocular girandolo como se muestra. ② Una el marco del ocular en el ocular y fije el anillo del ocular en su lugar enroscándolo. 1  ②  Basic Operation Before Shooting Vorbereitungen vor dem Fotografieren Opération de base avant la prise de vues Operación Basics antes del disparoMounting and Dismounting the Lens
< Dismounting the Lens>
While pressing in the lens release button, turn the lens counterclockwise as far as it will go and pull it out toward you. After dismounting the lens from the camera, protect the lens with the rear cap, and the camera with the body cap. - Do not touch the lens surface and camera inside with your fingers when attaching and detaching the lens. - Avoid direct sunlight when changing the lens with film loaded in the camera.  All mechanisms of the Contax RTS III including the shutter, film winding and rewinding mechanism are battery operated. It will not operate without batteries. 1 Erect the battery compartment cover locking knob, turn it in the direction of the arrow (the mark “ ” will move from “ ” to “ ”), then remove the battery compartment cover. 2 Insert the batteries with the plus and minus ends correctly, as illustrated inside the battery compartment. The camera will not operate if the and ends are wrong.  - The batteries that come with the camera are sample batteries that can be used only for testing the camera operation. Use the following batteries depending on the application. ① Six 1.5V alkaline batteries (AA size) Recommended for general use. ② Six 1.2V Ni-Cd batteries (AA size) Recommended especially for shooting in cold weather. ③ One 6V lithium battery (2CR5) Recommended when you are to use the same battery for a long time, because of its low natural discharge. It is also good as a spare battery to take with you on a trip. However, it is not recommended for use at low temperatures because it has a lower voltage than other batteries.  3 Fit the guide pin on the camera into the fixing hole in the battery chamber cover and replace the cover. Then fix it in place by turning the locking knob in the direction of the arrow as far as it will go (the mark “ ” move from “ ” to “ ”).  In ON position/Position EIN Position ON/En la posicón ON  In OFF position/Position AUS Position OFF/En la posicion OFFThe main switch has three positions: "OFF", "ON", and "AEL" (AE lock). OFF: To set the main switch to OFF, turn it so that the red dot is concealed. At OFF, the camera's power switch will turn off. If you are not using the camera, set the main switch at OFF to prevent tripping the shutter by mistake. ON: Turn the main switch so that the dot on it comes opposite "ON". At ON, the camera's power switch will turn on. AEL: Turn the main switch so that the dot it comes opposite "AEL". At AEL, exposure is locked. This AE lock is useful for shooting in backlight or continuous shooting of a moving object at a fixed exposure. - For details on the AE lock, see page 86. 
Diopler Adjustment
This camera has a built-in diopter adjustment unit. To adjust the viewfinder eyepiece to your eyesight, lift up the diopter adjuster and turn it until the circle in the center of the viewfinder appears clear. The adjustable range is +1 -3 diopters. After adjustment, push in the diopter adjuster. - If you cannot adjust with the camera's built-in diopter adjuster, use the optional FM type diopter corrector lenses. See page 136.  You can set the film speed in two ways: automatic setting with DX film and manual setting.Note on the shutter curtain:
The shutter curtain is a precision part. Never touch it with your finger or strike it with the film tip. When the film tip lies on the shutter curtain, in particular, never trip the shutter. - Take care not to touch or contaminate the DX contacts and data back contact. Always load and unload film in subdued light.  S .... Single-frame Shooting
Each time the shutter release is depressed, the camera will expose one frame, wind the film for the next shot and stop winding.CL and CH .... Continuous Shooting
As long as the shutter release is depressed, you can take pictures in succession at a rate of up to about three frames/sec. (CL) or about five frames/sec. (CH). (The frame rate will differ with the shutter speed and the conditions of batteries in the camera.)2 and 10 .... Self-timer Shooting
You can take picture with self-timer with a delay of 2 or 10 seconds. For details, see page 100....Multiple Exposure
See page 102.Frame rates with different batteries
(shutter speed 1/250 or faster, ISO 32 or higher)Aufnahmegeschwindigkeiten bei verschiedenen Batterien
(VerschluBzeit 1/250 Sek. oder kürzer, ISO 32 oder hoher)Fréquences de photos avec les différents types de piles
(vitesse d'obturation 1/250 ou plus, ISO 32 ou plus)Margen de fotogramas con pilas différentes
(Velocidad del obturador de 1/250 o mayor, ISO 32 o mayor)| Battery Batterietyp Pile Pilas | Drive mode Aufnahmebetriebsart Mode d'entrainment Modo motorizzato | |
| CL | CH | |
| Alkaline batteries Alkalibatterien Piles alcalines Pilas alcalinas | About 3 frames/sec. ca. 3 Bilder/Sek.Environ 3 photos/sec. Unos 3 fotogramas/seg. | About 5 frames/sec. ca. 5 Bilder/Sek.Environ 5 photos/sec. Unos 5 fotogramas/seg. |
| Ni-Cd batteries NiCd-Akkus Piles Ni-Cd Pilas de Ni-Cd | About 3 frames/sec. ca. 3 Bilder/Sek.Environ 3 photos/sec. Unos 3 fotogramas/seg. | About 4.5 frames/sec. ca. 4,5 Bilder/Sek.Environ 4,5 photos/sec. Unos 4,5 fotogramas/seg. |
| 2CR5 | About 2 frames/sec. ca. 2 Bilder/Sek.Environ 2 photos/sec. Unos 2 fotogramas/seg. | About 3.5 frames/sec. ca. 3,5 Bilder/Sek.Environ 3,5 photos/sec. Unos 3,5 fotogramas/seg. |
| * With new batteries * Gilt für frische Batterien | * Avec des piles neuves * Con pilas neuenvas | |
< Exposure Check Button>
When the main switch is at ON, depress the exposure check button. The display in the viewfinder will turn on to let you check the exposure. You can also check the exposure by depressing the shutter release halfway.  The shutter speed dial can be used for adjusting the exposure time of the film in the shutter-speed-priority auto exposure and manual exposure modes. It can be set at X125 (1/125 sec.) and speeds from 4 sec. to 1/8000 sec. in 1-step increments. It can be locked only at X125. Shutter speed VerschluZeit Vitesse d'obturation Velocidad del obturador  Shutter speed dial lock release button Verschlußzeitenringsperre-Freibageknopf Bouton de dégagement de verrou de cadran de vitesse d'obturation Boton de liberation del bloqueo del aro de velocidad del obturador To take sharp pictures, the camera must be held steady. Because blurred pictures are most often caused by camera shake, it is recommended to learn how to hold the camera steady by practicing it. Place the camera in the palm of your left hand and hold the distance ring of the lens so that you can operate it with your fingers. Hold the grip with your right hand and put the forefinger lightly on the shutter release. Stick the left elbow to the body, press the camera lightly against your face and look through the viewfinder. Always depress the shutter release very gently. The camera can be held not only in the horizontal position, but also in the vertical position depending on the subject. In any case, study your comfortable camera positioning and practice until you get used to it. It is also good to support your body or camera with a building, tree, and so on.< Microprism Collar and Matte Screen>
Turn the distance ring until the image on the microprism collar or matte screen appears sharp. If the subject is not in sharp focus, the image on the microprism collar will appear grainy and that on the matte screen blurred. - When using a slow lens or taking close-ups with a high magnification, focusing may be difficult. In such cases, use the matte screen to focus.  After the last frame is exposed, the camera will stop winding the film and the upper and lower digits of the number on the exposure counter will blink alternately. 1 With the main switch at ON, turn the rewind lever in the direction of the arrow while pressing in the rewinding lock release button. The film will start rewinding itself. The exposure counter will count down and return to "00" when rewinding is completed and the motor stops. - Be sure to remove your finger from the rewind lever when the rewinding operation has started. The lever will automatically return to its original position. - After rewinding is completed, the film tip will remain outside the cassette. If you want to wind the film back completely into the cassette, repeat the above-mentioned procedure after rewinding was ended.  After making sure the motor has stopped and the exposure counter has returned to "00", open the camera back and unload the film in subdued light. - To rewind the film in the middle of a roll, follow the foregoing steps 1 and 2. - Be sure to unload the film after it has been rewound. After the film has been rewound, the camera will not operate unless the camera back is once opened.< Système RTV (Real Time Vacuum) >
En adoptant une plaque de pression céramique et le système RTV, il est devenu possible de fixer la planité du film d'une manière impossible avec le système conventionnel. Le système RTV peut attirer le film sur la plaque de pression, juste avant le déplacement du premier ridesau de l'obturateur et relâche l'aspiration lorsque le deuxieme ridesau a fini de bouger. Il fonctionne dans les modes "Av", "Tv" et "M". - Le système RTV ne fonctionne pas dans le mode d'exposition prolongée ("B"). - Il ne fonctionne pas non plus, pour des raisons d'économie d'énergie, lorsque la marque d'advertissement des piles ("<") s'allume. Camera Functions and Applied Techniques
Kamerafunktionen und Aufnahmetechniken
Functions de l'appareil et techniques appliquées
Funciones de la CAMERA y Tecnicas aplicadas
Selecting the Exposure Mode
You can choose the following exposure modes depending on your shooting object and application. Av: Aperture-priority Auto Exposure
If you choose your desired aperture, the camera will automatically select the shutter speed suited for it to provide correct exposure. This mode is useful for taking pictures by utilizing the lens depth of field.Tv: Shutter-speed-priority Auto Exposure (with MM type lenses only)
If you choose your desired shutter speed, the camera will automatically select the aperture suited for it to provide correct exposure. This mode is useful for taking fast moving objects.M: Manual Exposure
In this mode, you can choose the aperture and shutter speed as desired. Intentional over- or underexposure is also easy.B: Bulb Exposure
This mode can be used for taking night scenes or pictures of the sky at night which require long exposure. As long as the shutter release is depressed, the shutter will open to expose the film. - When an AE lens is mounted, it is impossible to take pictures in the "Tv" mode. Even if the camera is set to the "Tv" mode, it will operation in the "Av" mode. - When no lens is mounted on the camera, it will operate in the "Av" mode even if it is set to the "Tv" mode.  1 Set the exposure mode selector lever to "Av". Set the aperture and shoot.
If you set the aperture with the lens' aperture ring, the camera will automatically set the shutter speed suited for it. In the viewfinder, the aperture you have set and the shutter speed automatically set by the camera will turn on.  1 Set the lens aperture to the minimum aperture (green) and set the exposure mode selector lever to "Tv". The minimum aperture on the aperture ring of MM type lenses is marked in green to show you that you should set the lens to it in the programmed auto exposure and shutter-speed-priority auto exposure modes.  2 Set the shutter speed and shoot. If you set the shutter speed by turning the shutter speed dial, the camera will automatically set the aperture suited for it. In the viewfinder, the shutter speed you have set will blink and the aperture automatically set by the camera will turn on. If the shutter speed you have selected cannot provide correct exposure because the aperture suited for it is beyond the lens' aperture range, the camera will automatically shift the shutter speed to always provide correct exposure. The shifted shutter speed will then turn on. - If the correct shutter speed is faster than that you have selected, the aperture will blink. Make sure the lens is set at its minimum aperture. - If an MM type lens is set to an aperture that is not its minimum aperture, the camera will automatically choose an appropriate aperture between the maximum aperture and the aperture being set. Shutter speed shift and warning in the shutter-speed-priority auto exposure mode Änderung der VerschluBzeit und Warning bei Belichtungsautomatik mit VerschluBzeitenvorwahl Décalage de vitesse d'obturation et avertissement dans le mode d'exposition automatique à priorité à la vitesse Cambio de velocidad del obturador y advertencia en el mode de exposión automatica con prioridad de velocidad del obturador. Overexposure warning
If the mark "▲" blinks in the shutter speed scale on the right edge of the viewfinder, it means overexposure. Because the subject is too bright, readjust the aperture sc that any speed indicator turns on with steady light. It is also possible to reduce the light intensity with an optional ND filter.Underexposure warning
If "LT" blinks on the shutter speed scale, it means underexposure. Because the subject is too dark, use an additional light to brighten up the subject or change the aperture so that "LT" stops blinking. Also, a dedicated flash unit will let you take correctly exposed pictures. - Even when an over- or underexposure warning appears, you can take pictures by depressing the shutter release.| Overexposure Überbelichtung Surexposition Sobrexp Joséciàn | 8000 4000 2000 1000 500 250 125 60 30 15 8 4 2 1s 25 45 LT |
| Underexposure Unterbelichtung Sous-exposition Subexposión | 1s 25 45 LT |
< Gebrauch des Okularschutzes>
Wenn Aufnahmen mit Belichtungsautomatik (Av oder Tv) über Selfbst- oder Fernauslöser gemacht werden, wird die Belichtigung durch Streulicht beeinträchtigt, das durch das Sucherokular eintritt, wenn Sie Ihr Gesicht wegbewegen. In einem solchen Fall empfeiht es sich, das Okular mit dem mit der Kamera geleiferten Okularschutz zu blockieren oder die AE-Verriegelung zu verwenden.  1 Set the exposure mode selector lever to "M".  2 Set the shutter speed and aperture and shoot. The shutter speed can be set by turning the shutter speed dial, and the aperture with the aperture ring. In the viewfinder, the shutter speed you have set will blink and the correct shutter speed selected by the camera will light. Operate the shutter speed dial or aperture ring so that the same shutter speed lights.  Set the exposure mode selector lever to "B". As long as the shutter release is depressed, the shutter will open to expose the film. To prevent camera shake, mount the camera on a tripod or a stable support and trip the shutter with an optional Cable Switch L by connecting it to the camera's cable release socket. - In the bulb exposure mode, the exposure counter will indicate the time that has passed during bulb exposure. It will count from "00" to "59 (seconds)" and repeat this display after that.  (□)
In this method, the camera measures the light intensity with emphasis on the subject in the center of the viewfinder and also takes into account the brightness in the surrounding area to determine the exposure value. As it reacts well to fluctuations of light, it is suited for ordinary objects as well as for fast moving objects.
()
In this method, the camera measures the brightness of the subject only in a 0.3mm spot in the center of the viewfinder to determine the exposure value. It is suited for shooting backlighted portraits or spotlighted stage scenes in which there is a great difference in brightness between the subject and the background, as well as for measuring the light intensity only on a part of the subject.
- In the continuous shooting modes (CL and CH), the exposure value measured for the first shot will be applied for a series of shots in continuous exposure.
Metering Sensitivity Chart
MeBemptfindlichkeits-Tabelle
Tableau de sensibilité de mesure
Grafico de sensibilities de medicacion
Center-Weighted Average Light Metering
Lichtmessung mit Mittenbetonung
Mesure de lumière moyenne pondérée centrale
Medicación de luz promedia centralmente ponderada

< Aufnahmen mit Polarisationsfilter>
Achten Sie darauf, ein Kreispolarisationsfilter zu verwenden. Ein gerades Polarisationsfilter kann zu Meßfehlern bei Spotmessung oder Vorblitz-TTL-Spotmessung führen, da ein Halbspiegel in der Meßoptik eingesetzt wird. In einem solchen Fall empfeht sich der Gebrauch von Lichtmessung mit Mittenbetonung oder direkter TTL-Lichtmessung.< Fotografia con un futuro de polarización>
Emplee un filtro de polarizacion circular. Los filtros de polarizacion de linea recta peuvent causar un error de medicacion durante la medicacion de punto o medicacion de punto TTL antes del flash, porque se utilize medio especular en el sistemas de medicacion. En theseos casos se recomienda la medicacion de la luz promedia ponderada centralmente o medicacion de la luz directa TTL. Spot Metering Spotmessung Mesure pontuelle Medicación de punto  <1> Using the Exposure Compensation Dial
Normally, the exposure compensation dial is set at "0" for aperture-priority auto exposure, shutter-speed-priority auto exposure, and manual exposure. To compensate exposure, however, turn the dial until your desired compensating value comes opposite the exposure compensation index. It can be set in 1/3-EV increments in a range of +2 EV to -2 EV. In the viewfinder, the "+" or "-" sign will blink to show you that exposure has been compensated. The camera will change the aperture in the shutter-speed-priority mode depending on the compensating value, and the shutter speed in the aperture-priority mode. In the manual exposure mode, the shutter speed will be changed. Operate the shutter speed dial or aperture ring so that the blinking shutter speed shifts to fall into one with the lighting shutter speed.  Exposure compensation index Belichtungskorrektur-Index Index de compensation d'exposition Marca de referencia de compensación de exposión After taking pictures with exposure compensation, be sure to return the dial to "0". Achten Sie nach beendeten Aufnahmen darauf, den Belichtungskorrekturring auf "0" zurückzustellen. Après avoir pris les photos avec la compensation d'exposition. toujours ramener le cadran sur "0". Después de tomar fotografías con la compensación de exposión, asegürese de volver a colocar el aró a "0". For backlighted subjects ....
Exposure compensation of “+1/3”~“+2”
If you are shooting your subject against the light, under a bright sky, on an ocean beach, in front of a window, and so on, where the greater part of your picture is occupied by a bright background, the subject will be underexposed and turn out dark like a silhouette when it is taken on center-weighted average light metering. In such cases, use exposure compensation of +1/3 +2 to give more exposure.  For spotlighted subjects ....
Exposure compensation of “-1/3”~“-2”
If you are shooting a spotlighted subject on a stage where a dark background predominates in the scene, it will be underexposed and turn out light when it is taken on center-weighted average light metering. In such cases, use exposure compensation of -1 / 3 -2 to reduce the amount of light or it. < 2> Using the AE Lock
The AE lock is used for storing the exposure value (combination of shutter speed and aperture) of the subject in memory during auto exposure. If the main switch is set to "AEL", the exposure value at that time will be stored in the camera memory so that you can trip the shutter with the same exposure value, unaffected by changes in brightness on the background. 1 First, face the central part of the viewfinder toward your subject then switch the main switch from "ON" to "AEL". The exposure will thus be locked. To measure exposure in a narrow area and lock it, set the metering mode selector lever for spot metering and use the AE lock. - The metering mark in the viewfinder will blink while the AE lock is activated. - You can take pictures with the same exposure value as many times as you want while the exposure is locked. - The exposure value will remain locked even if the metering mode is switched while the AE lock is activated.   - If you change the film speed or switch the exposure compensation while the AE lock is activated, exposure is made as follows: Av mode: The shutter speed will change. Tv mode: The aperture will change. - Set the main switch to "AEL" when the display in the viewfinder lights. 2 Recompose your subject and shoot. The exposure value will remain in memory while the AE lock is activated, but the display will turn off after 16 seconds to save battery. - In the continuous-shooting modes ("CL" and "CH"), you can take pictures in succession with the same exposure value, unaffected by changes in brightness on the background, if you have locked the exposure. - This camera stores in memory the exposure value in a combination of shutter speed and aperture. For example, if the aperture is changed in the "Av" mode after the AE lock is activated, the shutter speed will follow to maintain the same exposure value. - Wenn Sie die Einstellung der Filmmempfindlichkeit oder der Belichtungskorrektur bei aktiviertem Meßwertspeicher ändern, wird die Belichtung wie folgt geändert: Ay-Betriebsart: Die VerschluBzeit ändert sich. Tv-Betriebsart: Die Blende ändert sich. - Stellen Sie den Hauptschalter auf "AEL", wenn die Anzeige im Sicherer sightbar ist. 2 Wahlen Sie wieder den ursprünglichen Bildausschnitt und machen Sie die Aufnahme. - Der Belichtungswert bleibt solange gespeichert, wie der Meßwertspeicher aktiviert ist, noch die Anzeige im Sicherer verschwindet nach 16 Sekunden, um die Batterien zu schonen. - Wenn der Belichtungswert des Motivs bei Serienaufnahmen (Filmtransport "CL" oder "CH") über den Meßwertspeicher festgehalten wurde, werden alle Aufnahmen identisch belichtet, ohne daß Helligkeitsänderungen des Hintergrunds berücksichtigt werden. - These Kamera speichert den Belichtungswert als eine Kombination von Verschlußzeit und Blende. Wenn Sie bei aktiviertem Meßwertspeicher in der Betriebsart "Av" beispisseweise die Blendeneinstellung verändern, so ändert die Kamera automatisch die Verschlußzeit auf einen der neuen Blende entsprechenden Wert, um den Belichtungswert konstant zu halten.< 3> Using the A.B.C. Mode (Automatic Bracketing Control)
This mode allows you to take pictures successively in three steps of different exposure (standard, over- and underexposure) while watching the subject in the viewfinder. Freed from the trouble of exposure determination even under very subtle exposure conditions, you can keep your finger on the shutter release to capture any shooting opportunity. 1 Move the A.B.C. lever and set the compensating value. The camera will switch to the A.B.C. mode. The compensating values of ± 0.5 EV and ± 1 EV are available. This function can be used in the following exposure modes, and automatic exposure compensation is effected through the shutter speed or aperture. Exposure Mode/Belichtungsbetriebsart
Aperture-priority auto exposure (Av) Belichtungsautomatik mit Blendenvorwahl (Av) Shutter-speed-priority auto exposure (Tv) Belichtungsautomatik mit Verschlußzeitenvorwahl (Tv) Manual exposure (M) Manuelle Belichtung (M)Control Item/Geänderte Einstellung
Shutter speed VerschluBzeit Aperture (If it is beyond the aperture control range, the shutter speed will automatically be controlled.) Blende (Wenn der richtige Blendenwert außerhalb des Steuerbereiches liegt, wird die Verschlußzeit automatisch geändert.) Shutter speed Verschlußzeit - If the exposure compensation dial is set to other positions than "0", the A.B.C. mode is established on the basis of the compensating value being set. - If you want to shoot unaffected by changes in brightness in the surroundings, it is recommended to use the AE lock in the A.B.C. mode, too. - After taking pictures in the A.B.C. mode, be sure to return the A.B.C. lever to "0". - Flash pictures cannot be taken in the A.B.C. mode. 2 If you set the drive mode to "CL" or "CH" (continuous exposure) and continue to depress the shutter release, exposure will be effected in the order of standard exposure, over- (+) and underexposure (-) depending on the compensating value. After exposing three frames, the camera will stop. This mode can be used repeatedly by depressing the shutter release again. - If you set the drive mode to "S" or "B", you can take pictures frame by frame in the A.B.C. mode. If you set it to "2" or "10", you can take pictures continuously 2 or 10 seconds after depressing the shutter release. - Wenn sich der Belichtungskorrekturring auf einer anderen Einstellung als "0" befindet, arbeitet die A.B.C.-Betriebsart auf der Grundlage des jeweils eingestellten Korrekturwerts. - Wenn Helligeitsänderungen im Umfeld des Motivs nicht berücksichtigt werden sollen, empflicht sich auch in der A.B.C.-Betriebsart der Gebrauch des Meßwertspeichers. - Achten Sie nach beendeten Aufnahmen in der A.B.C.-Betriebsart darauf, den A.B.C.-Schieber auf "0" zurückzustellen. - These Funktion steht bei Blitzaufnahmen nicht zur Verfugung. 2 Wenn Sie eine Serienaufnahmen-Betriebsart einstellen (Filmtransport "CL" oder "CH") und den Auslöser durchgedrückt halten, so werden je nach Korrekturwert drei Aufnahmen hintereinander gemacht, undzar in der Reihenfolge Normalbelichtung, Überbelichtung (^+ + ) und Unterbelichtung (^ - ^ ) . Nach der dritten Aufnahme hält der Film an. Sie konnen diese Betriebsart wiederholt verwenden, indem Sie den Ausloser erneut drucken. - Bei Einstellung auf Filmtransport "S" oder "B" lessen sich Einzelaufnahmen in der A.B.C.-Betriebsart machen. Bei Wahl der Einstellung "2" oder "10" werden die Serienaufnahmen 2 bzw. 10 Sekunden nach Drucken des Auslösers gemacht.  Standard Exposure Normalbelichtung Exposition standard Exposión estandar  Overexposure Überbelichtung Surexposition Sobrexposisión  Underexposure Unterbelichtung Sous-exposition Subexposión In the A.B.C. mode, the exposure counter will change in the following order to show the order of shots. Example: Pictures are taken in the A.B.C. mode from the frame No. 18. Frame No. 18 Standard Exposure Frame No. 19 Overexposure Frame No. 20 Underexposure Frame No. 21 Standard Exposure (repeated) - If the camera's control range is exceeded by the compensating value, the limiting compensation value will apply. - To cancel the A.B.C. mode after it has been activated, set the A.B.C. lever to "0".  Blinks on both sides.  Blinks on left side.  Blinks on right side.  Blinks on both sides. - If the main switch is set to "OFF" and then to "ON" again in the A.B.C. mode, three frames will be exposed again in the A.B.C. mode as described above.  When the lens is focused on a subject, not only the subject itself, but also a certain zone in front of and behind it will turn out sharp in the picture. This is called the depth of field of a lens and it varies as follows: ① The smaller the aperture, the wider the depth of field, and vice versa.  ② The longer the subject distance, the wider the depth of field, and vice versa. ③ The zone of sharpness behind the point on which the lens is focused is wider than that in front of it. In the case of different lenses, lenses with a shorter focal length have a wider depth of field than those with a longer focal length.The self-timer will operate with a delay of 2 or 10 seconds.
Focus the lens on your subject and set the drive mode selector dial to "2" or "10". - The self-timer cannot be used when the camera is set for bulb exposure. - To shoot with the self-timer, mount the camera on a tripod. 2 Start the self-timer by depressing the shutter release. The shutter will trip after 2 or 10 seconds. While the self-timer is operating, the exposure counter will show the remaining time in seconds until the shutter trips and the self-timer LED will blink.  - In the auto exposure modes (Av or Tv), block the viewfinder eyepiece with the eyepiece shutter or use the AE lock so that the exposure is not affected by light entering through the eyepiece. - If the shutter release is depressed while the self-timer is operating, the exposure counter will return to 00 and count the remaining time. - The self-timer will stop in the following cases: ① When the main switch is set to OFF; ② When the drive mode is switched; ③ When the rewind lever is set to ON; ④ When the aperture stop-down button is depressed; ⑤ When the exposure mode is set to "B".Multiple Exposure
Special photographic effects are obtained by multiple exposures of the same image or different images on the same frame. 1 Lift up the drive mode selector dial and set it to " (multiple exposure). 2 Make the first exposure by depressing the shutter release. As soon as the shutter trips, the drive mode will automatically be reset to "S" and the shutter will be cocked for the next exposure. The film will not advance and the exposure counter will not move. 3 Make the second exposure by depressing the shutter release again. For multiple exposures of three or more times, repeat the foregoing steps 1 and 2, or fix the drive mode selector dial at " l with your finger and depress the shutter release each time. | Metering value in natural light | Automatically set shutter speed (display) |
| LT ~ 1/60 sec. | 60 (blinking) |
| 1/60 ~ 1/250 sec. | 60 ~ 250 (blinking)* |
| 1/250 ~ 1/8000 sec. | 250 (blinking)* |
| Shutter speed setting on the dial | Automatically set shutter speed (display) |
| 4~1/250 sec. | 4s~250 (same value as that on the dial) |
| 1/500 ~ 1/8000 sec. | 250 (blinking)* |
1 Bringen Sie das TLA-Blitzgerät an der Kamera an.
■ Stellen Sie das Blitzgerät auf “TTL AUTO” und schalten Sie das Blitzgerät ein.
Sobald der Blitz vollständig aufgeladen ist, erscheint das Blitzsymbol " " im Sicherer, und die Verschlußzeit wird automatisch entsprechend der Belichtungsbetriebsart der Kamera eingestellt.
Belichtungsautomatik mit Blendenvorwahl (Av)
| Meßwert bei tatsächchem Licht | Automatisch eingestellte Verschlußzeit (Anzeige) |
| LT ~ 1/60 Sek. | 60 (blinkt) |
| 1/60 ~ 1/250 Sek. | 60~250 (blinkt)* |
| 1/250 ~ 1/8000 Sek. | 250 (blinkt)* |
| Mit Verschlußzeiten-Wahlring eingestellteVerschlußzeit | Automatisch eingestellteVerschlußzeit (Anzeige) |
| 4~1/250 Sek. | 4s~250 (gleicher Wert wie am Währung eingestellt) |
| 1/500~1/8000 Sek. | 250 (blink)* |
Manual (M) and bulb (B) exposure
- Be sure to set the shutter speed to 1/250 sec. or slower because the automatic shutter speed setting does not work in these modes. - The shutter speed you have set will blink and the metering value in natural light will turn on. - To prevent operating error, it is recommended to set the shutter speed dial to "X125" (locked position).Set the aperture and shoot.
After shooting, the light adjustment result will be displayed for 4 seconds on the flashmeter in the viewfinder. Display of Light Adjustment| Result of Light Adjustment | Display | ||||
| Correct | -2 | -1 | +1 | +2 | (lighting) |
| Over | -2 | -1 | +1 | +2 | (blinking) |
| Under | -2 | -1 | +1 | +2 | (blinking) |
Manuelle Belichtung ("M") und Zeitaufnahmen ("B")
- Achten Sie darauf, eine Verschlußzeit von 1/250 Sek. oder länger einzustellen, da die automatische Korrektur der Verschlußzeit in diesen Betriebsarten nicht zur Verflügung stehen. - Die Anzeige der von Ihnen eingestallen Verschlußzeit blinking, und der bei natürlichem Licht gemessene Wert entscheid. - Um einen Bedienungsfehler auszuschlieben, empfehltes sich, den Verschlußzeiten-Wahlring in der Stellung "X125" zu verriegeln.2 Stellen Sie die gewünschte Blende am Objektiv ein und machen Sie die Aufnahme.
Nach der Aufnahme wird das Ergebnis der Lichtmengenregelung 4 Sekunden lang auf dem Blitzmesser im Sicherer angezeigt. Anzeige der Lichtmengenregelung| Ergebnis der Lichtmengenreitung | Anzeige | |||
| Richtige Belichtigung | -2 | -1 | +1 | +2 |
| Überbelichtigung | -2 | -1 | +1 | +2 |
| Unterbelichtigung | -2 | -1 | +1 | +2 |
Caution
- If the flashmeter displays "over" or "under", it means that the result is outside the light adjustment range. Change the aperture or shooting distance and shoot. - The result of light adjustment on TTL direct light metering is displayed in three steps: "Correct", "over" and "under". No intermediate position is displayed. - Be sure to set the A.B.C. lever to "0". - Set the drive mode to the single-frame or self-timer modes. It is impossible to take flash pictures in the continuous shooting modes (CL and CH). - The coupling range of film speeds is ISO 25~400 (without exposure compensation).In the exposure mode "Av":
Set the main switch at "AEL". Because the shutter speed is fixed at the metering value in natural light, make sure the flash is fully charged before you shoot.Vorsicht
- Wenn der Blitzmesser eine Über- oder Unterbelichtung anziegt, bedeutet dies, daß sich das Ergebnis außerhalb des Bereichs der Lichtmengenregelung befindet. Verändern Sie in einem solchen Fall die Biendeneinstellung oder Aufnahmeenternnung und machen Sie die Aufnahme. - Das Ergebnis der Lichtmengenregelung bei direkter TTL-Lichtmessung wird in drei Stufen angezeigt: richtige Belichtung, Überbelichtung und Unterbelichtung. Zwischenwerte werden nicht angezeigt. - Achten Sie darauf, daß der A.B.C.-Schieber auf "0" eingestellt ist. - Stellen Sie als Filmtransport-Betriebsart entweder Einzel- oder Selfbaulöseraufnahmen ein. In den Serienaufnahmen-Betriebsarten ("CL" und "CH") sind keine Blitzaufnahmen möglich. - Der Kopplungsbereich der Filmempfindlichkeit beträgt ISO 25 bis 400 (ohne Belichtungskorrektur).In Belichtungsbetriebsart "Av":
Stellen Sie den Hauptschalter auf "AEL". Überzeugen Sie sich, daß der Blitz vor der Aufnahme vollständig aufgeladen ist, da die Verschlußzeit auf den bei natürlichem Licht gesessenen Wert fixiert wird.In the exposure mode "Tv" or "M":
After the flash is fully charged, operate the shutter speed dial or aperture ring so that the set shutter speed (blinking) and the metering value (lighting) coincide, then shoot. - When you take slow-shutter synchro flash pictures, use a tripod to prevent camera shake with a slow shutter speed.Daylight flash
Subjects under direct sunlight or backlighted subjects will turn out dark without exposure compensation or fill-in flash. If you use flash as fill-in light in such cases, both the subject and background will be beautifully exposed. - If the metering value in natural light turns on at 1/500 sec. or faster, stop down the aperture so that the shutter speed is reduced to 1/250 sec. or slower. - If you are shooting in the exposure mode "M", be sure to set the shutter speed to 1/250 sec. or slower.Using the exposure compensation dial
If you want to enhance the effect by adjusting the flash light, use the exposure compensation dial.In Belichtungsbetriebsart "Tv" oder "M":
Betätigten Sie nach vollständigem Aufladen des Blitzes den Verschlußzeiten-Währing bzw. den Blendenring, so daß die Anzeige der vorgewählten Verschlußzeit (blinkt) und die des Meibwertes (leuchtet) übereinstimmen, und machen Sie dann die Aufnahme. - Bringen Sie die Kamera bei Beitzaufnahmen mit Synchronisation bei langen Verschlußzeiten au einem Stativ au, um ein Verwackeln zu verhindern.Tageslicht-Blitzaufnahmen
Motive in direkter Sonneneinstrahlung oder im Gegenlicht erscheinen oft dunkel im Bild, wenn die Aufnahmen ohne Belichtungskorrektur oder Aufhellblitz gemacht werden. Wenn Sie in einem solchen Fall mit Tageslichtblitz arbeiten, werden Motiv und Hintergrund einwandfrei belichtet. - Wenn die Anzeige des bei natürlichem Licht gemessenen Wertes bei einer Verschlusszeit von 1/500 Sek. oder kürzer aufleucht, schlieben Sie die Blende soweit, daß die Verschlusszeit auf 1/250 Sek. oder länger erhöht wird. - Achten Sie bei Blitzaufnahmen in der Belichtungsbetriebsart "M" darauf, eine Verschlußzeit von 1/250 Sek. oder länger einzustellen.Gebrauch des Belichtungskorrekturrings
Der Belichtungskorrekturring kann dazu verwendet werden, die Blitzlichtmenge so zu regeln, daß gewündchte Effekte erzielt werden.Camera Care and Precautions
- Do not leave the camera in hot places (on an ocean beach in summer, in a parked car under direct sunlight, etc.) for a long time, because the camera, film and batteries may be adversely affected. - After taking pictures at the seaside or on mountains, clean the camera thoroughly. Salt air will cause corrosion and sand and dust will adversely affect the internal precision parts of the camera. - To remove dust and dirt on the lens and viewfinder glass, use an air blower or a soft lens brush. If they are soiled with fingerprints, wipe off lightly with lens tissue. Remove dust and dirt on the mirror with a lens brush. - The lens and viewfinder may be clouded if the camera is brought into a warm room from outside where it is cold. This cloudiness will disappear soon, but it is always advisable to avoid sudden temperature changes because water droplets will cause internal corrosion. - If you are going to use the camera for important events such as an overseas trip or wedding ceremony, be sure to test it beforehand to make sure it functions properly. It is also advisable to bring spare batteries with you. - To clean the camera exterior, wipe with a soft cloth. Never use benzine, thinner or other solvents.Note on the shutter curtain
The shutter curtain is made of a very thin material. Never push it or touch it with your finger. When changing film, take particular care so that the film leading edge does not come into contact with it. If you use a blower to clean the camera interior, blow off very gently to avoid deformation or damage on it. Never use a pressurized blower.Microcomputer protection circuit
This camera incorporates a safety circuit to protect its microcomputer against strong external static electricity. Though rarely, it may fail to function because this safety circuit has come into action. In this case, set the main switch to OFF, remove the batteries, reload them and use the camera again.< Diopter Adjustment Lenses, FM Type>
If you cannot adjust the eyepiece to your eyesight with the camera's diopter adjuster (+1D -3D) use the eyesight adjustment lenses, FM type (optional accessories). The diopter correcting ranges with these lenses are as follows:| Diopter Adjustment Lens | Diopter Correcting Range |
| FM-3 | -5.0D ~ -1.5D |
| FM+2 | -0.5D ~ +4.0D |
Attachment:
Remove the eyepiece ring on the camera and screw in the diopter adjustment lens. - Store the removed eyepiece ring carefully so that it does not get lost.< Diopterlinsen Typ FM>
Wenn Sie das Okular mit dem eingebauten Dioptereinsteller (+1D bis -3D) der Kamera nicht auf Ohne Sehschärfe einstellen können, verwenden Sie die als Sonderzubehör lieferbaren Diopterlinsen vom Typ FM. Der Diopter-Korrekturbereich dieser Linsen ist folgender:| Diopterlinse | Diopter-Korrekturbereich |
| FM - 3 | -5,0D ~ -1,5D |
| FM + 2 | -0,5D ~ +4,0D |
