SPV C550 - Téléphone mobile ORANGE - Notice d'utilisation et mode d'emploi gratuit
Retrouvez gratuitement la notice de l'appareil SPV C550 ORANGE au format PDF.


| Type de produit | Smartphone |
| Système d'exploitation | Android |
| Écran | Écran tactile de 3,2 pouces, résolution 240 x 320 pixels |
| Processeur | Processeur à 600 MHz |
| RAM | 256 Mo |
| Stockage interne | 512 Mo, extensible via carte microSD |
| Appareil photo | Appareil photo de 3,2 MP avec autofocus |
| Connectivité | Wi-Fi, Bluetooth, 3G |
| Dimensions | 115 x 61 x 12 mm |
| Poids | 130 g |
| Type de batterie | Batterie lithium-ion 1300 mAh |
| Autonomie | Environ 5 heures en conversation, 300 heures en veille |
| Fonctions principales | Appels, SMS, navigation Internet, applications Android |
| Entretien et nettoyage | Nettoyer avec un chiffon doux, éviter les produits chimiques |
| Pièces détachées et réparabilité | Réparabilité limitée, pièces disponibles auprès de revendeurs agréés |
| Informations de sécurité | Éviter l'exposition à l'eau, ne pas utiliser en cas de surchauffe |
| Compatibilités | Compatible avec les réseaux GSM et 3G |
FOIRE AUX QUESTIONS - SPV C550 ORANGE
Questions des utilisateurs sur SPV C550 ORANGE
0 question sur cet appareil. Repondez a celles que vous connaissez ou posez la votre.
Poser une nouvelle question sur cet appareil
Téléchargez la notice de votre Téléphone mobile au format PDF gratuitement ! Retrouvez votre notice SPV C550 - ORANGE et reprennez votre appareil électronique en main. Sur cette page sont publiés tous les documents nécessaires à l'utilisation de votre appareil SPV C550 de la marque ORANGE.
MODE D'EMPLOI SPV C550 ORANGE
Congratulations on the purchase of your new Windows Mobile™ Smartphone!
Please read before operating your device.
THE DEVICE IS NOT CHARGED WHEN YOU TAKE IT OUT OF THE BOX.
DO NOT REMOVE THE BATTERY PACK WHEN THE DEVICE IS CHARGING.
WHEN INSERTING YOUR SIM CARD, MAKE SURE THE DEVICE IS POWERED OFF, AND THAT THE SIM CARD SNAPS INTO THE SOCKET SECURELY.
YOUR WARRANTY IS INVALIDATED IF YOU OPEN OR TAMPER WITH THE DEVICE'S OUTER CASING. (For more information, see the enclosed warranty statement.)
EXPLOSIVE ATMOSPHERES
When in any area with a potentially explosive atmosphere or where flammable materials exist, the product should be turned off and the user should obey all signs and instructions. Sparks in such areas could cause an explosion or fire resulting in bodily injury or even death. Users are advised not to use the equipment at refueling points such as service or gas stations. Users are reminded of the need to observe restrictions on the use of radio equipment in fuel depots, chemical plants or where blasting operations are in progress. Areas with a potentially explosive atmosphere are often, but not always, clearly marked. These include fueling areas, below deck on boats, fuel or chemical transfer or storage facilities, and areas where the air contains chemicals or particles, such as grain, dust, or metal powders.
Please be aware that this user guide is describing a global Pocket PC phone. There may be some differences in the features and applications described in this guide, and those available on your phone. These variations depend on your purchasing location and supplier.
Contents
Chapter 1 Getting Started 7
1.1 Knowing Your Smartphone......8
1.2 Status Indicators 15
1.3 Setting up Your Smartphone.....16
1.4 Included Accessories 20
1.5 Navigating 21
1.6 Entering Text and Numbers 26
1.7 Securing Your Smartphone......30
Chapter 2 Using your Smartphone 33
2.1 Making a Call 34
2.2 Receiving a Call 37
2.3 Using Contacts and Beaming ....39
2.4 Caller Photo ID 46
2.5 In-call Options 55
2.6 Retrieving a Voice Mail Message..56
2.7 Reviewing Your Calls 56
2.8 Speed Dials and Voice Tags......58
2.9 Advanced Dialing Information...62
Chapter 3 Using Your Camera 65
3.1 Camera Mode 66
3.2 Album Mode 78
Chapter 4 Personalizing your Smartphone 91
4.1 Customizing Phone Settings .......92
4.2 Customizing Profiles and Sounds.... 99
Chapter 5 Getting Connected 103
5.1 Connecting to the Internet 104
5.2 Internet Explorer 107
5.3 Bluetooth 110
5.4 Modem Link 113
Chapter 6 Messaging Features 115
6.1 Setting Up Accounts 116
6.2 Managing Accounts 118
6.3 Creating E-mail and SMS Messages 119
6.4 Receiving E-mail and SMS Messages 122
6.5 Viewing Message Folders 126
6.6 Managing Messaging 128
6.7 Instant Messaging 131
6.8 MMS Messaging 135
Chapter 7 Synchronizing 143
7.1 Using ActiveSync 144
7.2 Installing ActiveSync 145
7.3 Server ActiveSync 146
7.4 Other Information 149
Chapter 8 Applications 151
8.1 Using Calendar 152
8.2 Using Tasks 155
8.3 Using Calculator 156
8.4 Using Voice Notes 157
8.5 Using Windows Media Player...158
8.6 Using Java Manager 165
8.7 Games 169
Chapter 9 Maintaining Your Smartphone 173
9.1 Adding and Removing Programmes 174
9.2 File Manager 175
9.3 Task Manager 182
9.4 Space Maker 184
Appendix Regulatory Notices 190
Troubleshooting 197
Specifications 202
Index 205
Chapter 1
Getting Started
1.1 Knowing Your Smartphone
1.2 Status Indicators
1.3 Setting up Your Smartphone
1.4 Accessories
1.5 Navigating
1.6 Entering Text and Numbers
1.7 Securing Your Smartphone
1.1 Knowing Your Smartphone
This section will help you become familiar with your Smartphone's hardware, including a basic introduction to the buttons and features found on the top, bottom, front, side, and rear of the phone. A brief explanation of the LED indicator is also provided.
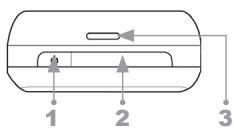
Top View
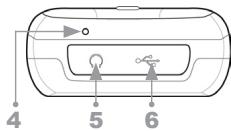
Bottom View
1. Power button
When your Smartphone is turned Off, press and hold the Power button to turn it On, and vice versa. When the Smartphone is On, press and quickly release the Power button to display the Quick List (illustrated later in this chapter), which allows you to change profiles or "lock" your Smartphone.
2. Infrared (IrDa) port
Enables your Smartphone to receive data from another IR-compatible device through beaming.
3. Speaker
An additional speaker can be found on the front of the Smartphone.
4. Microphone
5. Earphone plug
Plug the earphone jack here to use the hands-free mode or listen to sound or multimedia files.
6. Mini-USB connector
Attach the mini-USB cable here to synchronise the Smartphone with your PC, or to charge its battery.
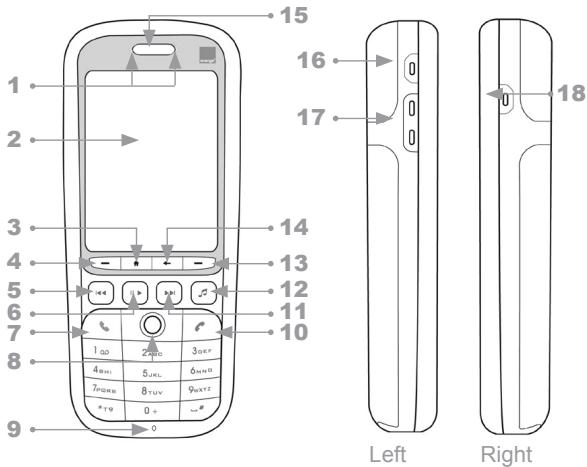
Front View
Side View
1. LED Indicators
The left bi-color LED Indicator (green/red) notifies you of the battery and network status of your Smartphone, and the right LED Indicator (blue) notifies you of the Bluetooth connectivity status. The meaning of the various colors in the two LED Indicators are described in a table later in this section.
2. Display screen
The status indicators concerning the current mode, battery strength, the current activity, or active program are displayed in the Title Bar at the top of the screen. In the center of the screen is the active menu or program (or incoming live video stream if Camera mode is active). At the bottom of the screen are the menus or commands related to the active program.
3. Home button
The Home button provides two functions:
Press to return to the Home screen.
- Press and hold to launch the Bluetooth/PDP Quick List.
4. Left Softkey (Softkey 1)
Performs the function shown in the "softkey label" on the screen immediately above the button. (For example, when in the Home screen, pressing the Left Softkey opens the Start menu.)
5. Media Player — Previous hardkey
If Windows Media Player is not running, pressing this hardkey will launch it (see Chapter 8 for information about using Media Player).
If already running, behaviors are as follows:
- A quick press and release within the first two seconds of file playback will stop playing the current file, jump to the previous file, and begin playing it.
- A quick press and release after the first two seconds of file playback will go back to the beginning of the current file and start playing it again from the beginning.
- Pressing and holding will "fast rewind" (with playback).
- If a file is selected but not currently being played, the previous file in the sequence will be selected.
- If Media Player is running in foreground but no file is loaded, nothing happens when you press this hardkey.
6. Media Player — Pause/Play/Stop hardkey
If Windows Media Player is not running, pressing this hardkey will launch it (see Chapter 8 for information about using Media Player).
If already running, behaviors are as follows:
- A quick press and release during file playback will pause the playback. Another quick press will resume playback.
- Pressing and holding will stop the playback.
- If a file is selected but not currently being played, pressing this hardkey will start playback of that file.
- When a file in "My Media" sub folders is selected, pressing this hardkey will bring Windows Media Player to the foreground and the file will be played.
- If Media Player is running in foreground but no file is loaded, nothing happens when you press this hardkey.
7. Talk key
Press to start a call or answer an incoming call. Press and hold to turn the speakerphone mode on or off, or switch between an active call and a call on hold.
8. Navigation Pad
Use to scroll selection up, down, left, or right. Press straight down on the center of the Navigation Pad (known as the Action button) to select. In a text field, use the navigation pad to move the cursor right or left, character by character.
9. Light Sensor
If enabled in Settings > Power Management, dark conditions (ambient luminance lower than 20~28 lux) sensed here will activate a backlight under the keypad, making it easier to see the buttons.
10. End key
Press to end a call; press to return to the Home screen; or press and hold to lock the keypad.
11. Media Player — Next hardkey
If Windows Media Player is not running, pressing this hardkey will launch it (see Chapter 8 for information about using Media Player).
If already running, behaviors are as follows:
- A quick press and release during file playback will stop playing the current file, and start playing the next file in the sequence.
- Pressing and holding will "fast forward" (with playback).
- If a file is selected but not currently being played, the next file in the sequence will be selected.
- If Media Player is running in foreground but no file is loaded, nothing happens when you press this hardkey.
12. Media Player — Launch hardkey
Press to launch Windows Media Player directly, allowing you to play media files on your Smartphone.
13. Right Softkey (Softkey 2)
Performs the function shown in the "softkey label" on the screen immediately above the button. (In many cases, pressing the Right Softkey opens a menu associated with a particular application.)
14. Back key
Press to go back to the previous screen, or to backspace over one character in a text field. Press and hold to delete the contents of an editable field.
15. Speaker
An additional speaker can be found on the top of your Smartphone.
16. User button
This button is programmable to be set as a user-defined function button.
17. Volume / Voice Tag / Voice Notes button
On the left side of your Smartphone, one of the functions of this button is to let you adjust Volume during the talk mode.
During the standby mode, pressing and holding the Volume Down button will launch the Voice Tag feature (explained in section 2.8). Or, you can press and hold the Volume Up button to launch the Voice Notes recorder (see section 8.4).
18. Camera button
On the right side of your Smartphone, this button switches to the Camera mode (if not already in Camera mode). If already in Camera mode, pressing this button captures a still image or begins capturing a video clip, depending on the current capture submode.)
LED Indicator Lights
The various colors that might display in the two LED Indicators are summarised in the table below.
| Left LED | Status |
| Solid green | Battery is fully charged |
| Blank | Battery case is empty |
| Solid Amber | Battery is charging |
| Flashing green | Network is attached |
| Flashing red | Battery very low (less than 4%) |
| Flashing amber | Battery temperature is hotter or colder than the functional limits of 0 to 48 degrees Celsius, and has stopped charging |
| Amber / green LED off | Battery fault. The “Battery Fault” icon is displayed (▲). In this case, the flashing green LED can be recovered by unplugging the AC adaptor. |
| Dim | Network is disconnected. |
| Right LED | Status |
| Flashing blue | Bluetooth set to “On” mode or “Discover-able” mode |
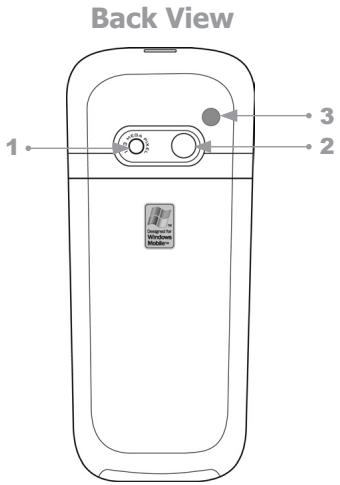
1. Camera lens
The "live" incoming video stream enters through this lens, when Camera mode is active.
2. Self-Portrait mirror
Position your Smartphone until this mirror reflects the image you want to capture.
3. Car antenna connector
Allows you to attach your Smartphone to a car antenna for better network signal reception, if desired.
1.2 Status Indicators
Status indicators are displayed in the Title Bar at the top of your Smartphone's screen.
| New message |
| New voice mail |
| New instant message (MSN) |
| Voice call active |
| Data call active |
| Call forwarding |
| Call on hold |
| Missed call |
| "1" indicates Line 1; "2" indicates Line 2 |
| Battery full |
| Battery very low (less than 4%) |
| Battery fault |
| Signal strength |
| Radio off |
| GPRS available |
| GPRS in use |
| Ringer off |
| Multipress input mode, lowercase |
| Multipress text input mode, uppercase |
| Multipress text input mode, caps lock |
| T9 text input mode, lowercase |
| T9 text input mode, uppercase |
| Caller ID monitor is off |
| Caller ID monitor is running |
1.3 Setting up Your Smartphone
In this section you will learn how to install a battery, SIM card, Mini-SD card, and how to charge the battery.
Installing the SIM Card
The SIM (Subscriber Identification Module) card contains a computer chip that stores your personal number, phone book, and other services provided by your cellular service provider.
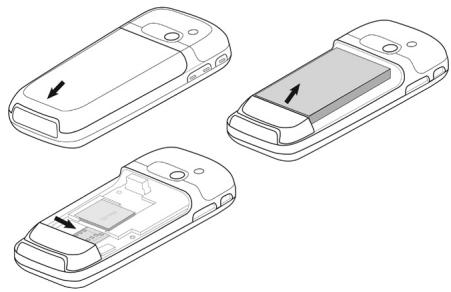
To insert a SIM card:
- Press and move the backside cover downward to open.
- Remove the battery by lifting it up from both sides of the bottom end.
- Lift up the SIM metal socket.
- Insert the SIM card with the gold-plated contact area on the card facing down. Push the metal socket down to lock into place.
Installing the Mini-SD card
Use only the Mini-SD (Secure Digital) card in your Smartphone. You can install the Mini-SD card to store images, video clips, music, and other data you may have obtained.

To insert a Mini-SD card:
- Remove the back phone cover as explained on the previous page.
- Slide the Mini-SD card into the holder, with the gold-plated contact area facing down.
- Push the card down and slide the metal latch over the Mini-SD card to secure it into place.
Installing the Battery
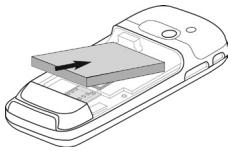
- Insert the battery by aligning the exposed copper part of the battery pack with the protruding copper conductor, then gently push the bottom of the battery into place.
- Slide the cover on the phone.
Charging the Battery
Your Smartphone is powered by a rechargeable Lithium- ion battery. The battery will eventually wear out after a few hundred charges or discharges. Replace the battery through an authorised vendor when the operating time is noticeably shorter than usual.
The time it takes for a battery to fully charge depends on the environment temperature at the time of charge. A completed charge normally takes about 3 hours in 0-10 degree temperatures, and less than 3 hours in temperatures ranging from 20 to 45 degrees.
| Mode | Estimated battery life |
| Talk Time | 5 hours |
| GPRS | 2 hours prox. |
| Standby | 250 hours |
Fully charge the new battery before using your Smartphone for the first time. When the low-battery indicator appears, save any unsaved data you are working on by synchronizing your Smartphone with your PC or an Exchange Server. Do not restart your Smartphone until you have connected it to an external power source.
NOTE: Do not leave your Smartphone connected to a charger for longer than a week because overcharging can shorten a battery's lifespan. Your battery will automatically discharge when the phone is not in use. Leaving the battery in extremely hot or cold places may also reduce its capacity or shorten its lifespan.
Your Smartphone can be charged whether it is powered on or off. Charge your battery by plugging the AC adaptor into the Mini-USB connector at the base of the device.
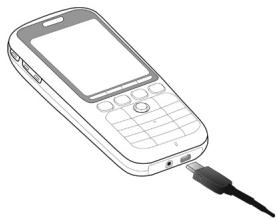
If your Smartphone is turned off, charging is indicated by an amber light. If turned on, charging is indicated by the solid amber light on the LED indicator and the charging icon ( 品 ). The completed charge is indicated by either a green light or a charged icon. You can also charge your Smartphone using the USB Sync cable while connected to the PC's USB port.
Battery Capacity indicator icons

Full

50%-74% capacity

28%-49% capacity

Less than 27% capacity

"Very Low" alert (less than 4% )
1.4 Included Accessories
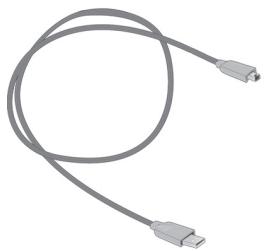
Mini USB cable
A USB cable is provided to allow you to synchronise information between your Smartphone and a desktop or notebook PC using ActiveSync. You can also charge the battery by plugging the cable to a PC's USB port.
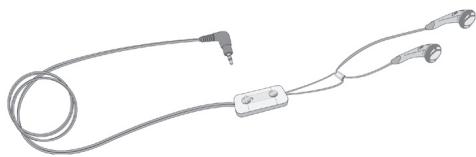
Stereo earphones with handsfree function
Use the earphones to listen to sound or multimedia files. The earphones can also function as a handsfree device.
Using the earphones
Connect the earphone cable to the earphone jack located at the base of the phone (identified in an illustration in section 1.1). Press the "Press To Talk" button to receive an incoming call. Press and hold it to end a call. Rotate the Volume buttons to adjust the sound level.
1.5 Navigating
This section discusses how to navigate through your Smartphone's screens in order to perform tasks efficiently.
Navigation Pad
The Navigation Pad provides an easy way to move or scroll through selections on the screen.
- Press the left side of the Navigation Pad to move left.
- Press the right side of the Navigation Pad to move right.
- Press the top of the Navigation Pad to move up.
- Press the bottom of the Navigation Pad to move down.
Action button
Select a highlighted item by pressing straight down on the center of the Navigation Pad, which is also known as the Action button. In many cases, scrolling to an item and pressing the Action button executes a command, or takes you to a program or setting, or serves as the Done/Save function. When you scroll to a checkbox, pressing the Action button activates or clears the box.
Softkeys
There are two softkeys on your Smartphone, located directly below the display screen: the Left Softkey ("Softkey 1") and the Right Softkey ("Softkey 2"). Each softkey performs the command displayed immediately above it on the screen (called the "Softkey label").
Menu
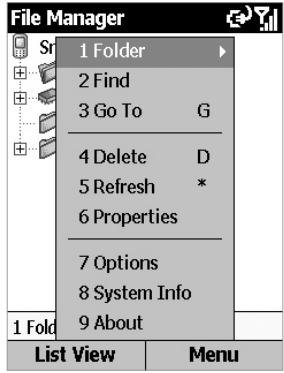
On many screens, the function of the Right Softkey is to open a menu which displays a list of options that are relevant to the current screen/application. Selecting a menu option will either perform that command or take you to another part of the user interface where you can perform the command. The example menu shown below comes from the File Manager application.
The Home button
Pressing the Home button takes you to the Home screen, which is your starting place for most tasks. All programs and features can be accessed from the Home screen.
By default, there are six program icons displayed at the left of Home screen: Contacts, Call History, Messaging, Calendar, Camera, and Orange World. In addition, other data is displayed in the Home screen, such as date/time, and current profile.
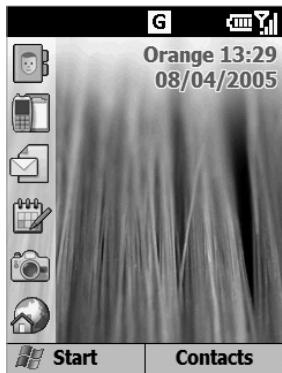
If you use Settings > Home Screen to change to a different Home screen layout value, the Home screen will change the layout according to your setting (explained in section 4.2).
For example, if you select Windows Default in Home screen layout, it will change to display the icons of five applications under the Title Bar, which were most recently accessed.
The Start menu
Your Smartphone comes with several bundled programs that you can start using immediately. You can also optionally install more from the included Application CD.
Pressing the Left Softkey when in the Home screen will open the Start menu. To access the next "page" of the Start menu, press 0 on your keypad.
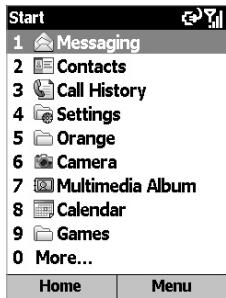
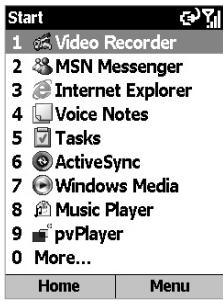
Select an item by scrolling to it and pressing the Action button. Or, you can press the corresponding number on the menu.
The Back button
Pressing the Back button takes you to the previous screen, in a similar manner to the Back button on an Internet browser. In a text field, pressing the Back button moves the cursor back and deletes the character to the left (similar to pressing the Backspace key on a keyboard).
The Quick List
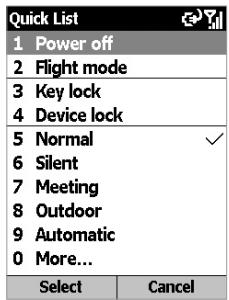
The Quick List offers convenient access to a list of functions, such as locking your Smartphone, locking the phone's keypad, enabling/disabling Flight mode, and choosing a different profile. (Please see section 4.2 for more details about profiles.)
To use the Quick List:
- Press and quickly release the Power button on top of your Smartphone to display the Quick List.
Caution: If you press and hold the Power button too long, your Smartphone will power off.)
- Select the item you want by scrolling to it and then pressing the Action button, or the related number.
1.6 Entering Text and Numbers
Your Smartphone supports three input modes for entering text and numbers: Multipress, T9, and Numeric. The Multipress and T9 modes are used for entering text, and the Numeric mode is for entering numbers. When you select a field that requires text or numeric entry, your Smartphone will automatically select the appropriate input mode.
When the cursor is in a field which requires text or number input, you can switch input modes yourself by holding down the asterisk (*) key to pop up the menu. Commands on the menu are Symbols, 123, Abc, T9 English, and T9 Languages. Selecting T9 Languages will open a submenu of all the languages available on your Smartphone with T9 capability.
One of the following status indicators will display in the Title Bar to show which input mode is currently active:
| Indicator | Mode |
| abc | Multipress text input mode, lowercase |
| Abc | Multipress text input mode, uppercase |
| ABC | Multipress text input mode, caps lock |
| t9 | T9 text input mode, lowercase |
| T9 | T9 text input mode, uppercase |
| T9 | T9 text input mode, caps lock |
| 123 | Numeric input mode |
Multipress mode
When you are in Multipress mode, you can enter a letter by pressing the number key on which the letter appears. To enter the first letter on the number key, press the key once, to enter the second letter, press the key twice quickly, and so on. The letter entered most recently is underlined until you have completed the keypresses for the letter and moved on to the next letter.
For example: To enter the word "hat," press 44, 2, 8.
When you enter letters that are on the same number key, you must pause after entering the first letter and wait until the underline disappears before entering the next letter, so your Smartphone can process the first letter. This pause is called the "Multipress time-out," and you can adjust the length of the pause between keystresses.
For example: To enter the word "cat," press 222, pause, press 2, and then press 8. Press the # key to move a space.
To enter punctuation in Multipress mode, press 1 repeatedly until you see the punctuation mark that you want.
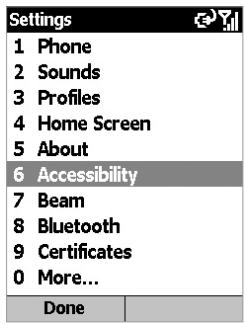
To change the Multipress Time-Out setting:
- Select Settings from the Start menu.
- Select Accessibility.
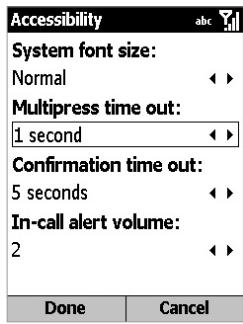
- In the Multipress time out field, select the length of the pause between keystresses that you prefer. (See illustrations on the next page.)
T9 mode
When you are in the T9 mode, just press the number keys that contain the letters that you want to form a word. T9 will then analyse your keypresses and attempt to complete the word. For example: To enter the word "shoe," press 7, 4, 6, 3.
To enter text in T9 mode:
- When in an editable field, press and hold the asterisk (*) key until the input menu appears. Select the desired T9 language from the menu. The t9 indicator should display in the Title Bar.
- Enter letters by pressing the keys on which the letters appear. Press a key only once for each letter.
- Press the # key to accept the word and enter a space after it, or press the Down button on the Navigation Pad to scroll through the available words; press the Action button to accept the word choice.
- Press 1 and then press the Up or Down button on the Navigation Pad to cycle through common punctuation symbols.
NOTE: T9 cannot always find the word you want in the T9 dictionary. In these cases, switch to Multipress mode. After you have entered the word in Multipress mode, the word will be added to the T9 dictionary.
Numeric mode
When you are in the Numeric mode, just press the number(s) you want to enter on the keypad. If a field permits numerical entry only, such as the Work phone field in Contacts, the input mode will automatically default to Numeric mode.
Miscellaneous input tasks
To enter a space: In Multipress or T9 mode, press the # key.
- To start a new line: Press the Action button.
- To switch between uppercase, lowercase, and caps lock: Press the * key.
- To enter a symbol: Press and hold the # key, select the symbol you want, and then press the Done softkey.
- To enter a number, an asterisk () , or a pound sign (#): Press and hold the * button on the phone keypad to pop up a selection list, then select 123 for Numeric mode. You can then press the desired corresponding key on the keypad.
To delete characters: Press the Back button to backspace over a single character. Press and hold the Back button to backspace and delete all text in a field.
To enter the plus (+) sign for international calls: Press and hold 0.
1.7 Securing Your Smartphone
You can customise the level of security you want to have on your Smartphone by locking the SIM card, the keypad, or the entire phone.
Locking the keypad
The keypad lock turns off the keypad functionality. This is a helpful feature if, for example, the phone is turned on and in your pocket, and you want to prevent accidental keypresses from dialing a number, etc. One way is to select Settings > Security > Enable Phone Lock from the Start menu. Another way:
- To lock your keypad: When in the Home screen, press and hold the End button. The Left Softkey will display Unlock, indicating that your phone is locked.
- To unlock your keypad: When in the Home screen, press the Unlock softkey, and press the # key.
Locking the SIM card
Locking your SIM (Subscriber Identity Module) card prevents you from using your Smartphone, but you can still turn it on and make emergency calls. When you turn your Smartphone on, you will be prompted for your PIN1 password, which you must enter correctly before you can use the phone.
- To lock the SIM: Select Settings > Security > Enable SIM Lock, and then press the Action button. Enter your PIN1 password, and then press the Done softkey.
- To unlock the SIM: Select Settings > Security > Disable SIM Lock, and then press the Action button. Enter your PIN1 password, and then press the Done softkey.
Locking your Smartphone
Locking your Smartphone prevents access to personal data. When you enable this feature, your Smartphone will automatically lock after a specified time of inactivity. A screen will be displayed requiring your phone lock password before access is granted. You can still receive calls and make emergency calls when the phone is locked.
-
To lock your Smartphone:
-
Press the Power button and quickly release, to display the Quick List. Select Device lock, then press the OK softkey.
- In the Lock phone after field, select the amount of time you want your Smartphone to be inactive before it automatically locks.
- In the Password field, enter the password you want to use, to access your Smartphone when it is locked.
-
In the Confirm password field, enter the password again, then press the Done softkey.
-
To unlock your Smartphone: Press the Unlock softkey, enter your password, then press the Unlock softkey again.
- To turn off phone lock: Select Settings > Security > Disable Phone Lock, enter your password, and then press the Done softkey.
NOTE: If you forget your password, please call your Customer Care Service Center for information about how to reset your device and thereby regain access to it. The procedure will cause your Smartphone to lose all programs you had installed, and personal data. However, note that if you had previously synchronised with a PC, you will be able to recover the lost programs easily by synchronizing with it again, after the reset. Therefore, it is recommended that you synchronise periodically, in the event that you ever need to easily recover your data.
Chapter 2
Using your Smartphone
2.1 Making a Call
2.2 Receiving a Call
2.3 Contacts and Beaming
2.4 Caller Photo ID
2.5 In-call Options
2.6 Retrieving a Voice Mail Message
2.7 Reviewing Your Calls
2.8 Speed Dials and Voice Tags
2.9 Advanced Dialing Information
2.1 Making a Call
There are several ways to make a call on your Smartphone.
Making a call from the Home screen
When in the Home screen, press the numbers on the keypad to enter the phone number, and then press the Talk button to make the call. Press the Back button if you need to backspace over a digit.
As you enter a phone number, your phone searches Contacts, Call History, Speed Dial lists, and your SIM card, to find a matching number. Matching names and numbers will be displayed. When you see the name of the person you want to call (or the entire number) displayed, select it and press the Talk button.
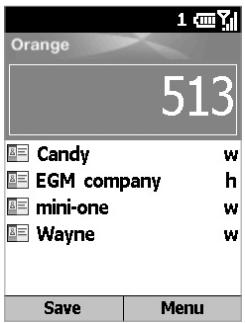
In this example, the first few digits of a phone number have been entered. The names listed in this screen have all been found to have phone numbers that start with these digits. At this point, you can select the desired name without having to enter more numbers.
Making a call from Contacts
Refer to section 2.3 if you need information about how to access your Contacts.
To make a call by Contact name
If there are many contacts listed, you can enter the first few letters of the desired contact's name to perform a search. Select the name you want to call, then press the Talk button. The phone number that has been specified as the default phone number for that contact entry will be dialed.
To change the default number for a Contact:
Select the contact whose default phone number you want to change, then press the Right or Left navigational button to change the default number. The abbreviation at the right side of the list indicates the default number. For example, if you change "w" to "m," the default number changes from Work phone (w) to Mobile phone (m). A list of abbreviations and their meanings is included in section 2.3.
To make a call from an open Contact Card:
Select the desired contact, then press the Action button to display all the information for that contact. Select the number you want to call, then press the Talk button. (See section 2.3 for an illustration of a Contact Card.)
Making a call using a recently dialed number
When in the Home screen, press the Talk button to display a list of recently-dialed names/numbers. Select the item you want to dial, then press the Talk button again. Note that you can also use the menu in this screen to open a Call Info screen for the selected item.
Making a call from the Call History list
Select Call History from the Start menu. Select the number or name you want to call, then press the Talk button.
Making a call from a hyperlink
When you see an underlined phone number presented as a hyperlink in an E-mail message, just scroll to it, and press the Action button to make the call.
Making emergency calls
Calls to emergency service numbers can be made under any circumstances, even if you have locked the SIM card and/or your phone. To place an emergency call, dial the emergency number appropriate for your location, and press the Talk button.
2.2 Receiving a Call
When you receive a call, the name and number of the caller are displayed on the screen. If the name of the caller is not in your Contacts list, only the caller's phone number is displayed, as shown in the example below. You can answer a call by pressing the Talk button or the Left softkey ("Accept").
If don't want to take the call, press the Right softkey ("Reject"). Note that selecting Reject will connect the caller to your voice mail box, if you subscribe to this service. You can also select Call History from the Start Menu to view a list of incoming call records.
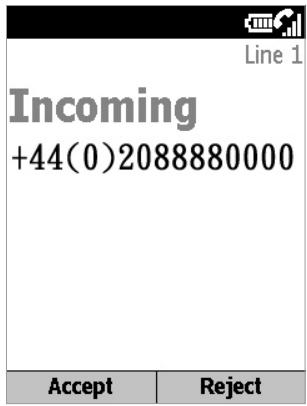
NOTE: This is the default behavior for incoming calls. Refer to section 2.4 if you want a Caller Photo ID (which you have associated with the caller) to be displayed on your screen during incoming calls.
Answering a second call using Call Waiting
If you are already talking on your Smartphone when you receive another call, the Call Waiting screen will appear. To place the current call on hold and answer the incoming call, press the Left Softkey ("Accept") or the Talk button to simultaneously place the first call on hold and answer the second call.
If you want to end the first call before answering the incoming call, press the End button, and then press the Accept Softkey or the Talk button to accept the incoming call.
Rejecting a Call Waiting call
If you are talking on your Smartphone when you receive another call, and you don't want to answer the incoming call, press the Right Softkey ("Reject") in the Call Waiting screen. This will keep your current call in progress, but will connect the "call waiting" caller to your voice mail box, if you subscribe to this service.
2.3 Using Contacts and Beaming
You can think of Contacts as an online address book, where you can store information about people and businesses you communicate with in contact cards. For example, you can store multiple phone numbers, E-mail and street addresses, Web pages, birthdays, anniversary dates, etc. You can use Contacts to dial phone numbers and compose E-mail and SMS messages directly from a contact card.
The Contact list
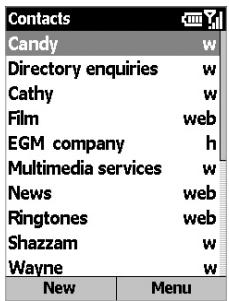
The Contacts list displays the names of your contacts alphabetically, along with an abbreviation for the default communication method, such as the person's work phone number (w) or home phone number (h). This makes it easy to reach the contact using the method you prefer. Note that if the contact entry includes a work phone number, your phone will automatically set it as the default number.
Accessing your Contacts
When in the Home screen, you can press the Right Softkey or select the Contacts icon to open the Contacts list directly. You can also select Contacts from the Start menu to open the screen as shown below on the left.
When selected, a sample Contacts listing is shown below on the right. Then, select the desired contacts from the list to access Contacts.
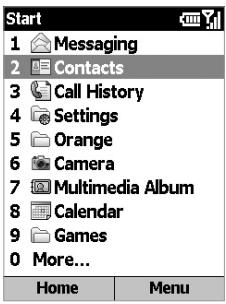
NOTE: You can also access your Contacts by selecting Caller Photo ID, as explained in section 2.4.
The following table shows some of the abbreviations that might be displayed in the Contacts list, and their meanings.
| Abbreviation | Meaning |
| w | Work phone |
| w2 | Second work phone |
| wfx | Work fax |
| h | Home phone |
| h2 | Second home phone |
| m | Mobile phone |
| pgr | Pager |
| car | Car phone |
| txt | Text message number |
| e | E-mail address |
| e2 | Second E-mail address |
| e3 | Third E-mail address |
| web | Web page |
To call a contact using the default number:
- Press the Right Softkey ("Contacts") when in the Home screen to directly open Contacts. Or, select Contacts from the Start menu.
- Scroll to and highlight the contact you want to call.
- Press the Talk button. The phone dials the contact's default phone number. The abbreviation for this number appears to the right of the contact name.
NOTE: If you want to change the default number, select the desired Contact entry and press the Action button. Then, select the number you want to assign as the default, and select Set as Default from the menu.
To call a contact using a number other than the default number:
Select the contact in the list, press the Left or Right navigational buttons to display the abbreviation for the number you want to use, then press the Talk button.
To find a contact by entering a name:
Begin entering the name of the contact to find until the name is displayed. For example, to find "Sandra," enter 7, 2, 6, 3, 7, 2 because these numbers correspond to the letters for that name.
To filter contacts:
Select Filter from the menu, then select the category whose entries you want to display, such as Business, Miscellaneous, or Personal. Only the contacts assigned to the category you select are displayed in the list.
To create a new contact:
When the Contacts list is displayed, press the Left Softkey ("New"), or select New Contact from the menu. After entering the desired data, press Done.
To delete a contact:
Select the desired entry in the Contacts list, then select Delete from the menu.
To assign a Photo ID to a contact:
Use the Caller Photo ID application. This is explained in section 2.4.
Contact cards
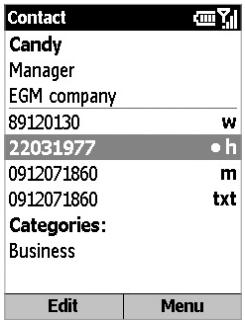
To view a "contact card," select the desired contact in the list and press the Action button. A contact card displays all of the information that you have entered for that contact. You can use the menu to add it to your Speed Dial, send a text message, add voice tag, save it to your SIM card, set the selected number as the default number, beam the Contact, delete it, or edit it.
To view and edit an existing contact card:
Select the desired entry from the Contact list. Press the Action button to view the contact card. If you wish to modify it, press the Left Softkey ("Edit") or select Edit from the menu.
To call a contact from a contact card:
Select the desired entry from the Contact list. Press the Action button to access that contact card. Press the Up or Down navigational button to select the number you want to call, then press the Action button to dial that number.
To send E-mail from a contact card:
- Select the desired entry from the Contact list.
- Press the Action button to open the related contact card.
- Select the E-mail address and press the Action button.
- Select an account to use, then press the Action button.
- Enter a subject, compose your message, and then select Send.
Using contact card menu options
Select the desired contact in the list, then press the Action button to access the related contact card. Using the menu accessed from that screen, you can perform the functions listed below.
Add Speed Dial
Enables you to create a shortcut to a phone number, E-mail address, or Web URL by assigning one or two numbers as a speed dial. (See section 2.8.)
Send SMS Message
Enables you to send an SMS (short message) to the contact person.
Add Voice Tag
After recording a Voice Tag, it serves as a shortcut to a phone number, E-mail address, or Web URL when you speak the Voice Tag. (See section 2.8.)
Save to SIM
Saves the contact to the SIM card.
Set as Default
Makes the selected phone number or E-mail address the default communication method for the contact.
Beam Contact
Sends the contact card data to another mobile device or a desktop PC using infrared or Bluetooth (see next page).
Delete
Removes the contact card from the Contacts list.
Edit
Enables you to modify information in the contact card.
Beaming information
You can use the Bluetooth or infrared port on your Smartphone phone to send and receive (beam) contact information between your Smartphone and another mobile device or a PC that has Bluetooth or an infrared port and supports vCards and vCal. However, you cannot beam SIM contacts. See Chapter 5 for more information about Bluetooth.
To beam a contact:
- Press the Right SoftKey ("Contacts") when in the Home screen to directly open Contacts. Or, select Contacts from the Start menu.
- Select the Contact entry you want to beam.
- Select Beam Contact from the menu in the Contacts screen.
- Scroll to the device to which you want to beam.
-
Do one of the followings:
-
To beam by infrared, make sure that the infrared ports are unobstructed and within close range of each other.
-
To beam by using Bluetooth, make sure that both Bluetooth radios are turned on and that Bluetooth is discoverable on the receiving device.
-
Press the Left Softkey ("Beam"). Status information will then be displayed, indicating the name of the device to which your Smartphone is beaming, and whether the beaming process is pending, finished, or has failed.
To receive beamed information:
- Select Settings from the Start menu.
- In the Settings screen, select Beam.
- Select the Receive incoming beams checkbox so that the checkbox is checked.
-
Do one of the followings:
-
To receive by infrared, align the infrared ports so that they are unobstructed and within close range of each other.
-
To receive by using Bluetooth, make sure that your Bluetooth radio is turned on and in discoverable mode.
-
Select Done. Your Smartphone is now capable of receiving beams (until you clear the Receive incoming beams checkbox).
NOTE: Your Smartphone can receive beamed files of any type, but you may need to copy some files to your PC for viewing.
SIM contacts
SIM contacts are stored on your SIM card. When you insert your SIM card into a different device, you can view and use the SIM contact information on the new device. Unlike regular contact cards, you can store only one phone number for each SIM contact.
To create a new SIM contact:
- Press the Right Softkey ("Contacts") when in the Home screen to directly open Contacts. Or, select Contacts from the Start menu.
- Open the menu and select New SIM Contact.
- Enter the Name and Number, then select Done.
The new contact appears in your contact list, and a SIM icon ( ) will display to the right of the name indicating that the contact is stored on your SIM card.
2.4 Caller Photo ID
Caller Photo ID is an application that adds more fun to using your Smartphone. It allows you to assign photos or animated GIF files to the entries in your Contacts. Then when a person calls you (for whom you have previously assigned a photo ID), that photo ID will appear on your Smartphone's incoming call screen.
You can also perform maintenance on the Contacts, and create new Contacts and Groups and assign members to the Groups, right from within Caller Photo ID. You can even use this application to assign ringtones to Contacts.
Caller Photo ID does not run automatically when you turn on your Smartphone. You must invoke it after your Smartphone is turned on.
Starting the Caller Photo ID program
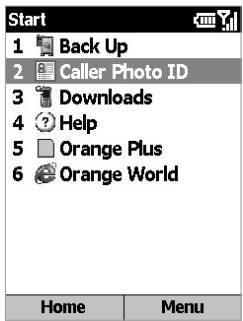
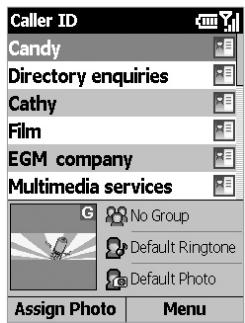
To invoke Caller Photo ID, select Orange > Caller Photo ID from the Start menu. The Caller ID screen will then open as shown below on the right, and all of your Contacts and SIM Contacts will be listed.
An icon should display in the Title Bar to indicate that the "Caller ID monitor" is running, meaning that Photo IDs (if assigned) will display when incoming calls are received. The Caller Photo ID monitor "On" and "Off" icons are illustrated in the table of section 1.2.
NOTE: Even if Caller Photo ID monitor is not running, you can still use Caller ID to assign photos and manage contacts and groups. The photos will display within your Contacts application, but incoming calls will not be able to display the Photo IDs you assigned. (To disable Caller Photo ID monitor manually, use Options > General as mentioned later in this section.)
Main ListView and Detailed View
When you start the Caller Photo ID application, the main ListView will display as shown in the example on the next page. The Contacts entries fully mirror those in your Contacts. Any changes you make to your Contacts data using Caller Photo ID will simultaneously be made in your Contacts.
In the example on the next page, a Photo ID has already been assigned to the selected Contact entry. The icon at the rightmost side of each Contact indicates whether the Contact resides in your phone's local memory or on the SIM card. If a Photo ID has been assigned, an additional icon will indicate such.
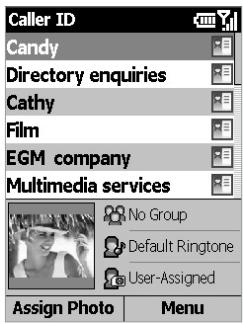
Main (List) View
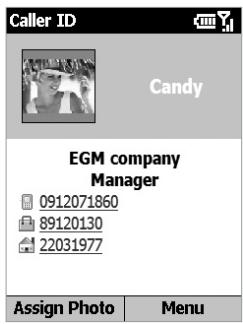
Detailed View
To switch to Detailed View, press the Action button. All data that has been entered for the selected Contact will be listed. To switch back to ListView, select Cancel from the menu.
Menu Commands
The menu in Detailed View lets you display the Next or Previous contact entry; Edit or Delete the current contact; and Assign or Unassign a photo ID to it.
The menu in ListView contains the following commands:
New
Opens a standard screen in which you can enter data and create a new entry in your Contacts.
Delete
Select the entry you want to delete, then select Delete. A message will remind you that if you delete this entry using Caller Photo ID, it will also be deleted in your Smartphone's Contacts.
Reset Filter
This command is enabled after you have performed any manual filtering of entries using your Smartphone's keypad. For example, if you have pressed the keys for "j," "a," "c," and "k" to list only the entries containing the string "jack," you can select Reset Filter, or press the * shortcut key, to reset the main view so that all entries are once again listed.
NOTE: This command does not affect any filtering you may have done using the Filter command explained below.
Filter
This command opens a submenu that lets you control which category of items are listed on the screen: SIM Only, Contacts Only, and Group. By default, No Filter is active.
Assign
This command opens a submenu that lets you assign a selected Photo and Ringtone to the Contact. The two options are explained later in "Assigning a Photo ID and Ringtone to a Contact."
Preview
This command is available if a Photo ID is currently assigned to the selected Contact entry. First, select a Contact entry in the list that already has a photo assigned to it, and then select Preview. Or, you can simply press the # button on your phone keypad to preview.
Options
Selecting Options opens a submenu that contains five commands: Manage Group, Set Default Photos, Display Settings, Text Settings, and General.
- Manage Group: This command provides a convenient interface that lets you perform complete management of your contacts groups. Initially, it opens the Manage Group screen, which lists all currently existing groups and the number of members assigned to each group, as well as the Photo ID assigned to the selected group (if any).
Press the Right Softkey in the Manage Group screen to open the menu, which lets you create New groups, Rename or Delete groups, Assign Members to groups, Assign Photo or Unassign Photo, and Preview the behavior of an already-assigned photo and/or template.
The Assign Photo, Unassign Photo, and Preview commands in the Manage Group screen operate the same as those for assigning individual Photo IDs, as explained later in "Assigning a Photo ID to a Contact." Note that a Photo ID assigned to a group will display during an incoming call only if no individual Photo ID has been assigned to the caller. The individually-assigned Photo ID has precedence over the group-assigned Photo ID.
- Set Default Photos: Opens a screen that lets you assign, change, or unassign default Photo IDs for Unknown Photo, Not-found Photo, and general Default Photo, as follows:
Unknown Photo: This photo will display whenever the phone number of the incoming call is not known to Caller Photo ID because no phone number was "passed in" to your Smartphone. This would occur if the person calling you has blocked their phone number from being displayed to the receiver, or has not enabled the broadcast of their Caller ID.
Not-found Photo: This option in the Set Default Photos screen lets you assign a generic Photo ID to any incoming call from a person whose number is not found in your Contacts. That is, the phone number of the incoming call is known, but has no matching entry in your Contacts.
Default Photo: This photo will display when the incoming call is found to be from a matching entry in your Contacts database, but so far there is no user-assigned Photo ID for either that individual Contact entry, or for the Group it belongs to.
-
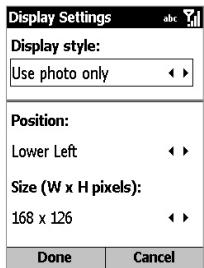
Display Settings: Opens the Display Settings screen, which allows you to specify whether the Photo ID should consist of only a photo (Use Photo Only), or a photo merged with a template (Use Template). Options available in this screen will depend on which of these is active in the Display Style field. This screen is illustrated in the next subsection ("Assigning a Photo ID to a Contact").
-
Text Settings: Opens the Text Settings screen, which allows you to specify the text shown on the screen. The Show text option contains three items: Show user settings, Show system settings, and Do not show text. When you select Show user settings, you can customise the text format shown on the screen, including Font type, Font style, Font size, etc.
-
General: Opens a screen that contains a checkbox: Display photo during incoming or waiting call. This option is active by default. If you uncheck this checkbox and then select "Done," Caller Photo ID monitor will be disabled. The phone will recover its original background image for incoming calls, and the Incoming Call monitor will be unloaded from memory. No photos will display when the checkbox is not checked.
Assigning a Photo ID and Ringtone to a Contact
The Assign > Photo and Assign > Ringtone commands let you assign an image file/animated GIF file ("Photo ID") and ringtone to an individual Contact entry stored in your Contacts, or Phonebook entry on the SIM card. You can also specify a size, and a position for the Photo ID.
And, to add more fun and a stronger visual impact to your incoming calls, you can assign an animated template, which will serve as a frame around the image, if desired. Templates are animated GIF files. You can choose to display the Photo ID only, or the Photo ID together with a template, and easily change Photo IDs and/or template at any time.
NOTE: The steps in this subsection are for the Assign Photo command on the main menu (individual Contact assignment), but this same basic procedure can also be followed when:
-
Assigning a Photo ID to a Group (using the Assign Photo command on the menu in the Manage Group screen).
-
Assigning "Unknown Photo," "Not-found Photo," and "Default Photo" (using the Assign Photo command on the menu in the Set Default Photos screen).
- Assigning an individual Photo ID using the Assign Photo command on the menu accessed when in Detailed View.
Assigning a Photo ID
First, make sure the photo you want to use is either a JPEG, BMP, or GIF file (either still or animated GIF). By default, the \Storage\My Documents folder is searched for these file types. If the file you want to use is located somewhere else, you can optionally search other folders in Step 2 below.
- In the main Caller ID screen, select the desired Contact in the list.
- Select Assign > Photo from the menu, or simply press the Left Softkey. The first Assign Photo screen will appear. In it, your JPEG, BMP, and GIF files will be displayed as thumbnails. (If you want to search other folders, open the menu and use the Change Folder command.)
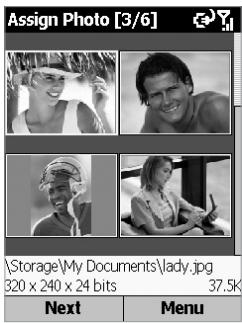
- Select the file you want to use as the Photo ID.
- Press the Left Softkey ("Next"). A Preview screen opens. Optional: If desired, you can use Caller Photo ID's New from Camera command to take a new picture and then assign it as a Photo ID right away. Open the menu in this
Assign Photo screen and select New from Camera. This switches to the Camera mode. After taking a new photo, you will be returned to Caller Photo ID so you can assign the new photo as a Photo ID.
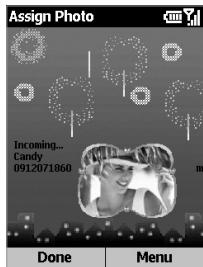
If Use Template is selected in the Display Settings screen, the photo is previewed in a template. You can use the menu in this Preview screen to preview the Next Template or Previous Template, or press the * or # keys to do so.
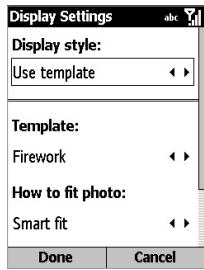
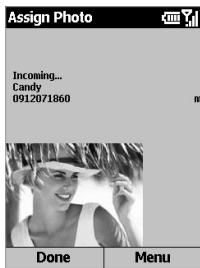
If Use Photo Only is selected in the Display Settings screen, the photo alone is previewed according to the current Position setting in Display Settings.
-
In this Preview screen, you can adjust the position of Incoming... information by pressing the Up/Down/Left/Right navigational button.
-
If this Preview screen already shows the setup you want, press the Left Softkey ("Done").
Or, to access various setup options, press the Right Softkey to open the menu.
Select Display Settings from the menu if you want to switch to either Photo Only assignment or Use Template assignment. If you select Use Photo Only, you can specify one of several positions, and a size. If you select Use Template, you can specify the template to be used, and the method for fitting the photo on the Incoming Call screen.
You can also open the Display Settings screen outside of the "Assign Photo" process by selecting Options > Display Settings from the main menu in ListView, and you can preview the behavior of any Photo ID assignment by selecting Preview.
Assigning a Ringtone
Caller Photo ID features another function that lets you identify the incoming caller easily: assigning a Ringtone. With this function, you can assign different ringtones to the individual Contact.
- In the List View screen, select the desired Contact in the list.
- Select Assign > Ringtone from the menu. The Assign Ringtone screen will appear. Select the desired Ringtone from the Select a ringtone list. (If you want to search other folders, open the menu and use the Change Folder command.)
- When selected, press the Left Softkey ("Done") to return to the main Caller ID screen. An icon will appear to indicate that a Ringtone is assigned to the Contact.
2.5 In-call Options
Listed below are the menu options that might possibly be available when a call is in progress. Some of these options are only available when multiple calls are in progress or during a conference call.
End
Disconnect the call.
Hold
Place the active call on hold.
Unhold
Activate the call on hold.
Swap
Switch between two calls.
Save Contacts
Create a Contact record for the caller.
Conference
Join together all existing calls, if you have subscribed to this service.
Private
Break one call out of a conference and make this call active while the rest of the conference is on hold.
Speakerphone
Increase the volume of the earphone.
Mute
Mute the microphone for the active call. The other party will not hear anything you say, but you can still hear the other party.
Unmute
Turn the microphone back on for the active call.
2.6 Retrieving a Voice Mail Message
When in the Home screen, press and hold 1 to call your voice mailbox, and follow the prompts to retrieve your messages.
NOTE: This is actually a Speed Dial (see section 2.8). Speed Dial 1 is reserved for voice mail access and the number is configured in your settings.
2.7 Reviewing Your Calls
Using Call History and Call Timers, you can view information about phone calls that you have made and received. For example, you can see who has called you recently and find out how much time you have spent talking on your Smartphone.
Call History
Call History displays the last 36 calls that you have made, received, and missed. Each entry in Call History contains the start time of the call, the duration, the caller's name, if available, and the caller's number. The oldest calls are automatically deleted from the list to make room for the newest calls.
To view your Call History, select Call History from the Start menu. If desired, you can then filter the list so that only Missed Calls, Incoming Calls, or Outgoing Calls are listed. Simply open the menu in the Call History screen, select Filter, and then select the desired category from the submenu.
Other commands on the menu in the Call History screen besides Filter:
Find Contact
Lets you view Contact information related to the selected entry.
Select the entry in the Call History list to whom you want to send E-mail, then select E-mail on the menu. You will be switched to the Messaging screen.
View Timers
Opens the Call Timers screen. See the subsection below for details.
Delete
Removes the selected item from the list.
Delete List
Removes all items in Call History.
Save to Contacts
Creates a new Contact entry using the info related to the selected item in Call History.
Call Timers
To access the Call Timers screen, select Call History from the Start menu, then open the menu in the Call History screen and select View Timers.
Call Timers gives you detailed information regarding the length of your last call, the total number of calls made and received, calls by type (incoming, outgoing, roaming, and data), and a lifetime counter.
Call Timers is useful for keeping track of your calling patterns, for example to determine what type of calling plan you want. It can also help you estimate your monthly billing. You can reset Call Timers to zero (0), for example, to start timing calls for a new monthly billing cycle.
2.8 Speed Dials and Voice Tags
You can create "Speed Dials" for frequently-called phone numbers, which allow you to make a call by simply pressing and holding one or two keys. You may choose Speed Dial entries from 2-99. Speed Dial 1 is reserved for voice mail access, and the number is configured in your settings.
You can create a Speed Dial for a phone number, a program on the Start menu, an E-mail address, or Web page address (URL) that is stored in Contacts.
Speed Dials
Creating a Speed Dial for a contact phone number
- Press the Right Softkey ("Contacts") when in the Home screen to directly open Contacts. Or, select Contacts from the Start menu.
- Select the desired Contact entry and then press the Action button to access its Contact card. All data entered for that Contact will be listed.
- Select the phone number for which you want to assign a Speed Dial.
- Press the Right Softkey to open the menu and select Add Speed Dial.
- In the Keypad Assignment field of the Add Speed Dial screen, select the number you want to assign as the Speed Dial. Press the Left or Right navigational button to select, or press the Action button to view the full list of choices.
NOTE: You can also use the Voice Tag field in the Add Speed Dial screen if you want to assign a Voice Tag (see next subsection).
- Press the Left Softkey ("Done") to save the new Speed Dial.
For URLs and E-mail addresses
You can also create Speed Dials for URLs (Web addresses) and E-mail addresses that are stored in Contacts. In Step 3 above, just select the desired E-Mail address or URL address (instead of a phone number).
Making a call using a Speed Dial
When in the Home screen, press and hold the number on the keypad that you have assigned as a Speed Dial for a number. If the Speed Dial number consists of two digits, press the first digit and then press and hold the second digit.
Viewing Speed Dials you have created
To view your Speed Dial setting, select Accessories > Speed Dial from the Start menu. All Speed Dial entries will be listed. In addition, you can use the menu in this screen to perform the following:
Run
Invokes the contact method associated with the selected Speed Dial (dials a number, starts Internet Explorer, or invokes Messaging). You can perform this same function by pressing the Left Softkey ("Go").
Find Contact
Opens the Contact card associated with the selected Speed Dial.
Delete
Deletes the selected Speed Dial entry from the list.
Filter
Lets you filter the list to display only the Speed Dial items or only the Voice Tag items.
Voice Tags
You can record a voice tag ("Speed Dial Voice Recognition") for a phone number, E-mail address, or Web page address that is stored in your Contacts. Then, when you verbally speak the voice tag, your Smartphone automatically dials the associated phone number, opens an E-mail message using the associated address, or goes to the associated Web page.
Creating a Voice Tag for a phone number, E-mail address, or URL in your Contacts
- Press the Right SoftKey ("Contacts") when in the Home screen to directly open Contacts. Or, select Contacts from the Start menu.
- Select the desired Contact entry, then press the Action button to access the related Contact card. All data entered for that Contact will be listed.
- Select the phone number, E-mail address, or Web page address for which you want to assign a Voice Tag.
- Press the Right Softkey to open the menu, and select Add Voice Tag.
- After the message/beep, begin recording the voice tag (preferably one easy-to-recognize word).
- Your Smartphone will automatically play back the voice tag. If successful, a message will indicate such. Select OK to close the message screen.
- The Add Speed Dial screen will display. It displays, and allows you to edit, the Name, Value, and Keypad Assignment. Press the Left Softkey ("Done") when ready to save the new voice tag.
To use the voice tag, press and hold the Volume Down button on the left side of your Smartphone for three seconds in the Home screen, to invoke the recording function. Say the word that you recorded as a voice tag. Your Smartphone plays back the voice tag and then dials the associated phone number; or opens a new E-mail message; or goes to the associated Web page (whichever you chose prior to creating it in Step 3 above).
Creating a Voice Tag for an application
You can also associate a voice tag with an application. For example, to build a voice tag for the Calendar application, do as follows:
- In the Home screen, press the Left Softkey ("Start") to open the Start menu.
- In the Start menu, highlight Calendar on the menu.
- Press the Right Softkey to open the menu and select Add Voice Tag.
- After the message/beep, say "Calendar."
- Your Smartphone will automatically play back the voice tag. If successful, a message will indicate such. Select OK to close the message screen.
- The Add Speed Dial screen will display. It displays, and allows you to edit, the Name, Value, and Keypad Assignment. Press the Left Softkey ("Done") when ready to save the new voice tag.
Then, in the future, you can invoke the Calendar application by holding the recording button in the Home screen and then saying "Calendar" after the beep. The system will repeat the voice tag "Calendar" to indicate that it recognized the word, and will then launch Calendar. If the phone misinterprets the word, press the End softkey and start over, making sure to speak the word clearly and closely into your Smartphone's microphone.
2.9 Advanced Dialing Information
The following information covers advanced dialing options that may be useful for phone numbers requiring special dialing instructions.
Inserting an international country code
International calls require a country code to be included in the phone number. A plus sign (+) must appear first, followed by the country code and the rest of the phone number. To enter the plus sign, press and hold 0 until + appears.
Inserting a three-second pause in a dialing sequence
Some international calls require a three-second pause in the dialing sequence in order for the call to process successfully. To insert a pause:
- Press the Right SoftKey ("Contacts") when in the Home screen to directly open Contacts. Or, select Contacts from the Start menu.
- Select the Contact entry that contains the phone number in which you want to insert a pause, then press the Action button to access the Contact card for that entry.
- Press the Left Softkey ("Edit"), or select Edit from the menu.
- In the Edit Contact screen, select the specific phone number in which you want to insert the pause. Then press the Left or Right navigational buttons to position the cursor within the number where you want to insert a three-second pause.
- Open the menu and select Insert Pause. The letter "p" will appear in the number for your reference, to show where the three-second pause will occur in the dialing sequence.
- Press the Left Softkey ("Done").
Inserting a manual pause in a dialling sequence
There may be phone numbers that require a pause longer than three seconds in the dialing sequence. For these cases, you can pause as long as you want, and manually continue the dialing sequence using the Talk button.
Follow the same steps outlined above in "Inserting a three-second pause in a dialing sequence," except in Step 5, select Insert Wait from the menu. The letter "w" will appear in the number for your reference, to show where the indefinite pause will occur in the dialing sequence. Don't forget that when you call a number containing a "manual pause," you will need to press the Talk button to continue dialing.
Chapter 3
Using Your Camera
3.1 Camera Mode
3.2 Album Mode
3.1 Camera Mode
When in Photo capture mode, you can capture standard still images. In Picture Theme capture mode, you can place your captured images into attractive frames (templates). Use Photo ID capture mode to capture an image that you want to assign to one of your Contacts as a Photo ID. Or, switch to Video or MMS Video capture mode and capture "live" video streams (with audio if desired), then share them with others. You can even send the captured files via E-mail, MMS, Bluetooth, or infrared beaming.
Invoking Camera mode
Use any of these methods to switch to Camera mode on your Smartphone:
- Press the Camera button on the right side of your Smartphone. The live incoming video stream will be shown on your screen. If you have not yet started the Camera application, the Photo capture mode will be active by default. If you previously started the Camera in the current session, the most recently used capture mode will be active.
- Select Camera from the Start Menu, or select Multimedia Album and then press the Left Softkey ("Camera").
- By default, the Camera icon is one of the six program icons in the Home screen. Press the Up/Down navigational button to select the Camera icon, then press the Action button to open a menu containing the following three options: Take a Picture, Media album, and Background. Select Take a Picture to enter the Camera mode.
Choosing a Capture submode
When in Camera mode, select Capture Mode from the main menu, and then select either Photo, Video, MMS Video, Photo ID, or Picture Theme from the submenu. Or, you can press 1 on your keypad to switch the capture submode.
NOTE: Newly-captured video files are placed in your \My Documents folder by default. However, the first time you capture a new still image, a new My Photos folder will be created under \My Documents, and the new image file will be placed there.
Capturing a still image
Switch to Photo capture mode. When in Photo capture mode, the word "Photo" appears in the Title Bar.
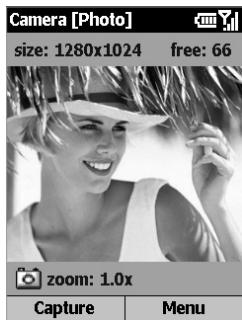
The current capture size (resolution) dimensions are shown at the upper left of the screen. Press 2 on your keypad to switch to the other resolutions available, or use the menu as explained later. Press the navigation pad up if you want to Zoom In, or down to Zoom back out. The current Zoom ratio is shown near the lower left of the screen. (See the Zooming In and Out section for a complete list of capture sizes and related zoom capability.)
Besides specifying a capture size, you can also specify the destination storage media for saved files, rename them after capturing them, and an output quality (the output format for image capture is JPEG). The number of images you can still capture, according to available memory and your current settings, is always displayed near the upper right of the screen.
Capturing a video using Video mode
Switch to Video capture mode as explained earlier. When in Video capture mode, the word "Video" will be shown in the Title Bar.
The Capture Size dimensions are shown near the upper left of the screen. Press 2 on your keypad to select the size (176 x 144, or 128 x 96). Press the navigation pad Up if you want to zoom in, or Down to zoom back out.
To specify the output format, select Options from the menu and then Modes (or, select Manage from the Capture Mode submenu). In the Encoder field, select either MPEG-4, H.263, or Motion-JPEG AVI. Also, you can set a limit to the video file size in this screen.
Select Options > Video to specify whether or not to capture audio to accompany the video clip, and to change the default renaming convention if desired. As a shortcut, you can press the 6 button on your phone keypad to toggle audio-capture capability On and Off. An icon resembling a microphone in the lower right of the Video Capture screen indicates whether audio capture is enabled or disabled. When Off, a diagonal line is drawn through the icon, as shown below.

Audio recording enabled

Audio recording disabled
The amount of time available for your next video capture, according to available memory and your current settings, is always displayed near the upper right of the screen.
To begin capturing a video clip, press the Camera button on the right side of your Smartphone, or the Left Softkey ("Capture"), or the Action button. Press any of them again to stop recording. If a limit has been set for the video file size, recording will stop automatically when the limit is reached.
Capturing a video using MMS Video mode
Switch to MMS Video capture mode. The usage, method of capturing, and options for MMS Video capture mode are the same as for Video capture mode, except for the following:
Whereas the Video capture mode allows you to set any file size limitation, MMS Video mode is permanently set to a file size limitation of 95 KB. When the video currently being recorded reaches a file size of 95 KB, the recording process will automatically stop.
In addition, when in MMS Video mode, there are only two choices for Encoder type: MPEG-4, and H.263. Typically, it is recommended that you use H.263 for video files to be sent as MMS attachments.
Using Photo ID mode
The Photo ID capture mode captures a still image in the same way as Photo capture mode, but captures at a size (176 x 180) which is convenient to use directly as a Photo ID for one of your contacts.
Immediately after capturing an image using Photo ID capture mode, you can select Save As > Caller ID Photo from the menu in the Review screen (shown later in the section entitled The Review screen) to invoke the Photo Caller ID application.
In Caller Photo ID, all entries in your Contacts will be listed. Select the Contact to which you want to assign the image you just captured. Then press the Left Softkey ("Next") and then again ("Done") to assign the photo. After that, you will be returned to the Capture screen of Camera mode automatically.
Using Picture Theme mode to frame your captured photos
When in Camera mode, select Capture Mode > Picture Theme from the menu. The Picture Theme capture mode lets you place your captured images into selected frames.
When you switch to Picture Theme, one of your templates in the My Documents\Frames folder will be loaded. To load a different template, press the navigation pad Left or Right; or select Select Template from the menu to browse and preview each template. The file name, dimensions, and number of images required for that template will be displayed in the Select Template screen, as shown below on the left.
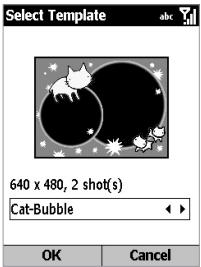
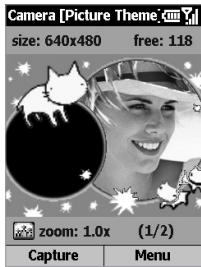
The figure on the right above shows the Picture Theme capture mode, ready to capture an image. The incoming video stream is previewed in the "place holder" where the captured image will be placed (in this example, it's the
place holder on the left). Note that (1/2) is displayed in the lower right of the screen. This indicates that the next image captured will be the first one; no images have been captured yet.
In templates that require two or more images, the focus switches to another "place holder" after the first one is filled.
To capture an image, press the Camera button on the right side of your Smartphone, the Left Softkey ("Capture"), or the Action button. The image will be saved with the frame.
Zoom capability is determined by the currently loaded template, as shown later in the table in the Zooming in and out section.
The Review screen
If the Review after capture checkbox is checked in Options > General (it is checked by default), a "Review" screen will appear immediately after you have captured a file using any of the five capture submodes.
In the example below, a video file has just been captured, so the first frame of the video file is shown in the Review screen. Pressing the Right Softkey will open the menu illustrated.
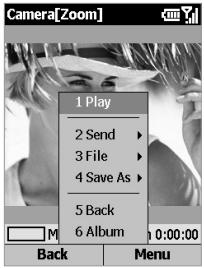
In the previous figure, the Title Bar indicates Zoom mode. This means you can press the Up and Down buttons to Zoom In and Out.
Or, when in Zoom mode, you can press the Action button to switch to Pan mode. If the image is too large to fit in the display area, you can press the Up, Down, Left, or Right buttons to pan the image to the desired position.
Commands on the menu in the Review screen vary according to the type of captured file, as follows:
Play
This command is available on the menu only if the newly-captured file is a video file. A Progress Bar at the bottom of the screen will indicate progress of the playback.
Send
You can send the newly-captured file via E-mail, via MMS, or via Bluetooth/Infrared beaming. If the file is a video file in Motion-JPEG AVI, the Send submenu only contains the via E-mail and the Beam file command. If the new file is a video in MPEG-4 or H.263 format, or if it is a still image (Photo, Photo ID, Picture Theme), via MMS, via E-mail and Beam file commands are available on this submenu. Selecting via MMS or via E-mail invokes a New message screen which allowing you to compose MMS or E-mail with the file already attached.
Finally, the Beam File command on the Send submenu lets you beam the file using either Infrared or Bluetooth. After you select Beam File, align your Smartphone phone's port with the port of the other device. When a device is detected, the device name will be displayed on the screen. If an Infrared device is detected, the file will be beamed directly. If a Bluetooth device is detected, press the Left Softkey ("Beam") to start beaming.
File
This submenu lets you:
- Delete (if you decide you don't want to keep the file)
- Move to (select the folder where you want to move it to)
- Copy to (select the folder where you want to copy it to)
- Rename (keep the file and change its name)
Save As
If the newly-captured file is a video, this submenu lets you save the first frame of the video as your Home Screen image, and also contains a command to Restore Home Screen if you want to re-set to the original Home screen. In addition to the above two commands, if the file is a still image, the Caller ID Photo command will be available. This invokes the Caller Photo ID application (as explained in the previous chapter) and lets you assign the image as a Photo ID to an entry in your Contacts.
Back
Keeps the file with its default filename, and returns to the Camera screen, ready to do more captures.
Album
Switches to the Thumbnail View of Album mode, where you can view, organize, and manipulate the files.
Zooming in and out
When in one of the five capture modes, you can press the Up/Down button to Zoom In/Out. However, Zoom capability depends on the current Capture Mode, Encoder type, and Resolution (Capture Size), all of which can be specified in Options > Mode.
Another way to zoom is to select Zoom on the menu.
| Capture Mode | Capture Size Setting | Zoom Available |
| Photo | 160 x 120 | 1.0x ~ 8.0x |
| 320 x 240 | 1.0x ~ 4.0x | |
| 640 x 480 | 1.0x ~ 2.0x | |
| 1280 x 1024 | 1.0x ~ 2.0x | |
| Photo ID | 176 x 180 | 1.0x ~ 4.0x |
| Picture Theme | Depends on the size of the currently loaded template. Examples: | |
| 160 x 120 template | 1.0x ~ 8.0x | |
| 320 x 240 template | 1.0x ~ 4.0x | |
| 640 x 480 template | 1.0x ~ 2.0x | |
| Video and MMS Video | 128 x 96 | 1x, 2x |
| 176 x 144 | 1x, 2x | |
NOTE: "1.0x" indicates normal (unzoomed) size.
Adjusting for various lighting conditions
From the main menu, select Ambience. The Ambience submenu lets you easily adjust the Camera screen so that it looks its best in various environments. Auto is the default setting, which means it will automatically adjust to different lighting conditions. You can optionally select Daylight, Incandescent, Fluorescent, or Night.
Or, you can affect the color display of the incoming video stream by selecting Grayscale (black and white), Sepia (light orange hue) or Cool (blue tint).
Adjusting Camera Properties
In addition, you can select Adjust View from the Ambience submenu if you wish to make adjustments to various Camera Properties of the sensor output. After the Adjust View screen opens, you can press the Up or Down button to change the Property (either Gamma, Brightness, Saturation, or Hue), then press the Right or Left button to change the value of the current Camera Property. If you wish to re-set the Camera Properties to their original default settings, simply open the menu in the Adjust View screen and select Restore Default.
Setting various Options
After you select Options from the menu, you can enter different screens to customise various behaviors of Camera mode, as follows:
General
In the General screen, you can:
- Specify the storage media to which newly-captured files are saved: Storage Card, or Internal Memory (\StorageMy Documents).
- Set the Flicker Adjustment according to the electrical voltage used in your country.
- Enable Review mode, so that every time you capture any new image or video file, you will enter the Review screen (shown and explained earlier). It is enabled by default.
- Disable the audible "shutter" sound so that images will be captured silently.
Counter
By default, sequential numbers are incorporated into the filename of each new image or video you capture. This screen lets you reset the counters individually to 001.
Photo
All still images you capture are saved in the JPEG format. In the Photo screen of Options, you can specify a JPEG quality (Basic, Normal, Fine, Superfine), and you can change the default file name prefix (IMAGE) if desired.
The location you specify in the Template Folder field is where Camera will look for templates when you enter Picture Theme mode. You can select Storage Card or Internal Memory. If Internal Memory is chosen, Camera will look in the \Storage\My Documents\Frames folder of your Smartphone phone, where a collection of template files is located. Likewise, if Storage Card is chosen, it will look in \My Documents\Frames of the Storage Card.
Video
By default, all video clips you capture will have accompanying audio recorded along with the video. In this screen, you can disable or re-enable the recording of audio along with your video files. (Or, when in a Camera screen, you can simply press 6 on your Smartphone's keypad to toggle audio capture On and Off.) You can also change the default filename prefix (VIDEO) which is used for each new video capture. For example, if your first video capture is in the MPEG-4 format, the file name would be VIDEO_001.mp4
Modes
The fields available in the Modes screen will vary depending on the Capture Mode and Encoder type selected. (The "Encoder" is the output format of newly-captured files.)
If Photo is the selected Capture Mode, you can choose the desired Resolution (capture size). They are all listed in the table in the "Zooming In and Out" section.
If Video is the selected Capture Mode, you can use the Encoder field to specify what file format to record in, and a desired Resolution. In addition, you can set a maximum limit to the file size. For example, if you enter 500 KB in the
Limit Video File Size field, then recording will automatically stop when that file size is reached.
If MMS Video is the selected Capture Mode, the "Limit Video File Size" field is not available. This is because the maximum file size is set to 95 KB for MMS Video captures. Encoder types available are MPEG-4 and H.263.
There are no changeable options available in the Modes screen when Picture Theme or Photo ID is the selected Capture Mode.
NOTE: Another way to enter the Modes screen is to select Menu > Capture Modes > Manage.
About
Displays the name/module, version/build, and copyright information.
Switching to Album Mode to view and manage your images/videos:
- When in Camera mode, select Album from the menu when in a Camera screen or Review screen. Or,
- Press the * key or the # key on your phone when in a Capture mode, to switch to Album's Thumbnail view.
3.2 Album Mode
The Multimedia Album program allows you to view the image and video files you have captured, as well as audio files and images/videos you have obtained from other sources such as E-mail, a Storage card, Infrared/Bluetooth beaming, or synchronised from a PC.
You can manipulate and organize the files into "albums" and slide shows with various transition effects. View images as thumbnails in various sizes, or in an enlarged view. You can zoom in/out, flip horizontally or vertically, rotate, sort, and associate files. You can even crop/resize/adjust brightness and save as a new file. In addition, if you connect to a server with media content via the Internet, Album can play the streaming media.
Supported file formats:
| Still-image formats | JPEG, GIF, PNG, BMP |
| Animation format | Animated GIF |
| Video format | AVI, MPEG-4 Simple profile, H.263 baseline |
| Audio formats | MPEG-4 AAC, WAV, MIDI, AMR-NB, AMR-WB |
Thamburger view mode
Album searches for the supported image, video, and audio files in your \My Documents folder. You can use the Change Folder command to search other folders if desired. Select Scan Subfolder Files in Options > General if you also want the sub folders of the parent folder to be searched.
Shown below on the left is Large thumbnail size. An example of ListView is shown on the right. Use Options > Thumbnail
to change to other thumbnail views such as Small, Normal, Large, Portrait, and List. You can also opt to show an index number and an "Info Bar" which displays data about the selected thumbnail (shown on the left below).
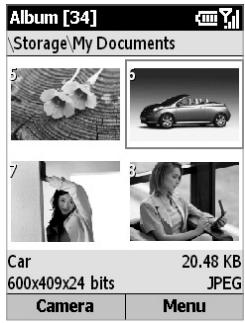
Large thumbnails with Info Bar
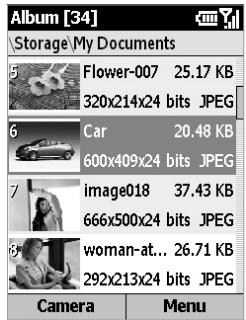
List View
To play a video or audio file, or to view a still image in an enlarged view, select the related thumbnail and then press the Action button to switch to Detailed View.
Detailed View mode
Detailed View mode utilises more of the screen to display still images or to play back video, animated GIF, or audio files. Press the navigation pad Left or Right to display the previous or next file. Press the Up or Down button to Zoom In or Out. If it is too large to fit in the display area, press the Action button to switch to Pan mode. You can then press Up/Down/Left/Right to pan to the desired portion of the image. The Title Bar displays the index number of the file, and indicates whether Pan mode or Zoom mode is active.
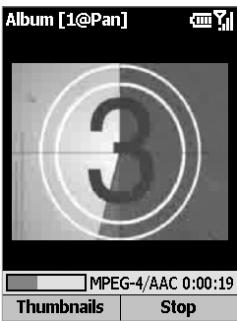
In the example above, Album's Detailed View shows a video file playback in progress. A "progress bar" and time counter near the bottom of the screen indicate the file format and the amount of time that has elapsed during the playback.
Keypad function during video file playback
| 6 | Toggle between Detailed View and Full Screen. Or, you can use View > Full Screen form the menu to enter Full Screen mode. |
| 7 | Play/pause. |
| 8 | Mute/unmute. |
| * / # | Display Actual Size/Fit-in-window video image. |
Slide Show view mode
First, in Thumbnail View mode, select the thumbnail that you want to appear initially in the slide show. Then select Slide Show from the menu. The slide show will then begin with the currently selected file.
Or, as a shortcut, you can press 0 when in either Thumbnail View or Detailed View to start a slide show. Each image, video, and audio file in the current folder will be played using the full screen, according to the settings that have been specified in Slide Show Options.
You can access this option by either selecting Slide Show Options from the menu during Slide Show view mode, or by selecting Options > Slide Show from the menu when in Thumbnail View mode. The options are summarised in the next section.
During a slide show, pressing 6 will also toggle the display of the Title Bar and Softkey Labels on and off; or, select Full Screen from the menu. Even if the Softkey labels are not displayed, you can still press the Right Softkey to open the menu, or the Left Softkey to end the slide show. You can also end a slide show by selecting End Show from the menu, or by pressing the * button or your Smartphone's Back button. Or, simply press 0 again to stop the slide show.
To pause a slide show, press the Action button. When ready to continue playing the slide show, press the Action button again.
During a slide show, you can press the navigation pad Left and Right to traverse to the previous or next slide.
To choose the type and speed of transition effects to be used during a slide show, select Transition Effects from the menu when in Slide Show view. Or, when in Thumbnail view, you can select Options > Transition Effects from the menu.
Summary of Options screens
Select Options from the menu when in Thumbnail view to access the following screens:
General
The options in General let you choose whether or not to:
- Search sub folders of the current folder for files of the supported types.
Show the images in ROM in the Album screen. - Force backlight and power to remain on during video and audio playback.
- Mute audio while playing video files.
- Automatically replay video, audio, and animated GIF files.
- Show or hide the Progress Bar during playback in Detailed View.
- Automatically rotate left, right, or never.
Slide Show
In this screen you can specify:
- The amount of time each file will display during the slide show.
- A rule for slide rotation during slide shows.
- The order of slide play (forward, backward, or random).
- Whether or not to force the backlight and system power to stay on during a slide show.
- Whether or not you want each slide show to start in Full Screen view (Title Bar and Softkey labels are hidden).
Transition Effects
Select from dozens of transition effects to be used between slides during a slide show, and specify the speed. This screen also lets you preview each choice before selecting it.
Sort By
Lets you sort the sequence of the files in the current folder according to Name, Date, Size, or Type. Then specify Ascending or Descending order.
Thumbsail
Choose the size for the thumbnails displayed in Thumbnail mode: Small, Normal, Large, Portrait, or List view. In addition, you can optionally show an index number in the upper left corner of each thumbnail; and an "Info Bar" in which data about the selected file is displayed.
Association
Choose the filetypes you want to associate with Album. Then, whenever you select a file of that type, it will automatically be opened in Album (Bitmap, JPEG, GIF, PNG, AVI, MPEG-4, MIDI, WAV, AMR-WB, AMR-NB, and SDP files).
Summary of Menu Functions
Some of the functions that the menus in Thumbnail View and Detailed View allow you to perform:
- Send the selected file via MMS, via E-mail, via Infrared beaming, or Bluetooth.
- Delete, move, copy, or rename the selected file.
- Save As a Caller ID Photo.
- Save As RingTone Line 1 or Line 2 (if a MIDl file is selected).
View Properties of the selected file (such as name, folder, date, size, type, colors, frames, dimensions, resolution, audio type, channel, etc.).
View the current file in Full Screen (Title Bar and Softkey labels are hidden). - Rotate an image 90 degrees clockwise.
-
Change to another folder and display files of the supported filetypes in that folder, including sub-options to switch to \My Documents on your SD card, jump up one level, or select recently visited folders.
-
The New command in Thumbnail view includes a suboption to invoke the voice recorder function of your Smartphone phone, and record a Voice Note.
- Switch to Camera mode.
- Edit Bitmap, JPEG, or still GIF files, and save changes to a different filetype. (More information on next page.)
Editing Files
Multimedia Album now allows you to edit BMP, JPEG, or still GIF files. You can crop, resize, and adjust brightness/contrast/gamma. First, select the image you want to edit. Then select Edit from the menu when in either Thumbnail View or Detailed View to enter the Edit screen.
Crop
In the Edit screen, select Crop from the menu. Press the navigation pad up/down/left/right to position the crossbar as desired, then press the Action button to delineate one corner of the area you want to crop. Press the navigation pad up/down/left/right as needed to enclose the desired area of the image for cropping, and press the Action button again to finish specifying the area. Then select Set Area from the menu. You can also move the specified square/rectangle, or resize it, using Move Area or Resize Area. Press the Left Softkey ("Done") to end the operation.
Resize
After you select Resize from the menu, the Resize screen opens. You can choose to resize the current image by a certain Percentage (up to a maximum of 500% ), or by Dimension (width/height up to 9999 pixels).
Level
This command lets you adjust the Brightness, Contrast, or Gamma properties of an existing image. After you select Level from the menu in the Edit screen, the Brightness screen will open. To switch to the Contrast or Gamma
screens, select from the menu, or press the navigation pad Left or Right. To adjust lighter or darker, press the navigation pad Up or Down.
Save As
This command lets you save the edited version of the file to a new filename, a different file format, and the desired folder. Or, you can use Save to overwrite the original file.
How Album handles DRM
DRM is Digital Rights Management, a method of controlling the usage of protected media objects after they have been downloaded. Some digital media files, such as songs downloaded from online stores, are encrypted to prevent the files from being unlawfully distributed or shared. Content providers use the DRM technology to encrypt these files when applicable. During the encryption process, the content provider creates a license which specifies how and when the file can be used.
For example, a content provider could create a license that allows you to play a certain file on your computer, but not on your Smartphone. Or, a license that allows you to play a certain file on your Smartphone, but perhaps only for a month, or perhaps only a certain number of times. Files that have licenses associated with them are called protected files.
Currently, there are three main methods (listed below) for delivering DRM-encrypted content and any applicable associated rights. The DRM-enabled content file and the "rights object" are separate components. The rights object is the encryption key, and also includes the instructions on how the content can be used.
Forward Lock
This type of file is not encrypted, but instead there is a flag associated with it that does not allow you the option to send/forward it from your Smartphone. There can only be one instance of the file.
Combined Delivery
The file is DRM-encrypted and is delivered to your Smartphone together with its rights object. In this case, the right is typically a preview or some other limited execution.
Separate Delivery
The encrypted DRM file is downloaded to your Smartphone alone, and the rights object is delivered separately through some other secure channel such as WAP Push, a special form of SMS with binary content in it.
The media types that Multimedia Album supports are listed below. When you download files of the following formats, and then attempt to view/play them in Album, it will detect whether or not they are protected files; if so, it will treat them in conformance to DRM specifications.
- Image files: .jpg, .gif, .bmp, .wbmp, .png
Audio files: .wav, .mid, .amr, .awb, .mp4
Video files: .mp4, .3gp, .avi
The previous illustrations of Album's Thumbnail View in this chapter show thumbnails of files that are not DRM-protected files, so no DRM icons displayed in those illustrations.
The figure below contains examples of DRM files. DRM files that can be used are identified by the "key" icon in the lower right corner of the thumbnail. DRM files that are invalid (cannot be viewed or played because, for example, the license has expired or been used) will be indicated by a key icon with a diagonal line running through it, as shown here.
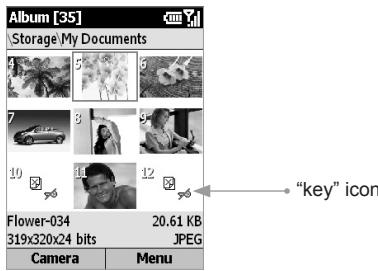
Multimedia Album will enable or disable menu items as appropriate, according to the current DRM file state. For example, commands on the Send submenu will not function if the file is Forward Locked or is a Combined Delivery file. But commands on the Send submenu will work if it is a Separate Delivery file. And the Edit command is always disabled for all DRM files.
How DRM files affect Album's Slide Show mode
If the current folder contains no non-DRM files, and no valid DRM files, the Slide Show command will be disabled. If the selected file is an invalid DRM file, Album will skip the selected file, and will show the next valid DRM or non-DRM file.
If the current folder does contain one or more valid DRM files, Album will display this message prior to starting a Slide Show: "Slide Show contains protected content. Album will commit rights when the content is used, and skip invalid rights content automatically."
If you select No, you will be returned to Thumbnail View. If you select Yes, only non-DRM and valid DRM files will be played/displayed during the Slide Show. Invalid DRM files will be skipped automatically. When valid DRM files are encountered, Album will commit rights automatically. No Confirm screens (such as the examples shown on the page after next) will appear.
Viewing Info about a DRM file
If you select Properties from the menu in Thumbsail View, you will notice that the last field in the Properties screen, Protected Status, indicates Yes if the selected file is any type of DRM file, and No if a non-DRM file. In addition, if the selected file is a DRM image file, the Properties screen will contain an Info button. Press the Right Softkey to view more information about the DRM status of the file (sample screen shown on the right below).
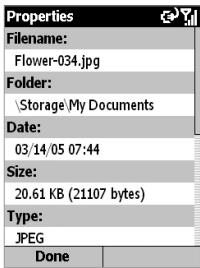
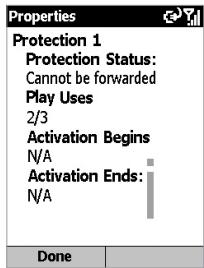
A Confirm screen similar to the one shown below on the left will initially display for DRM files that need to be activated.
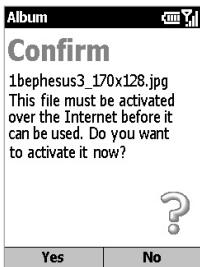
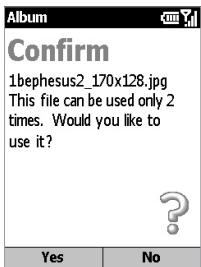
If you select a thumbnail representing a valid, usable DRM file, and then press the Action button to switch to Detailed View so that you can view/play the file, a Confirm screen will display the current license status each time (as shown in the example above on the right) and require you to select Yes (Left Softkey) to consume the rights. If you select No, a message will state that Album is unable to play or view the file, and give you an opportunity to switch to,Thumbsnail View.
Other examples of DRM-related messages that may appear are "This file is not active and can no longer be used" and "Cannot play the file."
Chapter 4
Personalizing your Smartphone
4.1 Customizing Phone Settings
4.2 Customizing Profiles and Sounds
4.1 Customizing Phone Settings
You can easily view and change various settings in your Smartphone. For example, you can use your favourite photo for the Home screen background, set up Call Forwarding to manage your calls more efficiently, and much more.
Select Settings from the Start menu. The items in the Settings screen are illustrated below.
| Settings | |
| 1 Phone | |
| 2 Sounds | |
| 3 Profiles | |
| 4 Home Screen | |
| 5 About | |
| 6 Accessibility | |
| 7 Beam | |
| 8 Bluetooth | |
| 9 Certificates | |
| 0 More... | |
| Done | |
| Settings | |
| 1 | Data Connections |
| 2 | Date and Time |
| 3 | Owner Information |
| 4 | Power Management |
| 5 | Regional Settings |
| 6 | Remove Programs |
| 7 | Security |
| 8 | Button settings |
| 9 | Unlock Screen Clock |
| Done | |
Phone
When you select Phone in the Settings screen shown above, the Phone screen appears and offers the following options:
Call Barring
Enables you to block incoming and/or outgoing calls.
Call Forwarding
Enables you to forward calls to another number.
Call Options
Specify your Voice Mail number, SMS Service Center number, Country code, and Area code. If you check the Any key answer checkbox, you will be able to answer
incoming calls by pressing any key. If Show SIM Contacts is checked, entries on the SIM card will be displayed in your Contacts list.
Call Waiting
Turn the Call Waiting function on or off.
Caller ID
Let your identification be known to all callers; to only the people in your contacts; or to no callers.
Channels
Configure cell broadcast.
Fixed Dialing
Limit your calling area to one or more specific phone numbers and/or area codes.
Networks
Identifies your current network, and allows you to change your network selection from Automatic to Manual. In addition, the menu in the Networks screen lets you find a new network, select a network, and list preferred networks.
Sounds
Please see the next section to customise the sounds for ringtone, notifications, and reminders.
Profiles
Please see the next section to switch to a different profile, or modify the attributes of an existing profile.
Home Screen
The settings in Home Screen are used to change the Home screen's layout, the color scheme, the background image, and the time delay before the Home screen appears when your Smartphone is idle.
To view or change these settings, select Settings > Home Screen from the Start menu, and the Home Screen screen appears as below.
Orange is the default setting in the Home screen layout field. The six icons at the left of Home screen will always remain the same (Contacts, Call History, Messaging, Calendar, Camera, and Orange World).
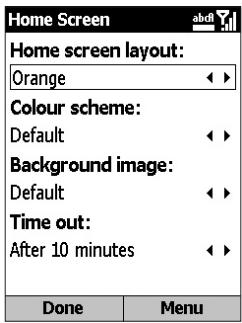
Note that the images available for selection in the Background Image field are those currently in the \StorageMy Documents folder of your Smartphone. (If the image file you want to use as the Home screen background image is not there, copy the file to \StorageMy Documents, then try again to make your selection from the Background Image field.)
About
Select Settings > About from the Start menu to open the About screen, which displays information about your Smartphone's operating system such as version numbers, copyright information, processor, total/available storage, and total/available memory.
Accessibility
Select Settings > Accessibility to view or modify your settings for System font size, Multipress time out, Confirmation time out, and In-call alert volume.
Beam
If you want to receive infrared or Bluetooth beams from other devices, you must turn on the option to receive incoming beams. To do this, select Settings > Beam, then activate the Receive Incoming Beams checkbox (that is, make sure the checkbox is checked). After you press the Left Softkey ("Done"), your Smartphone will be able to receive all incoming beams from other devices.
Bluetooth
Please see the next chapter for usage of this setting.
Date and time
To customise the date/time configuration on your Smartphone, select Settings > Date and Time from the Start menu. The Date and Time screen will open, which allows you to change your local time zone, the current date, the time, set an alarm time, and turn the alarm feature on or off.
Certificates
On your Smartphone, you can add and delete public key certificates. These certificates help establish your identity when you log on to a secure network, such as a corporate network. Certificates also help establish the identity of other computers, such as servers, with which you connect. This helps prevent unauthorized users from accessing your device and its information.
You can store two types of certificates on your Smartphone: Personal certificates that establish your identity, and Root certificates that establish the identity of servers with which you connect. Your Smartphone may include a set of preinstalled certificates.
Certificates that establish your identify:
Select Settings > Certificates > Personal, then select View from the menu to view the selected certificate, or Delete to delete it.
Certificates that identify servers you've connected to:
Select Settings > Certificates > Root. Select the desired certificate in the list, then select View from the menu to view the details of the selected certificate (or Delete to delete it).
Data Connections
Please see the next chapter for usage of this setting.
Owner Information
Select Settings > Owner Information from the Start menu to enter your personal information such as name, phone number, and E-mail address. This is helpful, for example, in the event that you lose your Smartphone, so that you can be contacted if it is found. In the Owner Information screen, there is also a Notes field in which you can enter any other miscellaneous information, if desired.
Power Management
Select Settings > Power Management from the Start menu if you want to check the current battery level. Also in the Power Management screen, you can adjust various power-saving settings, including Backlight time out, Display time out, and Light Sensor Enable.
The light sensor is located at the bottom of your Smartphone, under the 0 button on your keypad. Selecting On in the Light Sensor Enable will cause a " backlight" behind your keypad to activate and stay on, when ambient luminance is lower than 20 28 lux, making it easier to see the buttons in dark conditions; Selecting Off will conserve the Smartphone's battery power. However, even if Off is selected, a backlight will turn on temporarily every time you press a button on your Smartphone, whether you are in a dark or light environment.
NOTE: You can also view the Battery Level in the form of a percentage, using the File Manager application described in Chapter 9. (Select the System Info command on the menu in File Manager.)
Regional Settings
In the Regional Settings screen, you can change the language used by your Smartphone. After changing the language and some of the other settings, you must power your Smartphone off and back on, in order to make the changes take effect.
However, not all applications will be displayed with the desired language that you set in the Smartphone when changing languages. Some applications may not support the language that you set, so that it will display the default language.
The following items can be adjusted in the Regional Settings screen: Language, Locale, Short date style, Long date style, Time format, Positive/Negative numbers, and Positive/Negative currency.
Remove Programs
This feature lets you conveniently delete any programs from your Smartphone that you installed after purchasing it. Note that you cannot use this feature to remove any of the core programs that came with your Smartphone, such as Contacts, Calendar, Internet Explorer, etc.
When you select Settings > Remove Programs from the Start menu, the programs you have installed will be listed in the Remove Programs screen. Select the one you want to remove, then select Remove from the menu.
Security
Select Settings > Security from the Start menu to enable the phone lock or SIM lock, and to set the phone lock password. This was explained in detail in section 1.7.
Unlock Screen Clock
Select Settings > Unlock Screen Clock from the Start menu to enable display of digital clock in the "Unlock" message screen. You can also select to display the date in this screen.
4.2 Customizing Profiles and Sounds
Select Settings > Profiles from the Start menu to access the Profiles screen (as shown on the left below), in which you can switch to a different profile, or modify the attributes of an existing profile.
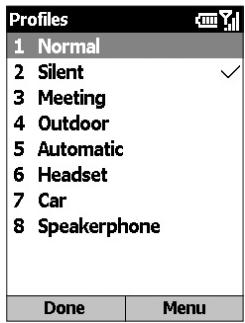
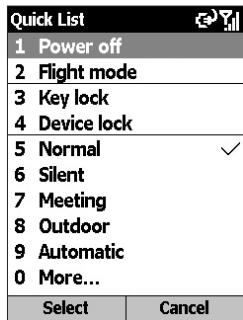
NOTE: You can also select a different profile using the Quick List. To display the Quick List screen (as shown on the right above), press the Power button on your phone and release quickly. Scroll to the desired profile and then press the Action button to select it.
To edit a profile's attributes, highlight the desired profile in the Profiles screen, then select Edit from the menu. If you later want to restore the settings back to the default attributes, select Reset to default from the menu.
The following table lists the profiles that come with your Smartphone, and their default attributes.
eae eaeenee ene eee eae eae eae eae ae eae ae eae ae ae ae ae ae ae ae ae ae ae ae ae ae ae ae ae ae ae ae ae ae ae ae ae ae ae ae ae ae ae ae ae ae ae ae ae ae ae ae ae ae ae ae ae ae ae ae ae ae ae ae ae ae ae ae ae ae ae ae ae ae ae ae ae ae ae ae ae ae ae ae ae ae ae ae ae ae ae ae ae ae ae ae ae ae ae ae ae ae ae ae ae aaee
| 乙 | pnoT | punos λeId | pnoT | 6hesea | pnoT | 6hese | 4hese |
| punos λeId | 6hesea | 6hese | |||||
| ε | ε | punos λeId | ε | 6hesea | ε | 6hese | |
| (λsnp s i e nne ne ne ne ne ne ne ne ne ne ne ne ne ne ne ne ne ne ne ne ne ne ne ne ne ne ne ne ne ne ne ne ne ne ne ne ne ne ne ne ne ne ne ne ne ne ne ne ne ne ne ne ne ne ne ne ne ne ne ne ne ne ne ne ne ne ne ne ne ne ne ne ne ne ne ne ne ne ne ne ne ne ne ne ne ne ne ne ne ne ne ne ne ne ne ne ne ne ne ne ne | |||||||
| ε | pnoT | punos λeId | pnoT | 6hesea | pnoT | 6hese | 4hese |
| punos λeId | punos λeId | 6hese | |||||
| 2 | ε | punos / pirel | ε | punos λeId | 6hese | ||
Sounds
When you select Settings > Sounds from the Start menu, the Sounds screen appears and offers the following options, allowing you to customise the sounds for ring tones, notifications, and reminders.
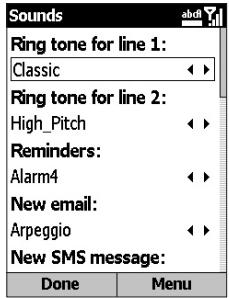
You can specify what sound file to use for the following functions:
Ring tone (line 1 and line 2)
- Reminders
New E-mail arrival
- New SMS text message arrival
- New voice message arrival
- New instant message arrival
New channel message arrival
Alarm clock
- SIM toolkit messages
- Exclamation
Question
-Warnings
Keypad control
After selecting one of the fields above, you can press the Right or Left navigational buttons to select different sounds. Or, press the Action button to open the Select an Item screen to view the entire list of sounds available for that field, and select from that list.
You can use the menu in the Sounds screen to Play or Delete the selected item. When completed, press the Left Softkey ("Done") to save all changes.
To use your own sounds:
- Go to where the desired sound file is stored on your desktop computer, and copy the file. The WAV, MIDI, and WMA filetypes can be used.
- In ActiveSync on your desktop computer, click Explore, go to \StorageApplicationData\Sounds, then paste the sound file into the Sounds folder.
- On your Smartphone, select Profiles > Sounds from the Start menu to open the screen shown above.
- Select the desired category (such as Ringtone, Reminders, New E-mail, etc.), select the sound file you copied to the phone, then press the Left Softkey ("Done").
Chapter 5
Getting Connected
5.1 Connecting to the Internet
5.2 Internet Explorer
5.3 Bluetooth
5.4 Modem Link
5.1 Connecting to the Internet
In the Home screen, select Settings > Data Connections from the Start menu to access the Data Connections screen (as shown below). The settings in this screen enable you to set up Dial-up, Virtual Private Network (VPN), Proxy, and General Packet Radio Service (GPRS) connections so you can connect to the Internet or your corporate network.
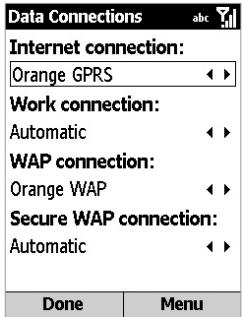
With a data connection, you can browse the World Wide Web, download E-mail, chat using MSN Messenger, or synchronise wirelessly with the server. Check with your service provider to see if a data connection has already been set up for you, and if over-the-air configuration is supported.
Dial-up Connections
You need to set up a dial-up connection to connect directly to the Internet or to your corporate network.
To create a dial-up connection to the Internet:
- In the Home screen, select Settings > Data Connections from the Start menu.
- Press the Right Softkey to open the menu in the Data Connections screen and select Edit Connections.
- Select Dial Up Connections in the Connections screen.
- In the Dial Up Connections screen, select Add from the menu if you need to create one. (A connection might already be set up by the operator for you.)
- In the Add Dial Up screen, enter a name for the connection in the Description field.
- In the Connects to field, select The Internet to connect directly to the Internet, or select Work to create a connection to your corporate network.
- Enter the appropriate information for the remaining fields, and press the Done softkey.
In the same way as above, you can choose the following in the Connections screen, then select Add from the menu to add new connections:
VPN Connections
A VPN connection is used to access your corporate network using an existing Internet connection.
Proxy Connections
A Proxy connection is used to access the Internet using an existing connection to your corporate or a WAP network.
GPRS Connections
If there is GPRS coverage in your area, you can set up a GPRS connection to access your corporate network or the Internet, which is faster than a Dial-up connection.
Options
In the Data Connections screen, you can select Options from the menu to specify number of radial attempts, amount of idle time to wait before disconnecting, and type of connection your desktop has.
Adding a URL exception
Some URLs for Web pages on your company Intranet may contain periods, for example: intranet.companyname.com. To view these pages in Internet Explorer, you must create a URL exception. Otherwise, the pages will not display.
NOTE: You do not need to create URL exceptions for Internet URLs.
- In the Data Connections screen, select Work URL Exceptions from the menu.
- Select Add from the menu.
- In the URL Pattern field, enter the URL. Separate multiple URLs with a semicolon (;).
- When completed, select Done.
5.2 Internet Explorer
Using Internet Explorer (IE), you can browse the World Wide Web on your Smartphone. IE supports HTML (Hypertext Markup Language), cHTML (compact Hypertext Markup Language), XHTML, WML 2.0, and WAP (Wireless Application Protocol). It also supports JScript, ActiveX controls, and CSS (cascading style sheets). The browser supports images and sounds, but it does not support frames on a Web page.
Starting Internet Explorer
In the Home screen, select Internet Explorer from the Start menu. The first time you do this, a default list of Favourites should appear. If you select one and then press the Action button or the Left Softkey ("Go"), IE will open that web page.
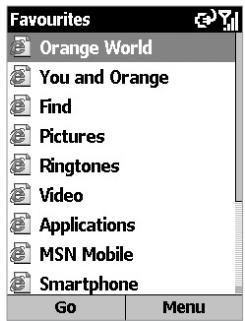
Enter a URL
To go to a World Wide Web site not listed in your Favourites, open the menu and select Address Bar. In the Address Bar screen, enter the desired URL, then press the Go softmax.
Viewing a list of recently-visited web pages
In the Address Bar screen, select View History and then press the Action button or the Go softkey to view a list of recently-visited Web pages. To go to a Web page listed in the History screen, select it and then press the Action button or the Go softkey.
Press the Back button on your Smartphone to return to a Web page you visited in the same session.
The phone caches the Web pages that you view, and stores them until the cache is full. It then replaces the oldest pages with the new pages. If you go back to a page that is cached on your Smartphone, you see the stored version, unless you refresh the page to see the latest version.
NOTE: While you are connected to the Internet, you can change between Internet Explorer and other programs on your Smartphone by pressing the Home button and launching the program you want. This does not close your Internet connection. Subsequently returning to Internet Explorer in the same session would re-display the most recently opened Web page. (To terminate the Internet Explorer program, you can use the Task Manager utility explained in Chapter 9.)
Using the Favourites list
If you see a Web page you want to visit another time, mark it as a favourite. The next time you want to visit that Web page, you can select it from your Favourites list.
If you select Add Favourite from the menu when the desired Web page is open, the name and URL of the current page is already filled in. You can edit the Name field and/or Address (URL) field if necessary. If you previously created additional folders, select a folder in the Folder field. Then, select Add to add it to your Favourites.
By default, only the Favourites folder exists. To create a new folder in which to place URLs, select Add Folder from the menu in the Favourites screen.
To edit the Name, Address (URL), or Folder fields of an existing entry in your favourites, select the desired Favourite in the list, then select Edit from the menu. To delete a favourite, select Delete.
Customizing Internet Explorer
You can customise Web browsing options; specify a different network to be connected to; a different language; and make more memory available on your Smartphone by clearing stored cookies and Web pages.
Select Options from the menu, then select either General, Connections, or Memory.
5.3 Bluetooth
Bluetooth is a short-range wireless communications technology. Devices with Bluetooth capabilities can exchange information over a distance of about 10 meters (30 feet) without requiring a physical connection.
Unlike infrared beaming, you don't need to line up the devices to beam information with Bluetooth. The devices only need to be within a range of about 10 meters. You can even beam information to a device in a different room, as long as it's within range.
The software included with your Smartphone allows you to use Bluetooth to beam information such as files, contact cards, appointments, and tasks to other Bluetooth-enabled devices.
Bluetooth modes
Select Settings > Bluetooth > Bluetooth from the Start menu. Then, select On, Off, or Discoverable in the Bluetooth field. The behavior of each of these modes is summarised below.
On
The Bluetooth radio is turned on and you can use Bluetooth features.
Off
The Bluetooth radio is turned off. You might want to turn the radio off at times to conserve battery power, or in situations where radio use is prohibited, like on airplanes and in hospitals. Bluetooth is also turned off when you turn Flight Mode on.
By default the Bluetooth radio is turned off. If you turn it on, and then turn off your device, the Bluetooth radio also turns off. When you turn on your device again, the Bluetooth radio turns on automatically.
Discoverable
The Bluetooth radio is turned on, and any other Bluetooth devices within range (about 10 meters) can detect your device and attempt to beam information to it, establish a bond, or use a Bluetooth service. In this mode, other devices can detect your device, whether or not a bond has been created. However, in order to receive a beam from another device, you must accept it on your device.
If you no longer want your device to be discoverable, select Off to turn off the radio; or On to leave the radio on but not allow detection by other devices.
NOTE: Bluetooth must be set to Discoverable mode if you want to use it in conjunction with Modem Link. See the next section for more information.
Bonds
A bond is a relationship that you create between your Smartphone and another Bluetooth device in order to exchange information more securely. Creating a bond involves entering the same personal identification number (PIN) on the two devices you want to bond. Once a bond is created, the devices recognize the bond and are able to exchange information without your entering a PIN again.
To create a bond:
- Make sure that the two devices are within 10 meters of each other and that Bluetooth is in Discoverable mode on both devices.
- In the Home screen, select Settings > Bluetooth > Bluetooth from the Start menu.
- Select Devices from the menu, and then New. Your device searches for other Bluetooth devices and displays them in the list.
- Select the device you want, then select Add.
-
In the PIN field, enter a PIN of between 1 and 16 characters, and select Done.
-
Enter the same PIN on the other device.
- If desired, enter the name of the other device in the Name field, and select Done.
To accept a bond:
- Make sure that Bluetooth is turned on and in Discoverable mode.
- When prompted to bond with the other device, select Yes.
- In the PIN field, enter a PIN of between 1 and 16 characters, and select Done. You must enter the same PIN that was entered on the device requesting the bond.
- Optionally, you can enter the name of the device requesting the bond in the Name field.
- Select Done. The bond is now created. You can now exchange information with the other device.
To delete a bond:
- Select Settings > Bluetooth > Bluetooth from the Start menu.
- Select Devices from the menu.
- Select the bond you want to delete, then select Delete from the menu.
NOTE: Select Settings > Bluetooth > Bluetooth Setting to enter a name for your device; to enable/disable Beam Authentication requirements; or to perform ActiveSync setup (bond with other Bluetooth device which supports serial port or ActiveSync profile as your ActiveSync partner).
5.4 Modem Link
Using Modem Link, you can use your Smartphone as an external modem for another device or computer by using an infrared, bluetooth, or USB connection.
To set up an infrared, USB, or Bluetooth connection:
- Ensure that your Smartphone is not connected to another device.
- Select Accessories > Modem Link from the Start menu.
- In the Connection field, select USB, IrCOMM, or Bluetooth. The default Baud Rate is set at 115,200.
- Press the Right Softkey to open the menu in the Modem Link screen, then select Activate from the menu.
- Press the Left Softkey ("Done").
NOTE: In order for the Bluetooth option to be available in the Connection field in Step 3 above, you need to set Bluetooth to Discoverable mode as described earlier in section 5.3. You also need to enable Bluetooth Modem capability on your desktop/laptop PC (Start menu > Settings > Network and Dial-up Connections). In addition, when creating a new modem on your desktop/laptop PC, you must enter this Extra Initialization command in the Properties > Advanced tab: AT+CGDCONT=1,"IP","APN field","0,0. (In this command, the value you insert in the APN field position depends on your operator.)
For details about setting up Modem Link with a desktop PC or laptop PC, please refer to the separate User's Manual for Modem Link.
Deactivating:
To deactivate the Modem Link at any time, select Deactivate from the menu in Step 4 above. (Failing to deactivate the modem link when you are finished using it might result in problems with using ActiveSync in the same session.)
Chapter 6
Messaging Features
6.1 Setting Up Accounts
6.2 Managing Accounts
6.3 Creating E-mail and SMS Messages
6.4 Receiving E-mail and SMS Messages
6.5 Viewing Message Folders
6.6 Managing Messaging
6.7 Instant Messaging
6.8 MMS Messaging
6.1 Setting Up Accounts
Please refer to your Orange Getting Started Guide for details of your email settings
Your Smartphone is equipped with powerful messaging features such as the ability to send and receive E-mail, Short Message Service (SMS), and Multimedia Messaging (MMS). It also allows you to view and manage your message folders, customise message notifications and use MSN Messenger to communicate with others. Please note that not all E-mail services allow users to set up POP3 on mobile devices. Consult your network administrator or service provider for more information on toll and service charges or other related information. This section describes the steps required for setting up your Smartphone to send and receive E-mail messages.
Configuring E-mail accounts
You can send E-mail messages by synchronizing or by connecting directly to an E-mail server through your Internet service provider or a corporate network.
NOTE: Before configuring E-mail on your Smartphone, you must have an Internet and E-mail account. You will also need to configure your device's data connection, as described in Chapter 5.
To set up an E-mail account:
- Select Messaging from the Start menu.
- In the Messaging screen, select Outlook E-Mail.
- In the Outlook E-Mail screen, press the Right Softkey to open the menu, and select Options.
- Select Account Setup. In the Account Setup screen, select IMAP4.
- Enter your display name for this E-mail account in Your name field, and your E-mail address in Email address field;
then, select Next. (You can select the Automatic setup checkbox to obtain E-mail settings from the Internet. Your Smartphone will make an Internet connection and attempt to determine the server settings for E-mail.)
- Enter your user name in User name field, and enter the password in Password field. These information are required to login your E-mail server. You can then enter the domain name in Domain field, if required.
- Select Save password checkbox to save your password, so that you do not need to enter it each time you connect to your E-mail server. Then, select Next.
- The Server type shows the type of E-mail server that hosts your mailbox (IMAP4). The Account name shows the name for this account. In Network field, press the Right or Left navigational buttons to select the type of network that your E-mail server runs on, and then select Next.
- Enter the information about your Incoming/Outgoing E-mail servers and select Next. If you are not sure what to enter, please ask your network operator for help.
-
Select message download options and select Next.
-
Select a connection option; then, select Next > Finish to complete the configuration.
6.2 Managing Accounts
Use and manage up to eight messaging accounts with your Smartphone.
Viewing the list of accounts
Select Messaging from the Start menu. All accounts are listed, and the number of unread messages in the Inbox of each account is shown in parentheses.
Moving between account
If you have an account open, you can quickly switch to another account by scrolling right or left, or selecting Switch Accounts from the menu.
Changing E-mail account options
Select Messaging from the Start menu, and then select an account. Select Menu > Options to select the type of option to change. Select Done to confirm.
Deleting an account
Select Messaging from the Start menu, and then select an account. Select Menu > Options > Account Setup. Scroll to an account and then select Delete from the menu.
6.3 Creating E-mail and SMS Messages
You can start creating a new E-mail, text message (SMS), or media message (MMS) from Messaging. You can also create a new E-mail or text message from Contacts.
To create a message using Messaging:
- Select Messaging from the Start menu.
- Select an account, and then select New.
- In To field, enter the recipient's E-mail address or SMS number. Insert a semicolon (;) between multiple addresses or numbers.
- In Cc field, optionally enter the E-mail addresses of persons to receive a copy. (This field does not appear for SMS and MMS messages.)
-
In Subj field, enter a subject. (This field does not appear for SMS messages.)
-
To save time, you can insert predefined text into messages. In Subj field, select Menu > Insert Text for E-mail and text messages; scroll to the text and select Insert.
- You can also insert a voice recording into a message. Select Menu > Insert Recording, and you will be prompted to start recording. Speak into your Smartphone's microphone, and press the Left Softkey ("Stop") when finished. When you press Done, you are returned to the New Message screen, and the audio file is automatically attached.
- At any time, you can request a delivery receipt by selecting Menu > Message Options, and then select the Request message delivery notification checkbox.
To create a message from a contact card:
- Select the desired Contact, and select the E-mail address or text message number to use.
- Select the account to use. In Subj field, enter a subject. (This field does not appear for SMS messages.)
- Enter a message. Select Send. E-mail messages are stored in Outbox and sent to recipients the next time you synchronise or connect to your E-mail server to send/ receive mail. Text messages are sent immediately.
Your Smartphone is capable of sending and receiving long messages consisting of over 640 characters, depending on the memory available in the phone. However, the number of characters is limited by your operator, who will charge you in increments of 160 characters. Messages longer than that will automatically be sent in chunks as multiple small messages. If a long message is received on your phone, the chunks will be unified and delivered as one SMS message. Conversely, if the recipient has a feature phone, each individual SMS message will be delivered individually to the feature phone. In either case, for example, 640 characters would require you to be charged for four messages, whereas 641 characters would cause you to be charged for five messages.
To cancel a message, select Menu > Cancel Compose.
Saving a draft of a message:
You can save a draft of a message that you are composing to finish and send later. Select Messaging from the Start menu. Choose an account and then select New. Enter the text of the message. Select Menu > Postpone Message. A draft of the message is stored in the Drafts folder of the account.
Reopening and sending a message draft:
Select Messaging from the Start menu. Select an account and then select Menu > Folders. Select Drafts and then scroll to the draft message you want to open.
Edit the message and select Send. E-mail messages are stored in Outbox and sent to recipients the next time you synchronise or connect to your E-mail server to send/receive mail. Text messages are sent immediately.
Inserting signatures into messages
For each messaging account, you can specify a signature to be automatically inserted into messages that you send.
To specify a signature to insert:
- In the Home screen, select Start > Messaging.
- Choose the desired account, and then select Menu > Options > Signatures.
- In the Signatures screen, select the account for which to specify a signature by pressing the Right or Left navigational buttons in Select an account field.
- Select Use signature with this account checkbox.
- To insert a signature in every message you send, select Include when replying and forwarding checkbox. Otherwise, a signature is inserted only in new messages.
- Replace the text within the Signature box with a signature to insert, and select Done. The signature is inserted into messages that you send from this account.
To stop inserting a signature:
- In the Home screen, select Start > Messaging.
- Select the appropriate item (E-Mail, MMS, SMS, etc.), and then select Menu > Options > Signatures.
- In the Signatures screen, select the account for which you want to stop inserting a signature into messages by pressing the Right or Left navigational buttons in Select an account field.
- Clear the Use signature with this account checkbox, and then select Done. A signature will no longer be inserted into messages that you send from this account.
6.4 Receiving E-mail and SMS Messages
You can receive E-mail and SMS messages through Inbox synchronization, or by connecting to your E-mail server. You can then view all of the messages in your Inbox.
When you connect to the E-mail server or synchronise your Inbox with your PC, only the first 0.5 KB of each new message are downloaded to the Inbox on your Smartphone by default. Only small attachments are downloaded, and the original messages remain on the E-mail server or your computer.
When you receive an E-mail message, your Smartphone plays a sound, and displays an icon which looks like an envelope, in the Title Bar at the top of the Home screen. By default, the Home screen also displays the number of unopened E-mail and SMS messages. To quickly view new messages, scroll down and select the message notification area on the Home screen, or select the Message soft key.
Working with the message list
Received messages are displayed and stored in the Inbox folder of the appropriate account. By default, messages are displayed in the order received, allowing you to change the display order and date of sent messages.
Viewing the Inbox message list
Select Messaging from the Start menu, and choose the appropriate account. The Inbox message list displays your received messages.
Changing message list display options
Select Messaging from the Start menu, and choose the appropriate account. Then, select Menu > Options > Display. You can change display settings in the Display screen; when compeleted, press the Left Softkey ("Done").
Marking a message as Read or Unread
Select Messaging from the Start menu, and choose the appropriate account. Scroll to the message to mark, and then select Menu > Mark as Read/Unread.
To forward a message:
- From an open message, select Forward from the menu.
- In To field, enter the recipient's E-mail address or SMS number. Insert a semicolon (;) between multiple addresses or SMS numbers.
- Optionally, you can enter an introductory message by scrolling to the message area, pressing the Action button to insert a blank line, and entering your text.
- Select Send. SMS messages are sent immediately. E-mail messages are stored in Outbox and sent to recipients the next time you synchronise or connect to your E-mail server.
Deleting a message:
Select Messaging from the Start menu. Go to the account that contains the message you want to delete. Scroll to the desired message, and then select Delete from the menu.
Working with large messages and attachments
When you receive large E-mail messages and attachments, your Smartphone downloads only a portion of them. You can view the partial message or attachment and decide if you want to download the rest of it.
When you synchronise, your Smartphone downloads the first 0.5 KB of each new E-mail message by default. When you connect to an Internet E-mail server, it downloads the amount (in KB) of each new message that you specified when you set up the account. The message size includes its attachments. The original messages and attachments remain on the server or your PC.
The attachment size is omitted from messages received from a POP3 E-mail server.
In the message list, messages that contain an attachment are indicated by the display of an icon that looks like an envelope with a paper clip. Within a message, attachments are displayed as a list of hyperlinks at the bottom of the message, and are preceded by the "attachment" icon. The hyperlink includes the file name and size of the attachment.
The following icons indicate the status of each attachment:

Not downloaded

Marked for download

Downloaded
Downloading a complete E-mail message
Select Messaging from the Start menu, and choose the appropriate account. Then, select the message you want to download. Select Menu > Mark for Download. The complete message is retrieved the next time you synchronise or connect to your E-mail server and send/receive E-mail.
Downloading an attachment
In an open message with an attachment to download, select the attachment. The attachment is downloaded the next time you synchronise or connect to your E-mail server and send/ receive E-mail. If there are multiple attachments in the message, all attachments are downloaded.
Viewing an attachment
In an open message containing a downloaded attachment, select the attachment. Note that you can open attachments only for files that are supported by your Smartphone's installed applications.
6.5 Viewing Message Folders
Each messaging account has a set of folders in which your Smartphone stores messages for that account.
- Deleted Items contains messages that you have deleted (until you empty this folder).
- Drafts contains messages that you save before sending.
- Inbox contains received messages.
- Outbox contains sent E-mail messages awaiting synchronization, or messages that will be sent upon the next E-mail server connection. SMS messages are sent immediately over the network and appear in your SMS Outbox folder only for a few seconds.
- Sent Items contains copies of sent messages.
You can move a message to a different folder within the same account.
When you synchronise or send and receive E-mail, your Smartphone synchronises any additional E-mail folders that you have created in Outlook on your desktop computer or on your E-mail server. It also synchronises the messages contained in those folders, if the folders are marked for synchronization.
To view message folder contents:
- Select Messaging from the Start menu.
- Select the desired account (E-Mail, MMS, SMS, etc.) to go to that account's screen.
- Select Folders from the menu to display the list of folders for that account (Deleted Items, Drafts, etc.).
- Select the folder to display its contents.
Moving a message to a different folder:
- Select Messaging from the Start menu.
- Select the desired account to go to that account's screen.
- Select Folders from the menu to display the list of folders for that account (Deleted Items, Drafts, etc.).
- Select the folder to display its contents.
- Highlight the message in that folder which you want to move.
- Select Move from the menu.
- Select the folder to which you want to move the selected message.
To empty the Deleted Items folder:
- Select Messaging from the Start menu.
- Select the desired account to go to that account's screen.
- Select Folders from the menu to display the list of folders for that account.
- Select the Deleted Items folder.
- Select Empty Folder from the menu.
6.6 Managing Messaging
All E-mail and SMS messages are stored in the respective Inbox of each account in Messaging. By default, the most recently received messages are displayed at the top of the Inbox list. Using the menu options, you can customise your Inbox settings to control the way you send, receive, and view messages.
Using Messaging menu options
It is easy to accomplish common messaging tasks from your Inbox. Select Messaging from the Start menu, and then select the desired account in the Messaging screen. You can press the Left softkey ("New") to compose a new message, or press the Right Softkey ("Menu") to reply to, foward, or delete messages. The menu contains several other options also, as illustrated below and explained on the next page.
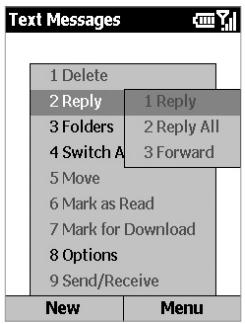
The commands on the menu (illustrated on the previous page) are:
| Option | Function |
| Delete | Delete the selected message. |
| Reply | Reply: Reply to an open or selected message. Reply All: Reply to the sender and those who received a copy of the open or selected message. Forward: Forward the selected message. |
| Folders | View the folders in this account. |
| Switch Accounts | Switch between this account and another. |
| Move | Move the open or selected message to another folder. |
| Mark as Read | Display the header text of a message in your Inbox in lightface, indicating that the message has been read. |
| Mark for Download | Retrieve the entire E-mail message from the E-mail server the next time you connect. |
| Options | Display a list of Inbox options that you can customise (explained on the next page). |
| Send/Receive | Connect to your E-mail server to send and receive messages. |
Customizing messaging options
You can optimize Messaging according to your work environment. For example, you can change the way your messages are displayed, specify how you want your messages to be sorted, edit pre-defined text strings, limit the size of messages you want to automatically download, and change your synchronization schedule.
Select Options from the menu shown in the previous illustration to access the following commands.
| Options Menu | Function |
| Display | Enable/disable display of date/time; sort messages by date/subject/sender in ascending or descending order. |
| Sending | Specify whether you want to include the original message text in your reply; save a copy of your sent messages; use Unicode for SMS messages when necessary; or request text message delivery notifications. |
| Edit My Text | Edit predefined text which can be inserted into messages. |
| Signatures | Create a “signature” and specify when to use it. |
| Account Setup | Set up your accounts. |
| Import SIM Messages | Import SMS messages from a SIM card to your inbox. The messages are not removed from the SIM card after they are imported. |
6.7 Instant Messaging
MSN Messenger on your Smartphone provides the same chat/instant message environment as MSN Messenger on your PC. Among other things, you can use it to:
- Send and receive instant messages.
- See the status of others in your Messenger contacts list, or change your own status (for example: available, busy, out to lunch).
- Invite other people to a chat.
- Block contacts from seeing your status or from sending you messages.
Setting up MSN Messenger
You need either a .NET Passport account or a Hotmail account to set up MSN Messenger. To set up a Microsoft .NET Passport account, go to: http://www/passport.com. Once you have an account, you need to create a connection on your Smartphone that allows you to connect to the Internet. For more information about creating connections, see Chapter 5.
Using MSN Messenger
You can sign in to MSN Messenger using your Hotmail credentials or your .NET Passport.
To sign in to, and sign out of, MSN Messenger
- Select MSN Messenger from the Start menu to open the welcome screen (as shown below on the left).
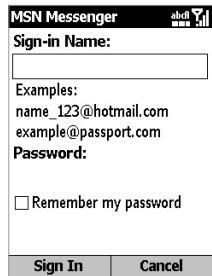
- Press the Left Softkey ("Sign In") to open the screen as shown above on the right.
- In the Sign-in Name field, enter the sign-in name that you use for Hotmail, or your .NET Passport. (Example: name_123@ hotmail.com).
- In the Password field, enter your Hotmail or .NET Passport password. Select the Remember my password checkbox if you don't want to enter your password in the future.
- Press the Left Softkey ("Sign In"). Similarly, select Sign Out from the menu when you are ready to log out of MSN Messenger.
Note: If you do not sign out of MSN Messenger, you will remain on a data connection. This may result in additional charges from your service provider.
Adding an MSN Messenger contact
In the MSN Messenger contacts list, select Add Contact from the menu. Add the Hotmail or .NET Passport sign-in name of a person with whom you want to chat. That sign-in name will be added to the contacts list.
Deleting an MSN Messenger contact
In the MSN Messenger contacts list, select the contact. Then, select Delete Contact from the menu.
Sending an instant message
Sign in to MSN Messenger. Highlight the contact in the list with whom you want to chat. Select Send Message from the menu, then enter your message and press the Left Softkey ("Send"). This starts a chat with the contact.
To reply to an instant message from someone
- Select Chats from the menu.
- Select the name of the person sending the instant message. The message displays, along with a box for your reply.
- Enter your reply and select Send.
Note: If you want to be able to receive instant messages at any time that your Smartphone is connected to a network, select Menu > Options > Passport Account. Then, Select the Run this program when connection is available checkbox. When completed, select Done.
Inviting a contact to an ongoing chat
During a chat session, select Invite from the menu, and then choose a contact from the list. The contact receives an instant message and can join the chat.
Changing between chats
Select Chats from the menu. In the list of ongoing chats, select the name of the contact with whom you want to chat.
Return to the contatcs list
During a chat, select My Contacts from the menu.
Ending a chat
Select End Chat from the menu.
Seeing who is already chatting
Select Chats from the menu. Chats in progress (of those in your contacts) are listed.
Blocking or unblocking an MSN Messenger contact
In the MSN Messenger contacts list, select the contact's name. Then, select Block from the menu. That contact will no longer be able to see your status or send you messages. If you later want to unblock the contact, select Unblock from the menu.
Changing your status
In the MSN Messenger contacts list, select your name. Select a status description, such as Away. This status will be displayed next to your name in the contact lists of your contacts.
Changing your display name
In the MSN Messenger screen listing your contacts, select Options > Passport Account from the menu. In My display name field, enter your name as you want it to display in the contacts lists of your contacts.
6.8 MMS Messaging
You can use MMS to create, view, store, send, or receive multimedia messages that include text, photos, videos, or audio files.
Editing MMS Settings
Select Start > Configurations > MMS Settings to open the Preferences screen. The fields in this screen are explained below.
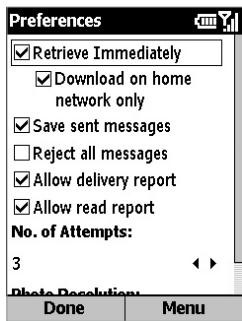
Retrieve Immediately
Choose whether or not you want your Smartphone to download messages as soon as they are available on the server.
No. of Attempts
Specify the number of times your messages will attempt to be sent before stopping.
Connect Via
Select your type of Internet/Network connection (Work, WAP Network, Internet, etc.).
Photo Resolution
Choose from a variety of resolutions (160 x 120, 320 x 240, 640 x 480, Original). Note that lower resolutions will normally lessen the time needed to send/receive a message.
MMSC Settings
The MMSC ("Multimedia Messaging Service Centre") settings are normally pre-set to the appropriate values, and in most cases you will not need to change them.
However, if you want to view or edit them, select MMSC Settings from the menu in the Preferences screen. To view or edit the settings for an existing item, select the desired item listed in the MMSC Settings screen and then press the Left Softkey ("Edit"), or select Edit from the menu. The following fields will be available for you to edit: Name, MMSC URL, WAP Gateway, Port, Connect Via, Max. Sending Size, and WAP Version.
Or, to create a new item, press the Right Softkey to open the menu in the MMSC Settings screen, then select New from the menu and fill in the required fields.
Creating and sending an MMS message
MMSComposer lets you create messages consisting of multiple slides.Each slide can contain a photo or video, audio (with photos only), and text. Messages will display similar to a slide show.You can then send your messages to other mobile devices or e-mail accounts.
MMS Composer is structured like most typical mail programs. It consists of the Inbox, Outbox, Sent Items, Drafts, and Deleted Items folders. To change folders, ensure that you are in the proper MMS account, and then select Folders from the menu. The steps below assume you are in the Inbox, Outbox, or Sent Items folder.
- Select Messaging from the Start menu. In the Messaging screen, select MMS.
- Press the Left Softkey ("New").
- An empty message screen will appear. In To field, enter the recipient's phone number or e-mail address. You can enter it manually, or press the Action button to select a person from your Contacts. In Subj field, enter a subject.
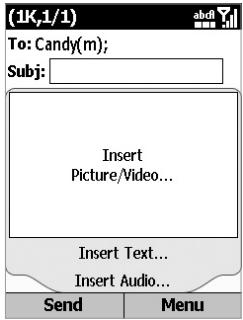
To insert a Photo or Video file:
- In the screen as shown above, select the Insert Picture/Video... box. (If necessary, press the Up and Down navigational buttons to select.)
- Press the Action button. All of your available photo and video files will be displayed in a Thumbnail view in the Select Media screen. (You can change it to a basic file list view using the menu.)
- Highlight the photo or video you want to attach, and then press the Left Softkey ("Select").
In addition, the menu on the Select Media screen contains the following commands:
- Select: Inserts the currently highlighted photo/video into your message.
-
Play/Open: Plays the highlighted video or opens the highlighted photo.
-
Information: Displays various data about the selected file.
- Delete: Removes the selected file.
- Capture Picture: Lets you take a new picture using your phone's built-in camera, and attach it to the MMS slide.
- Capture Video: Lets you capture a new video clip using your phone's built-in camera, and attach it to the MMS slide.
- ListView/Thumbnail View: Toggles the display between ListView (basic file list) and Thumbnail View (thumbnails of the files).
- Change Folder: Lets you choose a different folder from which you can select a photo or video to add to your message.
To insert text:
Select the Insert Text... portion of the screen and manually enter the desired text. If you want to save text you have entered (for re-use in a later message), you can press the Right Softkey to open the menu, and select Save as Canned Text. Or, if you want to insert previously-saved text, select Insert Canned Text from the menu. The Canned Text screen will open. Choose the text you want, and then press the Left Softkey ("Select") to insert it. A collection of pre-defined text strings are also provided with the program, part of which are shown in the figure below.
The menu on the screen contains the following commands:
- Select: Inserts the currently highlighted canned text into your message.
- New: Lets you create a new "canned text" word or phrase. Type in the text, and then press Save.
- Edit: Allows you to modify the currently selected canned text.
- Delete: Removes the currently selected canned text from the choices available in the Canned Text screen.
To attach an audio file:
NOTE: An audio file cannot be inserted into a slide if you have already inserted a video file into that slide.
- Select the Insert Audio... portion of the screen.
- Press the Action button. All of your available audio files will be displayed.
- Highlight the audio file you want to attach, and then press the Left SoftKey ("Select").
In addition, the menu on this screen contains the following commands:
- Select: Inserts the currently highlighted audio file into your message.
- Play: Plays the currently selected file.
- Information: Displays various data about the selected file.
- Delete: Removes the currently selected file from your Smartphone.
- Capture Audio: Lets you record a new audio track. A Record screen will open. Press Record to start recording, and Stop to stop recording. You can then preview the new recording by pressing Play. Press Done to add it to your message.
- Change Folder: Lets you choose a different folder from which you can select an audio file to add to your message.
4. Add more slides if desired:
All of the content you insert is included onto a single slide. The recipient will see the photo or video along with any text. Attached audio will play as well. However, you aren't limited to having only one slide. Press the Right navigational button to create a new slide (you can also select Slides > Add from the menu). You can proceed to add additional photos/videos/audio and text on new slides. Use the Left/Right navigational buttons to toggle between the different slides you've created. You can also navigate using Slides > Next and Slides > Previous on the menu.
5. Press Send to transmit the MMS message, or select Send Message from the menu.
If your account is set up to receive/send messages "manually," your message will be routed to the Outbox for sending. To send the message, go to the Outbox of the MMS account, and select Send/Receive from the menu.
You will automatically get an administrator message in your MMS Inbox prompting you to send the message if your account is set up to receive/send messages "automatically." To send the message immediately, scroll to the System Administrator message, then select Send/Receive from the menu.
To access the following additional options, press the Right Softkey to open the menu:
- Insert Object: Insert a picture/video, audio track, or text into the current slide. This works the same as doing it on the slide directly.
- Capture: Take a picture, or record video or audio, and attach the newly-captured file to your MMS message.
- Attachments: You can attach a vCard/vCalendar/file to your MMS message.
- Remove Picture/Video/Text/Audio: Removes the selected photo/video/text/audio file from the message.
-
Slides: Add, remove, or jump to the next/previous slide.
You can also adjust the duration of the current slide. -
Background: Select one background color for your MMS message.
- Template: Select New from Template to create a message with pre-set content. Select Save as Template to save your current message as a new template.
- Send Options: Set the expiration, delivery time, and/or priority of your message. You can also choose to send the message anonymously and enter recipients to send copies to.
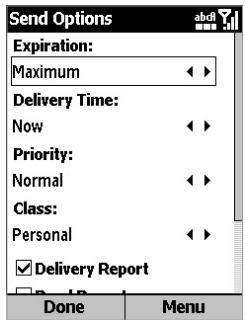
Preview Message: "Play" your message so you can see what the recipient will see.
- Send Message: Send the message.
- Cancel: Cancel the creation of the message.
- Recipients: Select Add to add recipients from your address book, or Clear All to remove any recipients you may have already added. (The Recipients command only appears on the menu when you are in the To field.)
- Edit Subject: Select Canned Text to add a previously saved text string to your subject, or Clear to erase the current Subject text. (The Edit Subject command only appears on the menu when you are in the Subject field.)
Viewing MMS messages
When previewing a message you are creating, or when viewing a message in one of your folders, you can press the Left Softkey to Pause or resume Playback of the message. Or, you can press the Right Softkey to open the menu, which contains:
- Stop/Play: Stops or resumes message playback.
- Object View: Displays a list view of the various message components. Highlight a component and press Open to view it. The menu accessed from the Object View screen lets you open, save, or view info about that component.
Next: Jumps to the next slide, if any. - Previous: Jumps to the previous slide.
When the message has completed playback, you will see a list of various message info. Press Done to exit.
Chapter 7
Synchronizing
7.1 Using ActiveSync
7.2 Installing ActiveSync
7.3 ActiveSync Server
7.4 Other Information
7.1 Using ActiveSync
Maintaining a steady connection between your Smartphone phone and your desktop or notebook PC is essential. This process of sharing information is called "synchronization." ActiveSync synchronises information stored on your Smartphone, from your PC or Exchange Server. It also allows you to share files between your Smartphone phone and your PC.
When you synchronise, ActiveSync compares the information on your Smartphone with the information on your PC and/or Exchange Server, and updates all locations with the most recent information.
With ActiveSync, you can:
- Keep your Outlook information up-to-date by synchronizing your Smartphone phone with your PC.
- Maintain connection with your Inbox, Calendar, and Contacts with a server so that you have the latest information, even when your computer is turned off.
- Copy (rather than synchronise) files between your Smartphone phone and your PC. Installation of new phone software applications and utilities are done through ActiveSync.
- Have control over when synchronization occurs by selecting a synchronization schedule.
- Select which types of information are synchronised and specify how much information is synchronised. For example, you can choose how many weeks of past appointments to synchronise.
- Using Server ActiveSync, you can synchronise information directly with an Exchange Server if your company is running Mobile Information Server.
7.2 Installing ActiveSync
Before synchronization can begin, you must install ActiveSync 3.7 or above on your desktop or notebook PC. Use the Application CD that came with your Smartphone, or install ActiveSync for free by downloading the software from http://www.microsoft.com/windowsmobile. ActiveSync is already installed on your Smartphone.
Creating a partnership
After the ActiveSync installation is completed, the New Partnership wizard will help you set up a partnership between your Smartphone and your desktop or notebook PC. Your first synchronization process will automatically begin when you finish using the wizard. After the first synchronization, you will notice that the information from your PC, which you selected, now appears on your Smartphone. Before setting up ActiveSync, connect your Smartphone phone to your computer using a USB port, or via infrared connection.
Selective synchronization
The first synchronization begins automatically after you finish using the New Partnership wizard.
By default, ActiveSync does not automatically synchronise all Outlook information. You can use ActiveSync options to turn synchronization for specific information types on and off:
- On your PC, invoke the ActiveSync program. Click on Options.
- By default, Calendar, Contacts, Tasks, and Inbox will be synchronised. De-select the check box for the item (s) you do not want to synchronise.
- To adjust the settings for a particular type of information, click on the type and then select Settings. For example, you may select which folders in Inbox to synchronise.
7.3 Server ActiveSync
Before synchronizing information with a server, make sure all the requested server authentication information such as username, password, and the name of the Mobile Information Server are correct. In the New Partnership wizard, select Synchronise with Mobile Information Server and/or this PC, instead of Synchronise with this PC.
To set up Server ActiveSync:
- In your Smartphone's Home screen, select Settings > ActiveSync from the Start menu.
- In the ActiveSync screen, select Menu > Options....
- Select Server Settings, and then Connection.
- In the User name field, enter your Exchange user name.
- In the Password field, enter your Exchange password.
- In the Domain field, enter the name of the domain of your Exchange server (if required).
- If you want your Smartphone to save your password so that you need not enter it when connecting, select Save password.
- If configuring a Server Name, enter the name of your Exchange server.
- Select Done repeatedly until you are returned to the ActiveSync screen. To begin synchronizing with the server, press the Sync softkey.
To change server synchronization settings:
First, disconnect your Smartphone from the PC. Follow the instructions above (setup 1 to 3) to enter the Server Settings screen. Select synchronization settings to edit Calendar, Contacts, or Inbox; change the amount of information to be synchronised. To synchronise the information, select the Sync [Information Type] with a server checkbox on the appropriate synchronization settings page.
Scheduling server synchronization
You can create a schedule for automatically synchronizing information on your Smartphone with a PC or with an Exchange Server. To set up a synchronization schedule with your PC, you must use ActiveSync on the PC. For more instructions, see Change desktop synchronization schedule in ActiveSync Help on the PC.
To set up a synchronization schedule with an Exchange server, you must use ActiveSync on your Smartphone. You can schedule synchronization of your Smartphone on two separate schedules:
Peak times schedule
To synchronise during working hours or other times you experience higher mail volumes.
Off-peak schedule
To synchronise during times when you experience lower mail volumes. When you are roaming, you can synchronise manually to reduce roaming charges, or you can synchronise using the mobile schedules.
- To edit schedule settings, your Smartphone must be disconnected from your PC.
- In your Smartphone's Home screen, select Settings > ActiveSync from the Start menu.
-
In the ActiveSync screen, select Menu > Options....
-
Select Mobile Schedule.
-
Select how often to synchronise in the Peak time sync list.
- Select how often to synchronise in the Off-peak time sync list.
- Select whether or not to synchronise on a schedule in the Roaming sync list.
-
Select the Sync outgoing items as they are sent checkbox to synchronise every time you send E-mail.
-
Select Done.
If you create a schedule for synchronizing while connected to a PC as well as a schedule for synchronizing remotely (wirelessly), your Smartphone synchronises according to both schedules.
Synchronizing Automatically
With ActiveSync, you can schedule automatic synchronization between your Smartphone and a server every time an item arrives or is changed at the server. Your Smartphone is informed of that event and synchronises automatically to retrieve those items, making your Smartphone always up-to-date. You must synchronise your Smartphone at least once (such as after creating a partnership) before you can see and change the settings for synchronization as items arrive.
NOTE: You can synchronise as items arrive, only if your company or service provider is running Exchange Server with Exchange ActiveSync.
Scheduling synchronization
- In your Smartphone's Home screen, select Settings > ActiveSync from the Start menu.
- In the ActiveSync screen, select Menu > Options... > Mobile Schedule.
- In the Mobile Schedule screen, set the Peak time sync field and/or the Off-peak time sync field to the desired time increment.
- Optionally select Sync outgoing items as they are sent.
- Press the Left Softkey ("Done").
7.4 Other Information
Remote synchronization
Remote synchronization is when your Smartphone is synchronizing over a wireless connection instead of using a direct local connection to a desktop computer. Synchronizing remotely with your desktop computer may depend on your network configuration. For example, you may need to set up a virtual private network (VPN) connection to your network.
To synchronise remotely, you need to set up a connection first, and then correctly configure your Smartphone. In the ActiveSync screen, select Options...>PC Settings from the menu. In the Use field, select the computer name. Then, select or clear the Use mobile schedule to sync with this PC and Sync with this PC during manual sync checkboxes.
Synchronizing Inbox
When you select Inbox for synchronization in ActiveSync, E-mail messages are synchronised as part of the general synchronization process. During synchronization, the following events occur:
- Messages are copied from the Outlook Inbox folder on your PC, or from the Exchange Server, to the Inbox folder of your Smartphone.
- By default, when synchronizing Inbox information with your PC or Exchange Server, you receive only messages from the last 3 days and the first 500 bytes of each new message.
- The messages on your Smartphone and on your PC are linked. When you delete a message on your Smartphone, it is deleted from your PC the next time you synchronise, and vice versa.
- Messages in sub folders of other Outlook E-mail folders are synchronised only if the folders have been selected for synchronization in Inbox on your Smartphone.
NOTE: SMS and MMS messages are not received in Messaging through synchronization. Instead, they are sent to your Smartphone by way of your cellular service provider.
Synchronizing Calendar
When you select Calendar for synchronization in ActiveSync, by default, Calendar items from the last two weeks are synchronised. Calendar items created on your Smartphone are copied to your desktop computer and/or server during synchronization, and vice versa. Similarly, Calendar items that are deleted from your Smartphone phone are deleted from your PC and/or server during synchronization, and vice versa.
Synchronizing Contacts
When you select Contacts for synchronization in ActiveSync, by default, all of your contacts are synchronised. Contacts created on your Smartphone are copied to your PC and/or server during synchronization, and vice versa. Similarly, contacts that are deleted from your Smartphone are deleted from your desktop computer and/or server during synchronization, and vice versa.
Synchronizing Tasks
Task synchronization is automatically selected in ActiveSync. By default, all of your incomplete tasks are synchronised. Tasks created on your phone are copied to your desktop computer during synchronization, and vice versa. Similarly, tasks that are deleted from your phone are deleted from your desktop computer during synchronization, and vice versa.
NOTE: Tasks can be synchronised only with your desktop computer; they cannot be synchronised with a server.
ActiveSync error messages
If your information cannot be successfully synchronised, you will see an error message on your Smartphone. To view more information about the error, scroll to it and press the Action byton. You might also want to consult "Synchronizing Information" in ActiveSync Help on your desktop computer.
Chapter 8
Applications
8.1 Using Calendar
8.2 Using Tasks
8.3 Using Calculator
8.4 Using Voice Notes
8.5 Using Windows Media Player
8.6 Using JAVA Manager
8.7 Games
8.1 Using Calendar
Calendar is the scheduling program on your Smartphone, where you can create and view appointments, and view your calendar by day, week, or month. When you create and edit appointments in Calendar, your changes are reflected on your PC when you synchronise.
To open Calendar:
- In the Home screen, press the UP or Down navigational buttons to select the Calendar icon, and then select Today (as shown below on the left).
- In the Home screen, select Calendar from the Start menu (as shown below on the right).
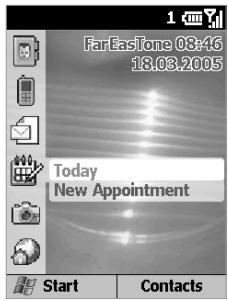
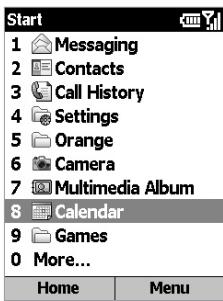
To create a new appointment:
- In the Calendar screen, select New from the menu.
- Enter information about the appointment.
When inputting a Calendar entry, you can specify the amount of time prior to the appointment that you want to be reminded in the Reminder field. If you don't want to be reminded, select None. The default reminder time is 15 minutes.
If you want to change the reminder time later, open the desired Calendar entry and then press the Left Softkey ("Edit"), or select Edit from the menu in the Calendar screen, and scroll to the Reminder field.
When you create a new appointment on your Smartphone, you can synchronise Calendar with your PC or Exchange Server to keep your schedule information up-to-date in all locations.
To edit an appointment:
- Select the desired appointment, press the Action button, and then select Edit from the menu or press the Left Softkey ("Edit").
- If the appointment is recurring, select Yes to edit only the current occurrence, or select No to edit the series.
- Make your changes and select Done.
To delete an appointment:
- Scroll to the appointment you want to delete.
- Select Delete from the menu.
- If the appointment is recurring, select Yes to delete only the current occurrence, or select No to delete the series.
Viewing your schedule
You can view your schedule in three different views: Agenda, Week, and Month.
Agenda View
The default view for calendar information. This view displays meetings and appointments scheduled for the current day. Appointments are shown in chronological order according to start time. All-day appointments are shown as a single line at the top of the Agenda view.
When in Agenda View, you can select Week View or Month View from the menu. Press the Left or Right navigational buttons to select a desired date/time, and then press the Action button to view the corresponding entries, if any. Or, use the menu to Go to Today, Go to Date, set Options, or return to the default Agenda View.
Note that in Month View, arrows pointing upward represent morning appointments, and arrows pointing downward represent afternoon appointments. If you have both morning and afternoon appointments on the same day, the arrows form a colored box. All-day events are indicated by an empty box. If you have morning and afternoon appointments and an all-day event on the same day, an empty box surrounds a colored box.
Customizing the calendar view
You can change viewing options for Calendar, such as specifying the first day of the week and the number of days per week to display, as well as showing and hiding week numbers. To do this, select Options from the menu. You can also set an interval for Reminders.
Importing calendar information
You can import calendar information from another calendar program that uses the iCal or vCal format, as well as calendar information from attachments in E-mail messages, SMS messages, links in Internet Explorer, or via beaming. When you import information and then synchronise, you can opt to have the information on your PC updated.
8.2 Using Tasks
A task is a personal or work-related project, assignment, or errand to track through to completion. A task can occur once, or it can recur. A recurring task can repeat at regular intervals, or repeat based on the date you mark the task complete. To start the Tasks application, select Tasks from the Start menu.
The task list
The task list is your "things to do" list. When you create or edit tasks with Outlook on your PC and then synchronise with your Smartphone, additional task information may display.
A task that has been marked as high priority is preceded by an exclamation mark, and one marked as low priority by a downward-pointing arrow. Overdue tasks are displayed bold and red.
Note that if you synchronise tasks with your PC, completed tasks are removed from your Smartphone during synchronization. They are then displayed in gray with a strikethrough on your PC.
To create a new task:
When you initially invoke Tasks, "Enter new task here" is displayed in the Tasks screen. Press the Up navigational button to move the focus to that field, and then enter the task name and press the Action button.
To mark a task as Complete:
Select the desired task in the list (one whose checkbox is not checked) and then press the Left Softkey ("Complete").
To change a completed task to Incomplete:
Select the desired task in the list (one that has already been marked as Complete with a checked checkbox) and then press the Left Softkey ("Activate").
8.3 Using Calculator
Calculator performs basic arithmetic, such as addition, subtraction, multiplication, and division.
To perform a calculation:
- In the Home screen, select Accessories > Calculator from the Start menu.
- Enter the first number of the formula using the keypad.
- Press the Right Softkey ("Options"). From the menu, select the type of calculation to perform: Add, Subtract, Multiply, Divide, or Decimal Point.
NOTES:
- A decimal point can also be inserted conveniently by pressing the asterisk (*) key on your keypad.
- In addition, you can scroll through the available mathematical symbols by pressing the # key until the symbol you want is displayed (instead of selecting from the menu).
-
Or, you can use the navigation pad to select a mathematical symbol as follows: Press the Up button for the plus sign (+); Down for the minus sign (-); Left for the division sign (I); and Right for the multiplication sign (X).
-
Enter the second number of the formula using the keypad.
- Open the Options menu again and select Equals, or simply press the Action button.
To clear a displayed number or calculation: Press the Left softkey ("Clear").
To clear the last digit entered: Press your Smartphone's Back button.
8.4 Using Voice Notes
You can use Voice Notes to create and play back short voice recordings and verbal reminders, instead of entering text, using your Smartphone's built-in audio recorder. Voice Notes are included in the All Notes list and are named consecutively (Recording1, Recording2, and so on).
To create a Voice Note:
- In the Home screen, select Voice Notes from the Start menu, or hold down the Volume Up button for two or three seconds (on the left side of your Smartphone). The All Notes screen displays.
- Press the Left Softkey ("Record"), or select Record from the menu. Right after you do this, the recording process begins, so be ready to start speaking into your Smartphone's microphone immediately. A counter displays the number of seconds elapsed during recording.
- Press the Left Softkey ("Stop") to stop recording a voice note. The voice note is saved (to \Storage My Documents\ Notes), and appears in the All Notes list of Voice Notes. By default, the first recording is named Recording1.
To rename, play, or delete a Voice Note:
Select the desired Voice Note file, and then select either Rename, Play, or Delete from the menu.
If you delete a voice note that has a default name, such as "Recording1," this name becomes available for the next new voice note that you create.
NOTES:
- Voice Note files will be shown as thumbnails in the Album application, and you can play them as you would any other audio file while in Album mode.
- You can also record a new voice note using the Album application. While in Thumbsail View mode, select New > Voice Note from the menu.
8.5 Using Windows Media Player
Your Smartphone comes with Microsoft® Windows Media® Player 10 Mobile, which lets you play Windows Media Audio, Windows Media Video, and MP3 audio files. You can also copy digital music and video directly from your PC to your phone by using either Windows Media Player or ActiveSync. For more information about copying files using Windows Media Player, see Media Player Help on your PC. For more information about copying files using ActiveSync, see ActiveSync Help on your PC.
To start Media Player, select Windows Media from the Start Menu. Or, simply press any of the three Media Player hardkeys on the front of your Smartphone (which were identified in the illustration in section 1.1). When launched, you can see three primary screens in Windows Media Player:
Library screen
This screen (as shown below) will initially appear when you start Media Player, if the Start Player on Library screen checkbox is checked in the Options > Library setting of Media Player. This screen lets you quickly find your audio files, video files, and playlists. It contains categories such as My Music, My Video, My TV, and My Playlists.
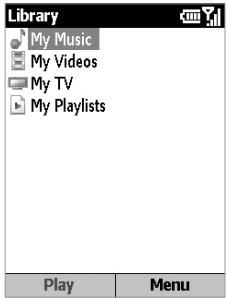
Playback screen
This screen (as shown below on the left) displays the playback controls, such as Play, Pause, Next, Previous, and Volume, as well as the album art window and the video window. This screen will initially appear when you start Media Player, if the Start Player on Library screen checkbox is not checked in the Options > Library setting of Media Player.
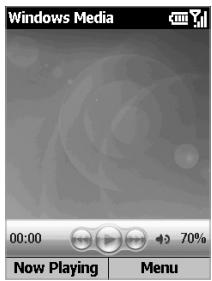
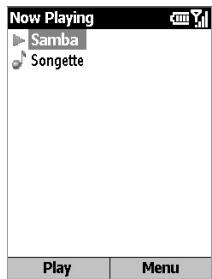
Now Playing screen
The screen (as shown above on the right) that displays the Now Playing playlist. This special playlist indicates the currently playing file and any files that are "queued up" to play next.
About libraries
The library contains links to your audio files, video files, and playlists allowing you to sort your content by criteria such as artist name, album title, or genre. Your Smartphone's Media Player can have multiple libraries. Each library represents an available storage location. For example, if you store some content in the internal RAM storage, the My Device library contains links to those files. If you also store content on storage cards, you will have additional libraries for each card. In the Library screen, you can choose the desired library.
When you turn on your Smartphone and invoke Media Player, the program automatically searches the internal storage for compatible digital media files. Similarly, when you insert a storage card, Media Player asks you if you want to search it for content. If you agree, it adds any content it finds to a Mounted Volume library. If you then copy new files to your phone or storage card and they do not appear in the library, you can manually update the library using the Update Library command.
Supported file formats
High-quality digital media files can require a large amount of storage space. To minimize file size, digital media files are often compressed by using software called a codec ("compressor/decompressor"). To play the file, it must be decompressed using the same codec that compressed the file. To see which codecs a file uses, select it and then select Properties from the menu. The following table shows the file formats supported by your Smartphone.
| File Formats Supported | File Extensions |
| Video | |
| • Windows Media Video | .wmv, .asf |
| • MPEG4 Simple Profile | .mp4 |
| • H.263 | .3gp |
| • Motion JPEG | .avi |
| Audio | |
| • Windows Media Audio | .wma |
| • MP3 | .mp3 |
| • MIDI | .mid, .midi, .rmi |
| • AMR Narrow Band | .amr |
| • AMR Wide Band | .awb |
| • AAC | .m4a |
About Playlists
A playlist is a list of digital media files that play in a specified order. Your playlists are available in the library, in the My Playlists category. A temporary playlist, called Now Playing, is available from the menu in the Now Playing screen. It lists the currently playing file, as well as any files that have been "queued up" to play next.
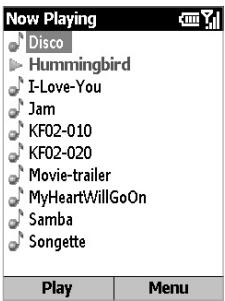
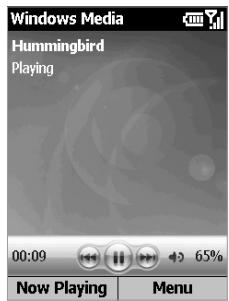
As shown in the example above on the right, the amount of time that has elapsed during the current playback is displayed in the lower left of the screen.
You can press the Up navigational button to increase volume by 5% , or press Down to decrease volume by 5% . The volume is displayed in the lower right of the screen.
You can press the Right navigational button to start playing the next sequential file, or press Left to play the previous file in this playlist. Press the Action button to Pause or Play.
If Media Player has already been launched, you can also press the three Media Player hardkeys above the navigation pad on your Smartphone to go to the next file and play it, go to the previous file and play it, or pause/play the current file. If Media Player is not running, pressing any of these three hardkeys will invoke it.
You can select Options > Buttons from the menu to view a list of button assignments which are currently defined, and which you can change, if desired. To "map" a function to a different hardware button, select it in the list, and select Assign from the menu in the Button Assignment screen. Then, press the button on your Smartphone to which you want to assign the function. Select Reset from the menu if you ever want to return all button assignments to their original default settings.
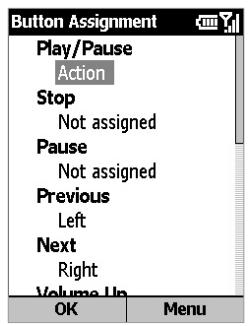
Commands available on the menu will differ, depending on the screen you are viewing. When playback of an audio or video file is in progress, the menu contains the following options:
Playback screen
| Option | Function |
| Play/Pause | Play or pause playback of the current file. |
| Stop | Stops playback. If playback is started again, it will start from the beginning of the current file. |
| Shuffle | Plays the items in the Now Playing playlist in a random order. |
| Repeat | Plays the items in the Now Playing playlist repeatedly. |
| Full Screen | When a video is playing, displays it using the entire screen. |
| Library | Displays the Library screen so you can choose a file to play. |
| Open URL | Play a streaming media file on a network (for example, content streamed from an Internet radio station.) |
| Options | Lets you adjust various Media Player options related to playback, audio/video, network, library, skins, and hardware button assignment (see previous page). |
| Properties | Displays information about the currently playing file. |
| About | Displays information about Windows Media Player, such as the version. |
About DRM, licenses, and protected files
Some digital media files, such as songs downloaded from online stores, are encrypted to prevent the files from being unlawfully distributed or shared. Content providers use a technology called Digital Rights Management (DRM), to encrypt the files. During the encryption process, the content provider creates a license which specifies how and when the file can be used.
For example, a content provider could create a license that allows you to play a certain file on your computer, but not on your Smartphone. Or, a license that allows you to play a certain file on your Smartphone, but only for a month, or perhaps only a certain number of times. Files that have licenses associated with them are called protected files.
If you want to copy a protected file from your desktop computer to your Smartphone, use the desktop Media Player to synchronise the file (instead of dragging the file from a folder on your desktop computer to a folder on your phone or storage card). This will ensure that the license is copied along with the protected file. In the desktop version of Windows Media Player 10 or later, you can use the Sync feature to automatically copy your audio files, video files, and playlists to your Smartphone every time you connect.
To see the protection status of a file, select it and then select Properties from the menu.
NOTE: See How Album handles DRM in Chapter 3 for more information about DRM files.
8.6 Using Java Manager
Your Smartphone supports Java 2 Edition, J2ME. The Java MIDlet Manager allows you to download Java applications such as games and tools specifically designed for mobile phones. You will find that some Java applications and games may have already been installed on your phone.
The Java MIDlet Manager gives you the flexibility of installing and managing additional J2ME applications from the Internet. To invoke the program, select Java from the Start menu.
Downloading Java games and utilities
To install, run, and manage MIDlet programs (MIDlets) on your Smartphone, you have to first download the MIDlet directly to your device from your desktop or notebook PC.
To download and install MIDlets directly from the Internet
- Connect to the Internet and select a MIDlet you wish to download. (Download both the .jad file and related .jar file.)
- Confirm that you wish to download the relevant files before the download begins. Once the download is complete, the Java MIDlet Manager automatically starts, and prompts you to install your new MIDlet.
To download MIDlets from the Internet on your PC
- Make sure that your Smartphone is synchronised to your PC. Using your Internet Explorer, go to www.midlet.org or any site that provides MIDlets for download.
- Choose the game or utility you want to install, download it, and save it to your hard drive.
- Click on the file and move it to the \Storage\My Documents folder of your Smartphone.
To install MIDlets on your Smartphone from your PC
- Select the Install command from the Java Manager menu.
- Choose a MIDlet available in the Install screen. Select a MIDlet by moving up/down using the navigation pad, or by pressing the related number on the keypad.
Uninstalling and re-installing MIDlets
To Uninstall
In the Java Apps screen, use the navigation pad to highlight the MIDlet you want to uninstall, and select Manage from the menu. Then, select Uninstall from the Manage submenu. You will be asked to confirm your selection.
To Re-install
In the Java Apps screen, select Install from the menu to access the Install screen. Use the navigation pad to highlight the MIDlet you want to re-install, and then select Install from the menu in the Install screen.
Running MIDlets
To run a MIDlet, go to the Java Apps screen and select the required MIDlet using the navigation pad or the related number on the keypad. Consult the content provider on how to use the game or utility you have installed. Some MIDlets have an Exit or Stop command within their menu structure. The content providers determine the location of this command.
Other menus and commands
The Install command has already been discussed. Some of the other functions available include:
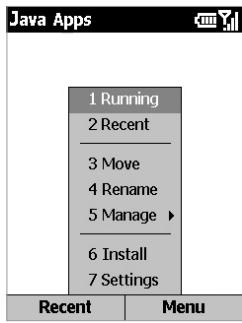
Running
Lists the MIDlet(s) currently running on your Smartphone.
Recent
Lists the most recently run MIDlets (maximum of nine can be listed).
Move
Lets you move the selected item into a different group.
Rename
Select the MIDlet you want to rename, and then enter the new name for that MIDlet in the dialog box.
Manage > Upgrade
You may be able to upgrade certain MIDlets using a network connection. The availability of this feature is determined by MIDlet manufacturers/distributors and their licensing arrangements. You must be connected to an appropriate network for this feature to be available, for example a corporate intranet or the Internet.
Manage > Uninstall
Deletes the selected MIDlet from your Smartphone's memory. Ensure that the MIDlet you want to select is not currently running. Also note that you cannot uninstall a MIDlet individually from a MIDlet suite. You must uninstall the complete MIDlet suite.
Settings
Select Settings from the menu to access these options:
- Display Options: Allows you to adapt the way the Java MIDlet Manager displays information. Sort Options allows you to choose whether you view your MIDlets in groups or as a list. View Options allows you to determine how lists of MIDlets are ordered.
- System Info: Displays information about the total storage space for MIDlets, the amount currently used and the amount currently available.
- About Java MIDlet Manager: Displays the version information.
- Choose Network Type: Opens the Select Service screen and enables you to choose your connection.
8.7 Games
Jawbreaker
The object of Jawbreaker is to clear out all the balls. The rule is that you may only clear out adjacent same-colored balls. The score depends on the number of the balls you clear out at every move.
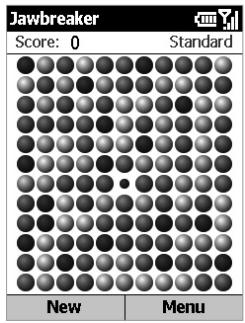
To start a game of Jawbreaker
Select Games > Jawbreaker from the Start menu. To start a new game, press the Left Softkey, or select New Game from the menu. The menu also lets you view Statistics or set Options.
To score
navigate to the ball you want to clear and press the Action button. The group will be outlined, and the score for that selection will be shown. To accept that selection, press the Action button again. To select a different grouping, press the navigation pad Up/Down/Left/Right.
Score equation: S = B^*(B - 1)
S: Score per move
B: Number of balls you clear out
For example, you score 30 points for clearing out 6 balls at one move.
Solitaire
The object of Solitaire is to use all the cards in the deck to build up the four suit stacks in ascending order, beginning with the aces. You win the game when all cards are on the suit stacks.
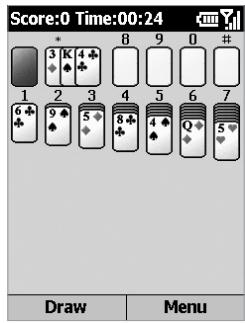
To start a game of Solitaire
Select Games > Solitaire from the Start menu. To start a new game, select New Game from the menu.
To play Solitaire:
- Move any aces on the seven stacks to the four card spaces at the top of the screen, and then make any other available plays.
- When you have made all available plays, select Draw from the menu, or press the Left Softkey, to turn over cards. The card that is face up on the deck is always available for play.
To move cards:
A number or character is displayed above each card stack. On the keypad, press the number or character of the card to move, and then press the number or character of the stack to which you want to move the card.
Pressing the navigation pad Up moves a card to one of the four stacks in the upper right corner of the screen if it belongs there. For example, if an ace appears in one of the lower stacks, press the number above it, and then press the navigation pad Up. If pressing the navigation pad Up does not move your card to the card stack, press the number or character of the card to move, and then press the navigation pad Up.
Chapter 9
Maintaining Your Smartphone
9.1 Adding and Removing Programs
9.2 File Manager
9.3 Task Manager
9.4 Space Maker
9.1 Adding and Removing Programs
You can use Add/Remove Programs on the Tools Menu of ActiveSync to add and remove programs. If you are connected via ActiveSync (see Chapter 7), and the program you want to install has an installer file that can be executed from the PC, installation will be performed automatically on your Smartphone when you invoke the Installer file on your PC.
If the program installation is done via a CAB file, copy the CAB file to the \Storage\My Documents folder of your Smartphone. Then, select it in File Manager (explained in the next section) and press the Action button, or select Run from the menu. It will then install automatically.
If you do install additional programs into your Smartphone, and then want to remove one or more of those programs, another way to do so (besides Add/Remove Programs in ActiveSync) is to select Settings > Remove Programs from the Start menu. All of the programs you've installed yourself will be listed in the Remove Programs screen. Select the program you want to delete, and then select Remove from the menu.
Clear Storage
Caution: Clear Storage erases all of your data, as well as resetting all of your Smartphone's settings back to the manufacturer default values.
If this is what you want to do, select Accessories > Clear Storage from the Start menu. As instructed in the Clear Storage screen, enter the digits 1234 in the field provided, then press the Right Softkey ("Yes") to complete the operation.
9.2 File Manager
Select Accessories > File Manager from the Start menu to invoke the File Manager application.
File Manager provides many easy-to-use features for file and folder management. It operates in either of two major views: Tree View and List View, with a separate menu of commands for each view.
Tree view
Tree View displays the entire file structure in your Smartphone's memory. The functions in Tree View primarily focus on folder management. When initially invoked, File Manager is in Tree View by default. An example is illustrated below.
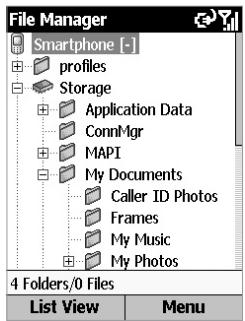
Menu commands in Tree View
Folder
Selecting Folder opens a submenu that lets you create a New Folder which will be a subfolder under the current folder; or Rename, Copy To, or Move To the currently selected folder.
Find
This command lets you search for files according to filename and/or text content. First, select the folder where you want the search to be executed, then select Find. The Find screen will open. Enter part or all of a filename (if you wish to search by name), and/or enter a text string (if you wish to search for all files containing that string). You can also specify the folder to be searched. If any matches are found, the Find Result screen will open.
Go To
Allows you to switch to other folders conveniently. Shortcut: press G (the 4 key on your Smartphone's keypad) when the menu is not open.
Delete
Allows you to delete an entire folder and all of its contents. Shortcut: press D (the 3 key on the keypad) when the menu is not open. To delete individual files, use Delete on the menu when in ListView.
Refresh
"Repaints" the Tree View to reflect the actual current contents in memory. You can also press the asterisk (*) shortcut key to update the screen.
Properties
Displays data related to the selected folder. (If you wish to view information about an individual file, use the Properties command in ListView.)
Options
The Options screen contains several checkboxes that allow you to customise certain behaviors of File Manager. For example, you can choose to use a small font, show or hide file extensions, show or hide files in ROM, force confirmation before overwriting or deleting files, etc. If you ever want to reset all options to the default behavior, select Reset Default from the menu.
System Info
The System Info screen displays useful information about Battery power, Memory usage, Flash, and Device data.
About
Displays application name, version, build, and copyright information
List view
List View displays the details of the selected folder (its sub folders and files). The functions in List View are basically file-oriented. Note that some files may not be displayed for security reasons. If in Tree View, press the Left Softkey to switch to ListView. If the currently selected folder in Tree View contains no sub folders, pressing the Action button will also switch to ListView. (If the selected folder in Tree View does have sub folders, pressing the Action button expands or collapses the tree for that folder.)
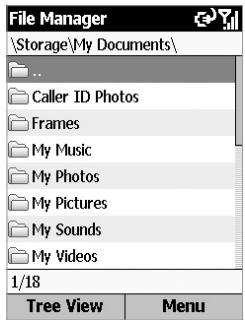
Menu commands in ListView
You can perform many additional file management functions using the commands on the menu when in ListView, as follows:
File
Selecting File opens a submenu that lets you create a New Folder which will be a subfolder under the current folder; or Rename, Copy To, Move To, or Duplicate the currently selected file(s).
Selecting Associate on the File menu allows you to associate all files that have the same extension as the selected file with a specific application program. Then, whenever you select a file of the associated file type, it will open using the application you specified.
Even if a particular file type is already associated with a particular application, you can perform a one-time override of that default association using the Open With command on the File submenu. It allows you to select a file, and then individually select the application that you want to open the file with.
Create Shortcut on the File submenu enables you to create a shortcut for a file and place it in any folder. First, select the file for which you want to create a shortcut, then select Create Shortcut and select the folder where you want it to be placed.
Zip Extraction
This command lets you "unzip" (extract) ZIP files that you may have received into your Smartphone via ActiveSync, infrared beaming, E-mail, etc. First, select the desired file (filename must have an extension of .zip). Then select Zip Extraction. This opens a submenu containing the Contents and Extract Here commands.
Select Extract Here from the submenu if you just want to extract all the files immediately and place them in the current folder.
Selecting Contents from the submenu will list all the files contained in the selected ZIP file. In the screen listing the individual files, you can open a menu containing several options. Among them are:
- Extract To: If you don't want all files in the list to be extracted, you can first select only the files you want. Then select the folder/subfolder where you want to place the extracted files and press the Left Softkey ("Extract").
- Integrity Test: This command checks to see if the data contained in all of the individual files (contained in the current ZIP file) is correct.
- View: This command is available when only one individual file or one folder is selected. If an individual file within the ZIP file is selected, then the View command invokes the application associated with that file type and displays the file. If the ZIP file contains folders, and one of the folders within the ZIP file is selected, then the View command will open the folder and display a list of the files within it. A "plus sign" (+) will be shown in front of encrypted items in a ZIP file.
Selection
If you want to select more than one item in the list, this command opens a submenu that lets you Go to Top, Go to End, Select All, Select None, Invert Select, or enable Select Multiple. In the Select Multiple screen, the menu offers additional options to select only the folders in the list, or only the files in the list.
Sort By
Lets you sort the items in the list by Name, Size, Date, or Type; in either Ascending or Descending order.
Send
This command opens a submenu containing two commands:
- Send via E-mail: Only one file can be E-mailed at a time. (If multiple files are selected, this command will be disabled.) First, select the file you want to E-mail, then select this command. The Compose New screen will open with the selected file already attached.
- Beam: Select one or more files that you want to send, or an entire folder, then select this command. File Manager can send files either via Infrared beaming, or via Bluetooth. The Send Data screen will open. Align your phone's port with the port of the other device. When a device is detected, the device name will be displayed on the screen. If an Infrared device is detected, the file(s) will be beamed directly. If a Bluetooth device is detected, press the Left Softkey ("Beam") to start beaming. The number of files sent successfully will be displayed near the bottom of the screen. After the files have finished being sent, "Done" displays. You can beam them again to another device, if desired, by pressing the Left Softkey again.
Run
If the currently selected file is an executable program file, selecting Run will invoke that application. Or, if you have used the Associate command on the File submenu to associate a particular file type with a particular application, selecting Run (when a file of that file type is selected) will start the associated application. The Action button is the shortcut key for this command.
Delete
Select the file or folder you want to delete, then select Delete on the menu (or press D on your Smartphone's keypad when the menu is not open).
Refresh
When you select Refresh from the menu, or press the asterisk (*) shortcut key on your keypad when the menu is closed, the contents of the List View will be repainted to reflect the actual current contents in memory.
Properties
If a file or folder is selected in the list at the time you select Properties from the main ListView menu, the Properties screen will display related information. Also, in the bottom portion of the screen, you can change some attributes of the file or folder, and view others. (This command is disabled if multiple files/folders are disabled.)
Options
The Options screen is the same one you can access from the menu in Tree View. It contains several checkboxes that allow you to customise certain behaviors of File Manager. For example, you can choose to use a small font, show or hide file extensions, show or hide files in ROM, etc. If you ever want to reset all options to the default behavior, select Reset Default from the menu.
File Manager is DRM-aware
DRM (Digital Rights Management) is a method of controlling the usage of protected media objects after they have been downloaded. For more information, see the section How Album handles DRM of Chapter 3.
File Manager will detect DRM-protected files, and will identify their status via icons. Similar to the Album application explained in Chapter 3, "key" icons are used to denote DRM files in File Manager's List View. The DRM icon also displays in the Rename, Associate, Open With, Select Multiple, Delete, and Properties screens.
DRM files that can be used are identified by a key icon. DRM files that are invalid are indicated by a key icon with a diagonal line running through it.
In addition, when the Properties screen is open, you can select License from the menu to open a screen of options such as Play, Display, Execute, and Print. File Manager
will take the appropriate action depending on the option you choose and depending on the license associated with the protected file. For example, selecting Play might open a Confirm screen like the examples illustrated in the last page of Chapter 3.
File Manager will allow or not allow the use of menu items as appropriate, according to the current DRM file state. For example, commands on the Send submenu will not function if the file is a "forward locked" or "combined delivery" (content and rights downloaded together) file. But commands on the Send submenu are enabled if it is a "separate delivery" (content and rights are downloaded separately) file.
9.3 Task Manager
Task Manager lists all the tasks/applications currently running on your Smartphone. You can then easily switch to and activate any currently running task, terminate any tasks, and view free memory/battery information.
When Task Manager is initially invoked, it lists all tasks/ applications that are currently running in the memory of your Smartphone. An example is illustrated below.
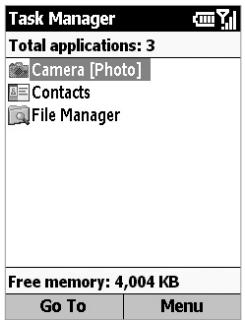
Menu Commands
Go To
This command activates the selected application/task. First, select the application in the list that you want to use. Then select Go To from the menu, or press the Action button, to switch to that application and make it the active task. (You can also use the Left Softkey to activate a task if the menu is not open.)
Refresh
Selecting the Refresh command, or pressing the asterisk () key on the Smartphone's keypad, will update and repaint the list of currently running tasks.
Stop
The Stop command (the 7 key on your Smartphone's keypad, if the menu is not open) stops the selected application. If for any reason the task cannot be terminated, a message will inform you of such. After you have stopped an application, the amount of Free Memory (shown near the bottom of the screen) is updated.
Stop All
Selecting Stop All (pressing the 2 key if the menu is not open) tells Task Manager to try to stop all the listed applications. A message will ask you to confirm that you want to terminate all currently running applications. Press the Left Softkey ("OK") to confirm.
Stop All But Selected
Select the one task in the list that you do not want to stop. Then, select Stop All But Selected. All other running tasks will then be terminated, except the one you selected.
System Info
Select System Info to view details concerning your Power/ Battery, Memory, Flash, and Device information.
9.4 Space Maker
Your Smartphone has a built-in, unremovable default storage card. The nomenclature of the card is hardware-dependent (in some phones it is known as "Flash" Storage). Your Smartphone uses this card to store certain data, such as the data in your Contacts, Tasks, Appointments (Calendar), and E-mail items. There are times when free storage space might become low, at which time you might want to delete any less important items in order to free up space.
Space Maker makes it easy for you to delete specific categories of any unwanted data in Flash storage as you see fit, thereby letting you control the amount of space available.
The main Space Maker screen, shown below on the left, displays the total amount of space available in your particular built-in storage, the amount of space currently being occupied by your data on the card (and percentage) and the amount of space currently not being used (and percentage).
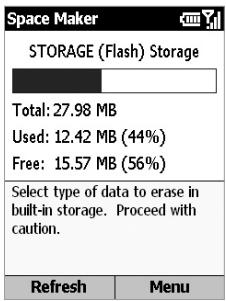
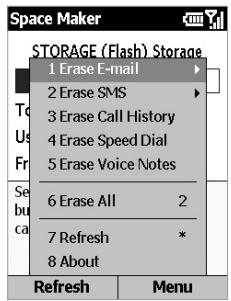
Keypad shortcuts: When the menu is not open, you can press the 2 key to invoke the Erase All command, or press the asterisk (*) key to update the storage usage data to reflect the current "Used" and "Free" amounts.
Menu Commands
Erase E-mail
Selecting Erase E-mail will open a submenu that gives you the flexibility to delete all E-mail, or only the E-mail marked as "Read," or only the E-mail in these individual folders: Deleted Items, Drafts, Inbox, Outbox, or Sent Items.
- Deleting All E-mail: Select All to delete all E-mail in all folders. All attachments will also be deleted. Note that SMS and MMS messages will not be deleted. (If you wish to delete SMS messages in your Inbox, use the Erase SMS command described on the next page.)
After you select All from the menu, a confirmation screen will appear. It displays the number of E-mails that will be deleted, and the amount of space currently being used by those messages which will be "freed up" in your Flash storage after the command has executed. Press the Left Softkey to Confirm, or the Right Softkey to Cancel.
After the "Delete All E-mail" operation has finished, all E-mail will be deleted from your Smartphone. Therefore, the next time you synchronise after deleting, your E-mail will be out-of-sync since it will be gone from your Smartphone but will still exist on your PC. If you want E-mail to be synchronised on both phone and PC, first delete your current partnership and then create a new partnership.
- Deleting Individual Categories of E-mail: Likewise, you can select one of the following commands from the submenu to delete only the E-mail in those categories: Read (deletes all E-mail marked as "Read"); Deleted Items; Drafts; Inbox; Outbox; and/or Sent Items. In each case, a screen will open which displays the number of items in that category, and the total space being used by those items (similar to the example illustrated in the next figure).
Erase SMS
The Erase SMS command opens a submenu that gives you a choice of deleting all SMS (Short Message Service) messages, or only the messages marked as "Read." Whether you select All or Read from thesubmenu, a confirmation screen will appear and display the number of SMS messages that will be deleted, as well as the amount of space being used by those SMS messages. Press the Left Softkey ("Confirm") to delete. You will then be returned to the main screen of Space Maker, and the new total "Used" and "Free" storage amounts will be displayed.
Erase Call History
To delete all Call History data, select Erase Call History on the menu. A confirmation screen will display the number of Call History records that will be deleted, and the amount of space currently being used by those records. Press the Left Softkey to Confirm that you want to delete all Call History records, or the Right Softkey to Cancel.
Erase Speed Dial
To delete all Speed Dial entries, select Erase Speed Dial on the menu. A confirmation screen will display the number of Speed Dial records that will be deleted, and the amount of space currently being used by that data. Press the Left Softkey to delete, or the Right Softkey to cancel.
Erase Voice Notes
This command deletes all voice recordings you have created and stored in Flash storage, using your Smartphone's Voice Notes function. In the confirmation screen, press the Left Softkey to delete.
Erase All
When you select the Erase All command from the menu (press 2 on your Smartphone's keypad when the menu is not open), the screen shown below opens. It allows you to conveniently select multiple categories of data that you want to delete (rather than deleting categories of data one-by-one using the individual commands on the main menu).
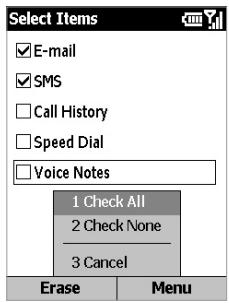
After checking the desired checkboxes, press the Left Softkey to begin the Erase process. You will still be given an opportunity to confirm the deletion of each category individually. Note that only the categories listed in the screen will be erased. MMS messages are not deleted.
Refresh
Selecting Refresh on the menu, pressing the asterisk (*) shortcut key, or pressing the Left Softkey in the main screen, updates and re-displays the amounts of Used Storage and Free Storage.
Whenever you use any of the Erase [Item] commands on the menu, the Refresh operation will be performed automatically to show you the new storage amounts resulting from the deletion.
Appendix
Regulatory Notices Troubleshooting Specifications Index
Regulatory Notices
Agency identification numbers
For regulatory identification purposes, your product (Smartphone phone) is assigned a model number of ST21A. The Battery Pack has been assigned a model number of ST26A, ST26B, and ST26C.
To ensure continued reliable and safe operation of your Smartphone, use only the accessories listed in this document.
NOTE: This product is intended to be used with a certified class 2 limited power source, rated 5 volts DC, maximum 1A power supply unit.
European Union Notice
Products with CE marking comply with the R&TTE Directive (99/5/EC), the EMC Directive (89/336/EEC) and the Low Voltage Directive (73/23/EEC) issued by the Commission of the European Community.
Compliance with these directives implies conformity to the following European Norms:
EN 60950 (IEC 60950) - Safety of Information Technology Equipment.
ETSI EN 301 489-7 - Electromagnetic compatibility and Radio spectrum Matters (ERM); ElectroMagnetic Compatibility (EMC) for radio equipment and services; Part 7: Specific conditions for mobile and portable radio and ancillary equipment of digital cellular radio telecommunications systems (GSM and DCS).
ETSI EN 301 511 - Global System for Mobile communications (GSM); Harmonized standard for mobile stations in the GSM 850 and DCS 1800 bands covering essential requirements under article 3.2 of the R&TTE directive (1999/5/EC).
ANSI/IEEE C.95.1-1992 - specific absorption rate in mobile phone emission condition for body health.
EN 50360 - 2001 - Product standard to demonstrate the compliance of mobile phones with the basic restrictions related to human exposure to electromagnetic fields (300 MHz 3 GHz).
- SAR value - CE (10g)
900MHz: Head 0.645 mW/g, Body 0.462 mW/g.
1800MHz: Head 0.172 mW/g, Body 0.171 mW/g.
ETSI EN 301 489-1 Electromagnetic compatibility and Radio spectrum Matters (ERM); ElectroMagnetic Compatibility (EMC) standard for radio equipment and services; Part 1: Common technical requirements.
ETSI EN 301 489-17 Electromagnetic compatibility and Radio spectrum Matters (ERM); ElectroMagnetic Compatibility (EMC) standard for radio equipment and services; Part 17: Specific conditions for 2.4 GHz wideband transmission systems and 5 GHz high performance WLAN equipment.
ETSI EN 300 328 Electromagnetic compatibility and Radio spectrum Matters (ERM); Wideband Transmission systems; data transmission equipment operating in the 2.4 GHz ISM band and using spread spectrum modulation techniques.
Important safety information
Retain and follow all product safety and operating instructions. Observe all warnings on the product and in the operating instructions.
To reduce the risk of bodily injury, electric shock, fire, and damage to the equipment, observe the following precautions.
Safety precautions for RF exposure
Use only original manufacturer-approved accessories, or accessories that do not contain any metal
Use of non-original manufacturer-approved accessories may violate your local RF exposure guidelines and should be avoided.
Heed service markings
Except as explained elsewhere in the Operating or Service documentation, do not service any product yourself. Service needed on components inside these compartments should be done by an authorised service technician or provider.
Damage requiring service
Unplug the product from the electrical outlet and refer servicing to an authorised service technician or provider under the following conditions:
- Liquid has been spilled or an object has fallen into the product.
The product has been exposed to rain or water.
The product has been dropped or damaged.
There are noticeable signs of overheating. - The product does not operate normally when you follow the operating instructions.
Avoid hot areas
The product should be placed away from heat sources such as radiators, heat registers, stoves, or other products (including amplifiers) that produce heat.
Avoid wet areas
Never use the product in a wet location.
Avoid pushing objects into product
Never push objects of any kind into cabinet slots or other openings in the product. Slots and openings are provided for ventilation. These openings must not be blocked or covered.
Mounting accessories
Do not use the product on an unstable table, cart, stand, tripod, or bracket. Any mounting of the product should follow the manufacturer's instructions, and should use a mounting accessory recommended by the manufacturer. Do not place the product with an unstable base.
Use product with approved equipment
This product should be used only with personal computers and options identified as suitable for use with your equipment.
Adjust the volume
Turn down the volume before using headphones or other audio devices.
Cleaning
Unplug the product from the wall outlet before cleaning. Do not use liquid cleaners or aerosol cleaners. Use a slightly damp cloth for cleaning, but NEVER use water to clean an LCD screen.
Safety precautions for power supply unit
Use the correct external power source
A product should be operated only from the type of power source indicated on the electrical ratings label. If you are not sure of the type of power source required, consult your authorised service provider or local power company. For a product that operates from battery power or other sources, refer to the operating instructions that are included with the product. Handle battery packs carefully: This product contains a Lithium-1on battery. There is a risk of fire and burns if the battery pack is handled improperly. Do not attempt to open or service the battery pack. Do not disassemble, crush, puncture, short external contacts or circuits, dispose of in fire or water, or expose a battery pack to temperatures higher than 140^ (60^) .
Exposure to radio rfrequency (RF) signals
Your wireless Smartphone phone is a radio transmitter and receiver. It is designed and manufactured not to exceed the emission limits for exposure to radio frequency (RF) energy. These limits are part of comprehensive guidelines and establish permitted levels of RF energy for the general population. The guidelines are based on the safety standards previously set by international standards bodies:
American National Standards Institute (ANSI) IEEE. C95.1-1992
National Council on Radiation Protection and Measurement (NCRP). Report 86. 1986
International Commission on Non-Ionizing Radiation Protection (ICNIRP) 1996
- Ministry of Health (Canada), Safety Code 6. The standards include a substantial safety margin designed to assure the safety of all persons, regardless of age and health.
The exposure standard for wireless mobile phones employs a unit of measurement known as the Specific Absorption Rate, or SAR.
The standard incorporates a substantial margin of safety to give additional protection for the public and to account for any variations in usage. Normal conditions only ensure the radiative performance and safety of the interference. As with other mobile radio transmitting equipment, users are advised that for satisfactory operation of the equipment and for the safety of personnel, it is recommended that no part of the human body be allowed to come too close to the antenna during operation of the equipment.


WARNING:
Your Smartphone phone contains a Lithium-iron battery pack. There is a risk of fire and burns if the battery pack is handled improperly. Do not disassemble, crush, puncture, short external contacts, or dispose of in fire or water. Do not attempt to open or service the battery pack. Replace only with the battery pack designated for this product. Recycle or dispose of batteries properly. Do not discard with your regular trash.
Telecommunications & Internet Association (TIA) safety information
Pacemakers
The Health Industry Manufacturers Association recommends that a minimum separation of six inches be maintained between a handheld wireless phone and a pacemaker to avoid potential interference with the pacemaker. These recommendations are consistent with the independent research by and recommendations of Wireless Technology Research. Persons with pacemakers:
- Should ALWAYS keep the phone more than six inches from their pacemaker when the phone is turned ON.
Should not carry the phone in a breast pocket. - Should use the ear opposite the pacemaker to minimize the potential for interference. If you have any reason to suspect that interference is taking place, turn your phone OFF immediately.
Hearing Aids
Some digital wireless phones may interfere with some hearing aids. In the event of such interference, you may want to consult your service provider, or call the customer service line to discuss alternatives.
Other Medical Devices
If you use any other personal medical device, consult the manufacturer of your device to determine if they are adequately shielded from external RF energy. Your physician may be able to assist you in obtaining this information.
Turn your phone OFF in health care facilities when any regulations posted in these areas instruct you to do so. Hospitals or health care facilities may be using equipment that could be sensitive to external RF energy.
Safety Precautions
SAFETY IN AIRCRAFT: This product can cause interference to an aircraft's navigation system and network. In most countries it is against the law to use this product on board an airplane.
ENVIRONMENTAL SAFETY: Do not use this product in gas stations, fuel stores, chemical plants and locations containing explosives.
ROAD SAFETY: Vehicle drivers in motion are not permitted to use handheld telephony services, except in emergency. In some countries, using hands-free devices as an alternative is allowed.
MEDICAL EQUIPMENT SAFETY: This product may cause medical equipment malfunction. In most hospitals or medical centers use of this product is forbidden.
Other tips and cautions
- Avoid using your Smartphone phone near metal structures (for example, the steel frame of a building).
- Avoid using your Smartphone phone near strong electromagnetic sources, such as microwave ovens, sound speakers, TV and radio.
- Avoid using your Smartphone phone after a dramatic change in temperature.
Troubleshooting
If you encounter a problem with your Smartphone, review the list below to try and find a solution. If still having problems, please contact Technical Support or your dealer.
General problems
| Problem | Soulton |
| ■ The screen of my Smartphone is blank. | · Your phone is designed by default to switch to a screen saver. To turn it on, press any key. · Your battery may be run down. Charge the battery immediately. |
| ■ During incoming calls or when alarms should occur, my Smartphone does not make any sound or vibrate. | · Check the Profiles and Sounds settings by selecting Settings from the Start menu. · Select Calendar from the Start menu and then select Options from the menu in the Calendar screen to see if Set Reminders is activated. |
| ■ My Smartphone operation has become very slow. | You may have opened too many programs. To release the operation load, you can terminate unneeded programs using the Task Manager utility (see Chapter 9). |
| ■ A "battery low" warning message pops up on the screen. | Plug the AC power into your Smartphone to charge it. |
| ■ Viewing my incoming messages. | Select Messaging from the Start menu, and then select either Text Messages, Outlook E-Mail, IMAP4, or MMS (Multimedia messages). |
| ■ A warning message about “Running out of memory” pops up on the screen. | Some ways to create space on your Smartphone are: · Delete any unnecessary files such as old E-mail, image files, or large video files. · Delete unneeded programs by selecting Settings > Remove Programs or Accessories > Clear Storage from Start menu. · Use Task Manager to terminate unneeded tasks (see Chapter 9). · Use Space Maker to delete misc. unneeded items (see Chapter 9). |
| ■ I cannot open an image or video file using Album. | The file type of the image or video may not be supported. See Chapter 3 for a list of Album's supported image/video file formats. |
| ■ The image appears dark on my screen when in Camera mode. | When in the Camera screen, you can adjust for different lighting conditions by opening the menu and selecting Ambience and/or Adjust View properties. |
ActiveSync problems
| Problem | Soulution |
| ActiveSync operation cannot be performed or connected. | Make sure the Mini-USB cable is connected securely. Make sure you have installed the ActiveSync software found on the Companion CD that came with your phone. Make sure the settings are correct in File > Connection Settings... in the ActiveSync window on your desktop computer. Chapter 7 discusses ActiveSync. If still not working, try to uninstall the ActiveSync software (using Control Panel on your desktop computer), then reinstall. |
| ActiveSync is connected, but data or information cannot be transferred. | Check Tools > Options... in the ActiveSync window on your computer to see if the information type you want has been selected for synchronizing. See more details about ActiveSync in Chapter 7. |
| I cannot perform over-the-air synchronization. | Ensure that Mobile Information Server has been installed. |
Connection problems
| Problem | Soulution |
| ■ Unable to use Infrared (IR) to transfer information. | Try the following: · Transfer only one file, or no more than 25 contact cards, at a time. · Line up the IR ports so that they are unobstructed and within close range. · Make sure nothing is between the two IR ports. · Adjust the room lighting. Some types of light interfere with IR connections. Try moving to a different location or turning off some lights. Do not try to use infrared beaming in the sunlight. |
| ■ Cannot connect to the Internet. | Try the following: · Ensure that you have set up and connected to an Internet Service Provider. · Ensure that the wireless connection to your mobile Service Provider is switched on and that the signal is unobstructed. · Verify with your Internet Service Provider that your user name and password are correct. |
| ■ Cannot end a Bluetooth connection. | If another device leaves its link On when it is pairing with your Smartphone, the only way to disconnect is by deactivating the Bluetooth link. From the Start menu, select Settings > Bluetooth > Bluetooth, and then set the Bluetooth field to Off. |
Cannot find a particular device.
- Ensure that the other device is activated.
- Ensure that you are within 10 meters of each other, and that there are no obstructions.
- Ensure that the other device is not in "Hidden" mode.
Having problems using Windows Media Player.
A number of resources are available to help you troubleshoot. For more information, see the Windows Media Player Mobile pages at: http://www.microsoft.com/windows/windowsmedia/support/faq.aspx
- Contents subject to change without notice.
Specifications
System information
| ■ Processor | TI OMAP, 750 MHz |
| ■ Memory | ROM: 64 MB (Standard) RAM: 32 MB SDRAM (Standard) |
| ■ Operating system | Microsoft Windows Mobile Smartphone |
Display
| ■ Type | Transflective 2.2" QVGA TFT-LCD |
| ■ Resolution | 176 x 220 at 64K colors |
GSM/GPRS tri-band module
| ■ GSM 850 | 824 ~ 849, 869 ~ 894 MHz |
| ■ GSM 900 | 880 ~ 915, 925 ~ 960 MHz |
| ■ GSM 1800 | 1710 ~ 1785, 1805 ~ 1880 MHz |
| ■ GSM 1900 | 1850 ~ 1910, 1930 ~ 1990 MHz |
Camera module
| ■ Type | 1.3 mega-pixel Color CMOS |
| ■ Resolution | • SXGA: 1280 x 1024 • SVGA: 800 x 600 • VGA: 640 x 480 • QVGA: 240 x 320 • QQVGA: 120 x 160 • QQQVGA: 80 x 60 |
Connection
| ■ Infrared | IrDA SIR |
| ■ I/O port | Standard 5-pin Mini-USB port for signals (for USB and power) |
| ■ Audio | Stereo headphone jack |
| ■ Bluetooth | V1.1, Class 2 transmit power |
Controls and lights
| ■ Navigation | 5-way navigation pad/Action button |
| ■ Buttons | • Power on/off (top) • User-defined button (left side) • Volume Control: up/down (left side) • Camera (right side) • Left Softkey) • Home screen • Back to previous screen • Right Softkey • Previous (Media Player) • Play/Pause/Stop (Media Player) • Next (Media Player) • Media Player button • Talk (start call/answer call) • End call/Lock keypad • 12-button dialing keypad |
| ■ Lights | • Event notification • Charge status • GSM/GPRS signals • Bluetooth connection |
Expansion slot
| ■ SD/MMC slot | Mini-SD memory card |
| Audio | |
| ■ Microphone/speaker | Built-in microphone and 3-in-1 speaker |
| ■ Headphone | MP3 stereo |
| Power supply | |
| ■ Battery | 1150mAh (typical) Lithium-Ion removable, rechargeable battery |
| ■ Talk time | Up to 5 hours |
| ■ Standby | Up to 250 hours |
| ■ AC adapter | • AC input/frequency: 100 ~ 240 VAC, 50/60Hz • Rated output: 5VDC, 1A (typical) |
- Contents subject to change without notice.
Index
A
Accept (receiving calls) 37
ActiveSync, installing 144
Add/Remove Programs 174
Album mode
Detailed View 79
Digital Rights Management 85
Editing functions 84
Slide Show View 81
Ambience (camera) 74
Assigning Photo ID to Contact 51
Audio, inserting into MMS 139
Audio, recording with video 76
B
Back button 6,18
Battery, charging 12
Battery, status indicators 13
Battery level (checking) 96
Beaming Contacts 44
Beam (Phone settings) 95
Bluetooth usage 110
Bonds (Bluetooth) 111
Brightness (Camera) 75
BT Settings (Bluetooth) 112
C
Calculator 156
Calendar 152
Caller ID 46
Caller ID enabling 93
Calling from Contacts 35
Calling from Home screen 34
Call Barring 92
Call Forwarding 92
Call History 56
Call History, erasing (Space
Maker) 186
Call Timers 57
Call Waiting 38,93
Camcorder Capture Mode 68
Camera button 6
Camera Mode usage 66
Caps Lock on/off 23
Capture sizes (Camera) 74
Car antenna connector 8
Certificates (Phone settings) 95
Chat, starting 133
Clear Storage utility 174
Contact Cards 42
Counter, resetting (Camera) 75
Country code 62
D
Data Connections 104
Default photo (Caller ID) 50
Detailed View (Album) 79
Detailed View (Caller ID) 48
Dial-up connections 104
Dialing pause, inserting 62
Digital Rights Management
Album 85
File Manager 181
Media Player 164
Discoverable mode (Bluetooth) 110,111
E
E-mail, composing 119
E-mail, deleting (Space Maker) 185
E-mail account, setting up 116
Earphones 14
Earphones plug 2
Emergency calls 36
Encoder types (Camera) 74
F
Favourites (Internet Explorer) 109
File Manager
Bluetooth/Infrared beaming 180
List View 177
Tree View 175
Zip Extraction 178
Find (search for files) 176
Flash storage, deleting items 184
Flicker Adjustment (Camera) 75
G
Games, Java, downloading 165
GPRS connections 105
I
In-call options 55
Infrared port 2
Instant messaging 131
Integrity test (for ZIP files) 179
Internet Explorer 107
J
Java, installing apps 165
Jawbreaker (game) 169
K
Keypad backlight 97
Keypad lock/unlock 24
L
LED Indicator colors 7
Lighting adjustment (camera) 74
Light Sensor (keypad backlight) 97
List View (File Manager) 177
Locking/unlocking phone 25
Locking keypad/SIM card 24
M
Media Player 158
Digital Rights Management 164
Libraries 159
Supported file formats 160
Message draft, saving 120
Message folders, viewing 118,126
Messaging options 128
MIDlet Manager (Java) 165
Mini SD card, inserting 11
Mirror 8
MMS, creating message 135
MMS Video Capture Mode 69
Model number (phone/battery) 190
Modem Link 113
Monitor, Caller ID 47
MSN Messenger 131
Multipress mode 21
N
Navigation Pad 5,15
Networks screen (Phone) 93
New from Camera (Photo ID) 53
Not-found photo (Caller ID) 50
0
Owner Information 96
P
Partnership, creating, ActiveSync 145
Password, enabling/disabling 25
Photo Capture Mode 67
Photo Contacts, using 46
Photo ID Capture Mode 69
Picture, inserting into MMS 137
Picture, taking 68
Picture Theme Capture Mode 70
Pocket Contacts 39
Pocket Internet Explorer 107
Power Management (battery) 96
Profiles 100
Proxy connections 105

Quick List 19,99

Receive incoming beams 45
Receiving calls 37
Rejecting calls 37
Resolution (capture size) 73
Review (captured files) 71

SD card, mini 11
Server ActiveSync 146
Signatures in messages 121
SIM card, inserting 10
SIM card lock/unlock 24
SIM Contacts, creating 45
Slide Show Mode (Album) 81
Softkeys 15
Solitaire (game) 170
Sounds settings 101
Space Maker 184
Speed Dials 58
Speed Dials, erasing (Space
Maker) 186
Stopping running apps 183
Synchronizing remotely 149
System Info display 177

T9 mode 22
Talk button 5,37
Tasks application, using 155
Task Manager 182
Templates (Caller ID) 51
Templates (Picture Theme) 71
Text, inserting into MMS 138
Three-second dialing pause 62
Transition Effects (Album) 81,82
Tree View (File Manager) 175

Unknown photo (Caller ID) 50
USB cable 14

Video, capturing 68
Video, inserting into MMS 137
Voice Mail, retrieving 56
Voice Notes 84,157
Voice Notes, erasing (Space Maker) 186
Voice Tags 60
VPN connections 105
W
Work URL Exceptions 106
Z
ZIP files, extracting 178
Zooming (Camera Mode) 73
For the following equipment:
Smartphone
(Product Name)
ST21A
(Model Designation/Trade Name)
High Tech Computer Corp.
(Manufacturer Name)
23 Hsin Hua Rd., Taoyuan 330, Taiwan
(Manufacturer Address)
is herewith confirmed to comply with the requirements set out in the Council Directive on the Approximation of the Laws of the Member States relating to Electromagnetic Compatibility Directive ; Low Voltage Directive and Radio & Telecommunications Terminal Equipment Directive (R&TTE)
Reference No. Title
89/336/EEC Electromagnetic Compatibility (EMC directive)
73/23/EEC Low Voltage Directive (LVD)
1999/5/EC Radio & Telecommunications Terminal Equipment Directive (R&TTE)
EN301489-1,-7&-17v1.2.1:2002
EN300328 v1.4.1: 2003
EN301511 v9.0.2: 2003-03
EN50361:2001
EN60950:2000
Person responsible for making this declaration:
Dalton Chuang
(Name, Surname)
Senior Manager
( Position / Title )
(Dalton (Place)
Chuang
(Date)
APr 29,2005 Legal Signatu
(Legal Signature)