
FREEDOM ZOOM 140 - Appareil photo argentique MINOLTA - Notice d'utilisation et mode d'emploi gratuit
Retrouvez gratuitement la notice de l'appareil FREEDOM ZOOM 140 MINOLTA au format PDF.


| Type de produit | Appareil photo argentique compact 35 mm |
| Marque | MINOLTA |
| Modèle | FREEDOM ZOOM 140 |
| Dimensions (L x l x h) | 110,5 x 60,5 x 46,5 mm |
| Poids (sans batterie) | 195 g |
| Alimentation | 1 pile lithium CR123A 3 V |
| Objectif | 37,5-140 mm f/5,4-11,7 (6 éléments en 6 groupes) |
| Plage de mise au point (grand-angle) | 0,6 m à l'infini |
| Plage de mise au point (téléobjectif) | 0,80 m à l'infini |
| Sensibilité film | DX automatique ISO 25-3200 |
| Vitesse d'obturation | 10-1/500 s |
| Flash intégré | Portée (ISO 100) : GA 0,6-4,6 m, Télé 0,8-2,1 m |
| Modes de flash | Auto, réduction yeux rouges, fill-in, désactivé, portrait nuit |
| Modes autofocus | Area AF, Spot AF, Target AF |
| Retardateur | 10 s |
| Compteur de vues | Affichage numérique sur panneau de données |
| Avancement et rembobinage du film | Automatique (rembobinage en fin de film ou manuel) |
| Entretien et nettoyage | Nettoyer le boîtier avec un chiffon doux et sec ; objectif avec soufflette et tissu optique |
| Sécurité | Ne pas exposer à l'humidité, ne pas démonter, éviter les chocs |
| Informations générales | Notice téléchargeable en PDF, 41 pages |
FOIRE AUX QUESTIONS - FREEDOM ZOOM 140 MINOLTA
Questions des utilisateurs sur FREEDOM ZOOM 140 MINOLTA
0 question sur cet appareil. Repondez a celles que vous connaissez ou posez la votre.
Poser une nouvelle question sur cet appareil
Téléchargez la notice de votre Appareil photo argentique au format PDF gratuitement ! Retrouvez votre notice FREEDOM ZOOM 140 - MINOLTA et reprennez votre appareil électronique en main. Sur cette page sont publiés tous les documents nécessaires à l'utilisation de votre appareil FREEDOM ZOOM 140 de la marque MINOLTA.
MODE D'EMPLOI FREEDOM ZOOM 140 MINOLTA
MINOLTA
The essentials of imaging
www.minolta.com
natural_image
Line drawing of two MINODA digital cameras with camera lens (no text or symbols)FREEDOM ZOOM 140/160
RIVA ZOOM 140/160
E INSTRUCTION MANUAL
CONTENTS
Thank you for your purchasing this Minolta camera. Before using your new camera, please take the time to read through this instruction manual for it contains important information on the use and care of your camera.
This is the combined manual for the Freedom/Riva Zoom 140/160 models. The description pertaining to each model is referred to as the “140 model” or “160 model.”
For Proper and Safe Use .... 4
GETTING STARTED
Names of Parts.... 10
Attaching the Camera Strap ...... 16
Inserting the Battery 17
Battery-condition Indicator 18
Loading the Film 19
BASIC OPERATION
Fully Automatic Operation 22
Area-AF Focus-area Indicator ..... 27
Focus Lock - Area AF 28
Focusing Range......29
Special Focusing Situations ...... 30
For Closer Subjects 32
Rewinding the Film 34
ADVANCED OPERATION
Selecting the AF Mode 36
Area AF 37
Focus-area Indicator Controls ..... 38
Spot AF.... 40
Focus Lock - Spot AF...... 41
Target AF 42
Selecting the Flash Mode 44
Flash Range 46
Autoflash 47
Autoflash with Red-eye Reduction 48
Fill-flash 49
Flash cancel 50
Night Portrait 51
Exposure Compensation 52
Self-timer 53
Continuous Advance.... 55
For Owners of the Quartz-date model..
57
Date and Time Imprinting 57
Remote Control Operation ...... 63
Viewfinder Brightness 70
APPENDIX
Care and Storage 73
Technical Specifications .... 78
FOR PROPER AND SAFE USE
Read and understand all warnings and cautions before using this product.
WARNING
Using batteries improperly can cause them to leak harmful solutions, overheat, or explode which may damage property or cause personal injury. Do not ignore the following warnings:
- Only use the batteries specified in this instruction manual.
- Do not install the batteries with the polarity (+/−) reversed.
- Do not use batteries which show wear or damage.
- Do not expose batteries to fire, high temperatures, water, or moisture.
- Do not attempt to recharge, short, or disassemble batteries.
- Do not store batteries near or in metallic products.
-
Do not use leaking batteries. If fluid from the batteries enters your eye, immediately rinse the eye with plenty of fresh water and contact a doctor. If fluid from the batteries makes contact with your skin or clothing, wash the area thoroughly with water.
-
Tape over lithium battery contacts to avoid short-circuiting during disposal; always follow local regulations for battery disposal.
- Do not disassemble this product. Electric shock may cause injury if a high voltage circuit inside the product is touched. Take the product to a Minolta Service Facility when repairs are required.
- Immediately remove the batteries and discontinue use if the camera is dropped or subjected to an impact in which the interior, especially the flash unit, is exposed. The flash has a high voltage circuit which may cause an electric shock resulting in injury. The continued use of a damaged product or part may cause injuries.
- Keep batteries or small parts that could be swallowed away from infants. Contact a doctor immediately if an object is swallowed.
- Store this product out of reach of children. Be careful when around children, not to harm them with the product or parts.
FOR PROPER AND SAFE USE
- Do not fire the flash directly into the eyes. It may damage eyesight.
- Do not fire the flash at vehicle operators. It may cause a distraction or temporary blindness which may lead to an accident.
- Do not look directly at the sun or strong light sources through the viewfinder. It may damage your eyesight or cause blindness.
- Do not expose this product to liquids or operate this product with wet hands. If liquid enters the product, immediately remove the batteries and discontinue use. The continued use of a product exposed to liquids may cause damage or inquiry through fire or electric shock.
- Do not use the product near inflammable gases or liquids such as gasoline, benzine, or paint thinner. Do not use inflammable products such as alcohol, benzine, or paint thinner to clean the product. The use of inflammable cleaners and solvents may cause an explosion or fire.
- If the product emits a strange odor, heat, or smoke, discontinue use. Immediately remove the batteries taking care not to burn yourself. The continued use of a damaged product or part may cause injuries.
• Take the product to a Minolta Service Facility when repairs are required.
CAUTION
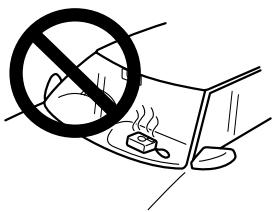
- Do not use or store the product in a hot or humid environment such as the glove compartment or trunk of a car. It may damage the product and batteries which may result in burns or injuries caused by heat, fire, explosion, or leaking battery fluid.
- If batteries are leaking, discontinue use of the product.
- The lens retracts when the camera is turned off or the auto-power-off function is activated. Touching the lens barrel while it is retracting may cause injury.
- Do not fire the flash while it is in contact with people or objects. The flash unit discharges a large amount of energy which may cause burns.
FOR PROPER AND SAFE USE
This device complies with Part 15 of the FCC Rules. Operation is subject to the following two conditions: (1) This device may not cause harmful interference, and (2) this device must accept any interference received, including interference that may cause undesired operation. Changes or modifications not approved by the party responsible for compliance could void the user's authority to operate the equipment. This equipment has been tested and found to comply with the limits for a Class B digital device, pursuant to Part 15 of the FCC Rules. These limits are designed to provide reasonable protection against harmful interference in a residential installation. This equipment generates, uses and can radiate radio frequency energy and, if not installed and used in accordance with the instructions, may cause harmful interference to radio communications. However, there is no guarantee that interference will not occur in a particular installation.
If this equipment does cause harmful interference to radio or television reception, which can be determined by turning the equipment off and on, the user is encouraged to try to correct the interference by one or more of the following measures:
- Reorient or relocate the receiving antenna.
- Increase the separation between the equipment and the receiver.
- Connect the equipment to an outlet on a circuit different from that to which the receiver is connected.
- Consult the dealer or an experienced radio/TV technician for help.
This Class B digital apparatus complies with Canadian ICES-003.
This mark on your camera certifies that this camera meets the requirements of the EU (European Union) concerning interference causing equipment regulations. CE stands for Conformité Européenne (European Conformity).
NAMES OF PARTS
GETTING STARTED
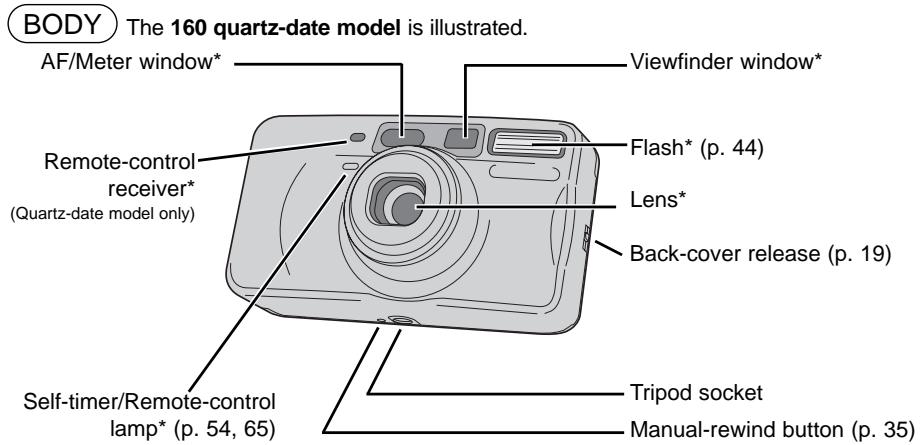
* This camera is a sophisticated optical instrument. Care should be taken to keep these surfaces clean. Refer to the care and storage section at the back of this manual (p. 73). 10
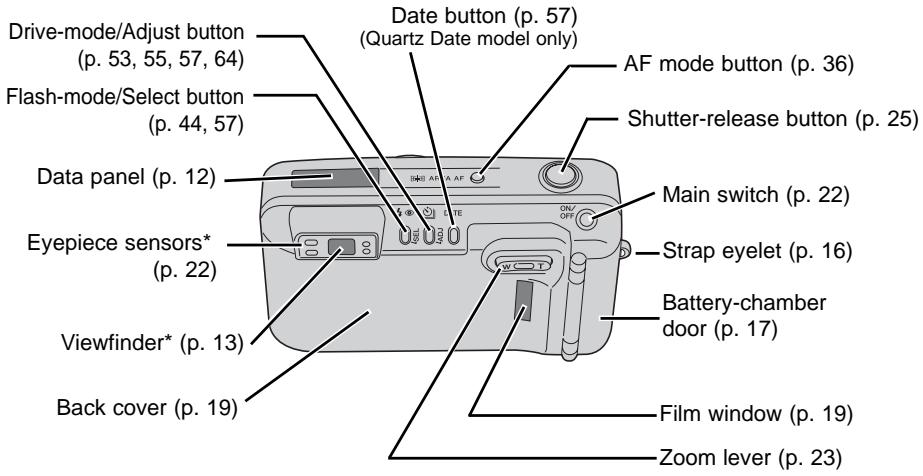
Continued on next page.
NAMES OF PARTS
GETTING STARTED
DATA PANEL) All indicators are displayed for clarity.
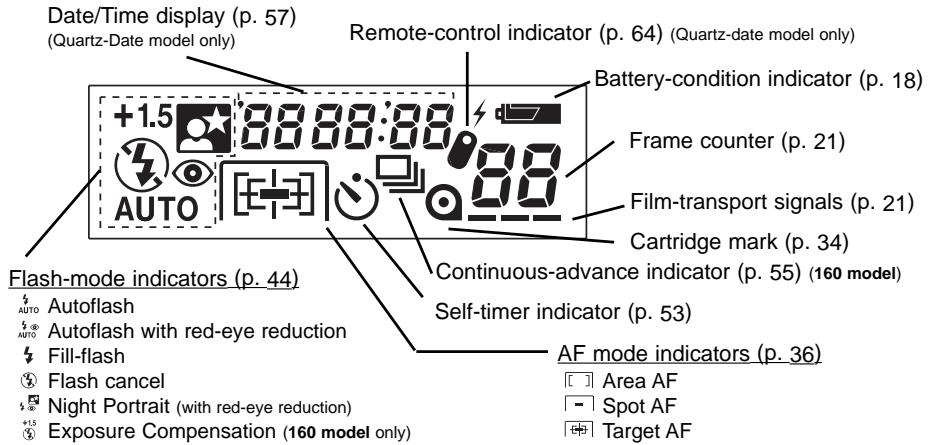
VIEWFINDER
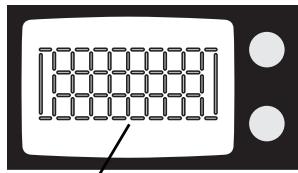
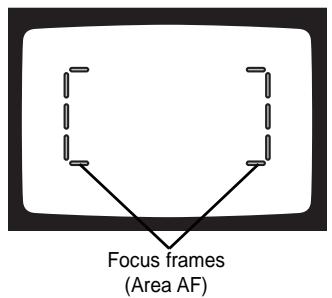
All focus frames and focus-area indicators are shown. This camera features a sophisticated matrix AF indication system that indicates the area of focus.
Focus-frame Display
Area AF (p. 37)

Spot AF (p. 40)
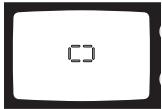
Target AF (p. 42)
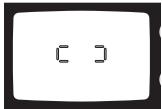
For focus-area indicators in Area AF, see pages 24 and 27.
Continued on next page.
NAMES OF PARTS
GETTING STARTED
VIEWFINDER
VIEWFINDER
natural_image
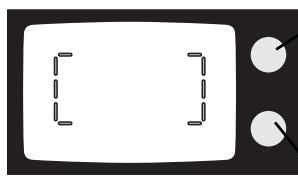
Simple illustration of a television with two dashed-line buttons and a blank screen (no text or symbols)Focus lamp (green)
With the shutter-release button pressed partway down -
Glows: focus confirmed
Blinks rapidly: subject is too close
Blinks slowly: focus not confirmed (p. 30)
Flash lamp (orange)
With the shutter-release button pressed partway down -
Glows: flash is charged and ready
Blinks rapidly: flash charging
Blinks slowly: camera-shake warning
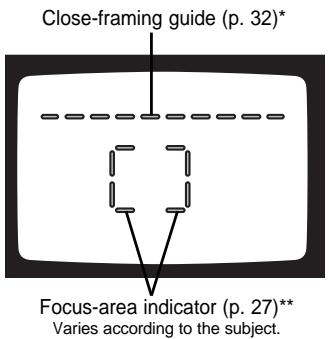
* The close-framing guide appears in Area, spot, and target-AF modes.
** The focus-area indicator is displayed in the Area-AF mode.
ATTACHING THE CAMERA STRAP
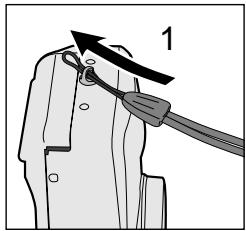
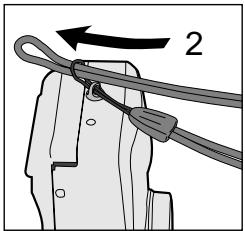
- Pass the small loop of the strap through the strap eyelet on the camera.
- Pass the other end of the strap through the small loop and tighten.
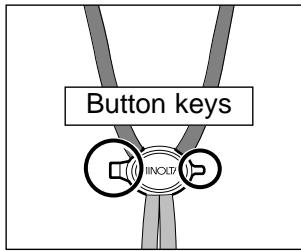
- Button keys are attached to the strap. Use the larger key to open the battery-chamber door, and the smaller key to push the manual-rewind button.
INSERTING THE BATTERY
GETTING STARTED
natural_image
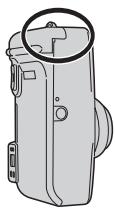
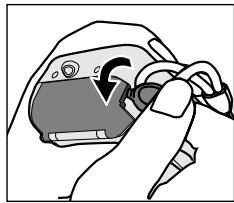
Illustration of a hand holding a device with a curved arrow indicating rotation (no text or symbols)The camera uses one 3-volt CR123A or DL123A lithium battery.
- Open the battery-chamber door using the larger button key on the camera strap.
-
Insert the battery. The positive and negative battery terminals should be orientated as illustrated on the diagram in the battery chamber. Snap the door closed.
-
Quartz-date model: after installing the battery, the date and time must be set, see page 59.
- When changing batteries, always turn the camera off.
BATTERY-CONDITION INDICATOR
Each time the camera is turned on, an indicator will appear on the data panel to indicate the power status of the battery.
![02 220 AUTO [ ]](/content/2025/01/165693/images/5d1e799ea29fb9d1986e3da3115205b8c8ead7b1b22b40b211c02918b62c02f1.jpg)
The indicator briefly appears. Power is sufficient for all camera operations.
![02 260 AUTO [ ] 8](/content/2025/01/165693/images/2d63e76e583794feb804177a390e659d4ec98f8ac825cf1cc2c3b3f9586ab2f5.jpg)
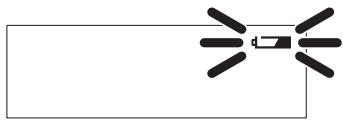
The indicator blinks. Power is sufficient for camera operation, but the battery must be replaced soon.
natural_image
Pure electrical circuit lines without any symbolsThe indicator blinks and no other indicators are displayed on the data panel. The shutter will not release. Replace the battery immediately.
LOADING THE FILM
GETTING STARTED
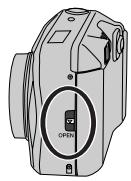
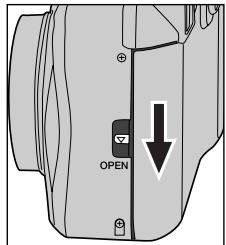
- Slide the back-cover release down to open the back cover.
- Before opening the back cover, look through the film window to confirm that film is not currently loaded.
- If the back cover does not open, turn the camera off and on to release the film-chamber lock.
- Use only DX-coded 35mm film rated between ISO 25 and 3200.
- Do not use Polaroid instant 35mm film. Winding problems may result.
• ISO 400 film is recommended for best results. - Always load and unload the film in subdued light.
LOADING THE FILM
GETTING STARTED
natural_image
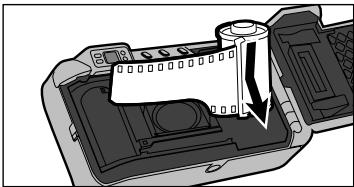
Diagram of a device interior showing a cylindrical component inserted into a housing (no text or symbols visible)- Place the film cartridge into the film chamber.
natural_image
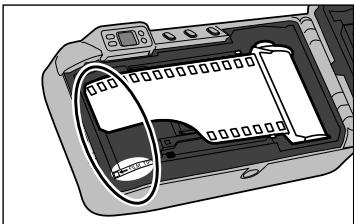
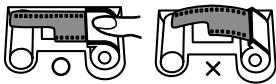
Illustration of a digital camera module with a scroll inside, showing no text or symbols on the device itself.- Extend the film leader to the film-tip mark. The film must lay flat.
- If the film tip extends beyond the index mark, push the excess film back into the cartridge.
natural_image
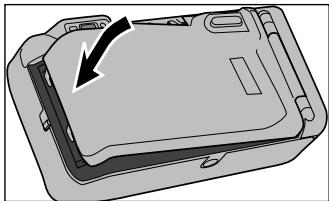
Diagram of a device casing with an arrow indicating a component (no text or symbols present)- Close the back cover.
- The film automatically advances to the first frame and "1" appears in the data-panel frame counter. - If the film has been loaded improperly, "0" will blink on the frame counter and the shutter will not release. Open the back cover and repeat the loading procedure.
- Once the film is loaded, the battery-chamber lock will engage preventing the back cover from being accidentally opened until the film is rewound.
FULLY AUTOMATIC OPERATION
BASIC OPERATION
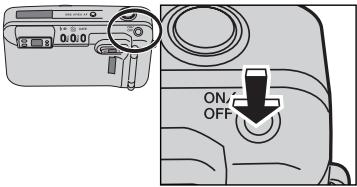
-
Press the main switch to turn the camera on.
-
To conserve battery power, the auto-power-off function will turn the camera off eight minutes after the last operation.
- Do not obstruct or hold the lens barrel.
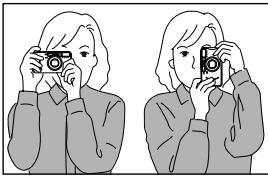
natural_image
Illustration of two women taking a photo with cameras (no text or symbols)-
Hold the camera steadily. Do not cover the flash, lens, or AF windows with your fingers.
-
For vertically framed pictures, turn the camera so the flash is to the top.
- When the camera is brought to your eye, the eyepiece sensors automatically activate the camera's focus and exposure systems.
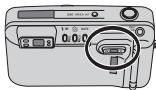
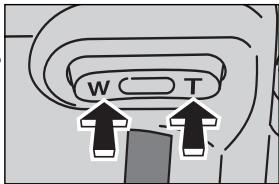
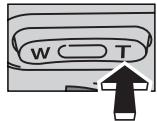
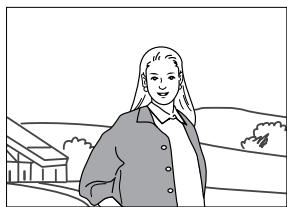
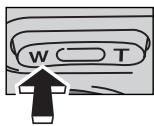
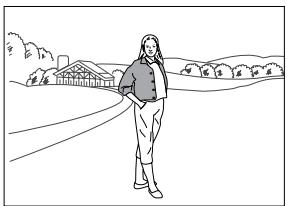
- Look through the viewfinder and press the zoom lever to zoom the lens.
- The viewfinder will adjust to match the lens' field of view.
T(elephoto): zoom in
natural_image
Line drawing of a person standing outdoors with buildings and hills in the background (no text or symbols)W(ide angle): zoom out
natural_image
Line drawing of a person standing outdoors near a rural landscape with houses and trees (no text or symbols)FULLY AUTOMATIC OPERATION
BASIC OPERATION
natural_image
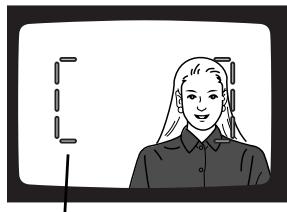
Illustration of a person with long hair and a collared shirt, standing in front of a rectangular frame (no text or symbols)Area-AF frame

-
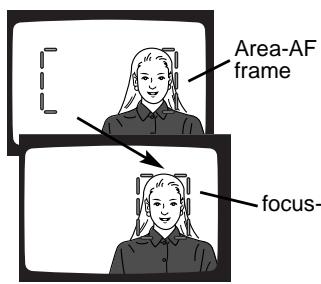
Place the subject within the Area AF frame. The focus frame will automatically change to a focus-area indicator to confirm the subject.
-
The Area-AF mode (p. 37) is automatically set when the camera is turned on.
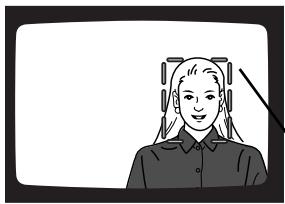
- The focus-area indicator shows the area the camera will focus on.
- The shape of the focus-area indicator varies with the subject.
natural_image
Illustration of a person with long hair wearing headphones (no text or symbols)Focus-area indicator
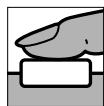
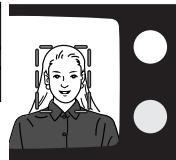
- Press the shutter-release button partway down.
- The status of the AF system and flash are indicated by the lamps next to the viewfinder.
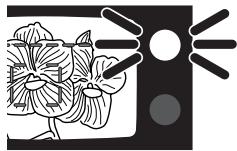
Focus lamp (green)
Glows: focus confirmed
Blinks rapidly: subject is too close
Blinks slowly: focus not confirmed (p. 30)
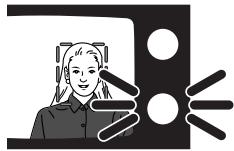
Flash lamp (orange)
Glows: flash is charged and ready
Blinks rapidly: flash charging
Blinks slowly: camera-shake warning
FULLY AUTOMATIC OPERATION
natural_image
Illustration of a person with headphones in front of a screen (no text or symbols)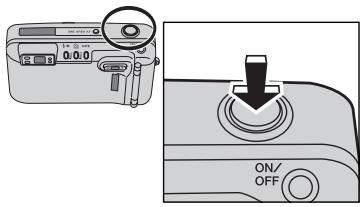
-
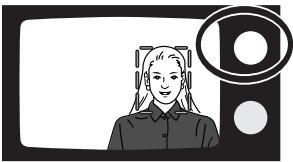
When the green focus lamp glows, press the shutter-release button all the way down to take the picture.
-
Press the shutter-release button with slow, steady pressure.
- The film automatically advances to the next frame.
• Always turn the camera off after use.
AREA-AF FOCUS-AREA INDICATOR
BASIC OPERATION
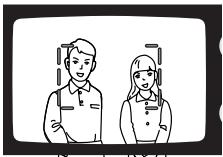
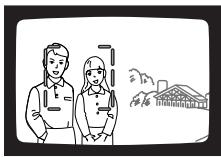
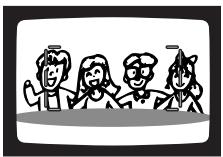
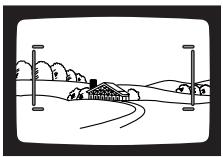
As long as the subject is located within the Area-AF focus frame, even if it is not centered, the camera will automatically locate the subject and indicate it with the focus-area indicator. The shape of focus-area indicator varies with the subject shape, see the sample illustrations below.
Portrait
(The camera focuses on the two foreground subjects and not on infinity.)
An off-center portrait
Group shot
Landscape
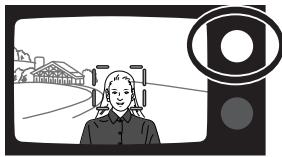
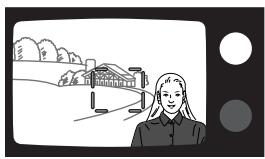
FOCUS LOCK - AREA AF
The focus-lock function allows the camera to be focused on a certain subject and then the picture can be recomposed to arrange the subject at a different position within the image area.
natural_image
Illustration of a person in uniform looking at a highway with a building and bridge in the background (no text or symbols)▼
natural_image
Illustration of a person standing near a bridge with trees and hills in the background (no text or symbols)- With focus-area indicator around the subject, press and hold the shutter-release button partway down.
- The green focus lamp will glow steadily to indicate the focus is locked. If the focus lamp blinks, reposition the camera and repeat the operation.
- Without lifting your finger, recompose the image in the viewfinder. Press the shutter-release button all the way down to take the picture.
- The focus lock will be canceled if the shutter button is released.
FOCUSING RANGE
BASIC OPERATION
The subject must be within the focusing range of the camera. The minimum focusing distance varies with the focal length of the lens.
| Wide-angle(37.5 mm) | Telephoto(140/160 mm) | |
| 140 model | 60 cm -∞(2.0 ft -∞) | 80 cm -∞(2.6 ft -∞) |
| 160 model | 95 cm -∞(3.1 ft -∞) |
If the subject is too close, the green focus lamp blinks rapidly and the shutter is locked. The subject must be beyond the minimum focusing distance. If the subject is extremely close, the green focus lamp may blink slowly and the shutter will release, but the focus will not be sharp.
SPECIAL FOCUSING SITUATIONS
BASIC OPERATION
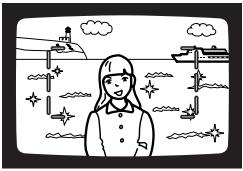
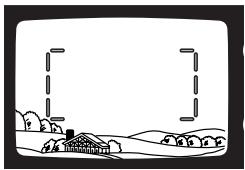
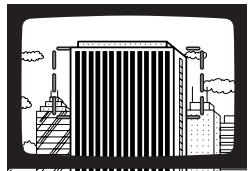
The camera may not be able to focus in certain situations. At this time, the focus-lock function (p. 28, 41) can be used to focus on an object at the same distance as your subject, and then the image can be recomposed to take the picture.
natural_image
Illustration of a girl standing in front of a ship with clouds and stars (no text or symbols)When your subject is near a very bright object or area.
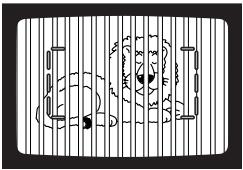
When two subjects overlap in the focus frame.
natural_image
Simple line drawing of a rural landscape with houses, trees, and hills (no text or symbols)When a low-contrast area fills the focus frame.
natural_image
Illustration of a modern high-rise building with striped facade and cloud-like structures at the base (no text or symbols)When the subject is composed of a regular repeating pattern.
The green focus lamp will blink slowly to warn that focus cannot be confirmed. The shutter can be released and the focus will be set to infinity; when using the flash, the focus is set between 2.3 - 6.8m (7.5 - 22.3 ft.) depending on the focal length used. Under certain conditions with regular repeating patterns, the green focus lamp may blink rapidly and the shutter will be locked.
FOR CLOSER SUBJECTS
BASIC OPERATION
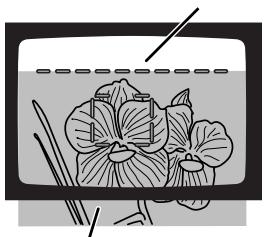
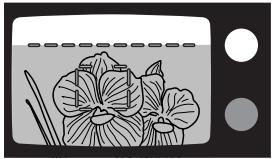
Close-framing guide
natural_image
Illustration of a fishbowl with lotus flowers and green leaves, no text or symbols presentActual image (shaded area)
Because of parallax, the image seen in the viewfinder and the image recorded with the camera are not exactly the same. Parallax becomes significant with close subjects. A close-framing guide automatically appears in the viewfinder when the image needs to be recomposed to eliminate the effect of parallax. The close-framing guide appears in Area AF, spot AF, and target AF.
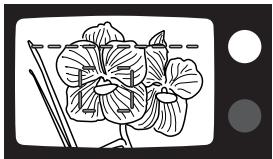
If the subject is too close, the green focus lamp blinks rapidly and the shutter is locked. If the subject is extremely close, the green focus lamp may blink slowly and the shutter will release, but the focus will not be sharp.
natural_image
Illustration of a flowering plant with leaves and stems, shown in black and white line art (no text or symbols)- With the focus-area indicator on the subject, press and hold the shutter release button partway down.
- The green focus lamp should glow to confirm the focus is locked.
natural_image
Illustration of lotus flowers in a kitchen setting (no text or symbols)- While pressing the shutter-release button partway down, recompose the picture so that the top of the subject falls below the close-framing guide. Press the shutter-release button all the way down to take the picture.
REWINDING THE FILM
BASIC OPERATION
The camera automatically rewinds the film after the last exposure is taken.
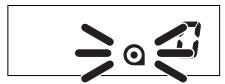
When the cartridge mark blinks on the data panel, the film has been rewound. Open the back cover and remove the film.
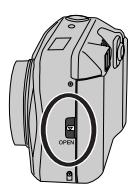
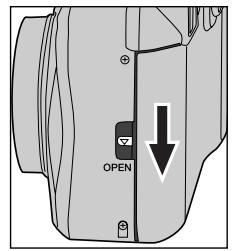
- The film-chamber lock is release during rewind. Do not open the back cover until the cartridge mark blinks on the data panel. Never force the back of the camera open.
- If the rewind motor stops before the film has been completely rewound, all the indicators on the data panel will blink. Remove and insert the battery.
- Although more pictures than specified on the film package may be taken, the film processor may only print the number specified on the film cartridge.
MANUAL REWIND
The film can be rewound before the roll is finished.
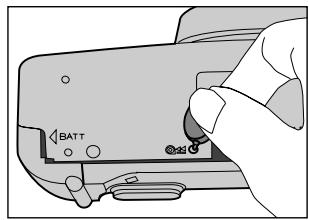
Gently press the manual-rewind button using the small button key on the strap (p. 16).
SELECTING THE AF MODE

Area AF (p. 37)

Spot AF (p. 40)

Target AF (p. 42)
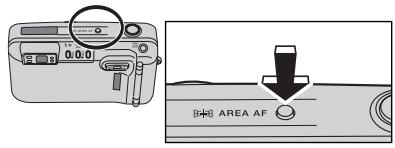
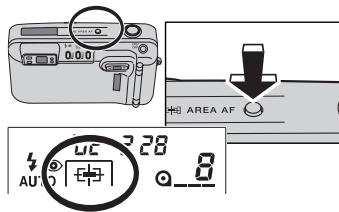
Three auto focus (AF) modes can be selected: Area AF, spot AF, and target AF.
Press the AF mode button until the desired AF indicator appears on the data panel.
- Spot-AF and target-AF mode is reset to Area AF when the camera is turned off.
AREA AF
ADVANCED OPERATION
![0.0 AREA AF 28 AU 0 [ ]](/content/2025/01/165693/images/4138f06634ba3006fd1c656d4a613c286f1a30ce285e7b69713b43615eb74b1f.jpg)
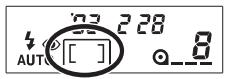
- Press the AF mode button until the Area-AF indicator appears on the data panel.
- Place the subject within the Area-AF frame.
- The focus frame will automatically change to a focus-area indicator to confirm the subject.
- Press the shutter-release button to take the picture.
FOCUS-AREA INDICATOR CONTROLS
ADVANCED OPERATION
The display of the focus-area indicator can be controlled with a custom function.
CUST-1:1 - The focus-area indicator automatically appears when looking through the viewfinder.
CUST-1:2 - The focus-area indicator appears when the shutter-release button is pressed partway down.
CUST-1:3 - The focus-area indicator is canceled and will not be displayed.
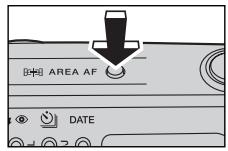
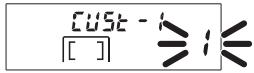
- Press and hold the AF mode button for about two seconds until "CUSt-1" appears on the top of the data panel.
- The number blinking in the frame-counter area is the current custom setting. The initial setting is CUSt 1:1.
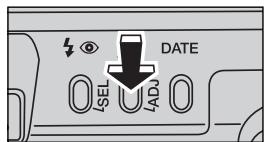
- To change the setting, press the adjust button or zoom lever until the desired setting number is displayed.
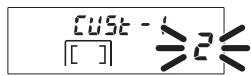
- Press the AF mode button once to enter the new setting.
- The camera will return to the shooting mode automatically after five seconds. Pressing the AF mode button again or pressing the shutter-release button partwary down will also return the camera to the shooting mode.
- The new custom setting will remain in effect even if the camera is turned off or the battery is changed.
SPOT AF
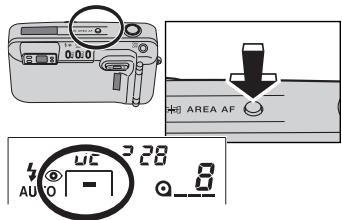
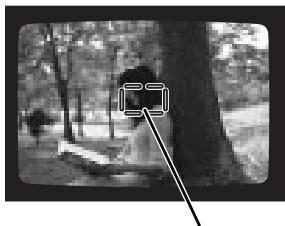
The camera focuses on a subject within the spot AF frame. This mode can be used to single out a specific subject from a group.
natural_image
Black-and-white photo of a person sitting in a tree with a large arrow pointing to the image (no text or symbols visible)- Press the AF mode button until the spot-AF indicator appears on the data panel.
- The spot-AF focus frame appears in the viewfinder.
- Place the subject in the spot-AF focus frame. Press the shutter-release button partway down to lock the focus.
Spot-AF focus frame
FOCUS LOCK - SPOT AF
ADVANCED OPERATION
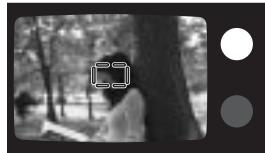
The focus-lock function allows the camera to be focused on a certain subject and then the picture can be recomposed to arrange the subject at a different position within the image area.
natural_image
Black-and-white photo of a person walking under a tree in a park setting (no visible text or symbols)

natural_image
Black-and-white photo of a forest scene with trees and a person walking (no visible text or symbols)- With subject in the focus frame, press and hold the shutter-release button partway down.
- If the green focus lamp glows steadily the focus is locked. If the focus lamp blinks, repeat the operation.
- Without lifting your finger, recompose the image in the viewfinder. Press the shutter-release button all the way down to take picture.
- The focus lock is canceled when the shutter button is released.
TARGET AF
ADVANCED OPERATION
natural_image
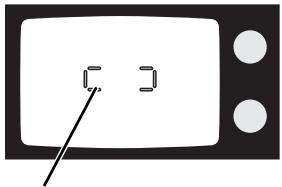
Simple line drawing of a microwave with a pointer pointing to the screen (no text or symbols)Target-AF focus frame
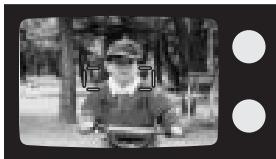
The target AF is ideal for moving subjects. The camera continually calculates the focus even when the shutter-release button is held partway down. Predictive focus control ensures someone moving toward the camera will be in focus; predictive focus control adjusts the focus during the slight delay between the time the shutter button is pressed and the exposure is made.
- Press the AF mode button until the target-AF indicator appears on the data panel.
- The target-AF focus frame appears in the viewfinder.
natural_image
Black-and-white photo of a person in a vehicle, possibly a motor or pulley, with trees and foliage in the background (no visible text or symbols)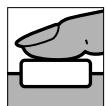
- Place the subject in the target-AF focus frame.
-
Press and hold the shutter-release button partway down until the green focus lamp glows.
-
Target AF has no focus-lock function. The camera continuously calculates focus while the shutter button is held partway down.
- Predictive focus control is activated when the focus lamp glows.
-
If the subject becomes too close, the green focus lamp blinks rapidly and the shutter will not release. Repeat the procedure from step 2.
-
Press the shutter-release button all the way down to take the picture.
SELECTING FLASH MODE
ADVANCED OPERATION
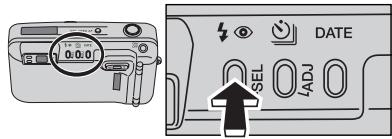
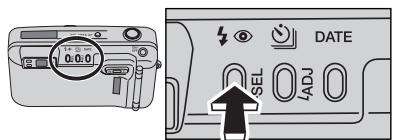
Press the flash-mode button until the desired flash-mode indicator appears on the data panel.
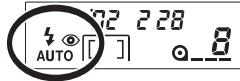
The following flash modes can be selected:
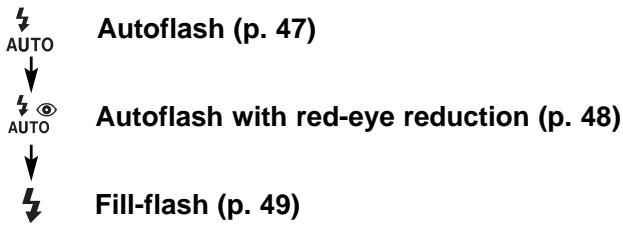
flowchart
graph TD
    A["AUTO"] --> B["Autoflash (p. 47)"]
    C["AUTO"] --> D["Autoflash with red-eye reduction (p. 48)"]
    E["..."] --> F["Fill-flash (p. 49)"]

Flash cancel (p. 50)
Night portrait (p. 51)
Exposure compensation (p. 52) (160 model only)
- When the camera is turned off, the fill-flash, flash cancel, night portrait, or exposure compensation mode will be reset to autoflash or autoflash with red-eye reduction, whichever of the two modes was set last.
FLASH RANGE
The flash range depends on the film speed and focal length in use. Because of the optical system, the flash range is not the same at the lens' wide-angle position as it is at the telephoto position. To ensure proper exposure, the subject must be within the flash range.
| Focal length Film speed | 37.5 mm | 140 mm (140 model) | 160 mm (160 model) |
| ISO100 | 0.6 - 4.6 m(2.0 - 15.1 ft) | 0.8 - 2.1 m(2.6 - 6.9 ft) | 0.95 - 2.0 m(3.1 - 6.6 ft) |
| ISO400 | 0.6 - 9.2 m(2.0 - 30.2 ft) | 0.8 - 4.2 m(2.6 - 13.8 ft) | 0.95 - 4.0 m(3.1 - 13.2 ft) |
The distances are based on use with color negative film.
AUTOFLASH
ADVANCED OPERATION
The flash will fire automatically in low-light or back-lit situations.
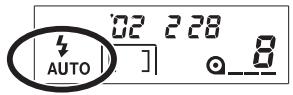
Press the flash-mode button until the autoflash indicator appears on the data panel to set the flash mode.
- When the orange flash lamp blinks quickly, the flash is charging. The shutter cannot be released until the flash is charged; the orange flash lamp will glow.
AUTOFLASH WITH RED-EYE REDUCTION
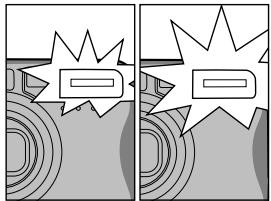
natural_image
Two-panel comic strip with abstract geometric shapes and starburst effects (no text or symbols)Pre-flash
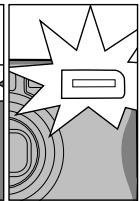
Main flash
The flash will fire a few short bursts before the main flash burst to reduce red-eye; an effect caused by light reflected from the retina. Used in low-light condition when taking photographs of people or animals, the pre-flashes contract the pupils of the subject's eyes. The flash will fire automatically in low-light or back-lit situations.
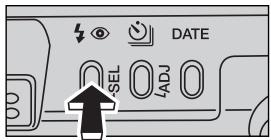
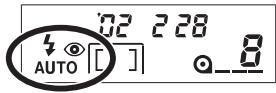
Press the flash-mode button until the autoflash-with-red-eye-reduction indicator appears on the data panel to set the flash mode.
- Warn your subject not to move until all the flash bursts have ended.
FILL-FLASH
ADVANCED OPERATION
natural_image
Black-and-white photo of a person wearing a white hat, smiling (no visible text or symbols)The flash fires with each exposure regardless of the amount of ambient light. Fill-flash can be used to reduce harsh shadows caused by strong direct light or sunshine.
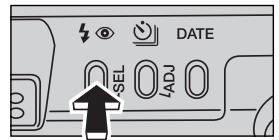
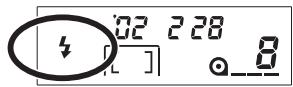
Press the flash-mode button until the fill-flash indicator appears on the data panel to set the flash mode.
FLASH CANCEL

natural_image
Nighttime cityscape with illuminated buildings and roads (no visible text or signage)The flash will not fire in this mode. Use flash cancel when flash photography is prohibited, natural light is desired to illuminate the subject, or the subject is beyond the flash range. The camera-shake warning may appear in this mode.
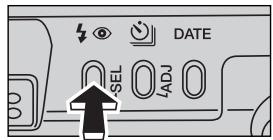
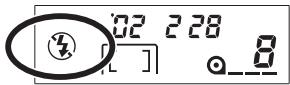
Press the flash-mode button until the flash-cancel indicator appears on the data panel to set the flash mode.
- The orange flash lamp may blink slowly as a camera-shake warning. Camera shake is a slight blurring of the image caused by slight hand motions during long exposures. To eliminate camera shake, use the flash or place the camera on a tripod.
NIGHT PORTRAIT
natural_image
Black-and-white photo of a person standing in front of illuminated buildings at night (no visible text or signage)ADVANCED OPERATION
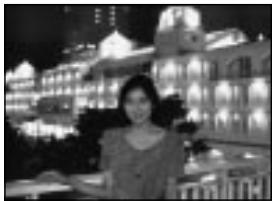
In night-portrait mode, the camera balances the flash and existing light exposure so you can take beautiful portraits at sunset or at night. The flash will fire with each exposure regardless of the amount of ambient light. Red-eye reduction is used with the night-portrait mode.
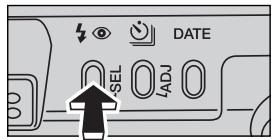
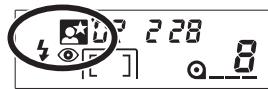
Press the flash-mode button until the night-portrait indicator appears on the data panel to set the flash mode.
- Warn your subject not to move after the flash bust as the shutter may still be open for the background exposure. Because of long exposure times, the use of a tripod is recommended
EXPOSURE COMPENSATION (160 MODEL ONLY)
natural_image
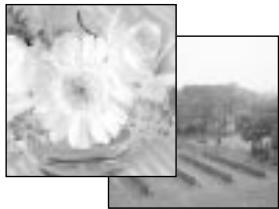
Black-and-white photo of a white flower in a bowl, with blurred background and no visible text or symbols.high-key subjects
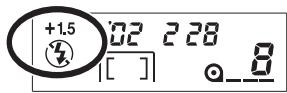
The multi-segment metering can expose for most situations: back lighting, and directly lit snow scenes. However, under certain conditions the meter can be deceived by high-key scenes like white interiors or foggy landscapes. This mode increases the exposure by 1.5 Ev. The flash is disabled.
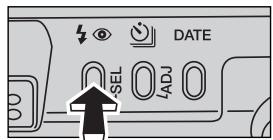
Press the flash-mode button until the exposure-compensation indicator appears to set the mode.
- The orange flash lamp may blink slowly as a camera-shake warning. Use the flash or place the camera on a tripod.
SELF-TIMER
ADVANCED OPERATION
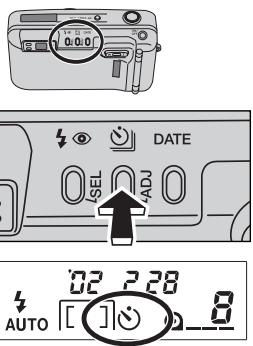
The self-timer is used for taking self-portraits. The self-timer delays release of the shutter for approximately 10 seconds after the shutter-release button is pressed.
-
With the camera on a tripod, press the drive-mode button until the self-timer indicator appears on the data panel.
-
Frame the subject as described in the manual.
-
Focus lock can be used with Area AF and spot AF.
- With target AF or when focus lock is not used, the focus is set just before the exposure. Make sure the subject is positioned inside the focus frames.
SELF-TIMER
- Press the shutter-release button all the way down to begin the countdown.
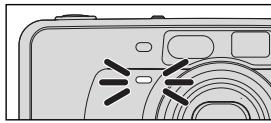
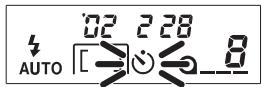
- The self-timer indicator will blink on the data panel. The self-timer lamp on the front of the camera will blink slowly during the countdown, then rapidly just before the shutter is released.
- To cancel the self-timer, press the drive-mode button again or turn the camera off.
- Self-timer is automatically canceled after the shutter is released.
CONTINUOUS ADVANCE (160 MODEL) ADVANCED OPERATION
natural_image
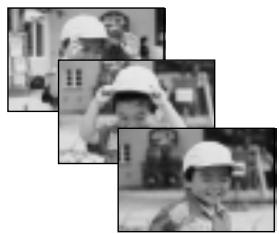
Black-and-white photo collage of three children wearing hard hats, no visible text or symbolsIn this mode, the camera continuously takes pictures as long as the shutter-release button is held down. The camera will take one picture every 2.2 seconds. When the flash is used, the rate may be slower because the flash must recharge between frames.
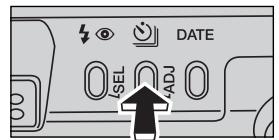
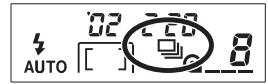
- Press the drive-mode button until the continuous-advance indicator appears on the data panel.
CONTINUOUS ADVANCE (160 MODEL ONLY)
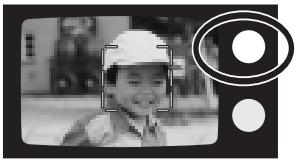
natural_image
Black-and-white photo of a smiling child wearing a helmet, with no visible text or symbols.- Frame the subject as described in the manual.
- Press the shutter-release button all the way down and hold to begin taking pictures.
-
Focus will be adjusted between exposures.
-
Continuous advance remains in effect until the drive mode is reset.
- When using target AF, predictive focus control is only active for the first frame of the series.
FOR OWNERS OF THE QUARTZ-DATE MODEL
The quartz-date model has date and time imprinting and remote-control operation.
DATE AND TIME IMPRINTING
The imprinting feature enables the date or time to be printed onto the lower-right portion of the picture. The date is recorded as the film is advanced to the next frame. The last picture on the roll may not be imprinted. The calendar is programmed through the year 2099.
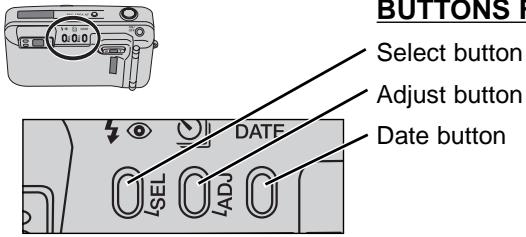
BUTTONS FOR THE DATE FUNCTION
Continued on next page.
IMPRINTING THE DATE OR TIME
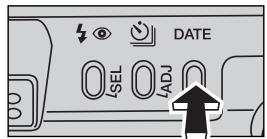
Press the date button to select the date imprinting format.
- The display will change as follows:

flowchart
graph LR
    A["02"] --> B["228"]
    B --> C["28 1:30"]
    C --> D["---"]
    D --> E["SET"]
    style A fill:#f9f,stroke:#333
    style E fill:#bbf,stroke:#333
- If the date/time display is blinking, the calendar and clock need to be reset (p. 59). No information will be imprinted until the date and time are entered.
SETTING THE DATE OR TIME
Note: the date and time must be reset each time the battery is replaced.
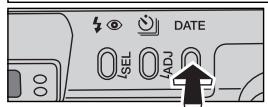
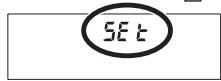
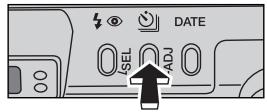
- Turn the camera on. Press the date button until "SEt" appears on the data panel.
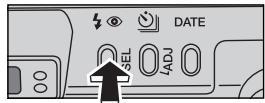
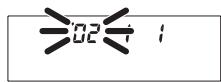
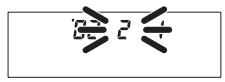
- Press the select (SEL) button until the item to be adjusted blinks.
• Each time the select button is pressed, the next item on the calendar and clock blinks. The sequence is:

flowchart
graph LR
    YY --> MM --> DD --> hh --> mm --> TheDisplay["The display stops blinking"]
    subgraph Feedback
        direction TB
        Y1["↑"] --> Y2["↓"]
    end
FOR OWNERS OF THE QUARTZ-DATE MODEL
ADVANCED OPERATION
-
Press the adjust (ADJ) button or zoom lever to change the blinking item.
-
The numerals continues to change as long as the button is held down.
-
Pressing the W side of the zoom lever counts down, the T side counts up.
-
Repeat steps 2 and 3 until all items in the date and time display are correct.
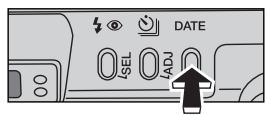
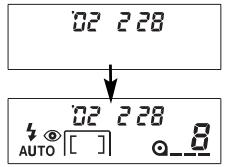
- Press the date button to set the date and time.
- The camera will return to the shooting mode automatically after five seconds. Pressing the date button again or pressing the shutter-release button partway down will also return the camera to the shooting mode.
- Pressing the select (SEL) button until the date/time display stops blinking can also set the calendar and clock.
CHANGING THE DATE FORMAT
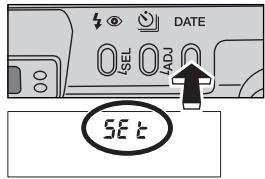
- Press the date button until "SEt" appears on the data panel.
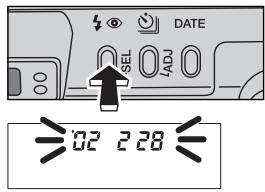
- Press and hold the select (SEL) button for more than 2 seconds until all items on the date display blink.
FOR OWNERS OF THE QUARTZ-DATE MODEL
ADVANCED OPERATION
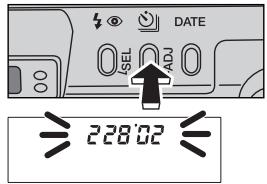
- Press the adjust (ADJ) button or zoom lever to change the display format.
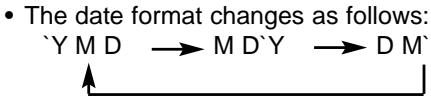
flowchart
graph LR
    A["Y M D"] --> B["M D'Y"]
    B --> C["D M'"]
![DATE 228:02 228:02 AUTO [ ] 8](/content/2025/01/165693/images/32256f635ee5d092342c485d1f8978115fd1a8a4470c4a08bccf9d5ee8cf741e.jpg)
-
Press the date button to set the date format.
-
The camera will return to the shooting mode automatically after five seconds. Pressing the date button again or pressing the shutter-release button partway down will also return the camera to the shooting mode.
- Pressing the select (SEL) button until the date/time display stops blinking can also set the date format.
REMOTE CONTROL OPERATION
The quartz-date model can be controlled by the IR remote control RC-3 (sold separately). The remote control allows remote camera operation up to 5 meters (16.5 feet) away.
NAMES OF PARTS
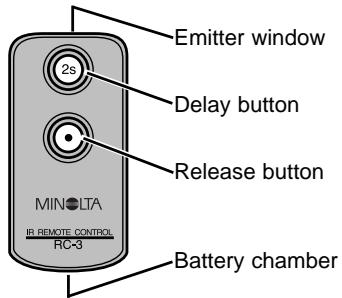
Continued on next page.
FOR OWNERS OF THE QUARTZ-DATE MODEL
ADVANCED OPERATION
TAKING PICTURES USING THE REMOTE CONTROL
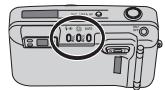
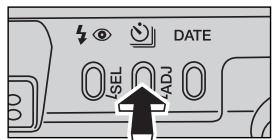
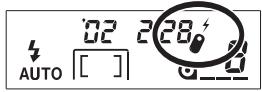
- Place the camera on a tripod. Point the camera so that the subject is within in the focus frames.
- Press the drive-mode button until the remote-control indicator appears on the data panel
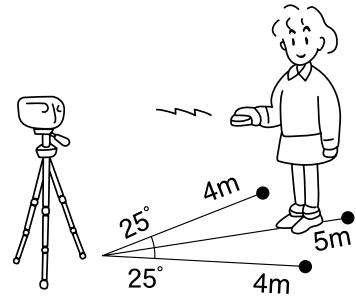
- Point the remote control toward the front of the camera and press either the release button (•) or the delay button (2s) to take the picture.
- If the release button (●) is pressed, the self-timer/remote-control lamp on the front of the camera will blink once before the picture is taken. If the delay button (2s) is pressed, the lamp will blink for two seconds before the picture is taken.
FOR OWNERS OF THE QUARTZ-DATE MODEL
ADVANCED OPERATION
- To save power, the camera automatically shuts down if the shutter is not released in approximately 8 minutes.
- Under fluorescent or extremely bright lighting, or with backlit subjects, the remote control may not operate or the effective distance may be reduced.
- The remote control mode will remain in effect after the picture has been taken. Press the drive-mode button to reset the drive mode, or turn the camera off.
FOCUS LOCK IN REMOTE CONTROL MODE
natural_image
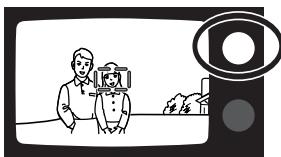
Illustration of a person using a camera on a screen with a magnifying glass (no text or symbols)Focus lock can be used in Area AF or spot AF.
-
Select remote-control mode using the drive-mode button.
-
Place the subject in the focus frames and press the shutter-release button partway down to confirm the focus; the green focus lamp will glow and remain lit.
-
It the focus lamp does not remain lit after pressing the shutter-release button partway down, the focus was not locked. Repeat the procedure.
- To cancel the focus lock, press the shutter-release button partway down again or press the zoom lever.
FOR OWNERS OF THE QUARTZ-DATE MODEL
ADVANCED OPERATION
natural_image
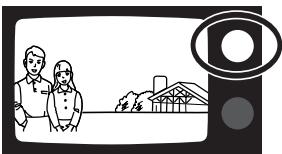
Illustration of two people standing in front of a barn with a camera lens icon (no text or symbols)3. Recompose the picture.
- The focus frames or focus-area indicator will disappear after releasing the shutter button. The focus lamp will remain lit indicating the focus is locked.
4. Point the remote control toward the front of the camera, press either the release button (•) or delay button (2s).
- The focus lock will remain in effect after the picture is taken allowing multiple remote-control pictures to be made. The green focus lamp will glow to indicate focus lock.
- To cancel focus lock, press the shutter-release button partway down or press the zoom lever.
CHANGING THE REMOTE-CONTROL BATTERY
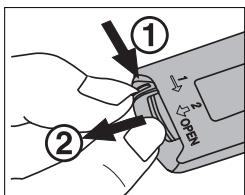
The remote control uses a 3V lithium battery (CR2032). When pressing the remote-control buttons does not release the shutter, the battery needs to be replaced. The supplied battery should be sufficient for approximately ten years of operation.
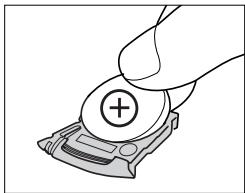
natural_image
Illustration of a hand holding a small electronic device with a plus button (no text or symbols)- Pull out the battery chamber as shown and remove the old battery.
- Insert a new battery into the battery chamber with the positive (+) pole up.
- Slide the battery chamber into the remote control.
VIEWFINDER BRIGHTNESS
ADVANCED OPERATION
The relative brightness of the AF frame or focus-area indicator can be adjusted. The brightness of the frame lines will continue to adjust automatically in relation to the new level.
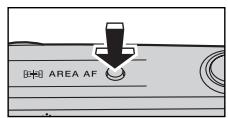
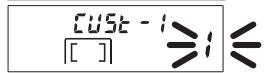
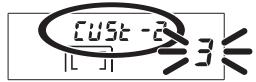
- Press and hold the AF mode button for about two seconds until "CUSt-1" appears on the top of the data panel.
-
The number blinking in the frame-counter area is the current custom setting.
-
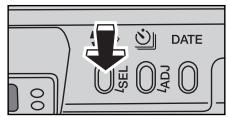
Press the select button until "CUSt-2" appears.
- The blinking number in the frame counter displays the current brightness level. The initial setting is 3. Brightness can be adjusted in five levels from 1 (low) to 5 (high).
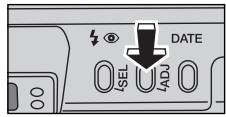
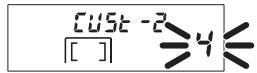
- Press the adjust button or zoom lever until the desired brightness level is displayed.
-
Press the AF mode button or press the shutter-release button partway down to set the brightness level.
-
The data-panel display returns to normal.
- The new brightness level will remain in effect even if the camera is turned off or the battery is changed.
MINOLTA HISTORY
On February 20th, 1962, John Glenn became the first American to orbit the Earth. On board his Friendship 7 spacecraft was a Minolta Hi-matic camera to record that historic event. The 4 hour, 55 minute, and 23 second flight orbited the Earth three times at an average speed of 28,000 kph (17,500 mph).
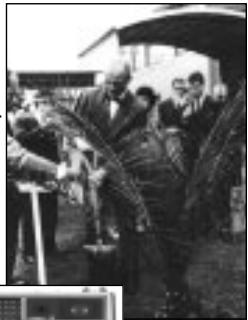
Mr. Glenn visited our Sakai camera factory in Japan on May 24th, 1963 to plant a palm tree to celebrate the occasion. The palm tree is still in the courtyard of the factory and stands over eight meters tall (26ft).
The camera? It was not lost. It is on display at the Smithsonian Institution's National Air and Space Museum in Washington D.C. This and other objects from John Glenn's Friendship 7 Mercury flight can be found in gallery 210, "Apollo to the Moon."
natural_image
Black-and-white photo of people gathered outdoors, one person holding an umbrella (no visible text or symbols)
CARE AND STORAGE
APPENDIX
OPERATING TEMPERATURE AND CONDITIONS
- This camera is designed for use from -10 to 40°C (14 to 104°F).
- Never leave the camera where it may be subjected to extreme temperatures such as in the glove compartment of a car.
- At colder temperatures, the data panel response time will be slow. At higher temperatures, the display will temporarily darken, but will be restored when the temperature normalizes.
- Never subject the camera to extreme humidity.
- To prevent condensation from forming, place the camera in a sealed plastic bag when bringing it from a cold environment into a warm one. Allow it to come to room temperature before removing it from the bag.
CARE AND STORAGE
APPENDIX
- When photographing in cold weather, it is recommend that you keep the camera and spare batteries inside your coat to keep them warm when you are not shooting. Cold batteries will regain some of their charge when they warm up.
- This camera is not waterproof, dust-proof, or sand-proof. Care should be taken when using of this camera near water or the beach to protect it from damage caused by water, dust, or sand. Protect the camera from moisture or splashes, especially saltwater spray. Be extremely careful to protect the interior and exterior of the camera and its accessories from sand.
CLEANING
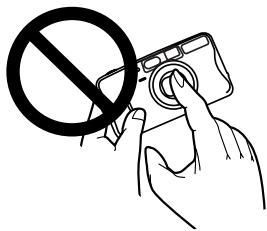
- Keep the AF window clean to ensure accurate focus.
- If the camera body is dirty, gently wipe it clean with a soft, clean, dry cloth.
- To clean the lens surface, first brush away any dust or sand then, if necessary, moisten a lens tissue with lens cleaning fluid and gently wipe the lens in a circular motion, starting from the center.
- Never place lens fluid directly on the lens.
- Never touch the lens surface with your fingers.
- Never use alcohol or solvents to clean the camera.
CARE AND STORAGE
APPENDIX
STORAGE
When storing the camera for extended periods, please follow these guidelines:
- Store the camera in a cool, dry, well-ventilated area away from dust and chemicals. For very long periods, place the camera in an airtight container with a silica gel drying agent.
- After prolonged storage, always check the camera's operation to make sure it is functioning properly.
BEFORE IMPORTANT EVENTS
- Check camera operation carefully and take test photographs. Purchase a spare battery.
- Minolta is not responsible for any loss which may occur due to an equipment malfunction.
CAMERA ERROR
If all the indicators on the data panel blink, or the data panel is blank and the camera will not function with a recently installed battery, remove and reinsert the battery. If the camera does not resume normal operation, or the camera malfunctions repeatedly, contact an authorized Minolta Service Facility.
QUESTIONS AND SERVICE
- If you have questions about your camera, contact your local camera dealer or write to the Minolta distributor in your area.
- Before shipping your camera for repair, please contact an authorized Minolta Service Facility for details.
TECHNICAL SPECIFICATIONS
APPENDIX
Camera Type: 35mm lens-shutter camera
Lens: 37.5-140mm f/5.4 - 11.7 lens (140 model)
37.5-160mm f/5.4 - 12.4 lens (160 model)
6 elements in 6 groups
Focusing Range: (140 model) (160 model)
(W): 0.6m - ∞ (2.0 ft - ∞) 0.6m - ∞ (2.0 ft - ∞)
(T): 0.80m - ∞ (2.6 ft - ∞) 0.95m - ∞ (3.1 ft - ∞)
Film Speed: Settings Automatic for DX-coded film.
Non-DX coded film set to ISO100.
Range ISO 25 to 3200
Metering Range (140 model) (160 model)
(ISO 100): Wide: Ev 3 - 17 Ev 3 - 17
Tele: Ev 3.9 - 17 Tele: Ev 4.1 - 17
Shutter Speed: 10 - 1/500 sec.
Flash Range (140 model) (160 model)
(ISO 100): Wide: 0.6 - 4.6 m (2.0 - 15.1 ft.) 0.6 - 4.6 m (2.0 - 15.1 ft.)
Tele: 0.8 - 2.1 m (2.6 - 6.9 ft.) 0.95 - 2.0 m (3.1 - 6.6 ft.)
Battery: One 3-volt CR123A lithium battery
Battery-condition indication: 3-stage indication
Battery performance: approx. 10 rolls based on Minolta's
standard test method using 24-exposure rolls with flash for
50% of the exposures.
Viewfinder: Magnification: 0.38X - 1.35X (140 model); 0.38X - 1.51X (160 model)
Field of View: 85% (at 3m)
Eye-relief: 17.3mm from the viewfinder frame
Dimensions: 110.5 x 60.5 x 46.5 mm
4.4 × 2.4 × 1.8 in
Weight: 195g (6.9 oz.) without battery
Specifications are based on the latest information available at the time of printing and are subject to change without notice.
Minolta Co., Ltd. 3-13, 2-Chome, Azuchi-Machi, Chuo-Ku, Osaka 541-8556, Japan
Minolta Europe GmbH Minoltaring 11, D-30855 Langenhagen, Germany
Reparatur/Repair Senator-Helmken-Strasse 1, D-28197 Bremen, Germany
Minolta France S.A. 365 Route de Saint-Germain, F-78420 Carrieres-Sur-Seine, France
Minolta (UK) Limited 7 Tanners Drive, Blakelands, Milton Keynes, MK14 5BU, England
Minolta Austria Ges. m.b.H. Amalienstrasse 59-61, A-1131 Wien, Austria
Minolta Camera Benelux B.V. Zonnebaan 39, P.O. Box 6000, NL-3600 HA Maarssen, The Netherlands
Belgian Branch Prins Boudewijnlaan 1, B-2550 Kontich, Belgium
Minolta (Schweiz) AG Riedstrasse 6, CH-8953 Dietikon, Switzerland
Minolta Svenska AB Albygatan 114, S-171 54 Solna, Sweden
Finnish Branch Niittykatu 6 PL 37, SF-02201 Espoo, Finland
Minolta Portugal Limitada Av. do Brasil 33-A, P-1700 Lisboa, Portugal
Minolta Corporation 101 Williams Drive, Ramsey, New Jersey 07446, U.S.A.
Minolta Canada Inc. 369 Britannia Road East, Mississauga, Ontario L4Z 2H5, Canada
Minolta Hong Kong Limited Room 208, 2/F, Eastern Center, 1065 King's Road, Quarry Bay, Hong Kong
Minolta Singapore (Pte) Ltd. 10, Teban Gardens Crescent, Singapore 608923
Shanghai Minolta Optical
Products Co., Ltd. 368 Minolta Road, Songjiang, Shanghai, China
9222-2472-11 NI-B206
© 2001 Minolta Co., Ltd. under the Berne Convention and
Universal Copyright Convention
Printed in China

- MINOLTA
- The essentials of imaging
- CONTENTS
- GETTING STARTED
- BASIC OPERATION
- ADVANCED OPERATION
- APPENDIX
- FOR PROPER AND SAFE USE
- WARNING
- CAUTION
- NAMES OF PARTS
- Focus-frame Display
- VIEWFINDER
- Focus lamp (green)
- Flash lamp (orange)
- ATTACHING THE CAMERA STRAP
- INSERTING THE BATTERY
- BATTERY-CONDITION INDICATOR
- LOADING THE FILM
- FULLY AUTOMATIC OPERATION
- AREA-AF FOCUS-AREA INDICATOR
- FOCUS LOCK - AREA AF
- FOCUSING RANGE
- SPECIAL FOCUSING SITUATIONS
- FOR CLOSER SUBJECTS
- REWINDING THE FILM
- MANUAL REWIND
- SELECTING THE AF MODE
- AREA AF
- FOCUS-AREA INDICATOR CONTROLS
- SPOT AF
- FOCUS LOCK - SPOT AF
- TARGET AF
- SELECTING FLASH MODE
- FLASH RANGE
- AUTOFLASH
- AUTOFLASH WITH RED-EYE REDUCTION
- FILL-FLASH
- FLASH CANCEL
- Press the flash-mode button until the flash-cancel indicator appears on the data panel to set the flash mode.
- NIGHT PORTRAIT
- Press the flash-mode button until the night-portrait indicator appears on the data panel to set the flash mode.
- EXPOSURE COMPENSATION (160 MODEL ONLY)
- Press the flash-mode button until the exposure-compensation indicator appears to set the mode.
- SELF-TIMER
- CONTINUOUS ADVANCE (160 MODEL) ADVANCED OPERATION
- CONTINUOUS ADVANCE (160 MODEL ONLY)
- FOR OWNERS OF THE QUARTZ-DATE MODEL
- DATE AND TIME IMPRINTING
- BUTTONS FOR THE DATE FUNCTION
- IMPRINTING THE DATE OR TIME
- SETTING THE DATE OR TIME
- CHANGING THE DATE FORMAT
- REMOTE CONTROL OPERATION
- TAKING PICTURES USING THE REMOTE CONTROL
- FOCUS LOCK IN REMOTE CONTROL MODE
- Recompose the picture.
- Point the remote control toward the front of the camera, press either the release button (•) or delay button (2s).
- CHANGING THE REMOTE-CONTROL BATTERY
- VIEWFINDER BRIGHTNESS
- MINOLTA HISTORY
- CARE AND STORAGE
- OPERATING TEMPERATURE AND CONDITIONS
- CLEANING
- STORAGE
- BEFORE IMPORTANT EVENTS
- CAMERA ERROR
- QUESTIONS AND SERVICE
- TECHNICAL SPECIFICATIONS
Marque : MINOLTA
Modèle : FREEDOM ZOOM 140
Catégorie : Appareil photo argentique