
TWINBOX 430 - Boîte de rangement STOREX - Notice d'utilisation et mode d'emploi gratuit
Retrouvez gratuitement la notice de l'appareil TWINBOX 430 STOREX au format PDF.
| Type de produit | Boîte de rangement numérique avec réception TNT HD |
| Marque | STOREX |
| Modèle | TWINBOX 430 |
| Alimentation | 100-240 V ~ 50/60 Hz |
| Connectivité | HDMI, composite, YPbPr, coaxial, USB (x2), LAN |
| Double tuner | TNT HD - Permet d'enregistrer une chaîne et d'en regarder une autre |
| Enregistrement | Direct, programmé, différé (timeshift) sur périphérique USB |
| Formats vidéo supportés | Avi, Xvid HD, MPEG HD, MKV, WMV HD, RMVB, VOB |
| Formats audio supportés | MP3, WMA, AAC, WAV, OGG, AC3, DDP, TrueHD, DTS, DTS HD, FLAC, APE |
| Formats photo supportés | HD JPEG, BMP, GIF, PNG, TIFF |
| Sortie vidéo | HDMI, composite, YPbPr (jusqu'à 1080p) |
| Sortie audio | Coaxiale numérique |
| Wifi | Via clé USB optionnelle (non incluse) |
| Entretien | Nettoyer avec un chiffon doux et sec; débrancher avant nettoyage |
| Sécurité | Ne pas exposer à l'humidité; ne pas ouvrir le boîtier |
| Pièces détachées | Télécommande, câble AV, adaptateur secteur |
| Garantie | 1 an pour l'appareil, 3 mois pour les accessoires |
| Support technique | support@storex.eu, 01 55 85 82 00 (France) |
FOIRE AUX QUESTIONS - TWINBOX 430 STOREX
Questions des utilisateurs sur TWINBOX 430 STOREX
0 question sur cet appareil. Repondez a celles que vous connaissez ou posez la votre.
Poser une nouvelle question sur cet appareil
Téléchargez la notice de votre Boîte de rangement au format PDF gratuitement ! Retrouvez votre notice TWINBOX 430 - STOREX et reprennez votre appareil électronique en main. Sur cette page sont publiés tous les documents nécessaires à l'utilisation de votre appareil TWINBOX 430 de la marque STOREX.
MODE D'EMPLOI TWINBOX 430 STOREX
STOREX
QUICK INSTALLATION GUIDE
TwinBox 430
TABLE OF CONTENTS
INTRODUCTION 5
FUNCTIONS 5
MAIN FEATURES 5
DESCRIPTION OF REMOTE CONTROL 6
BEFORE STARTING 8
FRONT VIEW. 8
REAR VIEW 8
CONNECT TWINBOX 430 TO YOUR TV 9
INSTALL THE DVBT CHANNELS 10
VIEW AND RECORD DVBT CHANNELS 12
VIEWING DVBT CHANNELS 12
LIVE RECORDING 12
SCHEDULED RECORDING 14
USE OF STORAGE DEVICE 16
ENJOY THE MULTIMEDIA WORLD 17
SETTINGS 18
DISPLAY AND LANGUAGE 18
NETWORK 19
TECHNICAL SUPPORT 22
WARRANTY REGISTRATION 22
GUARANTEE CONDITIONS 23
SECURITY INFORMATION 23
GENERAL 24
SAFETY 24
PRODUCT'S POWER SUPPLY 24
PLACING OF THE PRODUCT 24
CLEANING 24
IMPORTANT HINT 25
SAFETY-ENVIRONMENT 25
INTRODUCTION
The TwinBox 430 allows you to receive the free DVBT channels, including the high definition channels (HD) and to record them. DVBT Records (live, scheduled or deferred) are done on the USB storage (hard drive or USB key).
FUNCTIONS
- Connect to the wall antenna socket; you can view DVBT channels and HD DVBT channels.
- Connect an USB device (external hard drive or USB key) to be able to record DVBT and HD DVBT programs.
MAIN FEATURES
- Dual Tuner DVBT/ HD DVBT.
- USB Host Connections (x2).
- Video Connections: Composite, YPbPr and HDMI.
- Audio Connection: Coaxial.
- Power supply: 100V - 240V.
-
Supported formats - Video: Avi, Xvid HD, MPEG HD, MKV, WMV HD, RMVB and VOB
-
Audio: MP3, WMA, AAC, WAV, OGG, AC3, DDP, TrueHD, DTS, DTS HD,
FLAC and APE
- Photo: HD JPEG, BMP, GIF, PNG and TIFF
DESCRIPTION OF REMOTE CONTROL
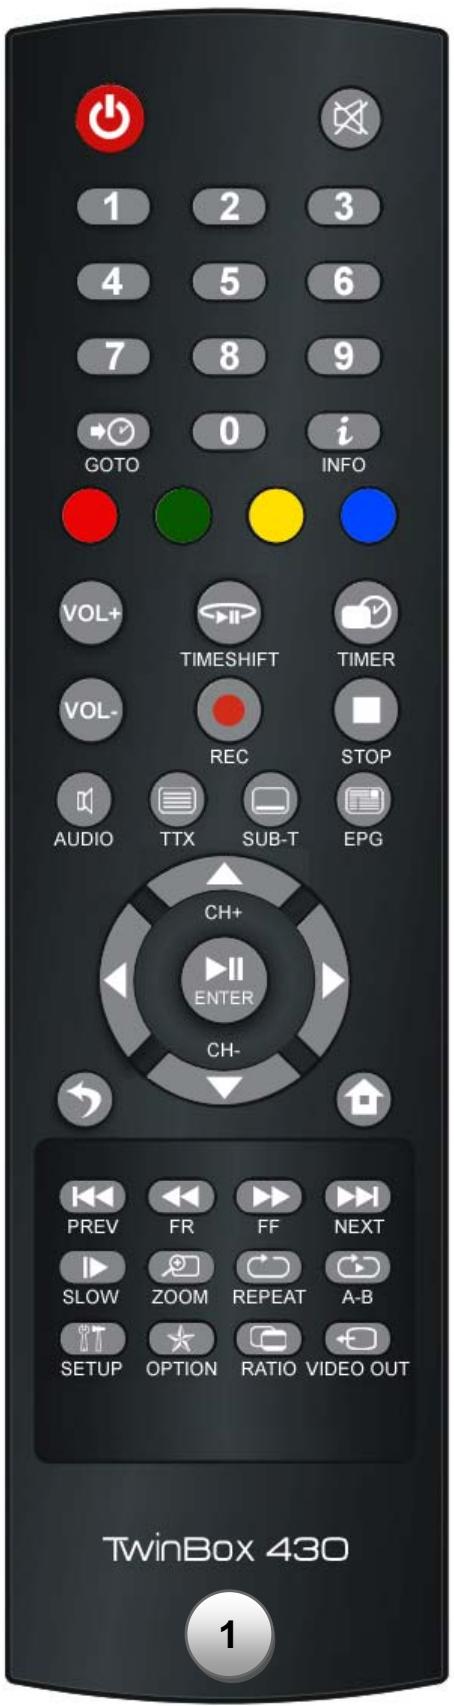
Remote control 1
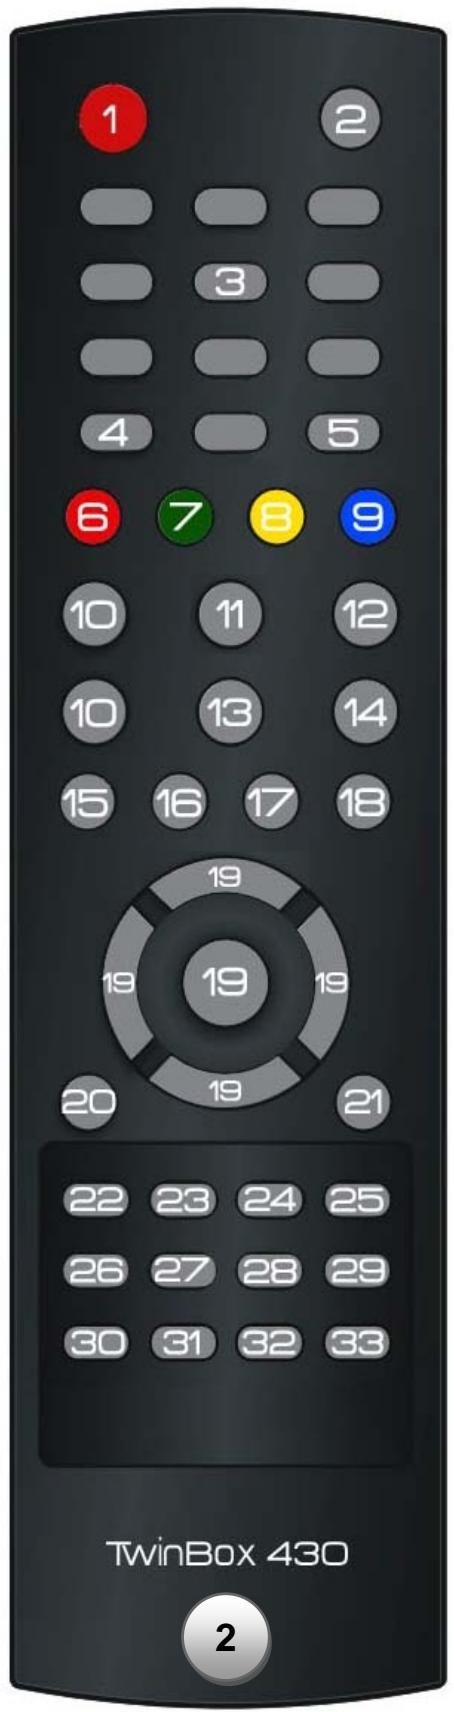
Remote control 2
Remote control 1: Corresponds to the real remote control.
Remote control 2: Corresponds to the numeration of the remote control's keys.
| No | KEY | FUNCTION | |
| 1 | STANDBY | Power on / off (standby) the TwinBox 430. | |
| 2 | MUTE | Enable / disable the sound (mute). | |
| 3 | NUMERIC KEYS | 0-9 | |
| 4 | GOTO | Allows going to a specific point of the video file (Time). | |
| 5 | INFO | Displays the information of the selected file. | |
| 6 | RED | Option key. | |
| 7 | GREEN | Option key. | |
| 8 | YELLOW | Option key. | |
| 9 | BLUE | Option key. | |
| 10 | VOL+/VOL- | Increase / decrease the volume. | |
| 11 | TIMEShift | Enables the "TIMESHIFT". | |
| 12 | TIMER | Allows direct access to the programming page. | |
| 13 | REC | Allows to records the program being viewed. | |
| 14 | STOP | Stop playing the media. | |
| 15 | AUDIO | Allows selecting the audio track. | |
| 16 | TTX | Enable / disable Teletext function | |
| 17 | SUBTITLE | Enable / disable the display of subtitles. | |
| 18 | EPG | Allows displaying the EPG screen (Electronic Program Guide). | |
| 19 | DIRECTIONAL KEYS CONFIRM | Switches between the various files and folders. "√" keys allows to change channels, ↑=CH+, ↓=CH- Play or pause playback of multimedia files. Allows to validate your choice and to see the list of DVBT channels. | |
| 20 | EXIT | Exits / return to the previous page. | |
| 21 | HOME | Allows direct access to the main page. | |
| 22 | PREVIEW | 1. Return to previous page when you browse media files. 2. Returns to the previous file when playing media files. | |
| 23 | FR/FR | Rewind the media file with a read speed of 2x, 4x, 8x ... | |
| 24 | NEXT | Fast forward the media file with a read speed of 2x, 4x, 8x ... | |
| 25 | SLOW | 1. Go to next page when you browse media files. 2. Go to the next file during when playing media files. | |
| 26 | ZOOM | Enables slow motion while viewing a video file. | |
| 27 | REPEAT | 1. Video and Music: Repeats the current file or repeat all files in the directory or cancel the repeat function. 2. Photo: Repeats the background music. | |
| 29 | A-B | Allows setting a point "A" and "B" to enable the repetition of the sequence. | |
| 30 | SETUP | Allows direct access to the configuration page. | |
| 31 | OPTION | Displays the list of options in the browser | |
| 32 | 4:3/16:9 | Allows toggling the display mode between 4:3 PS, 4:3 LB and 16:9. | |
| 33 | VIDEO OUT | Allows toggling between video displays modes. |
BEFORE STARTING

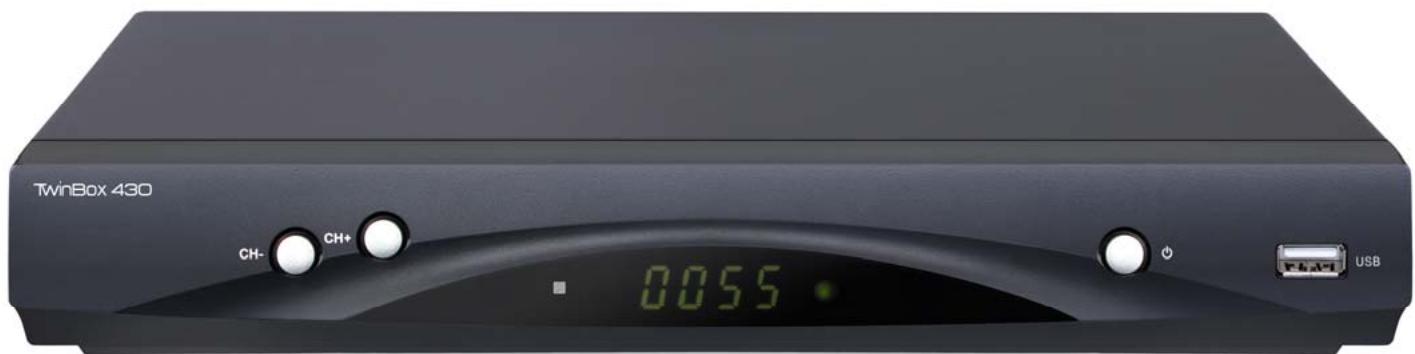
FRONT VIEW
- -/CH CH +: To change channel.
- VFD DISPLAY: To display hour or the time of the film.
INFRARED RECEIVER: To receive the signal from the remote control.
- POWER: Allows to put the TwinBox 430 in the standby mode.
- USB HOST: To record your programs and read the contents of your USB devices (USB keys, external hard drives ...).

REAR VIEW
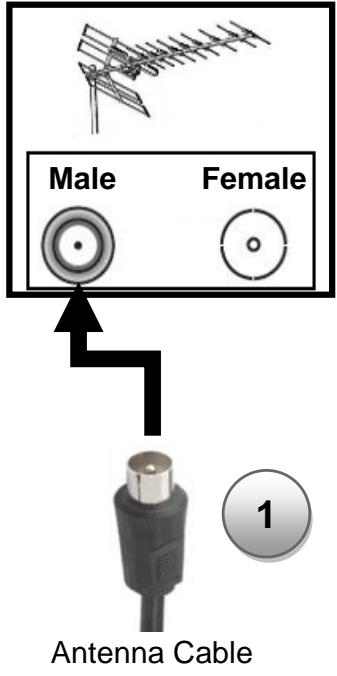
- ANTENNA IN: To connect an antenna cable from the wall outlet to TwinBox 430.
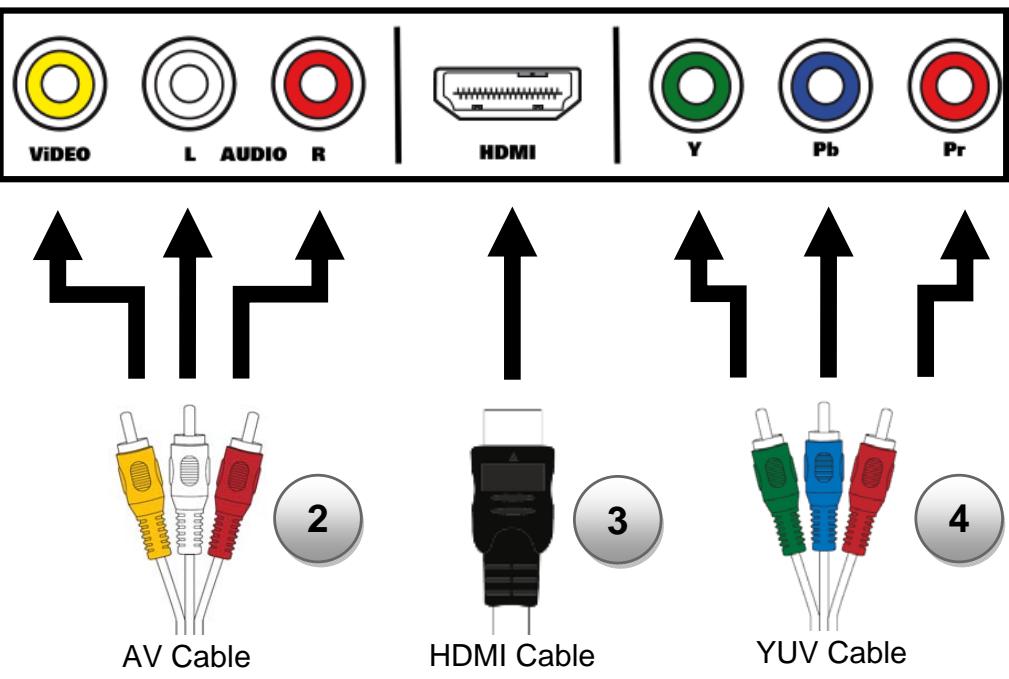
ANTENNA OUT: To connect an antenna cable from the TwinBox 430 to the TV. - Y / Pb / Pr: To connect an YUV cable to your TV.
- AV OUT: To Connect the AV cable (from the TwinBox 430 to your TV).
- COAXIAL: To connect a S-PDIF coaxial cable.
- HDMI: To connect the HDMI cable to your TV.
- LAN: To connect a network cable.
- USB HOST: To read the contents of your USB devices (USB keys, external hard drives ...).
- AC: To connect the TwinBox 430 to the wall socket.
CONNECT TWINBOX 430 TO YOUR TV
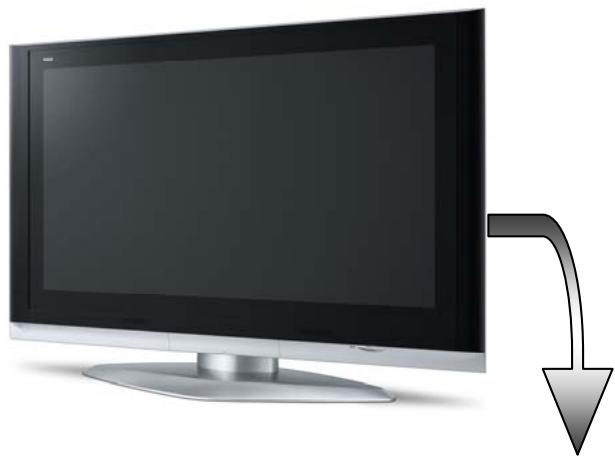
Antenna wall socket
Rear TV

- Connect your TwinBox 430 to the wall antenna socket to enjoy the DVBT and HD DVBT channels.
- Connect TwinBox 430 to the TV using the AV cable (depending on your configuration).
- Connect the power cord into your wall power socket.
INSTALL THE DVBT CHANNELS
Press "HOME" on the remote control and select "Setup" by pressing "ENTER".
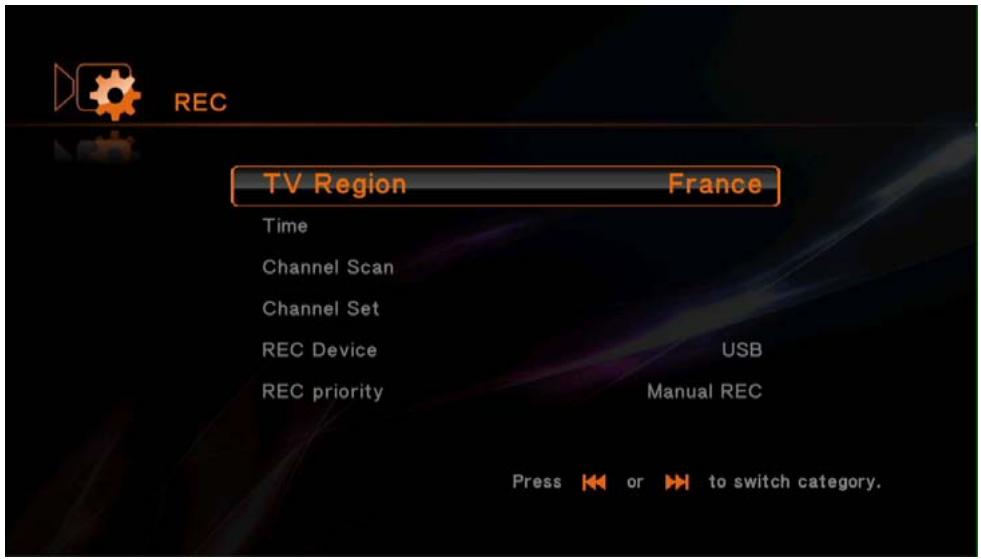
- Select "REC".
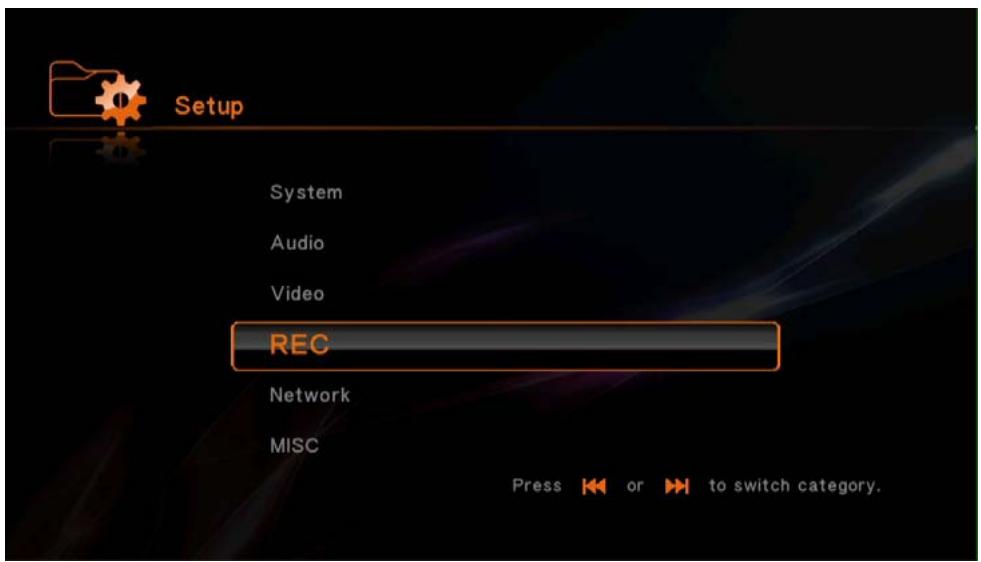
- Choose the geographic area that corresponds to your position.
- Select "Channel Scan" and then press ENTER. Select "Auto Scan" and press ENTER.
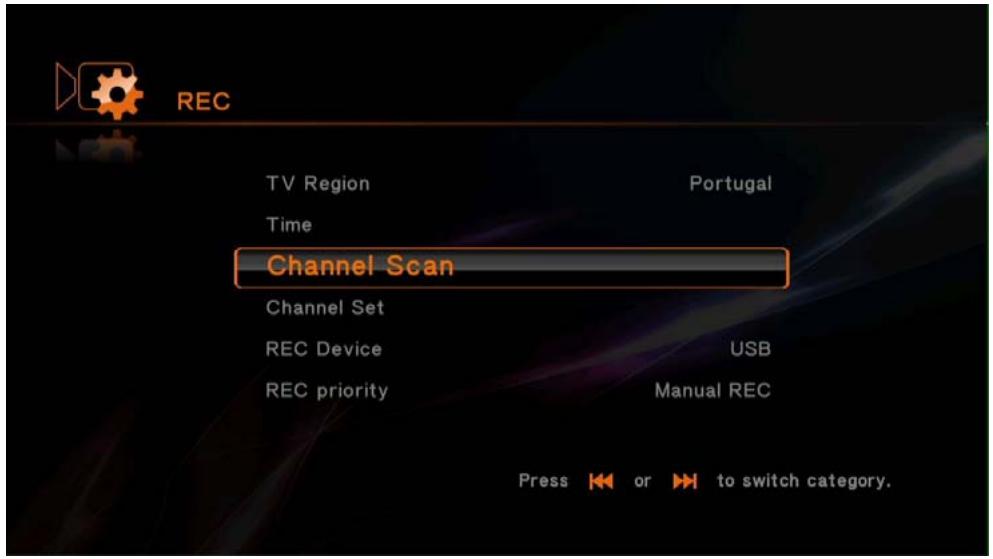
AUTO SCAN: To scan and automatically install the DVBT channels.
MANUAL SCAN: To manually scan and install the DVBT channels.
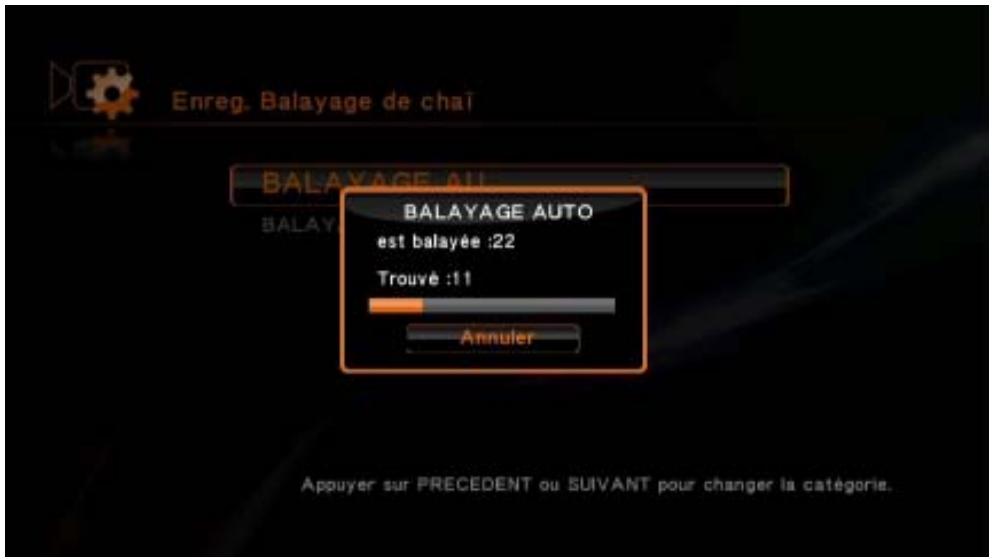
This progressing bar should appear.
- Once the channels scan is complete, press ENTER.
VIEW AND RECORD DVBT CHANNELS
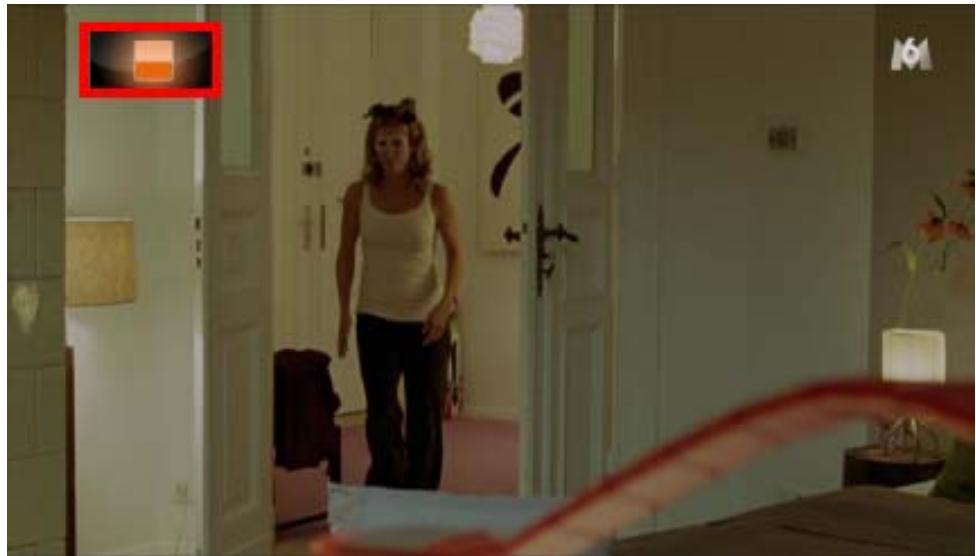
VIEWING DVBT CHANNELS
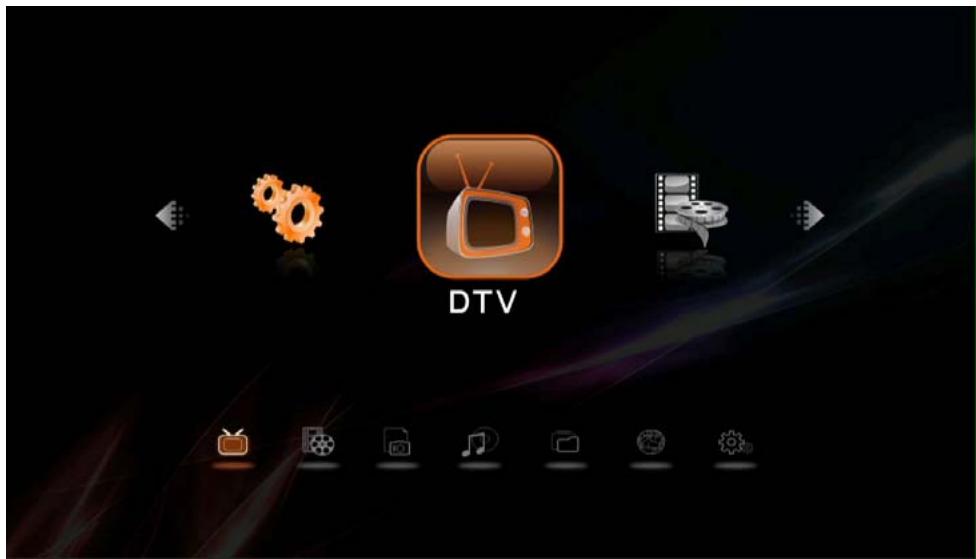
1. Select "DTV".

Use "to change channels.
- Press "i" to display the signal strength.
- Press "□" to change the subtitles.
- Press to display the Electronic Program Guide.
LIVE RECORDING
To be able to record DVBT / HD DVBT channels, you must have previously connected an USB device to the TwinBox 430.
1. Select "DTV".
- Select the desired channel for recording, using the channel list.

keys or press "ENTER" to display the
- Press "on your remote control to start recording.

- Press to stop recording the current program.
HINT: Records are stored directly on the device connected (USB or external hard drive) in the "REC" folder at the root of the device.
You can record one channel and watch another simultaneously, simply proceed in the same way as for normal viewing of a channel.
To schedule a record, you must first press "Timer" on the remote control. The TIMER interface will appear.
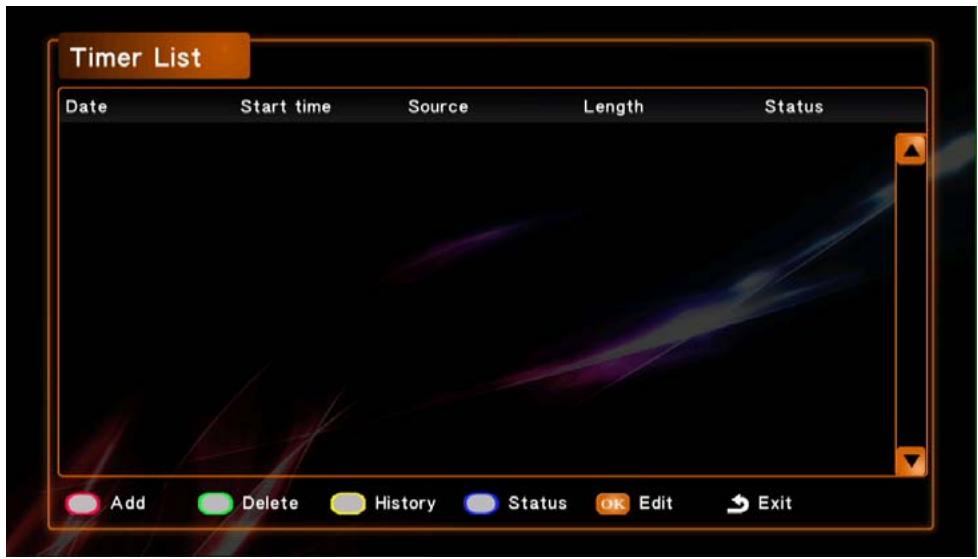
- Press "RED" on your remote control to enter the interface below and add a scheduled program.
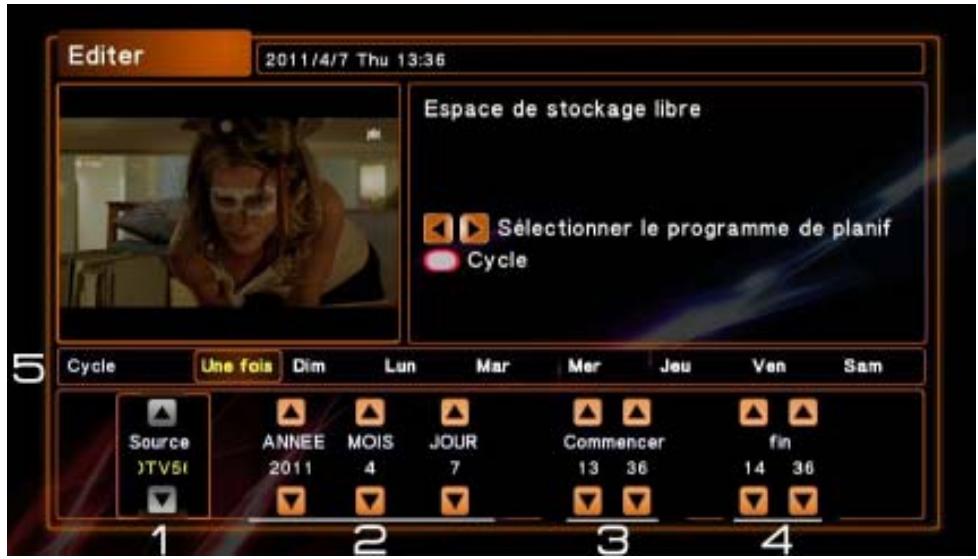
1.1. Select the recording source.
1.2. Select the recording date.
1.3. Select the start time of the record.
1.4. Select the end time of the record.
1.5. To select the recording repeat frequency, press "RED" on your remote control.
- Once
- From Monday to Friday
- Sunday
- Tuesday
- Thursday
-
Saturday
-
Everyday
- From Monday to
Saturday
- Monday
- Wednesday
-
Friday
-
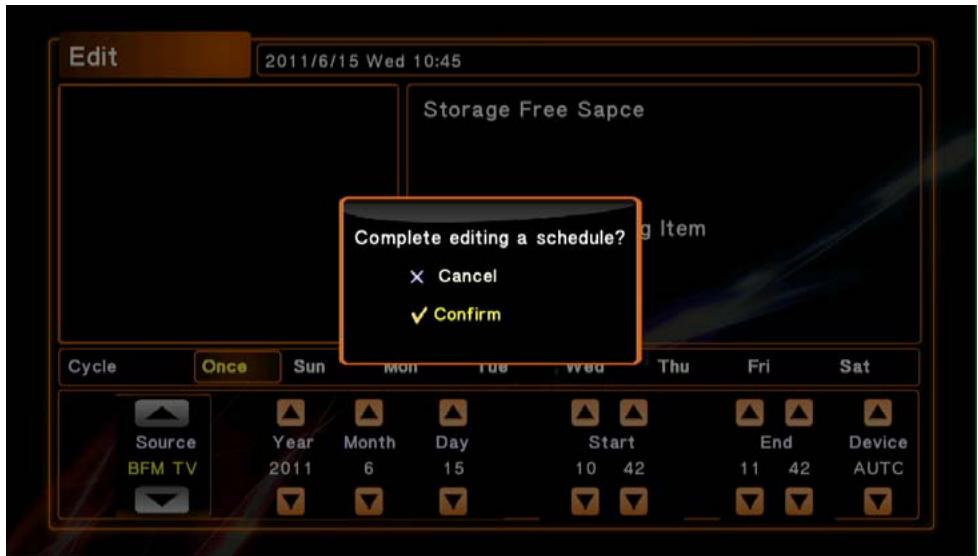
Select the recording device.
-
Press ENTER, a confirmation message will appear. If the settings are right for you, select "Confirm" and press ENTER.
HINT: You can record one channel and watch another simultaneously, simply proceed in the same way as for normal viewing of a channel.
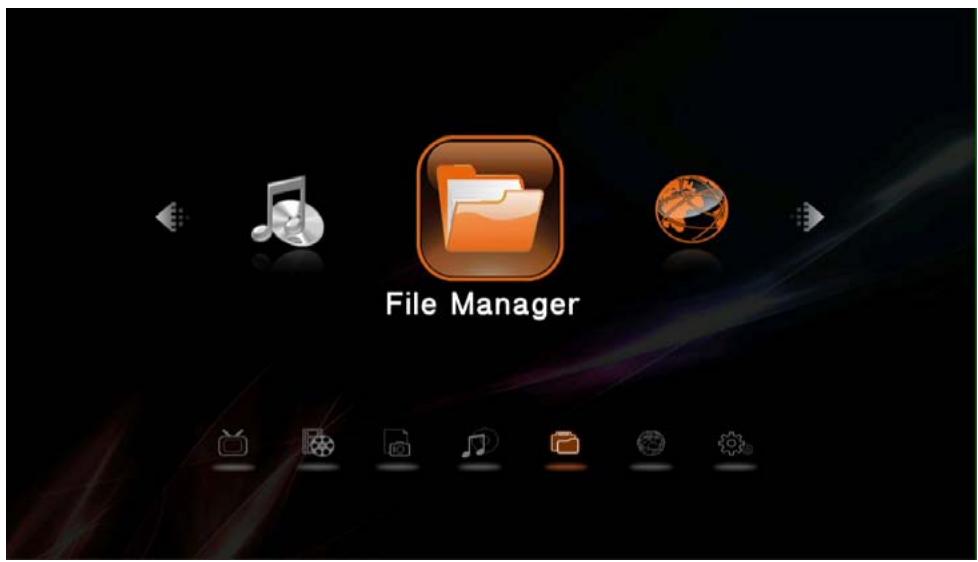
USE OF STORAGE DEVICE
The TwinBox 430 is equipped with two USB HOST ports that allow you to connect an USB key or an external hard drive to the TwinBox 430, to browse it and thus read the multimedia content stored in.
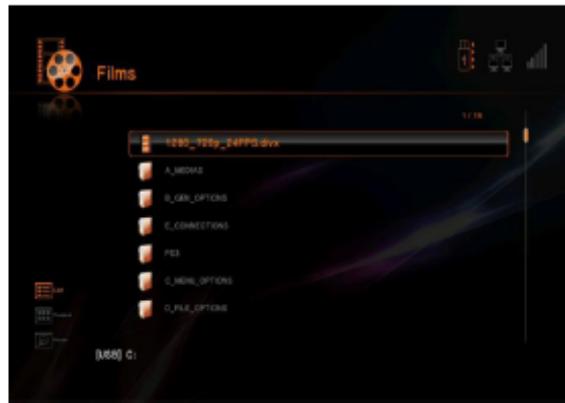
- Select "File Manager" and then press ENTER.

- Select your storage device and press "ENTER", select the file you want to view and press "ENTER".
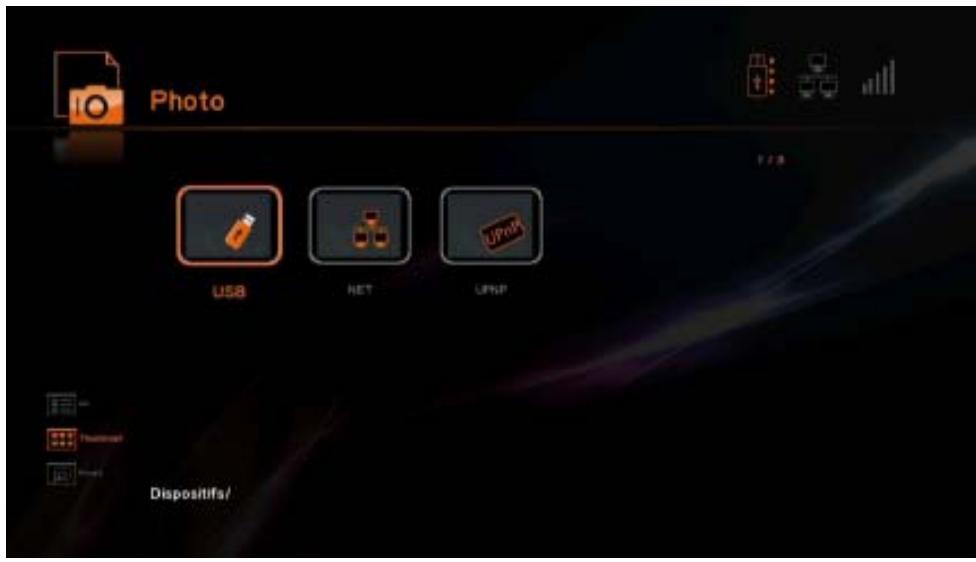
ENJOY THE MULTIMEDIA WORLD
- Select "File Manager" on the homepage.
- Select your STOREX server that appears in the list by pressing "ENTER", and select the folder you want to browse or the file you want to read.


- Enjoy the Multimedia world!
DISPLAY AND LANGUAGE
- Turn on your TwinBox 430.
- After startup, select "Setup" to configure your TwinBox 430.
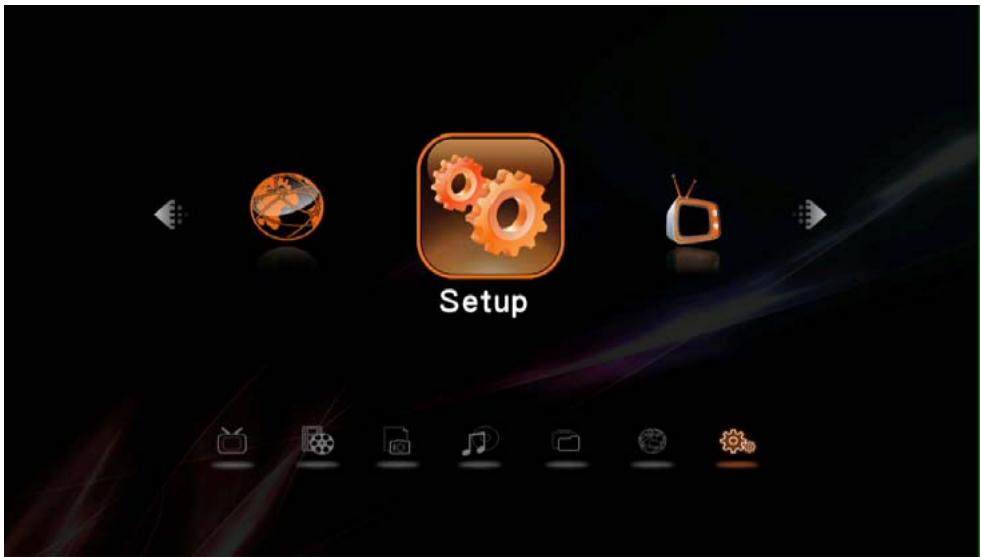
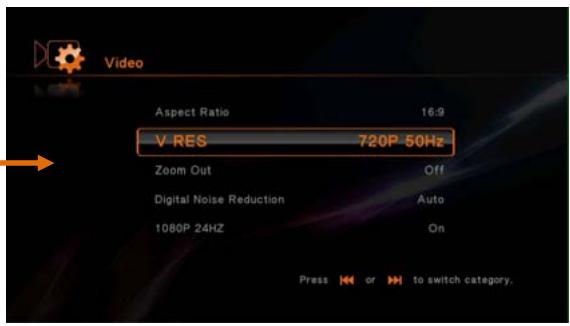
- Select "VIDEO" and then select "TV System" to select the display resolution.
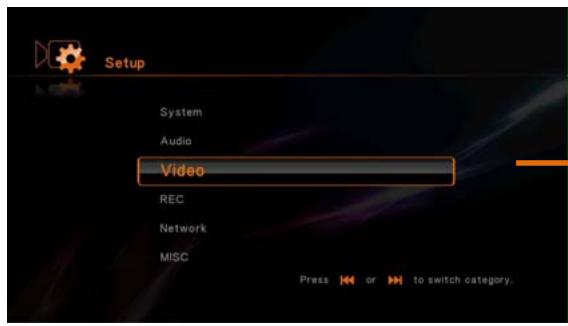
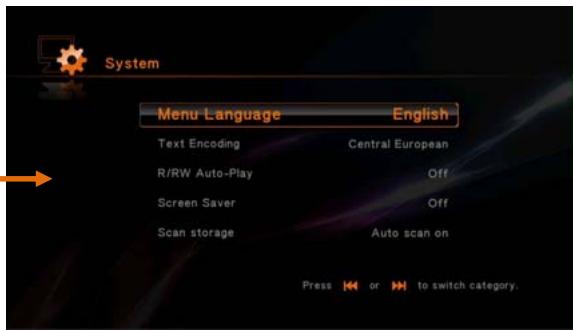
- Select "SYSTEM" and then select "MENU LANGUAGE" to change the language.

HINT: The WiFi key is an option of the TwinBox 430, please contact your distributor or visit the website http://www.e-storex.com to acquire a compatible WiFi key.
Connect the WiFi USB device (optional) on one of the USB HOST ports at the back of the unit.
The WiFi wireless Network is available only if the WiFi USB device is connected to the unit and your WiFi router is activated.
- Select the type of network you wish to connect to your home network.
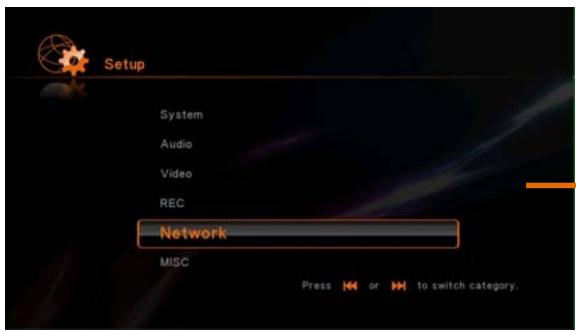
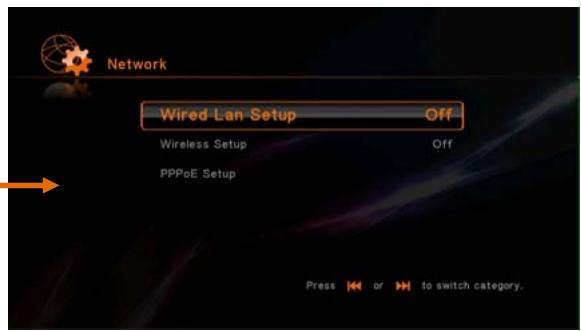
- Select "LAN SETTING" to connect with wired networking. Press ENTER and then select OK to set your wired connection.
- If you wish to have a wireless connection (WiFi) follows the steps below:
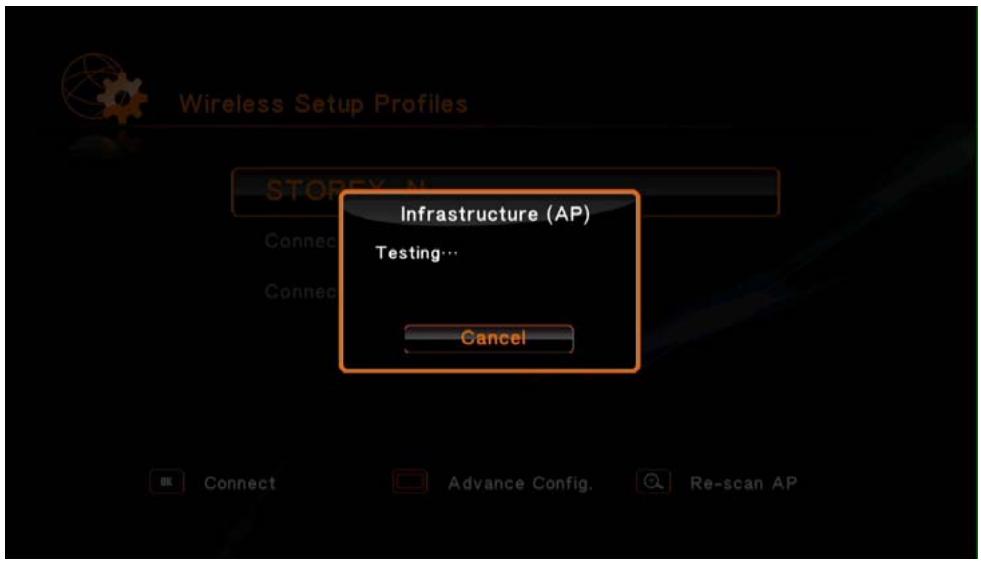
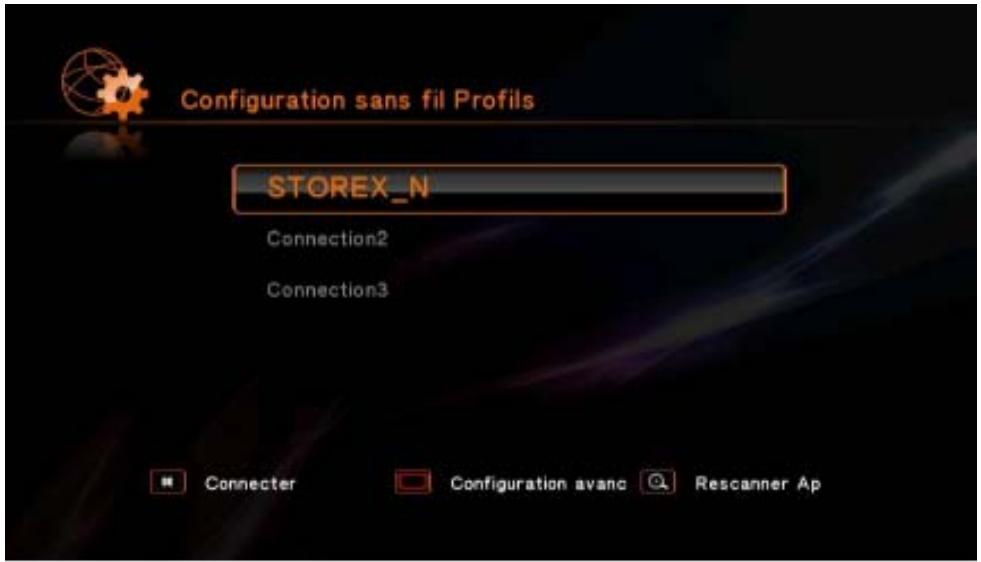
- Select "WIRELESS SETUP" then press "ENTER".

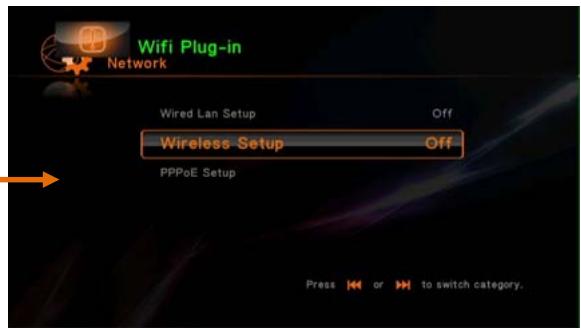
- The list of available names on your SSID network appears.
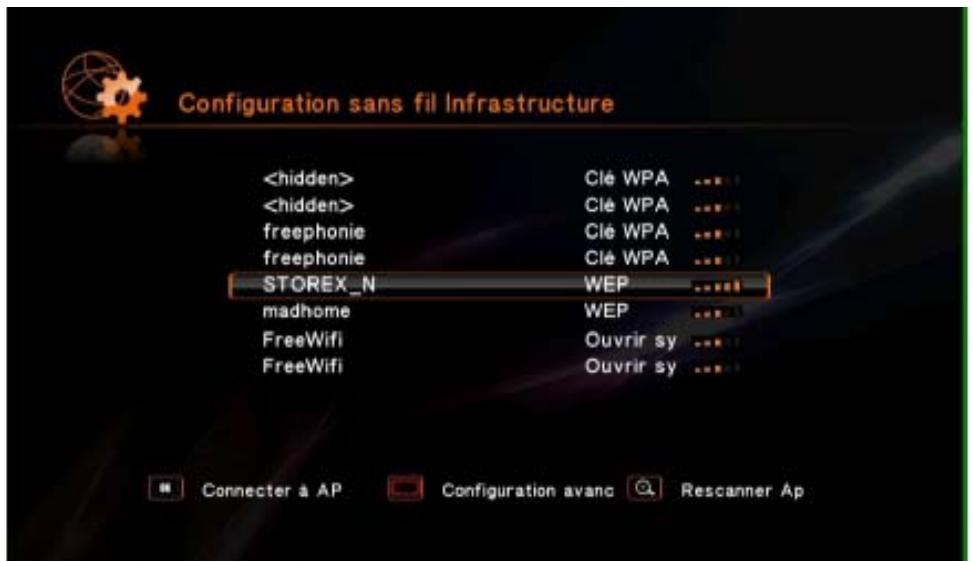
- Enter your key using the virtual keypad. Select OK and then press ENTER to confirm.
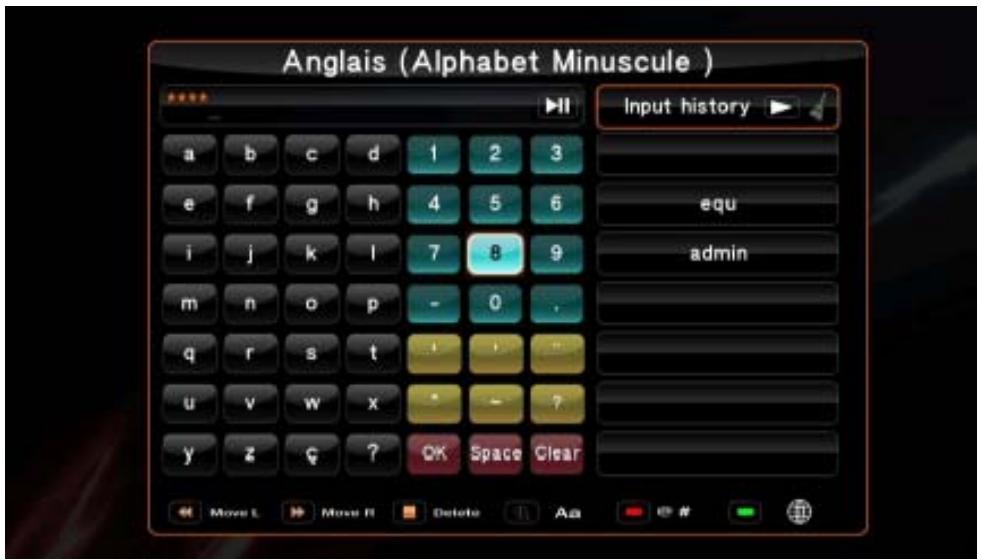
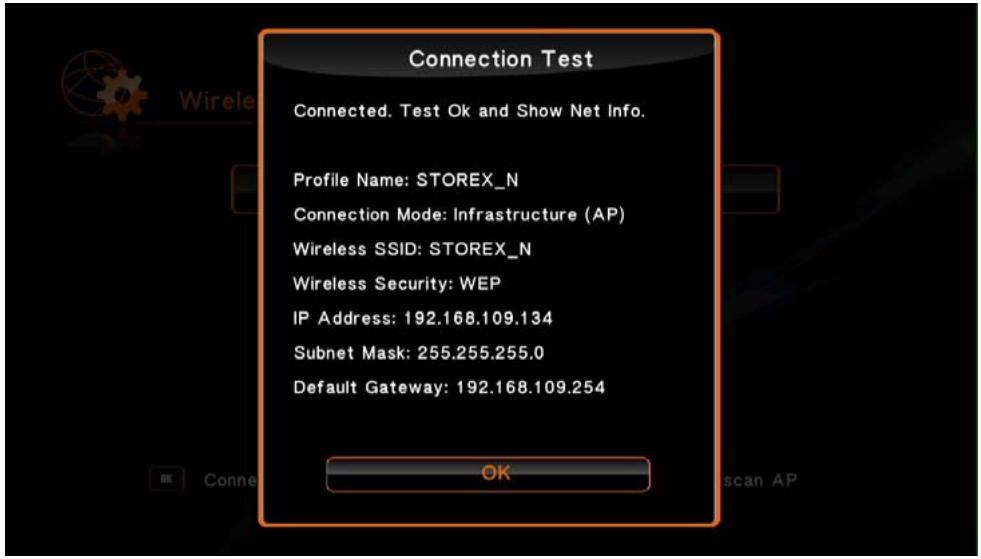
- The connection test begins; confirm your choice by pressing ENTER.
- You will find the IP address, subnet mask and default gateway if your connection is successful. Press OK to confirm settings.
- Once the above parameters are accepted, press HOME to return to the main page.
HINT
It is recommended to configure the network after you correctly connect the USB WiFi to the TwinBox 430.
- Please check that the anti-virus or firewall is not blocking access of this unit to the network.
Perhaps you might experience a temporary break and the freeze of the AV content read through the WiFi network because of network speed, video streams input capacity or AV files including HD codes. In this case, please copy them to a USB device or memory card before watching.
STOREX WEBSITE
Go to http://www storex.eu, select "DVBT Recorder" and then select TwinBox 430. You will be able to download the latest full version of the manual and software updates.
TECHNICAL SUPPORT
In order to easily manage your issue, you should contact our support team, we invite you to register your TwinBox 430 guarantee on our website at the following address:
http://garantie storex.eu
For repairing, contact your dealer to repair your TwinBow 430 under guarantee, or send your request via email to the following address:
support@storex.eu
or by phone at:
France: 01 55 85 82 00 (local call charge to Paris)
Spain: 902 110 572 (soporte.es@storex.eu)
Monday to Thursday from 9:30 to 19:30 p.m.
Friday from 9:30 to 18:30 p.m.
For more details, please read the full version of user manual (available on the website):
http://www storex.eu
WARRANTY REGISTRATION
We invite you to register your warranty for TwinBox 430 on our website at:
http://garantie storex.eu
GUARANTEE CONDITIONS
STOTEX's available guarantee is valid for 1 year for TwinBox 430 and 3 months long for its accessories (remote control, AV cables, power supply ...).
STOREX TwinBox guarantees your TwinBox 430 against any manufacturing or assembling faults. This guarantee only applies to the first purchase of the TwinBox 430 by the end user and is not transferable if the device is resold. This warranty does not cover any incompatibilities found by end user apart from recommendations specified on the packaging, or any other incompatibility generated by other hardware or software on the computer that is connected to the TwinBox 430. Proof of purchase must be presented to our services to apply STOREX guarantee.
The guarantee doesn't cover failures or defects induced by non-compliance to this manual's instructions, neglect, alteration, improper installation or maintenance, reparation or alteration not authorized by STOREX, improper tests, accident or external factor such as (not exhaustive) excessive heat or dampness, power failures or bad installation / uninstalling of TwinBox 430.
The only contractual obligation endorsed by STOREX pertains to the reparation or replacement of a defective product. In no case, STOREX cannot be held responsible for any loss of data, or its consequences induced by operational fault or a product failure. In any case, STOREX won't be bound to any financial responsibility for any amount exceeding the value of the product purchased by the end user.
This guarantee of your TwinBox 430 is defined and can't be modified, decreased or increased without written consent from STOREX. Furthermore, STOREX cannot be held responsible for any technical advice or service provided pertain to TwinBox 430.
You are not the grantee of this current warranty.
This warranty covers only your TwinBox 430 and is governed by French law.
For any request not covered by this guarantee, please contact STOREX support or log on to www.e-storex.com to order accessory.
HINT: STOREX™ reserves the right to modify the user manual without prior notice according to the product's evolutions. You can find the latest version of the manual on our website:
http://www storex.eu
SECURITY INFORMATION
This device was designed and manufactured to ensure your safety. The security mechanisms built into the product will protect you if you observe the following procedures for installing, operating and troubleshooting:
- Read and follow the instructions below before handling and installation of your equipment;
- Keep these instructions for future reference.
GENERAL
- Do not shake, or it may lead to damage to the device;
- Use only parts and accessories (power supply ...) recommended by the manufacturer;
- Do not move the appliance when in operation.
SAFETY
- To prevent fire or electric shock, do not put the appliance near objects filled with liquids,
- If a heavy object or liquid is dropped on the device, unplug it immediately and send it to check by qualified personnel before re-use.
- When in operation, the housing surface generates heat; Do place the product on a flat and rigid surface and avoid covering it or placing any object on it.
PRODUCT'S POWER SUPPLY
- In case you don't use the product for a long time or during a lightning storm, unplug the unit from the outlet by grabbing the plug itself, without pulling the cable,
- The included power adapter is specific to the product. Using a different adapter may cause damage or accidents.
PLACING OF THE PRODUCT
- Install the appliance away from any equipment with strong attraction such as microwave ovens, big speakers ...
- Place your product in a well ventilated area and on a hard and flat surface to disperse heat from the device.
CLEANING
- Never open the product to clean, otherwise the warranty will be canceled,
- Unplug the product from the wall outlet before cleaning the product,
- Clean the outside of the product and the remote control using a soft, dry cloth. Never use an abrasive pad, scouring powder or solvent such as alcohol or gasoline.
TROUBLESHOOTING
- Refer all troubleshootinging to qualified personnel. Troubleshooting is required when the appliance has been damaged in any way: plug or cord is damaged, liquid spilled into the product, introduction of small objects in the product, exposure to rain or moisture, malfunction, drop of the product...
IMPORTANT HINT
Warning: This product helps maintain a still video image or a picture-screen on your television screen indefinitely. If you leave the still video image or picture-screen on your television screen display for an extended period, you may damage your TV screen. The plasma TVs and projection televisions are sensitive.
SAFETY-ENVIRONMENT
CE Your STOREX product has been tested in laboratory and is consistent with corresponding European Directives for CE marking applicable during the time of marketing.

A traceability of the components of your STOREX product was performed; it showed us that the product complies with Environmental Directive (RoHS) in effect at the time of its release.

At its end of life, do not throw the product in a garbage but bring it to the distributor to your household waste disposal who will get the product in a recycling of electrical waste and electro mechanics and electronics (DEEE).

Your STOREX product was prepared, tested and packaged in a French company certified ISO9001: 2008 by an annual audit by a qualified person of the Bureau Veritas Certification.
HINT
TwinBox 430
is a product range of STOREX

STOREX
www storex.eu
© STOREX - 2011
All trademarks are patented by their respective owners.