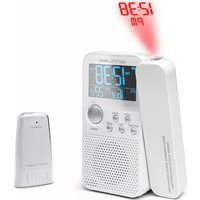
M-180CRW - Radio-réveil MUSE - Notice d'utilisation et mode d'emploi gratuit
Retrouvez gratuitement la notice de l'appareil M-180CRW MUSE au format PDF.


| Type de produit | Radio-réveil |
| Marque | Muse |
| Modèle | M-180CRW |
| Dimensions (L x H x P) | Environ 20 x 12 x 8 cm |
| Poids | Environ 400 g |
| Alimentation | Secteur 230 V avec pile de secours CR2032 |
| Fonctions principales | Radio FM, alarme avec snooze, affichage de l'heure et de la date |
| Entretien et nettoyage | Nettoyer avec un chiffon doux et sec. Ne pas utiliser de produits abrasifs. |
| Sécurité | Tenir hors de portée des enfants. Ne pas exposer à l'humidité ou aux températures extrêmes. |
| Pièces détachées et réparabilité | Pile de secours : CR2032. Aucune pièce détachée disponible. L'appareil n'est pas réparable par l'utilisateur. |
| Informations générales | Notice d'utilisation disponible en PDF sur notice-facile.com |
FOIRE AUX QUESTIONS - M-180CRW MUSE
Questions des utilisateurs sur M-180CRW MUSE
0 question sur cet appareil. Repondez a celles que vous connaissez ou posez la votre.
Poser une nouvelle question sur cet appareil
Téléchargez la notice de votre Radio-réveil au format PDF gratuitement ! Retrouvez votre notice M-180CRW - MUSE et reprennez votre appareil électronique en main. Sur cette page sont publiés tous les documents nécessaires à l'utilisation de votre appareil M-180CRW de la marque MUSE.
MODE D'EMPLOI M-180CRW MUSE
MUSE
M-180CR
User Manual
In/Out temperature projection clock radio

PLEASE READ THE INSTRUCTION CAREFULLY BEFORE OPERATING THE UNIT
UNPACKING YOUR UNIT
When you unpack your new clock radio, make sure that you have removed all the accessories and information papers:
- Projection clock radio
- AC/DC adaptor
- External temperature remote sensor with transparent cover and wall bracket - User manual
PRODUCT DESCRIPTION
Location of controls

- ON/OFF button
2 LCD display
-
ALM1 button
-
N.M. Button
-
ADM.2 button
-
DATE/SET bytes
-
DATE/SET BUTTON
-
NAP button
-
SLEEP button
-
Speaker
-
Projector
-
SNOOZE/ ▶/ ▶ button
-
Projector ON/OFF switch
-
ROTATE button (for projected
jmape
-
9C / 2F button
-
Dallas-based compensation
-
Battery backup compartment
-
5V DC in jack
-
Volume control
-
Band selector
-
Tuning knob
-
SETTING mode selector CLOCK/
ALM1/ALM2/LOCK
-
EM wire antenna
-
FM Wire antenna
- Induction voltage
GB-1GB-2
LCD display
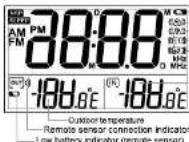
— Low battery indicator (unit) - Buzzer alarm #1 is set - Buzzer alarm #2 is set - Radio alarm #1 is set - Radio alarm #2 is set
-Indoor temperature
POWER SUPPLY
AC/DC adaptor
- The supplied AC/DC adaptor is suitable for use on AC mains supplies of 230V\~50Hz and should only be connected to a mains supply with these parameters.
Caution:
- The included AC/DC adaptor is for use with this unit only. Do not use it with other equipments.
- When the unit is not going to be used for long time, disconnect the AC/DC adaptor from the AC outlet.
- Be sure to use it near the wall outlet. If a malfunction occurs, disconnect the plug from the wall outlet at once.
- When the AC/DC adaptor is plugged in, the apparatus is not completely disconnected from the main power source, even when the unit is turned off.
- The AC/DC adaptor shall not be exposed to dripping or splashing and that no objects filled with liquids, such as vases, shall be placed on apparatus.
- To be completely disconnect the power input, the AC/DC adaptor of apparatus shall disconnected from the mains," as the disconnect devices is the AC/DC adaptor of apparatus.
- The AC/DC adaptor of apparatus should not be obstructed OR should be easily accessed during intended use."
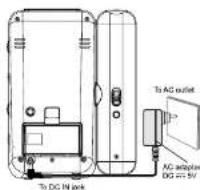
Battery backup system
DC power: 9V battery type 6F22 (not provided) for clock and alarm time backup system only.
An alkaline type battery is recommended. For optimum performance this battery should be replaced every 6 months.
Note: if no battery is installed or if the battery is low, "○" indicator is displayed (2). Connect the 9V battery inside the compartment (14) at the back of the unit.
BACKUP SYSTEM: Ensures that the unit continues to operate during an AC power disruption (In order to preserve the battery life, the display is switched off). All clock, date and alarm settings will be kept in the memory, however, the clock time may require adjustment for exact accuracy. If no battery is installed, the display will blink to indicate that you have to reset the time and alarm.
SETTING THE TIME
- Slide the SETTING mode switch (19) to CLOCK position, press ◀ / ▶ (10) to select the time mode between 12 hours and 24 hours, press DATE/SET (5) to confirm. Then the hour digits will flash, press ◀ / ▶ (10) to adjust the value. The time decrements or increments at a faster rate when you press and hold the buttons. Confirm with DATE/SET (5). Repeat this procedure for the minute, year, sequence (D-M or M-D) and value of day ('D') and month ('M')

Note: Pressing DATE/SET button (5) again, enters a new setting cycle.
Once the unit is plugged in, it will enter the time setting mode. "24Hr" blinks on display.
- Slide the SETTING mode switch (19) to LOCK position. The calendar is viewed for 3 seconds and display resumes to clock mode.

Pressing DATE/SET (5) displays the calendar for 3 seconds
INDOOR / OUTDOOR TEMPERATURE
Indoor temperature
Once the unit is connected, the indoor temperature is displayed (2).
Celsius (°C) and Fahrenheit (°F).degrees selection
The °C/°F button (13) switches the unit for both indoor and outdoor temperature between Celsius (°C) and Fahrenheit (°F) degrees.

Outdoor temperature


GB-4GB-3
- Remote sensor set-up
- Remove the wall bracket.
- Unlock two latches at the bottom to release the transparent cover.
- Slide down the battery door at the back.
- Insert 2 batteries, type R03/UM4/AAA (not provided). Follow the polarity indicated in
the battery compartment
- An alkaline type battery is recommended. For optimum performance this battery should be replaced every 6 months.
- Remote sensor synchronization
- To enter synchronization mode, press and hold ▶ (10) for 3 seconds on the main unit, “ ◇” flashes on the display (2) for 2 minutes.
- Press RESET button of the remote sensor with pointed object (such as ball-point pen). The LED blinks
- A few seconds later the temperature will appear on the display of the main unit.
- To exit synchronization mode, press ▶ button (10), "ψ" is not displayed.
Note:
^ To synchronize remote sensor and main unit on a different channel, press CH button and repeat synchronization operations.
' Once connected, the unit enters in synchronization mode with the remote sensor for 2 minutes. " ¢" flashes on the display.
-
Replace battery door and transparent cover, lock the 2 latches at the bottom. Install the remote sensor within a range of 50 meters from main unit in open area.
-
* □ "on the outdoor temperature area of the display, indicates that the remote sensor batteries are low. Replace them with new batteries.
After battery replacement, or after main unit reset, or if the sensor is under the influence of electrical fast transient or/and electrostatic phenomenon, reset the remote sensor with the RESET button.
Note:
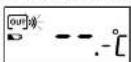
* If the unit fails to received the outdoor temperature for 10 minutes, it will display
…
* Displayed temperature and remote sensor operating range: -10.0°C to +60.0°C (+14.0°F to +140.0°F)
GB-5
LISTENING TO THE RADIO
- Press ON/OFF (1) to turn on the radio, press this button again to turn it off.
- Switch to FM or MW with the Band selector (17).
- Select a radio station with tuning knob (18). The frequency is displayed (2) for a few seconds. Then it returns to clock mode
- Adjust the volume (16) to the desired level.
- For a better reception, in FM extend the antenna (20); in MW rotate the unit.

THE TIME PROJECTION
- Tum on or off the projector with the ON/OFF switch (11) at the back of the projector.
- Rotate the projected time by 180° with the ROTATE button (12) at the back of the projector.

- Swivel the projector to move the projected time.
GB-6 GB-7
- ON/OFF (1): Press to stop the alarm and it will sound again 24 hours later. " In " or " " are still shown on the display.

Note: Pressing ON/OFF (1) to stop the alarm will not affect the current status of the radio.
- ALM. 1 or ALM. 2 (3 or 4): press to turn off the alarm permanently, the alarm indicator * ☑ " / " or " ☑ " or " are not shown on the display.
NAP FUNCTION
This function wakes you up after a short period of time. Only buzzer sound can be selected for NAP.
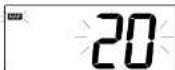
- Press and release the NAP (6) button. The "NAP" icon and the current nap lime flashes on display (2). During this period, adjust nap time by pressing ▶ on ▶ (19). Note: The nap range is from 10 minutes to 2 hours. (The default time is 20 minutes)
-
Press NAP (6) to confirm nap time. If no button is pressed during 5 seconds, it will return to clock display with NAP Icon.
-
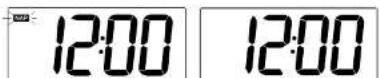
When the Nap alarm is triggered, press NAP (6) or ON/OFF (1) to stop, "NAP" icon will disappear.
-
To cancel NAP function before NAP alarm is triggered, press and hold NAP button (6), the "NAP" icon will blink for two seconds then go off. Release the NAP button.
GB-9 GB-11
木命名:1
2

THE ALARM AND WAKE-UP MODE
This unit allows to set two different wake-up times.
- Alarm 1 time set
Slide the SETTING mode switch (19) to ALM.1 position. Press ◀ / ▶ (10) to set the wake time, then press DATE/SET (5) to confirm. Set the hours first, then the minutes.

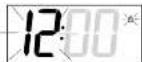
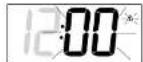
When alarm 1 setting is completed, slide the SETTING mode switch (19) to LOCK position
Note: To check the alarm 1 time, you can press and hold the ALM.1 button (3) for 4 seconds when the SETTING switch (19) is on LOCK position (the alarm 1 time is displayed for 3 seconds) or switch the SETTING mode switch to ALM.1 position
- Alarm 1 mode (buzzer or radio selection)


When the SETTING switch is on LOCK position, press ALM.1 button (3) repeatedly to switch among wake up by buzzer, radio or alarm off.
1" press: " & alarm by buzzer
2nd press:" [1] alarm by radio
3" press: alarm off, no icon displayed
- Alarm 2 settings
Same operations as for Alarm 1: SETTING mode switch (19) to ALM.2 for the time setting and ALM.2 (4) button for alarm mode.
Note:
If the radio is ON at the wake-up time, regardless the alarm source is radio or buzzer, the alarm will be triggered with buzzer lone and the radio will be mute. If alarm is stopped, the radio is resumed.
- Alarm stop
The alarm is programmed to run for 1 hour and 59 minutes.
Once the alarm 1 or alarm 2 is activated, corresponding alarm indicator with brackets "###"; "##" or "###"; "###" flashes on display.

- SNOOZE (10): Press to stop the alarm temporarily. The alarm will ring again when the snooze period is over. " & ?" on " or " & ?" flashes on display.
To adjust the snooze period (up to 30 minutes, the default time is 9 minutes), press and hold SNOOZE (10) for 5 seconds, the snooze time blinks on the display, press ▶ or ▶ (10) to adjust the value. It will return to clock display if no key is pressed within 5 seconds, the snooze time is stored.

CB-8
SLEEP FUNCTION
In sleep mode, radio will turn off automatically after a specified time.
- To set the sleep time, press and hold SLEEP button (7), at the same time press or (19) to adjust the value. The time decrements or increments will follow by a faster rate when you press and hold or button. Release SLEEP (7), your setting is stored in memory. The sleep time range is from 1 to 120 minutes.

-
The radio is turned on after setting Sleep Time. The radio will turn off when the preset time elapses. The "SLEEP" icon will be off.
-
If you want to turn off the radio before the SLEEP activates, press ON/OFF button. The sleep function will be cancelled, "SLEEP" icon will be off.
IMPORTANT SAFETY INSTRUCTIONS
CAUTION RISK OF ELECTRIC SHOCK DO NOT OPEN ATTENTION: To reduce the risk of electric shock, do not remove the cover. There are no user serviosable parts inside the unit. Refer all servicing to qualified personnel.
The lightening flash with arrowhead symbol within the triangle is a warning sign alerting the user of 'dangerous voltage' inside the unit.
The exclamation point within the triangle is a warning sign alerting the user of important instructions accompanying the product.
WARNING
- Do not throw batteries in fire!
- Do not mix different types of batteries or old batteries with new ones.
- Never recharge the batteries, apply heat to them or take them apart
- Attention should be drawn to the environmental aspects of battery disposal.
- Batteries shall not be exposed to excessive heat such as sunshine, fire or the like.
- The marking information is located at the bottom of apparatus
- Ensure a minimum distance of 5cm around the apparatus for sufficient ventilation.
- Ensure that the ventilation is not impeded by covering the ventilation openings with items, such as newspapers, table-clothes, curtains, etc.
- Do not place naked flame sources, such as lighted candles on the apparatus.
- Use the apparatus only in moderate climates.
- Do not be exposed to dripping or splashing. And that no object filled with liquids, such as vases, shall be placed on the apparatus.
- Do not use your set immediately after transport from a cold place to a warm place, there may be condensation problems.
- Make sure that you keep your set away from water and high temperatures.
- Clean the player with a soft cloth, or damp chamois leather. Never use solvent.
- Under the influence of electrical fast transient or/and electrostatic phenomenon, the product may malfunction and require user to power reset.
If at any time in the future you should need to dispose of this product please note that Waste electrical products should not be disposed of with household waste. Please recycle where facilities exist. Check with your Local Authority or retailer for recycling advice (Waste Electrical and Electronic Equipment Directive)
CE
GB-10

2009-9-8, 15:21
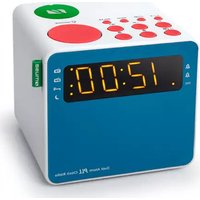
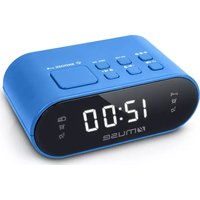
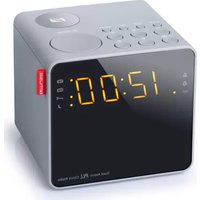


Marque : MUSE
Modèle : M-180CRW
Catégorie : Radio-réveil