
VMC-P10 - Accessoires photo SONY - Notice d'utilisation et mode d'emploi gratuit
Retrouvez gratuitement la notice de l'appareil VMC-P10 SONY au format PDF.
| Type de produit | Câble de connexion audio/vidéo pour caméscope |
| Marque | SONY |
| Modèle | VMC-P10 |
| Compatibilité | Caméscopes SONY Handycam avec prise multi-connecteur (8 broches) |
| Fonctions principales | Transmission de signaux vidéo composite et audio stéréo |
| Longueur du câble | 1,5 m |
| Diamètre du câble | 5 mm |
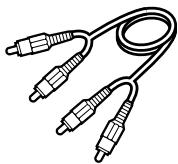
| Connecteurs | Prise multi-connecteur SONY 8 broches d'un côté, prises RCA (vidéo jaune, audio blanc/rouge) de l'autre |
| Poids | 50 g |
| Matériau | PVC |
| Couleur | Noir |
| Tension d'alimentation | Aucune (passif) |
| Entretien et nettoyage | Nettoyer avec un chiffon doux et sec. Ne pas utiliser de solvants. |
| Sécurité | Ne pas plier excessivement le câble. Éviter les torsions. |
| Pièces détachées et réparabilité | Non réparable. En cas de défaut, remplacer le câble. |
| Informations générales | Garantie 1 an. Fabriqué en Chine. |
FOIRE AUX QUESTIONS - VMC-P10 SONY
Questions des utilisateurs sur VMC-P10 SONY
0 question sur cet appareil. Repondez a celles que vous connaissez ou posez la votre.
Poser une nouvelle question sur cet appareil
Téléchargez la notice de votre Accessoires photo au format PDF gratuitement ! Retrouvez votre notice VMC-P10 - SONY et reprennez votre appareil électronique en main. Sur cette page sont publiés tous les documents nécessaires à l'utilisation de votre appareil VMC-P10 de la marque SONY.
MODE D'EMPLOI VMC-P10 SONY
QUICKSTARTGUIDE
Welcome
Thank you for purchasing this AIWA product.
When you unpack your DVD player/video cassette recorder for the first time, follow these procedures for set up.
For Assistance And Information
Call Toll Free 1-800-BUY-AIWA
(United States and Puerto Rico)
AIWA CO., LTD
8C-JF1-914-01
020408AMK-U-L
Printed in Indonesia
You will find these accessories in the package box.
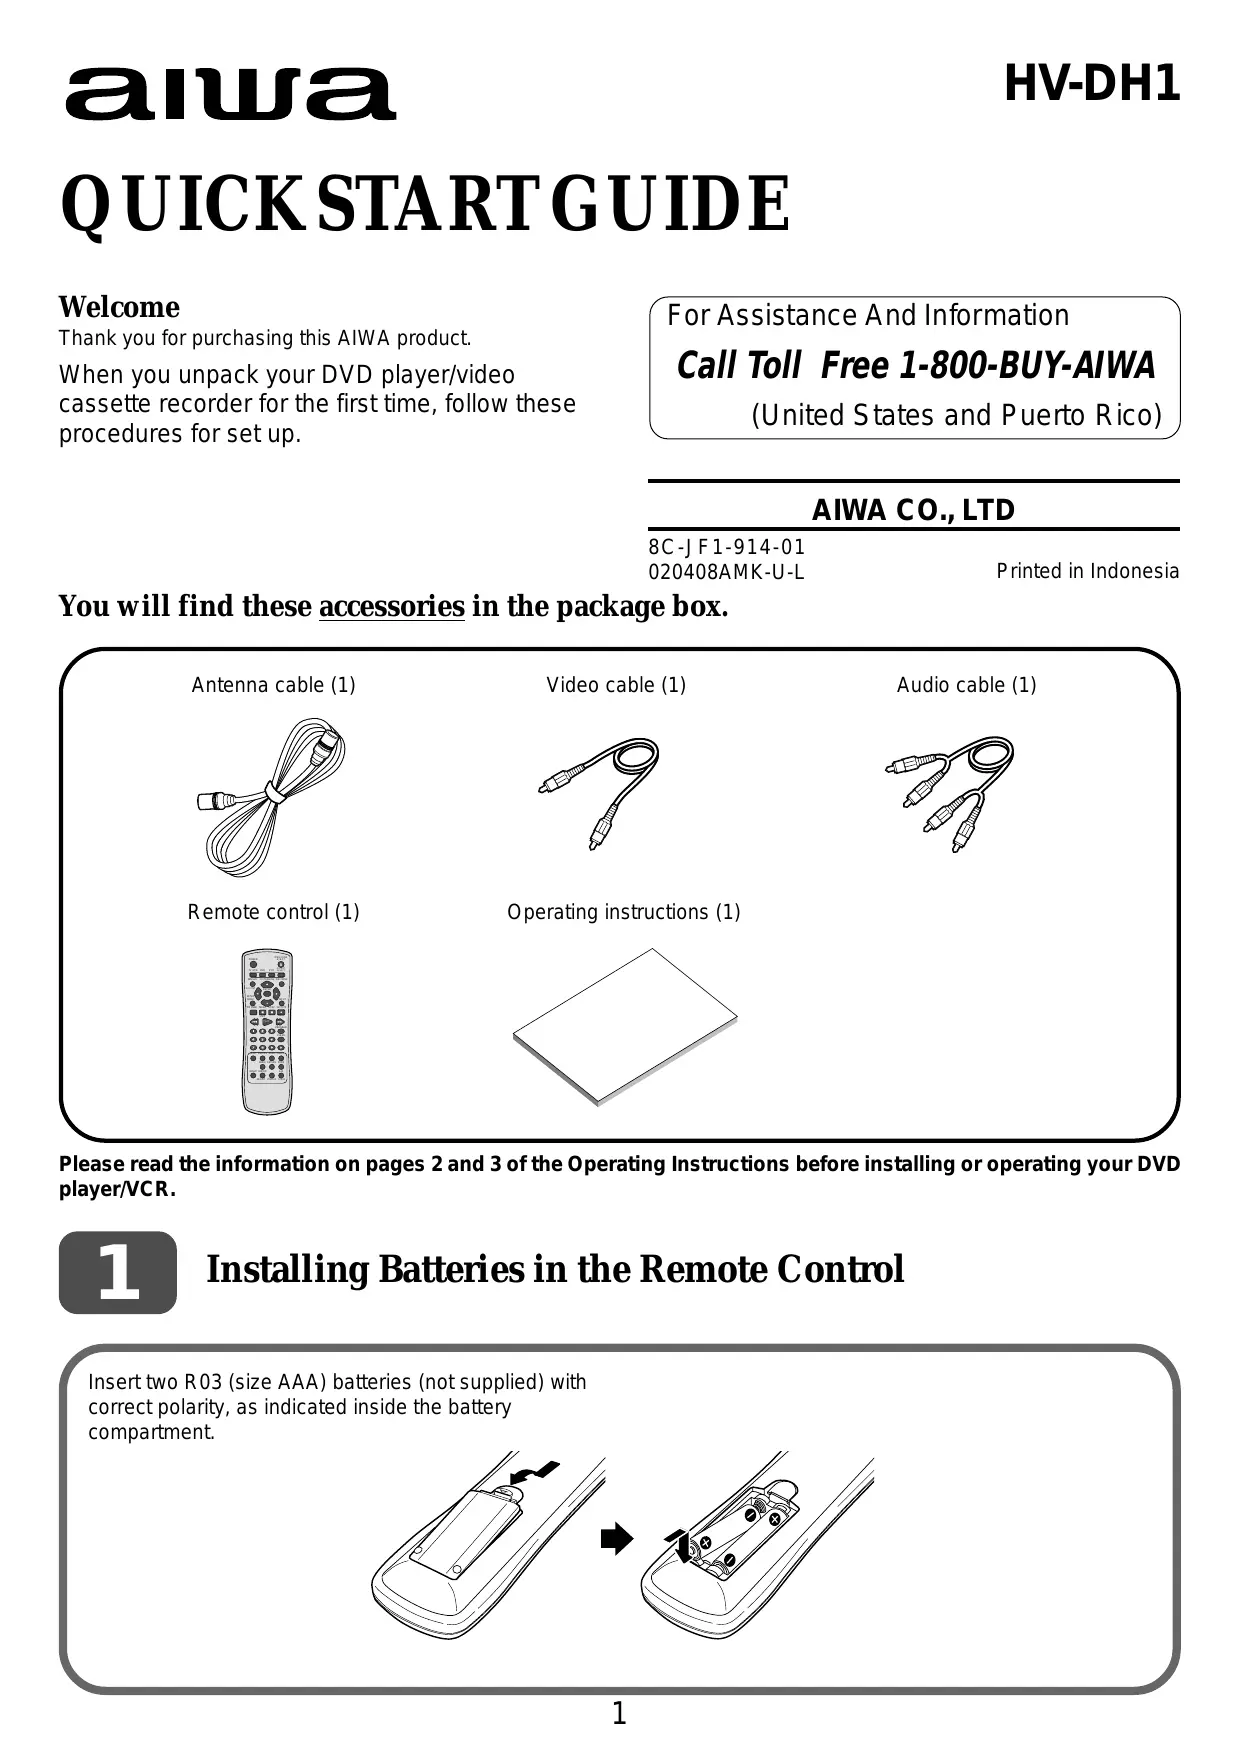
Antenna cable (1)
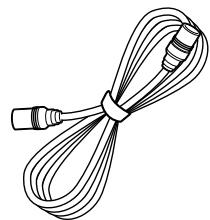
Remote control (1)
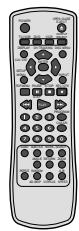
Video cable (1)
Operating instructions (1)

Audio cable (1)
Please read the information on pages 2 and 3 of the Operating Instructions before installing or operating your DVD player/VCR.
1
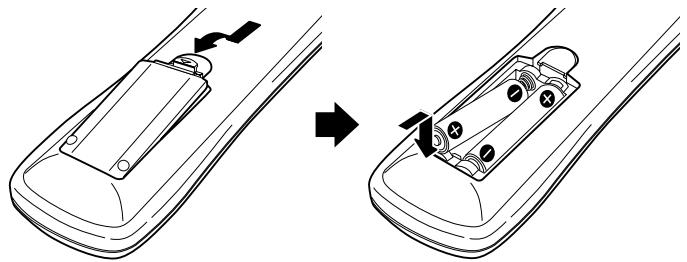
Installing Batteries in the Remote Control
Insert two R03 (size AAA) batteries (not supplied) with correct polarity, as indicated inside the battery compartment.
Basic connections
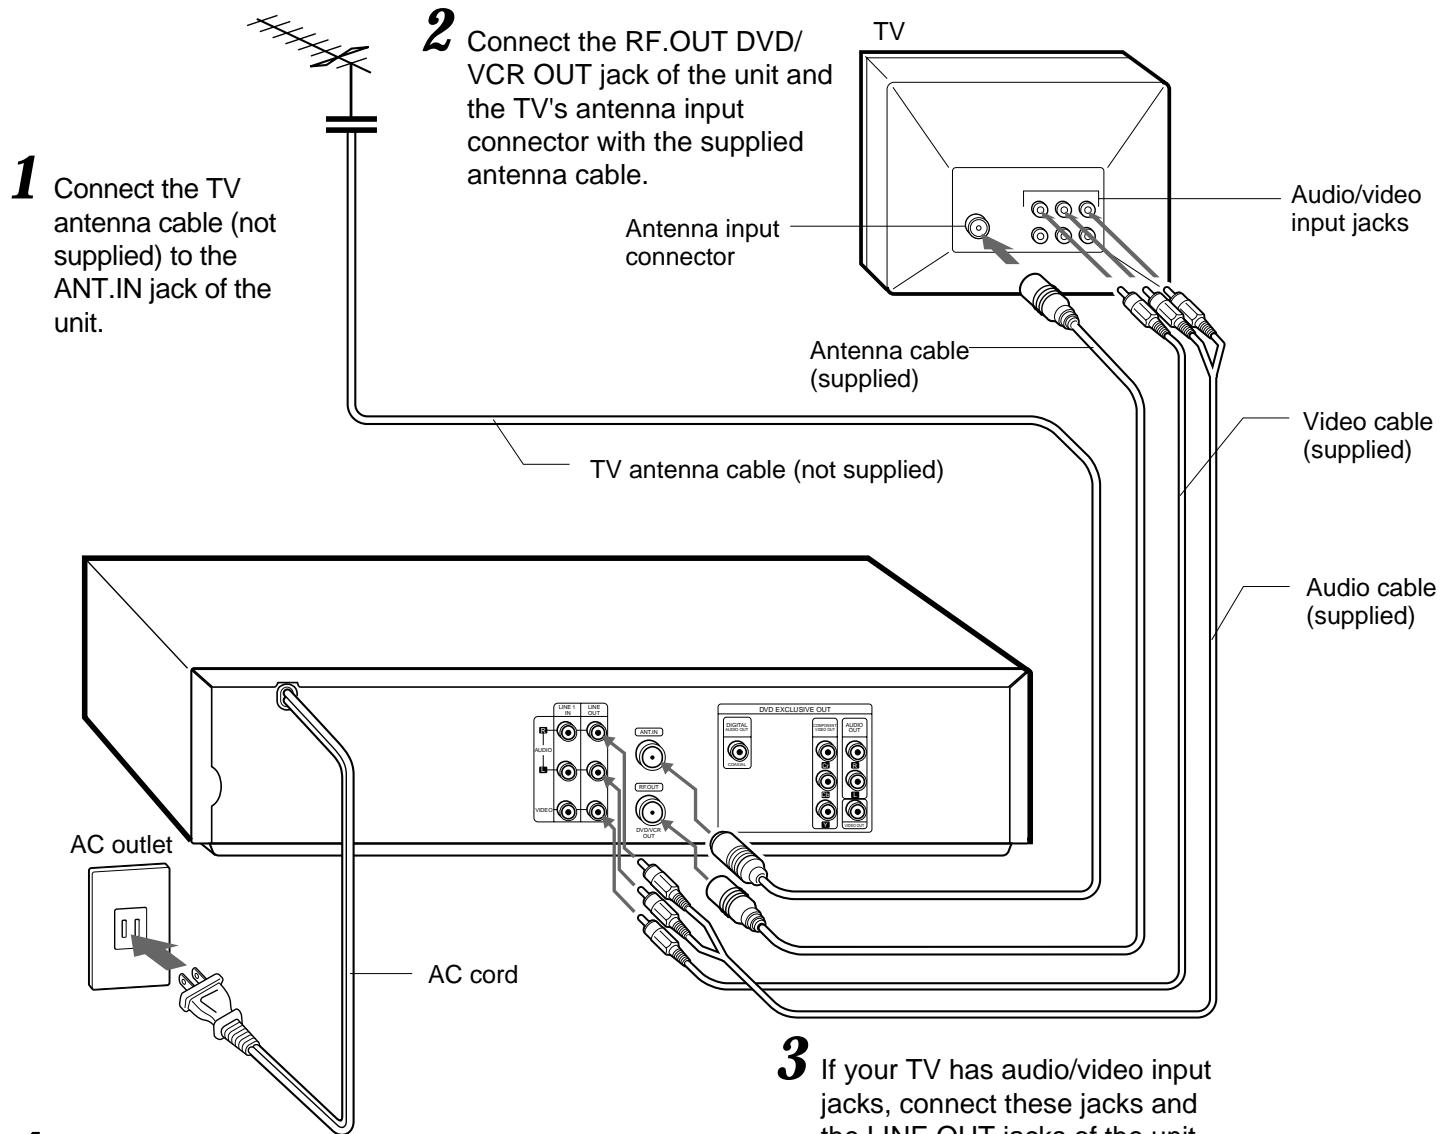
4 Connect the AC cord to the AC outlet.
3 If your TV has audio/video input jacks, connect these jacks and the LINE OUT jacks of the unit with the supplied audio and video cables.
Important
Connect the AC cord to the AC outlet after all connections are complete.
When the TV is connected to the unit only with the antenna cable

CHANNEL


You need to set the unit's RF output channel to a channel that is not used for broadcasts in your area. The default is channel 3.
To change the RF output channel setting, make sure the AC cord is plugged in to the AC outlet, but keep the power turned off. Press and hold down either of the two CHANNEL buttons at the front of the unit until the display in the LCD changes.
When displaying the output from this unit on the TV, select this channel on the TV.
CATV connections
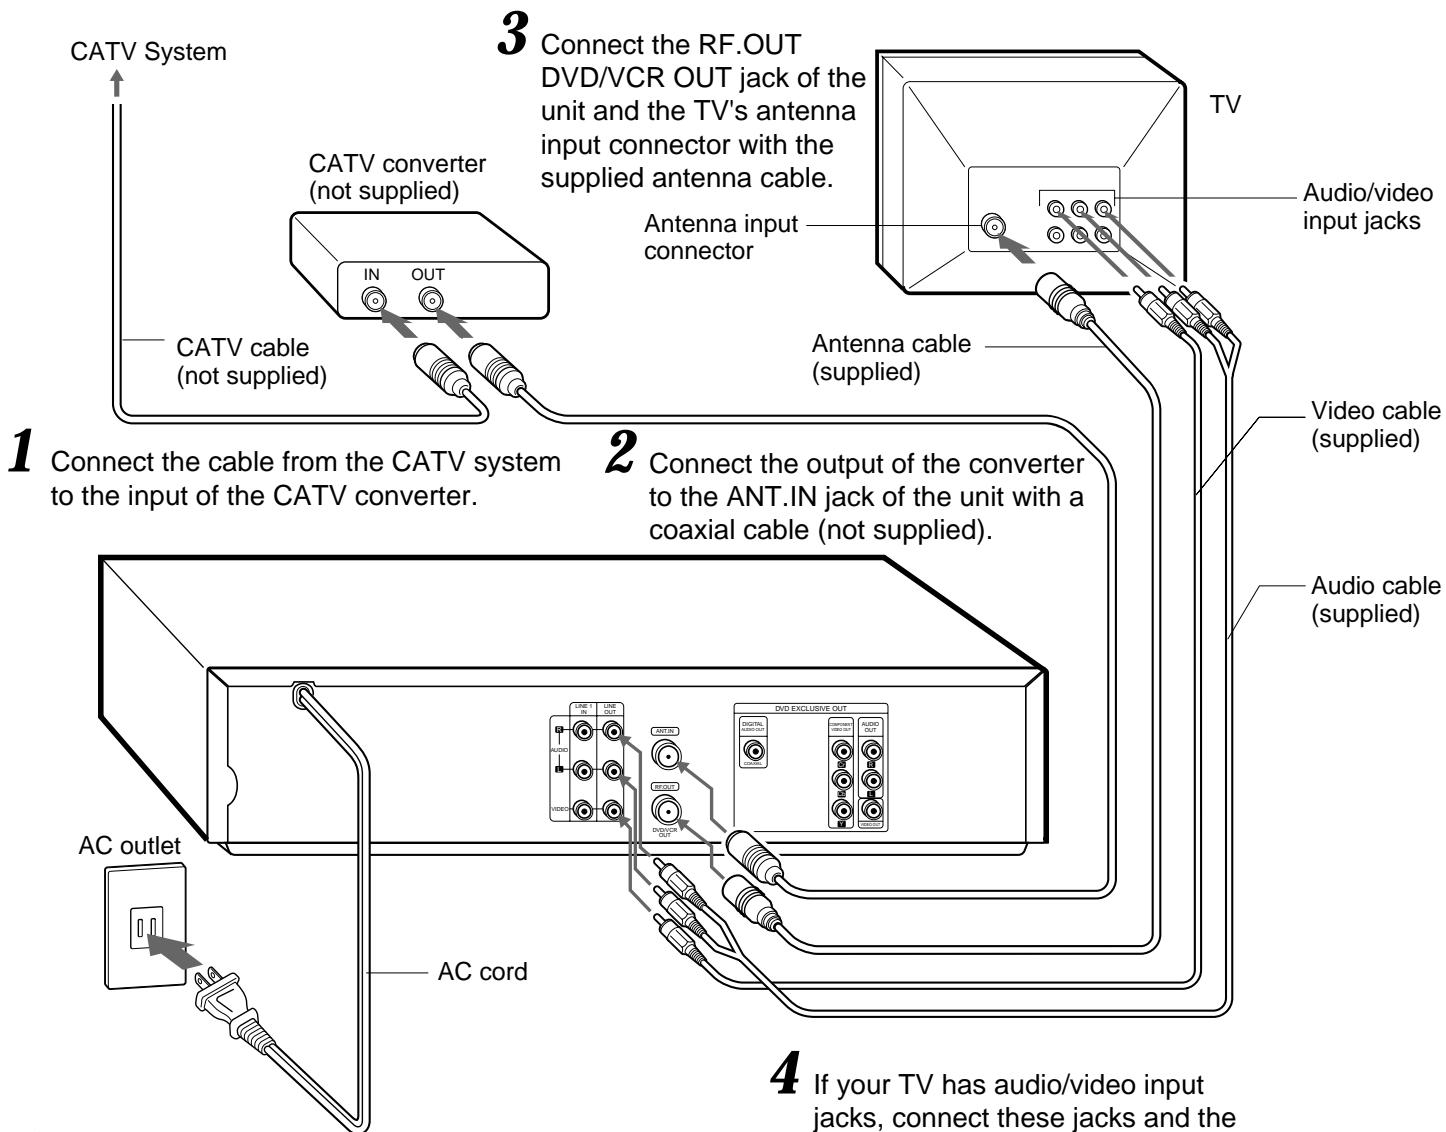
5 Connect the AC cord of to the AC outlet.
4 If your TV has audio/video input jacks, connect these jacks and the LINE OUT jacks of the unit with the supplied audio and video cables.
To connect to a CATV system without a CATV converter
Connect the cable from the CATV system to the ANT.IN jack of the unit in step 1 above.
If the program tuned in on the TV is not displayed clearly
Press TV/VCR on the remote control to turn off "VCR" in the display window, or turn off this unit.
To display TV or video program output from the unit
Press TV/VCR on the remote control to display "VCR" in the display window.
VCR
3
Setting the menu language
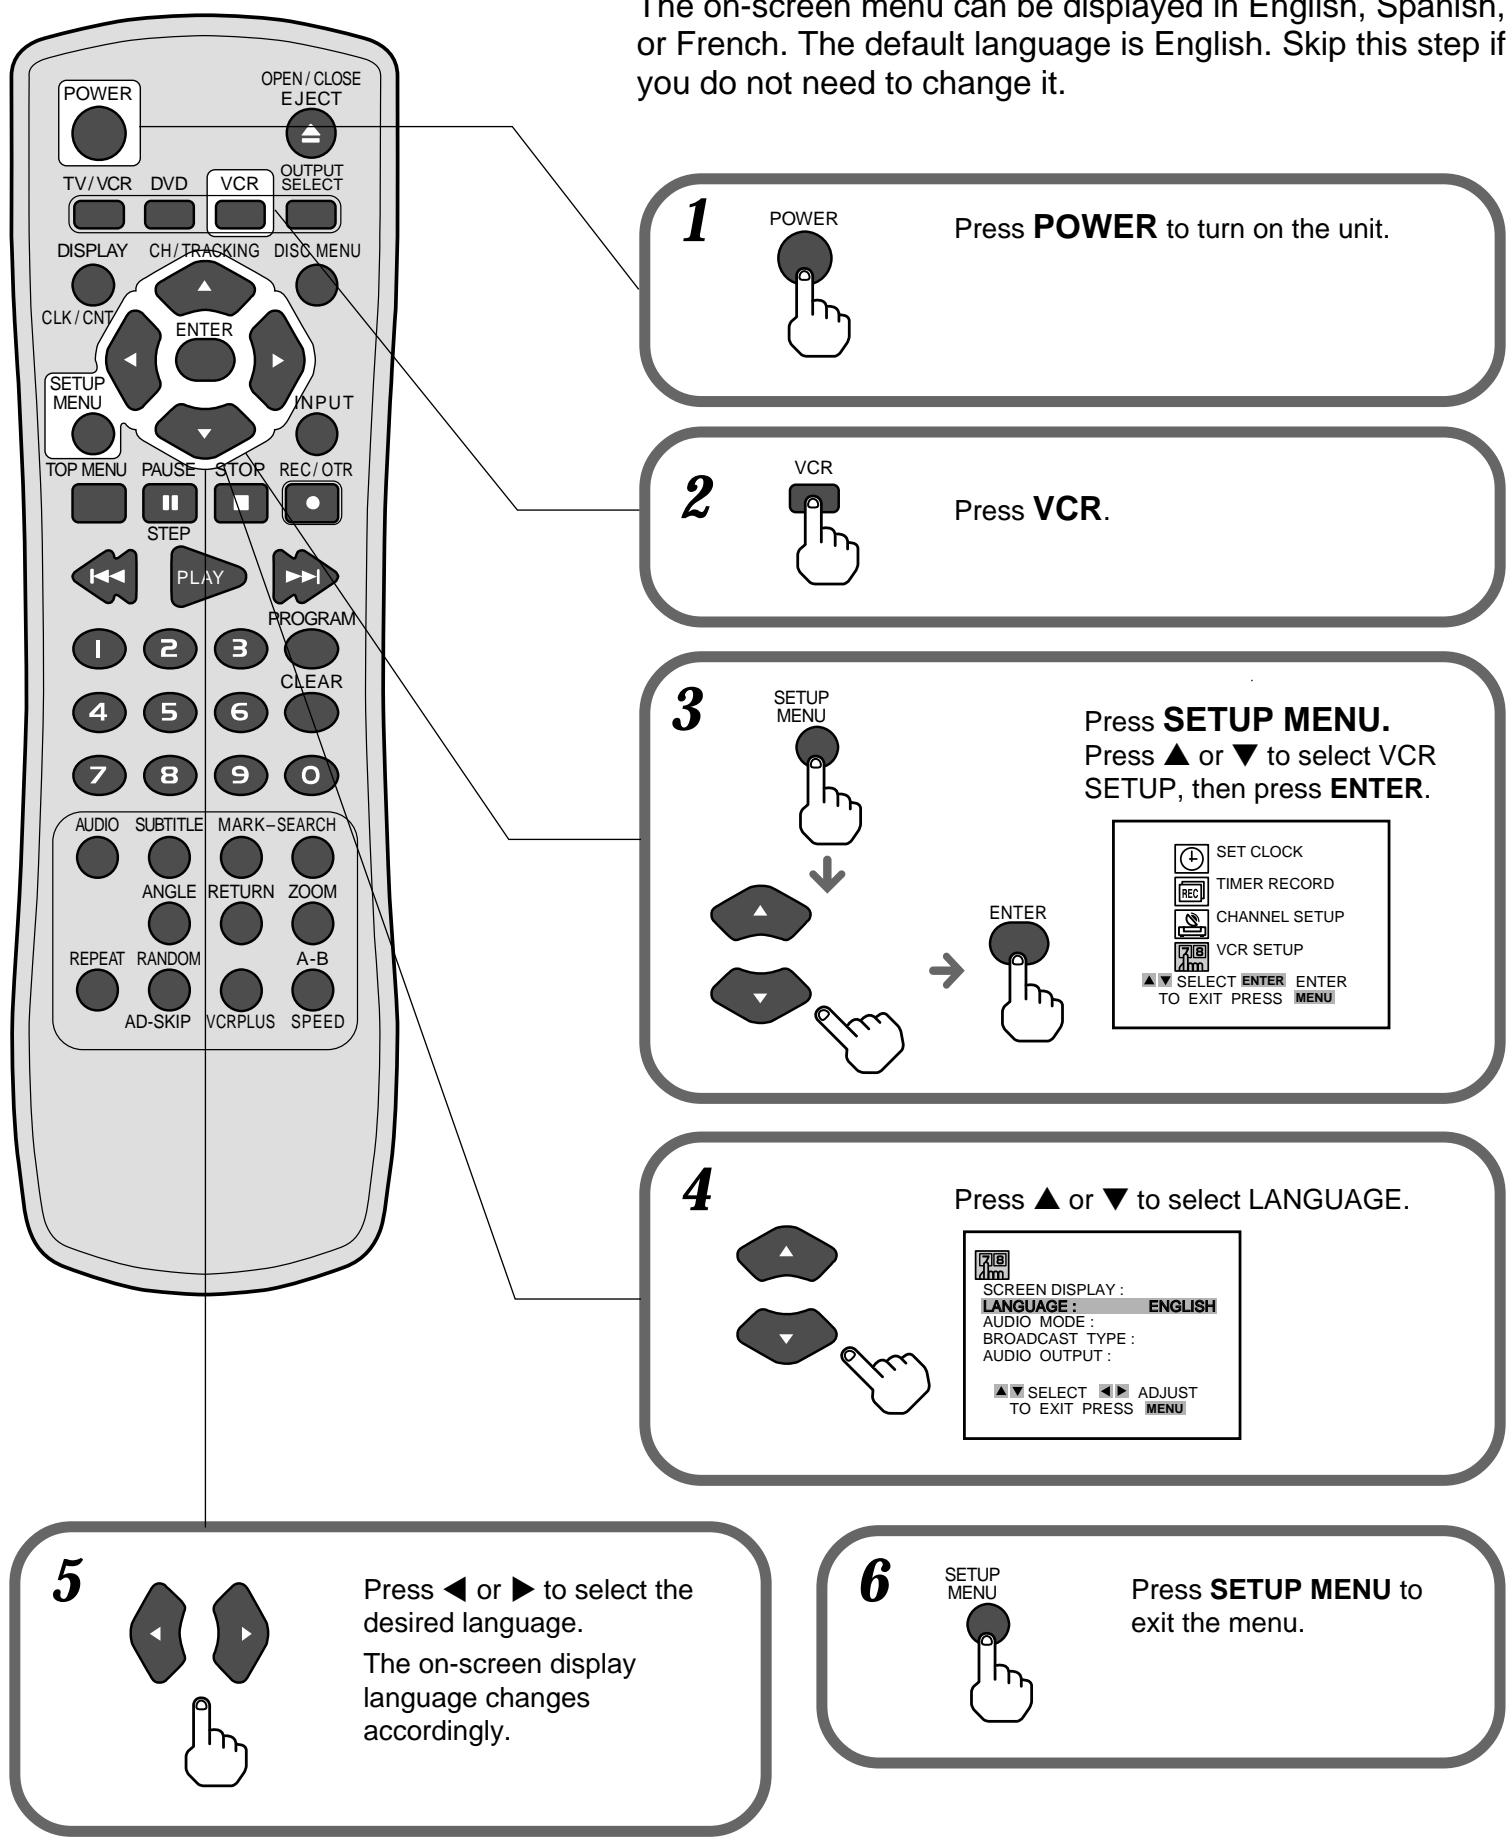
4
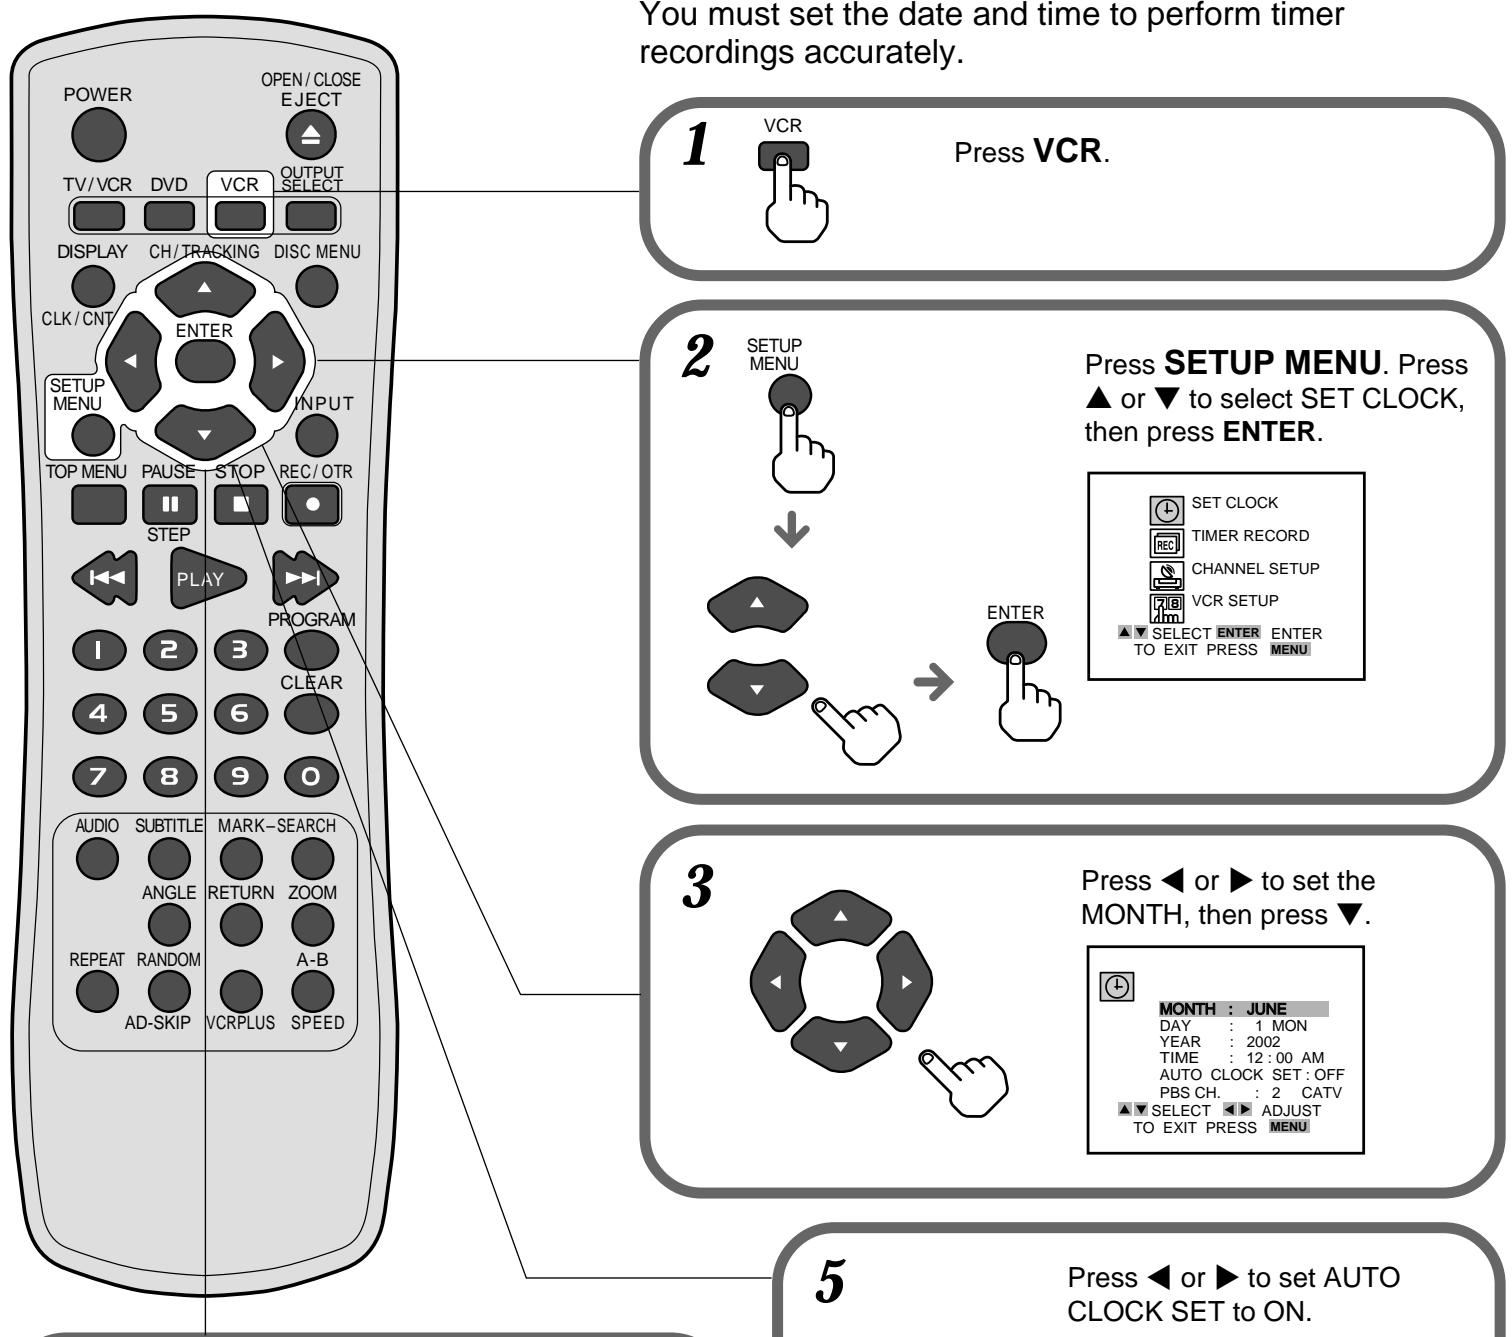
Setting the Clock
4
Press and hold or to change the setting rapidly.
Set DAY, YEAR, and TIME as in step 3.

MONTH : JUNE
DAY : 15 SAT
YEAR : 2002
TIME : 10:30 AM
AUTO CLOCK SET: OFF
PDS CH 0 GATV
PBSCH. 2 CATV
TO EXIT PRESS MENI
TO EXIT PRESS MENU

Press or to set AUTO CLOCK SET to ON.
Press , then press or to select the PBS channel for your area.
The VCR automatically corrects the clock setting once you set AUTO CLOCK SET to ON.

MONTH : JUNE
DAY : 17 SAT
YEAR : 2000
TIME : 10:30 AM
AUTO CLOCK SET!ON
1000
TO EXIT PRESS MENU
Press SETUP MENU to start the clock and exit the menu.
ETUP
MENU

6
5
Setting the VCR channels
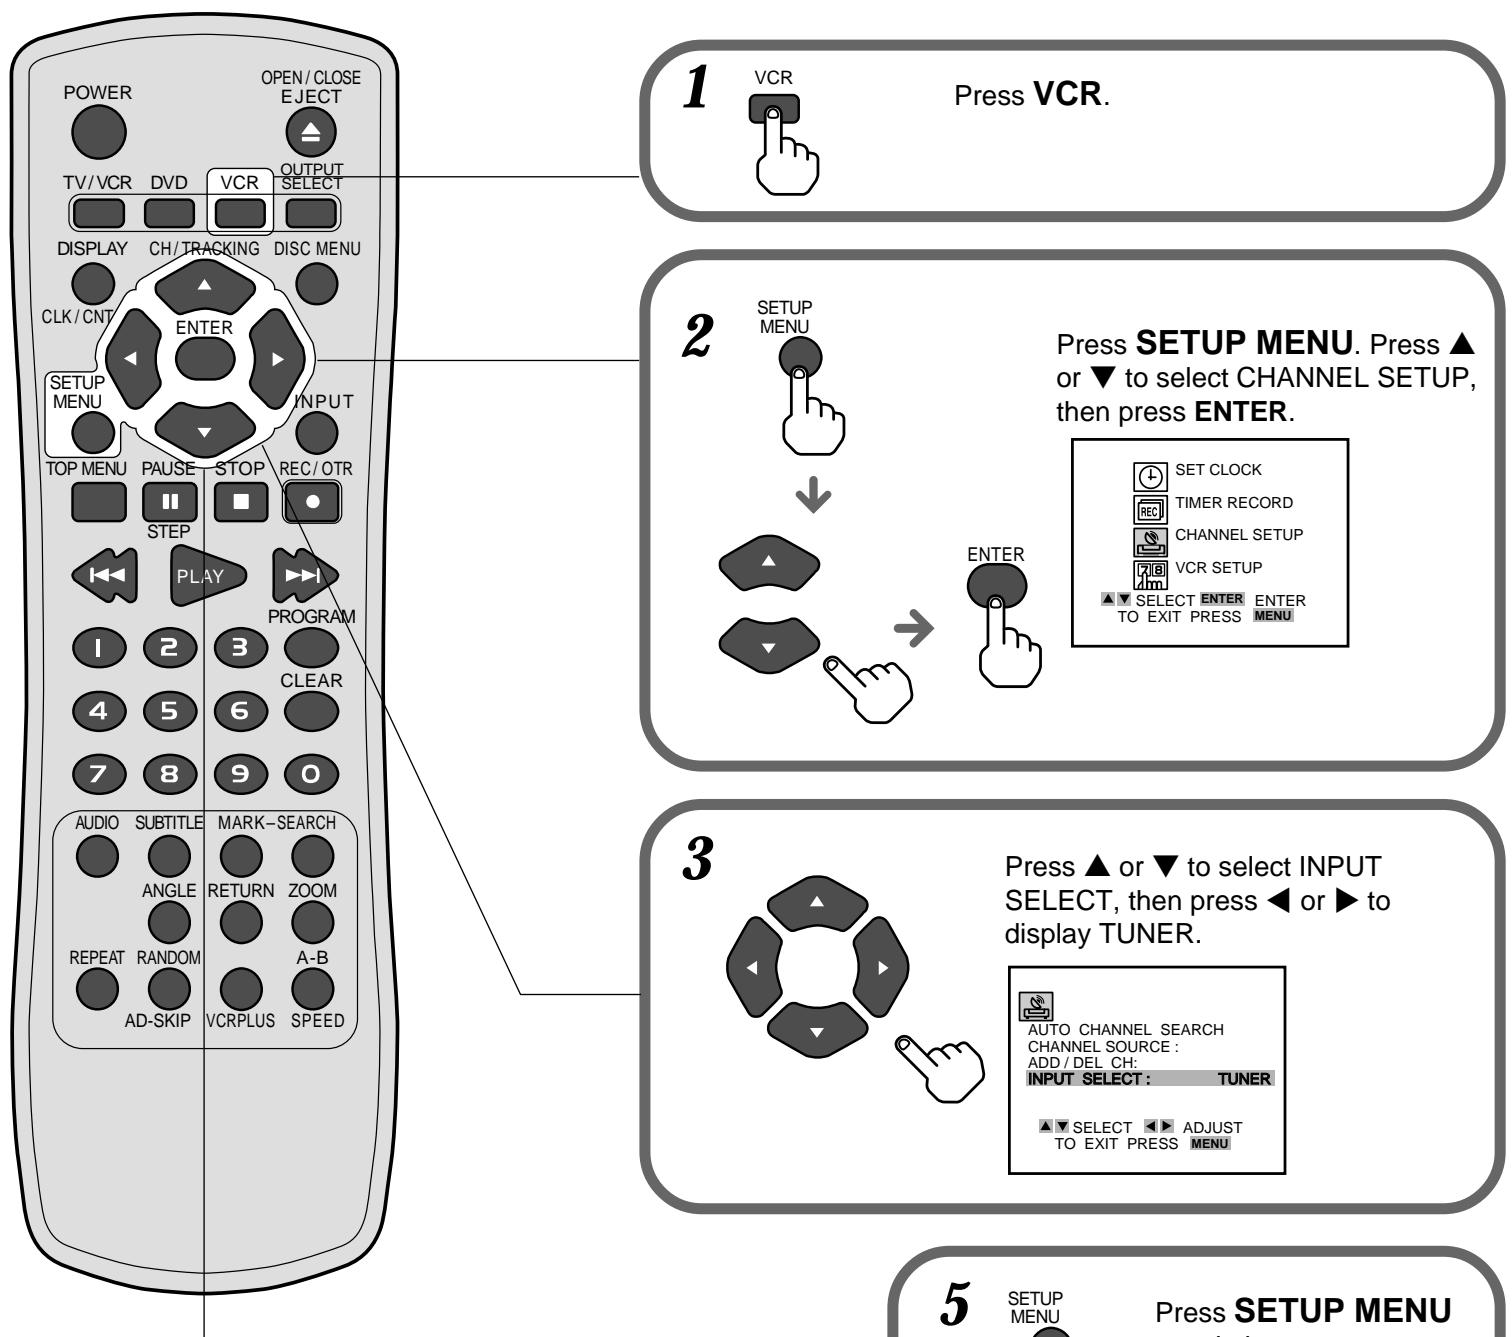
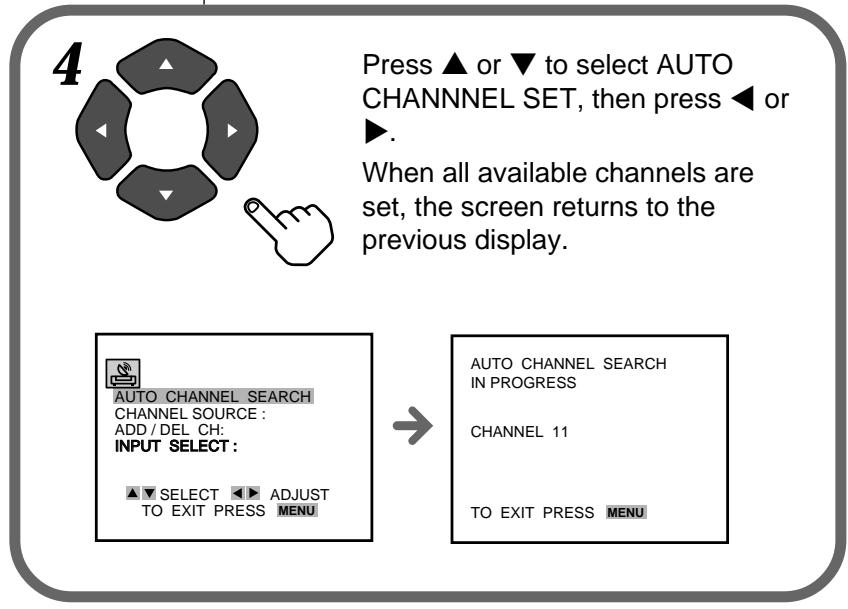

to exit the menu.
