
WS 1600 - Stazione Meteo ADE - Manuale utente e istruzioni gratuiti
Trova gratuitamente il manuale del dispositivo WS 1600 ADE in formato PDF.

| Tipo di prodotto | Stazione meteo con sensore esterno senza fili |
| Marca | ADE |
| Modello | WS 1600 |
| Alimentazione stazione base | 2 batterie LR6 (AA) 1,5 V o adattatore di rete 5 V (incluso) |
| Alimentazione sensore esterno | 2 batterie LR03 (AAA) 1,5 V |
| Frequenza radio | 433,92 MHz |
| Portata massima | Circa 60 metri in campo aperto |
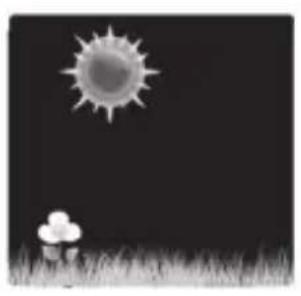
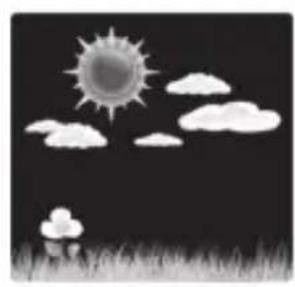
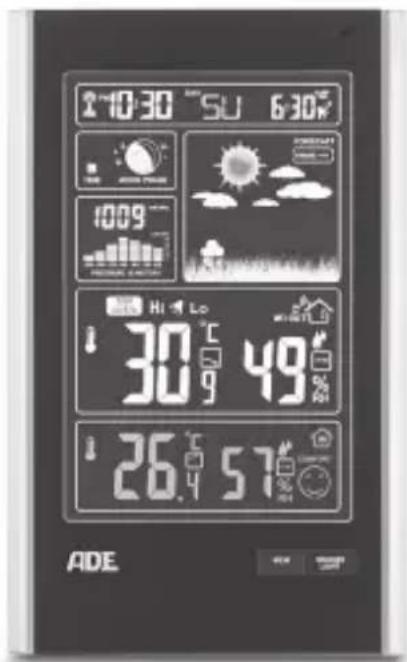
| Display | Data, ora, fasi lunari, maree, previsioni meteo, temperatura interna/esterna, umidità, pressione atmosferica |
| Funzioni di previsione | Previsioni su 12-24 h, tendenza pressione, temperatura, umidità |
| Funzione sveglia | Con snooze (5 min), spegnimento automatico dopo 2 min |
| Allarme temperatura | Regolabile |
| Memoria Min/Max | Temperatura e umidità delle ultime 24 ore |
| Retroilluminazione | Regolabile in intensità |
| Porta USB | Per ricarica di dispositivi (smartphone, ecc.) |
| Utilizzo previsto | Uso domestico, non per uso commerciale |
| Garanzia | 2 anni |
| Manutenzione | Pulire con un panno asciutto, proteggere dall'umidità e dalle temperature estreme |
| Sicurezza | Tenere fuori dalla portata dei bambini di età inferiore a 8 anni, non immergere |
Domande frequenti - WS 1600 ADE
Domande degli utenti su WS 1600 ADE
0 domanda su questo apparecchio. Rispondi a quelle che conosci o fai la tua.
Fai una nuova domanda su questo apparecchio
Scarica le istruzioni per il tuo Stazione Meteo in formato PDF gratuitamente! Trova il tuo manuale WS 1600 - ADE e riprendi in mano il tuo dispositivo elettronico. In questa pagina sono pubblicati tutti i documenti necessari per l'utilizzo del tuo dispositivo. WS 1600 del marchio ADE.
MANUALE UTENTE WS 1600 ADE
Wetterstation mit Funk-Außensor
Kurzanleitung WS 1600


Inhaltsverzeichnis
Lieferumfang 2
Bestimmungsgemäßer Gebrauch. 2
Sicherheit 3
Hinweise zum Aufstellort 4
Basisstation 5
Funk-AuBensenor 7
Inbetriebnahme. 8
Hauptfunktionen der Wetterstation 10
Technische Daten 15
Konformitätserklung 15
Garantie 16
Entsorgen 16
Diesist die Kurzanleitung.
Die ausfuhrliche Bedienungsanleitung zum Download als PDF-Datei finden Sie im Internet unter www.ade-germany.de/bedienungsanleitung Beachten Sie vor allem die Sicherheitshinweise.
Lieferumfang
Wetterstation bestehen aus:
-Basisstation
-Funk-Außensor
- Batterien:
-2 x LR6 (AA) für Basisstation
-2 x LR03 (AAA) / 1,5 V für Funk-Außensor
- Netzadapter für Basisstation
Bedienungsanleitung
Bestimmungsgemäßer Gebrauch
Die Wetterstation - bestehend aus Basisstation und Funk-Außensor - zeigt entsprechliche Wetterdaten (Luftdruck, Temperatur etc.) aus der tatsächlichen Umgebung an. Aus den gemessenen Wetterdaten ermittelt die Wetterstation eine Wettervorhorsage.
Die Wetterstation zeigt außer dem Datum, Uhrzeit und Mondphasen an und verfügt zusammen über eine Weckfunktion.
- Für die gewerbliche Nutzung in der Wettervorhorsage oder in der Wetterdaten-Messung ist die Wetterstation ungeeignet.
Sicherheit
Das Gerät und der Netzadapter sind von Kindern jüger als 8 Jahren fernzuhalten.
- KinderMUSSEN beaufsichtigt werden, um Sicherzustellen, dass sie nicht mit dem Gerät speilen.
- Funkwetterstation und Netzadapter)durfen nicht in Wasser oder andere Flüssigkeiten getaucht werden. Stromschlaggefahr! Benutzen Sie die Basisstation der FunkwetterstationDMAH auch nicht in der Nae von Feuchtquellen wie z.B. einem Waschbecken.
- Verwenden Sie nur den mitgelieferten Netzadapter und ersetzen Sieihn nur durch den gleichen Typ. Der Netzadapterarf nur in trockenen Innenräumen verwendet werden und muss vor Feuchtigkeit geschützt werden.
- Batterien können bei Verschlucken lebensgefährlich sein. Bewahren Sie Wetterstation, Funk-Außensensor und Batterien deshalb für Kleinkinder unerreichbar auf. Werde eine Batterie verschlukt, muss sofort medizinische Hilfe in Anspruch genommen werden.
- Halten Sie Kinder von Verpackungsmaterial und den zum Lieferumfang gehörenden Kleinteilen fern. Bei Verschlucken besteht Erstickungsgefahr.
- Schließen Sie das Gerät an eine ordnungsgemäß insellierte Steckdose an, deren Spannung den „Technischen Daten" entspricht.
- Achten Sie daraufuf, dass die Steckdose gut zugänglich ist, damit Sie im Bedarfsfall schnell den Netzadapterziehen können.
- Benutzen Sie die Funkwetterstation nicht, wenn Netzadapter oder Netzadapterkabel beschädigt sind.
- Achtung: Explosionsgefahr bei unsachgemäßem Umgang mit Batterien. Batterien dürfen nicht geladen, mit anderen Mitteln reaktiviert, auseinander genommen, ins Feuer geworfen oder kurzgeschlossen werden.
- Vermeiden Sie den Kontakt der Batterieflüssigkeit mit Haut, Augen und Schleimhäuten. Bei Kontakt müssen Sie die betroffenen Stellen sofort mit reichlich klarem Wasser spulen und umgehend einen Arzt aufsuchen.
Schützen Sie Basisstation und Funk-Außensensor von Staub, Stößen, extremen Temperaturen und direkter Sonneneinstrahlung.
Schützen Sie die Basisstation vor Feuchtigkeit. Stellen Sie die Basisstation ausschließlich in einem trockenen, geschlossenen Raum auf. - Der Funk-Außensensor ist gegen Feuchtigkeit geschützt, muss aber vor direkter Nässeeinwirkung, z. B. Regen, geschützt werden.
Hinweise zum Aufstellort
- Der maximale Abstand zwischen Basisstation und Funk-Außensor darf 60 Meter betragen.
Abschirmende Baumaterialien wie z. B. Stahlbeton reduzieren oder verhindern den Funkempfang zwischen Basisstation und Funk-Außensor. - Geräte wie Fernseher, Schnurlose Telefon, Computer und Leuchtstoffrähren können den Funkempfang ebenfalls stären.
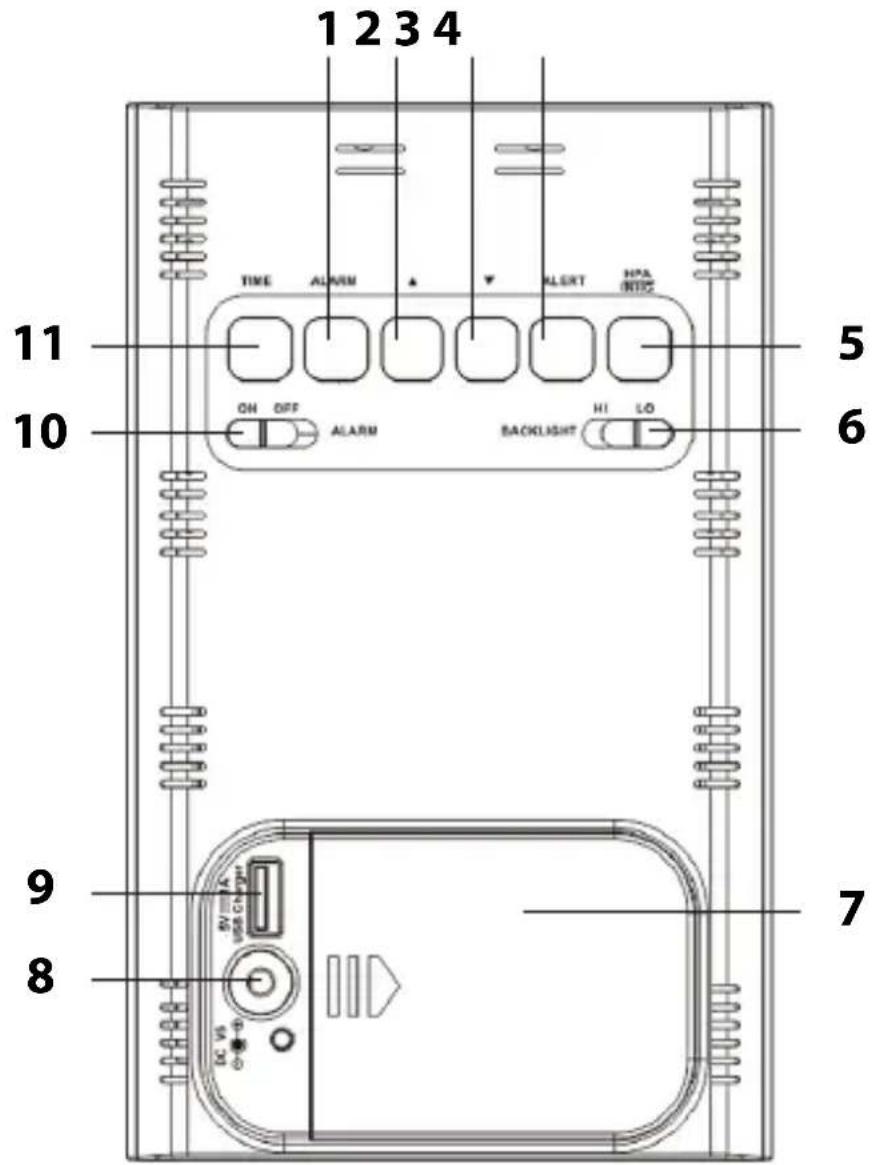
Basisstation
Frontansicht

1 siehe „Datumss- und Wochenanzeige
2 siehe „Wettervorhersage und Wettertrend"
3 siehe „Wetterdaten"
4 - Displaybeleuchtung ein- und ausschalten
- Weckwiederholfunktion aktivieren
5 gespeicherte MIN/MAX-Temperaturen anzeigen
6 siehe „Luftdruckanzeige"
7 siehe „Mondphasen- und Gezeitenanzeige"
Rückansicht
1 Weckzeit einstellen
2 Werte einstellen (erhohen)
Maßeinheit der Temperatur wechseln
3 Werte einstellen (verringern)
- Funkempfang manuell starten/unterbrechen
4 Temperaturalarm einstellen sowie ein- und ausschalten
5 Maßeinheit des Luftdrucksändern
6 Helligkeit der Displaybeleuchtung wahlen
7 Batteriefach
8 Anschlussbuchse für Netzadapter
9 Anschlussbuchse für USB zum Aufladen von externen Geräten (Smartphone, MP3-Player etc.)
10 Weckfunktion ein- und ausschalten
11 Datum und Uhrzeit manuell einstellen
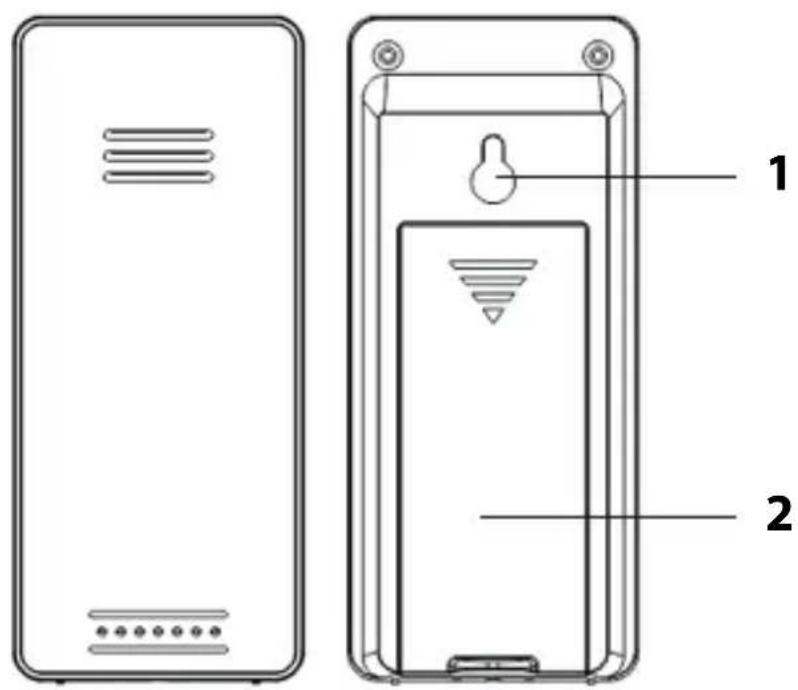
Funk-Außensensor
1 Aufhänge-Öse
2 Batteriefach

Gehen Sie in der aufgeführten Reihenfolge vor und legen Sie zuerst die Batterien in den Funk-Außensor.
Außensor
- Entfernen Sie die Batteriefach-Abdeckung auf der Rückseite des Außensensors, indem Sie mit etwas Kraft auf den aufgedruckten Pfeil drücken. Schieben Sie die Batteriefach-Abdeckung in Pfeilrichtung weg vom Außensor.
- Legen Sie 2 Batterien des Typs LR03 (AAA) / 1,5 V so ein, wie auf dem Boden des Batteriefachs abgebildet. Beachten Sie die richtige Polarität der Batterien (+/-).
- Schieber Ben Sie die Batteriefach-Abdeckung wieder in den Außensor.
Basisstation
Sie können die Funkwetterstation mit dem Netzadapter oder mit Batterien betreiben.
Ist die Funkwetterstation mit einer Steckdose verbunden, erfolgt der Betrieb über das Stromnetz, auch wenn Batterien im Geräte eingelegt sind. Entfernen Sie entladene Batterien aus dem Batteriefach, da diese auslaufen können.

HINWEIS vor Sachschaden
- Verwenden Sie ausschließlich den zum Lieferumfang gehörenden Netzadapter für den Betrieb über das Stromnetz.
Strombetrieb
- Stecken Sie den Stecker des mitgelieferten Netzadapters in die Anschlussbuchse der Basistation.
- Stecken Sie den Netzadapter in eine Steckdose deren Netzspannung den „Technischen Daten" entspricht.
- Warten Sie ca. 30 Minuten. These Zeit benötigt die Basisstation, um alle Wetterdaten zu}sammeln und Funksignale vom Zeitzeichensender zu erhalten.
Batteriebetrieb
- Drücken Sie mit etwas Kraft auf die Batteriefach-Abdeckung und schieben Sie sie zur Seite.
- Legen Sie 2 Batterien des Typs LR6 (AA) / 1,5 V so ein, wie auf dem Boden des Batteriefachs abgebildet. Achten Sie auf die richtige Polarität (+/-).
- Schieber den Sie die Batteriefach-Abdeckung wieder seitlich auf.
- Warten Sie ca. 30 Minuten. These Zeit benötigt die Basisstation, um alle Wetterdaten zu}sammeln und Funksignale vom Zeitzeichensender zu erhalten.
Funkempfang starten
Sobald die Basisstation mit Strom versorgt wird, werden für einen kurzen Moment sámttliche Anzeigen im Display eingebrendet. Außen dem wird das Display kurz beleucht und ein Piepton ertont.
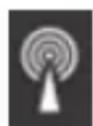
Danach schaltet das Gerät auf Empfang, wobei die Funkwellen-Anzahl die Qualität des Empfangs anziegt: Je mehr Funkwellen im Display angezeigt werden,esto better ist der Empfang.
Während des Empfangs hat ausschließlich die Taste Funktion, alle anderen Tasten sind für diese Zeit deaktiviert.
Sobald das Signal in ausreichender Stärke empfangen wurde, werden im Display die entsprechenden Daten und das Funkturm-Symbol dauerhaft angezeigt. Thiser Vorgang kann einige Minuten dauern.
Die Wetterstation schaltet ab sofort mehrmals in jeder Nacht automatisch auf Empfang. Dabei wird die angezeigte Zeit mit der vom Zeitzeichen-Sender empfangenenverglichen und ggf. korrigiert.
Wurde kein ausreichend starkes Signal empfangen, bricht die Basisstation nach einigen Minuten den Empfangsvorgang ab und das Funkturm-Symbol erlöscht. Der Empfangsvorgang wird zu einem späteren Zeitpunkt neu gestartet.
Hauptfunktionen der Wetterstation
Weitere Funktionen sind in der ausfuhrlichen Bedienungs-anleitung beschrieben.
Wettervorhersage und Wettertrend
Nach der Inbetriebnahme konnen die Angaben zur Wettervorhorsage etwa 12 Stunden noch nicht genutzt werden, da die Wetterstation diese Zeit benötigt, um die Wetterdaten zu}sammeln und auszuwerten. Die Wettervorhorsage ergibt sich aus den gesammelten Daten und den darauf gemessenen Luftdruckänderungen.
Die Vorhorsage bezieht sich auf das Gebiet um die Wetterstation mit einem Radius von etwa 30 bis 50 km für
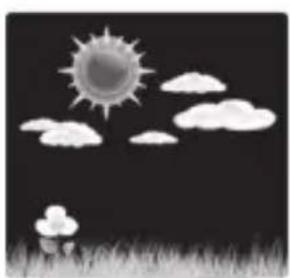
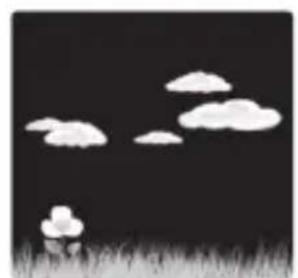
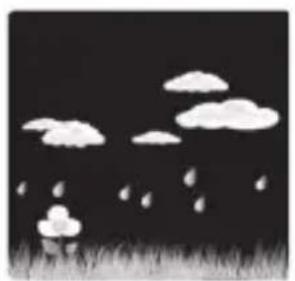
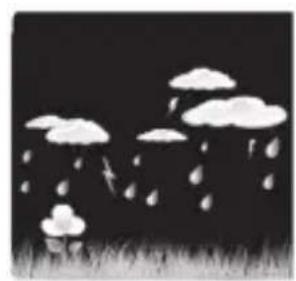
einen Zeitraum der{nachsten 12 bis 24 Stunden. Die Genaugigkeit der Wettervorhersage liegt bzw.bei etwa bei 75%
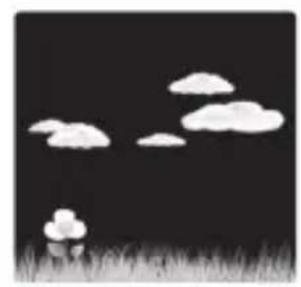
sonnigleichtbewölktbewölkt
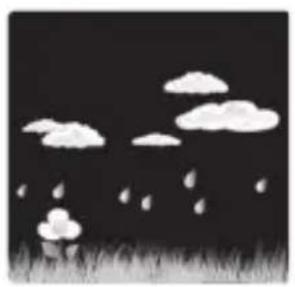

regnerisch starker Regen Schnefall
In Verbindung mit dem Luftdrucktrend sind weitere Wetterdeutungen möglich.
steigender Luftdruck
konstanter Luftdruck

fallender Luftdruck
Zwei Beispiele:
Wettervorhersage zeigt Regen, der Luftdruck fällt schnell und stark ab >> starker Regen ist wahrscheinlich.
- Wettervorhersage zeigt Regen, der Luftdruck ist in den letzten 12 Stunden gestiegen aber in den letzten 3 Stunden wieder etwas abgefallen >> leichter Regen ist wahrscheinlich.
Temperatur- und Luftfeuchtgkeitenstrend
Für die von Basisstation und Funksensor gemessenen Werte für Temperatur und Luftfeuchtigkeit wird der Trend in Form eines Pfeils angezeigt:

steigend

konstant

fallend
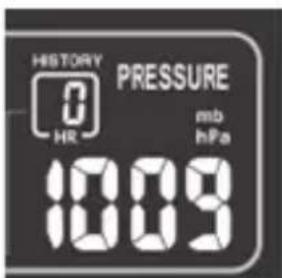
Luftdruckanzeige
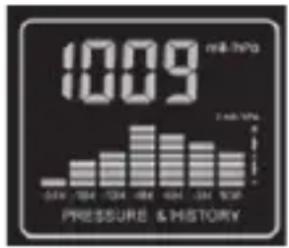
Das der aktuell herschende Luftdruck wird in der gewählten Maß einheit (üblich: hPa = Hektopascal) angezeigt.
Außerdem wird ein Luftdruck-Histogramm der letzten 24 Stunden angezeigt.
Gespeicherte Wetterdaten
Mit der Taste MEM erhalten Sie die höchsten und geringsten Werte der letzten 24 Stunden in Bezug auf Temperatur und Luftfeuchtigkeit angezeigt.
1x drucken: MAX-Werte werden angezeigt
2x drucken: MIN-Werte werden angezeigt
3x drucken:normale Display-Anzeige
Um die gespeicherten Werte zu Löschen:
-Halten Sie die Taste MEM ca. 2 Sekunden gedrückt, bis die angezeigten Werte gelöscht sind.
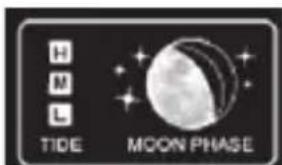
Mondphasen- und Gezeitenanzeige
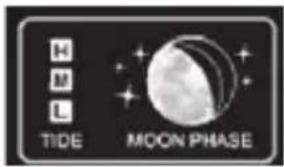
Die angezeigten Mondphasen sowie die Gezeiten (Tide) werden automatisch mit dem Datumactualisiert.


Neumond zunehmender Halbmond
Halbmond
zunehmenderVollmond


Vollmond abnehmender
Vollmond
Halbmond
abnehmender Halbmond
Gezeitenanzeige:
- H = Flut
M = Mittlere Tide - L = Ebbe
Wecken
Weckzeit einstellen
- Halten Sie ALARM einige Sekunden gedrückt, bis die Weckstunden-Anzeige blinkt und ALARM TIME eingeblendet wird.
- Stellen Sie mit den Tasten ▲ oder ▼ie gewünschte Weckstunde ein.
-
Drücken Sie ALARM. Im Display blinkt die Minutenanzeige für die Weckzeit.
-
Stellen Sie mit den Tasten ▲der die gewünschte Weckminute ein.
- Drücken Sie abschlussend ALARM, um die Einstellungen zu speichern.
Weckfunktion ein- und ausschalten
- Stellen Sie mit Schieberegler ALARM die Weckfunktion ein und aus (ON/OFF).
Sobald das Wecksymbol angezeigt wird, ist Weckfunktion aktiviert.
Weckalarm beenden
Zur eingestellt den Zeit werden Sie von einem Wecksignal geweckt, wobei das Signal mit zunehmender Weckdauer immer intensiver wird.
Weckalarm ganz ausschalten
- Drücken Sie eine beliebige Taste der Basisstation (außer SNOOZE/LIGHT), um den Alarm zu beenden.
Autostopp-Funktion
Wenn Sie keine Taste drücken, schaltet sich der Alarm nach 2 Minuten automatisch aus. Nach 24 Stunden wird der Alarm erneut ausgelöst.
Weckwiederholung (Snoopze-Funktion)
- Drücken Sie 1x die Taste SNOOZE/LIGHT, wenn das Wecksignal ertönt.
Das Wecksignal verstummt und im Display blinkt und Z^z . Nach ca. 5 Minuten schaltet sich das Gerät wieder ein und weckt Sie erneut. Diese Vorgang kann mehrfach wiederholt werden.
Technische Daten
Die vollständigen „Technischen Daten" finden Sie in der ausfuhrlichen Bedienungsanleitung.
Basisstation
Modell: Wetterstation WS 1600
Eingang: 5 V
Batterien: 2x LR6 (AA) / 1,5 V
Sendefrequency: 433, 92 MHz
Max. Sendeleistung: +10 dBm
Funk-Außensor
Batterien: 2x LR03 (AAA) / 1,5 V
Reichweite: ca. 60 Meter (offenes Gelände)
Netzadapter
Eingang: 230V ,50Hz
Ausgang: 5 V
Schutzklasse:
Inverkehrbringer: Waagen-Schmitt GmbH
Hammer Steindamm 27-29
22089 Hamburg, Germany
Konformitätserklärung
Hiermit erklärt die Waagen-Schmitt GmbH, dass die Wetterstation WS 1600 den Richtlinien 2014/53/EU und 2011/65/EU entspricht. Der vollständige Text der EU-Konformitätserklärung ist unter der folgenden Internetadresse verfügbar: www.ade-germany.de/doc
Die Erklärung verliert ihre Gültigkeit, falls an dem Geräte eine nicht mit uns abgestimmte Änderung vorgenommen wurde.
Hamburg, Januar 2018
Waagen-Schmitt GmbH
Hammer Steindamm 27-29
22089 Hamburg, Germany

Garantie
Sehr geehrte Kundin, sehr geehrter Kunde,
die Firma Waagen-Schmitt GmbH garantiert für 2 Jahre ab Kaufdatum die kostenfreie Behebung von Mangeln aufgrund Material- oder Fabrikationsfehlern durch Reparatur oder Austausch.itte geben Sie den Artikel im Garantiefall mit dem Kaufbeleg (unter Angabe des Reklamationsgrundes) an ihren Handler zurück.
Entsorgen
Verpackung entsorgen

Entsorgen Sie die Verpackung sortenrein.
Geben Sie Pappe und Karton zum Altpapier,
Folien in die Wertstoff-Sammlung.
Articlelentsorgen
Entsorgen Sie den Antikel entsprechend der Vorschriften, die in ihrem Land gelten. Die vollständige Entsorgungshinweise finden Sie in der ausfuhrliche Bedienungsanleitung.
Weather Station with Wireless Outdoor Sensor
Quick Guide WS 1600
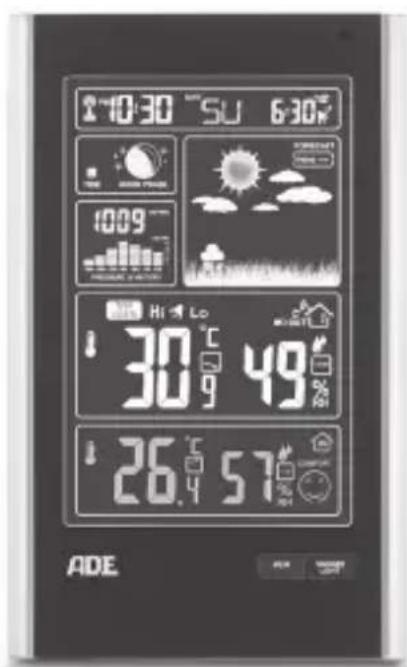


Table of Contents
Scope of delivery 2
Intended Use 2
Safety 3
Tips on installation site. 4
Base station 5
Wireless outdoor sensor 7
Start-up 8
Main functions of the weather station 10
Technical Data 14
Declaration of Conformity 15
Guarantee 16
Disposal. 16
This is the quick guide.
You will find the full operating manual for download as a PDF file on the internet at www.ade-germany.de/bedienungsanleitung Above all, pay attention to the safety instructions.
Scope of delivery
- Weather stations consist of:
-Base station
-Wireless outdoor sensor - Batteries:
-2 x LR6 (AA) for base station
-2 x LR03 (AAA)/1.5 V for wireless outdoor sensor - Mains adaptor for base station
- Operating Manual
Intended Use
- The weather station – consisting of a base station and wireless outdoor sensor – displays various weather data (air pressure, temperature, etc.) pertaining to the near environment. The weather station makes a weather forecast on the basis of the measured weather data.
- Furthermore, the weather station displays the date, time, and lunar phases and is also equipped with an alarm.
- The weather station is unsuited to commercial use in weather forecasting or in taking meteorological measurements.
Safety
- The device and the mains adaptor must be kept away from children younger than 8 years.
- Children must be supervised to ensure that they do not play with the device.
- The wireless weather station and mains adaptor must not be submerged in water or other liquids. Risk of electric shock! You should therefore not use the base station of the wireless weather station in the vicinity of sources of moisture, such as wash basins.
- Only use the supplied mains adaptor and replace it only with one of the same type. The mains adaptor may only be used in dry indoor spaces and must be protected from moisture.
- Batteries, when swallowed, can be life-threatening. You should therefore store the weather station, wireless outdoor sensor, and batteries out of reach of small children. If a battery is swallowed, medical assistance must be sought immediately.
- Keep children away from packaging material and other small parts included in the scope of delivery. Risk of choking if swallowed.
- Connect the device to a correctly installed socket that has a voltage corresponding to that described under "Technical Data".
- Ensure that the socket is easily accessible, so that the mains adaptor can be pulled out quickly if necessary.
-
Do not use the wireless weather station if the mains adaptor or mains adaptor cable are damaged.
-
Attention: Risk of explosion if batteries are improperly used. Batteries must not be recharged, reactivated by other means, dismantled, thrown into fire, or short-circuited.
- Avoid contact of the battery fluid with skin, eyes, and mucosa. If you do come into contact with the fluid, you must immediately flush the affected areas thoroughly with clean water and promptly see a doctor.
- Protect the base station and wireless outdoor sensor from dust, impacts, extreme temperatures and direct sunlight.
- Protect the base station from moisture. Position the base station exclusively in a dry, closed room.
- The wireless external sensor is protected against moisture, it must however be protected from direct exposure to moisture, e.g. rain.
Tips on installation site
- The maximum distance between base station and wireless outdoor sensor is 60 metres. ("direct line-of-sight").
- Protective building materials, e.g. reinforced concrete, reduce or inhibit signal reception between the base station and wireless external sensor.
Devices such as TVs, cordless phones, computers, and fluorescent tubes can likewise disrupt signal reception.
Base station
Front view
1 see "Date and week indicator"
2 see "Weather forecast and weather trend"
3 see "Weather data"
4 • Switch display light on/off
- Activate snooze function
5 Display saved MIN/MAX temperatures
6 see "Air pressure indicator"
7 see "Lunar phase and tide indicator""
Rear view
1 Setting the alarm time
2 - Adjust values (increase)
- Change temperature unit
3. Adjust values (decrease)
- Manually start/suspend signal reception
4 Set temperature alarm and turn it on and off
5 Change air pressure unit
6 Select brightness of display light
7 Battery compartment
8 Connection socket for mains adaptor
9 USB socket for charging of external devices (smartphone, MP3 player, etc.)
10 Switching the alarm function on/off
11 Manually set date and time
Wireless outdoor sensor
1 Hanging eyelet
2 Battery compartment

Proceed according to the order listed below and first insert the batteries into the wireless outdoor sensor.
Outdoor sensor
- Remove the battery compartment cover on the rear side of the outdoor sensor by pressing with a little force on the imprinted arrow. Slide the battery compartment cover in the direction of the arrow, away from the outdoor sensor.
- Insert 2 batteries of type LR03 (AAA)/1.5 V as depicted on the bottom of the battery compartment. Pay attention to the correct polarity of the batteries (+/-).
- Slide the battery compartment cover back into place on the outdoor sensor.
Base station
You can operate the wireless weather station with the mains adaptor or with batteries.
If the wireless weather station is connected to a mains socket, then it operates via mains power, even when the batteries are inserted in the device. Remove discharged batteries from the battery compartment, since they can leak.

NOTE on material damage
- For operation via mains power, use only the mains adaptor delivered with the weather station.
Current mode
- Insert the plug of the supplied mains adaptor into the connection socket of the base station.
- Plug the mains adaptor into a socket that has a voltage corresponding to that described under "Technical Data".
- Wait approx. 30 minutes. The base station requires this time to collect all weather data and to receive radio signals from the time signal transmitter.
Battery operation
- With some force, press on the battery compartment cover and slide it to the side.
- Insert 2 batteries of the type LR6 (AA)/1.5 V as depicted on the bottom of the battery compartment. Pay attention to the correct polarity (+/-) .
- Then slide the battery compartment cover back into place.
- Wait approx. 30 minutes. The base station requires this time to collect all weather data and to receive radio signals from the time signal transmitter.
Starting signal reception
As soon as the base station is supplied with current, all of the indicators on the display will fade in for a brief moment. Furthermore, the display is briefly lit up and a beep sounds.
The device then switches to receiving-mode, during which the number of radio waves indicates the quality of the reception: The more radio waves shown on the display, the better is the reception.
While receiving, only the button functions; all other buttons are deactivated during this time.
As soon as the signal has been received with sufficient strength, the corresponding data and the radio-tower symbol will be shown on the display. This process can last a few minutes.
From now on, the weather station automatically switches to receiving-mode multiple times each night. During this process, the displayed time is compared with that received from the time signal transmitter and, if necessary, corrected.
If no sufficiently strong signal has been received, the base station aborts the receiving process after a few minutes and the radio-tower symbol goes out. The receiving process is started again at a later point in time.
Main functions of the weather station
Additional functions are described in the full operating manual.
Weather forecast and weather trend
After start-up, the information can still not be used for weather forecasting for approximately 12 hours, since the weather station needs this time to collect and analyse the weather data. The weather forecast is based on the collected data and the measured air pressure changes.
The forecast pertains to the region around the weather station with a radius of approx 30 to 50km , for a period of 12 to 24 hours. The accuracy of the weather forecast lies around 75% .
sunny light cloud cloudy
rainy heavy rain snowfall
In conjunction with the air pressure trend, further weather interpretations are possible.

rising air pressure

constant air pressure

falling air pressure
Two examples:
- Weather forecast shows rain, the air pressure is falling off quickly and steeply >> strong rain is probable.
- Weather forecast shows rain, the air pressure has risen in the last 12 hours but in the last 3 hours as fallen off somewhat >> light rain is probable.
Temperature and humidity trend
For the temperature and humidity values measured by the base station and wireless sensor, the trend is displayed in the form of an arrow:

rising
constant

falling
Air pressure indicator
The currently prevailing air pressure is displayed in the chosen unit (usually: hPa = hectopascals).
Furthermore, an air pressure histogram for the last 24 hours is displayed.
Saved weather data
Using the MEM button, you will get the highest and lowest temperature and humidity values for the last 24 hours displayed.
- Press 1x: MAX values are displayed
- Press 2x: MIN values are displayed
- Press 3x: normal display indicator
In order to delete the saved values:
- Press and hold the MEM button for approx. 2 seconds until the displayed values are deleted.
Lunar phase and tide indicator
The displayed lunar phases as well as the tides are automatically updated with the date.


new moon waxing crescent half-moon
waxing gibbous


full moon waning gibbous half-moon
waning crescent
Tide indicator:
- H = High tide
M = Mid tide - L = Low tide
Comfort indicator
The comfort indicator is based on the temperature and humidity and is displayed in the form of a smiley:

Alarm
Setting the alarm time
- Press and hold ALARM for a few seconds until the alarm hours indicator blinks and ALARM TIME fades in.
- Using the + and - buttons, set the desired alarm hour.
- Press ALARM. The minute indicator for the alarm time blinks on the display.
-
Using the + and - buttons, set the desired alarm minute.
-
Finally, press ALARM to save the settings.
Switching the alarm function on/off
-Using the ALARM slide control, turn the alarm function on and off (ON/OFF).
As soon as the alarm symbol is displayed, the alarm function is activated.
Stopping the alarm
At the set time you will be woken by an alarm signal, which will become more intense as the waking time increases.
Switching the alarm off completely
- Press any button on the base station (except SNOOZE/ LIGHT) to stop the alarm.
Auto-stop function
If you do not press a button, the alarm switches off automatically after 2 minutes. After 24 hours, the alarm will be triggered again.
Snoopze function
- Press the SNOOZE/LIGHT button once when the alarm signal sounds.
The alarm signal goes silent and and Z^z flash on the display. The alarm signal falls silent for approx. 5 minutes.
Then the device switches back on and the alarm sounds again. This procedure can be repeated multiple times.
Technical Data
You will find all of the "Technical Data" in the full operating manual.
Base station
Model: Weather Station WS 1600
Input: 5V
Batteries: 2x LR6 (AA) / 1.5 V
Transmission frequency: 433, 92 MHz
Max. Transmission power: + 10 dBm
Wireless outdoor sensor:
Batteries: 2x LR03 (AAA) / 1.5 V
Range: approx. 60 metres (open terrain)
Mains adaptor
Input: 230 V 50Hz
Output: 5 V
/1.5A
Protection class:

Distributor: Waagen-Schmitt GmbH
Hammer Steindamm 27-29
22089 Hamburg, Germany
Declaration of Conformity
Waagen-Schmitt GmbH hereby declares that the weather station WS 1600 complies with the directives 2014/53/EU and 2011/65/EU.
The full text of the EU Declaration of Conformity is available at the following Internet address:
www.adegermany.de/doc.
This declaration loses its validity if modifications are made to the weather station without our approval.
Hamburg, January 2018
Waagen-Schmitt GmbH
Hammer Steindamm 27-29
22089 Hamburg, Germany
CE
Guarantee
Dear Valued Customer,
The company Waagen-Schmitt GmbH guarantees for 2 years from the purchase date the cost-free rectification of defects on the basis of material or fabrication errors through repair or exchange.
In the event of a guarantee claim, please return the product with the proof of purchase (stipulating the reason for claim) to your dealer.
Disposal
Disposing of the packaging

Dispose of the packaging with similar materials. Put cardboard with waste paper, films with recyclable materials.
Disposing of the weather station
Dispose of the weather station in accordance with the regulations that apply in your country.
You will find complete information about disposal in the full operating manual.
Estación meteorológica con sensor inalámbrico exterior
Guía=rápidaWS1600


Índice
Articulos incluidos en la entrega 2
Uso adequado. 2
Seguridad 3
Indicaciones sobre el lugar de colocacion.......4
Estación base 5
Sensor exterior inalámbrico 7
Puesta en funciona. 8
Funciones principales de la estacion meteorologica. 10
Datos技术和. 15
Declaración de conformidad. 15
Garantía 16
Eliminación 16
Esta es la guía
En Internet encontrará el manual de instructuciones detallado paradescending en formatting PDF enwww.ade-germany.de/bedienungsanleitung
Tenga en cuenta sobre todo lasindicaciones de seguidad.
Artículos incluidos en la entrega
Las estaciones meteorologicas constan de:
-Estación base
-Sensor exterior inalámbrico
Pilas:
-2 x LR6 (AA) para la estación base
-2 x LR03 (AAA)/1,5 V para el sensor exterior inalámbrico
Adaptador de red para la estación base
- Manual de funciona
Uso adequado
- La estación meteorológica, consta de una estación base ym el sensor inalámbrico para exteriores, muestra various datos meteorológicos (presión de aire, temperatura, etc.) relacionados con el entorno(PRXSIMO. La estación meteorológica realiza un pronóstico del tiempo sobre la base de los datos meteorológicos medidos.
- Por otra parte, la estación meteorológica muestra la Fecha, la hora y las fases lunares y, también está equipo-pado con una alarma.
- La estación meteorológica no es adequúa para su uso comercial en la predicción del tiempo o en la toma de medicaciones meteorológicas.
Seguridad
- El equipo y el adaptor de red deben mantenerse alejados de los niños menos de 8 años.
- Debe vigilar que los niños no juguen con el equipo.
- La estación meteorológica inalámbrica y el adaptador de red no deben sumergirse en agua ni en ningún除外 liquido. Riesgo de descarga electrica! Por tanto no utilizes la base de la estación meteorológica inalámbrica cerca de fuentes de humedad como por ejemplo lavabos.
- Utilice únicamente el adaptor de red suministrado y sustitúyalo por otro del mesmo tipo. El adaptor de red soloDebe utiliser en espacios interiores secs y deben protegerse contra la humedad.
Las pilas peuvent suponer un peligro de muerte si se ingieren. Por tanto, mantenga la estación meteorológica, el sensor inalámbrico exterior y las pilas fuera del alcance de los niños. Si se ingiere una pila, deben acudir inmediamente en busca de asistencia Médica.
- Mantenga la los niños alejados del material de embalaje y de las piezas pequeñas contentsas en el material suministrado. Existe el riesgo de asfixia por ingestión.
- Conecte el dispositivo a un enchufe correctamente instalado con la tension españica en los " datos技术和icos".
- Preste atencion a que el enchufe sea accesible para que, en caso necessario, poder tirarrapidamente del adaptorador de red.
- No utilise la estación meteorológica inalámbrica si el adaptador de red o su cable está danados.
- Atencion: Existe riesgo de explosión debido a la incorrecta Manipulación de las pilas. Las pilas no deben cargarse, reactivarse con otros medios, desmontarse,arrojarse al fuego o ponerse en cortocircuito.
- Evite el contacto del liquido de las pilas con la piel, ojos y mucosas. En caso de contacto, deben limpiarse inmediamente la zona afectada con agua limpia y acudir al medico sin perdida de tiempo.
Proteja la base y el sensor exterior inalámbrico del polvo, los golpes, las temperatas extremas y La exposión directa al sol.
Proteja la estación base de la humedad. Coloque la base exclusivamente en un espacio cerrado y seco.
- El sensor exterior inalámbrico está protegido contra la humedad, pero debe evitarse que se moje directamente, como por ejemplo por la lluvia.
Indicaciones sobre el lugar de colocacion
- La distancia Tmaxima entre la base y el sensor inalámbrico debe ser de 60 metros. ("contacto visual directo")
- Los materiales de construcción que tienen efecto de apantallamiento, como por exemple el hormigón armado, reducen o impiden la Reception de la seals entre la base y el sensor exterior inalámbrico.
- Los aparatos comoTelevisores,telefonosinalambricos,ordenadores y tubos fluorescentes, poderen interferir en la recepcion de la seals.
Estación base
Vista delantera

1 vea "Indicador de Fecha ymana"
2 vea "Pronóstico meteorológico y de tendencia del clima"
3 vea "Datas meteorológicos"
4 Encender/apagar la luz de la pantalla
- Activar funciona de repetición
5 indicator de temperatas MIN/MAX guardadas
6 vea "Indicador de presión de aire"
7 vea "Indicador de fases lunares y mareas"
Vista trasera

1 Ajustar hora de alarma
2 • Ajuste de values (aumento)
- Cambiar unidades de temperatura
3 · Ajuste de values (disminución)
- Iniciar/interrumpir la recepción inalámbrica
4 Ajustar alarmade temperatureyconexionydesconexion
5 Modificar unidades de medida de presión atmósferica
6 SeLECTIONAR intensidad de iluminacion de la pantalla
7 Compartimiento de las pilas
8 Toma de connexion para adaptor de red
9 Conector USB para entrega de dispositivos externos (smartphone, reproductor MP3, etc)
10 Conectar y desconectar la funciona descentador
11 Ajustar manualmenteecha y hora
Sensor exterior inalámbrico

1 Ojete colgante
2 Compartimiento de las pilas

Siga la secuencia indica y coloque en primer lugar las pilas en el sensor exterior.
Sensor exterior
1. Retire la tapa del compartmento de las pilas en la parte posterior del sensor exterior presionando con un poco de fuerza en la flecha impresa. Deslice la tapa del compartmento de las pilas en la direccion de la flecha, lejos del sensor exterior.
2. Inserte 2 pilas de tipo LR03 (AAA)/1,5 V como se muestra en la parte inferior del compartmento de las pilas. Preste atencion a la polaridad correcta de las pilas (+ / - )
3. Deslice la tapa del compartmento de las pilas en su lugar en el sensor exterior.
Estación base
Se pueda usar la estación meteorológica inalámbrica con el adaptor de red o con pilas. Si la estación meteorológica inalámbrica está connectada a una toma de corriente, entonces funciona a工程技术 de la red electrica, incluso cuando se insertan las pilas en el dispositivo. Retire las pilas descargas del compartmentimiento de las pilas, ya que podráan tener fugas.

NOTA sobre los daños materiales
- Para su uso atramés de la red electrica,utilice unicamente el adaptador de corriente suministrado con la estación meteorológica.
Modo actual
1. Inserte el enchufe del adaptordo de corriente suministrado en la toma de connexion de la estacion base.
2. Enchufe el adaptor de corriente a una toma queonga una tensión correspondiente a la descririta en los "Datas技术和icos".
3. Espere aproximadamente 30 Minutes. La estación base requires this time to recopilar todos los datos del tiempo y recibir señales de radio desde el transmisor de signaled horaria.
Funcionamento con pilas
1. Presione con fuerza la tapa del compartmente de las pilas y desplácela hacía elazo.
2. Inserte 2 pilas del tipo LR6 (AA)/1,5 V como se muestra en la parte inferior del compartmento de las pilas. Preste atencion a la polaridad correcta (+ / - )
3. Vuelva a colocar nuevomente en su situ lo tapa del compartmente de las pilas.
4. Espere aproximadamente 30 Minutes. La estación base requires this time to recopilar todos los datos del tiempo y recibir señales de radio desde el transmisor de signaled horaria.
A partir de la Reception de la seals
Cuando la estación base recibe corriente, se iluminan en la pantalla todos losindicadores durante un momento. Adejas,la pantalla se ilumina brevamente y suena un pitido.

Entonces el dispositivo cambia a modo de recepción, durante elrial número de ondas de radio indica la calidad de la recepción: Cuantas más ondas de radio aparecen en la pantalla, mejor es la recepción.
Durante la Reception, solo las functions de los botones todos losREMAs botones se desactivan durante este tiempo.
Tan primo como se reciba una señal con suficiente intensidad, aparecen los datos correspondientes y el símbolo de la torre de radio en la pantalla. Este proceso puede tardar uno horas.
A partir de ahora, la estación meteorológica cambia automaticamente al modo de Reception variedes每次 cada noche. Durante este periodo, el tiempo mostrado se compare con el recibido desde el transmisor deolenal de tiempo y, si esnecessary, se corrige.
Si no se ha recubiido una señal lo suficientemente intensa, la estación base aborta el proceso de Receptionkingrzdespues de uno微量元素 y el symbolo de la torre de radio se apaga. El proceso de receptionacion se inicia de nuevo en un punto posterior en el tiempo.
Funciones principales de la estación meteorológica
En el manual de instrucciones se describe detalladamente除外nasrogenes.
Predicción meteorológica y tendencia
Después de la puesta en funciona,[20] los datos de predicción meteorológica no pueden utiliser duranteunas 12 horas, ya que la estación meteorológica nécessita ese tiempo para recoger y valorar los datos meteorológicos.
La predicción meteorológica se realiza a partir de los datos recogidos y de las variaciones de la presión atmósferica medidas al hacerlo.
La predicción se realiza para un radio deelines 30 a 50 km alrededor de la estación meteorológica y para un periodo entre 12 y 24 horas. La exactitude la previsión meteorológica ronda el 75% .


soleado parcialmente nublado nublado


lluvia fuertes lluvias aguanieve
Teniendo también en cuenta la tendencia de la presión atmosférica, son posibles otheras interpretaciones.

presión en aumento

presión constante

presión en descenso
Dos ejemplos:
- La previsión meteorológica indica lluvia, la presión atmosférica descienda mucho y rápidamente >> es probable una lluvia fuerte.
- La previsión meteorológica indica lluvia, la presión atmosférica haeightado en las ultimas 12 horas pero a vuelto a descender ligeramente en las ultimas 3 horas >> es probable una lluvia débil.
Tendency de la temperatura y la humedad del aire
Se muestra la tendencia en forma de flecha para los valores de la temperatura y humedad del aire medidos por la estacion base y el sensor inalambrico:

ascendente

constante

descendente
Indicador de presión de aire

La presión del aire que prevaleceactualmente se visualiza en la unidad elegida (generalmente: hPa = hectopascales)
Además se muestra un historrama de la presión atmósferica en las ultimas 24 horas.
Datas meteorológicos guardados
Con el botón MEM, hace que se mueste los valores más alto y más bajo de las ultimas 24 horas relativos a laTemperatura y humedad del aire.
- Presionar 1 vez: Se muestran los valuesolestimos
- Presionar 2 vezes: Se muestran los values他们在
- Presionar 3 vezes: se muestra la pantalla normal
Para borrar los valores guardados:
-Mantenga presionado el botón MEM uno 2 seguidos hasta que los values desaparezcan.
Indicador de fases lunares y mareas

Las fases lunares y las mareas seactualizan automatistically al Cambiar la Fecha.


luna nuevo lunafucke media luna
cuarto cremiente


luna llena cuarto menguante media luna
cuarto menguante
Indicador de mares:
- H = pleamar
M=marea media
- L = bajamar
Alarma
Configuración de la hora de la alarma
1. Mantenga presionado unoicosometimesALARMhasta que parpadeen las horas del descentador y aparezca ALARM TIME.
2. Utilizando los botones y,establezca la hora de alarma deseada.
3. Pulse ALARM. El indicator de Minutes para la hora de alarma parpadea en la pantalla.
4. Usando los botones y,ajuste los Minutes de alarmadeseados.
5. Porultimate,pulse ALARM para guardar la configuracion.
Encendido/apagado de la función de alarma
- Conecte y desconecte la funciona descentador (ON/OFF) con el control deslizante ALARM.
Tan pronto como aparece el símbolo de alarma, se activa la función de alarma.
Detener la alarma
Whenever you want to use the formula, you can use the following formula.
Apagar la alarma por completo
-Pulse该如何ier boton en la estacion base (excepto SNOOZE/LIGHT) para detener la alarma.
Función de parada automática
Si no se pulsa un botón, la alarma se apaga automatistically cuando de 2 horas. Transcurridas 24 horas, la alarma volverá a sonar automatistically.
Función de repetition
-Pulse el botón SNOOZE/LIGHT una vez cuando suene la seals de alarma.
El sonido del descentador se para y en la pantalla parpadea y Z^ .
La señal de alarma se queda en silencio durante 5 horas aproximadamente. A continuacion, el dispositivo cambia de nuevo y la alarma suena de nuevo. Este procedimiento se pueda repetir varias vezes.
Datasétécnicos
Los "Datas Técnicos" completos los encontrará en el manual de instruciones detallado.
Estación base
Modelo: Estacion meteorologica WS 1600
Entrada: 5V
Pilas: 2x LR6 (AA)/1,5 V
Frecuencia de 433,92 MHz
transmisión::
Potencia maximal de +10dBm
transmisión
Sensor exterior inalámbrico
Pilas: 2x R03 (AAA)/1,5 V
Alcance: 60 metros (en terreno abierto)
Adaptador de red
Entrada: 230 ~V , 50 ~Hz
Salida: 5 V
Nivel de seguidad:
Distribuidor: Waagen-Schmitt GmbH
Hammer Steindamm 27-29
22089 Hamburg, Germany
Declaración de conformidad
Por la presente, Waagen-Schmitt GmbH declares que la estación meteorológica WS 1600 cumple las directivas 2014/53/UE y 2011/65/UE. El texto completo declaración de conformidad CE está disponible en lasuma dirección de Internet: www.ade-germany.de/doc.Esta declaración pierde su validez si se realizan
modificaciones en la estación meteorológica sin nuestra aprobacion.
Hamburgo, enero 2018
Waagen-Schmitt GmbH
Hammer Steindamm 27-29
22089 Hamburgo, Germany

Garantía
Estimada/o cliente, laEmpresa Waagen-Schmitt GmbH garantiza durante 2 años a partir de la Fecha de compra, la eliminación de los defectos debidos a fallos de material o fabricación, mediante reparación o cambio del equipo. En caso de solicitar la aplicación de la garantía, lleve el articulo a su distribuidor con el justificante de compra (explicando el motivo de la reclamación).
Eliminación
Eliminación del embalaje

Elimine el embalaje分开ando los materiales.
Lleve el papel y cartón al contentedor de cartón y las láminas al de plásticos
Eliminación del articulo
Elimine el articulo conforme a la normativa correspondiente aplicable en su País. Encontrará las instrucciones completas para la eliminación en el manual de instrucciones detallado.
Station météo avec capteur radio extérieur
Guide de démarrage WS 1600


Table des matieres
Contenu de livraison 2
Utilisation conforme. 2
Sécurité 3
Indications relatives au lieu d'installation 4
Station de base 5
Capeur extérieur sans fil 7
Mise en marche 8
Fonctions principales de la station météo 10
Caracteristiques techniques. 15
Déclaration de conformité 15
Garantie 16
Mise au rebut. 16
Ceci est le guide de démarrage
Le mode d'emploi détaillé téléchargeable en format PDF se trouve sur Internet à l'adresse www.ade-germany.de/bedienungsanleitung
Respectez tout particulièrement les instructions de sécurité.
Contenu de livraison
- Les stations météorologiques sont composées de : - Station de base
- Câpteur extérieur sans fil
- Piles:
-2 piles LR6 (AA) pour la station de base
-2 piles LR03 (AAA)/1,5 V pour le capteur extérieur sans fil
- Un adaptateur secteur pour la station de base
Mode d'emploi
Utilisation conforme
- La station météo, constituee d'une station de base et d'un capteur extérieur sans fil, affiche diverses données météorologiques (pression atmosphérique, températures, etc.) relatives à l'environnement immédiat. La station météo calcule ses prévisions sur la base des données météorologiques mesurées.
- En outre, la station météo affiche la date, l'heure, les phases lunaires et est également équipée d'une alarme.
- La station météo n'est pas adaptée aux prévisions météorologiques ou à la prise de mesures météorologiques dans un contexte commercial.
Sécurité
L'appareil et l'adaptateur secteur doit être tenus hors de portée des enfants de moins de 8 ans.
- Les enfants doivent être surveillés afin de s'assurer qu'ils ne jouent pas avec l'appareil.
- La station météo et l'adaptateur secteur ne doit pas être immergés dans de l'eau ou dans d'autres liquides. Risque d'électrocution! Pour cette raison, n'utilise pas la station de base de la station météo radio àproximitéde sources d'humidité,par ex.un évier.
- N'utilisez que l'adaptateur secteur inclus et ne le remplacez que par un adaptateur du même type. L'adaptateur secteur ne doit être utilisé que dans des espaces interieurs secs et doit être protégé de l'humidité.
- Les piles peuvent être dangereuses pour la santé en cas d'ingestion. Pour cette raison, conservez la station météo, le capteur radio extérieur et les piles hors de portée de jeunes enfants. En cas d'ingestion d'une pile, il faut immédiatement solliciter une aide Médicale.
- Tenez les enfants éloignés des matériaux d'emballage et des petits éléments faisant partie du contenu de l'emballage. Il existe un risque d'étouffement en cas d'ingestion.
Raccordez l'appareil à une prise électrique installée de manière conforme et dont la tension correspond aux « Caracteristiques techniques »
Veillez à ce que la prise électrique soit bien accessible de façon à pouvoir rapidement retarder la fiche en cas de besoin.
- N'utilisez pas la station météo radio si l'adaptateur sekteur ou le cable de l'adaptateur sont endommages.
- Attention: Risque d'explosion en cas de manipulation non conforme de la pile. Les piles ne doivent pas etre chargees, reactivées avec d'autres moyens, démon-tées, jetées au feu ou court-circuits.
- Évitez que le liquide de la pile n'entre en contact avec la peau, les yeux et les muqueuses. En cas de contact, rincez immédiatement les zones concernées avec de l'eau claire et consultez immédiatement un médecin.
- Protégez la station de base et le capteur radio extérieur contre la poussière, les chocs, les températures extrêmes et l'exposition directe aux rayons du soleil.
- Protégez la station de base de l'humidité. Installez la station de base exclusivement dans une piece sèche et fermée.
- Le capteur radio extérieur est protégé contre l'humidité, mais doit être protégé des effets directs de l'humidité tels que la pluie.
Indications relatives au lieu d'installation
L'éloignement maximal entre la station de base et le capteur radio extérieur peut atteindre 60 mètres. (« contact visuel direct »)
- Les matériaux blindés tels que le beton armé réduisent ou empêchent la réception radio entre la station de base et le capteur radio extérieur.
- Les apparêils tels que les téléviseurs, les téléphones sans fil, les ordinateurs et les lampes fluorescentes peuvent également perturber la réception radio.
Station de base
Vue de face

1 voir « Témoin de date et de semaine »
2 voir « Prévisions et tendances météorologiques »
3 voir «Données météorologiques»
4 • Bouton Marche/Arrêt pour l'écran
Activation de la fonction de rappel d'alarme
5 Afficher les températures MIN/MAX enregistrées
6 voir « Témoin de pression atmosphérique »
7 Voir « phase lunaire et heures »
Vue de l'arrière

1 Régler l'heure de réveil
2 - Réglage des valeurs (augmentation)
- Modifier l'unité de mesure de la température
3 - Réglage des valeurs (diminution)
- Demarrer / interrompre la réception radio
4 Régler l'alarme de température et éteindre ou allumer
5 Modifier l'unité de mesure de la pression d'air
6 Sélectionner la luminosité de l'écran
7 Compartiment à piles
8 Prise pour l'adaptateur secteur
9 Douille de raccordement USB pour la recharge d'appareils externes (smartphones, lecteurs MP3, etc.)
10 Allumer/éteindre la fonction réveil
11 Régler manuellement la date et l'heure
Capeur extérieur sans fil

1 Cēillet d'accrochage
2 Compartiment à piles

Procedez dans l'ordre prescrit et inserez d'abord les piles dans le capteur radio extérieur.
Capeur extérieur
1. Retirez le couvercle du compartment à piles à l'arrière du capteur extérieur en appliquant un peu de force sur la flèche imprimée. Faites glisser le couvercle du compartment à piles dans le sens de la flèche en l'éloignant du capteur extérieur.
2. Insérez 2 piles de type LR03 (AAA)/1,5 V comme représenté sur la partie inférieure du compartment à piles. Veillez à respecter la polarité des piles (+/-).
3. Faites glisser le couvercle du compartment à piles en place sur le capteur extérieur.
Station de base
Vous pouvez faire fonctionner la station météo sans fil avec l'adaptateur secteur ou avec des piles.
Si la station mete o sans fil est branchee a une prise de courant, elle fonctionne alors sur l'alimentation secteur, meme lorsque les piles sont inserees dans l'appareil. Retirez les piles dechargees du compartment a piles, car elles peuvent couler.

NOTE sur les dommages matériels
Pour le fonctionnement sur secteur, utilisez uniquement l'adaptateur secteur livre avec la station météorologique.
Mode actuel
1. Insérez la fiche de l'adaptateur secteur fourni dans la prise de branchement de la station de base.
2. Branchez l'adaptateur secteur sur une prise présenteant une tension correspondant à cette décrite à la rubrique « Spécifications techniques »
3. Attendez environ 30 minutes. La station de base a besoin de ce temps pour recueillir toutes les données météorologiques et receivevoir les signaux radio de l'émetteur du signal horaire.
Fonctionnement sur piles
1. Exercez une légère pression sur le couvercle du compartment batterie et faites-le glisser sur le côté.
2. Insérez 2 piles de type LR6 (AA)/1,5 V comme représenté sur la partie inférieure du compartment à piles. Veillez à respecter la polarité (+/-).
3. Faites à nouveau glisser le couvercle du compartment batterie sur le (:oté.
4. Attendez environ 30 minutes. La station de base a besoin de ce temps pour recueillir toutes les données météorologiques et receivevoir les signaux radio de l'émetteur du signal horaire.
Lancement de la réception du signal
Dès que la station de base est alimentée en électricité, tous les affichages sont brièvementprésentés à l'écran. En outre, l'affichage s'allume brièvement et un bip retentit.

L'appareil passe alors en mode de réception. Dans ce mode, le nombre d'ondes radio indique la qualité de la réception : Plus il y a d'ondes radio affichées à l'écran,ILAmeure est la réception.
Lors de la réception, seule la touche ▲ fonctionne; toutes les autres touches sont désactivées à ce moment.
Dès que le signal est reçu avec une force suffisante, les données correspondantes et le symbole de la tour de radio s'affichent sur l'écran. Ce processus peut durer quelques minutes. À partir de ce moment, la station météo passée automatiquement en mode réception plusieurs fois pendant la nuit. Pendant ce processus, l'heure affichée est comparée à cette reçue de l'émetteur du signal horsaire et corrigée le cas échéant. Si aucun signal suffisamment fort n'est reçu, la station de base abandonne le processus de réception après quelques minutes et le symbole de la tour de radio s'en va. Le processus de réception est repété à un moment ultérieur.
Fonctions principales de la station météo
Les autres fonctions sont décrites dans le mode d'emploi détaillé.
Prévisions et tendances météorologiques
Après la mise en marche, les données pour les prévisions météorologiques ne peuvent pas encore être utilisées pendant environ 12 heures car la station météo nécessite ce temps pour collecter et analyser les données
météorologiques. Les prévisions météorologiques sont issues des données collectées et des variations de pression atmosphérique mesurées.
La prévision se refère à la zone autour de la station météo avec un rayon d'environ 30 à 50 km pour une durée concernant les 12 à 24 heures à partir. La précision des prévisions météorologiques est d'environ 75% .


ensoleillé légèrement nuageux nuageux


plouvieux plue battante chutes de neige
D'autres interpretations météos sont possibles selon la tendance de la pression atmosphérique.

pression ascendante

pression constante

pression descendante
Deux exemples :
- Les prévisions météos indiquent de la pluie, la pression baise rapidement et fortement >> de fortes pluies sont probables.
- Les prévisions météos indiquent de la pluie, la pression a augmente au cours des 12 dernières heures mais est légèrement redescendue au cours des 3 dernières heures >> de faibles pluies sont probables.
Évolution des températures et de l'humidité de l'air
Pour les valeurs mesurées par la station de base et le capteur radio concernant la température et l'humidité de l'air, l'évolution est indiquée sous forme de flèche :

montante

constante

descendante
Un témoin de pression atmosphérique

La pression atmosphérique qui prévaut actuellement est affichée dans l'unité可以选择 (en général : hPa = hectopascals).
Par ailleurs, un historiagramme de pression d'air des 24 dernières heures est affché.
Données thermiques enregistrées
La touche MEM vous donne les valeurs les plus élevées et les plus faibles des 24 dernières heures par rapport à la température et à l'humidité de l'air..
- Appuyez 1 fois : La valeur MAX est affichée
- Appuyez 2 fois : La valeur MIN est affichée
- Appuyez 3 fois : l'affichage normal revient à l'écran
Pour supprimer les valeurs enregistrées :
-Maintenez la touche MEM enfoncée pendant env. 2 secondes, jusqu'à ce que les valeurs affichées soient supprimées.
Affichage de la phase lunaire et de la marée

Les phases lunaires et marées (Tide) sont automatiquement mises à jour avec la date.


nouvelle lune
lune montante demi-lune
gibbeuse montante


pleine lune gibbeuse descendante
demi-lune
lune descendante
Affichage de la marée :
H = Flot
- M = Marée moyenne
- L = Reflux
Alarme
Réglage de l'heure de l'alarme
1. Maintenez enfoncée la touche ALARM pendant quelques secondes jusqu'à ce que l'affichage des heures de réveil clignote et ALARM TIME apparaisse à l'écran.
2. En utilisant les touches , reglez l'heure de l'alarme souhaitation.
3. Appuyez sur ALARM.
Le tímoin des minutes pour l'heure de l'alarme clignote à l'écran.
4. En utilisant les touches et réglez les minutes de l'alarme souhaitation.
5. Pour terminer, appuyez sur ALARM pour enregistrrer les réglages.
Activation/désactivation de la fonction d'alarme
-À l'aide du curseur ALARM, activez ou désactivez la fonction réveil (ON/OFF).
Dès que le symbole d'alarme est affché, la fonction d'alarme est activée.
Arrêt de l'alarme
Vous serez réveillé à l'heure souhaitation par une sonnerie d'alarme, qui devendra plus intense à mesure que la durée de l'éveil augmente.
Arrêt complet de l'alarme
- Appuyez sur une touche quelconque de la station de base (à l'exception de SNOOZE/LIGHT) pour arrêté l'alarme.
Fonction d'arrêt automatique
Si vous n'appuyez sur aucune touche, l'alarme se désactive automatiquement au bout de 2 minutes. ÀpRES 24 heures, l'alarme se déclenchera à nouveau automatiquement.
Fonction de rappel d'alarme
- Appuyez une fois sur la touche SNOOZE/LIGHT lorsqu'la sonnerie d'alarme retentit.
Caracteristiques techniques
L'ensemble des « Caractéristiques techniques » se trouve dans le mode d'emploi détaillé.
Station de base
Modèle: Station météo WS 1600
Entrée:5V
Piles:2xLR6(AA)/1,5V
Fréquence de
transmission :
Puisance de
transmission max.:
Capeur radio extérieur
Piles:2xR03(AAA)/1,5V
Portée : env. 60 mètres (milieu ouvert)
Adaptateur secteur
Entrée: 230 ~V , 50 ~Hz
Sortie:5V
Classe de protection :
Distributor: Waagen-Schmitt GmbH
HammerSteindamm 27 - 29
22089 Hamburg, Germany
Déclaration de conformité
Waagen-Schmitt GmbH déclare que la station météo
WS1600 est conforme aux directives 2014/53 EU et
2011/65/EU. Le texte complet de la déclaration de
conformité européen est disponible sur le site internet
suivant: www.ade-germany.de/doc
Cette déclaration perd sa validité si des modifications sont apportées à la station météo sans notre approbation.
Hamburg,janvier 2018
Waagen-Schmitt GmbH
Hammer Steindamm 27-29
22089 Hamburg, Germany

Garantie
Chère cliente, cher client, la société Waagen-Schmitt GmbH garantit la prise en charge gratuite de defaults matériels ou de fabrication pendant 2 ans à partir de la date d'achat, par une réparation ou un remplacement.
Dans le cas où vous souhaitez faire usage de cette garantie, veuilles remettre l'article ainsi que la preuve d'achat (en indiquant les raisons de votre réclamation) à votre revendeur.
Mise au rebut
Élimination de l'emballage

Éliminez les emballages de façon conforme. Jetez le papier et le carton avec les papiers de récapération, les plastiques dans les collecteurs de matières recyclables.
Mise au rebut de l'article
Veuillez eliminer l'article selon les prescriptions en vigueur dans votre pays en matière de traitement des déchets.
L'ensemble des prescriptions de mise au rebut se trouve dans le mode d'emploi détaillé.
Stazione meteo con sensore radio esterno
Guida rapida WS 1600


Indice dei contenuti
Ambito della fornitura 2
Destinazione d'uso 2
Sicurezza 3
Luogo di installmente. 4
Stazione base. 5
Sensore esterno senza fili. 7
Messa in funzione 8
Funzioni principali della stazione meteo. 10
Caratteristiche tecniche 15
Dichiarazione di conformità 15
Garanzia 16
Smaltimento 16
Il presente documento contiene la guida rapida. Il manuale in formato pfd con le istruzioni per l'uso dettagliate più essere scaricato all'indirizzo www.ade-germany.de/bedienungsanleitung Prestare particolare attenzione alle istruzioni per la sicurezza
Ambito della fornitura
- Ogni stazione meteorologica comprende:
-Stazione base
-Sensore esterno senza fili
- Batterie:
-2 batterie stilo LR6 per la stazione base
-2 batterie ministilo LR03 da 1,5 V per il sensore esternoenza fili
- Alimentatore elettrico per la stazione base
- Manuale operativo
Destinazione d'uso
- La stazione meteo, composta alla stazione base e dal sensore esternorawnza fili, mostra vari dati relativi alle condizioni del tempo (pressione atmosferica, temperatura ecc.) nell'ambiente circostante. La stazione meteorologica è in grado di effettuare le previsioni del tempo sulla base dei dati meteo registrati.
- Inoltre, la stazione meteo indica la data, l'ora e le fasi lunari,或者其他 ad essere dotata di una sveglia.
- La presente stazione meteorologica non è destinata ad un uso commerciale delle previsions del tempo o dei dati meteo registrati.
Sicurezza
- Tenere il disposativo e l'alimentatore lontano alla portata dei bambini di età inferiore agliotto anni.
- Sorvegliare i bambini per evitare che giochino con l'apparecchio.
Non immershere in acqua o altri liquidi la stazione meteo radiocommandata e l'alimentatore. Pericolo di scosse elettriche! Non utilizzato la base della stazione meteo radiocommandata vicino a lavandini e altri oggetti contententi acqua o fonti di umidità.
- Utilizzare sempre l'alimentatore fornito in dotazione e sostituirlo solo con uno dello stesso tipo. Utilizzare l'alimentatore solo in ambienti interni asciutti e proteggerlo dall'umidità.
L'ingestione delle batterie può costituire un pericolò mortale. Pertanto, tenera la stazione meteo, il sensore radio esterno e le batterie lontano alla portata dei bambini piccoli. In caso di ingestione di una batteria, consultare immediatamente un medico.
- Tenere lontano alla portata dei bambini il materiale di imballo e i componenti della fornitura di piccole dimensioni. In caso di ingestione sussiste un pericolò di soffocamento.
- Collegare l'apparecchio ad una presa correttamente installata, la cui tensione corrisponda a quella indicata nella "Scheda technique"
- Accertarsi che la presa sia facilemente accessibile, in modo che in caso di necessità l'alimentatore possa essere scollegato velocemente.
- Non utilizzato la stazione meteo se l'alimentatore o il cavo dello stesso sono danneggiati.
- Attenzione: L'utilizzo improprio delle batterie può costituire un pericolo di esplosione. Le batterie non devono essere ricaricate, riattivate con altri mezzi, smontate, buttate nel fuoco o messe in cortocircuito.
- Evitare il contatto del liquido delle batterie con la pelle, gli occhi e le mucose. In caso di contatto con il liquido, lavare subito con acqua abbondante e consul-tare immediatamente un medico.
- Proteggere la stazione base e il sensore radiocommando rromoto da polvere, urti, temperature estreme e luce diretta del sole.
- Proteggere la stazione base dall'umidità. Collocare la stazione base solo in un ambiente interno asciutto.
Il sensore radio esterno è dotato di protezione contro l'umidità; evitare, tuttavia, l'esposizione diretta ad acqua o altri liquidi, come ad esempio la pioggia.
Luogo di installmente
- La distanza massima tra la stazione base e il sensore radio esterno non deve superare 60 metri. (contatto visivo diretto").
- Materiali schermanti, come ad esempio il cemento armato, riducono o impediscono la trasmissione tra la stazione base e il sensore radio esterno.
- Anche dispositivi quali televisori, Telefoni cordless, computer e tubi fluorescenti, possoono disturbare la trasmissione.
Stazione base
Vista frontale

1 Vedi la sezione "Indicatore di data e settimana"
2 Vedi la sezione "Previsioni del tempo e tendenza meteo"
3 Vedi la sezione "Dati meteo"
4 Accensione/spegnimento illuminazione schermo
Attivazione funzione snooze
5 visualizzazione delle temperature minime e massime
6 Vedi la sezione "Indicatore di pressione atmosferica"
7 vedi "Indicazione delle fasi lunari e della marea"
Vista posteriore

1 Impostazione della sveglia
2 - Regolazione valori (aumento)
- Selettore unità di misura della temperatura
3 Regolazione valori (riduzione)
- Avvio manuale/interruzione della ricezione radio
4 Attivazione e disattivazione dell'allarme temperatura
5 Modifica delle unità di misura della pressione atmos.
6 Impostazione della luminosità del display
7 Vano battery
8 Presa di connessione per l'alimentatore elettrico
9 Porta USB per caricare dispositivi esterni (smartphone,lettore MP3 o simili)
10 Attivazione e disattivazione della sveglia
11 Impostazione manuale della data e dell'ora
Sensore esterno senza fili

1 Occhiello di fissaggio
2 Vano battery

Seguire i passi descritti qui sotto, cominciando con l'insertimento delle batterie nel sensore radio esterno.
Sensore esterno
1. Rimuovere il coperchio del vano porta-batteria situato sul retro del sensore esterno, applicando una leggera pressione sulla freccia stampata. Per rimuovere il coperchio del vano porta-batteria dal sensore esterno, farlo scorrere nella direzione individata alla freccia.
2. Inserire 2 batterie ministilo da 1,5V di tipo LR03, come indicate nella figura presente sul fondo del vano batterie. Fare attenzione alla corretta polarità (+ / -) di inserimento delle batterie.
3. Rimettere aerto il coperchio del vano porta-batteria del sensore esterno.
Stazione base
La stazione meteorawnza fili cui既可以 funzionare a batterie o con alimentazione elettrica. Se la stazione meteorawnza fili è collegata a una presa elettrica,essa funzionera a corrente,anche se le batterie sono insertite nel dispositivo.Rimuoveredal vano le batterie scariche,per evitare il rischio di perdite.

NOTA sui danni materiali
Per il funzionamento tramite corrente, servirsi escludivamente dell'alimentatore elettrico in dotazione con la stazione meteo.
Modalità alimentazione elettrica
1. Inserire lo spinotto dell'alimentatore elettrico in dotazione nell'apposita presa di connessione sulla stazione base.
2. Collegare poi l'alimentatore ad una presa di corrente a muro, che supporta una tension corrispondente a quale indica nella sezione "Dati tecnici".
3. Attendere circa 30 minuti. Questo è il tempo richiesto alla stazione base per raccogliere dati meteo e ricevere i segnali radio dal trasmettitore per la sincronizzazione oraria.
Funzionamento a batterie
1. Premere leggermente sul coperchio del vano batterie e spingerlo lateralmente.
2. Inserire 2 batterie stilo da 1,5V di tipo LR6, come indicate nella figura presente sul fondo del vano batterie. Fare attenzione alla corretta polarità (+ / -) di inserimento delle batterie.
3. Richiudere il coperchio del vano batterie spingendolo.
4. Attendere circa 30 minuti. Questo è il tempo richiesto alla stazione base per raccogliere dati meteo e ricevere i segnali radio dal trasmettitore per la sincronizzazione oraria.
Avvio ricezione del segnale
Non appena la stazione base viene collegata all'alimentazione, tutti gli indicatori appariranno breveamente sul display. Inoltre, lo schermo si illumina rapidamente, accompagnato da un breve segnale acustico.

Il disposizione quindi rientra in modalità di ricezione e in tale fase il numero di onde radio mostrate sullo schermo indica la qualità della riscione: maggiore è il numero di onde radio indicate sullo schermo, migliorare è la riscione.
In fase di ricezione, solo il tastinge funziona: tutti gli altri tastingi sono disattivati in questa fase.
Alla ricezione di un segnale sufficientemente forte, i relativi dati, accompagnati dal symbolo di un radio trasmettitore, appariranno sullo schermo. Questo processo può durare alcuni minuti.
Da questo momento, la stazione meteo passera automaticamente in modalità di ricezione, diverse volte agli sera. In这对于a fase, l'orario visualizzato viene confrontato con quello ricevuto dal trasmettitore del segnale orario e, se necessario, corretto.
Se il segnale ricevuto non è sufficientemente forte, la stazione base annulla il processo di ricezione dopo quello minuto, nelle simbolo del trasmettitore radio scompare dallo schermo. Il processo di ricezione verrà comunique ripetuto successivamente.
Funzioni principali della stazione meteo
Ulteriori funzioni sono descripte nel manuale per l'uso.
Previsioni del tempo e tendenza del tempo
Dopo la messa in funzione, la stazione meteo impiega circa 12 ore per raccogliere ed elaborare i dati ricevuti e produrre previsioni del tempo attendibili.
Le previsionsi del tempo sono prodotte utilizzando i dati raccolti e le variazioni della pressione atmosferica.
Le previsions coprono un area con un raggio di circa 30 - 50 km alla stazione e sono valide per le prossime 12 - 24 ore. La percentuale di precisione delle previsions del tempo è di circa il 75% .


Sereno Poco nuvoloso Nuvoloso


Pioggia temporali nevicata
Insieme alla tendenza della pressione atmosferica, è possibile ottenere ulteriori informazioni sul tempo.

pressione atmosferica in aumento

pressione atmosferica invariata

pressione atmosferica in diminuzione
Due esempi:
- Le previsionsi indicano pioggia, la pressione è in rapida diminuzione >> sono probabili forti piogge.
- Le previsionsi indicano pioggia, la pressione atmosef- rica è salita nelle ultime 12 ore, ma poi è leggermente diminuita nelle ultime 3 ore >> pioggia leggera probabile.
Tendenza della temperatura e dell'umidità
La tendenza della temperatura e la tendenza dell'umidità misurate alla stazione base e dal sensore sono indicate con una freccia:

in augmento

invariata

in diminuzione
Indicatore di pressione atmospherica

Il valore di pressione atmospherica prevalente al momento viene moltoromo sullo schermo nell'unità selezionata (di solito: hPa = ettopascal).
Inoltre, viene visualizzato un istogramma della pressione atmospherica delle ultime 24 ore.
Dati meteorologici memorizzati
Il pulsante MEM consente di visualizzare i valori massimi e minimi delle ultime 24 ore relativi alla temperature e all'umidità.
- Premere 1 volta per: visualizzare i valori massimi
Premere 2 volte per: visualizzare i valori minimi
Premere 3 volte per: visualizzare la schermata predefinita
Per eliminare i valori memorizzati:
- tenere premuto il pulsante MEM per circa 2 secondi, forn o quando i valori visualizzati non saranno statici cancellati.
Indicazione delle fasi lunari e dellaarea

Le fasi lunari e la marea saranno attualizzate automaticamente assieme alla data.


luna nuova luna crescente Mezzaluna
luna gibbosa crescente


luna piena luna gibbosa calante Mezzaluna
luna calante
Visualizzazione della marea:
- H = alta marea
M=marea media
- L = bassaarea
Allarme
Impostazione ora di allarme
1. Tenere premuto ALARM per alcuni secondi, fino a quando l'ora della sveglia lampeggerà e ALARM TIME apparirà sul display.
2. Usando i tasti et, scegliere l'ora di allarme voluta.
3. Premere il tasting ALARM.
L'indicatore dei minuti relativi all'orario di allarme inizia a lampeggiare sullo schermo.
4. Usando i tasti et, scegliere i minuti dell'orario di allarme voluto.
5. Infine, premere il tasting ALARM per salvare l'impostazione definita.
Attivazione/disattivazione della funzione di allarme
- Attivare o disattivare (ON/OFF) la sveglia con il cursore Alarm.
Non appena il symbolo di allarme èppare sullo schermo, la funzione di allarme si attiva.
Interruzione dell'allarme
Allo scoccare dell'ora impostata, l'allarme della sveglia inizia a suonare, divertando più intenso col passare del tempo.
Interruzione completa della suoneria di allarme
- Premere qualunque tasto della stazione base (ad eccezione di SNOOZE/LIGHT) per interrompere l'allarme.
Funzione di blocco automatico
Se non si preme alcun tasto, la suoneria finisce automaticamente dopo 2 minuti. Dopo 24 ore, l'allarme scatta di nuovo.
Funzione Snooze
-Premere il tasting SNOOZE/LIGHT una volta, nelle segnale di allarme suona.
Il segnale della sveglia si interrompe e sul display lampeggeranno e Z^ . Il segnale di allarme non suona per circa 5 minuti. Poi la funzione si riattiva e l'allarme suona di nuovo. Tale procedura può essere ripetuta più volte.
Caratteristiche tecniche
Le „Caratteristiche tecniche“ dettagliate sono contenate nel manuale dell'utente.
Stazione base
Modello: Stazione meteo WS 1600
Ingresso: 5 V
Batterie: 2x LR6 (AA) / 1,5 V
Frequenza di 433,92 MHz
transmissione:
Max. Potenza di +10dBm
transmissione:
Sensore radio esterno
Batterie: 2x R03 (AAA) / 1,5 V
Portata: circa 60 metri (in campo aperto)
Alimentatore
Ingresso: 230V ,50Hz
Uscita: 5V = /1,5A
Classediprotezione:
Distributore: Waagen-Schmitt GmbH
Hammer Steindamm 27-29
22089 Hamburg, Germany
Dichiarazione di conformità
Con la presente Waagen-Schmitt GmbH dichiarara che la stazione meteo WS 1600 è conforme alle Direttive 2014/53/UE e 2011/65/UE. Il testo Completo della dichiarazione di conformità UE è disponibile al segunte indirizzo Internet: www.ade-germany.de/doc.
La presente dichiarazione non è più valida se la stazione meteo subisce modifiche non autorizzate da moi.
Amburgo, gennaio 2018
Waagen-Schmitt GmbH
Hammer Steindamm 27-29
22089 Amburgo, Germany

Garanzia
Gentile cliente,
la ditta Waagen-Schmitt GmbH garantisce la riparazione o la sostituzione gratuite dell'unità per un periodo di 2 anni a partire alla data di acquisto, nel caso di difetti di materiale o fabbricazione del prodotto. A tale scopo, consignare al rivenditore il prodotto e la prova di acquisto (citando i motivi del reclamo).
Smaltimento
Smaltimento dell'imballaggio

Smaltire l'imballaggio nella raccolta differenziata. Conferire il cartone nella raccolta della carta e la pellicola in quella del materiale riciclabile.
Smaltimento del prodotto
Smaltire il prodotto secondo le norme vigenti nel proprio paese. Informazioni dettagiate sullo smaltimento sono contente nel manuale dell'utente.
Stacja meteorologiczna z radiowym czujnikiem zewⁿetrznym
Skrócona instrukcja WS 1600


Spistresci
Zawartość dostawy. 2
Użycie zgodne z przyeznaczenia. 2
Bezpieczenstein 3
Wskazówki dotyczęe lokalizacje 4
Stacja bazowa 5
Zewnetrzny czujnik bezprzewodowy. 7
Uruchomienie. 8
Głowne funkcje staci meteorologicznej 10
Dane techniczne 14
Deklaracji zgodnosci 15
Gwarancja 16
Utylizacja 16
Niniejsza instrukcja jest instrukcja skrocona.
Pełna wersja instrukcji obslugi jest dostepna do podbrania w formie pliku PDF na stronie internetowej www.ade-germany.de/bedienungsanleitung.
Naleź y w szczególnosci przyestrzegać wskazowej dotycznych bezpiecznych.
Zawartosc dostawy
- Elementy staci pogodowej:
-Stacja bazowa
-Zewnętrzny czujnik bezprzewodowy
Baterie:
-2 x LR6 (AA) do staci bazowej
-2 x LR03 (AAA)/1,5 V do zewnętrznego czujnika bezprzewodowej
Zasilacz staci bazowej
Instrukcja obslugi
Użycie zgodne z przyeznaczenia
- Stacja pogodowa, składajność są ze staci bazowej i zewétrznych czujnika bezprzewodowej wyświetla rożne informacje o pogodzie (ci内分泌 neuromasovychyczne, temperature, itp.) w najblźsej okolicy. Stacja pogodowa prognozuje pogodę na podstawie pomiarów warunkowy atmosferycznych.
- Ponadto stacja pogodowa podaje date, godzine, fazy ksieżyca i ma zintegrowy alarm.
- Stacja pogodowa nie nadaje są do wykorzystania komercyjniego polegajćego na tworzeniu prognoz pogody ani do dokonywania pomiarów meteorologicznych.
Bezpieczenstwo
- Urzadzenie oraz zasilacz powinny znajdować są z dala od przycie w wieku poniȩjej 8 lat.
- Dzieci musza byc pod stały madzorem, aby zapewnić, zeNie;będą bawity sie urzadzeniem.
- Radiowej staci meteorologicznej ani zasilacza nie wolno zanurzać w wodzie ani innych pląnach. Niebezpieczeniawo porañenia prądem! Dlatego własnie podstawy radiowej staci meteorologicznej nie wolno rownikę uzywać w povlizu zródeł wilgoci, jak np. zlewu.
- Naleź uzywać wyłącznych dostarczonego zasilacza i wymieniać go tylko na zasilaczkiego samego rodzaju. Zasilacz wolno stosować wyłącznych w suchych pomieszczeniach, chroni⁺c go przyd wilgoci⁺.
- Połkniȩcie baterii stanowy zagrożenie dla zycia. Z togo powodu stȩje meteorologiczną, radiowy czujnik zewétrzny i baterie naleźny przechowywoć poza zaiegiem małych;dzieci. W przypadku połkniȩcia bateriiny aleźny natychmiast zworćić są o pomoc medycznych.
Dzieci nalezy trzymac rownik z dala od opakowania i mazych elementów znajdujacych sie w zakresie dostawy. Połkniȩcie grozi uduszeniem.
Urzejdenie nalezy podlączyc do zainstalowanego zgodnie z przyepsami gniazda, które odpowiada napieciu podanemu w częsci „Dane techniczne".
- Aby zapewnic möglichść szybkiego wyjecia zasilacza w razie potrzeby, gniazdo powinno być latwo dostepne.
- W przypadku uszkodzenia zasilacza lub kabla zasilajęcego nie wolno uzywać radiowej staci meteorologicznej.
Uwaga: Zagrożenie wybuchem w przyypadku nieprawidłowego obchodzenia są z bateriami. BateriiNie wolnoładowość, reaktywowości w inny sposob, rozkładać na czȩci, wrzuć w ogienczy powodowej ich zwarcia.
- Naleź unikać kontaktu płynu baterii ze skóra, oczami czy sluzowej. W przyypadku takiego kontaktu dane.),规模最大 naleź spłukć obficie czysta wodą i natychmiast udać są do lekarza.
- Podstawe i radiowy czujnik zewétrzny chronicć przyd Kurzem, uderzeniami, ekstremalnymi temperaturami i bezposrednim nasłonecznieniem.
- Podstawe naleź równieź chronicć przyd widgocią. Naleź są umieszczȩć wyłącznie w suchym, zamkniętym pomieszczemu.
- Radiowy czujnik zewnetrzny jest chroniony przy wilgocią. Naleź go"Justak chronić dodatkowo przy bezposrechnim zamoczenia, np. deszczem.
Wskazówki dotyczęc e lokalizacje
- Maksymalna odleglość między podstawymi radio-wym czujnikiem zewétrznych powinna wynosić 60 metrow. „beźposrechni kontakt wzrokowy".
- Ekranujace materiały budowlane, jak np.źelazobeton zmiejejszaj lub eliminuję zakres sygnału radiowej mistrędzy podstawymi radiowym czujnikiem zewétrznym.
- Zasięg sygnatu mogą również zakłocć takie urzadzenia, jak telewizor, Telefony bezprzewodowe, komputerczy swietłowki.
Stacja bazowa
Przód

1 patrz: „Data i tydzień"
2 patrz: „Prognoza i trendy pogody"
3 patrz:"Pogoda"
4 Węczechy węczech podstawianie wycieliacza
Włęcz fungcję drzemki
5 Wyswietlanie zapisanych temperatur MIN/MAKS.
6 patrz: „Wskaznik ciñnienia atmosferycznego"
7 patrz „Wskaznik faz ksiezyca i pplywow"

Tyt
1 Ustawianie czasu budzenia
2. Regulacja wartość (zwierkszenia)
Zmiana jegnostki miary temperature
3. Regulacja wartość (obnizenie)
- Ręczne uruchamianie/przerywanie zakresu radiowego
4 Ustawianie oraz wączenia i wyȩczaniaAlarmu temperature
5 Zmiana Jednostki miary temperature
6 Wybor jasnosci oswietlenia wyświetlacza
7 Gniazdo baterii
8 Port zasilacza sieciowego
9 Gniazdo przyłączeniowe USB doładowania urȩdzen zewétrznych (smartfon, odtwarzacz MP3 itd.)
10 Włączanie i wyłączanie funkcjibudzenia
11 Réczne ustawianie daty i godziny
Zewnętrzny czujnik bezprzewodowy

1 Zaccep do powieszenia
2 Gniazdo baterii

Zachowujac odpowiednia kolejnosc, wlozyc najpierw baterie do radiowego czujnika zewnetrznego.
Czujnik zewétrzny
1. Zdejmij oszone gniazda baterii z tyfu czujnika zewnetrznego: w tym celu wcijsnij nadrukowan strzafte. Zsuń oszone gniazda baterii w kierunku wskazanym przyez strzafte, od czujnika zewnetrznego.
2. Włódz 2 baterie typu LR03 (AAA)/1,5 V zgodnie z ilustracja na spodzie gniażda baterii. Dopilnuj wąsciwej biegunowychi baterii (+/-).
3. Wsuń osłone gniazda baterii czujnika zewnętrznego z powrotem na.),
Stacja bazowa
Bezprzewodowa stacja pogodowa sąs byc zasilana bateriami lub z sieci.
Jesli bezprzewodowa stacja pogodowa jest podłoczona do sieci elektrycznej, działa na zasilaniu sieciowym, nawejection wewnatrix znajdujcie baterie. Zuzyte bateria naleźny usunac z gniażda baterii, poniewacz sąnzapić z nich wyciek.

UWAGA na möglichść uszkodzenia
- Do zasilania z sieci energetycznej uzywaj wyłącznie zasilacza dołączonego do staci pogodowej.
Aktualny tryb
1. Wsadź wtyczkę dołaczonego zasilacza do gniażda przyłączeniowej staci bazowej.
2. Podłucz zasilacz do prawnów zastalowanego gniażda o napięciu odpowiadajćemu napiȩciu podanemu w „Danych technicznych".
3. Odczekaj ok. 30 minut. Stacja bazowa potrzebuje tyle czasu na zebranie informaci o pogodzie i otrzymanie informaci od nadajnika synchronizujuść czas.
Dziafanie na bateriach
1. Lekko nacin溃疡 oszone komory baterii i odsunac ja na bok.
2. Włódz 2 baterie typu LR6 (AA)/1,5 V zgodnie z ilustracja na spodzie gniażda baterii. Dopilnuj wąsciwej biegunowychci baterii (+/-).
3. Nasunac oslone komory baterii z boku.
4. Odczekaj ok. 30 minut. Stacja bazowa potrzebuje tyle czasu na zebranie informaci o pogodzie i ostrzymanie informaci od nadajnika synchronizujućego czas.
Rozpoczecie odbierania sygnału
Po doprowadzeniu zasilania elektrycznego do staci bazowej, przy czółki moment zapalu są wszystkie wskazniki na wyświetlaczu. Ponadto wyświetlacź swieci przy czwilę i wydaje sygnat dzwiekowy.

Nastepnie urzadzenie przyłącza są na tryb odbierania, a liczba fal radiowych wskazuje jakość odbioru: Im wearyj fal radiowych na wyświetlaczu, tym lepszy odbior.
W trakcie odbierania działa tylko przycisk w tym czasie pozostawe przyciski są wyłaczone.
Od razu po otrzymaniu sygnału o odpowiednej sile na wyświetlaczu pojawi są odpowiednia data i symbol nadajnika radiowej. Może to potrwac kilka minut.
Od tej pory stacja pogodowa kaźdej nocy;będzie automatycznie przyłączać sie w tryb odbierania. W trakcie odbierania porównych jest czas wyświetlany z czasem otrzymywanym od nadajnika, w razie potrzeby dokonywana jest korekta.
Jesli nie otrzymano wystarczajaco silnego sygnau,
stacja bazowa po kilku minutach anuluje proces
pobierania i znika symbol nadajnika radiowej. Proces
pobierania zostanie ponownie uruchomiony poźniaj.
Głowne funkcje staci jmeteorologicznej
Dodatkowe funkcj opisane są w pełnej wersji instrukcj obstugi.
Prognoza i trend pogody
Po uruchomieniu urzadzenia danych nie mayna stosować do prognozy pogody przy ezolejnych 12 godzin, ponieważ stacja meteorologiczna wymaga unto czasu na povranie i ocenę informaci o pogodzie.
Prognoza pogodawynika zzebranych informacji orazzmierzonych przy tymzmian cijsnienia powietrza.
Prognozada dotyczy obszaru wokol stacli meteorologicznej o promieniu okofo 30 do 50~km w czasie od 12 do 24 godzin. Dokladnosc prognozy pogody oblicza sie na okofo 75% .


slopecznie lekke zachmurzenie zachmurzenie

opady deszczu

intensywnedeszczu

opady sniegu
W połączeniu z Trendem ci.Snienia powietrza sąna dokonać dalszych interpretacje pogody.

wzrost ciśnienia powietrza

state cśnienie powietrza

spadek ciśnienia powietrza
Dwa przykBady:
- Prognoza pogody wskazuje deszcz, ciśnienie powietrza spada szybko i znacznie >> istnieje sąliwość silniejszych opadów.
- Prognoza pogody wskazuje deszcz, ciśnienie powietrza wzroslo w ciągu ostatnich 12 godzin, ale w ciągu ostatnich 3 godzin zaczego ponownie spadać >> istnieje möglichść niewielkich opadów.
Trend temperature i wilgotnosci
Wartosci temperature i wilgotnosci zmierzone przy podstawymi czujnik radiowy wyznaczaja trend za pomoczą strzałyk:

wzrost

staly

spadek
Wskaznik cijsnienia atmosferycznego

Aktualne cijsnienie atmosferyczne jest wyświetlane w wybranej Jednostce (zazwyczaj: hPa = hektopaskale).
Ponadto wyświetla są historogram spreźzonego powietrza zostatnic 24 godzin.
Zapisane dane pogody
Przyciskiem MEM wyświetla są najwyźsze i najniźsze wartosci zostat nich 24 godzin dla temperatury i wilgotnosci powietrza.
Naciśćcie 1 raz: wyświetlaj są wartość MAX
Naciśćcie 2 razy: wyświetlą są wartość MIN
- Naciśćcie 3 razy: zwykle wskazanie na wyświetlaczu. Aby usunjć zapisane wartosci:
-przytrzymać wcińskiropy przycisk MEM przyez ok. 2 sekundy,ź wyświetlane wartosci zostaną skasowane.
Wskaźnik faz ksieżyca i pływo

Wyświetlane fazy ksieźyca oraz pływy są aktualizowane automatycznych data.


now sierp przybywajacy pierwsza
kwadra
przybywajczyksięzyc garbaty


pełnia ubywajćy księźyc garbaty
pierwszakwadra
sierp ubywajacy
Wskaźnik pływow:
H = przyplyw
M=średni pfyw
L = odplyw
Alarm
Nastawianie budzika
1. Przytrzymać przy bez kilkak sekund wciśniety przycisk ALARM,ź zacznie migać wskaznik godziny budzenia i wyświetli są ALARM TIME.
2. Ustaw godzine, o któraj budzik ma zadzwonić za pomocamy przycisków ▲ i ▼
3. Nacijsnij przycisk ALARM. Na wyświetlaczu zacznie migać minuta godziny, w特别是 budzik ma zadzwonić.
4. Ustaw minute, o któraj budzik ma zadzwonić za pomoczą przycisków ▲ i ▼
5. Aby zapisać ustawuminium, nacijsnij ALARM.
Włączanie/wyłączanie budzika
-Regulatorem suwakowym ALARM wącza są i wyłącza (ON/OFF) funkcje budzenia.
Kiedy wyświetlany jest symbol budzika, fungcjja jest aktywna.
Wyłaczenia budzika
O ustalonej porze budzik zacznie dzwonić, a przyweek czasem;będzie coraz gólnejjszy.
Dezaktywacja budzika
- Aby wyłaczyc budzik, naciśnij dowolny przycisk na staci bazowej (za wyjatkiem SNOOZE/LIGHT).
Automatyczne wyłuczanie
Ješli nie nacijsieszźadnégo przycisku, budzik automatycznie przyestanie dzwonić po upływie 2 minut. Po 24 godzinachznów zadzwoni.
Funkcja drzemki
-Aby budzik przystał dzwonić, nacijsnij przycisk SNOOZE/LIGHT.
Sygnal budzenia zanika, na wyswietlaczu miga i Z.
Dzwiek budzika zostanie wyłaczony na ok. 5 minut.
Po tym czasie urzadzenie wączy są i budzik znów zaczniedzwonić. Drzemę mayna powtarzać wielokrotnie.
Dane techniczne
Kompletne „Dane techniczne" znajduja sie w pełnej wersji instrukcj obstugi.
Podstawa
Model: Stacja meteorologiczna WS 1600
Moc wejosciowa: 5 V
Baterie: 2x LR6 (AA) / 1,5 V
Częstotliwość: 433, 92 MHz
Maks. moc transmisji: +10 dBm
Radiowy czujnik zewétrzny
Baterie: 2x R03 (AAA) / 1,5 V
Zasięg: ok. 60 metrów (otwarta przyestrzeni)
Zasilacz
Moc wejsciowa: 230V 50 Hz
Moc wyjsciowa: 5 V
Klasa ochronna:
Dystrybutor: Waagen-Schmitt GmbH
Hammer Steindamm 27-29
22089 Hamburg, Germany
Deklaracje zgodnosci
Niniejszym firma Waagen-Schmitt GmbH, oświadczta, ze staćja pogodowa WS 1600 jest zgodna z dyrektywami 2014/53/UE i 2011/65/UE.
Pełny tekst deklaracje zgodnosci UE jest dostępty na poliższej stronie internetowej:
www.adegermany.de/doc
Deklaracje przystaste obłowymiązywać, sąsi stacja pogodowa zostanie zmodyfikowana bez naszej zgody.
Hamburg, styczen 2018
Waagen-Schmitt GmbH
Hammer Steindamm 27-29
22089 Hamburg, Germany
CE
Gwarancja
Szanowski Państwo,
Firma Waagen-Schmitt GmbH gwarantuje przy 2 lata od daty zakupu bezplatne usuwanie braków z tytułu będów materiałowych lub produktyjnych w drodze naprawy lub wymiany.
W przypadku korzystania z gwarancji prosimy o podanie sprezedawcy artykułu wraz z dowodem zakupu (podajć rownikę powód reklamacje).
Utylizacja
Utylizacja opakowania

Opakowanie naleź yutilizowej zgodnia z了我的 rodzajem. Tektura i karton powinny trafić do pojemnika na papier, folia do pojemnika na surowce wtorne.
Utylizacja produktu
Produkt nalezy utylizować zgodnie z przypepisami obłowiazujacymi w danym kraju.
Kompletne informacja dotyczne utylizacje znejdujasie w pełnej wersji instrukcji obslugi.
Artículos incluidos en la entrega
Las estaciones meteorologicas constan de: -Estación base -Sensor exterior inalámbrico Pilas: -2 x LR6 (AA) para la estación base -2 x LR03 (AAA)/1,5 V para el sensor exterior inalámbrico Adaptador de red para la estación base - Manual de funcionaUso adequado
- La estación meteorológica, consta de una estación base ym el sensor inalámbrico para exteriores, muestra various datos meteorológicos (presión de aire, temperatura, etc.) relacionados con el entorno(PRXSIMO. La estación meteorológica realiza un pronóstico del tiempo sobre la base de los datos meteorológicos medidos. - Por otra parte, la estación meteorológica muestra la Fecha, la hora y las fases lunares y, también está equipo-pado con una alarma. - La estación meteorológica no es adequúa para su uso comercial en la predicción del tiempo o en la toma de medicaciones meteorológicas.Seguridad
- El equipo y el adaptor de red deben mantenerse alejados de los niños menos de 8 años. - Debe vigilar que los niños no juguen con el equipo. - La estación meteorológica inalámbrica y el adaptador de red no deben sumergirse en agua ni en ningún除外 liquido. Riesgo de descarga electrica! Por tanto no utilizes la base de la estación meteorológica inalámbrica cerca de fuentes de humedad como por ejemplo lavabos. - Utilice únicamente el adaptor de red suministrado y sustitúyalo por otro del mesmo tipo. El adaptor de red soloDebe utiliser en espacios interiores secs y deben protegerse contra la humedad. Las pilas peuvent suponer un peligro de muerte si se ingieren. Por tanto, mantenga la estación meteorológica, el sensor inalámbrico exterior y las pilas fuera del alcance de los niños. Si se ingiere una pila, deben acudir inmediamente en busca de asistencia Médica. - Mantenga la los niños alejados del material de embalaje y de las piezas pequeñas contentsas en el material suministrado. Existe el riesgo de asfixia por ingestión. - Conecte el dispositivo a un enchufe correctamente instalado con la tension españica en los " datos技术和icos". - Preste atencion a que el enchufe sea accesible para que, en caso necessario, poder tirarrapidamente del adaptorador de red. - No utilise la estación meteorológica inalámbrica si el adaptador de red o su cable está danados. - Atencion: Existe riesgo de explosión debido a la incorrecta Manipulación de las pilas. Las pilas no deben cargarse, reactivarse con otros medios, desmontarse,arrojarse al fuego o ponerse en cortocircuito. - Evite el contacto del liquido de las pilas con la piel, ojos y mucosas. En caso de contacto, deben limpiarse inmediamente la zona afectada con agua limpia y acudir al medico sin perdida de tiempo. Proteja la base y el sensor exterior inalámbrico del polvo, los golpes, las temperatas extremas y La exposión directa al sol. Proteja la estación base de la humedad. Coloque la base exclusivamente en un espacio cerrado y seco. - El sensor exterior inalámbrico está protegido contra la humedad, pero debe evitarse que se moje directamente, como por ejemplo por la lluvia.Indicaciones sobre el lugar de colocacion
- La distancia Tmaxima entre la base y el sensor inalámbrico debe ser de 60 metros. ("contacto visual directo") - Los materiales de construcción que tienen efecto de apantallamiento, como por exemple el hormigón armado, reducen o impiden la Reception de la seals entre la base y el sensor exterior inalámbrico. - Los aparatos comoTelevisores,telefonosinalambricos,ordenadores y tubos fluorescentes, poderen interferir en la recepcion de la seals.Estación base
Vista delantera
 1 vea "Indicador de Fecha ymana" 2 vea "Pronóstico meteorológico y de tendencia del clima" 3 vea "Datas meteorológicos" 4 Encender/apagar la luz de la pantalla - Activar funciona de repetición 5 indicator de temperatas MIN/MAX guardadas 6 vea "Indicador de presión de aire" 7 vea "Indicador de fases lunares y mareas"Vista trasera
 1 Ajustar hora de alarma 2 • Ajuste de values (aumento) - Cambiar unidades de temperatura 3 · Ajuste de values (disminución) - Iniciar/interrumpir la recepción inalámbrica 4 Ajustar alarmade temperatureyconexionydesconexion 5 Modificar unidades de medida de presión atmósferica 6 SeLECTIONAR intensidad de iluminacion de la pantalla 7 Compartimiento de las pilas 8 Toma de connexion para adaptor de red 9 Conector USB para entrega de dispositivos externos (smartphone, reproductor MP3, etc) 10 Conectar y desconectar la funciona descentador 11 Ajustar manualmenteecha y horaSensor exterior inalámbrico
 1 Ojete colgante 2 Compartimiento de las pilas  Siga la secuencia indica y coloque en primer lugar las pilas en el sensor exterior.Sensor exterior
1. Retire la tapa del compartmento de las pilas en la parte posterior del sensor exterior presionando con un poco de fuerza en la flecha impresa. Deslice la tapa del compartmento de las pilas en la direccion de la flecha, lejos del sensor exterior. 2. Inserte 2 pilas de tipo LR03 (AAA)/1,5 V como se muestra en la parte inferior del compartmento de las pilas. Preste atencion a la polaridad correcta de las pilas (+ / - ) 3. Deslice la tapa del compartmento de las pilas en su lugar en el sensor exterior.Estación base
Se pueda usar la estación meteorológica inalámbrica con el adaptor de red o con pilas. Si la estación meteorológica inalámbrica está connectada a una toma de corriente, entonces funciona a工程技术 de la red electrica, incluso cuando se insertan las pilas en el dispositivo. Retire las pilas descargas del compartmentimiento de las pilas, ya que podráan tener fugas.  NOTA sobre los daños materiales - Para su uso atramés de la red electrica,utilice unicamente el adaptador de corriente suministrado con la estación meteorológica.Modo actual
1. Inserte el enchufe del adaptordo de corriente suministrado en la toma de connexion de la estacion base. 2. Enchufe el adaptor de corriente a una toma queonga una tensión correspondiente a la descririta en los "Datas技术和icos". 3. Espere aproximadamente 30 Minutes. La estación base requires this time to recopilar todos los datos del tiempo y recibir señales de radio desde el transmisor de signaled horaria.Funcionamento con pilas
1. Presione con fuerza la tapa del compartmente de las pilas y desplácela hacía elazo. 2. Inserte 2 pilas del tipo LR6 (AA)/1,5 V como se muestra en la parte inferior del compartmento de las pilas. Preste atencion a la polaridad correcta (+ / - ) 3. Vuelva a colocar nuevomente en su situ lo tapa del compartmente de las pilas. 4. Espere aproximadamente 30 Minutes. La estación base requires this time to recopilar todos los datos del tiempo y recibir señales de radio desde el transmisor de signaled horaria.A partir de la Reception de la seals
Cuando la estación base recibe corriente, se iluminan en la pantalla todos losindicadores durante un momento. Adejas,la pantalla se ilumina brevamente y suena un pitido.  Entonces el dispositivo cambia a modo de recepción, durante elrial número de ondas de radio indica la calidad de la recepción: Cuantas más ondas de radio aparecen en la pantalla, mejor es la recepción.Durante la Reception, solo las functions de los botones todos losREMAs botones se desactivan durante este tiempo.
Tan primo como se reciba una señal con suficiente intensidad, aparecen los datos correspondientes y el símbolo de la torre de radio en la pantalla. Este proceso puede tardar uno horas. A partir de ahora, la estación meteorológica cambia automaticamente al modo de Reception variedes每次 cada noche. Durante este periodo, el tiempo mostrado se compare con el recibido desde el transmisor deolenal de tiempo y, si esnecessary, se corrige. Si no se ha recubiido una señal lo suficientemente intensa, la estación base aborta el proceso de Receptionkingrzdespues de uno微量元素 y el symbolo de la torre de radio se apaga. El proceso de receptionacion se inicia de nuevo en un punto posterior en el tiempo.Funciones principales de la estación meteorológica
En el manual de instrucciones se describe detalladamente除外nasrogenes.Predicción meteorológica y tendencia
Después de la puesta en funciona,[20] los datos de predicción meteorológica no pueden utiliser duranteunas 12 horas, ya que la estación meteorológica nécessita ese tiempo para recoger y valorar los datos meteorológicos. La predicción meteorológica se realiza a partir de los datos recogidos y de las variaciones de la presión atmósferica medidas al hacerlo. La predicción se realiza para un radio deelines 30 a 50 km alrededor de la estación meteorológica y para un periodo entre 12 y 24 horas. La exactitude la previsión meteorológica ronda el 75% .    soleado parcialmente nublado nublado    lluvia fuertes lluvias aguanieve Teniendo también en cuenta la tendencia de la presión atmosférica, son posibles otheras interpretaciones.  presión en aumento  presión constante  presión en descensoDos ejemplos:
- La previsión meteorológica indica lluvia, la presión atmosférica descienda mucho y rápidamente >> es probable una lluvia fuerte. - La previsión meteorológica indica lluvia, la presión atmosférica haeightado en las ultimas 12 horas pero a vuelto a descender ligeramente en las ultimas 3 horas >> es probable una lluvia débil.Tendency de la temperatura y la humedad del aire
Se muestra la tendencia en forma de flecha para los valores de la temperatura y humedad del aire medidos por la estacion base y el sensor inalambrico:  ascendente  constante  descendenteIndicador de presión de aire
 La presión del aire que prevaleceactualmente se visualiza en la unidad elegida (generalmente: hPa = hectopascales) Además se muestra un historrama de la presión atmósferica en las ultimas 24 horas.Datas meteorológicos guardados
Con el botón MEM, hace que se mueste los valores más alto y más bajo de las ultimas 24 horas relativos a laTemperatura y humedad del aire. - Presionar 1 vez: Se muestran los valuesolestimos - Presionar 2 vezes: Se muestran los values他们在 - Presionar 3 vezes: se muestra la pantalla normal Para borrar los valores guardados: -Mantenga presionado el botón MEM uno 2 seguidos hasta que los values desaparezcan.Indicador de fases lunares y mareas
 Las fases lunares y las mareas seactualizan automatistically al Cambiar la Fecha.       luna nuevo lunafucke media luna cuarto cremiente       luna llena cuarto menguante media luna cuarto menguante Indicador de mares: - H = pleamar M=marea media - L = bajamarAlarma
Configuración de la hora de la alarma
1. Mantenga presionado unoicosometimesALARMhasta que parpadeen las horas del descentador y aparezca ALARM TIME. 2. Utilizando los botones y,establezca la hora de alarma deseada. 3. Pulse ALARM. El indicator de Minutes para la hora de alarma parpadea en la pantalla. 4. Usando los botones y,ajuste los Minutes de alarmadeseados. 5. Porultimate,pulse ALARM para guardar la configuracion.Encendido/apagado de la función de alarma
- Conecte y desconecte la funciona descentador (ON/OFF) con el control deslizante ALARM. Tan pronto como aparece el símbolo de alarma, se activa la función de alarma.Detener la alarma
Whenever you want to use the formula, you can use the following formula.Apagar la alarma por completo
-Pulse该如何ier boton en la estacion base (excepto SNOOZE/LIGHT) para detener la alarma.Función de parada automática
Si no se pulsa un botón, la alarma se apaga automatistically cuando de 2 horas. Transcurridas 24 horas, la alarma volverá a sonar automatistically.Función de repetition
-Pulse el botón SNOOZE/LIGHT una vez cuando suene la seals de alarma. El sonido del descentador se para y en la pantalla parpadea y Z^ . La señal de alarma se queda en silencio durante 5 horas aproximadamente. A continuacion, el dispositivo cambia de nuevo y la alarma suena de nuevo. Este procedimiento se pueda repetir varias vezes.Datasétécnicos
Los "Datas Técnicos" completos los encontrará en el manual de instruciones detallado.Estación base
Modelo: Estacion meteorologica WS 1600 Entrada: 5V Pilas: 2x LR6 (AA)/1,5 V Frecuencia de 433,92 MHz transmisión:: Potencia maximal de +10dBm transmisiónSensor exterior inalámbrico
Pilas: 2x R03 (AAA)/1,5 V Alcance: 60 metros (en terreno abierto)Adaptador de red
Entrada: 230 ~V , 50 ~Hz Salida: 5 V Nivel de seguidad: Distribuidor: Waagen-Schmitt GmbH Hammer Steindamm 27-29 22089 Hamburg, GermanyDeclaración de conformidad
Por la presente, Waagen-Schmitt GmbH declares que la estación meteorológica WS 1600 cumple las directivas 2014/53/UE y 2011/65/UE. El texto completo declaración de conformidad CE está disponible en lasuma dirección de Internet: www.ade-germany.de/doc.Esta declaración pierde su validez si se realizan modificaciones en la estación meteorológica sin nuestra aprobacion. Hamburgo, enero 2018 Waagen-Schmitt GmbH Hammer Steindamm 27-29 22089 Hamburgo, Germany Garantía
Estimada/o cliente, laEmpresa Waagen-Schmitt GmbH garantiza durante 2 años a partir de la Fecha de compra, la eliminación de los defectos debidos a fallos de material o fabricación, mediante reparación o cambio del equipo. En caso de solicitar la aplicación de la garantía, lleve el articulo a su distribuidor con el justificante de compra (explicando el motivo de la reclamación).Eliminación
Eliminación del embalaje
 Elimine el embalaje分开ando los materiales. Lleve el papel y cartón al contentedor de cartón y las láminas al de plásticosEliminación del articulo
Elimine el articulo conforme a la normativa correspondiente aplicable en su País. Encontrará las instrucciones completas para la eliminación en el manual de instrucciones detallado.Station météo avec capteur radio extérieur
Guide de démarrage WS 1600    Table des matieres
Contenu de livraison 2 Utilisation conforme. 2 Sécurité 3 Indications relatives au lieu d'installation 4 Station de base 5 Capeur extérieur sans fil 7 Mise en marche 8 Fonctions principales de la station météo 10 Caracteristiques techniques. 15 Déclaration de conformité 15 Garantie 16 Mise au rebut. 16Ceci est le guide de démarrage
Le mode d'emploi détaillé téléchargeable en format PDF se trouve sur Internet à l'adresse www.ade-germany.de/bedienungsanleitung
Respectez tout particulièrement les instructions de sécurité.
Contenu de livraison
- Les stations météorologiques sont composées de : - Station de base - Câpteur extérieur sans fil - Piles: -2 piles LR6 (AA) pour la station de base -2 piles LR03 (AAA)/1,5 V pour le capteur extérieur sans fil - Un adaptateur secteur pour la station de base Mode d'emploiUtilisation conforme
- La station météo, constituee d'une station de base et d'un capteur extérieur sans fil, affiche diverses données météorologiques (pression atmosphérique, températures, etc.) relatives à l'environnement immédiat. La station météo calcule ses prévisions sur la base des données météorologiques mesurées. - En outre, la station météo affiche la date, l'heure, les phases lunaires et est également équipée d'une alarme. - La station météo n'est pas adaptée aux prévisions météorologiques ou à la prise de mesures météorologiques dans un contexte commercial.Sécurité
L'appareil et l'adaptateur secteur doit être tenus hors de portée des enfants de moins de 8 ans. - Les enfants doivent être surveillés afin de s'assurer qu'ils ne jouent pas avec l'appareil. - La station météo et l'adaptateur secteur ne doit pas être immergés dans de l'eau ou dans d'autres liquides. Risque d'électrocution! Pour cette raison, n'utilise pas la station de base de la station météo radio àproximitéde sources d'humidité,par ex.un évier. - N'utilisez que l'adaptateur secteur inclus et ne le remplacez que par un adaptateur du même type. L'adaptateur secteur ne doit être utilisé que dans des espaces interieurs secs et doit être protégé de l'humidité. - Les piles peuvent être dangereuses pour la santé en cas d'ingestion. Pour cette raison, conservez la station météo, le capteur radio extérieur et les piles hors de portée de jeunes enfants. En cas d'ingestion d'une pile, il faut immédiatement solliciter une aide Médicale. - Tenez les enfants éloignés des matériaux d'emballage et des petits éléments faisant partie du contenu de l'emballage. Il existe un risque d'étouffement en cas d'ingestion. Raccordez l'appareil à une prise électrique installée de manière conforme et dont la tension correspond aux « Caracteristiques techniques » Veillez à ce que la prise électrique soit bien accessible de façon à pouvoir rapidement retarder la fiche en cas de besoin. - N'utilisez pas la station météo radio si l'adaptateur sekteur ou le cable de l'adaptateur sont endommages. - Attention: Risque d'explosion en cas de manipulation non conforme de la pile. Les piles ne doivent pas etre chargees, reactivées avec d'autres moyens, démon-tées, jetées au feu ou court-circuits. - Évitez que le liquide de la pile n'entre en contact avec la peau, les yeux et les muqueuses. En cas de contact, rincez immédiatement les zones concernées avec de l'eau claire et consultez immédiatement un médecin. - Protégez la station de base et le capteur radio extérieur contre la poussière, les chocs, les températures extrêmes et l'exposition directe aux rayons du soleil. - Protégez la station de base de l'humidité. Installez la station de base exclusivement dans une piece sèche et fermée. - Le capteur radio extérieur est protégé contre l'humidité, mais doit être protégé des effets directs de l'humidité tels que la pluie.Indications relatives au lieu d'installation
L'éloignement maximal entre la station de base et le capteur radio extérieur peut atteindre 60 mètres. (« contact visuel direct ») - Les matériaux blindés tels que le beton armé réduisent ou empêchent la réception radio entre la station de base et le capteur radio extérieur. - Les apparêils tels que les téléviseurs, les téléphones sans fil, les ordinateurs et les lampes fluorescentes peuvent également perturber la réception radio.Station de base
Vue de face
 1 voir « Témoin de date et de semaine » 2 voir « Prévisions et tendances météorologiques » 3 voir «Données météorologiques» 4 • Bouton Marche/Arrêt pour l'écran Activation de la fonction de rappel d'alarme 5 Afficher les températures MIN/MAX enregistrées 6 voir « Témoin de pression atmosphérique » 7 Voir « phase lunaire et heures »Vue de l'arrière
 1 Régler l'heure de réveil 2 - Réglage des valeurs (augmentation) - Modifier l'unité de mesure de la température 3 - Réglage des valeurs (diminution) - Demarrer / interrompre la réception radio 4 Régler l'alarme de température et éteindre ou allumer 5 Modifier l'unité de mesure de la pression d'air 6 Sélectionner la luminosité de l'écran 7 Compartiment à piles 8 Prise pour l'adaptateur secteur 9 Douille de raccordement USB pour la recharge d'appareils externes (smartphones, lecteurs MP3, etc.) 10 Allumer/éteindre la fonction réveil 11 Régler manuellement la date et l'heureCapeur extérieur sans fil
 1 Cēillet d'accrochage 2 Compartiment à piles  Procedez dans l'ordre prescrit et inserez d'abord les piles dans le capteur radio extérieur.Capeur extérieur
1. Retirez le couvercle du compartment à piles à l'arrière du capteur extérieur en appliquant un peu de force sur la flèche imprimée. Faites glisser le couvercle du compartment à piles dans le sens de la flèche en l'éloignant du capteur extérieur. 2. Insérez 2 piles de type LR03 (AAA)/1,5 V comme représenté sur la partie inférieure du compartment à piles. Veillez à respecter la polarité des piles (+/-). 3. Faites glisser le couvercle du compartment à piles en place sur le capteur extérieur.Station de base
Vous pouvez faire fonctionner la station météo sans fil avec l'adaptateur secteur ou avec des piles. Si la station mete o sans fil est branchee a une prise de courant, elle fonctionne alors sur l'alimentation secteur, meme lorsque les piles sont inserees dans l'appareil. Retirez les piles dechargees du compartment a piles, car elles peuvent couler.  NOTE sur les dommages matériels Pour le fonctionnement sur secteur, utilisez uniquement l'adaptateur secteur livre avec la station météorologique.Mode actuel
1. Insérez la fiche de l'adaptateur secteur fourni dans la prise de branchement de la station de base. 2. Branchez l'adaptateur secteur sur une prise présenteant une tension correspondant à cette décrite à la rubrique « Spécifications techniques » 3. Attendez environ 30 minutes. La station de base a besoin de ce temps pour recueillir toutes les données météorologiques et receivevoir les signaux radio de l'émetteur du signal horaire.Fonctionnement sur piles
1. Exercez une légère pression sur le couvercle du compartment batterie et faites-le glisser sur le côté. 2. Insérez 2 piles de type LR6 (AA)/1,5 V comme représenté sur la partie inférieure du compartment à piles. Veillez à respecter la polarité (+/-). 3. Faites à nouveau glisser le couvercle du compartment batterie sur le (:oté. 4. Attendez environ 30 minutes. La station de base a besoin de ce temps pour recueillir toutes les données météorologiques et receivevoir les signaux radio de l'émetteur du signal horaire.Lancement de la réception du signal
Dès que la station de base est alimentée en électricité, tous les affichages sont brièvementprésentés à l'écran. En outre, l'affichage s'allume brièvement et un bip retentit.  L'appareil passe alors en mode de réception. Dans ce mode, le nombre d'ondes radio indique la qualité de la réception : Plus il y a d'ondes radio affichées à l'écran,ILAmeure est la réception.Lors de la réception, seule la touche ▲ fonctionne; toutes les autres touches sont désactivées à ce moment.
Dès que le signal est reçu avec une force suffisante, les données correspondantes et le symbole de la tour de radio s'affichent sur l'écran. Ce processus peut durer quelques minutes. À partir de ce moment, la station météo passée automatiquement en mode réception plusieurs fois pendant la nuit. Pendant ce processus, l'heure affichée est comparée à cette reçue de l'émetteur du signal horsaire et corrigée le cas échéant. Si aucun signal suffisamment fort n'est reçu, la station de base abandonne le processus de réception après quelques minutes et le symbole de la tour de radio s'en va. Le processus de réception est repété à un moment ultérieur.Fonctions principales de la station météo
Les autres fonctions sont décrites dans le mode d'emploi détaillé.Prévisions et tendances météorologiques
Après la mise en marche, les données pour les prévisions météorologiques ne peuvent pas encore être utilisées pendant environ 12 heures car la station météo nécessite ce temps pour collecter et analyser les données météorologiques. Les prévisions météorologiques sont issues des données collectées et des variations de pression atmosphérique mesurées. La prévision se refère à la zone autour de la station météo avec un rayon d'environ 30 à 50 km pour une durée concernant les 12 à 24 heures à partir. La précision des prévisions météorologiques est d'environ 75% .    ensoleillé légèrement nuageux nuageux    plouvieux plue battante chutes de neige D'autres interpretations météos sont possibles selon la tendance de la pression atmosphérique.  pression ascendante  pression constante  pression descendanteDeux exemples :
- Les prévisions météos indiquent de la pluie, la pression baise rapidement et fortement >> de fortes pluies sont probables. - Les prévisions météos indiquent de la pluie, la pression a augmente au cours des 12 dernières heures mais est légèrement redescendue au cours des 3 dernières heures >> de faibles pluies sont probables.Évolution des températures et de l'humidité de l'air
Pour les valeurs mesurées par la station de base et le capteur radio concernant la température et l'humidité de l'air, l'évolution est indiquée sous forme de flèche :  montante  constante  descendanteUn témoin de pression atmosphérique
 La pression atmosphérique qui prévaut actuellement est affichée dans l'unité可以选择 (en général : hPa = hectopascals). Par ailleurs, un historiagramme de pression d'air des 24 dernières heures est affché.Données thermiques enregistrées
La touche MEM vous donne les valeurs les plus élevées et les plus faibles des 24 dernières heures par rapport à la température et à l'humidité de l'air.. - Appuyez 1 fois : La valeur MAX est affichée - Appuyez 2 fois : La valeur MIN est affichée - Appuyez 3 fois : l'affichage normal revient à l'écran Pour supprimer les valeurs enregistrées : -Maintenez la touche MEM enfoncée pendant env. 2 secondes, jusqu'à ce que les valeurs affichées soient supprimées.Affichage de la phase lunaire et de la marée
 Les phases lunaires et marées (Tide) sont automatiquement mises à jour avec la date.       nouvelle lune lune montante demi-lune gibbeuse montante       pleine lune gibbeuse descendante demi-lune lune descendante Affichage de la marée : H = Flot - M = Marée moyenne - L = RefluxAlarme
Réglage de l'heure de l'alarme
1. Maintenez enfoncée la touche ALARM pendant quelques secondes jusqu'à ce que l'affichage des heures de réveil clignote et ALARM TIME apparaisse à l'écran. 2. En utilisant les touches , reglez l'heure de l'alarme souhaitation. 3. Appuyez sur ALARM. Le tímoin des minutes pour l'heure de l'alarme clignote à l'écran. 4. En utilisant les touches et réglez les minutes de l'alarme souhaitation. 5. Pour terminer, appuyez sur ALARM pour enregistrrer les réglages.Activation/désactivation de la fonction d'alarme
-À l'aide du curseur ALARM, activez ou désactivez la fonction réveil (ON/OFF). Dès que le symbole d'alarme est affché, la fonction d'alarme est activée.Arrêt de l'alarme
Vous serez réveillé à l'heure souhaitation par une sonnerie d'alarme, qui devendra plus intense à mesure que la durée de l'éveil augmente.Arrêt complet de l'alarme
- Appuyez sur une touche quelconque de la station de base (à l'exception de SNOOZE/LIGHT) pour arrêté l'alarme.Fonction d'arrêt automatique
Si vous n'appuyez sur aucune touche, l'alarme se désactive automatiquement au bout de 2 minutes. ÀpRES 24 heures, l'alarme se déclenchera à nouveau automatiquement.Fonction de rappel d'alarme
- Appuyez une fois sur la touche SNOOZE/LIGHT lorsqu'la sonnerie d'alarme retentit.Caracteristiques techniques
L'ensemble des « Caractéristiques techniques » se trouve dans le mode d'emploi détaillé.Station de base
Modèle: Station météo WS 1600 Entrée:5V Piles:2xLR6(AA)/1,5V Fréquence de transmission : Puisance de transmission max.:Capeur radio extérieur
Piles:2xR03(AAA)/1,5V Portée : env. 60 mètres (milieu ouvert)Adaptateur secteur
Entrée: 230 ~V , 50 ~Hz Sortie:5V Classe de protection : Distributor: Waagen-Schmitt GmbH HammerSteindamm 27 - 29 22089 Hamburg, GermanyDéclaration de conformité
Waagen-Schmitt GmbH déclare que la station météo WS1600 est conforme aux directives 2014/53 EU et 2011/65/EU. Le texte complet de la déclaration de conformité européen est disponible sur le site internet suivant: www.ade-germany.de/doc Cette déclaration perd sa validité si des modifications sont apportées à la station météo sans notre approbation. Hamburg,janvier 2018 Waagen-Schmitt GmbH Hammer Steindamm 27-29 22089 Hamburg, Germany Garantie
Chère cliente, cher client, la société Waagen-Schmitt GmbH garantit la prise en charge gratuite de defaults matériels ou de fabrication pendant 2 ans à partir de la date d'achat, par une réparation ou un remplacement. Dans le cas où vous souhaitez faire usage de cette garantie, veuilles remettre l'article ainsi que la preuve d'achat (en indiquant les raisons de votre réclamation) à votre revendeur.Mise au rebut
Élimination de l'emballage
 Éliminez les emballages de façon conforme. Jetez le papier et le carton avec les papiers de récapération, les plastiques dans les collecteurs de matières recyclables.Mise au rebut de l'article
Veuillez eliminer l'article selon les prescriptions en vigueur dans votre pays en matière de traitement des déchets. L'ensemble des prescriptions de mise au rebut se trouve dans le mode d'emploi détaillé.Stazione meteo con sensore radio esterno
Guida rapida WS 1600   Indice dei contenuti
Ambito della fornitura 2 Destinazione d'uso 2 Sicurezza 3 Luogo di installmente. 4 Stazione base. 5 Sensore esterno senza fili. 7 Messa in funzione 8 Funzioni principali della stazione meteo. 10 Caratteristiche tecniche 15 Dichiarazione di conformità 15 Garanzia 16 Smaltimento 16 Il presente documento contiene la guida rapida. Il manuale in formato pfd con le istruzioni per l'uso dettagliate più essere scaricato all'indirizzo www.ade-germany.de/bedienungsanleitung Prestare particolare attenzione alle istruzioni per la sicurezzaAmbito della fornitura
- Ogni stazione meteorologica comprende: -Stazione base -Sensore esterno senza fili - Batterie: -2 batterie stilo LR6 per la stazione base -2 batterie ministilo LR03 da 1,5 V per il sensore esternoenza fili - Alimentatore elettrico per la stazione base - Manuale operativoDestinazione d'uso
- La stazione meteo, composta alla stazione base e dal sensore esternorawnza fili, mostra vari dati relativi alle condizioni del tempo (pressione atmosferica, temperatura ecc.) nell'ambiente circostante. La stazione meteorologica è in grado di effettuare le previsioni del tempo sulla base dei dati meteo registrati. - Inoltre, la stazione meteo indica la data, l'ora e le fasi lunari,或者其他 ad essere dotata di una sveglia. - La presente stazione meteorologica non è destinata ad un uso commerciale delle previsions del tempo o dei dati meteo registrati.Sicurezza
- Tenere il disposativo e l'alimentatore lontano alla portata dei bambini di età inferiore agliotto anni. - Sorvegliare i bambini per evitare che giochino con l'apparecchio. Non immershere in acqua o altri liquidi la stazione meteo radiocommandata e l'alimentatore. Pericolo di scosse elettriche! Non utilizzato la base della stazione meteo radiocommandata vicino a lavandini e altri oggetti contententi acqua o fonti di umidità. - Utilizzare sempre l'alimentatore fornito in dotazione e sostituirlo solo con uno dello stesso tipo. Utilizzare l'alimentatore solo in ambienti interni asciutti e proteggerlo dall'umidità. L'ingestione delle batterie può costituire un pericolò mortale. Pertanto, tenera la stazione meteo, il sensore radio esterno e le batterie lontano alla portata dei bambini piccoli. In caso di ingestione di una batteria, consultare immediatamente un medico. - Tenere lontano alla portata dei bambini il materiale di imballo e i componenti della fornitura di piccole dimensioni. In caso di ingestione sussiste un pericolò di soffocamento. - Collegare l'apparecchio ad una presa correttamente installata, la cui tensione corrisponda a quella indicata nella "Scheda technique" - Accertarsi che la presa sia facilemente accessibile, in modo che in caso di necessità l'alimentatore possa essere scollegato velocemente. - Non utilizzato la stazione meteo se l'alimentatore o il cavo dello stesso sono danneggiati. - Attenzione: L'utilizzo improprio delle batterie può costituire un pericolo di esplosione. Le batterie non devono essere ricaricate, riattivate con altri mezzi, smontate, buttate nel fuoco o messe in cortocircuito. - Evitare il contatto del liquido delle batterie con la pelle, gli occhi e le mucose. In caso di contatto con il liquido, lavare subito con acqua abbondante e consul-tare immediatamente un medico. - Proteggere la stazione base e il sensore radiocommando rromoto da polvere, urti, temperature estreme e luce diretta del sole. - Proteggere la stazione base dall'umidità. Collocare la stazione base solo in un ambiente interno asciutto. Il sensore radio esterno è dotato di protezione contro l'umidità; evitare, tuttavia, l'esposizione diretta ad acqua o altri liquidi, come ad esempio la pioggia.Luogo di installmente
- La distanza massima tra la stazione base e il sensore radio esterno non deve superare 60 metri. (contatto visivo diretto"). - Materiali schermanti, come ad esempio il cemento armato, riducono o impediscono la trasmissione tra la stazione base e il sensore radio esterno. - Anche dispositivi quali televisori, Telefoni cordless, computer e tubi fluorescenti, possoono disturbare la trasmissione.Stazione base
Vista frontale
 1 Vedi la sezione "Indicatore di data e settimana" 2 Vedi la sezione "Previsioni del tempo e tendenza meteo" 3 Vedi la sezione "Dati meteo" 4 Accensione/spegnimento illuminazione schermo Attivazione funzione snooze 5 visualizzazione delle temperature minime e massime 6 Vedi la sezione "Indicatore di pressione atmosferica" 7 vedi "Indicazione delle fasi lunari e della marea"Vista posteriore
 1 Impostazione della sveglia 2 - Regolazione valori (aumento) - Selettore unità di misura della temperatura 3 Regolazione valori (riduzione) - Avvio manuale/interruzione della ricezione radio 4 Attivazione e disattivazione dell'allarme temperatura 5 Modifica delle unità di misura della pressione atmos. 6 Impostazione della luminosità del display 7 Vano battery 8 Presa di connessione per l'alimentatore elettrico 9 Porta USB per caricare dispositivi esterni (smartphone,lettore MP3 o simili) 10 Attivazione e disattivazione della sveglia 11 Impostazione manuale della data e dell'oraSensore esterno senza fili
 1 Occhiello di fissaggio 2 Vano battery  Seguire i passi descritti qui sotto, cominciando con l'insertimento delle batterie nel sensore radio esterno.Sensore esterno
1. Rimuovere il coperchio del vano porta-batteria situato sul retro del sensore esterno, applicando una leggera pressione sulla freccia stampata. Per rimuovere il coperchio del vano porta-batteria dal sensore esterno, farlo scorrere nella direzione individata alla freccia. 2. Inserire 2 batterie ministilo da 1,5V di tipo LR03, come indicate nella figura presente sul fondo del vano batterie. Fare attenzione alla corretta polarità (+ / -) di inserimento delle batterie. 3. Rimettere aerto il coperchio del vano porta-batteria del sensore esterno.Stazione base
La stazione meteorawnza fili cui既可以 funzionare a batterie o con alimentazione elettrica. Se la stazione meteorawnza fili è collegata a una presa elettrica,essa funzionera a corrente,anche se le batterie sono insertite nel dispositivo.Rimuoveredal vano le batterie scariche,per evitare il rischio di perdite. NOTA sui danni materiali
Per il funzionamento tramite corrente, servirsi escludivamente dell'alimentatore elettrico in dotazione con la stazione meteo.Modalità alimentazione elettrica
1. Inserire lo spinotto dell'alimentatore elettrico in dotazione nell'apposita presa di connessione sulla stazione base. 2. Collegare poi l'alimentatore ad una presa di corrente a muro, che supporta una tension corrispondente a quale indica nella sezione "Dati tecnici". 3. Attendere circa 30 minuti. Questo è il tempo richiesto alla stazione base per raccogliere dati meteo e ricevere i segnali radio dal trasmettitore per la sincronizzazione oraria.Funzionamento a batterie
1. Premere leggermente sul coperchio del vano batterie e spingerlo lateralmente. 2. Inserire 2 batterie stilo da 1,5V di tipo LR6, come indicate nella figura presente sul fondo del vano batterie. Fare attenzione alla corretta polarità (+ / -) di inserimento delle batterie. 3. Richiudere il coperchio del vano batterie spingendolo. 4. Attendere circa 30 minuti. Questo è il tempo richiesto alla stazione base per raccogliere dati meteo e ricevere i segnali radio dal trasmettitore per la sincronizzazione oraria.Avvio ricezione del segnale
Non appena la stazione base viene collegata all'alimentazione, tutti gli indicatori appariranno breveamente sul display. Inoltre, lo schermo si illumina rapidamente, accompagnato da un breve segnale acustico.  Il disposizione quindi rientra in modalità di ricezione e in tale fase il numero di onde radio mostrate sullo schermo indica la qualità della riscione: maggiore è il numero di onde radio indicate sullo schermo, migliorare è la riscione.In fase di ricezione, solo il tastinge funziona: tutti gli altri tastingi sono disattivati in questa fase.
Alla ricezione di un segnale sufficientemente forte, i relativi dati, accompagnati dal symbolo di un radio trasmettitore, appariranno sullo schermo. Questo processo può durare alcuni minuti. Da questo momento, la stazione meteo passera automaticamente in modalità di ricezione, diverse volte agli sera. In这对于a fase, l'orario visualizzato viene confrontato con quello ricevuto dal trasmettitore del segnale orario e, se necessario, corretto. Se il segnale ricevuto non è sufficientemente forte, la stazione base annulla il processo di ricezione dopo quello minuto, nelle simbolo del trasmettitore radio scompare dallo schermo. Il processo di ricezione verrà comunique ripetuto successivamente.Funzioni principali della stazione meteo
Ulteriori funzioni sono descripte nel manuale per l'uso.Previsioni del tempo e tendenza del tempo
Dopo la messa in funzione, la stazione meteo impiega circa 12 ore per raccogliere ed elaborare i dati ricevuti e produrre previsioni del tempo attendibili. Le previsionsi del tempo sono prodotte utilizzando i dati raccolti e le variazioni della pressione atmosferica. Le previsions coprono un area con un raggio di circa 30 - 50 km alla stazione e sono valide per le prossime 12 - 24 ore. La percentuale di precisione delle previsions del tempo è di circa il 75% .    Sereno Poco nuvoloso Nuvoloso    Pioggia temporali nevicata Insieme alla tendenza della pressione atmosferica, è possibile ottenere ulteriori informazioni sul tempo.  pressione atmosferica in aumento  pressione atmosferica invariata  pressione atmosferica in diminuzione Due esempi: - Le previsionsi indicano pioggia, la pressione è in rapida diminuzione >> sono probabili forti piogge. - Le previsionsi indicano pioggia, la pressione atmosef- rica è salita nelle ultime 12 ore, ma poi è leggermente diminuita nelle ultime 3 ore >> pioggia leggera probabile.Tendenza della temperatura e dell'umidità
La tendenza della temperatura e la tendenza dell'umidità misurate alla stazione base e dal sensore sono indicate con una freccia:  in augmento  invariata  in diminuzioneIndicatore di pressione atmospherica
 Il valore di pressione atmospherica prevalente al momento viene moltoromo sullo schermo nell'unità selezionata (di solito: hPa = ettopascal). Inoltre, viene visualizzato un istogramma della pressione atmospherica delle ultime 24 ore.Dati meteorologici memorizzati
Il pulsante MEM consente di visualizzare i valori massimi e minimi delle ultime 24 ore relativi alla temperature e all'umidità. - Premere 1 volta per: visualizzare i valori massimi Premere 2 volte per: visualizzare i valori minimi Premere 3 volte per: visualizzare la schermata predefinita Per eliminare i valori memorizzati: - tenere premuto il pulsante MEM per circa 2 secondi, forn o quando i valori visualizzati non saranno statici cancellati.Indicazione delle fasi lunari e dellaarea
 Le fasi lunari e la marea saranno attualizzate automaticamente assieme alla data.       luna nuova luna crescente Mezzaluna luna gibbosa crescente       luna piena luna gibbosa calante Mezzaluna luna calante Visualizzazione della marea: - H = alta marea M=marea media - L = bassaareaAllarme
Impostazione ora di allarme
1. Tenere premuto ALARM per alcuni secondi, fino a quando l'ora della sveglia lampeggerà e ALARM TIME apparirà sul display. 2. Usando i tasti et, scegliere l'ora di allarme voluta. 3. Premere il tasting ALARM. L'indicatore dei minuti relativi all'orario di allarme inizia a lampeggiare sullo schermo. 4. Usando i tasti et, scegliere i minuti dell'orario di allarme voluto. 5. Infine, premere il tasting ALARM per salvare l'impostazione definita.Attivazione/disattivazione della funzione di allarme
- Attivare o disattivare (ON/OFF) la sveglia con il cursore Alarm. Non appena il symbolo di allarme èppare sullo schermo, la funzione di allarme si attiva.Interruzione dell'allarme
Allo scoccare dell'ora impostata, l'allarme della sveglia inizia a suonare, divertando più intenso col passare del tempo.Interruzione completa della suoneria di allarme
- Premere qualunque tasto della stazione base (ad eccezione di SNOOZE/LIGHT) per interrompere l'allarme.Funzione di blocco automatico
Se non si preme alcun tasto, la suoneria finisce automaticamente dopo 2 minuti. Dopo 24 ore, l'allarme scatta di nuovo.Funzione Snooze
-Premere il tasting SNOOZE/LIGHT una volta, nelle segnale di allarme suona. Il segnale della sveglia si interrompe e sul display lampeggeranno e Z^ . Il segnale di allarme non suona per circa 5 minuti. Poi la funzione si riattiva e l'allarme suona di nuovo. Tale procedura può essere ripetuta più volte.Caratteristiche tecniche
Le „Caratteristiche tecniche“ dettagliate sono contenate nel manuale dell'utente.Stazione base
Modello: Stazione meteo WS 1600 Ingresso: 5 V Batterie: 2x LR6 (AA) / 1,5 V Frequenza di 433,92 MHz transmissione: Max. Potenza di +10dBm transmissione:Sensore radio esterno
Batterie: 2x R03 (AAA) / 1,5 V Portata: circa 60 metri (in campo aperto)Alimentatore
Ingresso: 230V ,50Hz Uscita: 5V = /1,5A Classediprotezione: Distributore: Waagen-Schmitt GmbH Hammer Steindamm 27-29 22089 Hamburg, GermanyDichiarazione di conformità
Con la presente Waagen-Schmitt GmbH dichiarara che la stazione meteo WS 1600 è conforme alle Direttive 2014/53/UE e 2011/65/UE. Il testo Completo della dichiarazione di conformità UE è disponibile al segunte indirizzo Internet: www.ade-germany.de/doc. La presente dichiarazione non è più valida se la stazione meteo subisce modifiche non autorizzate da moi. Amburgo, gennaio 2018 Waagen-Schmitt GmbH Hammer Steindamm 27-29 22089 Amburgo, Germany Garanzia
Gentile cliente, la ditta Waagen-Schmitt GmbH garantisce la riparazione o la sostituzione gratuite dell'unità per un periodo di 2 anni a partire alla data di acquisto, nel caso di difetti di materiale o fabbricazione del prodotto. A tale scopo, consignare al rivenditore il prodotto e la prova di acquisto (citando i motivi del reclamo).Smaltimento
Smaltimento dell'imballaggio
 Smaltire l'imballaggio nella raccolta differenziata. Conferire il cartone nella raccolta della carta e la pellicola in quella del materiale riciclabile.Smaltimento del prodotto
Smaltire il prodotto secondo le norme vigenti nel proprio paese. Informazioni dettagiate sullo smaltimento sono contente nel manuale dell'utente.Stacja meteorologiczna z radiowym czujnikiem zewⁿetrznym
Skrócona instrukcja WS 1600   Spistresci
Zawartość dostawy. 2 Użycie zgodne z przyeznaczenia. 2 Bezpieczenstein 3 Wskazówki dotyczęe lokalizacje 4 Stacja bazowa 5 Zewnetrzny czujnik bezprzewodowy. 7 Uruchomienie. 8 Głowne funkcje staci meteorologicznej 10 Dane techniczne 14 Deklaracji zgodnosci 15 Gwarancja 16 Utylizacja 16 Niniejsza instrukcja jest instrukcja skrocona. Pełna wersja instrukcji obslugi jest dostepna do podbrania w formie pliku PDF na stronie internetowej www.ade-germany.de/bedienungsanleitung. Naleź y w szczególnosci przyestrzegać wskazowej dotycznych bezpiecznych.Zawartosc dostawy
- Elementy staci pogodowej: -Stacja bazowa -Zewnętrzny czujnik bezprzewodowy Baterie: -2 x LR6 (AA) do staci bazowej -2 x LR03 (AAA)/1,5 V do zewnętrznego czujnika bezprzewodowej Zasilacz staci bazowej Instrukcja obslugiUżycie zgodne z przyeznaczenia
- Stacja pogodowa, składajność są ze staci bazowej i zewétrznych czujnika bezprzewodowej wyświetla rożne informacje o pogodzie (ci内分泌 neuromasovychyczne, temperature, itp.) w najblźsej okolicy. Stacja pogodowa prognozuje pogodę na podstawie pomiarów warunkowy atmosferycznych. - Ponadto stacja pogodowa podaje date, godzine, fazy ksieżyca i ma zintegrowy alarm. - Stacja pogodowa nie nadaje są do wykorzystania komercyjniego polegajćego na tworzeniu prognoz pogody ani do dokonywania pomiarów meteorologicznych.Bezpieczenstwo
- Urzadzenie oraz zasilacz powinny znajdować są z dala od przycie w wieku poniȩjej 8 lat. - Dzieci musza byc pod stały madzorem, aby zapewnić, zeNie;będą bawity sie urzadzeniem. - Radiowej staci meteorologicznej ani zasilacza nie wolno zanurzać w wodzie ani innych pląnach. Niebezpieczeniawo porañenia prądem! Dlatego własnie podstawy radiowej staci meteorologicznej nie wolno rownikę uzywać w povlizu zródeł wilgoci, jak np. zlewu. - Naleź uzywać wyłącznych dostarczonego zasilacza i wymieniać go tylko na zasilaczkiego samego rodzaju. Zasilacz wolno stosować wyłącznych w suchych pomieszczeniach, chroni⁺c go przyd wilgoci⁺. - Połkniȩcie baterii stanowy zagrożenie dla zycia. Z togo powodu stȩje meteorologiczną, radiowy czujnik zewétrzny i baterie naleźny przechowywoć poza zaiegiem małych;dzieci. W przypadku połkniȩcia bateriiny aleźny natychmiast zworćić są o pomoc medycznych. Dzieci nalezy trzymac rownik z dala od opakowania i mazych elementów znajdujacych sie w zakresie dostawy. Połkniȩcie grozi uduszeniem. Urzejdenie nalezy podlączyc do zainstalowanego zgodnie z przyepsami gniazda, które odpowiada napieciu podanemu w częsci „Dane techniczne". - Aby zapewnic möglichść szybkiego wyjecia zasilacza w razie potrzeby, gniazdo powinno być latwo dostepne. - W przypadku uszkodzenia zasilacza lub kabla zasilajęcego nie wolno uzywać radiowej staci meteorologicznej. Uwaga: Zagrożenie wybuchem w przyypadku nieprawidłowego obchodzenia są z bateriami. BateriiNie wolnoładowość, reaktywowości w inny sposob, rozkładać na czȩci, wrzuć w ogienczy powodowej ich zwarcia. - Naleź unikać kontaktu płynu baterii ze skóra, oczami czy sluzowej. W przyypadku takiego kontaktu dane.),规模最大 naleź spłukć obficie czysta wodą i natychmiast udać są do lekarza. - Podstawe i radiowy czujnik zewétrzny chronicć przyd Kurzem, uderzeniami, ekstremalnymi temperaturami i bezposrednim nasłonecznieniem. - Podstawe naleź równieź chronicć przyd widgocią. Naleź są umieszczȩć wyłącznie w suchym, zamkniętym pomieszczemu. - Radiowy czujnik zewnetrzny jest chroniony przy wilgocią. Naleź go"Justak chronić dodatkowo przy bezposrechnim zamoczenia, np. deszczem.Wskazówki dotyczęc e lokalizacje
- Maksymalna odleglość między podstawymi radio-wym czujnikiem zewétrznych powinna wynosić 60 metrow. „beźposrechni kontakt wzrokowy". - Ekranujace materiały budowlane, jak np.źelazobeton zmiejejszaj lub eliminuję zakres sygnału radiowej mistrędzy podstawymi radiowym czujnikiem zewétrznym. - Zasięg sygnatu mogą również zakłocć takie urzadzenia, jak telewizor, Telefony bezprzewodowe, komputerczy swietłowki.Stacja bazowa
Przód
 1 patrz: „Data i tydzień" 2 patrz: „Prognoza i trendy pogody" 3 patrz:"Pogoda" 4 Węczechy węczech podstawianie wycieliacza Włęcz fungcję drzemki 5 Wyswietlanie zapisanych temperatur MIN/MAKS. 6 patrz: „Wskaznik ciñnienia atmosferycznego" 7 patrz „Wskaznik faz ksiezyca i pplywow"  Tyt 1 Ustawianie czasu budzenia 2. Regulacja wartość (zwierkszenia) Zmiana jegnostki miary temperature 3. Regulacja wartość (obnizenie) - Ręczne uruchamianie/przerywanie zakresu radiowego 4 Ustawianie oraz wączenia i wyȩczaniaAlarmu temperature 5 Zmiana Jednostki miary temperature 6 Wybor jasnosci oswietlenia wyświetlacza 7 Gniazdo baterii 8 Port zasilacza sieciowego 9 Gniazdo przyłączeniowe USB doładowania urȩdzen zewétrznych (smartfon, odtwarzacz MP3 itd.) 10 Włączanie i wyłączanie funkcjibudzenia 11 Réczne ustawianie daty i godzinyZewnętrzny czujnik bezprzewodowy
 1 Zaccep do powieszenia 2 Gniazdo baterii  Zachowujac odpowiednia kolejnosc, wlozyc najpierw baterie do radiowego czujnika zewnetrznego.Czujnik zewétrzny
1. Zdejmij oszone gniazda baterii z tyfu czujnika zewnetrznego: w tym celu wcijsnij nadrukowan strzafte. Zsuń oszone gniazda baterii w kierunku wskazanym przyez strzafte, od czujnika zewnetrznego. 2. Włódz 2 baterie typu LR03 (AAA)/1,5 V zgodnie z ilustracja na spodzie gniażda baterii. Dopilnuj wąsciwej biegunowychi baterii (+/-). 3. Wsuń osłone gniazda baterii czujnika zewnętrznego z powrotem na.),Stacja bazowa
Bezprzewodowa stacja pogodowa sąs byc zasilana bateriami lub z sieci. Jesli bezprzewodowa stacja pogodowa jest podłoczona do sieci elektrycznej, działa na zasilaniu sieciowym, nawejection wewnatrix znajdujcie baterie. Zuzyte bateria naleźny usunac z gniażda baterii, poniewacz sąnzapić z nich wyciek.  UWAGA na möglichść uszkodzenia - Do zasilania z sieci energetycznej uzywaj wyłącznie zasilacza dołączonego do staci pogodowej.Aktualny tryb
1. Wsadź wtyczkę dołaczonego zasilacza do gniażda przyłączeniowej staci bazowej. 2. Podłucz zasilacz do prawnów zastalowanego gniażda o napięciu odpowiadajćemu napiȩciu podanemu w „Danych technicznych". 3. Odczekaj ok. 30 minut. Stacja bazowa potrzebuje tyle czasu na zebranie informaci o pogodzie i otrzymanie informaci od nadajnika synchronizujuść czas.Dziafanie na bateriach
1. Lekko nacin溃疡 oszone komory baterii i odsunac ja na bok. 2. Włódz 2 baterie typu LR6 (AA)/1,5 V zgodnie z ilustracja na spodzie gniażda baterii. Dopilnuj wąsciwej biegunowychci baterii (+/-). 3. Nasunac oslone komory baterii z boku. 4. Odczekaj ok. 30 minut. Stacja bazowa potrzebuje tyle czasu na zebranie informaci o pogodzie i ostrzymanie informaci od nadajnika synchronizujućego czas.Rozpoczecie odbierania sygnału
Po doprowadzeniu zasilania elektrycznego do staci bazowej, przy czółki moment zapalu są wszystkie wskazniki na wyświetlaczu. Ponadto wyświetlacź swieci przy czwilę i wydaje sygnat dzwiekowy.  Nastepnie urzadzenie przyłącza są na tryb odbierania, a liczba fal radiowych wskazuje jakość odbioru: Im wearyj fal radiowych na wyświetlaczu, tym lepszy odbior.W trakcie odbierania działa tylko przycisk w tym czasie pozostawe przyciski są wyłaczone.
Od razu po otrzymaniu sygnału o odpowiednej sile na wyświetlaczu pojawi są odpowiednia data i symbol nadajnika radiowej. Może to potrwac kilka minut. Od tej pory stacja pogodowa kaźdej nocy;będzie automatycznie przyłączać sie w tryb odbierania. W trakcie odbierania porównych jest czas wyświetlany z czasem otrzymywanym od nadajnika, w razie potrzeby dokonywana jest korekta. Jesli nie otrzymano wystarczajaco silnego sygnau, stacja bazowa po kilku minutach anuluje proces pobierania i znika symbol nadajnika radiowej. Proces pobierania zostanie ponownie uruchomiony poźniaj.Głowne funkcje staci jmeteorologicznej
Dodatkowe funkcj opisane są w pełnej wersji instrukcj obstugi.Prognoza i trend pogody
Po uruchomieniu urzadzenia danych nie mayna stosować do prognozy pogody przy ezolejnych 12 godzin, ponieważ stacja meteorologiczna wymaga unto czasu na povranie i ocenę informaci o pogodzie. Prognoza pogodawynika zzebranych informacji orazzmierzonych przy tymzmian cijsnienia powietrza. Prognozada dotyczy obszaru wokol stacli meteorologicznej o promieniu okofo 30 do 50~km w czasie od 12 do 24 godzin. Dokladnosc prognozy pogody oblicza sie na okofo 75% .    slopecznie lekke zachmurzenie zachmurzenie  opady deszczu  intensywnedeszczu  opady sniegu W połączeniu z Trendem ci.Snienia powietrza sąna dokonać dalszych interpretacje pogody.  wzrost ciśnienia powietrza  state cśnienie powietrza  spadek ciśnienia powietrza Dwa przykBady: - Prognoza pogody wskazuje deszcz, ciśnienie powietrza spada szybko i znacznie >> istnieje sąliwość silniejszych opadów. - Prognoza pogody wskazuje deszcz, ciśnienie powietrza wzroslo w ciągu ostatnich 12 godzin, ale w ciągu ostatnich 3 godzin zaczego ponownie spadać >> istnieje möglichść niewielkich opadów.Trend temperature i wilgotnosci
Wartosci temperature i wilgotnosci zmierzone przy podstawymi czujnik radiowy wyznaczaja trend za pomoczą strzałyk:  wzrost  staly  spadekWskaznik cijsnienia atmosferycznego
 Aktualne cijsnienie atmosferyczne jest wyświetlane w wybranej Jednostce (zazwyczaj: hPa = hektopaskale). Ponadto wyświetla są historogram spreźzonego powietrza zostatnic 24 godzin.Zapisane dane pogody
Przyciskiem MEM wyświetla są najwyźsze i najniźsze wartosci zostat nich 24 godzin dla temperatury i wilgotnosci powietrza. Naciśćcie 1 raz: wyświetlaj są wartość MAX Naciśćcie 2 razy: wyświetlą są wartość MIN - Naciśćcie 3 razy: zwykle wskazanie na wyświetlaczu. Aby usunjć zapisane wartosci: -przytrzymać wcińskiropy przycisk MEM przyez ok. 2 sekundy,ź wyświetlane wartosci zostaną skasowane.Wskaźnik faz ksieżyca i pływo
 Wyświetlane fazy ksieźyca oraz pływy są aktualizowane automatycznych data.       now sierp przybywajacy pierwsza kwadra przybywajczyksięzyc garbaty       pełnia ubywajćy księźyc garbaty pierwszakwadra sierp ubywajacy Wskaźnik pływow: H = przyplyw M=średni pfyw L = odplywAlarm
Nastawianie budzika
1. Przytrzymać przy bez kilkak sekund wciśniety przycisk ALARM,ź zacznie migać wskaznik godziny budzenia i wyświetli są ALARM TIME. 2. Ustaw godzine, o któraj budzik ma zadzwonić za pomocamy przycisków ▲ i ▼ 3. Nacijsnij przycisk ALARM. Na wyświetlaczu zacznie migać minuta godziny, w特别是 budzik ma zadzwonić. 4. Ustaw minute, o któraj budzik ma zadzwonić za pomoczą przycisków ▲ i ▼ 5. Aby zapisać ustawuminium, nacijsnij ALARM.Włączanie/wyłączanie budzika
-Regulatorem suwakowym ALARM wącza są i wyłącza (ON/OFF) funkcje budzenia. Kiedy wyświetlany jest symbol budzika, fungcjja jest aktywna.Wyłaczenia budzika
O ustalonej porze budzik zacznie dzwonić, a przyweek czasem;będzie coraz gólnejjszy.Dezaktywacja budzika
- Aby wyłaczyc budzik, naciśnij dowolny przycisk na staci bazowej (za wyjatkiem SNOOZE/LIGHT).Automatyczne wyłuczanie
Ješli nie nacijsieszźadnégo przycisku, budzik automatycznie przyestanie dzwonić po upływie 2 minut. Po 24 godzinachznów zadzwoni.Funkcja drzemki
-Aby budzik przystał dzwonić, nacijsnij przycisk SNOOZE/LIGHT. Sygnal budzenia zanika, na wyswietlaczu miga i Z. Dzwiek budzika zostanie wyłaczony na ok. 5 minut. Po tym czasie urzadzenie wączy są i budzik znów zaczniedzwonić. Drzemę mayna powtarzać wielokrotnie.Dane techniczne
Kompletne „Dane techniczne" znajduja sie w pełnej wersji instrukcj obstugi.Podstawa
Model: Stacja meteorologiczna WS 1600 Moc wejosciowa: 5 V Baterie: 2x LR6 (AA) / 1,5 V Częstotliwość: 433, 92 MHz Maks. moc transmisji: +10 dBmRadiowy czujnik zewétrzny
Baterie: 2x R03 (AAA) / 1,5 V Zasięg: ok. 60 metrów (otwarta przyestrzeni)Zasilacz
Moc wejsciowa: 230V 50 Hz Moc wyjsciowa: 5 V Klasa ochronna: Dystrybutor: Waagen-Schmitt GmbH Hammer Steindamm 27-29 22089 Hamburg, GermanyDeklaracje zgodnosci
Niniejszym firma Waagen-Schmitt GmbH, oświadczta, ze staćja pogodowa WS 1600 jest zgodna z dyrektywami 2014/53/UE i 2011/65/UE. Pełny tekst deklaracje zgodnosci UE jest dostępty na poliższej stronie internetowej: www.adegermany.de/doc Deklaracje przystaste obłowymiązywać, sąsi stacja pogodowa zostanie zmodyfikowana bez naszej zgody. Hamburg, styczen 2018 Waagen-Schmitt GmbH Hammer Steindamm 27-29 22089 Hamburg, GermanyCE
Gwarancja
Szanowski Państwo, Firma Waagen-Schmitt GmbH gwarantuje przy 2 lata od daty zakupu bezplatne usuwanie braków z tytułu będów materiałowych lub produktyjnych w drodze naprawy lub wymiany. W przypadku korzystania z gwarancji prosimy o podanie sprezedawcy artykułu wraz z dowodem zakupu (podajć rownikę powód reklamacje).Utylizacja
Utylizacja opakowania
 Opakowanie naleź yutilizowej zgodnia z了我的 rodzajem. Tektura i karton powinny trafić do pojemnika na papier, folia do pojemnika na surowce wtorne.Utylizacja produktu
Produkt nalezy utylizować zgodnie z przypepisami obłowiazujacymi w danym kraju. Kompletne informacja dotyczne utylizacje znejdujasie w pełnej wersji instrukcji obslugi.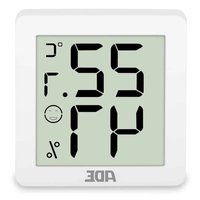
- Wetterstation mit Funk-Außensor
- Inhaltsverzeichnis
- Diesist die Kurzanleitung.
- Lieferumfang
- Bestimmungsgemäßer Gebrauch
- Sicherheit
- Hinweise zum Aufstellort
- Basisstation
- Frontansicht
- Rückansicht
- Funk-Außensensor
- Außensor
- HINWEIS vor Sachschaden
- Strombetrieb
- Batteriebetrieb
- Funkempfang starten
- Während des Empfangs hat ausschließlich die Taste Funktion, alle anderen Tasten sind für diese Zeit deaktiviert.
- Hauptfunktionen der Wetterstation
- Wettervorhersage und Wettertrend
- Zwei Beispiele:
- Temperatur- und Luftfeuchtgkeitenstrend
- Luftdruckanzeige
- Gespeicherte Wetterdaten
- Mondphasen- und Gezeitenanzeige
- Wecken
- Weckzeit einstellen
- Weckfunktion ein- und ausschalten
- Weckalarm beenden
- Weckalarm ganz ausschalten
- Autostopp-Funktion
- Weckwiederholung (Snoopze-Funktion)
- Technische Daten
- Funk-Außensor
- Netzadapter
- Konformitätserklärung
- Garantie
- Entsorgen
- Verpackung entsorgen
- Articlelentsorgen
- Weather Station with Wireless Outdoor Sensor
- Table of Contents
- This is the quick guide.
- Scope of delivery
- Intended Use
- Safety
- Tips on installation site
- Base station
- Front view
- Rear view
- Wireless outdoor sensor
- Outdoor sensor
- NOTE on material damage
- Current mode
- Battery operation
- Starting signal reception
- While receiving, only the button functions; all other buttons are deactivated during this time.
- Main functions of the weather station
- Weather forecast and weather trend
- Temperature and humidity trend
- Air pressure indicator
- Saved weather data
- Lunar phase and tide indicator
- Comfort indicator
- Alarm
- Setting the alarm time
- Switching the alarm function on/off
- Stopping the alarm
- Switching the alarm off completely
- Auto-stop function
- Snoopze function
- Technical Data
- Wireless outdoor sensor:
- Mains adaptor
- Declaration of Conformity
- CE
- Guarantee
- Disposal
- Disposing of the packaging
- Disposing of the weather station
- Estación meteorológica con sensor inalámbrico exterior
- Índice
- Esta es la guía
- Artículos incluidos en la entrega
- Uso adequado
- Seguridad
- Indicaciones sobre el lugar de colocacion
- Estación base
- Vista delantera
- Vista trasera
- Sensor exterior inalámbrico
- Sensor exterior
- Modo actual
- Funcionamento con pilas
- A partir de la Reception de la seals
- Durante la Reception, solo las functions de los botones todos losREMAs botones se desactivan durante este tiempo.
- Funciones principales de la estación meteorológica
- Predicción meteorológica y tendencia
- Dos ejemplos:
- Tendency de la temperatura y la humedad del aire
- Indicador de presión de aire
- Datas meteorológicos guardados
- Indicador de fases lunares y mareas
- Alarma
- Configuración de la hora de la alarma
- Encendido/apagado de la función de alarma
- Detener la alarma
- Apagar la alarma por completo
- Función de parada automática
- Función de repetition
- Datasétécnicos
- Adaptador de red
- Declaración de conformidad
- Garantía
- Eliminación
- Eliminación del embalaje
- Eliminación del articulo
- Station météo avec capteur radio extérieur
- Table des matieres
- Ceci est le guide de démarrage
- Le mode d'emploi détaillé téléchargeable en format PDF se trouve sur Internet à l'adresse www.ade-germany.de/bedienungsanleitung
- Respectez tout particulièrement les instructions de sécurité.
- Contenu de livraison
- Utilisation conforme
- Sécurité
- Indications relatives au lieu d'installation
- Station de base
- Vue de face
- Vue de l'arrière
- Capeur extérieur sans fil
- Capeur extérieur
- Mode actuel
- Fonctionnement sur piles
- Lancement de la réception du signal
- Lors de la réception, seule la touche ▲ fonctionne; toutes les autres touches sont désactivées à ce moment.
- Fonctions principales de la station météo
- Prévisions et tendances météorologiques
- Deux exemples :
- Évolution des températures et de l'humidité de l'air
- Un témoin de pression atmosphérique
- Données thermiques enregistrées
- Affichage de la phase lunaire et de la marée
- Alarme
- Réglage de l'heure de l'alarme
- Activation/désactivation de la fonction d'alarme
- Arrêt de l'alarme
- Arrêt complet de l'alarme
- Fonction d'arrêt automatique
- Fonction de rappel d'alarme
- Caracteristiques techniques
- Capeur radio extérieur
- Adaptateur secteur
- Déclaration de conformité
- Mise au rebut
- Élimination de l'emballage
- Mise au rebut de l'article
- Stazione meteo con sensore radio esterno
- Indice dei contenuti
- Ambito della fornitura
- Destinazione d'uso
- Sicurezza
- Luogo di installmente
- Stazione base
- Vista frontale
- Vista posteriore
- Sensore esterno senza fili
- Sensore esterno
- NOTA sui danni materiali
- Modalità alimentazione elettrica
- Funzionamento a batterie
- Avvio ricezione del segnale
- In fase di ricezione, solo il tastinge funziona: tutti gli altri tastingi sono disattivati in questa fase.
- Funzioni principali della stazione meteo
- Previsioni del tempo e tendenza del tempo
- Tendenza della temperatura e dell'umidità
- Indicatore di pressione atmospherica
- Dati meteorologici memorizzati
- Indicazione delle fasi lunari e dellaarea
- Allarme
- Impostazione ora di allarme
- Attivazione/disattivazione della funzione di allarme
- Interruzione dell'allarme
- Interruzione completa della suoneria di allarme
- Funzione di blocco automatico
- Funzione Snooze
- Caratteristiche tecniche
- Sensore radio esterno
- Alimentatore
- Dichiarazione di conformità
- Garanzia
- Smaltimento
- Smaltimento dell'imballaggio
- Smaltimento del prodotto
- Stacja meteorologiczna z radiowym czujnikiem zewⁿetrznym
- Spistresci
- Zawartosc dostawy
- Użycie zgodne z przyeznaczenia
- Bezpieczenstwo
- Wskazówki dotyczęc e lokalizacje
- Stacja bazowa
- Przód
- Zewnętrzny czujnik bezprzewodowy
- Czujnik zewétrzny
- Aktualny tryb
- Dziafanie na bateriach
- Rozpoczecie odbierania sygnału
- W trakcie odbierania działa tylko przycisk w tym czasie pozostawe przyciski są wyłaczone.
- Głowne funkcje staci jmeteorologicznej
- Prognoza i trend pogody
- Trend temperature i wilgotnosci
- Wskaznik cijsnienia atmosferycznego
- Zapisane dane pogody
- Wskaźnik faz ksieżyca i pływo
- Nastawianie budzika
- Włączanie/wyłączanie budzika
- Wyłaczenia budzika
- Dezaktywacja budzika
- Automatyczne wyłuczanie
- Funkcja drzemki
- Dane techniczne
- Podstawa
- Radiowy czujnik zewétrzny
- Zasilacz
- Deklaracje zgodnosci
- Gwarancja
- Utylizacja
- Utylizacja opakowania
- Utylizacja produktu
Marca : ADE
Modello : WS 1600
Categoria : Stazione Meteo