
946 - Printer DELL - Besplatni korisnički priručnik
Pronađite besplatno priručnik za uređaj 946 DELL u PDF formatu.

Pitanja korisnika o 946 DELL
0 pitanje o ovom uređaju. Odgovorite na one koje znate ili postavite svoje.
Postavi novo pitanje o ovom uređaju
Preuzmite upute za vaš Printer u PDF formatu besplatno! Pronađite svoj priručnik 946 - DELL i uzmite svoju elektroničku napravu natrag u ruke. Na ovoj stranici objavljeni su svi dokumenti potrebni za korištenje vaše naprave. 946 marke DELL.
KORISNIČKI PRIRUČNIK 946 DELL
Dell™ All-In-One Printer 946 User's Guide
Click the links to the left for information on the features and operation of your printer. For information on other documentation included with your printer, see Finding Information.
To order ink or supplies from Dell:
- Double-click the icon on your desktop.

-
Visit Dell's website: www.dell.com/supplies.
-
Order Dell printer supplies by phone. Refer to the Owner's Manual for the correct phone number for your country.
For the best service, make sure you have the Dell printer Service Tag available. See Express Service Code and Service Tag number.
Notes, Notices, and Cautions

NOTE: A NOTE indicates important information that helps you make better use of your printer.

NOTICE: A NOTICE indicates either potential damage to hardware or loss of data and tells you how to avoid the problem.

CAUTION: A CAUTION indicates a potential for property damage, personal injury, or death.
Information in this document is subject to change without notice. © 2006 Dell Inc. All rights reserved.
Reproduction in any manner whatsoever without the written permission of Dell Inc. is strictly forbidden.
Trademarks used in this text: Dell, the DELL logo, Dell Picture Studio, and Dell Ink Management System are trademarks of Dell Inc.; Microsoft and Windows are registered trademarks of Microsoft Corporation.
Other trademarks and trade names may be used in this document to refer to either the entities claiming the marks and names or their products. Dell Inc. disclaims any proprietary interest in trademarks and trade names other than its own.
Model 946
June 2006 SRV KJ941 Rev. A00
Finding Information
| What are you looking for? | Find it here |
| Drivers for my printerMy User's Guide | Drivers and Utilities CD If you purchased your Dell computer and printer at the same time, documentation and drivers for your printer are already installed on your computer. You can use the CD to uninstall/reinstall drivers or access your documentation.Readme files may be included on your CD to provide last-minute updates about technical changes to your printer or advanced technical reference material for experienced users or technicians. If you purchased your Dell computer and printer at the same time, documentation and drivers for your printer are already installed on your computer. You can use the CD to uninstall/reinstall drivers or access your documentation.Readme files may be included on your CD to provide last-minute updates about technical changes to your printer or advanced technical reference material for experienced users or technicians. |
| How to set up my printer | Setting Up Your Printer poster |
| Safety informationHow to set up and use my printerWarranty information | Owner's Manual |
| Express Service Code and Service Tag number | Express Service Code and Service Tag number This label is located under the printer unit. For more information, see This label is located under the printer unit. For more information, see |
| Express Service Code. | |
| Latest drivers for my printerAnswers to technical service and support questionsDocumentation for my printer | Dell Support WebsiteThe Dell Support website provides several online tools, including:Solutions - Troubleshooting hints and tips, articles from technicians, and online coursesUpgrades - Upgrade information for components, such as memoryCustomer Care - Contact information, order status, warranty, and repair informationDownloads - DriversReference - Printer documentation and product specifications |
| How to use Windows XPDocumentation for my printer | Windows XP Help and Support Center1. Click Start→ Help and Support.2. Type a word or phrase that describes your problem, and then click the arrow icon.3. Click the topic that describes your problem.4. Follow the instructions shown on the screen. |
About Your Printer
Understanding the Printer Parts
Setting Up Your Printer
Understanding the Operator Panel
You can use your printer to do a variety of things. A few important things to note:
- If your printer is connected to a computer, you can use either the printer operator panel or the printer software to produce quality documents quickly.
- You do not need to connect your printer to a computer to make photocopies, send faxes, or print from a PictBridge-enabled camera.
NOTE: The printer (whether it is connected to a computer or not) must be connected to a telephone line before you can send a fax.
NOTE: If you use a DSL modem for your computer, you must install a DSL filter on the telephone line attached to your printer.
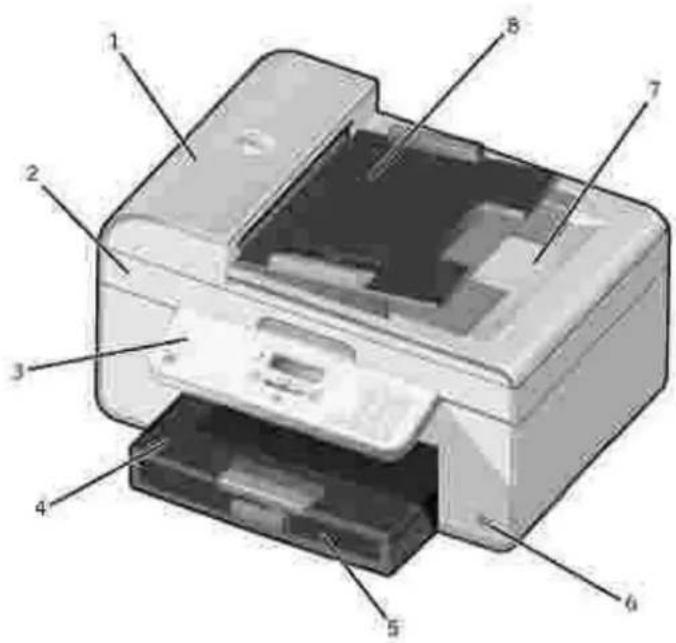
Understanding the Printer Parts
| Number: | Part: | Description: |
| 1 | Automatic Document Feeder (ADF) | Scan, copy, or fax multiple page documents and/or legal sized documents. |
| 2 | Printer unit | Unit you lift to gain access to the ink cartridges. |
| 3 | Operator panel | Panel on the printer you use to control copying, scanning, faxing, and printing. For more information, see Using the Operator Panel. |
| 4 | Paper input tray | Where you load paper into the printer. |
| 5 | Paper exit tray | Tray that holds the paper as it exits the printer.NOTE: Pull the paper exit tray stop straight out to extend it. |
| 6 | PictBridge connector | The connector you use to connect your PictBridge-compatible digital camera to your printer. |
| 7 | Top cover with integrated ADF exit tray | Top of printer that holds your document or photo flat while you scan it. You can also pick up your original document after it has gone through the ADF here. |
| 8 | ADF input tray | Load original documents in the printer. Recommended for scanning, copying, or faxing multiple-page documents. |

| Number: | Part: | Description: |
| 9 | Supplies Reorder Label | To order ink cartridges or paper, visit www.dell.com/supplies. |
| 10 | Express Service Code | ·Identify your printer when you usesupport.dell.comor contact technical support.·Enter the Express Service Code to direct your call when contacting technical support.NOTE:The Express Code is not available in all countries. |
| Number: | Part: | Description: |
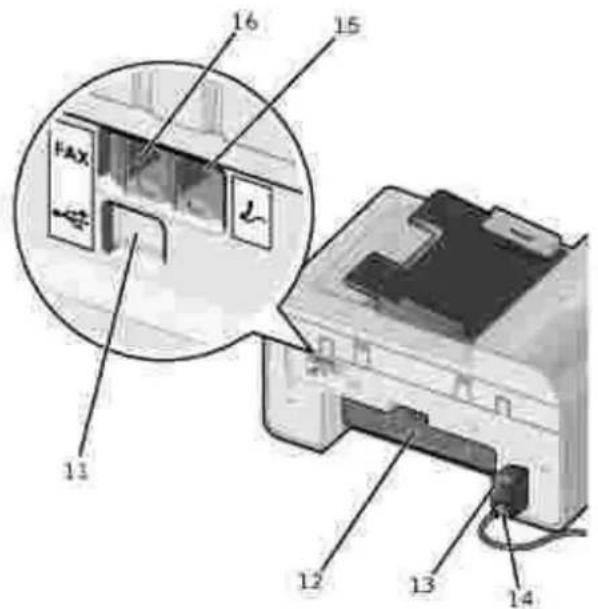
| 11 | USB connector | Connects your printer to a computer using a USB cable (sold separately). |
| 12 | Rear access door | Open to remove paper jams. |
| 13 | Power supply | Supplies power to the printer.NOTE:The power supply is removable. When the power supply is removed from the printer, but remains plugged into a wall outlet, an LED is illuminated to notify you that power is present.NOTE:If the power is off when you unplug your machine, the power will be off when you plug it back in. |
| 14 | Power cord connector | Connects printer power supply to power outlet using the supplied country-specific power cord. |
| 15 | PHONE jack connector (↓ - right side connector) | Remove the blue plug to connect additional devices, such as a data/fax modem, telephone, or answering machine to your printer.NOTE:If the phone communication is serial in your country (such as Germany, Sweden, Denmark, Austria, Belgium, Italy, France, and Switzerland), you must remove the blue plug from the PHONE jack connector (↓ - right side connector), and insert the supplied yellow terminator for your fax to work correctly. You will not be able to use this port for additional devices in these countries. |
| 16 | FAX connector ( FAX - left side connector) | Connects your printer to an active telephone line to send and receive faxes.NOTE:Do not connect additional devices to the FAX connector (FAX - left side connector) and do not connect a DSL (digital subscriber line) or ISDN (integrated services digital network) without using a digital line filter to the printer. |
Setting Up Your Printer
NOTE: Your printer supports Microsoft® Windows® 2000, Windows XP, and Windows XP Professional X64 Edition.
To set up your printer, follow the steps on your Setting Up Your Printer poster. If you encounter problems during setup, see Troubleshooting.
NOTE: Your printer modem is an analog device that only works when directly connected to a wall jack. Other devices such as a telephone or answering machine can be attached to the PHONE jack connector (↓ - right side connector) to pass through the printer as described in the setup steps. If you have a digital connection such as ISDN, DSL, or ADSL, a digital line filter is required. Contact your Internet Service Provider for details.
Initial Setup Menu
The printer automatically cycles through initial setup the first time you power on the printer. Initial setup consists of specifying the language, country, date, time, fax number, and fax name.
If necessary, you can change the settings for language, country, date, time, fax number, and fax name by accessing the Setup menu. For more information, see Setup Mode.
Understanding the Operator Panel
Using the Operator Panel
The operator panel buttons allow you to copy documents and photos, fax documents, and print photos from a PictBridge-enabled camera without connecting to a computer. The printer is on when Power is illuminated. You can change settings using the Select button ⏻, and left and right Arrow buttons < >; and initiate a scan, copy, or fax using the Start button ⏻.
The display features:
- Printer status
- Messages
- Menus
| Number | Part: | Purpose: | |
| 1 | Power |  | To turn your printer on or off. |
| 2 | Error message light |  | To alert you of errors such as paper out or a paper jam. |
| 3 | Back |  | To move back a menu level while navigating through the available menus on the display. |
| 4 | Left arrow |  | Decrease a number on the display.Scroll through a list on the display. |
| 5 | Cancel |   | Cancel a scan, print, or copy job in progress.Exit a menu.Clear a fax number, or end a fax transmission and return the display to the fax default.Clear current settings and return to default settings. |
| 6 | Select |  | To choose the option that appears on the display. |
| 7 | Right arrow |  | Increase a number on the display.Scroll through a list on the display. |
| 8 | Pause |  | Insert a three-second pause in the number to be dialed to wait for an outside line or get through an automated answering system.NOTE: Enter a pause only when you have already begun entering the number. |
| 9 | A keypad number or symbol | In fax mode:Enter fax numbers.Select letters when creating a speed dial list.Type numbers to enter or edit the date and time shown on the printer display.In copy mode, select the number of copies you want to make. | |
| 10 | Start |  | Start a scan, copy, or fax job.NOTE:If you initiate a copy without specifying color or black and white, color is used by default. |
| 11 | LCD (Liquid Crystal Display) | To show options available to you. |
Operator Panel Menus
Copy Mode
Scan Mode
Fax Mode
Setup Mode
Maintenance Mode
PictBridge Mode
There are five modes available from the main menu on your printer: Copy, Scan, Fax, Setup, and Maintenance.
A sixth mode, PictBridge mode, is also available on the printer. This mode is only available when you plug a PictBridge-enabled camera into your printer. For more information, see PictBridge Mode.
Copy Mode
| Main menu | Mode Main Menu |
| Copy | Copy Color |
| Copies | |
| Quality | |
| Dark | |
| Paper Size | |
| Paper Type | |
| Zoom | |
| Repeat Image | |
| Collate | |
| N-Up | |
| Original Size | |
| Original Type | |
| Scan | |
| Fax | |
| Setup | |
| Maintenance |
-
From the main menu, use the left and right Arrow buttons <> to scroll to Copy.
-
Press the Select button ⏻.
-
Press the right Arrow button > until the heading you want appears on the display, and then press the Select button ⏻.
-
Use the left and right Arrow buttons < > to scroll through the available menu items.
-
When the setting you want appears on the display, press the Select button ⏻ to save the setting.
Copy Mode Menu
| From this menu: | You can: |
| Copy Color | Specify your copy to be color or black and white.Color*Black |
| Copies | Specify the number of copies you want to make from 1-99. |
| Quality | Specify the quality of the copy.Auto Detect*DraftNormalPhoto |
| Dark | Change the darkness setting using the left and rightArrow buttons(>)(the middle setting is the default). |
| Paper Size | Specify the size of the paper in the paper input tray.8.5x11"*8.5x14"A4*B5A5A6L2LHagaki3x5"3.5x5"4x6"5x7"10x15cm13x18cmNOTE:The default paper size is based on country selection. |
| Paper Type | Specify the type of paper in the paper input tray.Auto Detect*PlainCoatedPhotoTransparency |
| Zoom | Specify how much you want the copy to magnify the original document50%100%*150%200%Custom%Fit to page2x2 Poster3x3 Poster4x4 Poster2.25x3.25"3x5"3.5x5"4x6"5x7"8x10"8.5x11"8.5x14"L2LHagaki60x80 mm9x13 cm10x15 cm13x18 cm20x25 cmA4 |
| Repeat Image | Specify how many times you want the image to repeat on a page.1*4916NOTE:The Repeat Image feature cannot be used with zoom. If you select a value other than 1, Zoom is automatically set to 100%. |
| Collate | Press the Select button if you want to collate your multiple-page copies.For more information about collating copies, see Collating Copies. |
| N-up | Specify how many different images or pages of a document you want to print on a single page.1 Up*2 Up4 UpNOTE:N-up and Repeat Image cannot be used together. If a value other than 1 Up is specified and then you select a Repeat Image value greater than 1, the Repeat Image setting is ignored and the N-up setting is used. |
| Original Size | Specify the size of the original document you are copying. Automatic*8.5x11"2.25x3.25"3x5"3.5x5"4x6"5x7"8x10"L2L HagakiA6A5B5A460x80mm9x13 cm10x15 cm13x18 cm20x25 cm |
| Original Type | Specify the type of the original document you are copying. Text/Graphics*Text onlyPhoto |
| * Factory default setting | |
Scan Mode
| Main menu | Mode Main Menu |
| Copy | |
| Scan | Scan Color |
| Scan To | |
| Quality | |
| Original Size | |
| Fax | |
| Setup | |
| Maintenance |
- Turn on your computer and printer, and make sure they are connected. If you are working over a network, make sure your printer is connected to the network.
- From the main menu, use the use the left and right Arrow buttons <> to scroll to Scan, and then
press the Select button √.
-
Press the right Arrow button > until the heading you want appears on the display, and then press the Select button ⏻.
-
Use the left and right Arrow buttons < > to scroll through the available menu items.
When the setting you want appears on the display, press the Select button ⏻ to save the setting.
Scan Mode Menu
| From this menu: | You can: |
| Scan Color | Color*Black |
| Scan To | If your printer is connected locally:Select the application to which you want your scanned image or document to be sent.If your printer is connected to a network:Select the computer on the network and the application on the selected computer to which you want your scanned image or document to be sent.NOTE: If the computer you are sending scanned images or documents to requires a PIN, you are prompted to enter the PIN before the scan is initiated. For more information about scanning across a network, see Scanning Single-Page Documents and Single Photos. |
| Quality | Specify the resolution for which you want your original document or image to be scanned.Automatic75 dpi150 dpi*300 dpi600 dpi |
| Original Size | Specify the size of the original document you want to scan.Auto Detect*8.5x11"2.25x3.25"3x5"4x6"5x7"8x10"A6A5B5 |
| *Factory default settings | |
Fax Mode
| Mode Main menu | Mode Main Menu | Mode Submenu | Mode Submenu |
| Copy | |||
| Scan | |||
| Fax | Phone Book | View | |
| Add | |||
| Remove | |||
| Modify | |||
| On Hook Dial | |||
| Delay Fax | |||
| Auto Answer | |||
| Quality | |||
| Dark | |||
| Fax Setup | Reports | Activity Report | |
| Confirmation | |||
| Print Reports | |||
| Ringing and Answering | Ringer Volume | ||
| Answer Fax When | |||
| Ring Pattern | |||
| Fax Forward | |||
| Caller ID Pattern | |||
| Fax Printing | Paper Size | ||
| Paper Type | |||
| Fit Fax to Page | |||
| Fax Footer | |||
| Dialing and Sending | Your fax number | ||
| Your fax name | |||
| Dial Method | |||
| Redial Time | |||
| Redial Attempts | |||
| Dial Prefix | |||
| Dial Volume | |||
| Scan | |||
| Max Send Speed | |||
| Error Correction | |||
| Auto Fax Convert | |||
| Fax Blocking | Turn On/Off | ||
| Add | |||
| Remove | |||
| Modify | |||
| Block No-ID | |||
| Setup | |||
| Maintenance |
-
From the main menu, use the left and right Arrow buttons <> to scroll to Fax.
-
Press the Select button ⏻.
-
The display asks for a phone number. Press the Select button √.
-
Press the right Arrow button > until the heading you want appears on the display, and then press the Select button ⏻.
-
Use the left and right Arrow buttons < > to scroll through the available menu items.
-
When the setting you want appears on the display, press the Select button ⏻ to save the setting or enter the submenu.
In order for faxing to function properly:
- The printer's FAX connector (FAX - right side connector) must be connected to an active phone line. See Setting Up the Printer With Equipment for setup details.

NOTE: You cannot fax with a DSL (digital subscriber line) or ISDN (integrated services digital network) unless you purchase a digital line filter. Contact your Internet Service Provider for more details.
- If you are using the Dell Printer Fax Tools to send a fax from within an application, the printer must be connected to a computer with a USB cable.
Fax Mode Main Menu
| From this menu: | You can: |
| Phone Book | Specify the action for which you want to perform in your Phone Book.ViewAddRemoveModifyPrintFor more information about your Phone Book, seeSpeed Dial. |
| On Hook Dial | Press the Select button √ if you want the printer to go off hook.For more information, seeManually Dialing a Fax While Listening to a Telephone Line (On Hook Dial). |
| Delay Fax | Send a delayed fax or view faxes waiting to be sent.Delay UntilView PendingFor more information about sending delayed faxes, seeSend a Delayed Fax. |
| Auto Answer | Turn the Auto Answer feature on, off, or schedule a time for the feature to be enabled and disabled.On*ScheduledOff |
| Quality | Specify the quality (resolution) of the fax being sent.Standard*FineSuperfineUltrafine |
| Dark | Use the left and rightArrow buttons < > to specify the darkness setting (middle setting is the default). |
| Fax Setup | Set various setup features for your printer's fax settings.ReportsRinging and AnsweringFax PrintingDialing and SendingFax BlockingFor more information on any of the options listed under the Fax Setup heading, seeFax Setup Menu. |
| *Factory default setting | |
Fax Setup Menu
The option you select from the Fax Setup heading controls the settings shown on the display.
- Use the left and right Arrow buttons < > to scroll through the available menus items.
-
When the setting you want appears on the display, press the Select button ⏻ to save the setting.
-
If you want to change more settings in the Fax Setup menu, use the left and right Arrow buttons to scroll through the available headings.
-
When the heading you want appears on the display, press the Select button √.
-
Use the left and right Arrow buttons < > to scroll through the available menu items.
-
When the setting you want appears on the display, press the Select button ⏻ to save the setting or enter the submenu.
Fax Setup Menu
| From this menu: | You can: |
| Reports | Specify the type of report you would like to set print settings for.Activity ReportFax ConfirmationPrint ReportsFor more information on any of the options listed under the Reports heading, see Additional Fax Options. |
| Ringing and Answering | Set various ringing and answering features for your printer's fax settings.Ringer VolumeAnswer Fax WhenRing PatternFax ForwardCaller ID PatternFor more information on any of the options listed under the Ringing and Answering heading, see Additional Fax Options. |
| Fax Printing | Set the settings for how you want faxes to print.Paper SizePaper TypeFit Fax to PageFax FooterFor more information on any of the options listed under the Fax Printing heading, see Additional Fax Options. |
| Dialing and Sending | Set various options controlling how your printer sends faxes.Your Fax Number - use the keypad to enter your fax number. This is thenumber used on the fax footer.Your Fax Name - use the keypad to enter your fax name. This is the name used on the fax footer.Dial MethodRedial TimeRedial AttemptsDial PrefixDial VolumeScanMax Send SpeedError CorrectionAuto Fax ConvertFor more information on any of the options listed under the Dialing and Sending heading, seeAdditional Fax Options. |
| Fax Blocking | Add or remove numbers from which you want to block faxes.Turn On/OffAddRemoveModifyPrintBlock No-IDFor more information about blocking faxes, seeBlocking Faxes. |
Additional Fax Options
The option you select from the various options on the Fax Setup menu controls the settings shown on the display.
- Use the left and right Arrow buttons < > to scroll through the available menu items.
- When the setting you want appears on the display, press the Select button ⏻ to save the setting.
- If you want to change more of the additional settings in the menu, use the left and right Arrow buttons < > to scroll through the available headings.
- When the heading you want appears on the display, press the Select button √.
- Use the left and right Arrow buttons < > to scroll through the available menu items.
- When the setting you want appears on the display, press the Select button ☑ to save the setting or enter the submenu.
Additional Fax Options Menu
| From this menu: | You can: |
| Activity Report | Specify when you want a fax activity report to be printed. · On Request* · After 40 Faxes |
| Confirmation | Specify how often you want to print a fax confirmation. · On Error* · Off · Print for All |
| Print Reports | Specify which report or log you want to print. · Activity Report · Send Log · Receive Log · Settings List |
| Ringer Volume | Specify the volume of the ringer from the built-in speaker on the printer. · Off · Low* · High |
| Answer Fax When | Specify how many rings you want to occur before the printer answers the fax if the printer is in Auto Answer mode. · After 1 Ring · After 2 Rings · After 3 Rings* · After 4 RingsNOTE: In order to use fax blocking you must have two or more rings selected. |
| Ring Pattern | Specify a type of ring for which the printer will only answer incoming calls with that ring. If Any is selected the printer answers all incoming calls. · Single · Double · Triple · Any* |
| Fax Forward | Specify if you want your incoming faxes to be forwarded to another fax number. · Off* · Forward · Print & Forward |
| Caller ID Pattern | Specify the Caller ID pattern you want to use. · Pattern 1* · Pattern 2 · Pattern nNOTE: The number of patterns shown is based on country selection. |
| Error Correction | Specify if you want error correction enabled or not. · On* · Off |
| Paper Size | Specify the size of paper in the paper input tray.8.5x11"*8.5x14"A4*NOTE: The default paper size is based on country selection. |
| Paper Type | Specify the type of paper in the paper input tray.Auto Detect*PlainCoatedPhotoTransparency |
| Fit Fax to Page | Specify if you want oversized faxes to be scaled to fit on the paper in the paper input tray.Fit-to-Page*Use Two Pages |
| Fax Footer | Specify if you want to insert the Time/Date/Page Number/System Identification footer at the bottom of each fax received.On*Off |
| Dial Method | Specify the printer dialing method.Touch-tone*PulseBehind PBX |
| Redial Time | Specify the amount of time the printer should wait before attempting to send a non-successful fax again.1 Minute2 Minutes*3 Minutes4 Minutes5 Minutes6 Minutes7 Minutes8 Minutes |
| Redial Attempts | Specify the number of times the printer should attempt to re-send a non-successful fax.0 Times1 Time2 Times3 Times*4 Times5 Times |
| Dial Prefix | Specify a number up to eight digits that will be added to the beginning of each number dialed.NOTE:A pause is automatically inserted after the prefix when dialing occurs.If no prefix is set:None*CreateIf a prefix is set:Current prefix is displayedNone |
| Dial Volume | Specify the volume dial volume.OffLow*High |
| Scan | Specify if you want the original document to be scanned into memory before or after dialing the fax number.Before Dial*After Dial |
| Max Send Speed | Specify the maximum speed at which a fax is sent.240048007200960012000144001680019200216002400026400288003120033600* |
| Auto Fax Convert | Turn Auto Fax Convert on or off. If you are faxing a high-resolution document to a fax machine that prints at a lower resolution, the printer automatically converts the resolution to match that of the receiving fax machine.On*Off |
| Turn On/Off | Turn fax blocking on or off.OnOff* |
| Block No-ID | Turn fax blocking for faxes without caller ID on or off.OnOff* |
| * Factory default setting | |
Setup Mode
| Main menu | Mode Main Menu | Mode Submenu |
| Copy | ||
| Scan | ||
| Fax | ||
| Setup | Device Setup | Language |
| Country | ||
| Date/Time | ||
| Host Fax Settings | ||
| Button Beep | ||
| Power Save | ||
| Clear Timeout Settings | ||
| Defaults | Copy/Fax paper size | |
| Copy paper type | ||
| Set Defaults | ||
| Maintenance |
-
From the main menu, use the left and right Arrow buttons <> to scroll to Setup.
-
Press the Select button ⏻.
-
Press the right Arrow button > until the heading you want appears on the display, and then press the Select button ⏻.
-
Use the left and right Arrow buttons <> to scroll through the available menu items.
-
When the setting you want appears on the display, press the Select button ✅ to save the setting or enter the submenu.
Setup Mode Main Menu
| From this menu: | You can: |
| Device Setup | Select the operator panel setting you want to reconfigure.LanguageCountryDate/TimeHost Fax SettingsButton BeepPower SaveClear Timeout SettingsFor more information about any of the Device Setup options, seeAdditional Setup Options. |
| Defaults | Change the default settings from the factory to settings you specify.Copy/Fax paper sizeCopy paper typeSet DefaultsFor more information about any of the Defaults options, seeAdditional Setup Options. |
Additional Setup Options
The option you select from the various options on the Setup mode main menu controls the settings shown on the display.
- Use the left and right Arrow buttons < > to scroll through the available menu items.
- When the setting you want appears on the display, press the Select button ⏻ to save the setting.
- If you want to change more of the additional settings in the menu, use the left and right Arrow buttons < > to scroll through the available headings.
- When the heading you want appears on the display, press the Select button ☑.
- Use the left and right Arrow buttons < > to scroll through the available menu items.
- When the setting you want appears on the display, press the Select button ⏻ to save the setting.
Additional Setup Options Menu
| From this menu: | You can: |
| Host Fax Settings | Specify if you want to allow the printer fax settings to be reconfigured from the Printer Setup Utility software. Allow* Block |
| Button Beep | Specify if you want to hear a beep when you press buttons on the operator panel or not. On* Off |
| Power Save | Specify how much time you want to elapse before the printer switches to Power Save mode. Never After 60 min After 30 min* After 10 min Now |
| Clear Settings Timeout | Select how much time you want to elapse before the settings list is reset to the defaults. 2 minutes* Never |
| Copy/Fax Paper Size | Specify the size of paper in the paper input tray. 8.5x11"* 8.5x14" A4* B5 A5 A6 L 2L Hagaki 3x5" 3.5x5" 4x6" 5x7" 10x15 cm 13x18 cmNOTE: The default paper size is based on country selection. |
| Copy Paper Type | Specify the type of paper in the paper input tray. Auto Detect* Plain Coated Photo Transparency |
| Set Defaults | Press the Select button [278] to change the current settings on your printer to the default settings. |
| *Factory default settings | |
Maintenance Mode
| Main menu | Mode Main Menu |
| Copy | |
| Scan | |
| Fax | |
| Setup | |
| Maintenance | Ink Levels |
| Clean Cartridges | |
| Align Cartridges | |
| Print Test Page |
- From the main menu, use the left and right Arrow buttons < > to scroll to Maintenance.
- Press the Select button √.
- Press the right Arrow button > until the heading you want appears on the display, and then press the Select button ⏻.
- Use the left and right Arrow buttons < > to scroll through the available maintenance tasks.
- When the task you want appears on the display, press the Select button ⏻ to perform the task.
Maintenance Mode Menu
| From this menu: | You can: |
| Ink Level | Press the Select button ☑ to view the level of ink in both cartridges. |
| Clean Cartridges | Press the Select button ☑ to clean the ink cartridges. A cleaning page prints. You may discard the page when printing is complete. |
| Align Cartridges | Press the Select button ☑ to align the ink cartridges. An alignment page prints. You may discard the page when printing is complete. |
| Print Test Page | Press the Select button ☑ to print a test page. You may discard the page when printing is complete. |
PictBridge Mode
When you plug your PictBridge-enabled camera into your printer, the printer automatically switches to PictBridge mode.
| Mode | Mode Main Menu |
| Pictbridge | Paper Size |
| Photo Size | |
| Layout | |
| Quality | |
| Paper Type |
- When your printer changes to PictBridge mode, press the right Arrow button > until the heading you want appears on the display, and then press the Select button ⏻.
- Use the left and right Arrow buttons < > to scroll through the available menu items.
- When the setting you want appears on the display, press the Select button ⏻ to save the setting.
PictBridge Mode Menu
| From this menu: | You can: |
| Paper Size | Specify the size of the paper in the paper input tray.3.5x5"4x6"5x7"8.5x11"*L2LHagakiA6A5B5A4*10x15 cm13 x 18 cmNOTE:The default paper size is based on country selection. |
| Photo Size | Specify the size of the photos you want to print.2.25x3.25"3.5x5"4x6"*5x7"8x10"8.5x11"L2LHagakiA6A5B5A460x80 mm9x13 cm10x15 cm13x18 cm20x25 cmUsing Layout - this is only displayed if there is a photo size and layout conflict. Press the Select button ☑ to resolve the conflict. |
| Layout | Specify the layout of the photos on the printed page.Automatic*Borderless1 per page2 per page3 per page4 per page6 per page8 per page16 per page1 centered |
| Quality | Specify the print quality (resolution) of the photos.Automatic*DraftNormalPhoto |
| Paper Type | Specify the type of paper in the paper input tray.Auto Detect*PlainCoatedPhotoTransparency |
| * Factory default setting | |
Understanding Paper and Specialty Media Guidelines
Loading Paper
Understanding the Automatic Paper Type Sensor
Loading Original Documents
Loading Paper
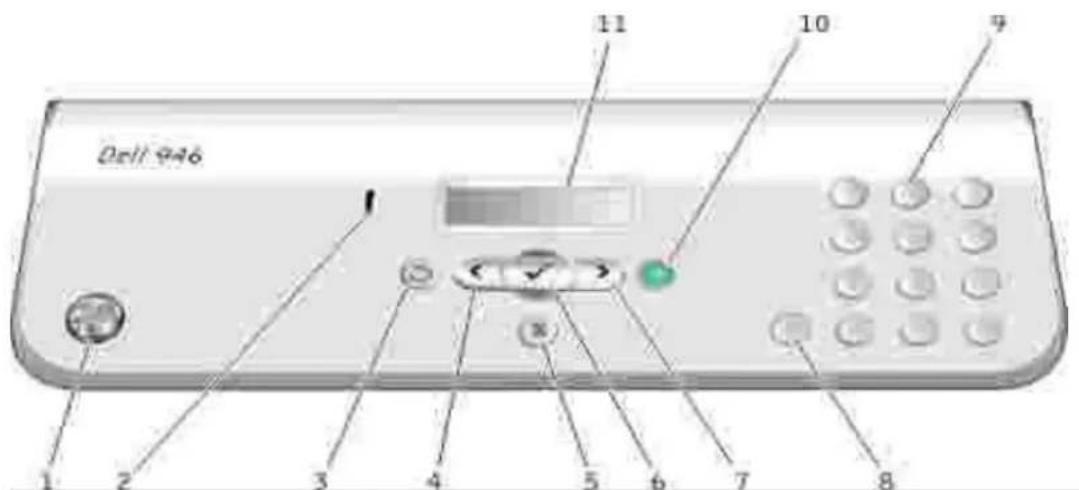
- Fan the paper.
natural_image
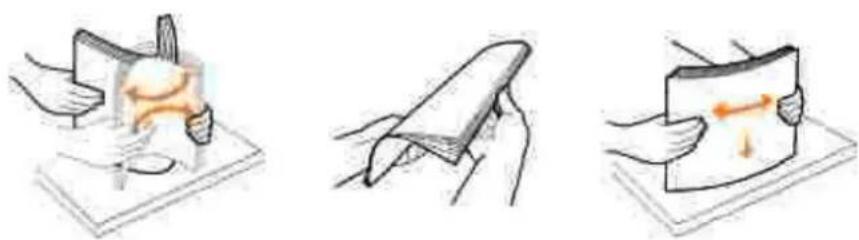
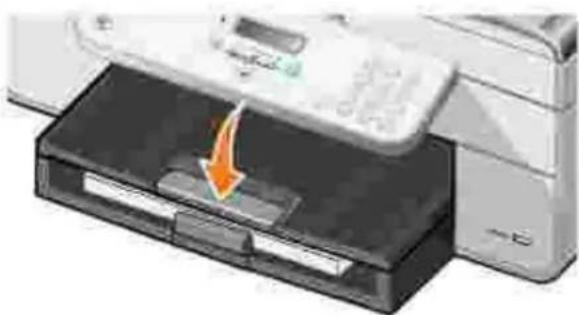
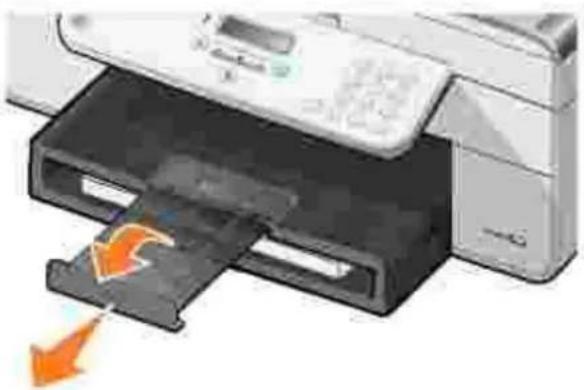
Three-step illustration showing hands performing a foldable or mechanical press application on a surface, with no visible text or symbols.- Lift the paper exit tray, and extend the paper support.
natural_image
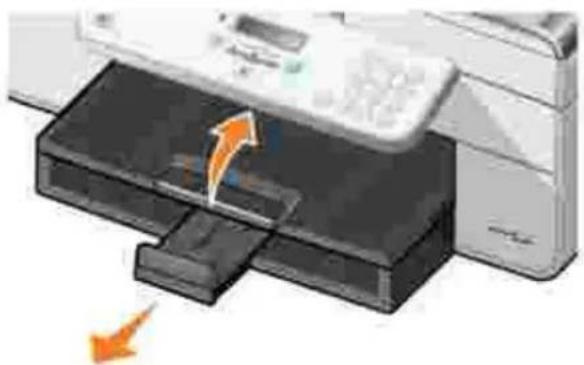
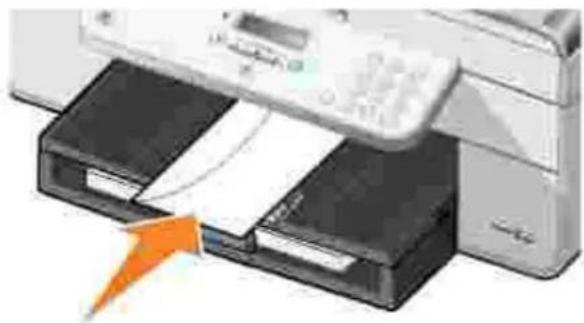
Illustration of a printer printer with an orange arrow indicating compression or disassembly (no text or symbols present)- Insert paper into the paper input tray.

natural_image
Illustration of a printer printing process with orange arrows indicating motion (no text or symbols)
NOTE: Do not force the paper into the printer.
- Squeeze and slide the paper guides to rest against the edges of the paper.
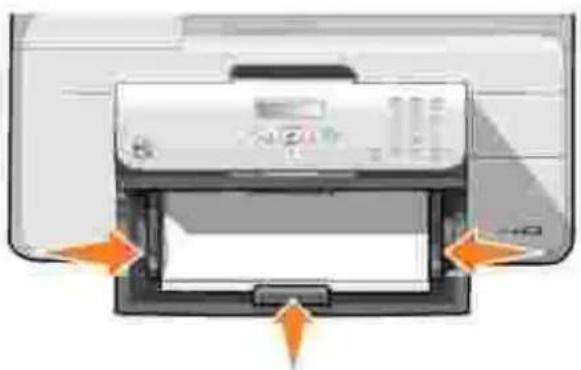
natural_image
Illustration of a printer with paper inside, showing paper being inserted (no text or symbols visible)- Lower the paper exit tray.
natural_image
Illustration of a printer with a paper feeding into a stacker (no text or symbols visible)- Extend the paper exit tray stop to catch paper as it exits the printer.

NOTE: The paper exit tray can hold up to 50 sheets of paper.
natural_image
Illustration of a printer with an orange arrow indicating flow or movement, showing internal structure and no visible text or symbols.Print Media Guidelines for the Paper Input Tray
| Load up to: | Make sure: |
100 sheets of plain paper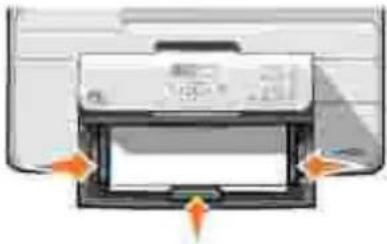 | The paper guides rest against the edges of the paper.You load letterhead paper with the print side facing down and the top of the letterhead going into the printer first.You selectAutomatic, Draft, Normal, orPhotoprint quality.Do not selectDraftif you have a photo cartridge installed. |
20 sheets of banner paper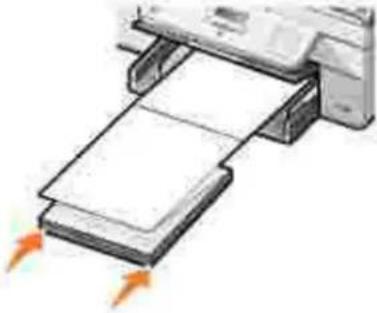 | You remove all paper from the paper input tray before inserting banner paper.You use banner paper designed for inkjet printers.You place a stack of banner paper in front of the printer, and feed in the first sheet.The paper guides rest against the edges of the paper.You selectA4 BannerorLetter Bannerpaper size. |
15 envelopes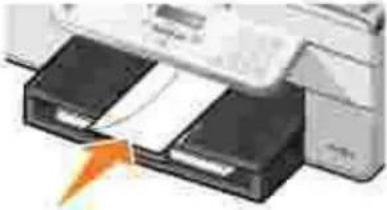 | The print side of the envelope faces down.The envelopes are centered on the paper exit tray.You print the envelopes withLandscapeorientation.NOTE:For Japanese customers: If you are mailing within Japan, the envelope can be printed in Portrait orientation with the stamp in the lower right corner, or in Landscape orientation, with the stamp in the lower left corner. If you are mailing internationally, print Landscape orientation with the stamp in the upper left corner.You select the correct envelope size. Select the next biggestsize if the exact envelope size is not listed, and set the left and right margins so your envelope text is correctly positioned. |
35 greeting cards, index cards, postcards, or photo cards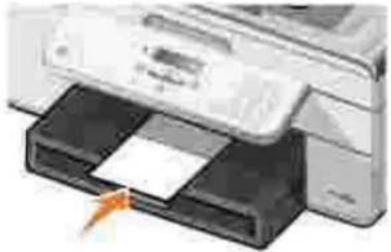 | The print side of the cards faces down.The cards are centered on the paper exit tray.You selectAutomatic, Normal, orPhotoprint quality. |
| 75 sheets of photo, coated, or glossy paper | The print side of the paper faces down.The paper guides rest against the edges of the paper.You selectAutomatic, Normal, orPhotoprint quality. |
| 25 iron-on transfers | You follow the loading instructions on the iron-on transfer packaging.The print side of the transfer faces down.The paper guides rest against the edges of the transfer.You selectAutomatic, Normal, orPhotoprint quality. |
| 75 transparencies | The rough side of the transparencies faces down.The paper guides rest against the edges of the transparencies.You selectAutomatic, Draft, Normal, orPhotoprint quality. |
| 35 sheets of labels | The print side of the labels faces down.The to of the labels feeds into the printer first.The paper guides rest against the edges of the paper.You selectAutomatic, Draft, Normal, orPhotoprint quality. |
| 100 sheets of letterhead paper | The print side of the letterhead faces down.The top of the letterhead feeds into the printer first.The paper guides rest against the edges of the paper.You selectAutomatic, Draft, Normal, orPhotoprint quality. |
| 100 sheets of custom size paper | Your paper fits within these dimensions:Width: 3.0 - 8.5 inches (76.2 - 215.9 mm)Length: 5.0 - 14.0 inches (127.0 - 355.6 mm)The print side of the paper faces down.The paper guides rest against the edges of the paper.You selectAutomatic, Draft, Normal, orPhotoprint quality. |
Understanding the Automatic Paper Type Sensor
Your printer has an automatic paper type sensor that detects the following paper types:
- Plain
- Transparency
- Photo/glossy
If you load one of these paper types, the printer detects the paper type and automatically adjusts the Quality/Speed settings.
| Quality/Speed settings | ||
| Paper type | Black and Color Cartridges Installed | Photo and Color Cartridges Installed |
| Plain | Normal | Photo |
| Transparency | Normal | Photo |
| Glossy/photo | Photo | Photo |

NOTE: Your printer cannot detect the paper size.
To choose paper size:
- With your document open, click File→ Print.
The Print dialog box opens.
- Click Preferences, Properties, Options, or Setup (depending on your program or operating system).
The Printing Preferences dialog box opens.
-
On the Print Setup tab, select the paper size.
-
Click OK.
Unless you turn off the automatic paper type sensor, it always remains on. To turn off the automatic paper type sensor for a specific print job:
- With your document open, click File→ Print.
The Print dialog box opens.
- Click Preferences, Properties, Options, or Setup (depending on your program or operating system).
The Printing Preferences dialog box opens.
-
On the Print Setup tab, select the paper type.
-
Click OK.
To turn off the automatic paper type sensor for all print jobs:
- In Windows XP, click Start→ Control Panel→ Printers and Other Hardware→ Printers and Faxes.
In Windows 2000, click Start→ Settings→ Printers.
-
Right-click the Dell AIO Printer 946 icon.
-
Click Printing Preferences.
The Printing Preferences dialog box opens.
-
On the Print Setup tab, select the paper type.
-
Click OK.
Loading Original Documents
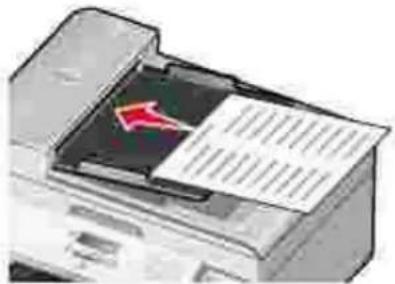
Into the ADF
You can load up to 50 sheets of your original document (text side up) into the ADF for scanning, copying, and faxing. The ADF is recommended for loading multiple-page documents.

NOTE: Do not load postcards, photo cards, photo paper, or small images in the ADF. Place these items on the scanner glass.
Paper Guidelines for the ADF
| Load up to: | Make sure: |
| 50 sheets of letter size paper | The document is loaded text side up.The paper guides rest against the edges of the paper. |
| 50 sheets of A4 size paper | The document is loaded text side up.The paper guides rest against the edges of the paper. |
| 50 sheets of legal size paper | The document is loaded text side up.The paper guides rest against the edges of the paper. |
| 50 sheets of two-, three-, or four-hole pre-punched media | The paper fits within these dimensions:Width: 8.27 - 8.5 inches (210.0 - 215.9 mm)Length: 11.0 - 14.0 inches (279.4 - 355.6 mm)The document is loaded text side up.The paper guides rest against the edges of the paper. |
| 50 sheets of edge-reinforced three-hole copier media | The paper fits within these dimensions:Width: 8.27 - 8.5 inches (210.0 - 215.9 mm)Length: 11.0 - 14.0 inches (279.4 - 355.6 mm)The document is loaded text side up.The paper guides rest against the edges of the paper. |
| 50 sheets of preprinted forms and letterhead media | The paper fits within these dimensions:Width: 8.27 - 8.5 inches (210.0 - 215.9 mm)Length: 11.0 - 14.0 inches (279.4 - 355.6 mm)The document is loaded text side up.The paper guides rest against the edges of the paper.The media absorbs ink well.You allow the preprinted media to dry thoroughly before use in the ADF.You do not use media printed with metallic ink particles in the ADF.You avoid embossed designs. |
| 50 sheets of custom size paper | The paper fits within these dimensions:Width: 8.27 - 8.5 inches (210.0 - 215.9 mm)Length: 11.0 - 14.0 inches (279.4 - 355.6 mm)The document is loaded text side up.The paper guides rest against the edges of the paper. |
Onto the Scanner Glass
- Open the top cover.
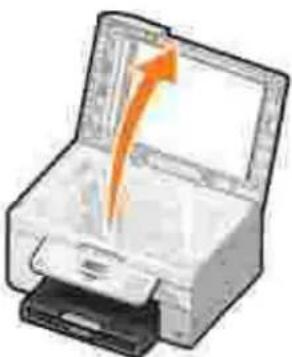
natural_image
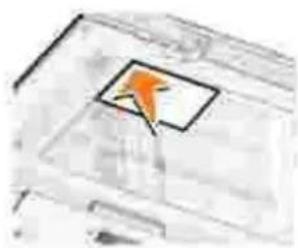
Illustration of a printer with an orange arrow indicating compression or compression process (no text or symbols)- Place the original document face down on the scanner glass.

NOTE: Make sure the upper left corner of the front of the item aligns with the arrow on the printer.
For portrait orientation:
For landscape orientation:
natural_image
Close-up of a transparent plastic container with an orange arrow pointing to a square (no text or symbols visible)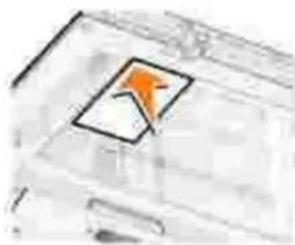
natural_image
Close-up of a transparent plastic container with an orange arrow pointing to it (no text or symbols visible)- Close the top cover.
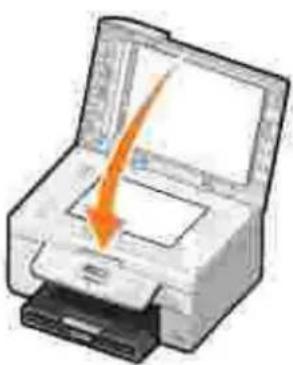
natural_image
Illustration of a printer with an orange arrow indicating compression or disassembly (no text or symbols present)Printing
Printing a Document
Printing Photos
Printing Envelopes
Printing Photos From a PictBridge-Enabled Camera
Printing a Document
- Turn on your computer and printer, and make sure they are connected.
- Load the paper. For more information, see Loading Paper.
- With your document open, click File→ Print.
The Print dialog box opens.
- Click Preferences, Properties, Options, or Setup (depending on the program or operating system).
The Printing Preferences dialog box opens.
- On the Print Setup and Advanced tabs, make any necessary changes for your document.
- When you finish customizing your settings, click OK.
The Printing Preferences dialog box closes.
- Click OK or Print (depending on the program or operating system).
Printing Photos
NOTE: Dell recommends you use a color cartridge and a photo cartridge for printing photos.
- Turn on your computer and printer, and make sure they are connected.
- Load the paper. For more information, see Loading Paper.
NOTE: Photo/glossy or coated paper is recommended for printing photos.
- With your document open, click File→ Print.
The Print dialog box opens.
- Click Preferences, Properties, Options, or Setup (depending on the program or operating system).
The Printing Preferences dialog box opens.
- On the Print Setup tab, select Photo, then select the dpi settings for the photo from the drop-down menu.
NOTE: To print borderless photos, select the Borderless check box in the Print Setup tab, and then select the borderless paper size from the drop-down menu on the Advanced tab. Borderless printing is only performed if you are using photo/glossy paper. The printout on non-photo paper contains a 2mm margin on all sides.
-
On the Print Setup and Advanced tabs, make any necessary changes for your document.
-
When you are finished customizing your print options, click OK.
The Printing Preferences dialog box closes.
-
Click OK or Print.
-
Remove each photo after it exits the printer to prevent your photos from sticking together or smudging.
NOTE: Before placing your prints in a nonadhesive photo album or frame, allow sufficient time for the prints to dry thoroughly (12 to 24 hours, depending on the ambient conditions). This maximizes the life of your prints.
Printing Envelopes
- Turn on your computer and printer, and make sure they are connected.
- Load the envelope between the paper guides with the print side facing down, with the flap on the left side.
natural_image
Illustration of a printer being inserted into two binders, with an orange arrow indicating the process (no text or symbols present)- With your document open, click File→ Print.
The Print dialog box opens.
- Click Preferences, Properties, Options, or Setup (depending on the program or operating system).
The Printing Preferences dialog box opens.
- On the Print Setup tab, select Landscape orientation.

NOTE: For Japanese customers: If you are mailing within Japan, the envelope can be printed in portrait orientation with the stamp in the lower right corner or in landscape orientation with the stamp in the lower left corner. If you are mailing internationally, print landscape orientation with the stamp in the upper left corner.
Printing Photos From a PictBridge-Enabled Camera
Your printer supports PictBridge-enabled cameras.
- Insert one end of the USB cable into the camera.
- Insert the other end of the USB cable into the PictBridge port on the front of the printer.
Refer to the instructions included with your camera for selection of the appropriate camera USB settings and PictBridge connection and usage information.
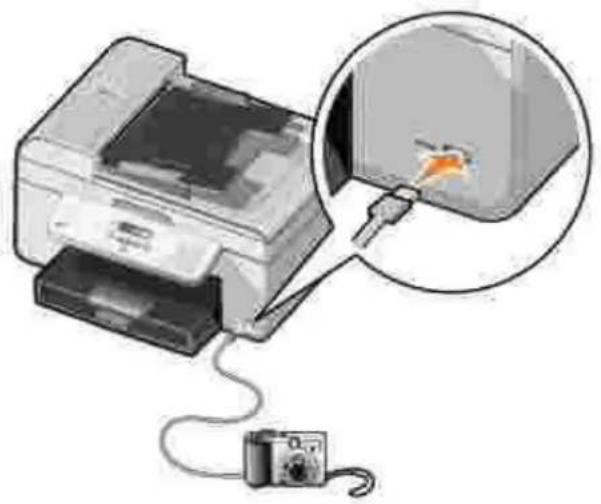
natural_image
Illustration of a printer connected to a power cord with an attached cable, showing a magnified view of the printer's internal structure (no text or symbols present)- Turn on your digital camera.
The printer automatically enters PictBridge mode.
- Refer to the instructions included with your camera to begin printing photos.

NOTE: For many digital cameras, there are two USB mode selections: computer and printer (or PTP). For PictBridge printing, the printer (or PTP) USB selection should be used. For more information, refer to the documentation included with your camera.
Copying
Copying Documents
Copying Photos
Collating Copies
Changing Copy Settings
Copying Documents
Using the Operator Panel
-
Turn on your printer.
-
Load the paper. For more information, see Loading Paper.
-
Load your original document. For more information, see Loading Original Documents.
-
From the main menu, use the left and right Arrow buttons < > to scroll to Copy, and then press the Select button ✅.
-
Make any necessary changes to the copy settings. For more information, see Copy Mode Menu.
-
Press the Start button

NOTE: If you press the Start button without specifying a color selection, the copy is printed in color by default.
Using Your Computer
-
Turn on your computer and printer, and make sure they are connected.
-
Load the paper. For more information, see Loading Paper.
-
Load your original document. For more information, see Loading Original Documents.
-
Click Start→ Programs or All Programs→ Dell Printers→ Dell AIO Printer 946.
-
Select Dell All-In-One Center.
The Dell All-In-One Center opens.
-
Select the number of copies (1-99), and then specify the color setting from the Copy drop-down menu.
-
Click See More Copy Settings to customize your copy.
-
When you finish customizing your settings, click Copy Now.
Copying Photos
Using the Operator Panel
- Turn on the printer.
- Load photo paper. For more information, see Loading Paper.
- Load your original document. For more information, see Loading Original Documents.
- From the main menu, use the left and right Arrow buttons < > to scroll to Copy, and then press the Select button ⚙️.
- Press the right Arrow button > until Quality appears on the display, and then press the Select button ⏻.
- Press the right Arrow button > until Photo appears on the display, and then press the Select button
- Press the Start button
Using Your Computer
- Turn on the printer.
- Load photo paper. For more information, see Loading Paper.
- Load your original document. For more information, see Loading Original Documents.
- Click Start→ Programs or All Programs→ Dell Printers→ Dell AIO Printer 946.
- Select Dell All-In-One Center.
The Dell All-In-One Center opens.
-
Click Preview Now.
-
Adjust the dotted lines to fit around the portion of the image you want to print.
-
Select the number of copies (1-99), and then specify the color settings from the Copy drop-down menu.
-
Click See More Copy Settings to customize your copy.
-
When you finish customizing your settings, click Copy Now.
Collating Copies
Using the Operator Panel
- Turn on the printer.
- Load the paper. For more information, see Loading Paper.
- Load your original document. For more information, see Loading Original Documents.
- From the main menu, use the left and right Arrow buttons < > to scroll to Copy, and then press the Select button ⚙️.
- Press the right Arrow button > until Collate appears on the display, and then press the Select button ⏻.
- Using the keypad or the left and right Arrow buttons < > , specify the number of copies you want to create, and then press the Select button ⏻ .
- Press the Start button
Copy to Memory appears on the display.
- After the page is scanned, you are asked if there is another page.
If you have another page to scan:
a. Remove the original document from the scanner glass.
b. Place the next original document on the scanner glass.
c. Press the right Arrow button > until Yes appears on the display, and then press the Select button ⏻.
d. Repeat this process until all original documents are copied to memory.
If you do not have another page to scan:
Press the right Arrow button > until No appears on the display and then press the Select button ⏻. The document begins to print.
Using Your Computer
- Turn on your computer and printer, and make sure they are connected.
- Load the paper. For more information, see Loading Paper.
- Load your original document. For more information, see Loading Original Documents.
- Click Start→ Programs or All Programs→ Dell Printers→ Dell AIO Printer 946.
- Select Dell All-In-One Center.
The Dell All-In-One Center opens.
- Select the number of copies (1-99), and then specify the color setting from the Copy drop-down menu.
- Click See More Copy Settings to customize your copy.
- Click the Advanced button.
The Advanced Copy Setting dialog box opens.
- On the Print tab, select the Collate Copies check box.
- Click OK.
- When you are finished customizing your settings, click Copy Now.
Changing Copy Settings
- Click Start→ Programs or All Programs→ Dell Printers→ Dell AIO Printer 946.
- Select Dell All-In-One Center.
The Dell All-In-One Center opens.
- Select the number of copies (1-99) and color setting from the Copy drop-down menus.
- Click See More Copy Settings to:
o Choose a copy quality.
o Select the paper size.
o Select the original document size.
o Lighten or darken your document.
o Reduce or enlarge your document.
-
Click the Advanced button to change options such as quality.
-
To make any changes, click the following tabs.
| Click this tab: | To: |
| Select the paper size and type.Select borderless printing options.Select the print quality. | |
| Scan | Select the color depth and scan resolution.Auto-crop the scanned image. |
| Image Enhancements | Straighten images after scan (deskew).Sharpen your blurry images.Adjust the brightness of your image.Adjust the color correction curve (gamma) of your image. |
| Image Patterns | Smooth the conversion of a gray image to a black and white dot pattern (dither).Remove image patterns from magazines or newspapers (descreen).Reduce the background noise on your color document. |
-
Click OK.
-
Click Copy Now.
Scanning
Scanning Single-Page Documents and Single Photos
Scanning Multiple-Page Documents Using the ADF
Scanning Multiple-Page Documents or Multiple Images Using Your Computer
Editing Scanned Text Using Optical Character Recognition (OCR)
Editing Scanned Images
Saving an Image on Your Computer
E-mailing a Scanned Image or Document
Enlarging or Reducing Images or Documents
Scanning Single-Page Documents and Single Photos

NOTE: Do not load postcards, photo cards, photo paper, or small images in the ADF. Place these items on the scanner glass.
Using the Operator Panel
- Turn on your computer and printer, and make sure they are connected. If you want to scan over the network, make sure your printer is connected to the network.
- Load your original document. For more information, see Loading Original Documents.
- Use the right right Arrow button > to scroll to Scan, and then press the Select button √.
- Use the right right Arrow button > to scroll to Scan To, and then press the Select button √.
- If your printer is connected locally:
a. The printer downloads the application list from the computer.
Use the left and right Arrow buttons <> to scroll through the available applications to which your scan to be sent.
b. When the application you want to use appears on the display, press the Select button ☑.
If your printer is connected to a network:

NOTE: This printer can only be attached to a network using a Dell Network Adapter (sold separately).
a. Use the left and right Arrow buttons < > to scroll through the available computers to which you want your scan to be sent.
b. When the computer you want to scan to appears on the display, press the Select button ⏻.
c. If the computer has a PIN number associated with it, use the keypad to enter the four-digit PIN.

NOTE: This can be found in the upper-right corner of the Dell All-In-One Center main page. For more information, see Using the Dell All-In-One Center. The PIN is not required by default; it is only requested if the PIN has been set.
d. Press the Select button ⏻.
- Press the Start button

The printer scans the page. When the scan is complete, a file is created in the selected application.
Using Your Computer
- Turn on your computer and printer, and make sure they are connected.
- Load your original document. For more information, see Loading Original Documents.
- Click Start→ Programs or All Programs→ Dell Printers→ Dell AIO Printer 946.
- Select Dell All-In-One Center.
The Dell All-In-One Center opens.

NOTE: You can also open the Dell All-In-One Center from the operator panel on your printer. When your printer is in scan mode, press the Start button 📋. The Dell All-In-One Center opens.
- From the Send scanned image to: drop-down menu, select the program you want to use.

NOTE: If the program you want to use is not listed, select Search for more... in the drop-down menu. On the next screen, click Add to locate and add the program to the list.
-
Click See More Scan Settings to customize your scan.
-
When you finish customizing your settings, click Scan Now.
When the printer completes scanning document or image, a file containing is created in the selected application.
Scanning Multiple-Page Documents Using the ADF
Using the Operator Panel
- Turn on your computer and printer, and make sure they are connected.
- Load your original document into the ADF. For more information, see Loading Original Documents.
- Use the right right Arrow button > to scroll to scan, and then press the Select button √.
- Use the right right Arrow button > to scroll to Scan To, and then press the Select button √.
- If your printer is connected locally:
a. The printer downloads the application list from the computer.
Use the left and right Arrow buttons < > to scroll through the available applications to which your scan to be sent.
b. When the application you want to use appears on the display, press the Select button ⏻.
If your printer is connected to a network:
NOTE: This printer can only be attached to a network using a Dell Network Adapter (sold separately).
a. Use the left and right Arrow buttons < > to scroll through the available computers to which you want your scan to be sent.
b. When the computer you want to scan to appears on the display, press the Select button ⏻.
c. If the computer has a PIN number associated with it, use the keypad to enter the four-digit PIN.
NOTE: This can be found in the upper-right corner of the Dell All-In-One Center main page. For more information, see Using the Dell All-In-One Center. The PIN is not required by default; it is only requested if the PIN has been set.
d. Press the Select button √.
- Press the Start button
The printer scans all pages loaded in the ADF. When all pages in the ADF are scanned, a single file containing all scanned pages is created in the selected application.
Using Your Computer
-
Turn on your computer and printer, and make sure they are connected.
-
Load your original document into the ADF. For more information, see Loading Original Documents.
- Click Start→ Programs or All Programs→ Dell Printers→ Dell AIO Printer 946.
- Select Dell All-In-One Center.
The Dell All-In-One Center opens.
NOTE: You can also open the Dell All-In-One Center from the operator panel on your printer. When your printer is in scan mode, press the Start button . The Dell All-In-One Center opens.
5. From the Send scanned image to: drop-down menu, select the program you want to use.
NOTE: If the program you want to use is not listed, select Search for more... in the drop-down menu. On the next screen, click Add to locate and add the program to the list.
6. Click See More Scan Settings to customize your scan.
7. When you finish customizing your settings, click Scan Now.
The printer scans all pages loaded in the ADF. When all pages in the ADF are scanned, a single file containing all scanned pages is created in the selected application.
Scanning Multiple-Page Documents or Multiple Images Using Your Computer
NOTE: Some programs do not support multiple-page scanning.
- Turn on your computer and printer, and make sure they are connected.
- Load your original document. For more information, see Loading Original Documents.
- Click Start→ Programs or All Programs→ Dell Printers→ Dell AIO Printer 946.
- Select Dell All-In-One Center.
The Dell All-In-One Center opens.
NOTE: You can also open the Dell All-In-One Center from the operator panel on your printer. When your printer is in scan mode, press the Start button 📋. The Dell All-In-One Center opens on your computer.
- From the Send scanned image to: drop-down menu, select the program you want to use.
NOTE: If the program you want to use is not listed, select Search for more... in the drop-down menu. On the next screen, click Add to locate and add the program to the list.
- Click See More Scan Settings to customize your scan.
- Click the Advanced button.
The Advanced Scan Settings dialog box opens.
-
On the Scan tab, select the Scan multiple items before output check box.
-
Click OK.
-
When you finish customizing your settings, click Scan Now.
After you scan the first page, a prompt appears requesting the next page.
-
Place the next sheet on the scanner glass, and click Yes. Repeat until you finish scanning all pages.
-
When finished, click No.
When the printer completes scanning the last page or image, a single file containing all scanned pages or images is created in the selected application.
Editing Scanned Text Using Optical Character Recognition (OCR)
OCR software converts a scanned image to editable text within a word-processing program.
NOTE: For customers using Japanese or Simplified Chinese: Ensure you have OCR software installed on your computer. A copy of OCR software was provided with your printer and should have installed at the same time as your printer software.
- Turn on your computer and printer, and make sure they are connected.
- Load your original document. For more information, see Loading Original Documents.
- Click Start→ Programs or All Programs→ Dell Printers→ Dell AIO Printer 946.
- Select Dell All-In-One Center.
The Dell All-In-One Center opens.
NOTE: You can also open the Dell All-In-One Center from the operator panel on your printer. When your printer is in scan mode, press the Start button . The Dell All-In-One Center opens on your computer.
- From the Send scanned images to: drop-down menu, select a word-processing or text-editing program.
NOTE: If the program you want to use is not listed, select Search for more... in the drop-down menu. On the next screen, click Add to locate and add the program to the list.
-
Click See More Scan Settings to customize your scan.
-
Click the Advanced button.
The Advanced Scan Settings dialog box opens.
-
On the Scan tab, select the Convert scanned item to text (OCR) check box.
-
Click OK.
-
When you finish customizing your settings, click Scan Now.
The scanned text opens in the program you selected.
Editing Scanned Images
-
Turn on your computer and printer, and make sure they are connected.
-
Load your original document. For more information, see Loading Original Documents.
-
Click Start→ Programs or All Programs→ Dell Printers→ Dell AIO Printer 946.
-
Select Dell All-In-One Center.
The Dell All-In-One Center opens.
NOTE: You can also open the Dell All-In-One Center from the operator panel on your printer. When your printer is in Scan mode, press the Start button . The Dell All-In-One Center opens on your computer.
- From the Send scanned image to: drop-down menu, select your scan destination.
NOTE: If the program you want to use is not listed, select Search for more... in the drop-down menu. On the next screen, click Add to locate and add the program to the list.
-
Click See More Scan Settings to customize your scan.
-
When you finish customizing your settings, click Scan Now.
When the image has finished processing, it opens in the program you selected.
- Edit the image using the tools available in your program. You may be able to:
o Remove red eye
o Crop your image
o Add text to your image
o Adjust the brightness and contrast of your image
For help, see the documentation that came with your graphics program.
Saving an Image on Your Computer
- Turn on your computer and printer, and make sure they are connected.
- Load your original document. For more information, see Loading Original Documents.
- Click Start→ Programs or All Programs→ Dell Printers→ Dell AIO Printer 946.
- Select Dell All-In-One Center.
The Dell All-In-One Center opens.

NOTE: You can also open the Dell All-In-One Center from the operator panel on your printer. When your printer is in scan mode, press the Start button 📋. The Dell All-In-One Center opens on your computer.
-
From the Productivity Tools section, click Save an image on my computer.
-
Follow the instructions on your computer screen to save an image on your computer.
E-mailing a Scanned Image or Document
- Turn on your computer and printer, and make sure they are connected.
- Load your original document. For more information, see Loading Original Documents.
- Click Start→ Programs or All Programs→ Dell Printers→ Dell AIO Printer 946.
- Select Dell All-In-One Center.
The Dell All-In-One Center opens.
NOTE: You can also open the Dell All-In-One Center from the operator panel on your printer. When your printer is in scan mode, press the Start button 📋. The Dell All-In-One Center opens on your computer.
5. From the Productivity Tools section, click E-mail an image or document.
6. From the What is being scanned? menu, make a selection.
7. Follow the instructions on the screen to prepare the photograph or document for e-mail.
8. Click Next.
9. Open your e-mail program, write a note to accompany the attached document, and then send it.
NOTE: If you have questions about attaching documents to e-mail, consult the Help for your e-mail program.
Enlarging or Reducing Images or Documents
- Turn on your computer and printer, and make sure they are connected.
- Load your original document. For more information, see Loading Original Documents.
- Click Start→ Programs or All Programs→ Dell Printers→ Dell AIO Printer 946.
- Select Dell All-In-One Center.
The Dell All-In-One Center opens.
NOTE: You can also open the Dell All-In-One Center from the operator panel on your printer. When your printer is in Scan mode, press the Start button . The Dell All-In-One Center opens on your computer.
- Click Preview Now.
NOTE: If the size of the scan (found in the lower right of the preview window) appears in red, you do not have the system resources available to perform the scan at the resolution or size you have selected. To correct this problem, either reduce your resolution or the size of your scan area.
-
From the Productivity Tools section, select Enlarge or reduce an image.
-
Follow the instructions on the screen to select the size of your new image.
-
When you finish customizing your image, click Scan Now.
Faxing
Setting Up the Printer With Equipment
Faxing Using the Printer Operator Panel
Sending a Fax From the Computer
Changing the Fax Setup
Speed Dial
Manually Dialing a Fax While Listening to a Telephone Line (On Hook Dial)
Send a Delayed Fax
Blocking Faxes
You do not need to connect your printer to a computer in order to fax. Use the printer operator panel for basic faxing. See Faxing Using the Printer Operator Panel.

NOTE: For faxing instructions using the computer software, see Sending a Fax From the Computer.
| Equipment | Benefits | See this section |
| printerphone cord(provided) | Make copies and send and receive faxes without the use of a computer. | Connecting directly to a telephone wall jack |
| printertelephone (sold separately)two phone cords (one provided) | Use the fax line as a normal telephone line.Set up your printer wherever your telephone is.Make copies and send and receive faxes without the use of a computer. | Connecting to a telephone |
| printertelephone (sold separately)answering machine(sold separately)three phone cords(one provided) | Receive both incoming voice messages and faxes. | Connecting to an answering machine |
| printertelephone (sold separately)computer modem(sold separately)three phone cords(one provided)USB cable (sold separately) | Increase the number of phone connection outlets. | Connecting to a computer modem |

NOTE: The phone cord (provided) must be plugged into the correct connector.
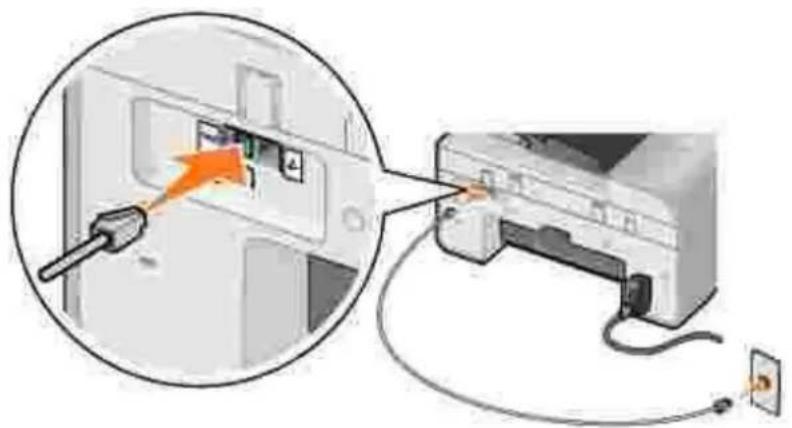
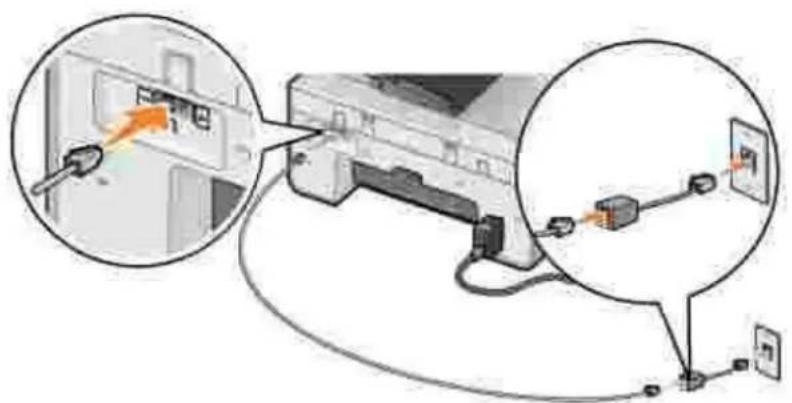
Setting Up the Printer With Equipment Connecting directly to a telephone wall jack
natural_image
Diagram showing a computer interface with an orange arrow pointing to a component, connected to a paper printer (no text or symbols visible)-
Connect one end of the phone cord to the FAX connector (FAX - left side connector).
-
Connect the other end of the phone cord to an active telephone wall jack.
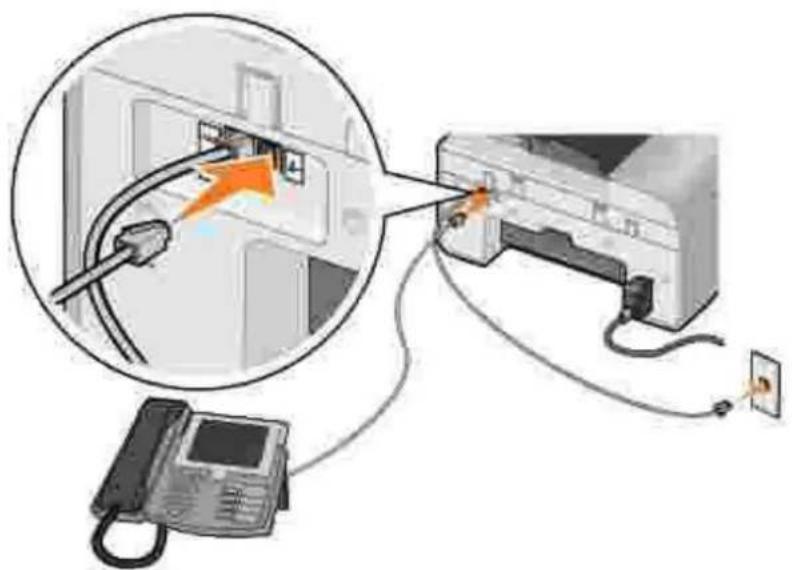
Connecting to a telephone
natural_image
Diagram showing connection between a printer and a telephone, with an orange arrow indicating cable routing (no text or symbols present)-
Connect a phone cord from the FAX connector (MAX - left side connector) on the printer to the telephone wall jack.
-
Remove the protective plug from the PHONE jack connector (2 - right side connector).
-
Connect a phone cord from the telephone to the PHONE jack connector (2 - right side connector).
NOTE: If the phone communication is serial in your country (such as Germany, Sweden, Denmark, Austria, Belgium, Italy, France, and Switzerland), you must remove the blue plug from the PHONE jack connector (↓ - right side connector), and insert the supplied yellow terminator for your fax to work correctly. You will not be able to use this port for additional devices in these countries.
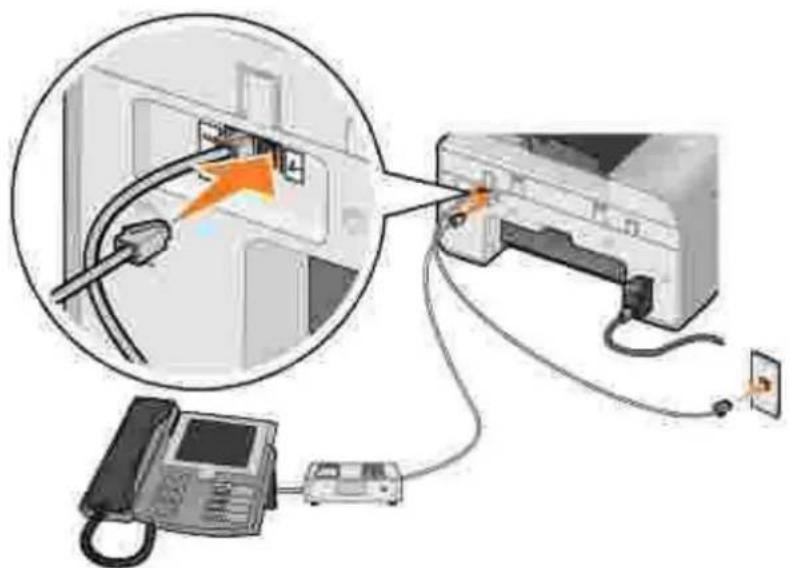
Connecting to an answering machine
natural_image
Diagram showing connection between a printer, telephone receiver, and printer with cable routing (no text or symbols)- Connect a phone cord from the FAX connector (MAX - left side connector) on the printer to the telephone wall jack.
- Remove the protective plug from the PHONE jack connector (2 - right side connector).
- Connect a phone cord from the telephone to the answering machine.
- Connect a phone cord from the answering machine to the PHONE jack connector (2 - right side connector).
NOTE: If the phone communication is serial in your country (such as Germany, Sweden, Denmark, Austria, Belgium, Italy, France, and Switzerland), you must remove the blue plug from the PHONE jack connector (↓ - right side connector), and insert the supplied yellow terminator for your fax to work correctly. You will not be able to use this port for additional devices in these countries.
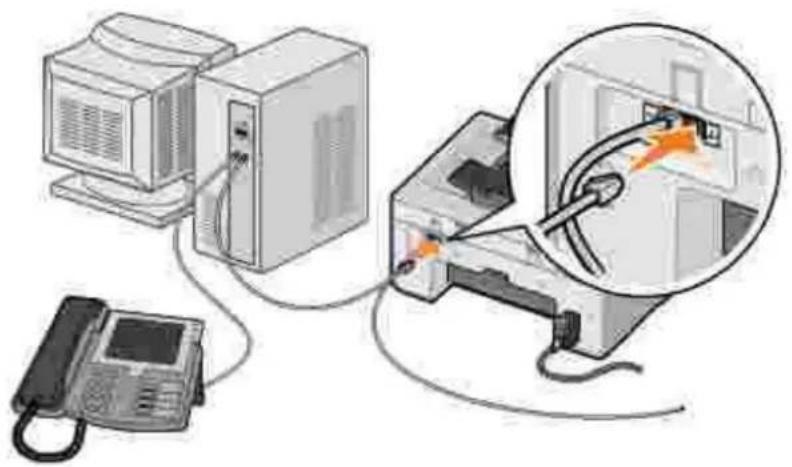
Connecting to a computer modem
natural_image
Illustration of a vintage computer setup with a monitor, tower, and telephone connected to an open device (no text or symbols visible)-
Connect a phone cord from the FAX connector (MAX - left side connector) on the printer to the telephone wall jack.
-
Remove the protective plug from the PHONE jack connector ( - right side connector).
-
Connect a phone cord from the computer modem to the PHONE jack connector (2 - right side connector).
-
Connect a phone from the computer modem to a telephone.
NOTE: If the phone communication is serial in your country (such as Germany, Sweden, Denmark, Austria, Belgium, Italy, France, and Switzerland), you must remove the blue plug from the PHONE jack connector (2 - right side connector), and insert the supplied yellow terminator for your fax to work correctly. You will not be able to use this port for additional devices in these countries.
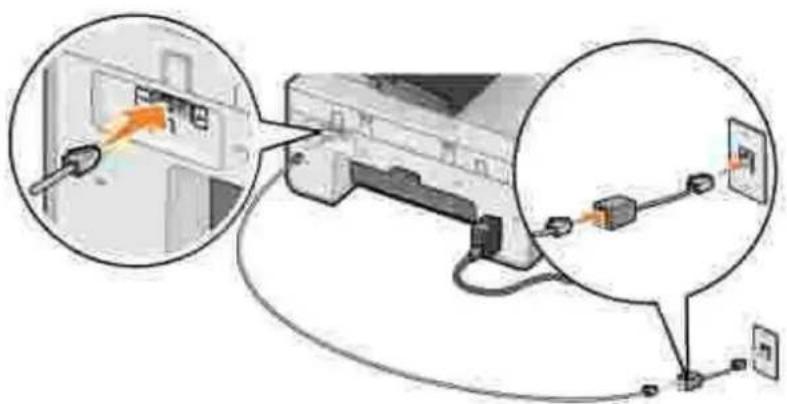
What if I Have a Digital Subscriber Line (DSL)?
DSL delivers digital data to a computer through a telephone line. Your printer is designed to work with analog data. If you are faxing over a telephone line connected to a DSL modem, install a DSL filter to avoid interference with the analog fax modem signal.
NOTE: ISDN (integrated services digital network) and cable modems are not fax modems and are not supported for faxing.
- Connect the DSL filter to an active telephone line.
- Connect the printer directly to the output of the DSL filter.
natural_image
Diagram showing cable connection to a device with an orange arrow pointing to a component, and a magnified inset illustrating the cable's cable routing (no text or symbols present)
NOTE: Do not install any splitters between the DSL filter and the printer. Contact your DSL service provider if you need more help.
Faxing Using the Printer Operator Panel
Sending a Fax
- Make sure your printer is on and connected to an active telephone line.
- Load your original document.
- From the main menu, use the left and right Arrow buttons < > to scroll to Fax, and press the Select button Ⓧ.
- Use the keypad to enter the fax number.

NOTE: You can enter up to 64 digits.
- Press the Start button

The printer scans your document and sends your fax to the number you entered. After the transmission is complete, the printer beeps to let you know the fax is complete.
Sending a Broadcast Fax
A broadcast fax allows you to send the same fax to multiple fax numbers at once. You can enter up to 30 different numbers.
- Make sure your printer is on and connected to an active telephone line.
- Load your original document.
- From the main menu, use the left and right Arrow buttons < > to scroll to Fax, and press the
Select button
- Use the keypad to enter the fax number.
- If you want to enter another fax number, press the Select button ☑.
- Use the keypad to enter the fax number.
- Repeat this process until you have entered all numbers to which the fax needs to be sent.
NOTE: You can also use the Phonebook or Redial History options to select phone numbers. Each number you select or enter is added to the fax list until you press the Start button .
- Press the Start button
After you initiate the fax, the printer dials the first number, establishes a connection, sends the fax, breaks the connection, and moves to the next number in the list. This continues until the list has been completed. If the printer is unable to make a connection to a fax number, the printer moves to the next number in the list. The number to which a connection was not established is moved to the end of the list, and it is tried again when the rest of the list has been completed.
NOTE: Fax numbers to which the printer could not establish a connection are retried based on the number of retries specified in the Dialing and Sending options. For more information, see Fax Setup Menu.
Receiving a Fax Automatically
- Make sure your printer is on and connected to an active telephone line.
- Make sure Auto Answer is turned on or is currently within the scheduled on period.
a. From the main menu, use the left and right Arrow buttons < > to scroll to Fax, and then press the Select button ⚙️.
b. Press the right Arrow button > until Auto Answer appears on the display, and then press the Select button ⏻.
c. If you always want the printer to answer the phone when it rings, press the right Arrow button until Yes appears on the display.
If you want to schedule a timeframe during which the printer answers the phone when it rings, press the right Arrow button > until Scheduled appears on the display, and then use the keypad to specify the times you want to turn Auto Answer on and off.
d. Press the Select button √.

NOTE: If you have your printer connected to an answering machine and Auto Answer is turned on, the answering machine answers the call. If a fax tone is detected, the answering machine is disconnected and the printer receives the fax. If a fax tone is not detected, the answering machine completes the call.
- Set the number of rings the printer should allow before answering the incoming fax.
a. From the main menu, use the left and right Arrow buttons < > to scroll to Fax, and then press the Select button ⚙️.
b. Press the right Arrow button > until Fax Setup appears on the display, and then press the Select button ⏻.
c. Press the right Arrow button > until Ringing and Answering appears on the display, and then press the Select button ⏻.
d. Press the right Arrow button > until Answer Fax When appears on the display, and then press the Select button ⏻.
e. Use the left and right Arrow buttons < > to scroll through the available settings.
f. When the number of rings you want appears on the display, press the Select button √.
When the number of set rings is detected, the printer automatically receives the fax.
Receiving a Fax Manually
- Make sure your printer is on and connected to an active telephone line.
- Make sure the Auto Answer feature has been turned off.
a. From the main menu, use the left and right Arrow buttons < > to scroll to Fax, and then press the Select button ⏻.
b. Press the right Arrow button > until Auto Answer appears on the display, and then press the Select button ⏻.
c. Press the right Arrow button > until No appears on the display, and then press the Select button ⏻.
- When there is an incoming fax, the display says Incoming Call: Press or 3355# to receive fax.
Sending a Fax From the Computer
Send faxes from computer files through the printer modem or the computer modem. Any file that can be printed can be faxed.
Connecting Cables
If you want to fax through the printer modem, connect an active telephone line to the FAX connector (FAX - left side connector) on the printer.
If you want to fax through the computer modem, connect an active telephone line to the LINE connector (☐ - left side connector) on the computer's fax modem.
What if I Have a Digital Subscriber Line (DSL)?
DSL delivers digital data to a computer through a telephone line. Your printer is designed to work with analog data. If you are faxing over a telephone line connected to a DSL modem, install a DSL filter to avoid interference with the analog fax modem signal.

NOTE: ISDN (integrated services digital network) and cable modems are not fax modems and are not supported for faxing.
- Connect the DSL filter to an active telephone line.
- Connect the printer directly to the output of the DSL filter.
natural_image
Diagram showing cable connection to a device with zoomed-in detail (no text or symbols)
NOTE: Do not install any splitters between the DSL filter and the printer. Contact your DSL service provider if you need more help.
Faxing Through the Printer Modem
Sending a Fax Using the Dell All-In-One Center
- Turn on your printer and computer, and make sure they are connected.
- Load your original document.
- Click Start → Programs or All Programs → Dell Printers → Dell AIO Printer 946.
- Select Dell All-In-One Center.
The Dell All-In-One Center opens.
- Click the Fax Now button.
- Follow the instructions on the screen to send your fax.
Sending Fax Using Dell Printer Fax Tools
Using the Dell Printer Fax Tools allows you the flexibility of faxing any document you are capable of printing.
- With your document open, click File→ Print.
The Print dialog box opens.
-
In the printer list, select Dell Printer Fax Tools.
-
Click OK or Print, and then follow the instructions on the screen.
Receiving a Fax
The printer modem only receives hardcopy documents. If you need to save soft copies of the faxes you receive, you must scan the received document to a file (see Saving an Image on Your Computer), or receive faxes using your computer modem (see Receiving a Fax Using Fax Console or Fax Service Management).
Faxing Through the Computer Modem
If an active telephone line is connected to the LINE connector (☐) on your computer modem, use Fax Console (Windows XP only) or Fax Service Management (Windows 2000 only) to send and receive faxes:
- Use Fax Console or Fax Service Management to print and receive files as faxes, or
- Use the Dell All-In-One Center to first scan a document to a file, and then use Fax Console or Fax Service Management to print the file to fax.
Installing Fax Console in Windows XP
- Click Start→ Settings→ Control Panel.
- Double-click Add or Remove Programs.
The Add or Remove Programs dialog box opens.
- Click Add/Remove Windows Components.
- In the Components list, click to select the Fax Services box.
- Click Next.
NOTE: You may be prompted to insert the Windows installation CD to finish installing this component.
- Click Finish.
- In the Add or Remove Programs dialog box, click Close.
Configuring Fax Console (Windows XP) or Fax Service Management (Windows 2000)
- Click Start→ Programs or All Programs→ Accessories→ Communications→ Fax→ Fax Console (Windows XP) or Fax Service Management (Windows 2000).
- On the Welcome to Fax Configuration screen, click Next.
- On the Sender Information screen, type the information you want to be displayed on your fax cover page, and then click Next.
- On the Select Device for Sending or Receiving Faxes screen, click the modem that is installed in your computer in the Please select the fax device list.
- If you want to disable the sending of faxes, clear the Enable Send check box.
- Select the Enable Receive check box if you want to receive faxes.
NOTE: Selecting the Enable Receive check box allows you to receive faxes but may cause the computer modem to answer all phone calls, in which case you may not receive voice mail.
- Click the Manual answer button or Automatically answer after (user defined number of rings) button.
- Click Next.
- On the Transmitting Subscriber Identification (TSID) screen, type the identification information (usually your fax number and your name or business name) in the TSID box.
This information appears in the header area of the faxes you send and identifies your fax machine to
the person who receives your faxes.
NOTE: The TSID is mandatory in some areas.
- Click Next.
NOTE: If you enabled your machine to receive faxes in step 6, continue with step 11 – step 15.
-
On the Called Subscriber Identification (CSID) screen, type the CSID (appears to confirm the fax is being sent to the correct recipient) that you want in the CSID box.
-
Click Next.
-
On the Routing Options screen, click to select the Print it on check box if you want each received fax to be automatically printed. When you select this check box, select the printer to print the received fax.
NOTE: Your printer must be on and connected to your computer to automatically print faxes.
-
Click to select the Store a copy in a folder check box if you want to create an archive copy of each fax.
-
Click Next.
-
Confirm the configuration settings in the Configuration Summary list, and then click Finish.
You are now ready to send or receive faxes.
Sending a Hardcopy Fax Using the Dell All-In-One Center
- Make sure your computer modem is connected to an active telephone line. If you have DSL broadband service on the same phone line that you are using to fax, you must also have a DSL filter installed. Contact your Internet Service Provider for information.
- Load your original document.
- Click Start→ Programs or All Programs→ Dell Printers→ Dell AIO Printer 946.
- Select Dell All-In-One Center.
The Dell All-In-One Center opens.
- From the Send scanned image to: drop-down menu, select File.
- Click Scan Now, and save your file to the desired location.
- Open the file you just scanned and saved.
- Click click File → Print
The Print dialog box opens.
- In the printer list, select Fax.
- Click OK or Print, and then follow the instructions on the screen.
Sending an Electronic Copy Fax Using Fax Console or Fax Service Management
- With the file open, click File → Print.
The Print dialog box opens.
-
In the printer list, select Fax.
-
Click OK or Print, and then follow the instructions on the screen.
Receiving a Fax Using Fax Console or Fax Service Management
- Make sure your computer modem is connected to an active telephone line.
- Click Start→ Programs or All Programs→ Accessories→ Communications→ Fax.
- Click Fax Console or Fax Service Management.
If you selected the Enable Receive check box when configuring Fax Console or Fax Service Management, you are now ready to receive a fax.
NOTE: Selecting the Enable Receive check box allows you to receive faxes but may cause the computer modem to answer all phone calls, in which case you may not receive voice mail.
Viewing Sent and Received Faxes Using Fax Console or Fax Service Management
NOTE: Only faxes sent and received by Fax Console can be seen by Fax Console.
-
Click Start→ Programs or All Programs→ Accessories→ Communications→ Fax.
-
Click Fax Console or Fax Service Management.
The following folders appear:
o Incoming-faxes currently being received
o Inbox-faxes that have been received
o Outbox-faxes scheduled to be sent
o Sent Items-faxes successfully sent
- Select Inbox to view received faxes, or select Sent Items to view sent faxes.
Viewing the Status of a Fax Using Fax Console or Fax Service Management
-
Click Start→ Programs or All Programs→ Accessories→ Communications→ Fax.
-
Click Fax Console or Fax Service Management.
The following folders appear:
o Incoming-faxes currently being received
o Inbox-faxes that have been received
o Outbox-faxes scheduled to be sent
o Sent Items-faxes successfully sent
-
Click the folder of your choice.
-
Select the fax in the right pane for which you want to view the status, and then click Preferences or Properties.
-
Click the General tab, and view the Status line.
-
Click Close when you are finished.
Changing the Fax Setup
Using the Operator Panel
If you are using your printer as a standalone fax machine, you can change the fax settings from the Fax mode menus on the operator panel. For more information about the settings, see Fax Mode.
Using the Printer Setup Utility
You can access the Printer Setup Utility if you want to configure the printer's fax settings from your computer.
- Click Start → Programs or All Programs → Dell Printers → Dell AIO Printer 946.
- Select Printer Setup Utility.

NOTE: In order for settings specified from the Printer Setup Utility to take effect on your printer, ensure Allow is selected from Host Fax Settings submenu in Setup mode on your operator panel. For more information, see Setup Mode.
Printer Setup Utility Tabs
| On this tab: | You can: |
| Send | Enter your name and fax number.Specify a maximum send speed and a print quality for outgoing faxes.Choose whether to scan the entire document before dialing the number.Choose whether to use error correction.Specify when to print a fax usage report.Specify when to print a fax activity report. |
| Receive | Choose whether you want to print a footer (date, time, and page number) on each page.Specify the printer to automatically resize oversize faxes so they print on one page, or keep the oversize fax to scale and print on two pages.Select whether you want to forward a fax or print it, and then forward it.Manage blocked faxes. |
| Connection/Dialing | Specify the number of times you want the machine to redial and the time between those attempts if the fax cannot be sent on the first try.Select the phone line format you want to use (Pulse, Touch-tone, Behind a PBX).Enter a dialing prefix.Specify how you want to answer incoming calls (manually, if fax tones are detected, or after a certain amount of rings).Specify a distinctive ring if your phone line has distinctive ring service activated. |
| Speed Dial | Add to, create, or edit the speed dial or group speed dial lists. |
Speed Dial
To make sending faxes easier, you can enter up to 99 speed dial numbers. Up to 89 individual fax numbers can be stored, or 10 groups that can hold up to 30 phone numbers each.
Creating a Speed Dial List From the Operator Panel
- From the main menu, use the left and right Arrow buttons <> to scroll to Fax, and then press the Select button ☑.
- Press the right Arrow button > until Phone Book appears on the display, and then press the Select button ⏻.
-
Press the right Arrow button > until Add appears on the display, and then press the Select button ⏻.
-
A quick dial number is automatically assigned by the printer. If you want to change the quick dial number, use the left and right Arrow buttons < > or the keypad to scroll to the quick dial number for which you want to specify a contact.
NOTE: Number 01 through 89 are available for individual speed dial contacts.
-
When the quick dial number you want to use is shown on the display, use the keypad to enter the fax number, and then press the Select button ☑.
-
Using the keypad, enter the name for the contact.
a. Find the number button that corresponds to the letter you want to enter, and press it repeatedly until the correct letter appears.
b. Press the right Arrow button ➤ to move to the next character space, or wait two seconds for the text to be accepted.
NOTE: To enter a space between words, press the right Arrow button > twice.
c. Repeat the previous steps until you are finished entering text.
NOTE: To delete a character, press the left Arrow button <.
- Press the Select button ⏻.
The contact is saved.
Creating a Group Dial List From the Operator Panel
- From the main menu, use the left and right Arrow buttons < > to scroll to Fax, and then press the Select button ⚙️.
- Press the right Arrow button > until Phone Book appears on the display, and then press the Select button ⏻.
- Press the right Arrow button > until Add appears on the display, and then press the Select button ⏻.
- A quick dial number is automatically assigned by the printer. To specify you want to enter a group, use the left and right Arrow buttons < > or the keypad to scroll to the group contact quick dial number to which you want to assign contacts.

NOTE: Numbers 90 through 99 are reserved for group contact lists.
-
When the quick dial number you want to use is shown on the display, use the keypad to enter the first fax number, and then press the Select button ☑.
-
You are asked if you want to enter another number to this group.
If you want to add another number:
a. Press the right Arrow button > until Yes appears on the display, and then press the Select button ⏻.
b. Use the keypad to enter the next fax number for the group, and then press the Select button
c. Repeat until all the fax numbers (up to 30) are specified for the group.
If you do not want to add another number:
Press the right Arrow button > until No appears on the display, and then press the Select button
- Using the keypad, enter the name of the group.
a. Find the number button that corresponds to the letter you want to enter, and press it repeatedly until the correct letter appears.
b. Press the right Arrow button > to move to the next character space, or wait two seconds for the text to be accepted.

NOTE: To enter a space between words, press the right Arrow button > twice.
c. Repeat the previous steps until you are finished entering text.

NOTE: To delete a character, press the left Arrow button <.
- Press the Select button
The group contact is saved.
Creating a Speed or Group Dial List From the Computer
-
Click Start→ Programs or All Programs→ Dell Printers→ Dell AIO Printer 946.
-
Select Printer Setup Utility.
The Printer Setup Utility opens.
- Click the Speed Dial tab.
Follow the instructions on the Speed Dial tab to add a new number to your speed dial list.
Using a Speed or Group Dial List
- From the main menu, use the left and right Arrow buttons <> to scroll to Fax, and then press the Select button ☑.
- Use the keypad to enter the one- or two-digit speed dial number.

NOTE: If you enter 1-99, the printer first checks the Phone Book to see if a contact exists for that speed dial number. If a contact exists, the speed dial entry is used. If a contact does not exist, the printer dials the number as entered.
- Press the Start button
Manually Dialing a Fax While Listening to a Telephone Line (On Hook Dial)
- From the main menu, use the left and right Arrow buttons < > to scroll to Fax, and then press the Select button ⚙️.
-
Press the right Arrow button > until On Hook Dial appears on the display, and then press the Select button ⏻.
-
Press the Select button ⚙ to make the printer go off hook.
-
Enter the number to which you want to send a fax.
The printer dials the numbers as they are entered on the keypad.
- Press the Start button when you are ready to send the fax.
Send a Delayed Fax
- Make sure your printer is on and connected to an active telephone line.
- Load your original document.
- From the main menu, use the left and right Arrow buttons < > to scroll to Fax, and then press the Select button ⏻.
- Press the right Arrow button > until Delay Sending Fax appears on the display, and then press the Select button ⏻.
- Press the right Arrow button > until Delay Until appears on the display, and then press the Select button ⏻.
- Use the keypad to specify the time you want the fax to be sent, and then press the Select button ☑.
- If your printer is not in 24hr mode, you are prompted to specify if this time is AM or PM. Use the left and right Arrow buttons < > to scroll to the setting you want to use, and then press the Select button ⏻.
- Use the keypad to enter the number to which you want to send the fax, and then press the Select button ⏻.
- If you want to enter another fax number:
a. Use the keypad to enter another number to which you want to send the fax, and then press the Select button ☑.
b. Repeat until you have entered all the fax numbers to which you want to send the fax.
If you want to use the Phone Book to select a contact:
a. Press the Select button √.
b. Use the left and right Arrow buttons < > to scroll through the available contacts.
c. When the contact you want to use appears on the display, press the Select button √.
d. Repeat until you have identified all the contacts to whom you want to send the fax.
- Press the Start button
At the designated time, the fax number is dialed, and the fax is transmitted to the designated fax number. If the fax transmission is unsuccessful, the unsuccessful number is tried again based on the redial settings.
Blocking Faxes
You can specify up to 50 numbers from which you want to block faxes. If the printer detects an incoming fax from one of these numbers, the call is disconnected and Blocked Number Call Stopped appears on the display.
Creating a Blocked Fax List
- From the main menu, use the left and right Arrow buttons < > to scroll to Fax, and then press the Select button ⏻.
- Press the right Arrow button > until Fax Setup appears on the display, and then press the Select button ⏻.
- Press the right Arrow button > until Fax Blocking appears on the display, and then press the Select button ⏻.
- Press the right Arrow button > until Add appears on the display, and then press the Select button
- Using the keypad, enter the fax number from which you want to block faxes, and then press the Select button ⏻.
- Using the keypad, enter the name of the blocked fax contact.
a. Find the number button that corresponds to the letter you want to enter, and press it repeatedly until the correct letter appears.
b. Press the right Arrow button > to move to the next character space, or wait two seconds for the text to be accepted.
NOTE: To enter a space between words, press the right Arrow button > twice.
c. Repeat the previous steps until you are finished entering text.
NOTE: To delete a character, press the left Arrow button <.
- Press the Select button √.
- If you want to enter another number:
a. Press the right Arrow button > until Yes appears on the display, and then press the Select button ⏻.
b. Using the keypad, enter the fax number from which you want to block faxes, and then press the Select button ☑.
c. Using the keypad, enter the name of the blocked fax contact.
d. Press the Select button √.
If you do not want to add another number:
Press the right Arrow button > until No appears on the display, and then press the Select button ⏻. The block fax entry is saved.
Turning Fax Blocking On

NOTE: In order to use fax blocking, you must have specified the printer to pick up after two or more rings in the Answer Fax When menu. For more information, see Additional Fax Options.
- From the main menu, use the left and right Arrow buttons < > to scroll to Fax, and then press the Select button ⏻.
- Press the right Arrow button > until Fax Setup appears on the display, and then press the Select button ⏻.
- Press the right Arrow button > until Turn On/Off appears on the display, and then press the Select button ⏻.
- Press the right Arrow button > until on appears on the display, and then press the Select button
The fax blocking feature is turned on.
Blocking Faxes Without Caller ID
- From the main menu, use the left and right Arrow buttons < > to scroll to Fax, and then press the Select button ⏻.
- Press the right Arrow button > until Fax Setup appears on the display, and then press the Select button ⏻.
- Press the right Arrow button > until Block No-ID appears on the display, and then press the Select button ⏻.
-
Press the right Arrow button > until on appears on the display, and then press the Select button
-
The fax blocking feature is turned on.
If the printer detects a fax from a machine without Caller ID, the transmission is disconnected.
Understanding the Software
Using the Dell All-In-One Center
Using Printing Preferences
Using Dell Picture Studio
Dell Ink Management System
Removing and Reinstalling Software
The printer software includes:
- Dell All-In-One Center - Allows you to perform various scan, copy, fax, and print operations with newly scanned and previously saved documents and images.
- Printing Preferences - Allows you to adjust printer settings.
- Dell Picture Studio™ - Allows you to manage, edit, display, print, and convert photos and other types of images.
- Dell Ink Management System™ - Warns you when your printer is running low on ink.
Using the Dell All-In-One Center
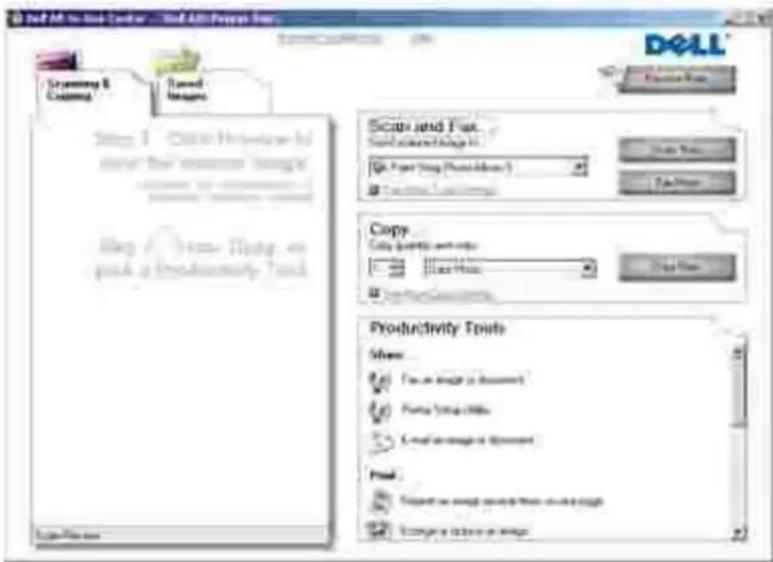
The Dell All-In-One Center allows you to:
- Scan, copy, fax, and use productivity tools.
-
Select where you want to send the scanned image.
-
Select the quantity and color of your copies.
- Access troubleshooting and maintenance information.
- Preview images you want to print or copy.
- Manage photos (copy them to folders, print them, perform creative copying).
To access the Dell All-In-One Center:
- Click Start→ Programs or All Programs→ Dell Printers→ Dell AIO Printer 946.
- Select Dell All-In-One Center.
The Dell All-In-One Center includes four main sections: Scan and Fax, Copy, Productivity Tools, and Preview.
| In this section: | You can: |
| Preview Now | Select a portion of the preview image to scan.View an image of what will be printed or copied. |
| Scan and Fax | Select the program where you want to send the scanned image.Select the type of image being scanned.Select how you will use the scan.SelectFax Now.SelectScan Now.NOTE:Click See More Scan Settingsto view all settings. |
| Copy | Select the quantity and color of your copies.Select a quality setting for your copies.Specify the blank paper size.Adjust the size of the scanned area.Lighten or darken your copies (this can also be accomplished using the operator panel).Enlarge or reduce your copies.NOTE:Click See More Copy Settingsto view all settings. |
| Productivity Tools | Fax using PC modem.E-mail an image or document.Repeat an image several times on one page.Enlarge or reduce an image.Print an image as a multi-page poster.Save an image on your computer.Use MagiChop to save multiple photos.Edit text found in a scanned document (Optical Character Recognition).Modify an image with a photo editor. |
For more information, click Help in the Dell All-In-One Center.
Using Printing Preferences
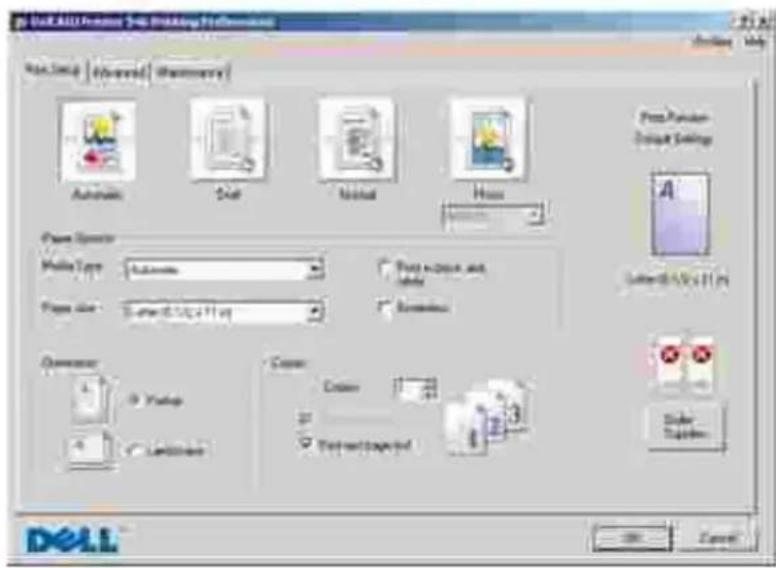
Printing Preferences allows you to change the various printer settings. You can change your printer settings in Printing Preferences depending on the type of project you want to create.
To access Printing Preferences:
- With your document open, click File→ Print.
The Print dialog box opens.
- Click Preferences, Properties, Options, or Setup (depending on the program or operating system).
The Printing Preferences dialog box opens.
To access Printing Preferences when a document is not open:
- In Windows XP, click Start→ Control Panel→ Printers and Other Hardware→Printers and Faxes.
In Windows 2000, click Start→ Settings→ Printers.
- Right-click the printer icon, and then select Printing Preferences.

NOTE: Changes made to the printer settings from the Printers folder become the default settings for most programs.
Printing Preferences Tabs
| Tab | Options |
| Print Setup | Quality/Speed - Select Automatic, Draft, Normal, or Photo depending on your desired output quality. Draft is the fastest option but should not be selected if you have a photo cartridge installed. |
| Media Type - Allows you to set the paper type manually, or have the printer sensor detect the paper type automatically. | |
| Paper Size - Select the size and type of paper. | |
| Print in Black and White - Print your color images in black and white to save the ink in your color ink cartridge. NOTE: You cannot select this setting if you have selected Use Color Cartridge for all Black Printing. | |
| Borderless - Select the check box if you want to print borderless photos. | |
| Orientation - Select how the document is arranged on the printed page. You can print using portrait or landscape orientation. | |
| Multiple Copies - Customize how the printer prints several photocopies of a single print job: Collated, Normal, or Print Last Page First. | |
| Advanced | 2-Sided Printing - Select this to print on both sides of the paper. |
| Layout - Select Normal, Banner, Mirror, N-up, Poster, Booklet, or Borderless. | |
| Automatic Image Sharpening - Automatically select the best image sharpening level based on image content. | |
| Dell Customer Experience Improvement Program - Allows you to access information about, and change your status in, the Dell Customer Experience Improvement Program. | |
| More Options - Allows you to specify Appearance Mode and Complete-A-Print settings. | |
| Maintenance | Install Print Cartridges |
| Clean Print Cartridges | |
| Align Print Cartridges | |
| Print a Test Page | |
| Network Support |
Using Dell Picture Studio
In Dell Picture Studio, you can explore digital photography and learn how to organize, create, or print photos. There are two components to the Dell Picture Studio:
• Paint Shop Photo Album 5
Click Start→ Programs or All Programs→ Dell Picture Studio 3→ Paint Shop Photo Album 5→ Paint Shop Photo Album 5.
- Paint Shop Pro Studio
Click Start→ Programs or All Programs→ Dell Picture Studio 3→ Paint Shop Pro Studio→ Jasc Paint Shop Pro Studio.
Dell Ink Management System
Each time you print a job, a printing progress screen appears, which shows the progress of the print job as well as the amount of ink remaining and the approximate number of pages remaining in the cartridge. The page counter is hidden during the first 50 pages of cartridge use, until printing habits are learned and a more accurate count can be given. The number of pages remaining changes as a result of the type of print jobs the printer completes.
When your ink cartridge levels are low, a Low Ink Warning appears on your screen when you try to print. This warning is displayed every time you print until you install a new ink cartridge. For more information on replacing ink cartridges, see Replacing Ink Cartridges.
When one or both of your ink cartridges are empty, the Reserve Tank window appears on your screen when you try to print. If you continue printing, the print job may not print as you expect.
If your black ink cartridge is out of ink, you can choose to print black from the color ink cartridge (Process Black) by selecting Complete-A-Print before clicking the Continue Printing button. If you select Complete-A-Print, and click Continue Printing, Process Black is used for all black printing until the black cartridge is replaced, or the option is cleared from More Options, located on the Advanced tab of the Printing Preferences. The Reserve Tank dialog does not display again until after the low ink cartridge has been replaced. The Complete-A-Print check box is automatically reset when a new or different cartridge is installed.
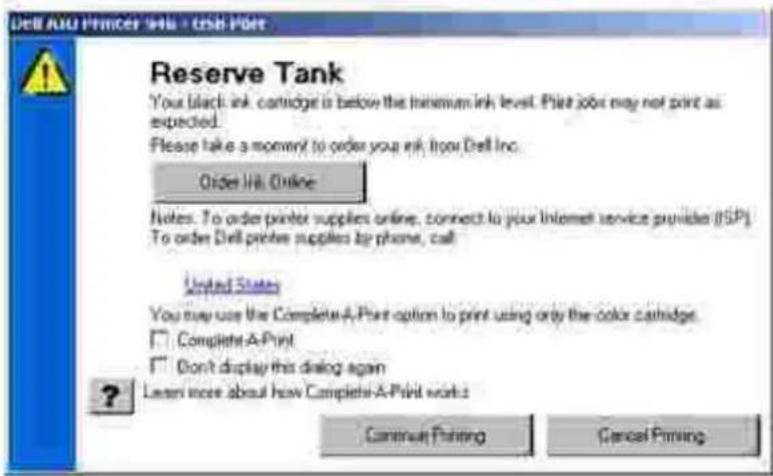
If your color ink cartridge is out of ink, you can choose to print color documents in grayscale by selecting Complete-A-Print before clicking the Continue Printing button. If you select Complete-A-Print, and click Continue Printing, all color documents will print in black and white until the color cartridge is replaced or the option is cleared from More Options, located on the Advanced tab of the Printing Preferences. The
Removing and Reinstalling Software
If your printer does not function properly, or communication error messages appear when using your printer, you can remove and reinstall the printer software.
- Click Start→Programs or All Programs→Dell Printers→Dell AIO Printer 946.
- Select Uninstall Dell AIO Printer 946.
- Follow the instructions on the computer screen.
- Restart your computer.
- Insert the Drivers and Utilities CD, and then follow the instructions on the screen.
If the installation screen does not appear:
a. In Windows XP, click Start→My Computer.
In Windows 2000, double-click My Computer from your desktop.
b. Double-click the CD-ROM drive icon, and then double-click setup.exe.
c. When the printer software installation screen appears, click Personal Installation or Network Installation.
d. Follow the instructions on your screen to complete the installation.
Ink Cartridge Maintenance
Replacing Ink Cartridges
Aligning Ink Cartridges
Cleaning the Ink Cartridge Nozzles

CAUTION: Before performing any of the procedures listed in this section, read and follow the "CAUTION: SAFETY INSTRUCTIONS" in your Owner's Manual.
Dell ink cartridges are available only through Dell. You can order more ink online at www.dell.com/supplies or by phone. To order by phone, see "Ordering Ink Cartridges and Supplies" in your Owner's Manual.
Dell recommends Dell ink cartridges for your printer. Dell does not provide warranty coverage for problems caused by using accessories, parts, or components not supplied by Dell.
Replacing Ink Cartridges
- Turn on your printer.
- Lift the printer unit.
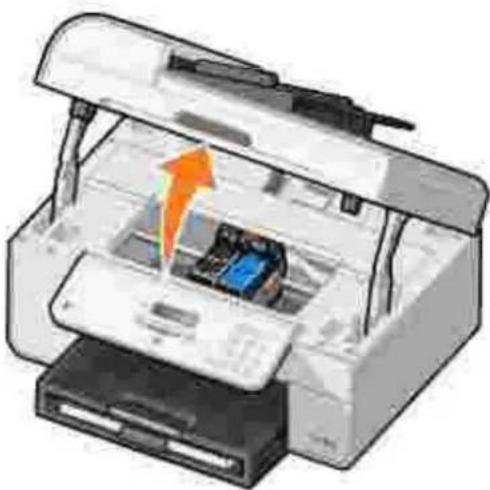
natural_image
Illustration of a printer with an open lid and internal components, showing no text or symbols.The ink cartridge carrier moves and stops at the loading position unless the printer is busy.
- Press down on the ink cartridge lever to raise each ink cartridge lid.
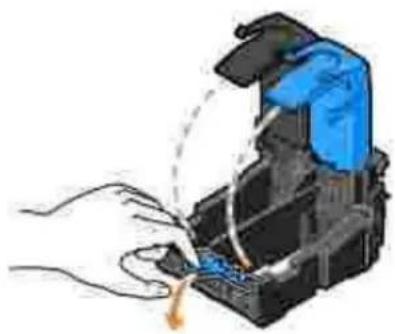
natural_image
Illustration of a person using a tool to clean or wash a component, with no visible text or symbols.- Remove the old ink cartridges.
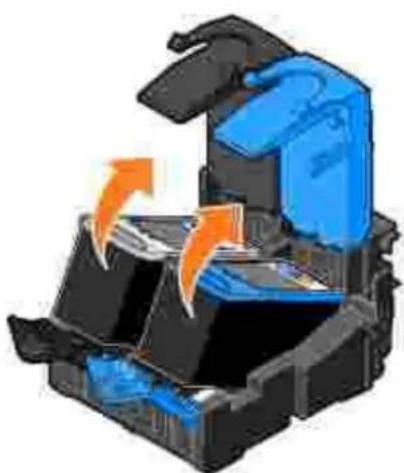
natural_image
Diagram of a blue and black mechanical device with orange arrows indicating motion or force (no text or symbols)-
Store the cartridges in an air-tight container, such as the storage unit you received with your photo cartridge, or dispose of them.
-
If you are installing new ink cartridges, remove the sticker and transparent tape from the back and bottom of each ink cartridge.

NOTE: The illustration below shows a black cartridge and a color cartridge (use for normal printing). For photo printing, use a photo cartridge (sold separately) and a color cartridge.
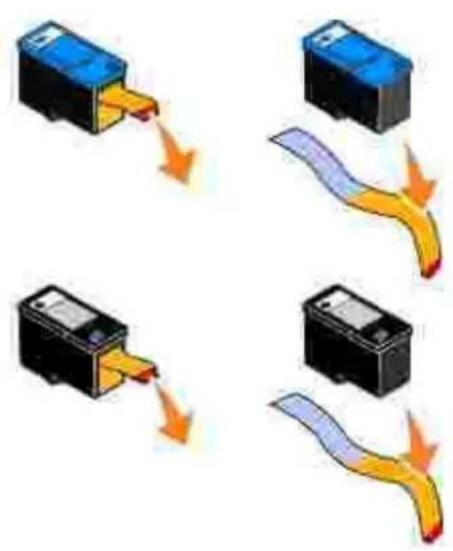
flowchart
graph TD
    A["Input"] --> B{Action}
    B -->|Yes| C["Process Step 1"]
    B -->|No| D["Process Step 2"]
    C --> E["Output"]
    D --> F["Output"]
- Insert the new ink cartridges. Make sure the black or photo ink cartridge is secure in the left ink cartridge carrier, and the color ink cartridge is secure in the right ink cartridge carrier.
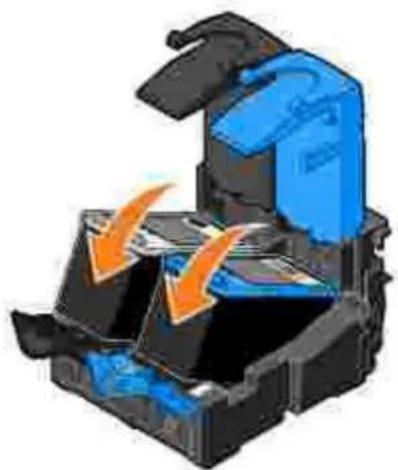
natural_image
3D illustration of a blue and black mechanical device with orange arrows indicating motion or force (no text or symbols)- Snap each lid closed.
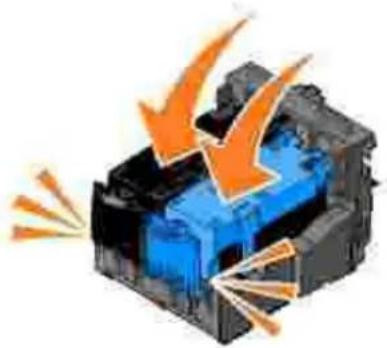
natural_image
Illustration of a blue industrial machine with orange downward arrows indicating motion or flow (no text or symbols)- Close the printer unit.
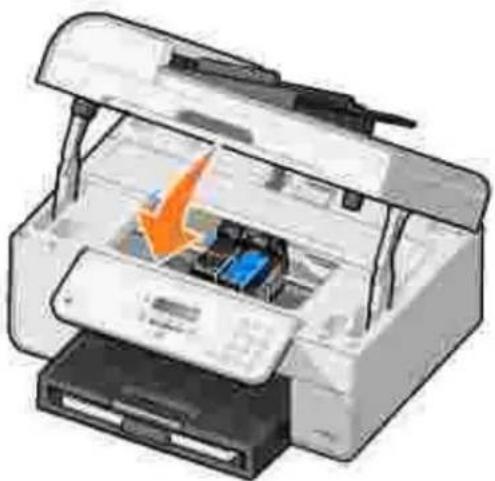
natural_image
Illustration of a printer with an orange arrow indicating compression or disassembly (no text or symbols present)An alignment page automatically prints.
Aligning Ink Cartridges
Your printer automatically aligns the ink cartridges when they are installed or replaced. After you close the printer unit, the alignment page prints. If you want to verify your ink cartridges are aligned, you can print an alignment page.
You may also need to align ink cartridges when characters are not properly formed or are not aligned at the left margin, or when vertical or straight lines appear wavy.
To align the ink cartridges from the operator panel:
- Load plain paper. For more information, see Loading Paper.
-
From the main menu, use the left and right Arrow buttons <> to scroll to Maintenance.
-
Press the Select button ⏻.
-
Use the left and right Arrow buttons <> to scroll to Align Cartridges.
-
Press the Select button √.
A blue and black alignment page prints. The ink cartridges align as the page prints.
You may discard the alignment page when the alignment is complete.
To align the ink cartridges:
-
Load plain paper. For more information, see Loading Paper.
-
In Windows XP, click Start→ Control Panel→ Printers and Other Hardware→ Printers and Faxes.
In Windows 2000, click Start→ Settings→ Printers.
-
Right-click the Dell AIO Printer 946 icon.
-
Click Printing Preferences.
The Printing Preferences dialog box opens.
-
Click the Maintenance tab.
-
Click Align Print Cartridges.
-
Click Print.
A blue and black alignment page prints. The ink cartridges align as the page prints.
You may discard the alignment page when the alignment is complete.
Cleaning the Ink Cartridge Nozzles
You may need to clean the nozzles when:
- White lines appear in graphics or solid black areas.
• Print appears smudged or too dark. - Colors fade, do not print, or do not print completely.
• Vertical lines appear jagged or edges appear rough.
To clean the ink cartridges from the operator panel:
- Load plain paper. For more information, see Loading Paper.
- From the main menu, use the left and right Arrow buttons <> to scroll to Maintenance.
- Press the Select button ⏻.
- Use the left and right Arrow buttons <> to scroll to Clean Cartridges.
- Press the Select button ⏻.
The cleaning page prints. You may discard the cleaning page when printing is complete.
To clean the ink cartridge nozzles:
- Load plain paper. For more information, see Loading Paper.
-
In Windows XP, click Start→ Control Panel→ Printers and Other Hardware→ Printers and Faxes.
In Windows 2000, click Start→ Settings→ Printers. -
Right-click the Dell™ All-In-One Printer 946 icon.
-
Click Printing Preferences.
The Printing Preferences dialog box opens.
-
Click the Maintenance tab.
-
Click Clean Print Cartridges.
The cleaning page prints. You may discard the cleaning page when printing is complete.
-
If the print quality has not improved, click Clean Again.
-
Print your document again to verify the improved print quality.
If you are still not satisfied with the print quality, wipe the ink cartridge nozzles, and then print your document again.
Troubleshooting
Setup Problems
General Problems
Error Messages
Improving Print Quality
Follow these tips when you troubleshoot your printer:
- If the printer does not work, ensure that the printer is properly connected to the electrical outlet and computer, if using a computer.
- If an error message appears on the operator panel display, write down the exact message.
Setup Problems
Computer Problems
| Verify your printer is compatible with your computer.The printer supports Windows XP, Windows XP Professional x64 Edition, and Windows 2000. |
| Make sure you turned on both your printer and your computer. |
| Check the USB cable.Ensure the USB cable is firmly connected to your printer and your computer.Shut down the computer, reconnect the USB cable as shown on the Setting Up Your Printer poster, and then restart the computer. |
| If the software installation screen does not appear automatically, install the software manually.Insert the Drivers and Utilities CD.In Windows XP, click Start→ My Computer.In Windows 2000, double-click My Computer from your desktop.Double-click the CD-ROM drive icon, and then double-click setup.exe.When the printer software installation screen appears, click Personal Installation or Network Installation.Follow the instructions on your screen to complete the installation. |
| Determine if the printer software is installed.Click Start→ Programs or All Programs→Dell Printers.If Dell AIO Printer 946 does not appear in the list of programs, the printer software is not installed. Install the printer software. For more information, seeRemoving and Reinstalling Software. |
| Correct communication problems between the printer and the computer.Remove the USB cable from your printer and your computer. Reconnect the USB cable to your printer and your computer.Turn off the printer. Unplug the printer power cable from the electrical outlet. Reconnect the printer power cable to the electrical outlet, and turn on the printer.Restart your computer. |
| Set your printer as the default printer.In Windows XP, click Start→ Control Panel→ Printers and Other Hardware→ Printers and Faxes.In Windows 2000, click Start→ Settings→ Printers.2. Right-click Dell AIO Printer 946, and select Set as Default. |
| Printer won't print and print jobs are stuck in the print queueCheck for multiple instances of the printer installed on your computer.In Windows XP, click Start→ Control Panel→ Printers and Other Hardware→ Printers and Faxes.In Windows 2000, click Start→ Settings→ Printers.2. Check for multiple objects for your printer.Print a job to each of these print objects to see which printer is active.Set that print object as the default printer by right-clicking the printer icon and selecting Set as Default Printer.Delete the other copies of the print object by right-clicking the printer name and selecting Delete. To prevent multiple instances of the printer in your Printers folder, make sure you always plug the USB cable back into the same USB port that was originally used for the printer. Also, do not install printer software multiple times from the Drivers and Utilities CD. |
Printer Problems
| Ensure the printer power cable is firmly connected to the printer and the electrical outlet. |
| Determine if the printer has been held or paused.1. In Windows XP, click Start→ Control Panel→ Printers and Other Hardware→ Printers and Faxes.In Windows 2000, click Start→ Settings→ Printers.2. Right-click the printer icon.3. Make sure Pause Printing is not selected. If Pause Printing is selected, click it to clear the option. |
| Check for flashing lights on the printer.For more information, see Error Messages. |
| Ensure you installed the ink cartridges correctly and removed the sticker and tape from each cartridge. |
| Make sure you loaded the paper correctly.For more information, seeLoading Paper. |
| Ensure the printer is not connected to a PictBridge-enabled camera.For more information, seePrinting Photos From a PictBridge-Enabled Camera. |
General Problems
Fax Problems
| Make sure an active telephone line is connected to the fax connector (FAX -left side connector) on the back of your printer. |
| Make sure that if you are using a DSL or ISDN line, you are using a digital line filter on the telephone line connecting your wall jack to the wall.For more information, seeWhat if I Have a Digital Subscriber Line (DSL)?.. |
| Make sure the power supply, telephone, and answering machine connections are secure. |
| Make sure the fax number, country code, and date/time are set correctly. |
| Make sure the telephone line is not in use by another device such as a dial-up modem internet service. If it is, wait until the other device is finished before sending your fax. |
| Make sure the original document is loaded correctly.For more information seeLoading Original Documents. |
| Make sure the memory is not full. Dial the receiving number first, and then scan your original document one page at a time. |
| Make sure the speed dial is set correctly. |
| Make sure the printer detects the dial tone. |
| Make sure the paper is loaded correctly.For more information, seeLoading Paper. |
| Make sure the printer doesn't have a paper jam.For more information, seePaper Problems. |
Paper Problems
| Make sure you loaded the paper correctly.For more information, seeLoading Paper. |
| Use only paper recommended for your printer.For more information, seePrint Media Guidelines for the Paper Input Tray. |
Use a smaller amount of paper when printing multiple pages.
For more information, see Loading Paper.
Make sure the paper is not wrinkled, torn or damaged.
Check for a paper jam.
Near the ADF
- Lift the ADF cover located to the left of the ADF input tray.
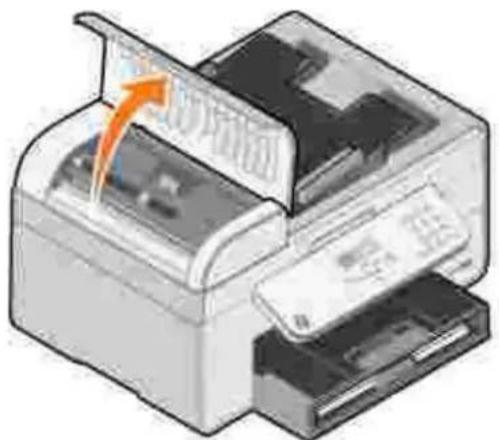
natural_image
Illustration of a printer with an orange arrow indicating paper direction (no text or symbols)-
Firmly grasp the paper, and gently pull it from the printer.
-
Close the ADF cover.
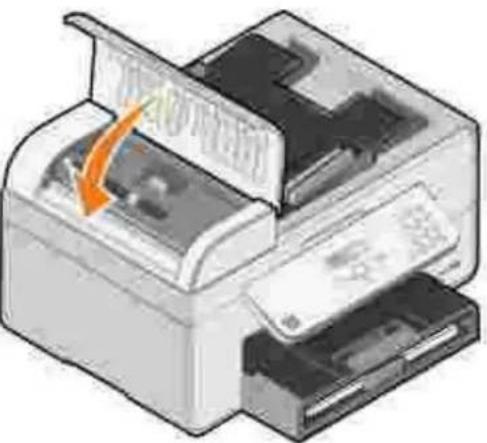
natural_image
Illustration of a printer with an orange arrow indicating a process or operation (no text or symbols present)-
Press the Select button ⏻.
-
Resend your print job to print any missing pages.
Near the paper input tray
- Lift the paper exit tray.
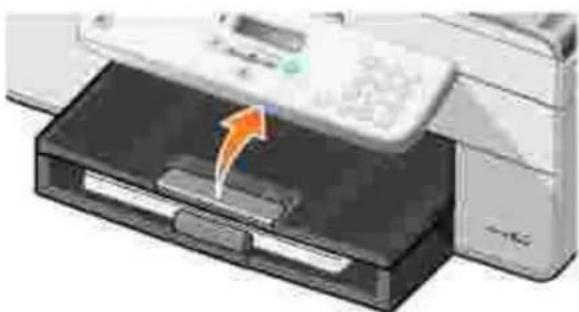
natural_image
Illustration of a printer printer with an orange arrow indicating compression or disassembly (no text or symbols present)- Firmly grasp the paper, and gently pull it from the printer.
- Lower the paper exit tray.
- Press the Select button
- Resend your print job to print any missing pages.
Near the paper exit tray
- Raise the paper unit.
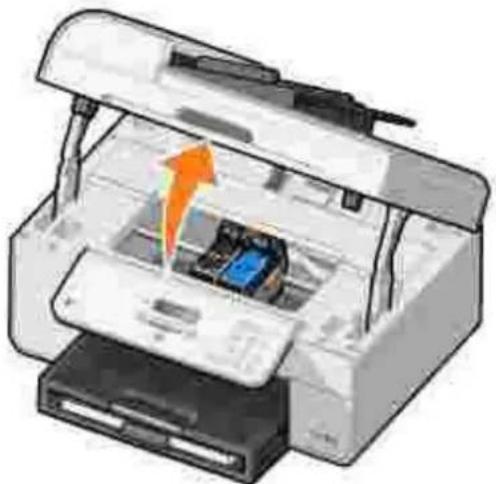
natural_image
Illustration of a printer with an orange arrow indicating compression or disassembly (no text or symbols present)- Firmly grasp the paper, and gently pull it from the printer.
- Close the printer unit.
- Press the Select button
- Resend your print job to print any missing pages.
Near the rear access door
- Open the rear access door.
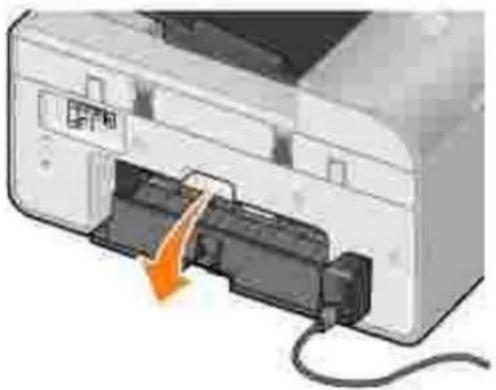
natural_image
Diagram of a printer internal structure showing a paper feeding into a slot, with an orange arrow indicating the insertion direction (no text or symbols present)- Firmly grasp the paper, and gently pull it from the printer.
- Close the rear access door.
- Press the Select button
- Resend your print job to print any missing pages.
To prevent jams and misfeeds, make sure:
- You place the printer on a flat, level surface.
- You use paper recommended for inkjet printers.
- You do not force the paper into the printer.
- You do not load too much paper.
- The paper guides rest against the edges of the paper.
- You select the correct paper type and size.
Network Problems
If you are using a wireless network printer adapter, ensure you have the latest firmware updates.
For the latest updates and information, visit support.dell.com.
Error Messages
| Error Message: | What it indicates: | Solution: |
| Paper Jam | A paper jam exists in the printer. | Clear the paper jam, and then press the Select button. For more information, see Paper Problems. |
| Paper Out | The paper input tray is empty. | Load paper, and then press the Select button. For more information, see Loading Paper. |
| Incorrect Print Head | One of the cartridges has an ID that is not valid. | Remove the cartridges, and install the correct Color, Black or Photo cartridge for your printer. For more information, see Replacing Ink Cartridges. |
| Missing Print Head | One of the cartridges is not installed. | Install a Color, Black or Photo ink cartridge. For more information, see Replacing Ink Cartridges. |
| Print Head Order | The ink cartridges are installed in the wrong carrier. | Remove the cartridges, and reinstall the ink cartridges in the correct carriers. For more information, see Replacing Ink Cartridges. |
| Print Carrier Stall | The ink cartridge carrier has stalled. | Clear the ink cartridge carrier jam, and then press the Select button. |
| Print Incomplete | The ink cartridge carrier stopped before all of the data was used. | Clear the ink cartridge carrier jam, and then press the Select button. |
| Print Head Short | The ink cartridge has a short. | Install a new Color, Black or Photo ink cartridge. For more information, see Replacing Ink Cartridges. |
| Print Head Programming | The printer is unable to program a print head ID. | Install a new Color, Black or Photo ink cartridge. For more information, see Replacing Ink Cartridges. |
| Mono TSR Error | An error was detected in the Black ink cartridge. | Install a new Black ink cartridge. For more information, see Replacing Ink Cartridges. |
| Color TSR Error | An error was detected in the Color ink cartridge. | Install a new Color ink cartridge. For more information, see Replacing Ink Cartridges. |
| Incorrect Home Position | The printer could not locate the correct home position of the ink cartridge carrier. | Clear the ink cartridge carrier jam, and then press the Select button. |
| Head Select | The printer ID and ink cartridge ID records do not agree. | Install a new Color, Black or Photo ink cartridge. For more information, see Replacing Ink Cartridges. |
Improving Print Quality
If you are not satisfied with the print quality of your documents, there are several different ways to improve the print quality.
- Use the appropriate paper. For example, use Dell Premium Photo Paper if you are printing photos with a photo ink cartridge.

NOTE: Dell Premium Photo Paper may not be available in all areas.
- Select a higher print quality.
To select a higher print quality:
- With your document open, click File→ Print.
The Print dialog box opens.
- Click Preferences, Properties, or Options (depending on your program or operating system).
The Printing Preferences dialog box opens.
-
On the Print Setup tab, select a higher quality setting.
-
Print your document again.
-
If the print quality does not improve, try aligning or cleaning the ink cartridges. For more information on aligning, see Aligning Ink Cartridges and Cleaning the Ink Cartridge Nozzles.
For additional solutions, go to support.dell.com.
Printer Specifications
Overview
Environmental Specifications
Power Consumption and Requirements
Fax Mode Capabilities
Print and Scan Mode Capabilities
Operating System Support
Memory Specifications and Requirements
Print Media Guidelines for the Paper Input Tray
Cables
Overview
| Memory | 32 MB SDRAM4 MB FLASH2 MB Fax |
| Connectivity | USB 2.0 high-speed |
| Printer life | Printer: 18,000 pagesScanner: 18,000 scansADF: 18,000 scans |
Environmental Specifications
Temperature/Relative Humidity
| Condition | Temperature | Relative humidity (non-condensing) |
| Operation | 61° to 90° F | 8 to 80% |
| Storage | 34° to 140° F | 5 to 80% |
| Shipping | -14° to 140° F | 5 to 100% |
Power Consumption and Requirements
| Rated AC Input | 110 V |
| Rated Frequency | 60 Hz |
| Minimum AC input | 90 VAC |
| Maximum AC input | 255 VAC |
| Maximum input current | 0.39 A |
| Average power consumption | |
| Standby mode | 7W |
| Operational mode | 14W |
Fax Mode Capabilities
When you scan to fax, your document will scan in at 100 dpi (dots per inch). You can fax black and white documents.
In order for faxing to function properly:
- The printer must be connected to an active phone line.
- The printer must be connected to a computer with a USB cable.

NOTE: If you are faxing over a telephone line connected to a DSL modem, install a DSL filter to avoid interference with the analog fax modem signal.

NOTE: You cannot fax with an ISDN (integrated services digital network) or cable modem. ISDN and cable modems are not fax modems and are not supported for faxing.
Print and Scan Mode Capabilities
Your printer can scan from 72 to 19,200 dpi. Although your printer has this capability, Dell recommends using the preset resolutions.
| Print and scan resolution | Scan resolution | Print resolution | |
| Glossy/Photo paper | All other media | ||
| Draft | 150 x 150 ppi | 600 x 600 dpi | 300 x 600 dpi |
| Normal | 300 x 300 ppi | 1200 x 1200 dpi | 600 x 600 dpi |
| Photo | 600 x 600 ppi | 4800 x 1200 dpi | 1200 x 1200 dpi |
Operating System Support
The printer supports:
Windows XP Professional x64
Windows XP
Windows 2000
For Vista compatible drivers, consult www.support.dell.com.
Memory Specifications and Requirements
Your operating system must meet the minimum system requirements.
| Operating system | Processor speed (Mhz) | RAM (MB) | Hard disk |
| Windows XPProfessional x64 | AMD Athlon 64, AMD Opteron, Intel Xeon with Intel EM64T support, or Intel Pentium 4 with Intel EM64T support | 256 | 1.5 GB |
| Windows XP | Pentium II 300 | 128 | 500 MB |
| Windows 2000 | Pentium II 233 | 128 | 500 MB |
Print Media Guidelines for the Paper Input Tray
| Media type: | Sizes Supported: | Load up to: |
| Plain paper | Letter: 8.5x11 inches (215.9x279.4 mm)A4: 8.27x11.69 inches (210.0x296.9 mm)Legal: 8.5x14 inches (215.9x355.6 mm)B5A5A6L2L | 100 sheets |
| Banner paper | Letter Banner: 8.5x11 inches (215.9x279.4 mm)A4 Banner: 8.27x11.69 inches (210.0x296.9 mm) | 20 sheets |
| Envelopes | 6 3/4 Envelopes: 3 1/4x6 1/2 inches7 3/4 Envelopes: 3 7/8x7 1/2 inches9 Envelopes: 3 7/8x8 7/8 inches10 Envelopes: 4 1/8x9 1/2 inchesBaronial 5 1/2 Envelopes: 4 3/8x5 3/4 inchesA2 Baronial Envelopes: 111x146 mmB5 Envelopes: 176x250 mmC5 Envelopes: 162x229 mmC6 Envelopes: 114x162 mmDL Envelopes: 110x220 mmChokei 3 Envelopes: 120x235 mmChokei 4 Envelopes: 90x205 mmChokei 40 Envelopes: 90x225 mmKakugata 3 Envelopes: 216x277 mmKakugata 4 Envelopes: 197x267 mmKakugata 5 Envelopes: 190x240 mmKakugata 6 Envelopes: 162x229 mm | 15 envelopes |
| Greeting cards, index cards, postcards, or photo cards | Photo/Post card: 4x6 inchesIndex card: 3x5 inchesHagaki | 35 cards |
| Photo/glossy or coated paper | Letter: 8.5x11 inches (215.9x279.4 mm)4x6 inches5x7 inches8x10 inches | 75 sheets |
| Iron-on transfers | 8.5x11 inches (215.9x279.4 mm) | 25 iron-on transfers |
| Transparencies | 8.5x11 inches (215.9x279.4 mm) | 75 transparencies |
| Labels | 35 sheets | |
| Custom size paper | The paper must fit the following dimensions:Width: 3.0-8.5 inches (76.2x215.9 mm)Length: 5.0x14.0 inches (127.0x355.6 mm) | 100 sheets |
Cables
Your printer uses a Universal Serial Bus (USB) cable (sold separately).


Appendix
Dell Technical Support Policy
Contacting Dell
Warranty and Return Policy
Dell Technical Support Policy
Technician-assisted technical support requires the cooperation and participation of the customer in the troubleshooting process and provides for restoration of the Operating System, application software and hardware drivers to the original default configuration as shipped from Dell, as well as the verification of appropriate functionality of the printer and all Dell-installed hardware. In addition to this technician assisted technical support, online technical support is available at Dell Support. Additional technical support options may be available for purchase.
Dell provides limited technical support for the printer and any Dell-installed software and peripherals. Support for third-party software and peripherals is provided by the original manufacturer, including those purchased and/or installed through Software & Peripherals (DellWare), ReadyWare, and Custom Factory Integration (CFI/DellPlus).
Contacting Dell
You can access Dell Support at support.dell.com. Select your region on the WELCOME TO DELL SUPPORT page, and fill in the requested details to access help tools and information.
You can contact Dell electronically using the following addresses:
- World Wide Web www.dell.com/ www.dell.com/ap/ (for Asian/Pacific countries only) www.dell.com/jp/ (for Japan only) www.euro.dell.com (for Europe only) www.dell.com/la/ (for Latin American countries)
- Anonymous file transfer protocol (FTP) ftp.dell.com/ Log in as user: anonymous, and use your email address as your password.
- Electronic Support Service mobile_support@us.dell.com support@us.dell.com apsupport@dell.com (for Asian/Pacific countries only) support.jp.dell.com/jp/jp/tech/email/ (for Japan only) support.euro.dell.com (for Europe only)
• Electronic Quote Service
Warranty and Return Policy
Dell Inc. ("Dell") manufactures its hardware products from parts and components that are new or equivalent to new in accordance with industry-standard practices. For information about the Dell warranty for your printer, refer to the Owner's Manual.
Licensing Notice
The printer resident software contains:
- Software developed and copyrighted by Dell and/or third parties
- Dell modified software licensed under the provisions of the GNU General Public License version 2 and the GNU Lesser General Public License version 2.1
- Software licensed under the BSD license and warranty statements
- Software based in part on the work of the Independent JPEG Group.
Click the title of the document you want to review:
• BSD License and Warranty Statements
- GNU License
The Dell modified GNU licensed software is free software; you can redistribute it and/or modify it under the terms of the licenses referenced above. These licenses do not provide you any rights to the Dell- or third-party-copyrighted software in this printer.
Since the GNU licensed software that the Dell modifications are based upon is supplied explicitly without warranty, use of the Dell modified version is similarly provided without warranty. See the warranty disclaimers in the referenced licenses for additional details.
To obtain source code files for the Dell modified GNU licensed software, launch the Drivers and Utilities CD that shipped with your printer and click Contact Dell, or refer to the "Contacting Dell" section of your Owner's Manual.


- Dell™ All-In-One Printer 946 User's Guide
- Notes, Notices, and Cautions
- Finding Information
- About Your Printer
- Understanding the Printer Parts
- Setting Up Your Printer
- Initial Setup Menu
- Understanding the Operator Panel
- Using the Operator Panel
- Operator Panel Menus
- Fax Mode Main Menu
- Additional Fax Options
- Additional Fax Options Menu
- Setup Mode Main Menu
- Additional Setup Options
- Additional Setup Options Menu
- Maintenance Mode
- Maintenance Mode Menu
- PictBridge Mode
- Understanding Paper and Specialty Media Guidelines
- Loading Paper
- Print Media Guidelines for the Paper Input Tray
- Understanding the Automatic Paper Type Sensor
- Loading Original Documents
- Into the ADF
- Onto the Scanner Glass
- Printing
- Printing a Document
- Printing Photos
- Printing Envelopes
- Printing Photos From a PictBridge-Enabled Camera
- Copying
- Copying Documents
- Using Your Computer
- Copying Photos
- Collating Copies
- Changing Copy Settings
- Scanning
- Scanning Single-Page Documents and Single Photos
- Scanning Multiple-Page Documents Using the ADF
- Scanning Multiple-Page Documents or Multiple Images Using Your Computer
- Editing Scanned Text Using Optical Character Recognition (OCR)
- Editing Scanned Images
- Saving an Image on Your Computer
- E-mailing a Scanned Image or Document
- Enlarging or Reducing Images or Documents
- Faxing
- Setting Up the Printer With Equipment Connecting directly to a telephone wall jack
- Connecting to a telephone
- Connecting to an answering machine
- Connecting to a computer modem
- What if I Have a Digital Subscriber Line (DSL)?
- Faxing Using the Printer Operator Panel
- Sending a Fax
- Sending a Broadcast Fax
- Select button
- Receiving a Fax Automatically
- Receiving a Fax Manually
- Sending a Fax From the Computer
- Connecting Cables
- Faxing Through the Printer Modem
- Sending a Fax Using the Dell All-In-One Center
- Sending Fax Using Dell Printer Fax Tools
- Receiving a Fax
- Faxing Through the Computer Modem
- Installing Fax Console in Windows XP
- Configuring Fax Console (Windows XP) or Fax Service Management (Windows 2000)
- Sending a Hardcopy Fax Using the Dell All-In-One Center
- Sending an Electronic Copy Fax Using Fax Console or Fax Service Management
- Receiving a Fax Using Fax Console or Fax Service Management
- Viewing Sent and Received Faxes Using Fax Console or Fax Service Management
- Viewing the Status of a Fax Using Fax Console or Fax Service Management
- Changing the Fax Setup
- Using the Printer Setup Utility
- Speed Dial
- Creating a Speed Dial List From the Operator Panel
- Creating a Group Dial List From the Operator Panel
- Creating a Speed or Group Dial List From the Computer
- Using a Speed or Group Dial List
- Manually Dialing a Fax While Listening to a Telephone Line (On Hook Dial)
- Send a Delayed Fax
- Blocking Faxes
- Creating a Blocked Fax List
- Turning Fax Blocking On
- Blocking Faxes Without Caller ID
- Understanding the Software
- Using the Dell All-In-One Center
- Using Printing Preferences
- To access Printing Preferences:
- Printing Preferences Tabs
- Using Dell Picture Studio
- Dell Ink Management System
- Removing and Reinstalling Software
- Ink Cartridge Maintenance
- Replacing Ink Cartridges
- Aligning Ink Cartridges
- To align the ink cartridges:
- Cleaning the Ink Cartridge Nozzles
- You may need to clean the nozzles when:
- Troubleshooting
- Setup Problems
- Computer Problems
- Printer Problems
- General Problems
- Fax Problems
- Paper Problems
- Check for a paper jam.
- To prevent jams and misfeeds, make sure:
- Network Problems
- Error Messages
- Improving Print Quality
- Printer Specifications
- Environmental Specifications
- Power Consumption and Requirements
- Fax Mode Capabilities
- Print and Scan Mode Capabilities
- Operating System Support
- Memory Specifications and Requirements
- Cables
- Appendix
- Dell Technical Support Policy
- Contacting Dell
- Warranty and Return Policy
- Licensing Notice
Marka : DELL
Model : 946
Kategorija : Printer