
KD-AVX12EE - Car radio JVC - Free user manual and instructions
Find the device manual for free KD-AVX12EE JVC in PDF.


| Product Type | Car Stereo with DVD/CD Receiver |
| Brand | JVC |
| Model | KD-AVX12EE |
| Dimensions (W x H x D) | 178 x 50 x 160 mm (1 DIN) |
| Weight | Approximately 1.5 kg |
| Power Supply | 12V DC (negative ground) |
| Maximum Power Output | 4 x 50 Watts |
| Playback Media | DVD, DVD±R/RW, CD, CD-R/RW, MP3, WMA, JPEG |
| Display | 3.5-inch TFT LCD with motorized tilt |
| Audio Inputs | Front AUX (3.5mm), Rear AV input (RCA) |
| USB Port | Front USB for iPod/iPhone and mass storage |
| Bluetooth | Built-in for hands-free calling and audio streaming |
| Radio Tuner | FM/AM with RDS |
| Remote Control | Included |
| Security | Detachable face plate |
| Maintenance | Clean with soft dry cloth; avoid solvents |
| Spare Parts & Repairability | Contact JVC service center for parts; user-replaceable fuse |
Frequently Asked Questions - KD-AVX12EE JVC
User questions about KD-AVX12EE JVC
0 question about this device. Answer the ones you know or ask your own.
Ask a new question about this device
Download the instructions for your Car radio in PDF format for free! Find your manual KD-AVX12EE - JVC and take your electronic device back in hand. On this page are published all the documents necessary for the use of your device. KD-AVX12EE by JVC.
USER MANUAL KD-AVX12EE JVC

For canceling the display demonstration, see page 5.
For installation and connections, refer to the separate manual.
Thank you for purchasing a JVC product.
Please read all instructions carefully before operation, to ensure your complete understanding and to obtain the best possible performance from the unit.
IMPORTANT FOR LASER PRODUCTS
- CLASS 1 LASER PRODUCT
- CAUTION: Do not open the top cover. There are no user serviceable parts inside the unit; leave all servicing to qualified service personnel.
- CAUTION: Visible and/or invisible class 1M laser radiation when open. Do not view directly with optical instruments.
- REPRODUCTION OF LABEL: CAUTION LABEL, PLACED OUTSIDE THE UNIT.
| CAUTIONVISIBLE AND/ORINVISIBLE CLASS 1MLASER RADIATIONWHEN OPEN. DO NOTVIEW DIRECTLY WITHOPTICAL INSTRUMENTS.EC60825-1:2001(ENG) | ATTENTIONRAYONNEMENT LASERR Sunshine EY/OUINVISIBLE DE CLASSE1M UNE FOIS OUVERT,NE PAS REGARDIERDIRECTWEET AVECDES INSTRUMENTSOPTIQUES.(FRA) | AV ISORADIACIÓN LÄSERDE CLASE 1MVISIBLE Y/O INVISIBLECUANDO ESTABIERTO. NO MIRAR DIRECTAMENTECON INSTRUMENTALÖPTICO.(ESP) | VARNINGSYNUG OCH/ELLEROSYNLGLASERSTRÄLNING.KLASS 1M, NÄR DENNADEL ÄR ÖPPNAD.BETRAKTA EJSTRALEN MED OPTISKAINSTRUMENT.(SWE) | 注意ここを聞くと可視及び/または不可視のクラス 1MLレーザー弾射が出ます。光学装置で直接見ないでください。(JPN) | CAUTIONVISIBLE AND/ORINVISIBLE CLASS KLASER RADIATIONWHEN OPEN.DO NOT STAREINTO BEAMFDA 21 CFR (ENG)LV44693-003A |
WARNINGS:
To prevent accidents and damage
- DO NOT install any unit and wire any cable in locations where;
- it may obstruct the steering wheel and gearshift lever operations.
- it may obstruct the operation of safety devices such as air bags.
- it may obstruct visibility.
- DO NOT operate the unit while driving. If you need to operate the unit while driving, be sure to look around carefully.
- The driver must not watch the monitor while driving.
Cautions on the monitor:
- The monitor built in this unit has been produced with high precision, but it may have some ineffective dots. This is inevitable and is not malfunction.
- Do not expose the monitor to direct sunlight.
- When the temperature is very cold or very hot...
- Chemical changes occur inside, causing malfunction. — Pictures may not appear clearly or may move slowly. Pictures may not be synchronized with the sound or picture quality may decline in such environments.

[European Union only]

How to reset your unit

- Your preset adjustments (except for the registered Bluetooth devices) will also be erased.

How to forcibly eject a disc
![graph TD A["NOT"] --> B["+ [Hold"]] B --> C{NO EJECT? EMERGENCY EJECT?} C --> D["↓"] D --> E["ENT"] F["ATT"] --> B G["↑"] --> B H["↓"] --> I["NO EJECT? EMERGENCY EJECT?"]](/content/2026/05/999353/images/3dca3b9a5cd486e0818bc01d970782a48cb430861503bf5ce2dd70bf206178fe.jpg)
• If this does not work, reset the unit.
This product incorporates copyright protection technology that is protected by U.S. patents and other intellectual property rights. Use of this copyright protection technology must be authorized by Macrovision, and is intended for home and other limited viewing uses only unless otherwise authorized by Macrovision. Reverse engineering or disassembly is prohibited.
For safety...
- Do not raise the volume level too much, as this will block outside sounds, making driving dangerous.
- Stop the car before performing any complicated operations.
Contents
INTRODUCTION
Playable disc types 4
Before operating the unit 5
OPERATIONS
Basic operations—Control panel ..... 7
Basic operations— Remote controller (RM-RK241) ..... 8
Listening to the radio 10
Disc operations 15
EXTERNAL DEVICES
Using the Bluetooth® devices— Cellular phone/audio player ...... 24
Listening to the CD changer 30
Listening to the DAB tuner 32
Listening to the iPod/D. Player ...... 35
Listening to other external components 36
SETTINGS
Sound equalization 37
Assigning titles to the sources ...... 38
Menu operations 39
REFERENCES
Maintenance 49
More about this unit 50
Troubleshooting 55
Specifications 58
Temperature inside the car...
If you have parked the car for a long time in hot or cold weather, wait until the temperature in the car becomes normal before operating the unit.
playable disc type
| Disc type Recording format, file type, etc. Playable | ||
| DVD DVD Video (Region Code: 5)* | 1ALL51535 | √OK |
| DVD Audio | ×NO | |
| DVD-ROM | ||
| DVD Recordable/Rewritable (DVD-R*2/-RW,+R/+RW*3)• Compliant to UDF bridge format• DVD-RAM cannot be played. | DVD Video | √OK |
| DivX/MPEG1/MPEG2 | ||
| JPEG | ||
| MP3/WMA/WAV | ||
| MPEG4 | ×NO | |
| DVD-VR,+VR | ||
| Dual Disc DVD side | √OK | |
| Non-DVD side | ×NO | |
| CD/VCD Audio CD/CD Text (CD-DA) | √OK | |
| VCD (Video CD) | ||
| DTS-CD*4 | ×NO | |
| CD-ROM | ||
| CD-I (CD-I Ready) | ||
| CD Recordable/Rewritable (CD-R/-RW)• Compliant to ISO 9660 level 1, level 2, Romeo, Joliet | CD-DA | √OK |
| MP3/WMA/WAV | ||
| JPEG | ||
| DivX/MPEG1/MPEG2 | ||
| MPEG4 | ×NO | |
*1 If you insert a DVD Video disc of an incorrect Region Code, "Region code error" appears on the monitor.
*2 DVD-R recorded in multi-border format is also playable (except for dual layer discs).
*3 It is possible to play back finalized +R/+RW (Video format only) discs. However, the use of +R double layer disc is not recommended.
*4 To reproduce DTS sound, use the digital connection. (Installation/Connection Manual)
- "DVD Logo" is a trademark of DVD Format/Logo Licensing Corporation registered in the US, Japan and other countries.
Caution for DualDisc playback
The Non-DVD side of a "DualDisc" does not comply with the "Compact Disc Digital Audio" standard. Therefore, the use of Non-DVD side of a DualDisc on this product may not be recommended.
Notes on reproduced sound (page 53)
Through the analog terminals (Speaker out/LINE OUT) of this unit...
- Multi-channel signals are downmixed. • DTS sound cannot be reproduced.
Before operating the unit
Cancel the display demonstration and set the clock. (⇨ also pages 40 and 41)
Indication language: In this manual, English indications are used for purpose of explanation. You can select the indication language on the monitor. ( page 41)

1 Turn on the power. ② Display . ③ Enter the menu. 4 Select ⇔ , then activate the screen.

Currently selected submenu Current setting
5 Cancel the display demonstrations.
Select <0ff>.

Continued on the next page

6 Return to the menu. 7 Select ⇔ , then activate the screen. 8 Set the clock time.

9 Return to the menu. 10 Select <12Hours/24Hours>. 11 Activate the <12Hours/24Hours> screen.
12 Select either the 12-hour or 24-hour system.

13 Return to the menu. 14 Select . 15 Activate the screen. 16 Select the setting.
- Off: Cancels. • Auto: Activate auto clock adjustment using the clock time (CT) data from an FM Radio Data System station.
17 Finish the procedure.

To display the clock time while playing back a video source, select → → .
Basic operations — Control panel
- Turn on the power.
- Turn off the power [Hold].
- Attenuate the sound (if the power is on).
Select the source.
TUNER → DAB → DISC (DVD/VCD/CD) → CD-CH, iPod, D.PLAYER, or EXT-IN → Bluetooth Phone → Bluetooth Audio → AV-IN → (back to the beginning)
- You cannot select these sources if they are not ready.
![Change the aspect ratio. Display or erase *1. Activate TA Standby Reception. Show PTY preset list [Hold]. Change the display information. Display window. Adjust the volume. Eject the disc. Change the control panel tilt (Tilt1 – Tilt4) [Hold, then press]. TUNER/DAB: Search for stations/ensembles. Rem…](/content/2026/05/999353/images/6e43277303ffb965887483149b03bd175a3ceee03c2ac889c6983a21b8e9f8d6.jpg)

• TUNER/DAB: Search for stations/ensembles. • DISC: Select chapters/tracks. - On menus: Go to previous/next step. - iPod/D.PLAYER: Select tracks. - Bluetooth Audio: Reverse skip/forward skip

• TUNER: Select preset stations. • DAB: Select services. • DISC: Select titles/folders. - On menus: Select items. - iPod/D.PLAYER: Enter player's menu/pause or stop playback. - Bluetooth Phone/Bluetooth Audio: Select a device.
*1 screens
You can use the menus to set up various settings.
The screen consists of the following sub-menus—
Setup/Equalizer/Sound/Mode/List/Bluetooth.
- For details, see pages 39 to 48.
*2 To attach the control panel

*3 By holding ▲ / ▼, you can display the list accessible for the selected source.
Basic operations — Remote controller (RM-RK241)
Installing the lithium coin battery (CR2025)

If the range of effectiveness of the remote controller decreases, replace the battery.
Before using the remote controller:
- Aim the remote controller directly at the remote sensor on the unit.
- DO NOT expose the remote sensor to bright light (direct sunlight or artificial lighting).
The unit is equipped with the steering wheel remote control function.
• See the Installation/Connection Manual (separate volume) for connection.
Warning: To prevent accidents and damage
- Do not install any battery other than CR2025 or its equivalent.
- Store the battery in a place where children cannot reach.
- Do not recharge, short, disassemble, or heat the battery or dispose of it in a fire.
- Do not leave the battery with other metallic materials.
- Do not poke the battery with tweezers or similar tools.
- Wrap the battery with tape and insulate when throwing away or saving it.
Main elements and features

EXTRA MONITOR
1 Monitor control buttons
• Used for a JVC monitor—KV-MR9010, or KV-MH6510.
DVD/RECEIVER
2 • Turns on the power.
• Attenuates the sound if the power is on. - Turns off the power if pressed and held (while the power is on).
3 Selects the source. 4 Selects the TUNER/DAB bands. 5 Changes the aspect ratio of the playback pictures. 6 Not used for this unit. 7 Adjusts the volume level.
- Not used as 2nd VOL button for this unit.
8*1 • DVD/DivX 6: Shows the disc menu. • VCD: Resumes PBC playback (page 21). 9 *1 Not used as SETUP button for this unit. 10 SHIFT button
11 ■ (stop)* 2, ▶ (play)*3, ■ (pause)
- ▶ (play) also functions as ZOOM button when pressed with SHIFT button ( page 22).
- Not applicable for CD changer operations.
12 For advanced disc operations:
• ▲ / ▼ DVD: Selects the titles. Other discs except VCD/CD: Selects the folders. • |◀◀/▶▶|: Press briefly: reverse skip/forward skip Press and hold: reverse search/forward search - ◀◀/▶▶: reverse search/forward search
For FM/AM operations:
- ▲ / ▼: Changes the preset stations. • |◀◀/▶▶|: – Functions to search for stations. Press briefly: Auto Search Press and hold: Manual Search
For DAB tuner operations:
- ▲ / ▼: Selects services. • |◀◀/▶▶|: – Functions to search for ensembles. Press briefly: Auto Search Press and hold: Manual Search
For Apple iPod/JVC D. player operations:
- ▼: Pauses/stops or resumes playback.
- ▲: Enters the main menu (then ▲ / ▼ / ◀◀ / ▶▶ work as the menu selecting buttons).*4
- |◀◀/▶▶| (in menu selecting mode)
- Selects an item if pressed briefly. (Then, press ▼ to confirm the selection.) – Skips 10 items at a time if pressed and held.
For Bluetooth operations:
- |◀◀/▶▶|: Reverse skip/forward skip (for audio operation)
13 Shows the on-screen bar.
- Also functions as DIRECT button when pressed with SHIFT button. (pages 20 and 21) 14*1 • DVD/DivX 6: Shows the disc menu. • VCD: Resumes PBC playback. (page 21)
- ◀: Skips back or forward by 5 minutes for DivX/MPEG1/MPEG2.
- DISC +/- buttons: Changes discs for "CD-CH."
15*1 • Makes selection/settings.
16 *1 RETURN button
17 • DVD: Selects audio language (), subtitles ( ), angle () * 5.
- DivX: Selects audio language ( ), subtitles ( ).
• VCD: Selects audio channel ().
*1 Functions as number buttons when pressed with SHIFT button.
– TUNER/DAB: Selects preset station/service. - DISC: Selects chapter/title/folder/track. - Bluetooth Phone: Dials preset phone number. Enters phone number/PIN c
*2 Ends the call for Bluetooth phone operations. ( page 28) *3 Answers the incoming call for Bluetooth phone operations. ( page 28) *4 ▲: Returns to the previous menu.
▼ : Confirms the selection.
*5 Not used as SURROUND button for this unit.
Listening to the radio

1 Select "TUNER." 2 Select the bands.

3 Search for a station—Auto Search.
- Manual Search: Hold either I◀◀ or ▶▶▶I until “Manual Search” appears on the display, then press it repeatedly.
- The ST indicator lights up when receiving an FM stereo broadcast with sufficient signal strength.
When an FM stereo broadcast is hard to receive
1


2


Mode menu icon
3


4

Reception improves, but stereo effect will be lost. • The MO indicator lights up.
To restore stereo effect, select <0ff> in step 4.
Tuning in to stations with sufficient signal strength
This function works only for FM bands. Once you have activated this function (selected ), it always works when searching for FM stations.
1
2
3

4
Only stations with sufficient signal strength will be detected.
- The DX indicator goes off, then the LO indicator lights up.
FM station automatic presetting —SSM (Strong-station Sequential Memory)
This function works only for FM bands. You can preset six stations for each band.
1
2

3
Local FM stations with the strongest signals are searched and stored automatically in the FM band.
Manual presetting
Ex.: Storing FM station of 92.5 MHz into preset number 4 of the FM1 band.
1![graph LR A["/BACK"] --> B["BAND"] B --> C["→ FM1 → FM2 → FM3 → AM"]](/content/2026/05/999353/images/184b4edb84593986424f93d71d7dea21d279b4759c4e836b2103691ffdca675c.jpg)
2 Tune in to a station you want to preset.
3
![[Hold] FM1 Store 87.5 89.9 97.9 105.9 108.0 107.9 ENT Preset list appears.*](/content/2026/05/999353/images/badfce08507bdd6dbef36c146046ec4b79b948eb8904eb777771f3380bad0724.jpg)
4 Select a preset number.

5![ENT [Hold] TUNER FM1 Preset4 No Name 92.5 MHz](/content/2026/05/999353/images/93319187356d278559c56ac46ad584129cc3743af0219283b8aff6c67656deff.jpg)
The station selected in step 2 is now stored in preset number 4.
* Each time you hold the button, you can change the FM bands. - Preset List can also be accessed through → . ( page 12)
Selecting preset stations
On the remote:
1 2![graph TD A["BAND"] --> B["→ FM1 → FM2 → FM3 → AM"] C["SHIFT [Hold"]] --> D["+"] D --> E["① DISC+"] ② △ MENUTOP M] D --> F["④ ENTER"] D --> G["⑤"] D --> H["⑥"] I["or"] --> J["▲ ▼"]](/content/2026/05/999353/images/aafaf035721791e65611f24eb4d534c0b4b2817815002c7e78c4776be5932063.jpg)
On the unit:

or
• Each time you hold the button, you can change the FM bands.
- Preset List can also be accessed through <AV
Menu> → .


List menu icon
The following features are available only for FM Radio Data System stations.
Searching for FM Radio Data System programme—PTY Search
You can search for your favorite programmes being broadcast by selecting the PTY code for your favorite programmes.

Available PTY codes appear (including six preset PTY codes).
Select a PTY code.


Frequency changes as search goes on.
If there is a station broadcasting a programme of the same PTY code as you have selected, that station is tuned in.
Available PTY codes:
News, Current Affairs, Information, Sport, Education, Drama, Cultures, Science, Varied Speech, Pop Music, Rock Music, Easy Listening, Light Classics M, Serious Classics, Other Music, Weather & Metr, Finance, Children's Progs, Social Affairs, Religion, Phone In, Travel & Touring, Leisure & Hobby, Jazz Music, Country Music, National Music, Oldies Music, Folk Music, Documentary
Storing your favorite programme types
You can store your favorite PTY codes into the PTY Preset List.
1 [Hold]

Available PTY codes appear (including six preset PTY codes).
2 Select a PTY code to store into the List.

Current PTY Preset List is shown on the display.

3 Select a listed code to be replaced with the one newly selected.

Now is replaced with .
Activating/deactivating TA/PTY Standby Reception
| TA Standby Reception Indicator | |
| Press /P to activate. TP | |
| The unit will temporarily switch to Traffic Announcement (TA), if available, from any source other than AM.The volume changes to the preset TA volume level if the current level is lower than the preset level ( page 43). | Lights up |
| Not yet activated. Tune in to another station providing the Radio Data System signals. | Flashes |
| Press /P to deactivate. Goes off |
| PTY Standby Reception Indicator | |
| Activate, then select, (pages 14, 46). | PTY |
| The unit will temporarily switch to your favorite PTY programme from any source other than AM. | Lights up |
| Not yet activated. Tune in to another station providing the Radio Data System signals. | Flashes |
| To deactivate, selectin step 4, then press ENT once (page 14). | Goes off |
- When a DAB tuner is connected, TA Standby/PTY Standby Reception also works for the DAB tuner and searches for the services.
Activating PTY Standby Reception
1

2
3


4


5 Select a PTY code for PTY Standby Reception.


Tracing the same programme—Network-Tracking Reception
When driving in an area where FM reception is not sufficient enough, this unit automatically tunes in to another FM Radio Data System station of the same network, possibly broadcasting the same programme with stronger signals.
Programme A broadcasting on different frequency areas (01 – 05)
![graph TD A["Car"] --> B["Sensor Wave 01"] B --> C["Sensor Wave 02"] C --> D["Sensor Wave 03"] D --> E["Sensor Wave 04"] E --> F["Sensor Wave 05"] style A fill:#f9f,stroke:#333 style B fill:#ccf,stroke:#333 style C fill:#cfc,stroke:#333 style D fill:#fcc,stroke:#333 style E fill:#cff,stroke:#333 styl…](/content/2026/05/999353/images/f2430ad141515e60084029f841782f24e2d86651ff17f06f53c9f2c4fddbff96.jpg)
When shipped from the factory, Network-Tracking Reception is activated.
To change the Network-Tracking Reception setting, see on page 43.
- When the DAB tuner is connected, refer also to "Tracing the same programme—Alternative Frequency Reception (DAB AF)." ( page 34)
Automatic station selection—Programme Search
Usually when you select preset stations, the preset station is tuned in.
If the signals from the FM Radio Data System preset station are not sufficient for good reception, this unit, using the AF data, tunes in to another frequency broadcasting the same programme as the original preset station is broadcasting. ( page 43)
- The unit takes some time to tune in to another station using programme search.
Disc operations
The disc type is automatically detected, and playback starts automatically (for some discs: automatic start depends on its internal program).
If a disc does not have any disc menu, all tracks in it will be played repeatedly until you change the source or eject the disc.
If "⊗" appears on the monitor, the unit cannot accept the operation you have tried to do.
- In some cases, without showing "operations will not be accepted."
Insert the disc.
Playback starts automatically.

Caution:
Do not place your finger behind the control panel.
Caution on volume setting:
Discs produce very little noise compared with other sources. Lower the volume before playing a disc to avoid damaging the speakers by the sudden increase of the output level.
DISP: Press if no playback picture appears, but disc information (pages 16 and 17) screen is displayed.

While playing the following discs, press . DISP
• Each time you press the button, playback picture and disc information screens appear alternately. - For discs except DVD and VCD: The control screen appears on the connected external monitor. ( page 51)


*1 Search speed: x2 ⇌ x10. *2 Search speed: ▶▶1 ⇔ ▶▶2. *3 "No Name" appears for conventional CDs. *4 Tag data will be shown instead of folder/file names when they are recorded and is set to . ( page 40)
- DivX, DivX Ultra Certified, and associated logos are trademarks of DivX, inc. and are used under license. • Official DivX® Ultra Certified product
- Plays all versions of DivX video (including DivX 6) with enhanced playback of DivX media files and the DivX Media Format
- Microsoft and Windows Media are either registered trademarks or trademarks of Microsoft Corporation in the United States and/or other countries.
Selecting playback modes
You can use only one of the following playback modes—Intro/Repeat/Random. Ex. To select Track Repeat
1

2

3

4
When one of the playback modes is selected, the corresponding indicator lights up on the disc information screen.
To cancel, select in step 3 or <0ff> in step 4.
| Disc type Intro Repeat Random | |||
 | — | Chapter:Repeats current chapterTitle:Repeats current title | — |
  | Track:Plays the first 15 seconds of each track (for VCD: PBC not in use) | Track:Repeats current track (for VCD: PBC not in use) | Disc:Randomly plays all tracks (for VCD: PBC not in use) |
 | Track:Plays the first 15 seconds of each trackFolder:Plays the first 15 seconds of the first track of each folder | Track:Repeats current trackFolder:Repeats all tracks of the current folder | Folder:Randomly plays all tracks of current folder, then tracks of next foldersDisc:Randomly plays all tracks |
  | — | Track:Repeats current trackFolder:Repeats current folder | — |
 | — | Folder:Repeats current folder | — |
Selecting tracks on the list
If a disc includes folders, you can display the Folder/Track (File) Lists, then start playback.
1![[Hold] Folder List My Best Cinema Pops My Best2 Favorite Song Cinema2 ENT](/content/2026/05/999353/images/bc8c7e336da162788b508179d4e617aa6cb0ea9ca04327ed5c53bdb45309507b.jpg)
Folder List appears.
- Hold the button to see the next/previous folders.
2 Select a folder, then activate the Track List.

Track List of the selected folder appears.
3 Select a track, and start playing.

- Folder List can also be accessed through <AV
Menu> → .


List menu icon
Prohibiting disc ejection
You can lock a disc in the loading slot.
![graph LR A["ATT"] --> B["+ [Hold"]] B --> C["→ ENT"] D["NO EJECT? EMERGENCY EJECT?"] --> C style A fill:#f9f,stroke:#333 style B fill:#ccf,stroke:#333 style C fill:#cfc,stroke:#333 note right of C "No Eject" appears.](/content/2026/05/999353/images/b7dcd68fa4d933373ce1bade96ff99aafebe5eae49ebb834bcd331f53442a0ba.jpg)
To cancel the prohibition, repeat the same procedure to select "EJECT OK?".
Operations using the remote controller—RM-RK241

: Stop playback.
☐ : Pause (Frame by frame playback if pressed during pause).
: Start playback.

Reverse/forward search*1. (No sound can be heard.)
(Slow motion *2 during pause. No sound can be heard.)

Press: Select chapter (within the same title, during play or pause).
Hold: Reverse/forward search*3
: Select title (during play or pause).
ASPECT: Select aspect ratio. : Select subtitle language. : Select audio language. : Select view angle.

Select chapter (during play or pause).
Select title (when not playing).

Select title (during play or pause).

Using menu driven features...

2 Select an item you want to start play.


: Stop playback. : Pause (Frame by frame playback if pressed during pause). : Start playback. Reverse/forward search*4. (No sound can be heard.) Press: Select track.
Hold: Reverse/forward search*5. (No sound can be heard.)
: Select folder. ASPECT: Select aspect ratio. : Select subtitle language. (DivX only) CD: Select audio language. (DivX only)

Select track (within the same folder).
![graph LR A["SHIFT"] + (DIRECT) --> B["OSD"] B --> C["OSD"] C --> D{0...9} D --> E["ENTER"]](/content/2026/05/999353/images/ce32234de5309daccc220f09cf3d4e33b661eff434d8f9d59d587049ca1f602d.jpg)
Select folder.

For DivX 6: Using menu driven features...

2 Select an item you want to start play.


While playing...
Return/advance the scenes by 5 minutes.
Current playback position

1st press
2nd press
: Stop playback.
■ : Shows the current file until you change it.
: Start playback (Slide show: each file is shown for a few seconds.).
Select track.
: Select folder.
ASPECT : Select aspect ratio.
ENTER
Select track (within the same folder).
ENTER
Select folder.

: Stop playback.
: Pause (Frame by frame playback if pressed during pause).
: Start playback.
←→ :
Reverse/forward search1. (Forward slow motion2 during pause. No sound can be heard.)
- Reverse slow motion does not work.
:
Press: Select track.
Hold: Reverse/forward search*. (No sound can be heard.)
ASPECT : Select aspect ratio.
: Select audio channel (ST: stereo, L: left, R: Right).
ENTER
Select track.

During PBC playback...
ENTER
Select an item on the menu.
• To return to the previous menus, press

To cancel PBC playback

ENTER
• To resume PBC, press
MENU
: Stop playback.
" : Pause.
: Start playback.
Reverse/forward search* 1.
Press: Select tracks.
Hold: Reverse/forward search*.
:Select folder.
ENTER
Select track (within the same folder).
ENTER
Select folder.
: Stop playback.
" : Pause.
: Start playback.
:Reverse/forward search* 1.
Press: Select track.
Hold: Reverse/forward search*.

*1 Search speed: x2 ⇔ x5 ⇔ x10 ⇔ x20 ⇔ x60
*2 Slow motion speed: 1/32 ⇔ 1/16 ⇔ 1/8 ⇔ 1/4 ⇔ 1/2
*3 Search speed: x2 ⇔ x10
*4 Search speed: ▶▶1 ⇔ ▶▶2 ⇔ ▶▶3
*5 Search speed: ▶▶1 ⇔ ▶▶2
Enlarging the view (Zoom in)
During moving picture playback...
![graph TD A["DVD Video"] --> B["SHIFT"] C["DivX"] --> D["ZOOM"] E["MPEG"] --> F["ZOOM 1 ZOOM 2 ZOOM 3 ZOOM 4"] G["VCD"] --> H["ZOOM OFF"] I["Zoom 5ZOOM 6"] --> J["ZOOM OFF"] K["Move the enlarged portion."] --> L["Δ"] L --> M["◀"] L --> N["▶"] L --> O["▽"] P["+ ZOOM"] --> Q["Zoom Off"]](/content/2026/05/999353/images/f782193d921424b75902f3ea67be35389e15b74009f689253b970758f3115269.jpg)
While pausing...

![graph TD A["SHIFT"] --> B["ZOOM"] B --> C["ZOOM 1 ZOOM 2"] C --> D["ZOOM OFF"] B --> E["↓"] E --> F["Δ"] F --> G["◀"] F --> H["▶"] F --> I["▽"]](/content/2026/05/999353/images/33465f6b6b7c64a071e0528340b1f4c10383475b212c9dc2fe99c73ccfccb8e0.jpg)
To cancel zoom, select "ZOOM OFF."
Operations using the on-screen bar (DVD/VCD/DivX/MPEG1/MPEG2/JPEG)
These operations are possible on the monitor using the remote controller.

1 Display the on-screen bar. (page 23)
OSD
(twice)
2 Select an item.

3 Make a selection.
ENTER
If a pop-up menu appears...

- For entering time/numbers...
: Move the entry position
: Select a number
To remove the on-screen bar
OSD
On-screen bar
Above example is of DVD Video. Items shown on the bar vary due to the disc type.
1 Disc type 2 • DVD: Audio signal format • VCD: PBC 3 Playback mode* DVD Video:
T. RPT: Title repeat C. RPT: Chapter repeat DivX/MPEG: T. RPT: Track repeat F. RPT: Folder repeat JPEG: F. RPT: Folder repeat VCD: T. RPT: Track repeat D. RND: Disc random T. INT: Track intro
4 Playback information
T02-C03 Current title/chapter TRACK 01 Current track F001-T001 Current folder/track F001-F002 Current folder/file
5 Time indication
TOTAL Elapsed playing time of the disc
T. REM Remaining title time (for DVD)
Remaining disc time (for others)
TIME Elapsed playing time of the current chapter/track
REM Remaining time of the current chapter/track
6 Playback status
Play ◀◀/▶▶ Reverse/forward search ◀/▶ Reverse/forward slow-motion || Pause ■ Stop
7 Operation icons
TIME Change time indication (see 5) Time Search (Specify a certain scene by entering time.) TITLE → Title Search (by its number) CHAP → Chapter Search (by its number) TRACK→ Track Search (by its number) RPT Repeat play* INT Intro play* RND Random play* Change the audio language or audio channel Change the subtitle language Change the view angle
* page 18
Using the Bluetooth ® devices — Cellular phone/audio player
For Bluetooth operations, it is required to connect the Bluetooth Adapter (KS-BTA200) to the CD changer jack on the rear.
- Refer also to the instructions supplied with the Bluetooth Adapter and the Bluetooth device.
- Refer to the list (included in the box) to see the countries where you may use the Bluetooth® function.
Preparation: Operate the device to turn on its Bluetooth function.
To use a Bluetooth device through the unit ("Bluetooth Phone" and "Bluetooth Audio") for the first time, you need to establish Bluetooth wireless connection between the unit and the device.
- Once the connection is established, it is registered in the unit even if you reset your unit. Up to five devices can be registered in total.
- Only one device can be connected at a time for each source ("Bluetooth Phone" and "Bluetooth Audio").
Registering a Bluetooth device ■ Registration (Pairing) methods
Use either of the following items in the menu to register and establish the connection with a device.
- Select "Bluetooth Phone" or "Bluetooth Audio" as the source to operate the menu.
| Make the unit ready to establish a new Bluetooth connection. Connection is established by operating the Bluetooth device. | |
| Make the unit ready to establish a new Bluetooth connection. Connection is established by operating this unit. |
Registering using
1 Select "Bluetooth Phone" or "Bluetooth Audio."

2


3


4


5 Enter a PIN (Personal Identification Number)* code to the unit.
- You can enter any number you like (1-digit to 16-digit number). * Some devices have their own PIN code. Enter the specified PIN code to the unit.


- To delete an unwanted digit, select blank space.
6


7 Operate the target Bluetooth device.
Enter the same PIN code (as entered in the above step) on the device to be connected.
Connected
Now connection is established and you can use the device through the unit.
The device remains registered even after you disconnect the device. Use (or activate ) to connect the same device from next time. (pages 47 and 48)
Searching for available devices
Perform steps 1 to 3 on page 24, then...
1
![graph LR A["NEW DEVICE"] --> B["Dial Menu"] A --> C["Message"] A --> D["Open"] A --> E["Search"] A --> F["Special Device"] G["ENT"] --> H["-->"] I["Searching..."] --> A](/content/2026/05/999353/images/67266ef02315d55c208a2002acd780c9ad481d821418986104bcaaaa67b81839.jpg)
The unit searches for available devices and displays the list of them. (If no available device is detected, "Device Unfound" appears.)
2 Select a device you want to connect.
![graph LR A["Vertical Process Step"] --> B["ENT Arrow"]](/content/2026/05/999353/images/b1fb0ec76dc4fb804d326e2f38ba376b8f8a36bdec68ef4a1a56259f484f7d7b.jpg)
3 Enter the specific PIN code of the device to the unit.
• Refer to the instructions supplied with the device to check the PIN code.
Connecting...
4 Use the Bluetooth device to connect.
Connected
Now connection is established and you can use the device through the unit.
Connecting a special device
Perform steps 1 to 3 on page 24, then...
1


ENSOLIDH
The unit displays the list of the preset devices.
2 Select a device you want to connect.


3 Use (or ) to connect.
Connecting/disconnecting a registered device
1 Select "Bluetooth Phone" or "Bluetooth Audio," then select a registered device you want to connect/disconnect.
![graph LR A["SRC"] --> B["Vertical Output"]](/content/2026/05/999353/images/7745c41bbfd35e6a2421cef8e96312742cbc0911879849260e7c379878c26510.jpg)
2 Perform steps 2 and 3 on page 24, then...
- Select to connect the selected device.
- Select to disconnect the selected device.
![graph LR A["Vertical Process Step"] --> B["ENT"] style A fill:#f9f,stroke:#333 style B fill:#bbf,stroke:#333](/content/2026/05/999353/images/b24811ada76d92b453a062cbffc1c5708d31150c5fc0632afb5742e327bd4207.jpg)
You can set the unit to connect a Bluetooth device automatically when the unit is turned on. ( page 48)
Deleting a registered device
1 Select "Bluetooth Phone" or "Bluetooth Audio," then select a registered device you want to delete.

2 Perform steps 2 and 3 on page 24, then...
- Select , then .

Using the Bluetooth cellular phone

1 Select "Bluetooth Phone." ② Enter the menu. 3 Establish the connection with a device, then make a call (or settings using the menu).
*1 Each time you press ▲ ▼, the registered device name (and "NEW DEVICE" when a new device can be registered) appear in turn. *2 Appears only when the information comes from the device. *3 You can adjust the volume level for "Bluetooth Phone" without affecting the volume level for other sources.
When a call comes in...

Name and phone number (if acquired)
- The source is automatically changed to "Bluetooth Phone."
When is activated...
The unit answers the incoming calls automatically. (page 48)
- When is deactivated, press any button (except ATT or +/-) to answer the incoming call.
To end the call
Hold any button (except ATT or +/-).
- You can adjust the microphone volume level. (page 48)
When an SMS comes in...
If the cellular phone is compatible with SMS (Short Message Service) and is set to (page 48), the unit rings and "Receiving Message" appears on the monitor to inform you of the arrival of the message.
To read the message
While "Receiving Message" is displayed...

- You cannot edit or send a message through the unit.
Making a call
You can make a call using one of items.
1

2


Bluetooth menu icon 3


4 Select the method to make a call.

- Redial: Shows the list of the phone numbers you have dialed. Go to the following step.
- Received Calls: Shows the list of the received calls. Go to the following step.
- Phonebook: Shows the phone book of the connected cellular phone. Go to the following step.
- Missed Calls: Shows the list of the missed calls. Go to the following step.
- Phone Number: Shows the phone number entry screen. "How to enter phone number" below. • Voice Dialing (Only when the connected cellular phone has the voice recognition system): Speak the name you want to call.
5 Select the name/phone number you want to call.
![graph LR A["Start"] --> B["Process Step"] B --> C["ENT"]](/content/2026/05/999353/images/9cad7a3c697256fde958c029fc53e057395b9955ef4edf1e0d4d502aef282d22.jpg)
How to enter phone number
On the unit:
Select a number. Move the entry position.

• To delete an unwanted digit, select blank space.
On the remote:
SHIFT + ① ... ⑨
- can also be accessed by...


Presetting the phone numbers
You can preset up to six phone numbers.
1 Display the phone number you want to preset by using one of items.
![Jack 12312341234 09898765432 09845671234 ENT Store ENT Dial ENT [Hold]](/content/2026/05/999353/images/0e0791ca91c86174496d48e1e94e0c5593ae48c81a2f9ee13e824c7c813ca2c3.jpg)
Ex.: "Jack" is selected from the phone book
2 Select a preset number.

The phone number selected in step 1 is now stored in preset number 4.
To call a preset number
On the remote:
![SHIFT [Hold] + ① (DISC) ② △ ③ MENUTOP M ④ ⑤ ENTER ⑥](/content/2026/05/999353/images/f472ff2a6bbf149e8ad15a5d216840929cb1f1879e56313eeb322ccf6e83d67c.jpg)
On the unit:
1
[Hold]

2


- Preset List can also be accessed through → .


List menu icon
You can use the following buttons on the remote controller for the Bluetooth phone operations.
: Answer the incoming call.
: End the call.
+ - : Adjust the volume.
SHIFT + Enter the phone number/PIN code.
Using the Bluetooth audio player

1 Select "Bluetooth Audio."
② Start playback.
• See page 24 for connecting a new device. • See pages 25 for connecting/disconnecting a registered device. • See page 26 for deleting a registered device.
*1 Each time you press ▲▼, the registered device names (and "NEW DEVICE" when a new device can be registered) appear in turn. *2 Appears only when the information comes from the device.
You can use the following buttons on the remote controller for the Bluetooth audio operations.

Bluetooth Information:
If you wish to receive more information about Bluetooth, visit the following JVC web site: http://www.jvc-victor.co.jp/english/car/
- The Bluetooth word mark and logos are owned by the Bluetooth SIG, Inc. and any use of such marks by Victor Company of Japan, Limited (JVC) is under license. Other trademarks and trade names are those of their respective owners.
Listening to the CD changer


Press: Select track
Hold: Reverse/forward search

Press: Select folder (MP3 only)
Hold: Display Disc List
It is recommended to use a JVC MP3-compatible CD changer with your unit.
• You can play only CDs (CD-DA) and MP3 discs.
Preparation:
Make sure is selected for the external input setting. ( page 44)
1 Select "CD-CH." ② Display the Disc List.


[Hold]
• Each time you hold the button, you can display the other list of the remaining discs.
3 Select a disc to start playing.


- While playing an MP3 disc, you can select and start playing a track in the disc using the Lists: Disc List (select the current disc) → Folder List → File List, then start playing a track you want.


[Hold]


Selecting playback modes
You can use only one of the following playback modes—Intro/Repeat/Random. Ex. To select Track Repeat
1

2

Mode menu icon
3
4
When one of the playback modes is selected, the corresponding indicator lights up on the monitor.
To cancel, select in step 3 or <0ff> in step 4.
| Disc type Intro Repeat Random | |||
 | Track: Plays the first 15 seconds of each trackDisc: Plays the first 15 seconds of the first track of all loaded discs | Track: Repeats current trackDisc: Repeats all tracks of the current disc | Disc: Randomly plays all tracks of the current discAll: Randomly plays all tracks of all loaded discs |
 | Track: Plays the first 15 seconds of each trackFolder: Plays the first 15 seconds of the first track of each folderDisc: Plays the first 15 seconds of the first track of all loaded discs | Track: Repeats current trackFolder: Repeats all tracks of the current folderDisc: Repeats all tracks of the current disc | Folder: Randomly plays all tracks of current folder, then tracks of next foldersDisc: Randomly plays all tracksAll: Randomly plays all tracks of all loaded discs |
| To usemenu | above. |
| To usemenu | page 30.Disc List → Folder List →File List |
You can use the following buttons on the remote controller to operate the CD changer.


: Select disc.

: Select folder (MP3 only).

Select track.
Listening to the DAB tuner

1 Select "DAB." 2 Select the bands.

* Information changes when you press DISP. While tuning in a service with DLS (Dynamic Label Segment), the TEXT indicator lights up.
③ Searching for an ensemble. - Manual Search: Hold either I◀◀ or ▶▶▶I until "Manual Search" appears on the display, then press it repeatedly. 4 Select a service (either primary or secondary) to listen to.
When surrounding sounds are noisy
Some services provide Dynamic Range Control (DRC) signals together with their regular programme signals. DRC will reinforce the low level sounds to improve your listening.
- The DRC indicator will light up while tuning in a service with the DRC signals.
1
2
3
4

- As the number increases, the effect becomes stronger.
Manual presetting
You can preset six DAB services (primary) for each band.
1![graph LR A["/BACK"] --> B["BAND"] B --> C["DAB1"] C --> D["DAB2"] D --> E["DAB3"]](/content/2026/05/999353/images/7eeb0ce7dabfa317e5c8a8e220ff43a7948c3f99d966e83f295bbfed92cbe350.jpg)
2 Search for a service you want to preset. 3
[Hold]

- Preset List can also be accessed through → (-right).
4 Select a preset number.

5

Selecting preset stations
On the remote: 1![graph LR A["BAND"] --> B["DAB1"] B --> C["DAB2"] C --> D["DAB3"]](/content/2026/05/999353/images/e58e743a9b196e9826eec11e322ac96ff77a07b4a3cacda9f8cef6b22ee5f5ec.jpg)
2
![SHIFT [Hold] + ① DISC ② △ ④ ⑤ ◀ ENTER ⑥ MENUTOP M ▶](/content/2026/05/999353/images/aafd06e8277b9f2dbbdd72b598718babe54a2f3bbfd756a742b53ad2d590bd5b.jpg)
On the unit:
1![graph LR A["/BACK"] --> B["BAND"] B --> C["DAB1"] C --> D["DAB2"] D --> E["DAB3"]](/content/2026/05/999353/images/f463363e059c33344a3e6c6c41f7f8eb90eac4f737d4f651a28d31003f044962.jpg)
2![[Hold] DAB1 Store Service Label No Serv. FFH Bayern HRS HRH ENT](/content/2026/05/999353/images/54e5145af6fa3622f7ee108f2ec2af459e8b9877d069014cf8c55e75d909ad9f.jpg)
3 Select a preset service.

- Preset List can also be accessed through → .


Activating/deactivating TA/PTY Standby Reception
• Operations are exactly the same as explained on page 13 for FM Radio Data System stations. - You cannot store PTY codes separately for the DAB tuner and for the FM tuner.
Activating/deactivating Announcement Standby Reception
Announcement Standby Reception allows the unit to switch temporarily to your favorite service (announcement type).
| Announcement Standby Reception Indicator | |
| Activate, then select, (below). | ANN |
| The unit will temporarily switch to your favorite service from any source other than FM/AM. | Lights up |
| Not yet activated. Tune in to another service providing the related signals. | Flashes |
| To deactivate, select <Off> in step 4, then press ENT once (below). | Goes off |
Activating Announcement Standby Reception
1

2

Mode menu icon
3

Available announcement types:
Transport News, Warning, News, Weather, Event, Special Event, Radio Info, Sports News, Financial News.
4

5

6 Select an announcement type for Announcement Standby Reception.


Tracing the same programme—Alternative Frequency Reception (DAB AF)
- While receiving a DAB service:
When driving in an area where a service cannot be received, this unit automatically tunes in to another ensemble or FM Radio Data System station, broadcasting the same programme. - While receiving an FM Radio Data System station:
When driving in an area where a DAB service is broadcasting the same programme as the FM Radio Data System station, this unit automatically tunes in to the DAB service.
When shipped from the factory, Alternative Frequency Reception is activated.
To deactivate the Alternative Frequency
Reception, see pages 39 and 43.
Listening to the iPod/D. player

It is required to connect the interface adapter (KS-PD100 for Apple iPod or KS-PD500 for JVC D. player) to the CD changer jack on the rear.
Preparation:
Make sure or is selected for the external input setting. (See page 44)
1 Select "iPod" or "D. PLAYER."
Playback starts automatically.
2 Select a track.
Selecting a track from the player's menu
1 Enter the player's menu.

- This mode will be canceled if no operations are done for about 5 seconds.
2 Select the desired item.

Press: Select an item
Hold: Skip 10 items at a time
For iPod:
Playlists ↔ Artists ↔ Albums ↔ Songs
↔ Genres ↔ Composers ↔ (back to the
beginning)
For D. player:
Playlist ↔ Artist ↔ Album ↔ Genre ↔
Track ↔ (back to the beginning)
3 Confirm the selection.

4 Repeat steps 2 and 3 to select a track.
- When a track is selected finally, playback starts. • To return to the previous menu...

Selecting playback modes
1 Display , then select menu icon. 2 Enter , then select or . 3 Select an appropriate option.
Repeat One: Functions the same as "Repeat One" or "Repeat Mode → One."
All: Functions the same as "Repeat All" or "Repeat Mode → All."
Random Album: Functions the same as "Shuffle Albums" of the iPod
Song/On: Functions the same as "Shuffle Songs" or "Random Play → On."
- When one of the playback modes is selected, the corresponding indicator lights up on the monitor.
To cancel, select in step 2 or <0ff> in step 3.
- iPod is a trademark of Apple Inc., registered in the U.S. and other countries.
Listening to other external components
AV-INPUT
You can connect an external component to the LINE IN/VIDEO IN plugs.
DISP: Press if no playback picture appears, but source information (this) screen is displayed.

1 Select "AV-IN." 2 Turn on the connected component and start playing the source.
If you select for (page 44), some status messages such as volume level change will not appear on the monitor while viewing the picture.
EXT-INPUT
You can connect an external component to the CD changer jack on the rear using the Line Input Adapter—KS-U57 (not supplied) or AUX Input Adapter—KS-U58 (not supplied).

Preparation:
Make sure is selected for the external input setting. ( page 44)
① Select "EXT-IN." 2 Turn on the connected component and start playing the source.
Sound equalization

Selecting sound mode
1
2
3
Select a sound mode.
- For preset values of each sound mode, see page 54.
Storing your own adjustment
You can store your adjustment into User1, User2, and User3.
1 Repeat steps ① and ②, then...
2 Adjust.![graph LR A["Process Step"] --> B["Directional Arrow"] B --> C["ENT"]](/content/2026/05/999353/images/b43c5512f07c0ef528fc3200be0853c44e0873f7379fd7b924f20ac061380e54.jpg)
3 Store.
Assigning titles to the sources

You can assign titles to "AV-IN" and "EXT-IN."
Ex.: Assigning title to "AV-IN"
1 Select "AV-IN." 2 Display the title entry screen.
1

2 Mode menu icon


3 Assign a title.
1 Select a character, then move the entering position.

• To change the character set, press DISP. (For available characters, see page 53.)
2 Repeat step 1 until you finish entering the title. • The maximum number of characters is 16.
4 Finish the procedure.

Menu operations

Ex. Changing the setting


![graph LR A["Sound"] --> B["Fader/Balance"] A --> C["Volume Adjust"] A --> D["Subwoofer"] A --> E["High Pass Filter"] A --> F["Crossover"] A --> G["Through"]](/content/2026/05/999353/images/c36c7c17a8494c5dcb5a662b748bb5a0ff6f51cd7134b13dd8da267f901f7f94.jpg)
- For some items, repeat these steps to set the sub-items.

![graph LR A["AV MENU"] --> B["AV Menu"] B --> C["Setup"] C --> D["ENT Enter"] D --> E["Setup"] E --> F["ENT"] F --> G["Display"] F --> H["Clock"] F --> I["Disc Setup 1"] F --> J["Disc Setup 2"] F --> K["Tuner"] F --> L["Input"] F --> M["Others"] C --> N["Mode"] C --> O["List"] C --> P["Bluetooth"] C…](/content/2026/05/999353/images/45c23e44549ebd98695e451d6000f2b71d0579527d1af4e54bce1350099f6719.jpg)
- The display indications may change according to changes in specifications.
| Menu items Selectable settings, [reference page] | ||
| Display | Demonstration Off : Cancels. | On: Activates the demonstration on the monitor. |
| Wall Paper You can select the background picture of the monitor.Crystal-Blue, Crystal-Pink, Crystal-Green, Wave-Yellow, Wave-Green, Metal-A, Metal-B, Ball-A, Ball-B, Ball-C, Clown Fish, Simple-Red, Simple-Orange, Simple-Bluegreen, Simple-Blue | ||
| Scroll Off : Cancels. | Once: Scrolls the disc information once.Auto: Repeats scrolling (5-second intervals).· Holding DISP scrolls the information regardless of this setting. | |
| Tag Display Off : Cancels. | On: Shows the Tag data while playing MP3/WMA/WAV tracks. | |
| Dimmer Off : Cancels. | On: Activates dimmer.Auto: Dims the monitor when you turn on the headlights.*1Time Set: Press ENT (or ▶▶▶) to display the time setting screen, then set the Dimmer On/Off times. | |
| Bright You can adjust brightness of the monitor.-15 (darkest) to +15 (brightest); Initial 00 | ||
| Picture Adjust*2 | You can adjust the following to make the monitor clear and legible for watching the playback picture. The setting will be stored separately for “DISC” and “AV-IN.”-15 to +15; Initial 0Bright: Adjust if the picture is too bright or too dark.Contrast: Adjust the contrast.Color: Adjust the color of the picture—lighter or darker.Tint: Adjust the tint if the human skin color is unnatural (not adjustable for PAL signals). | |
*1 The ILLUMINATION CONTROL lead connection is required. (Installation/Connection Manual) *2 Adjustable only when the source is a disc containing pictures or movies, or "AV-IN."
| Menu items Selectable settings, [reference page] | ||||
| Display | Aspect*3 | You can change the aspect ratio of the picture. | ||
| Aspect ratio of incoming signal | ||||
| 4:3 16:9 | ||||
| Full:For 16:9 original pictures |  |  | ||
| Auto: | · For “DISC”:Aspect ratio is automatically selected to match to the incoming signals.· For the other video sources: Aspect ratio is fixed to<Regular>. | |||
| Regular:For 4:3 original pictures | ||||
| Language*4 | Select the indication language shown on the monitor.English, Spanish, French, German, Italian, Dutch, Swedish, Danish, Russian | |||
| Clock | Time Set | Initial 0:00, [6] | ||
| 12Hours/24Hours | 12 Hours, 24 Hours, [6] | |||
| OSD Clock | Off, On, [6] | |||
| Clock Adjust | Off, Auto, [6] | |||
| Disc Setup 1*5 | Menu Language | Select the initial disc menu language; Initial Russian (also page 54). | ||
| Audio Language | Select the initial audio language; Initial Russian (also page 54). | |||
| Subtitle | Select the initial subtitle language or erase the subtitle( ); Initial Russian (also page 54). | |||
| OSD Language Select the on-screen language used for the external monitor connected to the VIDEO OUT plug; Initial Russian. | ||||
*3 Not adjustable for audio sources. *4 After you change the indication language setting, turn off then on the power so that your setting takes effect. *5 Selectable only for "DISC" (disc playback pauses).
Continued on the next page
| Menu items Selectable settings, [reference page] | ||
| Disc Setup 1*5 | Monitor Type Select the monitor type to watch a wide screen picture on the external monitor.16:9 4:3 Letterbox  4:3 Pan Scan 4:3 Pan Scan | 16:9 : Select when the aspect ratio of the external monitor is 16:9.4:3 Letterbox/4:3 Pan Scan : Select when the aspect ratio of the external monitor is 4:3. Refer to the illustrations on the left to see how the pictures are shown on the monitor. |
OSD PositionPosition 1 Position 2 | Select the position of the on-screen bar, [23].1 : Higher position2 : Lower position | |
| File Type Select playback file type when a disc contains different types of files.Audio : Plays back audio files.Still Picture : Plays back JPEG files.Video : Plays back DivX/MPEG1/MPEG2 files. | ||
| DivX Regist. (Registration) | This unit has its own Registration Code. Once you have played back a disc in which the Registration Code recorded, this unit's Registration Code is overwritten for copyright protection. | |
| Disc Setup 2*5 | D. Audio Output Select the signal format emitted through the DIGITAL OUT (optical) terminals. (also page 53)PCM Only : Select this when connecting an amplifier or a decoder incompatible with Dolby Digital, DTS, or MPEG Audio, or connecting to a recording device.Dolby Digital : Select this when connecting an amplifier or a decoder compatible with Dolby Digital.Stream : Select this when connecting an amplifier or a decoder compatible with Dolby Digital, DTS, or MPEG Audio. | |
*5 Selectable only for "DISC" (disc playback pauses).
| Menu items Selectable settings, [reference page] | ||
| Disc Setup 2*5 | Down Mix When playing back a multi-channel disc, this setting affects the signals reproduced through the LINE OUT plugs.Dolby Surround: Select this to enjoy multi-channel surround audio by connecting an amplifier compatible with Dolby Surround.Stereo: Normally select this. | |
| D. (Dynamic) Range Compres.(Compression) | You can enjoy a powerful sound at a low volume level while playing Dolby Digital software.Auto: Select to apply the effect to multi-channel encoded software.On: Select this to always use this function. | |
| Tuner | AF Regional When the received signals from the current station become weak...Off: Cancels—not selectable whenis set to.AF Regional: Switches to another station broadcasting the same programme. The REG indicator lights up.AF: Switches to another station. The programme may differ from the one currently received (AF indicator lights up),[14]. | |
| TA Volume | 00 to 30 or 50*6; Initial 15,[13]. | |
| Program Search | Off, On,[14] | |
| IF Band Width Auto: Increases the tuner selectivity to reduce interference noises between adjacent stations. (Stereo effect may be lost.)Wide: Subject to the interference from adjacent stations, but sound quality will not be degraded and the stereo effect will remain. | ||
| DAB AF*7 | Off, On,[34] | |
*5 Selectable only for "DISC" (disc playback pauses).
*6 Depends on the amplifier gain control. (page 45)
*7 Appears only when DAB tuner is connected.
Continued on the next page
| Menu items Selectable settings, [reference page] | ||
| Input | AV Input You can determine the use of LINE IN and VIDEO IN plugs.Off: Select when no component is connected ("AV-IN" is skipped while selecting the source).Audio&video: Select when connecting an AV component such as a VCR.Audio: Select when connecting an audio component such as a digital audio player.Camera*8: Select when connecting the rear view camera.Camera Mirror*8: The mirror image of the rear view is displayed on the monitor. (The monitor on the unit only; the normal rear view appears on the external monitor.) | |
| External Input*9 | When connecting an external component to the CD changer jack on the rear.Changer/iPod/D. Player*10: CD changer, iPod, or D. player [30, 35]External Input: Any other than the above. [36]For connecting the Bluetooth adapter/DAB tuner, this setting is not required. It is automatically detected. | |
| Others | Beep Off: Cancels. | On: Activates the key-touch tone. |
| Telephone Muting*11 | Off: Cancels.Muting1, Muting2: Select either one which mutes the sounds while using the cellular phone. | |
| Initialize | Initialize all settings you have made inPress ENT, then reset the unit (page 3). | |
*8 Reverse lamp lead connection is required. See Installation/Connection Manual (separate volume). The rear view through the camera appears on the monitor in "Full" aspect ratio (regardless of the aspect ratio setting) when you shift the gear to the reverse (R) position. *9 Cannot be selected if the source is "CD-CH," "iPod," "D.PLAYER," or "EXT-IN." *10 The name of the component detected through the CD changer jack is shown. *11 The TEL MUTING lead connection is required. See Installation/Connection Manual (separate volume).
| Menu items Selectable settings, [reference page] | |
| Flat/Hard Rock/R&B/Pop/Jazz/Dance/Country/Reggae/Classic/User1/User2/User3 | [37] |

Sound
| Menu items Selectable settings, [reference page] | |
Fader/Balance Adjust fader—speaker output balance between the front and rearAdjusts fader Adjust balance Adjust balance  | speakers.Upmost—front onlyDownmost—rear onlyWhen using a two-speaker system, set the fader to the center (00).Adjust balance—speaker output balance between the left and right speakers.Leftmost—left onlyRightmost—right only |
| Volume Adjust Adjust and store auto-adjustment volume level for each source,comparing to the FM volume level. The volume level will automaticallyincrease or decrease when you change the source. -12 to +12 ; Initial 00 | |
| Subwoofer Adjust the settings below in the submenu:Phase : Subwoofer phase. Select eitheror,which reproduces a better sound.Level: Subwoofer output level. Level: -06 to +08 ; Initial 00 | |
| High Pass Filter Through : Select whenthe subwoofer is not connected.On : Select when the subwoofer is connected. | |
| Crossover Adjust the crossover frequency between the front/rear speakers and thesubwoofer. 80Hz, 120Hz, 150Hz | |
| Amplifier Gain You can change the maximum volume level of this unit.Off : Deactivates the built-in amplifier.Low Power : VOL 00 to 30 (Select this if the maximum power of thespeakers is less than 50 W)High Power : VOL 00 to 50 | |
| Mono | Only for FM. (Off, On), [10] |
| DX/Local | Only for FM. (DX, Local), [11] |
| SSM | Only for FM. [11] |
| PTy Standby | Only for FM/DAB. (Off, News), [13, 33]When you activate PTY Standby Reception, you can change the PTY code for PTY Standby Reception. |
| Title Entry | Only for “AV-IN” and “EXT-IN.” [38] |
| All Off/Intro/Repeat/Random Only for disc playback and iPod/D. player.[18, 31, 35] | |
| D.(Dynamic) Range Control | Only for DAB. (Off, DRC1, DRC2, DRC3), [32] |
| Announce Standby | Only for DAB. (Off, Transport News), [34] |

List
The accessible lists differ depending on the sources, [12, 19, 28, 30, 33]

Bluetooth*13
| Menu items Selectable settings, [reference page] | |
Dial Menu*14To enter a phone numberSelect a number | Only for the device being connected for “Bluetooth Phone.”Select the method to make a call,[IMAGE] [27]Redial: Select a phone number from the list of the phone numbers you have dialed.Received Calls: Select a phone number from the list of the received calls.Phonebook: Select a name, then phone number from the phone book of the connected cellular phone. |
Move the entry position | Missed Calls: Select a phone number from the list of the missed calls.Phone Number: Enter the phone number.Voice Dialing: If the connected cellular phone has the voice recognition system, you can call by voice command. |
*12 Items listed under vary among the playback sources.
*13 Selectable only for "Bluetooth Phone" or "Bluetooth Audio." Select a device (or "NEW DEVICE") before operating the menu.
*14 Selectable items vary depending on the connected device.
| Menu items Selectable settings, [reference page] | |
| Message Only for the device being connected for “Bluetooth Phone.”* 15You can read a message from the following message histories.Unread: Messages you have not read.Read: Messages you have read.Unsent: Messages you have not sent.Sent: Messages you have sent. | |
| Open Only for “NEW DEVICE.”Make the unit ready to establish a new Bluetooth connection. Select this when establishing a Bluetooth connection with a device for the first time, mainly from the device,[24].Once the connection is established, it is registered in the unit. You can connect the unit and the device by using( below) from the next time. | |
| Search*16 | Only for “NEW DEVICE.”Make the unit ready to establish a new Bluetooth connection. Select this when establishing a Bluetooth connection with a device for the first time, mainly from the unit. The unit searches for available new devices,[25].Before starting a search, turn on the Bluetooth function of the device so that the unit can detect it.Once the connection is established, it is registered in the unit. You can connect the unit and the device by using( below) from the next time. |
| Special Device Only for “NEW DEVICE.”Shows the list of Bluetooth devices which requires some special procedure to establish Bluetooth connection. Select a device you want to connect,[25].After selecting the device, useor( above) for connection.Once the connection is established, it is registered in the unit. You can connect the unit and the device by using( below) from the next time. | |
| Connect Only for the registered devices.After selecting a device from among the registered devices (pages 26 and 29), establish the connection with it,[25]. | |
| Disconnect Only for the device being connected.Disconnect the current device before connecting another device,[25]. | |
| Delete Pair Only for the registered devices.Delete the registered devices,[26]. | |
*15 Selectable only when the device is compatible with SMS. *16 To establish the connection, enter the specific PIN code of the device on the unit and/or the device.
When operating the Bluetooth device, refer also to the instructions supplied with the device.
Continued on the next page
| Menu items Selectable settings, [reference page] | ||
| Settings | Auto\ Connect*17 | When the unit is turned on, the connection is established automatically with...Off: No Bluetooth device.Last: The last connected Bluetooth device.Order: The available registered Bluetooth device found at first. |
| Auto\ Answer*18 | On: The unit answers the incoming calls automatically.Off: The unit does not answer the calls automatically. Answer the calls manually.Reject: The unit rejects all incoming calls. | |
| Message\ Info*18 | Auto: The unit informs you of the arrival of a message by ringing and displaying “Receiving Message.” To read the message, press ENT (page 27).Manual: The unit does not inform you of the arrival of a message. | |
| MIC\ Setting*18 | Adjust microphone volume connected to the Bluetooth adapter.01, 02, 03 | |
| Version*19 | The Bluetooth software and hardware versions are shown. | |
*17 Selectable only for "Bluetooth Phone." *18 Only for the device connected for "Bluetooth Phone." Not selectable for "NEW DEVICE." *19 If you wish to receive more information about Bluetooth, visit the following JVC web site: http://www.jvc-victor.co.jp/english/car/
Maintenance
How to clean the connector
Frequent detachment will deteriorate the connectors. To minimize this possibility, periodically wipe the connectors with a cotton swab or cloth moistened with alcohol, being careful not to damage the connectors.

Moisture condensation
Moisture may condense on the lens inside the unit in the following cases:
• After starting the heater in the car. • If it becomes very humid inside the car. Should this occur, the unit may malfunction. In this case, eject the disc and leave the unit turned on for a few hours until the moisture evaporates.
How to handle discs
When removing a disc from its
case, press down the center holder of the case and lift the disc out, holding it by the edges.
Center holder

• Always hold the disc by the edges. Do not touch its recording surface.
When storing a disc into its case, gently insert the disc around the center holder (with the printed surface facing up).
• Make sure to store discs into the cases after use.
To keep discs clean
A dirty disc may not play correctly. If a disc does become dirty, wipe it with a soft cloth in a straight line from center to edge.
- Do not use any solvent (for example, conventional record cleaner, spray, thinner, benzine, etc.) to clean discs.
To play new discs
New discs may have some rough spots around the inner and outer edges. If such a disc is used, this unit may reject the disc.


To remove these rough spots, rub the edges with a pencil or ball-point pen, etc.
Do not use the following discs:
Warped disc

Sticker

Sticker residue

Stick-on label
More about this unit
General
Turning on the power
- By pressing SRC (source) on the unit, you can also turn on the power. If the source is ready, playback starts.
FM/AM
Storing stations in memory
- When SSM is over, received stations are preset in No. 1 (lowest frequency) to No. 6 (highest frequency).
Disc
General
- In this manual, the words "track" and "file" are used interchangeably. • This unit can also play back 8 cm discs.
- This unit can only play back audio CD (CD-DA) files if different types of audio files (MP3/WMA/WAV) are recorded in the same disc.
- This unit can display only one-byte characters. No other characters can be correctly displayed.
Inserting a disc
- When a disc is inserted upside down, "Cannot play this disc Check the disc" appears on the monitor. Eject the disc.
Ejecting a disc
- If the ejected disc is not removed within 15 seconds, the disc is automatically inserted again into the loading slot to protect it from dust. (Disc playback starts.)
Changing the source
- If you change the source, playback also stops without ejecting the disc. Next time you select "DISC" for the playback source, disc play starts from where it stopped previously.
Playing Recordable/Rewritable discs
- This unit can recognize a total of 5,000 files and 250 folders (a maximum of 999 files per folder).
- Use only "finalized" discs.
- This unit can play back multi-session discs; however, unclosed sessions will be skipped while playing.
- This unit can recognize a total of 25 characters for file/folder names.
- Some discs or files may not be played back due to their characteristics or recording conditions.
Playing DivX files
- This unit can play back DivX files with the extension code .divx, .div, .avi (regardless of the letter case—upper/lower).
- This unit supports DivX files whose resolution is 720 x 576 pixels or less. • Audio stream should conform to MP3 or Dolby Digital.
- This unit does not support GMC (Global Motion Compression).
- The file encoded in the interlaced scanning mode may not be played back correctly.
- The maximum bit rate for video is 4 Mbps (average).
Playing MPEG files
- This unit can play back MPEG files with the extension code .mpg or .mpeg.
- The stream format should conform to MPEG system/program stream.
- The file format should be MP@ML (Main Profile at Main Level)/SP@ML (Simple Profile at Main Level)/MP@LL (Main Profile at Low Level).
- Audio streams should conform to MPEG1 Audio Layer-2.
- The maximum bit rate for video is 4 Mbps (average).
Playing JPEG files
- This unit can play back JPEG files with the extension code <.jpg> or <.jpeg>.
- It is recommended that you record a file at 640 x 480 resolution. • This unit can play back baseline JPEG files. Progressive JPEG files or lossless JPEG files cannot be played.
Playing MP3/WMA/WAV files
- This unit can play back files with the extension code <.mp3> , <.wma> , or <.wav> (regardless of the letter case—upper/lower).
- This unit can play back the files meeting the conditions below:
- Bit rate: MP3/WMA: 32 kbps — 320 kbps
- Sampling frequency: 48 kHz, 44.1 kHz, 32 kHz (for MPEG1) 24 kHz, 22.05 kHz, 16 kHz (for MPEG2) 48 kHz, 44.1 kHz, 32 kHz, 22.05 kHz (for WMA) 44.1 kHz (for WAV)
- This unit can show ID3 Tag Version 1.0/1.1/2.2/2.3/2.4 (for MP3). This unit can also show WAV Tag and WMA Tag. - This unit can play back files recorded in VBR (variable bit rate). Files recorded in VBR have a discrepancy in elapsed time indication.
- This unit cannot play back the following files: - MP3 files encoded with MP3i and MP3 PRO format. - MP3 files encoded with Layer 1/2. - WMA files encoded with lossless, professional, and voice format. - WMA files which are not based upon Windows Media® Audio. - WMA files copy-protected with DRM. - Files which have the data such as AIFF, ATRAC3, etc.
Control screen
- The following control screens appear only on the external monitor.
DivX/MPEG1/MPEG2/JPEG/MP3/WMA/WAV
1 Current folder (highlighted bar) 2 Current folder number/total folder number 3 Folder list 4 Selected playback mode 5 Elapsed playing time of the current track (not displayed for JPEG) 6 Operation status 7 Current track number/total number of tracks in the current folder (total number of tracks on the disc) 8 Track information (only for MP3/WMA/WAV) 9 Track list 10 Current track (highlighted)
CD
1 Selected playback mode 2 Elapsed playing time of the current track 3 Operation status 4 Current track number/total number of tracks on the disc 5 Track information 6 Track list 7 Current track (highlighted bar)
Bluetooth operations
General
- While driving, do not perform complicated operations such as dialing numbers, using the phone book, etc. When you perform these operations, stop your car in a safe place.
- Some Bluetooth devices may not be connected to this unit depending on the Bluetooth version of the device.
- This unit may not work with some Bluetooth devices.
- Connecting conditions may vary depending on circumstances around you.
- When the unit is turned off, the device is disconnected.
Warning messages for Bluetooth operations
- Connection Error: The device is registered but the connection has failed. Use to connect the device again. (page 25)
- Error: Try the operation again. If "Error" appears again, check if the device supports the function you have tried.
- Device Unfound: No available Bluetooth device is detected by .
- Loading: The unit is updating the phone book and/or SMS.
- Please Wait... : The unit is preparing to use the Bluetooth function. If the message does not disappear, turn off and turn on the unit, then connect the device again (or reset the unit).
- Reset 08: Check the connection between the adapter and this unit.
Icons for phone types
• These icons indicate the phone type set on the device.


: Cellular phone
: Household phone
: Office
: General
: Other than above
DAB tuner
- Only the primary DAB service can be preset even when you store a secondary service.
iPod/D. player operations
- When you turn on this unit, the iPod/D. player is charged through this unit.
- The text information may not be displayed correctly. This unit can display up to 40 characters.
Note:
When operating an iPod or a D. player, some operations may not be performed correctly or as intended. In this case, visit the following JVC web site:
For iPod users: http://www.jvc.co.jp/english/car/support/ks-pd100/index.html
For D. player users: http://www.jvc.co.jp/english/car/support/ks-pd500/index.html
Menu settings
- If you change the setting from to while the volume level is set higher than "30," the unit automatically changes the volume level to "VOL 30."
- After you change any of settings, turn off then on the power, and re-insert the disc (or insert another disc) so that your setting takes effect.
- When you select < 16:9> for a picture whose aspect ratio is 4:3, the picture slightly changes due to the process for converting the picture width.
- Even if <4:3 Pan Scan> is selected, the screen size may become <4:3 Letterbox> for some discs.
Sound signals emitted through the rear terminals
Through the analog terminals (Speaker out/LINE OUT)
2-channel signal is emitted. When playing multi-channel encoded disc, multi-channel signals are downmixed. • DTS sound cannot be reproduced.
Through the DIGITAL OUT terminal
Digital signals (Linear PCM, Dolby Digital, DTS, MPEG Audio) are emitted.
- To reproduce the multi-channel sounds such as Dolby Digital, DTS, and MPEG Audio, connect an amplifier or a decoder compatible with these multi-channel sources to this terminal, and set correctly. (page 42)
| Playback disc\D. Audio Output | Output signals | |||
| Stream Dolby | Digital PCM Only | |||
| DVD | 48 kHz, 16/20/24 bits Linear PCM | 48 kHz, 16 bits stereo Linear PCM* | ||
| 96 kHz, Linear PCM 48 kHz, 16 bits stereo Linear PCM | ||||
| with Dolby Digital Dolby Digital bitstream | 48 kHz, 16 bits stereo Linear PCM | |||
| with DTS DTS bitstream | ||||
| with MPEG Audio MPEG bitstream | 48 kHz, 16 bits stereo Linear PCM | |||
| Audio CD, Video CD | 44.1 kHz, 16 bits stereo Linear PCM / 48 kHz, 16 bits stereo Linear PCM | |||
| Audio CD with DTS DTS bitstream | ||||
| DivX with Dolby Digital Dolby Digital bitstream | 48 kHz, 16 bits stereo Linear PCM | |||
| MPEG1/MPEG2 44.1/48 kHz, 16 bits Linear PCM | ||||
| MP3/WMA | 32/44.1/48 kHz, 16 bits Linear PCM | |||
| WAV | 44.1 kHz, 16 bits stereo Linear PCM | |||
* Digital signals may be emitted at 20 or 24 bits (at their original bit rate) through the DIGITAL OUT terminal if the discs are not copy-protected.
Characters shown on the monitor
In addition to the roman alphabet (A - Z, a - z), the following characters will be used to show the various information on the monitor.
- You can also use the following characters to assign titles. ( page 38).

Upper and lower cases

Numbers and symbols
Language codes (for DVD/DivX language selection)
| Code | Language Code | Language Code Language | Code Language Code Language | ||||||
| AA Afar | FA Persian KL Green | enlandic OC Occitan ST Sesotho | |||||||
| AB Abkhazian FI Finnish | KM Cambodian OM (Afan) | Oromo | SU Sundanese | ||||||
| AF | Afrikaans | FJ | Fiji | KN | Kannada | OR | Oriya | SW | Swahili |
| AM | Ameharic | FO | Faroese | KO | Korean (KOR) | PA | Panjabi | TA | Tamil |
| AR | Arabic | FY | Frisian | KS | Kashmiri | PL | Polish | TE | Telugu |
| AS | Assamese | GA | Irish | KU | Kurdish | PS | Pashto, Pushto | TG | Tajik |
| AY | Aymara | GD | Scots Gaelic | KY | Kirghiz | PT | Portuguese | TH | Thai |
| AZ | Azerbaijani | GL | Galician | LA | Latin | QU | Quechua | TI | Tigrinya |
| BA | Bashkir | GN | Guarani | LN | Lingala | RM | Rhaeto-Romance | TK | Turkmen |
| BE | Byelorussian | GU | Gujarati | LO | Laothian | RN | Kirundi | TL | Tagalog |
| BG | Bulgarian | HA | Hausa | LT | Lithuanian | RO | Rumanian | TN | Setswana |
| BH | Bihari | HI | Hindi | LV | Latvian, Lettish | RW | Kinyarwanda | TO | Tonga |
| BI | Bislama | HR | Croatian | MG | Malagasy | SA | Sanskrit | TR | Turkish |
| BN | Bengali, Bangla | HU | Hungarian | MI | Maori | SD | Sindhi | TS | Tsonga |
| BO | Tibetan | HY | Armenian | MK | Macedonian | SG | Sangho | TT | Tatar |
| BR | Breton | IA | Interlingua | ML | Malayalam | SH | Serbo-Croatian | TW | Twi |
| CA | Catalan | IE | Interlingue | MN | Mongolian | SI | Singhalese | UK | Ukrainian |
| CO | Corsican | IK | Inupiak | MO | Moldavian | SK | Slovak | UR | Urdu |
| CS | Czech | IN | Indonesian | MR | Marathi | SL | Slovenian | UZ | Uzbek |
| CY | Welsh | IS | Icelandic | MS | Malay (MAY) | SM | Samoan | VI | Vietnamese |
| DZ | Bhutani | IW | Hebrew | MT | Maltese | SN | Shona | VO | Volapuk |
| EL | Greek | JI | Yiddish | MY | Burmese | SO | Somali | WO | Wolof |
| EO | Esperanto | JW | Javanese | NA | Nauru | SQ | Albanian | XH | Xhosa |
| ET | Estonian | KA | Georgian | NE | Nepali | SR | Serbian | YO | Yoruba |
| EU | Basque | KK | Kazakh | NO | Norwegian | SS | Siswati | ZU | Zulu |
Preset equalizing values
What appears to be trouble is not always serious. Check the following points before calling a service center.
| Symptoms Remedies/Causes | ||
| General | ·No sound comes out of the speakers. ·Adjust the volume to the optimum level.·Check the cords and connections.DTS sound cannot be reproduced through the analog terminals (Speaker out/LINE OUT). | |
| ·The monitor is not clear and legible. Sunshine from the windscreen may cause this symptom.Adjust. ( page 40) | ||
| ·The unit does not work at all. | Reset the unit. ( page 3) | |
| ·“No Signal” appears. ·Change the source. | ·Start the playback on the external component connected to VIDEO IN plug.·Check the cords and connections.·Signal input is too weak. | |
| FM/AM | ·SSM automatic presetting does not work. | Store stations manually. ( page 11) |
| ·Static noise while listening to the radio. Connect the aerial firmly. | ||
| Disc playback | ·Disc can be neither recognized nor played. | Eject the disc forcibly. ( page 3) |
| ·Disc cannot be ejected. | Unlock the disc. ( page 19) | |
| ·Recordable/Rewritable discs cannot be played back.·Tracks on the Recordable/Rewritable discs cannot be skipped. | ·Insert a finalized disc.·Finalize the discs with the component which you used for recording. | |
| ·Playback does not start. ·Insert the disc correctly again. | ·Region code of the DVD is not correct. ( page 4)·The format of files is not supported by the unit. | |
| ·The playback picture is not clear and legible. | Adjust items in. ( page 40) | |
| ·Sound and pictures are sometimes interrupted or distorted. | ·Stop playback while driving on rough roads.·Change the disc. | |
| ·No playback picture appears on the monitor. Parking brake lead is not connected properly.( Installation/Connection Manual) | ||
| ·No picture appears on the external monitor. ·Connect the video cord correctly.·Select the correct input on the external monitor. | ||
| MP3/WMA/WAV playback | Disc cannot be played back. Change the disc. | Record the tracks using a compliant application in the appropriate discs. (page 4)Add appropriate extension codes to the file names. |
| Noise is generated. The track played back is not a playable file format. Skip to another file. | ||
| Tracks are not played back as you have intended them to play. | Playback order may differs from the one played back using other players. | |
| Elapsed playing time is not correct. This sometimes occurs during playback. This is caused by how the tracks are recorded. | ||
| Bluetooth* | Bluetooth device does not detect the unit. This unit can be connected with one Bluetooth cellular phone and one Bluetooth audio device at a time.While connecting a device, this unit cannot be detected from another device. Disconnect currently connected device and search again. | |
| The unit does not detect the Bluetooth device. | Check the Bluetooth setting of the device.Search from the Bluetooth device. After the device detects the unit, selecton the unit to connect the device. (page 24) | |
| The unit does not make pairing with the Bluetooth device. | Enter the same PIN code for both the unit and target device. If the PIN code of the device is not indicated on its instructions, try "0000" or "1234."Select the device name from, then try to connect again. (page 25, 47) | |
| Echo or noise occurs. Adjust the position of the microphone unit. | ||
| Phone sound quality is poor. Move the car to place where you can get a better signal reception. | ||
| The sound is interrupted or skipped during playback of a Bluetooth audio device. | Place the Bluetooth audio device nearer to the adapter.Disconnect the device connected for "Bluetooth phone."Turn off, then turn on the unit.(When the sound is not yet restored,) connect the device again. | |
| The connected audio device cannot be controlled. | Check whether the connected audio device supports AVRCP (Audio Video Remote Control Profile). | |
* For Bluetooth operations, refer also to the instructions supplied with the Bluetooth Adapter.
Symptoms Remedies/Causes
| CD changer | “No Disc” appears on the monitor. Insert a disc into the magazine. | |
| “No Magazine” appears on the monitor. Insert the magazine. | ||
| “No Files” appears on the monitor. Disc does not include playable files. Replace the disc with playable files. | ||
| “Reset 08” appears on the monitor. Connect this unit and the CD changer correctly and press the reset button of the CD changer. | ||
| “Reset 01” – “Reset 07” appears on the monitor. | Press the reset button of the CD changer. | |
| The CD changer does not work at all. | Reset the unit. ( page 3) | |
| DAB tuner | “No DAB Signal” appears on the monitor. Move to an area with stronger signals. | |
| “Reset 08” appears on the monitor. Connect this unit and the DAB tuner correctly, then reset the unit. ( page 3) | ||
| The DAB tuner does not work at all. Connect this unit and the DAB tuner correctly, then reset the unit. ( page 3) | ||
| “Antenna Power NG” appears on the monitor. | Check the cords and connections. | |
| iPod/D. player playback | The iPod/D. player does not turn on or does not work. | Check the connecting cable and its connection.Charge the battery.For D. player: Update the firmware version. |
| The sound is distorted. Deactivate the equalizer either on this unit or the iPod/D. player. | ||
| “Disconnect” appears on the monitor. Check the connecting cable and its connection. | ||
| For iPod: Playback stops. The headphones are disconnected during playback. Restart playback. | ||
| No sound can be heard.“Error 01” appears on the monitor when connecting a D. player. | Disconnect the D. player from the adapter. Then, connect them again. | |
| “No Files” or “No Track” appears on the monitor. | No tracks are stored. Import tracks to the iPod or D. player. | |
| “Reset 01” – “Reset 07” appears on the monitor. | Disconnect the adapter from both this unit and iPod/D. player. Then, connect them again. | |
| “Reset 08” appears on the monitor. Check the connection between the adapter and this unit. | ||
| The iPod’s or D. player’s controls do not work after disconnecting from this unit. | Reset the iPod or D. player. | |
| AV-IN | No picture appears on the monitor. Turn on the video component if it is not on.This unit is not connected to the video component correctly. Connect it correctly. | |
| The playback picture is not clear and legible. | Adjust items in. ( page 40) |
Specifications
| AMPLIFIER | Maximum Power Output: Front/Rear: 50 W per channel | ||
| Continuous Power Output (RMS): | Front/Rear: 20 W per channel into 4 Ω, 40 Hz to 20 000 Hz at no more than 0.8% total harmonic distortion | ||
| Load Impedance: 4 Ω (4 Ω to 8 Ω allowance) | |||
| Equalizer Control Range: Frequencies: 60 Hz, 150 Hz, 400 Hz, 1 kHz, 2.5 kHz, 6.3 kHz, 15 kHz | |||
| Signal-to-Noise Ratio: 70 dB | |||
| Audio Output Level LINE OUT (FRONT/ REAR)/SUBWOOFER: | Line-Out Level/Impedance: 2.5 V/20 kΩ load (full scale) | ||
| Output Impedance: 1 kΩ | |||
| Color System: PAL | |||
| Video Output (composite): 1 Vp-p/75 Ω | |||
| Other Terminals: Input: LIN | E IN, VIDEO IN, Aerial input | ||
| Output: VIDEO OUT, DIGITAL OUT (optical) | |||
| Others: CD changer, OE REMOTE | |||
| FM/AM TUNER | Frequency Range: FM: | 87.5 MHz to 108.0 MHz | |
| AM: | (MW) 522 kHz to 1 620 kHz(LW) 144 kHz to 279 kHz | ||
| FM Tuner | Usable Sensitivity: | 11.3 dBf (1.0 μV/75 Ω) | |
| 50 dB Quieting Sensitivity: | 16.3 dBf (1.8 μV/75 Ω) | ||
| Alternate Channel Selectivity(400 kHz): | 65 dB | ||
| Frequency Response: | 40 Hz to 15 000 Hz | ||
| Stereo Separation: | 35 dB | ||
| MW Tuner | Sensitivity/Selectivity: | 20 μV/35 dB | |
| LW Tuner | Sensitivity: | 50 μV | |
| DVD/CD | Signal Detection System: Non-contact optical pickup (semiconductor laser) | ||
| Frequency Response: DVD, | fs=48 kHz: 16 Hz to 22 000 Hz | ||
| DVD, fs=96 kHz: 16 Hz to 22 000 Hz | |||
| VCD/CD: 16 Hz to 20 000 Hz | |||
| Dynamic Range: 93 dB | |||
| Signal-to-Noise Ratio: 95 dB | |||
| Wow and Flutter: Less than measurable limit | |||
| MONITOR | Screen Size: 2.7 inch wide | liquid crystal display | |
| Number of Pixel: 123 200 pixels: 560 (horizontal) × 220 (vertical) | |||
| Drive Method: TFT (Thin Film Transistor) active matrix format | |||
| Color System: PAL/NTSC | |||
| Aspect Ratio: 16:9 (wide) | |||
| Allowable Storage Temperature: -10°C to +60°C | |||
| Allowable Operating Temperature: 0°C to +40°C | |||
| GENERAL | Power Requirement: Operating Voltage: DC 14.4 V (11 V to 16 V allowance) | ||
| Grounding System: | Negative ground | ||
| Allowable Operating Temperature: 0°C to +40°C | |||
| Dimensions (W × H × D): | Installation Size (approx.): | 182 mm × 52 mm × 160 mm | |
| Panel Size (approx.): | 188 mm × 58 mm × 14 mm | ||
| Mass (approx.): | 2.1 kg (excluding accessories) | ||
Design and specifications are subject to change without notice.
- Manufactured under license from Dolby Laboratories. Dolby and the double-D symbol are trademarks of Dolby Laboratories.
- "DTS" and "DTS Digital Out" are registered trademarks of DTS, Inc.
4

4
![graph LR A["BAND"] --> B["→ FM1 → FM2 → FM3 → AM"]](/content/2026/05/999353/images/11a278061ab70287fc2d67fe2733fb357df220fd79efb51281ca71c76b75dc10.jpg)
2![SHIFT + [Hold] ① DISCH ② △ ④ ⑤ MENUTOP M ◀ ENTER ⑥](/content/2026/05/999353/images/90c8e4a7df0dca8f6a846d0511f47379fe8eb966d66c74393b7b9b9ca7e15360.jpg)
OR
On the device:

OR
1![■/BACK BAND [Hold] FM1 Store ENT 87.5 89.9 97.9 92.5 108.0 107.9](/content/2026/05/999353/images/847a5273f8e3d8ed6b59016d156a4f538420905f906d01f5021bd5e607e86e1b.jpg)
News, Current Affairs, Information, Sport, Education, Drama, Cultures, Science, Varied Speech, Pop Music, Rock Music, Easy Listening, Light Classics M, Serious Classics, Other Music, Weather & Metr, Finance, Children's Progs, Social Affairs, Religion, Phone In, Travel & Touring, Leisure & Hobby, Jazz Music, Country Music, National Music, Oldies Music, Folk Music, Documentary
4
5
Programming
of phone numbers
[Hold]


4


Transport News, Warning, News, Weather, Event, Special Event, Radio Info, Sports News, Financial News.
4

5

6


![graph LR A["AV MENU"] --> B["AV Menu"] B --> C["Setup"] C --> D["ENT Enter"] D --> E["Setup"] E --> F["ENT"] F --> G["Display"] F --> H["Clock"] F --> I["Disc Setup 1"] F --> J["Disc Setup 2"] F --> K["Tuner"] F --> L["Input"] F --> M["Others"] C --> N["Equalizer"] C --> O["Sound"] C --> P["Bluetoot…](/content/2026/05/999353/images/ac7254f41dd154b70d6ff8d1081597cc55db702ed355f3772b99c1fcb6e07879.jpg)
Flat/Hard Rock/R&B/Pop/Jazz/Dance/Country/Reggae/Classic/User1/User2/User3 [37]

Sound
4

4
![2 SHIFT + [Утримання] ① DISC+ ② △ ④ ⑤ MENUTOP M ◀ ENTER 6](/content/2026/05/999353/images/83f977493442b043decbf85be033659d6b5dd7d21272aa5fcae60059b719f173.jpg)
or
On the main unit:
![graph LR A["/BACK"] --> B["BAND"]](/content/2026/05/999353/images/8f1934637a469d6f66fedb1f521613256f3fb90ead9e157059acd975f9f143fd.jpg)
or
![1 ■/BACK BAND [Утримання] FM1 Store 1 87.5 2 89.9 3 97.9 4 92.5 5 108.0 6 107.9 ENT ENT](/content/2026/05/999353/images/a62b0b001b18cf3e8581529a8f93c6dcb2d5b2682c44bbbec5bef7c0a0478829.jpg)
News, Current Affairs, Information, Sport, Education, Drama, Cultures, Science, Varied Speech, Pop Music, Rock Music, Easy Listening, Light Classics M, Serious Classics, Other Music, Weather & Metr, Finance, Children's Progs, Social Affairs, Religion, Phone In, Travel & Touring, Leisure & Hobby, Jazz Music, Country Music, National Music, Oldies Music, Folk Music, Documentary


4


[Hold]

[Hold]


4


Transport News, Warning, News, Weather, Event, Special Event, Radio Info, Sports News, Financial News.
4

5


③ Set the name.

Menu items
![graph LR A["AV MENU"] --> B["AV Menu"] B --> C["Setup"] C --> D["ENT Enter"] D --> E["Setup"] E --> F["ENT"] F --> G["Display"] F --> H["Clock"] F --> I["Disc Setup 1"] F --> J["Disc Setup 2"] F --> K["Tuner"] F --> L["Input"] F --> M["Others"] C --> N["Equalizer"] C --> O["Sound"] C --> P["Bluetoot…](/content/2026/05/999353/images/acbea354f44f72d27d2be6072831718efa714b1da44526bebfcb94b9364a765b.jpg)
Flat/Hard Rock/R&B/Pop/Jazz/Dance/Country/Reggae/Classic/User1/User2/User3
[37]

Sound
Connector
Moisture condensation
Having TROUBLE with operation?
Please reset your unit
Refer to page of How to reset your unit
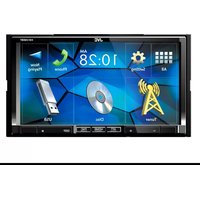
- THANK YOU FOR PURCHASING A JVC PRODUCT
- IMPORTANT FOR LASER PRODUCTS
- WARNINGS
- TO PREVENT ACCIDENTS AND DAMAGE
- CAUTIONS ON THE MONITOR
- HOW TO RESET YOUR UNIT
- HOW TO FORCIBLY EJECT A DISC
- FOR SAFETY
- CONTENTS
- INTRODUCTION
- OPERATIONS
- EXTERNAL DEVICES
- SETTINGS
- REFERENCES
- TEMPERATURE INSIDE THE CAR
- CAUTION FOR DUALDISC PLAYBACK
- NOTES ON REPRODUCED SOUND (PAGE 53)
- BEFORE OPERATING THE UNIT
- BASIC OPERATIONS — CONTROL PANEL
- BASIC OPERATIONS — REMOTE CONTROLLER (RM-RK241)
- INSTALLING THE LITHIUM COIN BATTERY (CR2025)
- BEFORE USING THE REMOTE CONTROLLER
- WARNING: TO PREVENT ACCIDENTS AND DAMAGE
- MAIN ELEMENTS AND FEATURES
- EXTRA MONITOR
- DVD/RECEIVER
- FOR FM/AM OPERATIONS
- FOR DAB TUNER OPERATIONS
- FOR APPLE IPOD/JVC D. PLAYER OPERATIONS
- FOR BLUETOOTH OPERATIONS
- LISTENING TO THE RADIO
- WHEN AN FM STEREO BROADCAST IS HARD TO RECEIVE
- TUNING IN TO STATIONS WITH SUFFICIENT SIGNAL STRENGTH
- FM STATION AUTOMATIC PRESETTING —SSM (STRONG-STATION SEQUENTIAL MEMORY)
- MANUAL PRESETTING
- SELECTING PRESET STATIONS
- ON THE REMOTE
- ON THE UNIT
- SEARCHING FOR FM RADIO DATA SYSTEM PROGRAMME—PTY SEARCH
- SELECT A PTY CODE
- AVAILABLE PTY CODES
- STORING YOUR FAVORITE PROGRAMME TYPES
- SELECT A PTY CODE TO STORE INTO THE LIST
- SELECT A LISTED CODE TO BE REPLACED WITH THE ONE NEWLY SELECTED
- ACTIVATING/DEACTIVATING TA/PTY STANDBY RECEPTION
- ACTIVATING PTY STANDBY RECEPTION
- TRACING THE SAME PROGRAMME—NETWORK-TRACKING RECEPTION
- AUTOMATIC STATION SELECTION—PROGRAMME SEARCH
- DISC OPERATIONS
- INSERT THE DISC
- CAUTION
- CAUTION ON VOLUME SETTING
- SELECTING PLAYBACK MODES
- SELECTING TRACKS ON THE LIST
- SELECT A FOLDER, THEN ACTIVATE THE TRACK LIST
- SELECT A TRACK, AND START PLAYING
- PROHIBITING DISC EJECTION
- OPERATIONS USING THE REMOTE CONTROLLER—RM-RK
- USING MENU DRIVEN FEATURES
- FOR DIVX 6: USING MENU DRIVEN FEATURES
- WHILE PLAYING
- DURING PBC PLAYBACK
- TO CANCEL PBC PLAYBACK
- ENLARGING THE VIEW (ZOOM IN)
- DURING MOVING PICTURE PLAYBACK
- WHILE PAUSING
- OPERATIONS USING THE ON-SCREEN BAR (DVD/VCD/DIVX/MPEG1/MPEG2/JPEG)
- USING THE BLUETOOTH ® DEVICES — CELLULAR PHONE/AUDIO PLAYER
- REGISTERING A BLUETOOTH DEVICE ■ REGISTRATION (PAIRING) METHODS
- REGISTERING USING
- OPERATE THE TARGET BLUETOOTH DEVICE
- CONNECTED
- SEARCHING FOR AVAILABLE DEVICES
- SELECT A DEVICE YOU WANT TO CONNECT
- ENTER THE SPECIFIC PIN CODE OF THE DEVICE TO THE UNIT
- CONNECTING
- USE THE BLUETOOTH DEVICE TO CONNECT
- CONNECTING A SPECIAL DEVICE
- USE (OR ) TO CONNECT
- CONNECTING/DISCONNECTING A REGISTERED DEVICE
- SELECT "BLUETOOTH PHONE" OR "BLUETOOTH AUDIO," THEN SELECT A REGISTERED DEVICE YOU WANT TO CONNECT/DISCONNECT
- PERFORM STEPS 2 AND 3 ON PAGE 24, THEN
- DELETING A REGISTERED DEVICE
- USING THE BLUETOOTH CELLULAR PHONE
- WHEN A CALL COMES IN
- WHEN IS ACTIVATED
- TO END THE CALL
- WHEN AN SMS COMES IN
- TO READ THE MESSAGE
- MAKING A CALL
- SELECT THE METHOD TO MAKE A CALL
- SELECT THE NAME/PHONE NUMBER YOU WANT TO CALL
- HOW TO ENTER PHONE NUMBER
- PRESETTING THE PHONE NUMBERS
- TO CALL A PRESET NUMBER
- USING THE BLUETOOTH AUDIO PLAYER
- BLUETOOTH INFORMATION
- LISTENING TO THE CD CHANGER
- PREPARATION
- LISTENING TO THE DAB TUNER
- WHEN SURROUNDING SOUNDS ARE NOISY
- ACTIVATING/DEACTIVATING ANNOUNCEMENT STANDBY RECEPTION
- AVAILABLE ANNOUNCEMENT TYPES
- SELECT AN ANNOUNCEMENT TYPE FOR ANNOUNCEMENT STANDBY RECEPTION
- TRACING THE SAME PROGRAMME—ALTERNATIVE FREQUENCY RECEPTION (DAB AF)
- TO DEACTIVATE THE ALTERNATIVE FREQUENCY
- LISTENING TO THE IPOD/D. PLAYER
- SELECTING A TRACK FROM THE PLAYER'S MENU
- LISTENING TO OTHER EXTERNAL COMPONENTS
- AV-INPUT
- EXT-INPUT
- SOUND EQUALIZATION
- SELECTING SOUND MODE
- STORING YOUR OWN ADJUSTMENT
- ASSIGNING TITLES TO THE SOURCES
- MENU OPERATIONS
- SOUND
- LIST
- BLUETOOTH
- MAINTENANCE
- HOW TO CLEAN THE CONNECTOR
- MOISTURE CONDENSATION
- HOW TO HANDLE DISCS
- WHEN REMOVING A DISC FROM ITS
- TO KEEP DISCS CLEAN
- TO PLAY NEW DISCS
- DO NOT USE THE FOLLOWING DISCS
- MORE ABOUT THIS UNIT
- GENERAL
- TURNING ON THE POWER
- FM/AM
- STORING STATIONS IN MEMORY
- DISC
- INSERTING A DISC
- EJECTING A DISC
- CHANGING THE SOURCE
- PLAYING RECORDABLE/REWRITABLE DISCS
- PLAYING DIVX FILES
- PLAYING MPEG FILES
- PLAYING JPEG FILES
- PLAYING MP3/WMA/WAV FILES
- CONTROL SCREEN
- BLUETOOTH OPERATIONS
- WARNING MESSAGES FOR BLUETOOTH OPERATIONS
- ICONS FOR PHONE TYPES
- DAB TUNER
- IPOD/D. PLAYER OPERATIONS
- NOTE
- MENU SETTINGS
- SOUND SIGNALS EMITTED THROUGH THE REAR TERMINALS
- THROUGH THE ANALOG TERMINALS (SPEAKER OUT/LINE OUT)
- THROUGH THE DIGITAL OUT TERMINAL
- CHARACTERS SHOWN ON THE MONITOR
- ON THE DEVICE
- PROGRAMMING
- OF PHONE NUMBERS
- MENU ITEMS
- HAVING TROUBLE WITH OPERATION
- PLEASE RESET YOUR UNIT
Brand : JVC
Model : KD-AVX12EE
Category : Car radio