
Meridian 2 BLMA2 - Embroidery machine BABY LOCK - Free user manual and instructions
Find the device manual for free Meridian 2 BLMA2 BABY LOCK in PDF.


| Product Type | Embroidery Machine |
| Brand | Baby Lock |
| Model | Meridian 2 BLMA2 |
| Dimensions (W x H x D) | Approx. 500 x 300 x 400 mm |
| Weight | Approx. 12 kg |
| Power Supply | 100-240V, 50/60Hz |
| Power Consumption | Approx. 90W |
| Embroidery Area | Up to 200 x 200 mm (single hoop) |
| Needle System | 130/705H (standard home sewing needles) |
| Maximum Stitch Speed | Up to 1,000 stitches per minute |
| Built-in Designs | Over 200 embroidery designs |
| Built-in Fonts | 10 embroidery fonts |
| USB Connectivity | Yes, for importing designs |
| LCD Display | Color touch screen, 7 inches |
| Editing Functions | Resize, rotate, mirror, combine designs |
| Auto Needle Threader | Yes |
| Auto Thread Cutter | Yes |
| Bobbin Winding | Independent bobbin winder |
| Lighting | LED work light |
| Maintenance | Clean bobbin area regularly; oil as per manual |
| Safety Features | Automatic needle stop when bobbin runs out; safety lock |
| Accessories Included | Hoops (3 sizes), needles, bobbins, instruction manual |
| Warranty | Standard 2-year limited warranty |
Frequently Asked Questions - Meridian 2 BLMA2 BABY LOCK
User questions about Meridian 2 BLMA2 BABY LOCK
0 question about this device. Answer the ones you know or ask your own.
Ask a new question about this device
Download the instructions for your Embroidery machine in PDF format for free! Find your manual Meridian 2 BLMA2 - BABY LOCK and take your electronic device back in hand. On this page are published all the documents necessary for the use of your device. Meridian 2 BLMA2 by BABY LOCK.
USER MANUAL Meridian 2 BLMA2 BABY LOCK
natural_image
Close-up of a textured fabric with various colors including red, blue, yellow, and white, arranged in a grid pattern (no text or symbols visible)baby lock
FOR THE LOVE OF SEWING
To register your machine warranty and receive Baby Lock product updates and offers, go to babylock.com/login. If you have questions about registration, visit your Authorized Baby Lock Retailer.
Baby Lock Consumer Helpline: 800-313-4110
www.BabyLock.com
INTRODUCTION
Thank you for purchasing this machine. Before using this machine, carefully read the "IMPORTANT SAFETY INSTRUCTIONS", and then study this manual for the correct operation of the various functions. In addition, after you have finished reading this manual, store it where it can quickly be accessed for future reference.
IMPORTANT SAFETY INSTRUCTIONS
Please read these safety instructions before attempting to use the machine.
⚠️DANGER
- To reduce the risk of electric shock
1 Always unplug the machine from the electrical outlet immediately after using, cleaning, making any user servicing adjustments mentioned in this manual, or if you are leaving the machine unattended.
WARNING
- To reduce the risk of burns, fire, electrical shock, or injury to persons.
2 Always unplug the machine from the electrical outlet, or when making any adjustments mentioned in the instruction manual.
- To unplug the machine, switch the machine to the symbol "O" position to turn it off, then grasp the plug and pull it out of the electrical outlet. Do not pull on the cord.
- Plug the machine directly into the electrical outlet. Do not use an extension cord.
- Always unplug your machine if there is a power failure.
3 Electrical Hazards:
- This machine should be connected to an AC power source within the range indicated on the rating label. Do not connect it to a DC power source or inverter. If you are not sure what kind of power source you have, contact a qualified electrician.
- This machine is approved for use in the country of purchase only.
4 Never operate this machine if it has a damaged cord or plug, if it is not working properly, has been dropped or damaged, or water is spilled on the unit. Return the machine to the nearest authorized Baby Lock retailer for examination, repair, electrical or mechanical adjustment.
- While the machine is stored or in use if you notice anything unusual, such as an odor, heat, discoloration or deformation, stop using the machine immediately and unplug the power cord.
- When transporting the machine, be sure to carry it by its handle. Lifting the machine by any other part may damage the machine or result in the machine falling, which could cause injuries.
- When lifting the machine, be careful not to make any sudden or careless movements, which may cause a personal injury.
5 Always keep your work area clear:
- Never operate the machine with any air openings blocked. Keep ventilation openings of the machine free from the build up of lint, dust, and loose cloth.
- Never drop or insert foreign object into any opening.
- Do not operate where aerosol (spray) products are being used or where oxygen is being administered.
- Do not use the machine near a heat source, such as a stove or iron; otherwise, the machine, power cord or garment being embroidered may ignite, resulting in fire or an electric shock.
- Do not place this machine on an unstable surface, such as an unsteady or slanted table, otherwise the machine may fall, resulting in injuries.
6 Special care is required when embroidering:
• Always pay close attention to the needle. Do not use bent or damaged needles.
- Keep fingers away from all moving parts. Special care is required around the machine needle.
- Switch the machine to the symbol "O" position to turn it off when making any adjustments in the needle area.
- Do not use a damaged or incorrect needle plate, as it could cause the needle to break.
- Do not push or pull the fabric when embroidering.
7 This machine is not a toy:
- Your close attention is necessary when the machine is used by or near children.
- This product contains small parts. Keep the product out of the reach of children to prevent accidental ingestion of small parts.
- The plastic bag that this machine was supplied in should be kept out of the reach of children or disposed of. Never allow children to play with the bag due to the danger of suffocation.
- Do not use the seam ripper in any other way than how it is intended.
- Do not use outdoors.
8 For a longer service life:
- When using and storing this machine, avoid direct sunlight and high humidity locations. Do not use or store the machine near a space heater, iron, halogen lamp, or other hot objects.
- Do not use cleansers or organic solvents, such as thinner, petroleum ether or alcohol, to clean the machine. Otherwise, the finish may peel off or become scratched.
- Always consult the Instruction and Reference Guide when replacing or installing any assemblies, the presser feet, needle, or other parts to assure correct installation.
9 For repair or adjustment:
- If the light unit is damaged, it must be replaced by an authorized Baby Lock retailer.
- In the event a malfunction occurs or adjustment is required, first follow the troubleshooting table in the back of the Instruction and Reference Guide to inspect and adjust the machine yourself. If the problem persists, please consult your local authorized Baby Lock retailer.
Use this machine only for its intended use as described in the manual.
Use accessories recommended by the manufacturer as contained in this manual.
The contents of this manual and specifications of this product are subject to change without notice.
For additional product information and updates, visit our website at www.babylock.com
SAVE THESE INSTRUCTIONS This machine is intended for household use.
FOR USERS IN COUNTRIES EXCEPT EUROPEAN COUNTRIES
This appliance is not intended for use by persons (including children) with reduced physical, sensory or mental capabilities, or lack of experience and knowledge, unless they have been given supervision or instruction concerning use of the appliance by a person responsible for their safety. Children should be supervised to ensure that they do not play with the appliance.
FOR USERS IN EUROPEAN COUNTRIES
This appliance can be used by children aged from 8 years and above and persons with reduced physical, sensory or mental capabilities or lack of experience and knowledge if they have been given supervision or instruction concerning use of the appliance in a safe way and understand the hazards involved. Children shall not play with the appliance. Cleaning and user maintenance shall not be made by children without supervision.
FOR USERS IN THE UK, EIRE, MALTA AND CYPRUS ONLY
IMPORTANT
- In the event of replacing the plug fuse, use a fuse approved by ASTA to BS 1362, i.e. carrying the mark, rating as marked on plug.
• Always replace the fuse cover. Never use plugs with the fuse cover omitted.
- If the available electrical outlet is not suitable for the plug supplied with this equipment, you should contact your authorized Baby Lock retailer to obtain the correct lead.
Federal Communications Commission (FCC) Supplier's Declaration of Conformity (For U.S.A. Only)
Responsible Party: Tacony Corporation
1760 Gilsinn Lane, Fenton,
Missouri 63026, U.S.A.
declares that the product
Product Name: Baby Lock Embroidery Machine
Model Number: BLMA2
This device complies with Part 15 of the FCC Rules. Operation is subject to the following two conditions: (1) this device may not cause harmful interference, and (2) this device must accept any interference received, including interference that may cause undesired operation.
This equipment has been tested and found to comply with the limits for a Class B digital device, pursuant to Part 15 of the FCC Rules. These limits are designed to provide reasonable protection against harmful interference in a residential installation. This equipment generates, uses, and can radiate radio frequency energy and, if not installed and used in accordance with the instructions, may cause harmful interference to radio communications. However, there is no guarantee that interference will not occur in a particular installation. If this equipment does cause harmful interference to radio or television reception, which can be determined by turning the equipment off and on, the user is encouraged to try to correct the interference by one or more of the following measures:
- Reorient or relocate the receiving antenna.
- Increase the separation between the equipment and receiver.
- Connect the equipment into an outlet on a circuit different from that to which the receiver is connected.
- Consult the authorized Baby Lock retailer or an experienced radio/TV technician for help.
- This transmitter must not be co-located or operated in conjunction with any other antenna or transmitter.
Important
Changes or modifications not expressly approved by Tacony Corporation could void the user's authority to operate the equipment.
This equipment complies with FCC/IC radiation exposure limits set forth for an uncontrolled environment and meets the FCC radio frequency (RF) Exposure Guidelines and RSS-102 of the IC radio frequency (RF) Exposure rules. This equipment should be installed and operated keeping the radiator at least 20cm or more away from person's body.
For Users in Canada
This device complies with Industry Canada's licence-exempt RSSs. Operation is subject to the following two conditions:
(1) This device may not cause interference; and
(2) This device must accept any interference, including interference that may cause undesired operation of the device.
This equipment complies with FCC/IC radiation exposure limits set forth for an uncontrolled environment and meets the FCC radio frequency (RF) Exposure Guidelines and RSS-102 of the IC radio frequency (RF) Exposure rules. This equipment should be installed and operated keeping the radiator at least 20cm or more away from person's body.
For Users in Mexico
The operation of this equipment is subject to the following two conditions:
(1) it is possible that this equipment or device may not cause harmful interference, and
(2) this equipment or device must accept any interference, including interference that may cause undesired operation.
By downloading, copying, installing or using the software you agree to this license. If you do not agree to this license, do not download, install, copy or use the software.
Intel License Agreement For Open Source Computer Vision Library
Copyright © 2000, Intel Corporation, all rights reserved. Third party copyrights are property of their respective owners.
Redistribution and use in source and binary forms, with or without modification, are permitted provided that the following conditions are met:
- Redistribution's of source code must retain the above copyright notice, this list of conditions and the following disclaimer.
- Redistribution's in binary form must reproduce the above copyright notice, this list of conditions and the following disclaimer in the documentation and/or other materials provided with the distribution.
- The name of Intel Corporation may not be used to endorse or promote products derived from this software without specific prior written permission.
This software is provided by the copyright holders and contributors “as is” and any express or implied warranties, including, but not limited to, the implied warranties of merchantability and fitness for a particular purpose are disclaimed. In no event shall Intel or contributors be liable for any direct, indirect, incidental, special, exemplary, or consequential damages (including, but not limited to, procurement of substitute goods or services; loss of use, data, or profits; or business interruption) however caused and on any theory of liability, whether in contract, strict liability, or tort (including negligence or otherwise) arising in any way out of the use of this software, even if advised of the possibility of such damage.
All information provided related to future Intel products and plans is preliminary and subject to change at any time, without notice.
WPA ^TM and WPA2 ^TM are trademarks of Wi-Fi Alliance ^® .
Any trade names and product names of companies appearing on Baby Lock products, related documents and any other materials are all trademarks or registered trademarks of those respective companies.
COPYRIGHT AND LICENSE
This product includes software developed by the following vendor: ©2008 Devicescape Software, Inc.
PRECAUTION FOR WIRELESS CONNECTION
Make sure you use a router or firewall when connecting your machine to the Internet to protect it against unauthorized access from the Internet.
CONTENTS
Chapter 1 GETTING READY 9
NAMES OF MACHINE PARTS 9
INCLUDED ACCESSORIES 10
Included Accessories....10
Options....12
TURNING THE MACHINE ON/OFF....13
LCD SCREEN 15
Using the Machine Settings Key 16
Using the Machine Help 19
WIRELESS NETWORK CONNECTION
FUNCTIONS.... 21
Operations Available with a Wireless Network Connection ... 21
Enabling a Wireless Network Connection.... 22
Using the Wizard to Set Up the Wireless Network
Connection 22
CONNECTING THE ACCESSORY TO THE
MACHINE.... 24
Using a USB Mouse 24
WINDING/INSTALLING THE BOBBIN...... 24
Winding the Bobbin 24
Setting the Bobbin 27
UPPER THREADING.... 28
Upper Threading....28
CHANGING THE NEEDLE.... 31
Chapter 2 BASIC EMBROIDERY 33
BEFORE EMBROIDERING .... 33
Embroidery Step by Step.... 33
About the Embroidery Unit.... 33
SELECTING PATTERNS.... 35
Selecting Embroidery Patterns 35
Selecting Character Patterns 37
Selecting Frame Patterns.... 38
Combining Patterns 39
EDITING PATTERNS...... 41
Previewing the Pattern.... 43
Changing the Size and the Density of the Pattern 43
Creating Repeated Patterns.... 44
Embroidering the Pattern Repeatedly.... 47
Deselect Region Setting (No Sew Setting) 48
EDITING COLORS 50
Changing the Thread Color 50
Finding New Color Schemes with the Color Visualizer
Function.... 51
Thread Color Sorting 52
VIEWING THE EMBROIDERY SCREEN .... 53
PREPARING THE FABRIC 55
Attaching Iron-on Stabilizers (Backing) to the Fabric.... 55
Hooping the Fabric in the Embroidery Frame 56
ATTACHING THE EMBROIDERY FRAME...... 58
CONFIRMING THE PATTERN POSITION ..... 59
Checking the Needle Drop Point with the Embroidery Foot "W+"
with LED Pointer 59
Displaying a Background Image.... 60
Checking the Pattern Position.... 62
THE 2-POINT EMBROIDERY POSITIONING
FUNCTION 63
EMBROIDERING A PATTERN 67
Embroidering Attractive Finishes 67
Embroidering Patterns 67
If the Thread Breaks or the Bobbin Runs out of Thread During
Embroidering....70
Resuming Embroidery after Turning off the Power 71
Chapter 3 ADVANCED EMBROIDERY 73
VARIOUS EMBROIDERING FUNCTIONS ...... 73
Basting Embroidery.... 73
Creating an Appliqué Piece 74
MAKING EMBROIDERY ADJUSTMENTS...... 77
Adjusting Thread Tension 77
Adjusting the Bobbin Case.... 78
Using the Automatic Thread Cutting Function (End Color Trim) 79
Using the Thread Trimming Function (Jump Stitch Trim)..... 80
Adjusting the Embroidery Speed 80
Changing the Thread Color Display 81
Aligning the Pattern and the Needle 81
Embroidering Linked Characters 82
USING THE MEMORY FUNCTION 83
Saving Embroidery Patterns.... 83
Retrieving Embroidery Patterns 84
EMBROIDERY APPLICATIONS 85
Using a Frame Pattern To Make an Appliqué.... 85
Embroidering Couching Patterns.... 86
Creating Stippling, Echo Quilting, or Decorative Fill Patterns around a Design 89
Embroidering Split Embroidery Patterns 90
Chapter 4 IQ DESIGNER 91
ABOUT IQ DESIGNER.... 91
PATTERN DRAWING SCREEN.... 91
Before Creating Designs.... 93
Drawing Lines 93
Drawing Regions 94
Using the Stamp Key.... 95
Using the Erase Key 96
Using the Select Key.... 96
STITCH SETTINGS SCREEN 97
Specifying Individual Stitch Settings.... 97
Specifying Global Stitch Settings.... 98
Loading the Background Image.... 99
LINE CONVERSION.... 100
Create a Pattern with Line Conversion 100
ILLUSTRATION CONVERSION 102
Create a Pattern with Illustration Conversion 102
STIPPLING 104
Basic Stippling with IQ Designer 104
Decorative Stitching around a Pattern in Embroidery
(a Quilting Function).... 106
IQ INTUITION- MONITORING APP.... 108
IQ INTUITION- POSITIONING APP 109
Chapter 5 APPENDIX 111
CARE AND MAINTENANCE.... 111
Cleaning the LCD 111
Cleaning the machine surface 111
Restrictions on Oiling 111
Precautions on Storing the Machine.... 111
Cleaning the Race 111
Cleaning the Bobbin Case 112
Cleaning the Cutter in the Bobbin Case Area 112
Changing Embroidery Foot "W+" with LED Pointer..... 113
BEFORE LENDING OR DISPOSING OF THE
PRODUCT.... 114
ADJUSTING THE SCREEN.... 114
Touch Panel is Malfunctioning.... 114
TROUBLESHOOTING.... 115
If the Thread Becomes Tangled Under the Bobbin
Winder Seat 115
List of Symptoms.... 115
ERROR MESSAGES 119
SPECIFICATIONS 121
UPDATING YOUR MACHINE'S SOFTWARE... 123
Update Procedure Using USB Media 123
Update Procedure Using Wireless LAN Connection.... 123
INDEX 125
Chapter 1 GETTING READY

Note
- Be sure to install the latest software. Refer to "UPDATING YOUR MACHINE'S SOFTWARE" on page 123.
NAMES OF MACHINE PARTS
■ Main Parts
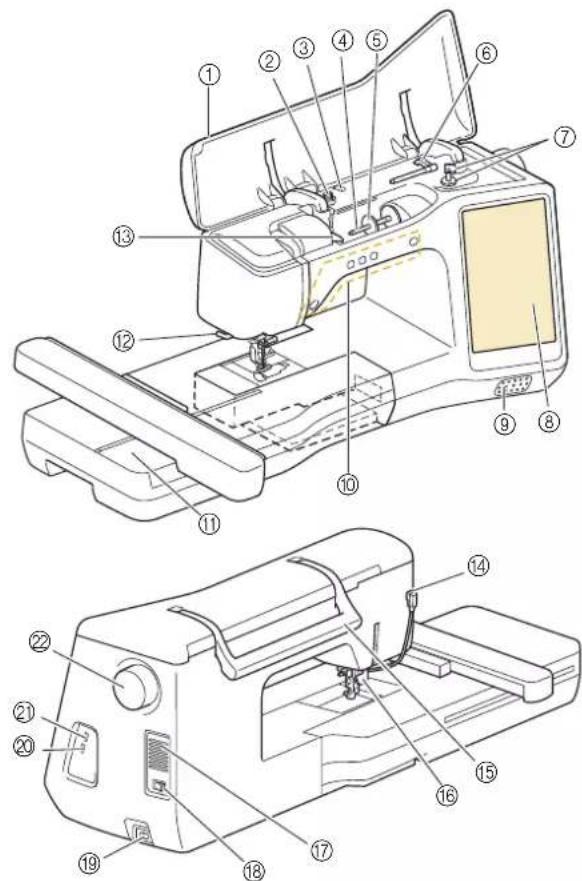
①Top cover
②Pretension disk (page 25)
③Thread guide for bobbin winding (page 25)
④Spool pin (page 26)
⑤Spool cap (page 24)
⑥Supplemental spool pin (page 24)
⑦Bobbin winder (page 24)
⑧LCD (liquid crystal display) (page 15)
⑨Speaker
⑩Operation buttons (page 10)
⑪Embroidery unit (page 34)
⑫Thread cutter (page 30)
⑬Thread guide plate (page 26)
⑭Connector for the presser foot (page 114)
⑮Handle
Carry the machine by its handle when transporting the machine.
⑯Presser foot lever
You cannot use the presser foot lever after the presser foot has
been raised using (Presser foot lifter button).
⑰Air vent
The air vent allows the air surrounding the motor to circulate. Do not cover the air vent while the machine is being used.
⑱Main power switch (page 13)
⑲Power cord receptacle (page 14)
⑳USB port for mouse (page 24)
②USB port
②Handwheel
Turn the handwheel toward you (counterclockwise) to raise and lower the needle.
■ Needle and Presser Foot Section

①Screw for embroidery foot (page 114)
②Embroidery foot
The embroidery foot helps control fabric flexibility for better stitch consistency.
③Bobbin cover (page 27)
④Needle plate cover (page 27)
⑤Needle plate (page 113)
⑥Needle bar thread guide (page 30)
⑦Needle clamp screw (page 32)
Operation Buttons

①"Start/Stop" button

Press the "Start/Stop" button to start or stop embroidering. The button changes color according to the machine's operation mode.
Green: The machine is ready to embroider or is embroidering.
Red: The machine is not ready to start embroidering.
②Needle position button

Press the needle position button to raise or lower the needle position. Pressing the button twice embroiders a single stitch.
③Thread cutter button

Press the thread cutter button after embroidering to trim the excess thread.
④Presser foot lifter button

Press the presser foot lifter button to lower the presser foot and apply pressure to the fabric. Press this button again to raise the presser foot.
⑤Automatic threading button

Use the automatic threading button to automatically thread the needle.
INCLUDED ACCESSORIES
Included Accessories
After opening the box, check that the following accessories are included. If any item is missing or damaged, contact your authorized Baby Lock retailer.
| Part Name | |
| Part Code | |
1. | Embroidery foot “W+” with LED pointer (on machine) |
| BLTY-EF | |
2. | Embroidery couching foot “Y” |
| XH1815-101 | |
3.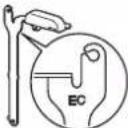 | Yarn guide for embroidery couching |
| XH3803-001 | |
4. | Yarn threader |
| XF7187-001 | |
5.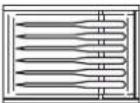 | Needle set75/11 6 needles:Ball point needle for embroidery |
| XC6469-001 | |
6. | Bobbin × 10 (One bobbin is in machine.) |
| X52800-120 | |
7.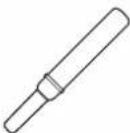 | Seam ripper |
| XF4967-001 | |
8. | Scissors |
| XF2052-001 | |
9.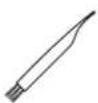 | Cleaning brush |
| X59476-051 | |
10. | Screwdriver (small) |
| X55468-051 | |
11. | Screwdriver (large) |
| XC4237-021 | |
12. | Disc-shaped screwdriver |
| XC1074-051 | |
13. | Spool cap (small) |
| 130013-157 | |
14. | Spool cap (medium) × 2 (One spool cap is on machine.) |
| X55260-156 | |
15. | Spool cap (large) |
| 130012-027 | |
16. | Thread spool insert (mini king thread spool) |
| XA5752-121 | |
17.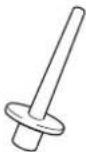 | Vertical spool pin |
| XC8619-052 | |
18. | Spool felt (on machine) |
| X57045-051 |
| Part Name | |
| Part Code | |
19. | Spool net x 2 |
| XA5523-050 | |
20. | Embroidery needle plate cover |
| XE5131-001 | |
21. | Touch pen (stylus) |
| XA9940-051 | |
22. | Bobbin case (on machine) |
| XC8167-651 | |
23. | Bobbin cover (on machine) |
| XE8992-101 | |
24. | Embroidery frame with decal set36 cm (H) x 24 cm (W)(approx. 14 inches (H) x 9-1/2 inches (W)) |
| EF95S: FrameEF96: Embroidery sheet | |
25. | Embroidery frame with decal set18 cm (H) x 13 cm (W)(approx. 7 inches (H) x 5 inches (W)) |
| EF75S: FrameEF79: Embroidery sheet | |
26. | Embroidery positioning sticker sheets x 4 |
| XE4912-501 | |
27.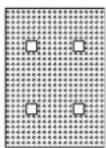 | Lens calibration sheet |
| XH4336-001 | |
28. | Embroidery bobbin thread (#90, white) |
| BBTE-W | |
29. | Stabilizer material |
| X81176-001 | |
| 30. | Bobbin center pin and instruction sheet |
| XF5048-001 | |
31.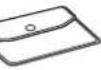 | Accessory bag |
| XC4487-021 | |
32.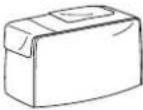 | Soft cover |
| XG0717-001 | |
33. | Power cord |
| XC6052-121 | |
34. | Instruction and Reference Guide |
| D02M4U-001 | |
35. | Quick Reference Guide |
| D02M50-001 |

Memo
- Please visit www.babylock.com to download the Embroidery Design Guide.
Options
The following are available as optional accessories to be purchased separately from your authorized Baby Lock retailer.
* These embroidery frames can be used for general embroidery but cannot be used with the application (IQ Intuition).
| Part Name | |
| Part Code | |
1.* | Embroidery frame set30 cm (H) × 20 cm (W)(approx. 12 inches (H) × 8 inches (W)) |
| EF92: FrameEF94: Embroidery sheet | |
2.* | Embroidery frame with decal set24 cm (H) × 24 cm (W)(approx. 9-1/2 inches (H) × 9-1/2 inches (W)) |
| EF97S: FrameEF98: Embroidery sheet | |
3.*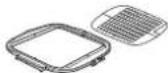 | Embroidery frame set20 cm (H) × 20 cm (W)(approx. 8 inches (H) × 8 inches (W)) |
| EF91: FrameEF93: Embroidery sheet | |
4.* | Embroidery frame set15 cm (H) × 15 cm (W)(approx. 6 inches (H) × 6 inches (W)) |
| BLMA-150 | |
5.* | Embroidery frame with decal set10 cm (H) × 10 cm (W)(approx. 4 inches (H) × 4 inches (W)) |
| EF74S: FrameEF78: Embroidery sheet | |
6.*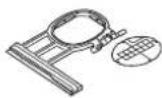 | Embroidery frame set2 cm (H) × 6 cm (W)(approx. 1 inch (H) × 2-1/2 inches (W)) |
| EF73: FrameEF77: Embroidery sheet | |
7.*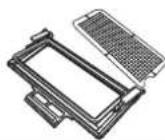 | Border embroidery frame30 cm (H) × 10 cm (W)(approx. 12 inches (H) × 4 inches (W)) |
| BLMA-CBH | |
8. | Magnetic frame300 mm (H) × 180 mm (W)(approx. 12 inches (H) × 7 inches (W)) |
| EMF300 | |
9. | Magnetic frame 18 cm (H) × 13 cm (W)(approx. 7 inches (H) × 5 inches (W)) |
| EMF180 | |
10. | Magnifying lens |
| BLMA-ML | |
11.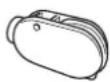 | Multi-purpose screwdriver |
| BLMPD2 | |
12. | Embroidery foot “W” |
| XF4012-101 | |
13.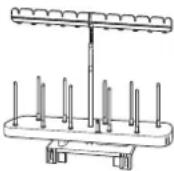 | 10 spool stand |
| BLMA-TS | |
14.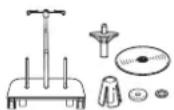 | Spool stand |
| BLMA-STS |

Memo
- To obtain optional accessories or parts, contact your authorized Baby Lock retailer or visit our site www.babylock.com.
- All specifications are correct at the time of printing. Please be aware that some specifications may change without notice.
- Visit your nearest authorized Baby Lock retailer or our site www.babylock.com for a complete listing of optional accessories available for your machine.
- Always use accessories recommended for this machine.
- Use only regular household electricity for the power source. Using other power sources may result in fire, electric shock, or damage to the machine.
- Do not touch the plug with wet hands. Electric shock may result.
- Make sure that the plugs on the power cord are firmly inserted into the electrical outlet and the power cord receptacle on the machine. Otherwise, a fire or electric shock may result.
- Turn the main power to OFF and remove the plug in the following circumstances:
- When you are away from the machine
• After using the machine - When the power fails during use
- When the machine does not operate correctly due to a bad connection or a disconnection
• During electrical storms
CAUTION
- Use only the power cord included with this machine.
- Do not use extension cords or multi-plug adapters with many other appliances plugged in to them. Fire or electric shock may result.
- When unplugging the machine, always turn the main power to OFF first. Always grasp the plug to remove it from the outlet. Pulling on the cord may damage the cord, or lead to fire or electric shock.
- Do not allow the power cord to be cut, damaged, modified, forcefully bent, pulled, twisted, or bundled. Do not place heavy objects on the cord. Do not subject the cord to heat. These things may damage the cord, or cause fire or electric shock. If the cord or plug is damaged, take the machine to your authorized Baby Lock retailer for repairs before continuing use.
- Unplug the power cord if the machine is not to be used for a long period of time. Otherwise, a fire may result.
• (For U.S.A only) This appliance has a polarized plug (one blade wider than the other). To reduce the risk of electrical shock, this plug is intended to fit in a polarized electrical outlet only one way. If the plug does not fit fully in the electrical outlet, reverse the plug. If it still does not fit, contact a qualified electrician to install the proper electrical outlet. Do not modify the plug in any way.
1 Insert the power supply cord into the power cord receptacle, then insert the plug into a wall outlet.

①Main power switch
②Power supply cord
2 Turn the main power switch to "I" to turn on the machine.

Memo
- The light, LCD and the "Start/Stop" button light up when the machine is turned on.
3 When the machine is turned on, the opening movie is played. Touch anywhere on the screen.
4 Turn the main power switch to "O" to turn off the machine.
■ Setting Your Machine for the First Time
When you first turn on the machine, set the language and time/date to your language and local time/date.
1 Touch and to set your local language and then
touch OK.
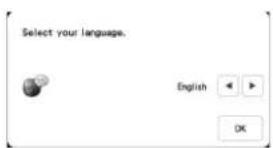
2 The message screen, confirming if you want to set time/date, appears. Touch . OK
3 Touch or to set time/date. And then touch OK.

①Select [ON] to display time/date on the screen.
②Touch or to select the date display format.
③ Set the year (YYYY), month (MM) and date (DD).
④Select whether 24h or 12h setting will display.
⑤Set the current time.
→ The clock starts from 0 second of the time you set.
Memo
- The time/date you set may be cleared, if you don't turn on the machine for an extended period of time.
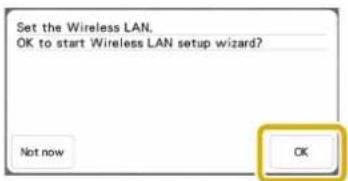
4 The following message about a wireless LAN connection appears. To set up a connection, touch
OK, and then refer to steps 3 through 6 in "Using the Wizard to Set Up the Wireless Network Connection" on page 22 to finish setting up a wireless LAN connection.
LCD SCREEN
Touch the LCD screen or a key with your finger or the included touch pen to select a machine function.
IMPORTANT
- Only touch the screen with your finger or the touch pen (stylus) included with the machine. Do not use a mechanical pencil, screwdriver or any other hard or sharp object. In addition, do not press the screen with extreme pressure. Otherwise the screen may be damaged.

Note
- All or part of the screen may sometimes become darker or lighter due to changes in the surrounding temperature or other changes in the environment. This is not a sign of a malfunction. If the screen is difficult to read, adjust its brightness.
■ Home Page Screen
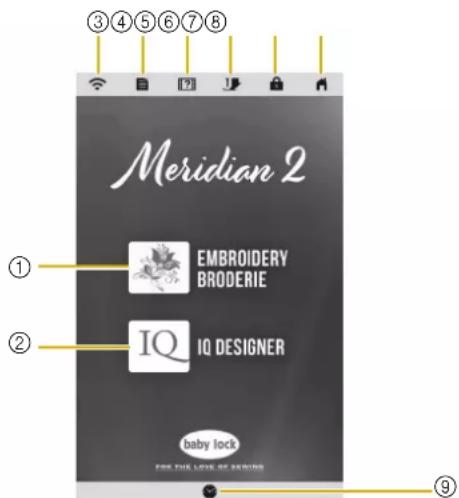
| No. | Display | Explanation Page | |
| Name | |||
1Select a embroidery pattern. 33 | |||
Emb key  | |||
2Create an original  | embroidery pattern. | 91 | |
| IQ Designer key | |||
3Shows  | 's signal strength. Touch this key to specify the wireless settings.If there is a new update file, the key appears as 📞 | 17, 22 | |
| Wireless LAN key | |||
4Change  | stop position, adjust the pattern or screen, and change other machine settings. | 16 | |
| Machine settings key | |||
5See exp on  | on how to use the machine. You can see the tutorial videos and also MP4 movie files that you have saved on USB media. | 19 | |
| Machine help key | |||
6Touch  y before changing the needle, the presser foot, etc. This key locks all key and button functions to prevent operation of the machine. y before changing the needle, the presser foot, etc. This key locks all key and button functions to prevent operation of the machine. | 27, 31 | ||
| Presser foot/ Needle exchange key | |||
7Lock th en.  | When the screen is locked, you can still embroider, but cannot change any of the screen functions. Touch this key again to unlock the screen. | — | |
| Screen lock key | |||
8Return  home page screen at any time and select a different category - [Embroidery] or [IQ Designer]. home page screen at any time and select a different category - [Embroidery] or [IQ Designer]. | — | ||
| Home page screen key | |||
9Set the  late. Time/Date key late. Time/Date key | 14 | ||
Using the Machine Settings Key
Touch change the default machine settings (needle stop position, embroidery speed, opening display, etc.). To display the different settings screens, touch
"General settings", for "Embroidery settings" or for "Wireless LAN settings".

Note
• The machine default setting is highlighted.
Memo
- Touch or to display a different settings screen.
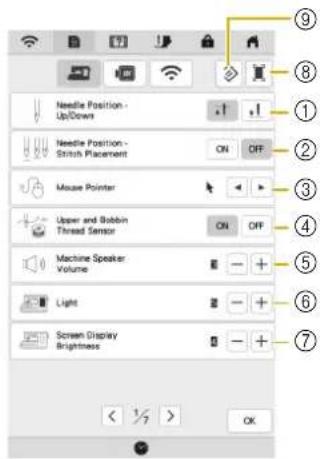
■ General Settings

![If you have purchased an upgrade kit and want to certify your sewing machine, press [CERTIFICATION] key. ✓ KST - Certification SOS XXXXX No. XXXXXXXXXX Version XXXX Reset to Default Reset < 3/7 > OK](/content/2026/05/997271/images/051101863e70b700d2955366f6872ca3714a941a51b47b9ed464cd48a08b5dbd.jpg)
IMPORTANT
- When [Upper and Bobbin Thread Sensor] is set to [OFF], the machine cannot detect tangled upper thread. Continuing to use the machine with tangled thread may cause damage.
①Select the needle stop position (the needle position when the machine is not operating) to be up or down.
②Select the operation of the (Needle position button) from the following two sequences.
Each press of the (Needle position button):
[ON] : Switches the needle position between being raised, stopped immediately before entering the fabric, or lowered.
[OFF]: Switches the needle position between being raised or lowered.
③Select the shape of the pointer when a USB mouse is used.
④Turn both the upper and bobbin thread sensors [ON] or [OFF]. If it is turned [OFF], the machine can be used without thread.
⑤Select the speaker volume. Increase the number for louder volume, decrease for softer volume.
⑥Select the brightness of the work area lights.
⑦Select the screen display brightness.
⑧You can save the current settings screen image in a USB media by touching this key when the USB media is inserted into the USB port. The files are saved in a folder labeled [bPocket].
⑨Reset settings on this page to original default. Some settings are not reset.
⑩Set the [Eco Mode] and the [Shutoff Support Mode] to save the machine power (page 18).
⑪Select the length of time until the screen saver appears.
⑫Select the image of the screen saver (page 18).
⑬Select the initial screen that is displayed when the machine is turned on.
⑭Select the display language.
⑮KIT I has been certified on this machine.
⑯Shows the total number of stitches embroidered on this machine, which is a reminder to take your machine in for regular servicing. (Contact your authorized Baby Lock retailer for details.)
⑰Shows the internal machine number for this machine.
⑱Shows the program version.
⑲Erase all saved data, customized settings and network information in the machine.
■ Embroidery Settings


①Select the embroidery frame to be used.
②Select the center point marker or grid lines.
③Select the thread color display on the embroidery screen; thread number, color name. (page 81)
④Select the thread brand of the thread color display. (page 81)
⑤Adjust the maximum embroidery speed (page 80).
⑥Adjust the upper thread tension for embroidering (page 78).
⑦Select the height of the embroidery foot during embroidering (page 55).
⑧Select the display units for embroidering (mm/inch).
⑨Select the color of the background for the embroidery display area.
⑩Select the color of the background for the thumbnail area.
⑪Select the size of pattern thumbnails.
⑫Adjust the distance between the pattern and the basting stitching. (page 73)
⑬When set to [ON], pressing the "Start/Stop" button when the embroidery foot is raised automatically lowers the embroidery foot before starting embroidering.
⑭Adjust the position and brightness of the embroidery foot "W+" with LED pointer (this setting is available if embroidery foot "W+" with LED pointer has been attached.) (page 60)
■ Wireless LAN Settings
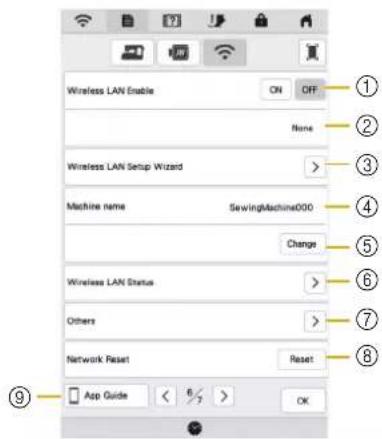

①Enable/Disable the wireless LAN function (page 22).
②Shows the connected SSID.
③Set the machine to connect wireless LAN function.
④Shows the machine name used on the wireless network.
⑤Change the machine name used on the wireless network.
⑥Check the wireless LAN status.
⑦Display other menus.
⑧Reset network operations.
⑨Display the introduction to the applications. Touch the key of the app whose information you want to display. On smart devices with a QR reader app installed, scan the QR code to display a screen that shows how to install the app.

IQ Intuition- Monitoring: The machine's embroidering status can be monitored from your smart device. For details, refer to "IQ INTUITION- MONITORING APP" on page 108. IQ Intuition- Positioning: You can position your embroidery designs on the fabric, by capturing image of the hooped fabric and sending the image to your machine. For details, refer to "IQ INTUITION- POSITIONING APP" on page 109.
⑩If there is a new update program, download the update file. (page 123)
⑪Display update program information. (page 123)
■ Setting the [Eco Mode] and the [Shutoff Support Mode]
You can save the machine power by setting the [Eco Mode] and the [Shutoff Support Mode].
If you leave the machine turned on without using it for the set period of time, the machine enters in each mode.
Touch display [Eco Mode] and [Shutoff Support Mode]. (page 16)
[Eco Mode];
Machine will enter a sleep mode after the set period of time. Touch the screen or press the "Start/Stop" button to continue operating.
[Shutoff Support Mode];
Machine will enter the lower power mode after the set period of time. Turn the machine off and then back on to restart operating.
![BABY LOCK Meridian 2 BLMA2 - [Shutoff Support Mode]; - 1](/content/2026/05/997271/images/20602f49f56161d29252e21c0c5d4d4135a9e0b42b370df66a20a4ec3378d6db.jpg)
Memo
- If you turn off the machine while the machine is in the [Eco Mode] or the [Shutoff Support Mode], wait for about 5 seconds before turning on the machine again.
- For details on condition of the [Eco Mode] and [Shutoff Support Mode], refer to "SPECIFICATIONS" on page 121.
■ Changing the Screen Saver Image
Instead of the default image, you can select your own personal images for the screen saver of your machine. Before changing the screen saver image, prepare the image on USB media. For details on compatible image files, refer to "SPECIFICATIONS" on page 121.

Touch

→ The settings screen appears.

Touch

→ The general settings screen appears.

Display [Screen Saver] in the general settings screen.


Touch
Select

Touch
Custom


Connect the USB media that contains your personal image to the USB port of the machine.

Touch to select the first image.


Select the device that is connected.

→ A list of your personal images appears on the screen.
* : Delete the selected image.
* : Return to the previous page.

Select a file name and then touch
Set
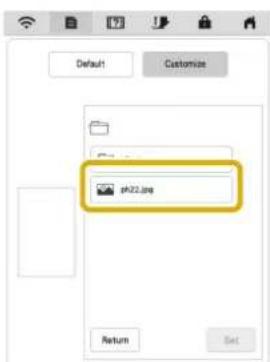
→ The selected image is stored on your machine.
* : Return to the previous page.

Repeat steps 7 through 9 to set the remaining images.

Touch to return to the original screen.

Memo
- Touch [Default] to select default images for the screen saver.

Using the Machine Help
Touch to display the machine help screen. Functions are available from the screen shown below.


①Explanation for upper threading, winding the bobbin, preparing to embroider a pattern, and how to use the machine (page 19)
②Tutorial videos or MPEG-4 (MP4) videos (page 20, page 20)
③Display the introduction to the applications. Touch the key of the app whose information you want to display. On smart devices with a QR reader app installed, scan the QR code to display a screen that shows how to install the app.
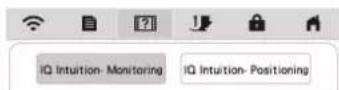
IQ Intuition- Monitoring: The machine's embroidering status can be monitored from your smart device. For details, refer to "IQ INTUITION- MONITORING APP" on page 108.
IQ Intuition- Positioning: You can position your embroidery designs on the fabric, by capturing image of the hooped fabric and sending the image to your machine. For details, refer to "IQ INTUITION- POSITIONING APP" on page 109.
④End-user license agreements (EULA)

Using the Operation Guide Function
Touch display the screen shown
below. Categories are displayed at the top of the screen.
Touch a key to see more information about that category. Some of the functions are described in the movies. Watch these movies for a better understanding of the functions.

①Information about the main parts of the machine and their functions
②Information about the operation buttons
③Information about threading the machine, changing needles, etc.
④Information about attaching the embroidery unit, preparing fabric for embroidering, etc.
⑤Information about troubleshooting
⑥Information about cleaning the machine, etc.
■ Playing a Tutorial Video
This machine provides tutorial videos on how to use the machine.
1 Touch ? .
2 Touch □ Video
3 Select the category and the tutorial video.

①Category
②Tutorial video
4 Play the tutorial video.

①Number of seconds elapsed/Total number of seconds
②Repeat
③Return to beginning
④Skip back 10 seconds
⑤Play
⑥Skip forward 10 seconds
⑦Stop
⑧Pause
⑨Save to machine (when playing from USB media).
A video can be saved to favorites) of the machine, from where it can be played.
When playing from the machine's memory, Memory
changes to Touch to delete the video.
Note
- The specifications shown in the movie may differ from the ones on the actual product, in details.
- The movie includes optional parts not included with this product.
5 After you are finished playing the video, touch . Close
■ Playing MPEG-4 (MP4) Videos
Your MP4 videos can be played from USB media. In addition, the MP4 video can be saved to the machine so that a tutorial video on creating a project, for example, can be viewed at any time. For details on supported file extensions, refer to "SPECIFICATIONS" on page 121.
Memo
- Some types of MP4 file cannot be played with the machine.
1 Touch ? .
2 Touch Video
3 Select the device where the video is saved.

①Tutorial videos
②Videos saved on the machine (favorites)
③Videos from USB media plugged into the USB port
④Videos from USB media plugged into the USB port for mouse
4 Select the video that you want to play.

Note
- Long file names may be shortened when they are displayed.
5 Play the video.
* Use the operation keys as described in "Playing a Tutorial Video" on page 20.
6 After you are finished playing the video, touch . Close
WIRELESS NETWORK CONNECTION FUNCTIONS
Operations Available with a Wireless Network Connection
This machine supports a wireless network connection. The following useful operations will be available if the machine is connected to a wireless network.
For updating
Directly download the update file to the machine. (page 123)
natural_image
Technical line drawing of a mechanical component with an upward arrow indicating motion (no text or symbols)■ For embroidering
- Conveniently check the operating status of the machine from your smart device by using the dedicated mobile application (IQ Intuition-Monitoring).

- IQ Intuition- Positioning: You can position your embroidery designs on the fabric, by capturing image of the hooped fabric and sending the image to your machine.
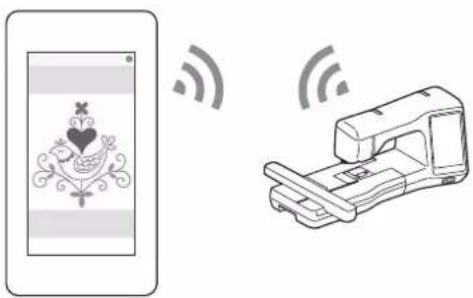
- Wirelessly transfer an embroidery pattern from your computer to the machine by using the dedicated Windows application (Design Database Transfer). The application can be downloaded from the following URL. https://www.babylock.com/accessories/software/design-database-transfer
* Settings must be specified in Design Database Transfer. For more information, refer to the manual for Design Database Transfer.

- Wirelessly transfer to the machine an embroidery pattern edited with embroidery editing software (Palette version 11 or later) on a computer. Also, transfer to Palette an embroidery pattern edited on the machine.
* Settings must be specified in Palette. For more information, refer to the manual for Palette.
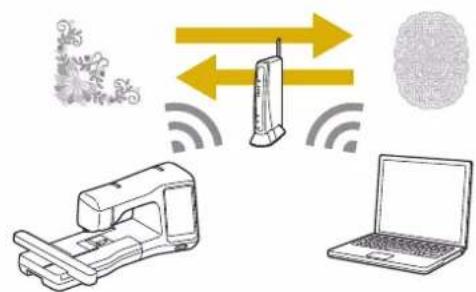
- When an updated version of the software is available on our website, the wireless LAN key appears as
( page 123 )
Enabling a Wireless Network Connection
The machine can be connected to your wireless network. Refer to "SPECIFICATIONS" on page 121 for requirements for a wireless network connection.
1 Touch
2 Set [Wireless LAN Enable] to [ON].

→ The machine begins to emit the wireless network signal.
Using the Wizard to Set Up the Wireless Network Connection
There are multiple ways to set up the wireless network connection. We recommend the method that uses the wizard on this machine.
In order to connect your machine to a wireless network, the security information (SSID and network key) for your home network will be required. The network key may also be called a password, security key or encryption key. First, find your security information and note it.
| SSID Network Key (Password) | |
Memo
- The wireless network connection cannot be set up if you do not have the security information.
• How to find the security information
①Check the manual provided with your home network.
②The default SSID may be the manufacturer's name or the model name.
③If you cannot find the security information, contact the manufacturer of the router, your network administrator or your Internet provider.
④Some SSIDs and network keys (passwords) are case (upper case and lower case) sensitive. Please properly record your information.
2 Touch beside [Wireless LAN Setup Wizard].

→ A list of available SSIDs appears.
3 Touch beside the SSID that was noted.

→ The screen for entering the network key (password) appears.
Memo
- If the SSID that was noted does not appear in the list, touch . Refresh
- If the desired network SSID is not displayed, specify it as described below.
①Select New SSID.
②Enter the desired network SSID, and then touch OK.
③Select the authentication method and encryption mode.
- If the machine had already been connected to the home network, touch ,and then select the saved SSID.
4 Enter the network key (password) that was noted, and then touch . OK
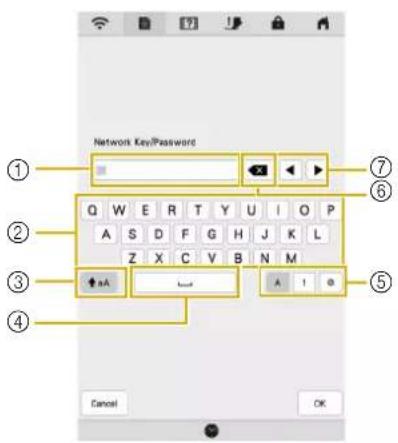
①Text input area
②Character keys
③Caps key
④Space key
⑤Letters/numbers/symbols key
⑥Backspace key (Deletes the character at the cursor's position.)
⑦Cursor keys (Move the cursor to the left or right.)
5 When the following message appears, touch . OK

→ When a connection is established, the following message appears.

6 Touch to exit the setup.

→ The name beside [Machine name] is the name that will be used when registering the machine with embroidery editing software (Palette version 11 or later) or Design Database Transfer in order to transfer files.
Memo
- The name in the [Machine name] field will be used with the IQ Intuition- Monitoring App and IQ Intuition- Positioning App.
- While connected, the signal strength is indicated by the icon in the upper-left corner of the display.
- Once a wireless network connection has been set up, a connection will be established each time the machine is turned on. However, [Wireless LAN Enable] in the network settings screen must remain set to [ON].
■ Using the [Others] Menu to Set Up the Wireless Network Connection
The |Others| menu contains the following items.

①TCP/IP settings can be manually entered.
②Shows the MAC address.
③Use when proxy settings are required.
CONNECTING THE ACCESSORY TO THE MACHINE
Using a USB Mouse
A USB mouse, connected to the machine, can be used to perform a variety of operations in the screens.
Connect a USB mouse to the USB port.

Memo
- Use a basic computer mouse to operate the machine functions. Some USB mouse devices may not be compatible with this machine.

①USB port
②USB mouse

Note
- The left mouse button can be used to perform operations such as choosing a design and choosing menu keys.
- The mouse pointer does not appear in the screen saver or opening screen.
- Clicking a Key
When the mouse is connected, the pointer appears on the screen. Move the mouse to position the pointer over the desired key, and then click the left mouse button.

Memo
- Double-clicking has no effect.

①Pointer
WINDING/INSTALLING THE BOBBIN
Winding the Bobbin
IMPORTANT
- Use the plastic bobbins that came with this machine or bobbins of the same type: 11.5 mm (approx. 7/16 inch) plastic Class 15 (A style) bobbins, which are available from your Baby Lock retailer.
■ Using the Supplemental Spool Pin
With this machine, you can wind the bobbin during embroidering. While using the main spool pin for embroidery, you can conveniently wind the bobbin using the supplemental spool pin.
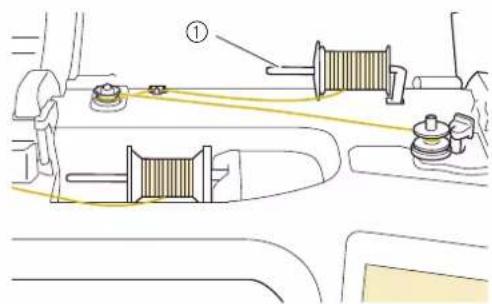
①Supplemental spool pin
1 Turn the main power to ON and open the top cover.
2 Align the groove in the bobbin with the spring on the bobbin winder shaft, and set the bobbin on the shaft.

①Groove in the bobbin
②Spring on the bobbin winder shaft
3 Place the spool of thread for the bobbin and the spool cap onto the supplemental spool pin.
Slide the spool onto the supplemental spool pin so that the thread unwinds to the front from the bottom.
Otherwise the thread may become tangled around the supplemental spool pin.

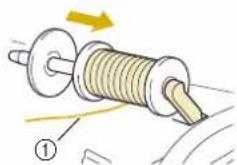
①The thread unwinds to the front from the bottom.
4 Slide the spool cap onto the spool pin as far as possible to the right, with the rounded side on the left.
IMPORTANT
- If the spool or the spool cap is not installed correctly, the thread may become tangled around the spool pin, and the machine may be damaged.
- Three spool cap sizes are available, allowing you to choose a spool cap that best fits the size of spool being used. If the spool cap is too small for the spool being used, the thread may catch on the slit in the spool or the machine may be damaged. When using mini king thread spool, use the thread spool insert. For details on thread spool insert (mini king thread spool), refer to "Note" on page 25.

Note
- When using the spool as shown below, use the thread spool insert (mini king thread spool). Make sure that the thread spool insert is firmly inserted. After installing it, pull out some thread, and check that the thread unwinds without getting caught.

①Thread spool insert (mini king thread spool)
②Hole diameter 8.0 mm to 10.5 mm (approx. 5/16 inch to 13/32 inch)
③Spool (cross-wound thread)

5 With your right hand, hold the thread near the thread spool. With your left hand, hold the end of the thread, and use both hands to pass the thread through the thread guide.

①Thread guide
6 Pass the thread around the pretension disk making sure that the thread is under the pretension disk.

①Pretension disk
→ Make sure that the thread passes under the pretension disk.

②Pretension disk
③Pull it in as far as possible.
→ Check to make sure thread is securely set between pretension disks.
7 Wind the thread clockwise around the bobbin 5 or 6 times, pass the thread through the guide slit in the bobbin winder seat, and then pull the thread to cut it.

①Guide slit in bobbin winder seat (with built-in cutter)
Note
- Be sure to wind the thread clockwise around the bobbin, otherwise the thread may become wrapped around the bobbin winder shaft.
CAUTION
- Be sure to cut the thread as described. If the bobbin is wound without cutting the thread using the cutter built into the guide slit in the bobbin winder seat, the thread may become tangled in the bobbin or the needle may break and cause injury when the bobbin thread starts to run out.
8 Set the bobbin winding switch to the left, until it clicks into place.

①Bobbin winding switch
→ The bobbin winding window appears.
9 Touch Start.
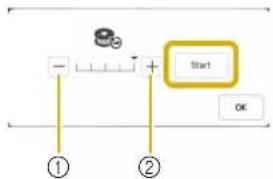
①Touch to decrease the winding speed.
②Touch to increase the winding speed.
→ Bobbin winding starts. changes to

while the bobbin is winding. The bobbin stops rotating when bobbin winding is completed. The bobbin winding switch will automatically return to its original position.
Memo
- Touch to minimize the bobbin winding window. Then, you can perform other operations, such as selecting a pattern or adjusting the thread tension, while the bobbin is being wound.
- Touch (in Top right of the LCD screen) to display the bobbin winding window again.

- The sound of winding the bobbin with stiff thread, such as metallic thread for quilting, may be different from the one produced when winding normal thread; however, this is not a sign of a malfunction.
10 After bobbin winding is finished, cut the thread with scissors and remove the bobbin.

natural_image
Illustration of a mechanical device with a spring and spool, accompanied by a tape measure and a yellow upward arrow (no text or symbols)IMPORTANT
- When removing the bobbin, do not pull on the bobbin winder seat. Doing so could loosen or remove the bobbin winder seat, and could result in damage to the machine.
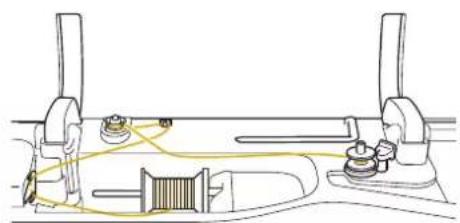
■ Using the Spool Pin
You can use the main spool pin to wind the bobbin before embroidering. You cannot use this spool pin to wind the bobbin while embroidering.
natural_image
Pure technical diagram of a mechanical or electrical component with no visible text, numbers, or symbols1 Turn the main power to ON and open the top cover.
2 Align the groove in the bobbin with the spring on the bobbin winder shaft, and set the bobbin on the shaft.

①Groove in the bobbin
②Spring on the bobbin winder shaft
3 Remove the spool cap and place the spool of thread for the bobbin onto the spool pin.
Slide the spool onto the spool pin so that the thread unwinds to the front from the bottom.

①Spool pin
②Spool cap
③Spool of thread
④Spool felt
4 Slide the spool cap onto the spool pin as far as possible to the right, with the rounded side on the left.
5 While holding the thread with both hands, pass the thread through grooves of the thread guide plate.

①Thread guide plate
6 Pass the thread through the thread guide.
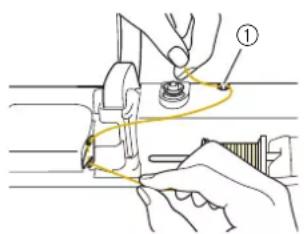
①Thread guide
7 Pass the thread around the pretension disk making sure that the thread is under the pretension disk.
Pull the thread as far as possible.

①Pretension disk
②Thread guide
8 Follow steps 7 through 10 on page 25 through page 26.
Setting the Bobbin
CAUTION
- Use a bobbin that has been correctly wound with thread, otherwise the thread tension may be incorrect and the needle may break, causing injuries.

- Before inserting or changing the bobbin, be sure to touch in the LCD to lock all keys and buttons. Otherwise injuries may occur if the "Start/Stop" button or any other button is pressed and the machine starts embroidering.
1 Touch to lock all keys and buttons and raise the presser foot.
* If the message [OK to automatically lower the presser foot?] appears on the LCD screen, touch OK to continue.
2 Slide the bobbin cover latch to the right and remove the bobbin cover.
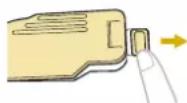
3 Insert the bobbin into the bobbin case so that the thread unwinds to the left.

natural_image
Illustration of hands assembling a mechanical component with a close-up view (no text or symbols)4 Lightly hold down the bobbin with your right hand, and then guide the end of the thread around the tab of the needle plate cover with your left hand.
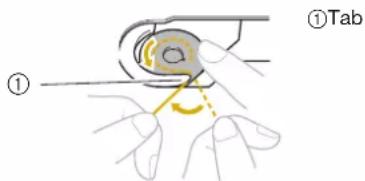
Note
- Be sure to hold down the bobbin with your finger and unwind the bobbin thread correctly, otherwise the thread may break or the thread tension will be incorrect.
5 While lightly holding down the bobbin with your right hand, guide the thread through the slit in the needle plate cover and lightly pull it with your left hand.

①Slit
Memo
- By pulling the thread in this way, the thread will enter the tension spring of the bobbin case to apply the appropriate tension to the bobbin thread during embroidery.
6 While lightly holding down the bobbin with your right hand, continue guiding the thread through the slit with your left hand. Then, cut the thread with the cutter.

→ The cutter cuts the thread.
7 Reattach the bobbin cover.
Insert the tab of the bobbin cover into the notch of the needle plate cover, and then lightly press down on the right side.
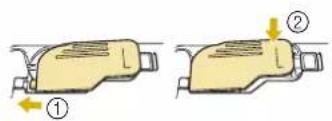
natural_image
Two identical illustrations of a yellow mechanical device with arrows indicating motion or force direction (no text or symbols)8 Touch to unlock all keys and buttons.
UPPER THREADING
Upper Threading
CAUTION
- Be sure to thread the machine properly. Improper threading can cause the thread to tangle and break the needle, leading to injury.
IMPORTANT
- When using 65/09 needle, manually thread the needle. If the automatic needle threading function is used, the unit may be damaged.
Memo
- The automatic threading function can be used with home sewing machine needle size 75/11.
- When threads such as metallic thread or specialty threads are used, it is not recommended to use the needle threader.
- For most embroidery applications, the upper thread should be 40-weight rayon or polyester embroidery thread.
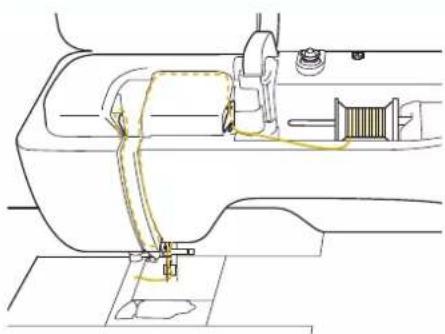
natural_image
Technical line drawing of a sewing machine needle and screw (no text or symbols)1 Turn the main power to ON.
2 Press (Bresser foot lifter button) to raise the presser foot.
→ The upper thread shutter opens so the machine can be threaded.
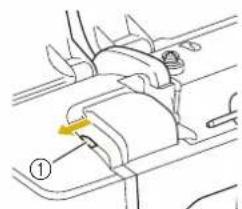
① Upper thread shutter
3 Press (Needle position button) to raise the needle.
IMPORTANT
- Be sure to raise the needle before using the automatic needle threader. Otherwise, the needle may not thread correctly and the needle threader may be damaged.
4 Remove the spool cap and place the spool of thread onto the spool pin.
Slide the spool onto the spool pin so that the thread unwinds to the front from the bottom.

①Spool pin
②Spool cap
③Spool of thread
④Spool felt
5 Slide the spool cap onto the spool pin as far as possible to the right, with the rounded side on the left.
CAUTION
- Choose a spool cap that best fits the size of spool being used. For more information, refer to "Note" on page 25.


natural_image
Diagram showing a mechanical assembly process: adding a shaft into a cylindrical component, then adding a pin to a rotating wheel (no text or symbols present)- If the spool or the spool cap is not positioned correctly, the thread may become tangled around the spool pin, possibly causing the needle to break, resulting in injuries.
Note
- When using thread that winds off quickly, such as metallic thread, place the spool net over the spool before placing the spool of thread onto the spool pin.
If the spool net is too long, fold it to fit the size of the spool.

①Spool net
②Thread spool
③Spool pin
④Spool cap
* When threading the spool with the spool net on, make sure that 5-6cm (approx. 2 - 2-1/2 inches) of thread is pulled out.
* It may be necessary to adjust the thread tension when using the spool net.
6 While holding the thread with both hands, pass the thread through grooves of the thread guide plate.
①Thread guide plate
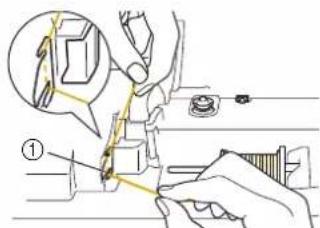
7 While holding the thread in your right hand, pass the thread through the thread guide in the direction indicated.

natural_image
Line drawing of a car interior with hands operating the wheel (no text or symbols)8 Guide the thread down, up, then down through the groove, as shown in the illustration.
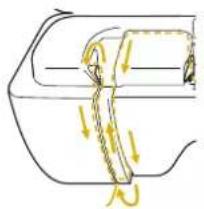
natural_image
Diagram of a mechanical or fluidic component with directional arrows indicating flow or movement (no text or symbols)Memo
- Look in the upper groove area to check if the thread catches on the thread take-up lever visible inside the upper groove area.

natural_image
Diagram showing a hand holding a yellow object through a circular inset, with no visible text or symbols.9 Pass the thread through the needle bar thread guide (marked "6") by holding the thread with both hands and guiding it as shown in the illustration.

①Needle bar thread guide ②Tab
10 Pass the thread through the notch in the thread guide. Then firmly pull the thread from front to back into the slit of the thread guide disk (marked "7").

①Notch in thread guide ②Thread guide disk
11 Press (Bresser foot lifter button) to lower presser foot.
12 Pull the thread up through the thread cutter to cut the thread, as shown in the illustration.

①Thread cutter
Note
- When using thread that quickly winds off the spool, such as metallic thread, it may be difficult to thread the needle if the thread is cut. Therefore, instead of using the thread cutter, pull out about 8 cm (approx. 3 inches) of thread after passing it through the thread guide disks (marked "7").

natural_image
Illustration of a hand holding a medical device with a yellow cable and pen inserted, labeled with number ① (no text or symbols on the diagram itself)①About 8 cm (approx. 3 inches) or more
13 Press (Automatic threading button) to have the machine automatically thread the needle.
→ The thread passes through the eye of the needle.
Memo
- When (Automatic threading button) is pressed, the presser foot will be automatically lowered. After threading is finished, the presser foot moves back to the position before (Automatic threading button) was pressed.
14 Carefully pull the end of the thread that was passed through the eye of the needle.
* If a loop was formed in the thread passed through the eye of the needle, carefully pull on the loop of thread through to the back of the needle.

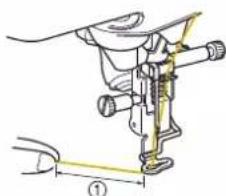
15 Raise the presser foot lever and pull out about 10 cm (approx. 4 inches) of the thread, and then pass it under the presser foot toward the rear of the machine.
natural_image
Mechanical assembly diagram showing a sewing machine needle and handle (no text or labels)①About 10 cm (approx. 4 inches)

Memo
- If the needle could not be threaded or the thread was not passed through the needle bar thread guides, perform the procedure again starting from step 3.

Note
- Some needles and threads cannot be threaded with the needle threader. In this case, instead of using the needle threader after passing the thread through the needle bar thread guide (marked "6"), manually pass the thread through the eye of the needle from the front.

■ Using the Vertical Spool Pin
Use the vertical spool pin when using an irregularly shaped thread spool, and when embroidering with metallic thread.

Insert the vertical spool pin onto the bobbin winder shaft.

①Bobbin winder shaft
②Vertical spool pin

Install the spool felt and the thread spool in that order, and then thread the upper thread.

①Spool felt
②Thread spool

Memo
- When setting the thread spool, set it so that the thread winds off from the front of the spool.
- This method keeps the thread from twisting as it comes off the spool pin.
CHANGING THE NEEDLE
CAUTION
- Always touch on the screen to lock all keys and buttons before changing the needle. If is not touched and the "Start/Stop" button or another operation button is pressed accidentally, the machine will start and injury may result.
- Use only home sewing machine needles. Other needles may break and may cause injury.
- Never use a bent needle. This may cause injury.
Thread and Needle Number
The lower the thread number is, the heavier the thread; the higher the needle number, the larger the needle.
■ Embroidery Needles
Use a ball point needle 75/11.

Memo
- To check the needle correctly, place the flat side of the needle on a flat surface. Check the needle from the top and the sides. Throw away any bent needles.
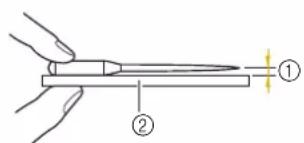
①Parallel space
②Flat surface (bobbin cover, glass, etc.)
- The machine needles are consumables. Replace the needle in cases such as those described below.
- If an unusual sound is produced when the needle enters the fabric. (The tip of the needle may be broken or dull.)
- If stitches are skipped. (The needle may be bent.)
1 Press (Needle position button) to raise the needle.
2 Touch to lock all keys and buttons.
* If the message [OK to automatically lower the presser foot?] appears on the LCD screen, touch to continue.
Note
- Before replacing the needle, cover the hole in the needle plate with fabric or paper to prevent the needle from falling into the machine.
3 Remove the presser foot. (page 113)
4 Use the disc-shaped screwdriver to turn the needle clamp screw toward you (counterclockwise) to loosen the screw. Remove the needle.

5 With the flat side of the needle facing the back, insert the new needle all the way to the top of the needle stopper (viewing window) in the needle clamp. Use the disc-shaped screwdriver to securely tighten the needle clamp screw.

①Needle stopper ②Hole for inserting the needle ③Flat side of the needle
CAUTION
- Be sure to push in the needle until it touches the stopper, and securely tighten the needle clamp screw with the disc-shaped screwdriver. If the needle is not completely inserted or the needle clamp screw is loose, the needle may break and cause injury.
6 Attach the presser foot. (page 114)
7 Touch to unlock all keys and buttons.
Chapter 2 BASIC EMBROIDERY
BEFORE EMBROIDERING
Embroidery Step by Step
Follow the steps below to prepare the machine for embroidery.

| Step # | Aim Action Page | ||
| 1 | Presser foot attachment | Attach embroidery foot “W+” with LED pointer. | 113 |
| 2 | Checking the needle | Use needle 75/11 for embroidery. | 31 |
| 3 | Embroidery unit attachment | Attach the embroidery unit. 33 | |
| 4 | Bobbin thread setup | For the bobbin thread, wind embroidery bobbin thread and set it in place. | 24 |
| 5 | Fabric preparation Attach a stabilizer material to the fabric, and hoop it in the embroidery frame. | 55 | |
| 6 | Pattern selection Turn | the main power to ON, and select an embroidery pattern. | 35 |
| 7 | Embroidery frame attachment | Attach the embroidery frame to the embroidery unit. | 58 |
| 8 | Checking the layout | Check and adjust the size and position of the embroidery. | 59 |
| 9 | Embr thread setup | Set up embroidery upper y thread according to the pattern. | u 28 p |
About the Embroidery Unit
CAUTION
- Do not move the machine with the embroidery unit attached. The embroidery unit could fall off and cause injury.
IMPORTANT
- Keep your hands and foreign objects away from the embroidery carriage and frame when the machine is embroidering. Damage or malfunction may result.
- Be sure to turn off the power before attaching or removing the embroidery unit. Otherwise, the machine may be damaged.
- Do not touch the inner connector of the embroidery unit. The pins on the embroidery unit connection may be damaged.
- Do not apply strong force to the embroidery unit carriage or pick up the unit by the carriage. Otherwise, the embroidery unit may be damaged.
- Do not push on the carriage when attaching the embroidery unit onto the machine. Moving the carriage may damage the embroidery unit.
- Make sure that there is enough space for the carriage of the embroidery unit to move. If the embroidery frame comes into contact with an object, the pattern may not be embroidered correctly, or damage may result.
- Do not touch the embroidery carriage until the initialization finishes.
Note
- To avoid distorting your embroidery design, do not touch the embroidery carriage and frame when the machine is embroidering.
- Store the embroidery unit in a safe place to prevent damage to the unit.
■ Attaching the Embroidery Unit
1 Turn the main power to OFF.
2 Insert the embroidery unit connection into the connection port of the machine until it snaps into place.

natural_image
Line drawing of a mechanical assembly with a tool and a highlighted component (no text or symbols)Note
- Be sure there is no gap between the embroidery unit and the machine. If there is a gap, the embroidery patterns will not embroider with the correct registration.
3 Turn the main power to ON.
→ The following message will appear.

4 Touch OK
→ The carriage will move to the initialization position.
■ Removing the Embroidery Unit
1 Remove the embroidery frame.
- For details on removing the embroidery frame, refer to "Removing the Embroidery Frame" on page 59.
2 Touch, then touch.
→ The carriage will move to the removal position.
3 Turn the main power to OFF.
4 Press the release button, and pull the embroidery unit away from the machine.

natural_image
Illustration of a hand operating a wooden cutting machine with yellow directional arrows indicating movement (no text or symbols)SELECTING PATTERNS
■ Copyright Information
The patterns stored in the machine and patterns sold separately are intended for private use only. Any public or commercial use of copyrighted patterns is an infringement of copyright law and is strictly prohibited.
■ About Embroidery Patterns
There are many character and decorative embroidery patterns stored in the machine's memory (see the "Embroidery Design Guide" for a full summary of patterns in the machine's memory or visit www.babylock.com). You can also use patterns sold separately.
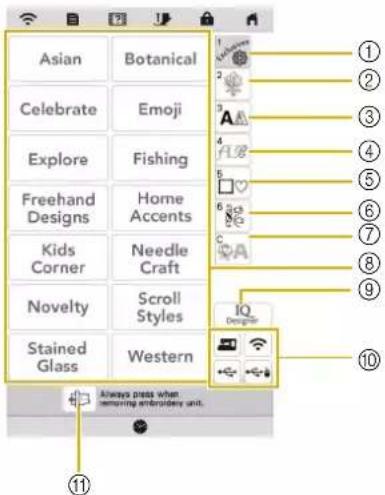
①Baby Lock "Exclusives"
②Embroidery patterns
③Character patterns
④Decorative alphabet patterns
⑤Frame patterns
⑥Utility embroidery patterns
⑦Couching patterns (page 86)
⑧Pattern type selection keys
⑨IQ Designer (page 91)
⑩Patterns saved in the machine's memory, USB media, etc. (page 84)
⑪ Touch this key to position the embroidery unit for storage.
Selecting Embroidery Patterns
1 Touch the category tab and then touch the pattern type selection key or pattern key you want to embroider.

①Pattern category tab
②Pattern type/pattern selection key
2 Select a pattern.

* Touch the category tab or to return to the previous screen.
→ The selected pattern is displayed.

Touch for the pattern.

* Touch to * en the background color for the pattern image with bright thread colors, to get a clearer image.
→ The pattern is designated with a red box around it on the edit screen.

Touch to edit the selected pattern.
(page 41)


Touch Embroidy.
→ The embroidery screen appears.

Touch to edit the pattern before embroidering. (page 53)
* To return to the edit screen, touch

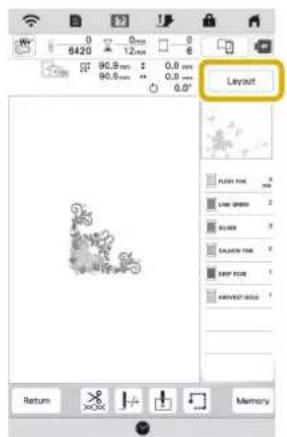

Start embroidering. (page 67)
Selecting Character Patterns
1 Touch ^3 AA.
2 Touch the key of the font you want to embroider.
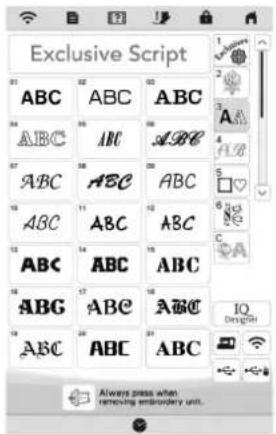
* : View the next page.
: View the previous page.
3 Select the character category and then type in the text. (page 37)
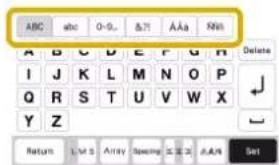
4 Touch Set .
→ The edit screen appears.
5 Follow the steps from 4 to 7 of "Selecting Embroidery Patterns" on page 35.
■ Character Pattern Input Keys
Memo
- If a key display is grayed out, you cannot use that function with the selected pattern.

| No. | Display Explanation |
| Name | |
| 1 | Return to the previous screen. |
| Return key | |
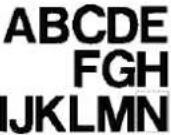
| 2 | Change the size of the character patterns.To change the size of one character, touchABC A to display and then selectthe character. The size of the selectedcharacter is changed. |
| Size key | |
| 3 | Change the configuration of the characterpatterns. |
| Array key | |
| 4 | Change the spacing of the characterpatterns. |
| Character spacing key |
| No. | Display Explanation | |
| Name | ||
| 5S | Switch alignment | This function is available when multiple lines of characters are input. |
| Alignment key | Right alignment | |
 | ||
| Left alignment | ||
 | ||
| Center alignment | ||
 | ||
| 6 | Change the font of the characters. | |
| AAA | Depending on the font that was selected, it may not be possible to change the font. | |
| Font Type key | To change the font of one character, touchABC A to display and then select the character. The font of the selected character is changed. | |
| 7 | Apply the character pattern editing. | |
| Set key | ||
| 8 | Enter a space. | |
| Space key | ||
| 9 | Make a new line. | |
| Line feed key | ||
| 10 | Delete the character. | |
| Delete key | ||
| 11- | Select the category of character. | |
| Category keys | ||
| 12 | Select to edit all characters or one character. | |
| ABC A | Edit all characters. | |
| Select one/all key | Edit one character. | |
| 13 | Move the cursor and select a character. | |
| Character selection keys | ||
Selecting Frame Patterns
1 Touch 5
2 Touch the key of the frame shape you want to embroider in the top part of the screen.
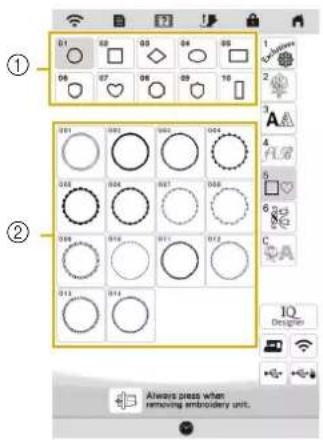
①Frame shapes
②Frame patterns
→ Various frame patterns are displayed at the bottom part of the screen.
3 Touch the key of the frame pattern you want to embroider.
→ The selected pattern is displayed on the screen.
4 Touch Set.
→ The edit screen appears.
5 Follow the steps from 4 to 7 of "Selecting Embroidery Patterns" on page 35.
Combining Patterns
Example:

1 Select a pattern and then touch

2 Touch Add.
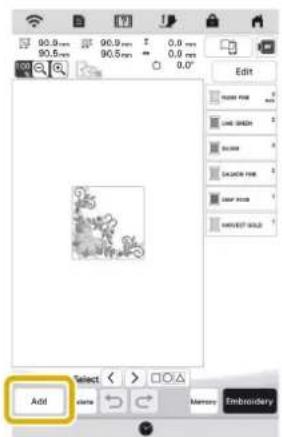
3 Touch ^3 AA.
4 Select "and enter "LOVE".
→ The characters you enter will be displayed in the center of the embroidery pattern area.
5 Touch Set.
6 Touch and then touch . Move
7 Use to move the characters.
* Characters can also be moved by directly dragging them with your finger or the touch pen.
8 Touch OK.
9 Touch to change the color of the characters. (page 50)

10 Touch OK.
11 When all editing is finished, touch Embroidey
Memo
- Combined patterns will be embroidered in the order they were entered.
■ Selecting a Pattern
If multiple patterns have been combined, use
Select < > to select the pattern to be edited. Patterns can also be selected by directly touching the screen with your finger or touch pen.

■ Selecting Multiple Patterns at the Same Time
Multiple patterns can easily be edited, for example, when moving patterns, if they are all selected together.
1 Touch □○△.

2 Touch each pattern to be selected.

①Touch or to check the patterns to be selected, and then touch. The selected patterns are highlighted with a red box. To deselect the selected patterns, touch. Reset
②Touch this key to deselect all selected patterns.
③Touch this key to select all patterns in the pattern display area.
④Patterns can be moved with this key.
Memo
- You can also select multiple patterns by dragging your finger to specify the area of selection.
3 Touch to return to the edit screen.
→ Each selected pattern is surrounded with a red box.
Memo
- The following functions are available while multiple patterns are selected.
- Moving
- Copying
- Grouping
- Stippling
- Extracting pattern outlines
■ Grouping Patterns
If the multiple patterns are grouped, they can be edited as a single pattern.
1 Select patterns you want to group. (page 40)
2 Touch
→ The selected patterns are grouped.

* To ungroup a grouped pattern, select the grouped pattern, and then touch . A this time, multiple patterns are selected. To cancel the multiple selection, touch any other pattern or the blank area.
Memo
- The following functions are applied to all patterns in the grouped pattern.
- Moving
- Rotating
- Appliqué
- Border
- Extracting pattern outlines
- Simple stippling
- Thread color changing
EDITING PATTERNS
Using these keys, you can edit the pattern as you like.

Memo
- If a key display is grayed out, you cannot use that function with the selected pattern.
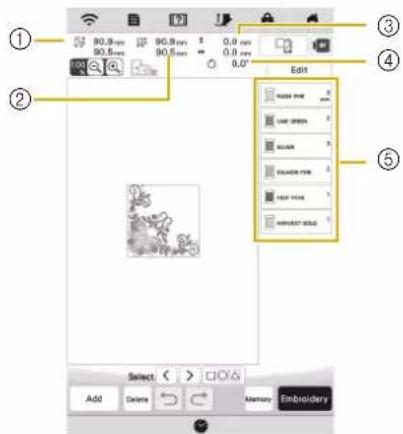
①Size of the entire combined pattern
②Size of the pattern currently selected
③Distance from the center of the frame to the center of the pattern currently selected
④Degree of rotation for the pattern currently selected
⑤Color sequence and stitching times of each step of the pattern
■ Key Functions
Touch to display the editing window.

| No. | Display | Explanation Page | |
| Name | |||
| 1 | Move move | moving window. | 39 |
| Move key | : Move the pattern inthe direction shown by the arrow.: Center the pattern. |
| No. | Display | Explanation Page | |
| Name | |||
| 2 | Display the pattern sizing window.Size key | Decrease the pattern proportionately.Decrease the pattern vertically.Decrease the pattern horizontally.Enlarge the pattern proportionately.Stretch the pattern vertically.Stretch the pattern horizontally.Change the size of the character patterns.Reset the size. (except for character patterns.)Move the pattern inthe direction shown by the arrow. | 44 |
| 3 | Display the pattern rotating rotateRotate key | Rotating window.Reset the position.Move the pattern inthe direction shown by the arrow.You can also rotate the pattern by dragging the red point at the corners of the pattern. | - |
| Group selected multiple patterns. 40 | |||
| Group key | |||
| 5 | Duplicate the pattern. - | ||
| Duplicate key | |||
| 6 | Change the pattern to a horizontal mirror image. | - | |
| Horizontal mirror image key | |||
| 7 | Make and edit the repeated pattern. | 44 | |
| Border key | |||
| 8 | Allows the thread density density to change for some Alphabet characters and frame patterns. Other patterns density can be modified after the pattern size is changed. | 43 | |
| Density key | |||
| 9 | Change the thread color. 51 | ||
| Thread palette key | |||
| 10 | Create an appliqué outline of the pattern. | 74 | |
| Appliqué key | |||
| 11 | Separate the contA,BC | inuous character patterns to adjust the spacing or edit separately afterwards.: Select where the patterns is to be separated.: Separate the patten. A separated character pattern cannot be combined again. | - |
| Separate key | |||
| 12 | Edit character pattern. 37, 42 | ||
| Letter Edit key | |||
| 13 | Extract the outline of the pattern.The extracted pattern can be used with IQ Designer. | 106 | |
| Outline key | |||
| 14 | Touch this key to create stippling, echo quilting, or decorative fill around a pattern. | 89 | |
| Stippling key | |||
| 15 | Touch this key to specify not to embroider the selected thread color. | 48 | |
| Deselect region setting (no sew setting) key | |||
| 16 | Touch this key when you want to change the thread color, character by character in character embroidery. Since the machine stops at the end of each character, the upper thread can be changed as you embroider. | - | |
| Multi color key | |||
| 17 | Proce and the embroidery screen. - | ||
| Embroidery key | |||
| 18 | Save a pattern in the machine's memory or USB media. The pattern can also be transferred to a computer via a wireless network connection. | 83 | |
| Memory key | |||
| 19 | Redo the last operation that was undone. | - | |
| Redo key | |||
| 20 | Undo the last operation. - | ||
| Undo key | |||
| 21 | Delete the selected pattern (the pattern outlined by the red box). | - | |
| Delete key | |||
| 22 | Add another pattern to the editing pattern. | 39 | |
| Add key | |||
| 23 | Select the pattern to edit when there are multiple patterns. | 39 | |
| Pattern select key | |||
| 24 | Make multiple patterns to be selected at the same time. | 40 | |
| Multiple selection key | |||
| No. | Display | Explanation Page | |
| Name | |||
| 25 | Magnify keys | Magnify the image.Use / / < / > to scroll through the display in any direction.Demagnify the image (minimum: 100%).Select the percent of magnification. | — |
| 26 | Preview the embroidered image.43 | ||
| Image key | |||
■ Editing Letters

For details on input keys, refer to "Character Pattern Input Keys" on page 37.

Memo
- To edit character patterns with multiple lines in the edit screen, ungroup the pattern. (page 40)
Previewing the Pattern
1 Touch
→ An image of the pattern as it will be embroidered appears.
2 Touch to select the frame used in
the preview.
* Frames displayed in gray cannot be selected.
* Touch to enlarge the image of the pattern.
* The pattern can be embroidered as it appears in the display.

natural_image
Illustration of a mobile device interface with a small floral icon on the screen and control buttons (no text or symbols)3 Touch to check the embroidering order.
→ The stitch simulator screen appears.

①Simulation speed keys
②Operation keys
: Start the simulation at the set speed.
II : Pause the simulation.
■ : Stop the simulation.
* Touch to return to the embroidery frame selection screen.
4 Touch OK.
Changing the Size and the Density of the Pattern
If if selected, you can change the pattern size while maintaining the thread density. The machine recalculates the stitch density automatically. With this function, the pattern will be enlarged or reduced at a larger ratio than with normal pattern resizing.
1 Touch, and then touch. Size
2 Select in the size window.

* : Change the pattern size while maintaining the number of stitches. Enlarged patterns will be less dense, and reduced patterns will be more dense. In order to maintain embroidering quality, there is a limit to how much the embroidery pattern can be enlarged or reduced.
*: Change the pattern size while maintaining the thread density. After the pattern size is changed, the thread density can be changed in the edit screen. The number of stitches is recalculated depending on the pattern size.
Memo
- This function cannot be used with alphabet character patterns, frame patterns, repeated patterns or buttonhole patterns.
- Patterns with a large number of stitches (100,001 or more) cannot be resized while maintaining a thread density.
- You can also change the size by dragging the red point at the sides and corners of the pattern.

Select the direction in which to change the pattern size.


When you select in step 2, touch, and OK
then touch to change the thread density.
* : Make the pattern less dense.
* : Make the pattern more dense.

Touch OK.
Creating Repeated Patterns
Using the border function, you can create repeated patterns. You can also adjust the spacing of the patterns.

Touch, and then touch.

Select the direction in which the pattern will be repeated.
* : Repeat the pattern above.
* : Repeat the pattern below.
* : Delete above pattern.
* : Delete below pattern.
Vertical direction


①Repeating and deleting keys
②Spacing keys
③Key to cancel pattern repeating
Horizontal direction


①Repeating and deleting keys
②Spacing keys
③Key to cancel pattern repeating

Adjust the spacing of the repeated pattern.
* : Widen spacing.
* : Tighten spacing.


Complete repeated patterns by repeating steps 2 through 3.

Touch OK.
■ Repeating Patterns Using the Matrix Copy
Place the pattern repeatedly throughout the embroidery area.
1 Touch .
2 Touch

→ The repeated pattern is displayed positioned throughout the area.
3 Adjust the spacing of the repeated pattern.
* Widen spacing. * Tighten spacing.

→ Every time the key is pressed, the pattern is automatically re-laid out.
4 Touch Set.
5 Touch OK.
■ Repeating One Element of a Repeated Pattern
You can select one element of a repeated pattern and repeat only that single element. This function allows you to create complex repeated patterns.
1 Touch
2 Choose the direction in which the repeated pattern will be cut.
* : Cut horizontally.
* : Cut vertically.
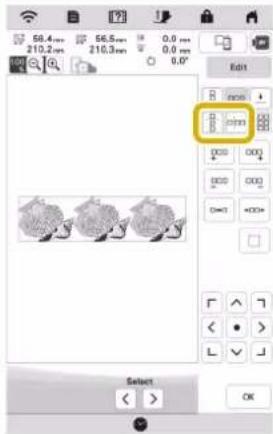
→ The pattern direction indicator will change depending on the direction selected.
3 Use and to select the cut line.

4 Touch .

→ The repeated pattern will be divided into separate elements.
5 Touch .
6 Use and to select the element to repeat.

7 Repeat the selected element.
8 Touch OK.
■ Color Sorting Repeated Patterns
Touch Embroidery automatically change the embroidering order of colors in combined border embroidery patterns so that the same color can be continuously embroidered. This allows you to continue embroidering without repeatedly changing the upper thread or changing the embroidering order manually.


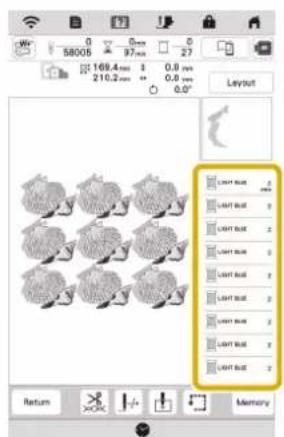
Memo
- When a grouped pattern is repeated, the embroidering order is changed in each pattern.
- If there are repeated patterns with other repeated patterns or other patterns, the embroidering order of only the repeated patterns is changed.
■ Assigning Thread Marks
By sewing thread marks, you can easily align patterns when rehooping the fabric to embroider a series. When embroidering is finished on a pattern, a thread mark in the shape of an arrow will be sewn using the final thread. When embroidering a series of patterns, use the point of this arrow for positioning the following designs to be embroidered.




Memo
- When there are two or more elements, use
↓ to select an element to assign a thread mark(s) to.

Embroidering the Pattern Repeatedly
After creating the repeated pattern, rehoop the embroidery frame and keep embroidering for the next pattern.
1 Select the repeated pattern and assign the thread mark at the center of the bottom of the pattern.
* Refer to "Assigning Thread Marks" on page 47.
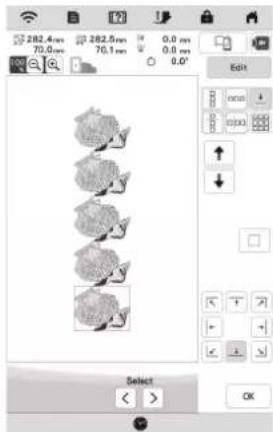


3 Press the "Start/Stop" button to start embroidering.
→ When embroidering is finished, the thread mark is embroidered with the last thread color.
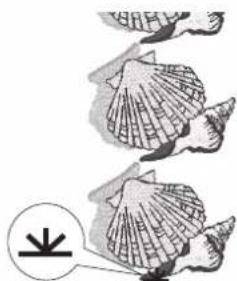
natural_image
Illustration of seashell structures with a downward arrow symbol (no text or labels)
5 Rehoop the fabric in the embroidery frame.
Note
- Adjust the position of the fabric so that the embroidering area for the next pattern is within the embroidering area.

①Pattern embroidered first
②Position of pattern to be embroidered next
③Embroidering area
6 Attach the embroidery frame to the machine, and then
touch


7 Touch to set the starting point to the center top of the pattern.

natural_image
Screenshot of a graphic editing software interface showing a row of five identical bird silhouettes, with no visible text or symbols on the shapes themselves.8 Touch OK.
9 Touch, and then touch.


10 Touch to move the embroidery frame until

the thread mark on the fabric is aligned with the light of the LED pointer.
* To check the needle drop point with the light of the LED pointer, touch 📊
Memo
- For the accurate needle drop point, slowly turn the handwheel toward you (counterclockwise) to lower the needle. Then, turn the handwheel away from you (clockwise) until the mark on the handwheel is at the top. The carriage cannot move if the mark on the handwheel is not at the top.

①Mark
11 Touch OK.
12 Remove the thread mark.
13 Start embroidering.
Deselect Region Setting (No Sew Setting)
The deselect region setting (which specifies that a thread color will not be embroidered) can be applied to a part of the pattern with a specific color.
1 Touch in the embroidering edit screen.
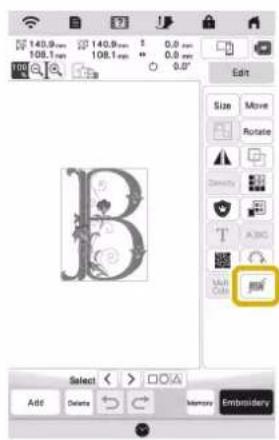

From the thread color sequence display, select the thread color that will not be embroidered.
→ The selected thread color is highlighted in blue.


Touch

→ The mark appears to indicate that the selected thread color will not be embroidered.
The parts of the pattern that will not be embroidered are hidden in the pattern preview screen.


Memo
- To cancel the setting, select the thread color and touch 📄.

If necessary, repeat steps 2 and 3 for all thread colors that will not be embroidered.

After specifying the desired settings, touch . OK

Touch 📂d then touch to check an enlarged image of the finished embroidery.
* After deselecting a region, check the image to be sure no previously hidden stitches are visible.
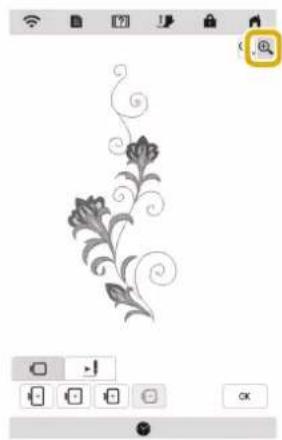
natural_image
Decorative floral vine pattern with swirls and leaves, displayed in a mobile app interface (no text or symbols on the floral design)
Memo
- When a pattern with the deselect region setting applied is saved, the deselect region setting is also saved. However, the pattern cannot be saved if the deselect region setting is applied to all thread colors. - The parts with the deselect region setting applied are merely not displayed; they are not deleted. The embroidery area required to embroider the pattern is the same as for the original pattern.

EDITING COLORS
Changing the Thread Color
You can change the thread color by moving the color to be changed to the top of the embroidering order and selecting a new color from the thread colors in the machine.
1 Touch, and then touch.
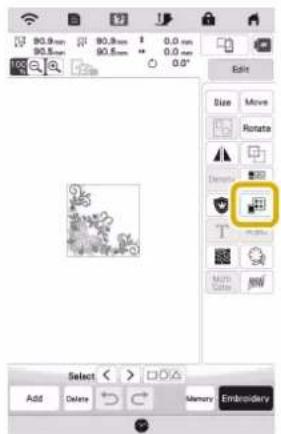
→ The thread color palette appears.
2 Touch the color of the part to be changed.
* Touch or to display the thread color that is not on the screen.
→ The selected thread color image appears.

①Selected thread color image
Memo
- When you directly touch a part of the pattern whose color is to be changed, the part can be selected and displayed.
3 Select a new color from the thread color palette, and then touch . OK
* To return to the original color, touch . If Reset multiple colors have been changed, this command will return all colors to their original colors.

①Thread brand for colors
②Thread color palette
→ The display shows the changed colors.
Memo
- Touch to specify a thread color by entering its number. If you enter the wrong number, touch C, and then enter the correct number. After entering the number, touch . OK
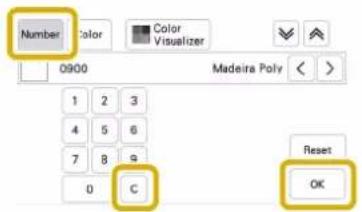
Finding New Color Schemes with the Color Visualizer Function
With the color visualizer function, the machine suggests new color schemes for the embroidery pattern that you have selected. After you select the desired effect ([Random], [Vivid], [Gradient] or [Soft]), sample color schemes for the selected effect are displayed.

Touch, and then touch.


Touch



Memo
- This function may not be available depending on the pattern you select (ex. a repeated pattern, licensed pattern).

Select the thread brand for colors and the number of colors you want to create the pattern with.

①Thread brand for colors
②Number of colors to be used

Select the desired effect.

①Effects for schemes
→ If you select [Random] or [Gradient], the color specifying screen will appear.
→ If you select [Vivid] or [Soft], proceed to step 7.

Touch to set and specify the thread color to use in the effect.
* If you don't need to specify the thread color, just set to Auto.
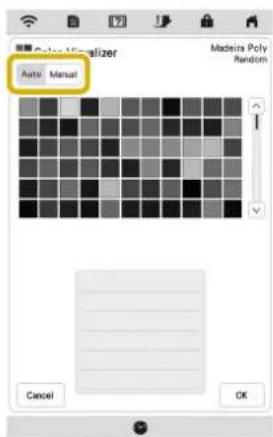
[Manual] setting for [Random]
You can select up to 6 colors to be used in the [Random] effect. The effect will be created using the selected colors.

①Select colors from the palette.
②Selected colors are listed.
[Manual] setting for [Gradient]
You can select one color to be used in the [Gradient] effect. The effect will be created with a color you select.
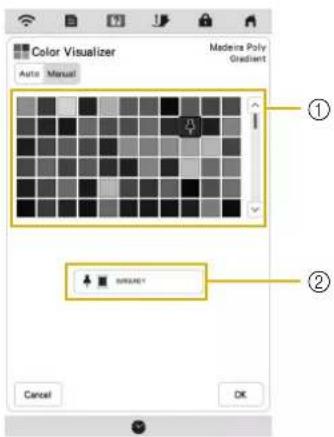
①Select a color from the palette.
②Selected color is displayed.
6 Touch OK.
7 Select the desired color scheme from samples.
* Touch to add the new schemes.

①Touch to review the previous schemes.
Memo
• To temporarily register your favorite schemes, touch (to release your favorite schemes, touch again). 9 color schemes can be added. Touch Favorite to check the registered favorite schemes.
To cancel the registration, touch


• Maximum 20 pages of schemes can be reviewed.
8 Select the displayed color scheme.
* : Return to the previous screen.
* or <: Display the other color schemes.
* : Select the displayed color scheme.

natural_image
Colorful floral decorative border design on a mobile app interface (no text or symbols in the main graphic)→ The thread color palette screen will appear.
Thread Color Sorting
This function allows you to embroider while replacing the thread spool a minimal number of times.
Before starting to embroider, touch the embroidery screen to rearrange the embroidery order and sort it by thread colors.
1 Touch in the embroidery screen.

2 Touch

* Touch again to check the sorted thread colors.

→ The embroidery color order is rearranged and sorted by thread colors.
* Touch, thenvoto cancel color sorting and embroider with the original embroidery color order.
Note
- This function does not work on overlapping patterns.
VIEWING THE EMBROIDERY SCREEN

* This screen appears when embroidery starts.
①The presser foot symbol
Attach embroidery foot "W+" with LED pointer or embroidery foot "W" (sold separately) for all embroidery projects.
②A preview of the pattern
③The boundary for embroidering with the selected frame in the settings screen
④Total number of stitches in the selected pattern and number of stitches that have already been embroidered
⑤The time necessary to embroider the pattern, and the time already spent embroidering the pattern (not including time for changing and automatically trimming the thread)
⑥The number of colors in the pattern, and the number of the color currently being embroidered
⑦Switch the progress bar (which shows the embroidering progress) between showing only one color or all colors. This key appears after starting embroidering or after touching the key.
⑧The part of the embroidery pattern that will be embroidered with the thread color at the top of the list
⑨The order for thread color changes and the embroidering time for each thread color
* The displayed time is the approximate time that will be required. The actual embroidering time may be longer than the displayed time, depending on the embroidery frame that is used. In addition, the amount of time required to change thread colors is not included.
■ Key Functions
Using these keys, you can move or rotate pattern, etc.
Touch to display the editing window.

Note
- Some operations or functions are not available for certain patterns. If the key display is grayed out, you cannot use that function or operation with the selected pattern.
| No. | Display | Explanation Page | |
| Name | |||
| 1 | Turn on the light of the LED pointer. | 59 | |
| Needle point check key | Touch this key to check the needle drop point with the light of the LED pointer. | ||
| 2 | Shows the embroidery frames that can be used for the selected pattern. | 56 | |
| Available frames | Be sure to use the proper frame. | ||
| 3 | Shows the size of the selected pattern. | — | |
| Pattern size | |||
| 4 | Preview the embroidery image. 43 | ||
| Image key | |||
| 5 | Shows the distance between the embroidering position and the center (when the embroidery pattern is moved). | — | |
| Distance | |||
| 6 | Shows the degree of rotation of the pattern. | — | |
| Degree | |||
| 7 | Display the pattern moving window. | — | |
| Move key | |||
| 8 | Display the pattern rotating window. | — | |
| Rotate key | |||
| 9 | Add the basting stitch around the pattern. You can select the distance from the pattern to the basting stitching. | 17, 73 | |
| Basting key | |||
| No. | Display | Explanation Page | |
| Name | |||
| 10C | Change the setting | to embroiderthe pattern with a single color.Touch the key again to return tothe original setting.Even if uninterrupted embroideringhas been set, the automaticthread cutting function and thethread trimming function can beused.The icons of the spool of threadare grayed out. | — |
| Uninterruptedembroiderykey | |||
| 11Touch this key to | rearrange thestitching sequence for combinedpatterns. | 52 | |
| Thread colorsorting key | |||
| 12Touch this key to | align theembroidering position. | 61 | |
| Embroiderypositioningkey | |||
| 13Switch on/off the | 2-pointembroidery positioning functionwith a LED pointer. | 63 | |
| 2-pointembroiderypositioningfunction with aLED pointeron/off key | |||
| 14Save the pattern toMemory | to the machine’smemory or USB media. Thepattern can also be transferred toa computer via a wireless networkconnection. | 83 | |
| Memory key | |||
| 15Check the position of the pattern. | 62 | ||
| Trace key | :Move the carriage totrace the embroidery area of thepattern. This allows you tocheck that there is enoughspace to embroider the pattern.:Move the carriage tothe selected position. | ||
| 16Specify the needle start position. | 81, 82 | ||
| Starting pointkey | :Set the needle startposition to the lower-left cornerof the pattern. This setting isuseful when connectingpatterns since it allows you tocontinue embroidering until thefirst stitch of the next pattern.:Move the carriage tothe selected position. | ||
| 17Move the needle forward or backin the pattern; useful if the threadbreaks while embroidering or ifyou want to start again from thebeginning. | 70 | ||
| Forward/Backkey | |||
| 18Set automatic thread cutting,thread trimming or the threadtension. For embroidery, thesefunctions are set automatically. | 77-80 | ||
| Cut/Tensionkey | |||
| 19 | Return to the edit screen. — | ||
| Return key | |||
PREPARING THE FABRIC
CAUTION
- Use fabrics with a thickness of less than 2 mm (approx. 1/16 inch). Using fabrics thicker than 2 mm (approx. 1/16 inch) may cause the needle to break and cause injury.
Memo
- When using layers with thicker batting etc., you can embroider more attractive finishes by adjusting the embroidery presser foot height in the embroidery settings screen.
Touch, and use and in the +
[Embroidery Foot Height] in the embroidery settings screen. Adjust the presser foot height for thick or puffy fabrics.

- To increase the space between the embroidery foot and the needle plate, set the [Embroidery Foot Height] to a larger number.
- In the case of thick terry cloth towels, we recommend that you place a piece of water soluble stabilizer on the top surface of the towel. This will help to reduce the nap of the toweling and result in more attractive embroidery.
Attaching Iron-on Stabilizers (Backing) to the Fabric
CAUTION
- Always use a stabilizer material for embroidery when embroidering on stretch fabrics, lightweight fabrics, fabrics with a coarse weave, or fabrics which cause pattern shrinkage. Otherwise, the needle may break and cause injury.
1 Iron the iron-on stabilizer material to the wrong side of the fabric.
- Use a piece of stabilizer which is larger than the embroidery frame being used.

①Fusible side of stabilizer
②Fabric (wrong side)
③Size of the embroidery frame

Memo
- When embroidering small pieces of fabric that cannot be hooped in an embroidery frame, use stabilizer material as a base. After lightly ironing the fabric to the stabilizer material, hoop it in the embroidery frame. If stabilizer material cannot be ironed onto the fabric, attach it with a basting stitch. After completing the embroidery, remove the stabilizer material carefully.
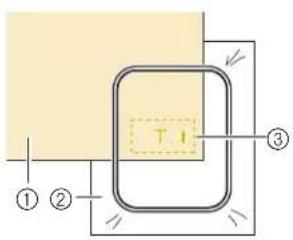
①Fabric ②Stabilizer ③Basting
- When embroidering on thin fabrics such as organdy or lawn, or on napped fabrics such as towel or corduroy, use water soluble stabilizer (sold separately) for best results. The water soluble stabilizer material will dissolve completely in water, giving the project a more attractive finish.
Hooping the Fabric in the Embroidery Frame
■ Types of Embroidery Frames
Optional embroidery frames can be used. When choosing frames that do not appear on the screen, be sure to check the design size of the embroidery field of the optional frame. Check with your authorized Baby Lock retailer for frame compatibility.
Select a frame that matches the pattern size. Available frame options are displayed on the LCD.

①Highlighted: Can be used
②Shaded: Cannot be used
- Inserting the Fabric

Note
- If the fabric is not securely held in the embroidery frame, the pattern will embroider out poorly. Insert the fabric on a level surface, and gently stretch the fabric taut in the frame.
- Only embroidery frames with factory-coded stickers can be used with the application (IQ Intuition- Positioning). (page 109)
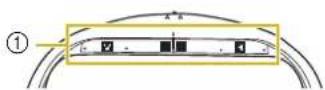
①Factory-coded stickers

Lift-up and loosen the frame adjustment screw and remove the inner frame.

①Frame adjustment screw
②Inner frame

Lay the fabric right side up on top of the outer frame.
3 Insert the inner frame making sure to align the inner frame's △ with the outer frame's . ▽
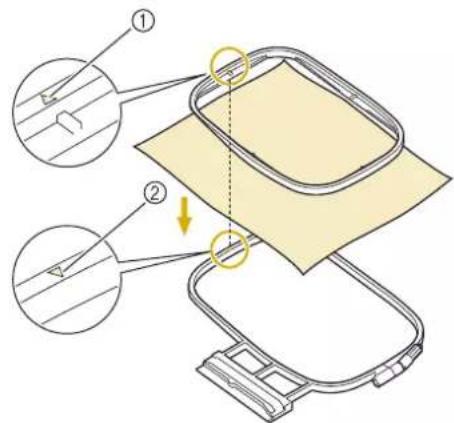
①Inner frame's

②Outer frame's

4 Slightly tighten the frame adjustment screw.
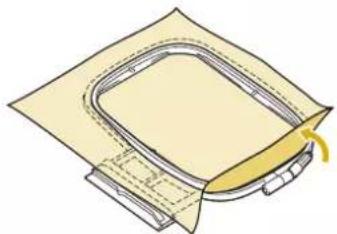
natural_image
Diagram of a garment pattern piece with fabric and stitching (no text or symbols)5 Gently smooth out the fabric. Make sure fabric is flat and without wrinkles.
* After stretching the fabric, make sure the fabric is taut.
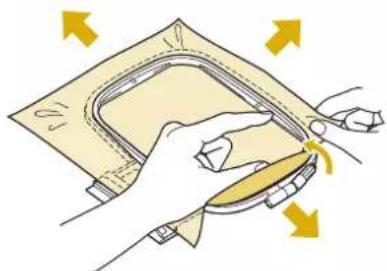
natural_image
Illustration of a hand using a tool to cut a component, with yellow arrows indicating direction (no text or symbols)* Make sure the inside and outside frames are even before you start embroidering.
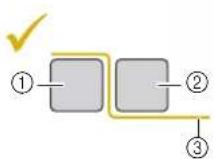
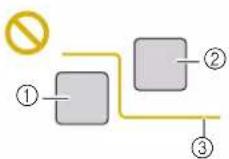
①Outer frame
②Inner frame
③Fabric
6 Tighten the frame adjustment screw to keep the fabric from loosening while stitching.

natural_image
Pure mechanical diagram showing a connector with a yellow circular arrow indicating rotation (no text or symbols)7 Return the frame adjustment screw to its initial position.
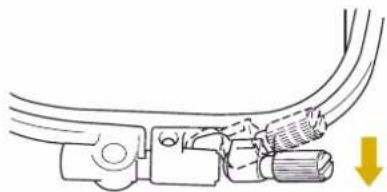
natural_image
Pure mechanical diagram showing a lever mechanism with no text or symbolsMemo
- You can use the disc-shaped screw driver, when you loosen or tighten the frame adjustment screw.

■ Using the Embroidery Sheet
When you want to embroider the pattern in a particular place, use the embroidery sheet with the frame.
1 With a chalk pencil, mark the area of the fabric you want to embroider.

①Embroidery pattern
②Mark

Place the embroidery sheet on the inner frame. Align the guide lines on the embroidery sheet with the mark you made on the fabric.
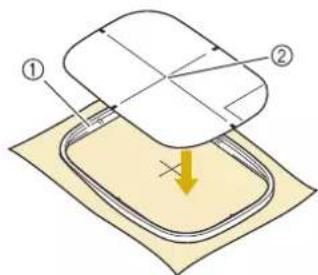
①Inner frame
②Guide line

Gently stretch the fabric so there are no folds or wrinkles, and press the inner frame into the outer frame.

①Inner frame
②Outer frame

Remove the embroidery sheet.

natural_image
Diagram showing a yellow object being folded or placed on a yellow surface, with an open lid and an upward arrow indicating motion (no text or symbols)ATTACHING THE EMBROIDERY FRAME

Note
- Wind embroidery bobbin thread and insert the bobbin before attaching the embroidery frame. Check that there is enough thread in the bobbin.
- Make sure that the frame-securing lever is correctly lowered after the embroidery frame has been installed in the embroidery frame holder.

Press (Presser foot lifter button) to raise the presser foot.

Align the embroidery frame guide with the right edge of the embroidery frame holder.
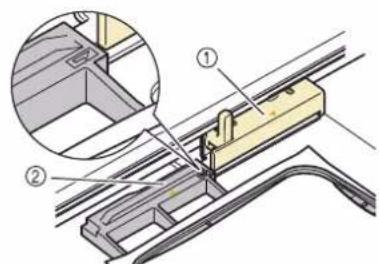
①Embroidery frame holder
②Embroidery frame guide

Slide the embroidery frame into the holder, making sure to align the embroidery frame's with the holder's ▽.

①Arrow mark

Lower the frame-securing lever to be level with the frame to secure the embroidery frame in the embroidery frame holder.

①Frame-securing lever
■ Removing the Embroidery Frame
1 Press (Presser foot lifter button) to raise the presser foot.
2 Raise the frame-securing lever.

natural_image
Technical illustration of a mechanical assembly with a yellow tool inserted into a wooden frame (no text or symbols)3 Pull the embroidery frame toward you.

natural_image
Technical diagram of a mechanical assembly with no visible text or symbolsCONFIRMING THE PATTERN POSITION
The pattern is normally positioned in the center of the embroidery frame. If the pattern needs to be repositioned for better placement on the garment, you can check the layout before starting embroidery.
Checking the Needle Drop Point with the Embroidery Foot "W+" with LED Pointer
1 Touch in the embroidery screen.
→ The LED pointer indicates the needle drop point.

Memo
- When the LED pointer turns on, the presser foot height is automatically adjusted according to the fabric thickness.
- appears when the embroidery foot "W+" with LED pointer is attached to the machine.
- If is not displayed, you cannot use the LED pointer.
- The LED pointer turns off automatically by lowering the presser foot or returning to the previous page.
Note
- With spongy fabric, the position may not be accurate due to the various depths of the fabric.
- With fabric that has a very uneven surface such as quilting, the fabric thickness may not be correctly measured. In this case, the pointer indication should be used only as a reference.
■ Adjusting the LED Pointer
Adjust the LED pointer if it indicates a point different than the actual needle drop point. Before adjusting the LED pointer, mark the actual needle drop point on the fabric to be embroidered, and attach the embroidery frame.
1 Touch
→ The settings screen appears.
2 Touch
→ The embroidery settings screen appears.
3 Display [Embroidery Foot with LED Pointer Adjustment] in the embroidery setting screen.
![BABY LOCK Meridian 2 BLMA2 - Display [Embroidery Foot with LED Pointer Adjustment] in the embroidery setting screen. - 1](/content/2026/05/997271/images/457c88f39c7ba0a23ceebcecafb14ae375cde620aa0d3c26fc566693181db528.jpg)
Note
- As a default, appears gray. After the embroidery foot "W+" with LED pointer is attached to the machine, the key becomes available and settings can be specified.
4 Touch Start.
→ The Embroidery Foot "W+" with LED Pointer Adjustment screen appears.
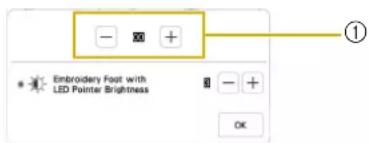
①LED pointer adjustment
Note
- The specified setting is saved in the machine's memory. This is useful for positioning during continuous embroidering.
- For normal use, return the setting to [00].
5 Use or to adjust the LED pointer so that it indicates the actual needle drop point.
Memo
- In order to more accurately check the needle drop point, turn the handwheel toward you (counterclockwise) to lower the needle.
6 Touch to return to the original screen.
■ Adjusting the Brightness of the LED Pointer
1 Follow the steps from 1 to 3 of "Adjusting the LED Pointer" on page 59 to display the embroidery foot with LED pointer adjustment screen.
2 Use or to adjust the brightness of the LED pointer.

3 Touch to return to the original screen.
Displaying a Background Image
Using a special application downloaded to a smartphone or tablet, you can transfer a photo of the hooped fabric to be embroidered to the machine to be used as a background image.
The embroidery frame is displayed in the application. You can see how the pattern will be arranged on the actual fabric.
For details, refer to "IQ INTUITION- POSITIONING APP" on page 109.
Note
- The wireless network settings must first be specified on the machine. Refer to “WIRELESS NETWORK CONNECTION FUNCTIONS” on page 21.
- Only embroidery frames with factory-coded stickers can be used with the application (IQ Intuition- Positioning).

①Factory-coded stickers
■ Displaying the Background Image on the Screen of the Machine
1 Select the pattern. (page 35)
2 Photograph the fabric in the frame with the easy mode of the application, and then transfer it to the machine. For a detailed procedure, refer to the application.
3 Touch OK.
* Attach the frame used in the image before touching


→ The transferred background image appears on the screen of the machine.
Memo
- To hide the background image, touch

Touch to display the background image again.
- The transferred background image includes the embroidery frame display.
■ Calibrating the Position of the Background Image
By calibrating the position of the background image transferred to the machine, the pattern can be positioned more accurately.
1 Select a pattern. (page 35)
2 Set the application to advanced mode, attach the embroidery positioning sticker to the fabric in the hoop, take the photo of the background, and with the advanced mode of the application, transfer it to the machine.
For a detailed procedure, refer to the application.
3 Touch OK.
* Attach the frame used in the image before touching


→ The carriage will move, and the LED pointer will turn on.
4 Use to align
of the larger circle in the embroidery positioning sticker.
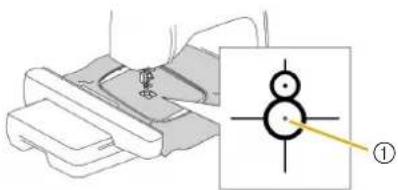
natural_image
Diagram showing a hand operating a mechanical component with a magnified inset highlighting a circular feature (no text or symbols)①Center of the larger circle in the embroidery positioning sticker
Memo
- The position can also be calibrated by lowering the needle with the handwheel. This method enables more accurate positioning. Slowly turn the handwheel toward you (counterclockwise) to check the needle drop point. Then, turn the handwheel away from you (clockwise) until the mark on the handwheel is at the top. The carriage cannot move if the mark on the handwheel is not at the top.

①Mark
5 Touch OK.
→ The position of the background image is calibrated.
■ Aligning the Embroidering Position
1 Calibrate the position of the background image. (page 61)
2 Touch 8.

Memo
- The orientation of the pattern will change depending on the orientation of the embroidery positioning sticker.
3 When the following message appears, touch . OK

4 Select the position to be set as the reference point.

natural_image
Decorative floral pattern within a square frame, displayed in an app interface (no text or symbols on the pattern itself)5 Touch OK.

natural_image
Decorative floral pattern within a square frame, displayed on a smartphone screen (no text or symbols)→ When the following message appears, touch OK
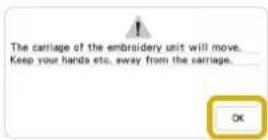
6 Remove the embroidery positioning sticker, and then start embroidering.
* To remove the embroidery positioning sticker more easily, touch that the embroidery frame moves slightly forward and away from under the needle. After the embroidery positioning sticker is removed, touch . OK

Checking the Pattern Position
The carriage moves and shows the pattern position. Watch the embroidery frame closely to make sure the pattern will be embroidered in the right place.
1 Touch □.

2 From , touch the key for the position that you want to check.

①Selected position
→ The carriage will move to the selected position on the pattern.
Memo
- To see the entire embroidering area, touch . The carriage moves and shows the embroidery area.

natural_image
Diagram of a mechanical assembly with directional arrows indicating motion or force (no text or symbols)CAUTION
- Do not lower the needle when the embroidery frame is moving. If the needle is down, it could break and result in injury.
3 Touch OK.
THE 2-POINT EMBROIDERY POSITIONING FUNCTION
By using the 2-point embroidery positioning function with a LED pointer, the embroidering position can easily be aligned. This is useful when embroidering in an area where it is necessary to align the pattern, as shown below.

1 Use a chalk pencil to mark the desired embroidering position.
The line drawn for the reference direction should be longer.

natural_image
Abstract geometric line drawing with irregular shapes and a highlighted polygon (no text or symbols)①Chalk pencil mark

Memo
- If the desired position of the pattern can be clearly established, such as when embroidering along a pocket, it is not necessary to mark the position with a chalk pencil.
2 Hoop the fabric in the embroidery frame.

natural_image
Abstract geometric line drawing with a pentagon inside a rounded rectangle (no text or symbols)
Note
- When hooping the fabric in the embroidery frame, make sure that the embroidery pattern will fit within the embroidering area of the frame being used.

①Embroidering area
②Embroidery pattern size
③Chalk pencil mark
3 Select the pattern.
4 Touch 📋 monitor play the embroidery screen.

Touch and then touch .

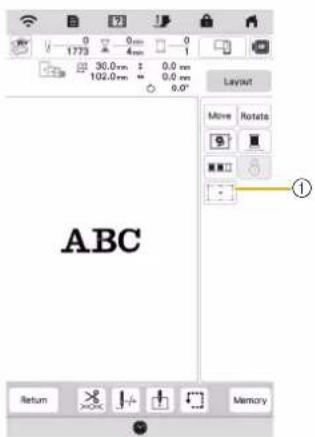
①Switch on/off the 2-point embroidery positioning function with a LED pointer.

Memo
- The LED pointer lights up to indicate the needle drop point.
- When the LED pointer is turned on, the embroidery foot height is automatically adjusted according to the fabric thickness.
- If the surface of the fabric is too uneven or rough, check and adjust the alignment of the light of the LED pointer and the needle drop point before starting to embroider.
6 If a message appears, indicating that the move and rotate settings will return to the original ones, touch OK.
7 From the reference points shown in the screen, select the point to be used for aligning the pattern.
For this example, select the point in the lower-left corner of the pattern.

8 Touch Next .
9 Select the direction (from the reference point) to be used as a reference for aligning the pattern.
For this example, select the arrow pointing to the right as the reference direction.
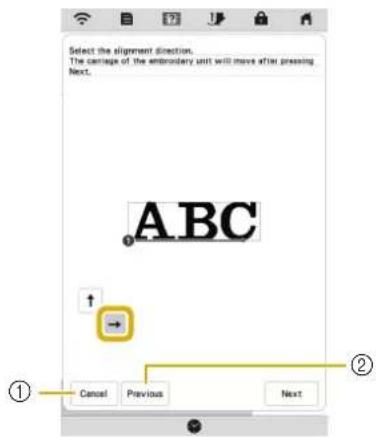
①Cancel the pattern alignment settings.
②Return to the previous screen.
10 Touch Next .
11 Touch the positioning keys to move the embroidery frame until the position of the LED pointer and the center of the first mark are aligned.
To change the speed that the frame moves, use the frame movement speed keys. If it is difficult to make a precision alignment, touch a frame movement speed key for a slower speed.

①Positioning keys
②Frame movement speed keys
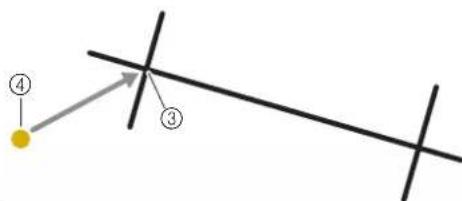
③Center of the first mark
④Light of the LED pointer
Note
- If is displayed to the left of the positioning keys, the LED pointer has shifted from its initial position. Touch to adjust the position.

12 Touch Next .
13 Touch the positioning keys to move the embroidery frame until the position of the LED pointer and the center of the second mark are aligned.
To change the speed that the frame moves, use the frame movement speed keys. If it is difficult to make a precision alignment, touch a frame movement speed key for a slower speed.

①Positioning keys
②Frame movement speed keys

③Center of the second mark
④Light of the LED pointer

Note
- Set the position of the LED pointer to a position that is not too close to the first reference point. If it is too close, a message will appear, prompting you to reposition it.
- In order to increase the accuracy of the pattern alignment, align the position of the LED pointer above the second mark (③) and as far away from the center mark as possible.

Touch Set.
→ The pattern is repositioned.
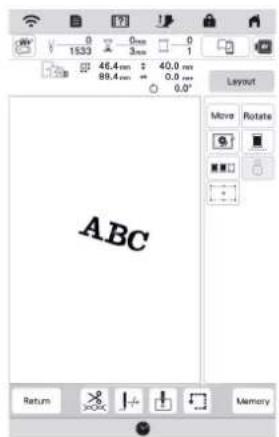

Press the "Start/Stop" button to start embroidering.

Another example
By specifying an alignment point and direction, embroidery patterns can be positioned and aligned for various purposes.
In this example, a pattern is aligned at the left center of the towel.
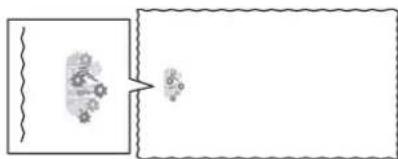

Use a chalk pencil to mark the desired embroidering position.
The line drawn for the reference direction should be longer.
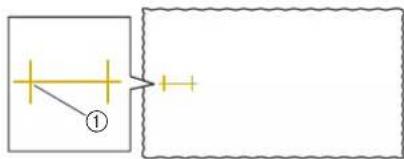
①Chalk pencil mark

Hoop the fabric in the embroidery frame.

natural_image
Simple diagram with a rectangular frame and a central cross, no text or symbols present.
Select the pattern.

Touch Embroidery play the embroidery screen.

Touch and then touch .


①Switch on/off the 2-point embroidery positioning function with a LED pointer.

If a message appears, indicating that the move and rotate settings will return to the original ones, touch OK.

From the reference points shown in the screen, select the point to be used for aligning the pattern.
For this example, select the point in the lower-center of the pattern.

8 Touch Next .
9 Select the direction (from the reference point) to be used as a reference for aligning the pattern.
For this example, select the arrow pointing upward as the reference direction.

①Cancel the pattern alignment settings.
②Return to the previous screen.
10 Touch Next.
11 Touch the positioning keys to move the embroidery frame until the position of the LED pointer and the center of the first mark are aligned.

①Positioning keys
②Frame movement speed keys

③Center of the first mark
④Light of the LED pointer
12 Touch Next
13 Touch the positioning keys to move the embroidery frame until the position of the LED pointer and the center of the second mark are aligned.

①Positioning keys
②Frame movement speed keys

③Center of the second mark
④Light of the LED pointer
14 Touch Set. → The pattern is repositioned.
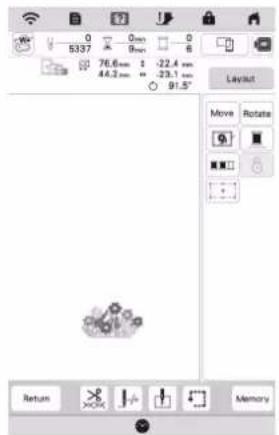
15 Press the "Start/Stop" button to start embroidering.
EMBROIDERING A PATTERN
Embroidering Attractive Finishes
Many factors are involved in achieving a beautiful embroidery result. Using the appropriate stabilizer (page 55) and hooping the fabric in the frame (page 56) are two important factors mentioned earlier. Another important point is the appropriateness of the needle and thread being used. See the explanation of threads below.
| Thread Upper thread Use | embroidery thread intended for use with this machine. |
| Bobbin thread | Use embroidery bobbin thread intended for use with this machine. |

Memo
- If you use threads other than those listed above, the embroidery may not embroider out correctly.
Bobbin case (recommended for embroidering with included 90 weight bobbin thread)
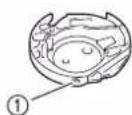
①Bobbin case
The included bobbin case is set for 90 weight bobbin thread. When you use different weights of bobbin thread, the tension screw on this bobbin case can be adjusted if necessary. For details, refer to "Adjusting the Bobbin Case" on page 78.
CAUTION
- When embroidering on large items (especially jackets or quilts), do not let the fabric hang off of the table. Otherwise, the embroidery unit cannot move freely and the embroidery frame may strike the needle, causing the needle to break and possibly causing injury.
■ Embroidery Needle Plate Cover
Under some conditions, based on the type of fabric, stabilizer, or thread being used, there may be some looping in the upper thread. In this case, attach the included embroidery needle plate cover to the needle plate. Attach the cover by inserting the two projections on the underside of the cover into the notches on the needle plate as shown below.
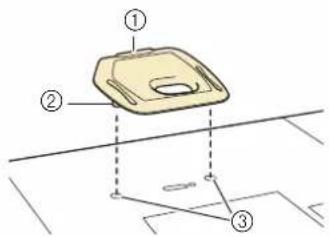
①Groove
②Projection
③Notch
To remove the embroidery needle plate cover, place your fingernail in the groove and lift the plate out.
CAUTION
- Push the embroidery needle plate cover as far as possible to attach it. If the embroidery needle plate cover is not securely attached, it may cause the needle to break and cause injury.
Embroidering Patterns
1 Prepare embroidery threads of the colors shown on the screen.
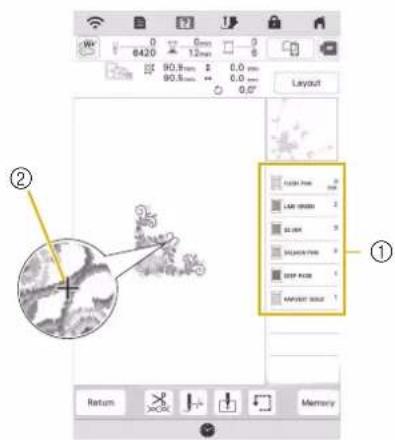
①Embroidery color order
②Cursor

Memo
- The [+) cursor moves over the pattern, showing which part of the pattern is being embroidered.
2 Using the automatic needle threader, thread the machine for the first color. (page 28)

natural_image
Technical line drawing of a mechanical assembly with no visible text or symbols3 Lower the presser foot, then press the "Start/Stop" button to start embroidering.
→ When the first color is completely embroidered, the machine will automatically trim the threads and stop. The embroidery foot will then automatically be raised. On the embroidery color order display, the next color will move to the top.

Memo
- If you want to get more attractive finishes, try the procedures below;
- After 5-6 stitches, press the "Start/Stop" button again to stop the machine.
- Trim the excess thread at the beginning of the pattern. If the excess thread tail is under the embroidery foot, raise the embroidery foot, then trim the excess thread.
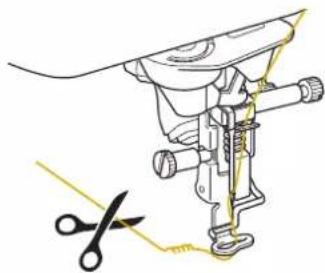
natural_image
Illustration of a sewing machine needle with scissors cutting the base (no text or symbols)- If there is thread left over from the beginning of embroidering, it may be embroidered over as you continue embroidering the pattern, making it very difficult to deal with the thread after the pattern is finished. Trim the threads at the beginning of each thread change.
4 Remove the upper thread for the first color from the machine. Thread the machine with the next color.
5 Repeat the same steps for embroidering the remaining colors.

①Current stitch numbers/Total stitch numbers
②Current time/Total time
③Part of pattern to be embroidered next
④ Embroidered colors/Total colors
→ When the last color is embroidered, [Finished embroidering] will appear on the display. Touch
ok, and the display will return to the original screen.

Memo
- The thread trimming function is originally set to trim excess thread jumps (threads linking parts of the pattern, etc.). Depending on the type of thread and fabric that are used, an end of upper thread may remain on the surface of the fabric at the beginning of the stitching. After embroidering is finished, cut off this excess thread. If the setting has been turned off, trim the excess thread jumps using scissors after the pattern is finished. Refer to page 80 for information on the thread trimming function.
IMPORTANT
- Do not press Thread cutter button) after the threads have been cut. Doing so could tangle the thread or damage the machine.
- Do not press (Thread cutter button) when there is no fabric set in the machine or during machine operation. The thread may tangle, possibly resulting in damage.
Using Appliqués
When the color embroidering order display shows
[APPLIQUE MATERIAL],
[ (APPLIQUE POSITION)] or
[(APPLIQUE)], follow the procedure below.

Required materials
• Fabric for the appliqué piece
• Fabric for the appliqué base
- Stabilizer material
• Fabric glue or temporary spray adhesive
- Embroidery thread
Note
- Refer to "Embroidery Design Guide" to review the recommended method for built-in appliqué patterns. Please visit www.babylock.com. Some appliqué patterns differ from the procedure described in this manual.
- The correct names and numbers of the thread colors to be used will not appear. Use the thread colors depending on those in the appliqué pattern.
■ 1. Creating an Appliqué Piece
1 Attach stabilizer material to the wrong side of the fabric for the appliqué piece.
2 Sew the cutting line of the appliqué piece. Remove the fabric for the appliqué piece from the embroidery frame, and then carefully cut along the sewn cutting line.

①Outline of appliqué
②Fabric for appliqué piece
Note
- If the appliqué piece is cut out along the inside of the cutting line, it may not be correctly attached to the fabric. Therefore, carefully cut out the appliqué piece along the cutting line.
• After cutting out the appliqué piece, carefully remove the thread.
■ 2. Sewing the Appliqué Position on the Base Fabric
1 Attach stabilizer material to the wrong side of the fabric for the appliqué base.
2 Sew the appliqué position.


①Position of appliqué
②Base fabric
3 Remove the embroidery frame from the embroidery unit.
Note
- Do not remove the base fabric from the embroidery frame until all embroidering is finished.
■ 3. Affixing the Appliqué Piece to the Base Fabric
Lightly apply fabric glue or temporary spray adhesive to the back of the appliqué piece, and then attach it to the base fabric within the outline of the position sewn in step 2 of "2. Sewing the Appliqué Position on the Base Fabric".

natural_image
Simple illustration of a yellow rectangular object with a curved arrow pointing to it, no text or symbols present.Note
- If the appliqué piece cannot be attached to the base fabric with fabric glue or temporary spray adhesive, securely baste it in place with basting stitches.
- If thin fabric is used for the appliqué piece, reinforce and secure it in place with an iron-on adhesive sheet. An iron can be used to attach the appliqué piece to the appliqué location.

After the appliqué piece is attached, attach the embroidery frame to the machine.
Thread the machine with the embroidery thread, lower the presser foot lever, and then press the "Start/Stop" button to embroider the appliqué.


■ 4. Embroidering the Remainder of the Pattern

Change the embroidery thread according to the embroidery color order display, and then finish embroidering the remainder of the pattern.


Memo
- Since glue may become attached to the presser foot, needle or needle plate, clean off any glue after finishing embroidering the appliqué pattern.
- For best results, trim all excess threads each time the thread color is changed.
ADJUSTMENTS DURING THE EMBROIDERY PROCESS
If the Thread Breaks or the Bobbin Runs out of Thread During Embroidering

Redo the upper threading or replace the bobbin.
If the upper thread breaks, stop the machine, trim the bobbin thread, and then rethread the machine.

If the bobbin thread is almost empty or broken, touch of the displayed message, remove the embroidery frame, and then replace the bobbin.


Note
- If [Upper and Bobbin Thread Sensor] in the settings screen of the machine is set to [OFF], the message shown above does not appear.

Touch J+ .

Touch J-1, J-10, J-100, J-or to move the needle back the correct number of stitches before the area where the thread broke, and then touch. OK
- Touch to restart from the beginning.


Memo
- If you cannot move back to the spot where the thread broke, touch 📋 to select the color and move to the beginning position of that color, then use ⌘+10, ⌘+100, to move ahead to slightly before where the thread broke.

Lower the presser foot and press the "Start/Stop" button to continue embroidering.
Resuming Embroidery after Turning off the Power
The current color and stitch number are saved when embroidery is stopped. The next time the machine is turned on, you have the option to continue or delete the pattern.

Chapter 3 ADVANCED EMBROIDERY
VARIOUS EMBROIDERING FUNCTIONS
Basting Embroidery
Before embroidering, basting stitches can be sewn along the outline of the pattern. This is useful for embroidering fabric that cannot have stabilizer material affixed with an iron or adhesive. Basting stitches can be used to attach material that cannot be hooped to stabilizer, making it possible to be embroidered.

Note
- It is recommended to finish combining and editing the pattern before selecting the basting setting. If the pattern is edited after selecting the basting setting, the basting and pattern may become misaligned, and the basting under the pattern may be difficult to remove after embroidering is complete.

Touch


Use and to specify the distance from the pattern to the basting stitching.


Memo
- The higher the setting, the farther the basting is from the pattern.
- The setting remains selected even if the machine is turned off.

Touch to return to the embroidering screen.

Touch, and then touch to select the basting setting.


Note
- When is touched, the pattern is moved to the center. After selecting the basting setting, move the pattern to the desired position.
→ Basting is added to the beginning of the embroidering order.

Press the "Start/Stop" button to start embroidering.

When embroidering is finished, remove the basting stitching.
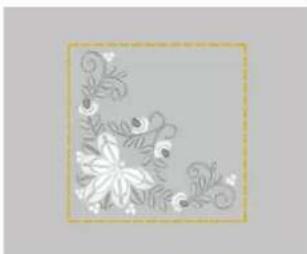
natural_image
Decorative floral border with white flowers and swirls on a light gray background (no text or symbols)Creating an Appliqué Piece
Creating an appliqué piece is convenient for fabrics that cannot be embroidered or when you wish to attach an appliqué to a garment.
■ Creating an Appliqué Piece
The following pattern will be used to create an appliqué piece.

Note
- Felt or denim fabrics are recommended to make the appliqué piece. Depending on the pattern and fabric used, lighter weight fabrics may cause the stitching to appear smaller.
- For best results, be sure to use stabilizer material for embroidering.
- When making appliqué pieces, do not use the optional border embroidery frame. Depending on the pattern density and fabric used, shrinkage of the stitching may occur.
1 Select the pattern, and edit it if necessary.

Note
- Finish combining and editing the pattern before selecting the appliqué setting. If the pattern is edited after selecting the appliqué setting, the appliqué stitching and pattern may become misaligned.
- Since an outline is added, the pattern for an appliqué piece (when the appliqué setting is selected) will be larger than the original pattern. First, adjust the size and position of the pattern as shown below.

①Embroidering area
②About 1cm (approx. 1/2 inch)
③Pattern size
2 Touch and then, touch.

3 Specify the distance between the pattern and the appliqué outline, and then touch . OK
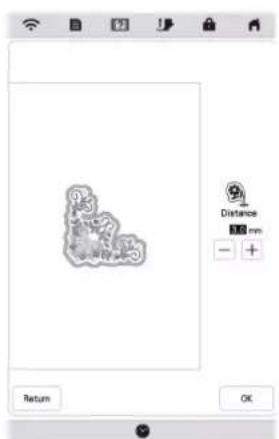
→ The pattern and appliqué outline are grouped.

Touch

→ The steps for creating the appliqué piece are added to the embroidering order.

Memo
- Three steps are added to the embroidering order: appliqué cutting line, position of pattern placement on the stabilizer material, and appliqué stitching.

①Cutting line for appliqué
②Position of pattern placement on stabilizer material
③Appliqué stitching
- When setting the [Thread color] to [#123] (thread number) in the settings screen, the following screen is displayed.

Note
- An appliqué piece cannot be created if the pattern is too large or too complicated or a combined pattern is separated. Even if the selected pattern fits within the embroidering area, the entire appliqué pattern may exceed the embroidering area when the outline is added. If an error message appears, select a different pattern or edit it.

Fuse or stick a piece of stabilizer to the back of the felt or denim fabric to be used as the appliqué piece.

Hoop the fabric for the appliqué piece in the embroidery frame, attach the embroidery frame to the machine, and then start embroidering.

After the pattern is embroidered, thread the machine with the thread for the cutting line, and then sew the cutting line (APPLIQUE MATERIAL).
①Cutting line for appliqué


Memo
- We recommend using thread for the cutting line that is closest to the color of the fabric.

Remove the fabric for the appliqué piece from the embroidery frame, and then carefully cut along the stitching. After cutting, carefully remove all of the cutting line thread.
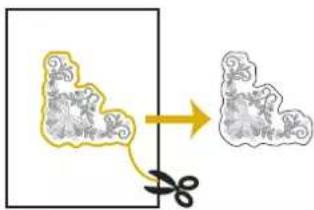

Note
- Depending on the pattern density and fabric used, there may be shrinking of the pattern, or the appliqué may be misaligned with the placement line. We recommend cutting slightly outside of the cutting line.
- When using patterns that are vertically and horizontally symmetrical, use a chalk pencil to indicate the pattern orientation before cutting it out.
- Carefully cut out the pattern on the outline you just sewed. Do not cut inside the cutting line, otherwise the appliqué fabric will not be caught by the appliqué stitch.
9 Use two layers of adhesive water soluble stabilizer material with their sticky sides together, and then hoop them in the embroidery frame.
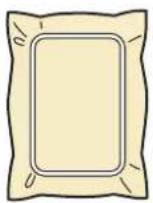
Note
- If water soluble stabilizer is used, it is not necessary to remove the stabilizer material after sewing the appliqué outline. To reduce shrinkage of the pattern, we recommend using water soluble stabilizer. - Put together two layers of water soluble stabilizer, otherwise the stabilizer material may tear during embroidering.
10 Thread the machine with the thread for the outline, and then sew the placement line for the appliqué position (APPLIQUE POSITION).
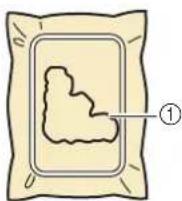
①Pattern placement line
11 Lightly apply glue or spray adhesive, and paste the appliqué piece so that it aligns with the placement line.

natural_image
Illustration of a bag with a cloud inside, showing a small irregular shape on the left (no text or symbols)Note
- Before pasting the appliqué piece down, make sure the appliqué piece is positioned correctly within the placement line.
12 With the machine threaded using the thread for the outline from step 10, embroider the outline (APPLIQUE).

①Outline of appliqué piece
Memo
- The outline is sewn using satin stitching. - Since glue may become attached to the presser foot, needle or needle plate, clean off any glue after finishing embroidering the appliqué pattern.
13 After embroidering is finished, remove the stabilizer material from the embroidery frame.
14 Use scissors to cut the excess water soluble stabilizer from outside the appliqué outline.
15 Soak the appliqué piece in water to dissolve the water soluble stabilizer.

16 Dry the appliqué piece, and then iron it if necessary.
Note
- Do not apply a strong force when ironing, otherwise the stitching may be damaged.
MAKING EMBROIDERY ADJUSTMENTS
Adjusting Thread Tension
When embroidering, the thread tension should be set so that the upper thread can slightly be seen on the wrong side of the fabric.
The following screen appears when you touch


Memo
- If the thread tension is changed from the default setting, the new setting will remain after turning the machine off and on. This new setting will apply to any selected design.
■ Correct Thread Tension
The pattern can be seen from the wrong side of the fabric. If the thread tension is not set correctly, the pattern will not finish well. The fabric may pucker or the thread may break.

①

②
①Right side
②Wrong side
Follow the operations described below to adjust thread tension according to the situation.

Note
- If the thread tension setting is made extremely loose, the machine may stop during embroidering. This is not the sign of a malfunction. Increase the thread tension slightly, and start embroidering again.

Memo
- If the thread tension is changed from the default setting, the new setting will remain after turning the machine off and on. This new setting will apply to any selected design.
■ Upper Thread Is Too Tight
The tension of the upper thread is too tight, resulting in the bobbin thread being visible from the right side of the fabric.

Note
- If the bobbin thread was incorrectly threaded, the upper thread may be too tight. In this case, refer to "Setting the Bobbin" on page 27 and rethread the bobbin thread.

①

②
①Right side
②Wrong side
Touch in to tension the upper thread tension. (The tension number will decrease.)

■ Upper Thread Is Too Loose
The tension of the upper thread is too loose, resulting in a loose upper thread, loose thread locks, or loops appearing on the right side of the fabric.
Note
- If the upper thread was incorrectly threaded, the upper thread may be too loose. In this case, refer to "Upper Threading" on page 28 and rethread the upper thread.

①

②
①Right side
②Wrong side
Touch in to tension the upper thread tension. (The tension number will increase.)

■ Adjusting Overall Upper Thread Tension
When embroidering, if the overall tension of the upper thread is too tight or too loose, adjust it from the setting screen. The selected setting will be applied to all patterns. If an individual embroidery pattern needs additional fine tuning, refer to "Adjusting Thread Tension" on page 77.
1 Touch
→ The settings screen appears.
2 Touch
→ The embroidery settings screen appears.
3 Display [Embroidery Tension] in the embroidery settings screen.
4 Use +to adjust the upper thread tension.
* : Tighten the upper thread tension.
* : Loosen the upper thread tension.
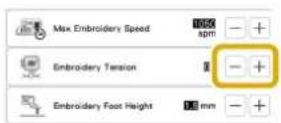
5 Touch OK.
Adjusting the Bobbin Case
The bobbin case can be easily adjusted when bobbin tension changes are required to accommodate different bobbin threads. Refer to "Embroidering Attractive Finishes" on page 67.
To adjust the bobbin tension for embroidery function, using the bobbin case, turn the slotted screw (-) with a (small) screwdriver.

①Do not turn a phillips screw (+). ②Adjust with a screwdriver (small).
■ Correct Tension
Upper thread slightly appears on the wrong side of fabric.

①

②
①Right side
②Wrong side
■ Bobbin Thread Is Too Loose
Bobbin thread appears slightly on the right side of fabric.

①

②
①Right side
②Wrong side
If this occurs, turn the slotted screw (-) clockwise, being careful not to over-tighten the screw, approximately 30-45 degrees to increase bobbin tension.
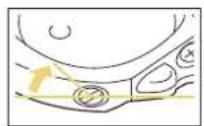
■ Bobbin Thread Is Too Tight
Upper thread on the right side of fabric seems to be lifting/looping and bobbin thread is not seen on the wrong side of fabric.

①

②
①Right side
②Wrong side
If this occurs, turn the slotted screw (-) counterclockwise, being careful not to over-loosen the screw, approximately 30-45 degrees to decrease bobbin tension.

IMPORTANT
- DO NOT adjust the position of the phillips (+) screw on the bobbin case as this may result in damage to the bobbin case, rendering it unusable.
- If the slotted screw (-) is difficult to turn, do not use force. Turning the screw too much or providing force in either (rotational) direction may cause damage to the bobbin case. Should damage occur, the bobbin case may not maintain proper tension.

Note
- When adjusting the bobbin case, be sure to remove the bobbin from the bobbin case.
Using the Automatic Thread Cutting Function (End Color Trim)
The automatic thread cutting function will cut the thread at the end of embroidering each color. This function is initially turned ON. To turn this function OFF, touch and then .
* This setting returns to its default when the machine is turned off.

Touch


Touch to turn off the automatic thread cutting function.

→ The key will display as . When one color thread is embroidered, the machine will stop without cutting the thread.
Using the Thread Trimming Function (Jump Stitch Trim)
The thread trimming function will automatically trim any excess thread jumps within the color. This function is initially turned ON. To turn this function OFF, touch key and then
* Your customized setting remains after turning the machine off and on.
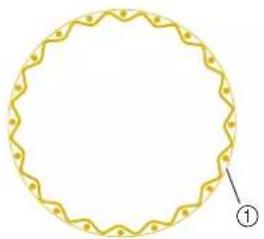
natural_image
Circular decorative border with wavy lines and a numbered label (①) at the bottom right corner.①Jump stitch

1 Touch
2 Touch to turn off the thread trimming function.

→ The key will display as the machine will not trim the thread before moving to the next stitching.
■ Selecting the Length Of Jump Stitch Not to Trim
When the thread trimming function is turned on, you can select the length of the jump stitch. Select a setting from 5 mm to 50 mm in 5 mm increments.
* Your customized setting remains after turning the machine off and on.
Touch or to select the length of jump stitch.
For example: Touch to select 25 mm (approx. 1 inch) and the machine will not trim a jump stitch of 25 mm or less before moving to the next stitching.

Note
- If design has many trims it is recommended to select a higher jump stitch trim setting in order to reduce the amount of excess tails on backside of fabric.
- The higher number of the jump stitch length selected, the fewer number of times the machine will trim. In this case, more jump stitches remain on the surface of the fabric.
Adjusting the Embroidery Speed
1 Touch
→ The settings screen appears.
2 Touch
→ The embroidery settings screen appears.
3 Display [Max Embroidery Speed] in the embroidery settings screen.
4 Use +to change the maximum embroidery speed.
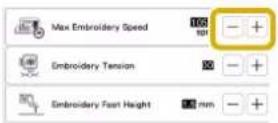
Memo
- SPM is the number of stitches embroidered in one minute.
- Decrease the embroidery speed when embroidering on thin, thick, or heavy fabrics and when using a specialty thread like a metallic thread.
- The setting specified before the main power is set to OFF remains selected the next time that the machine is turned ON.
5 Touch OK.
Changing the Thread Color Display
You can display the name of the thread colors or embroidery thread number.

Memo
- Colors on the screen may vary slightly from actual spool colors.
- [Original], imported data remains the brand thread created with the software, is set as a default.

Touch

→ The settings screen appears.

Touch

→ The embroidery settings screen appears.

Display [Thread Color] in the embroidery settings screen.

Use ▶ to display the name of the thread colors or the embroidery thread number.
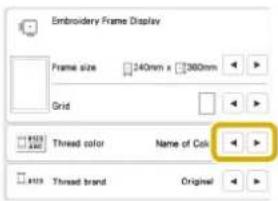

Use to select a thread brand.


Touch

Aligning the Pattern and the Needle
Example: Aligning the lower left side of a pattern and the needle


Mark the embroidery start position on the fabric, as shown.

natural_image
Simple geometric lines forming an L-shape on a plain background (no text or symbols)
Touch


Touch

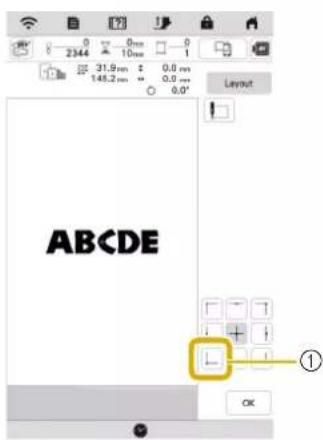
①Start position
→ The needle is positioned in the lower-left corner of the pattern. The carriage moves so that the needle is positioned correctly.

Touch

K

Touch
and then, touch .
Move

Use to align the needle and the mark on the
L V J
fabric, and start embroidering the pattern.

natural_image
Simple geometric diagram showing a vertical line intersecting a horizontal line, with no text or symbols present.Embroidering Linked Characters
Follow the procedure described below to embroider linked characters in a single row when the entire pattern extends beyond the embroidery frame.
Example: Linking "FG" to the characters "ABCDE"
ABCDEFG
1 Select the character patterns for "ABCDE".
2 Touch

3 Touch □.
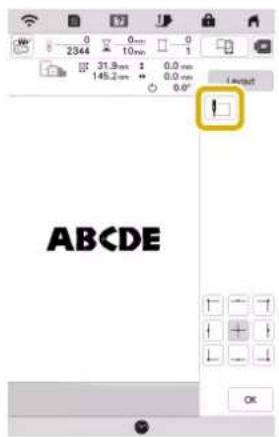
→ The needle is positioned in the lower-left corner of the pattern. The carriage moves so that the needle is positioned correctly. The machine is set to embroider until the first stitch of the next character pattern (F).
Note
- To cancel the starting point setting and return the starting point to the center of the pattern, touch


- Using can select a different starting point for embroidering. However, the starting point setting is canceled.
4 Touch OK.
5 Touch

6 Touch to turn off the thread cutting function and then touch . OK

7 Press the "Start/Stop" button.
8 After the characters are embroidered, cut the threads to a generous length, remove the embroidery frame, reposition the fabric in the hoop so that the remaining characters ("FG") can be embroidered, and then attach the embroidery frame.

①End of the embroidering
9 As in step 1, select the character patterns for "FG".
10 Touch
11 Touch L.
→ The needle is positioned in the lower-left corner of the pattern. The carriage moves so that the needle is positioned correctly.
12 Touch, then and use to align

the needle with the end of embroidering for the previous pattern.

13 Touch OK.
14 Press the "Start/Stop" button to start embroidering the remaining character patterns.

USING THE MEMORY FUNCTION
Saving Embroidery Patterns
Note
- Do not turn the main power to OFF while the [Saving...] screen is displayed. You will lose the pattern you are saving.
1 Touch when the pattern you want to save is in the embroidering screen.

Memo
- You can also save the pattern by touching the embroidery edit screen.
2 When saving the embroidery pattern in a USB media, insert the USB media into the USB port on the machine.

3 Touch the desired destination to start saving.

flowchart
graph LR
    A["①"] --> B["Printer"]
    B --> C["Wireless Device"]
    C --> D["Wi-Fi Icon"]
    D --> E["②"]
    E --> F["③"]
    G["Cancel"]
①Save to the machine's memory.
②Save to the USB media. The pattern is saved in a folder labeled [bPocket].
③Save to the wireless function pocket. For the detailed procedure, refer to the manual for Palette (version 11 or later).
Retrieving Embroidery Patterns
When retrieving the embroidery patterns from a USB flash drive, insert the USB flash drive into the USB port on the machine.
To retrieve embroidery patterns via wireless network, use Palette (version 11 or later) or Design Database Transfer to transfer the patterns in advance. For details on transferring embroidery patterns, refer to the manual for Palette or Design Database Transfer.

①Retrieve from the machine's memory.
②Retrieve from a USB media.
③Retrieve the pattern via the wireless network connection. For detailed procedures, refer to Palette manual (Version 11 or later).
Memo
- If the embroidery pattern to be retrieved is in a folder of the USB media, touch the key for that folder. Touch to return to the previous screen.
- You can save all or multiple data to the machine by touching 📄.
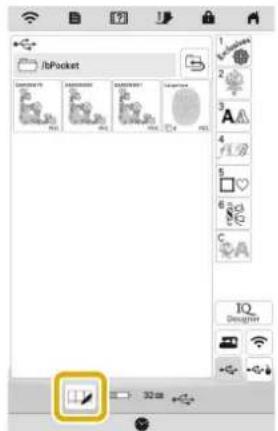
- To select multiple patterns, touch their thumbnails.
• : Select all patterns.
• : Deselect all patterns.
• : Save the selected patterns to the machine.
* To cancel the selection, touch again.
2 Touch Set .
* Touch to delete the embroidery pattern.
EMBROIDERY APPLICATIONS
Using a Frame Pattern To Make an Appliqué

Note
- If you change the size or position of the patterns when making an appliqué, make a note of the size and the location.
Method 1
You can use framed patterns of the same size and shape to create an appliqué. Embroider one pattern with a straight stitch and one pattern with a satin stitch.
1 Select a straight stitch frame pattern. Embroider the pattern onto the fabric for the appliqué piece, then cut neatly around the outside of the shape.

2 Embroider the same pattern from step 1 onto the base fabric.
3 Apply two-sided stabilizer material to the back of the fabric for the appliqué piece created in step 1. Attach the appliqué to the base fabric matching the shapes.

4 Select the satin stitch frame pattern of the same shape as the appliqué. Embroider over the fabric for the appliqué piece and base fabric from step 3 to create the appliqué.

Method 2
1 Select a straight stitch frame pattern, and embroider the pattern onto the base fabric.

2 Place the fabric for the appliqué piece over the pattern embroidered in step 1 and embroider the same pattern on the fabric for the appliqué piece.
* Be sure that the fabric for the appliqué piece completely covers the stitched line.


Remove the embroidery frame from the embroidery unit, and cut around the outside of the stitches of the fabric for the appliqué piece. And then, reattach the embroidery frame to the embroidery unit.


Note
- Do not remove the fabric from the embroidery frame to cut it. Also, do not pull or push on the fabric. Otherwise, the fabric may loosen in the frame.

Select the satin stitch frame pattern of the same shape as the appliqué and embroider the satin stitch pattern to create an appliqué.
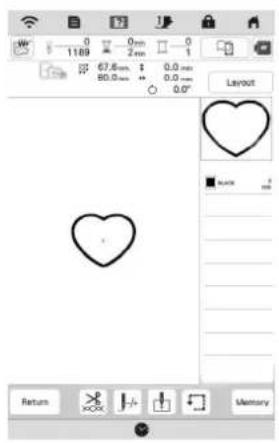

Embroidering Couching Patterns
Couching patterns can be embroidered using yarn.
CAUTION
- When using yarn, we recommend selecting yarn of weight 4 (MEDIUM Medium yarn is often referred to as worsted weight, 20 knitted stitches per 10cm , or 9-11 wraps per inch. The diameter of the yarn is approximately 2 - 3mm (approx. 1/12-1/8 inch). If the yarn is extremely thin or thick, has an unusual shape (flat or furry), or more than 2 yarns, the best finishing results may not be achieved, or injuries or damage may result.

Note
- If the spool stand in the procedure is not included with your machine, purchase the optional spool stand from your authorized Baby Lock retailer or our web site.
- Before embroidering your project, do trial embroidery on a scrap piece of fabric that is the same as that used in your project.

Preparing for Embroidery Couching

Turn off the machine.
Attach the embroidery unit.

Install a bobbin wound with embroidery bobbin thread.

Turn on the machine.

Touch

then touch .


5 Select the desired pattern from the desired category.
And then touch Set

①Couching patterns
②Fill couching embroidery font
6 Touch to lock all keys and buttons, and then raise the presser foot lever.
7 Attach embroidery couching foot "Y".

natural_image
Mechanical assembly diagram showing a motor with a yellow circular component inserted, no text or symbols presentCAUTION
- When using the embroidery couching foot "Y", make sure the machine is in embroidery mode. Otherwise, the needle will strike the embroidery couching foot, causing the needle to break and possibly causing injury.
8 Rotate the handwheel and check that the needle is in the left half of the hole in embroidery couching foot "Y".
If the needle is not in the left half, use the disc-shaped screwdriver to turn the screw of embroidery couching foot "Y" to adjust the position of the embroidery foot. Turn the screw toward you to move the embroidery foot to the right. Turn the screw toward the back to move the embroidery foot to the left.
After making adjustments, rotate the handwheel and check that the needle does not touch the presser foot.
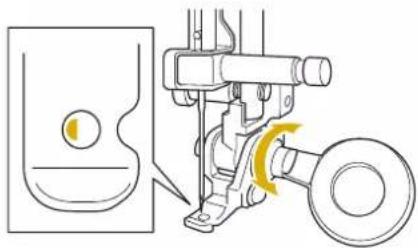
natural_image
Mechanical assembly diagram showing a piston and wheel assembly with a yellow motion arrow (no text or symbols)9 Attach the spool stand (sold separately) to the machine.
At this time, do not raise the telescopic thread guide shaft.

natural_image
Technical line drawing of a mechanical assembly with no visible text or symbolsMemo
- The spool stand (BLMA-STS) is an optional accessory, which is available from your Baby Lock retailer.
10 Insert the yarn guide for embroidery couching into the slot on the top left of the machine.
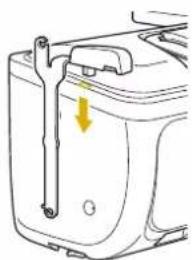
natural_image
Diagram of a mechanical component with a yellow arrow indicating direction (no text or symbols)11 Pass the yarn through the telescopic thread guide and the yarn guide (①) to (②).

Note
- Pull off an appropriate amount of yarn from the ball so that the yarn does not become taut.
• Make sure that the yarn does not become entangled as you work.
12 Pass the yarn through the guide on embroidery couching foot "Y".

natural_image
Technical line drawing of a mechanical assembly with no visible text or symbols13 Thread the yarn through embroidery couching foot "Y". Pass the yarn through the loop in the yarn threader, and then pass the threader from top to bottom through the hole in embroidery couching foot "Y". Pull the yarn to the front of the machine.
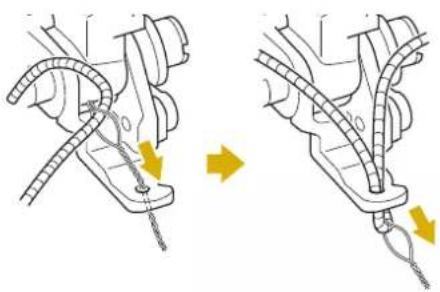
natural_image
Mechanical assembly diagram showing two steps of connecting a cable with arrows indicating motion (no text or symbols)Memo
- Place a sheet of paper under the presser foot to smoothly pass the yarn threader through the hole in embroidery couching foot "Y".
14 Touch to unlock all keys and buttons.
15 Thread the machine with the upper thread.
Note
- Do not use the spool stand for upper thread. Otherwise thread may tangle with yarn.
Memo
- For best results, use an upper thread that is the same color as the yarn.
16 Press (Presser foot lifter button) twice to raise the presser foot and then attach the embroidery frame to the embroidery unit.
■ Embroidering a Couching Pattern
1 Touch Embroidey.
2 Make sure that about 20 cm (approx. 8 inches) of yarn is pulled to the front of the machine.
3 While holding the yarn in your hand in front of you, press the "Start/Stop" button.

natural_image
Line drawing of a hand inserting a small component into a device (no text or symbols)CAUTION
- Pulling the yarn upwards may cause it to catch on the needle, causing it to break. Be careful not to allow the yarn to catch on the needle.
Note
- Before embroidering, make sure that there is enough yarn, upper thread and bobbin thread.
- Make sure that the yarn passes smoothly through the guides. Unravel as much yarn from the ball as necessary so that the yarn does not become taut.
- Use yarn that has no knots.
4 After embroidering several stitches, release the yarn.
→ When embroidering is finished, the machine will automatically trim the threads and stop.
Memo
- When using a high-density yarn, the upper thread tension may be disturbed. If this happens, it is possible to improve it by raising the [Embroidery Foot Height] by about 1 mm on the settings screen.
5 Cut the yarn, leaving about 20 cm (approx. 8 inches).
6 Punch a hole through the fabric with an awl or tapestry needle and then use the yarn threader to pull the excess yarn to the wrong side of the fabric.
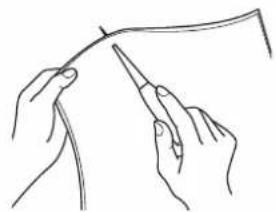
natural_image
Line drawing of two hands holding a thin wire or filament, no text or symbols present

natural_image
Line drawing of hands tying a knot with scissors (no text or symbols)7 Tie the end of the yarn so it cannot be pulled out, and then use scissors to cut off any excess yarn.
Creating Stippling, Echo Quilting, or Decorative Fill Patterns around a Design
Stippling, echo quilting, and decorative fill patterns can be created around the machine's built-in patterns or original embroidery data without using IQ Designer.

Memo
- If this simple stippling operation is used with batting sandwiched between two layers of fabric, the embroidery pattern and stippling may become misaligned. Stippling can be added in IQ Designer after the pattern is embroidered. For details, refer to "Decorative Stitching around a Pattern in Embroidery (a Quilting Function)" on page 106.

Select the pattern that stippling will be added around.
* To select multiple patterns, refer to "Selecting Multiple Patterns at the Same Time" on page 40.

Touch in the embroidery edit screen.

→ Stippling is automatically applied around the selected pattern.

After specifying the stitch settings for the stippling, touch , and then touch . OK

①The stippling is added within the area of the selected frame size. If the pattern is larger than the selected frame size, the area indicating the frame size will appear in gray, and stippling will not be added.
②Specify the distance from the outline of the pattern to the stippling.
③Specify the spacing for the stippling.
* Touch in the stippling settings screen to create an echo quilting pattern.
* Touch in the stippling settings screen to create a decorative fill pattern.
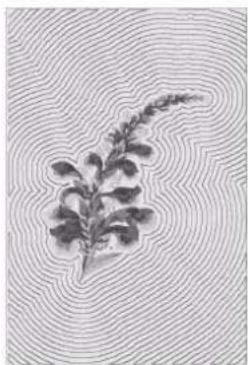
natural_image
Illustration of a plant with feathery leaves against a wavy background (no text or symbols)①

natural_image
Black-and-white floral illustration on a swirling background (no text or symbols)②
①Echo quilting pattern
②Decorative fill pattern
Embroidering Split Embroidery Patterns
Split embroidery patterns created with Palette Ver. 7 or later can be embroidered. With split embroidery patterns, embroidery patterns larger than the embroidery frame are divided into multiple sections, which combine to create a single pattern after each section is embroidered.
For details on creating split embroidery patterns and for more detailed embroidery instructions, refer to the Instruction guide included with Palette Ver. 7 or later.
1 Insert the USB media containing the created split embroidery pattern, and then select the split embroidery pattern to be embroidered. (page 84)

2 Select section to be embroidered.


4 If necessary, touch and edit the pattern.
Touch Embroidery play the embroidery screen.

5 Embroider the pattern section.
6 When embroidering is finished, the following screen appears. Touch . OK

→ A screen appears so that a section of the split embroidery pattern can be selected.
7 Repeat steps 2 through 6 to embroider the remaining sections of the pattern.
Chapter 4 IQ DESIGNER
ABOUT IQ DESIGNER PATTERN DRA
With IQ Designer, you can use the functions listed below:
- Hand-drawn functions - creating embroidery patterns by drawing on the LCD screen
- Loading functions - creating embroidery patterns by transferring data from the application or USB media.
You can also combine patterns that you have created with the machine's built-in patterns.
Start IQ Designer by touching in the home page screen or touching in the embroidery pattern selection screen.
NG SCREEN

①Pattern drawing area
②Pattern preview area
Memo
- The actual dimension of the pattern area is the size of the embroidery frame, which is shown in the pattern preview area. The pattern you drew may be bigger than you expected. Please resize the pattern after converting the design to the embroidery pattern.
- When the pattern is enlarged so that only a part of it appears in the pattern drawing area, the entire pattern is displayed in the pattern preview area. The red frame in the pattern preview area indicates the part of the pattern displayed in the pattern drawing area. Move the red frame in the pattern preview area with the touch pen (stylus) or your finger to display the corresponding area in the pattern drawing area.
■ Key Functions

| No. | Display | Explanation Page | |
| Name | |||
| 3 | Magnify the pattern. 94 | ||
| Magnify key | |||
| 4 | Load the fabric asthe background or the picture as the reference when creating the pattern. You can load the image file from the application or USB media. | 99 | |
| Load key | |||
| 5 | Load a line drawing, then edit andconvert it to embroidery data. You can load a line drawing from the application or USB media to create the embroidery design. | 100 | |
| Line design key | |||
| 6 | Load an image, then edit andconvert it to embroidery data. You can load an image from the application or USB media to create the embroidery design. | 102 | |
| Illustrationdesign key | |||
| 7 | Draw lines and set the color. You can select the line type, stitch type and color as you need. | 93 | |
| Line tool key | Touchtopick up the color,line type and stitch type from a line in the pattern within the pattern drawing area. The picked up color is shown as the currently selected line color beside the button and as the selected color in the Line Property screen. | ||
| 8 | Paint with brush and set the color.You can select the brush type, fill type and color as you need. Painted lines and regions will be converted to the pattern to be embroidered with fill stitch. Touchtopick up the color,brush type and fill type from a region in the pattern within the pattern drawing area. The picked up color is shown as the currently selected region color in the color bar and the Region Property screen. | 94 | |
| Brush tool key | |||
| No. | Display | Explanation Page | |
| Name | |||
| 9 | Erase lines and shapes that have been drawn. You can select the size/shape of the eraser. | 96 | |
| Erase key | |||
| 10 | Select the stamp shape for pattern drawing. | 95 | |
| Stamp key | |||
| 11 | Select a section for moving, copying, deleting, changing size and rotating lines and shapes that have been drawn. | 96 | |
| Select key | |||
| 12 | Cut out the selected section. — | ||
| Cut key | |||
| 13 | Change the size of the selected section. | 104 | |
| Size key | |||
| 14 | Rotate the selected section. — | ||
| Rotate key | |||
| 15 | Duplicate the selected section. The temporarily positioned section can immediately be rotated, enlarged, reduced or moved. | — | |
| Duplicate key | |||
| 16 | Paste in the selected section duplicated with the duplicate key or a selected section using the cut key. | — | |
| Paste key | |||
| 17 | Proceed to the stitch settings screen. | — | |
| Next key | |||
| 18 | Recall image data created with IQ Designer from the machine's memory or the USB media. | — | |
| Recall key | |||
| 19 | Store the pattern being created to the machine's memory or the USB media. | — | |
| Memory key | |||
| 20 | Undo the last operation that was performed and return to the previous state. Each touch of this key will undo one operation. | — | |
| Undo key | |||
| 21 | Clear all the lines and shapes and start from the beginning. The background image is also cleared. | — | |
| All Clear key | |||
| 22 | Exit from IQ Designer. All lines and shaped are erased when you touch this key. | — | |
| Cancel key |
Before Creating Designs
The pattern preview displays the design smaller than the actual size. You can view the actual pattern size by setting the |Embroidery Frame Display|.
With [Embroidery Frame Display] in the settings screen, the embroidery frame and grid can be specified separately.

Touch

→ The settings screen appears.

Touch

→ The embroidery settings screen appears.

Display [Embroidery Frame Display] in the embroidery settings screen.

Select the embroidery frame display.

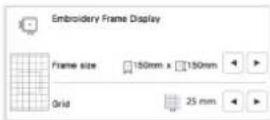
①Embroidery frame types
②Grid types
Drawing Lines

Touch
and draw lines.
natural_image
Pure graphical interface elements without any text, numbers, or symbols
Memo
- When is touched, all regions will be displayed in the background to clarify the drawing lines on the screen.
■ Setting the Line Types, Stitch Types and Colors
You can set or change the line types, stitch types and colors anytime. You can also specify the line types, stitch types and colors before drawing lines.

Touch to set the line types, stitch types and colors.

natural_image
Abstract graphic design with geometric shapes and a highlighted yellow icon (no text or symbols)→ The settings screen appears.

①Line types
②Stitch types
③ Line color selection: touch the color palette to activate the drawing pen color.
Line types
| Freehand line with the end open. | |
| Freehand line closing the end automatically. | |
| Straight line with one stroke | |
| Straight line changing directions to the point you select. If the end point is created near the start point, a closed object will be created. |

Stitch types
| Zigzag stitch | |
| Running stitch | |
| Triple stitch | |
| Candlewicking stitch | |
| Chain stitch | |
| E stitch | |
| V stitch | |
Select motif stitchesDisplays motif stitch selection screen, where Select can be touched to select a pattern. | |
| Line without stitch for creating a region.Created region will be defined by the gray line. |

Touch to return to the pattern drawing screen.
→ You can check the selected stitch type and color.

①Color bar
②Stitch type

Touch then touch on the line to change its color.
→ The connected line will be changed to the selected color.

Memo
- Touch to magnify the image when you cannot touch on the line correctly.
- Touch, and then select a color within the pattern drawing area to apply the same color to other lines or parts of the pattern.
①Use to select the line color.
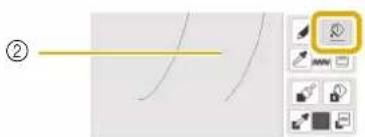
②Touch for changing the line color, and then select the pattern to be changed.
Drawing Regions

Touch and draw with brush.

■ Setting the Brush Types, Fill Patterns and Fill Colors

Touch to set the brush types, fill patterns and fill colors.

natural_image
Abstract curved line drawing with tool icons on the right side (no text or symbols)→ The setting screen appears.
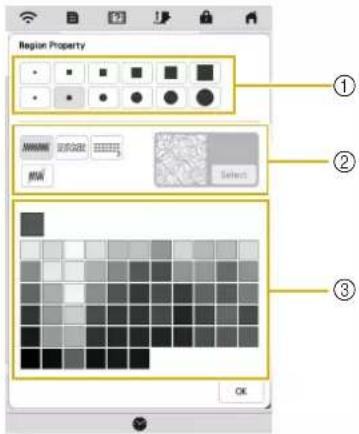
①Brush types
②Fill stitch types
③ Fill color selection: touch the color palette to activate the paint brush color.
Brush shapes/sizes

Fill stitch types
| Fill stitch pattern | |
| Stippling pattern |

Select when you don't want fill stitch.
2 Touch to return to the pattern drawing screen.
→ The color bar on the brush tool key is changed to the selected color. If a stippling pattern or decorative fill pattern has been selected, the stitch pattern is displayed.
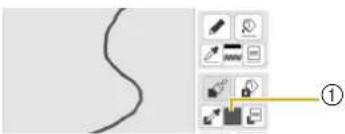
①Color bar
3 Touch and touch on the brush line to change color and fill stitch type. You can also set the fill color, stitch type and fill pattern of a closed area made of the lines and brush lines.
Memo
- Touch magnify the image when you cannot touch on the fill correctly.
- Touch, and then select a pattern color in the pattern drawing area to apply that fill color and stitch type to other patterns.

natural_image
Two dark droplet shapes with a yellow arrow pointing to one, alongside a grid of software icons (no text or symbols on the droplets themselves)①Use to select the fill color.

natural_image
Two dark droplet shapes with a yellow line and a small icon on the right (no text or symbols)②Touch for changing the fill color and stitch type, and then select the pattern to be changed.
Using the Stamp Key
1 Touch
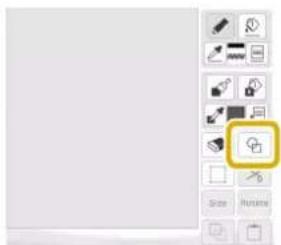
2 Select a stamp type and stamp shape.

①Stamp shapes
②Stamp types
③Saved outlines
④Frame embroidering areas
Stamp shapes
| Basic shapes | |
| Closed shapes | |
| Open shapes |
Stamp types (Only for Basic shapes)
| Outline | |
| Fill stitch | |
| Outline and fill stitch |
* Select the outline (), fifth stitch (), or outline and fill stitch () of a basic shape.
Saved outlines
| Embroidery pattern outlines can be registered as stamp shapes. When registering stamp shapes, select from the last 20 embroidery patterns used. If more than 20 shapes are registered, the oldest one is automatically erased. For details on registering a stamp shape, refer to “Decorative Stitching around a Pattern in Embroidery (a Quilting Function)” on page 106. |
Frame embroidering areas
| Select an embroidering area in order to arrange the pattern to fit an embroidery frame. |
* Touch to return to the pattern drawing screen.

Touch toset the selected stamp.
→ The pattern drawing screen appears.
* You can change size of, rotate or move the shape right after you create it by touching or. Rotate
Using the Erase Key

Touch


natural_image
Pure geometric shape with no text or symbols, showing a diamond outline and a highlighted icon (no readable text or symbols)
Select the shape of the eraser.

→ The pattern drawing screen appears.

Drag along the area or line that you want to erase
while the key appears as
Using the Select Key
You can select the part of the design to move and/or edit. Some keys are available only after you select the part.

Touch


natural_image
Simple line drawing of a heart inside an egg shape with tool palette in the corner (no text or symbols)
Select the area you want to edit.
* Drag to create the red box around your selected area to be edited.
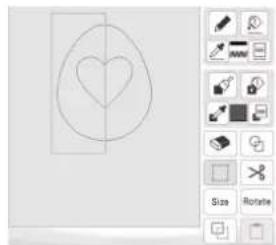
natural_image
Simple line drawing of a heart shape inside an oval, with no text or symbols present.
Edit the design with available keys. (Refer to "Key Functions" on page 92 for the details of each key function.)

Touch, and then specify the stitch setting.
STITCH SETTINGS SCREEN
After creating the pattern drawing data (.pm9) in the drawing screen (page 91), you will have an opportunity to:
- Check and change the stitch settings for each line and region.
- Save the pattern drawing data (.pm9).
- Convert the data to an embroidery pattern (.phx), proceed to the embroidery edit screen, and/or save the embroidery pattern.
Specifying Individual Stitch Settings
Select a pattern in the stitch settings screen to specify its line and region stitch settings. If multiple patterns are selected, the settings are applied to those patterns.
■ Line Settings

①Select the line to be changed.
②Shows the stitch type and color for the selected line.
③Shows the stitch settings for the selected line.
Line stitch settings
Select the type of stitching you want applied to your line art.
Zigzag stitch
| MWI [Zigzag width] | Specifies the width of the stitch. |
| WWW [Density] | Specifies the density of the stitch. |
Running stitch -/Triple stitch

* Both includes an under sewing.
| ...... [Run Pitch] | Specifies the length of the stitch. |
Candlewicking Stitch

| *** [Size] | Increases/reduces the size of the stitch. |
| *** [Spacing] | Specifies the spacing of the stitch. |
Chain stitch
| ◇◇◇ [Size] | Increases/reduces the size of the stitch. |
| •≡≡• [Thickness] | Sets repeated embroidering at the same part. |
E stitch
| [Stitch width] | Increases/reduces the size of the pattern. |
| [Spacing] | Specifies the spacing of the E stitch. |
| [Thickness] | Sets repeated embroidering at the same part. |
| [Flip] | Specifies if the decorative line shows up inside or outside. |
V stitch
| [Stitch width] | Increases/reduces the size of the pattern. |
| [Spacing] | Specifies the spacing of the V stitch. |
| • [Thickness] | Sets repeated embroidering at the same part. |
| [Flip] | Specifies if the decorative line shows up inside or outside. |
Motif stitch
| [Size] | Increases/reduces the size of the pattern. |
| [Spacing] | Specifies the spacing of the motif stitch. |
| [Flip] | Specifies if the decorative line shows up inside or outside. |
■ Region Settings

①Select the region to be changed.
②Shows the stitch type and color for the selected region.
③Shows the stitch settings for the selected region.
Fill stitch settings

| [Direction] | Specifies the embroidering direction. SelectManualto change to the desired direction offill stitch. |
| [Density] | Specifies the stitch density of fill stitch. |
| [Pullcompensation] | Specifies to correct the shrinkage of thepattern by slightly shortening or lengtheningthe stitching. Change the setting after youtest embroider the pattern and can check theshrinkage. |
| [Undersewing] | Select if you need or do not need the undersewing for the stabilized fabric. |
Stippling stitch settings

| [Run Pitch] | Specifies the length of a stitch of the stippling stitch. | |
| [Spacing] | Specifies the spacing between the stitches when embroidering the stippling stitch. | |
| [Distance] | Specifies the offset from the pattern outline. |
Decorative fill stitch settings

| [Size] | Increases/reduces the size of the pattern. |
| [Direction] | Specifies the rotation angle of the pattern. |
| [Outline] | Select whether [ON] or [OFF] the outline is also converted to embroidery data. If [ON] is selected, the number of thread jumps can be reduced. |
1 Use
→ Each touch of moves the highlighting of the selected pattern in order.
2 Select the setting to be changed, and then change the setting in the screen that appears. (In this example, the embroidering direction will be changed.)

→ The setting screen appears.

3 Touch ,anel then use to change the direction.

4 Touch to apply the setting.
\* appears on the tab for settings that were changed.
\* Change other settings in the same way.
Specifying Global Stitch Settings
The same stitch settings can be changed at the same time for multiple patterns of the same type.
1 Use < > to select the stitch whose settings are to be changed, and then touch.

→ The same stitch type lines or regions will be selected at the same time.

2 Follow steps 2 through 4 in "Specifying Individual Stitch Settings" on page 97 to change the settings.
3 Touch to create the embroidery pattern.

→ When the following message appears, touch OK

4 Touch to display the pattern editing screen.

→ When the following message appears, touch OK

①: Check an enlarged view of the pattern.
②: Save the embroidery data.
Loading the Background Image
Prepare the data file of your favorite picture so that you can create an embroidery pattern. Load the image file from the application "IQ INTUITION- POSITIONING APP" on page 109 or a USB media.
1 Touch

2 Select the device you saved the data to.

3 Select the data, and then touch . Set

4 The selected image is displayed transparently in the pattern drawing area.

5 Using the included touch pen (stylus), touch and then draw lines to trace the image.
\* For details on drawing lines, refer to "Drawing Lines" on page 93.

①Transparency adjustment
\* Touch or < to adjust the transparency of the background.
Each touch of lights the background, making the line pattern darker. Each touch of darkens the background, making the line pattern lighter.
6 After editing the pattern, touch to specify the settings for pattern.
7 Touch to create the embroidery pattern.
LINE CONVERSION
Custom patterns can be created from drawings. You can create patterns by loading an image on the application "IQ INTUITION- POSITIONING APP" on page 109 or a USB media.

natural_image
Diagram showing a curved umbrella transforming into a shaded umbrella shape (no text or symbols)
Recommended line drawings for Line Conversion
- Line drawings must be drawn clearly using lines with approximately 1 mm thickness.
• Line drawings should be drawn in a strong contrast.
- If the lines are too short or gathered too densely, they will not be loaded correctly.
Note
- For details on creating patterns using color illustrations, refer to "ILLUSTRATION CONVERSION" on page 102.
- If you cannot convert the drawings as expected, you can edit the design in IQ Designer. Refer to "PATTERN DRAWING SCREEN" on page 91.
- Line drawings are converted without recognizing the thickness of lines. If you want to change the thickness of lines, specify in the settings screen. Refer to "STITCH SETTINGS SCREEN" on page 97.
- Line drawings are converted as black lines. If you want to change the colors, specify in IQ Designer. Refer to "Drawing Lines" on page 93.
Create a Pattern with Line Conversion
1 Touch Line design

→ The image display screen appears.

Select the device you saved the data to.


Select the data, and then touch . Set


When loading is finished, specify the [Gray-Scale Detection level] on the screen if necessary.
The [Gray-Scale Detection level] can change the black and white threshold for the image.

\* If you do not know how the settings should be changed, first continue the operation without specifying settings and check the results.
\* To stop loading and return to the screen in step touch. The loaded image will be deleted when you return to the previous screen.


Move to frame the image for the pattern.

Touch OK.
→ The screen for confirming the converted image appears.

In the screen for confirming the converted image, you can adjust the [Gray-Scale Detection level] again, if necessary.

①The settings for the lines to be embroidered appear.
\* If you do not know how the settings should be changed, first continue the operation without specifying settings and check the results.
\* : Enlarge the image.
\* : Display the image before being converted. Compare the images before and after being converted, and then change the settings if necessary.
\* : Return to the previous screen.
→ After changes to the settings for |Gray-Scale Detection level| are applied, changes to Retry. Touch for check that the image is as desired.

Touch Set.
→ The pattern drawing screen appears.

If necessary, edit the loaded image.

\* After the loaded image is converted to stitching, it appears as a background in the pattern drawing screen. Use gauge ① to adjust the transparency of the background. Each touch of lightens the background, making the line pattern darker. Each touch of darkens the background, making the line pattern lighter.
ILLUSTRATION CONVERSION
Custom patterns can be created from color illustrations. You can create patterns by loading an image on the application "IQ INTUITION- POSITIONING APP" on page 109 or a USB media.

natural_image
Illustration of a penguin transforming into another penguin (no text or symbols)
Recommended illustrations for Illustration Conversion
• Illustrations that are clearly drawn, with no gradation, fading or blurriness.
• Illustrations that are at least a 5 mm square
• Illustrations that are extremely simple images
Create a Pattern with Illustration Conversion

Touch
Illustration design

→ The image display screen appears.

Select the device you saved the data to.


Select the data, and then touch


When loading is finished, specify the necessary settings in the loaded image confirmation screen.
Change the settings to adjust the image so it can easily be converted to the desired pattern.

1[Max. Number of Colors] The number of colors in an image will be reduced less than the number specified here, and then the outline will be extracted. 2[Remove Background] Select whether or not the background color will be included as one of the colors. 3[Line] Select whether or not the outline will be detected as a line. A thick outline can also be detected as a region. When detected as a line, the line thickness and color can be specified.
\* To stop loading and return to the screen in step 2, touch Cancel.

Memo
\- Touch to detect the outline.
Line thickness can be specified from 1.0 mm (approx. 1/16 inch) to 5.0 mm (approx. 3/16 inch).

\- Touch to select the outline color. Select by touching the color, or moving icon using


Move to frame the image for the pattern.

Touch OK.
→ The screen for confirming the converted image appears.

In the screen for confirming the converted image, adjust the image as necessary as in step 4.

\* : Enlarge the image.
\* : Display the image before being converted. Compare the images before and after being converted, and then change the settings if necessary.
\* : Return to the previous screen.
→ After changes to the settings described above have


Touch Set.
→ The pattern drawing screen appears.

If necessary, edit the loaded image.

\* After the loaded image is converted to stitching, it appears as a background in the pattern drawing screen. Use gauge ① to adjust the transparency of the background. Each touch of lightens the background, making the illustration pattern darker. Each touch of darkens the background, making the illustration pattern lighter.

STIPPLING
Basic Stippling with IQ Designer
Create a stippling design with the basic procedure.
Example:

1 Touch

2 Select the square shape, and then touch . OK

3 Touch

4 Select the heart shape, and then touch . OK

5 Touch Size .

6 Touch until the heart shape fits in the square shape, and then touch . OK
7 Touch , and then touch .

8 Touch 📋 and then select the stitch color. Touch OK after setting the color.

9 Select the region you want to set stippling effect.

①Select this region.
10 Touch Next.

11 Adjust the stippling stitch settings to create the desired effect, and then touch Preview
\* For details, refer to "Specifying Individual Stitch Settings" on page 97.

→ When the following message appears, touch 9k


Touch to convert into embroidery.

→ When the following message appears, touch OK


Follow the procedure described on "EDITING PATTERNS" on page 41 to edit the pattern as desired.

Note
\- You can also load a line drawing or an image of the fabric to create a region for stippling stitches.
Decorative Stitching around a Pattern in Embroidery (a Quilting Function)

Memo
- For best results, reduce the embroidery speed. (page 17)
- For best results, hoop the stabilizer and fabric and embroider the design prior to adding the batting and backing under the hoop for quilting.
A quilt can be created with stippling stitch around an embroidery pattern.

Touch in the home page screen and select the pattern that decorative stitching will be added around, and then touch in the embroidery edit screen.

→ The outline of the pattern is displayed.

Set the distance and touch Memory

→ A message appears, and the pattern outline is registered as a stamp shape in IQ Designer. Touch


3 Touch Embroidery tinue to the embroidery screen, and then embroider the pattern at the center.
4 Remove the embroidery frame from the carriage.
5 Photograph the embroidery frame with the application.
6 Attach the embroidery frame to the carriage again.
7 Place the batting and bottom layer of fabric under the embroidery frame.
8 Touch in the home page screen to start IQ Designer.
9 Touch to load the embroidered fabric. Refer to "Loading the Background Image" on page 99 for details.

10 Touch, touch to recall the stamp shape registered in step 2, and then arrange it over the loaded pattern.


11 Use a stamp or rectangular frame to determine the region to be stitched.
Note
\- If the region is to be drawn by hand, be sure to draw a completely closed shape. If the region is not closed, it cannot be correctly filled with any of the fill stitches.

12 Touch to select the pattern and color of the decorative stitching.

13 Touch, and then fill the region to be stitched outside of the stamp shape outline.

14 If you select the stamp shapes to determine the region
on step 11, touch for the line tool keys to select
. Touch, then select the frame outline, and
then touch . Next
\* Stitch settings can be adjusted in the stitch settings screen. For details, refer to "STITCH SETTINGS SCREEN" on page 97.

15 Specify the stitch spacing and length in the stitch
settings screen, and then touch .Preview

→ Check the pattern, and then touch Set

16 Embroider the stippling stitch around the embroidery pattern.
IQ INTUITION- MONITORING APP
With the IQ Intuition- Monitoring App installed on your smart device and the machine and smart device connected to the same wireless network, you can check the operating status of the machine. In addition, you can receive notifications when the machine stops.
■ Installing the App
1 Use your smart device to scan the appropriate QR code below to visit Google Play™ or the App Store.

Android™: https://www.babylock.com/IQIntuition\_MonitoringAndroid

iOS:
https://www.babylock.com/IQIntuition\_MonitoringiOS
2 Install [IQ Intuition- Monitoring].

IQ Intuition- Monitoring
Memo
- To download and install the app, you can also search for [IQ Intuition- Monitoring] in Google Play™ or the App Store.
- For more information on how to use this application, visit the following web site. https://www.babylock.com/support
■ Monitoring

Memo
\- The app will be updated from time to time. The following descriptions may differ from the actual screens and operations.
1 Connect the machine to your wireless network.
\* Refer to "WIRELESS NETWORK CONNECTION FUNCTIONS" on page 21.
2 Confirm that your smart device and your machine are connected to the same network.
3 Tap the icon for [IQ Intuition- Monitoring] on the smart device to start the app.
4 Follow the instructions that appear in the app to connect the app to your machine.
\* Select the name that appears beside [Machine name] in the settings screen on your machine.
→ The machine can now be monitored.
IQ INTUITION- POSITIONING APP
With IQ Intuition-Positioning app, you can position your embroidery designs on the fabric, by capturing image of the hooped fabric and sending the image to your machine.
■ Installing the IQ Intuition- Positioning App
1 Use your smart device to scan the appropriate QR code below to visit Google Play™ or the App Store.

Android™:
https://www.babylock.com/IQIntuition\_PositioningAndroid

iOS:
https://www.babylock.com/IQIntuition\_PositioningiOS

Install [IQ Intuition- Positioning].

IQ Intuition- Positioning

Memo
- To download and install the app, you can also search for [IQ Intuition- Positioning] in Google Play™ or the App Store.
- For more information on how to use this application, visit the following web site. https://www.babylock.com/support
Chapter 5 APPENDIX
CARE AND MAINTENANCE
CAUTION
\- Be sure to unplug the machine before cleaning it. Otherwise, injury may result.
Cleaning the LCD
If the surface of the LCD is dirty, lightly wipe it with a soft dry cloth.
Cleaning the machine surface
When wiping dirt off the machine, firmly wring a soft cloth soaked in (lukewarm) water.
After cleaning the machine, dry it with a soft, dry cloth.
Restrictions on Oiling
In order to prevent damaging this machine, it must not be oiled by the user. This machine was manufactured with the necessary amount of oil applied to ensure correct operation, making periodic oiling unnecessary.
If problems occur, such as difficulty turning the handwheel or an unusual noise, immediately stop using the machine, and contact your authorized Baby Lock retailer.
Precautions on Storing the Machine
Do not store the machine in any of the locations described below, otherwise damage to the machine may result, for example, rust caused by condensation.
\* Exposed to extremely high temperatures
\* Exposed to extremely low temperatures
\* Exposed to extreme temperature changes
\* Exposed to high humidity or steam
\* Near a flame, heater or air conditioner
\* Outdoors or exposed to direct sunlight
\* Exposed to extremely dusty or oily environments

Note
\- In order to extend the life of this machine, periodically turn it on and use it. Storing this machine for an extended period of time without using it may reduce its efficiency.
Cleaning the Race
1 Press (Needle position button) to raise the needle.
2 Turn the main power to OFF, and then unplug the machine.
3 Remove the needle and embroidery foot (page 31, page 113).
4 Remove the bobbin cover.
5 Slide the needle plate cover toward you to remove it.

natural_image
Illustration of hands operating a device with arrows indicating motion (no text or symbols)

Note
\- If the embroidery unit is attached, the needle plate can be removed when the bobbin cover is removed.
6 Grasp the bobbin case, and then gently lift out.

natural_image
Hand placing a yellow object into a device component (no text or symbols visible)
7 Use the cleaning brush or a vacuum cleaner to remove any lint and dust from the race and bobbin thread sensor and the surrounding area.

①Cleaning brush
②Race
③Bobbin thread sensor
IMPORTANT
\- Do not apply oil to the bobbin case.

Memo
\- If lint or dust collects on the bobbin thread sensor, the sensor may not operate correctly.

Insert the bobbin case so that the ▲ mark on the bobbin case aligns with the ● mark on the machine.

\* Align the ▲ and ● marks.

①▲ mark
② mark
③Bobbin case
\* Make sure that the indicated points are aligned before installing the bobbin case.
CAUTION
\- Never use a bobbin case that is scratched or has a burr on it. Otherwise the upper thread may become tangled, and the needle may break and cause injury. For a new bobbin case, contact your nearest authorized Baby Lock retailer.
- Be sure that the bobbin case is correctly installed, otherwise the needle may break and cause injury.

Insert the tabs on the needle plate cover into the needle plate, and then slide the cover back on.

natural_image
Illustration of a hand inserting a device into a device (no text or symbols visible)

Reattach the bobbin cover.
Cleaning the Bobbin Case
Thread wax and dust easily collect around the notch in the tension spring on the bobbin case, resulting in an incorrect thread tension. Therefore, the bobbin case should be cleaned as necessary should tension problems arise.
When cleaning the bobbin case, use card stock or another type of paper of similar thickness and sturdiness in order to prevent pieces of paper tearing off and getting lodged in the bobbin case.

Follow steps 1 to 6 in "Cleaning the Race" to remove the bobbin case.

Using a piece of paper of adequate thickness and sturdiness, slide the paper between the tension plate base and the tension spring and also slide the paper behind the notch of the spring to remove any dirt or dust.

①Tension plate base
②Notch
③Paper (e.g. business card type)
④Tension spring

Memo
\- Do not bend the tension spring. In addition, do not use anything other than recommended paper to clean the bobbin case.

Use the cleaning brush to remove any lint and dust from inside the bobbin case.

Replace the bobbin case and needle plate cover.
Cleaning the Cutter in the Bobbin Case Area
The cutter below the needle plate should be cleaned. If dust or lint accumulate on the cutter, it will be difficult to cut the thread when (thread cutter button) is pressed or the automatic thread cutting function is used. Clean the cutter when the thread is not easily cut.

Follow steps 1 through 5 in "Cleaning the Race" to remove the needle plate cover.
2 Use the screwdriver included with the machine to unscrew and remove the needle plate.

natural_image
Diagram of a mechanical or electrical component with no visible text, numbers, or symbols
3 Use the cleaning brush or a vacuum cleaner to remove any lint and dust from the cutter in the bobbin case area.

①Cutter
CAUTION
\- Do not touch the cutter, otherwise injuries may result.
4 Align the two screw holes in the needle plate with the two holes at the needle plate mounting base, and then fit the needle plate onto the machine.
5 Lightly finger-tighten the screw on the right side of the needle plate. Then, use the screwdriver included to firmly tighten the screw on the left side. Finally, firmly tighten the screw on the right side.

natural_image
Architectural floor plan showing room layout and furniture placement (no text or labels)
6 Replace the bobbin case and the needle plate cover following steps 8 through 10 in "Cleaning the Race".
Changing Embroidery Foot "W+" with LED Pointer
CAUTION
\- When attaching an embroidery foot, always
touch on the screen. You may accidentally press the "Start/Stop" button and possibly cause injury.
\- Be sure to use the embroidery foot "W+" with LED pointer when doing embroidery. Using another embroidery foot may cause the needle to strike the embroidery foot, causing the needle to break and possibly causing injury.
1 Press (Needle position button) to raise the needle.
2 Touch to lock all keys and buttons.
\* If the message [OK to automatically lower the presser foot?] appears on the LCD screen, touch
ok to continue.
Note
\- Before replacing the needle, cover the hole in the needle plate with fabric or paper to prevent the needle from falling into the machine.
3 Raise the presser foot lever.
4 Remove the connector of the embroidery foot "W+" with LED pointer from the connector on the back of the machine.

natural_image
Pure mechanical diagram showing a lever and guide mechanism without any text or symbols
5 Use the included disc-shaped screwdriver to loosen the screw for the embroidery foot, and then remove the embroidery foot "W+" with LED pointer.

natural_image
Mechanical assembly diagram showing a lever mechanism with a highlighted yellow component (no text or labels)
①Screw for embroidery foot
6 Position the embroidery foot "W+" with LED pointer on the presser foot bar by aligning the notch of the presser foot to the large screw.
Side view

natural_image
Diagram showing a mechanical assembly before and after transformation, with no visible text or symbols

Hold the embroidery foot in place with your right hand, and then use the disc-shaped screwdriver to securely tighten the screw for the embroidery foot.

①Screw for embroidery foot
CAUTION
\- Use the disc-shaped screwdriver to firmly tighten the screw for the embroidery foot. If the screw is loose, the needle may strike the embroidery foot and break, possibly cause injury.

Plug the connector of the embroidery foot "W+" with LED pointer into the jack on the back left side of your machine.

natural_image
Pure mechanical diagram showing a lever and pivot point without any text, numbers, or symbols

Touch to unlock all keys and buttons.
→ All keys and operation buttons are unlocked, and the previous screen is displayed.
BEFORE LENDING OR DISPOSING OF THE PRODUCT
Please be sure to reset the settings of your machine to delete the following data.
- all saved data
- customized settings
• network information

Touch, and then touch beside [Reset to Default].

Touch Reset.

Note
\- Do not turn the main power to OFF while the [Deleting...] screen is displayed.
ADJUSTING THE SCREEN
Touch Panel is Malfunctioning
If the screen does not respond correctly when you touch a key (the machine does not perform the operation or performs a different operation), follow the steps below to make the proper adjustments.

Holding your finger on the screen, turn the main power switch to OFF and back to ON.

→ The touch panel adjustment screen appears.

Using the included touch pen, lightly touch the center of each +, in order from 1 to 13.


Note
\- Only use the included touch pen to touch the screen. Do not use a mechanical pencil, pin, or other sharp object. Do not press too hard on the screen. Otherwise, damage may result.

Turn the main power to OFF, then turn it back to ON.

Note
\- If you finish the screen adjustment and the screen still does not respond, or if you cannot do the adjustment, contact your authorized Baby Lock retailer.
TROUBLESHOOTING
If the machine stops operating correctly, check the following possible problems before requesting service. You can solve most problems by yourself.
Visit us at www.babylock.com.
If the problem persists, contact your authorized Baby Lock retailer.
If the Thread Becomes Tangled Under the Bobbin Winder Seat
If the bobbin winding starts when the thread is not passed through the pretension disk correctly, the thread may become tangled beneath the bobbin winder seat.
Wind off the thread according to the following procedure.

①Thread
②Bobbin winder seat
CAUTION
\- Do not remove the bobbin winder seat even if the thread becomes tangled under the bobbin winder seat. The cutter in the bobbin winder seat may cause injury.

Touch to stop the bobbin winding.


Cut the thread with scissors near the pretension disk.

①Pretension disk

Push the bobbin winder switch to the right, and then remove the bobbin from the shaft and cut the thread leading to the bobbin in order to be able to completely remove the bobbin from shaft.


Hold the thread end with your left hand, and wind off the thread clockwise from under the bobbin winder seat with your right hand as shown below.

natural_image
Illustration of a hand holding a small object with a yellow arrow indicating rotation (no text or symbols)
List of Symptoms
Check the following possible problems before requesting service. If the reference page is “\*”, contact your authorized Baby Lock retailer.

Getting Ready
Symptom, Cause/solution Reference Cannot thread the needle. Needle is not in the correct position.• Press (Needle position button) to raise the needle. 10 Needle is installed incorrectly. 31 Needle is turned, bent or the point is dull. 31 Upper threading is incorrect. 28 The needle threader hook is bent and does not pass through the eye of the needle. * The needle threader lever cannot be moved or returned to its original position. * A size 65/9 needle is being used.• The needle is incompatible with the needle threader. Manually pass the thread through the eye of the needle. 31
Cannot lower the presser foot with the presser foot lever. Presser foot was raised using (Presser foot lifter button).• Press (Presser foot lifter button) to lower the presser foot. 10
Bobbin thread does not wind neatly on the bobbin. The thread is not passed through the bobbin winding thread guide correctly. 25 Bobbin spins slowly. 26 The thread that was pulled out was not wound onto the bobbin correctly. 25 Symptom, Cause/solution Reference The empty bobbin was not set on the pin properly. 24
While winding the bobbin, the bobbin thread was wound below the bobbin winder seat. You have not wound the bobbin thread properly when you initially wound thread on the bobbin.Ensure that the bobbin thread was properly set in the guides. 24
The bobbin thread cannot be pulled up. Needle is turned, bent or the point is dull. 31 Bobbin is set incorrectly. 27
Machine does not operate All keys and buttons have been locked by 31, 113
Nothing appears in the LCD. Main power switch is not turned on. 13 The plug of the power cord is not inserted into an electrical outlet. 14
The LCD screen does not look very clear. The brightness of the screen is not adjusted. 16
Nothing happens, even if the LCD display is touched Adjust the screen. 114 The screen has been locked.• Touch either of the following keys to unlock the screen. —
The LCD screen is fogged up. Condensation has formed on the LCD screen.• After a while, the cloudiness will disappear. —
Embroidery unit does not operate. Embroidery unit is not attached correctly. 33 Embroidery frame was attached before the unit was initialized. 33
Symptom, Cause/solution Reference Pointer of the embroidery foot “W+” with LED pointer does not indicate the position correctly With thick elastic fabric, the position will be misaligned only at raised parts in the fabric. 59 With fabric having a very uneven surface, the position is not correctly aligned.• The pointer indication should be used only as a reference. —
■ While Operating
Symptom, Cause/solution Reference Machine does not operate. “Start/Stop” button was not pressed. 10 There is no pattern selected. 35 Presser foot is not lowered. 10
Needle breaks. Needle is installed incorrectly. 31 Needle clamp screw is not tightened. 32 Needle is turned or bent. 31 Using improper needle, thread or the fabric prepared insufficiently for embroidering. 31, 55, 67 Upper thread tension is too tight. 77 Fabric is pulled during embroidering. — Spool cap is set incorrectly. 28 There are scratches around the opening in the presser foot. * There are scratches on the bobbin case. * Needle is defective. 31 A bobbin designed specifically for this machine is not used. 24 Upper threading is incorrect. 28 Bobbin is set incorrectly. 27 Presser foot is attached incorrectly. 113 Stabilizer is not attached to fabric being embroidered. 55 Bobbin thread is incorrectly wound. 24
Upper thread breaks. Machine is not threaded correctly (used the wrong spool cap, spool cap is loose, the thread did not catch the needle bar threader, etc.) 28 Knotted or tangled thread is being used. — Upper thread tension is too tight. 77 Symptom, Cause/solution Reference Thread is twisted. — Needle is turned, bent or the point is dull. 31 Needle is installed incorrectly. 31 There are scratches around the opening in the presser foot. * There are scratches on the bobbin case. * Using improper needle or thread for the selected fabric. 31 A bobbin designed specifically for this machine is not used. 24
The thread is tangled on the wrong side of the fabric. Upper threading is incorrect. 28 Using improper needle or thread for the selected fabric. 31
The upper thread is too tight. The bobbin thread is incorrectly installed. 27
Bobbin thread breaks. Bobbin is set incorrectly. 27 Bobbin thread is incorrectly wound. 24 There are scratches on the bobbin or it doesn't rotate properly. 27 Thread is twisted. — A bobbin designed specifically for this machine is not used. 24
Fabric puckers. There is a mistake in the upper or bobbin threading. 27, 28 Spool cap is set incorrectly. 28 Using improper needle or thread for the selected fabric. 31 Needle is turned, bent or the point is dull. 31 Thread tension is set incorrectly. 77
The pattern is not embroidered correctly. The thread tension is incorrect. 77 The thread is tangled, for example, in the bobbin case. 111 Skipped stitches Machine is threaded incorrectly. 28
Symptom, Cause/solution Reference Using improper needle, thread or the fabric prepared insufficiently for embroidering. 31, 55, 67 Needle is turned, bent or the point is dull. 31 Needle is installed incorrectly. 31 Needle is defective. 31 Dust or lint has collected under the needle plate. 111 Not embroidering Needle is turned, bent or the point is dull. 31 Bobbin is set incorrectly. 27 Upper threading is incorrect. 28
High-pitched sound while embroidering Pieces of thread are caught in the race. 111 Upper threading is incorrect. 28 A bobbin designed specifically for this machine is not used. 24 There are needle holes or friction scratches in the bobbin case. 111
The needle contacts the needle plate. The needle clamp screw is loose. 31 Needle is turned, bent or the point is dull. 31
The handwheel feels sluggish when it is turned. Thread is tangled in the bobbin case. 111
■ After Embroidering
Symptom, Cause/solution Reference Thread tension is incorrect. Upper threading is incorrect. 28 Bobbin is set incorrectly. 27 Using improper needle, thread or the fabric prepared insufficiently for embroidering. 31, 55, 67 Thread tension is set incorrectly. 77 Bobbin thread is incorrectly wound. 24 Needle is turned, bent or the point is dull. 31 A bobbin designed specifically for this machine is not being used. 24
The pattern is not embroidered correctly. Thread is twisted. — Thread tension is set incorrectly. 77 Symptom, Cause/solution Reference Fabric was not inserted into the frame correctly (fabric was loose, etc.). 56 Stabilizing material was not attached. • Always use stabilizing material, especially with stretch fabrics, lightweight fabrics, fabrics with a coarse weave, or fabrics that often cause pattern shrinkage. See your authorized Baby Lock retailer for the proper stabilizer. 55 There was an object placed near the machine, and the carriage or embroidery frame hit the object during embroidering. 33 Fabric outside the frame edges interferes with the arm, so the embroidery unit cannot move. • Reinsert the fabric in the embroidery frame so that the excess fabric is away from the arm, and rotate the pattern 180 degrees. 56 Fabric is too heavy, so the embroidery unit cannot move freely. • Place a large thick book or similar object under the arm head to lightly lift the heavy side and keep it level. — Fabric is hanging off the table. • If the fabric is hanging off the table during embroidery, the embroidery unit will not move freely. Place the fabric so that it does not hang off the table or hold the fabric to keep it from dragging. 67 Fabric is snagged or caught on something. • Stop the machine and place the fabric so that it does not get caught or snagged. — Embroidery frame was removed during embroidering (for example, to reset the bobbin). The presser foot was bumped or moved while removing or attaching the embroidery frame, or the embroidery unit was moved. 70 Stabilizer is incorrectly attached, for example, it is smaller than the embroidery frame. 55
Loops appear on the surface of the fabric when embroidering The thread tension is incorrectly set. 77 The tension of the upper thread is incorrectly set for the combination of the fabric, thread and pattern being used.• Use the embroidery needle plate cover. 67 The combination of the bobbin case and bobbin thread is incorrect. 67
ERROR MESSAGES
Below is an explanation of error messages. Refer to these when necessary (if you touch or do the operation correctly while the error message is displayed, the message disappears).
Error messages Cause/solution 1 Cannot change the configuration of the characters. This message is displayed when there are too many characters and the curved character configuration is impossible. 2 Cannot recognize the data for the selected pattern. The data may be corrupted. This message is displayed when there is a possibility that the data for the selected pattern is corrupted. 3 Change to a larger embroidery frame. This message is displayed when the machine is in embroidery mode and the small frame is attached, and the selected pattern does not fit in the small frame. 4 Failed to save file. This message is displayed when no more images can be saved on the USB media. In this case, delete a file from the USB media or use different USB media. 5 Includes a special pattern that cannot be saved to external memory. Save the pattern in the machine's memory. This message is displayed when you try to save a copyright protected pattern to USB media. According to copyright laws, patterns that are illegal to reproduce or edit cannot be saved to USB media. If this message displays, save the pattern in the machine's memory. 6 Lower the presser foot lever. This message is displayed when (Presser foot lifter button) is pressed while the presser foot lever is raised and the needle is lowered. 7 Not enough available memory to save the data. Delete some patterns or use a different media. This message is displayed when the memory is full and the embroidery pattern cannot be saved. 8 OK to recall and resume previous memory? This message appears if the machine is turned off while embroidering, then turned on again. Touch to return the machine to the condition (pattern position and number of stitches) when it was turned off. Follow the procedure described in "If the Thread Breaks or the Bobbin Runs out of Thread During Embroidering" on page 70 to align the needle position and embroider the remainder of the pattern. 9 OK to separate the combined border pattern? This message is displayed when rotating a saved combined pattern in the embroidery screen. 10 Pattern extends to the outside of embroidery frame. This message is displayed when the machine is in embroidery mode, and the character pattern combination is too large to fit in the embroidery frame. 11 Pattern extends to the outside of embroidery frame. If you plan to add more patterns, rotate the pattern combination. This message is displayed when the machine is in embroidery mode and the combined character pattern is too large for the embroidery frame. You can rotate the pattern 90 degrees and continue combining characters. 12 Preventive maintenance is recommended. This message is displayed when the machine needs to be maintained. Once this message appears, it is recommended to take your machine to an authorized Baby Lock retailer for a regular maintenance check. Although this message will disappear and the machine will continue to function once you touch, the message will display several more times until the appropriate maintenance is performed. 13 Set the clock. This message appears when the time/date is not set. Set time/date. (page 14) 14 The bobbin thread is almost empty. This message is displayed when the bobbin thread is running out. Although a few stitches can be embroidered when the "Start/Stop" button is pressed, replace with a wound bobbin immediately. When embroidering, touch, touch, OK, remove the embroidery frame, and then replace the bobbin with one wound with plenty of embroidery bobbin thread. If [Upper and Bobbin Thread Sensor] in the general settings screen of the machine setting mode is set to [OFF], this message does not appear. 15 The bobbin winder safety device has activated. Is the thread tangled? This message is displayed when the bobbin is being wound, and the motor locks because the thread is tangled, etc. 16 The safety device was activated since the main shaft motor was heated. Is the thread tangled? This message is displayed when the temperature of the motor increases, activating the safety device. Wait until the temperature decreases. If the error persists, contact your nearest authorized Baby Lock retailer. 17 The safety device was activated since the main shaft motor seized. Is the thread tangled? This message is displayed when the motor locks due to tangled thread or for other reasons related to thread delivery. 18 The safety device was activated since the needle position sensor malfunctioned. This message is displayed when an error in the needle position sensor is detected, activating the safety device. Turn the machine off, then on again. If the message continues to appear, the machine may be damaged. Contact your nearest authorized Baby Lock retailer. 19 There is no needle plate cover. Attach a needle plate cover. This message is displayed when the needle plate cover is not attached. 20 This file cannot be used. This message appears if the file format is incompatible with this machine. Check the list of compatible file formats. (page 121) 21 This file exceeds the data capacity and cannot be used. Use a suitable size file. This message is displayed when the file size exceeds the data capacity of the machine. Confirm the file size and format. (page 121) 22 This USB media cannot be used. This message is displayed when you try to use incompatible media. For a list of compatible USB media, visit www.babylock.com 23 USB media error This message is displayed when an error occurs with the USB media. For a list of compatible USB media, visit www.babylock.com
SPECIFICATIONS
Item Specification Dimensions of machine Approx. 612 mm (W) × 348 mm (H) × 321 mm (D)(approx. 24-3/32 inches (W) × 13-11/16 inches (H) × 12-5/8 inches (D)) Weight of machine Approx. 15 kg (approx. 33.1 lb) Dimensions of machine with embroidery unit attached Approx. 916 mm (W) × 348 mm (H) × 524 mm (D)(approx. 36-1/16 inches (W) × 13-11/16 inches (H) × 20-5/8 inches (D)) Weight of machine with embroidery unit attached Approx. 20.7 kg (approx. 45.6 lb) Maximum embroidery speed 1050 stitches per minute Interfaces Wireless LAN ^1 Memory Embroidery patterns 10 IQ Designer 100 MB Data Types Embroidery patterns ^2 .pes .phc .phx .dst Data that can be loaded when using IQ Designer .jpg (up to 2 MB), .png (up to 2 MB), .bmp (up to 3 MB) Maximum embroidering area 360 mm (H) x 240 mm (W) (approx. 14 inches (H) x 9-1/2 inches (W)) Types of USB Devices/Media that can be Used ^3 Embroidery patterns Data can be saved to or recalled from USB media. Use media that meets the following specifications.• USB Flash drive (USB Flash memory)Embroidery data can be recalled only from;• USB External CD/DVD drives Condition of the [Eco Mode] and [Shutoff Support Mode] [Eco Mode] Available time OFF, 10 - 120 (minute) “Start/Stop” button Green flashing Suspended functionMachine light, Screen display, LED pointer After recoveringThe machine starts from the previous operation. [Shutoff Support Mode] Available time OFF, 1 - 12 (hour) “Start/Stop” button Green slow flashing Suspended functionAll functions After recoveringAn error message appears.You need to turn off and on the machine to restart. Compatible image files of the Screen Saver Image Format .jpg File size Max. 150 KB for each image File dimension 1280 × 1280 pixels or less (If the width is between 800 and 1279 pixels, the image will be displayed at 800 pixels.) Number allowed 5 or less Videos that can be played MP4 file format Video - H.264/MPEG-4 AVC, Audio - AAC Size 450 (H) × 800 (W) Maximum file size 1 GB
\*1 The wireless network connection complies with IEEE 802.11b/g/n standards and uses the 2.4 GHz frequency.
A wireless network cannot be set up with WPA ^TM /WPA2 ^TM Enterprise.
Use Design Database Transfer or Palette version 11 or later to transfer data from your computer to the machine. For the operating systems compatible with the software, visit our website www.babylock.com.
\*2 • Using data other than that saved using our data design systems or this machine may cause this machine to malfunction. When the machine is used to save a file with any extension, it is saved as a .phx data file.
\- Since Tajima (.dst) data does not contain specific thread color information, it is displayed with our default thread color sequence. Check the preview and change the thread colors as desired.
\*3 Some USB media may not be usable with this machine. Please visit our website www.babylock.com for more details.
\* Please be aware that some specifications may change without notice.
Note
\- We recommend using the 26 letters of the alphabet (uppercase and lowercase), the numbers 0 through 9, “-”, and “\_” for the name of the file/folder.
IMPORTANT
\- When using embroidery data other than our original patterns, the thread or needle may break when embroidering with a stitch density that is too fine or when embroidering three or more overlapping stitches. In that case, use one of our original data design systems to edit the embroidery data.
UPDATING YOUR MACHINE'S SOFTWARE
You can update your machine's software using the following two procedures.
Update Procedure Using USB Media
When an update program is available on www.babylock.com, please download the files following the instructions on the website and steps below.

Note
\- When using USB media to update the software, check that no data other than the update file is saved on the USB media being used before starting to update.
1 While pressing (Automatic threading button), turn the main power to ON.
2 Touch

3 Insert the USB media into the primary (top) USB port on the machine.

4 Touch Load .
→ When updating is finished, the completion message appears.
5 Turn the machine off, remove the USB media, and turn the machine on again.
Update Procedure Using Wireless LAN Connection
If the machine is connected to a wireless network with a strong, reliable connection, update files can be downloaded directly to the machine using this network.
For details on the wireless LAN connection, refer to page 22.

Memo
\- The machine periodically checks if there is a new update file on the server. When there is a new update file, the wireless LAN key is displayed as


1 Display page 7 of the settings screen.
2 Touch Start
\* The machine starts to download the update file, if there is a new update file on server.

①When the wireless LAN key appears as , touching
Start causes the machine to check if there is a new update file. If there is a new file, downloading begins.
Note
- Do not turn off the machine during the download.
- Touch to pause the download. To
restart, touch . Resume
3 When downloading is finished, turn off the machine, then hold down (Automatic threading button) while turning on the machine.

natural_image
Simple line drawing of a hand holding a small object, with an inset showing a directional arrow (no text or symbols)
4 Touch

natural_image
Pure graphical icons including a computer monitor, wireless signal icon, and connection symbols without any text or labels
5 Touch to update the machine.
\* Do not turn off the machine during the update.
Memo
\- If there are changes or additions to functions, manuals available on the machine may be updated.
INDEX
A
Accessories
options 12
Air vent
Alphabet characters
embroidery 37
Appliqué
using an embroidery frame pattern 85
Automatic threading button 10, 28
B
Bobbin
setting 27
winding 24
Bobbin case
cleaning 111
Bobbin cover 9
Bobbin threading
setting the bobbin 27
winding the bobbin 24
Bobbin winder 9
Bobbin winding switch 26
Border key 44, 47
C
Cleaning
race 111
Clock 14
Color visualizer function 51
Couching patterns 86
D
Decorative fill pattern 89
Deselect region setting 48
E
Echo quilting 89
Eco mode 18
Editing
embroidery edit 41
Embroidery
2-point embroidery positioning function 63
adjusting the speed 80
automatic thread cutting function (End color trim) 79
key functions 54
resuming embroidery after turning off the power 71
selecting patterns 35
thread color display 81
thread trimming function (Jump stitch trim) 80
Embroidery appliqué 69
Embroidery edit
changing the thread color 50
key functions 41
repeated patterns 44
Embroidery foot "W+" with LED pointer 113
Embroidery frames
attaching 58
inserting fabric 56
removing 59
types 56
using the embroidery sheet 57
Embroidery needle plate cover 67
Embroidery patterns
checking the position 62
editing 41
embroidering 67
linked characters 82
retrieving 84
saving 83
selecting 35
using a frame pattern to make an appliqué 85
Embroidery sheet 57
Embroidery unit 33
Error messages 119
F
Favorite color scheme 52
H
Handle 9
Handwheel 9
Home page screen 15
1
Image key 43
IQ Designer 91
IQ Intuition- Monitoring App 108
IQ Intuition- Positioning App 109
K
Key functions
embroidery 54
embroidery edit 41
L
LCD screen 9,15
light 16
M
Machine help key 19
Main power switch 9
Metallic thread 29
MPEG-4 (MP4) videos 20
N
Needle
changing the needle 31
Needle bar thread guide 9
Needle plate 9
Needle position button 10
O
Operation buttons 9, 10
P
Power cord 14
Power cord receptacle 9
Presser foot code 53
Presser foot lever 9
Presser foot lifter button 10
Presser foot/Needle exchange key 32, 113
Pretension disk 9, 25, 27
R
Race 111
Repeated patterns 44
Retrieving
embroidery patterns 84
machine's memory 84
S
Saving
embroidery patterns 83
machine's memory 83
Screen saver 18
Screw for embroidery foot 9
Set
automatic thread cutting 79
embroidery settings 17
general settings 16
machine settings key 16
thread tension 77
thread trimming 80
Shutoff support mode 18
Speaker 16
Specifications 121
Spool cap 9
Spool net 29
Spool pin 9
Stabilizer 55
Start/Stop button 10
Starting point key 81
Stippling 89
Supplemental spool pin 9, 24
T
Thread
thread tension 77
Thread color display 81
Thread color palette 50
Thread cutter 9
Thread cutter button 10
Thread guide 9, 25, 27
Thread guide plate 9,26
Thread marks 47
Touch pen 114
Trial key 62
Troubleshooting 115
Tutorial video 20
U
Upgrading 123
Upper threading
using the Automatic threading button 28
USB mouse 24
USB port 9


Meridian 2 ^TM
2 Select the setting to be changed, and then change the setting in the screen that appears. (In this example, the embroidering direction will be changed.)
 → The setting screen appears. 3 Touch ,anel then use to change the direction.
4 Touch to apply the setting.
\* appears on the tab for settings that were changed. \* Change other settings in the same way.Specifying Global Stitch Settings
The same stitch settings can be changed at the same time for multiple patterns of the same type.1 Use < > to select the stitch whose settings are to be changed, and then touch.
 → The same stitch type lines or regions will be selected at the same time. 2 Follow steps 2 through 4 in "Specifying Individual Stitch Settings" on page 97 to change the settings.
3 Touch to create the embroidery pattern.
 → When the following message appears, touch OK  4 Touch to display the pattern editing screen.  → When the following message appears, touch OK  ①: Check an enlarged view of the pattern. ②: Save the embroidery data.Loading the Background Image
Prepare the data file of your favorite picture so that you can create an embroidery pattern. Load the image file from the application "IQ INTUITION- POSITIONING APP" on page 109 or a USB media. 1 Touch  2 Select the device you saved the data to.  3 Select the data, and then touch . Set  4 The selected image is displayed transparently in the pattern drawing area.  5 Using the included touch pen (stylus), touch and then draw lines to trace the image. \* For details on drawing lines, refer to "Drawing Lines" on page 93.  ①Transparency adjustment \* Touch or < to adjust the transparency of the background. Each touch of lights the background, making the line pattern darker. Each touch of darkens the background, making the line pattern lighter. 6 After editing the pattern, touch to specify the settings for pattern. 7 Touch to create the embroidery pattern.LINE CONVERSION
Custom patterns can be created from drawings. You can create patterns by loading an image on the application "IQ INTUITION- POSITIONING APP" on page 109 or a USB media. natural_image
Diagram showing a curved umbrella transforming into a shaded umbrella shape (no text or symbols)Recommended line drawings for Line Conversion
- Line drawings must be drawn clearly using lines with approximately 1 mm thickness. • Line drawings should be drawn in a strong contrast. - If the lines are too short or gathered too densely, they will not be loaded correctly.Note
- For details on creating patterns using color illustrations, refer to "ILLUSTRATION CONVERSION" on page 102. - If you cannot convert the drawings as expected, you can edit the design in IQ Designer. Refer to "PATTERN DRAWING SCREEN" on page 91. - Line drawings are converted without recognizing the thickness of lines. If you want to change the thickness of lines, specify in the settings screen. Refer to "STITCH SETTINGS SCREEN" on page 97. - Line drawings are converted as black lines. If you want to change the colors, specify in IQ Designer. Refer to "Drawing Lines" on page 93.Create a Pattern with Line Conversion
1 Touch Line design
 → The image display screen appears.  Select the device you saved the data to.   Select the data, and then touch . Set    When loading is finished, specify the [Gray-Scale Detection level] on the screen if necessary. The [Gray-Scale Detection level] can change the black and white threshold for the image.  \* If you do not know how the settings should be changed, first continue the operation without specifying settings and check the results. \* To stop loading and return to the screen in step touch. The loaded image will be deleted when you return to the previous screen.   Move to frame the image for the pattern.  Touch OK. → The screen for confirming the converted image appears.  In the screen for confirming the converted image, you can adjust the [Gray-Scale Detection level] again, if necessary.  ①The settings for the lines to be embroidered appear. \* If you do not know how the settings should be changed, first continue the operation without specifying settings and check the results. \* : Enlarge the image. \* : Display the image before being converted. Compare the images before and after being converted, and then change the settings if necessary. \* : Return to the previous screen. → After changes to the settings for |Gray-Scale Detection level| are applied, changes to Retry. Touch for check that the image is as desired.  Touch Set. → The pattern drawing screen appears.  If necessary, edit the loaded image.  \* After the loaded image is converted to stitching, it appears as a background in the pattern drawing screen. Use gauge ① to adjust the transparency of the background. Each touch of lightens the background, making the line pattern darker. Each touch of darkens the background, making the line pattern lighter.ILLUSTRATION CONVERSION
Custom patterns can be created from color illustrations. You can create patterns by loading an image on the application "IQ INTUITION- POSITIONING APP" on page 109 or a USB media. natural_image
Illustration of a penguin transforming into another penguin (no text or symbols)Recommended illustrations for Illustration Conversion
• Illustrations that are clearly drawn, with no gradation, fading or blurriness. • Illustrations that are at least a 5 mm square • Illustrations that are extremely simple imagesCreate a Pattern with Illustration Conversion
 Touch Illustration design  → The image display screen appears. Select the device you saved the data to.
  Select the data, and then touch    When loading is finished, specify the necessary settings in the loaded image confirmation screen. Change the settings to adjust the image so it can easily be converted to the desired pattern. | 1[Max. Number of Colors] | The number of colors in an image will be reduced less than the number specified here, and then the outline will be extracted. |
| 2[Remove Background] Select whether or not the background color will be included as one of the colors. | |
| 3[Line] Select whether or not the outline will be detected as a line. A thick outline can also be detected as a region. When detected as a line, the line thickness and color can be specified. | |
Memo
\- Touch to detect the outline. Line thickness can be specified from 1.0 mm (approx. 1/16 inch) to 5.0 mm (approx. 3/16 inch).  \- Touch to select the outline color. Select by touching the color, or moving icon using   Move to frame the image for the pattern.  Touch OK. → The screen for confirming the converted image appears.  In the screen for confirming the converted image, adjust the image as necessary as in step 4.  \* : Enlarge the image. \* : Display the image before being converted. Compare the images before and after being converted, and then change the settings if necessary. \* : Return to the previous screen. → After changes to the settings described above have   Touch Set. → The pattern drawing screen appears.  If necessary, edit the loaded image.  \* After the loaded image is converted to stitching, it appears as a background in the pattern drawing screen. Use gauge ① to adjust the transparency of the background. Each touch of lightens the background, making the illustration pattern darker. Each touch of darkens the background, making the illustration pattern lighter. STIPPLING
Basic Stippling with IQ Designer
Create a stippling design with the basic procedure. Example: 1 Touch
2 Select the square shape, and then touch . OK
3 Touch
4 Select the heart shape, and then touch . OK
5 Touch Size .
 6 Touch until the heart shape fits in the square shape, and then touch . OK 7 Touch , and then touch .  8 Touch 📋 and then select the stitch color. Touch OK after setting the color.  9 Select the region you want to set stippling effect.  ①Select this region. 10 Touch Next.  11 Adjust the stippling stitch settings to create the desired effect, and then touch Preview \* For details, refer to "Specifying Individual Stitch Settings" on page 97.  → When the following message appears, touch 9k   Touch to convert into embroidery.  → When the following message appears, touch OK   Follow the procedure described on "EDITING PATTERNS" on page 41 to edit the pattern as desired. Note
\- You can also load a line drawing or an image of the fabric to create a region for stippling stitches.Decorative Stitching around a Pattern in Embroidery (a Quilting Function)
Memo
- For best results, reduce the embroidery speed. (page 17) - For best results, hoop the stabilizer and fabric and embroider the design prior to adding the batting and backing under the hoop for quilting. A quilt can be created with stippling stitch around an embroidery pattern.  Touch in the home page screen and select the pattern that decorative stitching will be added around, and then touch in the embroidery edit screen.  → The outline of the pattern is displayed.  Set the distance and touch Memory  → A message appears, and the pattern outline is registered as a stamp shape in IQ Designer. Touch   3 Touch Embroidery tinue to the embroidery screen, and then embroider the pattern at the center. 4 Remove the embroidery frame from the carriage. 5 Photograph the embroidery frame with the application. 6 Attach the embroidery frame to the carriage again. 7 Place the batting and bottom layer of fabric under the embroidery frame. 8 Touch in the home page screen to start IQ Designer. 9 Touch to load the embroidered fabric. Refer to "Loading the Background Image" on page 99 for details.  10 Touch, touch to recall the stamp shape registered in step 2, and then arrange it over the loaded pattern.   11 Use a stamp or rectangular frame to determine the region to be stitched.Note
\- If the region is to be drawn by hand, be sure to draw a completely closed shape. If the region is not closed, it cannot be correctly filled with any of the fill stitches.  12 Touch to select the pattern and color of the decorative stitching.  13 Touch, and then fill the region to be stitched outside of the stamp shape outline. 14 If you select the stamp shapes to determine the region
on step 11, touch for the line tool keys to select . Touch, then select the frame outline, and then touch . Next \* Stitch settings can be adjusted in the stitch settings screen. For details, refer to "STITCH SETTINGS SCREEN" on page 97. 15 Specify the stitch spacing and length in the stitch
settings screen, and then touch .Preview  → Check the pattern, and then touch Set  16 Embroider the stippling stitch around the embroidery pattern.IQ INTUITION- MONITORING APP
With the IQ Intuition- Monitoring App installed on your smart device and the machine and smart device connected to the same wireless network, you can check the operating status of the machine. In addition, you can receive notifications when the machine stops.■ Installing the App
1 Use your smart device to scan the appropriate QR code below to visit Google Play™ or the App Store.  Android™: https://www.babylock.com/IQIntuition\_MonitoringAndroid  iOS: https://www.babylock.com/IQIntuition\_MonitoringiOS 2 Install [IQ Intuition- Monitoring].  IQ Intuition- MonitoringMemo
- To download and install the app, you can also search for [IQ Intuition- Monitoring] in Google Play™ or the App Store. - For more information on how to use this application, visit the following web site. https://www.babylock.com/support■ Monitoring
Memo
\- The app will be updated from time to time. The following descriptions may differ from the actual screens and operations.1 Connect the machine to your wireless network.
\* Refer to "WIRELESS NETWORK CONNECTION FUNCTIONS" on page 21.2 Confirm that your smart device and your machine are connected to the same network.
3 Tap the icon for [IQ Intuition- Monitoring] on the smart device to start the app.
4 Follow the instructions that appear in the app to connect the app to your machine.
\* Select the name that appears beside [Machine name] in the settings screen on your machine. → The machine can now be monitored.IQ INTUITION- POSITIONING APP
With IQ Intuition-Positioning app, you can position your embroidery designs on the fabric, by capturing image of the hooped fabric and sending the image to your machine.■ Installing the IQ Intuition- Positioning App
1 Use your smart device to scan the appropriate QR code below to visit Google Play™ or the App Store.
 Android™: https://www.babylock.com/IQIntuition\_PositioningAndroid  iOS: https://www.babylock.com/IQIntuition\_PositioningiOS  Install [IQ Intuition- Positioning].  IQ Intuition- Positioning Memo
- To download and install the app, you can also search for [IQ Intuition- Positioning] in Google Play™ or the App Store. - For more information on how to use this application, visit the following web site. https://www.babylock.com/supportChapter 5 APPENDIX
CARE AND MAINTENANCE
CAUTION
\- Be sure to unplug the machine before cleaning it. Otherwise, injury may result.Cleaning the LCD
If the surface of the LCD is dirty, lightly wipe it with a soft dry cloth.Cleaning the machine surface
When wiping dirt off the machine, firmly wring a soft cloth soaked in (lukewarm) water. After cleaning the machine, dry it with a soft, dry cloth.Restrictions on Oiling
In order to prevent damaging this machine, it must not be oiled by the user. This machine was manufactured with the necessary amount of oil applied to ensure correct operation, making periodic oiling unnecessary. If problems occur, such as difficulty turning the handwheel or an unusual noise, immediately stop using the machine, and contact your authorized Baby Lock retailer.Precautions on Storing the Machine
Do not store the machine in any of the locations described below, otherwise damage to the machine may result, for example, rust caused by condensation. \* Exposed to extremely high temperatures \* Exposed to extremely low temperatures \* Exposed to extreme temperature changes \* Exposed to high humidity or steam \* Near a flame, heater or air conditioner \* Outdoors or exposed to direct sunlight \* Exposed to extremely dusty or oily environments Note
\- In order to extend the life of this machine, periodically turn it on and use it. Storing this machine for an extended period of time without using it may reduce its efficiency.Cleaning the Race
1 Press (Needle position button) to raise the needle. 2 Turn the main power to OFF, and then unplug the machine. 3 Remove the needle and embroidery foot (page 31, page 113). 4 Remove the bobbin cover. 5 Slide the needle plate cover toward you to remove it. natural_image
Illustration of hands operating a device with arrows indicating motion (no text or symbols)Note
\- If the embroidery unit is attached, the needle plate can be removed when the bobbin cover is removed. 6 Grasp the bobbin case, and then gently lift out. natural_image
Hand placing a yellow object into a device component (no text or symbols visible)IMPORTANT
\- Do not apply oil to the bobbin case. Memo
\- If lint or dust collects on the bobbin thread sensor, the sensor may not operate correctly.  Insert the bobbin case so that the ▲ mark on the bobbin case aligns with the ● mark on the machine.  \* Align the ▲ and ● marks.  ①▲ mark ② mark ③Bobbin case \* Make sure that the indicated points are aligned before installing the bobbin case.CAUTION
\- Never use a bobbin case that is scratched or has a burr on it. Otherwise the upper thread may become tangled, and the needle may break and cause injury. For a new bobbin case, contact your nearest authorized Baby Lock retailer. - Be sure that the bobbin case is correctly installed, otherwise the needle may break and cause injury.  Insert the tabs on the needle plate cover into the needle plate, and then slide the cover back on. natural_image
Illustration of a hand inserting a device into a device (no text or symbols visible)Cleaning the Bobbin Case
Thread wax and dust easily collect around the notch in the tension spring on the bobbin case, resulting in an incorrect thread tension. Therefore, the bobbin case should be cleaned as necessary should tension problems arise. When cleaning the bobbin case, use card stock or another type of paper of similar thickness and sturdiness in order to prevent pieces of paper tearing off and getting lodged in the bobbin case.  Follow steps 1 to 6 in "Cleaning the Race" to remove the bobbin case.  Using a piece of paper of adequate thickness and sturdiness, slide the paper between the tension plate base and the tension spring and also slide the paper behind the notch of the spring to remove any dirt or dust.  ①Tension plate base ②Notch ③Paper (e.g. business card type) ④Tension spring Memo
\- Do not bend the tension spring. In addition, do not use anything other than recommended paper to clean the bobbin case.  Use the cleaning brush to remove any lint and dust from inside the bobbin case.  Replace the bobbin case and needle plate cover.Cleaning the Cutter in the Bobbin Case Area
The cutter below the needle plate should be cleaned. If dust or lint accumulate on the cutter, it will be difficult to cut the thread when (thread cutter button) is pressed or the automatic thread cutting function is used. Clean the cutter when the thread is not easily cut.  Follow steps 1 through 5 in "Cleaning the Race" to remove the needle plate cover. 2 Use the screwdriver included with the machine to unscrew and remove the needle plate. natural_image
Diagram of a mechanical or electrical component with no visible text, numbers, or symbolsCAUTION
\- Do not touch the cutter, otherwise injuries may result. 4 Align the two screw holes in the needle plate with the two holes at the needle plate mounting base, and then fit the needle plate onto the machine. 5 Lightly finger-tighten the screw on the right side of the needle plate. Then, use the screwdriver included to firmly tighten the screw on the left side. Finally, firmly tighten the screw on the right side. natural_image
Architectural floor plan showing room layout and furniture placement (no text or labels)Changing Embroidery Foot "W+" with LED Pointer
CAUTION
\- When attaching an embroidery foot, always touch on the screen. You may accidentally press the "Start/Stop" button and possibly cause injury. \- Be sure to use the embroidery foot "W+" with LED pointer when doing embroidery. Using another embroidery foot may cause the needle to strike the embroidery foot, causing the needle to break and possibly causing injury. 1 Press (Needle position button) to raise the needle. 2 Touch to lock all keys and buttons. \* If the message [OK to automatically lower the presser foot?] appears on the LCD screen, touch ok to continue.Note
\- Before replacing the needle, cover the hole in the needle plate with fabric or paper to prevent the needle from falling into the machine. 3 Raise the presser foot lever. 4 Remove the connector of the embroidery foot "W+" with LED pointer from the connector on the back of the machine. natural_image
Pure mechanical diagram showing a lever and guide mechanism without any text or symbolsnatural_image
Mechanical assembly diagram showing a lever mechanism with a highlighted yellow component (no text or labels)natural_image
Diagram showing a mechanical assembly before and after transformation, with no visible text or symbolsCAUTION
\- Use the disc-shaped screwdriver to firmly tighten the screw for the embroidery foot. If the screw is loose, the needle may strike the embroidery foot and break, possibly cause injury.  Plug the connector of the embroidery foot "W+" with LED pointer into the jack on the back left side of your machine. natural_image
Pure mechanical diagram showing a lever and pivot point without any text, numbers, or symbolsBEFORE LENDING OR DISPOSING OF THE PRODUCT
Please be sure to reset the settings of your machine to delete the following data. - all saved data - customized settings • network information  Touch, and then touch beside [Reset to Default].  Touch Reset. Note
\- Do not turn the main power to OFF while the [Deleting...] screen is displayed.ADJUSTING THE SCREEN
Touch Panel is Malfunctioning
If the screen does not respond correctly when you touch a key (the machine does not perform the operation or performs a different operation), follow the steps below to make the proper adjustments.  Holding your finger on the screen, turn the main power switch to OFF and back to ON.  → The touch panel adjustment screen appears.  Using the included touch pen, lightly touch the center of each +, in order from 1 to 13.  Note
\- Only use the included touch pen to touch the screen. Do not use a mechanical pencil, pin, or other sharp object. Do not press too hard on the screen. Otherwise, damage may result.  Turn the main power to OFF, then turn it back to ON. Note
\- If you finish the screen adjustment and the screen still does not respond, or if you cannot do the adjustment, contact your authorized Baby Lock retailer.TROUBLESHOOTING
If the machine stops operating correctly, check the following possible problems before requesting service. You can solve most problems by yourself. Visit us at www.babylock.com. If the problem persists, contact your authorized Baby Lock retailer.If the Thread Becomes Tangled Under the Bobbin Winder Seat
If the bobbin winding starts when the thread is not passed through the pretension disk correctly, the thread may become tangled beneath the bobbin winder seat. Wind off the thread according to the following procedure.  ①Thread ②Bobbin winder seatCAUTION
\- Do not remove the bobbin winder seat even if the thread becomes tangled under the bobbin winder seat. The cutter in the bobbin winder seat may cause injury.  Touch to stop the bobbin winding.   Cut the thread with scissors near the pretension disk.  ①Pretension disk  Push the bobbin winder switch to the right, and then remove the bobbin from the shaft and cut the thread leading to the bobbin in order to be able to completely remove the bobbin from shaft.   Hold the thread end with your left hand, and wind off the thread clockwise from under the bobbin winder seat with your right hand as shown below. natural_image
Illustration of a hand holding a small object with a yellow arrow indicating rotation (no text or symbols)List of Symptoms
Check the following possible problems before requesting service. If the reference page is “\*”, contact your authorized Baby Lock retailer. Getting Ready
| Symptom, Cause/solution | Reference |
| Cannot thread the needle. | |
| Needle is not in the correct position.• Press (Needle position button) to raise the needle. | 10 |
| Needle is installed incorrectly. 31 | |
| Needle is turned, bent or the point is dull. 31 | |
| Upper threading is incorrect. 28 | |
| The needle threader hook is bent and does not pass through the eye of the needle. | * |
| The needle threader lever cannot be moved or returned to its original position. | * |
| A size 65/9 needle is being used.• The needle is incompatible with the needle threader. Manually pass the thread through the eye of the needle. | 31 |
| Cannot lower the presser foot with the presser foot lever. | |
| Presser foot was raised using (Presser foot lifter button).• Press (Presser foot lifter button) to lower the presser foot. | 10 |
| Bobbin thread does not wind neatly on the bobbin. | |
| The thread is not passed through the bobbin winding thread guide correctly. | 25 |
| Bobbin spins slowly. 26 | |
| The thread that was pulled out was not wound onto the bobbin correctly. | 25 |
| Symptom, Cause/solution | Reference |
| The empty bobbin was not set on the pin properly. | 24 |
| While winding the bobbin, the bobbin thread was wound below the bobbin winder seat. | |
| You have not wound the bobbin thread properly when you initially wound thread on the bobbin.Ensure that the bobbin thread was properly set in the guides. | 24 |
| The bobbin thread cannot be pulled up. | |
| Needle is turned, bent or the point is dull. 31 | |
| Bobbin is set incorrectly. 27 | |
| Machine does not operate | |
| All keys and buttons have been locked by | 31, 113 |
| Nothing appears in the LCD. | |
| Main power switch is not turned on. | 13 |
| The plug of the power cord is not inserted into an electrical outlet. | 14 |
| The LCD screen does not look very clear. | |
| The brightness of the screen is not adjusted. 16 | |
| Nothing happens, even if the LCD display is touched | |
| Adjust the screen. | 114 |
| The screen has been locked.• Touch either of the following keys to unlock the screen. | — |
| The LCD screen is fogged up. | |
| Condensation has formed on the LCD screen.• After a while, the cloudiness will disappear. | — |
| Embroidery unit does not operate. | |
| Embroidery unit is not attached correctly. | 33 |
| Embroidery frame was attached before the unit was initialized. | 33 |
| Symptom, Cause/solution | Reference |
| Pointer of the embroidery foot “W+” with LED pointer does not indicate the position correctly | |
| With thick elastic fabric, the position will be misaligned only at raised parts in the fabric. | 59 |
| With fabric having a very uneven surface, the position is not correctly aligned.• The pointer indication should be used only as a reference. | — |
| Symptom, Cause/solution | Reference |
| Machine does not operate. | |
| “Start/Stop” button was not pressed. | 10 |
| There is no pattern selected. | 35 |
| Presser foot is not lowered. | 10 |
| Needle breaks. | |
| Needle is installed incorrectly. 31 | |
| Needle clamp screw is not tightened. 32 | |
| Needle is turned or bent. 31 | |
| Using improper needle, thread or the fabric prepared insufficiently for embroidering. | 31, 55, 67 |
| Upper thread tension is too tight. 77 | |
| Fabric is pulled during embroidering. — | |
| Spool cap is set incorrectly. 28 | |
| There are scratches around the opening in the presser foot. | * |
| There are scratches on the bobbin case. | * |
| Needle is defective. | 31 |
| A bobbin designed specifically for this machine is not used. | 24 |
| Upper threading is incorrect. | 28 |
| Bobbin is set incorrectly. 27 | |
| Presser foot is attached incorrectly. | 113 |
| Stabilizer is not attached to fabric being embroidered. | 55 |
| Bobbin thread is incorrectly wound. | 24 |
| Upper thread breaks. | |
| Machine is not threaded correctly (used the wrong spool cap, spool cap is loose, the thread did not catch the needle bar threader, etc.) | 28 |
| Knotted or tangled thread is being used. | — |
| Upper thread tension is too tight. 77 | |
| Symptom, Cause/solution | Reference |
| Thread is twisted. | — |
| Needle is turned, bent or the point is dull. 31 | |
| Needle is installed incorrectly. 31 | |
| There are scratches around the opening in the presser foot. | * |
| There are scratches on the bobbin case. * | |
| Using improper needle or thread for the selected fabric. | 31 |
| A bobbin designed specifically for this machine is not used. | 24 |
| The thread is tangled on the wrong side of the fabric. | |
| Upper threading is incorrect. 28 | |
| Using improper needle or thread for the selected fabric. | 31 |
| The upper thread is too tight. | |
| The bobbin thread is incorrectly installed. 27 | |
| Bobbin thread breaks. | |
| Bobbin is set incorrectly. 27 | |
| Bobbin thread is incorrectly wound. 24 | |
| There are scratches on the bobbin or it doesn't rotate properly. | 27 |
| Thread is twisted. | — |
| A bobbin designed specifically for this machine is not used. | 24 |
| Fabric puckers. | |
| There is a mistake in the upper or bobbin threading. | 27, 28 |
| Spool cap is set incorrectly. 28 | |
| Using improper needle or thread for the selected fabric. | 31 |
| Needle is turned, bent or the point is dull. 31 | |
| Thread tension is set incorrectly. 77 | |
| The pattern is not embroidered correctly. | |
| The thread tension is incorrect. 77 | |
| The thread is tangled, for example, in the bobbin case. | 111 |
| Skipped stitches | |
| Machine is threaded incorrectly. 28 | |
| Symptom, Cause/solution | Reference |
| Using improper needle, thread or the fabric prepared insufficiently for embroidering. | 31, 55, 67 |
| Needle is turned, bent or the point is dull. 31 | |
| Needle is installed incorrectly. 31 | |
| Needle is defective. 31 | |
| Dust or lint has collected under the needle plate. | 111 |
| Not embroidering | |
| Needle is turned, bent or the point is dull. 31 | |
| Bobbin is set incorrectly. 27 | |
| Upper threading is incorrect. 28 | |
| High-pitched sound while embroidering | |
| Pieces of thread are caught in the race. | 111 |
| Upper threading is incorrect. 28 | |
| A bobbin designed specifically for this machine is not used. | 24 |
| There are needle holes or friction scratches in the bobbin case. | 111 |
| The needle contacts the needle plate. | |
| The needle clamp screw is loose. | 31 |
| Needle is turned, bent or the point is dull. 31 | |
| The handwheel feels sluggish when it is turned. | |
| Thread is tangled in the bobbin case. | 111 |
| Symptom, Cause/solution | Reference |
| Thread tension is incorrect. | |
| Upper threading is incorrect. 28 | |
| Bobbin is set incorrectly. 27 | |
| Using improper needle, thread or the fabric prepared insufficiently for embroidering. | 31, 55, 67 |
| Thread tension is set incorrectly. 77 | |
| Bobbin thread is incorrectly wound. 24 | |
| Needle is turned, bent or the point is dull. 31 | |
| A bobbin designed specifically for this machine is not being used. | 24 |
| The pattern is not embroidered correctly. | |
| Thread is twisted. | — |
| Thread tension is set incorrectly. 77 | |
| Symptom, Cause/solution | Reference |
| Fabric was not inserted into the frame correctly (fabric was loose, etc.). | 56 |
| Stabilizing material was not attached. • Always use stabilizing material, especially with stretch fabrics, lightweight fabrics, fabrics with a coarse weave, or fabrics that often cause pattern shrinkage. See your authorized Baby Lock retailer for the proper stabilizer. | 55 |
| There was an object placed near the machine, and the carriage or embroidery frame hit the object during embroidering. | 33 |
| Fabric outside the frame edges interferes with the arm, so the embroidery unit cannot move. • Reinsert the fabric in the embroidery frame so that the excess fabric is away from the arm, and rotate the pattern 180 degrees. | 56 |
| Fabric is too heavy, so the embroidery unit cannot move freely. • Place a large thick book or similar object under the arm head to lightly lift the heavy side and keep it level. | — |
| Fabric is hanging off the table. • If the fabric is hanging off the table during embroidery, the embroidery unit will not move freely. Place the fabric so that it does not hang off the table or hold the fabric to keep it from dragging. | 67 |
| Fabric is snagged or caught on something. • Stop the machine and place the fabric so that it does not get caught or snagged. | — |
| Embroidery frame was removed during embroidering (for example, to reset the bobbin). The presser foot was bumped or moved while removing or attaching the embroidery frame, or the embroidery unit was moved. | 70 |
| Stabilizer is incorrectly attached, for example, it is smaller than the embroidery frame. | 55 |
| Loops appear on the surface of the fabric when embroidering | |
| The thread tension is incorrectly set. | 77 |
| The tension of the upper thread is incorrectly set for the combination of the fabric, thread and pattern being used.• Use the embroidery needle plate cover. | 67 |
| The combination of the bobbin case and bobbin thread is incorrect. | 67 |
ERROR MESSAGES
Below is an explanation of error messages. Refer to these when necessary (if you touch or do the operation correctly while the error message is displayed, the message disappears).| Error messages Cause/solution | ||
| 1 | Cannot change the configuration of the characters. | This message is displayed when there are too many characters and the curved character configuration is impossible. |
| 2 | Cannot recognize the data for the selected pattern. The data may be corrupted. | This message is displayed when there is a possibility that the data for the selected pattern is corrupted. |
| 3 | Change to a larger embroidery frame. This message is displayed when the machine is in embroidery mode and the small frame is attached, and the selected pattern does not fit in the small frame. | |
| 4 | Failed to save file. This message is displayed when no more images can be saved on the USB media. In this case, delete a file from the USB media or use different USB media. | |
| 5 | Includes a special pattern that cannot be saved to external memory. Save the pattern in the machine's memory. | This message is displayed when you try to save a copyright protected pattern to USB media. According to copyright laws, patterns that are illegal to reproduce or edit cannot be saved to USB media. If this message displays, save the pattern in the machine's memory. |
| 6 | Lower the presser foot lever. | This message is displayed when (Presser foot lifter button) is pressed while the presser foot lever is raised and the needle is lowered. |
| 7 | Not enough available memory to save the data. Delete some patterns or use a different media. | This message is displayed when the memory is full and the embroidery pattern cannot be saved. |
| 8 | OK to recall and resume previous memory? This message appears if the machine is turned off while embroidering, then turned on again. Touch to return the machine to the condition (pattern position and number of stitches) when it was turned off. Follow the procedure described in "If the Thread Breaks or the Bobbin Runs out of Thread During Embroidering" on page 70 to align the needle position and embroider the remainder of the pattern. | |
| 9 | OK to separate the combined border pattern? This message is displayed when rotating a saved combined pattern in the embroidery screen. | |
| 10 | Pattern extends to the outside of embroidery frame. | This message is displayed when the machine is in embroidery mode, and the character pattern combination is too large to fit in the embroidery frame. |
| 11 | Pattern extends to the outside of embroidery frame. If you plan to add more patterns, rotate the pattern combination. | This message is displayed when the machine is in embroidery mode and the combined character pattern is too large for the embroidery frame. You can rotate the pattern 90 degrees and continue combining characters. |
| 12 | Preventive maintenance is recommended. This message is displayed when the machine needs to be maintained. Once this message appears, it is recommended to take your machine to an authorized Baby Lock retailer for a regular maintenance check. Although this message will disappear and the machine will continue to function once you touch, the message will display several more times until the appropriate maintenance is performed. | |
| 13 | Set the clock. This message appears when the time/date is not set. Set time/date. (page 14) | |
| 14 | The bobbin thread is almost empty. | This message is displayed when the bobbin thread is running out. Although a few stitches can be embroidered when the "Start/Stop" button is pressed, replace with a wound bobbin immediately. When embroidering, touch, touch, OK, remove the embroidery frame, and then replace the bobbin with one wound with plenty of embroidery bobbin thread. If [Upper and Bobbin Thread Sensor] in the general settings screen of the machine setting mode is set to [OFF], this message does not appear. |
| 15 | The bobbin winder safety device has activated. Is the thread tangled? | This message is displayed when the bobbin is being wound, and the motor locks because the thread is tangled, etc. |
| 16 | The safety device was activated since the main shaft motor was heated. Is the thread tangled? | This message is displayed when the temperature of the motor increases, activating the safety device. Wait until the temperature decreases. If the error persists, contact your nearest authorized Baby Lock retailer. |
| 17 | The safety device was activated since the main shaft motor seized. Is the thread tangled? | This message is displayed when the motor locks due to tangled thread or for other reasons related to thread delivery. |
| 18 | The safety device was activated since the needle position sensor malfunctioned. | This message is displayed when an error in the needle position sensor is detected, activating the safety device. Turn the machine off, then on again. If the message continues to appear, the machine may be damaged. Contact your nearest authorized Baby Lock retailer. |
| 19 | There is no needle plate cover. Attach a needle plate cover. | This message is displayed when the needle plate cover is not attached. |
| 20 | This file cannot be used. This message appears if the file format is incompatible with this machine. Check the list of compatible file formats. (page 121) | |
| 21 | This file exceeds the data capacity and cannot be used. Use a suitable size file. | This message is displayed when the file size exceeds the data capacity of the machine. Confirm the file size and format. (page 121) |
| 22 | This USB media cannot be used. This message is displayed when you try to use incompatible media. For a list of compatible USB media, visit www.babylock.com | |
| 23 | USB media error This message is displayed when an error occurs with the USB media. For a list of compatible USB media, visit www.babylock.com | |
| Item Specification | |||
| Dimensions of machine Approx. 612 mm (W) × 348 mm (H) × 321 mm (D)(approx. 24-3/32 inches (W) × 13-11/16 inches (H) × 12-5/8 inches (D)) | |||
| Weight of machine Approx. 15 kg (approx. 33.1 lb) | |||
| Dimensions of machine with embroidery unit attached | Approx. 916 mm (W) × 348 mm (H) × 524 mm (D)(approx. 36-1/16 inches (W) × 13-11/16 inches (H) × 20-5/8 inches (D)) | ||
| Weight of machine with embroidery unit attached | Approx. 20.7 kg (approx. 45.6 lb) | ||
| Maximum embroidery speed 1050 stitches per minute | |||
| Interfaces | Wireless LAN ^1 | ||
| Memory | Embroidery | patterns | 10 |
| IQ Designer 100 MB | |||
| Data Types | Embroidery patterns ^2 | .pes .phc .phx .dst | |
| Data that can be loaded when using IQ Designer | .jpg (up to 2 MB), .png (up to 2 MB), .bmp (up to 3 MB) | ||
| Maximum embroidering area 360 mm | (H) x 240 mm (W) (approx. 14 inches (H) x 9-1/2 inches (W)) | ||
| Types of USB Devices/Media that can be Used ^3 | Embroidery patterns Data can be saved to or recalled from USB media. Use media that meets the following specifications.• USB Flash drive (USB Flash memory)Embroidery data can be recalled only from;• USB External CD/DVD drives | ||
| Condition of the [Eco Mode] and [Shutoff Support Mode] | [Eco Mode] Available time OFF, 10 - 120 (minute) | ||
| “Start/Stop” button Green flashing | |||
| Suspended functionMachine light, Screen display, LED pointer | |||
| After recoveringThe machine starts from the previous operation. | |||
| [Shutoff Support Mode] | Available time OFF, 1 - 12 (hour) | ||
| “Start/Stop” button Green slow flashing | |||
| Suspended functionAll functions | |||
| After recoveringAn error message appears.You need to turn off and on the machine to restart. | |||
| Compatible image files of the Screen Saver Image | Format | .jpg | |
| File size | Max. 150 KB for each image | ||
| File dimension | 1280 × 1280 pixels or less (If the width is between 800 and 1279 pixels, the image will be displayed at 800 pixels.) | ||
| Number allowed | 5 or less | ||
| Videos that can be played | MP4 file format | Video - H.264/MPEG-4 AVC, Audio - AAC | |
| Size | 450 (H) × 800 (W) | ||
| Maximum file size | 1 GB | ||
Note
\- We recommend using the 26 letters of the alphabet (uppercase and lowercase), the numbers 0 through 9, “-”, and “\_” for the name of the file/folder.IMPORTANT
\- When using embroidery data other than our original patterns, the thread or needle may break when embroidering with a stitch density that is too fine or when embroidering three or more overlapping stitches. In that case, use one of our original data design systems to edit the embroidery data.UPDATING YOUR MACHINE'S SOFTWARE
You can update your machine's software using the following two procedures.Update Procedure Using USB Media
When an update program is available on www.babylock.com, please download the files following the instructions on the website and steps below. Note
\- When using USB media to update the software, check that no data other than the update file is saved on the USB media being used before starting to update. 1 While pressing (Automatic threading button), turn the main power to ON. 2 Touch  3 Insert the USB media into the primary (top) USB port on the machine.  4 Touch Load . → When updating is finished, the completion message appears. 5 Turn the machine off, remove the USB media, and turn the machine on again.Update Procedure Using Wireless LAN Connection
If the machine is connected to a wireless network with a strong, reliable connection, update files can be downloaded directly to the machine using this network. For details on the wireless LAN connection, refer to page 22. Memo
\- The machine periodically checks if there is a new update file on the server. When there is a new update file, the wireless LAN key is displayed as   1 Display page 7 of the settings screen. 2 Touch Start \* The machine starts to download the update file, if there is a new update file on server.  ①When the wireless LAN key appears as , touching Start causes the machine to check if there is a new update file. If there is a new file, downloading begins.Note
- Do not turn off the machine during the download. - Touch to pause the download. To restart, touch . Resume 3 When downloading is finished, turn off the machine, then hold down (Automatic threading button) while turning on the machine. natural_image
Simple line drawing of a hand holding a small object, with an inset showing a directional arrow (no text or symbols)4 Touch
natural_image
Pure graphical icons including a computer monitor, wireless signal icon, and connection symbols without any text or labels5 Touch to update the machine.
\* Do not turn off the machine during the update.Memo
\- If there are changes or additions to functions, manuals available on the machine may be updated.INDEX
A
Accessories options 12 Air vent Alphabet characters embroidery 37 Appliqué using an embroidery frame pattern 85 Automatic threading button 10, 28B
Bobbin setting 27 winding 24 Bobbin case cleaning 111 Bobbin cover 9 Bobbin threading setting the bobbin 27 winding the bobbin 24 Bobbin winder 9 Bobbin winding switch 26 Border key 44, 47C
Cleaning race 111 Clock 14 Color visualizer function 51 Couching patterns 86D
Decorative fill pattern 89 Deselect region setting 48E
Echo quilting 89 Eco mode 18 Editing embroidery edit 41 Embroidery 2-point embroidery positioning function 63 adjusting the speed 80 automatic thread cutting function (End color trim) 79 key functions 54 resuming embroidery after turning off the power 71 selecting patterns 35 thread color display 81 thread trimming function (Jump stitch trim) 80 Embroidery appliqué 69 Embroidery edit changing the thread color 50 key functions 41 repeated patterns 44 Embroidery foot "W+" with LED pointer 113 Embroidery frames attaching 58 inserting fabric 56 removing 59 types 56 using the embroidery sheet 57 Embroidery needle plate cover 67 Embroidery patterns checking the position 62 editing 41 embroidering 67 linked characters 82 retrieving 84 saving 83 selecting 35 using a frame pattern to make an appliqué 85 Embroidery sheet 57 Embroidery unit 33 Error messages 119F
Favorite color scheme 52H
Handle 9 Handwheel 9 Home page screen 151
Image key 43 IQ Designer 91 IQ Intuition- Monitoring App 108 IQ Intuition- Positioning App 109K
Key functions embroidery 54 embroidery edit 41L
LCD screen 9,15 light 16M
Machine help key 19 Main power switch 9 Metallic thread 29 MPEG-4 (MP4) videos 20N
Needle changing the needle 31 Needle bar thread guide 9 Needle plate 9 Needle position button 10O
Operation buttons 9, 10P
Power cord 14 Power cord receptacle 9 Presser foot code 53 Presser foot lever 9 Presser foot lifter button 10 Presser foot/Needle exchange key 32, 113 Pretension disk 9, 25, 27R
Race 111 Repeated patterns 44 Retrieving embroidery patterns 84 machine's memory 84S
Saving
embroidery patterns 83 machine's memory 83 Screen saver 18 Screw for embroidery foot 9Set
automatic thread cutting 79 embroidery settings 17 general settings 16 machine settings key 16 thread tension 77 thread trimming 80 Shutoff support mode 18 Speaker 16 Specifications 121 Spool cap 9 Spool net 29 Spool pin 9 Stabilizer 55 Start/Stop button 10 Starting point key 81 Stippling 89 Supplemental spool pin 9, 24T
Thread
thread tension 77 Thread color display 81 Thread color palette 50 Thread cutter 9 Thread cutter button 10 Thread guide 9, 25, 27 Thread guide plate 9,26 Thread marks 47 Touch pen 114 Trial key 62 Troubleshooting 115 Tutorial video 20U
Upgrading 123 Upper threading using the Automatic threading button 28 USB mouse 24 USB port 9  Meridian 2 ^TM


- INTRODUCTION
- IMPORTANT SAFETY INSTRUCTIONS
- ⚠️DANGER
- WARNING
- Electrical Hazards:
- SAVE THESE INSTRUCTIONS This machine is intended for household use.
- FOR USERS IN COUNTRIES EXCEPT EUROPEAN COUNTRIES
- FOR USERS IN EUROPEAN COUNTRIES
- FOR USERS IN THE UK, EIRE, MALTA AND CYPRUS ONLY
- IMPORTANT
- Federal Communications Commission (FCC) Supplier's Declaration of Conformity (For U.S.A. Only)
- For Users in Canada
- For Users in Mexico
- Intel License Agreement For Open Source Computer Vision Library
- COPYRIGHT AND LICENSE
- PRECAUTION FOR WIRELESS CONNECTION
- CONTENTS
- Chapter 1 GETTING READY 9
- Chapter 2 BASIC EMBROIDERY 33
- Chapter 3 ADVANCED EMBROIDERY 73
- Chapter 4 IQ DESIGNER 91
- Chapter 5 APPENDIX 111
- BEFORE LENDING OR DISPOSING OF THE
- Chapter 1 GETTING READY
- Note
- NAMES OF MACHINE PARTS
- Operation Buttons
- ①"Start/Stop" button
- ②Needle position button
- ③Thread cutter button
- ④Presser foot lifter button
- ⑤Automatic threading button
- INCLUDED ACCESSORIES
- Memo
- Options
- CAUTION
- LCD SCREEN
- Using the Machine Settings Key
- ■ General Settings
- ■ Embroidery Settings
- ■ Wireless LAN Settings
- ■ Setting the [Eco Mode] and the [Shutoff Support Mode]
- [Eco Mode];
- [Shutoff Support Mode];
- ■ Changing the Screen Saver Image
- Touch
- Using the Machine Help
- Using the Operation Guide Function
- ■ Playing a Tutorial Video
- ■ Playing MPEG-4 (MP4) Videos
- WIRELESS NETWORK CONNECTION FUNCTIONS
- Operations Available with a Wireless Network Connection
- For updating
- ■ For embroidering
- Enabling a Wireless Network Connection
- Touch
- Set [Wireless LAN Enable] to [ON].
- Using the Wizard to Set Up the Wireless Network Connection
- In order to connect your machine to a wireless network, the security information (SSID and network key) for your home network will be required. The network key may also be called a password, security key or encryption key. First, find your security information and note it.
- Touch beside [Wireless LAN Setup Wizard].
- Touch beside the SSID that was noted.
- ■ Using the [Others] Menu to Set Up the Wireless Network Connection
- CONNECTING THE ACCESSORY TO THE MACHINE
- Using a USB Mouse
- - Clicking a Key
- WINDING/INSTALLING THE BOBBIN
- Winding the Bobbin
- ■ Using the Supplemental Spool Pin
- Place the spool of thread for the bobbin and the spool cap onto the supplemental spool pin.
- ■ Using the Spool Pin
- Setting the Bobbin
- UPPER THREADING
- ■ Using the Vertical Spool Pin
- CHANGING THE NEEDLE
- Thread and Needle Number
- ■ Embroidery Needles
- Chapter 2 BASIC EMBROIDERY
- BEFORE EMBROIDERING
- Embroidery Step by Step
- About the Embroidery Unit
- ■ Attaching the Embroidery Unit
- Turn the main power to ON.
- ■ Removing the Embroidery Unit
- SELECTING PATTERNS
- ■ Copyright Information
- ■ About Embroidery Patterns
- Selecting Embroidery Patterns
- Touch for the pattern.
- Touch to edit the selected pattern.
- Touch Embroidy.
- Touch to edit the pattern before embroidering. (page 53)
- Start embroidering. (page 67)
- Selecting Character Patterns
- ■ Character Pattern Input Keys
- Selecting Frame Patterns
- Combining Patterns
- ■ Selecting a Pattern
- ■ Selecting Multiple Patterns at the Same Time
- Touch □○△.
- Touch each pattern to be selected.
- Touch to return to the edit screen.
- ■ Grouping Patterns
- Select patterns you want to group. (page 40)
- Touch
- EDITING PATTERNS
- ■ Key Functions
- Previewing the Pattern
- Touch to select the frame used in
- the preview.
- Touch to check the embroidering order.
- Touch OK.
- Changing the Size and the Density of the Pattern
- Touch, and then touch. Size
- Select in the size window.
- Creating Repeated Patterns
- Vertical direction
- Horizontal direction
- ■ Repeating Patterns Using the Matrix Copy
- Adjust the spacing of the repeated pattern.
- ■ Repeating One Element of a Repeated Pattern
- Choose the direction in which the repeated pattern will be cut.
- Use and to select the cut line.
- Touch .
- Touch .
- Use and to select the element to repeat.
- Repeat the selected element.
- Touch OK.
- ■ Color Sorting Repeated Patterns
- ■ Assigning Thread Marks
- Embroidering the Pattern Repeatedly
- Select the repeated pattern and assign the thread mark at the center of the bottom of the pattern.
- Press the "Start/Stop" button to start embroidering.
- Rehoop the fabric in the embroidery frame.
- Attach the embroidery frame to the machine, and then
- Touch to set the starting point to the center top of the pattern.
- Touch, and then touch.
- Touch to move the embroidery frame until
- Touch OK.
- Remove the thread mark.
- Start embroidering.
- Deselect Region Setting (No Sew Setting)
- Touch in the embroidering edit screen.
- EDITING COLORS
- Changing the Thread Color
- Touch, and then touch.
- Touch the color of the part to be changed.
- Select a new color from the thread color palette, and then touch . OK
- Finding New Color Schemes with the Color Visualizer Function
- [Manual] setting for [Random]
- [Manual] setting for [Gradient]
- Thread Color Sorting
- Touch in the embroidery screen.
- VIEWING THE EMBROIDERY SCREEN
- PREPARING THE FABRIC
- Attaching Iron-on Stabilizers (Backing) to the Fabric
- Hooping the Fabric in the Embroidery Frame
- ■ Types of Embroidery Frames
- - Inserting the Fabric
- ■ Using the Embroidery Sheet
- ATTACHING THE EMBROIDERY FRAME
- ■ Removing the Embroidery Frame
- CONFIRMING THE PATTERN POSITION
- Checking the Needle Drop Point with the Embroidery Foot "W+" with LED Pointer
- ■ Adjusting the LED Pointer
- Display [Embroidery Foot with LED Pointer Adjustment] in the embroidery setting screen.
- Touch Start.
- Use or to adjust the LED pointer so that it indicates the actual needle drop point.
- Touch to return to the original screen.
- ■ Adjusting the Brightness of the LED Pointer
- Follow the steps from 1 to 3 of "Adjusting the LED Pointer" on page 59 to display the embroidery foot with LED pointer adjustment screen.
- Use or to adjust the brightness of the LED pointer.
- Touch to return to the original screen.
- Displaying a Background Image
- ■ Displaying the Background Image on the Screen of the Machine
- Select the pattern. (page 35)
- Photograph the fabric in the frame with the easy mode of the application, and then transfer it to the machine. For a detailed procedure, refer to the application.
- Touch OK.
- ■ Calibrating the Position of the Background Image
- Select a pattern. (page 35)
- Set the application to advanced mode, attach the embroidery positioning sticker to the fabric in the hoop, take the photo of the background, and with the advanced mode of the application, transfer it to the machine.
- Use to align
- Touch OK.
- ■ Aligning the Embroidering Position
- Calibrate the position of the background image. (page 61)
- Touch 8.
- When the following message appears, touch . OK
- Select the position to be set as the reference point.
- Remove the embroidery positioning sticker, and then start embroidering.
- Checking the Pattern Position
- Touch □.
- From , touch the key for the position that you want to check.
- THE 2-POINT EMBROIDERY POSITIONING FUNCTION
- Use a chalk pencil to mark the desired embroidering position.
- Hoop the fabric in the embroidery frame.
- Select the pattern.
- Touch 📋 monitor play the embroidery screen.
- If a message appears, indicating that the move and rotate settings will return to the original ones, touch OK.
- From the reference points shown in the screen, select the point to be used for aligning the pattern.
- Touch Next .
- Select the direction (from the reference point) to be used as a reference for aligning the pattern.
- Touch Next .
- Touch the positioning keys to move the embroidery frame until the position of the LED pointer and the center of the first mark are aligned.
- Touch Next .
- Touch the positioning keys to move the embroidery frame until the position of the LED pointer and the center of the second mark are aligned.
- Another example
- Touch Next.
- Touch Next
- Touch Set. → The pattern is repositioned.
- Press the "Start/Stop" button to start embroidering.
- EMBROIDERING A PATTERN
- Embroidering Attractive Finishes
- ■ Embroidery Needle Plate Cover
- Embroidering Patterns
- Using the automatic needle threader, thread the machine for the first color. (page 28)
- Lower the presser foot, then press the "Start/Stop" button to start embroidering.
- Remove the upper thread for the first color from the machine. Thread the machine with the next color.
- Repeat the same steps for embroidering the remaining colors.
- Using Appliqués
- ■ 1. Creating an Appliqué Piece
- ■ 2. Sewing the Appliqué Position on the Base Fabric
- ■ 3. Affixing the Appliqué Piece to the Base Fabric
- ■ 4. Embroidering the Remainder of the Pattern
- ADJUSTMENTS DURING THE EMBROIDERY PROCESS
- If the Thread Breaks or the Bobbin Runs out of Thread During Embroidering
- Resuming Embroidery after Turning off the Power
- Chapter 3 ADVANCED EMBROIDERY
- VARIOUS EMBROIDERING FUNCTIONS
- Basting Embroidery
- Creating an Appliqué Piece
- ■ Creating an Appliqué Piece
- Select the pattern, and edit it if necessary.
- Touch and then, touch.
- Specify the distance between the pattern and the appliqué outline, and then touch . OK
- MAKING EMBROIDERY ADJUSTMENTS
- Adjusting Thread Tension
- ■ Correct Thread Tension
- ■ Upper Thread Is Too Tight
- ■ Upper Thread Is Too Loose
- ■ Adjusting Overall Upper Thread Tension
- Display [Embroidery Tension] in the embroidery settings screen.
- Use +to adjust the upper thread tension.
- Adjusting the Bobbin Case
- ■ Correct Tension
- ■ Bobbin Thread Is Too Loose
- ■ Bobbin Thread Is Too Tight
- Using the Automatic Thread Cutting Function (End Color Trim)
- Using the Thread Trimming Function (Jump Stitch Trim)
- Touch to turn off the thread trimming function.
- ■ Selecting the Length Of Jump Stitch Not to Trim
- Adjusting the Embroidery Speed
- Display [Max Embroidery Speed] in the embroidery settings screen.
- Use +to change the maximum embroidery speed.
- Changing the Thread Color Display
- Aligning the Pattern and the Needle
- Embroidering Linked Characters
- ABCDEFG
- Touch L.
- Touch, then and use to align
- Touch OK.
- USING THE MEMORY FUNCTION
- Saving Embroidery Patterns
- Retrieving Embroidery Patterns
- Touch Set .
- EMBROIDERY APPLICATIONS
- Using a Frame Pattern To Make an Appliqué
- Method 1
- Method 2
- Embroidering Couching Patterns
- Preparing for Embroidery Couching
- Creating Stippling, Echo Quilting, or Decorative Fill Patterns around a Design
- Select the pattern that stippling will be added around.
- Touch in the embroidery edit screen.
- Embroidering Split Embroidery Patterns
- Chapter 4 IQ DESIGNER
- ABOUT IQ DESIGNER PATTERN DRA
- NG SCREEN
- Before Creating Designs
- Drawing Lines
- ■ Setting the Line Types, Stitch Types and Colors
- Stitch types
- Drawing Regions
- Brush shapes/sizes
- Fill stitch types
- Touch to return to the pattern drawing screen.
- Touch and touch on the brush line to change color and fill stitch type. You can also set the fill color, stitch type and fill pattern of a closed area made of the lines and brush lines.
- Using the Stamp Key
- Select a stamp type and stamp shape.
- Saved outlines
- Frame embroidering areas
- Using the Erase Key
- Using the Select Key
- STITCH SETTINGS SCREEN
- Specifying Individual Stitch Settings
- ■ Line Settings
- Line stitch settings
- ■ Region Settings
- Use
- Touch ,anel then use to change the direction.
- Touch to apply the setting.
- Specifying Global Stitch Settings
- Use < > to select the stitch whose settings are to be changed, and then touch.
- Follow steps 2 through 4 in "Specifying Individual Stitch Settings" on page 97 to change the settings.
- Touch to create the embroidery pattern.
- Loading the Background Image
- LINE CONVERSION
- Recommended line drawings for Line Conversion
- Create a Pattern with Line Conversion
- Touch Line design
- ILLUSTRATION CONVERSION
- Recommended illustrations for Illustration Conversion
- Create a Pattern with Illustration Conversion
- Select the device you saved the data to.
- STIPPLING
- Basic Stippling with IQ Designer
- Select the square shape, and then touch . OK
- Touch
- Select the heart shape, and then touch . OK
- Touch Size .
- Decorative Stitching around a Pattern in Embroidery (a Quilting Function)
- If you select the stamp shapes to determine the region
- Specify the stitch spacing and length in the stitch
- IQ INTUITION- MONITORING APP
- ■ Installing the App
- ■ Monitoring
- Connect the machine to your wireless network.
- Confirm that your smart device and your machine are connected to the same network.
- Tap the icon for [IQ Intuition- Monitoring] on the smart device to start the app.
- Follow the instructions that appear in the app to connect the app to your machine.
- IQ INTUITION- POSITIONING APP
- ■ Installing the IQ Intuition- Positioning App
- Use your smart device to scan the appropriate QR code below to visit Google Play™ or the App Store.
- Chapter 5 APPENDIX
- CARE AND MAINTENANCE
- Cleaning the LCD
- Cleaning the machine surface
- Restrictions on Oiling
- Precautions on Storing the Machine
- Cleaning the Race
- Cleaning the Bobbin Case
- Cleaning the Cutter in the Bobbin Case Area
- Changing Embroidery Foot "W+" with LED Pointer
- BEFORE LENDING OR DISPOSING OF THE PRODUCT
- ADJUSTING THE SCREEN
- Touch Panel is Malfunctioning
- TROUBLESHOOTING
- If the Thread Becomes Tangled Under the Bobbin Winder Seat
- List of Symptoms
- Getting Ready
- ERROR MESSAGES
- UPDATING YOUR MACHINE'S SOFTWARE
- Update Procedure Using USB Media
- Update Procedure Using Wireless LAN Connection
- Touch
- Touch to update the machine.
- INDEX
- A
- B
- C
- D
- E
- F
- H
- 1
- K
- L
- M
- N
- O
- P
- R
- S
- Saving
- Set
- T
- Thread
- U
- Meridian 2 TM
Brand : BABY LOCK
Model : Meridian 2 BLMA2
Category : Embroidery machine