
VE1462TT - Household Fan DCG - Free user manual and instructions
Find the device manual for free VE1462TT DCG in PDF.


| Brand | DCG |
| Model | VE1462TT |
| Product Type | Tower Fan |
| Dimensions (Height x Width x Depth) | 100 cm x 30 cm x 30 cm |
| Weight | 5 kg |
| Power Supply | 220-240 V, 50/60 Hz |
| Power Consumption | 50 W |
| Number of Speed Settings | 3 |
| Oscillation | Yes, 90° |
| Timer | Yes, up to 7 hours |
| Remote Control | Yes, included |
| Airflow Modes | Normal, Natural, Sleep |
| Overheat Protection | Yes |
| Safety Switch | Yes, auto shut-off when tilted |
| Cleaning Instructions | Wipe with a soft, damp cloth. Do not use abrasive cleaners. |
| Spare Parts Available | Remote control, screws, filter |
| Reparability | Repairable by qualified technician |
| Certification | CE |
Frequently Asked Questions - VE1462TT DCG
User questions about VE1462TT DCG
0 question about this device. Answer the ones you know or ask your own.
Ask a new question about this device
Download the instructions for your Household Fan in PDF format for free! Find your manual VE1462TT - DCG and take your electronic device back in hand. On this page are published all the documents necessary for the use of your device. VE1462TT by DCG.
USER MANUAL VE1462TT DCG
natural_image
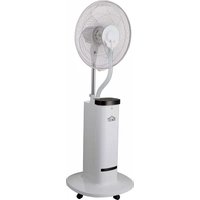
Black outdoor water spray fan with attached cable, mounted on a stand against a blue water background (no text or symbols visible)VE1462TT VENTILATORE CON NEBULIZZATORE IONIZZATORE STAND FAN WITH REMOTE CONTROL
CLIMA dcg16.it
CARATTERISTICHE TECNICHE: 220-240V\~ 50Hz 100W

PRIMA DI USARE L'APPARECCHIO, LEGGERE QUESTE ISTRUZIONI PER LA SICUREZZA. CONSERVARLE PER CONSULTAZIONI FUTURE.
ISTRUZIONI IMPORTANTI PER LA SICUREZZA
natural_image
Three-step diagram showing a device with a handle, labeled in Chinese (no text or symbols on the devices themselves)flowchart
graph TD
    A["Top Box"] --> B["Arrow Up"]
    B --> C["Bottom Box"]
    C --> D["Arrow Down"]
    D --> E["Bottom Box with Arrow"]
    E --> F["Arrow Left"]
    F --> G["Arrow Right"]
    G --> H["Arrow Bottom"]
READ AND SAVE THESE SAFETY INSTRUCTIONS BEFORE USING THIS APPLIANCE
IMPORTANT SAFETY INSTRUCTIONS
WARNING: When using electrical appliance, basic safety precautions should always be followed to reduce the risk of fire, electrical shock and personal injury.
Use this fan only as described in this manual. Other use not recommended may cause fire, electric shock or injury to persons.
This product is intended for household use ONLY and not for commercial, industrial or outdoor use.
To protect against electric shock: do not place fan on windowsills, immerse unit, plug or cord in water or spray with liquids.
To reduce the risk of shock, this plug is intended to fit the outlet. If the plug does not fit fully in the outlet, reverse the plug. If it still does not fit, contact a qualified electrician. DO NOT attempt to defeat this safety feature.
To reduce the risk of fire or electric shock, do not use this fan with any solid-state speed control device.
This appliance is not intended for use by person (including children) with reduced physical, sensory or mental capabilities, or lack of experience and knowledge, unless they have been given supervision or instruction concerning use of the appliance by a person responsible for their safety.
Children should be supervised to ensure that they do not play with the appliance.
Turn the fan OFF and unplug the fan from the outlet when not in use, when moving the fan from one location to another and before cleaning.
To disconnect the fan, first turn the unit OFF, grip the plug and pull it from the wall outlet. Never pull the plug by the cord.
Do not operate the fan in the presence of explosive and/or flammable fumes.
Do not place the fan or any parts near an open flame, cooking or other heating appliance.
Do not operate fan with a damaged cord or plug, or if the product malfunctions, or dropped and damaged in any manner.
Avoid contact with moving fan parts.
The use of attachments not recommended by the manufacturer may be hazardous.
Place the fan on a dry level surface.
Do not hang or mount fan on a wall or ceiling.
Do not operate if the fan housing is damaged.
A loose fit between the AC outlet (receptacle) and plug may cause overheating and a distortion of the plug. Contact a qualified electrician to replace loose or worn outlet.
Only use on a power supply that matches that shown on the unit's rating label. If the supply cord is damaged, it must be replaced by the manufacturer, its service agent or similarly qualified persons in order to avoid hazard.
This appliance can be used by children aged from 8 years and above and persons with reduced physical, sensory or mental capabilities or lack of experience and knowledge if they have been given supervision or instruction concerning use of the appliance in a safe way and understand the hazards involved. Children shall not play with the appliance. Cleaning and user maintenance shall not be made by children without supervision.
MAIN TECHNICAL DATA TECHNICAL CHARACTERISTICS
Model No.: VE1462TT
Rated Voltage: 220V-240V\~
Rated Frequency: 50Hz
Power Input: 100 W
Protection Class I
Max Mist Capacity: 200 ml / hr
Blade Size: 400 mm
Water Tank Capacity: 1500 ml
PARTS IDENTIFICATION / ASSEMBLY
1) Parts Identification
INDEX PART NAME INDEX PART NAME
[1]: Fan ring [7]: Display & Control panel
[2]: Fan grill [8]: Rear housing
[3]: Motor housing [9]: Water tank storage
[4]: Mist outlet dish [10]: Base
[5]: Mist tube [11]: Wheel(s)
[6]: Fixation screw
![[1] [2] [3] [4] [5] [6] [7] [8] [9] [10] [11]](/content/2026/05/981713/images/baff2a23a4732c3686dd640cc5370619f679c6fe35ecb02f7b885326d9f8e93e.jpg)
2) Fan assembly
INDEX PART NAME INDEX PART NAME
[1]: Mist outlet dish [9]: Fan body
[2]: Front fan grill [10]: Power cord
[3]: Blade cap [11]: Base
[4]: Fan blade [12]: Base nut
[5]: Grill mounting nut [13]: Wheel(s)
[6]: Rear fan grill [14]: Water tank storage
[7]: Motor set [15]: Mist tube
[8]: Fixation screw [16]: Fan ring
![[1][2][3][4][5] [6] [16] [15] [7] [8] [9] [14] [10] [12] [11] [13]](/content/2026/05/981713/images/4b27ff876495fde9eba0381712f49afc95771ed38c5b980045444eef291d4848.jpg)
How To Assemble:
1) Fix the four wheels [13] in the base [11].
2) Install fan body [9] on the base [11], and fasten the base nut [12].
3) Fasten the motor set [7] with the fixation screw [8]
4) Put the rear fan grill [6] on motor set [7], and fasten grill mounting nut [5].
4) Install the blade [4] on motor shaft, then counterclockwisely fasten blade cap [3].
5) Make the front fan grill [2] face to face rear fan grill [6], and clip it properly with grill ring [16].
7) Connect the mist tube [15] with mist outlet dish [1].
3) Tank assembly
- Open the water tank cover
- Lift the water tank evenly.
- Take out the water tank evenly.

natural_image
Three-step diagram showing a device with a handle, before and after assembly (no text or symbols)- Allow the tank to stand in the correct position.
- Open the tank cover and input water.
- Install the water tank cover tightly and re-install it to the fan and close the panel.

flowchart
graph TD
    A["Top Bottle"] --> B["Arrow Up"]
    B --> C["Bottom Bottle"]
    C --> D["Arrow Down"]
    D --> E["Bottom Product"]
Note: Use only clean tap water or purified water to ensure longer product life.
OPERATION
- Please ensure the unit is in the (OFF) position before plugging into the power socket.
- Place the unit on a firm level surface.
- Avoid overloading the circuit by not plugging other high wattage products into the same power socket.
Display screen & Control panel
1) Display panel


2) Control button
3) Remote control
Function Description
OFF: Press this button to turn off the fan
ON/SPEED: Press this button to start the fan at 1 Speed, in Normal Mode.
Press again to switch the fan speed from 1-2-3.
SWING: Press to start/stop Fan Oscillation.
MIST: Press this button to turn on/off the ultrasonic humidifier.
ION: Press this button to turn the lonizer feature on/off (the fan must be operating for lonizing to work).
When the ioniser is turned on, it will assist in the purification of the room air.
TIMER: When the unit is in use, you can set the Timer to turn off the fan after the specified time. Press this button repeatedly to increase the Timer setting in 1 hour increments (up to a maximum of 15 hours) as indicated on the LED Display. After 5 seconds, the Timer starts. Once the Timer has run out, the unit will turn off.
WIND: Press to select Normal Mode, Natural Breeze Mode or Sleep Mode (as indicated on the LED Display).
NORMAL Mode: Fan operates at the speed selected with "ON/SPEED/OFF" button.
NATURAL BREEZE Mode: Fan speed varies automatically to simulate a breeze*.
SLEEP Mode: Fan speed varies automatically for use during sleep*.
CLEANING AND STORAGE INDEX PART NAME INDEX PART NAME
[1]: Plastic tube [5]: Water overflow hole
[2]: Mist cask [6]: Water tank
[3]: Mist patch [7]: Brush
[4]: Flume [8]: Cleaning detergent
![[6] [2] [1] [4] [3] [5]](/content/2026/05/981713/images/a10a8c7a1c07ba7cc15ebb355f75d09ac62e82901cff368668e270b70443fc33.jpg)
![[8] [7] [5] [3]](/content/2026/05/981713/images/63d70fa5ff93250933c899085fd723d4ab2a1e6482872efb80d87c05db3125bc.jpg)
Before cleaning, turn the unit off, unplug from the power supply and wait for the unit to cool down. To clean the unit use a soft cloth to wipe off any dust. Please clean the water tank every two or three weeks, and clean the flume every week. Please take out water tank when cleaning it, and pull the plastic tube out of the mist properly. Then slowly remove the mist machine and water tank..Use dry cloth to clean the mist machine or use mild detergent to clean the mist machine if it has mineral water residue. Keep the unit in a cool and dry place when not to be used for a long time.
MAINTAINENCE
Have your product repaired by a qualified person
This electric product is in accordance with the relevant safety requirements. Repairs should only be carried out by qualified persons using original spare parts, otherwise this may result in considerable danger to the user. Please contact the store which you bought the product for after sale services if any.
natural_image
Symbol of a trash bin crossed with a diagonal line, no text or numbers present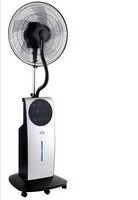


- VE1462TT VENTILATORE CON NEBULIZZATORE IONIZZATORE STAND FAN WITH REMOTE CONTROL
- ISTRUZIONI IMPORTANTI PER LA SICUREZZA
- READ AND SAVE THESE SAFETY INSTRUCTIONS BEFORE USING THIS APPLIANCE
- IMPORTANT SAFETY INSTRUCTIONS
- To reduce the risk of fire or electric shock, do not use this fan with any solid-state speed control device.
- MAIN TECHNICAL DATA TECHNICAL CHARACTERISTICS
- PARTS IDENTIFICATION / ASSEMBLY
- 1) Parts Identification
- INDEX PART NAME INDEX PART NAME
- 2) Fan assembly
- How To Assemble:
- 3) Tank assembly
- OPERATION
- Display screen & Control panel
- Function Description
- CLEANING AND STORAGE INDEX PART NAME INDEX PART NAME
- MAINTAINENCE
Brand : DCG
Model : VE1462TT
Category : Household Fan