
VE1634TT - Household Fan DCG - Free user manual and instructions
Find the device manual for free VE1634TT DCG in PDF.


| Product Type | Stand Fan |
| Brand | DCG |
| Model | VE1634TT |
| Number of Blades | 13 |
| Power Supply | 220-240V~ 50Hz |
| Power Consumption | 55W |
| Speed Settings | 3 (Low, Medium, High) |
| Wind Modes | Normal, Natural, Sleep |
| Timer | 1 to 12 hours |
| Oscillation | Yes, with swing button |
| Remote Control | Included, with CR2025 battery |
| Display | LED, shows room temperature and settings |
| Adjustable Height | Yes, via removable columns |
| Assembly Required | Yes, base, columns, blade, grills |
| Cleaning | Soft damp cloth, mild detergent if needed |
| Safety Features | Overheat protection (assumed), child lock not mentioned |
| Use | Indoor household only |
Frequently Asked Questions - VE1634TT DCG
User questions about VE1634TT DCG
0 question about this device. Answer the ones you know or ask your own.
Ask a new question about this device
Download the instructions for your Household Fan in PDF format for free! Find your manual VE1634TT - DCG and take your electronic device back in hand. On this page are published all the documents necessary for the use of your device. VE1634TT by DCG.
USER MANUAL VE1634TT DCG
natural_image
Three DCG air conditioners on stands in a tropical beach setting (no text or symbols visible on the fans or background)VE1634TT VENTILATORE PIANTANA 13 PALE TIMER E TELECOMANDO
13 BLADES STAND FAN WITH TIMER AND REMOTE CONTROL
INFORMAZIONI TECNICHE: 220-240V\~ 50Hz 55W

PRIMA DELL'USO, LEGGERE ATTENTAMENTE QUESTE ISTRUZIONI, CONSERVANDOLE PER CONSULTAZIONI FUTURE.
Gentile cliente,
PLEASE READ THESE INSTRUCTIONS CAREFULLY BEFORE USING AND KEEP THEM FOR FURTHER USE.
Dear customer,
Thank you for choosing our product. This manual will provide you with valuable information necessary for the proper care and maintenance of your new product. Please take a few moments to thoroughly read the instructions and familiarize yourself with all the operational aspects of your new stand air circulator.
IMPORTANT INSTRUCTIONS
When using electrical appliances, basic safety precautions should always be followed to reduce the risk of fire, electric shock and injury to persons, including the following:
- Never insert foreign objects, such as fingers, pencil etc. through the grills when this circulator is running.
- Always unplug the circulator when moving from one location to another, when removing grills or for cleaning.
- Do not immerse this product, plug or cord in water or spray with liquids.
- Do not allow the power supply or power cord to come in contact with water or wet locations.
- Do not operate any product with a damaged cord or plug or after the product malfunctions, has been dropped or damaged in any manner. Return this product to authorized service facility for examination, electrical or mechanical adjustment, or repair.
- Do not operate in the presence of explosive and/or flammable fumes.
- Do not use this circulator outdoors or where there are bodies of water, such as the bathroom or laundry room. Never locate
product where it may fall into a bathtub, laundry, swimming pool or other water container.
- Place this circulator on a flat, stable surface.
- Do not use this circulator near curtains, plants, window treatment or where other objects can become caught in the blades.
- To disconnect, grip plug and pull from wall outlet. Never yank on cord.
- Do not run cord under carpeting. Do not cover cord with throw rugs, runners, or similar coverings. Arrange cord away from traffic area and where it will not be tripped over. To avoid a tripping hazard, safely coil/store the power cord.
- If you notice any malfunction, such as an unusual noise from the circulator, turn the circulator off and unplug it immediately.
- This appliance can be used by children aged from 8 years and above and persons with reduced physical, sensory or mental capabilities or lack of experience and knowledge if they have been given supervision or instruction concerning use of the appliance in a safe way and understand the hazards involved.
- Children shall not play with the appliance.
- Cleaning and user maintenance shall not be conducted by children without supervision.
- In order to ensure your children's safety, please keep all packaging (plastic bags, boxes, polystyrene etc.) out of their reach.
- If the supply cord is damaged, it must be replaced by the manufacturer, its service agent or similarly qualified persons in order to avoid hazard.
- Use this circulator only for intended household use as described in this manual. Any other use not recommended by the manufacturer may cause fire, electric shot, or injury to persons.
PART REFERENCE
- Front grill
- Fan blade
- Back grill
- Back grill lock
- Control panel
- LED display
- Upper column (removable)
- Lower column(removable)
- Base
- Remote control

ASSEMBLY
ASSEMBLY OF BASE
For Stand Fan
- Remove all parts from packing. Set the base on the floor.
- Insert the lower column with adapter into the base and secure them by turning the lower column clockwise.
- Insert the upper column with adapter into the top hole of the lower column and secure them by turning the upper column clockwise.
- Place the fan body on the top of the upper column. Tighten the body securing knob.
For Stand Fan(Medium height)
- Set the base on the table, insert the upper column with the adapter into the base and secure them by turning them clockwise.
- Place the fan body on the top of the upper column. Tighten the body securing knob.
For Table Fan
- Set the base on the table, insert the connecting adapter into the base and secure them by turning the connecting adapter clockwise.
- Place the fan body on the top of the connecting adapter. Tighten the body securing knob.
ASSEMBLY OF BLADE AND GRILLS
- Remove and discard the plastic sleeve on the motor shaft. Position the back grill against the front of the motor housing through the motor shaft. Ensure all guiding pegs on the motor housing are lined up with cutouts on the back grill.
- Secure the back grill into place with the mounting nut. Fasten the nut firmly onto the motor housing by tightening it in a clockwise direction.
- Install the fan blade onto the motor shaft with the cutouts fitted. Place the blade cap on the motor shaft after the blade. Fasten into place by tightening the cap in a counter-clockwise direction.
- Attach front grill to the back grill and hold in place with back grill lock then tight the lock screw.
- Check the correct rotation of the blade.
OPERATING INSTRUCTIONS
Plug into 220-240V\~ 50Hz power socket, the appliance will be in standby mode and the display will indicate the current room temperature and will gradually change as the room temperature changes.
The appliance may be operated by the press buttons on the control panel or by the supplied remote control.
- Press ON/OFF button to power on, the appliance operates at default low fan speed.
- Press SPEED button to select desired speed Low-Medium-High in turn. LED display will display the corresponding wind speed. The
set speed will flash several times and then the display will return to indicate the current room temperature and will gradually change as the room temperature changes.
-
Press TIMER button to activate timer, the time can be set from 1 to 12 hours. The display will indicate the corresponding set time. The fan will stop automatically after the set time has expired. The set time will flash several times and then the display will return to indicate the current room temperature and will gradually change as the room temperature changes.
-
Press MODE button will cycle the fan through different patterns of wind modes.
NORMAL wind (P1): The fan is operating at the selected fan speed(HIGH, MID, LOW).
NATURAL wind (P2): The fan is simulating a natural wind by cycling through all the speeds.
SLEEP wind (P3): The fan speed will decrease by one level per half hour and then continue to run at low speed, ideal for resting.
- If it is selected HIGH, the unit will work under HIGH NORMAL wind mode for half an hour, then revert to work under MID NORMAL wind mode for half an hour and then revert to LOW NORMAL wind mode.
- If it is selected MID, the unit will work under MID NORMAL wind mode for half an hour and then revert to LOW NORMAL wind mode.
-
If it is selected LOW, the unit will work under LOW NORMAL wind mode.
-
Press SWING button to activate the oscillation function for widespread air distribution.
Press again to stop the oscillation function.
-
Press ON/OFF button once again to turn the fan off.
-
Always unplug the fan from the power socket when not in use or if it will be left unattended.
REMOTE CONTROLLER INSTRUCTION
- The remote control includes one CR2025 battery. Battery comes pre-installed.
- Pull the plastic insulation film out from the backside of the remote control before first use.
- The remote control functions are the same as the control panel on the circulator. Follow the same instructions above to operate the fan remotely.
- Note: The remote control must be pointed towards the receiver on the fan in order to work.
- Please take out the battery for long time no use.
MAINTENANCE AND STORAGE
- Always unplug the unit before cleaning.
- To keep the circulator clean, the outer shell may be cleaned with a soft, damp cloth. You may use a mild detergent if necessary. After cleaning, dry the unit with a soft cloth. CAUTION: DO NOT let liquid enter the circulator.
- DO NOT use alcohol, gasoline, abrasive powders, furniture polish, or rough brusher to clean the circulator. This may cause damage or deterioration to the surface of the circulator.
- DO NOT immerse the circulator in water.
- Wait until the unit is completely dry before use.
- Store the circulator in a cool, dry location when not in use. To prevent dust and dirt build-up, use the original packing to repack the unit.
TECHNICAL DATA
Rated voltage: 220-240V\~
Rated frequency: 50Hz
Power: 55W
natural_image
Symbol of a trash bin crossed with a diagonal line, no text or numbers present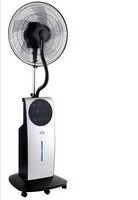


- VE1634TT VENTILATORE PIANTANA 13 PALE TIMER E TELECOMANDO
- BLADES STAND FAN WITH TIMER AND REMOTE CONTROL
- INFORMAZIONI TECNICHE: 220-240V\~ 50Hz 55W
- IMPORTANT INSTRUCTIONS
- When using electrical appliances, basic safety precautions should always be followed to reduce the risk of fire, electric shock and injury to persons, including the following:
- PART REFERENCE
- ASSEMBLY
- ASSEMBLY OF BASE
- For Stand Fan
- For Stand Fan(Medium height)
- For Table Fan
- ASSEMBLY OF BLADE AND GRILLS
- OPERATING INSTRUCTIONS
- REMOTE CONTROLLER INSTRUCTION
- MAINTENANCE AND STORAGE
- TECHNICAL DATA
Brand : DCG
Model : VE1634TT
Category : Household Fan