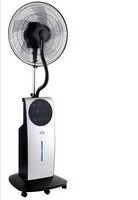
VE1400T - Household Fan DCG - Free user manual and instructions
Find the device manual for free VE1400T DCG in PDF.


| Product Type | Domestic Tower Fan |
| Brand | DCG |
| Model | VE1400T |
| Dimensions (Height x Width x Depth) | Approx. 85 cm x 30 cm x 30 cm |
| Weight | Approx. 4.5 kg |
| Power Supply | 220-240 V ~ 50 Hz |
| Power Consumption | 45 W |
| Number of Speed Settings | 3 (Low, Medium, High) |
| Oscillation | Yes, 90° wide-angle oscillation |
| Timer | Yes, up to 7.5 hours |
| Remote Control | Yes, included |
| Control Type | Touch panel + remote |
| Noise Level | ≤ 55 dB (max speed) |
| Airflow | Approx. 1200 m³/h |
| Safety Features | Overheat protection, stable base, tip-over switch |
| Maintenance | Clean with a soft, damp cloth; do not use abrasive cleaners |
| Filter | Washable dust filter (rear) |
| Spare Parts Availability | Contact DCG customer service for replacement parts |
| Repairability Index | 7.5/10 (based on typical design) |
Frequently Asked Questions - VE1400T DCG
User questions about VE1400T DCG
0 question about this device. Answer the ones you know or ask your own.
Ask a new question about this device
Download the instructions for your Household Fan in PDF format for free! Find your manual VE1400T - DCG and take your electronic device back in hand. On this page are published all the documents necessary for the use of your device. VE1400T by DCG.
USER MANUAL VE1400T DCG
VE1400T VENTILATORE CON NEBULIZZATORE 5 PALE 136 CM 5 BLADES MIST FAN
CLIMA dcg16.it
CARATTERISTICHE TECNICHE: 230V\~ 50Hz 90W

Montaggio:
NOTE: Please read the manual carefully before using
WARNINGS
ATTENTION: read this booklet carefully it contains important instructions for a safe installation, use and maintenance. Important instructions to be kept for future reference.
It is forbidden for the children to play with the device.
This device must be used only for the purpose it was expressly designed; any use not complying with the instructions contained in the manual is considered inappropriate and dangerous. The manufacturer is not responsible for possible damages caused by the inappropriate and/or unreasonable use.
This device is NOT suitable to use it in an explosive environment (in the presence of flammable substances such as gas, vapor, mist or dust, in atmospheric conditions when, after ignition, the combustion is spread in the air).
The packing materials (plastic bags, expanded polystyrene, etc.) must be kept out of the reach of children or disabled persons since they represent potential sources of danger.
The installation/assembly of the device will be made/ or according to the indications of the manufacturer. A wrong procedure may cause damages to persons, animals or objects, for which the manufacturer cannot be considered responsible.
Place and use the device on a horizontal and stable surface.
Before use check the integrity of the device and power cable. In case you are not sure contact a qualified person.
Before powering the device make sure the rating (voltage and frequency) corresponds to the grid and the socket is suitable for the plug of the device.
Make sure the power system is equipped with proper protection according to the law in force.
DO NOT power the device using multiple sockets.
If possible, avoid the use of adapters and/or extension cables; if their use is absolutely necessary, use only materials in compliance with the current safety regulations and according to the electrical parameters of the adapters.
The device must not be switched on using external timers and/or other remote control devices which are not specified in this manual.
DO NOT use or store the device near heat sources (heaters, stoves etc.).
DO NOT dip the device in water or other liquids; in case the accidental fall in the water DO NOT try to take it out, but first of all unplug immediately the power cable from the socket.
If you use the device for the first time, make sure to remove any label or protective sheet which blocks its proper functioning.
TECHNICAL INFORMATION
- Misting Board
- Front Grill
- Misting Board Lock Screws
- Blade Lock Nut
- Blades
- Grill Lock Nut
- Back Grill
- Motor Shaft
- Motor Cover
- Grill Ring
- Grill Lock Nut
- Motor Holder
- Connection Holder
- Main Holder
- Power Connection Line
- Holder Fixed Screw
- Main Body
- Water Tank
- Water Outlet Lock nut
- Base
- Wheels
- Misting Tube
- Control Panel
- Remote Control
- Decorate Panel
- Water Indicator

Assembling the appliance:
- Install the five castors on the base (20).
- Install the body (17) into the base (20), and use the base lock nut (22) to screw on the base tightly.
- Connect power connection line (15), and put it into the main body (17), and tight up by holder fixed screw (16).
- Install the back grill (7), and tight up by grill lock nut (6) on the motor cover (12)
- Install the blades (5) on to the motor shaft (8), and anticlockwise by blade lock nut (4).
Installation
- Be sure to remove all packaging material from inside the appliance.
- Ensure that the fan is switched off from the supply mains before start any installation or assembly operation.
- The appliance should be used with its base fitted.
- Install misting board (1) on the front grill (2) and screw up by misting board lock screws (3).
- Put the front grill (2) and back grill (7) together, and screw to fasten by grill ring, and tight up by grill lock nut (11).
ATTENTION!
- Make sure the products unplugged from the mains before filling or refelling the water tank.
- Only use water in the water tank. Do not add any chemicals, oils or other additives.
- Only use cold or lukewarm water in the water tank. The water must not be warmer than 40^ C.
Place the fan on a dry and stable surface and insert the plug on the socket; the unit will emit a short "BIP" sound indicating that power is supplied. For your convenience the unit can be operated by using control panel in the main body or by using remote control included.
OPERATION THE APPLIANCE:
Control panel
Remote Control


Filling water:
- Push the water tank upward and remove the water tank.
- Unscrew the filler cap and fill with water.
- Screw the filler cap and put the water tank back in position.
- CAUTION: The temperature of water should not be 40^ C above.
Operating the ice box:
- Turn off the appliance and pull out plug from the electrical outlet.
- Take out water tank, and then take out the ice box from appliance.
- Put the ice box into refrigerator for freezing
- After freezing, put the ice box on water holder make temperature lower.
- It can be reused.
Operating aroma tank:
- Take aroma case out on the body rear shell.
- Put several drops aroma liquid into the aroma case, and put the aroma case back in position.
- Slowly the aroma evaporates and be full of room while the mist fan working.
ON/OFF button:
- Firstly push ON/OFF button, the indicator light is on.
- Secondly push ON/OFF button, the wind speed is in the low level by default. Meanwhile, the indoor temperature shows on the panel. Thirdly push ON/OFF button, all stop working, all indicator lights off.
Speed button:
- Firstly push speed button, the wing speed is in the medium level
- Secondly push speed button, the wind speed is in the high level
- Thirdly push speed button, the wind speed returns to the low level.
Mode button:
- Natural mode → Sleep mode → Normal mode
Natural mode : The wind imitate the blow of natural wind based on strong and soft wind.
Sleep mode: the first half hour after running as strong and soft natural wind, it becomes med natural wind and the second half hour it changes to soft natural wind until the end of preset time.
Normal mode: The wind blow based on Low/Med/High speed.
Mist function:
- Mist function can be used separately, or worked together with the fan.
- Firstly push Mist button, the mist spray in low volume. Secondly push Mist button, the mist spray in medium volume.
- Thirdly push Mist button, the mist spray in high volume.
- Note: While the mist function work normally, the indicator light on the body shell is blue, while the water is lacking, the indicator light is red.
plus or minus pole.
Oscillation function:
- The oscillation function makes it possible to direct the flow from the apparatus so that it automatically alternates over a range of 75^
- To activate this function, push the OSC button. The yellow light of OSC on.
- Press it again to stop oscillation, yellow light of Osc off. Ionic function:
- Mist function can be used separately, or worked together with the fan.
- The appliance can generate negative ions generated by the ionizer emanate from the unit throughout the room and cause dust, pollen, pet dander etc to clump together and drop out of the air.
- Push the ion button, green light of Ion function on,
- Push it again to stop working, the green light of lon function off.
Mosquito repellent function
- Mosquito repellent function can be used separately, or worked together with the fan.
- Put the mosquito repellent tablet (not included with the product) into its hole on the body rear shell.
- Push Mosquito button red light of mosquito repellent on, to avoid the mosquitoes annoy.
- Push it again to stop working, red light of mosquito repellent off.
Note:
- Turn off the power when you replacing the mosquito repellent tablet, wait for 10 minutes then replacement in order to avoid burns or electric shock.
- Do put the mosquito repellent tablet in contact with eyes or mouth. If put in mouth by accident, wash mouth and seek medical care immediately.
- Note: While the mist function work normally, the indicator light on the body shell is blue, while the water is lacking, the indicator light is red. plus or minus pole.
CLEANING AND MAINTENANCE
NOTED: Before cleaning the appliance always disconnect the power plug from the receptacle.
- DO NOT dip the device in water, or splash it with any other liquids.
- DO NOT use solvents or any other chemical products for cleaning it. When you do not use it, after cleaning it, store the fan in a dry place.
- When you have finished using the fan at the end of the season, wipe off any dust to maintain it in good working order for the next season; if necessary disassemble the grille and remove the fan; clean them with a soft damp cloth.
- Remove the water tank and clean it with lukewarm water; before replace the water tank in the unit make sure it is completely dry. Draining the water out of the unit placing a container underneath the water drain (indicated with an arrow in below picture) and let any water remaining in the water reservoir drain out.
natural_image
Symbol of a trash bin crossed with a diagonal line, no text or numbers present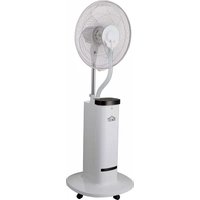


- VE1400T VENTILATORE CON NEBULIZZATORE 5 PALE 136 CM 5 BLADES MIST FAN
- Montaggio:
- WARNINGS
- TECHNICAL INFORMATION
- Assembling the appliance:
- Installation
- ATTENTION!
- OPERATION THE APPLIANCE:
- Control panel
- Remote Control
- Filling water:
- Operating the ice box:
- Operating aroma tank:
- ON/OFF button:
- Speed button:
- Mode button:
- Mist function:
- Oscillation function:
- Mosquito repellent function
- Note:
- CLEANING AND MAINTENANCE
- NOTED: Before cleaning the appliance always disconnect the power plug from the receptacle.
Brand : DCG
Model : VE1400T
Category : Household Fan