
LD 3265 AOK - Wall mount ECG - Free user manual and instructions
Find the device manual for free LD 3265 AOK ECG in PDF.


| Product Type | Wall Mount Bracket |
| Brand | ECG |
| Model | LD 3265 AOK |
| Recommended TV Size | 32" to 65" |
| VESA Compatibility | Up to 400x400mm |
| Maximum Weight Capacity | 50 kg (110 lbs) |
| Tilt Range | -15° to +15° |
| Swivel Range | ±90° |
| Rotation (Landscape/Portrait) | Yes, 360° rotation |
| Distance from Wall | Adjustable, 50-400 mm |
| Material | Steel, powder-coated |
| Color | Black |
| Included Hardware | All necessary screws, anchors, and spacers |
| Level Adjustment | Yes, after installation |
| Cable Management | Integrated clips for clean wiring |
| Installation Type | Single stud or dual stud (recommended) |
| Certifications | UL listed, TÜV approved |
| Dimensions (WxHxD) | 400 x 250 x 50 mm (folded) |
| Net Weight | 3.5 kg |
| Warranty | 5 years |
| Maintenance | Clean with dry cloth; avoid solvents |
| Safety Notes | Professional installation recommended; do not exceed weight limit |
| Spare Parts Availability | Contact ECG customer service |
| Manual Languages | EN, CS, SK |
Frequently Asked Questions - LD 3265 AOK ECG
User questions about LD 3265 AOK ECG
0 question about this device. Answer the ones you know or ask your own.
Ask a new question about this device
Download the instructions for your Wall mount in PDF format for free! Find your manual LD 3265 AOK - ECG and take your electronic device back in hand. On this page are published all the documents necessary for the use of your device. LD 3265 AOK by ECG.
USER MANUAL LD 3265 AOK ECG
natural_image
Black metal-framed wall-mounted device with vertical connectors and mounting holes (no text or symbols visible)LD 3265 AOK
UNIVERZÁLNÍ DRŽÁK TV
NÁVOD K OBSLUZE
UNIVERZÁLNY DRŽIAK TV
NÁVOD NA OBSLUHU
UNIVERSAL TV MOUNT
INSTRUCTION MANUAL
UNIVERZALNI NOSAČ ZA TV UREĐAJE
UPUTE ZA UPORABU
CZ
SK
GB
HR
natural_image
Four grayscale icons showing different types of electrical tools: screwdriver, wrench, drill bit, and measuring tool (no text or symbols)3 – Instalace plochého televizoru
natural_image
Four grayscale icons showing different tools: screwdriver, wrench, drill bit, and measuring tape (no text or symbols)SK
Read carefully and save for future use!
Please refer to a qualified professional to install the wall mount properly. Prior to the wall mount installation, check the contents of the assembly set and inform your vendor in case you discover any components are missing or are defective. Do not use defective components!! Use the wall mount solely for the purpose intended by the manufacturer. Make sure the wall is capable of supporting (especially in terms of weight) the wall mount prior to installing. Also make sure no power, water, gas or other lines are located behind the wall in the installation area. Keep the specified distance between the TV and wall (depends on the TV model). Install the wall mount to a safe location, which does not present a risk to anyone. Once the wall mount and flat screen TV are mounted, ensure that the stability and safety are sufficient. This inspection shall be repeated on a regular basis (at least 4 times a year).
The equipment is intended to be installed on wooden crossbars or solid concrete walls. Prior to the installation, make sure the assembly surface has he necessary loading capacity to carry the total weight of the TV and mount. Do not exceed the maximum TV weight of the mount.
This product is designed for household use only. Using the product outdoors can result in product failure or injury. The manufacturer is not liable for damages to the equipment and health caused by improper installation of the wall mount.
- Read all instructions and make sure you understand them prior to the installation. If you are not sure about any part of the installation process, contact a professional technician for support.
- The wall or surface on which the mount will be anchored to shall be capable of carrying the entire weight of the wall mount and TV. Reinforcement will be required otherwise.
- The installation requires the cooperation of at least two people and the use of a mechanical security mechanism and suitable tools. Otherwise it could result in damage to property or serious injury or fatal injury.
- Follow all instructions and recommendations concerning adequate ventilation and selecting a suitable location for anchoring the TV. See the your TV user's manual for more information.
- The product contains smaller pieces, which upon being inhaled or swallowed can lead to choking. Keep these pieces away from children!
ASSEMBLY SET DESCRIPTION
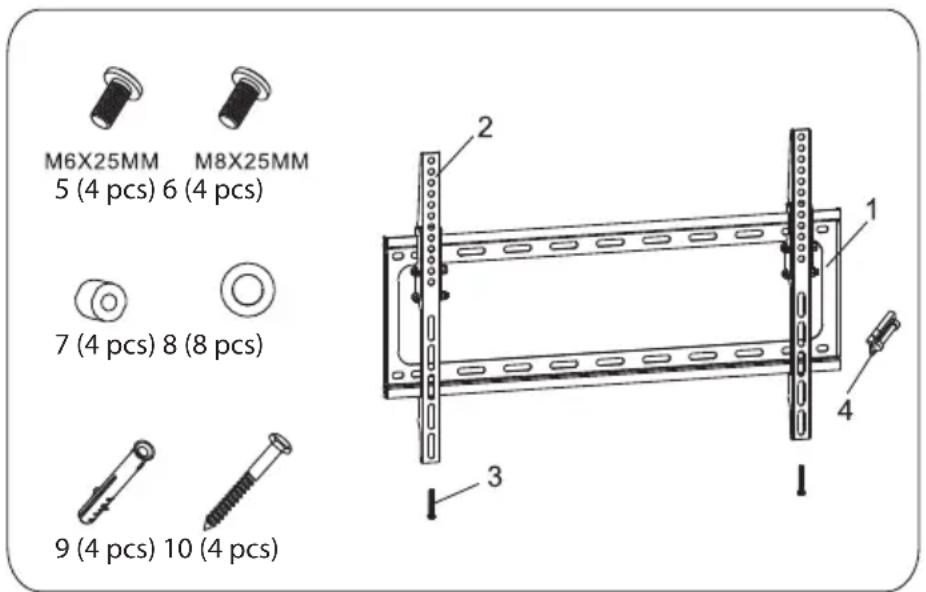
ASSEMBLY
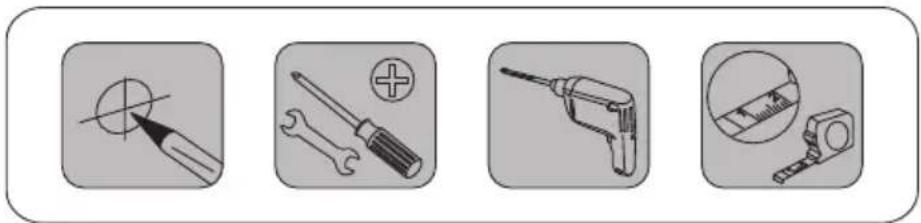
Tools required for the assembly:
natural_image
Four grayscale icons showing different tools: a pencil, screwdriver, drill bit, and measuring tape (no text or symbols)1A – Wooden crossbar assembly
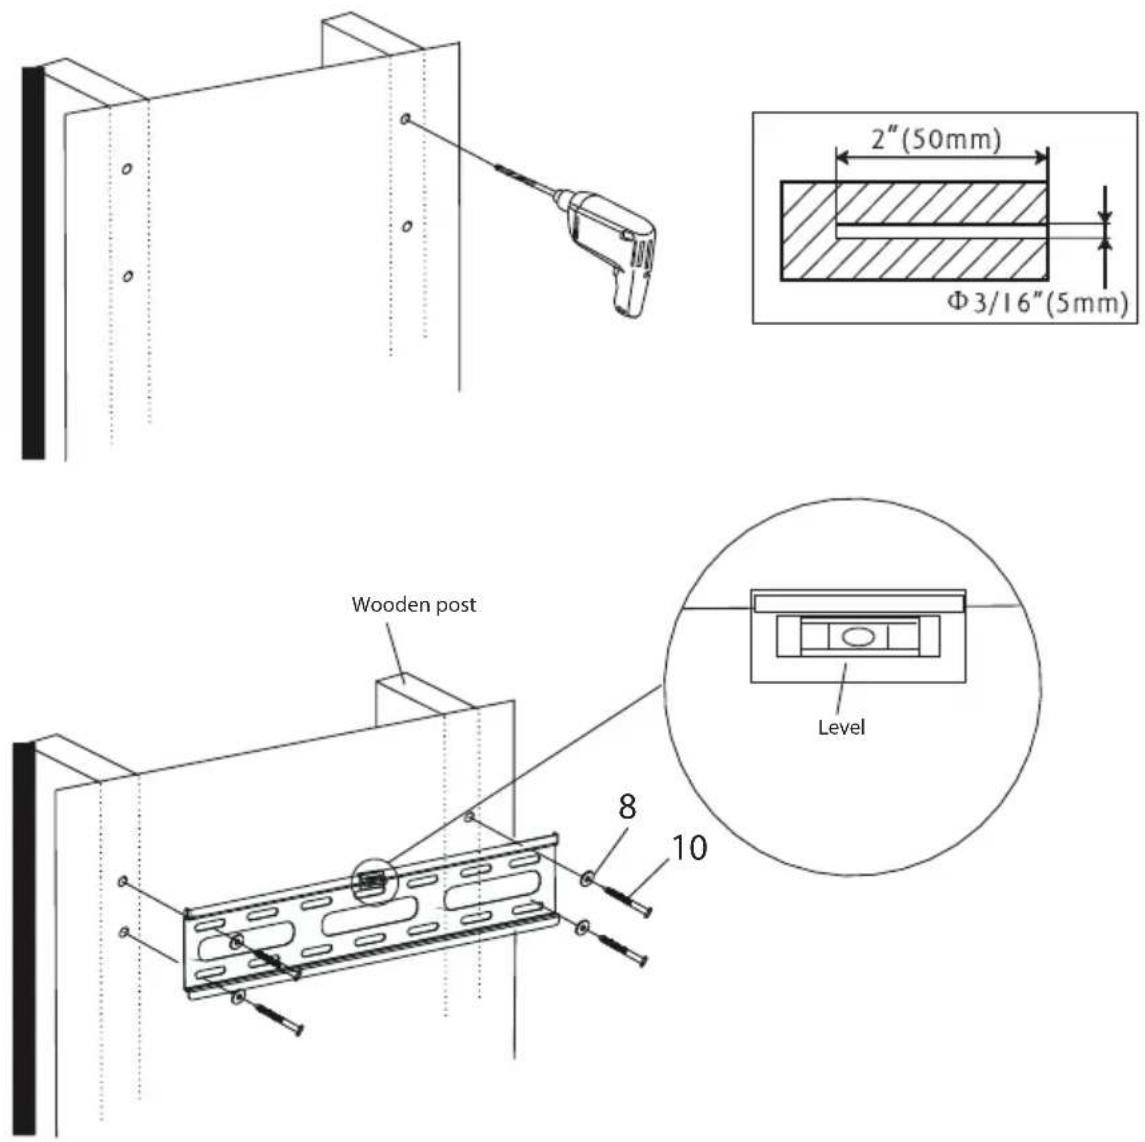
Use the wall board as a template. Make sure that it is level, mark the mounting holes into the centre of the wooden posts. Drill holes 5 mm in diameter and 50 mm deep. Align the wall board into a level position and use long bolts (10) and washers (8) to anchor the board to the wall. Tighten the bolts firmly, but not too much.
GB
1B – Concrete wall assembly
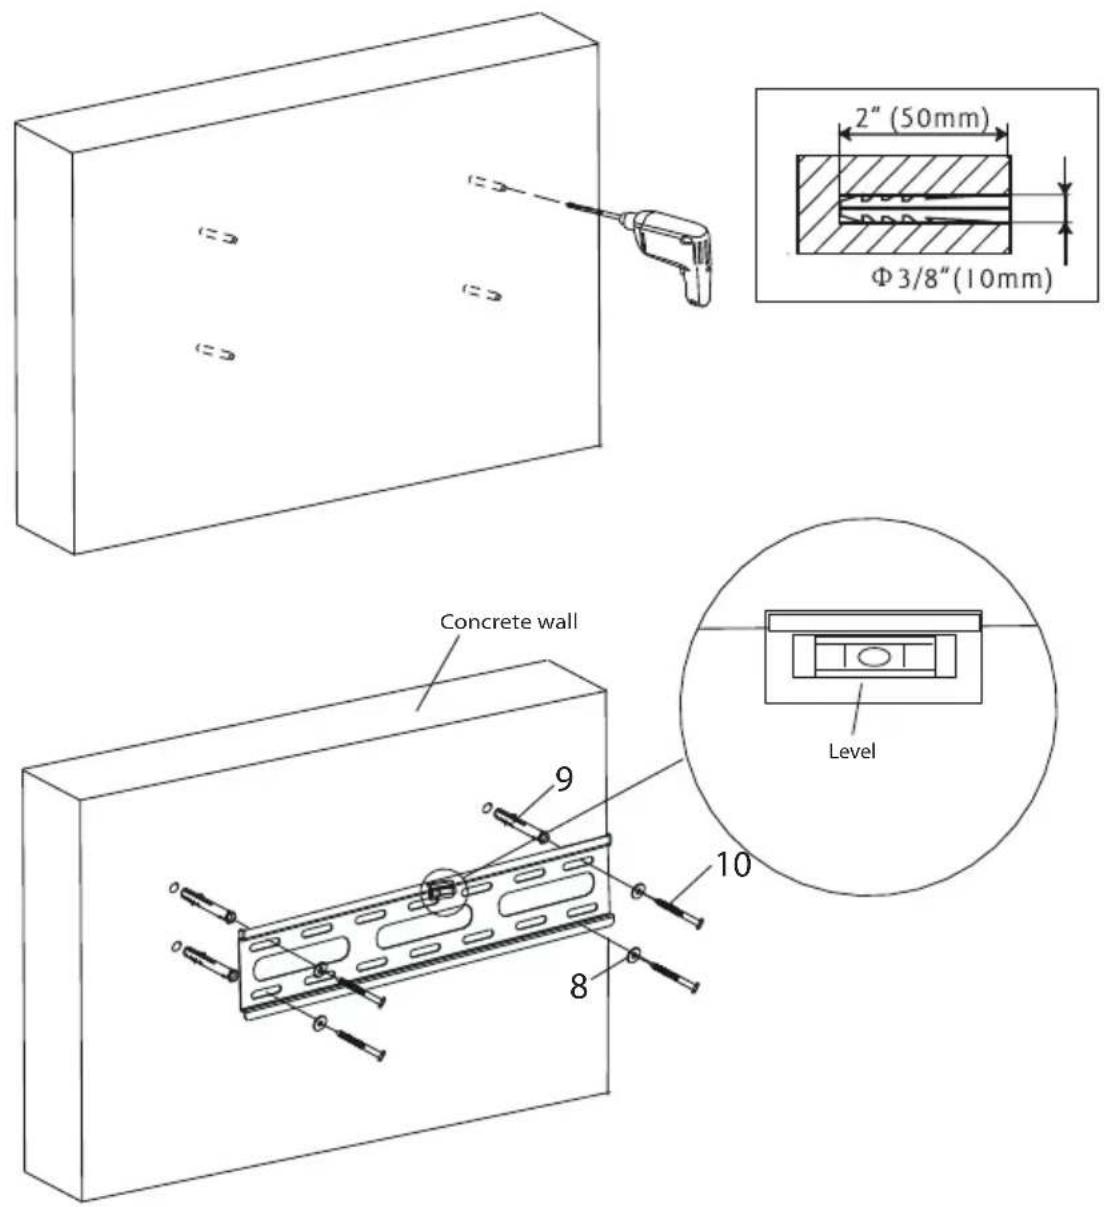
Apply the wall board to the wall, align into a level position and use it as a template to mark the holes. Drill holes 10 mm in diameter and 50 mm deep. Insert dowels (9) and long bolts (10) with washers (8) into the holes and tighten the wall board to the wall. Tighten the bolts firmly, but not too much.
GB
2 - Attaching the mounts to the TV
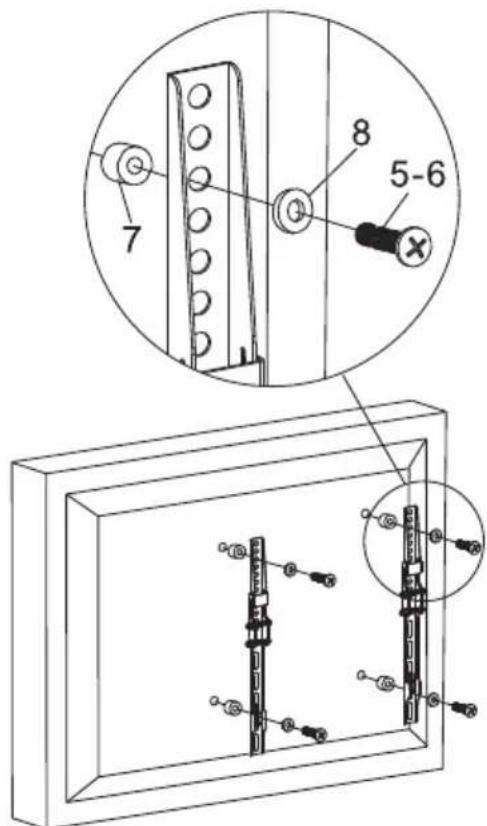
Align the mount vertically with respect to the back TV panel. Select small (5) or large (6) bolts. Use four bolts of the selected size, four washers (8) and distance washers (7) to anchor both mount rails in the top and bottom part to the back TV panel. Tighten the bolts firmly, but not too much.

3 – Installing a fl at screen TV
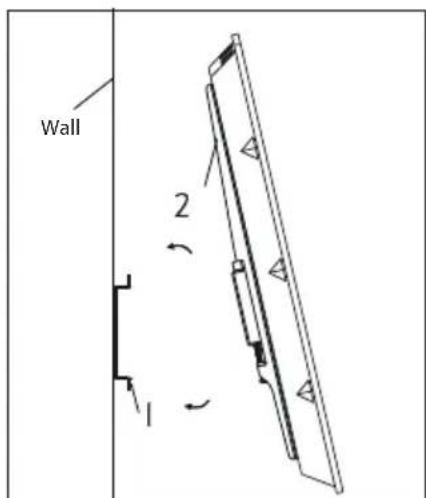
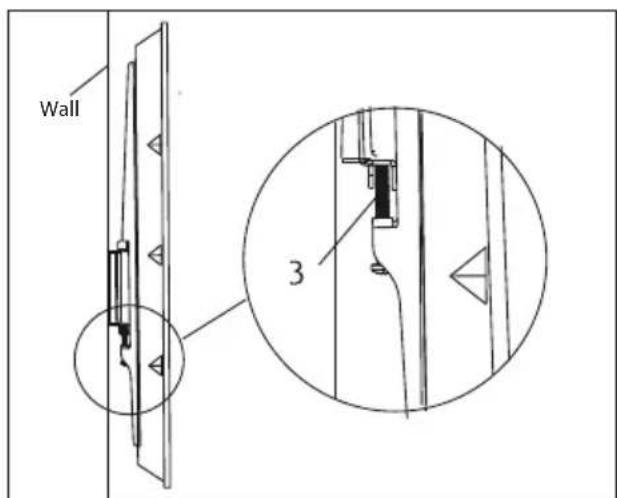
Hook the top side of the mount (2) by the top wall board fl ange (1). Then tilt the TV downward. Tighten the security bolts (3) on both sides of the mount to ensure the TV is fi xated in place.
NOTE: For safety reasons, always us a mechanical lifting device to lift heavy loads.
TECHNICAL SPECIFICATIONS
Panel size: 32" - 65"
Maximum TV weight: 35 kg
Maximum spacing: VESA 600 × 400
Distance from wall: 25 mm
Security bolts on the bottom side of the mount
Level for perfect horizontal mounting
The LD 3265 AOK set includes:
- Mount
- Cleaning solution 60 ml
- Cleaning brush
- Cleaning towel (200 × 200 mm)
USE AND DISPOSAL OF WASTE
Wrapping paper and corrugated paperboard – deliver to scrapyard. Packing foil, PE bags, plastic elements – throw into plastic recycling containers.
DISPOSAL OF PRODUCTS AT THE END OF LIFETIME
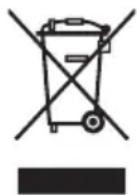
Disposal of electric and electronic equipment (valid in EU member countries and other European countries with an implemented recycling system)
The represented symbol on the product or package means the product shall not be treated as domestic waste. Hand over the product to the specified location for recycling electric and electronic equipment. Prevent negative impacts on human health and the environment by properly recycling your product.
Recycling contributes to preserving natural resources. For more information on the recycling of this product, refer to your local authority, domestic waste processing organization or store, where you purchased the product.
This product complies with EU directive requirements on electromagnetic compatibility and electrical safety.
The instruction manual is available at website www.ecg.cz.
Changes in text and technical parameters reserved.
08/05

SIGURNOSNE UPUTE
natural_image
Four technical icons showing different tools and components: screwdriver, wrench, drill, and measuring tape (no text or symbols present)HR
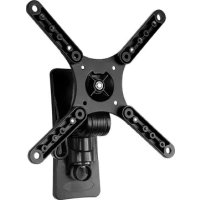
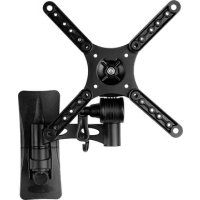
- LD 3265 AOK
- UNIVERZÁLNÍ DRŽÁK TV
- UNIVERZÁLNY DRŽIAK TV
- UNIVERSAL TV MOUNT
- UNIVERZALNI NOSAČ ZA TV UREĐAJE
- – Instalace plochého televizoru
- Read carefully and save for future use!
- ASSEMBLY SET DESCRIPTION
- ASSEMBLY
- 1A – Wooden crossbar assembly
- 1B – Concrete wall assembly
- - Attaching the mounts to the TV
- – Installing a fl at screen TV
- TECHNICAL SPECIFICATIONS
- USE AND DISPOSAL OF WASTE
- DISPOSAL OF PRODUCTS AT THE END OF LIFETIME
- SIGURNOSNE UPUTE
Brand : ECG
Model : LD 3265 AOK
Category : Wall mount