
d-Color MF550 - Printer OLIVETTI - Free user manual and instructions
Find the device manual for free d-Color MF550 OLIVETTI in PDF.


| Product Type | Multifunction Color Printer |
| Brand | Olivetti |
| Model | d-Color MF550 |
| Functions | Print, Copy, Scan, Fax |
| Print Technology | Color Laser |
| Print Speed (Black/Color) | Up to 55 ppm |
| Print Resolution | Up to 1200 x 1200 dpi |
| Paper Sizes Supported | A3, A4, A5, B4, B5, Legal, Letter |
| Paper Capacity (Standard) | 1,000 sheets |
| Duplex Printing | Automatic |
| Connectivity | Ethernet (10/100/1000), USB 2.0, Optional Wi-Fi |
| Display | Color Touch Screen |
| Dimensions (W x D x H) | 650 x 700 x 800 mm |
| Weight | Approximately 100 kg |
| Power Consumption (Active) | 1.5 kW |
| Power Consumption (Standby) | 100 W |
| Energy Star Certified | Yes |
| Security Features | Secure Print, User Authentication, Data Encryption |
| Consumables | Toner Cartridges (Cyan, Magenta, Yellow, Black), Waste Toner Bottle |
| Monthly Duty Cycle | Up to 200,000 pages |
Frequently Asked Questions - d-Color MF550 OLIVETTI
User questions about d-Color MF550 OLIVETTI
0 question about this device. Answer the ones you know or ask your own.
Ask a new question about this device
Download the instructions for your Printer in PDF format for free! Find your manual d-Color MF550 - OLIVETTI and take your electronic device back in hand. On this page are published all the documents necessary for the use of your device. d-Color MF550 by OLIVETTI.
USER MANUAL d-Color MF550 OLIVETTI
d-Color MF450 • MF550
REFERENCE GUIDE
GB
PUBLICATION ISSUED BY:
Olivelli S.p.A
Copyright © 2007, Olivetti
At rights reserved
The C€ mark affixed to the product certifies that the product satisfies the basic quality requirements.
CE
The manufacturer reserves the right to carry out modifications to the product described in this manual at any time and without any notice.

ENERGY STAR is a U.S. registered mark.
The ENERGY STAR program is an energy reduction plan introduced by the United States Environmental Protection Agency in response to environmental issues and for the purpose of advancing the development and utilization of more energy efficient office equipment.
Your attention is drawn to the following actions which could compromise the conformity attested to above, as well as the characteristics of the product.
- incorrect electrical power supply
- Incorrect installation, incorrect or improper use or use not in compliance with the warnings provided in the User's Manual supplied with the product:
- replacement of original components or accessories with others of a type not approved by the manufacturer, or performed by unauthorised personnel
This manual is also available in color PDF format on the CD-ROM provided.
All rights reserved. No part of this material may be reproduced or transmitted in any form or by any means, electronic or mechanical, including photocopying, recording or by any information storage and retrieval system, without permission in writing from the Publisher.
N°07-101
MANUFACTURER'S CE DECLARATION of CONFORMITY according to EN 45014
Declares under its sole responsibility that the product.
Categoria generale:
Equipment category
Information Technology Equipment
d-Color MF450, d-Color MF550
DF-611, WT-502, OT-503, LU-301, FS-517, FS-608, PK-512, OT-602,
FK-502, ML-501, SP-501, SA-501, SC-503, EK-602, Key Counter Kit, ES-519, SD-505, PE-510, MT-502
are in compliance with directive 99/5/EC dated 9" march 1999
2004/108/EC dated 12th December 2006
2006/95/CE del 12 Dicembre 2006; 2006/95/CE dated 12th December 2006
2008/9/EC, dated 12th December 2006,
ce designed and manufactured in compliance with the following European Harmonized Standards:
EN 55022:1998 + A1:2000 + A2:2003 (Limits and methods of measurements of radio interference characteristics of Information Technologies Equipment) / Class B.
Characteristics of Information Technology Equipment/Class B; EN 61000-3-2:2000 (Electrostatic Compatibility (EMC) - Pa
EN 41030-5-212004 (Electroagnetic Compartmentary LMC) - Part. 2 - Limits - Section 2 - Limits for harmonic current emissions (equipment input current ≤ 16 A per phase) / Class A
EN 61000-3-3:1995 + A1:2001 (Electromagnetic Compatibility (EMC) - Part 3 : Limits - Section 3 : Limitation of voltage fluctuations and flicker in low voltage supply systems for equipment with raced current up to and including 16A);
EN 55024:1998 + A1:2001 + A2:2003 (Electromagnetic Compatibility - Information technology equipment
Immunity characteristics - Limits and methods of measurement);
EN 60950-1:2001 + A11:2004 (Safety of Information Technology Equipment), including electrical business
equipment
EN 60825-1:1994 +A1:2002+A2:2001 (Radiation Safety of laser products, equipment classification,
requirements ad user's guide).
TS 103 021-1: V 1.1.1, TS 103 021-2: V 1.1.2, TS 103 021-3: V 1.1.2, EG 201 120: V 1.1.1,
EG 201 187: V L1.1 (Referred Voluntary Requirements).
Compliance with the above mentioned essential requirements is shown by affiring the CE marking on the product.
Ivrea, 21 Luglio 2007 Ivrea, 21 ^th July 2007

Notes: 1) CE Marking has been affixed in 2007
- The Quality System is in compliance with the LRF EN 210 9000 Series of Simulated
1.1 Energy Star® 1-3
What is an ENERGY STAR® product? 1-3
1.2 Explanation of manual conventions 1-4
Safety advices.... 1-4
Sequence of action 1-4
Tips.... 1-4
Special text markings.... 1-4
1.3 Descriptions and symbols for originals and paper 1-5
"Width" and "Length" 1-5
Paper orientation.... 1-5
1.4 Legal restrictions on copying.... 1-6
1.5 Safety information.... 1-7
Warning and precaution symbols.... 1-7
Meaning of symbols.... 1-7
Disassemble and modification 1-7
Power cord.... 1-8
Power source 1-8
Power plug 1-9
Grounding.... 1-9
Installation.... 1-10
Ventilation.... 1-10
Actions in response to troubles.... 1-11
Consumables 1-11
When moving the machine.... 1-12
Before successive holidays.... 1-12
1.6 Regulation notices 1-13
CE Marking (Declaration of Conformity) for users of the European Union (EU).... 1-13
User Instructions FCC Part 15 - Radio Frequency Devices (for U.S.A. users).... 1-13
Interference-Causing Equipment Standard (ICES-003 ISSUE 4) (for Canada users) 1-13
For users in countries not subject to class B regulations 1-13
Laser safety 1-13
Internal laser radiation 1-14
CDRH regulations.... 1-14
For European users.... 1-15
For Denmark users.... 1-15
For Finland, Sweden users.... 1-15
For Norway users.... 1-16
Laser safety label 1-16
Ozone release.... 1-16
Acoustic noise (for European users only).... 1-17
For EU member states only.... 1-17
1.7 Caution notations and labels 1-18
1.8 Space requirements.... 1-19
1.9 Operation precautions.... 1-20
Power source 1-20
Operating environment.... 1-20
Storage of copies 1-20
1.10 OpenSSL Statement.... 1-21
OpenSSL License.... 1-21
Original SSLeay License 1-21
1.11 Software licence agreement.... 1-23
2 Copy Operations
2.1 Control panel.... 2-3
2.2 Basic settings screens 2-5
2.3 Icons that appear in the screen.... 2-8
2.4 Turning on the main power and the auxiliary power 2-9
Turning on the machine 2-9
Scanning during warm-up 2-10
Turning off the machine.... 2-11
Manually conserving energy 2-11
Controlling each user's use of this machine (User authentication) 2-12
Controlling each account's use of this machine (Account track) 2-15
2.5 Loading paper into tray 1 and tray 2.... 2-18
2.6 Loading paper into tray 3.... 2-20
2.7 Loading paper into tray 4.... 2-21
2.8 Loading paper into the LCT 2-22
2.9 Loading paper into the bypass tray 2-23
2.10 Feeding the document 2-27
Loading the document into the ADF.... 2-27
Placing the document on the original glass 2-28
Scanning the document in separate batches ("Separate Scan" setting) 2-29
Scanning a multi-page document from the original glass.... 2-32
2.11 Selecting a paper setting.... 2-36
Automatically selecting the paper size ("Auto" paper setting) 2-36
Manually selecting the desired paper size 2-37
2.12 Specifying a zoom setting.... 2-38
Automatically selecting the zoom ratio ("Auto" zoom setting) 2-38
Specifying the zoom ratio of the document ("Full Size" setting) 2-39
Slightly reducing the copy ("Minimal" setting).... 2-40
Selecting a preset zoom ratio ("Enlarge and Reduce" settings).... 2-41
2.13 Selecting an Original > Copy setting (Duplex/Combine).... 2-42
2.14 Selecting a combined copy setting.... 2-43
Copying multiple document pages onto a single page ("Combined Copy" settings).... 2-44
2.15 Selecting the quality of the document.... 2-46
Loading documents with small print or photos ("Original Type" settings) 2-46
To select an original type setting.... 2-47
2.16 Selecting finishing settings.... 2-49
Separating copies by sets ("Sort" setting).... 2-52
Separating copies by pages ("Group" setting) 2-53
Selecting the output tray (d-Color MF450) 2-54
Stapling copies ("Staple" settings) 2-55
Punching holes in copies ("Punch" settings) 2-58
2.17 Selecting a folding setting 2-61
Folding copies in half ("Half-Fold" setting) 2-61
Binding copies at the center ("Center Staple & Fold" setting).... 2-64
To fold copies in three ("Tri-Fold" setting).... 2-67
2.18 Temporarily stopping scanning/printing 2-69
2.19 Interrupting a copy job (Interrupt mode) 2-70
2.20 Registering copy programs (Mode Memory) 2-71
2.21 Copying with programmed copy settings (Mode Memory) 2-74
2.22 Displaying function descriptions (Help).... 2-76
Overview of help screens 2-76
Displaying main help screens 2-78
2.23 Copy paper 2-80
Possible paper sizes 2-80
Paper types and paper capacities.... 2-81
Special paper.... 2-82
2.24 Selecting the paper settings.... 2-84
Automatically detecting the paper size ("Auto Detect" setting).... 2-84
Selecting a paper size setting ("Size" setting) 2-85
Specifying a non-standard paper size ("Custom Size" settings).... 2-87
Storing a non-standard paper size ("Custom Size" settings).... 2-88
Selecting a setting for oversized paper ("Wide Paper" settings) 2-91
Specifying a setting for special paper 2-93
Printing double-sided copies manually 2-94
2.25 Original documents.... 2-96
Documents that can be loaded into the ADF 2-96
Precautions for loading documents into the ADF 2-97
Documents that can be placed on the original glass.... 2-97
Precautions for positioning documents on the original glass 2-97
2.26 Inserting paper between OHP transparencies ("OHP Interleave" function).... 2-98
2.27 Adding cover pages ("Cover Sheet" function).... 2-100
2.28 Inserting different paper into copies ("Insert Sheet" function).... 2-103
2.29 Inserting copies of a different document for a specified page
("Insert Image" function) 2-106
2.30 Specifying pages to be printed on the front side ("Chapters" function).... 2-109
2.31 Scanning documents with different settings and printing copies all together
("Program Jobs" function) 2-112
2.32 Producing separate copies of each page in a page spread ("Book Copy" function).... 2-116
2.33 Tiling copy images ("Image Repeat" function).... 2-120
2.34 Copying an enlarged image on multiple pages ("Poster Mode" function).... 2-124
2.35 Copying booklets ("Booklet Original" function) 2-128
2.36 Adjusting the image to fit the paper ("Image Adjust" settings) 2-130
2.37 Copying with the page layout of a booklet ("Booklet" function) 2-133
2.38 Printing the date/time or page number on copies ("Stamp/Composition" functions) ..... 2-135
2.39 Saving the scanned document in a user box ("Save in User Box" function).... 2-136
2.40 Overview of utility mode parameters 2-139
List of registration information and parameters 2-139
3 Print Operations
3.1 Setting up the PCL driver for Windows.... 3-3
Common settings 3-3
Basic tab 3-4
Layout tab 3-4
Finish tab.... 3-4
Cover mode tab.... 3-5
Stamp/Composition tab 3-5
Quality tab 3-5
Other tab (d-Color MF450) 3-5
Configure tab.... 3-6
Settings tab 3-6
3.2 Specifying the basic tab settings (PCL driver for Windows) 3-7
Printing to suit the paper size.... 3-7
Specifying a custom size 3-8
Selecting the paper tray 3-8
Specifying the paper type for a paper tray.... 3-9
Selecting the output method.... 3-10
Specifying the user authentication settings 3-12
Specifying the account track settings.... 3-13
3.3 Specifying the layout tab settings (PCL driver for Windows).... 3-14
Printing multiple pages on one page (N in 1, Poster mode).... 3-14
Chapter.... 3-15
Specifying duplex/booklet printing 3-15
Setting the binding margin 3-15
Shifting images.... 3-16
3.4 Specifying the finish tab settings (PCL driver for Windows).... 3-17
Stapling 3-17
Specifying the saddle stitch setting 3-17
Hole punching 3-18
Folding.... 3-18
Specifying the output tray 3-18
Specifying the procedure for adjusting the binding position 3-18
3.5 Specifying the cover mode tab settings (PCL driver for Windows) 3-19
Printing documents with a front cover/back cover.... 3-19
Printing multiple pages 3-19
Printing with transparency interleaves.... 3-20
3.6 Specifying the stamp/composition tab settings (PCL driver for Windows) 3-21
Printing a watermark.... 3-21
Editing a watermark.... 3-21
Printing different original documents together (overlay).... 3-22
Editing an overlay file.... 3-24
Creating an overlay file 3-24
Registering an overlay file.... 3-25
Printing with copy protection.... 3-26
Printing the date and page numbers 3-28
3.7 Specifying the quality tab settings (PCL driver for Windows) 3-29
Adjusting the color and quality 3-29
Font Settings 3-30
3.8 Setting up the PostScript driver for Windows.... 3-31
Common settings 3-31
Basic tab 3-32
Layout tab.... 3-32
Finish tab 3-32
Cover mode tab 3-33
Stamp/Composition tab 3-33
Quality tab 3-33
Other tab (d-Color MF450) 3-33
Advanced tab 3-33
Device settings tab 3-34
Configure tab.... 3-34
Settings tab 3-35
3.9 Setting up the PPD driver for Mac OS 9.2 3-36
Page setup dialog box.... 3-36
Print dialog box.... 3-37
3.10 Page Setup (PPD driver for Mac OS 9.2) 3-39
Page attributes (basic settings) 3-39
Custom page sizes 3-40
PostScript options.... 3-41
3.11 Printing (PPD driver for Mac OS 9.2).... 3-42
General (basic settings) 3-42
Layout (printing multiple pages on one page) 3-43
Printer specific options (Finishing options 1 to 4).... 3-43
3.12 Setting options (PPD driver for Mac OS 9.2).... 3-45
3.13 Setting up the PPD driver for Mac OS X.... 3-46
Page setup dialog box.... 3-46
Print dialog box.... 3-46
Common settings in the print dialog box 3-49
3.14 Page setup (PPD driver for Mac OS X) 3-50
Page attributes (basic settings) 3-50
Custom page sizes 3-51
3.15 Printing (PPD driver for Mac OS X) 3-52
General settings.... 3-52
3.16 Output Method (PPD driver for Mac OS X).... 3-53
Selecting the output method 3-53
Specifying the user authentication settings.... 3-55
Specifying the account track settings 3-56
Checking the output method setting details 3-57
3.17 Layout/Finish (PPD driver for Mac OS X) 3-59
Shifting images 3-60
Chapter 3-61
Checking the layout/finish setting details.... 3-62
3.18 Paper tray/output tray (PPD driver for Mac OS X) 3-63
Specifying the paper type for a paper tray 3-64
3.19 Cover mode/transparency interleave (PPD driver for Mac OS X) 3-65
3.20 Per page setting (PPD driver for Mac OS X).... 3-67 Adding and editing the settings in per page setting.... 3-68
3.21 Stamp/Composition (PPD driver for Mac OS X).... 3-69 Printing with copy protection.... 3-70 Printing the date and time.... 3-72 Printing the page numbers.... 3-73
3.22 Quality (PPD driver for Mac OS X).... 3-74 3.23 Sending a fax.... 3-75 Fax operations.... 3-75 Selecting a recipient from the phone book.... 3-77 Specifying the transmission settings.... 3-78 Creating a fax cover sheet.... 3-79
3.24 Setting up the fax driver for Windows.... 3-82 Common settings.... 3-82 Fax tab.... 3-83 Basic tab.... 3-83 Layout tab.... 3-83 Stamp/Composition tab.... 3-83 Configure tab.... 3-83 Settings tab.... 3-84
3.25 Using a phone book .... 3-85 Adding a recipient to the phone book.... 3-85 Editing a phone book.... 3-87 To change a registered recipient to a group.... 3-88 To change a group name.... 3-88 To create a folder.... 3-88 To search the personal information.... 3-88
4 Box Operations
4.1 Saving copies in user boxes.... 4-3 Settings that can be saved and changed.... 4-3 Saving copy documents.... 4-3
4.2 Saving scans in user boxes.... 4-7 Using a user box destination.... 4-7 Entering destinations directly.... 4-8 Saving in user box mode.... 4-10
4.3 Saving printouts in user boxes.... 4-13 Saving data in a user box.... 4-13 Saving data in the secure print user box.... 4-15 Saving data in the encrypted PDF user box.... 4-17
4.4 Overview of document organizing.... 4-18 Available operations in the file document screen.... 4-18 Checking documents saved in user boxes.... 4-18 Description of file document screen.... 4-20 Searching for a user box name.... 4-21
4.5 Deleting a document.... 4-23 4.6 Changing the document name.... 4-24 4.7 Moving a document.... 4-26 4.8 Duplicating a document.... 4-28 4.9 Checking document details.... 4-30 Check the details.... 4-30 Preview screen operations.... 4-32
4.10 Overview of document printing.... 4-34 Available operations in the use document screen.... 4-34 Checking documents saved in user boxes.... 4-34 Description of use document screen.... 4-36 Searching for a user box name.... 4-36
4.11 Printing.... 4-37 Available print settings.... 4-37 To print a document.... 4-37 Changing the number of copies.... 4-38
Specifying single-sided/double-sided printing 4-38
Specifying finishing settings 4-39
4.12 Combined printing 4-44
Available combined printing parameters.... 4-44
To print a document 4-44
4.13 Overview of document transmissions 4-47
Available document transmission operations.... 4-47
Transmission methods 4-47
Checking documents saved in user boxes 4-48
Description of use document screen 4-50
Searching for a user box name 4-50
To send a document.... 4-50
4.14 Secure print user box 4-52
Available printing parameters 4-52
To print a document (Mode 1)....4-52
To print a document (Mode 2) 4-55
4.15 Encrypted PDF user box 4-58
Printing....4-58
Deleting....4-60
5 Network Scanner Operations
5.1 Using scan/fax programs.... 5-3
Recalling a scan/fax program 5-3
Registering scan/fax programs 5-6
Editing and deleting scan/fax programs.... 5-10
5.2 Sending data in an e-mail message (Scan to e-mail).... 5-12
Scan to e-mail.... 5-12
Selecting a destination from the address book.... 5-12
Selecting a group destination.... 5-13
Entering addresses directly.... 5-15
Selecting a destination that was searched for 5-16
Selecting a destination with an address search.... 5-18
5.3 Sending data to a computer on the network (Scan to SMB).... 5-20
Scan to SMB 5-20
Scan to SMB operations with Windows File Sharing (Mac OS X)/Samba (Linux/Unix) 5-20
Scan to SMB operations with Windows 98 SE and Windows Me 5-20
Selecting a destination from the address book.... 5-21
Entering addresses directly 5-22
5.4 Sending data to a server (Scan to FTP) 5-24
Scan to FTP 5-24
Selecting a destination from the address book.... 5-24
Entering addresses directly 5-26
5.5 Specifying scan and transmission settings
(Scan settings/original settings/communication settings)...... 5-28
Settings that can be specified 5-28
Original type.... 5-30
Simplex/Duplex 5-31
Resolution 5-32
File type 5-33
Density 5-35
Separate scan.... 5-36
Color (Quality adjustment) 5-36
Background removal (Quality adjustment) 5-38
Sharpness (Quality adjustment) 5-39
Frame erase (Erase) 5-40
Book copy (Book scan) 5-41
Scan size (Application) 5-43
Annotation (Application) 5-45
Date/Time (Application) 5-45
Page number (Application) 5-48
Stamp (Application) 5-51
Header/Footer (Application) 5-54
Send & Print (Application) 5-59
Document name 5-60
Original settings.... 5-62
E-Mail setting 5-64
URL notification setting.... 5-65
E-Mail encryption 5-66
Digital signature.... 5-66
5.6 Settings that can be specified from utility mode 5-67
Utility mode parameters.... 5-67
Other related parameters 5-67
Web Connection.... 5-67
5.7 Registering an address book destination 5-68
E-Mail destination.... 5-68
User box....5-69
PC (SMB) 5-71
FTP 5-74
5.8 Registering a group destination 5-77
6 Web Connection Operations
6.1 Information tab 6-3
Device Information - Configuration Summary 6-3
Device Information - Option 6-4
Device Information - Consumables 6-5
Device Information - Meter Count 6-6
Online Assistance....6-7
Change User Password 6-7
Function Permission Information 6-8
Network Setting Information 6-9
Print Setting Information 6-9
Print Information.... 6-10
6.2 Job tab.... 6-11
Current Jobs.... 6-11
Job History 6-12
Communication List 6-13
6.3 Box tab 6-14
Open User Box 6-14
Document operations.... 6-16
Changing user box settings 6-18
Create User Box 6-19
Open System User Box 6-20
Create System User Box 6-22
6.4 Direct Print tab 6-24
Direct Print 6-24
6.5 Store Address tab.... 6-25
Address Book.... 6-25
Registering a destination.... 6-26
Group 6-29
Registering a group destination 6-30
Program.... 6-31
Registering a program destination.... 6-32
Temporary One-Touch 6-48
Subject 6-49
Text....6-50
7 Fax Operations (Option)
7.1 General fax operation.... 7-3 Sending a fax.... 7-3
7.2 Loading the original.... 7-6 Loading the original in the ADF.... 7-6 Loading the original on the original glass.... 7-6 Faxing a multi-page original using the original glass.... 7-7 Sending the original using both the ADF and the original glass.... 7-8
7.3 Specifying scanning conditions 7-9 Specifying scanning settings.... 7-9 Original type.... 7-9 Simplex/Duplex.... 7-10 Resolution.... 7-10 Density.... 7-11
7.4 Specifying only one destination....7-12 Specifying from registered destinations....7-12 Searching for a registered destination (Index button)....7-13 Searching for a registered destination (Address type)....7-13 Searching for registered destinations (Detail search)....7-14 Specifying by direct input....7-15 Specifying from the job history....7-16
7.5 Specifying multiple destinations (Sequential broadcast transmission or broadcast transmission).... 7-17 Specifying multiple destinations (from registered destinations, direct input, job history).... 7-17 Specifying multiple destinations (using the group button).... 7-17
7.6 Sending a fax using a program destination.... 7-19 To send a fax after specifying a program destination.... 7-19
7.7 Operations while scanning .... 7-21 If original size cannot be detected.... 7-21 When there is a memory overflow.... 7-21 Original auto rotation.... 7-21
7.8 When unable to send.... 7-22 Redial.... 7-22 Auto redial function.... 7-22 Redial confirmation screen (d-Color MF550).... 7-22 Manual redial (Current jobs list).... 7-23 Manual redial (Fax retransmit user box).... 7-24
7.9 Reserving a transmission.... 7-25 7.10 Aborting transmission.... 7-26 Aborting a job during transmission.... 7-26 Canceling timer transmission reserved jobs.... 7-27
7.11 Sending a fax after specifying a time (Timer TX).... 7-28 To conduct timer TX.... 7-28
8 Network Fax Operations (Option)
8.1 General fax operation (Internet fax).... 8-3 Sending an internet fax.... 8-3
8.2 General fax operation (IP address fax).... 8-7 Sending an IP address fax.... 8-7
8.3 Specifying transmission color settings (IP address fax).... 8-10 Specifying transmission color settings.... 8-10
8.4 Specifying the scan conditions....8-11 Specifying scan settings....8-11 Original type....8-11 Simplex/Duplex....8-12 Resolution....8-12 Density....8-13
8.5 Specifying only one destination.... 8-14
Specifying from registered destination 8-14
Searching the registered destination (Search text button).... 8-15
Searching the registered destination (Address type) 8-15
Searching the registered destination (Detail search).... 8-16
Specifying by direct input.... 8-17
8.6 Specifying multiple destinations (Broadcast transmission).... 8-19
Specifying multiple destinations (by registered destination and direct input).... 8-19
Specifying multiple destinations (by group button).... 8-20
8.7 Send a fax with program destination 8-21
Sending a fax after specifying program destination 8-21
8.8 When unable to send 8-23
Redial 8-23
Auto redial function 8-23
Redial confirmation screen.... 8-23
Manual redial (Current jobs list) 8-24
8.9 Reserving the transmission.... 8-25
8.10 Stopping the transmission 8-26
Stopping during transmission 8-26
9 Appendix
9.1 Entering text.... 9-3
Enlarging the keyboard 9-4
To type text 9-5
List of available characters.... 9-5
10 Index
1 Introduction
1 Introduction
Thank you for choosing this machine.
This manual contains details on the operation of the various functions of the machine, precautions on its use, and basic troubleshooting procedures. In order to ensure that this machine is used correctly and efficiently, carefully read this manual before using the machine.
The illustrations used in this manual may appear slightly different from views of the actual equipment.
1.1 Energy Star®

As an ENERGY STAR ^® Partner, we have determined that this machine meets the ENERGY STAR ^® Guidelines for energy efficiency.
What is an ENERGY STAR® product?
An ENERGY STAR ^® product has a special feature that allows it to automatically switch to a "low-power mode" after a period of inactivity. An ENERGY STAR ^® product uses energy more efficiently, saves you money on utility bills and helps protect the environment.

Note
The machine illustrations shown in this manual can vary and depend on the machine configuration.
1.2 Explanation of manual conventions
The marks and text formats used in this manual are described below.
Safety advices

DANGER
Failure to observe instructions highlighted in this manner may result in fatal or critical injuries in fact of electrical power.
→ Observe all dangers in order to prevent injuries.

WARNING
Failure to observe instructions highlighted in this manner may result in serious injuries or property damage.
→ Observe all warnings in order to prevent injuries and to ensure safe use of the machine.

CAUTION
Failure to observe instructions highlighted in this manner may result in slight injuries or property damage.
→ Observe all cautions in order to prevent injuries and to ensure safe use of the machine.
Sequence of action
1 The number 1 as formatted here indicates the first step of a sequence of actions.
2 Subsequent numbers as formatted here indicate subsequent steps of a sequence of actions.
? Text formatted in this style provides additional assistance.
→ Text formatted in this style describes the action that will ensure the desired results are achieved.
An illustration inserted here shows what operations must be performed.
Tips

Note
Text highlighted in this manner contains useful information and tips to ensure safe use of the machine.

Reminder
Text highlighted in this manner contains information that should be reminded.

Detail
Text highlighted in this manner contains references for more detailed information.
Special text markings
[Stop] key
The names of keys on the control panel are written as shown above.
MACHINE SETTING
Display texts are written as shown above.
1.3 Descriptions and symbols for originals and paper
The use of words and symbols in this manual are explained below.
"Width" and "Length"
Whenever paper dimensions are mentioned in this manual, the first value always refers to the width of the paper (shown as "Y" in the illustration) and the second to the length (shown as "X").

natural_image
Diagram of a mechanical or architectural component with directional arrows and a grid pattern (no text or symbols)Paper orientation
Lengthwise (☐)
If the width (Y) of the paper is shorter than the length (X), the paper has a vertical or portrait orientation, indicated by ☐.

natural_image
Pure technical diagram of a mechanical assembly with no visible text, numbers, or symbolsCrosswise (☐)
If the width (Y) of the paper is longer than the length (X), the paper has a horizontal or landscape orientation, indicated by ☐.

natural_image
Diagram of a mechanical or architectural component with directional arrows and labeled X/Y axes (no text or symbols beyond axis labels)1.4 Legal restrictions on copying
Certain types of originals must never be copied with the purpose or intent to pass copies of such originals off as the originals.
The following is not a complete list, but is meant to be used as a guide to responsible copying.
Financial Instruments
- Personal checks
- Traveler's checks
- Money orders
• Certificates of deposit - Bonds or other certificates of indebtedness
• Stock certificates
Legal Originals
- Food stamps
- Postage stamps (canceled or uncanceled)
- Checks or drafts drawn by government agencies
- Internal revenue stamps (canceled or uncanceled)
- Passports
- Immigration papers
- Motor vehicle licenses and titles
• House and property titles and deeds
General
- Identification cards, badges, or insignias
• Copyrighted works without permission of the copyright owner
In addition, it is prohibited under any circumstances to copy domestic or foreign currencies, or works of art without permission of the copyright owner.
When in doubt about the nature of an original, consult with legal counsel.

Detail
In order to prohibit the illegal reproduction of certain originals, such as paper currency, this machine is equipped with a counterfeit prevention feature.
Due to the counterfeit prevention feature that this machine is equipped with, images may be distorted.
1.5 Safety information
This section contains detailed instructions on the operation and maintenance of this machine. To achieve optimum utility of this device, all operators should carefully read and follow the instructions in this manual.
Please read the following section before connecting the machine to the supply. It contains important information related to user safety and preventing equipment problems.
Please keep this manual in a handy place near the machine.
Make sure you observe all of the precautions appear in each section of this manual.
KM_Ver.01E_C

Note
Some parts of the contents of this section may not correspond with the purchased product.
Warning and precaution symbols
The following indicators are used on the warning labels or in this manual to categorize the level of safety warnings.

WARNING
Ignoring these warnings could cause serious injury or even death.
→ Do not ignore these safety advices.

CAUTION
Ignoring this cautions could cause injury or damage to property.
→ Do not ignore these safety advices.
Meaning of symbols
| Symbol Meaning Example Meaning | |||
 | A triangle indicates a danger against which you should take precaution. | This symbol warns against possible causes of burns. | |
 | A diagonal line indicates a prohibited course of action. | This symbol warns against dismantling the device. | |
 | A black circle indicates an imperative course of action. | This symbol indicates you must unplug the device. | |
Disassemble and modification

WARNING
Ignoring these warnings could cause serious injury or even death.
→ Do not ignore these safety advices.
| Warning Symbol | |
| Do not attempt to remove the covers and panels which have been fixed to the product. Some products have a high-voltage part or a laser beam source inside that could cause an electrical shock or blindness. |  _ _ |
| Do not modify this product, as a fire, electrical shock, or breakdown could result. If the product employs a laser, the laser beam source could cause blindness. |  _ _ |
Power cord

WARNING
Ignoring these warnings could cause serious injury or even death.
→ Do not ignore these safety advices.
| Warning Symbol | |
| Use only the power cord supplied in the package. If a power cord is not supplied, only use the power cord and plug that is specified in POWER CORD INSTRUCTION. Failure to use this cord could result in a fire or electrical shock. |  |
| Use the power cord supplied in the package only for this machine and NEVER use it for any other product. Failure to observe this precaution could result in a fire or electrical shock. |  |
| Do not scratch, abrade, place a heavy object on, heat, twist, bend, pull on, or damage the power cord. Use of a damaged power cord (exposed core wire, broken wire, etc.) could result in a fire or breakdown.Should any of these conditions be found, immediately turn OFF the power switch, unplug the power cord from the power outlet, and then call your authorized service representative. |   |
Power source

WARNING
Ignoring these warnings could cause serious injury or even death.
→ Do not ignore these safety advices.
| Warning Symbol | |
| Use only the specified power source voltage. Failure to do that could result in a fire or electrical shock. |  |
| Connect power plug directly into wall outlet having the same configuration as the plug. Use of an adapter leads to the product connecting to inadequate power supply (voltage, current capacity, grounding), and may result in fire or shock. If proper wall outlet is not available, the customer shall ask qualified electrician for the installation. |  |
| Do not use a multiple outlet adapter nor an extension cord in principle. Use of an adapter or an extension cord could cause a fire or electrical shock.Contact your authorized service representative if an extension cord is required. |  |
| Consult your authorized service representative before connecting other equipment on the same wall outlet. Overload could result in a fire. |  |

CAUTION
Ignoring this cautions could cause injury or damage to property.
→ Do not ignore these safety advices.
| Caution Symbol | |
| • The outlet must be near the equipment and easily accessible. Otherwise you can not pull out the power plug when an emergency occurs. |  |
Power plug

WARNING
Ignoring these warnings could cause serious injury or even death.
→ Do not ignore these safety advices.
| Warning Symbol | |
| Do not unplug and plug in the power cord with a wet hand, as an electrical shock could result. |  |
| Plug the power cord all the way into the power outlet. Failure to do this could result in a fire or electrical shock. |  |

CAUTION
Ignoring this cautions could cause injury or damage to property.
→ Do not ignore these safety advices.
| Caution Symbol | |
| Do not tug the power cord when unplugging. Pulling on the power cord could damage the cord, resulting in a fire or electrical shock. |  |
| Remove the power plug from the outlet more than one time a year and clean the area between the plug terminals. Dust that accumulates between the plug terminals may cause a fire. |  |
Grounding

WARNING
Ignoring these warnings could cause serious injury or even death.
→ Do not ignore these safety advices.
| Warning Symbol | |
| • Connect the power cord to an electrical outlet that is equipped with a grounding terminal. |  |
Installation

WARNING
Ignoring these warnings could cause serious injury or even death.
→ Do not ignore these safety advices.
Warning Symbol
- Do not place a flower vase or other container that contains water, or metal clips or other small metallic objects on this product. Spilled water or metallic objects dropped inside the product could result in a fire, electrical shock, or breakdown. Should a piece of metal, water, or any other similar foreign matter get inside the product, immediately turn OFF the power switch, unplug the power cord from the power outlet, and then call your authorized service representative.


CAUTION
Ignoring this cautions could cause injury or damage to property.
→ Do not ignore these safety advices.
| Caution Symbol | |
| After installing this product, mount it on a secure base. If the unit moves or falls, it may cause personal injury. | |
| Do not place the product in a dusty place, or a site exposed to soot or steam, near a kitchen table, bath, or a humidifier. A fire, electrical shock, or breakdown could result. | |
| Do not place this product on an unstable or tilted bench, or in a location subject to a lot of vibration and shock. It could drop or fall, causing personal injury or mechanical breakdown. | |
| Do not let any object plug the ventilation holes of this product. Heat could accumulate inside the product, resulting in a fire or malfunction. | |
| Do not use flammable sprays, liquids, or gases near this product, as a fire could result. |
Ventilation

CAUTION
Ignoring this cautions could cause injury or damage to property.
→ Do not ignore these safety advices.
Caution Symbol
- Always use this product in a well ventilated location. Operating the product in a poorly ventilated room for an extended period of time could injure your health. Ventilate the room at regular intervals.

Actions in response to troubles

WARNING
Ignoring these warnings could cause serious injury or even death.
→ Do not ignore these safety advices.
| Warning Symbol | |
| Do not keep using this product, if this product becomes inordinately hot or emits smoke, or unusual odor or noise. Immediately turn OFF the power switch, unplug the power cord from the power outlet, and then call your authorized service representative. If you keep on using it as is, a fire or electrical shock could result. |  |
| Do not keep using this product, if this product has been dropped or its cover damaged. Immediately turn OFF the power switch, unplug the power cord from the power outlet, and then call your authorized service representative. If you keep on using it as is, a fire or electrical shock could result. |  |

CAUTION
Ignoring this cautions could cause injury or damage to property.
→ Do not ignore these safety advices.
| Caution Symbol | |
| The inside of this product has areas subject to high temperature, which may cause burns.When checking the inside of the unit for malfunctions such as a paper misfeed, do not touch the locations (around the fusing unit, etc.) which are indicated by a "Caution HOT" caution label. |  |
Consumables

WARNING
Ignoring these warnings could cause serious injury or even death.
→ Do not ignore these safety advices.
| Warning Symbol | |
| • Do not throw the toner cartridge or toner into an open flame. The hot toner may scatter and cause burns or other damage. |  |

CAUTION
Ignoring this cautions could cause injury or damage to property.
→ Do not ignore these safety advices.
| Caution Symbol | |
| Do not leave a toner unit or drum unit in a place within easy reach of children. Licking or ingesting any of these things could injure your health. |  |
| Do not store toner units and PC drum units near a floppy disk or watch that are susceptible to magnetism. They could cause these products to malfunction. |  |
When moving the machine

CAUTION
Ignoring this cautions could cause injury or damage to property.
→ Do not ignore these safety advices.
| Caution Symbol | |
| · Whenever moving this product, be sure to disconnect the power cord and other cables. Failure to do this could damage the cord or cable, resulting in a fire, electrical shock, or breakdown. |  |
| · When moving this product, always hold it by the locations specified in the user manual or other documents. If the unit falls it may cause severe personal injury. The product may also be damaged or malfunction. | [2KDS] |
Before successive holidays
When the optional Fax Kit FK-502 is not installed:

CAUTION
Ignoring this cautions could cause injury or damage to property.
→ Do not ignore these safety advices.
| Caution Symbol | |
| • Unplug the product when you will not use the product for long periods of time. |  |
1.6 Regulation notices
CE Marking (Declaration of Conformity) for users of the European Union (EU)
This product complies with the following EU directives:
89/336/EEC, 73/23/EEC and 93/68/EEC directives.
This declaration is valid for the area of the European Union.
This device must be used with a shielded network (10 Base-T/100 Base-TX) cable and a shielded parallel cable. The use of non-shielded cables is likely to result in interference with radio communications and is prohibited under CISPR rules and local rules.
User Instructions FCC Part 15 - Radio Frequency Devices (for U.S.A. users)
This equipment has been tested and found to comply with the limits for a Class A digital device, pursuant to Part 15 of the FCC Rules.
These limits are designed to provide reasonable protection against harmful interference when the equipment is operated in a commercial environment. This equipment generates, uses and can radiate radio frequency energy and, if not installed and used in accordance with the instruction manual, may cause harmful interference to radio communications. Operation of this equipment in a residential area is likely to cause harmful interference in which case the user will be required to correct the interference at his own expense.

WARNING
The design and production of this unit conform to FCC regulations, and any changes or modifications must be registered with the FCC and are subject to FCC control.
Any changes made by the purchaser or user without first contacting the manufacturer will be subject to penalty under FCC regulations.
→ This device must be used with a shielded network (10 Base-T/100 Base-TX) cable and a shielded parallel cable. The use of non-shielded cables is likely to result in interference with radio communications and is prohibited under FCC rules.
Interference-Causing Equipment Standard (ICES-003 ISSUE 4) (for Canada users)
This Class A digital apparatus complies with Canadian ICES-003.
For users in countries not subject to class B regulations

WARNING
Interference with radio communications:
→ This is a Class A product. In a domestic environment this product may cause radio interference in which case the user may be required to take adequate measures.
→ This device must be used with a shielded network (10 Base-T/100 Base-TX) cable and a shielded parallel cable. The use of non-shielded cables is likely to result in interference with radio communications and is prohibited under CISPR rules and local rules.
Laser safety
This is a digital machine which operates using a laser. There is no possibility of danger from the laser provided the machine is operated according to the instructions in this manual.
Since radiation emitted by the laser is completely confined within protective housing, the laser beam cannot escape from the machine during any phase of user operation.
This machine is certified as a Class 1 laser product: This means the machine does not produce hazardous laser radiation.
Internal laser radiation
| Specification | |
| Maximum average radiation power | 12.9 μW at the laser aperture of the print head unit |
| Wavelength 775-800 nm | |

WARNING
This product employs a Class 3B laser diode that emits an invisible laser beam.
→ The laser diode and the scanning polygon mirror are incorporated in the print head unit.
→ The print head unit is NOT A FIELD SERVICE ITEM:
Therefore, the print head unit should not be opened under any circumstances.

CDRH regulations
This machine is certified as a Class 1 Laser product under Radiation Performance Standard according to the Food, Drug and Cosmetic Act of 1990. Compliance is mandatory for Laser products marketed in the United States and is reported to the Center for Devices and Radiological Health (CDRH) of the U.S. Food and Drug Administration of the U.S. Department of Health and Human Services (DHHS). This means that the device does not produce hazardous laser radiation.
The label shown on page 1-13 indicates compliance with the CDRH regulations and must be attached to laser products marketed in the United States.

CAUTION
Use of controls, adjustments or performance of procedures other than those specified in this manual may result in hazardous radiation exposure.
→ This is a semiconductor laser. The maximum power of the laser diode is 30 mW and the wavelength is 775-800 nm.
For European users

CAUTION
Use of controls, adjustments or performance of procedures other than those specified in this manual may result in hazardous radiation exposure.
This is a semiconductor laser. The maximum power of the laser diode is 30 mW and the wavelength is 775-800 nm.
For Denmark users

ADVARSEL
KLASS 1 LASER APPARAT

VAROITUS
A laser safety label is attached to the outside of the machine, as shown below.

Locate the machine in a well ventilated room
→ A negligible amount of ozone is generated during normal operation of this machine. An unpleasant odor may, however, be created in poorly ventilated rooms during extensive machine operations. For a comfortable, healthy, and safe operating environment, it is recommended that the room well ventilated.

ATTENTION
Acoustic noise (for European users only)
For EU member states only
This symbol means: Do not dispose of this product together with your household waste!
Please refer to the information of your local community or contact our dealers regrading the proper handling of end-of-life electric and electronic equipments. Recycling of this product will help to conserve natural resources and prevent potential negative consequences for the environment and human health caused by inappropriate waste handling.

This product complies with RoHS (2002/95/EC) Directive.
This device is not intended for use at a video workstation in compliance with BildscharbV.
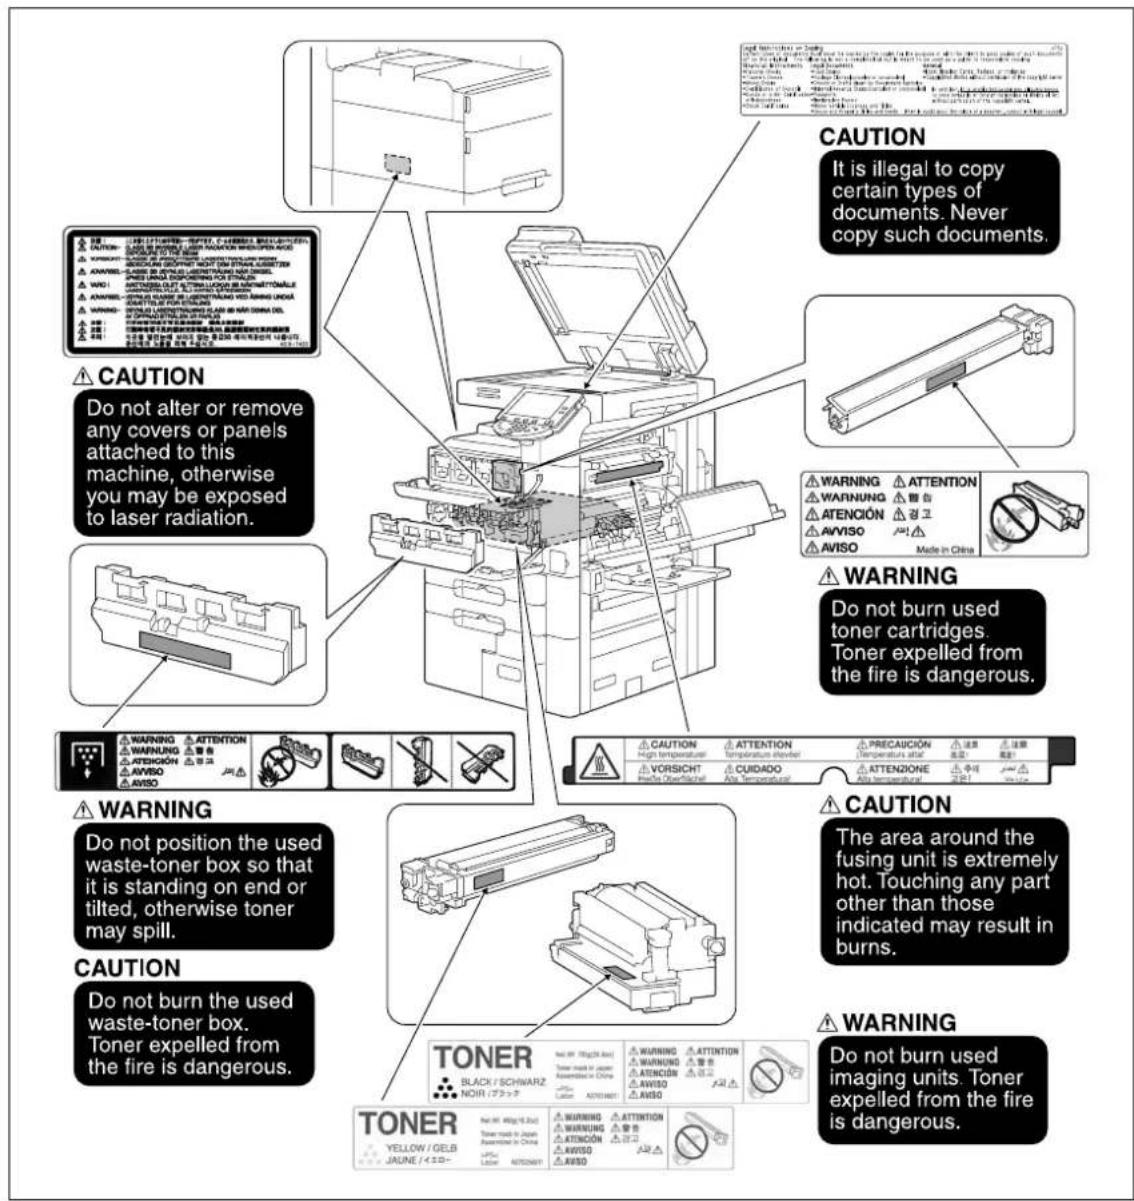
1.7 Caution notations and labels
Safety precaution notations and labels appear on this machine at the following positions.
Be very careful that an accident does not occur when operations such as removing paper misfeeds are performed.
1.8 Space requirements
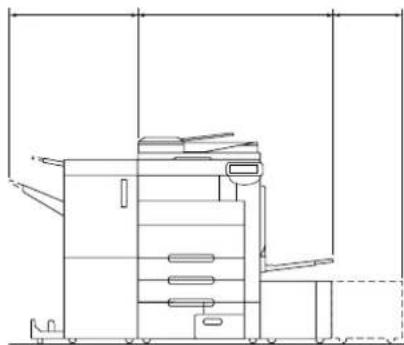
To ensure that machine operation, consumables replenishing, part replacement, and regular maintenance can easily be performed, adhere to the recommended space requirements detailed below.
806.5 958.3 387 391.9 1130 50
natural_image
Technical line drawing of a printer or printer unit with no visible text or symbols1155 494

natural_image
Technical line drawing of a mechanical device with no visible text or symbolsUnit: mmd-Color MF550/MF450+FS-6(

1649

Unit: mm (inch)d-Color MF450+FS-519+S

Reminder
Be sure to allow a clearance of 100 mm (4 in.) or more at the back of this machine for the ventilation duct.
1.9 Operation precautions
To ensure the optimum performance of this machine, observe the precautions described below.
Power source
The power source requirements are as follows.
• Voltage fluctuation: Maximum ± 10% (at 220 to 240 V AC)
• Frequency fluctuation: Maximum ± 3 Hz (at 50 Hz)
- Use a power source with as little voltage or frequency fluctuations as possible.
Operating environment
The environmental requirements for correct operation of the machine are as follows.
• Temperature: 10°C (50°F) to 30°C (86°F) with fluctuations of no more than 10°C (18°F) within an hour
- Humidity: 15% to 85% with fluctuations of no more than 20% within an hour
Storage of copies
To store copies, follow the recommendation listed below.
- Copies that are to be kept for a long time should be kept where they are not exposed to light in order to prevent them from fading.
- Adhesive that contains solvent (e.g., spray glue) may dissolve the toner on copies.
- Color copies have a thicker layer of toner than normal black-and-white copies. Therefore, when a color copy is folded, the toner at the fold may peel off.
1.10 OpenSSL Statement
OpenSSL License
Copyright © 1998-2000 The OpenSSL Project. All rights reserved.
Redistribution and use in source and binary forms, with or without modification, are permitted provided that the following conditions are met:
- Redistributions of source code must retain the above copyright notice, this list of conditions and the following disclaimer.
- Redistributions in binary form must reproduce the above copyright notice, this list of conditions and the following disclaimer in the documentation and/or other materials provided with the distribution.
- All advertising materials mentioning features or use of this software must display the following acknowledgment: "This product includes software developed by the OpenSSL Project for use in the OpenSSL Toolkit. (http://www.openssl.org/)"
- The names "OpenSSL Toolkit" and "OpenSSL Project" must not be used to endorse or promote products derived from this software without prior written permission. For written permission, please contact openssl-core@openssl.org.
- Products derived from this software may not be called "OpenSSL" nor may "OpenSSL" appear in their names without prior written permission of the OpenSSL Project.
- Redistributions of any form whatsoever must retain the following acknowledgment: "This product includes software developed by the OpenSSL Project for use in the OpenSSL Toolkit (http://www.openssl.org/)"
THIS SOFTWARE IS PROVIDED BY THE OpenSSL PROJECT "AS IS" AND ANY EXPRESSED OR IMPLIED WARRANTIES, INCLUDING, BUT NOT LIMITED TO, THE IMPLIED WARRANTIES OF MERCHANTABILITY AND FITNESS FOR A PARTICULAR PURPOSE ARE DISCLAIMED. IN NO EVENT SHALL THE OpenSSL PROJECT OR ITS CONTRIBUTORS BE LIABLE FOR ANY DIRECT, INDIRECT, INCIDENTAL, SPECIAL, EXEMPLARY, OR CONSEQUENTIAL DAMAGES (INCLUDING, BUT NOT LIMITED TO, PROCUREMENT OF SUBSTITUTE GOODS OR SERVICES; LOSS OF USE, DATA, OR PROFITS; OR BUSINESS INTERRUPTION) HOWEVER CAUSED AND ON ANY THEORY OF LIABILITY, WHETHER IN CONTRACT, STRICT LIABILITY, OR TORT (INCLUDING NEGLIGENCE OR OTHERWISE) ARISING IN ANY WAY OUT OF THE USE OF THIS SOFTWARE, EVEN IF ADVISED OF THE POSSIBILITY OF SUCH DAMAGE.
This product includes cryptographic software written by Eric Young (eay@crypt-Soft.com). This product includes software written by Tim Hudson (tjh@cryptsoft.com).
Original SSLeay License
Copyright © 1995-1998 Eric Young (eay@cryptsoft.com) All rights reserved.
This package is an SSL implementation written by Eric Young (eay@cryptsoft.com).
The implementation was written so as to conform with Netscapes SSL.
This library is free for commercial and non-commercial use as long as the following conditions are aheared to. The following conditions apply to all code found in this distribution, be it the RC4, RSA, Ihash, DES, etc., code; not just the SSL code.
The SSL documentation included with this distribution is covered by the same copyright terms except that the holder is Tim Hudson (tjh@cryptsoft.com).
Copyright remains Eric Young's, and as such any Copyright notices in the code are not to be removed. If this package is used in a product, Eric Young should be given attribution as the author of the parts of the library used. This can be in the form of a textual message at program startup or in documentation (online or textual) provided with the package.
Redistribution and use in source and binary forms, with or without modification, are permitted provided that the following conditions are met:
-
Redistributions of source code must retain the copyright notice, this list of conditions and the following disclaimer.
-
Redistributions in binary form must reproduce the above copyright notice, this list of conditions and the following disclaimer in the documentation and/or other materials provided with the distribution.
-
All advertising materials mentioning features or use of this software must display the following acknowledgement:
"This product includes cryptographic software written by Eric Young (eay@crypt-soft.com)" The word ‘cryptographic’ can be left out if the rouines from the library being used are not cryptographic related.
- If you include any Windows specific code (or a derivative thereof) from the apps directory (application code) you must include an acknowledgement:
"This product includes software written by Tin Hudson (tjh@cryptsoft.com)"
THIS SOFTWARE IS PROVIDED BY ERIC YOUNG "AS IS" AND ANY EXPRESS OR IMPLIED WARRANTIES, INCLUDING, BUT NOT LIMITED TO, THE IMPLIED WARRANTIES OF MERCHANTABILITY AND FITNESS FOR A PARTICULAR PURPOSE ARE DISCLAIMED. IN NO EVENT SHALL THE AUTHOR OR CONTRIBUTORS BE LIABLE FOR ANY DIRECT, INDIRECT, INCIDENTAL, SPECIAL, EXEMPLARY, OR CONSEQUENTIAL DAMAGES (INCLUDING, BUT NOT LIMITED TO, PROCUREMENT OF SUBSTITUTE GOODS OR SERVICES; LOSS OF USE, DATA, OR PROFITS; OR BUSINESS INTERRUPTION) HOWEVER CAUSED AND ON ANY THEORY OF LIABILITY, WHETHER IN CONTRACT, STRICT LIABILITY, OR TORT (INCLUDING NEGLIGENCE OR OTHERWISE) ARISING IN ANY WAY OUT OF THE USE OF THIS SOFTWARE, EVEN IF ADVISED OF THE POSSIBILITY OF SUCH DAMAGE.
The licence and distribution terms for any publicly available version or derivative of this code cannot be changed. i.e. this code cannot simply be copied and put under another distribution licence [including the GNU Public Licence.]
All other product names mentioned are trademarks or registered trademarks of their respective companies
1.11 Software licence agreement
This package contains the following materials provided by Olivetti S.p.A. (Olivetti): software included as part of the printing system, the digitally-encoded machine-readable outline data encoded in the special format and in the encrypted form ("Font Programs"), other software which runs on a computer system for use in conjunction with the Printing Software ("Host Software"), and related explanatory written materials ("Documentation"). The term "Software" shall be used to describe Printing Software, Font Programs and/or Host Software and also include any upgrades, modified versions, additions, and copies of the Software.
The Software is being licensed to you under the terms of this Agreement.
Olivetti grants to you a non-exclusive sublicense to use the Software and Documentation, provided that you agree to the following:
- You may use the Printing Software and accompanying Font Programs for imaging to the licensed output de-vice(s), solely for your own internal business purposes.
- In addition to the license for Font Programs set forth in Section 1 ("Printing Software") above, you may use Roman Font Programs to reproduce weights, styles, and versions of letters, numerals, characters and symbols ("Typefaces") on the display or monitor for your own internal business purposes.
- You may make one backup copy of the Host Software, provided your backup copy is not installed or used on any computer. Notwithstanding the above restrictions, you may install the on any number of computers solely for use with one or more printing systems running the Printing Software.
- You may assign its rights under this Agreement to an assignee of all of Licensee's right and interest to such Software and Documentation ("Assignee") provided you transfer to Assignee all copies of such Software and Documentation Assignee agrees to be bound by all of the terms and conditions of this Agreement.
- You agree not to modify, adapt or translate the Software and Documentation.
- You agree that you will not attempt to alter, disassemble, decrypt, reverse engineer or decompile the Software.
- Title to and ownership of the Software and Documentation and any reproductions thereof shall remain with Olivetti and its licensor.
- Trademarks shall be used in accordance with accepted trademark practice, including identification of the trademark owner's name. Trademarks can only be used to identify printed output produced by the Software. Such use of any trademark does not give you any rights of ownership in that trademark.
- You may not rent, lease, sublicense, lend or transfer versions or copies of the Software Licensee does not use, or Software contained on any unused media, except as part of the permanent transfer of all Software and Documentation as described above.
- IN NO EVENT WILL OLIVETTI OR ITS LICENSOR BE LIABLE TO YOU FOR ANY CONSEQUENTIAL, INCIDENTAL INDIRECT, PUNITIVE OR SPECIAL DAMAGES, INCLUDING ANY LOST PROFITS OR LOST SAVING, EVEN IF OLIVETTI HAS BEEN ADVISED OF THE POSSIBILITY OF SUCH DAMAGES, OR FOR ANY CLAIM BY ANY THIRD PARTY. OLIVETTI OR ITS LICENSOR DISCLAIMS ALL WARRANTIES WITH REGARD TO THE SOFTWARE, EXPRESS OR IMPLIED, INCLUDING, WITHOUT LIMITATION IMPLIED WARRANTIES OF MERCHANTABILITY, FITNESS FOR A PARTICULAR PURPOSE, TITLE AND NON-INFRINGEMENT OF THIRD PARTY RIGHTS. SOME STATES OR JURISDICTIONS DO NOT ALLOW THE EXCLUSION OR LIMITATION OF INCIDENTAL, CONSEQUENTIAL OR SPECIAL DAMAGES, SO THE ABOVE LIMITATIONS MAY NOT APPLY TO YOU.
- Notice to Government End Users: The Software is a "commercial item," as that term is defined at 48 C.F.R.2.101, consisting of "commercial computer software" and "commercial computer software documentation," as such terms are used in 48 C.F.R. 12.212. Consistent with 48 C.F.R. 12.212 and 48 C.F.R. 227.7202-1 through 227.7202-4, all U.S. Government End Users acquire the Software with only those rights set forth herein.
- You agree that you will not export the Software in any form in violation of any applicable laws and regulations regarding export control of any countries.
2
Copy Operations
2 C o p y O p e r a
2.1 Control panel

| No. | Part name Description | |
| 1 | Touch panel Displays various screens and messages. Specify the various settings by directly touching the panel. | |
| 2 | Main Power indicator Lights up in green when the machine is turned on with the main power switch. | |
| 3 | [Power] (auxiliary power) key Press to turn on/off machine operations. When turned off, the machine enters a state where it conserves energy. | |
| 4 | [Mode Memory] key | Press to register (store) the desired copy/fax/scan settings as a program or to recall a registered program. (See p. 2-71) |
| 5 | [Utility/Counter] key | Press to display the Meter Count screen and the Utility screen. |
| 6 | [Reset] key | Press to clear all settings (except programmed settings) entered in the control panel and touch panel. |
| 7 | [Interrupt] key | Press to enter Interrupt mode. While the machine is in Interrupt mode, the indicator on the [Interrupt] key lights up in green and the message "Now in Interrupt mode." appears on the touch panel. To cancel Interrupt mode, press the [Interrupt] key again. |
| 8 | [Stop] key | Pressing the [Stop] key while copying, scanning or printing temporarily stops the operation. |
| 9 | [Proof Copy] key | Press to print a single proof copy to be checked before printing a large number of copies. |
| 10 | [Start] key | Press to start the copy, scan or fax operation. When this machine is ready to begin the operation, the indicator on the [Start] key lights up in blue. If the indicator on the [Start] key lights up in orange, copying cannot begin. Press to restart a stopped job. |
| No. | Part name | Description |
| 11 Data indicator Flashes in blue while a print job is being received.Lights up in blue when a print job is queued to be printed or while it is being printed.The indicator lights up in blue when there is saved fax data or un-printed fax data. | ||
| 12 [C] (clear) key Press to clear a value (such as the number of copies, a zoom ratio, or a size) entered using the keypad. | ||
| 13 Keypad Use to type in the number of copies to be produced.Use to type in the zoom ratio.Use to type in the various settings. | ||
| 14 [Help] key Press to display the Help Menu screen.From this screen, descriptions of the various functions and details of operations can be displayed. (See p. 2-76) | ||
| 15 [Enlarge Display] key Press to enter Enlarge Display mode. | ||
| 16 | [Accessibility] key | Press to display the screen for specifying settings for user accessibility functions. |
| 17 [Power Save] key Press to enter Power Save mode. While the machine is in PowerSave mode, the indicator on the [Power Save] key lights up in green and the touch panel goes off. To cancel Power Save mode, press the [Power Save] key again. | ||
| 18 [Access] key If user authentication or account track settings have been applied, press this key after entering the user name and password (for user authentication) or the account name and password (for account track) in order to use this machine. | ||
| 19 [Brightness] dial Use to adjust the Brightness of the touch panel. | ||
| 20 [User Box] key Press to enter User Box mode. | While the machine is in User Box mode, the indicator on the [User Box] key lights up in green. | |
| 21 [Fax/Scan] key Press to enter Fax/Scan mode. | While the machine is in Fax/Scan mode, the indicator on the [Fax/Scan] key lights up in green. | |
| 22 [Copy] key Press to enter Copy mode. (As a default, the machine is in Copy mode.) While the machine is in Copy mode, the indicator on the [Copy] key lights up in green. | ||

Reminder
Do not apply extreme pressure to the touch panel, otherwise it may be scratched or damaged.
Never push down on the touch panel with force, and never use a hard or pointed object to make a selection in the touch panel.
2.2 Basic settings screens
When the machine is ready to begin making copies after being turned on, the Basic screen appears.
To activate a function or to select a setting, lightly touch the desired button in the touch panel.
Basic screen

Quick Copy screen

Touching □ displays the Color settings and [Finishing].

| No. | Item Name Description | |
| 1 | Message display area The status of the machine | and details on operations are displayed. |
| 2 | Functions/settings display area | Tabs and buttons for displaying screens containing various functions are displayed.Touch a tab or button to display the corresponding screen for specifying the settings. |
| 3 | Icon display area Icons indicating the status of jobs | ands the machine are displayed. |
| 4 | [Separate Scan] button Touch to scan the document | in separate batches.A document scanned in different batches can be treated as a single copy job. |
| 5 | [Finishing] button d-Color MF450: | Touch to specify settings for sorting, grouping, offsetting, stapling, hole punching or outputting to a specific tray.d-Color MF550:Touch to specify settings for collating, grouping, stapling, or hole punching.The settings that can be specified differ depending on the finisher that is installed. |
| 6 | Toner supply indicators These indicators show the amount of toner remaining for cyan (C), magenta (M), yellow (Y), and black (K). | |
| 7 | Left panel When the [Job List] button is pressed, a screen showing the jobs currently being performed or waiting to be performed is displayed.When the [Check Job] button is pressed, a screen showing the result of the specified settings is displayed. | |
| 8 | [Check Job] button The result of the specified settings is displayed. | |
| 9 | [Job List] button Jobs currently being performed or waiting to be performed are displayed.Various commands for checking and managing jobs are available. | |

Detail
The basic settings screen (Basic screen or Quick Copy screen) that appears can be set with the "Copy Setting" parameter in the Custom Display Settings screen (displayed from the User Setting screen). The arrangement of the buttons and screens differ with the Basic screen and Quick Copy screen; however, the functions that can be set are the same. As a default, "Basic" is selected. This manual contains descriptions of procedures using the Basic screen that appears when "Basic" is selected.

Note
If settings have been changed from the factory defaults, the tab for the screen containing the changed settings appears framed with a green line.
The green line can be changed to another color with the "Color Selection Settings" parameter in the Custom Display Settings screen (displayed from the User Setting screen in Utility mode).
2.3 Icons that appear in the screen
| Icon Description | |
 | Indicates that data is being sent from the machine, regardless of the current mode. |
 | Indicates that data is being received from the machine, regardless of the current mode. |
 | Indicates that an error occurred during an image stabilization operation, a print operation or a scan operation.Touch this icon to view a screen containing a warning code. |
 | If the warning screen was closed when a warning occurred, touch this button to display the warning screen again. |
| [crea1] | Appears when there is a message indicating that consumables must be replaced or the machine requires maintenance. Touch this icon to display the message, and then perform the replacement or maintenance procedure. |
 | Appears when an error occurs with the connection to the POP server. |
 | Indicates that paper is not loaded in the paper tray. |
 | Indicates that very little paper remains in the paper tray. |
 | Indicates that "Enhanced Security Mode" is set to "ON". |
2.4 Turning on the main power and the auxiliary power
This machine has two power controls: the main power switch and the [Power] (auxiliary power) key.
Turning on the machine
The main power switch turns on/off all functions of the machine. Normally, the main power switch is turned on.
The [Power] (auxiliary power) key turns on/off machine operations, for example, for copying, printing or scanning. When the [Power] (auxiliary power) key is turned off, the machine enters a state where it conserves energy.
1 Open the main power switch cover, and then set the main power switch to "|".

natural_image
Diagram of a refrigerator interior showing hand inserting a switch into a door (no text or symbols present)2 Close the main power switch cover.
3 Press the [Power] (auxiliary power) key. Check that the touch panel is turned on.

natural_image
Line drawing of a printer's front panel with a black arrow pointing to the button (no text or symbols present)
Detail
When the [Power] (auxiliary power) key is turned on, the indicator on the [Start] key lights up in orange, and a screen indicating that the machine is starting up appears.
After a few seconds, the message "Warming up. Ready to scan." appears on the touch panel, and the indicator on the [Start] key lights up in blue, indicating that a job can now be queued.
The default settings are the settings that are selected immediately after the machine is turned on (the power switch is set to "|") and before any setting is specified from the control panel or touch panel, and those that are selected when the [Reset] key is pressed to cancel all settings specified from the control panel or touch panel. The default settings can be changed.
The factory default settings are the settings that were selected when this machine was sent from the factory.

Note
A job can also be queued while the machine is warming up after the [Power] (auxiliary power) key is turned on. For details, refer to "Scanning during warm-up" on page 2-10.
After the machine has finished warming up, the scanned image will be printed.
The machine takes about 30 seconds to warm up at normal room temperature (23 °C) when the [Power] (auxiliary power) key is turned on after the main power switch is turned on.
Scanning during warm-up
1 Press the [Power] (auxiliary power) key.
- For details on turning on the machine, refer to "Turning off the machine" on page 2-11.
The indicator on the [Start] key lights up in orange.
After the warm-up message is displayed, the Basic screen appears. The indicator on the [Start] key lights up in blue.
2 Check that the message "Warming up. Ready to scan." appears on the touch panel.

3 Position the document to be copied.
- For details on positioning the document, refer to "Feeding the document" on page 2-27.
4 Specify any other desired copy settings.
5 Using the keypad, specify the desired number of copies.
6 Press the [Start] key.
The document is scanned, and the job is added to the list of queued jobs.
7 Check that the document has finished being scanned, and then position the next document.
8 Specify new copy settings and the desired number of copies, and then press the [Start] key.
- If the "Copy Operating Screen" parameter in the Utility mode was set to "Yes", touch [Next Copy Job] to display the Basic screen.
- After the machine has finished warming up, the jobs will automatically be printed in the order that they were queued.
? How can the job being printed be stopped?
→ Press the [Stop] key.

Detail
While the machine is warming up to begin printing after it is turned on using the [Power] (auxiliary power) key, copy settings can be specified and a document can be scanned to reserve a copy job. After the machine has finished warming up, the copies are automatically printed.
The print order can be changed or jobs can be deleted from the Detail screen of a job from the Current Jobs list in the Job List screen.
Turning off the machine
1 Press the [Power] (auxiliary power) key.
Check that the touch panel is turned off.
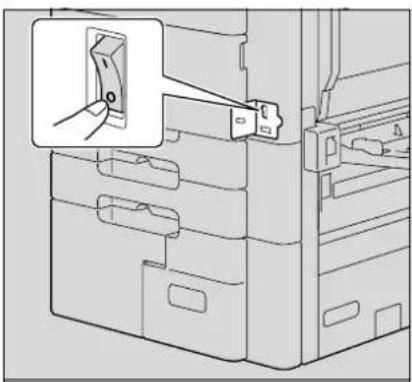
2 Open the main power switch cover, and then set the main power switch to "○".
natural_image
Diagram of a file folder with a magnified inset showing a close-up of the folder's handle (no text or symbols present)3 Close the main power switch cover.

Reminder
When the machine is turned off, then on again with the main power switch, wait at least 10 seconds to turn the machine on after turning it off. The machine may not operate correctly if it is turned on immediately after being turned off.
Do not turn off the machine with the main power switch or the [Power] (auxiliary power) key while it is making copies or printing, otherwise a paper misfeed may occur.
Do not turn off the machine with the main power switch or the [Power] (auxiliary power) key while it is scanning or sending or receiving data, otherwise all scan data or transmission data will be deleted.
Do not turn off the machine with the main power switch while a queued job or stored data is waiting to be printed, otherwise the jobs will be deleted.

Detail
The following are cleared when the main power switch and [Power] (auxiliary power) key are turned off. Settings that have not been programmed Jobs queued to be printed
Manually conserving energy
The machine can be manually set to an energy conservation mode (Low Power mode or Sleep mode).
1 Press the [Power Save] key (or press the [Power] (auxiliary power) key).
- As the factory default, the machine enters Low Power mode.

Controlling each user's use of this machine (User authentication)
If user authentication settings have been specified by the administrator, only users that have been registered can use this machine. In addition, the number of printed pages can be managed for each user.
√ When user authentication settings have been specified, only users who enter passwords for specified users can use this machine.
√ Contact the administrator for a user name and password and for the server name.
√ If machine authentication or external server authentication has been set, a total of 1,000 users and accounts can be registered.
1 Touch [User Name].
![Enter User Name and password, and then touch [<|vision_start|> user] or press the [access] key. User Name Password Login 13/11/2006 11:30 History 100%](/content/2026/05/977387/images/49280ea2744f643ffb645e9d7c96baac451e0bc08f07478de3f2f7adbb55ed0a.jpg)
- If a list of user names can be displayed, the desired user name can be selected from the list. Touch [User Name List], touch the button for the desired user name to select it, and then touch [OK].
- Users who have no access to a user name and password can touch [Public User Access] to use this machine.
- If "Enhanced Security Settings" is set to "ON", [Public User Access] and [User Name List] do not appear.

- If external server authentication was selected as the user authentication method, [Server Name] appears with the name of the default server.
Touch [Server Name] to display the names of the registered servers, and then select the desired server.

2 Type in the user name, and then touch [OK].

3 Touch [Password].
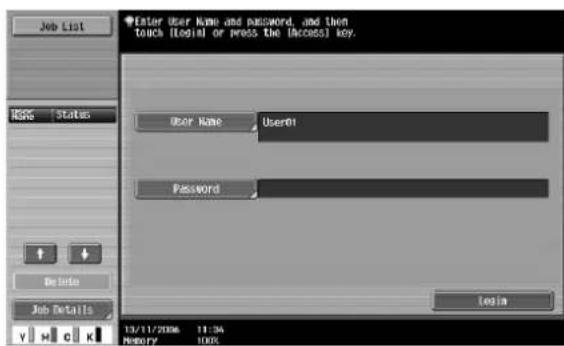
4 Type in the password, and then touch [OK].

5 Touch [Login] or press the [Access] key.
The Basic screen appears.
If account track settings have been applied, the account track screen appears. However, if "Synchronize User Authentication & Account Track" has been set to "Synchronize", the account track screen does not appear if the users and accounts are synchronized.
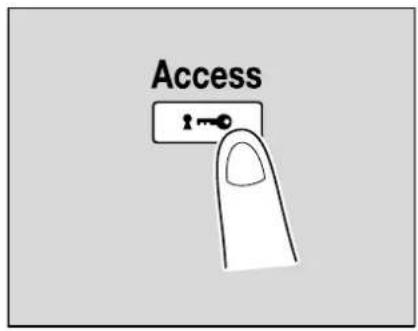
6 Make copies using the desired copy settings.
7 When you are finished printing, press the [Access] key.
A message appears, requesting confirmation to log off.

8 Touch [Yes], and then touch [OK].
The user authentication screen appears.
![OLIVETTI d-Color MF550 - Touch [User Name]. - 9](/content/2026/05/977387/images/0b6d4ee1d37667b4aedaa533159a3990651f3d1178c2db196fc91f79691f991e.jpg)
Note
The user authentication settings can be used together with the account track settings. If the "Synchronize User Authentication & Account Track" parameter is set to "Synchronize", complete user authentication, and then log on by using the account track screen.
User authentication settings can be specified using the User Authentication parameters in Administrator Settings mode, available from the Utility mode. Settings should be specified by the administrator.
Controlling each account's use of this machine (Account track)
If the account track settings have been specified by the administrator, only users of registered accounts can use this machine. In addition, the number of prints produced with each account can be controlled.
This is account track.
√ When account track settings have been specified, only users who enter passwords for specified accounts can use this machine.
√ Contact your administrator for passwords.
√ A total of 1,000 users and accounts can be registered.
1 Touch [Account Name].

- If the Administrator Settings mode settings have been set to "Password Only", touch [Password], and then continue with step 4.
![Enter login password and then teach (Login) or press the [Access] key. Password Login 13/11/2006 17:02 History 100%](/content/2026/05/977387/images/e43642b12949307f9a5da8f07860b674f0b0435ca0318def43871c3bf03148c2.jpg)
2 Type in the account name, and then touch [OK].
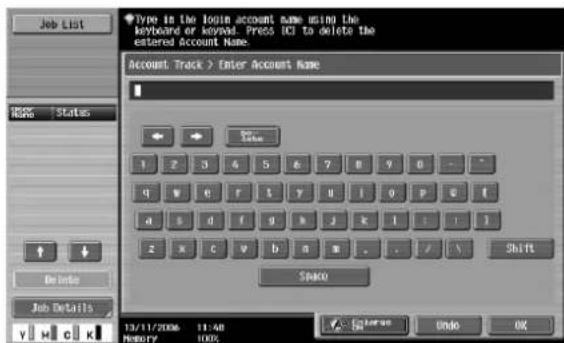
3 Touch [Password].
![Enter Account Name and password, and then touch [login] or press the [access] key. Account Name Group Password Login 13/11/2006 11:50 MEMORY 100%](/content/2026/05/977387/images/6ac6a4ffe647f497da8db7519ee3639aa19c5f0dea8b47f55fce2d72e7732f7c.jpg)
4 Type in the password, and then touch [OK].

5 Touch [Login] or press the [Access] key. The Basic screen appears.

6 Make copies using the desired copy settings.
7 When you are finished printing, press the [Access] key. A message appears, requesting confirmation to log off.

8 Touch [Yes], and then touch [OK].
The account track screen appears.
![OLIVETTI d-Color MF550 - When you are finished printing, press the [Access] key. A message appears, requesting confirmation to log off. - 2](/content/2026/05/977387/images/1d25a1e6a1a5d6f1b33e111bfd35f0c4b50aebf12fe4a9c3149bf13512f40505.jpg)
Detail
The accounts can be managed in Administrator Settings mode, available from the Utility mode. Settings should be specified by the administrator.
2.5 Loading paper into tray 1 and tray 2
1 Pull out tray 1 or tray 2.
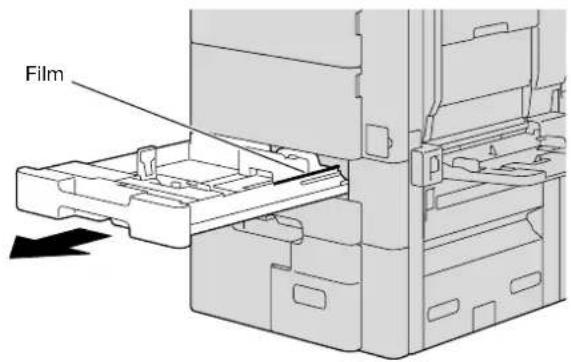
2 Slide the lateral guides to fit the size of paper to be loaded.
- If the lateral guides are not positioned correctly for the loaded paper, the paper size will not be correctly detected. Be sure to adjust the lateral guides to the size of the loaded paper.
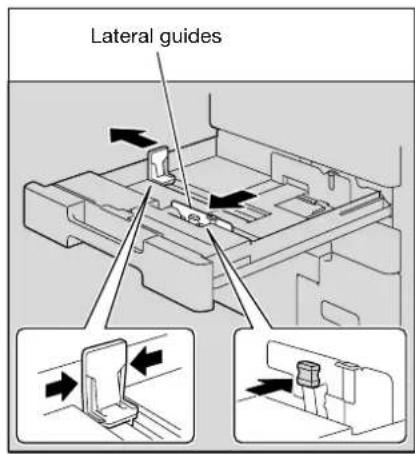
3 Load the paper into the tray so that the side of the paper to be printed on (the side facing up when the package was unwrapped) faces up.
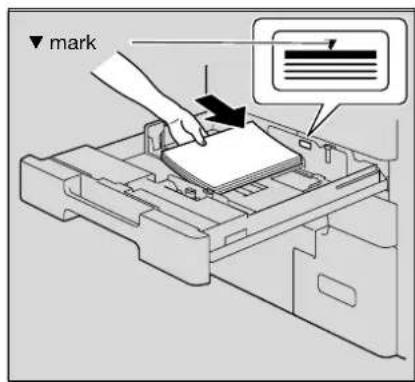
- Load letterhead paper so that the side to be printed on faces down.
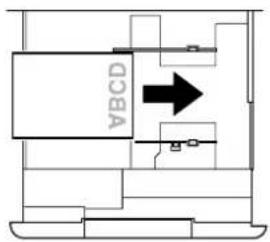

? How is curled paper loaded?
→ Flatten the paper before loading it.
How many sheets of paper and other media can be loaded?
→ Do not load so many sheets of plain paper that the top of the stack is higher than the ▼ mark.
4 Close tray 1 or tray 2.

Detail
If special paper is loaded, the paper type setting must be specified. For details, refer to "Specifying a setting for special paper" on page 2-93.

Reminder
Be careful not to touch the film.
For details on selecting the size and type of paper loaded in tray 1 and 2, refer to "Copy paper" on page 2-80.
For details on specifying the paper size for tray 1 and 2, refer to "Selecting a paper size setting ("Size" setting)" on page 2-85.
To print on OHP transparencies, envelopes or postcards, use the bypass tray.
2.6 Loading paper into tray 3
1 Pull out tray 3.

natural_image
Line drawing of a printer holder with an arrow indicating the paper direction (no text or symbols present)2 Lift up the paper take-up roller, and then load the paper into the tray.
- Load the paper into the tray so that the side of the paper to be printed on (the side facing up when the package was unwrapped) faces up. - Load letterhead paper so that the side to be printed on faces down.
? How is curled paper loaded?
→ Flatten the paper before loading it.
? How many sheets of paper and other media can be loaded?
→ Do not load so many sheets of plain paper that the top of the stack is higher than the ▼ mark.
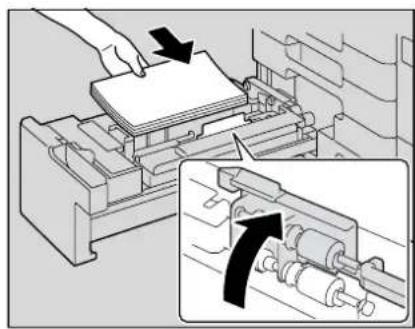
natural_image
Mechanical assembly diagram showing a hand pressing down on a sheet of paper into a machine, with an inset view of a rotating mechanical component (no text or symbols present)
3 Lower the paper take-up roller, and then close tray 3.

Reminder
For details on selecting the size and type of paper loaded in tray 3, refer to "Copy paper" on page 2-80.
Do not load tray 3 with paper of a size other than that previously specified.
Be careful not to touch the surface of the paper take-up roller with your hands.

Note
To change the size of paper loaded in tray 3, contact your service representative.
To print on OHP transparencies and envelopes, use the bypass tray.
2.7 Loading paper into tray 4
1 Pull out tray 4.

natural_image
Diagram of a computer drawer with an open drawer and a directional arrow indicating movement (no text or symbols present)2 Lift up the paper take-up roller, and then load the paper into the tray.
- Load the paper into the tray so that the side of the paper to be printed on (the side facing up when the package was unwrapped) faces up.
- Load letterhead paper so that the side to be printed on faces down.
? How is curled paper loaded?
→ Flatten the paper before loading it.
? How many sheets of paper and other media can be loaded?
→ Do not load so many sheets of plain paper that the top of the stack is higher than the ▼ mark.


3 Lower the paper take-up roller, and then close tray 4.

...
Reminder
For details on selecting the size and type of paper loaded in tray 4, refer to "Copy paper" on page 2-80.
Do not load tray 4 with paper of a size other than that previously specified.
Be careful not to touch the surface of the paper take-up roller with your hands.

...
Note
To change the size of paper loaded in tray 4, contact your service representative.
To print on OHP transparencies and envelopes, use the bypass tray.
2.8 Loading paper into the LCT
1 Open the upper door.

natural_image
Diagram of a mechanical device with an open panel and directional arrow indicating rotation (no text or symbols)2 Lift up the paper take-up roller, and then load the paper into the tray.
- Load the paper into the tray so that the side of the paper to be printed on (the side facing up when the package was unwrapped) faces down.
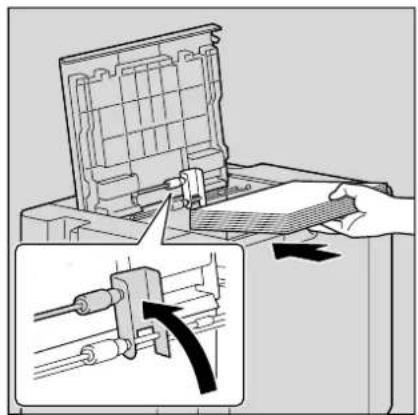
natural_image
Diagram showing a printer's internal structure being processed with a mechanical device, no text or symbols present- Load letterhead paper so that the side to be printed on faces up.
? How is curled paper loaded?
→ Flatten the paper before loading it.
? How many sheets of paper and other media can be loaded?
→ Do not load so many sheets of plain paper that the top of the stack is higher than the ▼ mark.

3 Lower the paper take-up roller, and then close the upper door.

Reminder
For details on selecting the size and type of paper loaded in the LCT, refer to "Copy paper" on page 2-80.

Note
If the machine is turned off, the bottom plate cannot be raised. When loading paper into the LCT, be sure that the machine is turned on with both the main power switch and the [Power] (auxiliary power) key.
2.9 Loading paper into the bypass tray
Paper can be fed manually through the bypass tray if you wish to copy onto paper that is not loaded into a paper tray, or if you wish to copy onto thick paper, postcards, envelopes, OHP transparencies or label sheets.
1 Open the bypass tray.
- When loading large-sized paper, pull out the tray extension.

2 With the side to be printed on facing down, insert the paper as much as possible into the feed slot.
3 Slide the lateral guides to fit the size of paper being loaded.
? How is curled paper loaded?
→ Flatten the paper before loading it.
? How many sheets of paper and other media can be loaded?
→ Do not load so many sheets of plain paper that the top of the stack is higher than the ▼ mark.

4 Select the paper type.

- To print on colored paper, envelopes or letterheads, touch , and then select the paper type.

- If "A6Card □" is selected, the paper type is automatically set to "Thick 3".
- If media other than postcards are inserted, select the appropriate paper type.
- If label sheets are loaded, select "Thick 1".
- Printing on OHP transparencies is possible only in black. When selecting OHP transparencies, select the "Black" Color setting, and then select the paper type.
- For details on selecting a setting for non-standard-size paper, refer to "Specifying a non-standard paper size ("Custom Size" settings)" on page 2-87.
- For details on selecting a setting for wide paper, refer to "Selecting a setting for oversized paper ("Wide Paper" settings)" on page 2-91.
- For details on special paper, refer to "Special paper" on page 2-82.
5 Touch [OK], and then touch [OK] in the next screen that appears.
The Basic screen appears again.

Reminder
Push the paper guides firmly up against the edges of the paper.
When loading postcards, load them in the □ orientation, as shown in the illustration. Do not load postcards in the □ orientation.
A maximum of 50 postcards can be loaded into the bypass tray.
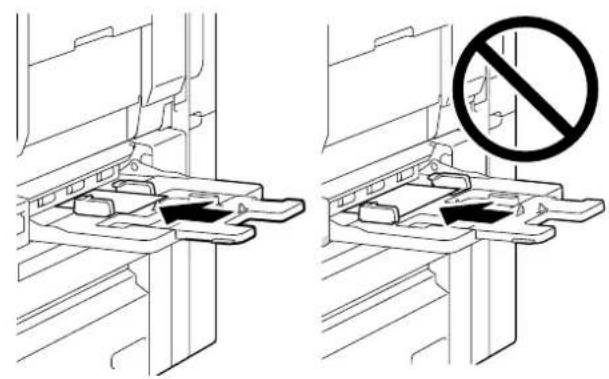
natural_image
Technical line drawing showing two views of a mechanical device with a no-smoking symbol (no text or labels present)A maximum of 20 OHP transparencies can be loaded into the bypass tray.
Printing on OHP transparencies is possible only in black.
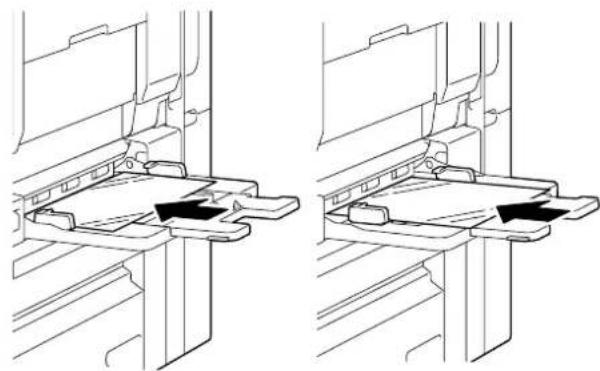
natural_image
Technical line drawing of two mechanical assembly components with mounting brackets (no text or symbols)Before loading envelopes, press them down to make sure that all air is removed, and make sure that the folds of the flaps are firmly pressed, otherwise the envelopes may become wrinkled or a paper misfeed may occur.
When loading envelopes, load them with the flap side up, as shown in the illustration. If the envelopes are loaded with the flap side down, a paper misfeed may occur. The flap side of envelopes cannot be printed on.
A maximum of 10 envelopes can be loaded into the bypass tray.

When loading label sheets, load them in the □ orientation, as shown in the illustration. Do not load label sheets in the □ orientation.
A maximum of 50 label sheets can be loaded into the bypass tray.
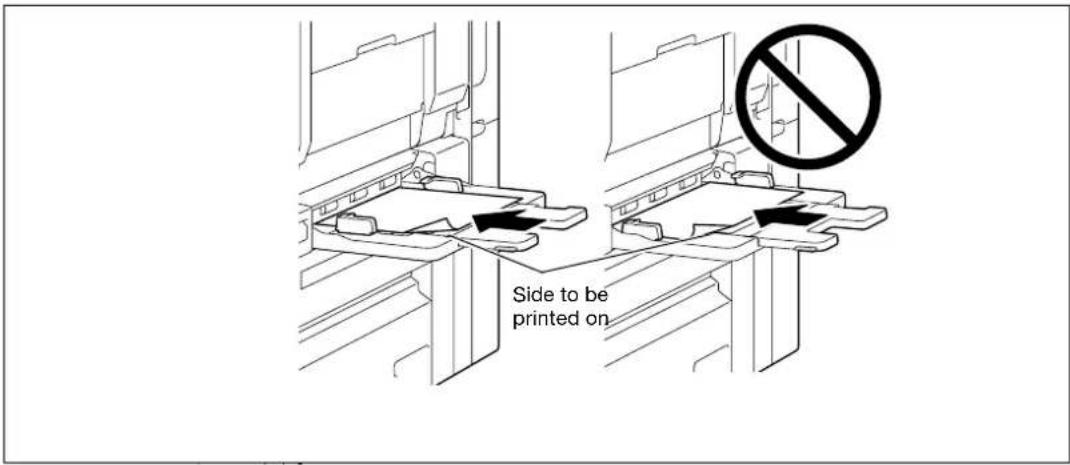
Be sure to load letterhead paper so that the side to be printed on faces up.

natural_image
Technical line drawing of two mechanical components with labeled parts (no text or symbols)
Note
The image will be printed on the surface of the paper facing down when the paper is loaded into the bypass tray.

Detail
For details on specifying the paper size for the bypass tray, refer to "Selecting a paper size setting ("Size" setting)" on page 2-85.
For details on the paper sizes, refer to "Copy paper" on page 2-80.
2.10 Feeding the document
The document can be fed in either of the following two ways. Be sure to position the document correctly according to the type of document being copied.
| Document Feed Method Features | |
| Using the ADF By using the ADF, a multi-page document can be fed automatically, one page at a time. This feed method can also be used to automatically scan double-sided documents. | |
| Using the original glass | Place the document directly on the original glass so that it can be scanned. This method is best with books and other documents that cannot be fed through the ADF. |
Loading the document into the ADF
√ Do not load documents that are bound together, for example, with paper clips or staples.
√ For details on the types of documents that can be loaded into the ADF, refer to "Original documents" on page 2-96.
Do not load more than 100 sheets or so many sheets that the top of the stack is higher than the ▼ mark, otherwise a document misfeed or damage to the document or machine may occur. However, a document that exceeds 100 pages can be scanned in separate batches. For details, refer to "Scanning the document in separate batches ("Separate Scan" setting)" on page 2-29.
√ If the document is not loaded correctly, it may not be fed in straight or a document misfeed or damage to the document may occur.
√ If the document is loaded in any orientation other than with the top of the document toward the back of the machine, be sure to select the document orientation.
1 Slide the lateral guides to fit the size of the document.
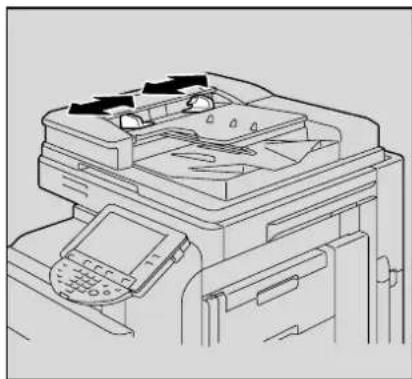
natural_image
Line drawing of an open office printer with a control panel and paper tray (no text or symbols)2 Load the document face up in the document feed tray.
- Load the document pages so that the top of the document is toward the back or the left side of the machine.

3 Adjust the lateral guides to the size of the document.

Placing the document on the original glass
√ For details on the types of documents that can be placed on the original glass, refer to "Original documents" on page 2-96.
√ When placing the document on the original glass, be sure to lift open the ADF at least 20°. If the document is placed on the original glass without the ADF being lifted at least 20°, the correct document size may not be detected.
√ Do not place objects weighing more than 2 kg on the original glass. In addition, do not press down extremely hard on a book spread on the original glass, otherwise the original glass may be damaged.
√ For thick books or large objects, make the copy without closing the ADF if it is installed. When a document is being scanned with the ADF open, do not look directly at the light that may shine through the original glass. Although the light that shines through the original glass is bright, it is not a laser beam and, therefore, is not as dangerous.
1 Lift open the ADF if it is installed.
2 Place the document face down on the original glass.
- Load the document pages so that the top of the document is toward the back or the left side of the machine.
When loaded in the □ orientation
When loaded in the □ orientation


natural_image
Diagram of a printer or scanner with an open lid and rotating button, showing no text or symbols.3 Align the document with the mask in the back-left corner of the document scales.

- For transparent or translucent documents, place a blank sheet of paper of the same size as the document over the document.

- For bound documents spread over two facing pages, such as a book or magazine, position the top of the document toward the back of this machine and align the document with the park in the back-left corner of the document scales, as shown.

4 Close the ADF if it is installed.
Scanning the document in separate batches ("Separate Scan" setting)
A large document can be divided and scanned in a number of batches.
A maximum of 100 document pages can be loaded into the ADF at one time. However, by copying with the "Separate Scan" setting, a document that exceeds 100 pages can be scanned and treated as a single copy job. In addition, the scanning location can be switched between the original glass and the ADF during the scanning operation.
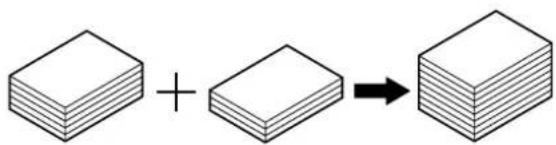
√ The loading capacity of the ADF is 100 sheets of plain paper (80 g/m ^-2 ) or 38 sheets of thick paper (210 g/m ^2 ).
√ The output method used with the "Separate Scan" setting can be set to "Page Print" or "Batch Print". As a default, "Batch Print" is selected.
1 Position the document to be copied.
- For details on positioning the document, refer to "Feeding the document" on page 2-27.
2 In the Basic screen, touch [Separate Scan].
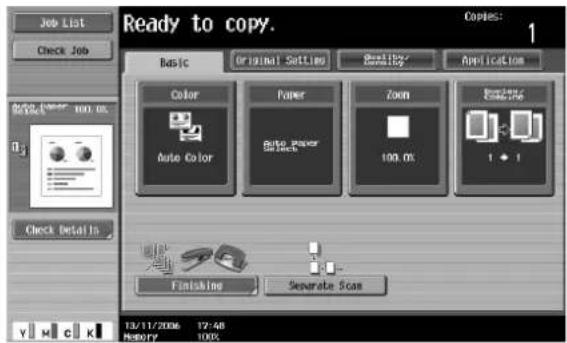
- To cancel the "Separate Scan" setting, touch [Separate Scan] again to deselect it.
3 Press the [Start] key.
After the document has been scanned, the following message appears.
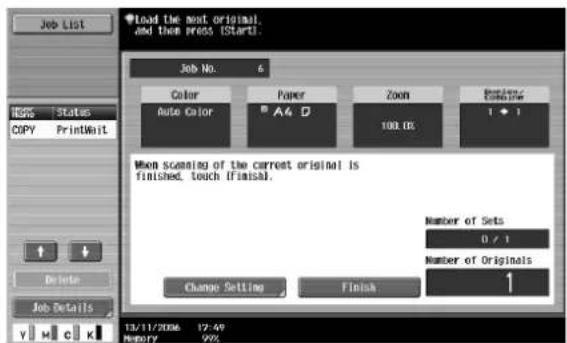
- If the "Separate Scan Output Method" parameter is set to "Batch Print", touch [Finish] in the following screen, which appears while the document is scanned with the ADF, to continue to step 5.

- Load the next batch of the document, and then press the [Start] key.
- Repeat step 2 until all document pages have been scanned.
- If the document cannot be loaded into the ADF, place it on the original glass. For details on the types of documents that can be loaded into the ADF, refer to "Original documents" on page 2-96.
- To change the scanning settings, touch [Change Setting].
- The buttons that appear in the screen for changing the settings differ depending on the specified settings. Settings for the following can be changed.
1-Sided/2-Sided, Binding Position, Zoom, Frame Erase, Center Erase Original Size
- To cancel changes to the settings, touch [Cancel].
![Job List HIPS | States COPY PrintMail Delete Job Details Settims can be changed for stopped scan job. Press [Start] to continue. Press [Stop] to cancel changes to settings. Job No. 3 Change Setting Basic Document 1-Sided 2-Sided Binding Position Zoom Original Size Application Frame Drive Center Drive 19/11/2006 15:07 History 99% Cancel OK](/content/2026/05/977387/images/cc78a959620d969adeff6875a0aab44bc940e643341c51c8e0722eb24d8a4c03.jpg)
- The amount of memory available can be checked beside "Memory" in the lower-left corner of the screen.
To delete the image data, press the [Stop] key, and then delete the job. For details, refer to "Temporarily stopping scanning/printing" on page 2-69.
4 After all document pages have been scanned, touch [Finish].
![Job List Scanning will be finished. Job No. 9 Color Auto Color Paper A4 D Zoom 100.0% Printed/Colorize 1 ◆ 1 Printin will start. Press [Start]. Number of Sets 0 / 1 Number of Originals 5 Change Setting Finish 13/11/2006 18:05 HISTORY 99%](/content/2026/05/977387/images/075733d9361ed171c0c86a473abfafe7e159bfbec8da331009443addfbcec6fa.jpg)
5 Press the [Start] key.
- If the "Separate Scan Output Method" parameter is set to "Batch Print", touch [Print] or press the [Start] key.

- If the "Separate Scan Output Method" parameter is set to "Batch Print", the copy settings can be changed. To change the copy settings, touch [Change Setting], and then touch [OK] after changing the settings as desired.

Scanning a multi-page document from the original glass
When making double-sided or combined copies using the original glass, place each page of a multi-page document on the original glass to scan it. The following procedure describes how to place single-sided document pages on the original glass to make double-sided copies.
√ The output method used with the "Separate Scan" setting can be set to "Page Print" or "Batch Print". As a default, "Page Print" is selected.
1 Lift open the ADF.
2 Position the first page or the first side of the document face down onto the original glass.
- For details on positioning the document, refer to "Placing the document on the original glass" on page 2-28.
When loaded in the □ orientation
When loaded in the □ orientation

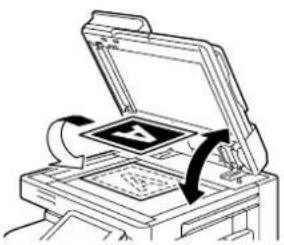
natural_image
Diagram of a printer or scanner with an open lid and rotating button, showing no text or symbols.3 Close the ADF if it is installed.
4 In the Basic screen, touch [Duplex/Combine].
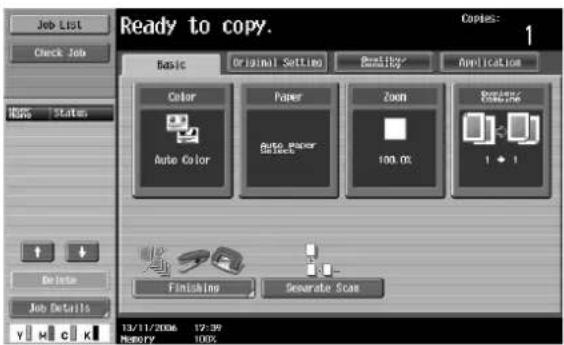
The Duplex/Combine screen appears.
5 Touch [1-Sided > 2-Sided].

6 Touch [Binding Position], select the binding position for the copy, and then touch [OK].
- For details on specifying the binding position, refer to "Selecting an Original > Copy setting (Duplex/Combine)" on page 2-42.

7 Touch [Original Direction], select the orientation of the loaded document, and then touch [OK].

8 Touch [OK].
9 Press the [Start] key.
Scanning begins.

10 Position the second page or second side of the document onto the original glass, and then press the [Start] key.
- To scan the remaining pages in the document, repeat step 10.
- To change the scanning settings, touch [Change Setting].
- The buttons that appear in the screen for changing the settings differ depending on the specified settings. Settings for the following can be changed.
1-Sided/2-Sided, Binding Position, Zoom, Frame Erase, Center Erase Original Size - To cancel changes to the settings, touch [Cancel].

11 After all document pages have been scanned, touch [Finish].

12 Press the [Start] key.
- If the "Separate Scan Output Method" parameter is set to "Batch Print", touch [Print] or press the [Start] key.
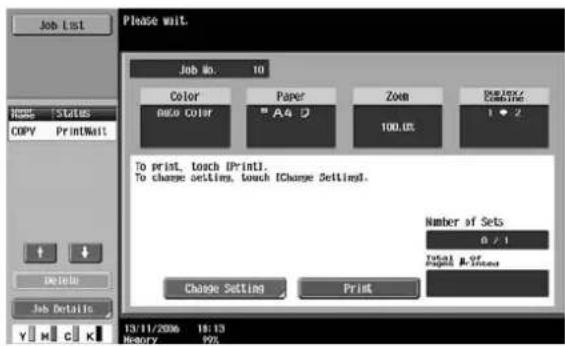
- If the "Separate Scan Output Method" parameter is set to "Batch Print", the copy settings can be changed. To change the copy settings, touch [Change Setting], and then touch [OK] after changing the settings as desired.
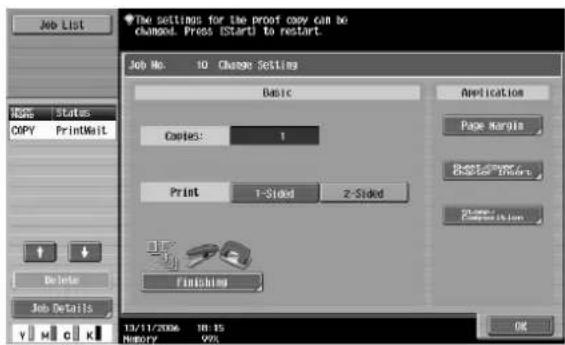
2.11 Selecting a paper setting
The paper size can be selected automatically according to the document size or it can be specified manually. Specify the paper size according to the corresponding procedure, depending on the desired copy settings.

Note
If a setting for special paper is selected for a paper tray, that tray is not selected automatically with the "Auto" Paper setting. (However, a paper tray set to "Single Side Only" is given priority to be selected with single-sided printing.) Be sure to specify a paper setting when special paper is loaded into a paper tray. For details, refer to "Specifying a setting for special paper" on page 2-93.
As the factory default, "Auto" is selected.
The "Auto" Zoom setting and the "Auto" Paper setting cannot both be selected at the same time. If the "Auto" Zoom setting was selected, the Zoom screen appears. In the Zoom screen, specify the desired Zoom setting.
The paper tray are selected in the following order when the "Auto" Paper setting is selected.
Tray 1 → Tray 2 → Tray 3 → Tray 4 → LCT (only when LCT is installed)
Automatically selecting the paper size ("Auto" paper setting)
The size of the loaded document is detected, and copies are produced using paper of the same size.
If the "Full Size" Zoom setting was specified, paper of the same size as the document is selected.
If the zoom ratio was increased or decreased, a paper size that corresponds to the specified zoom ratio is automatically selected.
1 In the Basic screen, touch [Paper].

The Paper screen appears.
2 Touch [Auto].

3 Touch [OK].
The Basic screen appears again.
Manually selecting the desired paper size
√ By also selecting the "Auto" Zoom setting, the most appropriate zoom ratio is selected based on the size of the loaded document and the specified paper size. For details on the "Auto" Zoom setting, refer to "Automatically selecting the zoom ratio ("Auto" zoom setting)" on page 2-38.
1 In the Basic screen, touch [Paper].
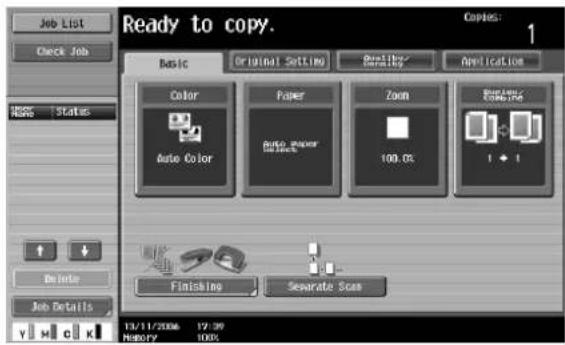
The Paper screen appears.
2 Select the paper tray loaded with the desired paper.
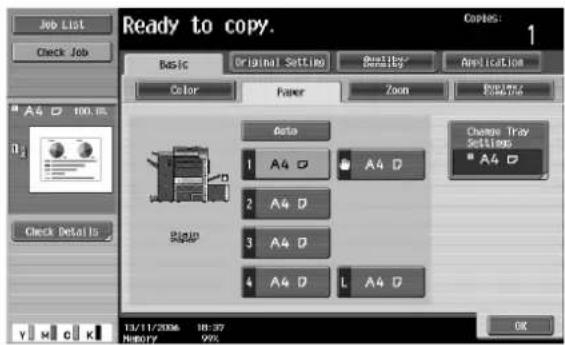
3 Touch [OK].
The Basic screen appears again.
2.12 Specifying a zoom setting
The zoom ratio can be set in order to make a copy on paper with a size different than the document or to enlarge or reduce the size of the copy image.
The following procedures describe how to specify the Zoom setting.
Automatically selecting the zoom ratio ("Auto" zoom setting)
The most appropriate zoom ratio is automatically selected based on the size of the loaded document and the specified paper size.
√ If the "Auto" Zoom setting is selected and an enlargement is to be copied on paper larger than the document, load the document with the same orientation as the paper.
√ The "Auto" Zoom setting and the "Auto" Paper setting cannot both be selected at the same time. If the "Auto" Paper setting was selected, the Paper screen appears. In the Paper screen, specify the desired Paper setting.
√ As the factory default, "Full Size" is selected.
1 In the Basic screen, touch [Zoom].
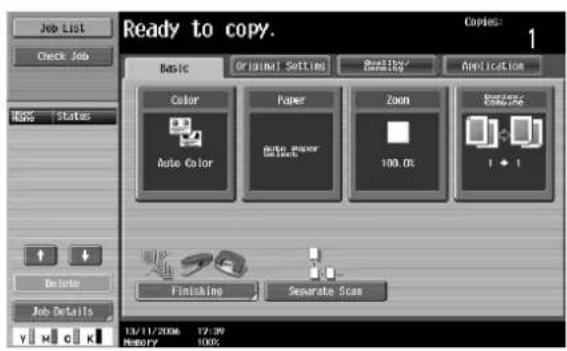
The Zoom screen appears.
2 Touch [Auto].
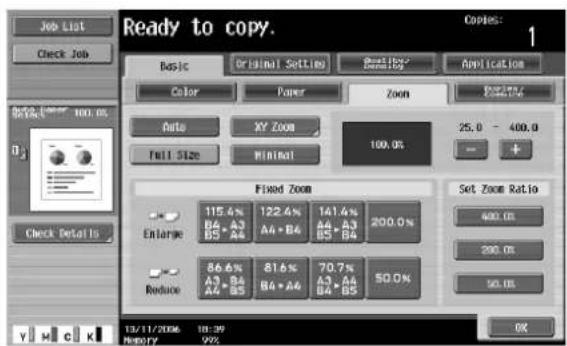
3 Touch [OK].
The Basic screen appears again.
Specifying the zoom ratio of the document ("Full Size" setting)
A copy that is the same size as the document (100%) is produced.
√ As the factory default, "Full Size" is selected.
√ Touch [+] to enlarge the zoom ratio, and touch [-] to reduce the zoom ratio in 0.1% increments.
1 In the Basic screen, touch [Zoom].

The Zoom screen appears.
2 Touch [Full Size].

3 Touch [OK].
The Basic screen appears again.
Slightly reducing the copy ("Minimal" setting)
A document image can be printed slightly smaller (93.0%) than the original document size and centered in the copy.
√ As the factory default, "Full Size" is selected.
√ The zoom ratio of the "Minimal" setting can be changed (between 90.0% and 99.9%).
1 In the Basic screen, touch [Zoom].

The Zoom screen appears.
2 Touch [Minimal].
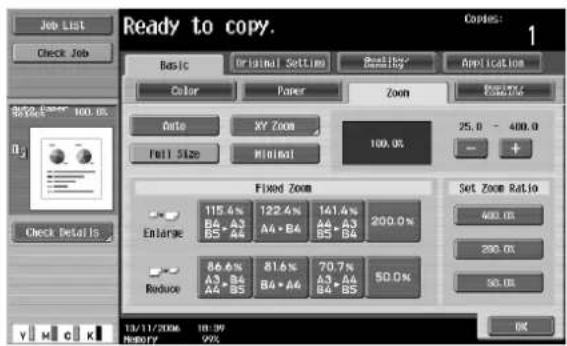
3 Touch [OK].
The Basic screen appears again.
Selecting a preset zoom ratio ("Enlarge and Reduce" settings)
The most suitable zoom ratios for copying from common standard document sizes to standard paper sizes are preset.
√ As the factory default, "Full Size" is selected.
1 In the Basic screen, touch [Zoom].
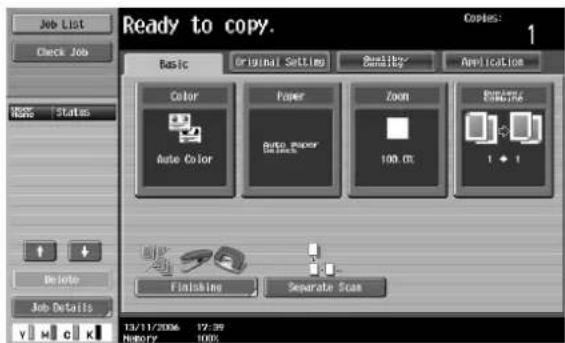
The Zoom screen appears.
2 Touch the button for the appropriate zoom ratio beside "Enlarge" and "Reduce", depending on the document and paper sizes.

3 Touch [OK].
The Basic screen appears again.
2.13 Selecting an Original > Copy setting (Duplex/Combine)
The following four Original > Copy setting combinations are possible.
| Original > Copy settings Description | |
| 1-Sided > 1-Sided Select this setting to produce single-sided copies from single-sided documents. | |
 |  |
| 1-Sided > 2-Sided Select this setting to produce one double-sided copy from two single-sided documents. | |
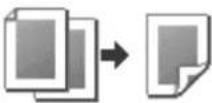 |  |
| 2-Sided > 1-Sided Select this setting to produce two single-sided copies from one double-sided document. | |
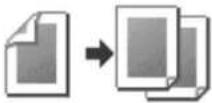 |  |
| 2-Sided > 2-Sided Select this setting to produce double-sided copies from double-sided documents. | |
 | 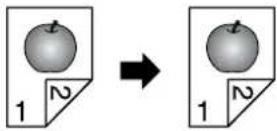 |
2.14 Selecting a combined copy setting
Document images of multiple pages (2, 4 or 8 pages) can be combined and printed on a single page, reducing paper use.
The following three combined copy settings are available.

Detail
When select the combined copy setting, copies are produced with the most appropriate zoom ratio (recommended zoom ratio) selected for the document and paper size. The zoom ratio that is selected can be changed manually.

Note
As the factory default, "Auto Display Zoom Ratio" is selected.
The "Auto Zoom for Combine/Booklet" parameter in Utility mode can be set so that the recommended zoom ratios are not used. In that case, specify the zoom ratio manually.
| Setting Description | |
| 2in1 Select this setting to print two document pages on one page. | |
| Horizontal |  |
| Vertical | 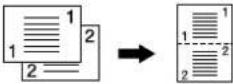 |
| 4in1 | Select this setting to print four document pages on one page. The page arrangement (Numbering Direction setting) can be specified. Horizontal |
| Vertical |  |
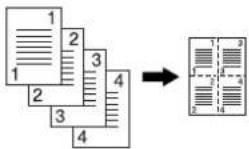 | |
| 8in1 Select this setting | to print eight document pages on one page. The page arrangement (Numbering Direction setting) can be specified. Horizontal  Vertical Vertical  |
The following procedure describes how to select a combined copy setting.
Copying multiple document pages onto a single page ("Combined Copy" settings)
If a combined copy setting is selected, specify the position of the binding margin and the loading orientation for the document, otherwise the copies may not be printed in the desired arrangement.
1 In the Basic screen, touch [Duplex/Combine].

The Duplex/Combine screen appears.
2 Select the desired combined copy setting.

- Select the setting and page arrangement according to the orientation and number of the combined pages.
If "4in1 / 8in1" is selected, whether the "Horizontal" or "Vertical" paper arrangement is selected can be viewed in the touch panel.
However, this appears only if the "Left Pane Display Default" parameter in Utility mode is set to "Check Job Settings".
If "2in1" was selected, the pages will be arranged as shown below.
Horizontal

Vertical

- If "4in1 / 8in1" was selected, the 4in1/8in1 screen appears. Touch [Vertical] or [Horizontal] to select the page arrangement.

- To cancel the setting, touch [No].
2.15 Selecting the quality of the document
Loading documents with small print or photos ("Original Type" settings)
Select the setting for the text and image type of the document to better adjust the copy quality.
The following Original Type settings are available.

Note
As the factory default, "Text/Photo" is selected.
| Icon Description | ||
 Text Text | Select this setting when copying documents containing only text.The edges of copied text are reproduced with sharpness, providing an image that is easy to read. | |
| Text/Photo Photo Paper |  | Select this setting when printing photos from documents containing both text and images onto photographic paper.A smooth copy image is produced. |
 Printed Photo Printed Photo | Select this setting when copying printed documents containing both text and images, such as pamphlets or catalogs. | |
 Photo Photo Paper Photo Photo Paper |  | Select this setting when printing photos from documents onto photographic paper.Select this setting to produce better reproductions of halftone document images (photographs, etc.) that cannot be reproduced with the usual settings.A smooth copy image is produced. |
 Printed Photo Printed Photo | Select this setting when copying printed documents, such as pamphlets or catalogs.Select this setting to produce better reproductions of halftone document images (photographs, etc.) that cannot be reproduced with the usual settings. | |
 Map Map | Select this setting when copying documents with a background color or documents containing pencil markings or fine colored lines. A sharp copy image is produced. | |
 Dot Matrix Original Dot Matrix Original | Select this setting when copying documents containing only text that appears faint (such as that written with a pencil).The copied text is reproduced so that it is darker, making it easier to read. | |
 Copied Paper Copied Paper | Select this setting when copying images (documents) printed with this machine. | |
The following procedure describes how to select an Original Type setting.
To select an original type setting
1 Position the document to be copied.
- For details on positioning the document, refer to "Feeding the document" on page 2-27.
2 In the Basic screen, touch [Quality/Density].
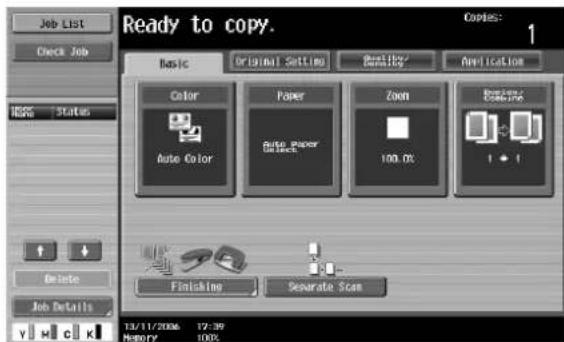
The Quality/Density screen appears.
3 Touch the button for the quality setting most appropriate for the loaded document.
- For a document that contains only text, touch [Text].
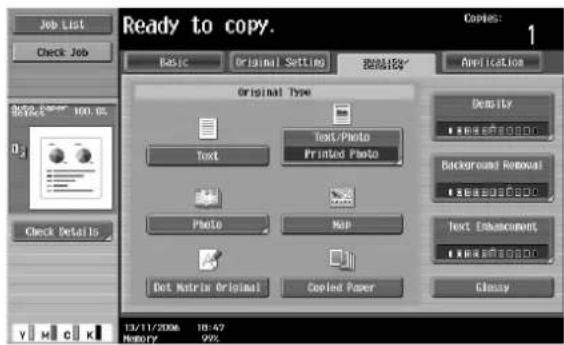
- For a document that contains both text and photos, touch [Text/Photo] to display the Photo Type screen. Touch the button for the appropriate setting, and then touch [OK].

- For a document that contains photos, touch [Photo] to display the Photo Type screen. Touch the button for the appropriate setting, and then touch [OK].

- For a document that contains maps, touch [Map].
- For a document that contains faint text, touch [Dot Matrix Original].
- For a document printed with this machine, touch [Copied Paper].
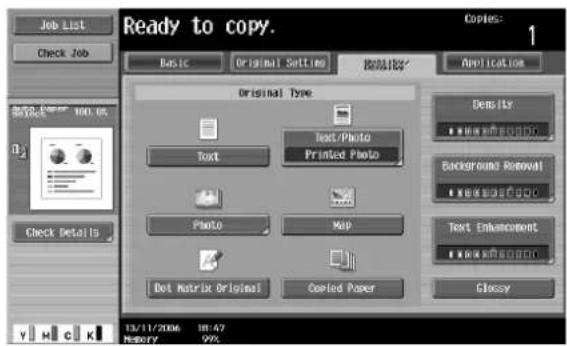
The Quality/Density screen appears again.
2.16 Selecting finishing settings
Various settings can be selected for sorting and finishing copies fed into the copy output tray.

● ● ●
Note
As the factory default, "Group" is selected.

Detail
If no finisher is installed and all of the following conditions are met, printed copies are fed out and sorted in an alternating crisscross pattern.
A4- or B5-size paper is used.
Paper of the same size and type is loaded with the □ orientation in one paper tray and with the □ orientation in another tray.
The "Auto" Paper setting is selected.
The "Auto" Paper setting is not selected when the "Mixed Original" setting is selected.

Note
From Administrator Settings mode, the machine can be set so that copies are fed out without being shifted when the finisher is installed. As a factory default, the machine is set to shift the copies that are fed out.
For details on "Fold/Bind" and "Center Staple / Fold", refer to "Selecting a folding setting" on page 2-61.
The following Finishing settings are available.
| Setting Description | |
| Sort Select this setting to separate each set of a multi-page document. | 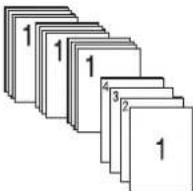 |
| Group Select this setting to separate the copies of each page in a multi-page document. | 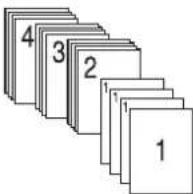 |
| Offset If no finisher is installed | If the sorting conditions are met, printed copies are fed out and sorted in an alternating crisscross pattern.  |
If a finisher is installed The copies are fed out and stacked on top of each other with each set shifted to separate it.  | |
| Fold/Bind Select one of these settings | to fold copies. The copies can also be bound with staples at the same time.  |
| Center Staple/Fold (d-Color MF450) Select | Select this setting to fold copies. The copies can also be bound with staples at the same time.  The “Center Staple & Fold” setting can be used if the saddle stitcher is installed on optional finisher FS-519 The “Center Staple & Fold” setting can be used if the saddle stitcher is installed on optional finisher FS-519 |
| Output Tray (d-Color MF450) Select the output tray where the finished copies are to be fed. | |
| Staple Select one of these settings to | bind the copies with a staple in the corner or with two staples.   |
| Punch Holes are punched (4 holes) in | the copies for filing them.  |
Available Finishing settings
Available finishers for d-Color MF550: FS-517 and FS-608
Available finisher for d-Color MF450: FS-517, FS-608 and FS-519
The following procedures describe how to select Finishing settings.

...
Reminder
The Staple settings are available only if the optional finisher is installed.
The Punch settings are available only if the punch kit is installed on the optional finisher.
Separating copies by sets ("Sort" setting)
√ As the factory default, "Group" is selected.
√ If finisher FS-519 is installed, the output tray can be selected. For details, refer to "Selecting the output tray (d-Color MF450)" on page 2-54.
√ If offset sorting is selected while no finisher is installed, printed copies will be fed out and sorted in an alternating □ and □ pattern if the following conditions are met.
A4- or B5-size paper is used.
Paper of the same size and type is loaded with the □ orientation in one paper tray and with the □ orientation in another tray.
The "Auto" Paper setting is selected.
The "Auto" Paper setting is not selected when the "Mixed Original" setting is selected.
√ If offset sorting is selected while a finisher is installed, printed copies are fed out and stacked on top of each other with each set shifted to separate it.
1 In the Basic screen, touch [Finishing].

The Finishing screen appears.
2 Touch [Sort].

- To separate each set of copies, touch [Yes] under "Offset".
3 Touch [OK].
The Basic screen appears again.
Separating copies by pages ("Group" setting)
√ As the factory default, "Group" is selected.
√ If finisher FS-519 is installed, the output tray can be selected. For details, refer to "Selecting the output tray (d-Color MF450)" on page 2-54.
√ If offset sorting is selected while no finisher is installed, printed copies will be fed out and sorted in an alternating □ and □ pattern if the following conditions are met.
A4- or B5-size paper is used.
Paper of the same size and type is loaded with the □ orientation in one paper tray and with the □ orientation in another tray.
The "Auto" Paper setting is selected.
The "Auto" Paper setting is not selected when the "Mixed Original" setting is selected.
√ If offset sorting is selected while a finisher is installed, printed copies are fed out and stacked on top of each other with each set shifted to separate it.
1 In the Basic screen, touch [Finishing].

The Finishing screen appears.
2 Touch [Group].

- To separate each set of pages, touch [Yes] under "Offset".
3 Touch [OK].
The Basic screen appears again.
Selecting the output tray (d-Color MF450)
√ The output tray can be selected only if optional finisher FS-519 is installed.
1 In the Basic screen, touch [Finishing].
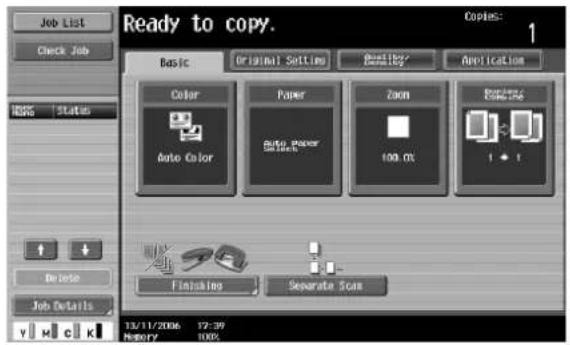
The Finishing screen appears.
2 Touch [Output Tray].

3 Select the output tray where copies are to be fed, and then touch [OK].

The Basic screen appears again.
Stapling copies ("Staple" settings)

...
Reminder
Copies can be fed out stapled either in the corner or at two places only when the finisher is installed.

Detail
In order for the copies to be stapled, all of the following conditions must be met.
The paper width must be between 182 mm and 311.1 mm.
The paper length must be between 139 mm and 457.2 mm.
If the "Mixed Original" setting is selected, all copies must be printed with paper of the same width.
If a Staple setting is selected, the "Sort" setting is automatically selected.
A Staple setting cannot be used together with offset sorting.
If a Staple setting is to be selected, select the orientation in which the document is positioned and the orientation of the page to be stapled, otherwise the copies may not be stapled as desired.
Copies can be fed out stapled either in the corner or at two places.
When Finisher FS-517/FS-608 is installed
| Tray | Paper weight | Paper size | Paper capacity |
| Output tray 1 Plain paper (64 g/m ^2 to 90 g/m ^2 )Thick paper 1/1+/2 (91 g/m ^2 to 209 g/m ^2 ) ^1 | A3 to A5 ,12-1/4 18 ^2 ,11 17 to 5-1/2 8-1/2 / ,8 13 ^3 ,16K / , 8K | 20 to 50 sets (A3 , 11 17 ,A5 , 5-1/2 8-1/2 )20 to 100 sets (others) |
*1 Can only be used as cover sheets.
^2 Can be used only with Finisher FS-608.
^3 There are five Foolscap sizes: 220 330 mm, 8-1/2 13,
8-1/4 13, 8-1/8 13-1/4, and 8 13. Any one of these sizes can be selected. For details, contact your technical representative.
Number of bound pages
Examples of the possible number of bound pages are listed below.
Finisher FS-517:
- 50 sheets of 90g / m^2 paper
- 2 sheets of 200g / m^2 paper + 48 sheets of 90g / m^2 paper
Finisher FS-608:
- 50 sheets of 80g / m^2 paper
- 2 sheets of 200g / m^2 paper + 48 sheets of 80g / m^2 paper
• 16 sheets of 90 g/m ^2 paper - 2 sheets of 200g / m^2 paper + 14 sheets of 90g / m^2 paper
When Finisher FS-519 is installed (d-Color MF450)

Detail
In order for the copies to be stapled, all of the following conditions must be met.
The paper width must be between 182 mm and 297 mm.
The paper length must be between 148.5 mm and 431.8 mm.
If the "Mixed Original" setting is selected, all copies must be printed with paper of the same width.
| Tray | Paper weight | Paper size | Loading Capacity |
| Finishing tray 1 Plain paper (64 g/m ^2 to 90 g/m ^2 ) | A3 ☐ to A5 ☑ | When the stack is 32 mm high or contains 200 sheets or 20 sets | |
| Thick paper 1 (91 g/m ^2 to 120 g/m ^2 ) | |||
| Finishing tray 2 Plain paper (64 g/m ^2 to 90 g/m ^2 ) | A3 ☐ to A5 ☑ | A4 ☐ or smaller: 132 mm high, 1,000 sheets or 100 setsB4 ☐ or larger: When the stack is 64.5 mm high or contains 500 sheets or 50 sets | |
| Thick paper 1 (91 g/m ^2 to 120 g/m ^2 ) | |||
| Optional finishing tray | Plain paper (64 g/m ^2 to 90 g/m ^2 ) | A3 ☐ to A5 ☑ | When the stack is 24 mm high or contains 200 sheets or 20 sets |
| Thick paper 1 (91 g/m ^2 to 120 g/m ^2 ) |
Number of Bound Pages
Examples of the possible number of bound pages are listed below.
- 50 sheets of 90g / m^2 paper
- 2 sheets of 209g / m^2 paper + 48 sheets of 90g / m^2 paper
• Maximum of 30 sheets of 91 to 120 g/m ^2 paper
1 In the Basic screen, touch [Finishing].

The Finishing screen appears.
2 Under "Staple", touch either [Corner] or [2 Position].

- To cancel the Staple setting, touch [None].
3 Touch [Position Setting].

- Select the stapling position, and then touch [OK].
- When the "2 Position" Staple setting is selected.

- When the "Corner" Staple setting is selected.

- Touch [Auto] to automatically determine the stapling position according to the orientation of the loaded document. If the document length is 297 mm or less, the long side of the paper is stapled. If the document length is more than 297 mm, the short side of the paper is stapled.
- If "Auto" is selected for the stapling position, load the document with the top toward the back of the machine. If the document is loaded in any other orientation, the stapling will not be correctly positioned.
- If "Auto" is selected, the stapling position is set at the top or at the left.
- To cancel the setting and select the default, press the [Reset] key.
4 Touch [OK].
The Basic screen appears again.
Punching holes in copies ("Punch" settings)

Detail
In order for holes to be punched in the copies, all of the following conditions must be met.
The paper width must be between 280 mm and 297 mm.
The paper length must be between 182 mm and 432 mm.
If a Punch setting is to be selected, select the orientation in which the document is positioned. If an Original Direction setting is not selected, holes may not be punched in the copies as desired.

Note
The Punch settings are available only if the punch kit is installed on the optional finisher.
When Punch kit PK-512 and/or Finisher FS-517/FS-608 are installed
| Tray Paper weight Paper size | ||
| Finishing Tray 1 64 g/m | ^2 to 128 g/m ^2 | "4-Hole" Punch setting:A3 □, B4 □, A4 □, B5 □, 11 □ 17 □, 8-1/2 □ 11 □,7-1/4 □ 10-1/2 □, 8K □, 16K □ |
When Punch kit PK-513 and/or Finisher FS-517/FS-608 are installed
| Tray Paper weight | Paper size | |
| Finishing Tray 1 64 g/m | ^2 to 128 g/m ^2 | "4-Hole" Punch setting: A3 □, B4 □, A4 □, B5 □ |
When Finisher FS-519 is installed (d-Color MF450)
| Paper weight Paper size | |
| Plain Paper (64 g/m2 to 90 g/m2)Thick Paper 1/1+/2 (91 g/m2 to 128 g/m2 | A3 □, A4 □, B5 □ |
1 In the Basic screen, touch [Finishing].

The Finishing screen appears.
2 Under "Punch", touch [4-Hole].

- To cancel the Punch setting, touch [None].
3 Touch [Position Setting].
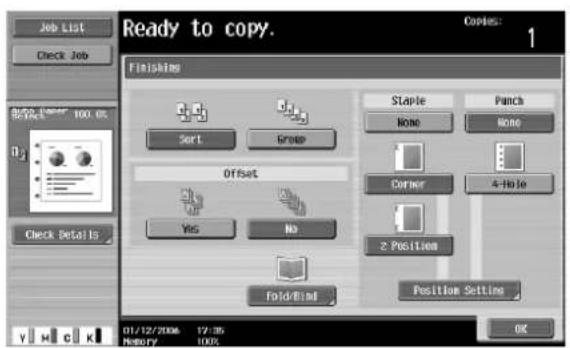
- Select the punched hole position, and then touch [OK].

- Touch [Auto] to automatically determine the position of the punched holes according to the orientation of the loaded document. If the document length is 297 mm or less, the holes are punched along the long side of the paper. If the document length is more than 297 mm, the holes are punched along the short side of the paper.
- If "Auto" is selected for the stapling position, load the document with the top toward the back of the machine. If the document is loaded in any other orientation, the stapling will not be correctly positioned.
- If "Auto" is selected, the punched hole position is set at the top or at the left.
- To cancel the setting and select the default, press the [Reset] key.
4 Touch [OK].
The Basic screen appears again.
2.17 Selecting a folding setting
If options are installed, copies can be folded before being fed out. The following folding settings are available. The available settings differ depending on the options that are installed.
| Setting Description | Compatible models | ||
| d-ColorMF550 | d-ColorMF450 | ||
Half-Fold Select this setting to fold copies in half before feeding them out. (Refer to page 2-61.)  | FS-608 FS-608 | FS-519 +SaddleStitcher | |
| Center Staple & Fold | Select this setting to staple copies at two places along the center, then fold the copies in half before feeding them out. (Refer to page 2-64.) 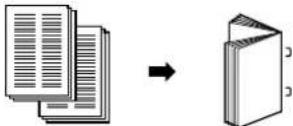 | FS-608 FS-608 | FS-519 +SaddleStitcher |
Tri-Fold Select this setting to fold copies in three before feeding them out. (Refer to page 2-67.)  | FS-608 FS-608 | ||

Note
Copies can be folded in half or in three or bound at the center only if the optional finisher is installed.
Folding copies in half ("Half-Fold" setting)
When Finisher FS-608 is installed
| Paper weight Paper size | |
| Plain paper(64 g/m2to 90 g/m2) | A3 □, B4 □, A4 □, 12-1/4 18 □, 11 17 □, 8-1/2 14 □,8-1/2 11 □, 8K □ |
| Maximum number of folded sheets Paper capacity | |
| 3 sheets When folding 3 sheets: | 25 sets or more (with a paper length of 299 mm or less)33 sets or more (others) |
1 In the Basic screen, touch [Finishing].

The Finishing screen appears.
2 Touch [Fold/Bind].

The Fold/Bind screen appears.
3 Touch [Half-Fold].

- As the factory default, the "Booklet" function is automatically specified when "Half-Fold" is selected.
- To cancel the "Half-Fold" setting, touch [No] or the button for a different setting.
4 Touch [OK], and then touch [OK] again.
When the saddle stitcher is installed on finisher FS-519 (d-Color MF450)
| Paper weight Paper size Maximum number of | folded sheets | |
| Plain Paper (64 g/m2 to 80 g/m2) | B5 □, A4 □, B4 □, A3 □ | 200 sheets or 20 sets |
| Thick Paper 1/1+/2 (91 g/m2 to 128 g/m2) | ||
Number of sheets folded in half
Examples of the possible number of sheets folded in half are listed below.
- 2 to 15 sheets of 90 ~g / m ^2 paper (maximum of 60 pages)
- 1 sheet of 64 to 209g / m^2 paper + 14 sheets of 64 to 90g / m^2 paper (maximum of 60 pages)
• Maximum of 13 sheets of 91 to 120 g/m ^2 paper
• Maximum of 10 sheets of 121 to 150 g/m ^2 paper
• Maximum of 8 sheets of 151 to 209 g/m ^2 paper

Detail
In order for copies to be bound at the center or folded in half, all of the following conditions must be met.
The paper width must be between 182 mm and 297 mm.
The paper length must be between 257 mm and 431.8 mm.
1 In the Basic screen, touch [Finishing].
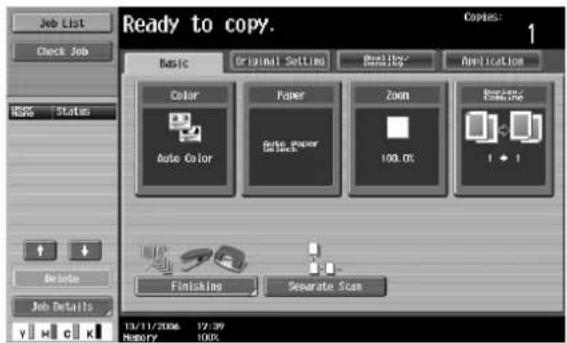
The Finishing screen appears.
2 Touch [Center Staple/Fold].

The Center Staple/Fold screen appears.
3 Touch [Yes] below "Half-Fold".

- As the factory default, the "Booklet" function is automatically specified when Half-Fold is selected.
- To cancel the "Half-Fold" setting, touch [No] or the button for a different setting.
4 Touch [OK], and then touch [OK] again.
Binding copies at the center ("Center Staple & Fold" setting)
When Finisher FS-608 is installed
| Paper weight Paper size Maximum number of | bound sheets | |
| 64 g/m2 to 80 g/m2 | A3 □, B4 □, A4 □, 12-1/4 ≡ 18 □,11 ≡ 17 □, 8-1/2 ≡ 14 □, 8-1/2 ≡ 11 □,8K □ | 20 sheets |
| 81 g/m2 to 90 g/m2 | 16 sheets | |
1 In the Basic screen, touch [Finishing].

The Finishing screen appears.
2 Touch [Fold/Bind].
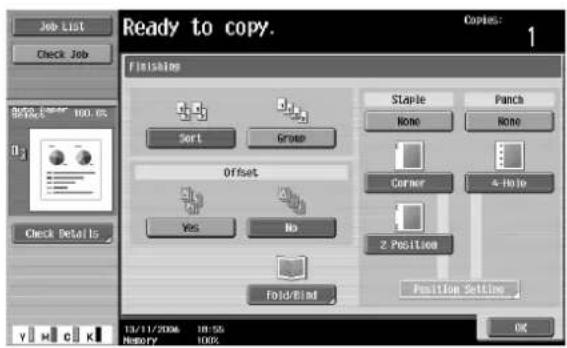
The Fold/Bind screen appears.
3 Touch [Center Staple & Fold].

- If a cover sheet is added with the "Cover Sheet" function, the cover sheet (200 g/m ^2 ) cannot be stapled.
- When the "Center Staple & Fold" setting is selected, the following factory default settings are automatically selected.
1-Sided > 2-Sided
Booklet
Recommended zoom ratio (70.7%) when the "Booklet" function is selected
- When the "Center Staple & Fold" setting is selected, the following Finishing settings are not available.
Group
Offset
Staple
Punch
- To cancel the "Center Staple & Fold" setting, touch [No] or the button for a different setting.
4 Touch [OK], and then touch [OK] again.
When the saddle stitcher is installed on finisher FS-519 (d-Color MF450)
| Paper weight Paper size Maximum number of | folded sheets | |
| Plain Paper (64 g/m2 to 80 g/m2) | B5 □, A4 □, B4 □, A3 □ | 200 sheets or 20 sets |
| Thick Paper 1/1+/2 (91 g/m2 to 128 g/m2) | ||
Number of sheets folded in half
Examples of the possible number of sheets folded in half are listed below.
- 2 to 15 sheets of 90g / m^2 paper (maximum of 60 pages)
- 1 sheet of 64 to 209g / m^2 paper + 14 sheets of 64 to 90g / m^2 paper (maximum of 60 pages)
• Maximum of 13 sheets of 91 to 120 g/m ^2 paper
• Maximum of 10 sheets of 121 to 150 g/m ^2 paper
• Maximum of 8 sheets of 151 to 209 g/m ^2 paper
![OLIVETTI d-Color MF550 - Touch [OK], and then touch [OK] again. - 1](/content/2026/05/977387/images/294cb80b3c207d36b7ba3f6f453cdd9120de5e2b6851286ef1eedc3421c9afa0.jpg)
Detail
In order for copies to be bound at the center or folded in half, all of the following conditions must be met.
The paper width must be between 182 mm and 297 mm.
The paper length must be between 257 mm and 431.8 mm.
1 In the Basic screen, touch [Finishing].

The Finishing screen appears.
2 Touch [Center Staple/Fold].
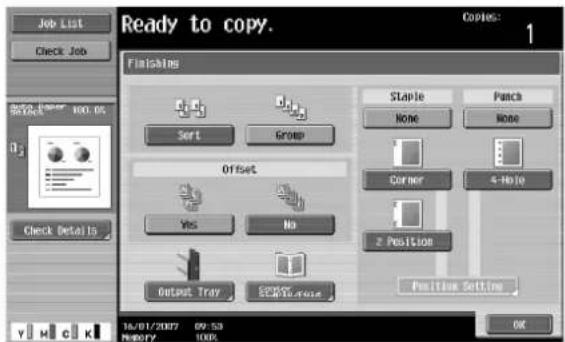
The Center Staple/Fold screen appears.
3 Specify the settings for binding pages.
- To staple copies at the center in two places, touch [Yes] below "Center Staple" and [No] below "Half-Fold".
- To bind copies at the center, touch [Yes] below "Center Staple" and [Yes] below "Half-Fold".

- If a cover sheet is added with the "Cover Sheet" function, the cover sheet (200 g/m ^2 ) cannot be stapled.
- When the "Center Staple & Fold" setting is selected, the following factory default settings are automatically selected.
1-Sided > 2-Sided
Booklet
Recommended zoom ratio (70.7%) when the "Booklet" function is selected
- When the "Center Staple & Fold" setting is selected, the following Finishing settings are not available.
Group
Offset
Staple
Punch
- To cancel the "Center Staple & Fold" setting, touch [No] or the button for a different setting.
4 Touch [OK], and then touch [OK] again.
To fold copies in three ("Tri-Fold" setting)
When Finisher FS-608 is installed
| Paper weight Paper size Maximum number of tri-folded | sheets | |
| 64 g/m2to 80 g/m2 | A4 □, 8-1/2 □ 11 □, 16K □ | 3 sheets |
| 81 g/m2to 90 g/m2 | 1 sheet | |
| Number of folded sheets Maximum number of sets | |
| 1 sheet 50 sets or more |
1 In the Basic screen, touch [Finishing].
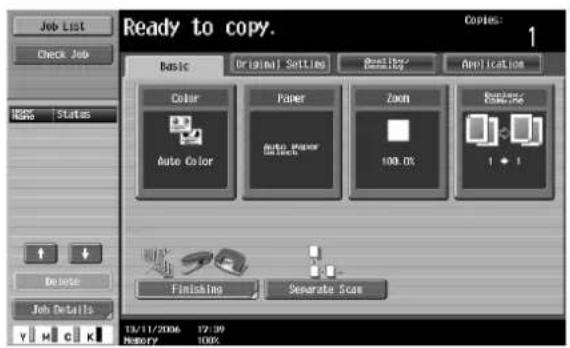
The Finishing screen appears.
2 Touch [Fold/Bind].

The Fold/Bind screen appears.
3 Touch [Tri-Fold].

- When the "Tri-Fold" setting is selected, the following Finishing settings are not available.
Group
Offset
Staple
Punch
- To cancel the "Tri-Fold" setting, touch [No] or the button for a different setting.
4 Touch [OK], and then touch [OK] again.
2.18 Temporarily stopping scanning/printing
Follow the procedure described below to temporarily stop scanning the document and stop the printing operation.
√ If a document is being scanned for a job, pressing the [Stop] key stops scanning.
1 Press the [Stop] key while a document is being scanned or a job is being printed.
Scanning/printing stops.

![Job List Select job to delete and touch [Delete] Press [Start] to restart the stopped job. Stopped Jobs Delete No. User Now Status Document Name Reg. Timbers: 100% 18 COPY Drop/Down Stamped 19:06 1 2 13/11/2006 19:06 MEMORY 99%](/content/2026/05/977387/images/1ce532029f39484b4d6daa0e8a4717afcd456b41d7746c65915d8168ea0979ab.jpg)
The Stopped Jobs screen appears.
2 To continue all stopped jobs, press the [Start] key.
2.19 Interrupting a copy job (Interrupt mode)
The current jobs can be temporarily interrupted so a document can be copied with different copy settings. This is convenient for quickly making a copy.
1 Position the document to be copied.
- For details on loading the document, refer to "Loading the document into the ADF" on page 2-27.
2 Press the [Interrupt] key.
- If a job is being printed, the message "The job is stopping." appears.
The indicator on the [Interrupt] key lights up in green and printing of the current job stops.
? What settings are selected when the [Interrupt] key is pressed?
→ When the [Interrupt] key is pressed, all functions and settings are reset to their defaults.
? Why is the [Interrupt] key not available?
→ The [Interrupt] key cannot be pressed while an original is being scanned.

3 Select the desired copy settings.
4 Press the [Start] key.
Printing for the interrupting job begins.
5 After the interrupting job has finished printing, press the [Interrupt] key.
The indicator on the [Interrupt] key goes off.
The copy settings return to those specified before printing was interrupted.
[Non-Text]
Note
If the interrupting job is cancelled, printing for the interrupted job automatically restarts.
2.20 Registering copy programs (Mode Memory)
Frequently used copy settings can be stored together as a program to easily be recalled. A maximum of 30 programs can be registered.
A name of up to 16 characters can be specified for the registered copy programs.
1 Using the touch panel and control panel keys, specify the copy settings to be registered in the copy program.
? Can the current settings be checked?
→ To check the currently specified copy settings, touch [Check Job] in the left panel, and then touch [Job Details].
2 Press the [Mode Memory] key.
The Recall Copy Program screen appears.

3 From the copy program buttons that appear in the screen, touch the button where you wish to store the copy settings, and then touch [Register Program].
- There are three Recall Copy Program screens. Touch and to display a different screen.
- If 30 copy programs have been registered, delete an unnecessary copy program.
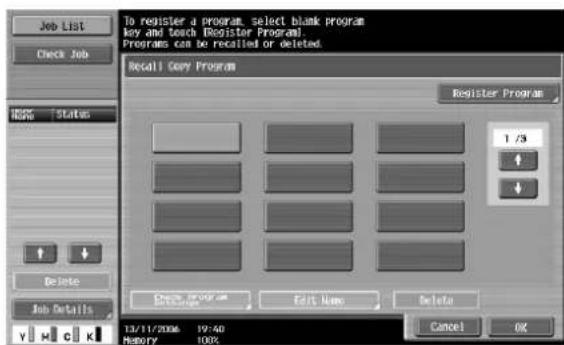
The Register Copy Program screen appears.
4 Use the control panel keypad and the keyboard that appears in the touch panel to type in the name of the copy program.
- The program name can contain a maximum of 16 characters.
- For details on typing in text, refer to "Entering text" on page 9-3.
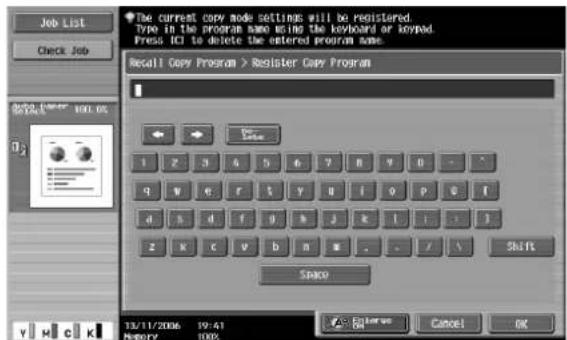
5 After typing in the name, touch [OK].

- The copy program can be given the same name as a copy program that has already been registered.
- To stop specifying the name of the copy program, touch [Cancel].
The Recall Copy Program screen appears again. The copy program is registered and a button with the entered copy program name appears.
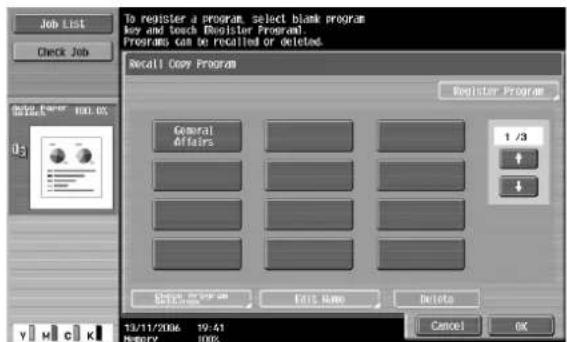
? Can the copy program name be corrected?
To change the entered copy program name, touch the button whose name is to be changed, and then touch [Edit Name]. The Edit Name screen appears. Return to step 4 and repeat the procedure to change the copy program name.
? Can the specified settings for a copy program be checked?
To check the programmed copy settings, touch the button for the desired copy program, and then touch [Check Program Settings]. For details, refer to "Copying with programmed copy settings (Mode Memory)" on page 2-74.
6 Touch [OK] or [Cancel].
- To return to the Basic screen, press the [Mode Memory] key.

Detail
To stop registering the program, press the [Reset] key or the [Mode Memory] key.
No matter which screen is displayed, the registration is cancelled.
Otherwise, continue to touch [Cancel] until the Basic screen is displayed.
The settings of a copy program cannot be changed.
If the copy program that was selected has been locked, [Edit Name] and [Delete] do not appear.
2.21 Copying with programmed copy settings (Mode Memory)
Programmed copy settings can be recalled to be used again for copying.
1 Position the document to be copied.
- For details on positioning the document, refer to "Feeding the document" on page 2-27.
2 Press the [Mode Memory] key.
The Recall Copy Program screen appears.
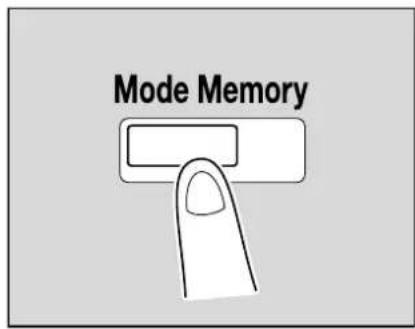
3 Touch the button for the copy program registered with the copy settings to be recalled.

- If the copy settings in the selected copy program are not to be checked, continue with step 8.
- If the copy program to be recalled is not displayed, touch ▼ and ▼ until the desired copy program is displayed.
4 Press the [Check Program Settings] key.
- The copy settings cannot be changed from the Check Job Settings screens.

The Check Job Settings screen appears.
There are six Check Job Settings screens. The number to the right of the screen title indicates the number of the currently displayed screen.
To display the previous screen, touch [← Back]. To display the next screen, touch [Forward → ]. If the setting for a function has been changed from the default, the button for that function appears with a colored frame.
5 Check the copy settings registered with the selected copy program.
6 Touch [Close].

The Recall Copy Program screen appears again.
7 Again touch the button for the copy program registered with the copy settings to be recalled.
- If [OK] is touched with no copy program selected, the Basic screen appears again without a copy program being recalled.
8 Touch [OK].
The programmed copy settings are recalled and the Basic screen appears again.
9 Press the [Start] key.
Copying begins with the recalled copy settings.

...
Note
To stop recalling a copy program, press the [Reset] key or the [Mode Memory] key or touch [Cancel].
2.22 Displaying function descriptions (Help)
Descriptions of the various functions and details of operations can be viewed.
There are two methods for displaying the Help screens.
- Main Help screens (from the Basic screen)
- Help screens for settings (from screens other than the Basic screen)
Overview of help screens
The following items are provided in the Help Menu screen.
Help Menu screen (1st level)

| Item Description | |
| [Function] Use to search for descriptions from a Help menu divided by the function types and names. | |
| [Search by Operation] Use to search for descriptions from a Help menu divided by the operations. | |
| [Function Map] Displays the Function Map screen, which contains a chart of the available functions and settings. | |
| [Name and Function of Parts] Displays the Help menu for the name and function of each part.Use to check the description of the main unit and its options. | |
| [Service/Admin. Information] Displays the name, extension number and e-mail address of the administrator. | |

Detail
The Help screens cannot be displayed when the following operations are being performed. While scanning, while printing, while printing a proof copy, during Enlarge Display mode, during Accessibility mode
While the Help screens are displayed, the following keys are not available. [Start], [Stop], [C] (clear), [Interrupt], [Proof Copy], [Access], [Mode Memory], [Enlarge Display]
Items in the Help Menu screen and other Help screens can be selected by touching the button or by pressing the key in the keypad for the number of the desired item.
To display the next screen higher in the menu structure, touch [Close].
Touch [Exit] to exit the Help mode and return to the screen that was displayed before the [Help] key was pressed.
Help screen (2nd level) (Example: Function)

| d-Color MF450 d-Color MF550 Description | ||
| [Copy], [Scan/Fax], [User Box], [Job List], [Print] | [Copy], [Scan/Fax], [User Box], [Job List] | Displays the first Help screen for each description. |

Detail
The items displayed in the Help menu for the name and function of each part differ depending on the options that are installed.
Help screen (bottom level) (Example: Function → Copy → Color)
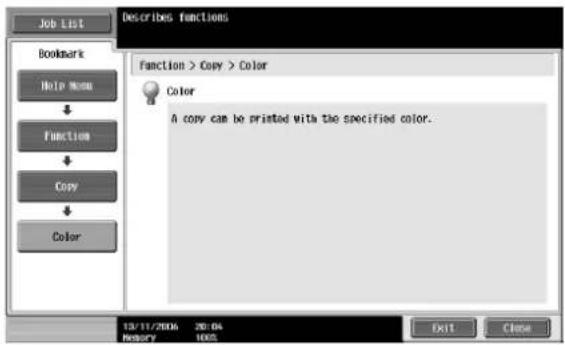
Function Map screen (Example: Copy)

flowchart
graph TD
    A["1"] --> B["Color"]
    C["2"] --> D["Paper"]
    E["3"] --> F["Zoom"]
    G["4"] --> H["Duplex/Combine"]
    I["5"] --> J["Duplex/Combine"]
    K["6"] --> L["Binding Position"]
A chart of the available functions and settings are displayed in the function maps. Select an item from the chart for the Help screen that you wish to view.

Detail
There are 13 Function Map screens for Copy mode. The top number indicates the number of the 13 screens that is currently displayed.
To display the previous screen, touch . To display the next screen, touch .

Press the key in the keypad for the number of the desired item in the Function Map screen.
To display the Help screen for "Function" that contains the selected item, touch [Close] in the Help screen displayed by selecting an item in a Function Map screen.
To quit the Help mode, press the [Help] key or touch [Exit].
Displaying main help screens
As an example, the following procedures describe the Help screens that are displayed for copy operations by using "Function".
1 With the Basic screen displayed, press the [Help] key. The Help Menu screen appears.

2 Touch [Function] or press the [1] key in the keypad.


The Help screen for "Function" appears.
? Is there more information about the buttons of the Help screens?
→ Refer to "Overview of help screens" on page 2-76.
3 Touch [Copy] or [Open] or press the [1] key in the keypad.

The Copy Help screen appears.
4 Touch [Open] or the desired information or press the key in the keypad for the number to the left of the desired information to display the corresponding Help screen.
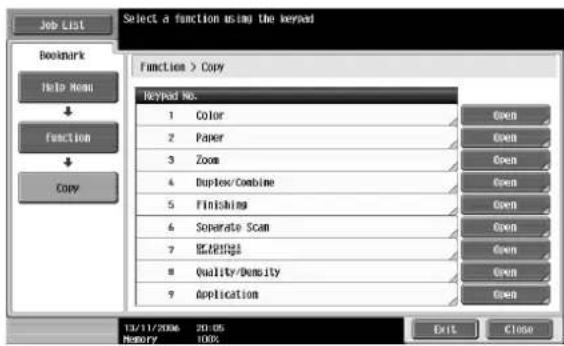
5 After checking the Help information, touch [Exit] or press the [Help] key again. The Basic screen appears again.
2.23 Copy paper
Use paper that meets the following specifications.
Possible paper sizes
Non-standard-sized paper:
| Paper source Paper width Paper length | ||
| Bypass tray *1 | 90.0 mm to 311.1 mm 139.7 mm to 457.2 mm | |
| Tray 1 -- | ||
| Tray 2 | ||
| Tray 3 | ||
| Tray 4 | ||
| LCT | ||
| Double-sided copies 139.7 mm to 3 | 11.1 mm 148 mm to 457.2 mm | |
*1 Banner paper (d-Color MF450)
Paper width: 210 mm to 297 mm
Paper length: 457 mm to 1200 mm
Standard-sized paper:
| Paper source Paper size | |
| Bypass tray | A3 □ to B6 □, A6 □, 12-1/4 ≡ 18 □,12 ≡ 18 □ to 5-1/2 ≡ 8-1/2 □/□, 8 ≡ 13 □^1, 16K □/□, 8K □ |
| Tray 1 | A3 □ to A5 □, 12-1/4 ≡ 18 □, 12 ≡ 18 □ to 8-1/2 ≡ 11 □,8 ≡ 13 □^1, 16K □, 8K □ |
| Tray 2 | |
| Tray 3 A4 □, B5 □ | *2, A5 □^2, 8-1/2 ≡ 11 □^2, 5-1/2 ≡ 8-1/2 □^2, 16K □^2, A6 card □^2 |
| Tray 4 | |
| LCT A4 □ | |
| Double-sided copies | A3 □ to A5 □/□, 12-1/4 ≡ 18 □, A6 card □,12 ≡ 18 □ to 5-1/2 ≡ 8-1/2, 8 ≡ 13 □^1, 16K □/□, 8K □ |
^*1 TherearefiveFoolscapsizes:220☐330mm☐,8-1/2☐13☐,8-1/4☐13☐,8-1/8☐13-1/4☐,and8☐13
☐. Any one of these sizes can be selected. For details, contact your technical representative.
^2 The setting must be changed by the technical representative.
| Loaded equipment Paper sizes that can be loaded | |
| Finisher (FS-517, FS-608) | Tray 1>A3 to A5, B6, A6, 12-1/4 18,12 18 to 5-1/2 8-1/2, 8 13 ^1 , 16K, 8KStaple: A3 to A5, 12-1/4 18 ^2 ,11 17 to 5-1/2 8-1/2, 8 13 ^1 , 16K, 8KPunch Settings (PK-512) ^3 :"4-Hole" Punch setting:A3, B4, A4, B5, 11 17, 8-1/2 11,7-1/4 10-1/2, 8K, 16KPunch Settings (PK-513) ^3 :"4-Hole" Punch setting:A3, B4, A4, B5A3 to A5, B6, 12-1/4 18,12 18 to 5-1/2 8-1/2, 8 13 ^1 <Finishing Tray 2>Half-Fold: A3, B4, A4, 12-1/4 18, 11 17,8-1/2 14, 8-1/2 11, 8KCenter Staple and Fold: A3, B4, A4, 8-1/2 14,8-1/2 11, 8KTri-fold: A4, 8-1/2 11, 16K |
Loaded equipment Paper sizes that can be loaded
| Finisher FS-519 (d-Color MF450) Finishing tray 1, 2 and optional Output Tray | |
| Optional Output Tray OT-602 (d-Color MF450) | A3 □ to B6 □, A6 □, 12-1/4 × 18 □"Group"/"Sort" settings: A3 □ to A5 □Staple settings: A3 □ to A5 □Punch settings: A3 □, A4 □, B5 □^3 |
| Saddle Stitcher SD-505 (d-Color MF450) | Fold & staple: A3 □, B4 □, A4 □, B5 □ |
| Mailbin Kit MT-502 (d-Color MF450) | A4 □, B4 □, A5 □, |
| Output tray OT-503 | A3 □ to B6 □, A6 □, 12- 1/4 18 □,12 18 □ to 5-1/2 8-1/2 13 1, 16K 1/8, 8K □ |
*1 TherearefiveFoolscapsizes:220 330mm,8-1/2 13,8-1/4 13,8-1/8 13-1/4 and 8 13. Any one of these sizes can be selected. For details, contact your technical representative.
*2 Can be used only with Finisher FS-608.
^*3 Can be used when the optional Punch kit is installed on the finisher.
Paper types and paper capacities
| Paper type Plain paper | Thick paper 1 | Thick paper 1+ | Thick paper 2 | Thick paper 3 | Thick paper 4 |
| Weight (g/m2) | 64 g/m2 to 90 g/m2 | 91 g/m2 to 120 g/m2 | 121 g/m2 to 157 g/m2 | 158 g/m2 to 209 g/m2 | 210 g/m2 to 256 g/m2 |
| Paper source | |||||
| Bypass tray 150 sheets 100 sheets 80 sheets 70 sheets 60 sheets 50 sheets | |||||
| Tray 1 and tray 2 | 500 sheets 400 sheets 280 sheets 250 sheets 200 sheets – | ||||
| Tray 3 1500 sheets 1150 sheets 800 sheets 700 sheets 600 sheets – | |||||
| Tray 4 1000 sheets 750 sheets 500 sheets 450 sheets 400 sheets – | |||||
| LCT 3000 sheets 2500 sheets 1750 sheets 1550 sheets 1300 sheets – | |||||
| Paper type Trans-paren-cies | Postcards | Envelopes | Label sheets | Banner paper (d-Color MF450) |
| Paper source | 210 g/m^2 to 256 g/m^2 | |||
| Bypass tray | 20 sheets | 50 sheets | 10 sheets | 50 sheets |
| Tray 1 and tray 2 | - | - | - | - |
| Tray 3 - | 200 sheets | - | - | - |
| Tray 4 - | 200 sheets | - | - | - |
| LCT | - | - | - | - |
* The setting must be changed by the technical representative.
Special paper
Paper other than plain paper, such as OHP transparencies and colored paper, is called special paper. Be sure to select a special paper setting for paper trays loaded with media such as OHP transparencies and colored paper. If the paper type is not correctly selected, paper misfeeds may occur.
| Paper type Icon Descriptions | ||
| Single Side Only Select this setting |  paper that should not be used with double-sided copying (for example, when one side has already been printed on) is loaded as plain paper with a weight of 64 g/m2 to 90 g/m2.A paper tray with the "Single Side Only" setting selected is given priority when the "Auto" Paper setting is specified.A paper tray with this setting is not automatically selected during double-sided printing. paper that should not be used with double-sided copying (for example, when one side has already been printed on) is loaded as plain paper with a weight of 64 g/m2 to 90 g/m2.A paper tray with the "Single Side Only" setting selected is given priority when the "Auto" Paper setting is specified.A paper tray with this setting is not automatically selected during double-sided printing. | |
| Special Paper Select this setting when special paper, for example, high-quality paper, is loaded as plain paper with a weight of 64 g/m2 to 90 g/m2.A paper tray with this setting is not automatically selected when the "Auto" Paper setting is specified. | ||
| Letterhead Select this setting when paper already printed with a company name or preset text is loaded as plain paper with a weight of 64 g/m2 to 90 g/m2.A paper tray with this setting is not automatically selected when the "Auto" Paper setting is specified. | ||
| Colored Paper Select this setting colored paper is loaded as plain paper with a weight of 64 g/m2 to 90 g/m2.A paper tray with this setting is not automatically selected when the "Auto" Paper setting is specified. | ||
| Transparency Select this setting with HP transparencies are loaded.A paper tray with this setting is not automatically selected when the "Auto" Paper setting is specified. When selecting OHP transparencies, select the "Black" Color setting, and then select the paper type. | ||
| Thick 1 Select this setting when the thick paper that is loaded has a weight of 91 g/m2 to 120 g/m2.A paper tray with this setting is not automatically selected when the "Auto" Paper setting is specified. | ||
| Thick 1+ Select this setting when thick paper that is loaded has a weight of 121 g/m2 to 157 g/m2.A paper tray with this setting is not automatically selected when the "Auto" Paper setting is specified. | ||
| Thick 2 Select this setting when the thick paper that is loaded has a weight of 158 g/m2 to 209 g/m2.A paper tray with this setting is not automatically selected when the "Auto" Paper setting is specified. | ||
| Thick 3 Select this setting when the thick paper that is loaded has a weight of 210 g/m2 to 256 g/m2.A paper tray with this setting is not automatically selected when the "Auto" Paper setting is specified. | ||
| Thick 4 Select this setting when the thick paper that is loaded has a weight of 257 g/m2 to 300 g/m2.A paper tray with this setting is not automatically selected when the "Auto" Paper setting is specified. | ||
| Envelopes Select these settings when envelopes are loaded.A paper tray with this setting is not automatically selected when the "Auto" Paper setting is specified. | ||

| Paper type Icon Descriptions | |||
| Duplex 2nd Side | Plain Pa-per |  | Select these settings when loading paper that has already been print-ed on one side."2nd Side" can be selected only if plain paper, thick paper 1, thick pa-per 1+, thick paper 2, thick paper 3 or thick paper 4 is loaded in the bypass tray. |
| Thick 1 |  | ||
| Thick 1+ |  | ||
| Thick 2 |  | ||
| Thick 3 |  | ||
| Thick 4 |  | ||
2.24 Selecting the paper settings
This section describes the procedures for specifying the size and type of paper loaded in each paper tray.

Detail
For details on loading the paper into tray 1 and tray 2, refer to "Loading paper into tray 1 and tray 2" on page 2-18.
For details on loading the paper into the bypass tray, refer to "Loading paper into the bypass tray" on page 2-23.
Automatically detecting the paper size ("Auto Detect" setting)
The size of the paper loaded into tray 1 and the bypass tray can be detected automatically.
The following procedure describes how to specify the setting for automatically detecting the paper loaded into tray 1.
1 In the Basic screen, touch [Paper].

The Paper screen appears.
2 Touch the button for tray 1.
- To select the automatic paper detection setting for tray 2 or the bypass tray, touch the button for the corresponding paper tray.

3 Touch [Change Tray Settings].
4 Touch [Auto Detect].

As the factory default, "Auto Detect" is selected.
5 Touch [OK], and then touch [OK] in the next screen that appears.
The Basic screen appears again.
Selecting a paper size setting ("Size" setting)
The paper size can be set for the bypass tray so that it can be used with the specified paper size.
This is useful, for example, when the size of the paper that is loaded cannot be automatically detected (such as with postcards or paper in inch sizes).
The following procedure describes how to specify the setting for postcards loaded into the bypass tray.
1 In the Basic screen, touch [Paper].
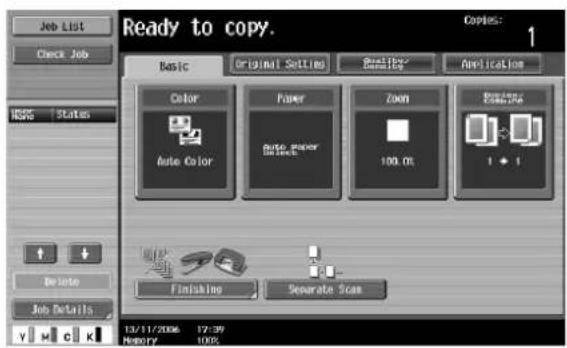
The Paper screen appears.
2 Select the button for the bypass tray.

3 Touch [Change Tray Settings].
4 Touch [Standard Size].

The Standard Size screen appears.
5 Touch twice, and then touch [A6Card].

- Touch and until the button for the desired paper size is displayed.
- If "A6Card" is selected, "Thick 3" is automatically selected. If paper other than postcards are loaded, change the paper type setting. For details on the paper type settings, refer to "Specifying a setting for special paper" on page 2-93.
6 Touch [OK], and then touch [OK] in the next two screens that appear.
The Basic screen appears again.
The paper size for the bypass tray is set.

Reminder
If paper other than the specified paper size is loaded, a paper misfeed may occur since the paper size is not automatically detected.

Detail
For tray 1 and tray 2, "12-1/4 18 is available.
Specifying a non-standard paper size ("Custom Size" settings)
Non-standard-sized paper can be loaded into the bypass tray.
If wide paper is loaded, it will be necessary to enter the paper size.
1 In the Basic screen, touch [Paper].

The Paper screen appears.
2 Select the button for the bypass tray.

3 Touch [Change Tray Settings].
4 Touch [Custom Size].

The Custom Size screen appears.
5 Type in the length (X) and width (Y) of the paper.
- Make sure that [X] is selected, and then use the keypad to type in the length of side X (between 139.7 mm and 457.2 mm).
- Touch [Y] to select it, and then use the keypad to type in the length of side Y (between 90.0 mm and 311.1 mm).
- If a value outside the allowable range is specified, the message "Input error" appears. Type a value within the allowable range.
- If the value was incorrectly entered, press the [C] (clear) key in the keypad to erase the value, and then specify the correct value.
To cancel changes to the settings, touch [Cancel].

? Can paper sizes be stored?
→ Five non-standard paper sizes can be stored.
→ To recall a stored paper size, touch the corresponding memory key.
→ The names "memory1" through "memory5" can be changed. For details on changing the names, refer to "Storing a non-standard paper size ("Custom Size" settings)" on page 2-88.
→ For details on storing paper sizes, refer to "Storing a non-standard paper size ("Custom Size" settings)" on page 2-88.
6 Touch [OK], and then touch [OK] in the next two screens that appear.
The Basic screen appears again.
Storing a non-standard paper size ("Custom Size" settings)
Five non-standard paper sizes can be stored.
Storing paper sizes that are used often allows the paper size to be quickly selected, without having to re-enter the setting.
1 In the Basic screen, touch [Paper].
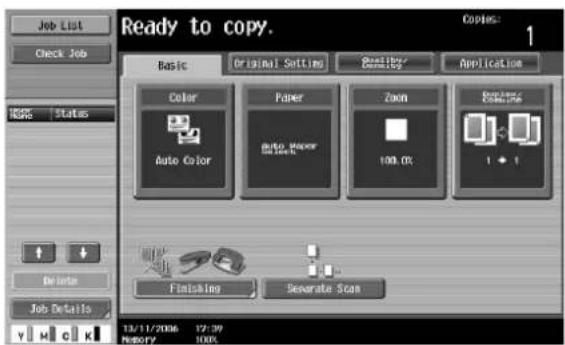
The Paper screen appears.
2 Select the button for the bypass tray.
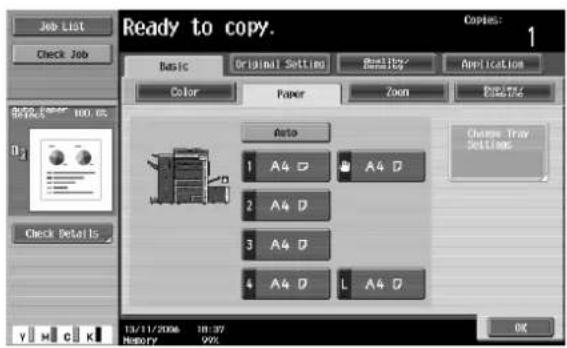
3 Touch [Change Tray Settings].
4 Touch [Custom Size].

The Custom Size screen appears.
5 Specify the X and Y sides of the paper, and then touch [Store].
- Make sure that [X] is selected, and then use the keypad to type in the length of side X (between 139.7 mm and 457.2 mm).
- Touch [Y] to select it, and then use the keypad to type in the length of side Y (between 90.0 mm and 311.1 mm).
- Check the illustration in the screen for the sides that are considered X and Y.
- If a value outside the allowable range is specified, the message "Input error" appears. Type a value within the allowable range.
- If the value was incorrectly entered, press the [C] (clear) key in the keypad to erase the value, and then specify the correct value.
To cancel changes to the settings, touch [Cancel].

6 Touch the memory button where the paper size is to be stored.

- To change the name of a memory key, touch [Change Custom Size Name], and then touch the key to be renamed.
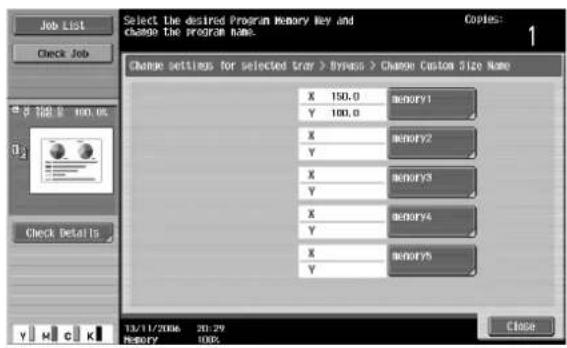
Using the keyboard that appears, type in the name of the key, touch [OK], and then touch [Close]. For details on typing in text, refer to "Entering text" on page 9-3.
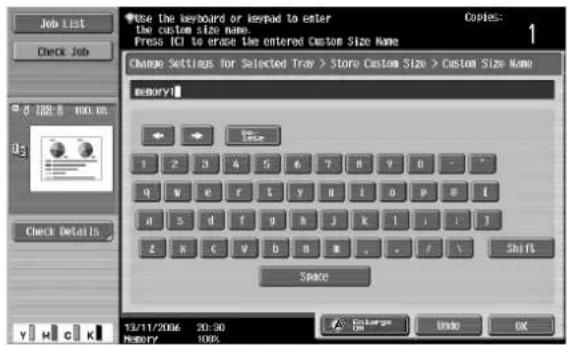
7 Touch [OK], and then touch [OK] in the next three screens that appear.
The Basic screen appears again.
Selecting a setting for oversized paper ("Wide Paper" settings)
Wide paper can be loaded into tray 1 or tray 2 or the bypass tray.
Wide paper is a size larger than the standard size and allows copies of standard-sized documents to be printed so that there is no loss at the edges. For example, if A3 wide paper is used, an area up to 311.1 mm 457.2 mm can be printed, allowing the entire area of an A3-size document to be printed.
If wide paper is loaded, it will be necessary to enter the paper size.
The following procedure describes how to specify the setting for wide paper loaded into the bypass tray.
1 In the Basic screen, touch [Paper].

The Paper screen appears.
2 Touch the button for the bypass tray.
- To set the paper size for tray 1 or 2, touch the button for the corresponding paper tray.

3 Touch [Change Tray Settings].
4 Touch [Wide Paper].
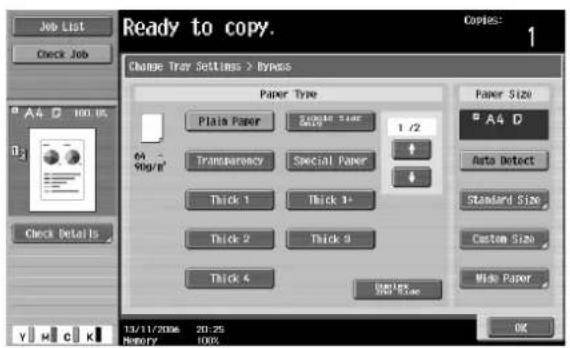
The Wide Paper screen appears.
5 Select the size of the paper to be loaded.
- Touch and until the button for the desired paper size is displayed.
- If tray 1 or 2 is set for wide paper, the size cannot be changed.

6 To change the size, touch [Change Size].
The Change Size screen for oversized paper appears.
7 Specify the X and Y sides of the paper, and then touch [OK].
- Touch either [X] or [Y], press the [C] (clear) key to clear the current setting, and then use the keypad to type in the size.
- To store a paper size of 12 ☐ 18 ☐, touch [12 ☐ 18 ☐]. Enter values for "X" and "Y".
- If a value outside the allowable range is specified, the message "Input error" appears. Type a value within the allowable range. The allowable range differs depending on the paper sizes.
- If the orientation of the loaded paper does not match the sizes specified for "X" and "Y", "Input error" appears, even if the values are within the allowable range. In addition, do not enter the same size for "X" and "Y".
- If the value was incorrectly entered, press the [C] (clear) key in the keypad to erase the value, and then specify the correct value.
To cancel changes to the settings, touch [Cancel].

8 Touch [OK], and then touch [OK] in the next two screens that appear.
The Basic screen appears again.

Note
The selected size button is programmed with the entered paper size, so that the paper size is available to be selected again without being typed in. In addition, the size can be changed.
Specifying a setting for special paper
If paper other than plain paper, such as OHP transparencies or special paper, is loaded in a paper tray, be sure to change the paper type setting for that tray.
The following procedure describes how to specify the setting for special paper loaded into tray 1.
1 In the Basic screen, touch [Paper].
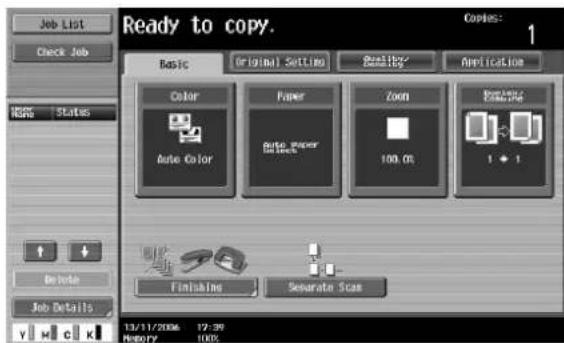
The Paper screen appears.
2 Touch the button for tray 1.
- To specify a setting for special paper for tray 1, tray 2 or tray 3 or the bypass tray, touch the button for the corresponding paper tray.
- If a setting for special paper is selected for a paper tray, that tray is not selected automatically with the "Auto" Paper setting. However, if the paper cannot be used for double-sided printing and the "Single Side Only" setting is selected for the paper tray, that tray is given priority.
- The auto tray switch feature applies only to paper trays specified with the same paper type setting.
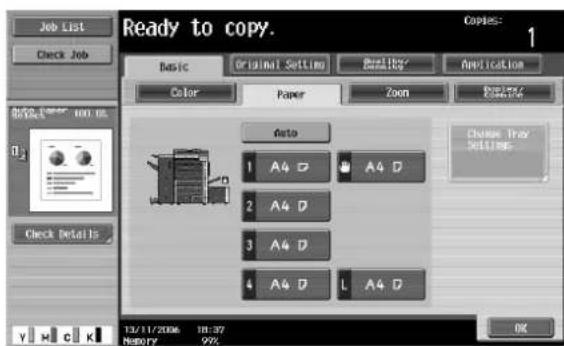
3 Touch [Change Tray Settings].
4 Select the appropriate setting for the type of special paper that is loaded.
- Touch the button for the desired paper type.

? What types of paper can be loaded in the paper tray?
→ There are limits on the types of paper that can be loaded in a paper tray.
→ If postcards were loaded, select "Thick 3".
5 Touch [OK], and then touch [OK] in the next screen that appears.
The Basic screen appears again.

Reminder
If special paper is loaded into the paper tray, be sure to select the corresponding paper type, otherwise a paper misfeed may occur.

Detail
For details on loading the paper into tray 3, refer to "Loading paper into tray 3" on page 2-20.
For details on loading the paper into tray 4, refer to "Loading paper into tray 4" on page 2-21.
Printing double-sided copies manually
The "2nd Side" setting is used to print double-sided copies on paper that cannot be fed through the automatic duplex unit.
The paper to be used for printing the second side can be loaded into the bypass tray.
1 In the Basic screen, touch [Paper].
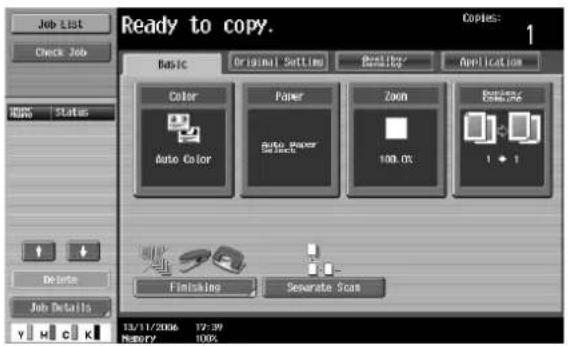
The Paper screen appears.
2 Touch the button for the bypass tray.
- A paper tray set to "2nd Side" is not selected when the "Auto" Paper setting is selected.
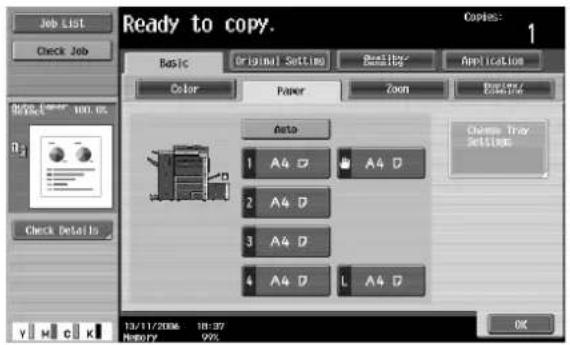
3 Touch [Change Tray Settings].
4 Touch [Duplex 2nd Side].

5 Select the type of paper to be loaded.

6 Touch [OK], and then touch [OK] in the next screen that appears.
The Basic screen appears again.
2.25 Original documents
When making copies, load the document into the ADF or position it on the original glass.
To copy documents that cannot be loaded into the ADF, position them on the original glass.
Documents that can be loaded into the ADF
There are three methods for using the automatic document feeder.
- Normal method
- For documents of mixed sizes
- For Z-folded documents
There are limits on the types of documents that can be loaded with each method.
Normal method
| Single-sided documents Double-sided documents | ||
| Document paper type/Weight Plain paper:35 g/m2 to 210 g/m2 | Plain paper:50 g/m2 to 128 g/m2 | |
| Document size | A3 □ to B6 □, A6 □,11 □ 17 □, 11 □ 15 □, 8 □ 13 □,8-1/2 □ 11 □/□ | |
| Paper capacity 100 sheets (80 g/m) | 2) | |
For documents of mixed sizes
| Single-sided documents Double-sided documents | |
| Document paper type/Weight Plain paper: 50 g/m ^2 to 128 g/m ^2 | |
| Document size Refer to "Mixed originals paper sizes". | |
| Paper capacity 100 sheets (80 g/m) ^2) | |
Mixed originals paper sizes
The following chart shows the possible combinations of standard-sized paper that can be used with the "Mixed Original" setting.
^1 Indicates the width of the widest document size of the mixed originals (width of the adjustable lateral guides of the automatic document feeder).
^2 Indicates document sizes that can be specified together with the maximum document width.
Precautions for loading documents into the ADF
The following types of documents should not be loaded into the ADF, otherwise paper misfeeds or damage to the document may occur.
- Wrinkled, folded, curled, or torn documents
- Highly translucent or transparent documents, such as OHP transparencies or diazo photosensitive paper
- Coated documents such as carbon-backed paper
- Documents printed on paper thicker than 210 g/m ^4
- Documents printed on paper thicker than 128 g/m ^2 during double-sided printing
- Documents that are bound, for example, with staples or paper clips
- Documents that are bound in a book or booklet
- Documents with pages bound together with glue
- Documents with pages that have had cutouts removed or are cutouts
- Label sheets
- Offset printing masters
- Documents with binder holes
- Documents that have just been printed with this machine

Reminder
Before loading folded documents, such as those folded in half or in a zigzag, into the ADF, be sure to flatten the pages.
Documents that can be placed on the original glass
To copy documents that cannot be loaded into the ADF, position them on the original glass.
| Original glass documents | |
| Document types Sheets, books | (page spreads), three-dimensional objects |
| Document sizes | A3 □ to B6 □, A6 □11 17 □ to 5-1/2 8-1/2 □/□, 8K, 16K □/□ |
| Maximum weight 2 kg |
Precautions for positioning documents on the original glass
Observe the following precautions when placing the document on the original glass.
- If a document of non-standard paper size is loaded, the "Auto" Paper setting and "Auto" Zoom setting cannot be used since the document size cannot be detected automatically.
- If a document of a non-standard paper size is loaded, select the paper drawer and zoom ratio or touch [Original Setting] and select the document size.
- If highly translucent or transparent documents, such as OHP transparencies or diazo photosensitive paper, are loaded, the document size cannot be detected automatically. Place a blank sheet of paper of the same size over the document.
- Do not place objects exceeding 2 kg on the original glass, otherwise the original glass may be damaged.
- Do not press down extremely hard on a book spread on the original glass, otherwise the original glass may be damaged.
2.26 Inserting paper between OHP transparencies ("OHP Interleave" function)
In order to prevent copies printed onto OHP transparencies from sticking together as a result of the heat that is produced during copying, paper (interleaves) can be inserted between the transparencies

√ No Finishing setting can be used.
1 Position the document to be copied.
- For details on positioning the document, refer to "Feeding the document" on page 2-27.
- For details on loading OHP transparencies, refer to "Paper types and paper capacities" on page 2-81 and "Loading paper into the bypass tray" on page 2-23.
2 In the Basic screen, touch [Color], and then touch [Black].
- Printing on OHP transparencies is possible only in black.
3 Load the OHP transparencies into the bypass tray, and load the interleaf paper into the desired paper tray.
- Use interleaf paper with the same size as the OHP transparencies.
4 Select [Transparency] as the paper type for the bypass tray, and then touch [OK].
- For details on specifying the paper type settings, refer to "Specifying a setting for special paper" on page 2-93.

5 Touch [Application], and then touch [Sheet/Cover/Chapter Insert].
- To cancel changes to the settings for all Application functions, press the [Reset] key. All changes to the settings are canceled.

The Sheet/Cover/Chapter Insert screen appears.
6 Touch [OHP Interleave].
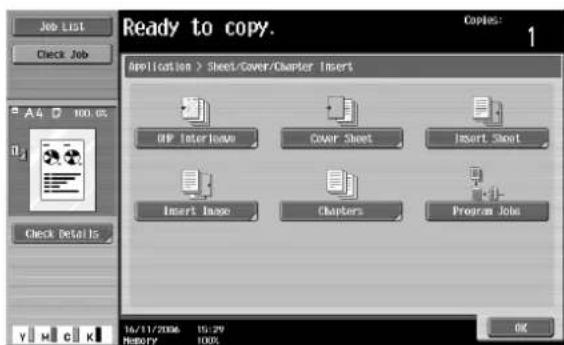
The OHP Interleave screen appears.
7 Select the paper tray loaded with the interleaf paper.
- To cancel the setting and select the default, press the [Reset] key.
- To cancel the "OHP Interleave" function, touch [No].

8 Touch [OK].
9 Specify any other desired copy settings.
- The number of copies is set to "1" and cannot be changed.
10 Press the [Start] key.
2.27 Adding cover pages ("Cover Sheet" function)
Copies can be made using paper different from the main body of the document (excluding the cover pages), and cover pages can be added using paper different from the copy.
The following types of cover pages and front and back cover page settings are available.
| Setting Description | ||
| Front Cover | Front (Copy) | The first page of the document is copied onto paper for the front cover sheet. With double-sided copying, the second page of the document is copied onto the back of the front cover sheet. |
| Front (Blank) Paper for the front cover sheet is added as the first page of the copy.The same operation is performed with double-sided copying. | ||
| Back Cover Back | (Copy) The last page of the document is copied onto the back cover page.With double-sided copying, a double-sided copy of the last two pages of the document is printed on paper for the back cover sheet if the document contains an even number of pages. | |
| Back (Blank) Paper for the back cover sheet is added after the last page of the copy.The same operation is performed with double-sided copying. | ||
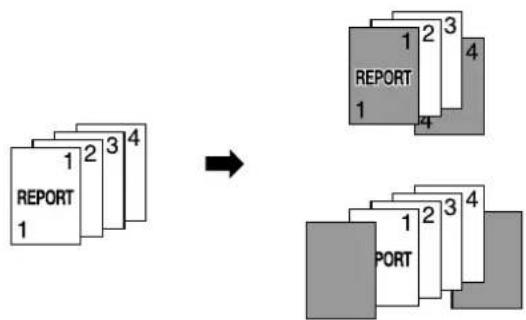
flowchart
graph TD
    A["REPORT 1"] --> B["REPORT 1"]
    A --> C["REPORT 2"]
    A --> D["REPORT 3"]
    A --> E["REPORT 4"]
    B --> F["REPORT 1"]
    C --> G["REPORT 2"]
    D --> H["REPORT 3"]
    E --> I["REPORT 4"]
1 Position the document to be copied.
- For details on positioning the document, refer to "Feeding the document" on page 2-27.
- For a document that exceeds 100 pages, refer to "Scanning the document in separate batches ("Separate Scan" setting)" on page 2-29.
2 Load the paper for the cover pages and the paper for the main body of the document into separate paper trays.
- Use paper with the same size for the cover pages and for the main body of the document, and load them in the same orientation.
3 Touch [Application], and then touch [Sheet/Cover/Chapter Insert].
- For details on using thick paper for the cover sheets and on loading the paper, refer to "Paper types and paper capacities" on page 2-81 and "Loading paper into the bypass tray" on page 2-23.
- To cancel changes to the settings for all Application functions, press the [Reset] key. All changes to the settings are canceled.
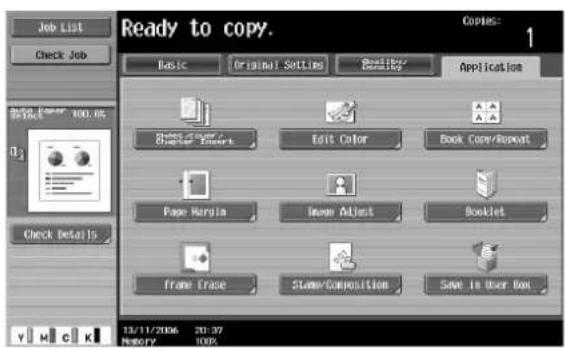
The Sheet/Cover/Chapter Insert screen appears.
4 Touch [Cover Sheet].
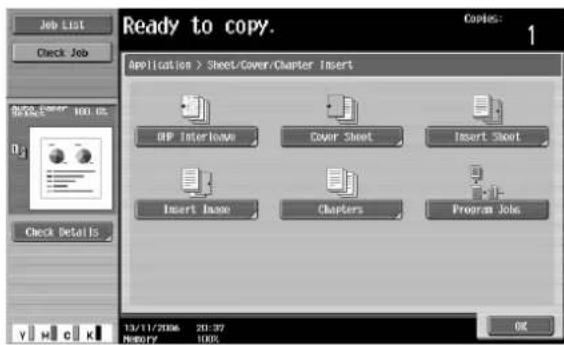
The Cover Sheet screen appears.
5 Select the desired cover page settings.
- To cancel the setting and select the default, press the [Reset] key.
- To cancel the "Cover Sheet" function, touch [No].
- The default setting for the paper tray loaded with cover pages can be specified from the Utility mode.

6 If desired, touch [Paper] under "Front Cover" or "Back Cover".
The corresponding Cover Paper screen appears.
7 Select the paper tray loaded with the paper for the cover pages.

8 Touch [OK], and then touch [OK] in the next two screen that appears.
9 Specify any other desired copy settings.
10 Using the keypad, type in the desired number of copies.
11 Press the [Start] key.
2.28 Inserting different paper into copies ("Insert Sheet" function)
Different paper (such as colored paper) can be inserted for specified pages in the copies.
There are settings ("Copy" and "Blank") for selecting whether or not the inserted pages are printed. When the settings are combined with single-sided copying or double-sided copying, the copies are printed as shown below.
If "Copy" is selected, the document is copied with the specified paper inserted for the specified pages.
When page 2 is specified
| Finishing Description | |
| Single-sided copies The specified paper is inserted for the 2nd sheet of the copy, and the 2nd sheet of the document is copied onto it. | |
| Double-sided copies The back side of the 1st sheet of the copy is left blank, the specified paper is inserted for the 2nd sheet of the copy, and a double-sided copy of the 2nd and 3rd sheets of the document are printed onto it. | |
Copy
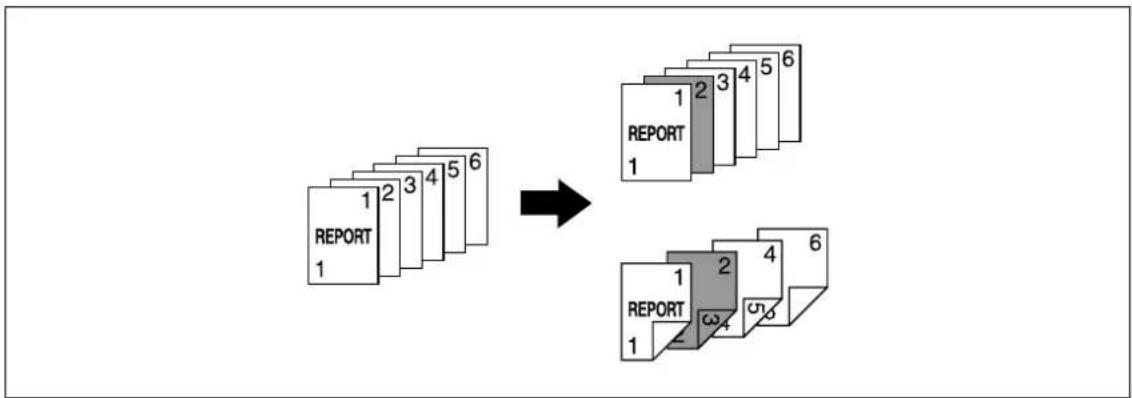
flowchart
graph TD
    A["16 REPORT"] --> B["2 3 4 5 6"]
    B --> C["3 4 5 6"]
    C --> D["1 2 3 4 5 6"]
    D --> E["2 4 6"]
    E --> F["1 2 3 4 6"]
If "Blank" is selected, the specified paper is inserted before the specified page.
When page 3 is specified
| Finishing Description | |
| Single-sided copies The specified paper is inserted as the 4th sheet of the copy. | |
| Double-sided copies The back side of the 2nd sheet of the copy is left blank, and the specified paper is inserted for the 3rd sheet of the copy. | |
Blank

flowchart
graph TD
    A["1 REPORT 1"] --> B["2 3 4 5 6"]
    B --> C["3 4 5 6"]
    C --> D["1 REPORT 1"]
    D --> E["2 3 4 5 6"]
    E --> F["3 REPORT 1"]
    F --> G["4 6"]
    G --> H["1 REPORT 1"]

Detail
The specified paper can be inserted at a maximum of 30 locations within a document of up to 999 pages.
In double-sided documents, one double-sided page is considered to be two pages (one for the front and one for the back).
1 Position the document to be copied.
- For details on positioning the document, refer to "Feeding the document" on page 2-27.
- For a document that exceeds 100 pages, refer to "Scanning the document in separate batches ("Separate Scan" setting)" on page 2-29.
2 Load the paper to be used for the insertions sheets and the main body of the document into the desired paper trays.
- Use paper with the same size for the insertion sheets and for the main body of the document, and load them in the same orientation.
- To cancel changes to the settings for all Application functions, press the [Reset] key. All changes to the settings are canceled.
3 Touch [Application], and then touch [Sheet/Cover/Chapter Insert].
- For details on using thick paper for the insertion sheets and on loading the paper, refer to "Paper types and paper capacities" on page 2-81 and "Loading paper into the bypass tray" on page 2-23.
- To cancel the setting and select the default, press the [Reset] key.
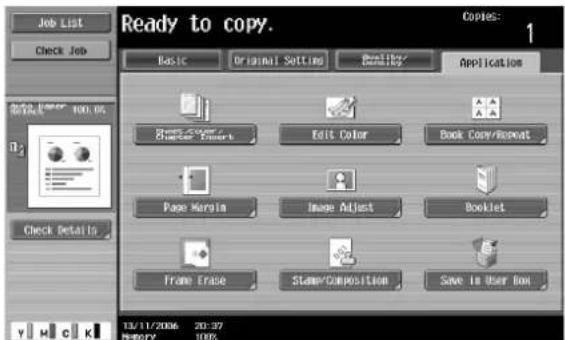
The Sheet/Cover/Chapter Insert screen appears.
4 Touch [Insert Sheet].
- To cancel the "Insert Sheet" function, touch [No].

The Insert Sheet screen appears.
5 Touch a button for a page number, and then use the keypad to type in the number of the page where the paper is to be inserted.
- There are two Insert Sheet screens. Touch and to display a different screen.
- To arrange the page numbers in order, starting with the lowest number, touch [Sort].
- To remove a page number that has been specified, touch the button for the page to be removed, and then press the [C] (clear) key.
- If the same page number is entered multiple times, copying is not possible. Delete repeated page numbers.
- If the entered page number is greater than the number of pages in the document, paper is not inserted.
6 Touch [Insert Paper].

The Insert Paper Settings screen appears.
7 Select the paper tray loaded with the paper for the insertion sheets, and then touch [OK].

8 Under "Insert Type", touch either [Copy] or [Blank].
- If "Copy" is selected, the document is copied with the specified paper inserted for the specified page. If "Blank" is selected, the specified paper is inserted after the specified page.
9 Touch [OK], and then touch [OK] in the next screen that appears.
10 Specify any other desired copy settings.
11 Using the keypad, type in the desired number of copies.
12 Press the [Start] key.
2.29 Inserting copies of a different document for a specified page ("Insert Image" function)
A multi-page document later scanned from the original glass can be inserted at the specified location in a document first scanned with the ADF. The inserted document is added after the specified pages.

Detail
A separate document can be inserted at a maximum of 30 locations within a document of up to 999 pages.
In double-sided documents, one double-sided page is considered to be two pages (one for the front and one for the back).

flowchart
graph LR
    A["REPORT 1"] --> B["Report 1"]
    C["REPORT 2"] --> D["Report 2"]
    E["REPORT 3"] --> F["Report 3"]
    G["REPORT 4"] --> H["Report 4"]
    I["A"] --> J["B"]
1 Load the document into the ADF.
- For details on positioning the document, refer to "Feeding the document" on page 2-27.
- For a document that exceeds 100 pages, refer to "Scanning the document in separate batches ("Separate Scan" setting)" on page 2-29.
2 Touch [Application], and then touch [Sheet/Cover/Chapter Insert].
- To cancel changes to the settings for all Application functions, press the [Reset] key. All changes to the settings are canceled.
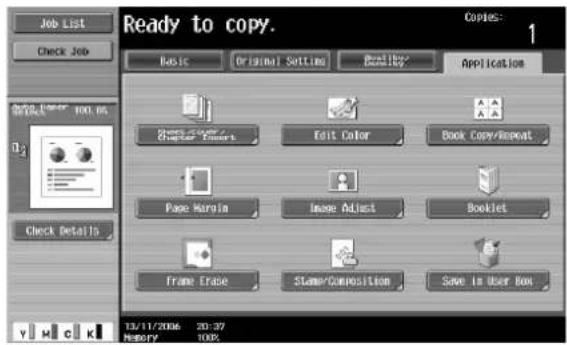
The Sheet/Cover/Chapter Insert screen appears.
3 Touch [Insert Image].
- To cancel the setting and select the default, press the [Reset] key.
- To cancel the "Insert Image" function, touch [No].

The Insert Image screen appears.
4 Using the keypad, specify the pages where the image is to be inserted.
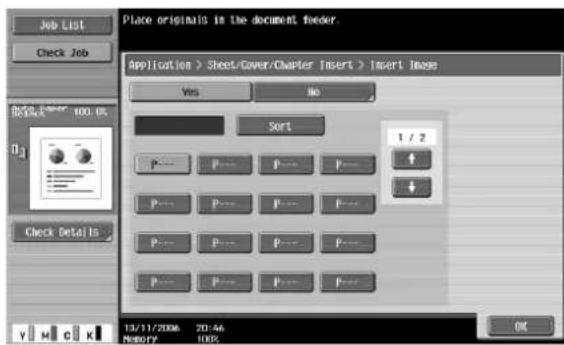
- There are two Insert Image screens. Touch and to display a different screen.
- The inserted document is added after the specified page.
- To arrange the page numbers in order, starting with the lowest number, touch [Sort].
- To remove a page number that has been specified, touch the button for the page to be removed, and then press the [C] (clear) key.
- If the document scanned from the original glass has more pages than the number of pages specified in the Insert Image screen, the extra pages of the insertion document are printed at the end of the document.
- If the document scanned from the original glass has fewer pages than the number of pages specified in the Insert Image screen, the missing insertion pages are not printed.
- If the same page number is specified twice, two insertion document pages are added at the specified location.
- If the specified page number is greater than the total number of pages in the main document, the corresponding insertion document page is added at the end of the document copy.
5 Touch [OK], and then touch [OK] in the next screen that appears.
6 Specify any other desired copy settings.
7 Using the keypad, type in the desired number of copies.
8 Press the [Start] key.
Scanning begins.

9 Place the document to be inserted on the original glass.
- For details on positioning the document, refer to "Feeding the document" on page 2-27.
10 Press the [Start] key.
Scanning begins.
11 Touch [Finish].
![Job List Scanning is stopped. Place document you wish to insert on the sides and press !starti. Job No. 21 Color Paper Zoom Printers Auto Color A4 D 100.0% When scanning is finished, touch [finish]. Insert Document 1 / 1 Finish Number of Sets 0 / 1 Number of Originals 5 13/11/2006 20:48 History 99%](/content/2026/05/977387/images/41b865e0dd882aec38c4200addc44e3b05a548682686ed41c784ec781271f780.jpg)
- To insert a multi-page document, repeat steps 9 and 10 until all pages of the insertion document are scanned in the order that they are to be inserted.
12 Press the [Start] key.
2.30 Specifying pages to be printed on the front side ("Chapters" function)
When making double-sided copies, the pages specified as the first page of a chapter can be printed on the front side of the paper. If the document was arranged so that the specified page would be printed on the back side of a page, the page is left blank and the specified page is printed on the front side of the next page. In addition, the specified page can be printed on different paper.

Detail
A maximum of 30 pages can be specified to be printed on the front side of the paper within a document of up to 999 pages.
In double-sided documents, one double-sided page is considered to be two pages (one for the front and one for the back).
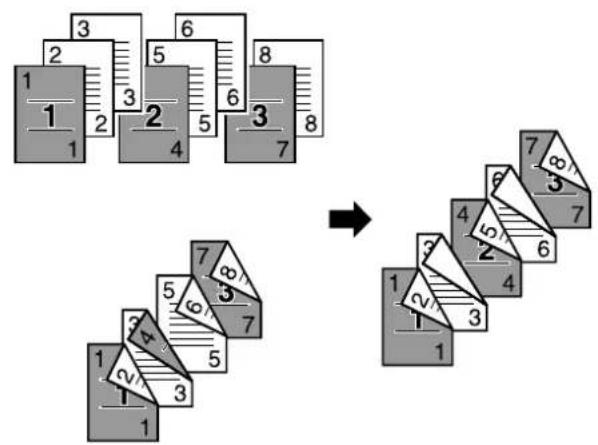

Note
Make sure that the paper loaded for the first page of the chapter and for the copy have the same size and orientation.
1 Position the document to be copied.
- For details on positioning the document, refer to "Feeding the document" on page 2-27.
- For a document that exceeds 100 pages, refer to "Scanning the document in separate batches ("Separate Scan" setting)" on page 2-29.
2 Touch [Application], and then touch [Sheet/Cover/Chapter Insert].
- To cancel changes to the settings for all Application functions, press the [Reset] key. All changes to the settings are canceled.

The Sheet/Cover/Chapter Insert screen appears.
3 Touch [Chapters].
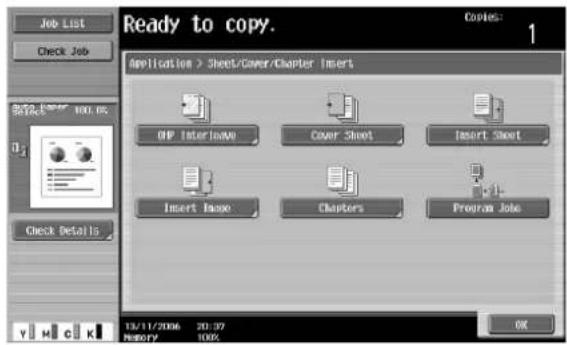
The Chapter screen (for editing) appears.
4 Using the keypad, specify the first page of the chapters.
![Enter 1st page of chapters using the keypad. Touch [sort] to sort pages in ascending order. Application > Sheet/Cover/Chapter Insert > Chapters Yes No Sort 1 / 2 P--- P--- P--- P--- P--- P--- P--- P--- P--- P--- P--- P--- P--- P--- P--- P--- P--- P--- P--- P--- 13/11/2006 20:49 History 100% OK](/content/2026/05/977387/images/155318d0e68f265700450ce57d3c826b0b03ba6d5b801433fb3dc96ab38507bc.jpg)
- There are two Chapter screens. Touch and to display a different screen.
- To arrange the page numbers in order, starting with the lowest number, touch [Sort].
- To remove a page number that has been specified, touch the button for the page to be removed, and then press the [C] (clear) key.
- Under "Original > Copy", select "1-Sided > 2-Sided".
- If the same page number is entered multiple times, copying is not possible. Delete repeated page numbers.
- If the specified page number is greater than the number of pages in the document, that page number is ignored.
5 Under "Chapter Paper", touch [Copy Insert] or [None].
- If "None" is selected, all pages of the copy are printed on the same paper.
- To cancel the setting and select the default, press the [Reset] key.
- To cancel the "Chapters" function, touch [No].

- If "Copy Insert" is selected, [Chapter Paper] appears. Touch [Chapter Paper], select the paper to be used for the first page of the chapter, and then touch [OK].
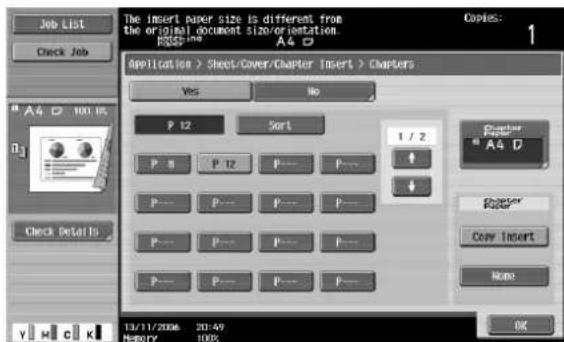
6 Touch [OK], and then touch [OK] in the next screen that appears.
7 Specify any other desired copy settings.
8 Using the keypad, type in the desired number of copies.
9 Press the [Start] key.
2.31 Scanning documents with different settings and printing copies all together ("Program Jobs" function)
Loaded document pages can be scanned with different settings and their copies can be printed together. Different Zoom or Paper settings can be specified for a part of the document or Finishing settings or a numbering function can be set after the entire document is scanned, and then all copies can be printed together.

flowchart
graph TD
    A["Original 1"] --> B["REPORT 1"]
    C["Original 2"] --> D["ABCD ABCD ABCD ABCD ABCD ABCD ABCD ABCD ABCD ABCD ABCD ABCD ABCD ABCD ABCD ABCD ABCD ABCD ABCD ABCD ABCD ABCD ABCD ABCD ABCD ABCD ABCD ABCD ABCD ABCD ABCD ABCD ABCD ABCD ABCD ABCD ABCD ABCD ABCD ABCD ABCD ABCD ABCD ABCD ABCD ABCD ABCD ABCD ABCD ABCD ABCD ABCDEPC"]
    E["Original 3"] --> F["Report 1"]
    G["05/1/23"] --> H["1 REPORT 1 F1"]

Note
100 document batches can be set.
The "Group" Finishing setting is not available when programming jobs. Instead, select "Sort".
1 Position the document to be copied.
- For details on positioning the document, refer to "Feeding the document" on page 2-27.
- When saving scanned data in a user box, some scanned data may be lost if more than 10,000 pages are saved in the box.
2 Touch [Application], and then touch [Sheet/Cover/Chapter Insert].
- To cancel changes to the settings for all Application functions, press the [Reset] key. All changes to the settings are canceled.

The Sheet/Cover/Chapter Insert screen appears.
3 Touch [Program Jobs], and then touch [OK].

4 Select the desired copy settings, and then press the [Start] key.
- To print a single copy to be checked, press the [Proof Copy] key. Scanning begins.
5 Touch [Fix], and then touch [OK].

- If the document was loaded on the original glass, touch [Finish] in the screen that appears, requesting confirmation that scanning is finished.
- If "Retry" was selected, touch [Change Setting] to change the copy settings.
6 Position the next document, and then touch [Change Setting].

7 Select the desired copy settings, and then press the [Start] key.
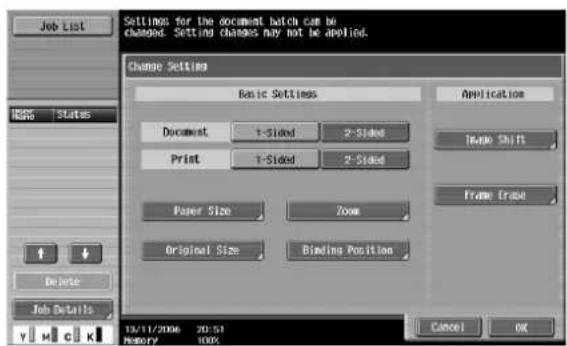
- To print a single copy to be checked, press the [Proof Copy] key.
- Repeat steps 6 and 7 until all documents have been scanned. The amount of memory available can be checked beside "Memory" in the lower-left corner of the screen. In addition, the number of document batches can be checked beside "Scanned Batches".
- When the memory is full, a message appears. Select whether to delete the last part of the data and scan it again, delete the last part of the data and print, or delete all of the document data.
- To cancel changes to the settings, touch [Cancel].
Scanning begins. After scanning is finished, touch [Fix], and then touch [OK].
? Is there more information about the settings?
→ Refer to the appropriate section.
8 After all document pages have been scanned, touch [Finish].
A message appears, requesting confirmation that scanning is finished.
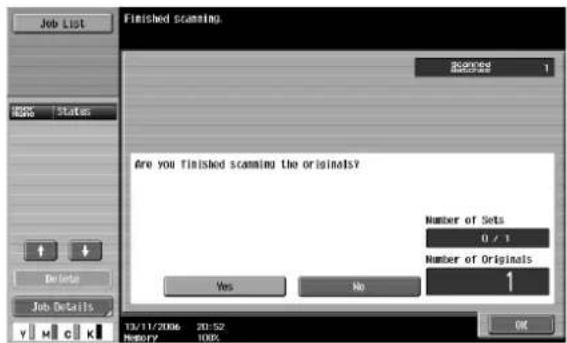
9 Touch [Yes], and then touch [OK].
- If "No" was selected, touch [Change Setting] to change the copy settings.
10 Specify any other desired copy settings.

- Touch [Print List], and then specify the printing method for the entire scanned document.

? Is there more information about the settings?
→ Refer to the appropriate section.
11 Using the keypad, type in the desired number of copies.
12 Touch [Start] or press the [Start] key.
- If [Cancel] is touched, a message appears, requesting confirmation to delete the data. To stop printing, touch [Yes], and then touch [OK].
2.32 Producing separate copies of each page in a page spread ("Book Copy" function)
An open book or catalog can be copied with the left and right pages on separate sheets of paper. The following copy methods are available, and there are settings for adding front and back covers.
| Setting Description | |
| Book Spread Both pages of the page spread are printed on the same page. | |
| Separation | Separate copies of each page in the page spread are printed in the document page order. The document is scanned to fit the size of paper that will be used. |
| Front Cover The front cover and separate copies of each page in the page spreads are printed in the document page order. | |
| Front and Back Cover The front cover, separate copies of each page in the page spreads and the back cover are printed in the document page order. | |

√ Place the document on the original glass.
1 Place the pages on the original glass, starting with the first page.
- For details on positioning the document, refer to "Feeding the document" on page 2-27.
- If "Front and Back Cover" was selected, the front cover is scanned before the back cover, and then all page spreads are scanned in order.

? How are the front and back covers copied?
→ Scan the front cover, then the back cover, and then scan the remainder of the document.
2 Load the paper to be used into the desired paper tray.
3 Touch [Application], and then touch [Book Copy/Repeat].
- To cancel changes to the settings for all Application functions, press the [Reset] key. All changes to the settings are canceled.
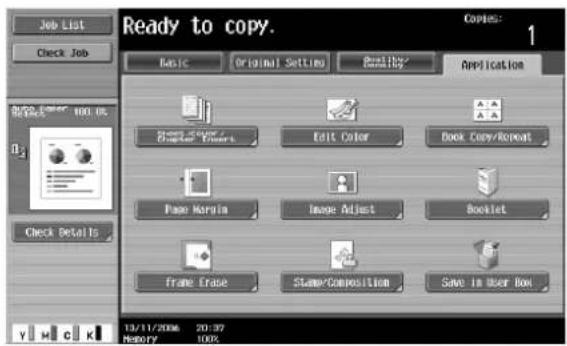
The Book Copy/Repeat screen appears.
4 Touch [Book Copy].
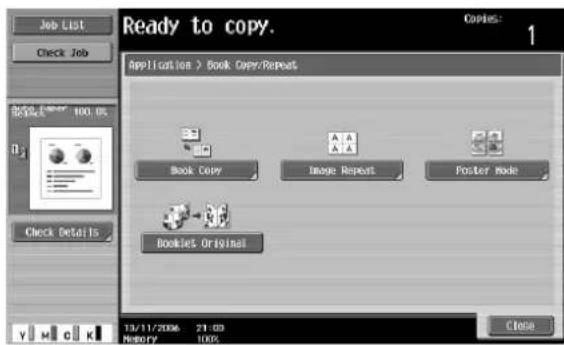
- [Booklet Original] does not appear if the optional finisher is not installed. The Book Copy screen appears.
5 Touch the button for the desired setting.

- If "Separation", "Front Cover" or "Front and Back Cover" is selected, [Binding Position] appears. Select the binding position of the document.
- If desired, specify a Book Erase function. Touch the button for the erasing method, touch [-] and [+] to specify the width of the area to be erased, and then touch "OK".
- When using the keypad to specify the settings, press the [C] (clear) key to erase the value, and then type in the setting.
- To cancel the "Book Copy" function, touch [No].
Center Erase screen

? What do the Book Erase functions do?
→ The shadow of the book binding and the shadow of the book edges can be erased from the copies. The "Frame Erase" and "Center Erase" functions can be used together.
? What happens when a value outside of the allowable range is specified?
→ The message "Input error" appears. If "Input error" appears or if the erased width was incorrectly entered, press the [C] (clear) key in the keypad, and then specify the correct value.
6 Touch [OK], and then touch [Close].
7 In the Basic screen, touch [Paper], and then select the paper tray loaded with the paper.
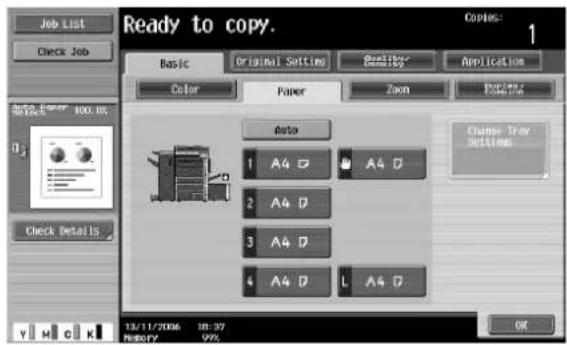
8 Specify any other desired copy settings.
- To cancel the setting and select the default, press the [Reset] key.
9 Using the keypad, type in the desired number of copies.
10 Press the [Start] key.
- For details on positioning the document, refer to "Scanning a multi-page document from the original glass" on page 2-32.
- Position the next page and repeat step 10 until all pages of the document are scanned.
Scanning begins.
If "Book Spread" or "Separation" is selected, printing begins.
If "Front Cover" or "Front and Back Cover" is selected, continue with step 11.
11 After all document pages have been scanned, touch [Finish].
- If "Front and Back Cover" was selected, the back cover is scanned after the front cover, and then all page spreads are scanned in order.
①

②
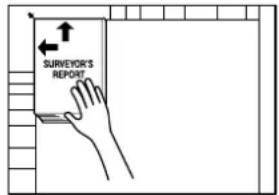
③
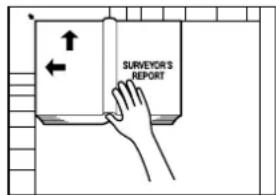
- If "Front Cover" was selected, all page spreads are scanned in order after the front cover.
①
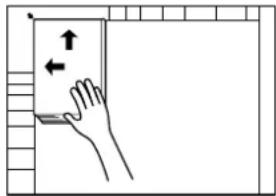
②

12 Press the [Start] key.
2.33 Tiling copy images ("Image Repeat" function)
A document image can be repeatedly printed on a single sheet of paper.
The possible number of repeating images is automatically selected based on the size of the loaded document, the specified paper size and the zoom ratio.
The following repeating formats and settings are available.
| Setting Description | |
| With Margin Multiple copies are printed of the entire image within the specified area. The area around the image appears as a margin. | |
| Without Margin Multiple copies of the selected area of the image are printed to fill the paper; however, a part of the image may be cut off. | |
| 2/4/8 Repeat A fixed number of copies of the selected image area are printed in the paper. The number of repeating copies can be set to 2, 4 or 8 times. However, any part of the image that does not fit within its specific section of the paper is cut off. After specifying settings in the 2/4/8 Repeat screen, the paper and zoom ratio settings must be specified. | |

flowchart
graph LR
    A["Document ABC"] --> B["With Margin"]
    B --> C["Without Margin"]
1 Position the document to be copied.
- For details on positioning the document, refer to "Feeding the document" on page 2-27.
2 Load the paper to be used into the desired paper tray.
3 Touch [Application], and then touch [Book Copy/Repeat].
- To cancel changes to the settings for all Application functions, press the [Reset] key. All changes to the settings are canceled.

The Book Copy/Repeat screen appears.
4 Touch [Image Repeat].

- [Booklet Original] does not appear if optional Finisher FS-608 is not installed. The Image Repeat screen appears.
5 Under "Layout", touch [With Margin] or [Without Margin], or touch [2/4/8 Repeat].
- To cancel the "Image Repeat" function, touch [No].

- Touching [2/4/8 Repeat] displays the 2/4/8 Repeat screen, where the number of repeats and the interval can be selected.

6 Check the scanning size under "Scan Range", touch [OK], and then touch [Close] in the next screen that appears.
- If the document size does not appear under "Scan Range" or to specify the scanning area, touch [Set Range], and then specify the scanning area from any of the screens.
- Touch [Photo Size] to display the Photo Size screen.
To cancel changes to the settings, touch [Cancel].
Set Range screen

Custom Size screen

Photo Size screen

? Can sizes in inches be displayed?
→ Touch or to display a different list of sizes.
? Can any size be specified?
→ Any size can be specified from the Custom Size screen. Touch [X] or [Y] to select the dimension, and then use the keypad to specify the correct value. (To enter a value, press the [C] (clear) key, and then use the keypad to type in the new value.)
? What happens when a value outside of the allowable range is specified?
→ The message "Input error" appears. If "Input error" appears or if the value was incorrectly entered, press the [C] (clear) key in the keypad, and then specify the correct value.
7 In the Basic screen, touch [Paper], and then select the paper tray loaded with the paper.

- If settings were specified in the 2/4/8 Repeat screen, touch [Zoom] in the Basic screen, and then specify the zoom ratio setting.

8 Specify any other desired copy settings.
- To cancel the setting and select the default, press the [Reset] key.
9 Using the keypad, type in the desired number of copies.
10 Press the [Start] key.
2.34 Copying an enlarged image on multiple pages ("Poster Mode" function)
A document image can be divided, and each section of the image can be printed enlarged. The finished size can be specified by the image size, zoom ratio or paper size.

flowchart
graph LR
    A["A"] --> B["Box 1"]
    A --> C["Box 2"]
    A --> D["Box 3"]
    B --> E["Box 4"]
    C --> F["Box 4"]
    D --> G["Box 4"]
1 Place the document on the original glass.
- For details on positioning the document, refer to "Feeding the document" on page 2-27.
2 Touch [Application], and then touch [Book Copy/Repeat].
- To cancel changes to the settings for all Application functions, press the [Reset] key. All changes to the settings are canceled.

The Book Copy/Repeat screen appears.
3 Touch [Poster Mode].
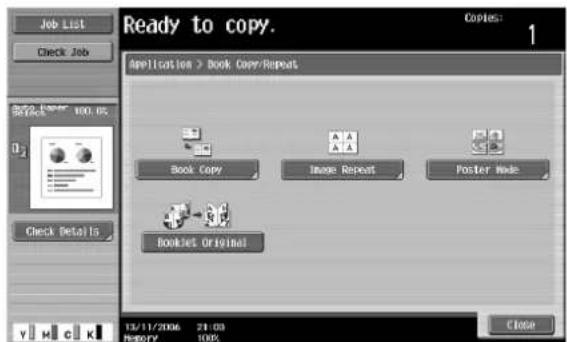
- [Booklet Original] does not appear if optional Finisher FS-608 is not installed. The Poster Mode screen appears.
4 Under "Output Size", touch [Image Size], [Paper Size] or [Zoom].
- The factory default setting for the finished size is "A2".

- Touch [Image Size], select the finished image size, and then touch [OK].
- Touch or to display a different list of standard sizes.
- Touching [Custom Size] displays the Custom Size screen. Touch [X] or [Y] to select the dimension, and then use the keypad to specify the desired value.

- Touch [Paper Size], select the finished paper size, and then touch [OK].
- Touch or to display a different list of paper sizes.
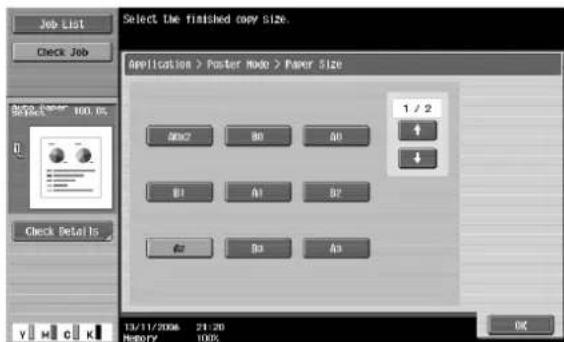
- Touch [Zoom], use the keypad to type in the desired value, and then touch [OK].

5 Check the document size, and then touch [OK].
- If the document size cannot be detected automatically or to specify the document size, touch [Original Size], and then specify the document size from any of the screens.
- Touch [Photo Size] to display the Photo Size screen. To cancel changes to the settings, touch [Cancel].
Original Size screen

Custom Size screen

Photo Size screen

? Can sizes in inches be displayed?
→ Touch or to display a different list of sizes.
? Can any size be specified?
→ Any size can be specified from the Custom Size screen. Touch [X] or [Y] to select the dimension, and then use the keypad to specify the correct value. (To enter a value, press the [C] (clear) key, and then use the keypad to type in the new value.)
? What happens when a value outside of the allowable range is specified?
→ The message "Input error" appears. If "Input error" appears or if the value was incorrectly entered, press the [C] (clear) key in the keypad, and then specify the correct value.
6 Specify any other desired copy settings.
- The number of copies is set to "1" and cannot be changed.
7 Press the [Start] key.
2.35 Copying booklets ("Booklet Original" function)
A booklet with its staples removed can be copied and bound with staples at the center to create copies of the original booklet.
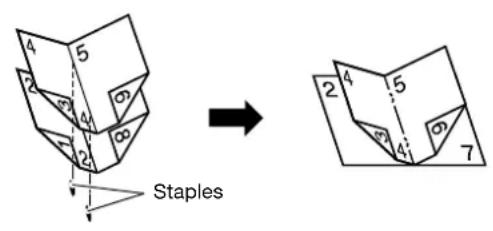
For details on stapling, refer to "Binding copies at the center ("Center Staple & Fold" setting)" on page 2-64.
With the "Booklet Original" function, copies are made of the entire page, including the center of the document (area bound with staples).
For details on positioning the document, refer to "Feeding the document" on page 2-27.
√ This function can be used when optional finisher is installed.
1 Position the document to be copied.
- Load a booklet with the staples removed.
- No more than 20 sheets can be stapled together with finisher FS-608 and no more than 15 sheets can be stapled together with finisher FS-608/FS-519; however, the number of sheets that can be stapled together differs depending on the paper type. For details, refer to "Selecting a folding setting" on page 2-61.
- When using the original glass, position the pages in order, starting with the side that includes the first page, then the side that includes the second page, then the side that includes the third page.


- When using the ADF, load the pages with the side that includes the first page on top.

2 Touch [Application], and then touch [Book Copy/Repeat].
- To cancel changes to the settings for all Application functions, press the [Reset] key. All changes to the settings are canceled.
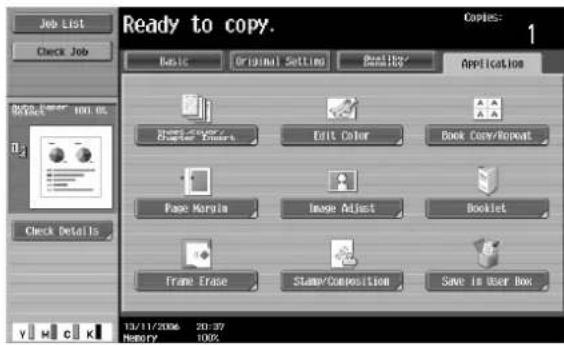
The Book Copy/Repeat screen appears.
3 Touch [Booklet Original].

4 Touch [Close].
5 Specify any other desired copy settings.
6 Using the keypad, type in the desired number of copies.
7 Press the [Start] key.
- If the document is placed on the original glass, scanning begins.
- For details on scanning a document from the original glass, refer to "Scanning a multi-page document from the original glass" on page 2-32.
8 After all document pages have been scanned, touch [Finish] and then press the [Start] key.
2.36 Adjusting the image to fit the paper ("Image Adjust" settings)
When the copy paper is larger than the original document, copies can be made with the document image centered and enlarged to fill the paper.
The image can be adjusted in any of the following ways.
| Setting Description | |
| Full Size The area that contains the entire image is centered and enlarged to the size of the paper. | |
| Center Zoom | The image is enlarged to the size of the paper so that the paper is filled. However, some parts of the image may be lost. |
| Centering The image is centered in the paper without being enlarged. | |

flowchart
graph TD
    A["Full Size"] --> B["Center Zoom"]
    B --> C["Centering"]
    A --> D["ABCD"]
    B --> E["ABCI"]
    C --> F["ABCD"]
1 Position the document to be copied.
- For details on positioning the document, refer to "Feeding the document" on page 2-27.
- If "Full Size" or "Center Zoom" is to be set, position the document on the original glass.
2 Touch [Application], and then touch [Image Adjust].
- To cancel changes to the settings for all Application functions, press the [Reset] key. All changes to the settings are canceled.

The Image Adjust screen appears.
3 Touch the button for the desired setting.
- To cancel the Image Adjust settings, touch [No].
- If a non-standard-sized document is loaded, the document size is not detected. Therefore, specify the document size in the Custom Size screen, and then press the [Start] key.

4 Check the document size, and then touch [OK].
- If the document size cannot be detected automatically or to specify the document size, touch [Original Size], and then specify the document size from any of the screens. To cancel changes to the settings, touch [Cancel].
Original Size screen

Custom Size screen

- Touch [Photo Size] to display the Photo Size screen.
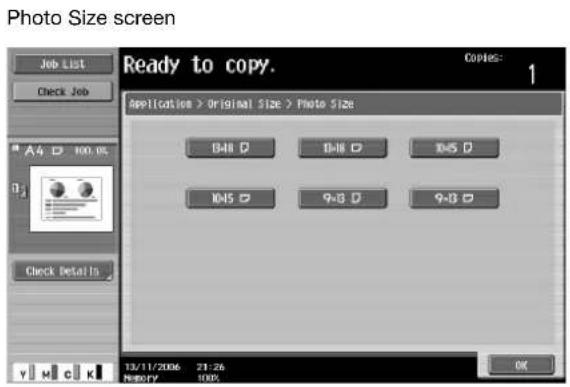
? Can sizes in inches be displayed?
→ Touch or to display a different list of sizes.
? Can any size be specified?
→ Any size can be specified from the Custom Size screen. Touch [X] or [Y] to select the dimension, and then use the keypad to specify the correct value. (To enter a value, press the [C] (clear) key, and then use the keypad to type in the new value.)
? What happens when a value outside of the allowable range is specified?
→ The message "Input error" appears. If "Input error" appears or if the value was incorrectly entered, press the [C] (clear) key in the keypad, and then specify the correct value.
5 Specify any other desired copy settings.
- To cancel the setting and select the default, press the [Reset] key.
6 Using the keypad, type in the desired number of copies.
7 Press the [Start] key.
2.37 Copying with the page layout of a booklet ("Booklet" function)
The page order of the scanned document is automatically arranged to produce double-sided copies in a page layout for center binding, such as for a magazine.
Stapling is possible only when the optional finisher is installed.

flowchart
graph TD
    A[""Left Bind" setting"] --> B[""Right Bind" setting"]
    B --> C["Report 1"]
    B --> D["Report 2"]
    B --> E["Report 3"]
    B --> F["Report 7"]
    B --> G["Report 8"]
    C --> H["6 3 4"]
    D --> I["8 1 3"]
    E --> J["8 1"]
    F --> K["8 1"]
    G --> L["8 1"]

Detail
Generally, a multiple of 4 document pages is required with a single-sided document, and a multiple of 2 document pages is required with a double-sided document. If there are not enough pages, blank pages are automatically added at the end.
For details on stapling, refer to "Binding copies at the center ("Center Staple & Fold" setting)" on page 2-64.
For a document that exceeds 100 pages, refer to "Scanning the document in separate batches ("Separate Scan" setting)" on page 2-29.
The width of the binding margin is automatically specified.
1 Position the document to be copied.
- For details on positioning the document, refer to "Feeding the document" on page 2-27.
2 Touch [Application], and then touch [Booklet].
- To cancel changes to the settings for all Application functions, press the [Reset] key. All changes to the settings are canceled.

3 Touch [Left Bind] or [Right Bind].
- If the document contains only pages in the landscape orientation, they will be bound at the top, regardless of which setting is selected.
- To cancel the setting and select the default, press the [Reset] key.
- To cancel the "Booklet" function, touch [No].
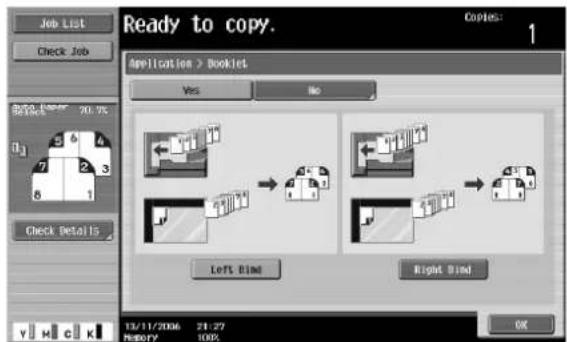
4 Touch [OK].
5 Specify any other desired copy settings.
6 Using the keypad, type in the desired number of copies.
7 Press the [Start] key.
2.38 Printing the date/time or page number on copies ("Stamp/Composition" functions)
The date/time or page number can be added to copies at the specified location, or a distribution number can be added when multiple copies are made.
The following Stamp/Composition functions are available and can be combined.
| Function Description | |
| Date/Time Select a format and print the date or time on the specified pages. | |
| Page Number Select a format and print page numbers starting with the specified page number. | |
| Stamp • Preset Stamp | Print copies with previously stored preset stamps overlapping pages.Reg is t er e d S t a m pPrint copies with a stamp registered with the Copy Protection Utility overlapping pages. |
| Copy Protect Print copies with copy protection text (hidden text that prevents unauthorized copying), such as a preset stamp or the date. | |
| Stamp Repeat Print copies with text (such as registered stamps, preset stamps or the date) repeating throughout the page. | |
| Overlay Copies can be printed with the contents of the first document page overlapped by (as an overlay image) the remaining document pages. | |
| Header/Footer The date and time or a distribution number can be printed on each page.This function is available only when specified by the administrator. | |
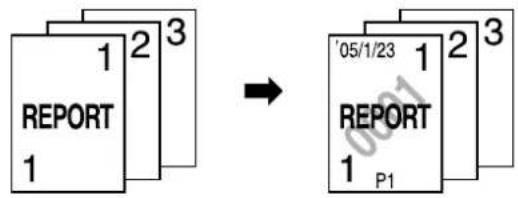
flowchart
graph LR
    A["REPORT 1"] --> B["'05/1/23 1 REPORT 1 P1"]
    A --> C["3"]
    A --> D["2"]
    A --> E["1"]
    B --> F["2"]
    B --> G["3"]
2.39 Saving the scanned document in a user box ("Save in User Box" function)
A scanned document can be saved in a user box. Documents saved in user boxes can be printed when necessary.
1 Position the document to be copied.
2 Touch [Application], and then touch [Save in User Box].
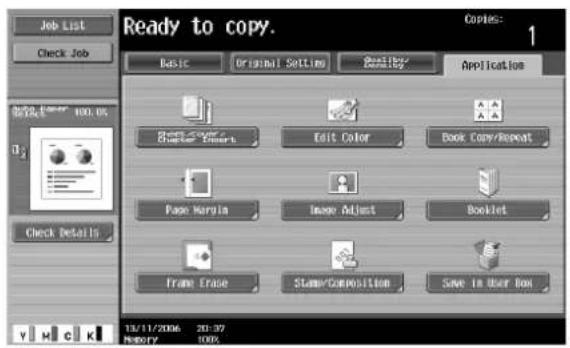
3 Touch [User Box].

A screen for selecting a user box appears.
4 Select the user box where the data is to be saved.
- Touch the tab containing the desired user box, and then button for the user box.
- To type in a user box number to specify the user box, touch [Enter User Box No.].
- It is not necessary to enter the password when saving data, even if a password has been specified for the box.

- Touching [Search User Box] displays the Search User Box screen.
User boxes can be searched for by the first letter of their name. Touch [etc] or the button that includes the first letter of the user box name to display a list of user boxes starting with the selected letter. A user box can be selected from this screen.

5 Touch [OK].
6 Select whether or not a copy will also be printed when the data is saved. To print a copy, touch [Yes] beside "Save & Print".

7 Check the name of the document to be saved. Touch [Document Name].
8 The name specified as the default appears beside "Document Name".
- For details on typing in text, refer to "Entering text" on page 9-3.

9 After typing in the name, touch [OK].
- To cancel the "Save in User Box" function, touch [No].
10 Touch [OK].
The Application screen appears again.

11 Specify any other desired copy settings.
12 Press the [Start] key.
If [Yes] beside "Page Print" was selected, the scanned document is copied and the document data is saved in the specified user box.
If [No] beside "Page Print" was selected, the data for the scanned document is saved in the specified user box.
2.40 Overview of utility mode parameters
List of registration information and parameters
This section describes the buttons available when the [Utility/Counter] key is pressed.

Note
The buttons that appear in the Utility mode parameters differ depending on the specified settings.
List of Utility mode parameters
| First-level menu Second-level menu | Third-level menu | |
| [1] One-Touch/User Box Registration | [1] Create One-Touch Destination [1] Address Book | |
| [2] Create User Box [1] Public/Personal User Box | ||
| [3] Limiting Access to Destinations [1] Apply Levels/Groups to Destinations | ||
| [2] User Settings [1] System Settings [1] Language Selection | ||
| [2] Measurement Unit Settings | ||
| [3] Paper Tray Settings | ||
| [4] Auto Color Level Adjust. | ||
| [5] Power Save Settings | ||
| [6] Output Settings | ||
| [7] AE Level Adjustment | ||
| [8] Auto Paper Select for Small Original | ||
| [9] Blank Page Print Settings | ||
| [2] Custom Display Settings [1] Copier Settings | ||
| [2] Scan/Fax Settings | ||
| [3] Copy Screen | ||
| [4] Fax Active Screen | ||
| [5] Color Selection Settings | ||
| [6] Left Panel Display Default | ||
| [3] Copier Settings Auto Booklet ON when Fold & Staple | ||
| Auto Zoom For Combine/ Booklet | ||
| Auto Sort/Group Selection | ||
| When AMS Direction is Incorrect | ||
| Default Copy Settings | ||
| Separate Scan Output Method | ||
| Enlargement Rotation | ||
| Auto Zoom (Platen) | ||
| Auto Zoom (ADF) | ||
| Specify Default Tray when APS Off | ||
| Select Tray for Insert Sheet | ||
| Tri-Fold Print Side | ||
| Print Jobs During Copy Operation | ||
| Automatic Image Rotation | ||
| [2] User Settings [4] Scan/Fax Settings | JPEG Compression Level | |
| Black Compression Level | ||
| TWAIN Lock Time | ||
| Default Scan/Fax Settings | ||
| Compact PDF Compression Level | ||
| [5] Printer Settings [1] Basic Settings | ||
| [2] Paper Setting | ||
| [3] PCL Settings | ||
| [4] PS Setting | ||
| [5] Print Reports | ||
| [6] Change Password | ||
| [7] Change E-Mail Address E-Mail Address | ||
| [3] Administrator Settings [1] System Settings [1] Power Save Settings | ||
| [2] Output Settings | ||
| [3] Date&Time Settings | ||
| [4] Daylight Saving Time | ||
| [5] Weekly Timer Settings | ||
| [6] Restrict User Access | ||
| [7] Expert Adjustment | ||
| [8] List/Counter | ||
| [9] Reset Settings | ||
| [0] User Box Settings | ||
| (next screen) | ||
| [2] Stamp Settings | ||
| [3] Blank Page Print Settings | ||
| [2] Administrator/Machine Settings [1] Administrator Registration | ||
| [2] Input Machine Address | ||
| [3] One-Touch/User Box Registration | ||
| [1] Create One-Touch Destination | ||
| [2] Create User Box | ||
| [3] One-Touch/User Box Registration List | ||
| [4] Maximum Number of User Boxes | ||
| [4] User Authentication/Account Track | ||
| [1] General Settings | ||
| [2] Authentication System | ||
| [3] Account Track Settings | ||
| [4] Print without Authentication | ||
| [5] Print Counter List | ||
| [6] External Server Settings | ||
| [8] Limiting Access to Destinations | ||
| [9] Authentication Device Setting | ||
| [3] Administrator Settings [5] Network setting [1] TCP/IP Setting | ||
| [2] NetWare Settings | ||
| [3] HTTP Server Settings | ||
| [4] FTP Setting | ||
| [5] SMB Setting | ||
| [6] LDAP Settings | ||
| [7] E-Mail Settings | ||
| [8] SNMP Settings | ||
| [9] AppleTalk Settings | ||
| [0] Bonjour Settings (next screen) | ||
| [1] TCP Socket Settings | ||
| [2] Network Fax Settings | ||
| [3] Detail Settings | ||
| [6] Copier Settings Zoom (Platen) | ||
| Zoom (ADF) | ||
| Specify Default Tray when APS Off | ||
| Select Tray for Insert Sheet | ||
| Print Jobs During Copy Operation | ||
| Tri-Fold Print Side | ||
| Automatic Image Rotation | ||
| [7] Printer Settings USB Timeout | ||
| Network Timeout | ||
| [8] Fax Settings [1] Header Information | ||
| [2] Header/Footer Position | ||
| [3] Line Parameter Setting | ||
| [4] TX/RX Settings | ||
| [5] Function Settings | ||
| [6] PBX Connection Settings | ||
| [7] Report Settings | ||
| [8] Job Settings List | ||
| [9] Multi Line Setting | ||
| [0] Network Fax Setting | ||
| [9] System Connection Open API Settings | ||
| [0] Security Settings [1] Administrator Password | ||
| [4] Check Consumable Life Print List | ||
| [6] Banner Printing (d-Color MF450) Allow | ||
| Restrict | ||
3
Print Operations
3 Print Operations
3.1 Setting up the PCL driver for Windows
Common settings
The following describes the common settings and buttons that are displayed on all tabs.
![PCI. Printing Preferences Basic Layout Finish Cover Mode Stamp/Composition Quality Other 8 1/2x11 [0.5x11 in] 8 1/2x11 [8.5x11 in] Favourite Setting Default Setting Help Original Orientation ● Pocket ● Landscape Original Size 8 1/2x11 ● Paper Size Some as Original Size Zoom (25, 400x) ● Auto ○ Manager Paper Type Auto Paper Type Plain Paper Output Method Print User Settings... Authentication/Account Tools... Copies 1 (1, 9999) ● Copy ○ Offset Paper Settings for Each Tray... Output OK Cancel Apply Help](/content/2026/05/977387/images/037f7edb74a54ba56ee8d831563a6759986753f8402f692ec1f75f0a5ceea151.jpg)
| Button Function | |
| OK Click this button to close the | dialog box and apply any settings that have been changed. |
| Cancel Click this button to cancel | any settings that have been changed and close the dia-log box. |
| Help Click this button to display t | the help for each item on the currently displayed dialog box. |
| Add (Favorite Setting) Click this b | button to save the current settings and to view them at a later time. |
| Edit (Favorite Setting) Click this b | button to change the saved settings. |
| Default Click this button to return | the settings to their defaults, which were selected when the driver was installed. |
| View When the [Paper View] button is clicked, a preview of the page layout as specified in the current settings is displayed and a preview image of the print job can be checked.When the [Printer View] button is clicked, a printer figure is displayed showing any options, such as the paper tray, that are installed on this machine. | |

Note
To enable any installed options, you must specify the Device Option settings.
Basic tab
| Item Function | |
| Original Orientation Specifies the | orientation of the original document. |
| Original Size Specifies the size of | the original document. |
| Paper Size Specifies the output paper size. Automatically enlarges or reduces when the Original Size setting is changed. | |
| Zoom Specifies the enlargement and reduction ratio. | |
| Paper Tray Selects the paper tray for printing. | |
| Paper Type Selects the paper type for printing. | |
| Output Method | For non-conventional printing, selects special output methods such as "Secure Print" or "Save in User Box". |
| [User Settings] Specifies the ID and password, or the file name and box number when performing "Secure Print" or "Save in User Box". | |
| [Authentication/Account Track] | Specifies the user name and password when performing user authentication, and the department name and password when performing account track on this machine. |
| Copies Specifies the number of copies to print. | |
| Collate Specifies whether to print multiple copies in sets. | |
| Offset When printing multiple copies, shifts the output position of each set. | |
| Paper Settings for Each Tray Specifies the paper type for each paper tray. | |
Layout tab
| Item | Function |
| Combination | Prints multiple pages on one page, or prints one sheet of an original document divided on multiple pages. Details can be specified by clicking the [Combination Details] button. |
| Rotate 180 | Prints the image rotated 180^ . |
| Skip Blank Pages | Does not print blank pages in the data. |
| Chapter | Specifies the page to be printed on the front side. |
| Print Type | Specifies duplex printing and booklet printing. |
| Binding Direction | Specifies the binding position. |
| Binding Margin | Specifies the binding margin. Click the [Binding Margin Settings] button to specify the margin values. |
| Image Shift | Prints by shifting the entire print image. Click the [Image Shift Settings] button to specify the image shift values. |
Finish tab
| Item | Function |
| Staple | Specifies stapling. |
| Saddle Stitch | Specifies to saddle stitch a printed document. |
| Punch | Specifies hole punching. |
| Fold | Specifies folding. |
| Output Tray Specifies the tray where to output the printed pages. | |
| Paper Arrangement | Specifies the method for adjusting the binding position. |
Cover mode tab
| Item Function | |
| Front Cover Attaches a front cover | page. |
| Front Cover Tray Selects the paper | tray for the front cover. |
| Back Cover Attaches a back cover | page. |
| Back Cover Tray Selects the paper | tray for the back cover. |
| Per Page Setting Inserts paper between pages and switches the paper and tray for each page. | |
| Transparency Interleave | Outputs and inserts interleaves when printing overhead projector transparencies. |
| Interleave Tray Selects the input tray for the transparency interleaves. | |
Stamp/Composition tab
| Item Function | |
| Watermark Prints a watermark (text) | stamp) on the page being printed. Watermarks can be added, changed, or deleted by clicking the [Edit] button. |
| Create Overlay File Prints an original document on top of an overlay that was created separately. | |
| Copy Protect Prints a special pattern to prevent copying. | |
| Date/Time Prints the date and time. | |
| Page Number Prints the page number. | |
Quality tab
| Item Function | ||
| Select Color Specifies the color for printing. | ||
| Quality Adjustment Adjusts the image quality. You can select "Simple" to adjust entire documents or "Detail" to adjust the text, photos, figures, tables, and graphs in the document. | ||
| Color Settings | Prints with a quality suitable for the selected original document. | |
| Pattern | Specifies the graphic pattern details. | |
| Image Compression | Specifies the compression ratio for a graphic image. | |
| Glossy Mode | Prints with a gloss. | |
| Font Set- tings | Download Font Format | Selects whether the fonts are downloaded to the printer as bitmap or outline. |
| Use Printer Fonts | Selects whether to use TrueType fonts or the printer fonts when printing. | |
Other tab (d-Color MF450)
| Item Function | |
| Excel Job Control | Controls jobs so that they are not separated when printing in Microsoft Excel. |
| Remove White Back-ground | Removes the white background when creating an overlay file with Microsoft PowerPoint. If this check box is cleared, the background is not removed and the overlay file is created according to the original document data. |
| Driver Version Info | Displays the version information of the printer driver. |
Configure tab
| Item Function | |
| Device Option | Specifies the status of the options that are installed on this machine and the status of the user authentication and account track functions. Specify the status of each item from the "Setting" drop-down list. |
| Paper Tray Information Shows the paper type specified for each tray. Click the [Paper Tray Settings] button to specify the settings for each paper tray. | |
| Acquire Device Information Communicates with this machine to read the status of the installed options. | |
| Acquire Settings Specifies the status of the connection that executes getting the option information. | |
| Software Tools Starts up software tools such as Web Connection. | |

Note
To display the Configure tab in Windows 2000/XP/NT 4.0/Server 2003, right-click the icon of the installed printer, and then click "Properties".
You cannot use the "Acquire Device Information" function if you are not connected to or able to communicate with this machine.
Settings tab
| Item Function | |
| EMF Spool (d-Color MF450) When | using an original system environment, select this check box if a metafile (EMF) spool is required. |
| Display Constraint Message Displays | ays a message when functions that cannot be specified at the same time were enabled from the printer driver. |
| Display paper set in Print Server Properties. | Uses the paper that was added in [Server Properties] of the printer folder. |
| Verify Authentication settings before printing | Verifies the authentication settings for this machine before printing and displays a message if the settings are not compatible. |
| Popup Authentication Dialog when printing | Displays the User Authentication/Account Track dialog box when a print job is specified to enter the user name and department name. |
| Save Custom Size Saves the custom paper sizes. | |

Note
To display the Settings tab in Windows 2000/XP/NT 4.0/Server 2003, right-click the icon of the installed printer, and then click "Properties".
3.2 Specifying the basic tab settings (PCL driver for Windows)
![PCI Printing Preferences Basic Layout Finish Cover Mode Stamp/Composition Quality Other 8 1/2x11 (8.5x11 in) 8 1/2x11 (8.5x11 in) Favore Setting Default Setting Help Edit... Original Orientation Pixel Landscape Original Size 0 1/2x11 Paper Size Same as Original Size Zoom (25...400%) Auto Manual Paper Tray Auto Paper Type Plan Paper Output Method Print User Settings... Authentication/Account Tools... Copes 1 [1..9999] Delete Offyx Paper Settings for Each Tray... Default OK Cancel Apply Help](/content/2026/05/977387/images/82dea0f11f18a1da3ed4bcb254dc4449a4afceec04fec215507b55852567dc7a.jpg)
Printing to suit the paper size
You can enlarge or reduce documents created when printing to match the output paper size.
1 Click the Basic tab.
2 From the "Original Size" and "Paper Size" drop-down lists, select the desired settings.
- You can also specify any enlargement or reduction ratio in the "Zoom" box.

Note
To print on paper sizes other than the standard sizes, be sure to set the custom paper sizes in Custom Size Settings first.
When "W" is selected for each standard paper size from the printer driver, the data can be centered and printed.
For example, if A4 size data is created and you want to center and print on A3 size paper, select "A4W" as the paper size and "Tray 1" or "Bypass Tray" as the paper tray from the printer driver.
To print, load A3 size paper in the tray ("Tray 1" or "Bypass Tray") of this machine that was specified from the printer driver, and then specify the settings described below from [Basic (Paper)] – [Change Tray Settings] – [Wide Paper] in the control panel.
Select "A4W".
Enter the A3 paper size (420.0 297.0) in [Change Size].
Specifying a custom size
When printing on paper of a custom size, you can select a preregistered custom paper size or specify a paper size value as described below.
1 From the "Original Size" or the "Paper Size" drop-down list, select "Custom Size".
The Custom Size Settings dialog box appears.
2 Specify settings for the following:
- Width: Specifies the width of the custom paper size according to the selected measurement unit.
- Length: Specifies the length of the custom paper size according to the selected measurement unit.
- Unit: Selects the measurement unit that specifies the size.
![Custom Size Settings Width 3.268 inch [3.544...12.240] Length 11.693 inch [5.500...10.000] Unit ○ gm ● inch OK Cancel Default Help](/content/2026/05/977387/images/eed2f7e489de588bf87276b143f240cc53528fba80db82c644a15c0b70703d54.jpg)
3 Click the [OK] button.

Note
For custom sizes that are used often, it comes in handy if you add them to the paper size list. Add a custom paper size from the Settings tab.
d-Color MF450: If using banner paper, specify the size of the banner paper in Custom Size.
Selecting the paper tray
You can specify the paper you want to use for printing by selecting the paper tray that contains the loaded paper.
1 Click the Basic tab.
2 From the "Paper Tray" drop-down list, select the desired paper tray.

Note
If "Auto" is specified as the paper tray, you can select the paper type. If the paper tray setting is changed to a setting other than "Auto", the paper type is fixed to its preregistered setting. Specify a paper type by clicking the [Paper Settings for Each Tray] button. For details, refer to "Specifying the paper type for a paper tray" on page 3-9.
Specifying the paper type for a paper tray
You can specify the paper type for a paper tray.
1 Click the Basic tab.
2 Click the [Paper Settings for Each Tray] button.
The Paper Settings for Each Tray dialog box appears.
3 From "Paper Type Settings", select the desired paper tray, and then select the paper type to be specified from the "Paper Type" drop-down list.

4 Click the [OK] button.

Note
The current specified settings can be checked in "Device Status".
Click the [Restore Device Status] button to communicate with this machine and read the status of the settings specified on this machine. You cannot use this function if you are not connected to or able to communicate with this machine.
The paper type for a paper tray can also be specified from the Configure tab, and the paper size and paper orientation can be specified as well.
Specify "Duplex Side 2" to print on the back side of a page.
Selecting the output method
Not only can you print directly, but you can select "Secure Print", which requires a password to print, or "Save in User Box", which saves data in the boxes that were created on the HDD.
1 Click the Basic tab.
2 From the "Output Method" drop-down list, select the output method.
- Print: Prints immediately.
- Secure Print: Saves the document to be printed in "Secure Print User Box" of this machine. When printing, you are required to enter the ID and password in this machine's control panel. Select when printing highly confidential documents.
- Save in User Box: Saves the document to be printed in a box on this machine.
- Save in User Box and Print: Saves the document in a box and prints at the same time.
- Proof Print: After a part of the document has been printed, this machine stops printing temporarily. Select to avoid misprinting a large volume of print jobs.
Secure Print
If "Secure Print" was selected, enter the ID and password in the dialog box that appeared.
![User Settings Secure Print Secure Print ID abcdefghijklmnopqrstuvwxyz Password Alphanumeric Max 16 Alphanumeric Max 8 Operate the followings on the printer's control panel in order to use the documents which is printed by "secure print". [User Box]-> [System User Box]-> [Secure Print] Save in User Box File Name Max 90 User Box Number Max 9 Type in [ID] and [Password] that are used with [Secure Print]. OK Cancel Default Help](/content/2026/05/977387/images/041e658c5f1b545b980057258b86fdbd704afade9bace379bfd2fd4856257e99.jpg)

Note
The ID and password that are required for "Secure Print" can be preregistered by clicking the [User Settings] button under "Output Method". If the ID and password are already registered, the dialog box to enter the ID and password does not appear when "Secure Print" is selected.
To print, specify "Secure Print Document Box" from the Box mode in this machine's control panel, and then enter the ID and password.
When password rules are enabled on this machine, the passwords that can be used for secured printing are limited and the jobs are deleted when a password that does not comply with the password rule is entered.
Save in User Box
When "Save in User Box" or "Save in User Box and Print" is selected, specify the file name to be saved and the box number for the save location in the dialog box that appears for entering the file name and box number.
![User Settings Secure Print Secure Print ID Password Abphanumeric Max 16 Abphanumeric Max 8 Operate the followings on the printer's control panel in order to use the documents which is printed by "secure print". [User Box] -> [System User Box] -> [Secure Print] Save in User Box File Name document01 Max 30 User Box Number 001 Max 9 Type in [File Name] and [Box Number] that are used with [Save User Box] OK Cancel Default Help](/content/2026/05/977387/images/ba6ef16373fe74784153eb5e03221f9f3110633daafd59dfd85a8e998f44e0e8.jpg)

...
Note
The file name and box number that are required for "Save in User Box" can be preregistered by clicking the [User Settings] button under "Output Method". If the file name and box number are already registered, the dialog box to enter the file name and box number does not appear when "Save in User Box" is selected.
Be sure to create the box of the save location in advance with the box function of this machine.
When password rules are enabled on this machine, specify the box that was created on this machine.
Proof Print
When a print job is sent, this machine stops printing temporarily after part of the document has been printed. The remaining print job is stored in this machine as a print job. When printing multiple copies, you can print the remaining part of the print job after checking the print results.

...
Note
To print the document, release the held document from the Job mode in this machine's control panel.
Specifying the user authentication settings
If the user authentication settings have been specified on this machine, you must enter a user name and password.

Note
If a job is printed using a user name or password that is not a registered account on this machine, or if a job is printed without selecting a user under "User Authentication", the operation is not authenticated by this machine and the job is canceled.
If the user authentication settings are specified on this machine and the authentication operation restriction function is in mode 2, the applicable user is locked and cannot be accessed if the authentication information is not entered correctly.
If the user authentication settings are not specified on the Configure tab, user authentication cannot be performed. If using the user authentication function, be sure to specify the settings on the Configure tab.
1 Click the Basic tab.
2 Click the [Authentication/Account Track] button.
3 Select "Recipient User", and then enter the user name and password.
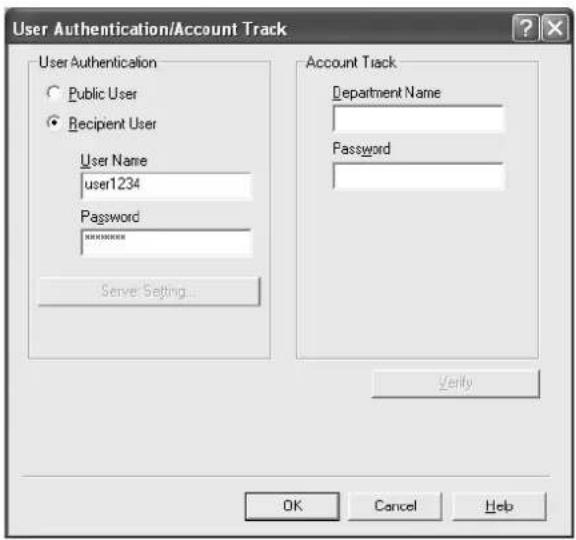
4 Click the [OK] button.

Note
If this machine has been set to permit public users, the machine can be used without a user name and password.
If performing user authentication on a server, the server settings must be specified. Click the [Server Setting] button to select the server.
Click the [Verify] button to communicate with this machine and to check whether authentication can be performed with the user that was entered. You cannot use this function if you are not connected to or able to communicate with this machine.
If printing is not allowed, printing cannot be performed even when used by a registered user. For details on the user authentication function, consult the administrator of this machine.
If performing user authentication with an optional authentication unit (biometric type), enter the user name and password in step 3. For details, refer to the operation manual of the authentication unit (biometric type).
Specifying the account track settings
If the account track settings have been specified on this machine, you must enter a department name and password.

...
Note
If a job is printed using a department name or password that is not a registered account on this machine, or if a job is printed without "Account Track" selected, the operation is not authenticated by this machine and the job is canceled.
When the account track settings are specified on this machine, the authentication operation restriction function is in mode 2, and the authentication information is not entered correctly, the applicable account is locked and cannot be accessed.
If the account track settings are not specified on the Configure tab, account track cannot be performed. If using the account track function, be sure to specify the settings on the Configure tab.
1 Click the Basic tab.
2 Click the [Authentication/Account Track] button.
3 Enter the department name and password.

4 Click the [OK] button.

...
Note
Click the [Verify] button to communicate with this machine and to check whether authentication can be performed with the user that was entered. You cannot use this function if you are not connected to or able to communicate with this machine.
If printing is not allowed, printing cannot be performed even when used by a registered account. For details on the account track function, consult the administrator of this machine.
3.3 Specifying the layout tab settings (PCL driver for Windows)

Printing multiple pages on one page (N in 1, Poster mode)
You can specify whether to print multiple pages of text on one page with N in 1 printing, or print one sheet of an original document divided on multiple pages with Poster Mode printing.
1 Click the Layout tab.
2 Select the "Combination" check box, and then specify the setting from the drop-down list.
- To change the "Border" and "Overlap width line" settings, click the [Combination Details] button, and then change the settings in the dialog box that appears.


Reminder
When printing a job that contains pages of different sizes and orientations, images may be missing or overlapping when the document is printed.
Chapter
You can specify the page you want to print on the front side when duplex printing or booklet printing.
Even if a specified page comes up to be printed on the back side in duplex printing or booklet printing, the specified page is moved and printed on the front side.
1 Click the Layout tab.
2 Select the "Chapter" check box.
3 Enter the page number of the page you want to print on the front side.

Note
When entering multiple page numbers, separate the page numbers with commas such as "2, 4, 6" or enter a page range using a hyphen such as "6-10".
The "Chapter" check box can only be selected when the duplex printing or the booklet printing setting is enabled.
Specifying duplex/booklet printing
You can print a document onto both sides of a page or in a booklet format (two facing pages). This comes in handy when you want to bind multiple-page documents.
1 Click the Layout tab.
2 From the "Print Type" drop-down list, select "2-Sided" or "Booklet".

Note
The binding position can be specified from the "Binding Direction" drop-down list.
Setting the binding margin
Binding margins are added to the document before it is printed.
1 Click the Layout tab.
2 From the "Binding Direction" drop-down list, select the binding position.
3 Select the "Binding Margin" check box.
4 To set the width of the binding margin, click the [Binding Margin Settings] button, and then specify the desired settings in the Binding Margin Settings dialog box that appears.
- Shift Mode: To add a binding margin, select how the image is to be shifted.
- Front Side/Back Side: Sets the binding margin values. By clearing the "Same value for front and back sides" check box, you can specify separate values for the front and back sides.
- Unit: Selects the measurement unit that specifies the size.
![Binding Margin Settings Shift Mode Parallel Shift Auto Reduction Front Side 0.00 inch [0.00...1.96] Back Side 0.00 inch [0.00...1.96] Unit mm inch Same value for front and back sides OK Cancel Default Help](/content/2026/05/977387/images/ebfb60c14c3c8472f00b0eef0a54c15394f1a3b55c5a22ee209089cc1453abb6.jpg)
Shifting images
The entire print image of a document is shifted and then printed. You can use this function when you want to adjust the print position.
1 Click the Layout tab.
2 Select the "Image Shift" check box.
3 To set the image shift settings, click the [Image Shift Settings] button, and then specify the desired settings in the Image Shift Settings dialog box that appears.
- Unit: Selects the measurement unit that specifies the size.
- Front Side/Back Side: Specifies the shift direction and sets the values. By clearing the "Same value for Front and Back sides" check box, you can set separate values for the front and back sides.
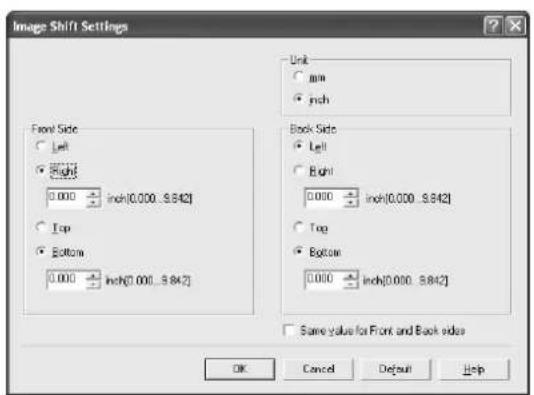
3.4 Specifying the finish tab settings (PCL driver for Windows)
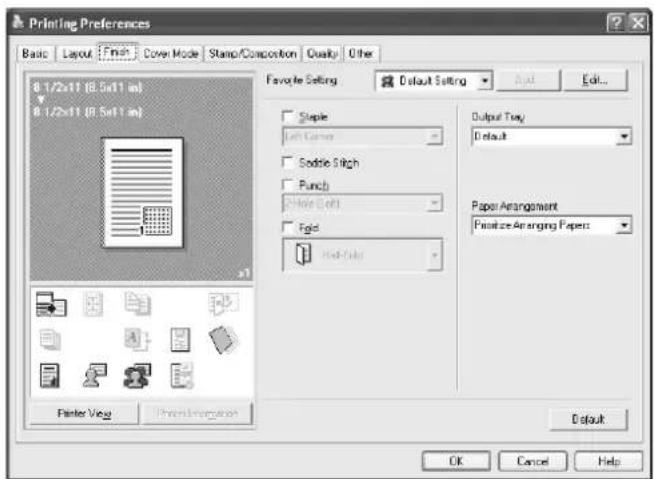
Stapling
Multiple-page documents can be stapled.

Reminder
The staple function is available only when the optional finisher is installed.
1 Click the Finish tab.
2 Select the "Staple" check box.
3 From the drop-down list, specify the number of staples and the stapling position.

Note
Specify the staple position noting the binding position specified in "Binding Direction".
Specifying the saddle stitch setting
You can specify to saddle stitch a printed document. By specifying the saddle stitch setting, printed documents can be folded in half and stapled.

Reminder
The saddle stitch function is available only when the optional finisher is installed.
1 Click the Finish tab.
2 Select the "Saddle Stitch" check box.

Note
The saddle stitch function cannot be specified when the staple, punch, or fold function is specified.
Hole punching
Holes can be punched into the printed document.

Reminder
The hole punch function is available only when the punch kit is installed on the optional finisher.
1 Click the Finish tab.
2 Select the "Punch" check box.
3 From the drop-down list, specify the number of punched holes.

Note
The hole-punch position changes according to the binding position specified from "Binding Direction".
Folding
You can specify to fold a printed document.

Reminder
The fold function is available only when the optional finisher is installed.
1 Click the Finish tab.
2 Select the "Fold" check box.
3 From the drop-down list, specify the folding condition.

Note
The fold function cannot be specified when the staple, punch, or saddle stitch function is specified.
Specifying the output tray
You can specify the tray to which the printed document is output.
1 Click the Finish tab.
2 From the "Output Tray" drop-down list, specify the output tray.
Specifying the procedure for adjusting the binding position
You can specify the procedure for adjusting the binding position for duplex printing.
If "Prioritize Arranging Papers" is selected, all pages can be processed to a suitable quality by this machine because the binding position is adjusted after all the print data is received. If "Prioritize Productivity" is selected, the printing process is performed efficiently because the binding position is adjusted while the data is printed simultaneously as it is being received.
If you want to increase the print efficiency, select "Prioritize Productivity". If the desired binding position and width cannot be achieved, select "Prioritize Arranging Papers".
1 Click the Finish tab.
2 From the "Paper Arrangement" drop-down list, specify the processing method.
3.5 Specifying the cover mode tab settings (PCL driver for Windows)
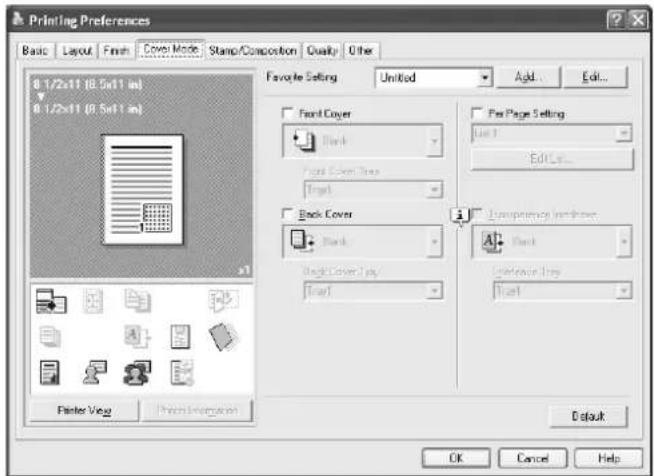
Printing documents with a front cover/back cover
1 Click the Cover Mode tab.
2 Select the "Front Cover" and "Back Cover" check boxes.
3 From the "Front Cover" and "Back Cover" drop-down lists, select the desired print settings. To print on the front cover and back cover, select "Print". To only add a blank page, select "Blank".
4 Select the paper tray that contains the loaded paper for the front cover and back cover.
Printing multiple pages
You can specify the print type and paper tray for each page. This comes in handy when you want to change the paper tray during a print job when printing multiple pages.
1 Click the Cover Mode tab.
2 Select the "Per Page Setting" check box.
3 From the "Per Page Setting" drop-down list, select the desired list name.
4 Click the [Edit List] button. The Per Page Settings – Edit List dialog box for specifying the print settings appears.
5 Click the [Add] button.
A new row for specifying the print settings is added to "Settings List".

6 Select the row that was added to the list, and then specify the print settings in "Add/Edit".
- Page Number: Enters the page number. When entering multiple page numbers, separate the page numbers with commas such as "2, 4, 6" or enter a page range using a hyphen such as "6-10".
- Print Type: Specifies Print Insert, Insert Blank Sheet, Print (1-Sided), and Print (2-Sided).
– Paper Tray: Specifies the paper tray. - Staple: Specifies the number of staples and the stapling position.
7 Click the [OK] button.
![OLIVETTI d-Color MF550 - Click the [OK] button. - 1](/content/2026/05/977387/images/c70b1b6c2d1b2dea3ce48780b285b1deaa1da592011d5b8a92343d360b83cbe0.jpg)
Note
To change existing print settings, select the desired row and change the settings. To delete existing print settings, select the desired row, and then click the [Delete] button.
Click the [Up] or the [Down] button to change the page number starting with the smallest page number.
The list name can be changed by clicking the [Edit List Name] button.
Printing with transparency interleaves
If "Transparency" is selected as the paper type, you can select the "Transparency Interleave" check box to enable the transparency interleave setting. By selecting the "Transparency Interleave" check box, overhead projector transparencies can be inserted between the printed pages.
1 Click the Cover Mode tab.
2 Select the "Transparency Interleave" check box.
3 From the "Transparency Interleave" drop-down list, specify the printing conditions.
4 From the "Transparency Interleave" drop-down list, select the paper tray that contains the paper to be used.
3.6 Specifying the stamp/composition tab settings (PCL driver for Windows)
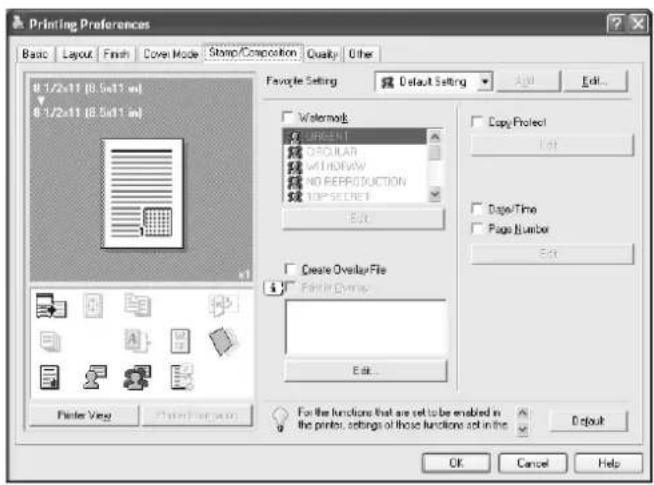
Printing a watermark
You can print specific text in the background as a watermark.
1 Click the Stamp/Composition tab.
2 Select the "Watermark" check box.
3 From the list, select the watermark that you want to print.
Editing a watermark
You can change the fonts and position of the watermark and you can register a new one.
1 Click the Stamp/Composition tab.
2 Select the "Watermark" check box.
3 Click the [Edit] button under "Watermark".
The Edit Watermark dialog box appears.
4 To create a watermark, click the [Add] button.
To change a watermark, select the watermark from the "Current Watermark" list.
5 Specify settings for the following:
![Edit Watermark 1 +100% Notice Current Watermark INTERNAL USE IMPORTANT Pool Confidential DRAFT COPY Notice Watermark Name Notice Watermark Text Notice Add Delete Up Save 100% 1 +100% 100% Position[100...+100] 0 % 0 Center Text Angle 0 Degree[180...+180] Font Name Andl Size 72 Point(7..800) Style Regular Frame None Text Color Red Transparent 1x Page Only Repeat Sharing OK Cancel Default Help](/content/2026/05/977387/images/c6303660facc579fc180b6160375bc15e327b0b6157e6f6c90ff1e2bfd2524d3.jpg)
- Watermark Name: Enters the name of the watermark.
- Watermark Text: Enters the text to be printed as a watermark.
- [Add]: Click to create a new watermark.
– [Delete]: Click to delete the selected watermark. - Position: Specifies the vertical and horizontal positions. The watermark position can also be specified by using the horizontal and vertical sliders in the dialog box.
- Text Angle: Specifies the watermark print angle.
- Font Name: Specifies the font.
- Size: Specifies the size.
- Style: Specifies the font style.
- Frame: Specifies the frame style.
- Text Color: Specifies the watermark text color.
- Sharing: Specifies whether to register the watermark as public or private.
- Transparent: Prints the watermark as a transparent image.
- 1st Page Only: Prints the watermark on the first page only.
- Repeat: Prints several watermarks on a single page.
6 Click the [OK] button.
![OLIVETTI d-Color MF550 - Click the [OK] button. - 1](/content/2026/05/977387/images/25df54e517a02a5206b52e50cf43cf997ecc67a675c752699c5ff518df24ed64.jpg)
Note
Up to 30 watermarks can be registered with the shared setting, and up to 20 watermarks can be registered with the private setting.
Only the administrator can select a setting under "Sharing".
Printing different original documents together (overlay)
An original document can be printed on top of the overlay data that was created separately. This function comes in handy when creating fax cover letters or form letters.

Note
You must create and preregister the overlay file to be printed. For details, refer to "Editing an overlay file" on page 3-24.
1 Create the print data using any application.
2 From the [File] menu, select "Print".
3 Select this machine in "Printer Name", and then click the [Properties] button or the [Preferences] button.
4 Click the Stamp/Composition tab.
5 Select the "Print in Overlay" check box.

6 From the list, select the overlay that you want to print.
7 Click the [Edit] button under "Print in Overlay".
The Edit Print In Overlay dialog box appears.
8 Specify the overlay printing method.

- Pages to Print: Specifies the pages to print.
- Overwrite: Specifies the sequence for printing the overlay on top of the original document.
9 Click the [OK] button.
The Stamp/Composition tab appears again.
10 Click the [OK] button.
The Print dialog box appears again.
11 Click the [Print] button.
The printing of the overlay is performed.
Editing an overlay file
To use an overlay, an overlay file must be created and added to the overlay file list. You can create and save a new overlay file by selecting the "Create Overlay File" check box, specifying the document that you want to create as an overlay file, then clicking the [Print] button on the Print dialog box. To add an existing overlay file that was created to the list, specify the file.
Creating an overlay file
1 Create the overlay file data using any application.
2 From the [File] menu, select "Print".
3 Select this machine in "Printer Name", and then click the [Properties] button or the [Preferences] button.
4 Click the Stamp/Composition tab.
5 Select the "Create Overlay File" check box.

6 Click the [OK] button.
The Print dialog box appears again.
7 Click the [Print] button.
The dialog box to save the overlay file appears.
8 Specify the storage location for the overlay file, enter the file name in the "File Name" box, and then enter the overlay name or a comment in the "Overlay Name" text box.
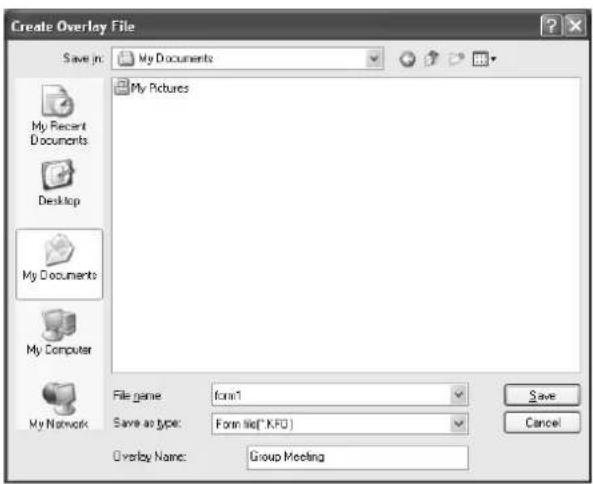
9 Click the [Save] button.
Instead of executing a print, the overlay file is saved and is added to the list to be used for the next operation. The file extension is ".KFO".
Registering an overlay file
1 Click the Stamp/Composition tab.
2 Click the [Edit] button under "Print in Overlay".
The Edit Print In Overlay dialog box appears.
3 Click the [Browse Files] button to open the overlay file.
The overlay file is added to the "Select Overlay File" list.
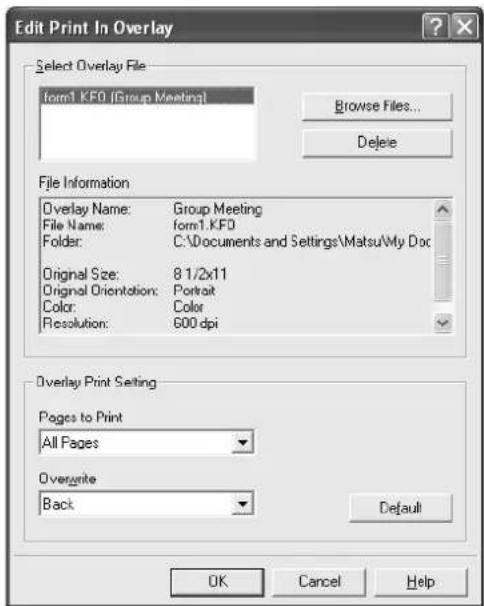

Note
By clicking the [Delete] button in the Edit Print In Overlay dialog box, the selected overlay file can be deleted from the overlay file list. The file itself is not deleted.
Printing with copy protection
You can print a special pattern on an entire page while printing.
When copying a printed page, the characters embedded in the pattern appear to prevent an illegal copy.
1 Click the Stamp/Composition tab.
2 Select the "Copy Protect" check box.
3 Click the [Edit] button under "Copy Protect".
The Edit Copy Protect dialog box appears.
4 Specify the copy protection type and the position. Multiple print items can be specified.

- Characters: Embeds the selected character string in a pattern. A preregistered character string (common stamp) or a character string registered on this machine (registered stamp) can be specified.
- Date/Time: Embeds the selected date and time in a pattern. By clicking the [Edit] button under "Format", you can specify the display type or the time format.
- Serial Number: Embeds the serial number of this machine in a pattern.
- Distribution Control Number: Embeds the number of copies in a pattern when printing multiple copies. By clicking the [Edit] button under "Start Number", you can specify the start number or the display type.
- Job Number: Embeds the print job number in a pattern for documents that are automatically paginated.
- Text Size: Specifies the text size of a pattern.
- Angle: Specifies the pattern angle.
5 Select the composition method for copy protection.
Select "Copy Protect" to specify the desired results when copying, or simply select "Stamp Repeat". In addition, you can select the embedding conditions.

– Pattern: Specifies the embedding method of a pattern.
– Pattern Overwrite: Specifies the order for printing a pattern on the original document.
- Background Pattern: Specifies the pattern background.
- Text/Background Color: Specifies the pattern color. The density and color contrast can be specified by clicking the [Adjust Color] button.
6 Click the [OK] button.
Printing the date and page numbers
You can print the date and page numbers on a document.
1 Click the Stamp/Composition tab.
2 Select the "Date/Time" or the "Page Number" check box.
The "Date/Time" and "Page Number" check boxes can be selected at the same time.
3 Click the [Edit] button under "Page Number".
The Edit Date/Time/Page Number dialog box appears.
4 Specify the format and print position for the date, time, and page number.
![Edit Date/Time/Page Number ✓ Date/Time Format 107/1/23 Edit... Pages to Print All Pages Text Color Black Print Position Top Left ✓ Page Number Slating Page 1 [1..9999] Slating Page Number 1 [1..9999] ✓ Cover Mode Print on Front and Back Cover Text Color Black Print Position Top Left OK Cancel Default Help](/content/2026/05/977387/images/fe84ced65fd21d70d911f1926a8e5f7ba33e2a98cb2af5c87f4c2e555cbdcc15.jpg)
- Format: Displays the format for the date and time to be printed. By clicking the [Edit] button, you can specify the display type or the time format.
- Pages to Print: Specifies the pages to print the date and time.
- Text Color: Specifies the text color to print.
- Print Position: Specifies the print position.
- Starting Page: Specifies the page to start printing the page number.
- Starting Page Number: Specifies the start number for printing the page number.
- Cover Mode: If cover pages are attached, specifies whether to print the page number on the front cover page or the back cover page.
5 Click the [OK] button.
3.7 Specifying the quality tab settings (PCL driver for Windows)

Adjusting the color and quality
1 Click the Quality tab.
2 Specify settings for the following:
| Item Function | |
| Select Color Specifies the color for printing.Full Color: Prints in color.Grayscale: Prints in grayscale.2 Color: Prints the two colors selected from the drop-down list. | |
| Quality Adjustment Adjusts the image quality.Simple: Adjusts the entire document.Detail: Adjusts the text, photos, and charts of each object in a document. | |
| Color Settings Specifies the contents of the original document. Prints with a quality suitable for the original document.Document: Prints with a quality suitable for documents with many characters.Photo: Prints with a quality suitable for photos.DTP: Prints with a quality suitable for documents produced using DTP.Web: Prints with a quality suitable for Web page printing.CAD: Prints with a quality suitable for CAD data printing. | |
| Resolution Displays the resolution. (The resolution cannot be changed on this machine.) | |
| Pattern Selects the print pattern. | |
| Image Compression Specifies the compression ratio for an image. | |
| Glossy Mode Prints using a gloss finish. | |
Font Settings
You can replace the TrueType fonts used in Windows with the printer fonts of this machine.
1 Click the Quality tab.
2 Click the [Font Settings] button.
3 Specify settings for the following:
- Download Font Format: Selects the TrueType font downloading method.
- Use Printer Fonts: Replaces the TrueType fonts with the printer fonts.

4 To use the printer fonts, change the fonts in "TrueType Font Substitution Table" as necessary. From the list shown in the dialog box above, select the TrueType font that you want to replace, and then select the printer font from the "Printer Font to Use" drop-down list.

Note
Using the printer fonts will shorten the printing time, however, there may be a difference in the screen display and the print results.
By selecting the TrueType font download method from the "Download Font Format" drop-down list, you can select the TrueType font type to download when downloading the TrueType fonts and not using the printer fonts. When using TrueType fonts, select the font type to be downloaded to the printer.
3.8 Setting up the PostScript driver for Windows
Common settings
The following describes the common settings and buttons that are displayed on all tabs.
![PS Printing Preferences Advanced Basic Layout Finish Cover Mode Stamp/Composition Quality Other 8 1/2x11 [8.5x11 in] 8 1/2x11 [8.5x11 in] Favopie Setting Default Setting Original Orientation Portrait Landscape Original Size B1/2x11 Paper Size Some as Original Size Zoom (25...400%) Aug Manual 100% Paper Tray Auto Paper Type Plan Paper Output Method Print User Settings... Authentication/Account Track... Copies 1 [1..9999] Colare Offset Paper Settings for Each Tray... Default OK Cancel Apply Help](/content/2026/05/977387/images/09d0850d7a1338789c64782f11ce279eb5204a0c29ab682e1d1344fd23cc0e55.jpg)
| Button Function | |
| OK Click this button to close the | dialog box and apply any settings that have been changed. |
| Cancel Click this button to cancel | any settings that have been changed and close the dia-log box. |
| Help Click this button to display the | the help for each item on the currently displayed dialog box. |
| Add (Favorite Setting) Click this button to save the current settings and to view them at a later time. | |
| Edit (Favorite Setting) Click this button to change the saved settings. | |
| Default Click this button to return the settings to their defaults, which were selected when the driver was installed. | |
| View When the [Paper View] button is clicked, a preview of the page layout as specified in the current settings is displayed and a preview image of the print job can be checked.When the [Printer View] button is clicked, a printer figure is displayed showing any options, such as the paper tray, that are installed on this machine. | |
  Paper Printer Paper Printer | |

...
Note
To enable any installed options, you must specify the Device Option settings.
Basic tab
| Item Function | |
| Original Orientation Specifies the orientation of the original document. | |
| Original Size Specifies the size of the original document. | |
| Paper Size Specifies the output paper size. Automatically enlarges or reduces when the Original Size setting is changed. | |
| Zoom Specifies the enlargement and reduction ratio. | |
| Paper Tray Selects the paper tray for printing. | |
| Paper Type Selects the paper type for printing. | |
| Output Method For non-conventional printing, selects special output methods such as "Secure Print" or "Save in User Box". | |
| [User Settings] Specifies the ID and password, or the file name and box number when performing "Secure Print" or "Save in User Box". | |
| [Authentication/Account Track] Specifies the user name and password when performing user authentication, and the department name and password when performing account track on this machine. | |
| Copies Specifies the number of copies to print. | |
| Collate Specifies whether to print multiple copies in sets. | |
| Offset When printing multiple copies, shifts the output position of each set. | |
| Paper Settings for Each Tray Specifies the paper type for each paper tray. | |
Layout tab
| Item | Function |
| Combination | Prints multiple pages on one page. Details can be specified by clicking the [Combination Details] button. |
| Rotate 180 | Prints the image rotated 180^ . |
| Chapter | Specifies the page to be printed on the front side. |
| Print Type | Specifies duplex printing and booklet printing. |
| Binding Direction | Specifies the binding position. |
| Binding Margin | Specifies the binding margin. Click the [Binding Margin Settings] button to specify the margin values. |
| Image Shift Prints by shifting the entire print | image. Click the [Image Shift Settings] button to specify the image shift values. |
Finish tab
| Item | Function |
| Staple | Specifies stapling. |
| Saddle Stitch | Specifies to saddle stitch a printed document. |
| Punch | Specifies hole punching. |
| Fold | Specifies folding. |
| Output Tray | Specifies the tray where to output the printed pages. |
| Paper Arrangement | Specifies the method for adjusting the binding position. |
Cover mode tab
| Item Function | |
| Front Cover Attaches a front cover page. | |
| Front Cover Tray Selects the paper tray for the front cover. | |
| Back Cover Attaches a back cover page. | |
| Back Cover Tray Selects the paper tray for the back cover. | |
| Per Page Setting Inserts paper between pages and switches the paper and tray for each page. | |
| Transparency Interleave | Outputs and inserts interleaves when printing overhead projector transparencies. |
| Interleave Tray Selects the input tray for the transparency interleaves. | |
Stamp/Composition tab
| Item Function | |
| Watermark Prints a watermark (text stamp) | on the page being printed. Watermarks can be added, changed, or deleted by clicking the [Edit] button. |
| Create Overlay File Prints an original document | on top of an overlay that was created separately. |
| Copy Protect Prints a special pattern to prevent copying. | |
| Date/Time Prints the date and time. | |
| Page Number Prints the page number. | |
Quality tab
| Item Function | ||
| Select Color Specifies the color for printing. | ||
| Quality Adjustment Adjusts the image quality. You can select "Simple" to adjust entire documents or "Detailed" to adjust the text, photos, and charts in the document. | ||
| Color Settings | Prints with a quality suitable for the selected original document. | |
| Glossy Mode | Prints with a gloss. | |
| Font Settings | Download Font Format | Selects whether the fonts are downloaded to the printer as bitmap or outline. |
| Use Printer Fonts | Selects whether to use TrueType fonts or the printer fonts when printing. | |
Other tab (d-Color MF450)
| Item | Function |
| Excel Job Control | Controls jobs so that they are not separated when printing in Microsoft Excel. |
| Driver Version Info | Displays the version information of the printer driver. |
Advanced tab
| Item Function | |
| Advanced Printing Features | Specifies whether to enable detailed print functions (booklet). |
| PostScript Output Option | Specifies the PostScript file output format. |
| Send PostScript Error Handler | Specifies whether to print an error report when a PostScript error occurs. |
| Mirrored Output | Reverses horizontally, then prints. |
| PostScript Pass through | Allows applications to print directly without using a GDI. |
Device settings tab
| Item Function | |
| Font Substitution Table Specifies the replacement of TrueType fonts with printer fonts. | |
| Available PostScript Memory Specifies the usable PostScript memory size. | |
| Output Protocol Specifies the protocol for transmitting to the printer. | |
| Send CTRL-D Before Each Job Specifies whether to reset printer before printing. | |
| Send CTRL-D After Each Job Specifies whether to reset printer after printing. | |
| Convert Gray Text to PostScript Gray Specifies whether to convert gray text in a document to PostScript gray. | |
| Convert Gray Graphics to PostScript Gray Specifies whether to convert gray graphics in a document to PostScript gray. | |
| Add Euro Currency Symbol to PostScript Fonts | Specifies whether to convert the Euro currency symbol in a document to PostScript fonts. |
| Job Timeout Printer stops printing when a print job is not completed within the specified time. | |
| Wait Timeout Printer stops printing when the printer does not receive data within the specified time from when the job was sent. | |
| Minimum Font Size to Downloaded as Outline | Specifies the minimum font size (pixels) when downloading TrueType fonts as outline fonts. Fonts smaller than the minimum specified size are downloaded as bitmap fonts. |
| Maximum Font Size to Download as Bitmap | Specifies the maximum font size (pixels) when downloading TrueType fonts as bitmap fonts. Fonts larger than the maximum specified size are downloaded as outline fonts. |

Note
To display the Device Settings tab in Windows 2000/XP/Server 2003, right-click the icon of the installed printer, and then click "Properties".
Configure tab
| Item Function | |
| Device Option Specifies the status of the options that are installed on this machine and the status of the user authentication and account track functions. Specify the status of each item from the "Setting" drop-down list. | |
| Paper Tray Information | Shows the paper type specified for each tray. Click the [Paper Tray Settings] button to specify the settings for each paper tray. |
| Acquire Device Information | Communicates with this machine to read the status of the installed options. |
| Acquire Settings | Specifies the status of the connection that executes getting the option information. |
| Software Tools | Starts up software tools such as Web Connection. |

Note
To display the Configure tab in Windows 2000/XP/Server 2003, right-click the icon of the installed printer, and then click "Properties".
You cannot use the [Acquire Device Information] function if you are not connected to or able to communicate with this machine.
Settings tab
| Item Function | |
| Display Constraint Message Displays a message when functions that cannot be specified at the same time were enabled from the printer driver. | |
| Display paper set in Print Server Properties. | Uses the paper that was added in [Server Properties] of the printer folder. |
| Verify Authentication settings before printing | Verifies the authentication settings for this machine before printing and displays a message if the settings are not compatible. |
| Popup Authentication Dialog when printing | Displays the User Authentication/Account Track dialog box when a print job is specified to enter the user name and department name. |

Note
To display the Settings tab in Windows 2000/XP/Server 2003, right-click the icon of the installed printer, and then click "Properties".
3.9 Setting up the PPD driver for Mac OS 9.2
The functions of this machine can be specified on the Page Setup and Print dialog boxes displayed from an application.
The settings can only be applied while using the application. When the application is exited, the settings return to their defaults.
Page setup dialog box

Page Setup items
| Menu Item Function | ||
| Page Attributes Paper | Specifies the paper size. | |
| Orientation Specifies the orientation. | ||
| Scale Specifies the enlargement and reduction ratio. | ||
| PostScript Options | Flip Horizontal Prints the image flipped horizontally. | |
| Flip Vertical Prints the image flipped vertically. | ||
| Invert Image Prints a negative image. | ||
| Substitute Fonts Replaces some fonts with printer fonts. | ||
| Smooth Text Smooths text data. | ||
| Smooth Graphics Smooths graphic data. | ||
| Precision Bitmap Alignment | Corrects jagged graphic images. | |
| Unlimited Downloadable Fonts | Does not limit downloading screen fonts. | |
| Custom Page Sizes | Paper Size | Specifies any paper size. |
| Margins | Specifies the paper margins. | |
| Custom Page Size Name | Enters the registered name for the specified paper size and margin after the [OK] button is clicked. | |
| Units | Selects the specified unit. | |

Note
Depending on the application, "Page Setup" may be displayed as "Paper Setup". In addition, you may have to select "Paper Setup" – "Options" from the "File" menu.
The dialog boxes differ depending on the application.
Print dialog box
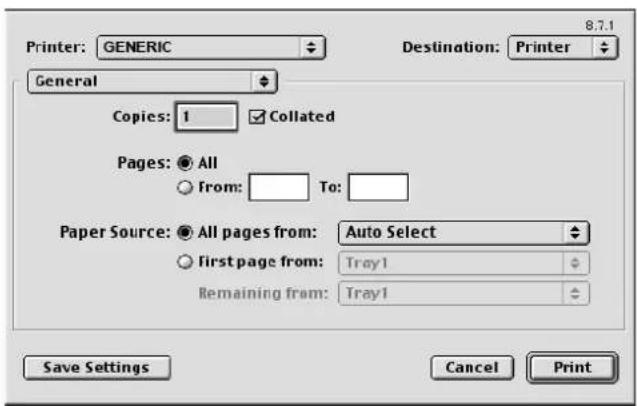
Print items
| Menu Item Function | ||
| Page Attributes Copies | Specifies the number of copies to print. | |
| Collated Prints multiple copies in sets. | ||
| Pages Specifies the print range to print. | ||
| Paper Source Selects the paper tray. | ||
| Color Matching Print Color | Color Specifies the color for printing. | |
| Intent Selects the matching method. | ||
| Printer Profile Specifies the color adjustment profile of the output device. | ||
| Background Printing | Print in Specifies background printing. | |
| Print Time Specifies the priority level and print time. | ||
| Save as File | Format | Specifies the PostScript file output format. |
| PostScript Level | Specifies the PostScript level. | |
| Data Format | Specifies the format to save a document. | |
| Font Inclusion | Specifies whether to include the font data on a file. | |
| Font Settings | Font Documentation | Adds information to the font key. |
| Font Downloading | Specifies the conditions to download fonts. | |
| Layout | Pages per sheet | Specifies the number of pages to print on one page. |
| Layout direction | Specifies the page order for printing multiple pages on one page. | |
| Border | Specifies the borders around pages. | |
| Job Logging | If there is a PostScript error | Specifies the PostScript error report conditions. |
| Job Documentation | Specifies the conditions for the operation record to be saved. | |
| Job Documentation Folder | Specifies the folder to which the operation record is to be saved. | |
| Cover Page | Print Cover Page | Attaches a cover. |
| Cover Page Paper Source | Selects the paper tray for the cover. | |
| Menu | Item | Function |
| Finishing Options 1 Offset Specifies offset. | ||
| Output Tray Selects the output tray. | ||
| Binding Direction Specifies the binding position. | ||
| Print Type Performs duplex printing. | ||
| Combination Performs booklet printing. | ||
| Staple Performs stapling. | ||
| Punch Performs hole punching. | ||
| Finishing Options 2 Fold Performs folding. | ||
| Front Cover Attaches a front cover page. | ||
| Front Cover Tray Selects the paper tray for the front cover. | ||
| Back Cover Attaches a back cover page. | ||
| Back Cover Tray Selects the paper tray for the back cover. | ||
| Transparency Interleave Inserts interleaves between overhead projector transparencies. | ||
| Interleave Tray Selects the paper tray for the transparency interleaves. | ||
| Finishing Options 3 | Output Method | Stops printing temporarily after part of the document has been printed so that the proof print can be checked. |
| Resolution | Specifies the print resolution. | |
| Select Color | Specifies whether to print in color or grayscale. | |
| Glossy Mode | Prints using a gloss finish. | |
| Color Settings | Prints with a quality suitable for the original document. | |
| Color Matching (Text) | Adjusts the color quality of the text in a document. | |
| Pure Black (Text) | Specifies whether to enable grayscale of the text in a document. | |
| Finishing Options 4 Screen (Text) | Specifies screening of the text in a document. | |
| Color Matching (Photo) Adjusts the color quality of photos in a document. | ||
| Pure Black (Photo) Specifies whether to enable grayscale of photos in a doc-ument. | ||
| Screen (Photo) Specifies screening of photos in a document. | ||
| Smoothing (Photo) Specifies smoothing of photos in a document. | ||
| Color Settings (Graphic) Adjusts the color quality of a chart and graph in a docu-ment to the text or photo settings. | ||
| Smoothing (Graphic) Adjusts the smoothing process of a chart and graph in a document to the text or photo settings. | ||

Note
The dialog boxes differ depending on the application.
3.10 Page Setup (PPD driver for Mac OS 9.2)
Page attributes (basic settings)
1 Select "Page Setup" or "Paper Setup" from the [File] menu.
2 Select "Page Attributes".

3 Specify settings for the following:
– Paper: Specifies the paper size.
- Orientation: Specifies the orientation.
- Scale: Specifies the enlargement and reduction ratio.


...
Note
The folding function can be selected from the screen that is displayed when "Layout" is selected in the Print dialog box.
Custom page sizes
1 Select "Page Setup" or "Paper Setup" from the [File] menu.
2 Select "Custom Page Sizes".
3 Click the [New] button.
4 Specify settings for the following:
– Paper Size: Specifies the paper size.
- Margins: Specifies the paper margins.
- Custom Page Size Name: Enter the registered name for the specified paper size and margins, and then click the [OK] button.
- Units: Selects the specified unit.

5 Click the [OK] button.
This saves the custom page size, which can be selected from the "Paper" drop-down list when "Page Attributes" is selected.
PostScript options
1 Select "Page Setup" or "Paper Setup" from the [File] menu.
2 Select "PostScript Options".
3 Specify settings for the following:
- Visual Effects: Provides "Flip Horizontal", "Flip Vertical", and "Invert Image" (negative image).
- Substitute Fonts: Replaces some fonts with printer fonts.
- Smooth Text: Smooths text data.
- Smooth Graphics: Smooths graphic data.
- Precision Bitmap Alignment: Corrects jagged graphic images.
- Unlimited Downloadable Fonts: Does not limit downloading screen fonts.

3.11 Printing (PPD driver for Mac OS 9.2)
General (basic settings)
1 From the [File] menu, select "Print".
2 Select "General".

3 Specify settings for the following:
– Copies: Specifies the number of copies to print.
- Collated: Prints multiple copies in sets.
- Pages: Specifies the print range to print.
– Paper Source: Selects the paper tray.
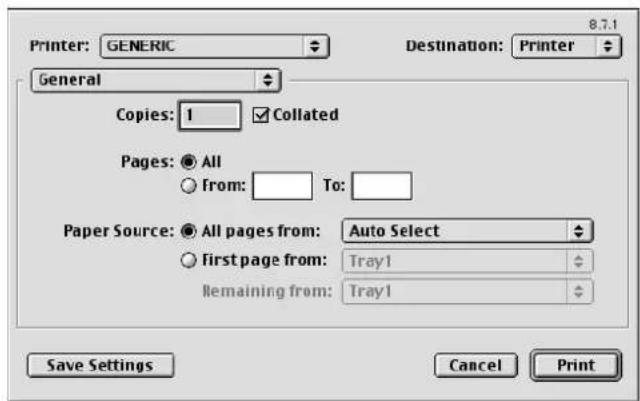
Layout (printing multiple pages on one page)
You can specify to print multiple pages on one page.
1 From the [File] menu, select "Print".
2 Select "Layout".
3 Specify settings for the following:
- Pages per sheet: Specifies the number of pages to print on one page.
- Layout direction: Specifies the page order for printing multiple pages on one page.
- Border: Specifies the borders around pages.
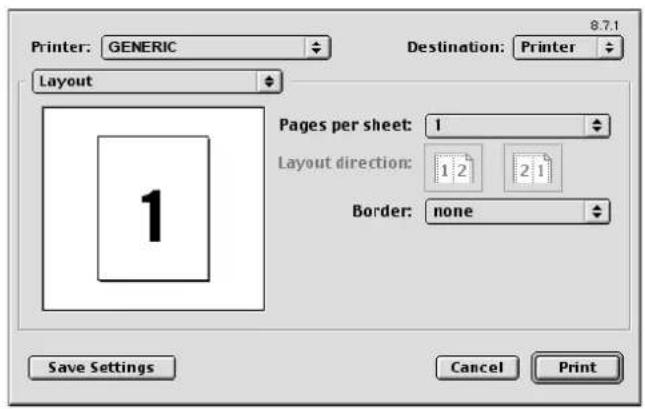
Printer specific options (Finishing options 1 to 4)
You can specify printer-specific options. You can specify these options when using the staple or hole punch functions of this machine.
1 From the [File] menu, select "Print".
2 Select "Finishing Options 1 to 4".
3 Specify settings for the following:
- Offset: Specifies offset.
- Output Tray: Selects the output tray.
– Binding Direction: Specifies the binding position. - Print Type: Performs duplex printing.
- Combination: Performs booklet printing.
- Staple: Performs stapling.
– Punch: Performs hole punching. - Fold: Performs folding.
- Front Cover: Attaches a front cover page.
- Front Cover Tray: Selects the paper tray for the front cover.
- Back Cover: Attaches a back cover page.
- Back Cover Tray: Selects the paper tray for the back cover.
- Transparency Interleave: Inserts interleaves between overhead projector transparencies.
- Interleave Tray: Selects the paper tray for the transparency interleaves.
- Output Method: Stops printing temporarily after part of the document has been printed so that the proof print can be checked.
- Resolution: Specifies the resolution.
- Select Color: Specifies whether to print in color or grayscale.
- Glossy Mode: Prints using a gloss finish.
– Color Settings: Prints with a quality suitable for the original document.
– Color Matching (Text): Adjusts the color quality of the text in a document.
– Pure Black (Text): Specifies whether to enable grayscale of the text in a document. - Screen (Text): Specifies screening of the text in a document.
– Color Matching (Photo): Adjusts the color quality of photos in a document.
– Pure Black (Photo): Specifies whether to enable grayscale of photos in a document. -
Screen (Photo): Specifies screening of photos in a document.
-
Smoothing (Photo): Specifies screening of photos in a document.
- Color Settings (Graphic): Adjusts the color quality of a chart and graph in a document to the text or photo settings.
- Smoothing (Graphic): Adjusts the smoothing process of a chart and graph in a document to the text or photo settings.


Reminder
The staple function is available only when the optional finisher is installed.
The hole punch function is available only when the punch kit is installed on the optional finisher.
The folding function is available only when the optional finisher is installed.
3.12 Setting options (PPD driver for Mac OS 9.2)
You can specify the options installed on this machine so that they can be used from the printer driver.

● ● ●
Reminder
If the installed options on this machine are not set from "Installable Options", the option function cannot be used with the printer driver. When installing options, be sure to make the proper settings.
1 On the Apple menu, click "Chooser".
2 Select the printer name.
3 Click the [Create] button.
4 Click the [Configure] button.
The setting screen for adding options appears.
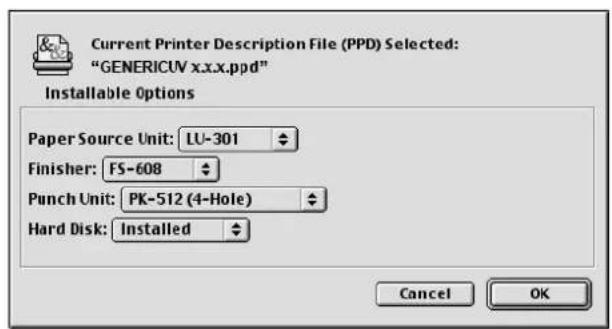
5 Select the option that is installed on this machine.
6 Click the [OK] button.
The Chooser window appears again.
7 Close the Chooser window.

...
Note
The option settings are displayed automatically the first time the printer driver is selected.
3.13 Setting up the PPD driver for Mac OS X
The functions of this machine can be specified on the Page Setup and Print dialog boxes recalled from the application.
The settings can only be applied while using the application. When the application is quit, the settings return to their default settings.
Page setup dialog box

Page setup items
| Menu Item Function | ||
| Page Attributes Paper | Size Specifies the paper size. | |
| Orientation Specifies the orientation. | ||
| Scale Specifies the enlargement and reduction ratio. | ||
| Custom Paper Size ^2 | Paper Size (Page size) Specifies any paper size. | |
| Printer Margins Specifies the paper margins. | ||

Note
Depending on the application, "Page Setup" may be displayed as "Paper Setup". In addition, you may have to select "Paper Setup" – "Options" from the "File" menu.
The dialog boxes differ depending on the application.
The items indicated by *2 are displayed only in Mac OS 10.2 and Mac OS 10.3.
Print dialog box

Print items
| Menu Item Function | ||
| Copies & Pages Copies | Specifies the number of copies to print. | |
| Collated Prints multiple copies in sets. | ||
| Pages Specifies the print range to print. | ||
| Layout Pages per Sheet | Specifies the number of pages to print on one page. | |
| Layout Direction Specifies the document page order. | ||
| Border Specifies the borders around pages. | ||
| Output Options *2 | Save as File Saves data to a file. | |
| Format Specifies the format for saving data to a file. | ||
| Scheduler *1 | Print Document Specifies the print time. | |
| Priority Specifies the priority level. | ||
| Paper Handling *1 | Reverse Page Order (Page Order) | Prints pages in the reverse order. |
| Print Selects the pages for printing. | ||
| Destination paper size *3 | Specifies the output paper size. | |
| ColorSync *1 | Color Conversion | Specifies the color conversion method. |
| Quartz Filter | Specifies the color for printing. | |
| Cover Page *1 | Print Cover Page | Specifies whether to attach a cover page. |
| Cover Page Type | Selects to print "Confidential" or other comments on the cover page. | |
| Billing Info | Enters the user information used for billing. | |
| Error Handling | PostScript Errors | Specifies whether to print an error report when a PostScript error occurs. |
| Tray Switching | Switches the paper source tray. (This function cannot be selected on this machine.) | |
| Output Method | Collate Prints multiple copies in sets. | |
| Offset | Specifies offset. | |
| Output Method | Specifies output methods, such as "Secure Print" and "Save in User Box". | |
| User Authentication | Select to perform user authentication and specify the user name and password. | |
| Account Track | Select to perform account track and specify the department name and password. | |
| Layout/Finish | Print Type Specifies duplex printing and booklet printing. | |
| Binding Direction | Specifies the binding position. | |
| Poster Mode | Prints one sheet of an original document divided on multiple pages. | |
| Overlap width line | Prints an overlap width line on split pages. | |
| Rotate 180 | Prints the image rotated 180°. | |
| Image Shift | Prints by shifting the entire print image. | |
| Chapter | Specifies the page to be printed on the front side. | |
| Staple Specifies stapling. | ||
| Punch | Specifies hole punching. | |
| Saddle Stitch/Fold | Specifies to fold and saddle stitch a printed document. | |
| Paper Arrangement | Specifies the method for adjusting the binding position. | |
| Paper Tray/Output Tray | Paper Tray | Selects the paper tray for printing. |
| Paper Type | Selects the paper type for printing. | |
| Paper Settings for Each Tray | Specifies the paper type for each paper tray. | |
| Output Tray | Specifies the tray where to output the printed pages. | |
| Menu | Item | Function |
| Cover Mode/Trans-parency Interleave | Front Cover Attaches a front cover page. | |
| Back Cover Attaches a back cover page. | ||
| Transparency Interleave Outputs and inserts interleaves when printing overhead projector transparencies. | ||
| Per Page Setting Per Page Setting Inserts paper between pages and switches the paper and tray for each page. | ||
| Stamp/Composition Copy Protect Prints a special pattern to prevent copying. | ||
| Quality Select Color Specifies the color for printing. | ||

Note
The dialog boxes differ depending on the application.
The items indicated by *1 are displayed only in Mac OS 10.3 and Mac OS 10.4.
The items indicated by *2 are displayed only in Mac OS 10.3.
The items indicated by *3 are displayed only in Mac OS 10.4.
Common settings in the print dialog box
The following describes the common settings that are displayed by the specific operations (Output Method, Layout/Finish, Paper Tray/Output Tray, Cover Mode/Transparency Interleave, and Per Page Setting) for this machine.

| Item Function | |
| Paper View A preview of the page layout as specified in the current settings is displayed and a preview image of the print job can be checked. | |
| Detailed Information Shows the current settings with text. | |
| Printer Information Displays the status of the installed options. | |
| Default Click this button to return the settings to their defaults, which were selected when the driver was installed. | |

Note
Click the [Acquire Device Information] button on the Printer Information dialog box to communicate with this machine and read the status of the settings specified on this machine. You cannot use this function if you are not connected to or able to communicate with this machine.
3.14 Page setup (PPD driver for Mac OS X)
Page attributes (basic settings)
1 Select "Page Setup" or "Paper Setup" from the [File] menu.
2 Select "Page Attributes".
3 Specify settings for the following:
- Paper Size: Specifies the paper size.
- Orientation: Specifies the orientation.
- Scale: Specifies the enlargement and reduction ratio.


Note
To print on paper sizes other than the standard sizes, be sure to set the custom paper sizes in Custom Page Sizes first.
When "W" is selected for each standard paper size from the printer driver, the data can be centered and printed.
For example, if A4 size data is created and you want to center and print on A3 size paper, select "A4W" as the paper size and "Tray 1" or "Bypass Tray" as the paper tray from the printer driver.
To print, load A3 size paper in the tray ("Tray 1" or "Bypass Tray") of this machine that is specified from the printer driver, and then specify the settings described below from [Basic (Paper)] – [Change Tray Settings] – [Wide Paper] in the control panel.
Select "A4W".
Enter the A3 paper size (420.0 297.0) in [Change Size].
Custom page sizes
1 Select "Page Setup" or "Paper Setup" from the [File] menu.
2 For Mac OS 10.4, select "Manage Custom Sizes" from the "Paper Size" drop-down list. For Mac OS 10.2 and Mac OS 10.3, select "Custom Paper Size" from "Settings".
3 Click the [New] (Mac OS 10.2/10.3) or the [+] (Mac OS 10.4) button.
4 Enter the paper size name.
5 Specify settings for the following:
- Page Size (Paper Size): Specifies any paper size.
- Printer Margins: Specifies the paper margins.

6 For Mac OS X 10.4, continue with step 7.
For Mac OS 10.2 and Mac OS 10.3, click the [Save] button.
7 Click the [OK] button.
This saves the custom paper size, which can be selected from the "Paper Size" drop-down list that is displayed when "Page Attributes" is selected.
3.15 Printing (PPD driver for Mac OS X)
General settings
1 From the [File] menu, select "Print".
2 Select "Copies & Pages".
3 Specify settings for the following:
– Copies: Specifies the number of copies to print.
- Collated: Prints multiple copies in sets.
- Pages: Specifies the print range to print.

3.16 Output Method (PPD driver for Mac OS X)

Collate: Prints multiple copies in sets.
Offset: Specifies offset.
Output Method: Specifies the output method. For details, refer to "Selecting the output method" on page 3-53.
User Authentication: Performs user authentication. For details, refer to "Specifying the user authentication settings" on page 3-55.
Account Track: Performs account track. For details, refer to "Specifying the account track settings" on page 3-56.
Detail Settings: Displays the functions for which the setting details have been specified.
Selecting the output method
Not only can you print directly, but you can select "Secure Print", which requires a password to print, or "Save in User Box", which saves data in the boxes that were created on the HDD.
From the "Output Method" drop-down list, select the output method.
Print: Prints immediately.
Secure Print: Saves the document to be printed in "Secure Print User Box" of this machine. When printing, you are required to enter the ID and password in this machine's control panel. Select when printing highly confidential documents.
Save in User Box: Saves the document to be printed in a box on this machine.
Save in User Box and Print: Saves the document in a box and prints at the same time.
Proof Print: After a part of the document has been printed, this machine stops printing temporarily. Select to avoid misprinting a large volume of print jobs.
Secure Print
If "Secure Print" was selected, enter the ID and password in the dialog box that appeared.


Note
By selecting the "Save Settings" check box, the specified settings are saved. In addition, if the "Do not show this window when setting" check box is selected, the dialog box does not appear when the function is specified.
The dialog box can be displayed by clicking the [Detail Settings] button. For details, refer to "Selecting the output method" on page 3-53.
To print, specify "Secure Print Document Box" from the Box mode in this machine's control panel, and then enter the ID and password.
When password rules are enabled on this machine, the passwords that can be used for secured printing are limited and the jobs are deleted when a password that does not comply with the password rule is entered.
Save in User Box
When "Save in User Box" or "Save in User Box and Print" is selected, specify the file name to be saved and the box number for the save location in the dialog box that appears for entering the file name and box number.
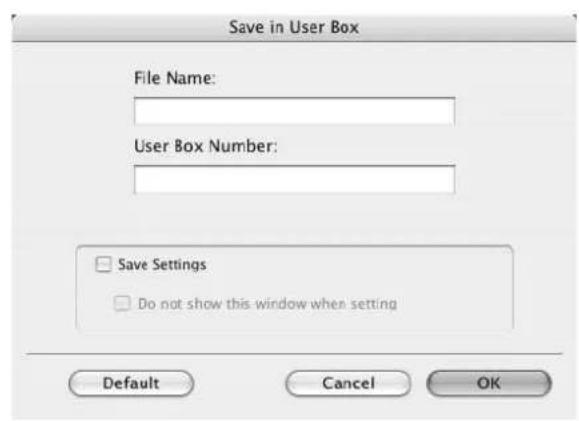

Note
By selecting the "Save Settings" check box, the specified settings are saved. In addition, if the "Do not show this window when setting" check box is selected, the dialog box does not appear when the function is specified.
The dialog box can be displayed by clicking the [Detail Settings] button. For details, refer to "Checking the output method setting details" on page 3-57.
Be sure to create the box of the save location in advance with the box function of this machine.
When password rules are enabled on this machine, specify the box that was created on this machine.
Proof Print
When a print job is sent, this machine stops printing temporarily after part of the document has been printed. The remaining print job is stored in this machine as a print job. When printing multiple copies, you can print the remaining part of the print job after checking the print results.

Note
To print the document, release the held document from the Job mode in this machine's control panel.
Specifying the user authentication settings
If the user authentication settings have been specified on this machine, you must enter a user name and password.

Reminder
If a job is printed using a user name or password that is not a registered account on this machine, or if a job is printed without selecting a user under "User Authentication", the operation is not authenticated by this machine and the job is canceled.
If the user authentication settings are specified on this machine and the authentication operation restriction function is in mode 2, the applicable user is locked and cannot be accessed if the authentication information is not entered correctly.
1 Select the "User Authentication" check box.
The User Authentication dialog box appears.
2 Select "Recipient User", and then enter the user name and password.

3 Click the [OK] button.

Note
If this machine has been set to permit public users, the machine can be used without a user name and password.
If performing user authentication on a server, the server settings must be specified. Click the [User Authentication Server Setting] button to select the server.
By selecting the "Save Settings" check box, the specified settings are saved. In addition, if the "Do not show this window when setting" check box is selected, the dialog box does not appear when the function is specified.
The dialog box can be displayed by clicking the [Detail Settings] button. For details, refer to "Checking the output method setting details" on page 3-57.
If printing is not allowed, printing cannot be performed even when used by a registered user. For details on the user authentication function, consult the administrator of this machine.
If performing user authentication with an optional authentication unit (biometric type), enter the user name and password in step 2. For details, refer to the operation manual of the authentication unit (biometric type).
Specifying the account track settings
If the account track settings have been specified on this machine, you must enter a department name and password.

Reminder
If a job is printed using a department name or password that is not a registered account on this machine, or if a job is printed without "Account Track" selected, the operation is not authenticated by this machine and the job is canceled.
When the account track settings are specified on this machine, the authentication operation restriction function is in mode 2, and the authentication information is not entered correctly, the applicable account is locked and cannot be accessed.
1 Select the "Account Track" check box.
The Account Track dialog box appears.
2 Enter the department name and password.

3 Click the [OK] button.

Note
By selecting the "Save Settings" check box, the specified settings are saved. In addition, if the "Do not show this window when setting" check box is selected, the dialog box does not appear when the function is specified.
The dialog box can be displayed by clicking the [Detail Settings] button. For details, refer to "Checking the output method setting details" on page 3-57.
If printing is not allowed, printing cannot be performed even when used by a registered account. For details on the account track function, consult the administrator of this machine.
Checking the output method setting details
By clicking the [Detail Settings] button, the "Output Method" functions for which detailed settings have been specified are shown.
The settings can be shown by clicking the [Expand All] button.
By selecting a function and clicking the [Settings] button, the dialog box for specifying the detailed settings for the selected function appears.
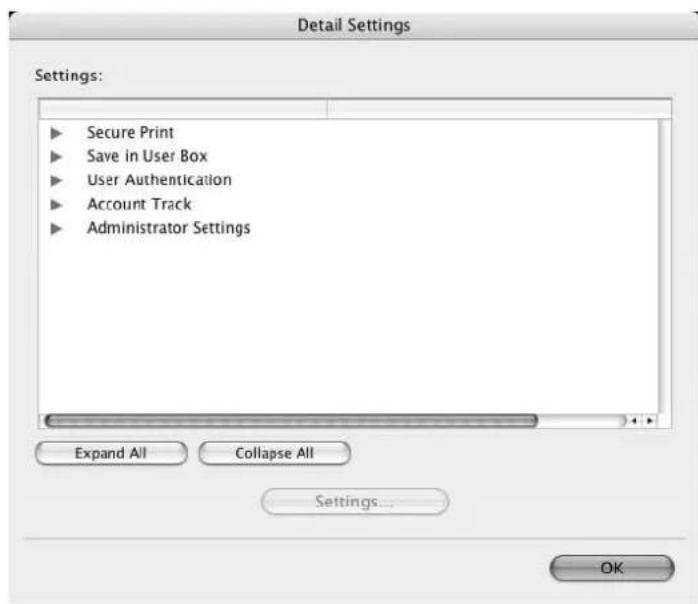
Secure Print: Displays the Secure Print dialog box for entering an ID and password. This is the same dialog box that appears when "Secure Print" is specified from the "Output Method" drop-down list.
Save in User Box: Displays the Save in User Box dialog box for entering a file name and box number. This is the same dialog box that appears when "Save in User Box" or "Save in User Box and Print" is specified from the "Output Method" drop-down list.
User Authentication: Displays the User Authentication dialog box for entering a user name and password. This is the same dialog box that appears when the "User Authentication" check box is selected.
Account Track: Displays the Account Track dialog box for entering a department name and password. This is the same dialog box that appears when the "Account Track" check box is selected.
Administrator Settings: Displays the Administrator Settings dialog box in which you can select when the User Authentication dialog box or the Account Track dialog box is displayed.

Popup Authentication Dialog when printing: Displays the User Authentication dialog box or the Account Track dialog box when a print job is specified to enter a user name or a department name.
3.17 Layout/Finish (PPD driver for Mac OS X)
You can switch between the Layout dialog box and the Finish dialog box.


Print Type: Specifies duplex printing and booklet printing.
Binding Direction: Specifies the binding position.
Poster Mode: Prints one page of an original document divided on multiple pages.
Overlap width line: Prints an overlap width line on split pages. This setting can be specified when "Poster Mode" is specified.
Rotated 180: Prints the image rotated 180^ .
Image Shift: Prints by shifting the entire print image. For details, refer to "Shifting images" on page 3-60.
Chapter: Specifies the page to be printed on the front side. For details, refer to "Chapter" on page 3-61.
Staple: Specifies stapling. Select the "Staple" check box, and then specify the number of staples and the stapling position from the drop-down list.
Punch: Specifies hole punching. Select the "Punch" check box, and then specify the number of punched holes from the drop-down list.
Saddle Stitch/Fold: Specifies to saddle stitch or fold a printed document.
Paper Arrangement: Specifies the method for adjusting the binding position. If "Prioritize Arranging Papers" is selected, all pages can be processed to a suitable quality by this machine because the binding position is adjusted after all the print data is received. If "Prioritize Productivity" is selected, the printing process is performed efficiently because the binding position is adjusted while the data is printed simultaneously as it is being received.
Detail Settings: Displays the functions for which the setting details have been specified.

Reminder
When printing a job that contains pages of different sizes and orientations with the "Poster Mode" setting specified, images may be missing or overlapping when the document is printed.
The staple function is available only when the optional finisher is installed.
The hole punch function is available only when the punch kit is installed on the optional finisher.
The saddle stitch function and the fold function are available only when the optional finisher is installed.

Note
The staple and hole-punch position changes according to the binding position specified from "Binding Direction".
The fold function cannot be specified when the staple, punch, or saddle stitch function is specified.
Shifting images
The entire print image of a document is shifted and then printed. You can use this function when you want to adjust the print position.
1 Select the "Image Shift" check box.
2 Select the shift direction and set the values.
By clearing the "Same value for Front and Back sides" check box, you can set separate values for the front and back sides.
![Image Shift Front Side Top Bottom 0.00 inch [0.00 ... 9.84] Left Right 0.00 inch [0.00 ... 9.84] Back Side Top Bottom 0.00 inch [0.00 ... 9.84] Left Right 0.00 inch [0.00 ... 9.84] Same value for Front and Back sides Save Settings Do not show this window when setting Default Cancel OK](/content/2026/05/977387/images/3cba729caa565f99361cf5d4a535b350551c695de9f9f33db41f1ee0a698f3ab.jpg)

...
Note
By selecting the "Save Settings" check box, the specified settings are saved. In addition, if the "Do not show this window when setting" check box is selected, the dialog box does not appear when the function is specified.
The dialog box can be displayed by clicking the [Detail Settings] button. For details, refer to "Checking the layout/finish setting details" on page 3-62.
Chapter
You can specify the page you want to print on the front side when duplex printing or booklet printing.
Even if a specified page comes up to be printed on the back side in duplex printing or booklet printing, the specified page is moved and printed on the front side.
1 Select the "Chapter" check box.
The dialog box for setting the detailed settings appears.
2 Enter the page number of the page you want to print on the front side.


...
Note
When entering multiple page numbers, separate the page numbers with commas such as "2, 4, 6" or enter a page range using a hyphen such as "6-10".
The "Chapter" check box can only be selected when the duplex printing or the booklet printing setting is enabled.
By selecting the "Save Settings" check box, the specified settings are saved. In addition, if the "Do not show this window when setting" check box is selected, the dialog box does not appear when the function is specified.
The dialog box can be displayed by clicking the [Detail Settings] button. For details, refer to "Checking the layout/finish setting details" on page 3-62.
Checking the layout/finish setting details
By clicking the [Detail Settings] button, the "Layout/Finish" functions for which detailed settings have been specified are shown.
The settings can be shown by clicking the [Expand All] button.
By selecting a function and clicking the [Settings] button, the dialog box for specifying the detailed settings for the selected function appears.

Image Shift: Displays the Image Shift dialog box. This is the same dialog box that appears when the "Image Shift" check box is selected.
Chapter: Displays the Chapter dialog box. This is the same dialog box that appears when the "Chapter" check box is selected.
3.18 Paper tray/output tray (PPD driver for Mac OS X)

Paper Tray: Selects the paper tray for printing.
Paper Type: Selects the paper type for printing. This setting can be specified when the paper tray setting is set to "Auto".
Paper Settings for Each Tray: Specifies the paper type for each paper tray. For details, refer to "Specifying the paper type for a paper tray" on page 3-64.
Output Tray: Specifies the tray where to output the printed pages.

...
Note
If "Auto" is specified as the paper tray, you can select the paper type. If the paper tray setting is changed to a setting other than "Auto", the paper type is fixed to its preregistered setting. Specify a paper type by clicking the [Paper Settings for Each Tray] button.
Specifying the paper type for a paper tray
You can specify the paper type for a paper tray.
1 Click the [Paper Settings for Each Tray] button.
The dialog box for setting the detailed settings appears.
2 Select the desired paper tray, and then select the paper type to be specified from the "Paper Type" drop-down list.
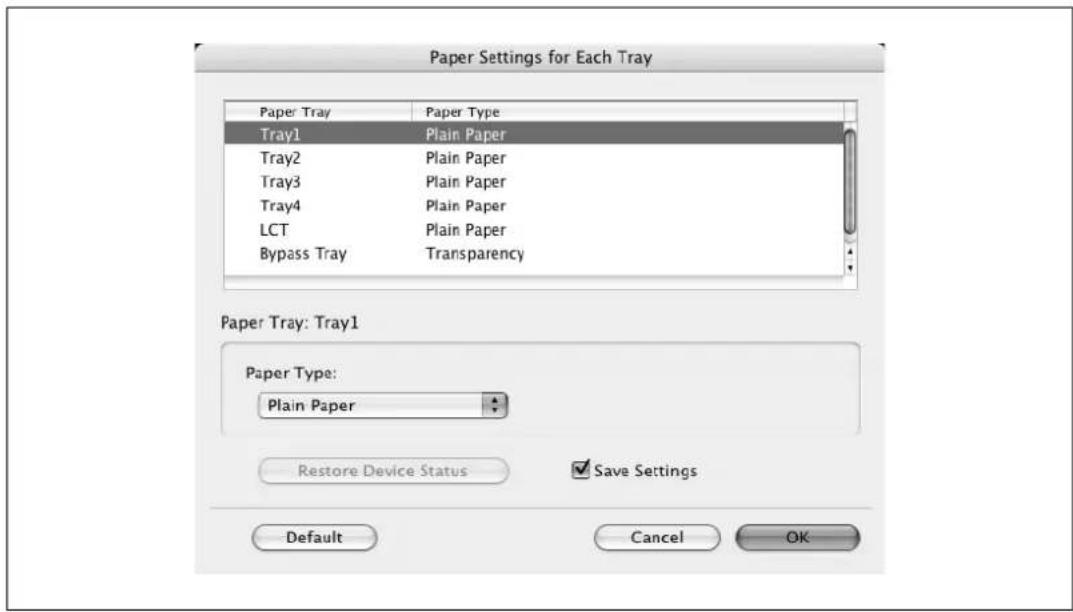

Note
Click the [Restore Device Status] button to communicate with this machine and read the status of the settings specified on this machine. You cannot use this function if you are not connected to or able to communicate with this machine.
By selecting the "Save Settings" check box, the specified settings are saved.
Specify "Duplex Side 2" to print on the back side of a page.
3.19 Cover mode/transparency interleave (PPD driver for Mac OS X)
You can switch between the Cover Mode dialog box and the Transparency Interleave dialog box.
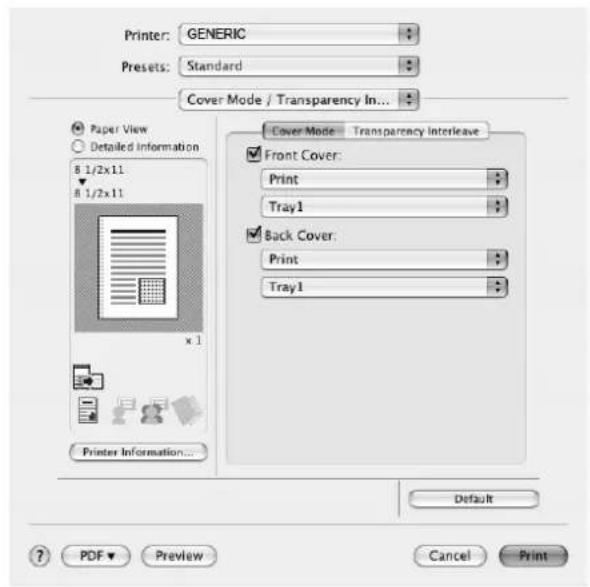

Front Cover: Attaches a front cover page. Select this check box, and then select the print conditions from the upper drop-down list, and the paper tray that contains the loaded paper to be used from the lower drop-down list.
Back Cover: Attaches a back cover page. Select this check box, and then select the print conditions from the upper drop-down list, and the paper tray that contains the loaded paper to be used from the lower drop-down list.
Transparency Interleave: Outputs and inserts interleaves when printing overhead projector transparencies. Select this check box, and then select the paper tray that contains the loaded paper to be used from the lower drop-down list.

Note
To print on the front cover and back cover, select "Print". To only add a blank page, select "Blank".
The "Transparency Interleave" setting can be specified if "Transparency" is selected as the paper type.
3.20 Per page setting (PPD driver for Mac OS X)
You can specify the print type and paper tray for each page. This comes in handy when you want to change the paper tray during a print job when printing multiple pages. The settings are added to the per page setting list and can be used as necessary.

Per Page Setting: Enables the per page setting function.
List: Displays the list of the settings that have been added to Per Page Setting.
Add: Adds settings to Per Page Setting. For details, refer to "Adding and editing the settings in per page setting" on page 3-68.
Edit: Edits the settings in Per Page Setting. For details, refer to "Adding and editing the settings in per page setting" on page 3-68.
Delete: Deletes the settings in Per Page Setting.
▲/▼: Changes the order of the per page setting list.
Adding and editing the settings in per page setting
1 Select the "Per Page Setting" check box.
2 Click the [Add] button to add a new setting to the list.
To edit the list, select the desired name in the list, and then click the [Edit] button.
The Per Page Settings dialog box for specifying the print settings appears.
3 Click the [Add] button to add the setting to the list.
A new row for specifying the settings is added to the settings list.

4 Select the row that was added to the list, and then specify the print settings in "Add/Edit".
- Page Number: Enters the page number. When entering multiple page numbers, separate the page numbers with commas such as "2, 4, 6" or enter a page range using a hyphen such as "6-10".
- Print Type: Specifies Print Insert, Insert Blank Sheet, Print (1-Sided), and Print (2-Sided).
– Paper Tray: Specifies the paper tray. - Staple: Specifies the number of staples and the stapling position.
5 Click the [OK] button.

Note
To change existing print settings, select the desired row and change the settings. To delete existing print settings, select the desired row, and then click the [Delete] button.
Click the [▲] button or the [▼] button to change the page number starting with the smallest page number.
The name of the list can be changed in the "List Name:" text box.
3.21 Stamp/Composition (PPD driver for Mac OS X)

Copy Protect: Prints a special pattern to prevent copying.
Date/Time: Prints the date and time.
Page Number: Prints the page number.
Printing with copy protection
You can print a special pattern on an entire page while printing.
When copying a printed page, the characters embedded in the pattern appear to prevent an illegal copy.
1 Select the "Copy Protect" check box.
The Copy Protect dialog box appears.
2 Specify the copy protection type and the position.
Multiple print items can be specified.
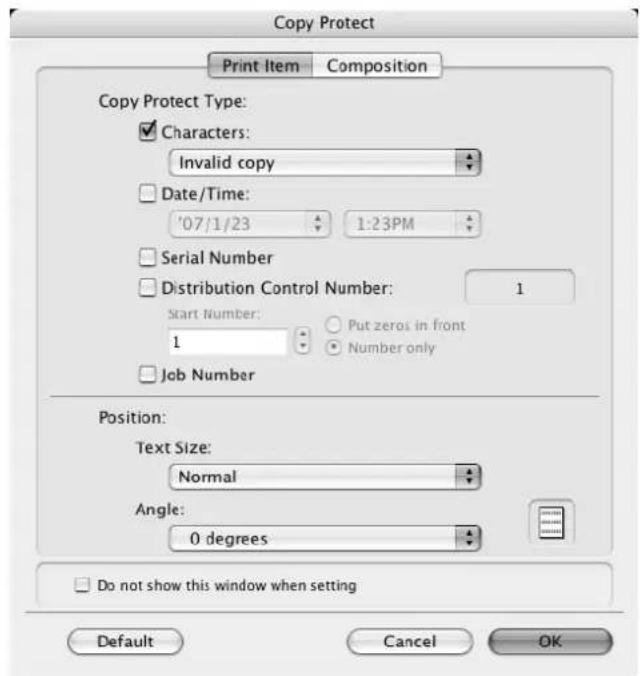
- Characters: Embeds the selected character string in a pattern. A preregistered character string (common stamp) or a character string registered on this machine (registered stamp) can be specified.
- Date/Time: Embeds the selected date and time in a pattern.
- Serial Number: Embeds the serial number of this machine in a pattern.
- Distribution Control Number: Embeds the number of copies in a pattern when printing multiple copies. The start number or the number of digits that are displayed can be specified.
- Job Number: Embeds the print job number in a pattern for documents that are automatically paginated.
- Text Size: Specifies the text size of a pattern.
- Angle: Specifies the pattern angle.
3 Select the composition method for copy protection.
Select "Copy Protect" to specify the desired results when copying, or simply select "Repeatable Stamp". In addition, you can select the embedding conditions.

– Pattern: Specifies the embedding method of a pattern.
– Pattern Overwrite: Specifies the order for printing a pattern on the original document.
- Background Pattern: Specifies the pattern background.
- Adjust Color: Specifies the color of the pattern.
4 Click the [OK] button.
![OLIVETTI d-Color MF550 - Click the [OK] button. - 1](/content/2026/05/977387/images/56f28b19402cfa6d382f0cd8eb0c00e86fa0e16e07b15977eae2a84df2334b47.jpg)
...
Note
If the "Do not show this window when setting" check box is selected, the dialog box does not appear when this function is specified. The dialog box can be displayed by clicking the [Settings] button.
Printing the date and time
You can print the date and time on a document.
1 Select the "Date/Time" check box.
The Date/Time dialog box appears.
2 Specify the format and print position for the date and time.

- Format: Displays the format for the date and time to be printed.
- Pages to Print: Specifies the pages to print the date and time.
- Text Color: Specifies the text color to print.
- Print Position: Specifies the print position.
3 Click the [OK] button.

Note
If the "Do not show this window when setting" check box is selected, the dialog box does not appear when this function is specified. The dialog box can be displayed by clicking the [Settings] button.
Printing the page numbers
You can print the date and page numbers on a document.
1 Select the "Page Number" check box.
The Page Number dialog box appears.
2 Specify the format and print position for the printing the page number.
![Page Number Starting Page: 1 [1 ... 99999] Starting Page Number: 1 [1 ... 99999] ✓ Cover Mode: Print on Front and Back Cover Text Color: Black Red Print Position: Bottom Do not show this window when setting Default Cancel OK](/content/2026/05/977387/images/c96ed44e2fc6ca5fa657aee816a16089dcd9ba9472c66160c13d0c31f76934a7.jpg)
- Starting Page: Specifies the page to start printing the page number.
- Starting Page Number: Specifies the start number for printing the page number.
- Cover Mode: If cover pages are attached, specifies whether to print the page number on the front cover page or the back cover page.
- Text Color: Specifies the text color to print.
- Print Position: Specifies the print position.
3 Click the [OK] button.

...
Note
If the "Do not show this window when setting" check box is selected, the dialog box does not appear when this function is specified. The dialog box can be displayed by clicking the [Settings] button.
3.22 Quality (PPD driver for Mac OS X)

Select Color: Specifies whether to print in color or grayscale.
Glossy Mode: Prints with a gloss.
Color Settings: Prints with a quality suitable for the selected original document.
Document: Prints with a quality suitable for documents with many characters.
Photo: Prints with a quality suitable for photos.
DTP: Prints with a quality suitable for documents produced using DTP.
Web: Prints with a quality suitable for Web page printing.
CAD: Prints with a quality suitable for CAD data printing.
Quality Adjustment: Adjusts the image quality. The text, photos, and charts of each object in a document can be adjusted.
3.23 Sending a fax
Fax operations

...
Reminder
To use the fax function, you must install the optional fax kit onto this machine. In addition, you must enable the fax kit on the Configure tab after installation.
1 Create the data you want to send using any application.
2 From the [File] menu, select "Print".
3 From "Printer Name", select "GENERIC 45C-1 FAX" ("GENERIC 45C-2 FAX" on d-Color MF450).
4 Click the [Preferences] button or the [Properties] button to change the fax driver settings as necessary.
- By clicking the [Preferences] button or the [Properties] button in the Print dialog box, you can specify the settings of each model in the fax Printing Preferences dialog box that appears. For details, refer to "Setting up the fax driver for Windows" on page 3-82.
5 Click the [Print] button.
The Fax Transmission Popup dialog box appears.
6 Enter the recipient's name and fax number in the "Name" and "FAX Number" text boxes.

7 Click the [Add Recipients] button.
- To add multiple recipients, repeat steps 6 and 7. Up to 100 recipients can be added.
- To delete a recipient from the list, click the [Delete From List] button.
8 If necessary, click the [Fax Mode Setting Details] button to specify the fax mode setting details, or select the "FAX Cover Sheet" check box to create a fax cover sheet.
- For details, refer to "Specifying the transmission settings" on page 3-78, or "Creating a fax cover sheet" on page 3-79.
9 Click the [OK] button.
The fax data is sent via this machine.
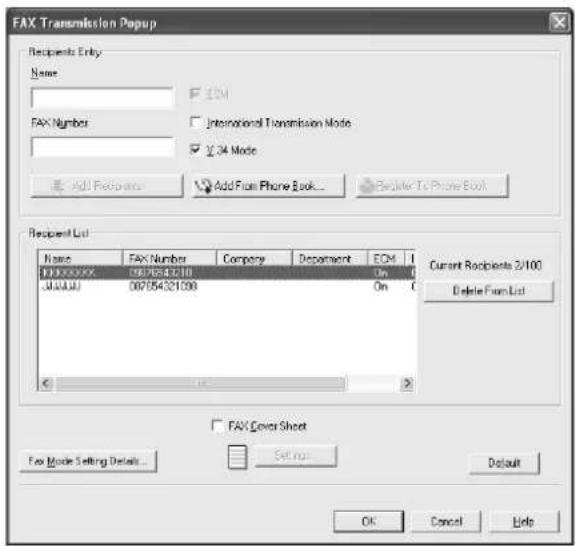
![OLIVETTI d-Color MF550 - Click the [OK] button. - 2](/content/2026/05/977387/images/df03a77f06249180960dbf6eb73af3f8683385bb265232b65bcf7a0148bb4fbe.jpg)
Note
Up to 80 characters can be entered in the "Name" text box.
Up to 38 characters (numbers 0 through 9, hyphens (-), #, *, P, and T) can be entered in the "FAX Number" text box. To send a fax overseas, be sure to enter the country code first.
Change the transmission mode as necessary.
ECM: Specifies the ECM (Error Correction Mode). If the "V.34 Mode" check box is selected, the "ECM" check box cannot be cleared.
International Transmission Mode: Slows the speed when sending faxes overseas. Select this check box if errors occur when sending faxes overseas.
V.34 Mode: Specifies the Super G3 fax mode. For normal fax operations, leave this check box selected. Clear it only if it is not possible to transmit in the recipient's mode.
The fax numbers that are registered in the phone book can be specified by clicking the [Add From Phone Book] button. For details, refer to "Selecting a recipient from the phone book" on page 3-77.
The names and fax numbers that were entered can be added to the phone book's "Simple Entry" folder by clicking the [Register To Phone Book] button.
Selecting a recipient from the phone book

...
Note
To use the phone book, the names and fax numbers of the recipients must be added to the phone book first. For details, refer to "Adding a recipient to the phone book" on page 3-85.
1 When sending a fax, click the [Add From Phone Book] button in the Fax Transmission Popup dialog box.
- To open the Fax Transmission Popup dialog box, follow steps 1 to 5 under "Fax operations". For details, refer to "Fax operations" on page 3-75.
2 Select "Personal List" or "Group" from the list on the left side of the dialog box to display the desired recipient in "Personal Information".
- Click the [Find] button to specify the conditions to search for a recipient.
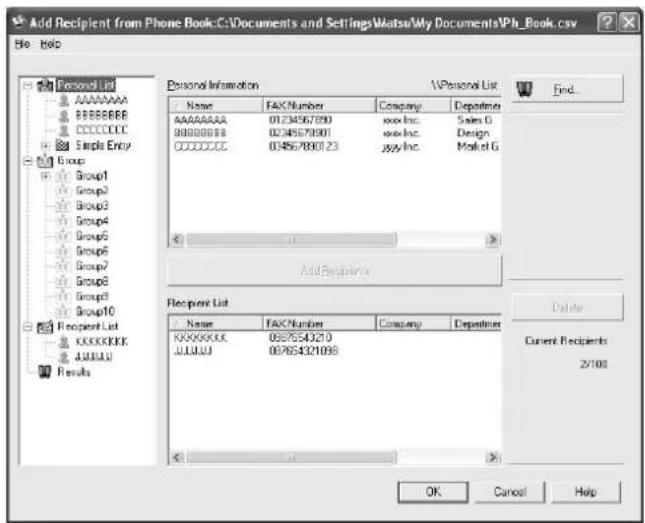
3 Select the name of the recipient you want to send a fax to, and then click the [Add Recipients] button.
- Multiple recipients can be added in the same way. Up to 100 recipients can be added.
- To delete a recipient, click the [Delete] button.
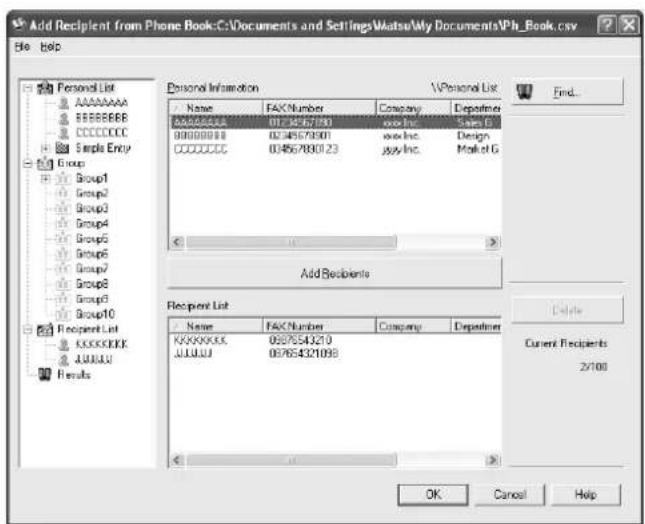
- If recipients have been added to a group, all the members of the group can be added to "Recipient List" (group transmission) by selecting a group name, then clicking the [Add Recipients] button.
4 Click the [OK] button.
The names that were specified are added to "Recipient List" and the Fax Transmission Popup dialog box appears again.
Specifying the transmission settings
When sending a fax, you can specify the transmission settings in the Fax Mode Details dialog box that appears when the [Fax Mode Setting Details] button is clicked in the Fax Transmission Popup dialog box.

Print Recipient File: Prints the document after a fax was sent.
Timer Send: Sets the transmission time. By clicking the [Reflect Current Time] button, the current time set on the computer is displayed in the "Send Time" boxes.
SUB Address: Specifies the sub address for sending confidential faxes using F-codes.
Sender ID: Specifies the sender ID for sending confidential faxes using F-codes.

Note
When using Timer Send, check that the time set on the computer is synchronized with the time on this machine. If the transmission time is earlier than the current time of this machine, the fax is sent the next day.
If sending confidential faxes using F-codes to another fax model, enter the sub address and sender ID in the "SUB Address" and the "Sender ID" text boxes. Up to 20 characters (numbers 0 through 9) can be entered in the "Sub Address" text box. Up to 20 characters (numbers 0 through 9, #, and *) can be entered in the "Sender ID" text box.
Creating a fax cover sheet
When sending a fax, you can attach a cover sheet to the fax message by selecting the "FAX Cover Sheet" check box in the Fax Transmission Popup dialog box. You can edit the cover sheets from the Fax Cover Sheet Settings dialog box that appears by clicking the [Settings] button in the Fax Transmission Popup dialog box.
In the Fax Cover Sheet Settings dialog box, you can change the settings on the Basic, Recipient, Sender, or Image tab by switching between each screen.
1 Select the "FAX Cover Sheet" check box in the Fax Transmission Popup dialog box.
2 Click the [Settings] button.
The Fax Cover Sheet Settings dialog box appears.
3 Select the size of the cover sheet from the "Cover Size" drop-down list.
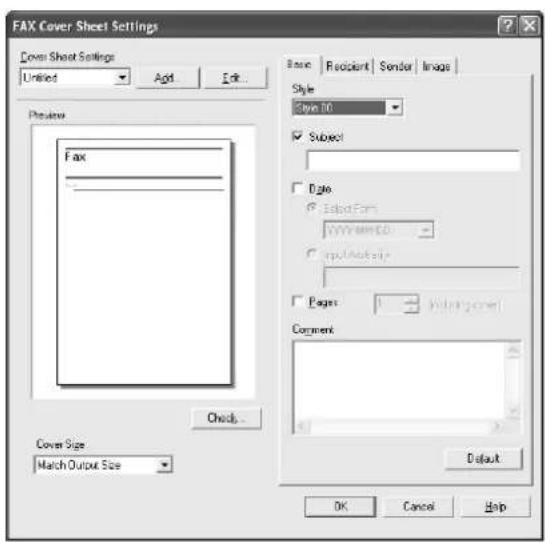
4 On the Basic tab, specify the format of the cover sheet and subject of the fax.
- Style: Selects the format design of the cover sheet.
- Subject: Enters the subject of the fax to be sent. Up to 64 characters can be entered in the "Subject" text box.
- Date: Specifies the date. Select a format or enter any format. If entering a format, up to 20 characters can be entered in the "Input Arbitrarily" text box.
- Pages: Specifies the number of pages to be sent.
- Comment: Enters the text to be displayed in the comment box. Up to 640 characters can be entered in the "Comment" text box, and returns are converted into two characters.
5 Specify the recipient information on the Recipient tab.

- Standard: Specifies standard text.
- Details: Specifies the details described under "Recipient Setting Details".
- Load with Joint Name: Lists the recipient with joint names. The items listed are the items shown under "Recipient List" on the Fax Transmission Popup dialog box.
- Change Each Recipient: Changes the description for each recipient. The items listed are the items shown under "Recipient List" on the Fax Transmission Popup dialog box.
- Load Set Information: Lists the information that was entered in the "Company", "Department", "Name", and "FAX Number" text boxes.
- Read: Reads the information of the first recipient to the information box.
- Up to 40 separate cover sheets can be created if "Change Each Recipient" is selected.
- Even if "Change Each Recipient" is selected, the first recipient is displayed as a sample in "Preview".
- If "Load with Joint Name" and "Change Each Recipient" are selected, the names that were added are entered, but titles cannot be added.
- If a recipient is not specified on the Fax Transmission Popup dialog box, "Load Set Information" cannot be selected. In addition, it cannot be selected on the fax tab in the Fax Printing Preferences dialog box as well.
6 Specify the sender information on the Sender tab.
Select the check box of the information to be listed, and then enter the information.

7 To place graphics such as a company logo or map on a cover sheet, specify the image file on the Image tab.
Select the "Zoom" check box to specify the size, and set the position with the values in the "X" and "Y" boxes.
![FAX Cover Sheet Settings Cover Sheet Settings Unified Add Edit Preview Fax Check Cover Size Match Output Size Basic | Recipient | Sender Image | Panel Image File Name Browse... Zoom 100 % Position X: 1 ... [1..100] Y: 1 ... [1..100] Default OK Cancel Help](/content/2026/05/977387/images/b421079ad4c4d8086814842fba64f473e4e5de7cdceac93a86aabbe649712623.jpg)
8 Check the specified settings.
Click the [Check] button to check an enlarged preview image.
- Click the [Add] button to save the cover sheet settings. The settings can then be recalled from the "Cover Sheet Settings" drop-down list the next time a cover sheet is used.
9 Click the [OK] button.
3.24 Setting up the fax driver for Windows
Common settings
The following describes the common settings and buttons that are displayed on all tabs.

| Button Function | |
| OK Click this button to close the | dialog box and apply any settings that have been changed. |
| Cancel Click this button to cancel | any settings that have been changed and close the dia-log box. |
| Help Click this button to display the help for each item on the currently displayed dialog box. | |
| Add (Favorite Setting) Click this button to save the current settings and to view them at a later time. | |
| Edit (Favorite Setting) Click this button to change the saved settings. | |
| Default Click this button to return | the settings to their defaults, which were selected when the driver was installed. |
| View A preview of the page layout | as specified in the current settings is displayed and a preview image of the print job can be checked. |
 | |

Reminder
To enable any installed options, you must specify the Device Option settings.
Fax tab
| Item Function | |
| Resolution Specifies the fax resolution. | |
| Print Recipient File Prints the document after the fax was sent. | |
| Timer Send Sets the transmission time. By clicking the [Reflect Current Time] button, the current time set on the computer is displayed in the "Send Time" boxes. | |
| SUB Address Specifies the sub address for sending confidential faxes using F-codes. | |
| Sender ID Specifies the sender ID for sending confidential faxes using F-codes. | |
| Cover Sheet Specifies the fax cover sheet. | |
| Phone Book Entry Edits the phone book. | |
Basic tab
| Item Function | |
| Original Orientation Specifies the orientation of the original document. | |
| Original Size Specifies the size of the original document. | |
| Paper Size Specifies the output paper size of the recipient. Automatically enlarges or reduces when the Original Size setting is changed. | |
| Zoom Specifies the enlargement and reduction ratio. | |
| [Authentication/Account Track] | Specifies the user name and password when performing user authentication, and the department name and password when performing account track on this machine. |
Layout tab
| Item Function | |
| Combination | Prints multiple pages on one page, or prints one sheet of an original document divided on multiple pages. Details can be specified by clicking the [Combination Details] button. |
| Skip Blank Pages | Does not print blank pages in the data. |
Stamp/Composition tab
| Item Function | |
| Watermark | Prints a watermark (text stamp) on the page being printed. Watermarks can be added, changed, or deleted by clicking the [Edit] button. |
Configure tab
| Item Function | |
| Device Option | Specifies the status of the options that are installed on this machine and the status of the user authentication and account track functions. Specify the status of each item from the "Setting" drop-down list. |
| Acquire Device Information | Communicates with this machine to read the status of the installed options. |
| Acquire Settings | Specifies the status of the connection that executes getting the option information. |

...
Note
To display the Configure tab in Windows 2000/XP/NT 4.0/Server 2003, right-click the "GENERIC 45C-1 FAX" ("GENERIC 45C-2 FAX" on d-Color MF450) icon, and then click "Properties".
You cannot use the [Acquire Device Information] function if you are not connected to or able to communicate with this machine.
Settings tab
| Item Function | |
| Display Constraint Message Displays a message when functions that cannot be specified at the same time were enabled from the printer driver. | |
| Display paper set in Print Server Properties | Uses the paper that was added in [Server Properties] of the printer folder. |
| Verify Authentication settings before printing | Verifies the authentication settings for this machine before printing and displays a message if the settings are not compatible. |
| Popup Authentication Dialog when printing | Displays the User Authentication/Account Track dialog box when a print job is specified to enter the user name and department name. |

Note
To display the Settings tab in Windows 2000/XP/NT 4.0/Server 2003, right-click the "GENERIC 45C-1 FAX" ("GENERIC 45C-2 FAX" on d-Color MF450) icon, and then click "Properties".
3.25 Using a phone book
Adding a recipient to the phone book
When sending a fax, you can recall the fax numbers that are used frequently by adding them to a phone book. A phone book can be added from the fax tab in the fax Printing Preferences dialog box.
From the fax tab in the fax Printing Preferences dialog box, click the [Phone Book Entry] button. The Phone Book Entry dialog box appears.

2 From the left side of the dialog box, select "Personal List", and then click the [Add New] button. The Personal Information\Personal List dialog box appears.
3 Enter the appropriate information in the "Name", "Fax Number", "Company", and "Department" text boxes.
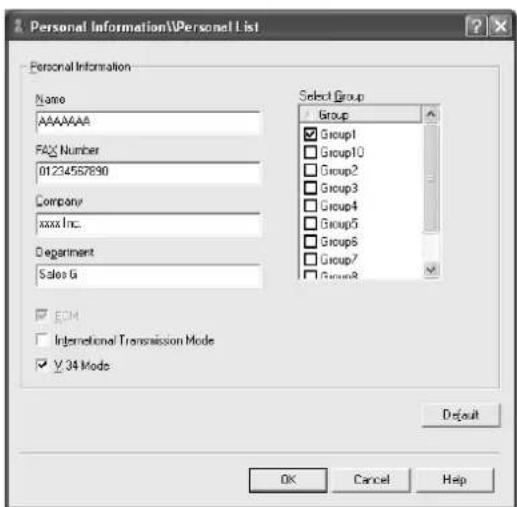
- If entering a name for a fax cover sheet, titles cannot be added. To add a title to a fax cover sheet, add the title in the "Name" text box.
- Up to 80 characters can be entered in the "Name", "Company", and "Department" text boxes.
- Up to 38 characters (numbers 0 through 9, hyphens (-), spaces, #, *, E, P, and T) can be entered in the "Fax Number" text box. To send a fax overseas, be sure to enter the country code first.
- Change the transmission mode as necessary.
ECM: Specifies the ECM (Error Correction Mode). If the "V.34 Mode" check box is selected, the "ECM" check box cannot be cleared.
International Transmission Mode: Slows the speed when sending faxes overseas. Select this check box if errors occur when sending faxes overseas.
V.34 Mode: Specifies the Super G3 fax mode. For normal fax operations, leave this check box selected. Clear it only if it is not possible to transmit in the recipient's mode.
4 To add a recipient to a group, select the check box of the group to be added.
- If adding a recipient to a group, you can specify the recipient in a group (group transmission). To send faxes to specific members, it comes in handy to add them to a group.
- Multiple groups can be selected and added.
- The group name can be changed.
5 Click the [OK] button.
The information of the recipient is registered and it is added to "Personal Information".
If a group was specified, the group that was added also appears in "Group".
6 Click the [OK] button.
If a name was added, the editing of the phone book is complete.
The first time you register a phone book, a dialog box to confirm whether you want to save the phone book appears.
7 Click the [Yes] button.
The Save As dialog box appears.
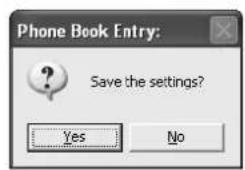
8 Specify the storage location, enter the file name, and then click the [Save] button.
The phone book is saved as a file.


...
Note
The Save As dialog box appears when a phone book is registered for the first time. The Save As dialog box does not appear from the second time the phone book is changed and thereafter since the phone book file is automatically overwritten.
The saved phone book file automatically appears the next time you open the phone book. To open a different phone book, select "Open" from the "File" menu in the Phone Book Entry dialog box. If multiple phone books have been saved, you can use the phone books by switching between them.
A new phone book can be created by clicking "New" from the "File" menu in the Phone Book Entry dialog box. You can save a file under a different name by clicking "Save As" from the "File" menu.
The file extension for the phone book files is ".csv".
Editing a phone book
You can easily change the personal information that was registered, change the group names, edit, or organize the phone books.
To change the personal information:
Select the name you want to change from "Personal List" on the left side of the dialog box, and then click the [Edit] button on the right. The same Personal Information\Personal List dialog box that appeared when you registered the phone book appears, allowing you to change the information.
You can select the name that you want to change from "Personal List" on the left side of the dialog box, and you can delete a recipient by clicking the [Delete] button on the right. If a recipient is deleted, it is also deleted from the registered group.
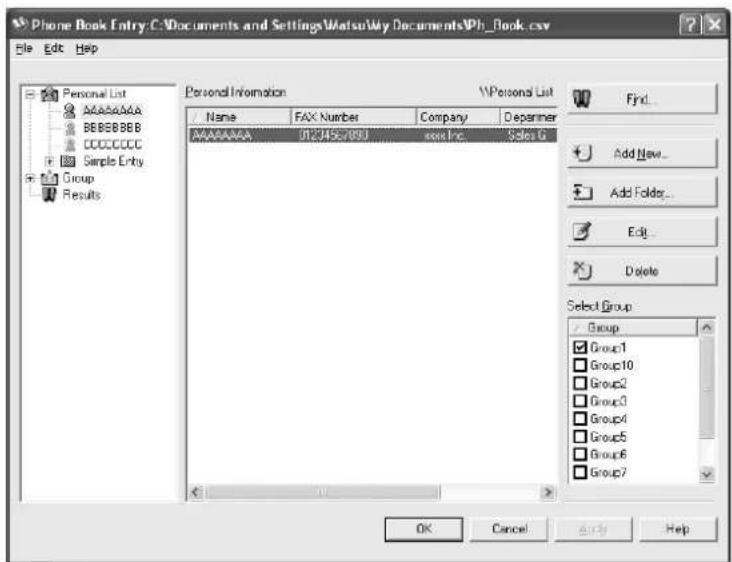

...
Note
When sending a fax, the names and fax numbers that were entered manually and registered by clicking the [Register To Phone Book] button, appear in the "Simple Entry" folder of the phone book.
To change a registered recipient to a group
→ From "Personal List" on the left side of the dialog box, select the name you want to change, and then select or clear the check box of the group under the "Select Group" drop-down list.


Note
A recipient can even be added to a group by dragging the recipient's name from "Personal List" on the left side of the dialog box to the desired group. However, the name cannot be dragged out of the group.
Up to 100 recipients can be added to a group.
To change a group name
→ Select the group that you want to change from "Group" on the left side of the dialog box, and then specify "Change Group Name" from the "Edit" menu.
To create a folder
→ Select "Personal List" on the left side of the dialog box, and then specify "Add Folder" from the "Edit" menu.
You can move names from "Personal List" by dragging them to a folder.

Note
Names can also be moved to the desired folder by right-clicking a name and selecting "Copy" or "Cut", then selecting "Paste" on the target folder.
Up to 40 characters can be entered for the folder name.
A folder can be up to three layers deep.
To edit a folder, select the desired folder, and then click the [Edit] button.
To delete a folder, select the desired folder, and then click the [Delete] button.
To search the personal information
→ Click the [Find] button on the left side of the dialog box to display the Find dialog box where the search conditions can be specified.
4
Box Operations
4 B o x O p e r a t i
4.1 Saving copies in user boxes
Settings that can be saved and changed
Within the various functions that can be specified before making copies, there are functions whose settings can be saved and there are functions that cannot be saved but can be set when printing. The functions whose settings can be saved and those that can be changed are listed below.
| Function type | Function | Can be saved | Can be set when printing |
| Number of copies | ○ | ||
| Paper tray selection ○ | |||
| Output tray selection ○ | |||
| Basic screen settings Color | ○ | ||
| Paper ○ | |||
| Zoom ○ | |||
| Original > Copy | ○ | ○ | |
| d-Color MF550: Fold/Bind d-Color MF450: Center Staple/Fold | ○ | ○ | |
| Collate/Group | ○ | ○ | |
| Punch | ○ | ○ | |
| Staple | ○ | ○ | |
| Duplex/Combine | Combine | ○ | |
| Quality/Density | Original Type | ○ | |
| Density | ○ | ||
| Background Adjustment | ○ | ||
| Application | Sheet/Cover/Chapter Insert | ○ | ○ |
| Edit Color | ○ | ||
| Page Margin | ○ | ○ | |
| Stamp/Composition | ○ | ○ |
○ available
not available

Detail
d-Color MF550: The Fold/Bind settings are available only if optional finisher FS-608 is installed. The Punch settings are available only if optional finisher FS-517 and the punch kit are installed.
d-Color MF450: The Center Staple/Fold settings are available only if optional finisher FS-519 is installed. The Punch settings are available only if optional finisher and the punch kit are installed.
Saving copy documents
Copy documents can be saved in user boxes. Specify the following information when saving copy documents.
| Parameter | Description |
| User Box | Specify the user box where the data is to be saved. |
| Document Name | Type in 30 characters or less for the name of the document to be saved. |
| Save & Print | To make copies of the document while saving it, touch [Yes]. |

Detail
The document can be saved in the following types of user boxes.
Public user boxes
Personal user boxes (when user authentication settings are specified)
Group user boxes (when account track settings are specified)
Annotation User Box
1 Press the [Copy] key in the control panel.
2 Touch [Application].
3 Touch [Save in User Box].
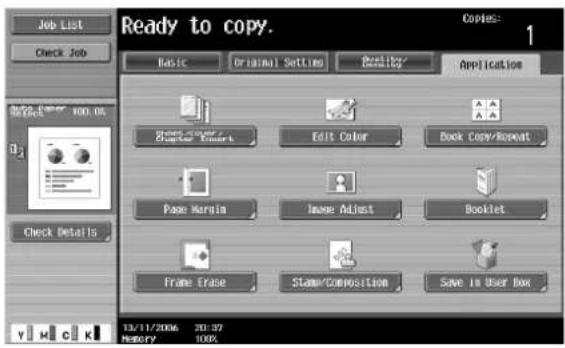
The Save in User Box screen appears.
4 Select the user box where the data is to be saved. Touch [User Box].

5 Touch the tab for the desired user box, and then touch the button for the user box to select it.
- To type in a user box number to specify the user box, touch [Enter User Box No.].
- To save the document in the Annotation User Box, touch [System User Box], and then touch [Annotation User Box] to select the user box.
The button for the selected user box appears selected.
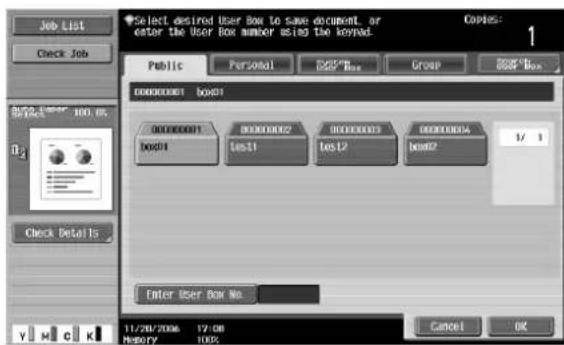
? Is a password required when saving data?
→ It is not necessary to enter the password when saving data, even if a password has been specified for the user box.
6 Touch [OK].
7 Specify the name of the document to be saved. To change the automatically specified name, touch [Document Name].

8 After typing in the name, touch [OK].
- To change the name, touch [Delete] until the characters are deleted, and then type in the new name. - To erase all of the text, press the [C] (clear) key.

9 Select whether or not a copy will also be printed when the data is saved. To print a copy, touch [Yes].
10 Touch [OK].
11 Specify the necessary copy settings.
- If a User Box function was set, [Save in User Box] appears selected.
12 Load the document into the ADF or place it on the original glass.
13 Press the [Start] key in the control panel.
- If "Yes" was selected beside "Save & Print", the scanned document is copied and the document data is saved in the specified user box.
- If "No" was selected beside "Save & Print", the scanned document data is saved in the specified user box.

Detail
For details on printing the document saved in a user box, refer to "Overview of document printing" on page 4-34.
4.2 Saving scans in user boxes
Scanned images can be saved in user boxes. User box destinations can be registered in the address book, or a user box destination can be specified directly.
The following procedures describe how to select a user box destination, how to specify a user box destination directly, and how to save from User Box mode.

Detail
The document can be saved in the following types of user boxes.
Public user boxes
Personal user boxes (when user authentication settings are specified)
Group user boxes (when account track settings are specified)
Annotation User Box (only when entered directly)
Using a user box destination
A destination where a user box has been registered is called a "user box destination".
User box destinations are saved on the Address Book tab and are indicated by "User Box" as the destination type. The following procedure describes how to select a previously registered user box destination for saving data.

Note
If a user box destination is used, the document is automatically saved with the default name.
1 Press the [Fax/Scan] key in the control panel.
The Fax/Scan mode screen appears.
2 Touch [Address Book].
The registered destinations are displayed.

3 Touch the button for the user box destination to select it.
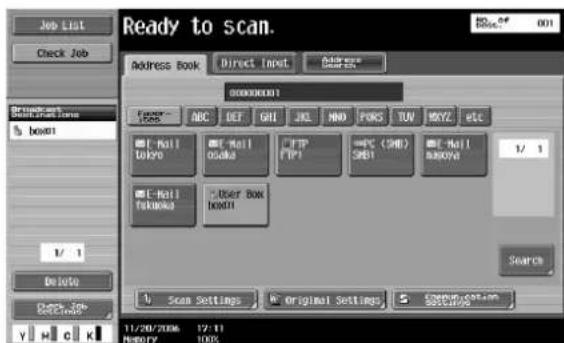
4 Specify the necessary scan settings.
5 Load the document into the ADF or place it on the original glass.
6 Press the [Start] key in the control panel.
The document is scanned and the data is saved.
Entering destinations directly
Using the control panel to directly type in the user box destination is called "direct input".

Note
If "Manual Destination Input" (displayed by touching [Security Settings] on the Administrator Settings screen, then [Security Details]) is set to "Restrict", [Direct Input] does not appear.
1 Press the [Fax/Scan] key in the control panel.
The Fax/Scan mode screen appears.
2 Touch [Direct Input].

3 Touch [User Box].
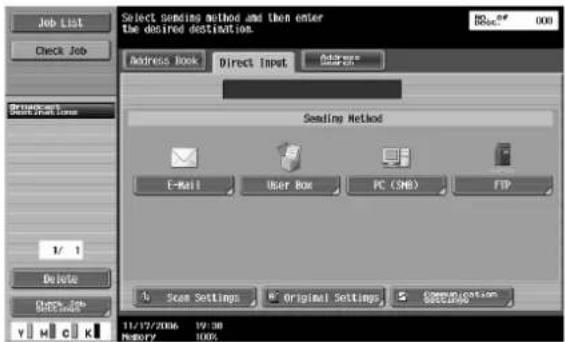
The User Box screen appears.
4 Select the user box where the data is to be saved. Touch [User Box].
- To save the document in the Annotation User Box, touch [Scan Settings], then [Application], and then touch [Annotation] to select the user box.

5 Touch the tab for the desired user box, and then select the user box.
- To type in a user box number to specify the user box, touch [Enter User Box No.]. The button for the selected user box appears selected.

6 Check the name of the document to be saved. Touch [Document Name].
- The default name appears beside "Document Name". To change the name, touch [Delete] until the characters are deleted, and then type in the new name. - To erase all of the text, press the [C] (clear) key.
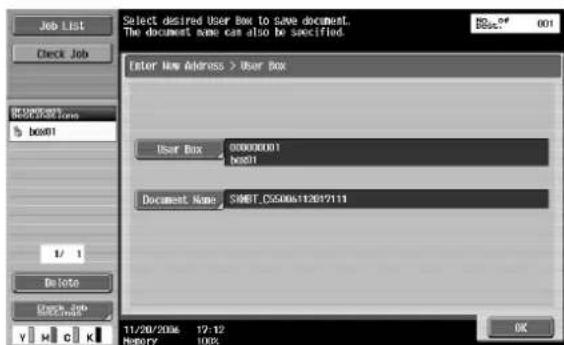
7 Type in the document name, and then touch [OK].

8 Touch [OK].
The Direct Input tab appears again. The number of the specified user box appears under "Broadcast Destinations".
9 Specify the necessary scan settings.
10 Load the document into the ADF or place it on the original glass.
11 Press the [Start] key in the control panel.

Note
Only one user box destination can be specified with a single transmission, but multiple e-mail and fax destinations can be specified.
Saving in user box mode
Press the [User Box] key in the control panel, and then directly type in the user box destination. Documents to be saved can be used in the same way as saved scan data.
1 Press the [User Box] key in the control panel.
The User Box Operations screen appears.
2 Touch [Save Document].

3 Touch the tab for the desired user box, and then select the user box.
- To save the document in the Annotation User Box, touch [System User Box], and then touch [Annotation User Box] to select the user box.
- To type in a user box number to specify the user box, touch [Enter User Box No.].
The button for the selected user box appears selected.

4 Touch [OK].
The Save Document screen appears.
5 Check the name of the document to be saved. Touch [Document Name].
- The default name appears beside "Document Name". To change the name, touch [Delete] until the characters are deleted, and then type in the new name.
- To erase all of the text, press the [C] (clear) key.
![To save. press [Start]. You can also change the Document Name. Save Document User Box 00000001 boot1 Document Name SMBT.C5006112817130 To save. press [Start]. You can also change the Document Name. + Scan Settings * Original Settings 11/20/2006 12:13 History 99% Cancel Start](/content/2026/05/977387/images/9da241e4656f12dac8a999844f01b0006a32a12cd243d6ea1a9a55b437075122.jpg)
6 Type in the document name, and then touch [OK].

7 Touch [OK].
8 Specify the necessary scan settings.
9 Load the document into the ADF or place it on the original glass.
10 Touch [Start], or press the [Start] key in the control panel.

Note
Only one user box destination can be specified with a single transmission.
4.3 Saving printouts in user boxes
If the printer driver for this machine is installed on a computer on the network, the document can be saved in a user box with the same operation for printing it.

Detail
The document can be saved in the following types of user boxes. The user box number must be entered in order to save the document.
Public user boxes
Personal user boxes (when user authentication settings are specified)
Group user boxes (when account track settings are specified)
Annotation User Box
Saving data in a user box
1 In the application, click "Print" on the "File" menu.
2 Click the [Properties] button beside the printer name.

3 From the "Output Method" list, select "Save in User Box" or "Save in User Box/Print".
![PCI Properties Basic Layout Finish Cover Mode Stamp/Composition Quality Other 8 1/2x11 [8.5x11 in] 8 1/2x11 [8.5x11 in] Favorie Setting Default Setting Original Orientation Portrait Landscape Original Size 81/2x11 Paper Size Some as Original Size Zoom [25...400%] Auto Manual 100 % Paper Tray Auto Paper Type Plain Paper Output Method Print Print Secure Print Save in User Box Save in User Box/Print Proof Print Offset Paper Settings for Each Tray... Default OK Cancel Help Printer View Printer Information](/content/2026/05/977387/images/ca8615e4fd687b95934c2e34c57e340e8b063afb34efa02a3f6494c16307fcb4.jpg)
4 In the User Settings dialog box, type the file name and box number, and then click the [OK] button.
![User Settings Secure Print Secure Print ID Password Abhanumeric Max 16 Abhanumeric Max 8 Operate the followings on the printer's control panel in order to use the documents which is printed by "secure print". [User Box] -> [System User Box] -> [Secure Print] Save in User Box File Name Max 30 User Box Number Max 9 Type in [File Name] and [Box Number] that are used with [Save User Box] OK Cancel Default Help](/content/2026/05/977387/images/b90d16f95fc1b4f61e0cc58a14761a82b67bf28e19849b84451f6b4a39d35fa6.jpg)
5 Click the [OK] button.
![PCL Properties Basic Layout Finish Cover Mode Stamp/Composition Quality Other 8 1/2x11 [8.5x11 in] 8 1/2x11 [8.5x11 in] k1 Printer View Printer Information Favorite Setting Original Orientation Portrait Landscape Original Size B1/2x11 Paper Size Some as Original Size Zoom [25...400%] Auto Manual 100 % Paper Tray Auto Paper Type Plain Paper Output Method Save in User Box User Settings... Authentication/Account Track... Copies 1 [1..5999] Collate Offset Paper Settings for Each Tray... Default OK Cancel Help](/content/2026/05/977387/images/0b82f10257b8ab9849059d976fe53356215ec9d90175deec42fb8612ae98bd19.jpg)
6 Click the [OK] button to start printing.
![OLIVETTI d-Color MF550 - Click the [OK] button to start printing. - 1](/content/2026/05/977387/images/1ba09a3d00f267b4671fcf9997d20d4bfd805af02b30a445e535eacb406c9112.jpg)
Detail
If user authentication and account track settings have been specified, click the [Authentication/Account Track] button, and then type in the user name for logging on and account information.
Saving data in the secure print user box
1 In the application, click "Print" on the "File" menu.
2 Click the [Properties] button beside the printer name.

3 From the "Output Method" list, select "Secure Print".
![PCI Properties Basic Layout Finish Cover Mode Stamp/Composition Quality Other 8 1/2x11 [8.5x11 in] 8 1/2x11 [8.5x11 in] Favorie Setting Untitled Add Edit... Original Orientation Portrait Landscape Original Size 8 1/2x11 Paper Size Some as Original Size Zoom [25...400%] Auto Manual 100 % Paper Tray Auto Paper Type Plain Paper Output Method Save in User Box Print Secure Print Save in User Box Save in User Box/Print Proof Print Offset Paper Settings for Each Tray... Default OK Cancel Help Printer View Printer Information](/content/2026/05/977387/images/6d3407ecb4034dd7fcadb3d18afb13e91f2a433f7e9c2338252e0a5eed03dfb6.jpg)
4 In the User Settings dialog box, type the ID and password for the confidential document, and then click the [OK] button.
![User Settings Secure Print Secure Print ID Password Alphanumeric Max 16 Alphanumeric Max 8 Operate the followings on the printer's control panel in order to use the documents which is printed by "secure print". [User Box] -> [System User Box] -> [Secure Print] Save in User Box File Name: document01 Max 30 User Box Number: 1 Max 9 Type in [ID] and [Password] that are used with [Secure Print]. OK Cancel Default Help](/content/2026/05/977387/images/bd576d56b2cc8af85ed71ecbb8b83fb466bd9600f88b9c22bf43f53766e6dd82.jpg)
5 Click the [OK] button.
![PCL Properties Basic Layout Finish Cover Mode Stamp/Composition Quality Other 8 1/2x11 (8.5x11 in) 8 1/2x11 (8.5x11 in) x1 Printer View Printer Information Favorite Setting Unified Add Edit... Original Orientation ● Portfolio ○ Landscape Original Size B1/2x11 ↓ Paper Size Same as Original Size Zoom [25...400%] ● Auto ○ Manual 100 % Paper Tray Auto Paper Type Plain Paper Output Method Secure First User Settings... Authentication/Account Track... Copies 1 [1..9999] □ Collate □ Offset Paper Settings for Each Tray... Default OK Cancel Help](/content/2026/05/977387/images/4e6c3352bb96b7195cfd212a4f1eaa35fe55875d47ae5f7fc695c58d44206c5b.jpg)
6 Click the [OK] button to start printing.
![OLIVETTI d-Color MF550 - Click the [OK] button to start printing. - 1](/content/2026/05/977387/images/be0f304b0021a0d8f9fb96dd769fcfce20208da6bee602826442d2bb82e9d72f.jpg)
Detail
If user authentication and account track settings have been specified, click the [Authentication/Account Track] button, and then type in the user name for logging on and account information.
Saving data in the encrypted PDF user box
A command for saving a file in a user box cannot be specified from the printer's Properties dialog box for a PDF file that requires a password to be en-tered in order for it to be opened. To print from this machine, the file must be saved in the Encrypted PDF User Box.
The file can be saved in the Encrypted PDF User Box in either of the following two ways.
- Saving from Direct Print
- Saving with direct printing from Web Connection

Detail
For details on Direct Print, refer to the corresponding manual.
For details on printing a document saved in the Encrypted PDF User Box, refer to "Encrypted PDF user box" on page 4-59.
4.4 Overview of document organizing
Available operations in the file document screen
The following operations can be performed from the File Document screen.
| Operation Description | Page refer- | ence |
| Delete Data that is no longer needed, for example, documents that have already been printed or transmitted, can be deleted. | p. 4-23 | |
| Edit Name The name of a saved document can be changed. p. 4-24 | ||
| Move Document data that is currently saved in a user box can be moved to a different public user box/personal user box/group user box. | p. 4-26 | |
| Copy Document data currently saved in a user box can be copied to a different public user box/personal user box/group user box. | p. 4-28 | |
| Document Details The date and time when the document was saved and a preview image can be checked. | p. 4-30 | |
From the File Document screen, documents in the following user boxes can be organized. The operations that can be performed with some user boxes may be limited. The limitations on the operations are shown below.
| Operation Public/personal/group user boxes | Annotation User Box Secure | Print User Box | |
| Delete ○ | ○ | ○ | |
| Edit Name ○ | ○ | ○ | |
| Move ○ | |||
| Copy ○ | |||
| Document Details ○ | ○ | ○ | |
○ available
not available

Detail
Documents can be moved or copied between public user boxes, personal user boxes and group user boxes.
When organizing documents in the Secure Print User Box, the ID and password for the confidential document must be entered.
Checking documents saved in user boxes
The following procedure describes how to check the list of documents saved in a user box.
1 Press the [User Box] key in the control panel.
2 Touch [File Document].

3 From the Public, Personal or Group tab, touch the button for the desired user box.
- The Personal tab displays only user boxes registered to the user that is logged on with user authentication.
- The Group tab displays only user boxes for the account that the user belongs to when account track settings are specified.

4 Touch [OK].
5 If a password has been set for the user box, type in the password, and then touch [OK].

The list of documents saved in the user box is displayed.

![OLIVETTI d-Color MF550 - If a password has been set for the user box, type in the password, and then touch [OK]. - 3](/content/2026/05/977387/images/365906cf49cb1a5cc1d667e41fa62d40c82d6750895d3567cbd37bdfd9254f19.jpg)
Note
If "Prohibited Functions When Authentication Error" in Administrator mode is set to "Mode 2" and a user enters an incorrect bpx password the specified number of times, that box is locked and can no longer be used. Contact the administrator to cancel operation restrictions.
Description of file document screen
As a default, thumbnails of the saved documents and the document names are displayed. The following information is displayed.
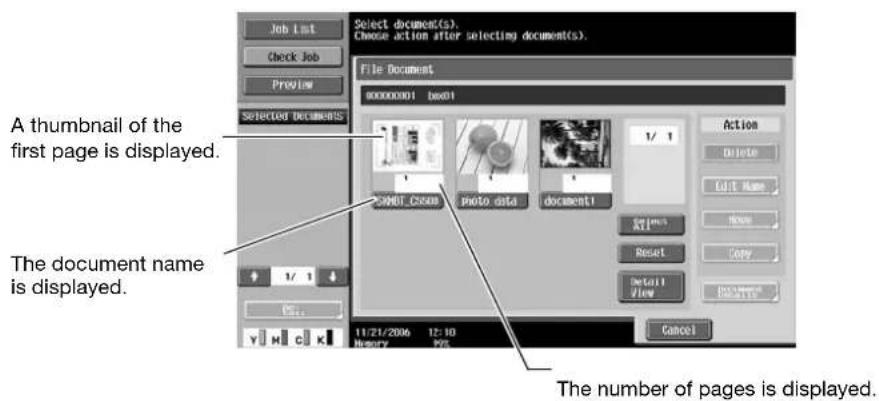
To check various information, such as the date/time when the document was stored and the document name, touch [Detail View].
The name of the user who stored the document and the mode when the document was registered are displayed.

The document name is displayed.
The date/time when the document was stored is displayed.
Touch to switch between displaying the list in ascending or descending order.
Searching for a user box name
The desired user box can be searched for by its name.
1 From the screen containing a list of the user boxes, touch [Search User Box].

2 The user boxes for each index character appear.

3 Touch the button for an index character to display the list of user boxes registered with that index character.
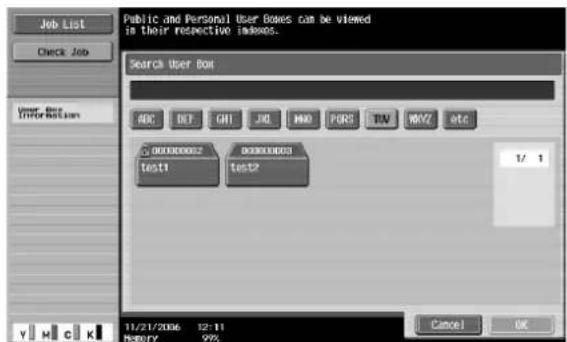

Detail
A user box name can be searched for from the Save Document screen, Use Document screen or File Document screen.
The personal user boxes and group user boxes that can be accessed when a user is logged on are also displayed.
4.5 Deleting a document
From the File Document screen, documents that are no longer needed, for example, documents that have already been printed, can be deleted.
1 From the File Document screen, select the document to be deleted.
– Multiple documents can be selected.
- To select all documents, touch [Select All].
- To cancel the selection of all documents, touch [Reset].

2 Touch [Delete].
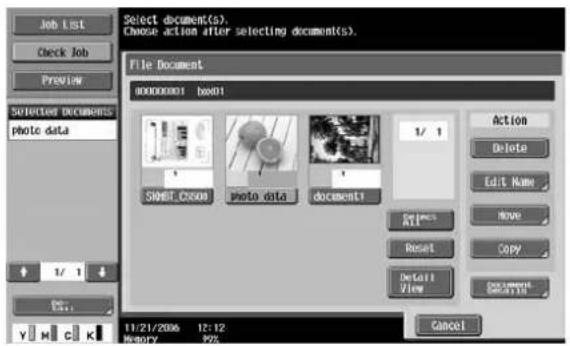
3 Check the document information that appeared, touch [Yes], and then touch [OK] to delete the document.

The documents are deleted.
4.6 Changing the document name
The name of a saved document can be changed.
1 From the File Document screen, select the document to be renamed.
- A name cannot be changed if multiple documents are selected.

2 Touch [Edit Name].

The current name appears.
3 Type in the new name.
![Use the keyboard or keypad to type in the document name. Press [Start] to change the selected document name. File Document > Edit Name photo data 1 2 3 4 5 6 7 8 9 0 - - q w e r t y d i o p e f d s d f g h j k l i i j z x c v b n m . . / S Shift Space 11/21/2006 12:12 History 99% Exchange OK Cancel Start](/content/2026/05/977387/images/a6bd4fb00a86882b490fe584ee1984254b61051931174805825632f62f3bf49f.jpg)
4 Touch [Start].

![OLIVETTI d-Color MF550 - Touch [Start]. - 2](/content/2026/05/977387/images/2d4b07f97533fc61151d093c6759e88fd254a535af1e9cecc16c70e3c7b20b67.jpg)
...
Note
The document name is the name of the file sent by e-mail or to an FTP or SMB server. Specify a document name according to the conditions of the destination server when transmitting.
The document name can also be changed when the document is transmitted.
4.7 Moving a document
Document data that is currently saved in a user box can be moved to a different public user box/personal user box/group user box.

Note
A document cannot be moved if multiple documents are selected.
1 From the File Document screen, select the document to be moved.
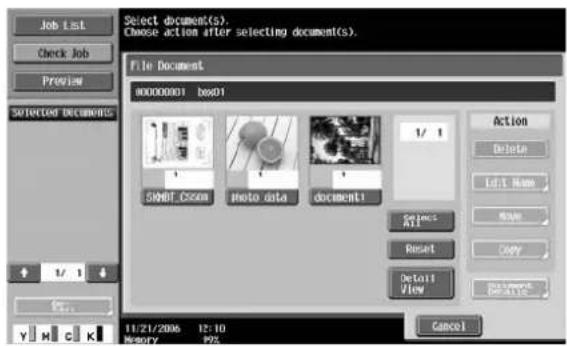
2 Touch [Move].
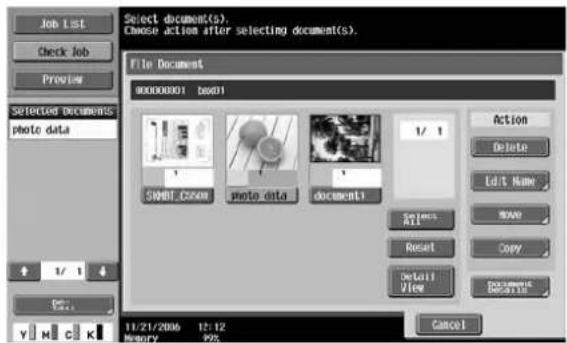
3 Specify the user box where the document is to be moved.

Is a password required for moving data to a different user box?
→ It is not necessary to enter the password when moving data to a different user box, even if a password has been specified for the box.
4 Check the information, and then touch [Start].
The data is moved, and a message appears, indicating that the operation was completed.

5 Touch [OK].
![OLIVETTI d-Color MF550 - Touch [OK]. - 1](/content/2026/05/977387/images/ee300361a01710c5f8fa42ab41b14965225e15a535a26ff5e63531bfb223aa78.jpg)
Note
The date and time that the document was moved is recorded under "Time Stored".
4.8 Duplicating a document
Document data that is currently saved in a user box can be copied to a different public user box/personal user box/group user box.

Note
A document cannot be copied if multiple documents are selected.
1 From the File Document screen, select the document to be copied.
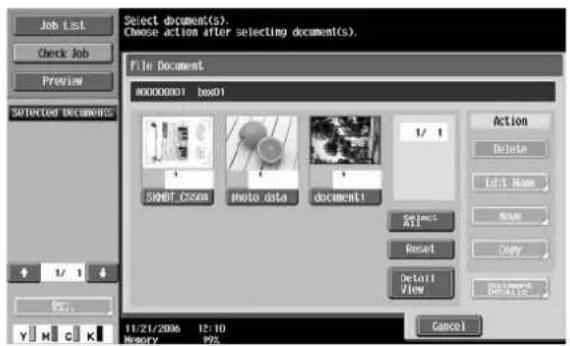
2 Touch [Copy].

3 Specify the user box where the document is to be copied.
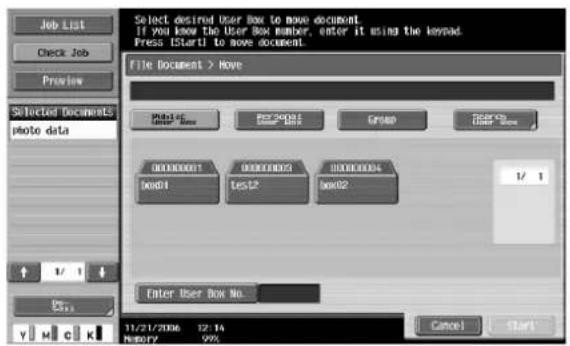
Is a password required for copying data to a different user box?
→ It is not necessary to enter the password when copying data to a different user box, even if a password has been specified for the box.
4 Check the information, and then touch [Start].
The data is copied, and a message appears, indicating that the operation was completed.

5 Touch [OK].
![OLIVETTI d-Color MF550 - Touch [OK]. - 1](/content/2026/05/977387/images/9c0f9b7ca425ffc52397294d99c2853360ddfcd7cc61fa18f36da9485cf0d5c8.jpg)
Note
The date and time that the document was copied is recorded under "Time Stored".
4.9 Checking document details
The details of saved documents can be checked from the touch panel.
The following information can be checked from the Document Details screen.
| Item Description | |
| Registered Time Displays the date and time that the document was stored. | |
| User Name Displays the mode (Scan, Copy or Print) and name of the user who stored the document. | |
| Document Name Displays the name of the document. | |
| No. of Pages Displays the number of pages in the document. | |
| Job No. Displays the job number when the document was stored. | |
| [Preview] button Touch this button to display the Enlarged Thumbnail View screen. For details, refer to "Preview screen operations" on page 4-32. | |

Detail
The preview screen can be displayed by touching a button in the sub display area or by touching a button in the Document Details screen.
Check the details

Note
Multiple documents can be selected.
1 From the File Document screen, select the document to be checked.
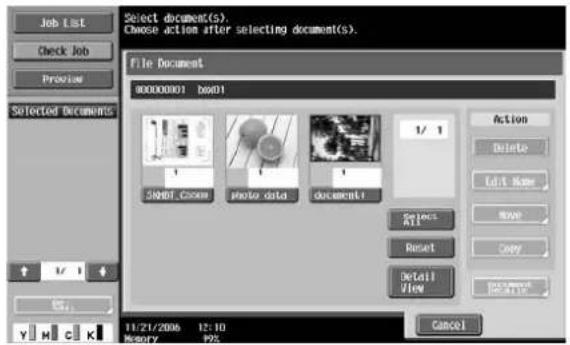
2 Touch [Document Details].

The Document Details screen appears.
3 Check the details of the document.

- To select multiple documents, touch and to display different screens.
- To display the preview, touch [Preview].
- To perform the operation from the sub display area, touch [Preview] in the sub display area, and then touch [Detail].
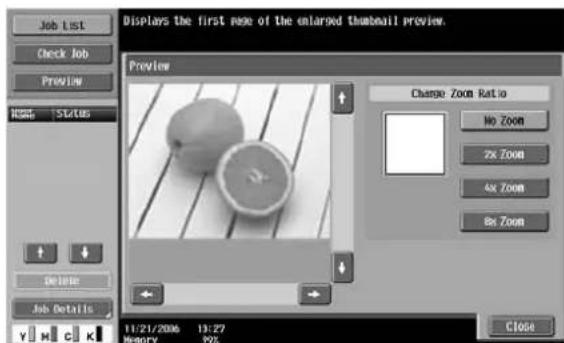
4 After checking the document, touch [Close].
Preview screen operations
Touching [Enlarged Thumbnail View] in the Document Details screen displays the Enlarged Thumbnail View screen. The image can be viewed at full size or at a size of 2, 4 or 8 times the normal size. The procedure for checking the image at a size of 4 times the normal size is described below.
!
Detail
With documents containing multiple pages, only the image of the first page can be checked.
The contents of a document saved with encryption cannot be previewed.
1 The image is displayed at full size in the Enlarged Thumbnail View screen. Touch [4e Zoom].

The image is displayed at a size 4 times the normal size, and the enlarged area is indicated by a green frame.
2 To select a different area to be enlarged, touch the scroll bar arrows on the right side and at the bottom of the image.
- When the selection is moved to the right:

- When the selection is moved down:

3 After checking the image, touch [Close].
4.10 Overview of document printing
Available operations in the use document screen
The following operations can be performed from the Use Document screen.
| Operation Description Page | reference | |
| Print Documents saved in user | boxes in Copy mode, Fax/Scan mode or Print mode can be printed. Finishing settings, such as the number of copies and double-sided printing, can be added when the document is printed. | p. 4-37 |
| Send Documents saved in user | boxes in Fax/Scan mode or Print mode can be sent by e-mail. Finishing and transmission settings can be added when the document is transmitted. | |
| Combine Multiple documents | within the same user box can be combined and printed. Finishing settings, such as the number of copies and double-sided printing, can be added when the document is printed. | p. 4-45 |
| Bind TX Multiple documents | within the same user box can be combined and transmitted. Finishing and transmission settings can be added when the document is transmitted. | |
| Document Details The date and time when the document was saved and a preview image can be checked. | p. 4-30 | |
From the Use Document screen, documents in the following user boxes can be printed and transmitted. The operations that can be performed with some user boxes may be limited. The limitations on the operations are shown below.
| Operation Public/person- al/group user boxes | Annotation User Box | Secure Print User Box | Encrypted PDF User Box |
| Print ○ | ○ | ○ | |
| Send ○ | ○ | ||
| Combine ○ | |||
| Bind TX | ○ | ||
| Document Details | ○ | ○ | ○ |
○ available
not available
Checking documents saved in user boxes
The following procedure describes how to check the list of documents saved in a user box.
1 Press the [User Box] key in the control panel.

2 Touch [Use Document].

3 From the Public, Personal or Group tab, touch the button for the desired user box.
- The Personal tab displays only user boxes registered to the user that is logged on with user authentication.
- The Group tab displays only user boxes for the account that the user belongs to when account track settings are specified.

4 Touch [OK].
5 If a password has been set for the user box, type in the password, and then touch [OK].

The list of documents saved in the user box is displayed.
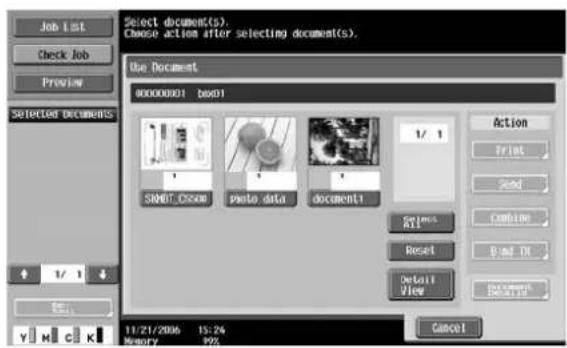
![OLIVETTI d-Color MF550 - If a password has been set for the user box, type in the password, and then touch [OK]. - 3](/content/2026/05/977387/images/aaf3548461082f8605246ddcd90281e597f98a020045b07a7e17c7080401bd31.jpg)
Note
If "Prohibited Functions When Authentication Error" in Administrator mode is set to "Mode 2" and a user enters an incorrect box password the specified number of times, that box is locked and can no longer be used. Contact the administrator to cancel operation restrictions.
Description of use document screen
The documents are displayed on the Use Document screen in the same way that they are displayed on the File Document screen. For details, refer to "Description of file document screen" on page 4-20.
Searching for a user box name
For details on searching for a user box name, refer to "Searching for a user box name" on page 4-21.
4.11 Printing
Available print settings
Settings can be specified for the following when a document is printed.
| Available parameters Description Page reference | ||
| Copies Specify the number of copies to be printed. p. 4-39 | ||
| Print Select whether a single-sided or double-sided copy is to be printed. | p. 4-39 | |
| Finishing d-Color MF550: Specify settings for collating, grouping, stapling, hole punching or folding/binding. d-Color MF450: Specify settings for collating, grouping, stapling, hole punching or center stapling/folding. | p. 4-40 | |
| Page Margin Print the document with a binding margin added. | ||
| Sheet/Cover/Chapter Insert Print the document with other paper added as cover sheets, insertions or chapter title pages. | ||
| Stamp/Composition Print the document with the date/time, page number or a stamp added. | ||

Detail
d-Color MF550: The Fold/Bind settings are available only if optional finisher FS-608 is installed.
d-Color MF450: The Center Staple/Fold settings are available only if optional finisher FS-519 is installed.
The Punch settings are available only if the punch kit is installed on the optional finisher.
For details on combining multiple documents and printing, refer to "Combined printing" on page 4-45.
To print a document
1 From the Use Document screen, select the document to be printed.

2 Under "Action", touch [Print].
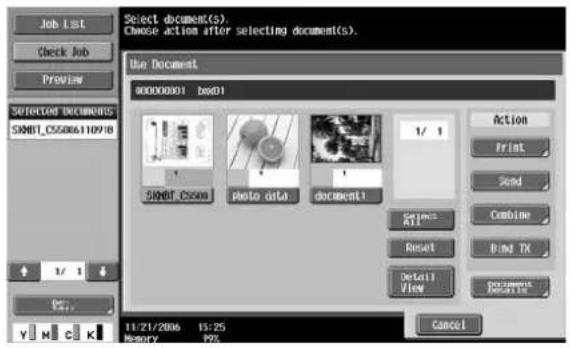
3 Select the print settings.
![To change document print settings, choose from the following options. If you are ready to print, press [Start]. Use Document > Print Basic Application Copies: 1 Print 1-Sided 2-Sided Finishing Page Margin Print name: FileName: Shamp: C:\Users\stock.com Y H C K 11/21/2006 15:25 History 99% Cancel Start](/content/2026/05/977387/images/fe9a3699eb3883ffec726b3a59014c7a129c44461e68cf95a2af74713cd8ea9f.jpg)
4 Touch [Start], or press the [Start] key in the control panel.
![OLIVETTI d-Color MF550 - Touch [Start], or press the [Start] key in the control panel. - 1](/content/2026/05/977387/images/588e2846655427acd6dc337e0152db2021ff728db38c47120a8187e20c154f3f.jpg)
Detail
For details on changing the settings, refer to the descriptions starting with page 4-39.
Changing the number of copies
Specify the number of copies to be printed.
→ In the Print screen, use the keypad to type in the desired number of copies.
![Job List Check Job Preview A4 D 100.05 To change document print settings, choose from the following options. If you are ready to print, press [start]. Use Document > Print Basic Application Copies: 5666 Print 1-Sided 2-Sided Finishing Page Margin Photo Visitors Name: Balance Sheet Cancel Start 11/21/2006 15:25 Memory 99%](/content/2026/05/977387/images/78a571eb0c7a932e921aba475aa2d256438f2ff897aa602574a5f9b09f5f38f4.jpg)
- The number of copies can be set between 1 and 9,999.
- To reset the number of copies to "1", press the [C] (clear) key.
Specifying single-sided/double-sided printing
Select whether a single-sided or double-sided copy of the document is to be printed.
→ Touch [1-Sided] or [2-Sided].
![To change document print settings, choose from the following options. If you are ready to print, press [Start]. Use Document > Print Basic Application Copies: 1 Print 1-Sided 2-Sided Finishing Page Margin Enter Copy Delete Users Shape Shading at this point Y M C K 11/21/2006 15:25 Memory 99% Cancel Start](/content/2026/05/977387/images/9fd38054a0e61453f7fcfd5efc3dafabc4d87c6794699eb8adfe3391092619c6.jpg)
Specifying finishing settings
Specify settings for collating, grouping, stapling, hole punching or folding/binding (d-Color MF550)/center stapling/folding (d-Color MF450). Settings can be specified for the following.
d-Color MF550:
| Parameter Description | |
| Sort Select this setting to feed out copies of the document by sets. | |
| Group Select this setting to feed out copies of the document by page. | |
| Offset Select this setting to separate the sets or pages of the copies.If a finisher is installed, the printed pages are fed out with each set shifted to separate it.If no finisher is installed, the printed pages are fed out sorted in an alternating criss-cross pattern. | |
| Staple Select one of these settings to bind copies with a staple in the corner (upper left or upper right) or with two staples. The stapling position can also be selected. | |
| Punch Select a setting to punch holes in copies. The position of the punched holes can also be selected. | |
Half-Fold (Fold/Bind): Select this setting to fold copies in half before feeding them out. | |
| Center Staple & Fold (Fold/Bind): | Select this setting to staple copies at two places along the center, then fold the copies in half before feeding them out. |
Tri-fold (Fold/Bind): Select this setting to fold copies in three before feeding them out. | |

Detail
The feeding method when a finisher is installed can be changed from Administrator mode.
When a Fold/Bind setting is selected, "Sort" is automatically selected, and the "Group", Offset, Staple and Punch settings are canceled.

Reminder
In order to select a Fold/Bind setting, all of the following conditions must be met.
The paper width must be between 182 and 314 mm.
The paper length must be between 257 and 458 mm.
In order to use a Fold/Bind setting, optional finisher FS-608 must be installed.
d-Color MF450:
| Parameter Description | |
| Sort Select this setting to feed out copies of the document by sets. | |
| Group Select this setting to feed out copies of the document by page. | |
| Offset Select this setting to separate the sets or pages of the copies.If a finisher is installed, the printed pages are fed out with each set shifted to separate it.If no finisher is installed, the printed pages are fed out sorted in an alternating criss-cross pattern. | |
| Staple Select one of these settings to bind copies with a staple in the corner (upper left or upper right) or with two staples. The stapling position can also be selected. | |
| Punch | Select a setting to punch holes in copies. The position of the punched holes can also be selected. |
| Half-Fold(Center Staple/ Fold) | Select this setting to fold copies in half before feeding them out. |
| Center Staple(Center Staple/Fold) | Select this setting to them out. er before feeding er before feeding |

Detail
The feeding method when a finisher is installed can be changed from Administrator mode.
When a Center Staple/Fold setting is selected, "Sort" is automatically selected, and the "Group", Offset, Staple and Punch settings are canceled.

Reminder
In order to select a Center Staple/Fold setting, all of the following conditions must be met.
The paper width must be between 182 and 314 mm.
The paper length must be between 257 and 458 mm.
In order to use a Center Staple/Fold setting, optional finisher FS-519 must be installed.
√ The screens illustrating the following actions are examples from the d-Color MF450.
1 In the Print screen, touch [Finishing].
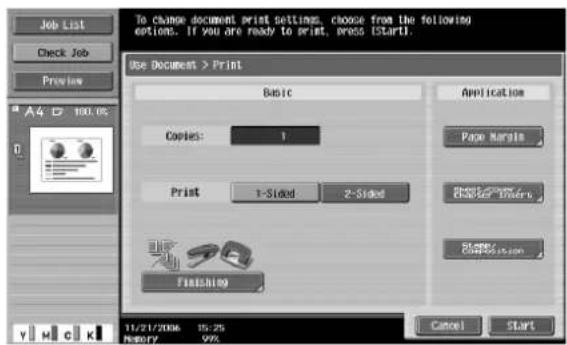
2 Touch [Sort] or [Group]. To separate the copies, touch [Yes] under "Offset".
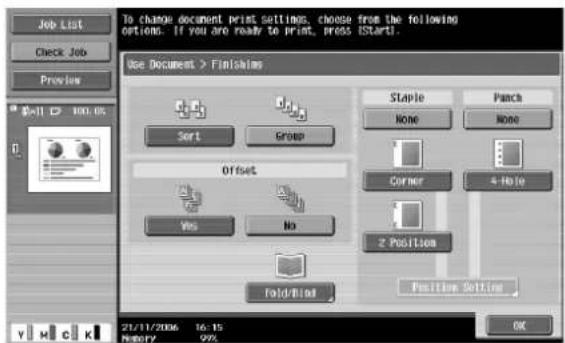
3 Select the desired Staple and Punch settings.

4 To specify the positions of the staples and punched holes, touch [Position Setting].
5 Touch the button for the desired position, and then touch [OK].
- When the "Corner" Staple setting is selected:
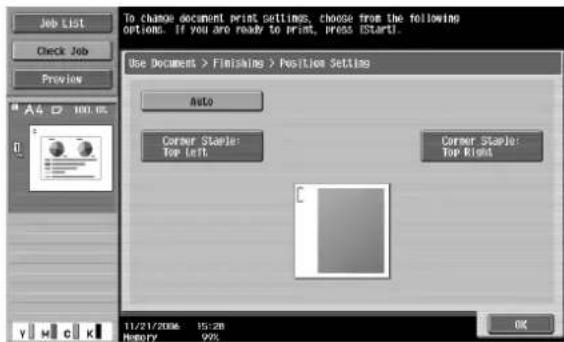
- When the "2 Positions" Staple setting is selected:

- When a Punch setting is selected:

6 d-Color MF550: If finisher FS-608 is installed, touch [Fold/Bind]. d-Color MF450: If finisher FS-519 is installed, touch [Center Staple/Fold].
7 Touch [Yes], and then select the desired folding method.

- To adjust the position of the center stapling and center fold, touch [Position Adjustment], and then specify an adjustment between -10 and +10.
![Use [+/-] keys to specify the position adjustment. Document > Center Staple/fold > Position Adjustment Center Staple Position Adjustment Half-Fold Position Adjustment 0 -10 - +10 - + 0 -10 - +10 - + 01/09/2007 14:45 MEMORY 99%](/content/2026/05/977387/images/9c559430721b9a817d3114140868137e33c3234bb907e941a946703bf7e5becc.jpg)
8 Touch [OK], and then touch [OK] in the next screen that appears.
4.12 Combined printing
Available combined printing parameters
Multiple documents can be printed together. Up to 10 documents can be selected to be printed together. Additional settings, such as those for the number of copies, can be specified for the selected document. Settings can be specified for the following.
| Available parameters Description | Page reference | |
| Copies Specify the number of | copies to be printed. p. 4-39 | |
| Print Select whether a single-sided or double-sided copy is to beprinted. | p. 4-39 | |
| Finishing d-Color MF450: | Specify settings for offsetting, stapling, hole punching or cent-er stapling/folding.d-Color MF550:Specify settings for offsetting, stapling, hole punching or fold-ing/binding. | p. 4-40 |
| Page Margin Print the document with a binding margin added. | ||
| Stamp/Composition Print the | document with the date/time, page number or astamp added. | |

...
Note
Documents saved in a box and having a front cover, back cover and blank insertion in addition to Image Repeat and OHP Interleave settings specified cannot be combined and printed.
"Sort", "Group" and "Tri-fold" cannot be specified with combined printing.

Detail
d-Color MF550: The Fold/Bind settings are available only if optional finisher FS-608 is installed.
d-Color MF450: The Center Staple/Fold settings are available only if optional finisher FS-519 is installed.
The Punch settings are available only if the punch kit is installed on the optional finisher.
To print a document
1 From the Use Document screen, select the document to be printed.

2 Under "Action", touch [Combine].

3 Specify the combination order.
- Select the two documents whose order is to be switched.
- The documents are combined and printed in the order specified here.

4 Touch [OK].

5 Select the print settings.
![To change document print settings, choose from the following options. If you are ready to print, press [Start]. Use Document > Print Basic Application Copies: 1 Print 1-Sided 2-Sided Finishing Page Margin Storage Cowskaya.com Y H C K 11/21/2006 16:14 History 99% Cancel Start](/content/2026/05/977387/images/80ec62d5dcb10e21fd10a058a4a63fa616c35d2e084c7387627f8c1e3f2353e3.jpg)
6 Touch [Start], or press the [Start] key in the control panel.
![OLIVETTI d-Color MF550 - Touch [Start], or press the [Start] key in the control panel. - 1](/content/2026/05/977387/images/80ef5959f54ac97408346fcd4b7680d64d3ec91c1f741e1370d862212a1069bb.jpg)
Detail
For details on changing the settings, refer to the descriptions starting with page 4-39.
4.13 Overview of document transmissions
Available document transmission operations
Document data saved in a user box can be sent using three different methods. The data can easily be routed simply by registering a destination with this machine instead of by sending the data through different computers.
| Method Description | |
| E-mail Document data can be sent as an e-mail attachment. | |
| PC (SMB) Document data is sent to a shared folder on the specified computer. | |
| FTP Document data is uploaded to the specified FTP server. | |

Note
Documents saved from Copy mode cannot be sent.
Transmission methods
Specify the destination using any of the following four methods depending on the desired transmission purpose and use. Destinations can be specified using any combination of these methods.
| Method Description | |
| Address book destination Select different destinations from those registered in the address book. | |
| Group destinations Multiple destinations can be registered together with this method. This is convenient when documents are always sent to the same destinations. | |
| Direct input With this method, destinations for e-mail transmissions, FTP transmissions and SMB transmissions are entered directly from the control panel. This is used when sending data to a destination that is not already registered. | |
| Address search Select this method when an LDAP server is used. Addresses registered on the LDAP server can be searched for the address that corresponds to the specified conditions. | |

Detail
Up to 500 destinations can be specified from the address book and with an Address search.
Up to five destinations can be entered directly each with e-mail transmissions, SMB transmissions and FTP transmissions.
Checking documents saved in user boxes
The following procedure describes how to check the list of documents saved in a user box.
1 Press the [User Box] key in the control panel.
2 Touch [Use Document].

3 From the Public, Personal or Group tab, touch the button for the desired user box.
- The Personal tab displays only user boxes registered to the user that is logged on with user authentication.
- The Group tab displays only user boxes for the account that the user belongs to when account track settings are specified.

4 Touch [OK].
5 If a password has been set for the user box, type in the password, and then touch [OK].

The list of documents saved in the user box is displayed.


Note
If "Prohibited Functions When Authentication Error" in Administrator mode is set to "Mode 2" and a user enters an incorrect box password the specified number of times, that box is locked and can no longer be used. Contact the administrator to cancel operation restrictions.
Description of use document screen
The documents are displayed on the Use Document screen in the same way that they are displayed on the File Document screen. For details, refer to "Description of file document screen" on page 4-20.
Searching for a user box name
For details on searching for a user box name, refer to "Searching for a user box name" on page 4-21.
To send a document
1 From the Use Document screen, select the document to be sent.

2 Under "Action", touch [Send].

3 Specify the destination and transmission settings.

4 Touch [Start], or press the [Start] key in the control panel.

Note
Transmission may not be possible if limitations have been placed on the document name according to the destination server conditions. Since the document name becomes the file name during transmission, consult your network administrator when specifying the document name.
4.14 Secure print user box
Available printing parameters
Settings can be specified for the following when a document is printed.
| Available parameters Description Page reference | ||
| Copies Specify the number of copies to be printed. p. 4-39 | ||
| Print Select whether a single-sided or double-sided copy is to be printed. | p. 4-39 | |
| Finishing d-Color MF450: | Specify settings for collating, grouping, stapling, hole punching or center stapling/folding. | p. 4-40 |
| d-Color MF550: | ||
| Specify settings for collating, grouping, stapling, hole punching or folding/binding. | ||
| Sheet/Cover/Chapter Insert Print the document with other paper added as cover sheets, insertions or chapter title pages. | ||
| Stamp/Composition Print the document with the date/time, page number or a stamp added. | ||

Detail
d-Color MF550: The Fold/Bind settings are available only if optional Finisher FS-608 is installed.
d-Color MF450: The Center Staple/Fold settings are available only if optional Finisher FS-519 is installed.
The Punch settings are available only if the punch kit is installed on the optional finisher.
To print a document (Mode 1)
Follow the procedure described below when "Prohibited Functions When Authentication Failed" (displayed by touching [Security Settings] on the Administrator Settings screen, then [Security Details]) is set to "Mode 1".
1 Touch [Use Document].

2 Touch [System User Box].

3 Touch [Secure Print User Box], and then touch [OK].
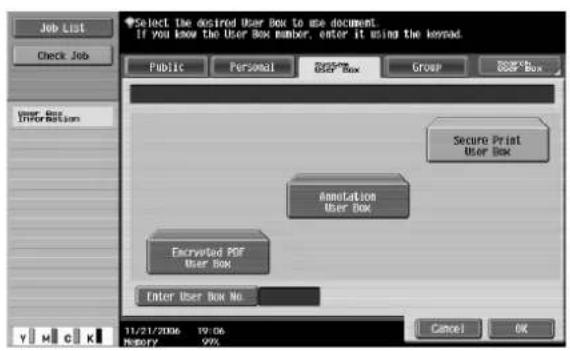
4 Type in the ID for the confidential document, and then touch [OK].

5 Type in the password for the confidential document, and then touch [OK]. A list of the documents that can be printed is displayed.
6 Select the document to be printed.

7 Under "Action", touch [Print].

8 Select the print settings.

9 Touch [Start], or press the [Start] key in the control panel.
![OLIVETTI d-Color MF550 - Type in the password for the confidential document, and then touch [OK]. A list of the documents that can be printed is displayed. - 4](/content/2026/05/977387/images/cea321c48c06e990996f711ec0aa8581aa58ea8a4ada59790c56ee0af9afdbfb.jpg)
Detail
For details on changing the settings, refer to the descriptions starting with page 4-39.
To print a document (Mode 2)
Follow the procedure described below when "Prohibited Functions When Authentication Error" (displayed by touching [Security Settings] on the Administrator Settings screen, then [Security Details]) is set to "Mode 2".
1 Touch [Use Document].

2 Touch [System User Box].

3 Touch [Secure Print User Box], and then touch [OK].

4 Type in the ID for the secured document, and then touch [OK].

A list of the documents that can be printed is displayed.
5 Select the document to be printed and then touch [Enter Password].
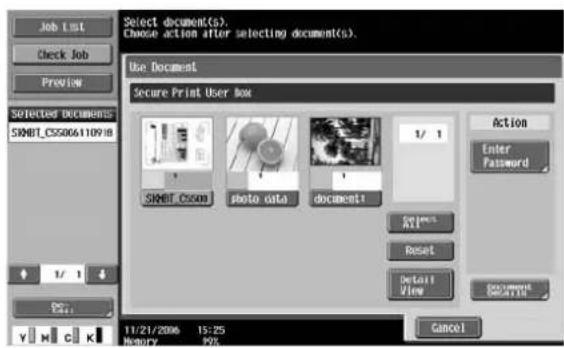
6 Type in the password for the secured document, and then touch [OK].
7 Under "Action", touch [Print].

8 Select the print settings.

- For a details on changing the settings, refer to "To print a document" on page 4-37.
9 Touch [Start], or press the [Start] key in the control panel.
4.15 Encrypted PDF user box
In order to print a document saved in the Encrypted PDF User Box, the password specified when the document was saved must be entered.

Detail
Documents are saved in the Encrypted PDF User Box by using Web Connection or Direct Print. For details on saving documents, refer to the manual for the corresponding software.
Printing
1 Touch [Use Document].

2 Touch [System User Box].

3 Touch [Encrypted PDF User Box], and then touch [OK].
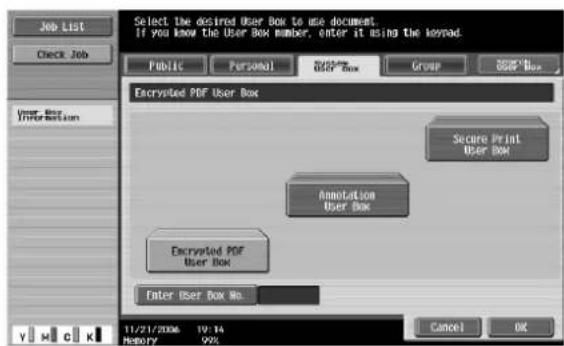
A list of documents appears.
4 Select the document to be printed.

5 Under "Action", touch [Print].

6 Type in the password, and then touch [OK].

Deleting
1 Touch [Use Document].
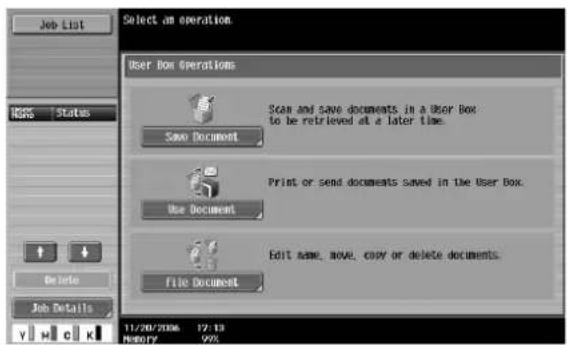
2 Touch [System User Box].

3 Touch [Encrypted PDF User Box], and then touch [OK].

4 Select the document to be deleted.
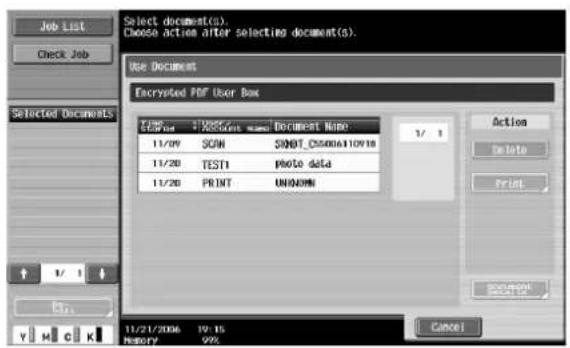
5 Under "Action", touch [Delete].

6 Check the message, touch [Yes] to delete the document, and then touch [OK].
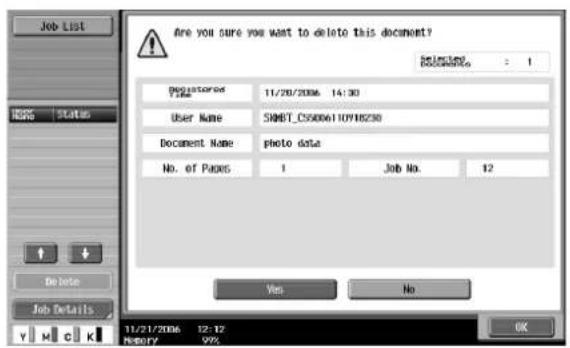
5
Network Scanner Operations
5 Network Scanner Operations
5.1 Using scan/fax programs
A set of scan settings and recipient information can be registered together as a program. This feature is convenient for frequently scanning documents and sending data under the same conditions. Follow the procedure described below to register and recall a Scan/Fax program.

Detail
Up to 400 normal programs and 12 temporary programs, which are temporarily available, can be registered.
If 412 programs have been registered, delete an unnecessary program. For details on deleting programs, refer to "Editing and deleting scan/fax programs" on page 5-10.
Recalling a scan/fax program
When a Scan/Fax program is recalled, the registered settings can be checked.
1 Press the [Fax/Scan] key in the control panel. The Fax/Scan mode screen appears.

2 Press the [Mode Memory] key. The Recall Scan/Fax Program screen appears.
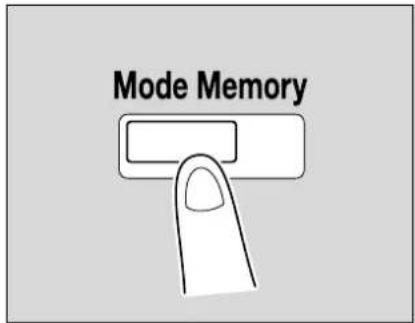
3 Touch the button for the program that is to be recalled.
- To continue without checking the settings registered with the selected program, continue with step 7.
- To stop recalling a program, press the [Reset] key or the [Mode Memory] key.
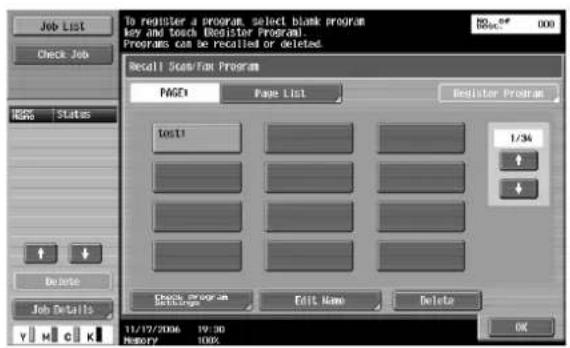
4 Touch [Check Program Settings].
The Check Scan/Fax Program Settings screen appears.

5 Touch the button for the setting to be checked.
- To check the list of specified destinations, touch [Check Address].
- The settings cannot be changed from the Check Scan/Fax Program Settings screen.

- To check the scan settings for the document, such as the document quality, background adjustment and scanning area size, touch [Check Scan Settings].
- There are three Check Scan Settings screens. The number of the currently displayed screen appears to the right of the screen title.
- To display the previous screen, touch [ Back]. To display the next screen, touch [Forward ].

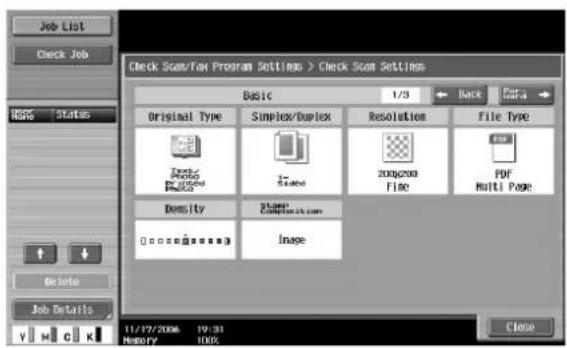
- To check settings such as the document orientation and binding position, touch [Check Original Settings].
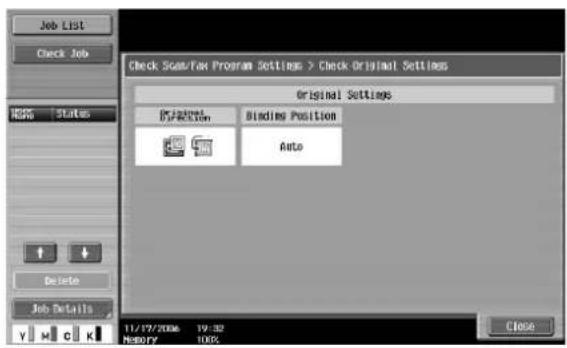
- To check settings such as the e-mail subject name and message text for Scan to E-Mail operations, touch [Check E-Mail Settings].

- To check the e-mail destination for notification of the completion of jobs, touch [Check URL Notif. Destination].
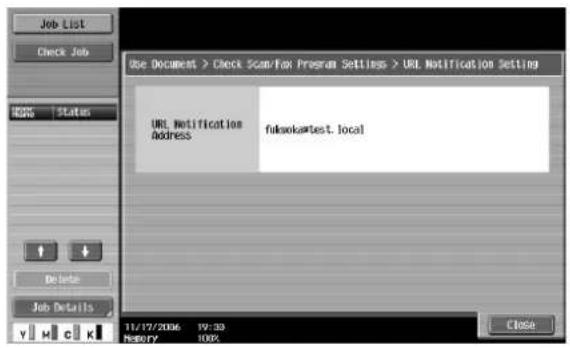
6 After checking the settings, touch [Close].
The Recall Scan/Fax Program screen appears again.
7 Touch [OK].

Registering scan/fax programs
1 Press the [Fax/Scan] key in the control panel. The Fax/Scan mode screen appears.

2 Touch [Scan Settings], [Original Settings] or [Communication Settings], and then specify the desired scan settings.
3 Press the [Mode Memory] key.
The Recall Scan/Fax Program screen appears.

4 Touch the button where the program is to be saved.

5 Touch [Register Program].
The Register Scan/Fax Program screen appears.

6 Touch [Name], and then use the control panel keypad and the keyboard that appears in the touch panel to type in the name of the program.
- The program name can contain a maximum of 24 characters.
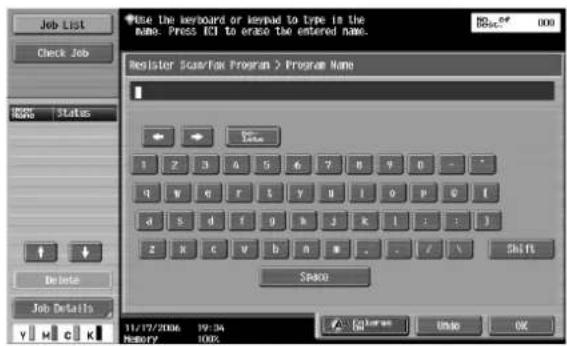
- To stop registering the program, press the [Reset] key or the [Mode Memory] key. - For details on typing in text, refer to "Entering text" on page 9-3.
7 Touch [OK].
8 Touch [Address], and then select the destination.
- When selecting destinations registered in the address book, destinations can be selected from each destination type.
- Destinations can be specified either by selecting destinations registered in the address book or by typing them in directly.
- Destinations that cannot be specified, such as fax destinations, are not displayed.
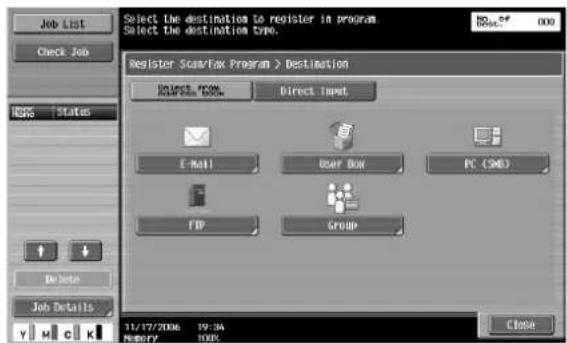
- To directly type in the destination, select the destination type, and then type in the destination information. For a user box destination, select a previously created user box.
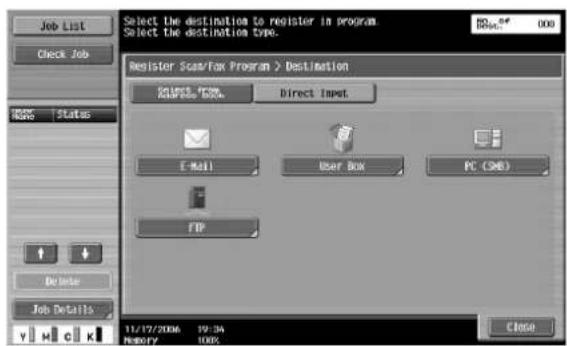
9 Touch [Close].
10 To send e-mail notifications of the completion of jobs, touch [Check URL Notif. Destination].
- The destinations that can be specified for URL notification are FTP, SMB or user box destinations.
- This feature is not available with Scan to E-Mail operations.
11 Touch [Yes], and then specify the e-mail address for the destination of URL notifications.
- Recipients can be specified either by selecting destinations registered in the address book or by typing them in directly.
- One destination can be specified.

12 Touch [Close].
13 Touch [OK].

The Recall Scan/Fax Program screen appears again. The program is registered and a button with the entered program name appears.
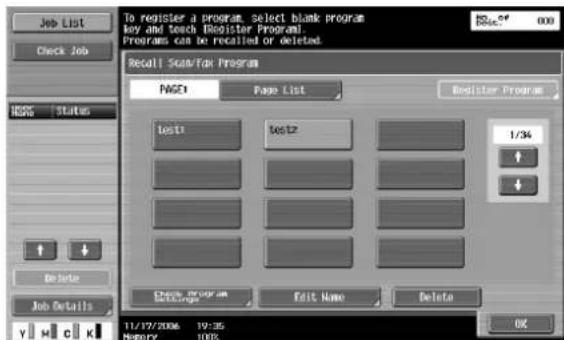
14 Touch [OK].
Editing and deleting scan/fax programs
The names of registered Scan/Fax programs can be edited, or the program can be deleted.
1 Press the [Fax/Scan] key in the control panel.
The Fax/Scan mode screen appears.
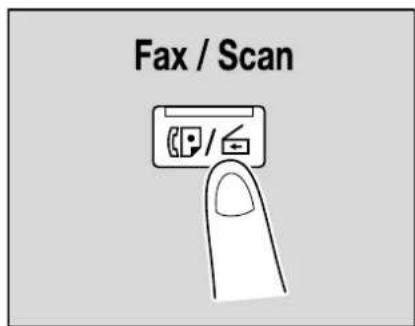
2 Press the [Mode Memory] key.
The Recall Scan/Fax Program screen appears.
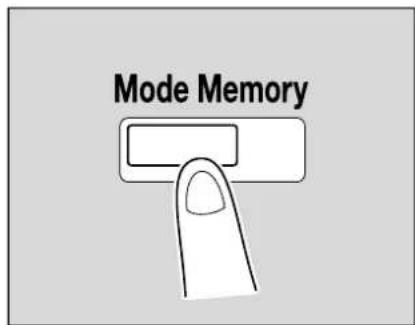
3 Touch the button for the program to be edited or deleted.
- To check the settings of the selected program, touch [Check Program Settings]. In the Check Scan/Fax Program Settings screen, select the items to be checked.
- To stop editing or checking a program, press the [Reset] key or the [Mode Memory] key.
- To view a list of the pages, touch [Page List]. From the Page List screen, the name of the page can be changed.

- To change the name of the selected program, touch [Edit Name]. Use the control panel keypad and the keyboard that appears in the touch panel to type in the name of the program.
- The program name can contain a maximum of 24 characters.
- For details on typing in text, refer to "Entering text" on page 9-3.
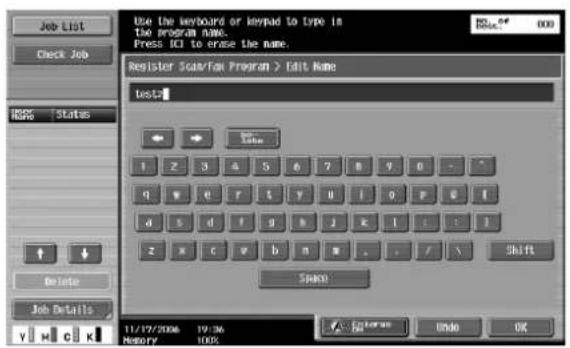
- To delete the selected program, touch [Delete]. Then, touch [Yes], then [OK].

4 Touch [OK].
5.2 Sending data in an e-mail message (Scan to e-mail)
Scan to e-mail
The Scan to E-Mail operation is used to send scan data to a specified e-mail address as a file attachment.
Recipients can be selected from destinations registered in the address book or they can be typed in directly. The methods can be combined, for example, by selecting a recipient from a group destination, then adding other destinations through direct input. Destinations can be selected using any of the following methods. For details, refer to the corresponding section.
| Selection method Page reference | |
| Selecting from the address book p. 5-12 | |
| Entering addresses directly p. 5-15 | |
| Selecting a group destination p. 5-13 | |
| Searching for a registered destination p. 5-16 | |
| Searching for an LDAP server address p. 5-18 |
Selecting a destination from the address book
Follow the procedure described below to send data by selecting a recipient from the already registered destinations.
For details on registering destinations, refer to "Registering an address book destination" on page 5-68.
1 Press the [Fax/Scan] key in the control panel.
The Fax/Scan mode screen appears.
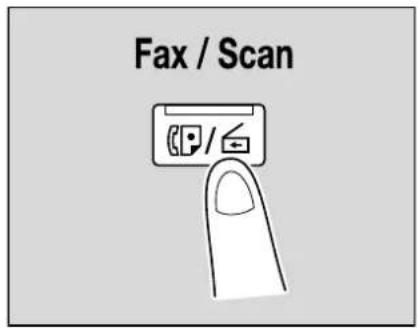
2 Touch [Address Book].
- The index appears if "Address Book Default" (displayed by touching [Custom Display Settings] on the User Settings screen, then [Fax/Scan Settings]) is set to "Index". If "Address Type" is selected, the index of destination types is displayed.
- The corresponding address appears as the name of the registered destination when an index button is touched.
- The desired destination can be searched for. For details, refer to "Selecting a destination that was searched for" on page 5-16.
A list of registered destinations appears.
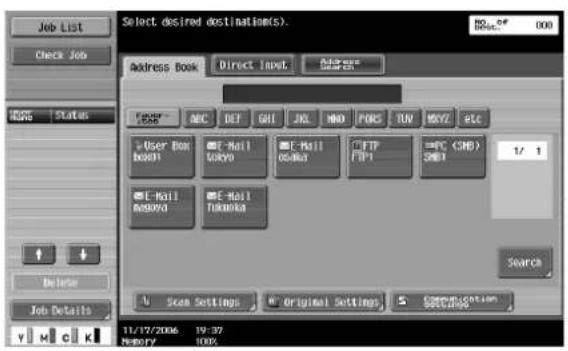
3 Touch a destination button to select the address.
- Multiple destinations can be specified at the same time.
- Additional destinations can be added by directly typing in the address.
The button appears selected, and the destination appears under "Broadcast Destinations".
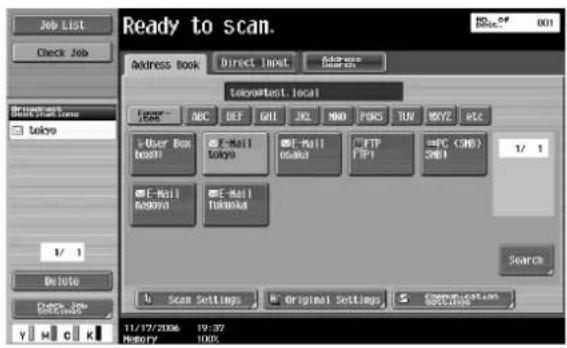
4 Touch [Scan Settings], [Original Settings] or [Communication Settings], and then specify the desired scan settings.
- For details on the scan settings, refer to "Specifying scan and transmission settings (Scan settings/original settings/communication settings)" on page 5-28.
5 Load the document into the ADF or place it on the original glass.
6 Press the [Start] key in the control panel.
Scanning of the document begins, and the data is sent.

Note
Do not turn off the machine until the scan job is deleted from the Job List screen.
Selecting a group destination
"Group" refers to multiple destinations that are registered collectively. Follow the procedure described below to send data by selecting a group that has been registered in advance.
For details on registering group destinations, refer to "Registering a group destination" on page 5-77.

Detail
In order to select a group destination, "Address Book Default" (displayed by touching [Custom Display Settings] on the User Settings screen, then [Fax/Scan Settings]) must be set to "Address Type"
If the destination types are not displayed in the index, touch [Search], and then search for destinations in the group destination type.
1 Press the [Fax/Scan] key in the control panel.
The Fax/Scan mode screen appears.
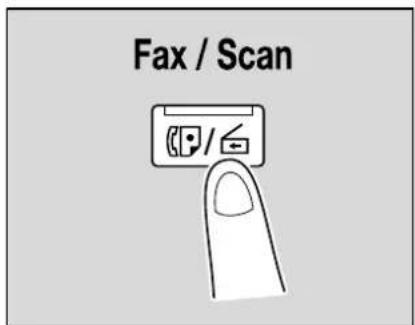
2 Touch [Group].
The destinations registered as groups appear.

3 Touch the button for the group destination.
A list of destinations registered in the group appears.

4 Select the destination where the data is to be sent, and then touch [OK].
- To select all destinations, touch [Select All].
- To deselect all destinations, touch [Reset].
- Additional destinations can be added by directly typing in the address.
The button appears selected, and the destination appears under "Broadcast Destinations".

5 Touch [Scan Settings], [Original Settings] or [Communication Settings], and then specify the desired scan settings.
- For details on the scan settings, refer to "Specifying scan and transmission settings (Scan settings/original settings/communication settings)" on page 5-28.
6 Load the document into the ADF or place it on the original glass.
7 Press the [Start] key in the control panel.
Scanning of the document begins, and the data is sent.

Note
Do not turn off the machine until the scan job is deleted from the Job List screen.
Entering addresses directly
Using the control panel to directly type in the destination address when scanning is called "direct input".
1 Press the [Fax/Scan] key in the control panel.
The Fax/Scan mode screen appears.

2 Touch [E-Mail] on the Direct Input screen.
A screen appears, allowing you to type in the address of the destination.

? Why is the Direct Input tab not displayed?
→ If the "Manual Destination Input" (displayed by touching [Security Settings] on the Administrator Settings screen, then [Security Details]) is set to "Restrict", the Direct Input tab does not appear.
3 Type in the address of the destination, and then touch [OK].
- To specify additional destinations, repeat steps 2 and 3.
– Frequently entered user names and domain names can be registered to be recalled and used again. First, prefixes and suffixes must be registered in Administrator mode.
The entered addresses appear under "Broadcast Destinations".

4 Touch [Scan Settings], [Original Settings] or [Communication Settings], and then specify the desired scan settings.
- For details on the scan settings, refer to "Specifying scan and transmission settings (Scan settings/original settings/communication settings)" on page 5-28.
5 Load the document into the ADF or place it on the original glass.
6 Press the [Start] key in the control panel.
Scanning of the document begins, and the data is sent.

Note
Do not turn off the machine until the scan job is deleted from the Job List screen.
Selecting a destination that was searched for
Follow the procedure described below to search for the desired destination. This procedure describes an advanced search.
| Parameter Description | |
| Index | This button appears if "Address Book Default" (displayed by touching [Custom Display Settings] on the User Settings screen, then [Fax/Scan Settings]) is set to "Address Type". The index characters can be searched based on the character that was specified when the destination was registered. |
| Address Type | This button appears if "Address Book Default" (displayed by touching [Custom Display Settings] on the User Settings screen, then [Fax/Scan Settings]) is set to "Index". The destination types can be searched based on the type that was specified when the destination was registered. |
| Detail Search Type in the destination name or part of the address to search for the corresponding address. | |
| Address Search An LDAP search | can be performed if an LDAP server is being used, for example, for user management. Search the addresses registered on the LDAP server for the address that corresponds to the conditions. A basic search, where a keyword is entered, and an advanced search, where multiple conditions are used to narrow down the search, are available. |

Detail
In order to perform an Address Search, settings for the LDAP server must be specified from Administrator mode.
For details on performing an Address Search, refer to "Selecting a destination with an address search" on page 5-18.
1 Touch [Address Book] in the Fax/Scan mode screen, and then touch [Search].
2 Touch [Detailed Search].
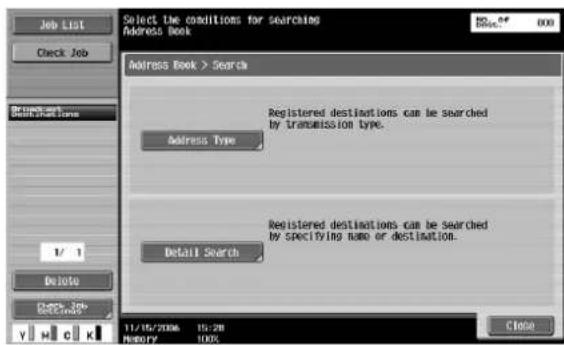
3 Touch [Name] or [Address] to select the search to be performed.

4 Type in the text to be searched for, and then touch [OK].
The Detailed Search screen appears again, and the search results are displayed.

5 Select the desired destination, and then touch [OK].
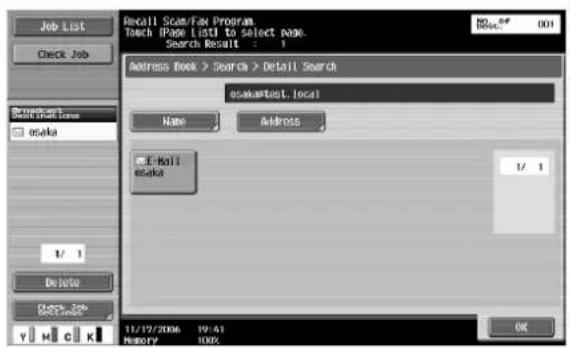
Selecting a destination with an address search
If LDAP server settings are specified in Administrator mode, [Address Search] appears in the Fax/Scan mode screen.

Detail
If the if "Manual Destination Input" (displayed by touching [Security Settings] on the Administrator Settings screen, then [Security Details]) is set to "Restrict", [Address Search] does not appear.
The position of [Address Search] can be changed from the User Settings screen.
1 Touch [Address Search] in the Fax/Scan mode screen.
2 If multiple LDAP servers are specified, select the server to be searched, and then touch [ON].

3 Select the desired search type.
- Authentication may be necessary, depending on the LDAP server that is specified.
- When there is only one LDAP server

- When there are multiple LDAP servers
![Select Search or [Advanced Search] Job List Check Job Search Search No search results 1/ 1 Delete Check Job Recycle Y M C K 11/17/2006 19:43 MEMORY 100% OK](/content/2026/05/977387/images/87717ada2b9acea56c07436441bd37ac8f9c7fbc3bf5e8599c8808feb52b484d.jpg)
4 Specify the search conditions.
- If "Basic Search" was selected, type in the keyword to be searched for, and then touch [Start Search].

- If "Advanced Search" was selected, select the search condition types and type in the text to be searched for, and then touch [Start Search].
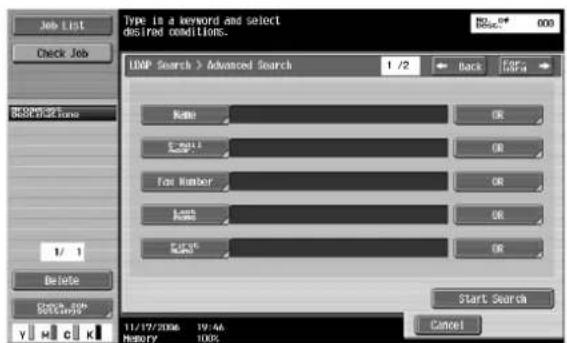
5 Select the desired destination, and then touch [OK].
5.3 Sending data to a computer on the network (Scan to SMB)
Scan to SMB
Scan data can be sent directly to a specific computer on the network.
In order to perform a Scan to SMB operation, first specify shared file settings in Windows on the computer receiving the data.
Destinations can be selected for Scan to SMB operations using any of the following methods. For details, refer to the corresponding section.
| Selection method Page reference | |
| Selecting from the address book p. 5-21 | |
| Entering addresses directly p. 5-22 | |
| Selecting a group destination p. 5-13 | |
| Searching for a registered destination p. 5-16 |

Reminder
When registering a destination for transmitting to a shared Windows folder, type the host name and folder name in uppercase letters.
Scan to SMB operations with Windows File Sharing (Mac OS X)/Samba (Linux/Unix)
When performing Scan to SMB operations with Mac OS X, Linux or UNIX, the network settings and user names must meet the following conditions. Change the settings according to the environment used with the transmission.
Machine settings
- Set "NTLM Settings" (displayed by touching [Network Setting] on the Administrator Settings screen, then [SMB Settings], then [Client Settings]) to "v1".
Server settings
- The user names and shared folder names must contain 12 or less characters.
- When looking up destinations, the shared folder name appear only in alphanumeric characters. Subfolder names can be shown in characters other than alphanumeric characters.
- When looking up a destination, first type in the user ID and password.

Note
Samba is a program that provides SMB services for Unix or Linux. In Mac OS X, Samba is called "Windows File Sharing".
CIFS is not supported.
Scan to SMB operations with Windows 98 SE and Windows Me
When performing Scan to SMB operations with Windows 98 SE/Windows Me, the network settings must meet the following conditions.
Machine settings
- Set "NTLM Settings" (displayed by touching [Network Setting] on the Administrator Settings screen, then [SMB Settings], then [Client Settings]) to "v1/v2" or "v1".
Selecting a destination from the address book
Follow the procedure described below to send data by selecting a recipient from the already registered destinations.
For details on registering destinations, refer to "Registering an address book destination" on page 5-68.
1 Press the [Fax/Scan] key in the control panel.
The Fax/Scan mode screen appears.

2 Touch [Address Book].
- The index appears if "Address Book Default" (displayed by touching [Custom Display Settings] on the User Settings screen, then [Fax/Scan Settings]) is set to "Index". If "Address Type" is selected, the index of destination types is displayed.
- The corresponding address appears as the name of the registered destination when an index button is touched.
- The desired destination can be searched for. For details, refer to "Selecting a destination that was searched for" on page 5-16.
A list of registered destinations appears.

3 Touch a destination button to select the address.
- Multiple destinations can be specified at the same time.
- Additional destinations can be added by directly typing in the address.
The button appears selected, and the destination appears under "Broadcast Destinations".

4 Touch [Scan Settings], [Original Settings] or [Communication Settings], and then specify the desired scan settings.
- For details on the scan settings, refer to "Specifying scan and transmission settings (Scan settings/original settings/communication settings)" on page 5-28.
5 Load the document into the ADF or place it on the original glass.
6 Press the [Start] key in the control panel.
Scanning of the document begins, and the data is sent.

Note
Do not turn off the machine until the scan job is deleted from the Job List screen.
Entering addresses directly
Using the control panel to directly type in the destination address when scanning is called "direct input". Settings can be specified for the following.
| Parameter Description | |
| Host Name Specify the host name (in uppercase letters) or IP address for the destination. Type using the keyboard that appears, and then touch [OK]. | |
| File Path Type the path to the destination folder in uppercase letters. | |
| User Name Type in the user name used to log on, and then touch [OK]. | |
| Password Specify the password. Type using the keyboard that appears, and then touch [OK]. | |
| Reference Check the structure of the folders on the destination computer. This can be used to directly specify the destination folder. | |
1 Press the [Fax/Scan] key in the control panel.
The Fax/Scan mode screen appears.

2 Touch [PC (SMB)] on the Direct Input screen.
A screen appears, allowing you to type in the host name for the destination and the file path.
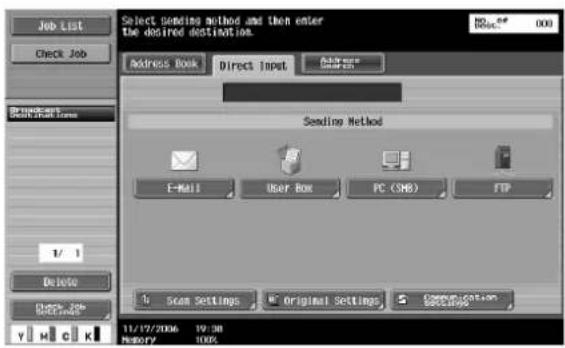
? Why is the Direct Input tab not displayed?
→ If the "Manual Destination Input" (displayed by touching [Security Settings] on the Administrator Settings screen, then [Security Details]) is set to "Restrict", the Direct Input tab does not appear.
3 Enter the information for the destination, and then touch [OK].
- To check the contents of the shared folders, and then touch [Reference].

- To specify an additional address, touch [Next Destination], and then enter the information. The entered addresses appear under "Broadcast Destinations".
4 Touch [Scan Settings], [Original Settings] or [Communication Settings], and then specify the desired scan settings.
- For details on the scan settings, refer to "Specifying scan and transmission settings (Scan settings/original settings/communication settings)" on page 5-28.
5 Load the document into the ADF or place it on the original glass.
6 Press the [Start] key in the control panel.
Scanning of the document begins, and the data is sent.
![OLIVETTI d-Color MF550 - Press the [Start] key in the control panel. - 1](/content/2026/05/977387/images/548010e2cb1334df34bbc4a147555ea6a8bd8d0827304f37ac9a112f93c33c4c.jpg)
Note
Do not turn off the machine until the scan job is deleted from the Job List screen.

Detail
If the computers or workgroups on the network (subnet) that this machine belongs to is more than the numbers listed below, browsing over the network may not be performed correctly.
Workgroups: 128
Computers: 128
5.4 Sending data to a server (Scan to FTP)
Scan to FTP
The Scan to FTP operation can be used in a network environment that contains an FTP server. The scan data can be sent to a folder specified on an FTP server on the network.
This is suitable for transmitting large-sized data, such as high-resolution data.
Destinations can be selected using any of the following methods. In addition, the methods can be combined, for example, by selecting a recipient from a group destination, then adding other destinations through direct input.
Transmission may not be possible if limitations have been placed on the document name according to the destination server conditions. Since the scanning settings are used, consult your network administrator when specifying the document name.
Destinations can be selected for Scan to FTP operations using any of the following methods. For details, refer to the corresponding section.
| Selection method Page reference | |
| Selecting from the address book p. 5-24 | |
| Entering addresses directly p. 5-26 | |
| Selecting a group destination p. 5-13 | |
| Searching for a registered destination p. 5-16 |

Detail
If a mail server is available in the network environment, the e-mail notification function can be used to send an e-mail message containing notification of the storage location of the scan data. For details on the e-mail notification function, refer to "E-Mail setting" on page 5-64.
If a proxy server is available in the network environment, an FTP server on the Internet can be accessed through the proxy server.
Selecting a destination from the address book
Follow the procedure described below to send data by selecting a recipient from the already registered destinations.
For details on registering destinations, refer to "Registering an address book destination" on page 5-68.
1 Press the [Fax/Scan] key in the control panel.
The Fax/Scan mode screen appears.
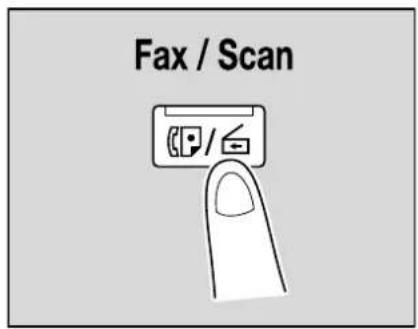
2 Touch [Address Book].
- The index appears if "Address Book Default" (displayed by touching [Custom Display Settings] on the User Settings screen, then [Fax/Scan Settings]) is set to "Index". If "Address Type" is selected, the index of destination types is displayed.
- The corresponding address appears as the name of the registered destination when an index button is touched.
- The desired destination can be searched for. For details, refer to "Selecting a destination that was searched for" on page 5-16.
A list of registered destinations appears.
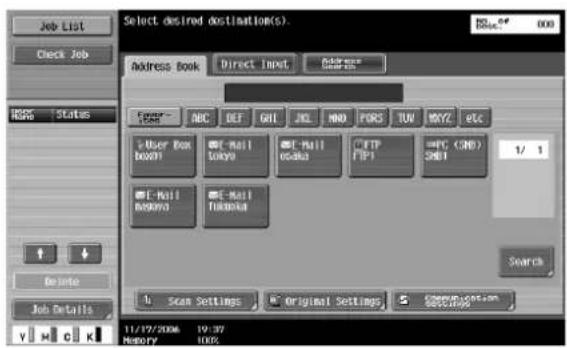
3 Touch a destination button to select the address.
- Multiple destinations can be specified at the same time.
- Additional destinations can be added by directly typing in the address.
The button appears selected, and the destination appears under "Broadcast Destinations".

4 Touch [Scan Settings], [Original Settings] or [Communication Settings], and then specify the desired scan settings.
- For details on the scan settings, refer to "Specifying scan and transmission settings (Scan settings/original settings/communication settings)" on page 5-28.
5 Load the document into the ADF or place it on the original glass.
6 Press the [Start] key in the control panel.
Scanning of the document begins, and the data is sent.

...
Note
Do not turn off the machine until the scan job is deleted from the Job List screen.
Entering addresses directly
Using the control panel to directly type in the destination address when scanning is called "direct input". Settings can be specified for the following.
| Parameter Description | |
| Host Name Specify the host name | or IP address for the destination. Type using the keyboard that appears, and then touch [OK]. |
| File Path Specify the path to the destination folder. Type using the keyboard that appears, and then touch [OK]. | |
| User Name Type in the user name | used to log on, and then touch [OK]. |
| Password Specify the password. | Type using the keyboard that appears, and then touch [OK]. |
Detailed Settings
| Parameter Description | |
| Port Number Type in the port number. | |
| PASV Select whether or not the | PASV (passive) mode is used. Touch [Yes] or [No]. |
| Proxy Select whether or not a proxy server is used. Touch [Yes] or [No]. | |
1 Press the [Fax/Scan] key in the control panel. The Fax/Scan mode screen appears.

2 Touch [FTP] on the Direct Input screen.
A screen appears, allowing you to type in the host name for the destination and the file path.

? Why is the Direct Input tab not displayed?
→ If the "Manual Destination Input" (displayed by touching [Security Settings] on the Administrator Settings screen, then [Security Details]) is set to "Restrict", the Direct Input tab does not appear.
3 Type in the destination information.

- To specify an additional address, touch [Next Destination], and then enter the information. The entered addresses appear under "Broadcast Destinations".
4 To specify advanced settings, touch [Detailed Settings], and then specify the settings.
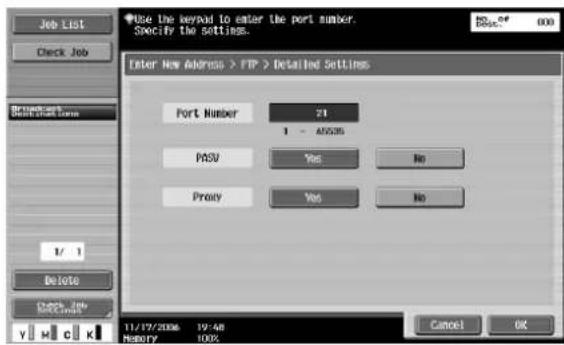
5 Touch [OK], and then touch [OK] in the next screen that appears.
6 Touch [Scan Settings], [Original Settings] or [Communication Settings], and then specify the desired scan settings.
- For details on the scan settings, refer to "Specifying scan and transmission settings (Scan settings/original settings/communication settings)" on page 5-28.
7 Load the document into the ADF or place it on the original glass.
8 Press the [Start] key in the control panel.
Scanning of the document begins, and the data is sent.

...
Note
Do not turn off the machine until the scan job is deleted from the Job List screen.
5.5 Specifying scan and transmission settings (Scan settings/original settings/communication settings)
Settings that can be specified
In the Fax/Scan mode screen, touch [Scan Settings], [Original Settings] or [Communication Settings] to specify detailed settings for scanning and sending. Settings can be specified for the following.

Scan Settings
| Parameter Description Page | reference | |
| Original Type Select the quality | of the document to be scanned. p. 5-30 | |
| Simplex/Duplex Select whether | a single-sided or double-sided document is to be scanned. | p. 5-31 |
| Resolution Select the resolution | for scanning. p. 5-32 | |
| File Type Select the file format | for the scan data to be saved. p. 5-33 | |
| Density Select the density for scanning. p. 5-35 | ||
| Separate Scan The scan operation | can be divided into several sessions when all pages of a document cannot be loaded into the ADF or when placing the document on the original glass. | p. 5-36 |
| Quality Adjustment | Adjust the image quality, such as the background, color and sharpness. | p. 5-36 |
| Erase | Specify settings for the "Erase" function. | p. 5-40 |
| Book Scan | Set the "Book Scanning" function. | p. 5-41 |
| Application | Specify settings for the scan size, filing numbers, etc. | p. 5-45 |
| Document Name | Specify the name that the document is saved with. | p. 5-60 |
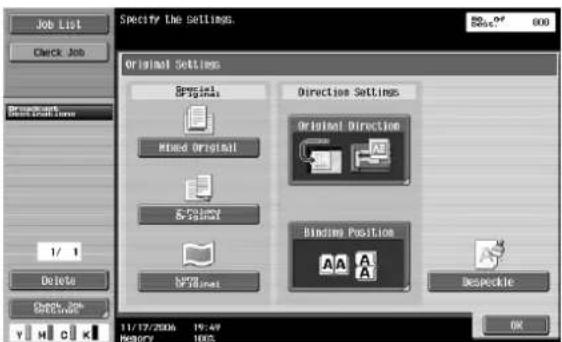
Original Settings
| Parameter Description Page | reference | |
| Mixed Original Select this setting | when loading a document containing different page sizes. | p. 5-62 |
| Z-Folded Original Select this setting | when loading a zigzag-folded document. p. 5-62 | |
| Long Original Select this setting | for documents that are longer than the standard size. | p. 5-62 |
| Original Direction Select the orientation of the loaded document. p. 5-62 | ||
| Binding Position Select the binding position for the document. p. 5-62 | ||
| Despeckle Select this setting to reduce the effect that dust on the left partition glass has on images when the document is loaded into the ADF. | p. 5-62 | |
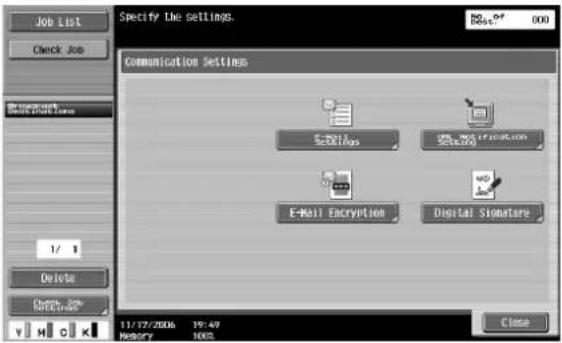
Communication Settings
| Parameter Description Page | reference | |
| E-Mail Setting Specify the document name, subject, From address and message body for sending e-mail messages. | p. 5-64 | |
| URL Notification Setting Specify the e-mail address where notifications of completion of the job are to be sent. | p. 5-65 | |
| E-Mail Encryption | This parameter appears when "S/MIME Communication Settings" is set to "ON". Select whether or not to encrypt e-mail messages that are sent. | p. 5-66 |
| Digital Signature | This parameter appears when "S/MIME Communication Settings" is set to "ON". Select whether or not to add a digital signature to e-mail messages that are sent. | p. 5-66 |

Detail
The "Digital Signature" parameter may not be available or may be set to normally sign, depending on the specified S/MIME communication settings.
Original type
From the following five image quality settings, select the appropriate setting according to the type of document being scanned.
| Setting Description | |
| Text Select this setting for documents consisting only of text. | |
| Text/Photo Select this setting for documents consisting of both text and photos (halftones). | |
| Photo Select this setting for documents consisting of only photos (halftones). | |
| Dot Matrix Original Select this setting for documents consisting of text that generally appears faint. | |
| Copied Paper Select this setting for documents with an even density produced using a copier or printer. | |
If "Text/Photo" or "Photo" is selected, the photo type can also be selected.
| Setting Description | |
| Photo Paper Select this setting for photos printed on photo paper. | |
| Printed Photo Select this setting for printed photos, such as in books or magazines. | |
1 Touch [Scan Settings] in the Fax/Scan mode screen.
2 Touch Original Type.

3 Touch the button for the image quality.
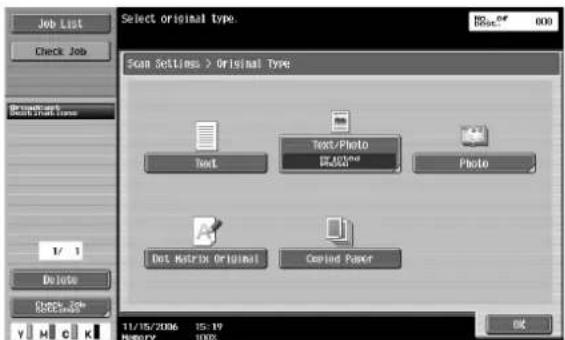
4 If "Text/Photo" or "Photo" is selected, select the photo type, and then touch [OK].

5 Touch [OK], and then touch [OK] in the next screen that appears.
Simplex/Duplex
Select whether a single-sided or double-sided document is to be scanned.
| Setting Description | |
| 1-Sided Select this setting to can a single-sided document. | |
| 2-Sided Select this setting tocan a double-sided document. | |
| Cover + 2-Sided Select this setting to scan the first page of the document as a single-sided cover page, then scan the remaining pages as double-sided. | |
1 Touch [Scan Settings] in the Fax/Scan mode screen.
2 Touch Simplex/Duplex.

3 Select the scanning type.
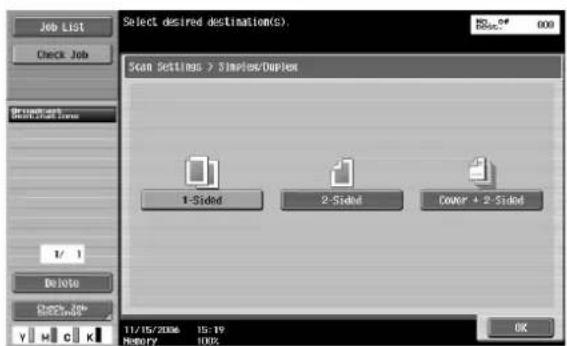
4 Touch [OK], and then touch [OK] in the next screen that appears.
Resolution
Select the resolution for scanning.
1 Touch [Scan Settings] in the Fax/Scan mode screen.
2 Touch Resolution.

3 Select the resolution.
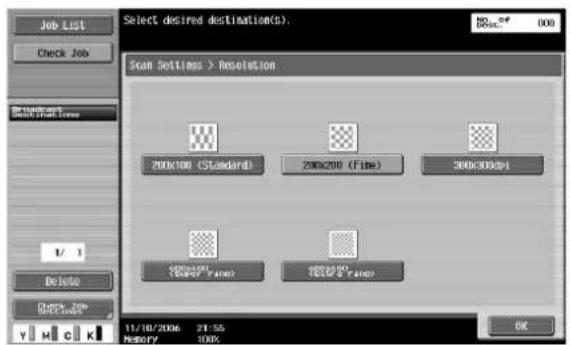
4 Touch [OK], and then touch [OK] in the next screen that appears.
File type
Select the file format for saving the scan data. The following four file formats are available.
File Type
| Setting Description | |
| PDF Select this setting to save the data in the PDF format. | |
| Compact PDF Select this setting to save the data in a highly compressed PDF format. | |
| TIFF Select this setting to save data in the TIFF format. | |
| JPEG Select this setting to save the data in the JPEG format. | |
Some File Type settings may not be available, depending on the selected Color setting. The possible combinations of the File Type and Color settings are shown below.
| Auto Color | Full Color | Grayscale | Black | |
| Compact PDF | ||||
| TIFF | ||||
| JPEG |
○ available
not available
If the "PDF" or "Compact PDF" File Type setting is selected, the encryption level and stamp combination method can be specified.
Encryption settings
| Parameter Description | |
| Encryption Level Select the encryption level. | |
| Password Enter the password | necessary to open encrypted data. Type in a password of 32 characters or less. For confirmation, type in the password again. |
| Document Permissions Enter | the password necessary to change document permissions. Type in a password of 32 characters or less. For confirmation, type in the password again. |
Stamp Composition
| Setting Description | |
| Image Select this setting to insert the text as an image. | |
| Text Select this setting to insert the text as text. | |

...
Note
The date/time, page number and header/footer can be combined as text.
Stamps are combined as images.
In addition, the grouping of the saved data can be specified.
Scan Setting
| Setting Description | |
| Single Page | Select this setting to create a single file for each page of the document. |
| Multi Page | Select this setting to create a single file from the entire scanned document. This setting cannot be selected if the "JPEG" File Type setting is selected. |

Detail
For details on specifying the Color setting, refer to "Color (Quality adjustment)" on page 5-36.
1 Touch [Scan Settings] in the Fax/Scan mode screen.
2 Touch [File Type].

3 Select the file format.
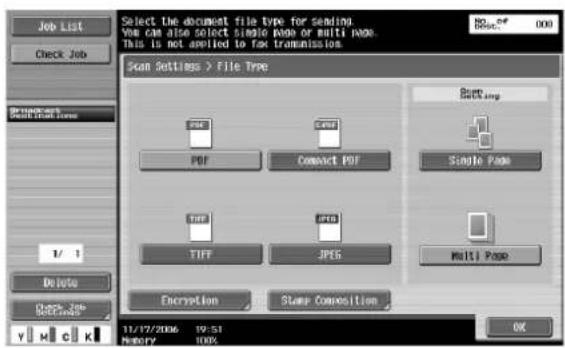
4 If "PDF" or "Compact PDF" was selected, touch [Encryption], if necessary.

5 Specify the encryption settings.

6 To specify the stamp combination method, touch [Stamp Composition].
7 Select the desired stamp composition.

8 Touch [OK].
9 Select the scan setting.
10 Touch [OK], and then touch [OK] in the next screen that appears.
Density
Adjust the density for scanning.
1 Touch [Scan Settings] in the Fax/Scan mode screen.
2 Touch Density.
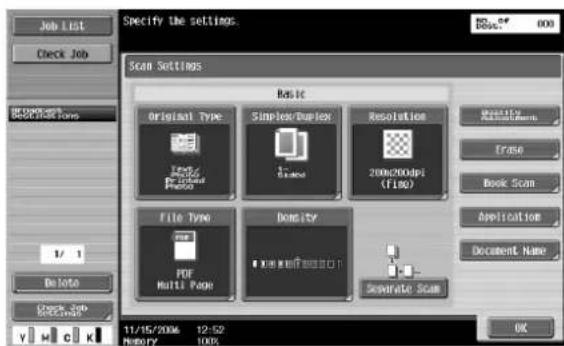
3 Select the density.
- To adjust the density, touch [Light] or [Dark].
- To select the default setting, touch [Standard].

4 Touch [OK], and then touch [OK] in the next screen that appears.
Separate scan
The scan operation can be divided into several sessions for various types of documents, for example, when all pages of a document cannot be loaded into the ADF, when placing the document on the original glass, or when single-sided documents are combined with double-sided documents.
Touch [Separate Scan] in the Fax/Scan mode screen. The setting is selected when the button appears selected.

Color (Quality adjustment)
Select whether the document will be scanned in color or black and white.
The following four settings are available.
| Setting Description | |
| Auto Color Select this setting to automatically detect the color of the document and scan it with the corresponding setting. | |
| Full Color Select this setting to scan in full color. | |
| Grayscale | Select this setting for documents with many halftones, such as in black-and-white photos. |
| Black Select this setting for documents with distinct black and white areas, such as in line drawings. | |
Some Color settings may not be available, depending on the selected File Type setting. The possible combinations of the Color and File Type settings are shown below.

Detail
For details on specifying the File Type setting, refer to "File type" on page 5-33.
1 Touch [Scan Settings] in the Fax/Scan mode screen.
2 Touch [Quality Adjustment].

3 Select the color type.
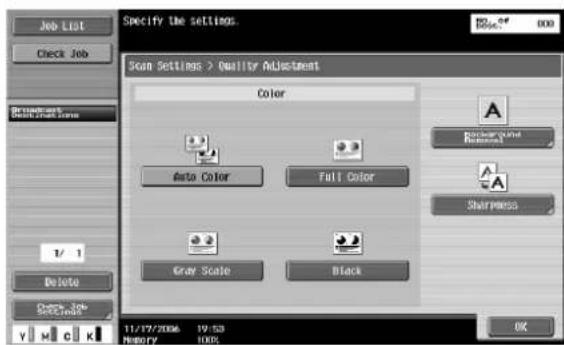
4 Touch [OK], and then touch [OK] in the next screen that appears.
Background removal (Quality adjustment)
The scanning density of the document background can be adjusted. When documents printed on colored paper are scanned in color, the background may become black. In that case, the density of the background can be adjusted.
1 Touch [Scan Settings] in the Fax/Scan mode screen.
2 Touch [Quality Adjustment].
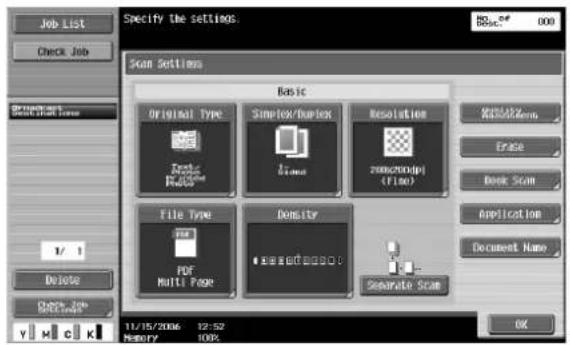
3 Touch [Background Removal].

4 Adjust the density of the background.
- To adjust the density automatically, touch [Auto].
- To adjust the density, touch [Light] or [Dark].
- To select the default setting, touch [Standard].

5 Touch [OK], and then touch [OK] in the next screen that appears.
Sharpness (Quality adjustment)
Contours, for example, the edges of text, can be emphasized when scanning.
1 Touch [Scan Settings] in the Fax/Scan mode screen.
2 Touch [Quality Adjustment].

3 Touch [Sharpness].

4 Adjust the sharpness.

5 Touch [OK], and then touch [OK] in the next screen that appears.
Frame erase (Erase)
An area around the edge of the document can be erased. Areas with a width of 0.1 to 50 mm can be specified separately for the left and right sides and the top and bottom.

Note
If a width to be erased around the document is specified with "Frame Erase" with the "Book Scanning" function, the same settings are also applied on the Frame Erase screen (displayed from the Erase screen).
1 Touch [Scan Settings] in the Fax/Scan mode screen.
2 Touch [Erase].

3 Touch [Frame Erase].

4 Select the width of the area to be erased.
- To use frame erasing, touch [Yes].
- To erase the same width on all sides, touch [Frame], and then specify a value.
- To specify different widths for the top, left, right and bottom, touch the button for the desired location, and then specify a value. To cancel frame erasing, touch [None].)
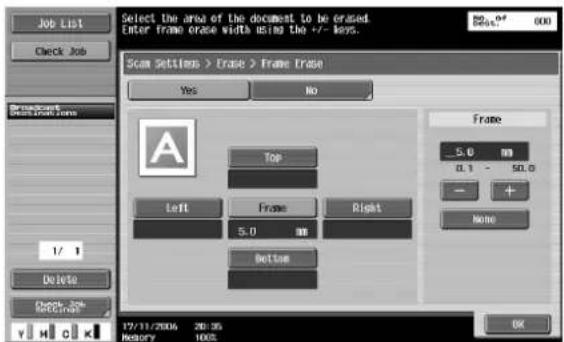
5 Touch [OK], and then touch [OK] in the next two screens that appear.
Book copy (Book scan)
Select the method for scanning page spreads. The following four scanning methods are available. In addition, the binding position and erase settings can be specified.
| Setting Description | |
| Book Spread Select this setting to scan a page spread as a single page. | |
| Separation Select this setting to scan a page spread as two separate pages (left and right). | |
| Front Cover Select this setting to scan the first page as the front cover. | |
| Front + Back Covers Select this setting to scan the first page as the front cover, the second page as the back cover, and the remaining pages as the body. | |
The document can be scanned while erasing the shadows typical for page spreads.
| Parameter Description | |
| Frame Erase An area around the edge of the document can be erased. Areas with a width between 0.1 and 50 mm can be specified separately for the left and right sides and the top and bottom. | |
| Center Erase An area along the center of the document can be erased. Areas with a width between 0.1 and 30 mm can be specified. | |

...
Note
Specify the size of the page spread as the scan size.
If a width to be erased around the document is specified with "Frame Erase" with the "Book Copy" function, the same settings are also applied on the Frame Erase screen (displayed from the Erase screen).
1 Touch [Scan Settings] in the Fax/Scan mode screen.
2 Touch [Book Scan].

3 Touch [Book Copy].

4 Specify the settings for the "Book Copy" function.
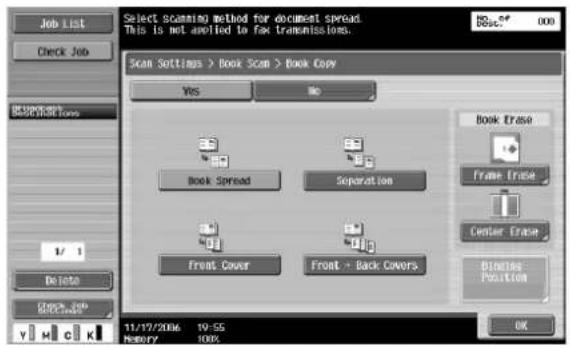
- If "Separation", "Front + Back Covers" or "Front Cover" was selected, touch [Binding Position], and then select the binding position.

5 Touch [OK], and then touch [OK] in the next two screens that appear.
Scan size (Application)
Select the size of paper that is to be scanned.
The following Scan Size settings are available.
| Setting Description | |
| Auto Select this setting to detect the size of the first page in the loaded document. When the "Mixed Original" setting is not selected. | |
| Standard sizes | Select a preset paper size (such as letter or 11 ☐ 17 (A4 or B5)) and orientation. |
| Custom Size Type in the dimensions of a custom size that is not available as a preset size. The size in the X direction can be set between 30 and 432 mm, and the size in the Y direction can be set between 30 and 297 mm. | |
| Photo Size | 9 ☐ 13 and 13 ☐ 18 mm sizes can be selected. |

Note
If the "Book Scanning" function was set, specify the size of the page spread.
1 Touch [Scan Settings] in the Fax/Scan mode screen.
2 Touch [Application].
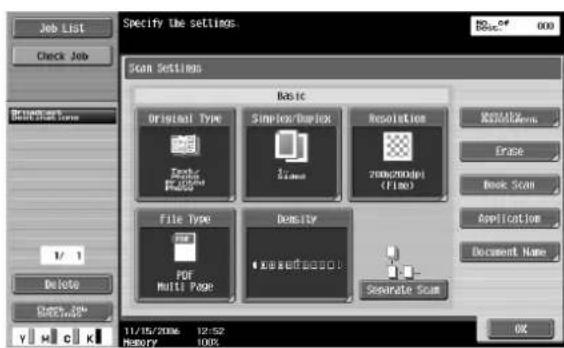
3 Touch [Scan Size].

4 Select the size and orientation.
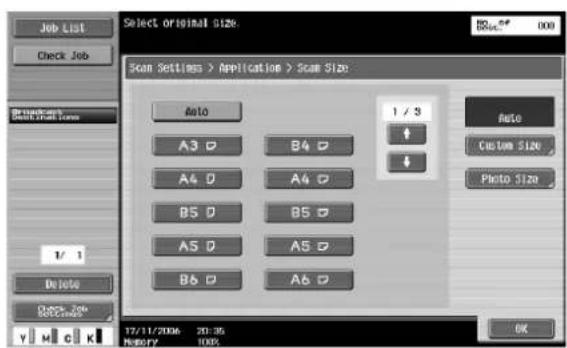
- Select the orientation and size of the paper to be scanned.
- Touching [Custom Size] displays the Custom Size screen. Use the keypad to type in the size, and then touch [OK].
- The values can be specified in 0.1 mm increments.
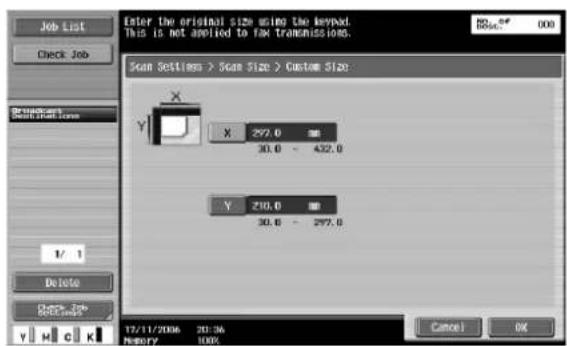
- Touching [Photo Size] displays the Photo Size screen. Select the orientation and size of the photo to be scanned, and then touch [OK].

5 Touch [OK], and then touch [OK] in the next two screens that appear.
Annotation (Application)
Previously specified text, numbers or the date/time can be added to a document when it is scanned and saved in a user box.
Date/Time (Application)
The scanning date and time can be added to all pages of a document.
Settings can be specified for the following.
| Parameter Description | |
| Date Format Select the format | for the date. |
| Time Format Select the whether or not the time is added and select its format. | |
| Pages Select the pages to be | printed on (either all pages or 1st page only). |
| Text Color Select the printing | color (black, red, blue, green, yellow, cyan and magenta). |
| Text Size Select the size (minimal or std.) in which text is printed. | |
| Print Position | Select the position within the page where the image is printed. After a position is selected, it can be finely adjusted. |
1 Touch [Scan Settings] in the Fax/Scan mode screen.
2 Touch [Application].

3 Touch [Stamp/Composition].

4 Touch [Date/Time].

5 To specify a date and time, touch [Yes], and then specify the date and time settings.

- Touching [Text Color] displays a screen for specifying the color. Touch the button for the desired color, and then touch [OK].

- Touching [Text Size] displays a screen for specifying the text size. Touch the button for the desired size, and then touch [OK].

- Touching [Print Position] displays a screen for specifying the printing position. Touch the button for the desired printing position, and then make any fine adjustments, if necessary. After specifying the settings, touch [OK].
- To make fine adjustments, touch [Adjust Position]. The position can be adjusted between 0.1 and 50mm in the left/right direction and the up/down direction.


6 Touch [OK], and then touch [OK] in the next three screens that appear.
Page number (Application)
Page numbers can be added to all pages of the document.
Settings can be specified for the following.
| Parameter Description | |
| Starting Page Number Specify | the starting page number. |
| Starting Chapter Number Specify | the starting chapter number. |
| Page Number Type Select the format for the page number. | |
| Text Color Select the printing color (black, red, blue, green, yellow, cyan and magenta). | |
| Text Size Select the size (minimal std.) in which text is printed. | |
| Print Position | Select the position within the page where the image is printed. After a position is selected, it can be finely adjusted. |
1 Touch [Scan Settings] in the Fax/Scan mode screen.
2 Touch [Application].

3 Touch [Stamp/Composition].

4 Touch [Page Number].

5 To specify the page numbers, touch [Yes], and then specify the page number settings.
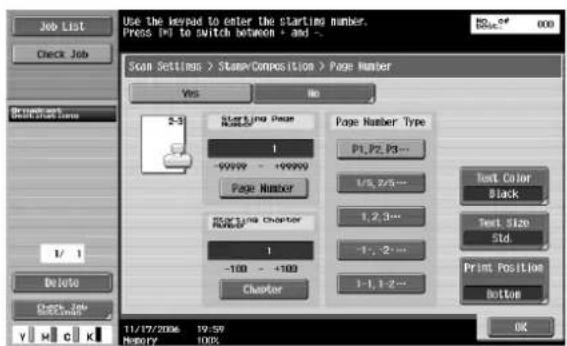
- Touching [Text Color] displays a screen for specifying the color. Touch the button for the desired color, and then touch [OK].

- Touching [Text Size] displays a screen for specifying the text size. Touch the button for the desired size, and then touch [OK].

- Touching [Print Position] displays a screen for specifying the printing position. Touch the button for the desired printing position, and then make any fine adjustments, if necessary. After specifying the settings, touch [OK].
- To make fine adjustments, touch [Adjust Position]. The position can be adjusted between 0.1 and 50mm in the left/right direction and the up/down direction.
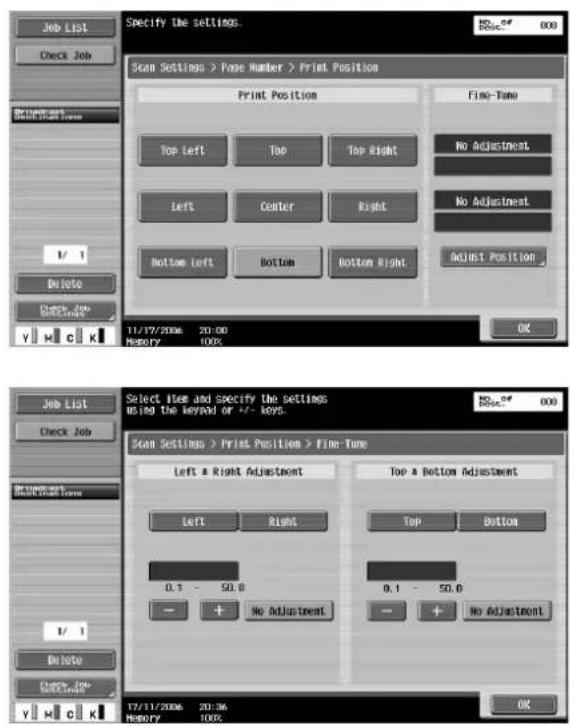
6 Touch [OK], and then touch [OK] in the next three screens that appear.
Stamp (Application)
Preset text, such as "URGENT", can be added to all pages of a document.

...
Note
If "File Type" is set to "PDF" or "Compact PDF", the stamps are added as images. They cannot be added as text.
Settings can be specified for the following.
| Parameter Description | |
| Stamp Type/Preset Stamps | Select a stamp, such as "URGENT", "PLEASE REPLY" or "DO NOT COPY". |
| Pages Select the pages to be printed on (either all pages or 1st page only). | |
| Text Color Select the printing color (black, red, blue, green, yellow, cyan and magenta). | |
| Text Size Select the size (minimal or std.) in which text is printed. | |
| Print Position | Select the position within the page where the image is printed. After a position is selected, it can be finely adjusted. |
1 Touch [Scan Settings] in the Fax/Scan mode screen.
2 Touch [Application].

3 Touch [Stamp/Composition].

4 Touch [Stamp].
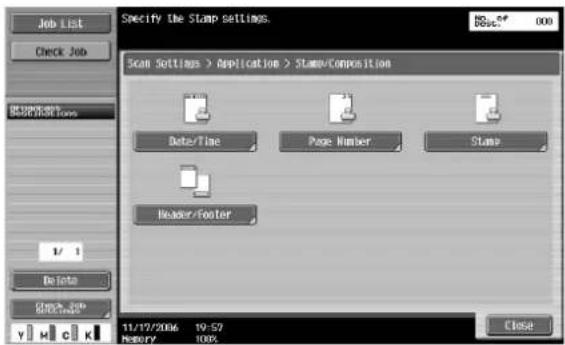
5 To specify a stamp, touch [Yes], and then specify the stamp settings.

- Touching [Text Color] displays a screen for specifying the color. Touch the button for the desired color, and then touch [OK].

- Touching [Text Size] displays a screen for specifying the text size. Touch the button for the desired size, and then touch [OK].
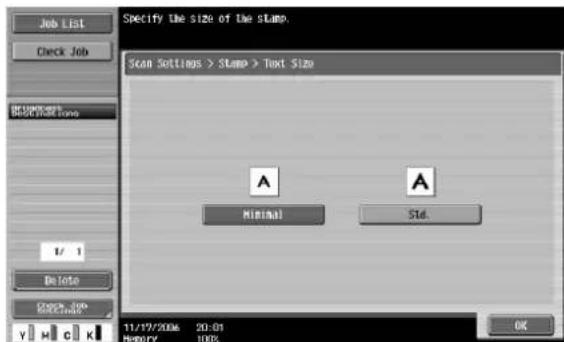
- Touching [Print Position] displays a screen for specifying the printing position. Touch the button for the desired printing position, and then make any fine adjustments, if necessary. After specifying the settings, touch [OK].
- To make fine adjustments, touch [Adjust Position].
The position can be adjusted between 0.1 and 50 mm in the left/right direction and the up/down direction.


6 Touch [OK], and then touch [OK] in the next three screens that appear.
Header/Footer (Application)
Headers or footers can be inserted on all pages. The contents of the header/footer must be previously registered in Administrator mode.

Detail
Headers/footers use registered information that is recalled; however, the information can be checked or changed when scanning. Settings can be specified for the following.
| Parameter Description | |
| Header Settings Select whether or not to insert a header. If a header is to be inserted, specify whether to insert text, the date/time or other information (distribution number, job number or serial number). | |
| Footer Settings Select whether or not to insert a footer. If a footer is to be inserted, specify whether to insert text, the date/time or other information (distribution number, job number or serial number). | |
| Pages Select the pages where the header/footer is to be inserted (either all pages or 1st page only). | |
| Text Color Select the text color (black, red, blue, green, yellow, cyan and magenta). | |
| Text Size Select the size (minimum or standard) in which text is printed. | |
1 Touch [Scan Settings] in the Fax/Scan mode screen.
2 Touch [Application].
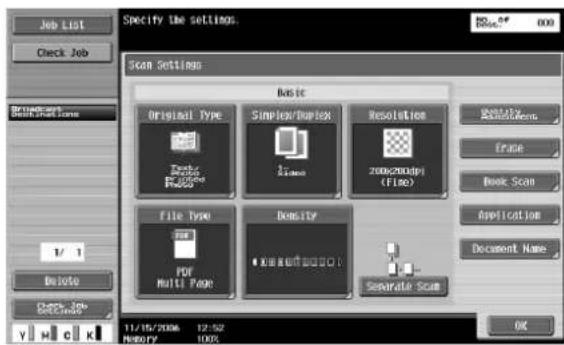
3 Touch [Stamp/Composition].

4 Touch [Header/footer].
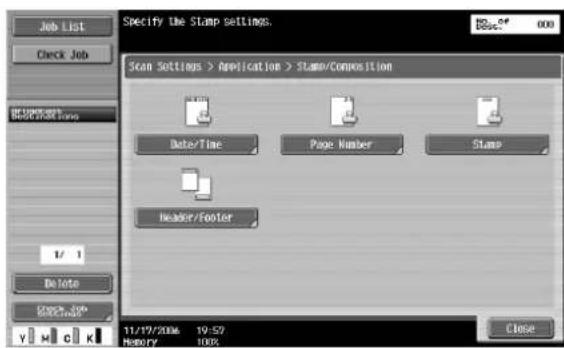
5 To print a header/footer, touch [YES], and then select the type of header/footer to be recalled.

6 To check or temporarily change the selected settings, touch [Check/Change Temporarily]. The Check/Change Temporarily screen appears.

7 Touch "Header Settings" or "Footer Settings", and then specify the header/footer settings.
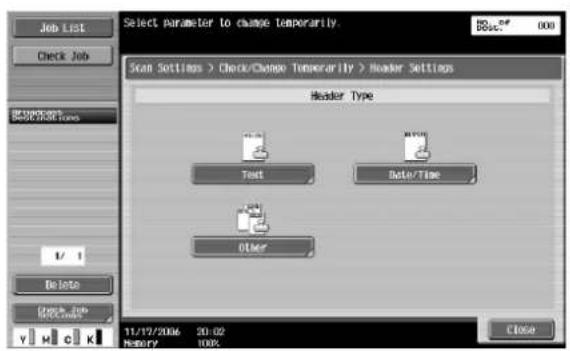
- Text
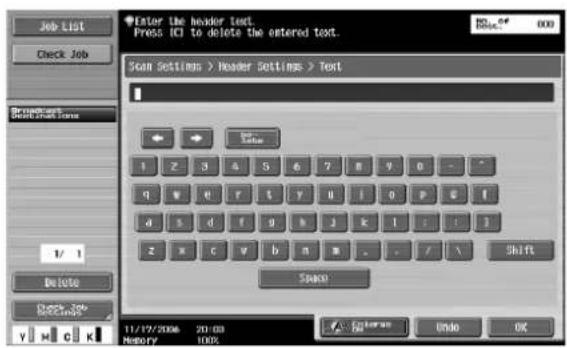
- Date / Time
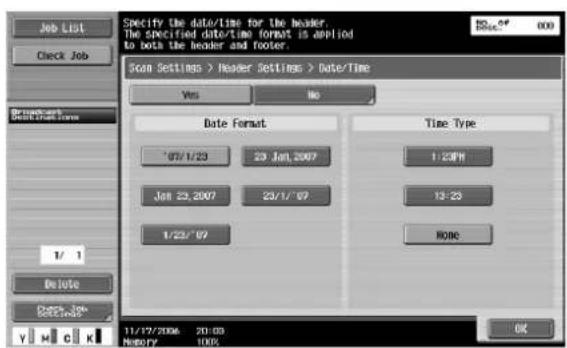
- Other

8 Specify the settings for the pages to be printed on, the text color and the text size.
- Text Color

- Text Size
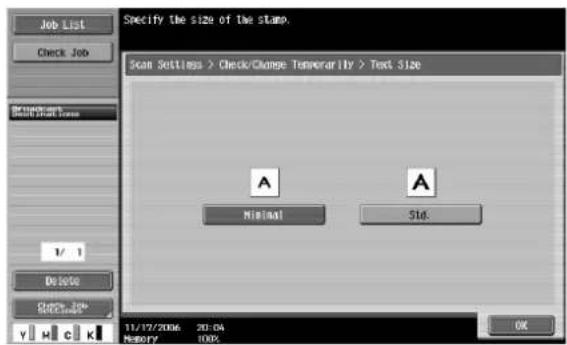
- To cancel the temporarily changed settings, touch [Reset].
9 Touch [OK], and then touch [OK] in the next screen that appears.
10 Touch [Close], and then touch [Close] in the next screen that appears.
Send & Print (Application)
Settings can be specified to print while scanning. Various print settings can be specified.
Settings can be specified for the following.
| Parameter Description | |
| Copies Use the keypad to type in the number of copies to be printed. A number between 1 and 9999 can be specified. | |
| Simplex/Duplex Select whether a single-sided or double-sided copy is to be printed. | |
| Staple | Select whether or not the prints will be stapled. If they will be stapled, select the number of staples and the position. |
1 Touch [Scan Settings] in the Fax/Scan mode screen.
2 Touch [Application].

3 Touch [Send & Print].

4 To print while scanning, touch [Yes], and then specify the desired settings.

5 To select the staple position, touch [Corner] or [2 Positions], and then touch [Position Setting].

6 Touch the button for the desired position, and then touch [OK].

7 Touch [OK], and then touch [OK] in the next two screens that appear.
Document name
Specify the name of the scan data. If no document name is specified, the name is automatically set based on the following information.
As an example, the name "SKMBT_C55006102315230" is described below.
| Section Description | |
| S This letter indicates | the mode when the document was saved.C: CopyS: Fax/ScanP: PrintNote"S" appears for documents saved in the Fax/Scan mode screen or the User Box screen. |
| KMBT_C550 This represents the name of the device that scanned the data. The factory default is "KMBT_C550" ("KMBT_C450" on d-Color MF450). This name can be changed with the "Input Machine Address" parameter on the Administrator/Machine Setting screen in Administrator mode. A name of up to 10 characters can be specified. | |
| 06102315231 | This indicates the year (first two digits), month, day, hour and minutes when the data was scanned. The last digit is a serial number if the document is part of a series of scans. |
| _0001 | This indicates the page when multi-page data is scanned. This numeral does not appear in the screen for the document name; however, it is added automatically as part of the name when the document is routed. Add this part to the name according to the naming conditions of the server receiving the files, for example, when data is sent by FTP. |
| .(file_extension) This is the extension for the specified data format. These characters do not appear in the screen for the document name; however, they are added automatically as part of the name when the document is routed. | |
1 Touch [Scan Settings] in the Fax/Scan mode screen.
2 Touch [Document Name].

3 Using the keyboard that appeared in the touch panel, type in the document name.
- The document name can contain a maximum of 30 characters.
- To stop registering the document name, press the [Reset] key.
- For details on typing in text, refer to "Entering text" on page 9-3.
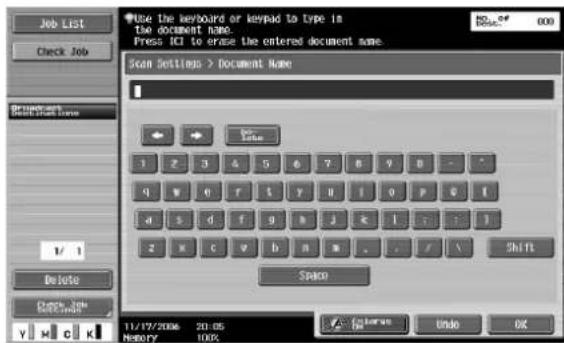
4 Touch [OK].
Original settings
Specify the type of document that is loaded, for example, if it contains mixed page sizes or is folded in a zigzag.
| Parameter Description | |
| Mixed Original Select this setting | when documents of different sizes are loaded into the ADF (optional). The scan speed is decreased since the size of each page is detected before it is scanned. |
| Z-Folded Original Select this setting to detect the size of a zigzag-folded document by the length fed through the ADF. | |
| Long Original Select this setting for documents that are longer than the standard size. | |
| Original Direction Select the orientation of the document. After the document is scanned, the data is processed so that it is correctly oriented. | |
| Binding Position Select the binding position, such as when holes are punched in the document or the document is stapled. In addition, specify the binding position when a double-sided document is loaded.This adjusts the scan of double-sided documents so that the binding position is not reversed.Left Select this setting for a document with binding on the left side.Top Select this setting for a document with binding at the top.Auto The binding is on the long side if the page is 297 mm or less, or it is on the short side if the page is more than 297 mm. | |
| Despeckle Select this setting to reduce the effect that dust on the left partition glass has on images when the document is loaded into the ADF. | |

Note
These functions can be used together.
1 Touch [Original Settings] in the Fax/Scan mode screen.
2 Select settings for the Original Settings functions.

- Touching [Original Direction] displays the Original Direction screen. Touch the button for the desired orientation, and then touch [OK].

- Touching [Binding Position] displays the Binding Position screen. Touch the button for the binding position, and then touch [OK].

- To apply the "Despeckle" setting, touch [Despeckle] to select it.

3 Touch [OK], and then touch [OK] in the next screen that appears.

Detail
The scanning speed will be reduced if the "Despeckle" setting is selected.
Clean the left partition glass when it becomes extremely dirty.
E-Mail setting
When data is sent, an e-mail message containing the document name can be sent to the specified e-mail address.

Detail
The information specified as the document name is used with Scan to FTP and Scan to SMB operations.
If "Change the "From" Address" (displayed by touching [System Settings] on the Administrator Settings screen, then [Restrict User Access], then [Restrict Operation]) is set to "Restrict", the From address cannot be entered directly.
| Parameter Description | |
| Document Name The name of the file to be saved is displayed. The document name specified later appears as the document name, even if the document name was specified with "Document Name" on the Scan Settings screen. If no document name is specified, the name automatically specified based on the settings in the Administrator Settings screen is displayed. A maximum of 30 characters can be entered. | |
| Subject The text specified from Utility mode is automatically displayed. Touch [Direct Input] to change the text. A maximum of 64 characters can be entered. | |
| From The e-mail address specified from Utility mode is automatically displayed. | |
| Body The text specified from Utility mode is displayed. Touch [Direct Input] to change the text.A maximum of 256 characters can be entered. | |
1 Touch [Communication Settings] in the Fax/Scan mode screen.
2 Touch [E-Mail Settings].

3 Specify the e-mail transmission settings.

4 Touch [Close], and then touch [Close] in the next screen that appears.
URL notification setting
Specify the e-mail address where notifications of completion of the job are to be sent.

Detail
The destinations that can be specified for "URL Notification Setting" include FTP servers, SMB server or user boxes.
This feature does not function during e-mail transmissions, even if a setting is specified.
1 Touch [Communication Settings] in the Fax/Scan mode screen.
2 Touch [URL Notification Setting].

3 Specify the e-mail address where notifications will be sent.
- Select a registered e-mail address.
- Touch [Direct Input], and then specify the e-mail address for the destination of URL notifications.
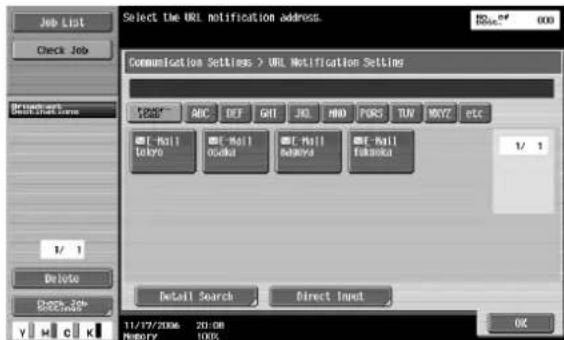
4 Touch [Close], and then touch [Close] in the next screen that appears.
E-Mail encryption
A setting can be specified for this parameter when "S/MIME Communication Settings" is set to "ON". Select whether or not to encrypt e-mail messages that are sent.
1 Touch [Communication Settings] in the Fax/Scan mode screen.
2 Touch [E-Mail Encryption].

3 Touch [Close], and then touch [Close] in the next screen that appears.
Digital signature
This parameter appears when "S/MIME Communication Settings" is set to "ON". Select whether or not to add a digital signature to e-mail messages that are sent.

Note
This parameter may not be available or may be set to normally sign, depending on the specified S/MIME communication settings.
1 Touch [Communication Settings] in the Fax/Scan mode screen.
2 To add a digital signature, touch [Digital Signature].
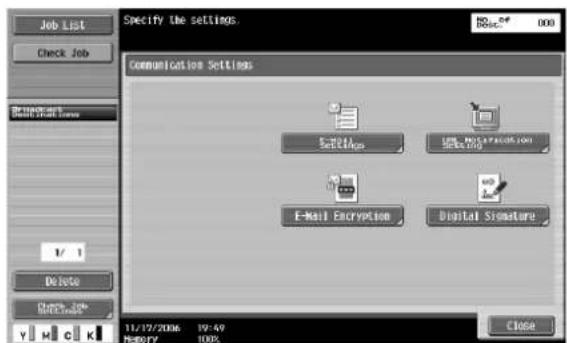
3 Touch [Close], and then touch [Close] in the next screen that appears.
5.6 Settings that can be specified from utility mode
Various basic settings and advanced parameters for using this machine can be set from the Utility mode. This chapter describes the procedures for setting the Utility mode parameters for scanning functions and the screens.
Utility mode parameters
The following Utility mode parameters are described in this manual.
| Parameter Description | |
| One-Touch Destionation/User Box Registration | Specify settings for scan destinations. Destinations can be registered as programs, groups or in the address book.For details, refer to "Registering an address book destination" on page 5-68 and"Registering a group destination" on page 5-77. |
| User Settings Specify default settings for the Fax/Scan mode screen and settings for saving data. | |
| Administrator Settings Register header/footer settings. | |
Other related parameters
Setting procedures are not provided in this manual; however, some parameters manage the scanning functions and network connection.
| Parameter Description | |
| Administrator Registration | If the e-mail address of the administrator is not specified, scan data cannot be sent by e-mail. |
| User Authentication Settings If "User Registration" is set so that scan operations are not permitted, scan operations cannot be performed. | |
Web Connection
Web Connection is a device management utility supported by the HTTP server integrated into the device. Using a Web browser on a computer connected to the network, machine settings can be specified from Web Connection.
Specifying settings with the utility is convenient since text can easily be typed in from your computer instead of with the machine's control panel.
5.7 Registering an address book destination
A maximum of 2,000 destinations can be registered.
E-Mail destination
Settings can be specified for the following for the e-mail destination to be registered.
| Parameter Description | |
| Name Type in a name of 24 characters or less for the registered destination. | |
| Index | Select the index characters. For frequently used destinations, touch [Favorites] so that the destination can be found more easily. |
| E-Mail Address Type in the address where the e-mail is sent. | |

Detail
If "Registering and Changing Address" in Administrator mode is set to "Restrict", specify these settings with "One-Touch/User Box Registration" on the Administrator Settings screen.
1 Touch [1 Create One-Touch Destination (Address Book)] in the Create One-Touch Destination screen.
2 Touch [1 E-Mail].
The E-Mail screen appears.
![To register a new e-mail address, touch Book To edit an existing e-mail address, Select desired address and touch Editl. Utility > Address Book > [E-mail] No. Name 0002 tokyo 0003 osaka 0006 nasoya 0007 fukuoka 1/ 1 Sep 11/17/2006 15:48 NOMOY 0005 Close](/content/2026/05/977387/images/d491f65aa10061feb2b02fc06d327592ea280acfdacabaddedc44ccc9e9b033b.jpg)
3 Touch [New].
The New screen appears.

4 Touch [Name], and then type in the registration name, using the keyboard that appears.
- For details on typing in text, refer to "Entering text" on page 9-3.
5 Touch [OK].
6 Touch [Index], and then select the index characters.

7 Touch [OK].
8 Touch [E-Mail Address], and then type in the e-mail address, using the keyboard that appears.
9 Touch [OK], and then touch [OK] in the next screen that appears.
The e-mail destination is registered.

Detail
To check a registered destination, select it, and then touch [Check Job Set].
To change the settings for a registered destination, select it, and then touch [Edit].
To delete a registered destination, select it, and then touch [Delete].

Note
The registration cannot be completed if no settings are specified for "Name" and "E-Mail Address".
To cancel the registration, touch [Cancel].
To finish specifying settings in the Utility mode, press the [Utility/Counter] key. Otherwise, exit the Utility mode by touching [Close] in each screen until the screen for the Copy, Fax/Scan or Box mode appears.
User box
Settings can be specified for the following for the user box destination to be registered.
| Parameter Description | |
| Name Type in a name of 24 characters or less for the registered destination. | |
| Index Select the index characters. For frequently used destinations, touch [Favorites] so that the destination can be found more easily. | |
| User Box Select one user box where data is to be saved. | |

Detail
In order to register a user box as a destination, the user box must be registered first.
1 Touch [1 Create One-Touch Destination (Address Book)] in the Create One-Touch Destination screen.
2 Touch [2 User Box].
The User Box screen appears.
![Job List Bookmark Utility One-Touch/ User Box Reg. Create One-Touch Destination Address Book User Box To register a new User Box destination, touch New! To edit an existing User Box destination, select desired destination and touch Edit! Utility > Address Book > User Box [12/17/2006 15:49] USEHLY 100% ABC DEF QAI JUL MNO PSRS TUV NOVZ etc No. None 0001:00001 1/1 New Close](/content/2026/05/977387/images/f9c286ba7dc0e902c6a9b538f7cdc51c3f9fdcf792a703db3cd0871d58a366c5.jpg)
3 Touch [New].
The New screen appears.

4 Touch [Name], and then type in the registration name, using the keyboard that appears.
- For details on typing in text, refer to "Entering text" on page 9-3.
5 Touch [OK].
6 Touch [Index], and then select the index characters.

7 Touch [OK].
8 Touch [User Box], and then select a user box.
9 Touch [OK], and then touch [OK] in the next screen that appears.
The user box destination is registered.

Detail
To check a registered destination, select it, and then touch [Check Job Set].
To change the settings for a registered destination, select it, and then touch [Edit].
To delete a registered destination, select it, and then touch [Delete].

Note
The registration cannot be completed if no settings are specified for "Name" and "User Box".
To cancel the registration, touch [Cancel].
To finish specifying settings in the Utility mode, press the [Utility/Counter] key. Otherwise, exit the Utility mode by touching [Close] in each screen until the screen for the Copy, Fax/Scan or Box mode appears.
PC (SMB)
Settings can be specified for the following for the SMB destination to be registered.
| Parameter Description | |
| Name Type in a name of 24 characters or less for the registered destination. | |
| Index Select the index characters. For frequently used destinations, touch [Favorites] so that the destination can be found more easily. | |
| User ID | Type in 127 characters or less for the user ID for logging onto the destination computer. |
| Password Type in 14 characters or less for the password for logging onto the destination computer. | |
| Host Address Type in the host address for the destination computer in the format of a host name, IPv4 address or IPv6 address.For a host name, type in 255 characters or less. | |
| File Path Type in 255 characters or less for the path to the saved file. | |
1 Touch [1 Create One-Touch Destination (Address Book)] in the Create One-Touch Destination screen.
2 Touch [4 PC (SMB)].
The PC (SMB) screen appears.
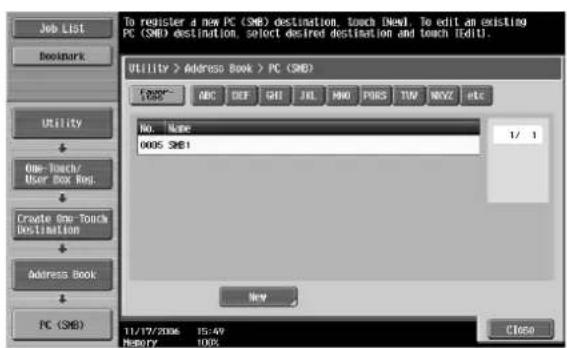
3 Touch [New].
New screen 1/2 appears.
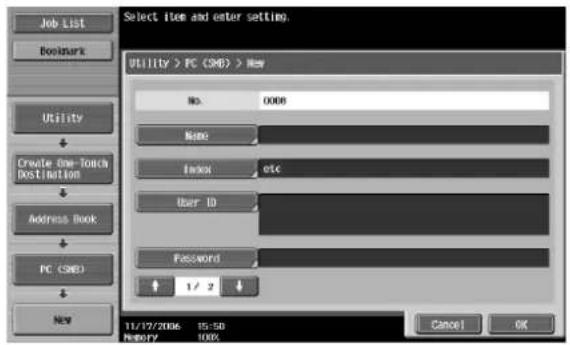
4 Touch [Name], and then type in the registration name, using the keyboard that appears.
- For details on typing in text, refer to "Entering text" on page 9-3.
5 Touch [OK].
6 Touch [Index], and then select the index characters.
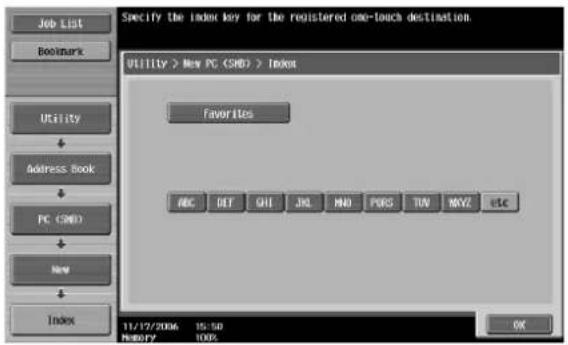
7 Touch [OK].
8 Touch [User ID], and then type in the user ID, using the keyboard that appears.
9 Touch [OK].
10 Touch [Password], and then type in the password, using the keyboard that appears.
11 Touch [OK].
12
Touch
![OLIVETTI d-Color MF550 - Touch [New]. - 3](/content/2026/05/977387/images/1b039053ad9741777cf85501e5730a0da39d3a5b11f942bf59f722a152deed06.jpg)
![OLIVETTI d-Color MF550 - Touch [New]. - 4](/content/2026/05/977387/images/cd6dd4be8d9eff7049e227080bff237d0f617399bcdbfdaa10655b0ae6be59a9.jpg)
New screen 2/2 appears.

13 Touch [Host Address], and then type in the IP address or host name.
- To enter a host name, touch [Host Name Input], and then type in the host name, using the keyboard that appears.
- To enter an IP address, touch [IPv4 Address Input] or [IPv6 Address Input], and then type in the address, using the keypad or the number buttons that appear. Touch or to move the cursor to the desired position, and then type in the numbers.
- When the input format is switched to entering an IP address after the host name was entered, the host name is cleared.
- If [Host Name Input] is touched after the IP address was entered, the entered IP address is saved and the input screen appears.
- Type the host name and file path in uppercase letters.
14 Touch [OK].
15 Touch [File Path], and then type in the file path, using the keyboard that appears.
16 Touch [OK], and then touch [OK] in the next screen that appears.
The SMB destination is registered.
![OLIVETTI d-Color MF550 - Touch [New]. - 6](/content/2026/05/977387/images/4dd2d1d44a39be401f4f23f13c3d49c9425586357e3283f2b25ecef848325223.jpg)
Detail
To check a registered destination, select it, and then touch [Check Job Set.].
To change the settings for a registered destination, select it, and then touch [Edit].
To delete a registered destination, select it, and then touch [Delete].

Note
The registration cannot be completed if no settings are specified for "Name", "Host Address" and "File Path".
To cancel the registration, touch [Cancel].
To finish specifying settings in the Utility mode, press the [Utility/Counter] key. Otherwise, exit the Utility mode by touching [Close] in each screen until the screen for the Copy, Fax/Scan or Box mode appears.
FTP
Settings can be specified for the following for the FTP destination to be registered.
| Parameter Description | |
| Name Type in a name | of 24 characters or less for the registered destination. |
| Index Select the index | characters. For frequently used destinations, touch [Favorites] so that the destination can be found more easily. |
| Host Address Type in | the host address in the format of a host name, IPv4 address or IPv6 address.For a host name, type in 63 characters or less. |
| File Path Type in 96 | characters or less for the path to the saved file. |
| User ID Type in 47 | characters or less for the user ID for logging onto the host computer. |
| Password Type in 31 | characters or less for the password for logging onto the host computer. |
| anonymous To specify | no user ID for logging onto the host computer, touch [ON]. |
| PASV Select whether | or not the PASV mode is used. |
| Proxy Select whether | or not a proxy server is used. |
| Port Number Type in | the port number. (Range: 1 to 65535) |
1 Touch [1 Create One-Touch Destination (Address Book)] in the Create One-Touch Destination screen.
2 Touch [5 FTP].
The FTP screen appears.

3 Touch [New].
The New screen appears.
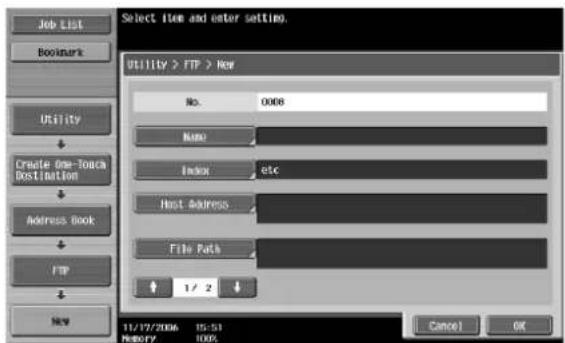
4 Touch [Name], and then type in the registration name, using the keyboard that appears.
- For details on typing in text, refer to "Entering text" on page 9-3.
5 Touch [OK].
6 Touch [Index], and then select the index characters.

7 Touch [OK].
8 Touch [Host Address], and then type in the IP address or host name.
- To enter a host name, touch [Host Name Input], and then type in the host name, using the keyboard that appears.
- To enter an IP address, touch [IPv4 Address Input] or [IPv6 Address Input], and then type in the address, using the keypad or the number buttons that appear. Touch or to move the cursor to the desired position, and then type in the numbers.
- When the input format is switched to entering an IP address after the host name was entered, the host name is cleared.
- If [Host Name Input] is touched after the IP address was entered, the entered IP address is saved and the input screen appears.
- When [Host Name Input] is touched, check that the DNS setting is correctly specified.
9 Touch [OK].
10 Touch [File Path], and then type in the file path, using the keyboard that appears.
11 Touch [OK].
12 Touch or
New screen 2/2 appears.

13 Touch [User ID], and then type in the user ID, using the keyboard that appears.
- To cancel registration of the user ID, touch [ON] beside "anonymous".
14 Touch [OK].
15 Touch [Password], and then type in the password, using the keyboard that appears.
16 Touch [OK].
17 If necessary, specify settings for "anonymous", "PASV mode", "Proxy" and "Port Number".
- To enter a port number, press the [C] (clear) key to clear the current value, and then use the keypad to type in the port number.
- If a value outside the allowable range is specified, the message "Input error" appears. Type a value within the allowable range.
18 Touch [OK].
The FTP destination is registered.

Detail
To check a registered destination, select it, and then touch [Check Job Set].
To change the settings for a registered destination, select it, and then touch [Edit].
To delete a registered destination, select it, and then touch [Delete].

Note
The registration cannot be completed if no settings are specified for "Name", "Host Address", "File Path", "User ID" and "Password".
To cancel the registration, touch [Cancel].
To finish specifying settings in the Utility mode, press the [Utility/Counter] key. Otherwise, exit the Utility mode by touching [Close] in each screen until the screen for the Copy, Fax/Scan or Box mode appears.
5.8 Registering a group destination
A group destination can be registered.

Detail
Up to 100 groups can be registered, and up to 500 destinations can be registered in a single group.
1 Touch [2 Create Group] in the Create One-Touch Destination screen.
The Group screen appears.

2 Touch [New].
The New screen appears.

3 Touch [Name], and then type in the registration name, using the keyboard that appears.
- For details on typing in text, refer to "Entering text" on page 9-3.
4 Touch [OK].
5 Touch [Select Group].
6 Select a destination type, and then select the destination to be registered.
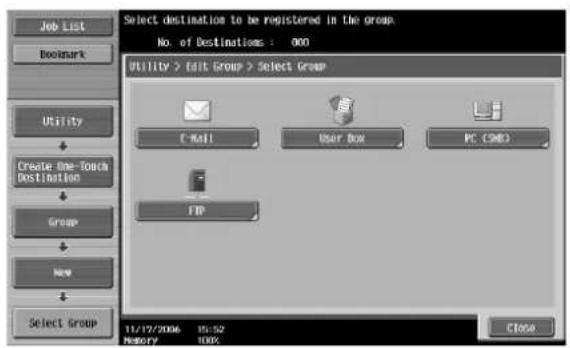
7 Touch [OK].
8 Touch [Close].
9 Touch [OK].
The Group destination is registered.

Detail
To check a registered destination, select it, and then touch [Check Job Set].
To change the settings for a registered destination, select it, and then touch [Edit].
To delete a registered destination, select it, and then touch [Delete].

Note
The registration cannot be completed if no settings are specified for "Name" and "Destination".
To cancel the registration, touch [Cancel].
To finish specifying settings in the Utility mode, press the [Utility/Counter] key. Otherwise, exit the Utility mode by touching [Close] in each screen until the screen for the Copy, Fax/Scan or Box mode appears.
6
Web Connection Operations
6 Web Connection Operations
The User mode provides functions for checking and operating the machine on a user level. You can select from five tabs (Information, Job, Box, Direct Print, and Store Address). This section contains descriptions of the items in the menu that appears on the left side of the page when each User mode tab is clicked.
6.1 Information tab
On the Information tab, information and settings concerning the system configuration of the machine are displayed.
Device Information - Configuration Summary
The system configuration and status of the machine are displayed. This is the first page that appears when the machine is accessed with Web Connection.

| Item Description | |
| Device Information Displays device information and the toner status. | |
| Paper Tray Displays the name of each installed paper tray, the size and type of the loaded paper, the remaining paper quantities and the paper capacities. | |
| Output Tray Displays the name of each installed output tray. | |
| Administrator Information Displays the administrator information. | |

Detail
If "HTML" was selected as the display format during logon, select a paper tray under "Paper Tray", and then click the [Detail] button to view detailed information.
Device Information - Option
The size of the machine's memory, the hard disk status, and the installation status of options can be displayed.

Item Description
RAM, HDD, Network Displays information on the memory, hard disk drive and network.
The installed options are displayed.
Device Information - Consumables
Information about consumables for the machine is displayed.
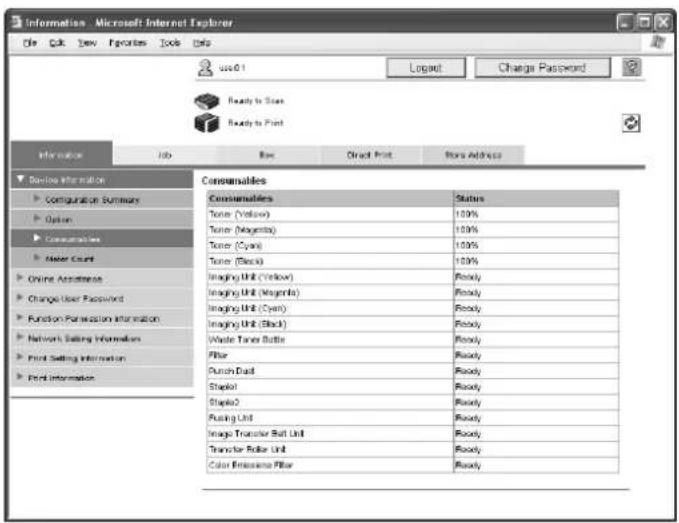
| d-Color MF450 d-Color MF550 Description | ||
| Toner (Yellow/Magenta/Cyan/Black)Imaging Unit (Yellow/Magenta/Cyan/Black)Waste Toner BottleOzone FilterHole-Punch Scrap BoxStaple CartrigeSaddle Staple Cartrige (1, 2)Fusing UnitImage Transfer Belt UnitTransfer Roller UnitColor Toner Filter | Toner (Yellow/Magenta/Cyan/Black)Imaging Unit (Yellow/Magenta/Cyan/Black)Waste Toner BottleFilterPunch DustStaple (1, 2)Fusing UnitImage Transfer Belt UnitTransfer Roller UnitColor Emissions Filter | Displays information for each of the items. |

...
Note
The information that is displayed differs depending on the options that are installed.
Device Information - Meter Count
Counters managed by the machine can be displayed.
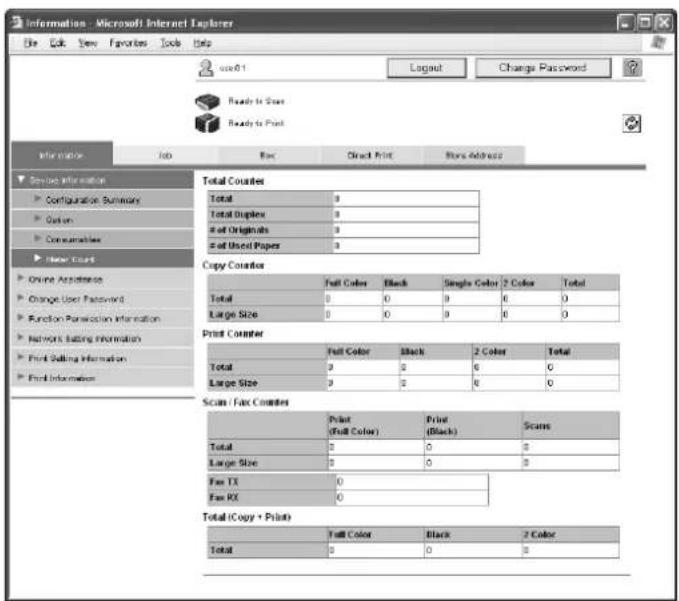
| Item Description | |
| Total Counter Displays totals for the output counters (Copy, Print, Scan and Fax). | |
| Copy Counter Displays the various counters. | |
| Print Counter | |
| Scan Counter (appears as Scan/Fax Counter if the option-al fax kit has been installed) | |
| Total (Copy + Print) Displays the counters for the Color settings. | |
Online Assistance
Support information for the machine can be displayed.
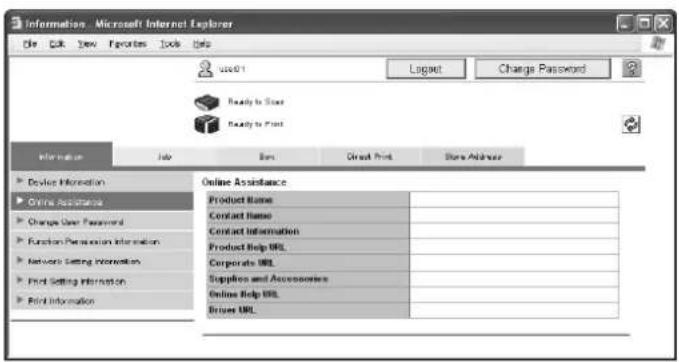
| Item Description | |
| Product Name Displays the product name. | |
| Contact Name Displays the information entered on the page that appeared after clicking "Online Assistance" in the menu on the Maintenance tab in Administrator mode. | |
| Contact Information | |
| Product Help URL | |
| Corporate URL | |
| Supplies and Accessories | |
| Online Help URL | |
| Driver URL | |
Change User Password
The password for the user who is logged on can be changed.

| Item Description | |
| User Name Displays the name of user who is logged on. | |
| Current Password Type in the current password. | |
| New Password Type in the new password (up to 64 characters, excluding " and +). | |
| Retype New Password Type in the new password again for confirmation. | |

Detail
If user authentication settings have specified on the machine, "Change User Password" appears in the menu.
The user password can be changed when "User Authentication" is set to "ON (MFP)".

Reminder
If "Password Rules" is set to "Enable", only a password containing 8 digits can be specified.
If a user password containing less than 8 characters has already been registered, change the password so that it contains 8 characters before setting "Password Rules" to "Enable".
Function Permission Information
Information on operations permitted by users and accounts can be displayed.

| Item Description | |
| Function Permission* Displays whether or not each machine operation can be used. | |
| Output Permission (Print/TX) Displays whether or not each machine output operation can be used. | |
| Upper Limit Management Displays the maximum limits and current counter values. | |
* This is only displayed in user registration information.

Detail
If user authentication and account track settings have been specified on the machine, "Function Permission Information" appears in the menu. If user authentication or account track settings have not been specified, only the specified function permissions are displayed.
Network Setting Information
Network settings for the machine can be displayed.

| Item Description | |
| Protocol Information Displays the | usage status for each protocol. |
| Network Information Displays information about the network. | |
Print Setting Information
Settings for the printer controller of the machine can be displayed. A print job sent with no settings specified is printed with these settings.

The following information can be selected from the submenu.
| Item Description | |
| Default Setting Displays information for each of the items. | |
| Font Information | |
| Macro List | |
| PCL Setting | |
| PS Setting | |
Print Information
→ Font and settings information can be printed. Select the report to be printed, select a paper tray from the "Paper Tray" list, and then click the [OK] button.

| Item Description | |
| PS Font List Prints the list of fonts that can be used with PostScript. | |
| PCL Font List Prints the list of fonts that can be used with PCL. | |
| GDI Demo Page Prints the GDI demo page. | |
| Configuration Page Prints the list of print settings specified for the machine. | |
| Paper Tray Select the paper tray loaded with the paper used for printing the reports. | |

Note
It may not be possible to print reports while the machine is processing a job.
6.2 Job tab
On the Job tab, the jobs managed by the machine are displayed. The display of the Job tab differs depending on the display format selected during logon.
Current Jobs
→ The jobs being performed and the jobs queued to be performed can be viewed. Select a job type, and then click the [Go] button.
Select from the following job types.
| Item Description | |
| Print Displays a list of print jobs and their details. | |
| TX Displays a list of transmission jobs and their details. | |
| RX* Displays a list of fax reception jobs and their details. | |
| Save Displays a list of user box jobs and their details. | |
* Appears if fax operations are available.
Sample page of print jobs

- The number assigned to the job when it was queued in the machine appears as the job number.
- To output a job sooner, select the job, and then click the [Increase Priority] button (with print jobs). The output priority setting is not available if an administrator user is logged on.
- To view the list of destinations, select the job, and then click the [Display Broadcast Destinations] button (with transmission jobs).
- To delete a job, select the job, and then click the [Delete] button.

Detail
If "HTML" was selected as the display format during logon, the page to be displayed can be selected.
If an administrator user or user box administrator is logged on, jobs of registered users can be deleted.
Job History
The completed jobs can be viewed. Select a job type, and then click the [Go] button.
Select from the following job types.
| Item Description | |
| Print Displays a list of print jobs and their details. | |
| TX Displays a list of transmission jobs and their details. | |
| RX* Displays a list of fax reception jobs and their details. | |
| Save Displays a list of user box jobs and their details. | |
* Appears if fax operations are available.
Sample page of print jobs
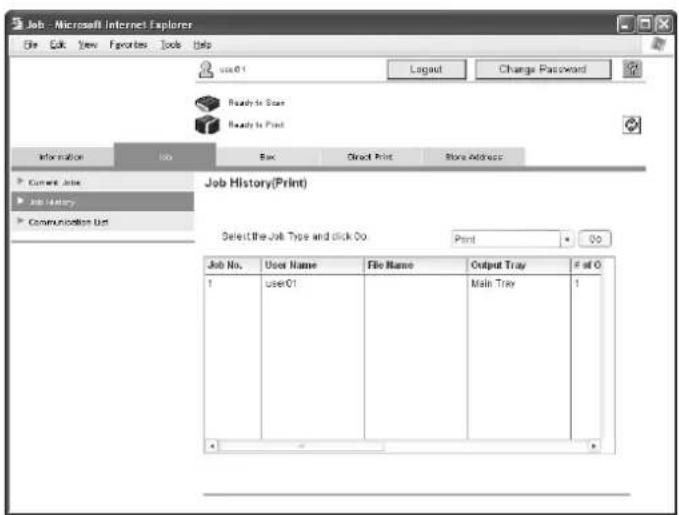
The number assigned to the job when it was queued in the machine appears as the job number.

Detail
If "HTML" was selected as the display format during logon, the page to be displayed can be selected.
If "HTML" was selected as the display format during logon, select a job, and then click the [Detail] button to view detailed information.
Communication List
The completed transmission and reception jobs can be viewed. Select a job type, and then click the [Go] button.
Select from the following job types.
| Item Description | |
| Scan to E-mail | Displays a list of scan transmission (e-mail, FTP and SMB) jobs and their details. |
| Fax TX* Displays a list of fax transmission jobs and their details. | |
| Fax RX* Displays a list of fax reception jobs and their details. | |
* Appears if fax operations are available.
Sample page when "Scan to E-mail" is selected
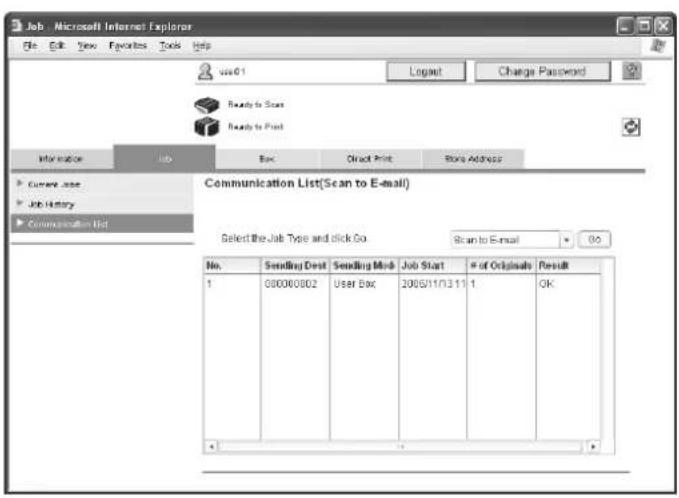
The number assigned to the job when it was queued in the machine appears as the job number.

Detail
If "HTML" was selected as the display format during logon, select a job, and then click the [Detail] button to view detailed information.
6.3 Box tab
From the Box tab, user boxes can be created, and documents in user boxes can be viewed and downloaded.

Note
If an administrator user or user box administrator is logged on, the settings for user boxes can be changed or the user boxes can be deleted without the box password being entered.
Open User Box
A list of all currently created user boxes (public user boxes, personal user boxes and group user boxes) can be displayed, and the user box to be opened can be specified.

Open User Box (Public/Group/Personal)
| Item Description | |
| User Box Number Type in the number of the user box to be opened. | |
| User Box Password Type in the password if one has been specified for the user box. | |
User Box List
| Item Description | |
| Search from Index Displays the list of user boxes according the index search characters selected when the box was created. | |
| Page (Display by 50 cases) If there are more than 50 user boxes, specify the page to be displayed. | |
| User Box List Displays the user box number, user box name, user box type and date/time that the box was created.appears beside user boxes where a password has been specified. | |
→ From the User Box List, click the name of the desired user box. Otherwise, type in the user box number and password, and then click the [OK] button.
Basic user box information and the list of documents saved in the user box are displayed.

Reminder
If "Prohibited Functions When Authentication Error" in Administrator mode is set to "Mode 2" and a user enters an incorrect user box password the specified number of times, that box is locked and can no longer be used. Contact the administrator to cancel operation restrictions.

Detail
When the name of a user box is clicked, a page for entering the password appears if a password has been specified for the box.

| Item Description | |
| [User Box Setting] button | Click this button to change the user box settings. For details, refer to "Changing user box settings" on page 6-18. |
| [Delete User Box] button Click this button to display a page to delete the user box. | |
| Thumbnail View Select whether or not thumbnails are displayed in the list of documents. | |
| Specify operation Select the operation to be performed with the document. For details, refer to "Document operations" on page 6-16. | |
| [Changes the display] button | Click this button to display the "Select" check box beside all documents with which the selected operation can be performed. |
| Select A check box appears beside all documents with which the selected operation can be performed. | |
| Thumbnail A thumbnail is displayed if the thumbnail view is turned on. | |
| Document Name Displays the name of the document. Click the name to display details about the document. | |
| [Edit Name] button Click this button to change the document name. | |
| [Cancel] button Click this button to return to the User Box List page | |

...
Note
If an administrator user is logged on, the File List is not displayed.
Document operations
Select from the following document operations.
- Display All
- Send to other device
- Download to PC
- Move/Copy
- Delete

Detail
"Send to other device" and "Download to PC" can be used with documents saved in Fax/Scan mode.
Some operations and documents may not be available, depending on the function limitation and output permission settings specified for the account or user who is logged on.
1 Select the operation from the "Specify operation" list, and then click the [Changes the display] button.

A check box appears beside all documents with which the selected operation can be performed.
2 Select the check box beside the documents with which the operation is to be performed, and then click the settings button.

The corresponding settings page appears.
3 Specify the desired settings, and then click the [OK] button. When the [Print Setting] button is clicked

- Click the [Cancel] button to return to the File List page.
Settings available with the [Print Setting] button
| Item Description | |
| Combine This setting appears if multiple documents were selected. To print multiple documents together, select this check box. This setting is not available if 11 or more documents are selected. | |
| Number of Sets Type in the number of copies to be printed. (Range: 1 to 9999) | |
| 2-Sided Print Select whether or not double-sided printing is performed. | |
| Finishing | If "Group" or "Sort" is selected, the "Offset" check box is available. If multiple documents were selected, "Group" and "Sort" is not available. |
| Change order | This appears if multiple documents were selected. Select a document, and then click the [Top], [Up], [Down] or [Bottom] button to change the document order. To return the documents to their original order, click the [Undo] button. To display the documents as thumbnails, click the [Thumbnail] button. |
Settings available with the [TX Setting] button
| Item Description | |
| Specify destination To select from | a list of destinations, click the [Select from List] button. A destination can also be searched for using its number, index characters or type. To check the transmission destinations, click the [Check Destination] button. |
| Bind TX This setting appears if multiple documents were selected. To send multiple docu-ments together, select this check box. This setting is not available if 11 or more documents are selected. | |
| File Type Select the file format ("PDF", "JPEG", "TIFF" or "Compact PDF"). | |
| Page Setting Select the page setting ("Multi Page" or "Single Page"). | |
| Change order | This appears if multiple documents were selected. Select a document, and then click the [Top], [Up], [Down] or [Bottom] button to change the document order. To return the documents to their original order, click the [Undo] button. To display the document list as thumbnails, click the [Thumbnail] button. |
Settings available with the [Download Setting] button
| Item Description | |
| Number of Originals Displays the | number of pages in the original. |
| Color Type Displays the color type. | |
| File Format Select the file format ("PDF", "JPEG", "TIFF" or "Compact PDF"). | |
| Page Range Specify the pages to be downloaded. If "Page" is selected, specify the starting and ending pages. If multiple documents were selected, "ALL" is selected. If "JPEG" was selected as the file format, "Page" is selected. | |
| Change order This appears if multiple documents were selected. Select a document, and then click the [Top], [Up], [Down] or [Bottom] button to change the document order. To return the documents to their original order, click the [Undo] button. To display the document list as thumbnails, click the [Thumbnail] button. | |
Settings available with the [Move/Copy Setting] button
| Item Description | |
| User Box Number To select a destination from the list of user boxes, click the [Search from List] button. A destination can also be searched for using the page number or index characters. | |
| Copy Select this check box to copy the document. | |
| Document Selection This appears if multiple documents were selected. Displays the names of the selected documents. To display the documents as thumbnails, click the [Thumbnail] button. | |
Settings available with the [Delete] button
| Item Description | |
| Document Selection Displays the | names of the selected documents. To display the documents as thumbnails, click the [Thumbnail] button. |
Changing user box settings
→ In the File List page, click the [User Box Setting] button.

| Item Description | |
| User Box Number Displays the user box number. This cannot be changed. | |
| User Box Name Type in a user box name of a maximum of 20 characters. | |
| Index Select the indexing characters. | |
| Auto Delete Document | Select the length of time ("Save", "12 hours", "1 day", "2 days", "3 days", "7 days" or "30 days") that a document is stored in a user box. |
| User Box Expansion Function is changed. | This setting appears when the optional fax kit is installed. To change the confidential reception function, select the check box. Select "ON" or "OFF", and then specify the password (up to 8 characters, including only numerals, * and #). |
| User Box Password is changed. | To change the user box password, select the check box. Type in the current password and the new password (up to 8 characters, excluding " and +). |
| User Box Owner is changed. Select this when changing the User Box owner, and select the Box Type. To change the user box owner, select the check box, and then select the user box type. If "Personal" or "Group" is selected, specify the user box owner. To select a user box owner from a list, click the [User List] or [Account List] button. | |
Create User Box
New user boxes can be created.

| Item Description | |
| User Box Number Select how the | registration number is to be specified ("Use opening number" or "Input directly"). If "Input directly" is selected, type in the number. If "0" is specified, the user box is automatically registered with the next available number. (Range: 1 to 999999999). |
| User Box Name Type in the user | box name (up to 20 characters). If a user box password is to be specified, select the "Use Box Password" check box, and then type in the password (up to 8 characters, excluding " and +). |
| Index Select the indexing characters. | |
| Type Select the user box type. If " | Personal" or "Group" is selected, specify the user box owner. To select a user box owner from a list, click the [User List] or [Account List] button. |
| Auto Delete Document | Select the length of time ("Save", "12 hours", "1 day", "2 days", "3 days", "7 days" or "30 days") that a document is stored in a user box. |
| User Box Expansion Function This setting appears when the optional fax kit is installed. To specify the confidential reception setting, click the [Display] button.Select the check box, and then specify the communication password (up to 8 characters, including only numerals, * and #). | |

Reminder
If "Password Rules" is set to "Enable", only a password containing 8 digits can be specified.
If a user box password containing less than 8 characters has already been registered, change the password so that it contains 8 characters before setting "Password Rules" to "Enable".

Note
If an administrator user is logged on, only public user boxes can be created, and they cannot be changed.
Open System User Box
"Open System User Box" appears when the optional fax kit is installed. System user boxes (Bulletin Board User Box, Polling TX User Box, Memory RX User Box, Relay User Box) can be opened, and basic user box information and the list of documents saved in the user box can be displayed.

Note
If an administrator user is logged on, system user boxes are displayed in the same way as in Administrator mode.
→ Select the system user box type, and then click the [OK] button.

- If "Bulletin Board User Box" or "Relay User Box" is selected, a list of currently available user boxes appears. Type in the user box number and password, and then click the [OK] button. Otherwise, click the name of the desired user box in the list. If a user box password was specified, type in the password, and then click the [OK] button.
- If "Memory RX User Box" is selected, type in the password, and then click the [OK] button. The user box information appears.
For a bulletin board user box


Note
Depending on the user box type, some displays and operations may not be available.
For details on the document operations, refer to "Document operations" on page 6-16.
→ For bulletin board user boxes and relay user boxes, click the [User Box Setting] button to change user box settings.

Change settings of the bulletin board user box
| Item Description | |
| User Box Number Displays the user box number. This cannot be changed. | |
| User Box Name Type in a user box name (up to 20 characters). | |
| Auto Delete Document | Select the length of time ("Save", "12 hours", "1 day", "2 days", "3 days", "7 days" or "30 days") that a document is stored in a user box. |
| User Box Password is changed. | To change the user box password, select the check box. Type in the current pass-word and the new password (up to 8 characters, including only numerals, * and #). |
| User Box Owner is changed. | To change the user box owner, select the check box, and then select the user box type.If "Personal" or "Group" is selected, specify the user box owner. To select a user box owner from a list, click the [User List] or [Account List] button. |
Change settings of the relay user box
| Item Description | |
| User Box Number Displays the user box number. This cannot be changed. | |
| User Box Name Type in a user box name (up to 20 characters). | |
| Relay Address | Specify the relay address. Click the [Search from List] button, and then select an address from a list. |
| Relay TX Password is changed. To change the user box password, select the check box. Type in the current password and the new password (up to 8 characters, including only numerals, * and #). | |
Create System User Box
"Create System User Box" appears when the optional fax kit is installed. New bulletin board user boxes and relay user boxes can be created.
→ Select the user box type, and then click the [OK] button.

Note
If an administrator user is logged on, system user boxes are created in the same way as in Administrator mode.

For a bulletin board user box

| Item Description | |
| User Box Number Select how the | registration number is to be specified ("Use opening number" or "Input directly"). If "Input directly" is selected, type in the number. If "0" is specified, the user box is automatically registered with the next available number. (Range: 1 to 999999999). |
| User Box Name Type in the user | box name (up to 20 characters). If a user box password is to be specified, check the "Use Box Password" check box, and then type in the password (up to 8 characters, excluding " and +). |
| Type Select the user box type. If | "Personal" or "Group" is selected, specify the user box owner. To select a user box owner from a list, click the [User List] or [Account List] button. |
| Auto Delete Document | Select the length of time ("Save", "12 hours", "1 day", "2 days", "3 days", "7 days" or "30 days") that a document is stored in a user box. |
For a relay user box
| Item Description | |
| User Box Number Select how the | registration number is to be specified ("Use opening number" or "Input directly"). If "Input directly" is selected, type in the number. If "0" is specified, the user box is automatically registered with the next available number. (Range: 1 to 999999999). |
| User Box Name Type in the user | box name (up to 20 characters). |
| Relay Address Click the [Search from List] button, and then select an address from a list. | |
| Relay TX Password Type in the relay password (up to 8 characters, including only numerals, * and #). | |
| Retype Relay TX Password Type in the relay password again (up to 8 characters, including only numerals, * and #). | |

Reminder
If "Password Rules" is set to "Enable", only a password containing 8 digits can be specified.
If a user box password containing less than 8 characters has already been registered, change the password so that it contains 8 characters before setting "Password Rules" to "Enable".
6.4 Direct Print tab
From the Direct Print tab, files can be specified and printed.
Direct Print
→ Click the [Browse] button to select the file, and then click the [Print] button.
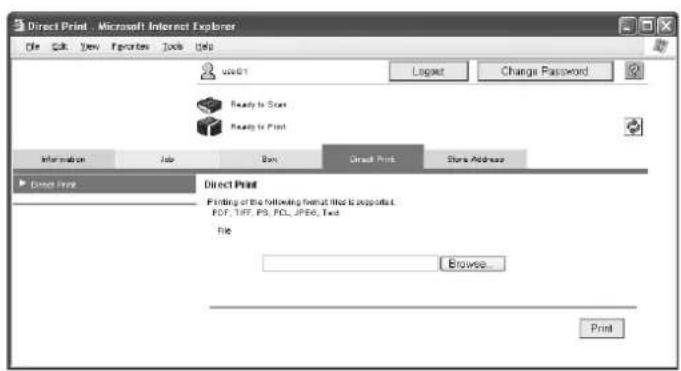

Note
If authentication settings have been specified and "Print without Authentication" is set to "Allow", direct printing can be used. Specify the setting for "Print without Authentication" from the control panel.
Some files cannot be printed, depending on their file format. Files in the following four file formats can be printed
PDF/TIFF/PS/PCL/JPEG/Text
6.5 Store Address tab
From the Store Address tab, transmission destinations and user box destinations for saving data can be registered and their settings can be changed.

Detail
This menu appears if the user is permitted to change registered destinations.
If a registered user is logged on, new destinations cannot be created unless the user is given access to the destinations.
Displaying the list of registered destinations and specifying "Reference Allowed Setting" for registered destinations may be limited, depending on the access permission level of the user who is logged on.
Address Book
The list of destinations currently registered in the address book can be displayed, and destinations can be registered or their settings can be changed.

| Item Description | |
| [New Registration] button | Click this button to register a new destination. For details, refer to "Registering a destination" on page 6-26. |
| Search from Number Select a range of registration numbers, and then click the [Go] button to display the list of destinations with the displayed numbers. | |
| Search from Index Select index characters, and then click the [Go] button to display the list of destinations with the displayed index characters. | |
| No. Displays the registration number. | |
| Function Displays the specified transmission type. | |
| Name Displays the name of the registered destination. | |
| S/MIME Shows whether or not a certificate is attached to the e-mail destination. | |
| [Edit] button Click this button to display a page for changing the settings and editing the registered destination. The settings are the same ones available during registration. | |
| [Delete] button Click this button to display a page to delete the registered destination. | |
Registering a destination
1 In the Address Book List page, click the [New Registration] button.
2 Select the transmission type, and then click the [OK] button.

A page for registering a destination appears.
For an e-mail address
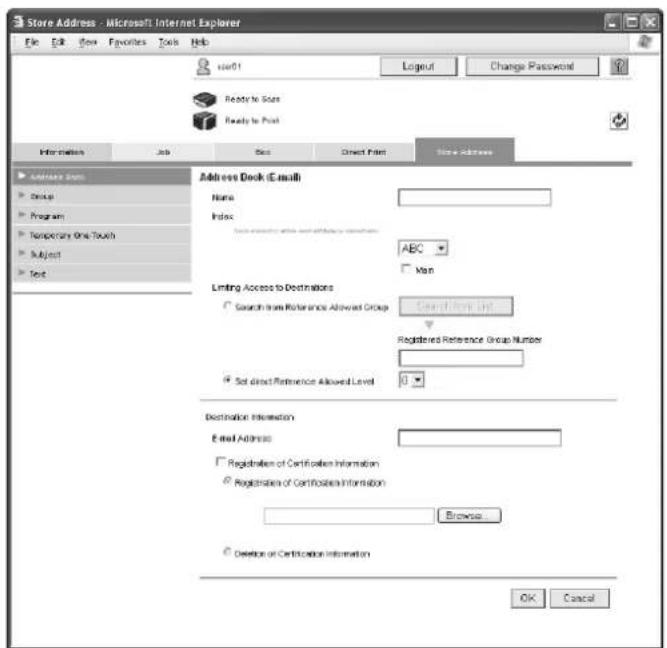
If "E-mail" was selected
| Item Description | |
| Name Type in the name of the destination (up to 24 characters). | |
| Index Select the index characters for the destination. To normally display the destination in the touch panel, check the "Main" check box. | |
| Limiting Access to Destinations Select the display level for the destination.If "Search from Reference Allowed Group" is selected, click the [Search from List] button, and then select an access permission group from the list. If "Set direct Reference Allowed Level" is selected, select a level. | |
| E-mail Address Type in the e-mail address of the destination (up to 320 characters). | |
| Registration of Certification Information | Select this check box to register certificate information.Select "Registration of Certification Information". Click the [Browse] button, and then specify the certificate information. Only files in the DER (Distinguished Encoding Rules) format are supported for certificate information.To delete the certificate information, select "Deletion of Certification Information". |
If "FTP" was selected
| Item Description | |
| Name Type in the name of the destination (up to 24 characters). | |
| Index Select the index characters for the destination. To normally display the destination in the touch panel, check the "Main" check box. | |
| Limiting Access to Destinations Select the display level for the destination.If "Search from Reference Allowed Group" is selected, click the [Search from List] button, and then select an access permission group from the list. If "Set direct Reference Allowed Level" is selected, select a level. | |
| Host Address Type in the IP address or host name for the FTP server to be used for transmitting (up to 63 characters). To type in the host name, check the "Please check to enter host name." check box. If the machine is set to use IPv6, an IPv6 address can also be specified. | |
| File Path Type in the destination file path (up to 96 characters). | |
| User ID Type in the user ID (up to 47 characters). | |
| Password Type in the password (up to 31 characters). | |
| anonymous Select either "ON" or "OFF". | |
| PASV Mode Select either "ON" or "OFF". | |
| Proxy Select either "ON" or "OFF". | |
| Port No. Type in the port number. (Range: 1 to 65535; Default: 21) | |
If "SMB" was selected
| Item Description | |
| Name Type in the name of the destination (up to 24 characters). | |
| Index Select the index characters | for the destination. To normally display the destination in the touch panel, check the "Main" check box. |
| Limiting Access to Destinations | Select the display level for the destination.If "Search from Reference Allowed Group" is selected, click the [Search from List] button, and then select an access permission group from the list. If "Set direct Reference Allowed Level" is selected, select a level. |
| Host Address | Type in the IP address or host name for the destination computer (up to 255 characters; host name in uppercase letters). To type in the host name, check the "Please check to enter host name." check box. If the machine is set to use IPv6, an IPv6 address can also be specified. |
| File Path Type in the destination file path (up to 255 characters, uppercase letters). | |
| User ID | Type in the user ID for the destination computer (up to 127 characters). |
| Password Type in the password for the destination computer (up to 14 characters). | |
If "User Box" was selected
| Item Description | |
| Name Type in the name of the destination (up to 24 characters). | |
| Index Select the index characters | for the destination. To normally display the destinationin the touch panel, select the "Main" check box. |
| Limiting Access to Destinations Select the display level for the destination. | |
| User Box No. | Type in the number for the destination user box. (Range: 1 to 999999999) A userbox can also be selected from a list by clicking the [Search from List] button. |
If "Abbr. Dial" was selected

Note
"Abbr. Dial" appears if the optional fax kit has been installed.
| Item Description | |
| Name Type in the name of the destination (up to 24 characters). | |
| Index Select the index characters for the destination. To normally display the destination in the touch panel, check the "Main" check box. | |
| Limiting Access to Destinations Select the display level for the destination.If "Search from Reference Allowed Group" is selected, click the [Search from List] button, and then select an access permission group from the list. If "Set direct Reference Allowed Level" is selected, select a level. | |
| Destination Type in the fax number for the destination (up to 38 characters, including only numerals, #, *, -, T, P and E). | |
| Line Setting | Select the line to be used ("No Selection", "Line 1" or "Line 2"). A setting can be selected if the optional fax multi line is installed. |
| Communication Setting Click the [Display] button, and then select the check box for a displayed setting ("V34 off", "ECM Off", "International Communication" or "Check Destination"). | |
If "IP Address Fax" was selected

Note
"IP Address Fax" appears if the IP address fax operation is available.
| Item Description | |
| Name Type in the name of the destination (up to 24 characters). | |
| Index Select the index characters for the destination. To normally display the destination in the touch panel, check the "Main" check box. | |
| Limiting Access to Destinations Select the display level for the destination.If "Search from Reference Allowed Group" is selected, click the [Search from List] button, and then select an access permission group from the list. If "Set direct Reference Allowed Level" is selected, select a level. | |
| Host Address Type in the IP address or host name for the destination fax (up to 63 characters).To type in the host name, check the "Please check to enter host name." check box.If the machine is set to use IPv6, an IPv6 address can also be specified. | |
| Port No. Type in the port number (Range: 1 to 65535; Default: 25) | |
| Destination Machine Type Select whether the destination is a color or monochrome machine. | |
If "Internet Fax" was selected

...
Note
"Internet Fax" appears if the Internet fax operation is available.
| Item Description | |
| Name Type in the name of the destination (up to 24 characters). | |
| Index Select the index characters | for the destination. To normally display the destination in the touch panel, check the "Main" check box. |
| Limiting Access to Destinations | Select the display level for the destination.If "Search from Reference Allowed Group" is selected, click the [Search from List] button, and then select an access permission group from the list. If "Set direct Reference Allowed Level" is selected, select a level. |
| Address Type in the address of the destination (up to 320 characters). | |
| Resolution Select the resolution. | |
| Paper Size Select the paper size. | |
| Compression Type Select the compression method. | |
Group
The list of currently registered group destinations can be displayed, and destinations can be registered or their settings can be changed.

| Item Description | |
| [New Registration] button | Click this button to register a new destination. For details, refer to "Registering a group destination" on page 6-30. |
| Search from Number Select a range | ge of registration numbers, and then click the [Go] button to display the list of destinations with the displayed numbers. |
| No. Displays the registration number. | |
| Name Displays the name of the registered destination. | |
| [Edit] button Click this button to display a page for changing the settings and editing the registered destination. The settings are the same ones available during registration. | |
| [Delete] button Click this button to display a page to delete the registered destination. | |
Registering a group destination
→ In the Group List page, click the [New Registration] button. A page for registering a destination appears.
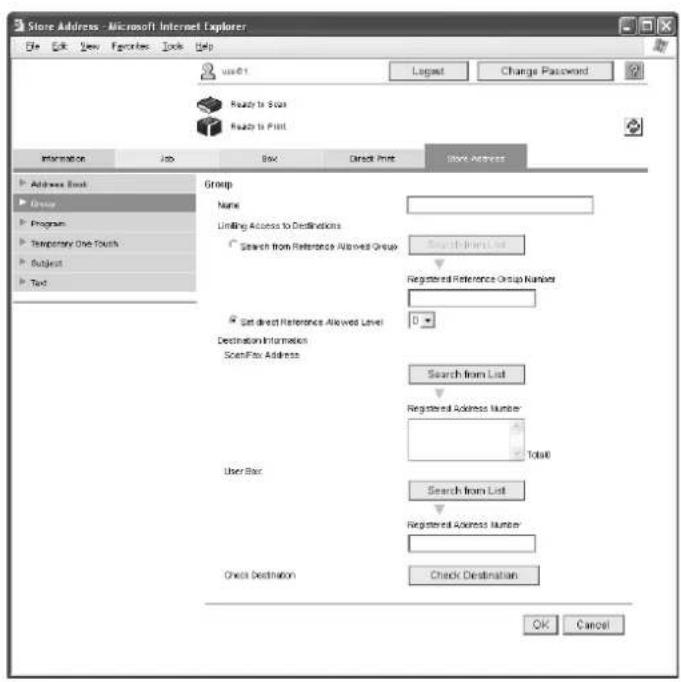
| Item Description | |
| Name Type in the name of the destination | destination (up to 24 characters). |
| Limiting Access to Destinations Select the display level for the destination.If "Search from Reference Allowed Group" is selected, click the [Search from List] button, and then select an access permission group from the list. If "Set direct Reference Allowed Level" is selected, select a level. | |
| Scan/Fax Address To select a destination number from a list of address book destinations, click the [Search from List] button. An address book destination can also be searched for using its number, index characters or type. | |
| User Box To select a destination number from a list of address book destinations, click the [Search from List] button. An address book destination can also be searched for using its number or index characters. | |
| [Check Destination] button A page for checking the destinations appears. | |
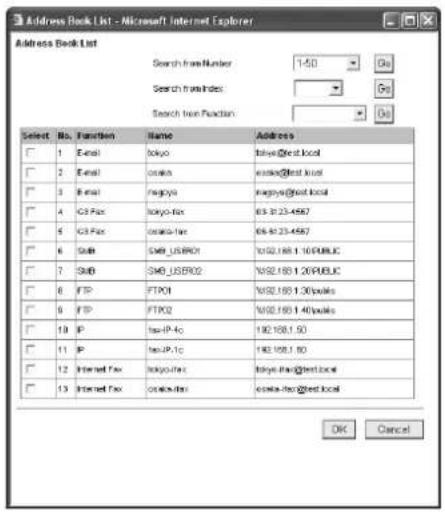
Program
The list of currently registered program destinations can be displayed, and destinations can be registered or their settings can be changed.

| Item Description | |
| [New Registration] button | Click this button to register a new destination. For details, refer to "Registering a program destination" on page 6-32. |
| Search from Number Select a range of registration numbers, and then click the [Go] button to display the list of destinations with the displayed numbers. | |
| No. Displays the registration number. | |
| Name Displays the name of the registered destination. | |
| [Edit] button Click this button to display a page for changing the settings and editing the registered destination. The settings are the same ones available during registration. | |
| [Delete] button Click this button to display a page to delete the registered destination. | |
Registering a program destination
1 In the Program List page, click the [New Registration] button.
2 Select the transmission type, and then click the [OK] button.

A page for registering a destination appears.
For an e-mail address
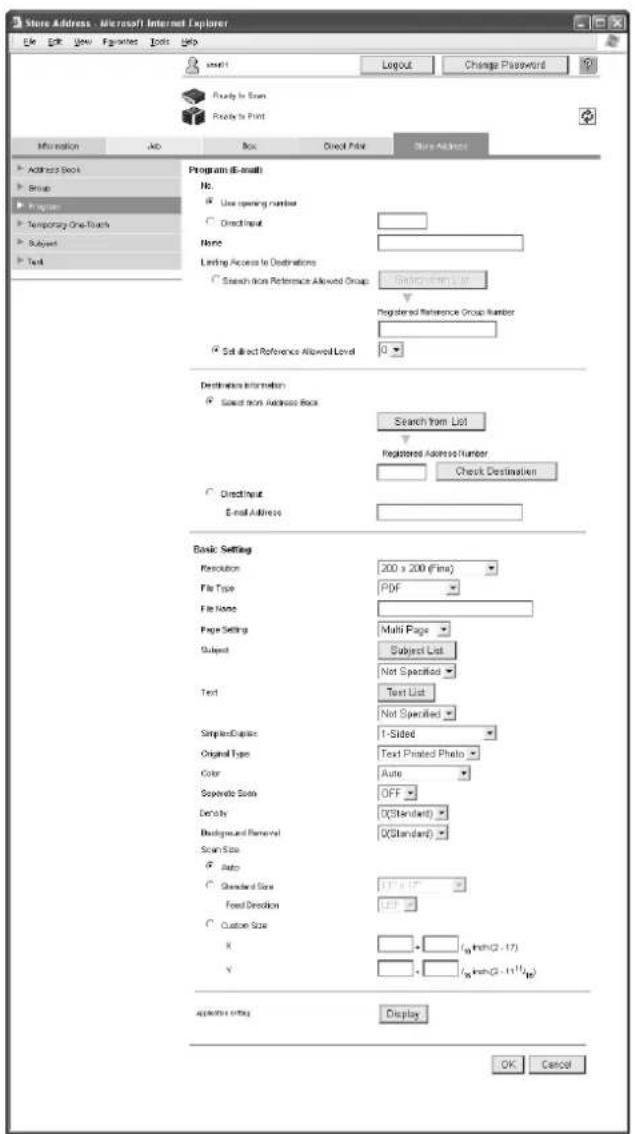

Detail
To select a registered program destination from the machine, press the [Mode Memory] key in the control panel.
If "E-mail" was selected.
| Item Description | |
| No. Specify the registration number. | Select "Use opening number" or "Direct Input". If "Direct Input" is selected, type in the number. If "0" is specified, the user box is automatically registered with the next available number. |
| Name Type in the name of the program (up to 24 characters). | |
| Limiting Access to Destinations Select | the display level for the destination.If "Search from Reference Allowed Group" is selected, click the [Search from List] button, and then select an access permission group from the list. If "Set direct Reference Allowed Level" is selected, select a level. |
| Destination Information Specify the destination. | Select "Select from Address Book" or "Direct Input". To select a destination from the address book, click the [Search from List] button, and then select from the list of address book destinations. An address book destination can also be searched for using its number or index characters. To check the transmission destinations, click the [Check Destination] button. If "Direct Input" is selected, type in the e-mail address (up to 320 characters). |
| Resolution Select the resolution. | |
| File Type Select the file format. | |
| File Name Type in the file name (up to 30 characters). | |
| Page Setting Select how the data is to be saved. | |
| Subject Specify the e-mail subject ("Not Specified" or 1 through 10). If "Not Specified" is selected, the default subject is used. To check the content of the subject, click the [Subject List] button. | |
| Text Specify the e-mail text ("Not Specified" or 1 through 10). If "Not Specified" is selected, the default text is used. To check the content of the text, click the [Text List] button. | |
| Simplex/Duplex | Select "1-Sided", "2-Sided" or "Cover Sheet + 2-Sided". |
| Original Type Select the document quality, such as text or photo. | |
| Color | Select the color mode. The file formats that can be saved may be limited according to the Color setting. |
| Separate Scan | Select either "ON" or "OFF". |
| Density | Select the density. |
| Background Removal | Adjust the density of the background. |
| Scan Size | Select the document size ("Auto", "Standard Size" or "Custom Size").If "Standard Size" is selected, select the size and the feed direction.If "Custom Size" is selected, specify the height and width. |
| Application Setting | Click the [Display] button, and then specify settings for the functions that are displayed. |
| Original Direction | Select the document orientation. |
| 2-Sided Binding Direction | Select the position of the document binding margin. |
| Special Original | d-Color MF450:Select "Normal", "Mixed Original", "Z-Folded Original" or "Long Original" as the setting for the loaded document.d-Color MF550:Select "Normal", "Mixed Original" or "Z-Folded Original" as the setting for the loaded document. |
| Book Scan | Select whether or not to enable book scanning.If "ON" is selected, select settings for the scanning method and center erasing.If any setting other than "Book Spread" is selected for the scanning method, select the binding position. |
| Erase | Select whether or not to enable frame erasing.If "ON" is selected, specify the width that is erased on all sides of the document ("Top", "Bottom", "Left" and "Right"). |
| Compose (Date/Time) Select whether | or not to print the date/time.If "ON" is selected, specify settings for the following.• Date Type• Time Type• Print Position• Fine-Tune (for making fine adjustments to the print position)• Color• Pages• Size |
| Compose (Page) Select whether or not to print the page number. | If "ON" is selected, specify settings for the following.• Page Number (Range: -99999 to 99999)• Chapter (Range: -100 to 100)• Page Number Type• Print Position• Fine-Tune (for making fine adjustments to the print position)• Color• Size |
| Compose (Header/Footer) Select whether or not to print the header/footer. | If "ON" is selected, specify the registration number of the header/footer. To check the registered header/foot, click the [Confirm Registed Contents] button. |
| Compose (Stamp) Select whether or not to print the stamp. | If "ON" is selected, specify settings for the following.• Preset Stamp or Registered Stamp• Print Position• Fine-Tune (for making fine adjustments to the print position)• Color• Pages• SizeTo check a registered stamp, click the [Confirm Registed Contents] button. A registered stamp must first be registered from the control panel. |
| Stamp Combine Method Select "Image" or "Text". | |
| [Return to Defaults] button | Click this button to reset the settings in the Application Setting page to their defaults. |
If "FTP" was selected
| Item Description | |
| No. Specify the registration number. | Select "Use opening number" or "Direct Input". If "Direct Input" is selected, type in the number. If "0" is specified, the user box is automatically registered with the next available number. |
| Name Type in the name of the program (up to 24 characters). | |
| Limiting Access to Destinations Select | the display level for the destination.If "Search from Reference Allowed Group" is selected, click the [Search from List] button, and then select an access permission group from the list. If "Set direct Reference Allowed Level" is selected, select a level. |
| Destination Information | Specify the destination.Select "Select from Address Book" or "Direct Input". To select a destination from the address book, click the [Search from List] button, and then select from the list of address book destinations. An address book destination can also be searched for using its number or index characters. To check the transmission destinations, click the [Check Destination] button. If "Direct Input" is selected, specify settings for the following.H o s t A d d r e s sF i l e P a t hU s e r I DPasswordanonymousPASV ModeP r o x yP o r t N o.To type in the host address and host name, check the "Please check to enter host name." check box. If the machine is set to use IPv6, an IPv6 address can also be specified. |
| Resolution | Select the resolution. |
| File Type | Select the file format. |
| Item | Description |
| File Name Type in the file name (up to | 30 characters). |
| Page Setting Select how the data is to | be saved. |
| Simplex/Duplex | Select "1-Sided", "2-Sided" or "Cover Sheet + 2-Sided". |
| Original Type Select the document quality, such as text or photo. | |
| Color Select the color mode. The file formats that can be saved may be limited according to the Color setting. | |
| Separate Scan Select either "ON" or "OFF". | |
| Density Select the density. | |
| Background Removal Adjust density of the background. | |
| Scan Size | Select the document size ("Auto", "Standard Size" or "Custom Size").If "Standard Size" is selected, select the size and the feed direction.If "Custom Size" is selected, specify the height and width. |
| Application Setting | Click the [Display] button, and then specify settings for the functions that are displayed. |
| E-mail Notification Select whether or not to enable e-mail notification.If "ON" is selected, specify the destination address in the "Address" box. To select a destination from a list, click the [Search from List] button. | |
| Original Direction Select the document orientation. | |
| 2-Sided Binding Direction Select the position of the document binding margin. | |
| Special Original d-Color MF450: | Select "Normal", "Mixed Original", "Z-Folded Original" or "Long Original" as the setting for the loaded document.d-Color MF550:Select "Normal", "Mixed Original" or "Z-Folded Original" as the setting for the loaded document. |
| Book Scan | Select whether or not to enable book scanning.If "ON" is selected, select settings for the scanning method and center erasing.If any setting other than "Book Spread" is selected for the scanning method, select the binding position. |
| Erase | Select whether or not to enable frame erasing.If "ON" is selected, specify the width that is erased on all sides of the document ("Top", "Bottom", "Left" and "Right"). |
| Compose (Date/Time) | Select whether or not to print the date/time.If "ON" is selected, specify settings for the following.Date TypeTime TypePrint PositionFine-Tune (for making fine adjustments to the print position)ColorPagesSize |
| Compose (Page) | Select whether or not to print the page number.If "ON" is selected, specify settings for the following.Page Number (Range: -99999 to 99999)Chapter (Range: -100 to 100)Page Number TypePrint PositionFine-Tune (for making fine adjustments to the print position)ColorSize |
| Compose (Header/Footer) | Select whether or not to print the header/footer.If "ON" is selected, specify the registration number of the header/footer. To check the registered header/foot, click the [Confirm Registed Contents] button. |
| Compose (Stamp) | Select whether or not to print the stamp.If "ON" is selected, specify settings for the following.Preset Stamp or Registered StampPrint PositionFine-Tune (for making fine adjustments to the print position)ColorPagesSizeTo check a registered stamp, click the [Confirm Registed Contents] button. A registered stamp must first be registered from the control panel. |
| Item Description | |
| Stamp Combine Method Select "Image" or "Text". | |
| [Return to Defaults] button | Click this button to reset the settings in the Application Setting page to their defaults. |
If "SMB" was selected
| Item Description | |
| No. Specify the registration number. | Select "Use opening number" or "Direct Input". If "Direct Input" is selected, type in the number. If "0" is specified, the user box is automatically registered with the next available number. |
| Name Type in the name of the program (up to 24 characters). | |
| Limiting Access to Destinations Select | the display level for the destination.If "Search from Reference Allowed Group" is selected, click the [Search from List] button, and then select an access permission group from the list. If "Set direct Reference Allowed Level" is selected, select a level. |
| Destination Information Specify the destination. | Select "Select from Address Book" or "Direct Input". To select a destination from the address book, click the [Search from List] button, and then select from the list of address book destinations. An address book destination can also be searched for using its number or index characters. To check the transmission destinations, click the [Check Destination] button. If "Direct Input" is selected, specify settings for the following.Host Address (Type the host name in uppercase letters.)File Path (Type in uppercase letters.)U s e r l DPasswordTo type in the host address and host name, check the "Please check to enter host name." check box. If the machine is set to use IPv6, an IPv6 address can also be specified. |
| Resolution Select the resolution. | |
| File Type Select the file format. | |
| File Name Type in the file name (up to 30 characters). | |
| Page Setting Select how the data is to be saved. | |
| Simplex/Duplex | Select "1-Sided", "2-Sided" or "Cover Sheet + 2-Sided". |
| Original Type | Select the document quality, such as text or photo. |
| Color | Select the color mode. The file formats that can be saved may be limited according to the Color setting. |
| Separate Scan | Select either "ON" or "OFF". |
| Density | Select the density. |
| Background Removal | Adjust density of the background. |
| Scan Size | Select the document size ("Auto", "Standard Size" or "Custom Size").If "Standard Size" is selected, select the size and the feed direction.If "Custom Size" is selected, specify the height and width. |
| Application Setting | Click the [Display] button, and then specify settings for the functions that are displayed. |
| E-mail Notification | Select whether or not to enable e-mail notification.If "ON" is selected, specify the destination address in the "Address" box. To select a destination from a list, click the [Search from List] button. |
| Original Direction | Select the document orientation. |
| 2-Sided Binding Direction | Select the position of the document binding margin. |
| Special Original | d-Color MF450:Select "Normal", "Mixed Original", "Z-Folded Original" or "Long Original" as the setting for the loaded document.d-Color MF550:Select "Normal", "Mixed Original" or "Z-Folded Original" as the setting for the loaded document. |
| Book Scan | Select whether or not to enable book scanning.If "ON" is selected, select settings for the scanning method and center erasing.If any setting other than "Book Spread" is selected for the scanning method, select the binding position. |
| Erase Select whether or not to enable | frame erasing.If "ON" is selected, specify the width that is erased on all sides of the document ("Top", "Bottom", "Left" and "Right"). |
| Compose (Date/Time) Select whether | or not to print the date/time.If "ON" is selected, specify settings for the following.Date TypeTime TypePrint PositionFine-Tune (for making fine adjustments to the print position)ColorPagesSize |
| Compose (Page) Select whether or not to print the page number. | If "ON" is selected, specify settings for the following.Page Number (Range: -99999 to 99999)Chapter (Range: -100 to 100)Page Number TypePrint PositionFine-Tune (for making fine adjustments to the print position)ColorSize |
| Compose (Header/Footer) Select whether or not to print the header/footer. | If "ON" is selected, specify the registration number of the header/footer. To check the registered header/foot, click the [Confirm Regsted Contents] button. |
| Compose (Stamp) Select whether or not to print the stamp. | If "ON" is selected, specify settings for the following.Preset Stamp or Registered StampPrint PositionFine-Tune (for making fine adjustments to the print position)ColorPagesSizeTo check a registered stamp, click the [Confirm Regsted Contents] button. A registered stamp must first be registered from the control panel. |
| Stamp Combine Method Select "Image" or "Text". | |
| [Return to Defaults] button | Click this button to reset the settings in the Application Setting page to their defaults. |
If "User Box" was selected
| Item Description | |
| No. Specify the registration number. | Select "Use opening number" or "Direct Input". If "Direct Input" is selected, type in the number. If "0" is specified, the user box is automatically registered with the next available number. |
| Name Type in the name of the program (up to 24 characters). | |
| Limiting Access to Destinations | Select the display level for the destination.If "Search from Reference Allowed Group" is selected, click the [Search from List] button, and then select an access permission group from the list. If "Set direct Reference Allowed Level" is selected, select a level. |
| Destination Information | Specify the destination.Select "Select from Address Book" or "Direct Input". To select a destination from the address book, click the [Search from List] button, and then select from the list of address book destinations. An address book destination can also be searched for using its number or index characters. To check the transmission destinations, click the [Check Destination] button. If "Direct Input" is selected, type in the number for the user box destination, or click the [Select from List] button and select from the list (1 to 999999999). |
| Resolution | Select the resolution. |
| File Type | Select the file format. |
| File Name | Type in the file name (up to 30 characters). |
| Page Setting | Select how the data is to be saved. |
| Simplex/Duplex | Select "1-Sided", "2-Sided" or "Cover Sheet + 2-Sided". |
| Original Type | Select the document quality, such as text or photo. |
| Item | Description |
| Color Select the color mode. The file formats that can be saved may be limited according to the Color setting. | |
| Separate Scan Select either "ON" or "OFF". | |
| Density Select the density. | |
| Background Removal Adjust the density of the background. | |
| Scan Size Select the document size ("Auto", "Standard Size" or "Custom Size").If "Standard Size" is selected, select the size and the feed direction.If "Custom Size" is selected, specify the height and width. | |
| Application Setting | Click the [Display] button, and then specify settings for the functions that are displayed. |
| E-mail Notification Select whether or not to enable e-mail notification.If "ON" is selected, specify the destination address in the "Address" box. To select a destination from a list, click the [Search from List] button. | |
| Original Direction Select the document orientation. | |
| 2-Sided Binding Direction Select the position of the document binding margin. | |
| Special Original d-Color MF450: | Select "Normal", "Mixed Original", "Z-Folded Original" or "Long Original" as the setting for the loaded document.d-Color MF550:Select "Normal", "Mixed Original" or "Z-Folded Original" as the setting for the loaded document. |
| Book Scan Select whether or not to enable book scanning.If "ON" is selected, select settings for the scanning method and center erasing.If any setting other than "Book Spread" is selected for the scanning method, select the binding position. | |
| Erase Select whether or not to enable frame erasing.If "ON" is selected, specify the width that is erased on all sides of the document ("Top", "Bottom", "Left" and "Right"). | |
| Compose (Date/Time) Select whether or not to print the date/time.If "ON" is selected, specify settings for the following.Date TypeTime TypePrint PositionFine-Tune (for making fine adjustments to the print position)ColorPagesSize | |
| Compose (Page) | Select whether or not to print the page number.If "ON" is selected, specify settings for the following.Page Number (Range: -99999 to 99999)Chapter (Range: -100 to 100)Page Number TypePrint PositionFine-Tune (for making fine adjustments to the print position)ColorSize |
| Compose (Header/Footer) | Select whether or not to print the header/footer.If "ON" is selected, specify the registration number of the header/footer. To check the registered header/foot, click the [Confirm Registed Contents] button. |
| Compose (Stamp) | Select whether or not to print the stamp.If "ON" is selected, specify settings for the following.Preset Stamp or Registered StampPrint PositionFine-Tune (for making fine adjustments to the print position)ColorPagesSizeTo check a registered stamp, click the [Confirm Registed Contents] button. A registered stamp must first be registered from the control panel. |
| Stamp Combine Method | Select "Image" or "Text". |
| [Return to Defaults] button | Click this button to reset the settings in the Application Setting page to their defaults. |
If "Abbr. Dial" was selected
| Item Description | |
| No. Specify the registration number. | Select "Use opening number" or "Direct Input".If "Direct Input" is selected, type in the number. If "0" is specified, the user box is automatically registered with the next available number. |
| Name Type in the name of the program (up to 24 characters). | |
| Limiting Access to Destinations Select | the display level for the destination.If "Search from Reference Allowed Group" is selected, click the [Search from List] button, and then select an access permission group from the list. If "Set direct Reference Allowed Level" is selected, select a level. |
| Destination Information Specify the destination. | Select "Select from Address Book" or "Direct Input". To select a destination from the address book, click the [Search from List] button, and then select from the list of address book destinations. An address book destination can also be searched for using its number or index characters. To check the transmission destinations, click the [Check Destination] button.If "Direct Input" is selected, type in the address (up to 38 characters, including only numerals, #, *, T, P and E). Click the [Display] button beside "Communication Setting", and then select the communication setting ("V34 Off", "ECM Off", "International Communication", "Check Destination"). If the optional fax multi line is installed, the line can be selected. |
| Resolution Select the resolution. | |
| File Type Select the file format. | |
| Simplex/Duplex | Select "1-Sided", "2-Sided" or "Cover Sheet + 2-Sided". |
| Original Type Select the document quality, such as text or photo. | |
| Separate Scan Select either "ON" or "OFF". | |
| Density Select the density. | |
| Background Removal Adjust the density of the background. | |
| Scan Size Select the document size ("Auto" or "Standard Size").If "Standard Size" is selected, select the size and the feed direction. | |
| Application Setting | Click the [Display] button, and then specify settings for the functions that are displayed. |
| Timer TX | Select whether or not to enable timer transmission. If "ON" is selected, specify the time. |
| Password TX | Select whether or not to enable password transmission. If "ON" is selected, specify the password. |
| F-Code | Select whether or not to enable F-codes. If "Enable" is selected, type in the SUB address and password. |
| 2-Sided Binding Direction | Select the position of the document binding margin. |
| Special Original | d-Color MF450:Select "Normal", "Mixed Original", "Z-Folded Original" or "Long Original" as the setting for the loaded document.d-Color MF550:Select "Normal", "Mixed Original" or "Z-Folded Original" as the setting for the loaded document. |
| Erase | Select whether or not to enable frame erasing.If "ON" is selected, specify the width that is erased on all sides of the document ("Top", "Bottom", "Left" and "Right"). |
| Compose (Date/Time) | Select whether or not to print the date/time.If "ON" is selected, specify settings for the following.Date TypeTime TypePrint PositionFine-Tune (for making fine adjustments to the print position)ColorPagesSize |
| Compose (Page) Select whether or not to print the page number.If "ON" is selected, specify settings for the following.Page Number (Range: -99999 to 99999)Chapter (Range: -100 to 100)Page Number TypeP r i n t P o s i t i o nFine-Tune (for making fine adjustments to the print position)ColorS i z e | |
| Compose (Header/Footer) Select whether or not to print the header/footer.If "ON" is selected, specify the registration number of the header/footer. To check the registered header/foot, click the [Confirm Registed Contents] button. | |
| Compose (Stamp) Select whether or not to print the stamp.If "ON" is selected, specify settings for the following.Preset Stamp or Registered StampP r i n t P o s i t i o nFine-Tune (for making fine adjustments to the print position)ColorPagesS i z eTo check a registered stamp, click the [Confirm Registed Contents] button. A registered stamp must first be registered from the control panel. | |
| Stamp Combine Method Select "Image" or "Text". | |
| [Return to Defaults] button | Click this button to reset the settings in the Application Setting page to their defaults. |
If "IP Address Fax" was selected
| Item Description | |
| No. Specify the registration number. | Select "Use opening number" or "Direct Input".If "Direct Input" is selected, type in the number. If "0" is specified, the user box is automatically registered with the next available number. |
| Name Type in the name of the program (up to 24 characters). | |
| Limiting Access to Destinations Select | the display level for the destination.If "Search from Reference Allowed Group" is selected, click the [Search from List] button, and then select an access permission group from the list. If "Set direct Reference Allowed Level" is selected, select a level. |
| Destination Information Specify the destination. | Select "Select from Address Book" or "Direct Input". To select a destination from the address book, click the [Search from List] button, and then select from the list of address book destinations. An address book destination can also be searched for using its number or index characters. To check the transmission destinations, click the [Check Destination] button.If "Direct Input" is selected, type in the host address. To type in the host name, check the "Please check to enter host name." check box. If the machine is set to use IPv6, an IPv6 address can also be specified. Type in the port number, and then select the destination type. |
| Resolution | Select the resolution. |
| File Type | Select the file format. |
| Simplex/Duplex | Select "1-Sided", "2-Sided" or "Cover Sheet + 2-Sided". |
| Original Type | Select the document quality, such as text or photo. |
| Color | Select the color mode. The file formats that can be saved may be limited according to the Color setting. |
| Separate Scan | Select either "ON" or "OFF". |
| Density | Select the density. |
| Background Removal | Adjust the density of the background. |
| Scan Size | Select the document size ("Auto" or "Standard Size").If "Standard Size" is selected, select the size and the feed direction. |
| Application Setting | Click the [Display] button, and then specify settings for the functions that are displayed. |
| Item | Description |
| Password TX Select whether or not to | enable password transmission. If "ON" is selected, specify the password. |
| F-Code Select whether or not to enable | F-codes. If "Enable" is selected, type in the SUB address and password. |
| 2-Sided Binding Direction Select the | position of the document binding margin. |
| Special Original d-Color MF450: | Select "Normal", "Mixed Original", "Z-Folded Original" or "Long Original" as the setting for the loaded document.d-Color MF550:Select "Normal", "Mixed Original" or "Z-Folded Original" as the setting for the loaded document. |
| Erase Select whether or not to enable | frame erasing.If "ON" is selected, specify the width that is erased on all sides of the document ("Top", "Bottom", "Left" and "Right"). |
| Compose (Date/Time) Select whether | or not to print the date/time.If "ON" is selected, specify settings for the following.• Date Type• Time Type• Print Position• Fine-Tune (for making fine adjustments to the print position)• Color• Pages• Size |
| Compose (Page) Select whether or not to print the page number. | If "ON" is selected, specify settings for the following.• Page Number (Range: -99999 to 99999)• Chapter (Range: -100 to 100)• Page Number Type• Print Position• Fine-Tune (for making fine adjustments to the print position)• Color• Size |
| Compose (Header/Footer) Select whether or not to print the header/footer. | If "ON" is selected, specify the registration number of the header/footer. To check the registered header/foot, click the [Confirm Registed Contents] button. |
| Compose (Stamp) Select whether or not to print the stamp. | If "ON" is selected, specify settings for the following.• Preset Stamp or Registered Stamp• Print Position• Fine-Tune (for making fine adjustments to the print position)• Color• Pages• SizeTo check a registered stamp, click the [Confirm Registed Contents] button. A registered stamp must first be registered from the control panel. |
| Stamp Combine Method Select "Image" or "Text". | |
| [Return to Defaults] button | Click this button to reset the settings in the Application Setting page to their defaults. |
If "Internet Fax" was selected
| Item | Description |
| No. | Specify the registration number.Select "Use opening number" or "Direct Input".If "Direct Input" is selected, type in the number. If "0" is specified, the user box is automatically registered with the next available number. |
| Name | Type in the name of the program (up to 24 characters). |
| Limiting Access to Destinations | Select the display level for the destination.If "Search from Reference Allowed Group" is selected, click the [Search from List] button, and then select an access permission group from the list. If "Set direct Reference Allowed Level" is selected, select a level. |
| Destination Information Specify the destination. | Select "Select from Address Book" or "Direct Input". To select a destination from the address book, click the [Search from List] button, and then select from the list of address book destinations. An address book destination can also be searched for using its number or index characters. To check the transmission destinations, click the [Check Destination] button.If "Direct Input" is selected, type in the e-mail destination. Select settings for the resolution, paper size and compression method. |
| Resolution Select the resolution. | |
| Subject Specify the e-mail subject ("Not Specified" or 1 through 10). If "Not Specified" is selected, the default subject is used. To check the content of the subject, click the [Subject List] button. | |
| Text Specify the e-mail text ("Not Specified" or 1 through 10). If "Not Specified" is selected, the default text is used. To check the content of the text, click the [Text List] button. | |
| Simplex/Duplex | Select "1-Sided", "2-Sided" or "Cover Sheet + 2-Sided". |
| Original Type Select the document quality, such as text or photo. | |
| Separate Scan Select either "ON" or "OFF". | |
| Density Select the density. | |
| Background Removal Adjust the density of the background. | |
| Scan Size Select the document size ("Auto" or "Standard Size").If "Standard Size" is selected, select the size and the feed direction. | |
| Application Setting | Click the [Display] button, and then specify settings for the functions that are displayed. |
| 2-Sided Binding Direction Select the position of the document binding margin. | |
| Special Original d-Color MF450: | Select "Normal", "Mixed Original", "Z-Folded Original" or "Long Original" as the setting for the loaded document.d-Color MF550:Select "Normal", "Mixed Original" or "Z-Folded Original" as the setting for the loaded document. |
| Erase | Select whether or not to enable frame erasing.If "ON" is selected, specify the width that is erased on all sides of the document ("Top", "Bottom", "Left" and "Right"). |
| Compose (Date/Time) | Select whether or not to print the date/time.If "ON" is selected, specify settings for the following.Date TypeTime TypePrint PositionFine-Tune (for making fine adjustments to the print position)ColorPagesSize |
| Compose (Page) | Select whether or not to print the page number.If "ON" is selected, specify settings for the following.Page Number (Range: -99999 to 99999)Chapter (Range: -100 to 100)Page Number TypePrint PositionFine-Tune (for making fine adjustments to the print position)ColorSize |
| Compose (Header/Footer) | Select whether or not to print the header/footer.If "ON" is selected, specify the registration number of the header/footer. To check the registered header/foot, click the [Confirm Registed Contents] button. |
| Item Description | |
| Compose (Stamp) Select whether or not to print the stamp. If "ON" is selected, specify settings for the following. Preset Stamp or Registered Stamp Print Position Fine-Tune (for making fine adjustments to the print position) Color Pages Size To check a registered stamp, click the [Confirm Registed Contents] button. A registered stamp must first be registered from the control panel. | |
| Stamp Combine Method Select "Image" or "Text". | |
| [Return to Defaults] button | Click this button to reset the settings in the Application Setting page to their defaults. |
If "Group" was selected.
| Item Description | |
| No. Specify the registration number. | Select "Use opening number" or "Direct Input".If "Direct Input" is selected, type in the number. If "0" is specified, the user box is automatically registered with the next available number. |
| Name Type in the name of the program (up to 24 characters). | |
| Limiting Access to Destinations Select | the display level for the destination.If "Search from Reference Allowed Group" is selected, click the [Search from List] button, and then select an access permission group from the list. If "Set direct Reference Allowed Level" is selected, select a level. |
| Destination Information Specify the destination. | To select from a list of group destinations, click the [Search from List] button.A group destination can also be searched for using its number. To check the transmission destinations, click the [Check Destination] button. |
| Resolution Select the resolution. | |
| File Type Select the file format. | |
| File Name Type in the file name (up to 30 characters). | |
| Page Setting | Select how the data is to be saved. |
| Subject | Specify the e-mail subject ("Not Specified" or 1 through 10). If "Not Specified" is selected, the default subject is used. To check the content of the subject, click the [Subject List] button. |
| Text | Specify the e-mail text ("Not Specified" or 1 through 10). If "Not Specified" is selected, the default text is used. To check the content of the text, click the [Text List] button. |
| Simplex/Duplex | Select "1-Sided", "2-Sided" or "Cover Sheet + 2-Sided". |
| Original Type | Select the document quality, such as text or photo. |
| Color | Select the color mode. The file formats that can be saved may be limited according to the Color setting. |
| Separate Scan | Select either "ON" or "OFF". |
| Density | Select the density. |
| Background Removal | Adjust the density of the background. |
| Scan Size | Select the document size ("Auto", "Standard Size" or "Custom Size").If "Standard Size" is selected, select the size and the feed direction.If "Custom Size" is selected, specify the height and width. |
| Application Setting | Click the [Display] button, and then specify settings for the functions that are displayed. |
| E-mail Notification | Select whether or not to enable e-mail notification.If "ON" is selected, specify the destination address in the "Address" box. To select a destination from a list, click the [Search from List] button. |
| Timer TX | Select whether or not to enable timer transmission.If "ON" is selected, specify the time. |
| Password TX | Select whether or not to enable password transmission.If "ON" is selected, specify the password. |
| F-Code | Select whether or not to enable F-codes.If "Enable" is selected, type in the SUB address and password. |
| Item | Description |
| Original Direction Select the document | orientation. |
| 2-Sided Binding Direction Select the position of the document binding margin. | |
| Special Original d-Color MF450: | Select "Normal", "Mixed Original", "Z-Folded Original" or "Long Original" as the setting for the loaded document.d-Color MF550:Select "Normal", "Mixed Original" or "Z-Folded Original" as the setting for the loaded document. |
| Book Scan Select whether or not to enable book scanning.If "ON" is selected, select settings for the scanning method and center erasing.If any setting other than "Book Spread" is selected for the scanning method, select the binding position. | |
| Erase Select whether or not to enable frame erasing.If "ON" is selected, specify the width that is erased on all sides of the document ("Top", "Bottom", "Left" and "Right"). | |
| Compose (Date/Time) Select whether or not to print the date/time.If "ON" is selected, specify settings for the following.Date TypeTime TypePrint PositionFine-Tune (for making fine adjustments to the print position)ColorPagesSize | |
| Compose (Page) Select whether or not to print the page number.If "ON" is selected, specify settings for the following.Page Number (Range: -99999 to 99999)Chapter (Range: -100 to 100)Page Number TypePrint PositionFine-Tune (for making fine adjustments to the print position)ColorSize | |
| Compose (Header/Footer) Select whether or not to print the header/footer.If "ON" is selected, specify the registration number of the header/footer. To check the registered header/foot, click the [Confirm Registed Contents] button. | |
| Compose (Stamp) Select whether or not to print the stamp.If "ON" is selected, specify settings for the following.Preset Stamp or Registered StampPrint PositionFine-Tune (for making fine adjustments to the print position)ColorPagesSizeTo check a registered stamp, click the [Confirm Registed Contents] button. A registered stamp must first be registered from the control panel. | |
| Stamp Combine Method Select "Image" or "Text". | |
| [Return to Defaults] button | Click this button to reset the settings in the Application Setting page to their defaults. |
If "No Destination" was selected.
| Item | Description |
| No. | Specify the registration number.Select "Use opening number" or "Direct Input". If "Direct Input" is selected, type in the number. If "0" is specified, the user box is automatically registered with the next available number. |
| Name | Type in the name of the program (up to 24 characters). |
| Limiting Access to Destinations | Select the display level for the destination.If "Search from Reference Allowed Group" is selected, click the [Search from List] button, and then select an access permission group from the list. If "Set direct Reference Allowed Level" is selected, select a level. |
| Resolution | Select the resolution. |
| File Type Select the file format. | |
| File Name Type in the file name (up to | 30 characters). |
| Page Setting Select how the data is to | be saved. |
| Subject Specify the e-mail subject ("Not Specified" or 1 through 10). If "Not Specified" is selected, the default subject is used. To check the content of the subject, click the [Subject List] button. | |
| Text Specify the e-mail text ("Not Specified" or 1 through 10). If "Not Specified" is selected, the default text is used. To check the content of the text, click the [Text List] button. | |
| Simplex/Duplex | Select "1-Sided", "2-Sided" or "Cover Sheet + 2-Sided". |
| Original Type Select the document quality, such as text or photo. | |
| Color Select the color mode. The file formats that can be saved may be limited according to the Color setting. | |
| Separate Scan Select either "ON" or "OFF". | |
| Density Select the density. | |
| Background Removal Adjust the density of the background. | |
| Scan Size | Select the document size ("Auto", "Standard Size" or "Custom Size").If "Standard Size" is selected, select the size and the feed direction.If "Custom Size" is selected, specify the height and width. |
| Application Setting | Click the [Display] button, and then specify settings for the functions that are displayed. |
| E-mail Notification Select whether or not to enable e-mail notification.If "ON" is selected, specify the destination address in the "Address" box. To select a destination from a list, click the [Search from List] button. | |
| Timer TX | Select whether or not to enable timer transmission.If "ON" is selected, specify the time. |
| Password TX | Select whether or not to enable password transmission.If "ON" is selected, specify the password. |
| F-Code Select whether or not to enable F-codes.If "Enabled" is selected, type in the SUB address and password. | |
| Original Direction | Select the document orientation. |
| 2-Sided Binding Direction | Select the position of the document binding margin. |
| Special Original | d-Color MF450:Select "Normal", "Mixed Original", "Z-Folded Original" or "Long Original" as the setting for the loaded document.d-Color MF550:Select "Normal", "Mixed Original" or "Z-Folded Original" as the setting for the loaded document. |
| Book Scan | Select whether or not to enable book scanning.If "ON" is selected, select settings for the scanning method and center erasing.If any setting other than "Book Spread" is selected for the scanning method, select the binding position. |
| Erase | Select whether or not to enable frame erasing.If "ON" is selected, specify the width that is erased on all sides of the document ("Top", "Bottom", "Left" and "Right"). |
| Compose (Date/Time) | Select whether or not to print the date/time.If "ON" is selected, specify settings for the following.Date TypeTime TypePrint PositionFine-Tune (for making fine adjustments to the print position)ColorPagesSize |
| Item Description | |
| Compose (Page) Select whether or not to print the page number.If "ON" is selected, specify settings for the following.Page Number (Range: -99999 to 99999)Chapter (Range: -100 to 100)Page Number TypePrint PositionFine-Tune (for making fine adjustments to the print position)ColorSize | |
| Compose (Header/Footer) Select whether or not to print the header/footer.If "ON" is selected, specify the registration number of the header/footer. To check the registered header/foot, click the [Confirm Registed Contents] button. | |
| Compose (Stamp) Select whether or not to print the stamp.If "ON" is selected, specify settings for the following.Preset Stamp or Registered StampPrint PositionFine-Tune (for making fine adjustments to the print position)ColorPagesSizeTo check a registered stamp, click the [Confirm Registed Contents] button. A registered stamp must first be registered from the control panel. | |
| Stamp Combine Method Select "Image" or "Text". | |
| [Return to Defaults] button | Click this button to reset the settings in the Application Setting page to their defaults. |
Temporary One-Touch
Destinations that will be used temporarily can be registered.
The list of currently registered temporary programs can be displayed, and new destinations can be registered or their settings can be changed.

Note
"Temporary One-Touch" appears if "Manual Destination Input" in Administrator mode is set to "Allow". Specify the setting for "Manual Destination Input" from the control panel.

| Item Description | |
| [New Registration] button Click this button to register a new destination. | |
| No. Displays the registration number. | |
| Name Displays the registered name. | |
| [Edit] button Click this button to display a page to change the settings for the registered temporary program. | |
| [Delete] button Click this button to display a page to delete the registered temporary program. | |
In the Temporary One-Touch List page, click the [New Registration] button, select the transmission type, and then click the [OK] button to display a page to register a new temporary program. The settings are the same ones available when registering a program. For details, refer to "Program" on page 6-31.

Detail
The registration number and the Limiting Access to Destinations Settings do not appear for Temporary One-Touch.
To select a registered temporary program from the machine, press the [Mode Memory] key in the control panel, and then touch [Page List], then [Temporary One-Touch].
Subject
A maximum of 10 subjects for sending e-mail messages can be registered.

| Item Description | |
| E-mail Default Select the subject to be used if none is specified when sending e-mail. | |
| Subject Displays the registered e-mail subject. | |
| [Edit] button Click this button to display a page to register and edit e-mail subjects. | |
| [Delete] button Click this button to display a page to delete the registered e-mail subject. | |
Registration page

Text
A maximum of 10 texts for sending e-mail messages can be registered.

| Item Description | |
| E-mail Default Select the text to be used if none is specified when sending e-mail. | |
| Text Displays the registered e-mail text. | |
| [Edit] button Click this button to display a page to register and edit e-mail texts. | |
| [Delete] button Click this button to display a page to delete the registered e-mail text. | |
Registration page

7
Fax Operations (Option)
7 Fax Operations (Option)
7.1 General fax operation
This section contains information about general operations for sending a fax.

Detail
Color faxes cannot be sent and received. Use scan functions to send a colored fax.
Sending a fax

Detail
The procedure for faxing a single-sided original using basic operations is explained here. Various functions that make sending faxes more convenient are provided in this machine.
1 Press [Fax/Scan] key to display the Fax/Scan screen.
2 Position the original to be faxed.

natural_image
Line drawing of a hand inserting a card into an open printer (no text or symbols visible)- For details on positioning the original, refer to "Loading the original" on page 7-6.

3 Touch [Scan Settings], specify the desired function and touch [OK].

- Scan Setting functions are specified as follows at the time of purchase.
– [File Type] is not available in Fax mode.

- For details on specifying basic scan settings, refer to "Specifying scanning conditions" on page 7-9.
4 Touch [Original Settings], specify the desired function and touch [OK].

5 Touch [Communication Settings], specify the desired function and touch [Close].

6 Specify the recipient's fax number.
- For details on procedures for specifying a fax number, refer to "Specifying only one destination" on page 7-12 and "Specifying multiple destinations (Sequential broadcast transmission or broadcast transmission)" on page 7-17.
- The destination can be specified in any of the following ways.
Address Book
Direct Input
Group destination
Program destination
- To cancel a selected destination, re-select the destination you wish cancel.
- Entered numbers and selected settings are all cleared by pressing [Reset] key.
- When [Manual Destination Input] is forbidden, the [Direct Input] tab will not be displayed.
- Recipient fax numbers can be specified more easily by registering the recipient's fax number to the Address Book, Group destinations, or Program destinations.
Entered destinations are displayed in the Broadcast Destinations list in the left panel of the screen.
7 Press [Start] key.
- The following screen is displayed when the TX Result Report Check screen is set to display. The TX Result Report is printed by touching [Yes].

- When the Destination Check Display Function is set, the Destination Settings screen is displayed. Confirm that the destination is correct and touch [Send].
- To abort transmission of a fax, press [Stop] key.
- If the fax could not be sent, a TX Result Report is printed (when the machine has been set to print a TX Result Report). And, it can be set such that the TX Result Report Check screen is displayed so as to enable the selection of whether or not to output the transmission result report screen for every transmission.
Scanning of the original begins, and the original is sent.
7.2 Loading the original
The original can be loaded in the ADF or on the original glass in this machine. If the original is loaded in the ADF, the original is scanned automatically from the ADF.
Loading the original in the ADF
If the ADF is used, originals with multiple pages can be automatically scanned. In addition, double-sided originals can also be faxed.
1 Close the ADF.
2 Sequentially arrange the original from the first page.
3 Position the original face-up up in the ADF.
- To record source information correctly, insert the front edge of the original into the ADF.

natural_image
Line drawing of a bed with a card and patterned blanket (no text or symbols)4 Adjust the lateral guides.
- The lateral guides are set to maximum width for mixed originals, and the original is positioned in line with the inner side.

Loading the original on the original glass
Using the original glass enables you to send originals that cannot be loaded in the ADF (e.g. thick originals like books, and thin originals).
1 Open the ADF.
2 Position the original face down and load the original pages on the left inner side so that they are aligned with the left side of the scale board.

natural_image
Illustration of an open book with a hand reaching toward it, showing a hand holding the page (no text or symbols present)3 Close the ADF slowly.
Faxing a multi-page original using the original glass
All pages of a multi-page original that cannot be loaded into the ADF can be faxed together using the original glass.
1 Press [Fax/Scan] key to display the Fax/Scan screen.
2 Specify the destination.
3 Specify functions if required.
4 Load the original on the original glass, and touch [Scan Settings], [Separate Scan], [OK] and then press [Start] key.

5 Load the original sequentially on the original glass and press [Start] key.
- Touching [Change Setting] enables you to alter Simplex/Duplex settings and Frame Erase settings.
- Repeat this operation until you have scanned the entire original you wish to send.
The scanned original is stored in the memory.
6 Touch [Finish].
7 Press [Start] key.
Transmission begins.
Sending the original using both the ADF and the original glass
Originals can be scanned using both ADF and the original glass, and large numbers of originals can be divided into many parts, loaded in the ADF and scanned.
1 Press [Fax/Scan] key to display the Fax/Scan screen.
2 Specify the destination.
3 Specify functions if required.
4 Load the original on the original glass or in the ADF, and touch [Scan Settings], [Separate Scan], [OK] and then press [Start] key.
- When using the original glass and the ADF, the ADF is given priority.

natural_image
Line drawing of a hand inserting a card into an open printer (no text or symbols visible)- For details on loading originals in the ADF, refer to "Loading the original in the ADF" on page 7-6, and for details on loading originals on the platen glass, refer to "Loading the original on the original glass" on page 7-6.
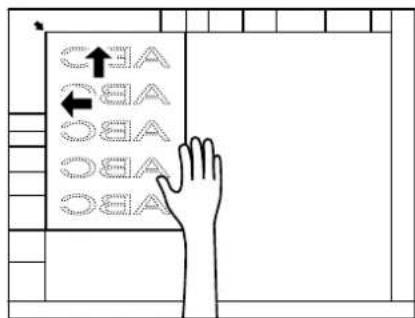
5 Load the original sequentially in the ADF or on the original glass and press [Start] key.
- Touching [Change Setting] enables you to alter Simplex/Duplex settings and Frame Erase settings. - Repeat this operation until you have scanned the entire original you wish to send. The scanned original is stored in the memory.
6 Touch [Finish].
7 Press [Start] key.
Transmission begins.

7.3 Specifying scanning conditions
Touching [Scanning Settings] on the Fax/Scan screen displays Original Type, Simplex/Duplex, Resolution and Density, and enables you to specify transmission conditions for the original to be sent.

Note
[File Type] cannot be used in Fax mode.
Specifying scanning settings

Note
You cannot specify different transmission conditions for different pages within one original.
1 Touch [Scanning Settings] on the Fax/Scan screen.
2 Touch the button you wish to specify.

Original type
Set the original type according to the content of the original.

There are 5 types of original type settings.
At the time of purchase, original type is set to [Text/Photo].
• [Text]:
Touch when scanning text-only originals. If you select this mode for scanning originals with photos, none of the image's intermediate colors will be reproduced, and the image will darken.
- [Text/Photo]:
Touch when originals with text and photos (half tone) mixed together, are to be scanned. Select this mode when text and photos are mixed together on 1 pages or when text and photos are mixed together on multiple pages.
• [Photo]:
Touch when scanning photo-only (half tone) originals.
- [Dot Matrix Original]: Touch when text has been written lightly on originals to be scanned, for example by pencil etc.
• [Copied Paper]: Touch when scanning a copied image as the original.
Simplex/Duplex
Set a scanning method for the ADF according to the state of the original.

There are 3 types of scanning settings.
At the time of purchase, the machine is set to [1-Sided].
• [1-Sided]:
Touch to scan 1-sided originals.
• [2-Sided]:
Touch to scan 2-sided originals.
- [Cover + 2-Sided]: Touch to scan 2-sided originals with covers. Scans the first page of the original as the cover page only on one side and scans the remaining pages on both sides.
Resolution
Sets the scanning resolution for the original.

There are 5 types of resolution settings.
At the time of purchase, resolution is set to [Fine].
• [200100 (Standard)]: Touch when you wish to reduce transmission time.
- [200 200 (Fine)]: Touch when scanning normal originals.
- [300 300 dpi]: Touch when scanning a normal original at a higher resolution.
- [400] 400 (Super Fine)]: Touch when scanning originals containing small text and images.
- [600] 600 (Ultra Fine)]: Touch when scanning originals containing particularly fine text and drawings.

Detail
Using more defined resolutions when scanning increases the volume of data sent and increases communication time.
If [Super Fine] or [Ultra Fine] are selected, and the recipient's machine is unable to receive faxes of these resolutions, the fax is sent at a resolution compatible with recipient's machine's capabilities.
Density
Set the density according to the content of the original.

Density can be set at 9 different levels.
At the time of purchase, density is set to [Standard].
• [Light]:
Touch for light-density scanning.
• [Standard]:
Touch for standard-density scanning.
• [Dark]: Touch for darker-density scanning.
7.4 Specifying only one destination
The following methods are possible for specifying one destination only.
- Specifying from registered destinations
- Specifying by direct input
- Specifying from job history
- Specifying from program destinations

Detail
Refer to "Specifying from registered destinations" on page 7-12 regarding methods for specifying from the registered destinations.
Refer to "Specifying by direct input" on page 7-15 regarding methods for specifying by direct input.
Refer to "Specifying from the job history" on page 7-16 regarding methods for specifying from the job history.
Refer to "Sending a fax using a program destination" on page 7-19 regarding methods for specifying from the program destinations.
Specifying from registered destinations
When an Address Book has been registered, you can search for the destination by the registered search word and dial the destination.

Detail
Refer to "Searching for a registered destination (Index button)" on page 7-13 regarding registered destination search methods used by touching the Index button.
Refer to "Searching for a registered destination (Address type)" on page 7-13 regarding searching by destination type.
Refer to "Searching for registered destinations (Detail search)" on page 7-14 regarding entering details to conduct searches.
→ Touch the desired destination button displayed in the [Address Book] tab.
- To cancel a selected destination, re-select the destination you wish to cancel.
- If [Reset] key is pressed, the selected address and the settings are cleared.
- When desired destination button is not displayed, it can be searched for using the following methods.
Touch the Index button Search by destination type Enter the details and search
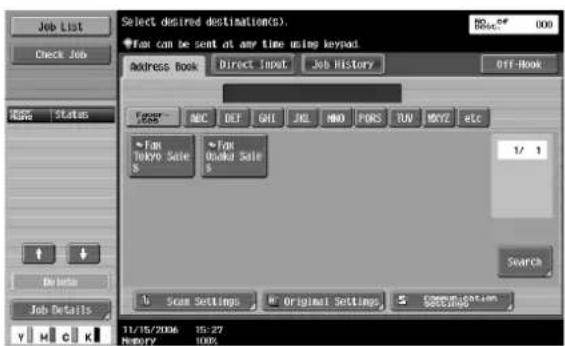
The destination is specified.
Searching for a registered destination (Index button)
Destinations can be searched for using the specified search word when a destination is registered.

Detail
The index default display can be changed with the Address Book Index Default Setting.
→ Touch Index buttons ([Favorites], [ABC] - [WXYZ], [etc]) displayed in the [Address Book] tab.
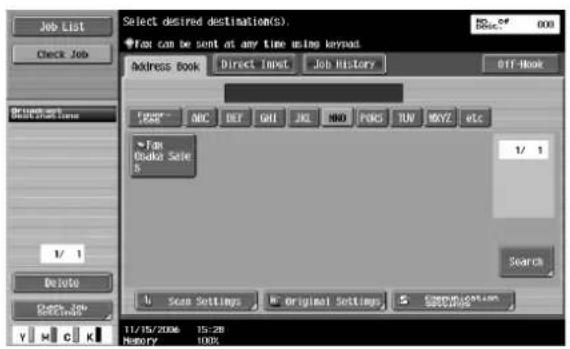
Desired destination button is displayed.
Searching for a registered destination (Address type)
Destinations can be searched by the address type (Fax, E-mail etc.).
1 Touch [Search] in the [Address Book] tab.

2 Touch [Address Type].
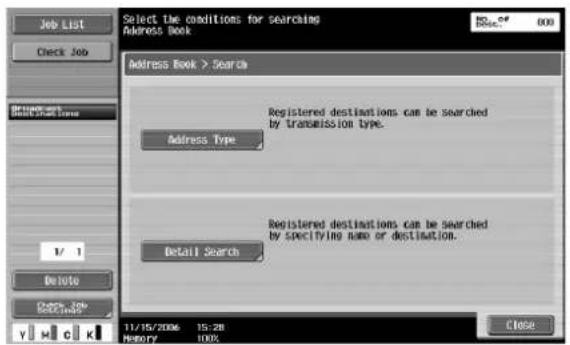
3 Select the address type.
- The default display settings of the [Address Book] tab can be changed to address type with the Default Address Book setting.

Desired destination button is displayed.
Searching for registered destinations (Detail search)
Destinations can be searched using part of the destination name or fax number.
1 Touch [Search] in the [Address Book] tab.

2 Touch [Detail Search].

- When a destination applicable to the entered information is not found, "Search Result: 0" is displayed and no button is on the screen.
3 Touch [Name] or [Address].
- Enter the name or fax number using the keyboard displayed on the screen and touch [OK].

Desired destination button is displayed.
Specifying by direct input
A destination can be specified by direct input even if the destination is not registered with the address book.

Note
When [Manual Destination Input] is forbidden, the [Direct Input] tab is not displayed.
→ Enter the fax number of the recipient.
- Enter the fax number of the recipient using the keypad or screen keyboard.
- Entered numbers are all cleared by pressing [C] (clear) key.

- Special dialing symbols such as tone, pause, -, etc. are entered if necessary.
[Tone]: If pulse dialing is being used, touch this button to send a push-button tone. Tone is used when a fax data services, etc are used. "T" appears on the screen.
[Pause]: Touch this button to insert a pause when dialing. Touch [Pause] once to insert a 1-second pause; multiple pauses can be entered. "P" appears on the screen.
[-]: Entered as a delimiter when dialing. This has no effect on dailing. "-" appears on the screen. - When the keypad is used, the fax number can be entered directly even when [Address Book] tab or the [Job History] tab is displayed.
- When using a dial (pulse) line, it is possible to change to push tone by just touching [*].
The destination is specified.

Detail
When a PBX (Private branch exchange) connection is set to active and a fax is sent from an internal line to an external line, touch [Pause] after dialing "0" or the external line number, to ensure the number is dial correctly. "P" appears in the screen.
Specifying from the job history
It is possible to specify number from the job history, which lists numbers you have sent faxes to in the past (from the previous five numbers).
1 Touch [Job History] on the Fax/Scan screen.

2 Select the desired destination from the list.
- To cancel a selected destination, re-select the destination you wish to cancel.
- Selected destinations and settings are all cleared by pressing [Reset] key.
- Touching [Dest] displayed on the side of the job history list switches the destination column names to fax numbers.
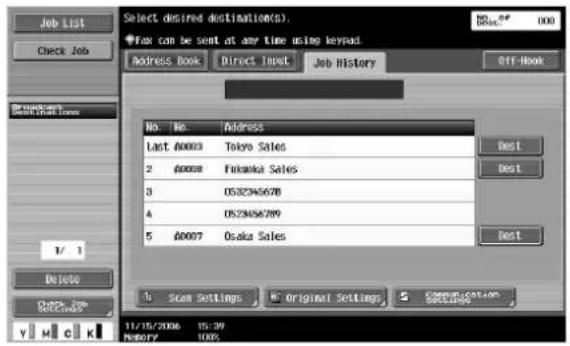
The destination is specified.
7.5 Specifying multiple destinations (Sequential broadcast transmission or broadcast transmission)
An original can be sent to multiple destinations with one operation. This function is called a sequential broadcast transmission or broadcast transmission.
The following procedure describes how to specify multiple destinations.
- Specifying from registered destinations
- Specifying by direct input
• Specifying from the job history
- Specifying by using the group button
- Specifying from the program destinations
- Destinations can be specified with a combination of above-mentioned methods.

Detail
Refer to "Specifying multiple destinations (from registered destinations, direct input, job history)" on page 7-17 regarding specifying destinations from registered destinations, direct input and the job history.
Refer to "Specifying multiple destinations (using the group button)" on page 7-17 for the regarding to specifying destinations using the group button.
Refer to "Sending a fax using a program destination" on page 7-19 regarding specifying a program destination.
Specifying multiple destinations (from registered destinations, direct input, job history)
→ Refer to "Specifying only one destination" on page 7-12, and specify only the destinations you wish to send to.
- When selecting multiple registered destinations or destinations from the job history, touch the required destinations one after another.
- When multiple destinations are specified by direct input, subsequent detinations are entered by touching [Next Destination] after a destination has been entered.
- To cancel a selected registered destination or destination from job history, re-select the destination you wish to cancel.
- Selected destinations and settings are all cleared by pressing [Reset] key.
Multiple destinations are specified.
Specifying multiple destinations (using the group button)
1 Touch [Search] in the [Address Book] tab.

2 Touch [Address Type].

3 Touch [Group].

4 Touch the desired group button.
Multiple destinations are specified.

Detail
The default display settings of the [Address Book] tab can be changed to address type with the Default Address Book setting.
A maximum of 605 destinations (500 address book destinations, 100 direct input destinations and 5 direct input e-mail addresses) can be specified.
7.6 Sending a fax using a program destination
When a program address has been registered, a fax can be sent by specifying the registered program button.
If transmission settings (Original type and original specification etc.) are registered by a program key, a fax can be sent by simply touching that button without the need for specifying function settings each time.
It is also possible to register a group button in 1 program button to send a fax once or register a time and send faxes at the same time each day.
To send a fax after specifying a program destination
1 Press [Fax/Scan] key, and the Fax/Scan screen is displayed.
2 Load the original to be faxed.
- Refer to "Loading the original" on page 7-6 for details on loading the original.
3 Press [Mode Memory] key.

4 Touch [Page List].

5 Touch the page button in which the desired program destination is registered, and then touch [OK]. - Touch or to display the previous or next page button screen.
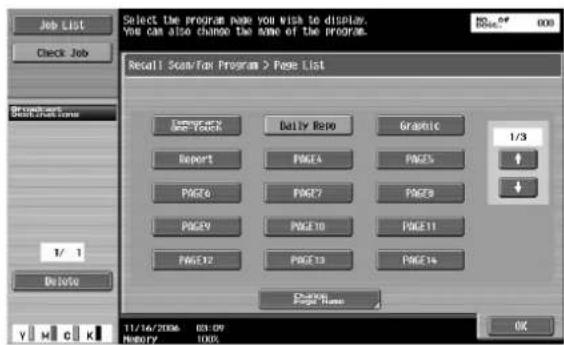
6 Touch the desired program button and touch [OK].
- Only one program destination can be specified.
- Touch or to display the previous or next program button screen.

Settings and destinations are recalled.
7 Press [Start] key.
Scanning of the original begins, and the original is sent.
7.7 Operations while scanning
If original size cannot be detected
If the original size cannot be detected, the scan size screen is displayed. Set the original size.
1 Touch the Original Size button and then touch [OK].

2 Touch [Close] and then touch [OK].
Fax/Scan screen is displayed.
3 Press [Start] key.
Fax is sent.
When there is a memory overflow
When using memory transmission, if the original contains many pages or when the original contains images with fine details creating a large amount of data, the memory may become full.
In such cases, set the machine to Quick Memory TX and send the fax (Quick Memory TX can be set at the Communication Method Settings in the Communication Settings screen).
Original auto rotation
d-Color MF550
When an A4 size (☐) or an 8-1/2 ☐ 11 (☐) size original is sent, it is rotated to A4 size (☐) or 8-12 ☐ 11 (☐) size and then sent.
When an original longer than A4 (☐) size or 8-1/2 ☐ 11 (☐) is sent once, the original is sent without being rotated to A4 (☐) size or 8-1/2 ☐ 11 size (☐).
d-Color MF450
An A4 or 8-1/2 ☐ 11 original loaded in the ☐ orientation is automatically rotated and sent in the ☐ orientation. When A4 or 8-1/2 ☐ 11 document pages are loaded in the ☐ orientation to be sent together with longer document pages, the A4 or 8-1/2 ☐ 11 document pages are sent without being rotated to the ☐ orientation.
In this case, it can be rotated and transmitted by setting the machine to mixed original.

Note
When you do not wish to conduct auto rotation, contact your technical representative.
7.8 When unable to send
If the fax cannot be sent because the recipient's line is busy, it can be transmitted again by using the redial function.
The redial function of this machine has auto redial, manual redial and resend functions.

Note
The destination cannot be changed for either auto redial or manual redial in the Current Jobs List.
Redial
Dialing the same destination again is called "redialing".
When a fax cannot be sent because the recipient's fax machine line is busy, the number is redialed after a set period has elapsed. Until it is redialed, the job to be sent is treated as a reserved job standing by to be redialed.
Auto redial function
When you are unable to send a fax because the recipient's line is busy, the machine automatically redials the number of times set via the Line Parameter Setting.

Detail
The number of auto redials set in advance is 3 times, at three-minute intervals.
Redial confirmation screen (d-Color MF550)
When a fax cannot be sent due to issues such as problems with the line, a screen for confirming redialling is displayed.
1 Touch [OK].
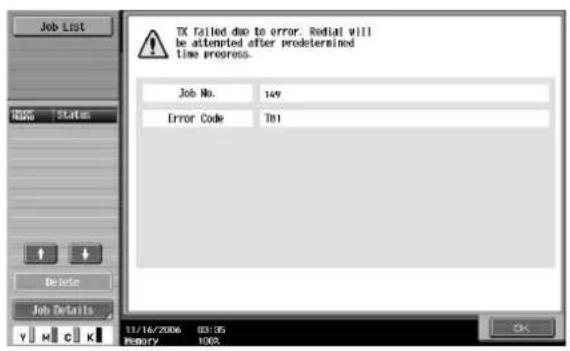
Redialing begins after the set time has elapsed.
When a transmission is not possible even after redialing, a display screen for confirming that the job cannot be correctly completed is displayed.
2 Touch [OK].
- To check the result for jobs that have been sent, touch [Job History].

Manual redial (Current jobs list)
This operation enables you to manually redial jobs waiting to be redialed.
1 Touch [Job List], and then touch [Job Details].
2 Touch [Send].
3 Select a job with the status [Waiting To Redial] and then select [Redial].
- When fax multi line is not installed

- When fax multi line is installed

The redial screen is displayed.
4 Touch [OK].
Redialing of the selected job is performed.
Manual redial (Fax retransmit user box)
Even if the auto redial frequency exceeds the one specified by the Line Parameter Setting, if the job cannot be sent, it is saved in the Fax Retransmit User Box. Jobs in the Fax Retransmit User Box can be manually redialed.

Detail
You need to set Incomplete TX Hold setting in the Utility mode to "Yes" to resend.
1 Press [User Box] key.
2 Touch [Use Document].
3 Touch [System User Box].
4 Touch [Fax Retransmit User Box] and then touch [OK].
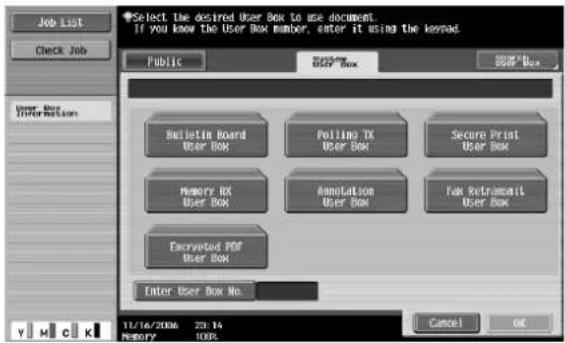
5 Select the job you wish to resend and touch [Fax].

6 Confirm the destinations displayed in Broadcast Destinations list and touch [Start] or press [Start] key. The job is resent.

Note
It is also possible to change the destination.
After resending, the job is automatically deleted from the Fax Retransmit User Box.
7.9 Reserving a transmission
It is possible to reserve the next transmission while the machine is communicating or printing. This function is called reserved transmission.

Note
[Off-Hook] cannot be used for reserved transmission.
1 Touch [Next Fax/Scan Job].
- If [TX Display] or [Copy Operating Screen] is not set to [Yes], [Next Fax/Scan Job] will not be displayed.
2 Load the original to be faxed.
- Refer to "Loading the original" on page 7-6 for details on loading the original.
- When you wish to release a reserved transmission, touch [Job List] and then touch [Delete].

natural_image
Line drawing of a hand inserting a card into an open printer (no text or symbols visible)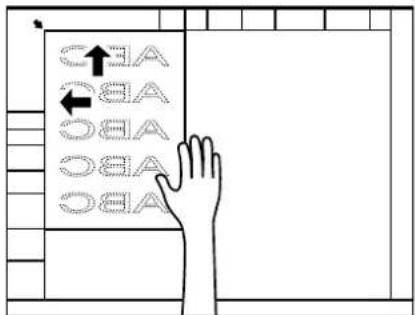
3 Specify functions if required.
4 Specify the destination.
5 Press [Start] key.
7.10 Aborting transmission
Operations for aborting transmissions differ according to whether the job is being executed (including reserved jobs) or timer transmission has been reserved.

Note
Jobs to be transmitted that are stored in this machine are called reserved jobs.
Aborting a job during transmission
It is possible to abort the transmission of jobs being transmitted (including reserved jobs) by using the following procedure.
1 Touch [Job List].
2 Touch [Job Details].
3 Touch [Send].
4 Check that the [Current Jobs] is selected.
5 Select the job you wish to abort, and touch [Delete].
6 Touch [Yes] and then touch [OK].

The job is deleted.
7 Touch [Close].
The machine returns to the Fax/Scan screen.
Canceling timer transmission reserved jobs
Transmission can be cancelled by deleting timer transmission reserved jobs.
1 Touch [Job List].
2 Touch [Job Details].
3 Touch [Send].
4 Check that the [Current Jobs] is selected, and touch [Timer TX Job].
5 Select the job you wish to abort, and touch [Delete].
- Touch or to display the next screen or previous screen.

6 Touch [Yes] and then touch [OK].

The job is deleted.
7 Touch [Close].
The machine returns to the Fax/Scan screen.
7.11 Sending a fax after specifying a time (Timer TX)
Timer TX is a function that specifies a time for transmission.
It is economical to transmit at discounted calling times, such as late at night or early in the morning.

Note
The following functions cannot be used together with this function.
Total # of Pages setting, Polling TX, Bulletin Board and Quick Memory TX

Detail
Only the time can be specified. Dates cannot be specified.
Specify the time in hours and minutes.
Timer TX can be specified for 21 originals including normal transmission of 20 originals and Polling RX of 1 original.
To conduct timer TX
1 Press [Fax/Scan] key, and make the Fax/Scan screen display.
2 Load the original to be faxed.
- Refer to "Loading the original" on page 7-6 for details on loading the original.
3 Touch [Communication Settings].
4 Touch [Communication Settings].
5 Touch [Timer TX].

6 Enter the transmission start time using the keypad.
- Enter the transmission start time with 2 digits in the 24-hour clock format.
Example:
Enter "21" and "07" when setting the transmission start time as 9.07 pm.
- Touch [No] to release timer transmission settings.

7 Touch [OK] twice, and then touch [Close].
Timer TX is set, and the machine returns to the Fax/Scan screen.
8 Specify other settings if required.
- For details on Scan Settings, refer to "Specifying scanning conditions" on page 7-9.
9 Specify the destination.
- For details regarding specifying destinations, refer to "Specifying only one destination" on page 7-12.
10 Press [Start] key.
- If the fax cannot be sent because the recipient's line is busy, the recipients number is redialed. For details regarding redialling, refer to "When unable to send" on page 7-22.
- For aborting transmission, refer to "Aborting transmission" on page 7-26.
The scanned original is stored in memory as a reserved original and transmission is started at the specified time.
8
Network Fax Operations (Option)
8 Network Fax Operations (Option)
8.1 General fax operation (Internet fax)
This section contains information about general operations for sending a fax.
Sending an internet fax

Detail
The procedure for faxing a single-sided original using basic operations is explained here. Various functions for sending a fax more conveniently are provided in this machine.
1 Press [Fax/Scan] key to display the Fax/Scan screen.
2 Load the original.

natural_image
Line drawing of a printer with a hand inserting a card into the cover (no text or symbols)- For details on positioning the original, refer to "Feeding the document" on page 2-27.
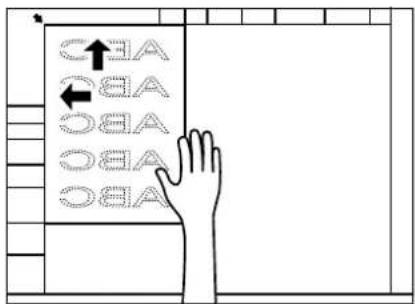
3 Touch [Scan Settings], specify the desired function and touch [OK].

- Scan Setting functions are specified as follows at the time of purchase.
- [File Type] is not available in Internet Fax mode.
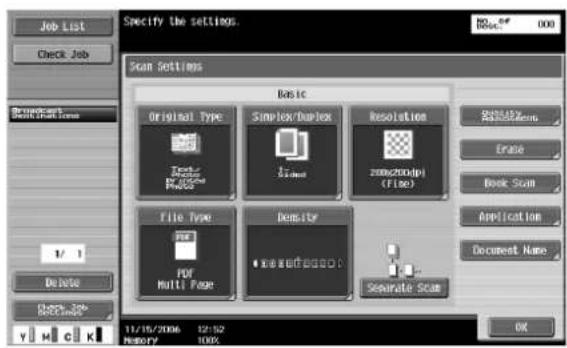
- For details on specifying Basic scan settings, refer to "Specifying the scan conditions" on page 8-11.
4 Touch [Original Settings], specify the desired function and touch [OK].
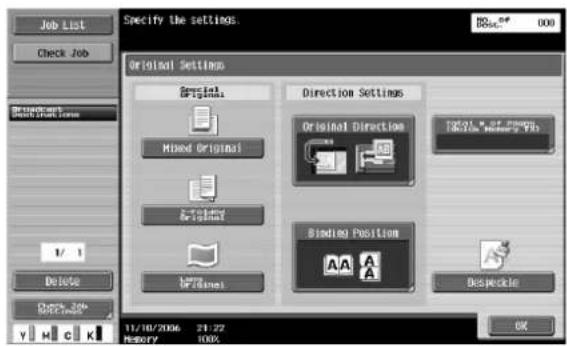
5 Touch [Communication Settings], specify the desired function and touch [Close]
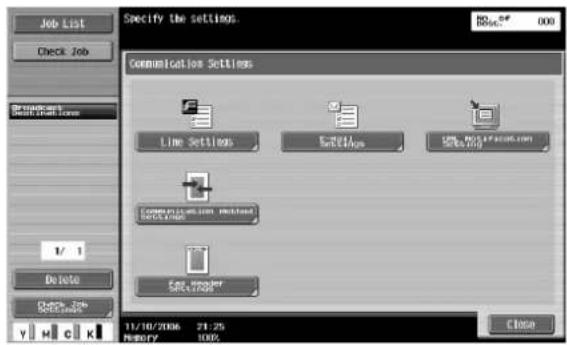
6 Specify the E-mail address of the recipient.
- Address Book
Direct Input
Group destination
Program destination
- Proceed to procedure 10 to specify a destination as an Address Book, a Group destination or a Program destination.
- Proceed to procedure 7 to specify a destination by Direct Input.
- For details on procedures for specifying an E-mail address, refer to "Specifying only one destination" on page 8-14 and "Specifying multiple destinations (Broadcast transmission)" on page 8-19.
- Re-select the destination to be cancelled to cancel the selected destination.
- All entered numbers and selected settings are cleared on pressing [Reset] key.
- When [Manual Destination Input] is prohibited, [Direct Input] tab is not displayed.
- Recipient E-mail addresses can be specified more easily by registering the recipient's E-mail addresses to the Address Book, Group destinations, or Program destinations.
Entered destination is displayed in the left panel of Broadcast Destination list.
7 In case of direct input, enter the E-mail address of the transmission destination and then touch [RX Ability (Destination)].

8 Select the Compression Type, Paper Size and Resolution to match the recipient's reception capability in the recipient's machine reception capability screen.
- Scan Setting functions are specified as follows at the time of purchase.
Compression Type: MH
Paper Size: A4
Resolution: 200☐200dpi (Fine) /200☐100dpi (Standard)
9 Touch [OK] until it returns to the Fax/Scan screen.
10 Press [Start] key.
- The following screen is displayed when the TX Result Report Check screen is set for display. The TX Result Report is printed on touching [Yes].

- When the Destination Check Display Function is set, the Destination Settings screen is displayed. Confirm that the destination is correct and touch [Send].
- Press [Stop] key when the fax sending is aborted.
Scanning of the original begins, and the original is sent.

Detail
If the fax could not be sent, a TX Result Report is printed (When specified as to print the TX Result Report). And, it can be set such that the TX Result Report Check screen is displayed so as to enable the selection of whether or not to output the transmission result report screen for every transmission.

Reminder
When SMTP server capacity is set in E-Mail TX (SMTP) settings in the Network Settings, there is an error if the size exceeds the set size and transmission is not possible.
8.2 General fax operation (IP address fax)
This section contains information on the general operation for sending an IP Address Fax.
Sending an IP address fax
1 Press [Fax/Scan] key to display the Fax/Scan screen.
2 Load the original.

natural_image
Line drawing of a hand using a handheld tool to press documents into an open printer (no text or symbols visible)- For details on positioning the original, refer to "Feeding the document" on page 2-27.

3 Touch [Scan Settings], specify the desired functions and touch [OK].
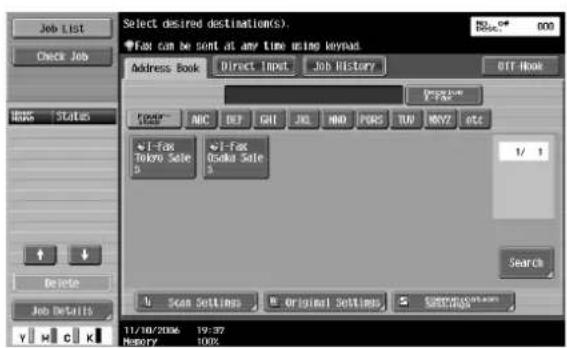
- Scan Setting functions are specified as follows at the time of purchase.
Resolution: 200 200 dpi (Fine)
- [File Type] at the time of IP Address Fax transmission is as follows. In color: PDF In monochrome: TIFF
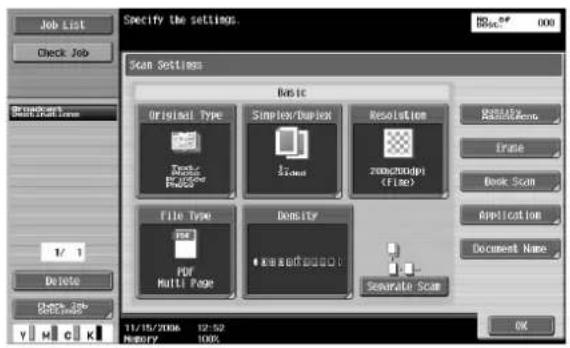
- For details on specifying Basic scan settings, refer to "Specifying the scan conditions" on page 8-11.
4 Touch [Original Settings], specify the desired function and touch [OK].

5 Touch [Communication Settings], specify the desired function and touch [Close].

6 Specify the IP Address of the recipient.
- Address Book
Direct Input
Group destination
Program destination
- For details of procedure for specifying the IP address, refer to the "Specifying only one destination" on page 8-14 and "Specifying multiple destinations (Broadcast transmission)" on page 8-19.
- Re-select the destination to be cancelled to cancel the selected destination.
- All entered numbers and selected settings are cleared on pressing [Reset] key.
- When [Manual Destination Input] is prohibited, [Direct Input] tab is not displayed.
- Touch [Color] on the IP Address Fax screen to send a color fax.
- IP Address of recipient can be easily specified on registering the IP Address of recipient to the Address Book, Group destination, and Program destination.
Entered destination is displayed in the left panel of broadcast destination list.
7 Press [Start] key.
- When the Destination Check Display Function is set, the Destination Settings screen is displayed. Confirm that the destination is correct and touch [Send].
- Press [Stop] key when the fax sending is aborted.
Scanning of the original begins, and the original is sent.
![OLIVETTI d-Color MF550 - Press [Start] key. - 1](/content/2026/05/977387/images/b80750c3265192f800a13db52b524c6c50aea1b5d7aad1ad04aed85eeeae26b6.jpg)
Detail
If the fax could not be sent, a TX Result Report is printed (when specified as to print the TX Result Report).
8.3 Specifying transmission color settings (IP address fax)
Whether the original is to be transmitted in color or monochrome is set.

Reminder
Color transmission and reception is possible only when IP Address Fax are used.
Color faxes cannot be transmitted or received in internet fax.
The recipient's machine should correspond to IP Address Fax.
Specifying transmission color settings
1 Press [Fax/Scan] key to display the Fax/Scan screen.
2 Touch [Scan Settings].
3 Touch [Quality Adjustment].

4 Select the desired mode from "Color".
- [Auto Color]: Automatically detects the color of the original and scans accordingly.
- [Full Color]: Scans at full color.
- [Gray Scale]: Select this setting when the original is full of halftone colors such as in black-and-white photo.
- [Black]: Select this setting for an original which has only black and white colors without any gray.
- File type is fixed to PDF in color transmission mode.
- When gray scale is selected, transmission image becomes monochromatic.

5 Touch [OK].
Returns to Scan Settings screen.
6 Touch [OK].
Returns to Fax/Scan screen.
7 Set other functions if required.
8.4 Specifying the scan conditions
If [Scan Settings] is touched, Original Type, Simplex/Duplex, Resolution, [File Type], Density are displayed and transmission conditions as per the original to be sent can be specified.
Specifying scan settings
1 Touch [Scan Settings] of the Fax/Scan screen.
2 Touch the button to be specified.


...
Note
Transmission condition cannot be specified for each page.
Original type
Set the Original Type as per the original contents.

There are following 5 types of Original Type.
At the time of purchase, original type is set for [Text/Photo].
• [Text]:
Touch only when the text original is to be scanned. The photo original becomes dark if it is scanned by selecting this mode without repeating the neutral color of the photo.
- [Text/Photo]:
Touch when originals with text and photos (half tone) mixed together, are to be scanned. Select this mode when text and photos are mixed together on 1 page or when text and photos are mixed together on multiple pages.
• [Photo]:
Touch only when the photo (half tone) original is to be scanned.
• [Dot Matrix Original]:
Touch when the originals with light text like the text written by pencil etc. is scanned.
• [Copied Paper]:
Touch when the copied image is scanned as original.
Simplex/Duplex
Set the scanning mode in ADF as per the original condition.
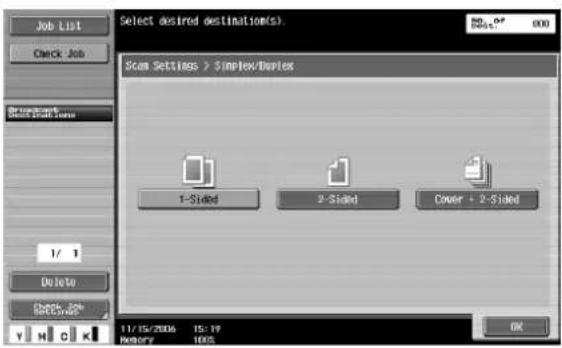
The 3 types of scanning modes are as follows.
At the time of purchase, mode is set to [1-Sided].
• [1-Sided]: Touch to scan 1-sided original.
• [2-Sided]: Touch to scan 2-sided original.
- [Cover + 2-Sided]: Touch to scan cover and 2-sided original. Only the front side is scanned for cover page and the back side is also scanned from the second page onwards.
Resolution
Set the resolution to get a fine scanned original.

There are following 5 types for Resolution.
At the time of purchase, resolution is set to [Fine].
• [200□100 (Standard)]: Touch when transmission time is to be shortened.
• [200☐200 (Fine)]: Touch to scan the normal original.
- [300□□300dpi]: Touch to scan the normal original of a higher resolution.
- [400□400 (Super Fine)]: Touch to scan the original having small text and figures.
- [600] 600 (Ultra Fine)]: Touch to scan especially fine originals with fine drawings and text.

Note
When [300 ☐ 300dpi] is selected, it is converted to 400 ☐ 400dpi and transmitted. However, if compact PDF is selected at the time of IP Address Fax transmission, it is transmitted at 300 ☐ 300dpi.
The communication time increases for more fine scanning and large amount of information to be transmitted.
Density
Set the density as per the original contents.

Density can be set in 9 levels.
At the time of purchase, density is set to [Standard].
• [Light]:
Touch for light scanning.
• [Standard]:
Touch for normal scanning.
• [Dark]:
Touch for dark scanning.
8.5 Specifying only one destination
Only one destination can be specified in internet fax in the following ways.
- Specifying from registered destination
- Specifying by direct input
- Specifying from the program destination

Detail
For details on the method of specifying form registered destination, refer to "Specifying from registered destination" on page 8-14.
Refer to "Specifying by direct input" on page 8-17 for the method to specify by direct input.
Refer to "Send a fax with program destination" on page 8-21 for the method to specify from the program.
Specifying from registered destination
When the Address Book is registered, specification can be done by searching from registered search text.
→ Touch the desired destination button in displayed [Address Book] tab.
- When desired destination button is not displayed, it can be searched by the following methods. Touch search text button Searching by destination type Enter the details and search
- Re-select the destination to be cancelled to cancel the selected destination.
- If [Reset] key is pressed, the selected destination and the settings are cleared.
- Refer to the "Searching the registered destination (Search text button)" on page 8-15 for the method of searching the registered destination by touching search character button.
- For details on method of searching by destination type, refer to the "Searching the registered destination (Address type)" on page 8-15.
- For details on searching after entering the details, refer to the "Searching the registered destination (Detail search)" on page 8-16.

The destination is specified.
Searching the registered destination (Search text button)
Destination can be searched from the specified search text when destination is registered.
→ Touch Index buttons ([favorites], [ABC] - [WXYZ], [etc]) displayed in the [Address Book] tab.
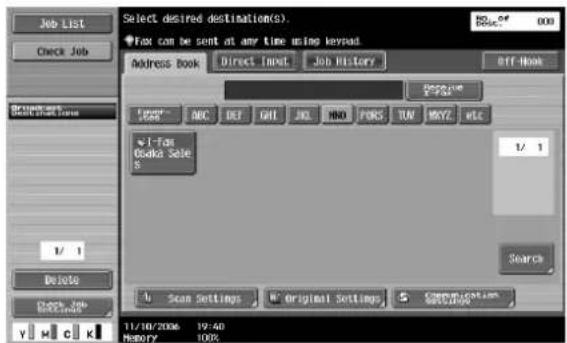
Desired destination button is displayed.
Searching the registered destination (Address type)
Destination can be searched from the address type (Internet Fax, IP Address etc.).
1 Touch [Search] of [Address Book] tab.

2 Touch [Address Type].

3 Select the destination type.
- Touch [Group] to search Group destination.
- Display of default settings of [Address Book] tab can be changed to address type by Default Address Book setting.

Desired destination button is displayed.
Searching the registered destination (Detail search)
Destination can be searched from destination name or E-mail address or a part of IP Address.
1 Touch [Search] of [Address Book] tab.

2 Touch [Detail Search].
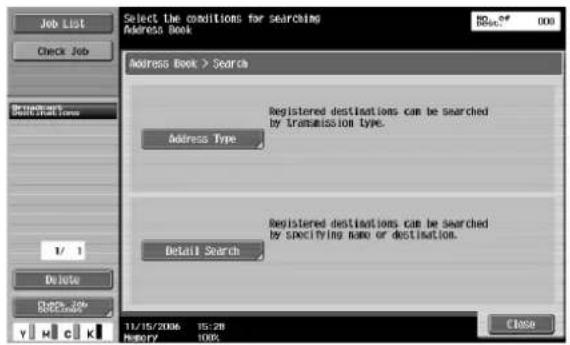
- When the destination applicable to the entered information is not found, "Search Result: 0" is displayed and button is not displayed on the screen.
3 Touch [Name] or [Destination].
- Enter the name or E-mail address, IP Address by the keyboard displayed on the screen and touch [OK].
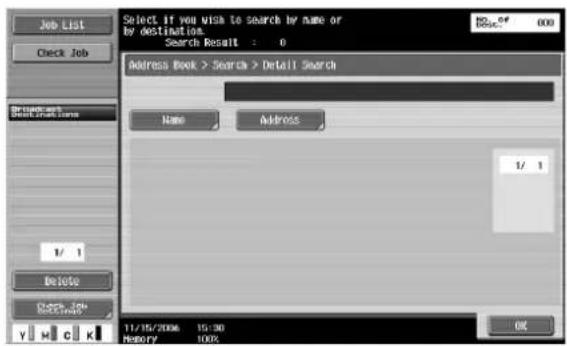
Desired destination button is displayed.
Specifying by direct input
The destination can be specified by direct input even if the destination is not registered in the Address Book.

Note
When [Manual Destination Input] is prohibited, [Direct Input] tab is not displayed.
1 Touch [Direct Input] on Fax/Scan screen.

2 Select Destination type.
- Touch [Internet Fax] to send the internet fax.
- Touch [IP Address Fax] to send IP Address Fax.

3 Enter the destination and then touch [OK].
- In case of internet fax, enter E-mail address of transmission destination with the keyboard on the screen.

- In case of IP Address Fax, touch [IP Address] and enter the IP Address or the host name with the keypad or keyboard of the screen and touch [OK]. To change the port number, press [C] (clear) key to clear the number, and enter the desired port number with the keypad.
- If the recipient's machine is a color machine, and a color original is to be sent, touch [Color].

- When [C] (clear) key is pressed, all entered addresses or numbers are cleared. The destination is specified.
8.6 Specifying multiple destinations (Broadcast transmission)
A fax can be sent to multiple destinations at the same time. This function is called broadcast transmission.
| Method Description | |
| Broadcast transmission only of internet fax | Total 505 faxes including 500 Address Book destinations and 5 by direct input. |
| Mixed broadcast transmission of internet fax/ G3 fax | Total 605 faxes including 500 Address Book destinations and 105 by direct input (Internet fax destinations 5, G3 fax destinations 100). |
| Broadcast transmission of IP Address Fax | Total 505 faxes including 500 Address Book destinations and 5 by direct input. However, the mixing color and monochrome is not possible. |
| Mixed broadcast transmission of IP Address Fax/G3 Fax | Total 605 faxes including 500 Address Book destinations and 105 by direct input (IP address fax destinations 5, G3 fax destinations 100). Only monochrome mode. |
| In case of mixed broadcast of internet fax/ G3 fax | Total 605 faxes including 500 Address Book destinations and 105 by direct input (G3 fax destinations 100, internet fax destinations 5). Only monochrome mode. |
| In case of mixed broadcast of Internet fax/ IP Address Fax/ G3 Fax | Total 605 faxes including 500 Address Book destinations and 105 by direct input (G3 fax destination 100, internet fax, IP address fax destinations 5). Only monochrome mode. |
The following procedure describes how to specify multiple destinations.
- Specifying from registered destination
- Specifying by direct input
- Specifying by the group button
- Specifying from the program destination
Destinations can be specified with the combination of above-mentioned methods.

Reminder
In case of IP address fax, if the destination at which recipient's machine type is set to [Color] and the destination at which recipient's machine type is set to [Monochrome], the transmission is in Monochrome mode.
When Internet Fax is sent by broadcast transmission, MDN/DSN request is not transmitted.

Detail
For details on method of specifying from Address Book or direct input, refer to "Specifying multiple destinations (by registered destination and direct input)" on page 8-19.
For details on method of specifying with the Group button, refer to "Specifying multiple destinations (by group button)" on page 8-20.
Refer to "Send a fax with program destination" on page 8-21 for the method to specify by the program.
Specifying multiple destinations (by registered destination and direct input)
The destination that is to be specified only when necessary is specified by referring to "Specifying only one destination" on page 8-14.
- Touch the required destination continuously to select multiple registered destinations.
- When multiple destinations are to be specified by the direct input, after entering the destination touch [Next Destination] to enter the next destination.
- Re-select the destination to be cancelled to cancel the registered destination.
- If [Reset] key is pressed, the selected destination and the settings are cleared.
Multiple destinations are specified.
Specifying multiple destinations (by group button)
1 Touch [Search] of [Address Book] tab.

2 Touch [Address Type].

3 Touch [Group].

4 Touch the targeted group button.
Multiple destinations are specified.

Detail
Display of default settings of [Address Book] tab can be changed to address type by Default Address Book setting.
8.7 Send a fax with program destination
When the program destination is registered, a fax can be sent by specifying the registered program button. If transmission settings (Original type and original specification etc.) are registered by a program button, a fax can be sent only by touching that button without specifying function settings at each time.
The transmission is possible once after registering group button in 1 program button.
Sending a fax after specifying program destination
1 Press [Fax/Scan] key to display the Fax/Scan screen.
2 Load the original.
- Refer to "Feeding the document" on page 2-27 for details on positioning the original.
3 Press [Mode Memory] key.

4 Touch [Page List].
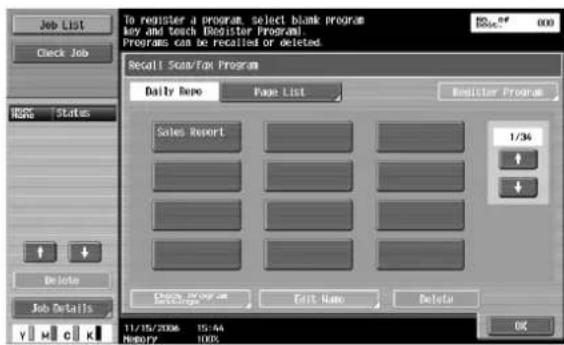
5 Touch the page button registered by the targeted program and then touch [OK].
- Page button is displayed on touching and.

6 Touch the targeted program button and touch [OK].
- Program button is displayed on touching
- You can specify only one program destination.


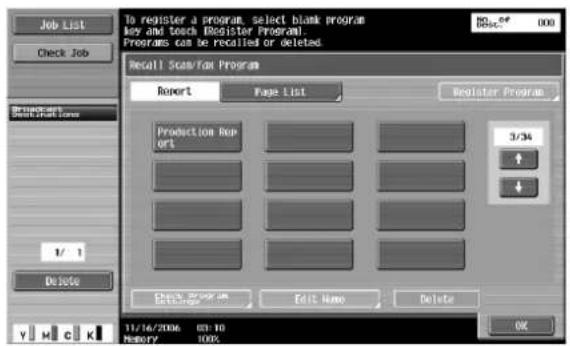
Settings and destination are called.
7 Press [Start] key.
The original is scanned and then transmitted.
8.8 When unable to send
When IP address fax is used, if the fax cannot be sent because the recipient's line was busy, it can be transmitted again by using the redial function.
The redial function of this function has auto redial, manual redial.

Note
The destination cannot be changed with auto redial or manual redial.
There is no E-mail resending function in internet fax.
Redial
Dialing again at the same destination is known as redial.
When fax cannot be sent since the line of recipient's fax machine is busy, the number is redialed after the lapse of the specific period. Before redialing, the sent job is treated to be job queued of the redial stand by.
Auto redial function
When it is unable to send the fax because the recipient's line is busy, it is automatically redialed as per the auto redial function, which is set through the Line Parameter Settings.

Detail
In advance, the number of auto redials is specified as 3 times for 3 minutes.
Redial confirmation screen
When the fax cannot be sent due to the problem in the recipient's fax machine, the screen to confirm redial is displayed.
1 Touch [OK].
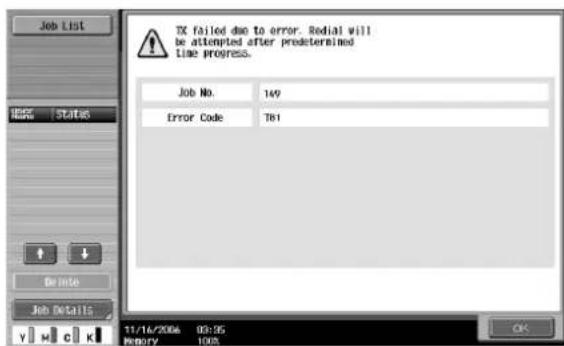
Redialing begins after the setting time progresses.
When the transmission is not possible even after redialing, the display screen to confirm that it cannot be terminated normally by the job, is displayed.
2 Touch [OK].
To check the result for jobs that have been sent, touch [Job History].

Manual redial (Current jobs list)
The job waited due to redial is manually redialed.
1 Touch [Job List] and then touch [Job Details] button.
2 Touch [Send].
3 Select the job condition [Waiting To Redial] and then select [Redial] button.

Redial screen is displayed.
4 Touch [OK].
The redialing of the selected job is performed.
8.9 Reserving the transmission
A function for queuing the next transmission while printing or during transmission.
This function is called reserved transmission.
1 Touch [Next Scan/Fax Job].
- Unless [TX Display] or [Copy Operating Screen] is not set to "Yes", the [Next Scan/Fax Job] is not displayed.
2 Load the original.
– Refer to "Feeding the document" on page 2-27 for details on positioning the original.
- When the reserved transmission is to be cancelled, touch [Job List] and then touch [Delete].

natural_image
Line drawing of a hand using a handheld tool to press or install a printer (no text or symbols visible)
3 Specify the functions if required.
- For details on Scan Settings, refer to "Specifying the scan conditions" on page 8-11.
4 Specify the destination.
5 Press [Start] key.
8.10 Stopping the transmission
Stopping during transmission
In case of job during transmission, the transmission can be stopped from the next operation.

Note
A fax to be stored in this machine are called queued jobs.
1 Touch [Job List].
2 Touch [Job Details].
3 Touch [Send].
4 Check that the [Current Jobs List] is selected.
5 Touch [Delete] to delete the job to be cancelled.
6 Touch [Yes] and then touch [OK].

The job is deleted.
7 Touch [Close].
Returns to Fax/Scan screen.

Appendix
9 A p p e n d i x
9.1 Entering text
The following procedure describes how to use the keyboard that appears in the touch panel for typing in the names of registered accounts and custom paper sizes. The keypad can also be used to type in numbers.
Any of the following keyboards may appear.
Example
Password input screen:
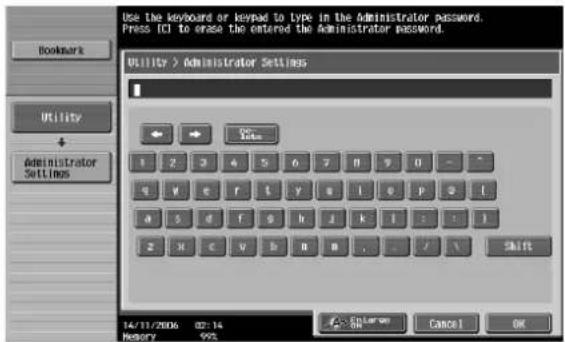
Screen for entering the name of a custom paper size:
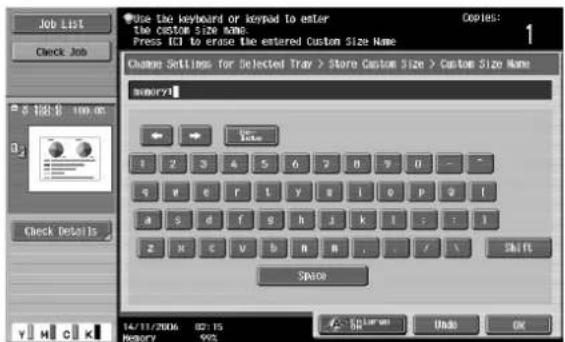
Touching [Shift] switches the keyboard display between lowercase letters (numbers) and uppercase letters (symbols).

Enlarging the keyboard
The keyboard can be displayed larger so that it easier to read.
1 While the keyboard is displayed, touch [Enlarge ON].
The keyboard is displayed enlarged.
![memory1 ← → De- lete 1 2 3 4 5 6 7 8 9 0 - ^ q w e r t y u i o p @ [ a s d f g h j k l ; : ] z x c v b n m . . / \ Space Shift Enlarge OFF Undo OK](/content/2026/05/977387/images/fd94655f54dba31fdb6eaa94e5971174feb8cf504b3c3127c2ae3439e34f2c5c.jpg)
2 To cancel the enlarged display and return the keyboard to its normal size, touch [Enlarge OFF] while the keyboard is displayed enlarged.

Note
The keyboard is used in the same way, even when it is displayed enlarged.
To type text
→ Touch the button for the desired character from the keyboard that appeared.
- To type in uppercase letters or symbols, touch [Shift].
- Numbers can also be typed in with the keypad.
The entered characters appear in the text box.


...
Note
To revert to the setting when the keyboard was displayed, touch [Cancel].
To clear all entered text, press the [C] (clear) key.
Some buttons may not appear, depending on the characters being entered.

Detail
To change a character in the entered text, touch and to move the cursor to the character to be changed, touch [Delete], and then type in the desired letter or number.
List of available characters
| Type Characters | |
| Alphanumeric characters/symbols | ABCDEFGHIJKLMNOPQRSTUVWXYZabcdefghijklmnopqrstuvwxyz((space)!"#$%&'()+,-/;<=>?@[]^_^{}~*0123456789 |
10
Index
10 Index
Symbols
[Power] (auxiliary power) key 2-9
Numerics
1-sided/2-sided 4-38
2in1 2-43
4in1 2-43
8in1 2-43
A
Aborting 7-26
Account track 2-15, 3-13, 3-56
Address book 5-68, 6-25
Address type 7-13
Address types 8-15
ADF 2-27, 2-96, 7-6
Annotation 5-45
Auto paper setting 2-36
Auto zoom setting 2-38
B
Back cover 3-19, 3-43, 3-65
Background removal 5-38
Basic screen 2-5
Basic tab 3-7
Binding direction 3-15, 3-43, 3-59
Binding margin 3-15
Binding position 3-43
Book copy 2-116, 5-41
Booklet 2-133, 3-15, 3-59
Booklet original 2-128
Border 3-14
Broadcast transmission 7-17, 8-19
Bypass tray 2-23
C
Caution notations and labels 1-18
Center Staple & Fold 2-61, 2-64
Certificate information 6-26
Changing document name 4-24
Chapter 3-15, 3-61
Chapters 2-109
Collate 3-42, 3-53
Color 5-36
Color selection 3-29, 3-43, 3-74
Color settings 3-29, 3-43, 3-74
Combination 3-14, 3-43
Combine 6-16
Combined pages 2-43
Combined printing 4-44
Communication settings 5-28, 7-3
Control panel 2-3
Copies 3-42, 3-52, 4-38
Copies & Pages 3-52
Copy protection 3-26, 3-70
Cover mode 3-65
Cover mode tab 3-19
Cover sheet 2-100
Custom page sizes 3-8, 3-40, 3-51
D
Date 3-28, 3-72
Date/Time 5-45
Deleting documents 4-23
Density 5-35, 7-11, 8-13
Destination settings 7-12
Detail search 7-14, 8-16
Detecting original size 7-21
Digital signature 5-66
Direct input 4-8, 5-15, 5-22, 5-26, 7-15, 8-17
Document details 4-30
Document feeding 2-27
Document name 5-60
Document orientation 1-5
Documents 2-96
Duplex 3-15, 3-43, 3-59, 8-12
Duplex/Combine 2-42
Duplicating documents 4-28
E
Editing a watermark 3-21
E-Mail destination 5-68
E-Mail encryption 5-66
E-Mail setting 5-64
Encrypted PDF user box 4-17, 4-58
Enlarge/Reduce settings 2-41
Entering text 9-3
F
Fax cannot be sent 7-22, 8-23
Fax cover sheet 3-79
File document screen 4-19
File type 5-33
Finish 3-59
Finish tab 3-17
Finishing 2-49, 3-43, 4-39
Folding 2-61, 3-18, 3-43, 3-59
Font settings 3-30
Frame erase 5-40
Front cover 3-19, 3-43, 3-65
FTP 5-24, 5-74
Full size 2-39
G
General fax operation 7-3, 8-3, 8-7
General settings 3-42, 3-52
Glossy mode 3-29, 3-43, 3-74
Group 2-49, 2-53, 6-29
Group destinations 5-13, 5-77, 7-17, 8-20
H
Half-Fold 2-61
Half-fold 2-61
Header/Footer 5-54
Help 2-76
Hole punching 3-18, 3-43, 3-59
|
Icons 2-8
Image adjustment 2-130
Image compression 3-29
Image repeat 2-120
Insert image 2-106
Insert sheet 2-103
Interrupt 2-70
L
Layout 3-43, 3-59
Layout tab 3-14
LCT 2-22
LDAP search 5-18
Legal restrictions on copying 1-6
Loading paper 2-18, 2-20, 2-21, 2-22, 2-23
Loading the original 7-6
Long original 5-62
M
Main power switch 2-9
Manual conventions 1-4
Memory overflow 7-21
Minimal 2-40
Mixed original 5-62
Mode memory 2-71
Moving documents 4-26
Multi-page original 7-7
N
N in 1 3-14
Non-standard-sized paper 2-87
0
Offset 3-43, 3-53
OHP interleave 2-98
Operating environment 1-20
Options 3-45
Orientation 3-39, 3-50
Original > Copy settings 2-42
Original auto rotation 7-21
Original glass 2-28, 2-97, 7-6
Original settings 5-28, 5-62
Original size 3-7
Original type 2-46, 5-30, 7-9, 8-11
Output method 3-10, 3-43, 3-53
Output tray 3-18, 3-43, 3-63
Overlap width line 3-14, 3-59
Overlay 3-22
Overlay file 3-25
Oversized paper 2-91
P
Page attributes 3-39, 3-50
Page number 3-28, 3-72, 5-48
Page setup 3-36, 3-39, 3-46, 3-50
Pages 3-42, 3-52
Paper 3-39
Paper arrangement 3-18, 3-59
Paper capacity 2-81
Paper settings 2-84
Paper size 2-80, 3-7, 3-8, 3-50
Paper source 3-42
Paper tray 3-8, 3-63
Paper type 2-81, 3-63
Pattern 3-29
PC (SMB) 5-20, 5-71
Per page setting 3-19, 3-67
Phone book 3-77, 3-85
Poster mode 2-124, 3-14
PostScript options 3-41
Power save 2-11
Power source 1-20
Previewing 4-32
Print settings 4-37
Print type 3-15, 3-43, 3-59
Printer specific options 3-43
Printing 3-37, 3-42, 3-46, 3-52
Printing and saving 4-13
Program 6-31
Program destinations 7-19, 8-21
Program jobs 2-112
Proof print 3-10, 3-53
Punch settings 2-49, 2-58
Q
Quality 3-74
Quality adjustment 3-29, 3-74
Quality tab 3-29
Quick copy screen 2-5
R
Recall copy program 2-74
Record 7-16
Redial 7-22, 8-24
Registered destination 5-12, 5-21, 5-24, 7-12, 8-14
Regulation notices 1-13
Reserved 7-25, 8-25
Resolution 3-29, 3-43, 5-32, 7-10, 8-12
S
S/MIME 6-25
Saddle stitch 3-17, 3-59
Safety information 1-7
Save in user box 2-136, 3-10, 3-53
Saving copy documents 4-3
Saving in user box mode 4-10
Saving scanned data 4-7
Scale 3-39, 3-50
Scan settings 5-28, 7-3
Scan size 5-43
Scan to e-mail 5-12
Scan/Fax programs 5-3
Search text button 8-15
Search word key 7-13
Searching for user box name4-21
Secure print 3-10, 3-53
Secure print user box 4-15, 4-52
Send & Print 5-59
Separate scan 2-29, 5-36
Sharpness 5-39
Shifting images 3-16, 3-60
Simplex 7-10, 8-12
Simplex/Duplex 5-31, 7-10, 8-12
Sort 2-49, 2-52
Space requirements 1-19
Special paper 2-82, 2-93
Specifying the destination 8-14
Specifying the scan conditions 7-9, 8-11
Stamp 5-51
Stamp/Composition 2-135, 3-69
Stamp/Composition tab 3-21
Staple settings 2-49, 2-55
Stapling 3-17, 3-43, 3-59
Stop 8-26
Subject 6-49
T
Temporarily stopping 2-69
Temporary one-touch 6-48
Text 6-50
Text entry 9-3
Thumbnail 6-14
Time 3-28, 3-72
Timer TX 7-28
Touch panel 2-5
Transmission color 8-10
Transmission settings 3-78
Transparency interleave 3-20, 3-43, 3-65
Tray 1 2-18
Tray 2 2-18
Tray 3 2-20
Tray 4 2-21
Tri-fold 2-61, 2-67
U
URL notification setting 5-65
Use document 4-34
Use document screen 4-35
User authentication 2-12, 3-12, 3-55
User box 5-69
User box destinations 4-7
Utility mode 5-67
W
Warm-up 2-10
Watermark 3-21
Z
Z-folded original 5-62
Zoom 3-7
DIRECTIVE 2002/96/CE ON THE TREATMENT, COLLECTION, RECYCLING AND DISPOSAL OF ELECTRIC AND ELECTRONIC DEVICES AND THEIR COMPONENTS
INFORMATION
1. FOR COUNTRIES IN THE EUROPEAN UNION (EU)
The disposal of electric and electronic devices as solid urban waste is strictly prohibited: it must be collected separately.
The dumping of these devices at unequipped and unauthorized places may have hazardous effects on health and the environment.
Offenders will be subjected to the penalties and measures laid down by the law.
To dispose of our devices correctly:
a) Contact the Local Authorities, who will give you the practical information you need and the instructions for handling the waste correctly, for example: location and times of the waste collection centres, etc.
b) When you purchase a new device of ours, give a used device similar to the one purchased to our dealer for disposal.

The crossed dustbin symbol on the device means that:
- when it to be disposed of, the device is to be taken to the equipped waste collection centres and is to be handled separately from urban waste;
- The producer guarantees the activation of the treatment, collection, recycling and disposal procedures in accordance with Directive 2002/96/CE (and subsequent amendments).
2. FOR OTHER COUNTRIES (NOT IN THE EU)
The treatment, collection, recycling and disposal of electric and electronic devices will be carried out in accordance with the laws in force in the country in question.
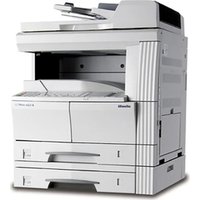
- This manual is also available in color PDF format on the CD-ROM provided.
- Copy Operations
- Print Operations
- Specifying the cover mode tab settings (PCL driver for Windows) 3-19
- Specifying the stamp/composition tab settings (PCL driver for Windows) 3-21
- Specifying the quality tab settings (PCL driver for Windows) 3-29
- Setting up the PostScript driver for Windows.... 3-31
- Setting up the PPD driver for Mac OS 9.2 3-36
- Page Setup (PPD driver for Mac OS 9.2) 3-39
- Printing (PPD driver for Mac OS 9.2).... 3-42
- Setting options (PPD driver for Mac OS 9.2).... 3-45
- Setting up the PPD driver for Mac OS X.... 3-46
- Page setup (PPD driver for Mac OS X) 3-50
- Printing (PPD driver for Mac OS X) 3-52
- Output Method (PPD driver for Mac OS X).... 3-53
- Layout/Finish (PPD driver for Mac OS X) 3-59
- Paper tray/output tray (PPD driver for Mac OS X) 3-63
- Cover mode/transparency interleave (PPD driver for Mac OS X) 3-65
- Box Operations
- Combined printing 4-44
- Overview of document transmissions 4-47
- Secure print user box 4-52
- Encrypted PDF user box 4-58
- Network Scanner Operations
- Using scan/fax programs.... 5-3
- Sending data in an e-mail message (Scan to e-mail).... 5-12
- Sending data to a computer on the network (Scan to SMB).... 5-20
- Sending data to a server (Scan to FTP) 5-24
- Specifying scan and transmission settings
- Web Connection Operations
- Fax Operations (Option)
- Network Fax Operations (Option)
- Appendix
- Index
- Introduction
- Energy Star®
- What is an ENERGY STAR® product?
- Note
- Explanation of manual conventions
- DANGER
- WARNING
- CAUTION
- Sequence of action
- Tips
- Reminder
- Detail
- Special text markings
- Descriptions and symbols for originals and paper
- "Width" and "Length"
- Paper orientation
- Legal restrictions on copying
- Financial Instruments
- Legal Originals
- General
- Safety information
- Warning and precaution symbols
- Meaning of symbols
- Disassemble and modification
- Power cord
- Power source
- Power plug
- Grounding
- Installation
- Warning Symbol
- Ventilation
- Caution Symbol
- Actions in response to troubles
- Consumables
- When moving the machine
- Before successive holidays
- Regulation notices
- Interference with radio communications:
- Laser safety
- Internal laser radiation
- CDRH regulations
- For European users
- For Denmark users
- ADVARSEL
- VAROITUS
- Locate the machine in a well ventilated room
- ATTENTION
- Acoustic noise (for European users only)
- For EU member states only
- Caution notations and labels
- Space requirements
- Operation precautions
- Operating environment
- Storage of copies
- OpenSSL Statement
- OpenSSL License
- Original SSLeay License
- Software licence agreement
- 2
- Copy Operations
- Control panel
- Basic settings screens
- Icons that appear in the screen
- Turning on the main power and the auxiliary power
- Turning on the machine
- Scanning during warm-up
- Turning off the machine
- Manually conserving energy
- Controlling each user's use of this machine (User authentication)
- Touch [User Name].
- Controlling each account's use of this machine (Account track)
- Touch [Password].
- Type in the password, and then touch [OK].
- Touch [Login] or press the [Access] key. The Basic screen appears.
- Make copies using the desired copy settings.
- When you are finished printing, press the [Access] key. A message appears, requesting confirmation to log off.
- Loading paper into tray 1 and tray 2
- Pull out tray 1 or tray 2.
- Slide the lateral guides to fit the size of paper to be loaded.
- Load the paper into the tray so that the side of the paper to be printed on (the side facing up when the package was unwrapped) faces up.
- Loading paper into tray 3
- Loading paper into tray 4
- Loading paper into the LCT
- Loading paper into the bypass tray
- Feeding the document
- Loading the document into the ADF
- Placing the document on the original glass
- Scanning the document in separate batches ("Separate Scan" setting)
- Scanning a multi-page document from the original glass
- Press the [Start] key.
- Position the second page or second side of the document onto the original glass, and then press the [Start] key.
- After all document pages have been scanned, touch [Finish].
- Press the [Start] key.
- Selecting a paper setting
- Automatically selecting the paper size ("Auto" paper setting)
- Touch [OK].
- Manually selecting the desired paper size
- Specifying a zoom setting
- Automatically selecting the zoom ratio ("Auto" zoom setting)
- Specifying the zoom ratio of the document ("Full Size" setting)
- Slightly reducing the copy ("Minimal" setting)
- Selecting a preset zoom ratio ("Enlarge and Reduce" settings)
- Selecting an Original > Copy setting (Duplex/Combine)
- Selecting a combined copy setting
- Copying multiple document pages onto a single page ("Combined Copy" settings)
- Selecting the quality of the document
- To select an original type setting
- Selecting finishing settings
- Separating copies by sets ("Sort" setting)
- Separating copies by pages ("Group" setting)
- Selecting the output tray (d-Color MF450)
- Stapling copies ("Staple" settings)
- Punching holes in copies ("Punch" settings)
- Touch [OK].
- Selecting a folding setting
- Folding copies in half ("Half-Fold" setting)
- Touch [Yes] below "Half-Fold".
- Touch [OK], and then touch [OK] again.
- Binding copies at the center ("Center Staple & Fold" setting)
- In the Basic screen, touch [Finishing].
- Touch [Fold/Bind].
- Touch [Center Staple & Fold].
- Specify the settings for binding pages.
- To fold copies in three ("Tri-Fold" setting)
- Temporarily stopping scanning/printing
- Interrupting a copy job (Interrupt mode)
- Registering copy programs (Mode Memory)
- Copying with programmed copy settings (Mode Memory)
- Displaying function descriptions (Help)
- Overview of help screens
- Help Menu screen (1st level)
- Displaying main help screens
- Copy paper
- Possible paper sizes
- Special paper
- Selecting the paper settings
- Automatically detecting the paper size ("Auto Detect" setting)
- Touch [Auto Detect].
- Selecting a paper size setting ("Size" setting)
- Specifying a non-standard paper size ("Custom Size" settings)
- Storing a non-standard paper size ("Custom Size" settings)
- Selecting a setting for oversized paper ("Wide Paper" settings)
- Specifying a setting for special paper
- Printing double-sided copies manually
- Touch the button for the bypass tray.
- Touch [Change Tray Settings].
- Touch [Duplex 2nd Side].
- Select the type of paper to be loaded.
- Touch [OK], and then touch [OK] in the next screen that appears.
- Original documents
- Documents that can be loaded into the ADF
- Precautions for loading documents into the ADF
- Documents that can be placed on the original glass
- Precautions for positioning documents on the original glass
- Inserting paper between OHP transparencies ("OHP Interleave" function)
- Touch [OHP Interleave].
- Select the paper tray loaded with the interleaf paper.
- Touch [OK].
- Specify any other desired copy settings.
- Press the [Start] key.
- Adding cover pages ("Cover Sheet" function)
- Touch [Cover Sheet].
- Select the desired cover page settings.
- Inserting different paper into copies ("Insert Sheet" function)
- Inserting copies of a different document for a specified page ("Insert Image" function)
- Touch [Insert Image].
- Using the keypad, specify the pages where the image is to be inserted.
- Press the [Start] key.
- Place the document to be inserted on the original glass.
- Touch [Finish].
- Specifying pages to be printed on the front side ("Chapters" function)
- Touch [Chapters].
- Using the keypad, specify the first page of the chapters.
- Under "Chapter Paper", touch [Copy Insert] or [None].
- Scanning documents with different settings and printing copies all together ("Program Jobs" function)
- Producing separate copies of each page in a page spread ("Book Copy" function)
- Touch [Application], and then touch [Book Copy/Repeat].
- Touch [Book Copy].
- Touch the button for the desired setting.
- Tiling copy images ("Image Repeat" function)
- Touch [Image Repeat].
- Under "Layout", touch [With Margin] or [Without Margin], or touch [2/4/8 Repeat].
- Copying an enlarged image on multiple pages ("Poster Mode" function)
- Copying booklets ("Booklet Original" function)
- Adjusting the image to fit the paper ("Image Adjust" settings)
- Touch the button for the desired setting.
- Check the document size, and then touch [OK].
- Copying with the page layout of a booklet ("Booklet" function)
- Touch [Left Bind] or [Right Bind].
- Printing the date/time or page number on copies ("Stamp/Composition" functions)
- Saving the scanned document in a user box ("Save in User Box" function)
- Touch [OK].
- Overview of utility mode parameters
- 3
- Print Operations
- Setting up the PCL driver for Windows
- Common settings
- Specifying the basic tab settings (PCL driver for Windows)
- Printing to suit the paper size
- Specifying a custom size
- Selecting the paper tray
- Specifying the paper type for a paper tray
- Selecting the output method
- Secure Print
- Save in User Box
- Proof Print
- Specifying the user authentication settings
- Specifying the account track settings
- Specifying the layout tab settings (PCL driver for Windows)
- Printing multiple pages on one page (N in 1, Poster mode)
- Chapter
- Specifying duplex/booklet printing
- Setting the binding margin
- Shifting images
- Specifying the finish tab settings (PCL driver for Windows)
- Stapling
- Specifying the saddle stitch setting
- Hole punching
- Folding
- Specifying the output tray
- Specifying the procedure for adjusting the binding position
- Specifying the cover mode tab settings (PCL driver for Windows)
- Printing documents with a front cover/back cover
- Printing multiple pages
- Click the [Add] button.
- Select the row that was added to the list, and then specify the print settings in "Add/Edit".
- Click the [OK] button.
- Printing with transparency interleaves
- Specifying the stamp/composition tab settings (PCL driver for Windows)
- Printing a watermark
- Editing a watermark
- Specify settings for the following:
- Click the [OK] button.
- Printing different original documents together (overlay)
- Editing an overlay file
- Creating an overlay file
- Registering an overlay file
- Printing with copy protection
- Select the composition method for copy protection.
- Printing the date and page numbers
- Specifying the quality tab settings (PCL driver for Windows)
- Adjusting the color and quality
- Font Settings
- Setting up the PostScript driver for Windows
- Setting up the PPD driver for Mac OS 9.2
- Print dialog box
- Print items
- Page Setup (PPD driver for Mac OS 9.2)
- Page attributes (basic settings)
- Custom page sizes
- PostScript options
- Printing (PPD driver for Mac OS 9.2)
- General (basic settings)
- Layout (printing multiple pages on one page)
- Printer specific options (Finishing options 1 to 4)
- Setting options (PPD driver for Mac OS 9.2)
- Setting up the PPD driver for Mac OS X
- Common settings in the print dialog box
- Page setup (PPD driver for Mac OS X)
- Printing (PPD driver for Mac OS X)
- General settings
- Output Method (PPD driver for Mac OS X)
- Checking the output method setting details
- Layout/Finish (PPD driver for Mac OS X)
- Checking the layout/finish setting details
- Paper tray/output tray (PPD driver for Mac OS X)
- Cover mode/transparency interleave (PPD driver for Mac OS X)
- Per page setting (PPD driver for Mac OS X)
- Adding and editing the settings in per page setting
- Stamp/Composition (PPD driver for Mac OS X)
- Select the composition method for copy protection.
- Click the [OK] button.
- Printing the date and time
- Printing the page numbers
- Quality (PPD driver for Mac OS X)
- Sending a fax
- Fax operations
- Click the [OK] button.
- Selecting a recipient from the phone book
- Specifying the transmission settings
- Creating a fax cover sheet
- Setting up the fax driver for Windows
- Using a phone book
- Adding a recipient to the phone book
- Editing a phone book
- To change a registered recipient to a group
- To change a group name
- To create a folder
- To search the personal information
- 4
- Box Operations
- B o x O p e r a t i
- Saving copies in user boxes
- Settings that can be saved and changed
- Saving copy documents
- Saving scans in user boxes
- Using a user box destination
- Entering destinations directly
- Saving in user box mode
- Saving printouts in user boxes
- Saving data in a user box
- Click the [OK] button.
- Click the [OK] button to start printing.
- Saving data in the secure print user box
- Saving data in the encrypted PDF user box
- Overview of document organizing
- Available operations in the file document screen
- Checking documents saved in user boxes
- Touch [File Document].
- From the Public, Personal or Group tab, touch the button for the desired user box.
- If a password has been set for the user box, type in the password, and then touch [OK].
- Description of file document screen
- Searching for a user box name
- Deleting a document
- Changing the document name
- Touch [Start].
- Moving a document
- Check the information, and then touch [Start].
- Touch [OK].
- Duplicating a document
- Checking document details
- Check the details
- Check the details of the document.
- After checking the document, touch [Close].
- Overview of document printing
- Available operations in the use document screen
- Touch [Use Document].
- Description of use document screen
- Printing
- Available print settings
- To print a document
- Select the print settings.
- Touch [Start], or press the [Start] key in the control panel.
- Changing the number of copies
- Specifying single-sided/double-sided printing
- Specifying finishing settings
- Touch the button for the desired position, and then touch [OK].
- Combined printing
- Available combined printing parameters
- Under "Action", touch [Combine].
- Specify the combination order.
- Select the print settings.
- Touch [Start], or press the [Start] key in the control panel.
- Overview of document transmissions
- Available document transmission operations
- Transmission methods
- To send a document
- Secure print user box
- Available printing parameters
- To print a document (Mode 1)
- Touch [System User Box].
- Touch [Secure Print User Box], and then touch [OK].
- Type in the ID for the confidential document, and then touch [OK].
- Type in the password for the confidential document, and then touch [OK]. A list of the documents that can be printed is displayed.
- To print a document (Mode 2)
- Touch [Use Document].
- Encrypted PDF user box
- Printing
- Under "Action", touch [Print].
- Type in the password, and then touch [OK].
- Deleting
- 5
- Network Scanner Operations
- Using scan/fax programs
- Recalling a scan/fax program
- Registering scan/fax programs
- Press the [Mode Memory] key.
- Touch the button where the program is to be saved.
- Touch [Register Program].
- Editing and deleting scan/fax programs
- Sending data in an e-mail message (Scan to e-mail)
- Scan to e-mail
- Selecting a destination from the address book
- Selecting a group destination
- Touch [Group].
- Touch the button for the group destination.
- Select the destination where the data is to be sent, and then touch [OK].
- Touch [Scan Settings], [Original Settings] or [Communication Settings], and then specify the desired scan settings.
- Load the document into the ADF or place it on the original glass.
- Entering addresses directly
- Selecting a destination that was searched for
- Selecting a destination with an address search
- Sending data to a computer on the network (Scan to SMB)
- Scan to SMB
- Scan to SMB operations with Windows File Sharing (Mac OS X)/Samba (Linux/Unix)
- Machine settings
- Server settings
- Scan to SMB operations with Windows 98 SE and Windows Me
- Enter the information for the destination, and then touch [OK].
- Touch [Scan Settings], [Original Settings] or [Communication Settings], and then specify the desired scan settings.
- Load the document into the ADF or place it on the original glass.
- Press the [Start] key in the control panel.
- Sending data to a server (Scan to FTP)
- Scan to FTP
- Test data
- Specifying scan and transmission settings (Scan settings/original settings/communication settings)
- Original type
- Simplex/Duplex
- Resolution
- File type
- Density
- Select the density.
- Touch [OK], and then touch [OK] in the next screen that appears.
- Separate scan
- Color (Quality adjustment)
- Background removal (Quality adjustment)
- Sharpness (Quality adjustment)
- Frame erase (Erase)
- Book copy (Book scan)
- Scan size (Application)
- Touch [Scan Size].
- Select the size and orientation.
- Annotation (Application)
- Date/Time (Application)
- Touch [Stamp/Composition].
- Touch [Date/Time].
- To specify a date and time, touch [Yes], and then specify the date and time settings.
- Page number (Application)
- Touch [Page Number].
- To specify the page numbers, touch [Yes], and then specify the page number settings.
- Stamp (Application)
- Header/Footer (Application)
- Send & Print (Application)
- Document name
- Original settings
- E-Mail setting
- URL notification setting
- E-Mail encryption
- Digital signature
- Settings that can be specified from utility mode
- Utility mode parameters
- Other related parameters
- Web Connection
- Registering an address book destination
- E-Mail destination
- User box
- PC (SMB)
- Touch [New].
- FTP
- Registering a group destination
- 6
- Web Connection Operations
- Information tab
- Device Information - Configuration Summary
- Device Information - Option
- Item Description
- Device Information - Consumables
- Device Information - Meter Count
- of Originals 0
- of Used Papers 0
- Online Assistance
- Change User Password
- Function Permission Information
- Network Setting Information
- Print Setting Information
- Print Information
- Job tab
- Current Jobs
- Job History
- Communication List
- Box tab
- Open User Box
- Document operations
- Changing user box settings
- Create User Box
- Open System User Box
- Create System User Box
- Direct Print tab
- Direct Print
- Store Address tab
- Address Book
- Registering a destination
- Group
- Registering a group destination
- Program
- Registering a program destination
- Temporary One-Touch
- Subject
- Registration page
- Text
- 7
- Fax Operations (Option)
- General fax operation
- Sending a fax
- Loading the original
- Loading the original in the ADF
- Loading the original on the original glass
- Faxing a multi-page original using the original glass
- Sending the original using both the ADF and the original glass
- Specifying scanning conditions
- Specifying scanning settings
- Specifying only one destination
- Specifying from registered destinations
- Searching for a registered destination (Index button)
- Searching for a registered destination (Address type)
- Select the address type.
- Searching for registered destinations (Detail search)
- Touch [Search] in the [Address Book] tab.
- Touch [Detail Search].
- Touch [Name] or [Address].
- Specifying by direct input
- → Enter the fax number of the recipient.
- Specifying from the job history
- Specifying multiple destinations (Sequential broadcast transmission or broadcast transmission)
- Specifying multiple destinations (from registered destinations, direct input, job history)
- Specifying multiple destinations (using the group button)
- Touch [Address Type].
- Touch [Group].
- Touch the desired group button.
- Sending a fax using a program destination
- To send a fax after specifying a program destination
- Operations while scanning
- When there is a memory overflow
- Original auto rotation
- d-Color MF550
- d-Color MF450
- When unable to send
- Redial
- Auto redial function
- Redial confirmation screen (d-Color MF550)
- Touch [OK].
- Touch [OK].
- Manual redial (Current jobs list)
- Manual redial (Fax retransmit user box)
- Reserving a transmission
- Aborting transmission
- Aborting a job during transmission
- Canceling timer transmission reserved jobs
- Sending a fax after specifying a time (Timer TX)
- To conduct timer TX
- Enter the transmission start time using the keypad.
- Touch [OK] twice, and then touch [Close].
- Specify other settings if required.
- Specify the destination.
- Press [Start] key.
- 8
- Network Fax Operations (Option)
- General fax operation (Internet fax)
- Sending an internet fax
- General fax operation (IP address fax)
- Sending an IP address fax
- Specify the IP Address of the recipient.
- Press [Start] key.
- Specifying transmission color settings (IP address fax)
- Specifying transmission color settings
- Specifying the scan conditions
- Specifying scan settings
- Specifying only one destination
- Specifying from registered destination
- Searching the registered destination (Search text button)
- Searching the registered destination (Address type)
- Select the destination type.
- Searching the registered destination (Detail search)
- Touch [Search] of [Address Book] tab.
- Touch [Name] or [Destination].
- Touch [Direct Input] on Fax/Scan screen.
- Select Destination type.
- Enter the destination and then touch [OK].
- Specifying multiple destinations (Broadcast transmission)
- Specifying multiple destinations (by registered destination and direct input)
- Specifying multiple destinations (by group button)
- Touch the targeted group button.
- Send a fax with program destination
- Sending a fax after specifying program destination
- When unable to send
- Redial confirmation screen
- Reserving the transmission
- Stopping the transmission
- Appendix
- A p p e n d i x
- Entering text
- Enlarging the keyboard
- To type text
- 10
- Symbols
- Numerics
- A
- B
- C
- D
- E
- F
- G
- H
- |
- L
- M
- N
- 0
- P
- Q
- R
- S
- T
- U
- W
- Z
- DIRECTIVE 2002/96/CE ON THE TREATMENT, COLLECTION, RECYCLING AND DISPOSAL OF ELECTRIC AND ELECTRONIC DEVICES AND THEIR COMPONENTS
- INFORMATION
- FOR COUNTRIES IN THE EUROPEAN UNION (EU)
- To dispose of our devices correctly:
- FOR OTHER COUNTRIES (NOT IN THE EU)
Brand : OLIVETTI
Model : d-Color MF550
Category : Printer