
Las Vegas 960 DSP - Receiver BLAUPUNKT - Free user manual and instructions
Find the device manual for free Las Vegas 960 DSP BLAUPUNKT in PDF.


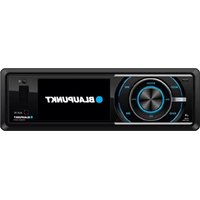
| Product Type | Car Audio Receiver |
| Brand | Blaupunkt |
| Model | Las Vegas 960 DSP |
| Dimensions (W x H x D) | 178 mm x 50 mm x 160 mm (single-DIN) |
| Weight | 1.2 kg |
| Power Supply | 12 V DC (negative ground) |
| Maximum Power Output | 4 x 50 Watts (peak) |
| RMS Power Output | 4 x 22 Watts (at 4 Ω) |
| DSP Processor | Built-in 32-bit Digital Signal Processor |
| Equalizer | 13-band graphic equalizer |
| Bluetooth Version | 4.0 (A2DP, AVRCP, HFP) |
| USB Input | Yes (supports MP3/WMA/WAV) |
| AUX Input | Front 3.5 mm |
| Radio Bands | FM, AM |
| RDS Features | Yes (AF, PS, TP, TA) |
| Display | LCD with variable color illumination |
| Remote Control | Included (wired or IR) |
| Preamp Outputs | 3 pairs (Front, Rear, Subwoofer) |
| Rear Camera Input | Yes (RCA composite) |
| Steering Wheel Control | Compatible (adapter required) |
| Maintenance | Clean with soft lint-free cloth; avoid liquids |
| Safety | Disconnect battery before installation; use proper fuses |
| Spare Parts & Repairability | Contact authorized service center; no user-serviceable parts inside |
Frequently Asked Questions - Las Vegas 960 DSP BLAUPUNKT
User questions about Las Vegas 960 DSP BLAUPUNKT
0 question about this device. Answer the ones you know or ask your own.
Ask a new question about this device
Download the instructions for your Receiver in PDF format for free! Find your manual Las Vegas 960 DSP - BLAUPUNKT and take your electronic device back in hand. On this page are published all the documents necessary for the use of your device. Las Vegas 960 DSP by BLAUPUNKT.
USER MANUAL Las Vegas 960 DSP BLAUPUNKT
Enjoy it.
Operating instructions
Thank you for purchasing the Android-based Smart True Hi-Fi & Car Multimedia system!
The innovative idea, bringing car multimedia, high-end digital sound processing, Internet, and active safety together, in addition to the traditional multimedia & navigation capabilities, really lets you feel the “blue” value with the Internet + sound "enjoy" + active safety charm.
The system, based on Android 4.4.4, has 2 variants: 9-inch and 10.1-inch screen models, and can match nearly 100 car models with dedicated car-specific fascia:
- 9-inch screen model units: Las Vegas 950 (WD) / 950DSP (WD) • 10.1-inch screen model units: Las Vegas 960 (WD) / 960DSP (WD)
- Las Vegas 950DSP (WD) and 960DSP (WD) with the TrueHIFI "Digital Sound Processing" functionality
Contents
Safety notes ....
General 4
Warning 4
Cleaning notes 5
Disposal notes....5
Scope of delivery 5
Software update 6
Bring your unit into operation ....
Switching on/off....7
Volume 7
Operation ....
Touchscreen 6
Keyboard input 7
Main menu 8
Wallpaper setting 9
Radio 9
Bluetooth....10
Navigation/Multimedia....11
AUX / Browser....12
Audio Setting W/O DSP 13
Audio Setting C/W DSP 14
System Setting......
Base Setting....15
Factory Setting....15
Steering Wheel Setting....16
WAN....6
Data Usage....17
More 17
System Setting......
3G/4G Dongle Connection 18
Sound....18
Display....19
Storage....19
Application....20
Location....20
Language Input....21
Date & Time....21
Add account 21
Accessibility 22
About....22
Car Assistant....
Process Manager 23
Software Uninstaller....23
Software Install 24
Cache Clear 24
Connection
Las Vegas 950 DSP(WD)/ 960 DSP (WD)....25
Las Vegas 950(WD)/ 960 (WD)....26
Legal Notice....27
Safety Notes
Generals
For your better use of the system, please carefully read this user manual before using the system, and note the following:
- If the system becomes abnormal during operation and the issue cannot be resolved, use the tip of a pin to press the reset button [RST] located in the upper left corner of the panel. This will reset the system to its factory state.
- Do not touch the display with hard objects to avoid scratching it. The system contains high-precision components, so do not open the cover or adjust any parts. For any repairs, please contact your local dealer.
- Avoid subjecting the system to strong impacts, as they could damage its mechanical structure.
- If the temperature inside your car is very high or very low, adjust the car's temperature first before using the system. The illustrations in this manual are intended to provide clearer instructions on how to operate the system; therefore, the HMI shown may differ slightly from the actual system, and some illustrations may not be implemented in practice.
- Please follow the instructions to operate the system. Damage caused by improper operation is not covered by the warranty.
- The performance of this system cannot replace human reasoning and judgment. Any route or driving advice provided by the system's navigation function cannot replace local traffic laws, your own judgment, or safe driving knowledge. Do not follow directions if the navigation function instructs you to perform an unsafe or unlawful operation that puts you in danger or leads you to an area you consider unsafe.
- Operating the system or viewing its screen while driving may cause serious traffic accidents. To avoid any accident, stop in a safe and legal spot before operating the system or viewing the screen.
- The system may come with pre-installed third-party software that connects to other devices. Please back up the data on those devices before use to prevent data loss due to unforeseen circumstances.
- If the system has "digital sound processing" functionality, do not adjust or set digital sound fields while driving. Ensure the volume is set so you can hear external traffic and emergency vehicles. If you cannot hear external traffic, you may cause a traffic accident. Make sure any other person who intends to use this system has carefully read these instructions and the following ones.
- If any explanation or instructions in this user manual are not clear enough, or if you are unsure how to operate the system, please contact your local Blaupunkt dealer or the relevant Blaupunkt department for information or contacts, and then use the system.
Warning!
- This system is intended for cars with a 12V battery and a negative grounded power supply. Do not install the system directly on a truck or bus with a 24V battery power supply.
- Do not install the system in a way that obstructs the driver's vision or interferes with driving operations.
- Do not expose the system and accessories to excessive moisture or water, as this may cause a short circuit, leading to fire or other damage.
- Do not replace the fuse attached to the power connector of the system with other types, as any mismatch could result in loss of over-current protection, potentially burning the system or causing a fire.
Cleaning notes
Solvents, cleaning and scouring agents, as well as dashboard sprays and plastic care products, may contain ingredients that could damage the surface of your unit.
Use only a dry or slightly moistened cloth to clean your unit.
When the system panel and TFT LCD screen are dirty, use a soft cloth or neutral detergent to wipe them. Using hard cloths or diluents such as alcohol could scratch the panel and TFT LCD.
Disposal notes

Do not dispose of your old units in household trash!
Use applicable recycling systems to dispose of your old units, and if any, remote controls as well as exhausted batteries.
Scope of delivery
The scope of delivery includes:
• Smart TrueHIFI & Car Multimedia unit - GPS antenna • Operating instruction book • Installation material - Connecting cables - WIFI antenna
Software update
Under the related Blaupunkt website, you will find the latest software and updates for your unit, including instructions for the software update
Bring your unit into operation
Switching on/off
Switching on/off with the power/mute button
For switch-on, press the power/button. For switch-off, hold the power/mute button pressed for more than 2 seconds.
Switching on/off via vehicle ignition
If your unit is connected with the vehicle ignition and it was switched off with the power button, it is switched on or off with the ignition.
Volume
Adjusting the volume
You can adjust the volume in increments from 0 (off) to 40 (maximum).
Press Volume + / Volume - to change the volume.
Muting the car sound system (Mute)
Briefly press the Power/Mute to mute the device or to reactivate the previous volume.
Operation
Touchscreen
Important note:
Do not use any pointed or hard objects, such as ball point pens or fountain pens, to operate the touchscreen of the product.
The product features a capacitive touchscreen that provides soft keys buttons and allows you to operate it.
Swiping/scrolling
Some functions require swiping across the display surface, e.g.
- scrolling in lists,
- adjusting sliders.
Tap on the display surface and rest your finger on the surface. Next, move your finger over the surface.
Zooming
When displaying maps (navigation) and images, you can enlarge or reduce the view (zoom):
Tap on the area of the map display with two fingers and rest your fingers on the surface. Move your two fingers closer together (zoom out/reduce) or further apart (zoom in/enlarge).
Keyboard input
A keyboard is displayed for entering text or numeric values:

Notes:
- The navigation app uses its own keyboard (see the chapter "Navigation").
- For entries that allow only certain characters, such as numbers, a special keyboard may be opened.
The keyboard offers different options:
- Input display
- Confirm input
- Short press: Confirms input Long press: Discards input
- Short press: Inputs characters Long press: Displays special characters for selection
- Short press: Inputs characters Long press: Displays keyboard settings
- For text input: Changes between capital and non-capital letters
For number/character input: Changes to additional special characters or returns
- Set keyboard to text or number and character input
Main menu
Opening main menu

- Screen management: select shortcuts or long press off the screen into the wallpaper, management applications • Home: return to the main menu desktop, long press to return to the nearest application • Power / mute: short press mute, press and hold turn off your unit • Back: Returns to the previous menu • Volume +: volume increase • Volume -: Volume down

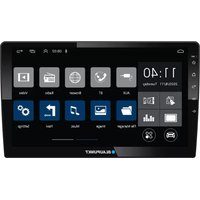
① Time ② System Setting ③ Sound EQ ④ Mute ⑤ Screen Brightness ⑥ Wifi ⑦ GPS ⑧ Car Assistant
Android Application

- Click on the main menu "application" to enter the application page.
- Enter the application page, long press an icon until the icon moves to the main screen/desktop, and then drag it to the main screen blank. In case that the main screen picture is full, it will show "this main screen has no space."
Wallpaper Setting
In addition to the system built-in wallpapers and dynamic wallpapers, the user can add his own wallpapers through external storage devices.
To change the wallpaper: click the "screen management" icon, select "wallpaper".

Another way to change wallpaper: go to setting → display → wallpaper.

Radio

• Band
Click the BAND icon to change the band FM1 / FM2 / FM3 / AM1 / AM2.
- Stereo / mono
Click the ST icon to toggle mono and stereo, and the ST logo is displayed in the lower left corner when the stereo is on.
• Far distance / proximity
Click the LOC icon to set the remote (remote and local weak station) or proximity (local strong signal radio) search mode. When the LOC flag is displayed above the "Channel Save" column, it means that only stations with close proximity and strong local signals can be received.
• Automatic search
Click the APS icon to search for the channel automatically and save it automatically.
- Step left / step right
Short press the left / right arrow icon for manual search, long press for semi-automatic search. After searching for the channel, press the P1 / P2 / P3 / P4 / P5 / P6 keys in the channel save area to save.
Bluetooth

Bluetooth call record
Bluetooth Music
- Dial keyboard
Used to enter the phone number you want to dial.
- Phone book
Download the phone number from your phone.
- Call records
Record all dialed, received and missed calls.
- Bluetooth music
Open the phone music player, user can play music through the car audio
- Connect / disconnect
Connect and disconnect the Bluetooth connection to the phone. First, use the phone to scan for Bluetooth devices, then press the screen prompts to enter the matching password.

Previous Play/Stop Next
Bluetooth Connection
Navigation
The system provides multi-mode navigation function:
• Google Map is pre-installed. - The user can download other navigation software (like Here We Go). - Use any navigation app on your mobile phone via the mirror mode LeadRide.
Users can use the following menu page to select their favorite navigation software. The system provides dual-mode GPS/BDS positioning support, which is more reliable.

Multimedia
This feature supports multiple storage devices, and supports music playback, picture browsing, and video playback.

Music Player Page
Photo Player Page
Video Player Page
AUX
This function requires external audio and video signal input (streaming media, players, etc.) to run.

Browser
Functional description
- Supports WIFI, 3G/4G USB dongle, or 3G/4G mobile hotspot shared network to achieve Internet access. For specific settings, please refer to the settings chapter.
- Click on the URL bar, in the pop-up soft keyboard, enter the URL and click "GO" to connect to the URL.

Audio settings
This function is only available for both LAV 950gas (WD) and 960dWD ( ) models.

Functional description
- You can freely choose one from "Normal - Jazz - Classic - Rock - Pop - Flat" six styles, in order to change the sound output effect.
- Pull up and down the "bass" and "treble" sliders to adjust the gains (volumes) corresponding to low frequencies and high frequencies respectively.
- Simulation of the "King Position" sound field by selecting one of preset positions (such as the driver seat), or by self-defining your favorite position.
- Open the loudness, and raise the gains of the high and low frequency components at low volume so that the loudness ratio of the low, medium and high components remains the same as the loudness at high volume.
Sound settings
This function is only available for Las Vegas950DSP (WD) and 960DSP (WD) models.

1 Preset audio source effects: 2 Q-factor setting: 3 Gain 4 Tips
Enter menu page "equalizer" - Set your personal favorite source style according to the characteristics of the selected source:
- "Gain" in the right bottom line & slide bars of the 15 different frequency bands: define your own style by yourself. Increase of the gain of certain frequency band would mean that you would get stronger volume as well as performance for that frequency band, and vice versa;
- "Q" value in the middle bottom line: while adjusting the gain of certain frequency band, the gains of all frequencies (band width) of the relevant frequency band (the left and right side of the center point) shall be changed accordingly. You can set this so-called Q-value to control the band width. Increase of this value would narrow the band width, and vice versa
- "Mode" in the left bottom line: you can choose one of the preset styles. In case that you select "Normal", you can recover the initial status of the equalizer including the gain and Q-value.
Enter menu page "King Position" - choose the position in your car where sound-effect shall be optimal:
- Click the button to select your favorite position (driver seat, co-driver seat, rear left seat, rear right seat, center position).

Menu page "expert configuration"
- Reserved for professional sound experts using the external TrueHIFI sound tuning software:
- Up to 6 sound tuning files set by sound experts can be stored here, and can be selected and put into use by you at your convenience. Taking into account your car's interior material characteristics, spatial structure and your personal preferences, experts configure the gains, phases, 31-band parametric equalizers, time delays and power limitations for each of 8 output channels.
- Please turn the switch on in upper right corner to enter the page "expert configuration". In case that you cannot switch on, it indicates that no expert configuration has been done before. If so, you shall contact and consult your dealer or sound expert, asking for sound tuning arrangement

In case that speakers and/or amplifiers are changed and/or added, the sound tuning files set and stored previously must NOT be used any more. Otherwise it could destroy speakers and/or amplifiers. No warranty or any responsibility shall be taken over herewith.
System setting
Enter the system settings shortcut: from drop menu, click the Settings button

Base settings
- Ban video
Select - Do not watch the video while driving, and the "Warning" screen appears when you enter the video
Deselected - can watch the video
Warning: the driver should only watch video during parking, otherwise no responsibility shall be taken over by us
- Keypress Beep
Select - the key tone is on
Not selected - key tone off
• Turn on the volume limit
Select - to limit the volume when turned on. Not selected - No limit to volume at boot time (not recommended).
- Reverse mirror
Select - Normal / Mirror
- Reverse mute
Select - mute when reversing
Not selected - Prompt when reversing
• Rearview video output
Select - mute when reversing driving
Not selected - Prompt when reversing driving
• Navigation and Music
• Navi prompts & Music
Selected - navigation route guiding while background media playing
Not selected - no media playing is possible while navigation route guiding
Not selected - no media playing is possible while navigation route guiding
Select - sound mix / sound switch
• Navigation App selection
Select one Navigation App which is associated with the "GPS" icon in the lower right corner in the main menu.
Select one Navigation App which is associated with the "GPS" icon in the lower right corner in the main menu.
When the headlamp is turned on, the screen brightness will decrease to the percentage of the Original brightness.
When the headlamp is turned on, the screen brightness will decrease to the percentage of the original brightness.
Set the virtual key backlight color
Factory settings
Factory settings are set by the manufacturer's technical staff.
Factory settings are set by the manufacturer's technical staff.
Steering wheel setting

Steering wheel setting
This function is suitable for some models that cannot connect the steering wheel control keys through the CAN module of the car network. The purpose is to bind the actual steering wheel control keys to the virtual steering wheel buttons (preset function keys) in the system.
The steering wheel control setting method is as follows:
- Wizard mode
- Click to enter the steering wheel setting page; the right side of the screen has 12 virtual steering wheel buttons (preset function keys).
- Click on one of the virtual steering wheel buttons (preset function keys) on the right side of the screen to make it blink.
- Press and hold the control key corresponding to the actual steering wheel.
- Click "Save" at the top right of the screen to complete the binding of the steering wheel button to the preset function key.
- Click "Reset" to delete the previous binding.
- Free mode
- Click to enter the steering wheel setting page. The right side of the screen has 12 virtual steering wheel buttons (preset function keys).
- Press and hold one of the control buttons on the actual steering wheel.
- Click on the corresponding virtual steering wheel button (preset function key) on the right side of the screen; it will flash.
- Click "Save" at the top right of the screen to complete the binding of the steering wheel button to the preset function key.
- Click "Reset" to delete the previous binding.
WLAN

WLAN
WIFI is turned off by default. According to the following HMI prompt, you must first open the WIFI. Click the switch icon to turn on WIFI and enter the WIFI list page. The user can search for available networks automatically by selecting the scanning button.
Click the switch icon to enter the list page.
Select the WIFI name to connect, enter the password for WIFI, and click Connect.
When the connection is successful, the title bar displays the WIFI icon.
Data Usage
Traffic usage

More

Click the "mobile networks" to enter the mobile network settings
- Airplane Mode
When you turn on this mode, all wireless features of the system will be turned off and you will not be able to use data services and Wi-Fi, but you can still enjoy local music, video, or use other applications that do not require a network.
- Mobile networks
Insert the USB 3G/4G network card device (such as USB dongle), configure the mobile network parameters (different mobile service provider parameter settings are different). Display of the network signal on the status bar means that this device is available.
• Tethering & portable hot spots
In case that the above mobile network is available, the system can share its network connection to other devices (such as mobile phones, tablet or computer, etc.), as hotspot for these devices.
3/4G Dongle Connection

- Attention: for certain mobile network operator (e.g. 3G network), it might be necessary to configure the APN access point, otherwise you can not get access to the Internet. For details please consult your local network operator.
Sound

• Volume adjustment for Music, video, games and other media. - Notification volume adjustment. - Default notification tone selection.
Display

- Brightness adjustment
- Wallpaper selection
- Font size adjustment
Storage

Before downloading the upgrade package or copying large files to the system or external storage device, check that the system or external storage device has sufficient free space.
Application

Display information of all Apps on the system and the external storage device incl. running and downloaded Apps, and conduct App uninstallation and stop.
Location

Determine the location mode and Apps which have recently requested for locations
Language and Input

Select the system language, input method, voice (text to speech output) and touch speed
Date and time

This feature varies from network to network
Add account
An account allows you to browse comfortably and access the services you want on the internet. Many applications or services require you to register accounts and grant permissions.
Miscellaneous

This page helps the user operate the system more conveniently.
About

This page displays system version, status, and other information: system updates, mobile data network information, legal information, model, system version, kernel version, version number, and other related information.
Car Assistant
The Car Assistant page integrates the process manager, software uninstaller, installation package management, and cache clearing.

Process Manager
• End and stop running programs to reduce memory consumption and speed up the system. - To stop an application: end a single process or select multiple processes and click "End Selected" to immediately stop them. - Note: After some system programs are stopped, the system will restart them to keep the system running properly.

Software uninstaller
The system automatically scans installed third-party apps. Uninstall unused apps from time to time to improve storage space utilization.
Click OK or Cancel
Car Assistant

Software Install
Automatically scan the application in the internal storage, touch select the application to install the internal storage.

Cache Clear
Clear the cache
Optional modules
• DVR (Street View Recorder) / ADAS (Driving Assistance System) • TPMS (tire pressure monitoring system) - CAN module
The above optional modules need to be purchased separately. For detailed usages please refer to the user manuals of the related optional modules.
Las Vegas 950DSP(WD)/960DSP(WD)
Las Vegas 950(WD)/960(WD)
Legal Notice
No part of this manual may be reproduced or transmitted in any form or by any means without prior written consent of Blaupunkt Car Multimedia Competence Center China (Blaupunkt CM China).
The product described in this manual may contain software owned by Blaupunkt CM China or the corresponding copyright owner. No person shall engage in any form of infringement of the copyright in the software, including the reproduction, distribution, alteration, excerpt, de-compilation, disassembly, decrypting, reverse engineering, leasing, transfer, sub-licensing, without the permission of the relevant rights holder or the applicable laws and/or regulations.
Trademark statement
- Android™ is a trademark of Google Corporation. • Wi-Fi is a registered trademark of the International Wi-Fi Alliance
- The Bluetooth® word and its logos are registered trademarks of Bluetooth SIG, Inc.
- Other trademarks, product names, service names, and company names appearing in this manual and in the product described in this manual are owned by their respective owners.
Attention
Some of the features and functions of the product and its accessories described in this manual depend on the design and performance of the local network and the software you installed. Some functions and features may not be supported by the local network operator or network service provider, or by the software you installed, or due to local network settings. Therefore, the description in this manual may not correspond exactly to the product or its accessories you purchased.
Blaupunkt CM China reserves the right to modify any information in this manual at any time without prior notice and without any liability.
Third-party software statement
* The third-party's software and applications, including related audio and video formats provided with this product, are owned by third parties. Blaupunkt CM China does not own the intellectual property rights of these third-party's software and applications, including related audio and video formats. Therefore, Blaupunkt CM China does not provide any guarantee for these third-party's software and applications. Blaupunkt CM China will not provide support to these software and applications, nor will it assume any responsibility for the functionality of these software and applications.
Third-party software statement
* Third-party's software and application services may be interrupted or terminated. Blaupunkt CM China does not guarantee that the availability of such software, content, or services can be maintained at any time. * Blaupunkt CM China does not assume any responsibility for its legitimacy, quality, and any other aspects of any third-party works (such as any text, image, audio, video, or software) that are not installed or provided by Blaupunkt CM China. You are solely responsible for any consequences arising from your own installation of any software or your own uploading and downloading any third-party works, including incompatibility of the installed software or works with this product.
- This product is based on an open Android operating system, and Blaupunkt CM China and/or its cooperation partners have made necessary modifications to the system, so that it may not support all the features of the standard version of the Android system, or it might happen that this product might not be compatible with certain third-party's software. Blaupunkt CM China does not assume any responsibility herewith.
Limitation of liability
- The contents of this manual are provided "as the current status" without any kind of either expressive or implied warranty, including, but not limited to, any merchantability or applying to a particular purpose, unless required by applicable regulatory rules.
- So long as applicable regulatory rules permit, Blaupunkt CM China shall, in no case, compensate for any direct, indirect, special, incidental, consequent, consequential loss or damage arising from the use of the contents of this manual and/or the product described in this manual. Neither shall Blaupunkt CM China make any compensation for any loss or damage of profits, data, goodwill or anticipated savings.
- So long as applicable regulatory rules permit, the maximum liability of Blaupunkt CM China for any loss suffered by you due to the use of the product described in this manual is limited to the price paid by you for the purchase of this product, except any compensation required by applicable laws and/or regulations in the case of any personal injury.
Competence Center China
This manual does not constitute any form of commitment and thus shall be used as information and reference only. The product including its features and performance (including, but not limited to, color, size, screen, display etc.) prevails in kind.
http://www.blaupunkt.com
- CONTENTS
- SAFETY NOTES
- CLEANING NOTES
- DISPOSAL NOTES
- SCOPE OF DELIVERY
- SOFTWARE UPDATE
- BRING YOUR UNIT INTO OPERATION
- OPERATION
- MAIN MENU
- WALLPAPER SETTING
- RADIO
- BLUETOOTH
- NAVIGATION/MULTIMEDIA
- AUX / BROWSER
- AUDIO SETTING W/O DSP
- AUDIO SETTING C/W DSP
- SYSTEM SETTING
- CAR ASSISTANT
- CONNECTION
- LEGAL NOTICE
- GENERALS
- WARNING
- SWITCHING ON/OFF
- SWITCHING ON/OFF WITH THE POWER/MUTE BUTTON
- SWITCHING ON/OFF VIA VEHICLE IGNITION
- VOLUME
- ADJUSTING THE VOLUME
- MUTING THE CAR SOUND SYSTEM (MUTE)
- TOUCHSCREEN
- IMPORTANT NOTE
- SWIPING/SCROLLING
- ZOOMING
- KEYBOARD INPUT
- NOTES
- OPENING MAIN MENU
- ANDROID APPLICATION
- BAND
- STEREO / MONO
- FAR DISTANCE / PROXIMITY
- AUTOMATIC SEARCH
- STEP LEFT / STEP RIGHT
- DIAL KEYBOARD
- PHONE BOOK
- CALL RECORDS
- BLUETOOTH MUSIC
- CONNECT / DISCONNECT
- NAVIGATION
- MULTIMEDIA
- AUX
- BROWSER
- FUNCTIONAL DESCRIPTION
- AUDIO SETTINGS
- SOUND SETTINGS
- MENU PAGE "EXPERT CONFIGURATION
- BASE SETTINGS
- FACTORY SETTINGS ARE SET BY THE MANUFACTURER'S TECHNICAL STAFF
- STEERING WHEEL SETTING
- WLAN
- DATA USAGE
- TRAFFIC USAGE
- MORE
- G DONGLE CONNECTION
- SOUND
- DISPLAY
- STORAGE
- APPLICATION
- LOCATION
- LANGUAGE AND INPUT
- DATE AND TIME
- ADD ACCOUNT
- MISCELLANEOUS
- ABOUT
- PROCESS MANAGER
- SOFTWARE UNINSTALLER
- SOFTWARE INSTALL
- CACHE CLEAR
- OPTIONAL MODULES
- TRADEMARK STATEMENT
- ATTENTION
- THIRD-PARTY SOFTWARE STATEMENT
- LIMITATION OF LIABILITY
- COMPETENCE CENTER CHINA
Brand : BLAUPUNKT
Model : Las Vegas 960 DSP
Category : Receiver