
PLVW125U - Monitor Pyle - Free user manual and instructions
Find the device manual for free PLVW125U Pyle in PDF.


| Product Type | LCD Monitor Display Screen |
| Brand | Pyle |
| Model | PLVW125U |
| Display Technology | Widescreen HD LCD |
| Screen Size | 12.5 inches |
| Native Resolution | 1366 x 768 (RGB) |
| Contrast Ratio | 500:1 |
| Brightness | 250 cd/m² |
| Power Consumption | <6.5 Watts |
| Power Supply | DC 12V |
| Fuse Rating | 3A or 5A |
| Video Inputs | 2 x RCA, HDMI, VGA |
| Audio Output | RCA (L/R) |
| Mounting Options | In-wall, in-console, universal mount; removable frame |
| Dimensions (with frame) | 16.0 x 10.0 x 1.1 inches |
| Weight | 6.05 lbs |
| Special Features | Full HD 1080p support, adjustable brightness/contrast/hue/saturation, front panel controls, wireless remote |
| Included Accessories | Wireless remote control, cut-out template, mounting screws |
| Safety Notes | Ensure correct power polarity; use specified fuse only |
| Maintenance | Clean with a soft, dry cloth. Do not use abrasive cleaners. |
Frequently Asked Questions - PLVW125U Pyle
User questions about PLVW125U Pyle
0 question about this device. Answer the ones you know or ask your own.
Ask a new question about this device
Download the instructions for your Monitor in PDF format for free! Find your manual PLVW125U - Pyle and take your electronic device back in hand. On this page are published all the documents necessary for the use of your device. PLVW125U by Pyle.
USER MANUAL PLVW125U Pyle
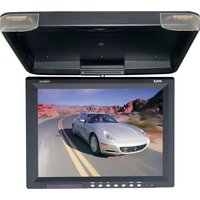
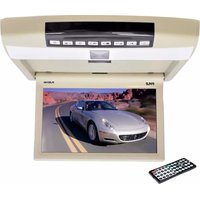
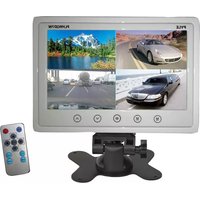
The Pyle 'PLVW' LCD Monitor Display Screens are universal and can be used in a wide variety of applications. Mount the versatile video display in your vehicle, at home or in the office. They are perfect for custom installations and can be used for convenient safety surveillance monitoring, vehicle media entertainment, as an optional second monitor expansion and more. The slim-styled panel design allows for simple HD high-resolution video display ability wherever needed. Connect your system using the inputs: (2) RCA video, (1) HDMI and (1) VGA connector; it also features RCA audio (LIR) connector jacks for connection to an external sound system. Enjoy the convenience of widescreen HD video display with the Pyle 'PLVW' Universal Monitor Systems.
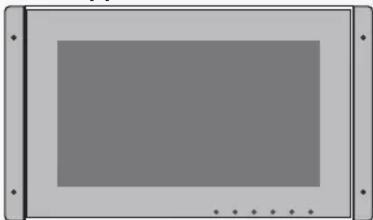
FRONT PANEL
- MODE: Switch between the video inputs. (HDMI,RCA1,RCA2,VGA)
- Analog Decrease: Forward select setting the items or analog decrease menu.
- MENU: Open the menu to adjust the units display settings.
- Analog Increase: Backward select setting the items or analog increase menu.
- POWER: Turn the unit on and off.
6.1R: Remote control receiver.
Please read this manual thoroughly before using this product and keep for future reference.

natural_image
Gray rectangular screen with six small icons at the bottom (no text or symbols on the screen)REMOTE

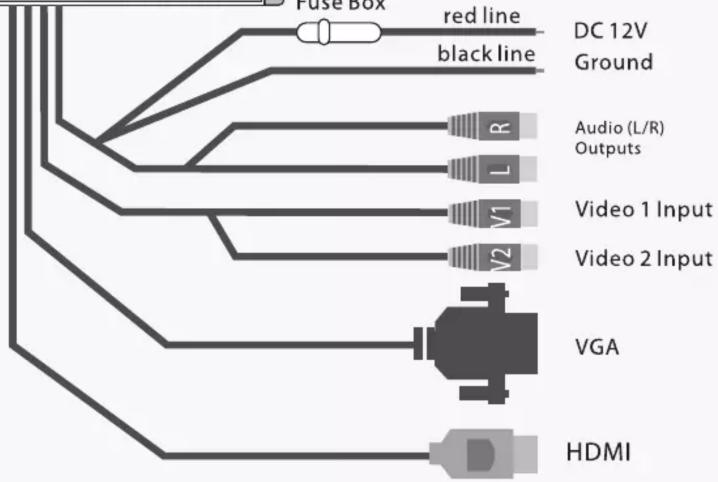
WIRING
Power supply do not meet the polarity, otherwise It will damage Insurance tube.
(Fuse Specifications : 3A or 5A)
VGA Supported Video Modes: Maximum matching resolution
natural_image
Front view of a rectangular electronic device with mounting flanges and a central screen (no text or symbols visible)HDMI Supported Video Modes:
1080P/1080I/720P/480P/576P
Important Note:
Video Inputs: RCA/VGA are used only for
video signal input transmission
-- do not support audio
Fuse Box
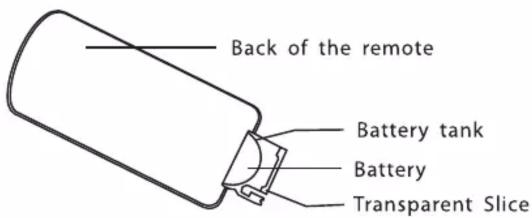
REMOTE CONTROL BATTERY
- Always use new batteries when relacing the old set.
- Do not attempt to charge, short-circuit, disassemble, heat or burn used batteries.
- Battery replacement is necessary when remote control acts sporadically or stops operating this device.
- Do not place objects between the remote receiver.
- If the monitor does not operate even when operating the remote control from a close range, it is time to replace the batteries.
MENU OPERATION Use the unit to achieve the desired settings.
- Press the MENU button on the unit to bring up the on-screen picture control menu.
- Select the desired menu by pressing the Remote left/right button on the unit to choose BRIGHTNESS-CONTRAST-HUE-SATURATION-LANGUAGE SOURCE-RESET-EXIT. Press the Remote MENU button to enter into the control menu.
- Adjust the current settings with the left/right button on the unit, then press the MENU button on unit to achieve the desired settings and return to the upper level of the menus.
Notice: In different mode menu is slightly different.
INSTALLATION & MOUNTING
1. Drive Mounting Holes
Draw a cutting line on the wall according to the following size to install. The depth of the hole should be larger than 36MM.
| SIZE / DIMENSIONS (L X W X D) | ||||
| MODEL | PLVW92U | PLVW125U | PLVW154U | PLVW194U |
| Cut-Out Dimensions | 10.3" x 7.2" x 1.5" 14.0" x 9.5" x 1.5" | 15.7" x 11.2" x 1.5" 13.4" x 18.5" x 1.5" | ||
| TOTAL DIMENSIONS | ||||
| -with Frame | 12.2" x 7.9" x 1.1" | 16.0" x 10.0" x 1.1" | 17.6" x 11.8" x 1.1" 20.4" x 13.9" x 1.3" | |
| -without Frame 11.4" x 6.7" x 0.9" | 15.1" x 8.9" x 0.9" | 16.8" x 10.6" x 0.9" | 19.6" x 12.8" x 1.1" | |
| Weight | 4.25 lbs. 6.05 lbs. 7.86 lbs. 11.67 lbs. | |||
TOTAL DIMENSIONS
2. Install the Main
Connect the lines, place the subjects in mounting hole, upper and lower case-preserving Gap, then with 4 screws.
Screw Specifications: 4mm X 12mm or 4mm X (12+*)mm
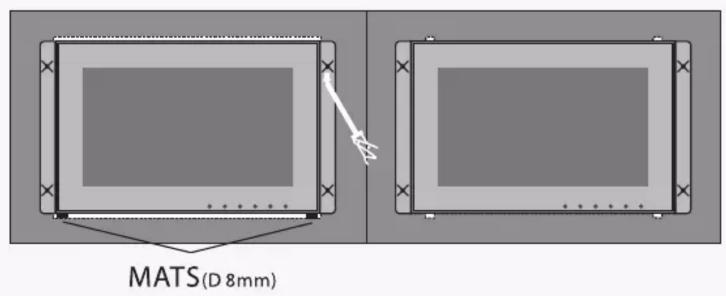
3. Panel Mounting
The display area is aligned with the position of the panel in the frame body, a little hard press to hang buckle at the surface of the panel and the body fit.
Note: The frame display area must be entirely within the neat, buckle clasp firmly to hang.

4. Panel Removal
Use a screwdriver or other flat tool, slightly hard to pry the bottom right corner (part 1), bottom right hang buckle will depart from the main body of the Panel; Then use the same method to open the panels hang buckle 2,3,4, to remove the Panel.

| MODEL | PLVW92U | PLVW125U | PLVW154U | PLVW194U |
| Video Display Screen Size | 9.0" -inch 12.5" | -inch 15.4" -inch 19.0" -inch | ||
| Native Resolution | 800 x 480 (RGB) | 1366 x 768 (RGB) | 1280 x 800 (RGB) | 1440 x 900 (RGB) |
| Contrast Ratio 500:1 500:1 | 500:1 | 1000:1 | ||
| Brightness | 200 cd/m | 250cd/m | 250cd/m | 250cd/m |
| Power Consumption | <5.5 Watt | <6.5 Watt | <11.5 Watt | <18 Watt |
| Amperage Draw 3A | 3A 3A | 3A | ||
FEATURES:
• Full HD 1080p Support
- Widescreen HD LCD Display
• In-Wall / In-Console Mountable
- For Vehicle & Home/Office Applications
- Universal Mount Perfect for Custom Installations
- Removable Screen Display Frame
- HDMI, VGA, (2) x RCA Video Input Connectors
• RCA (L/R) Audio Output Connector Jacks
• Video Input Selectable
- Front Panel Button Controls
• Steel Monitor Housing Frame Cut-Out Holes for Easy Mounting
- Brightness, Contrast, Hue, Saturation Adjustable
- Stain Resistant & Paintable Monitor Frame
- Works Great as Surveillance Display
- Includes Wireless Remote Control, Cut-Out Template, Mounting Screws
*Power Supply Cable Available, Model Sold Separately: PS5A
TECHNICAL SPECS:
• HDMI Support: 1080p, 1080i, 720p, 480p, 576p
• PAL/NTSC Auto Color System
• Screen Aspect Ratio Selectable - 16:9 / 4:3
• Power Supply: DC 12V

natural_image
Illustration of a laptop with a red checkmark on screen, no text or symbols presentVISIT US ONLINE:
Have a question?
Need service or repair?
Want to leave a comment?
PyleUSA.com/ContactUs

Brand : Pyle
Model : PLVW125U
Category : Monitor