
CEG7425B - Coffee maker BEKO - Free user manual and instructions
Find the device manual for free CEG7425B BEKO in PDF.


| Product Type | Built-in Automatic Coffee Machine |
| Brand | Beko |
| Model | CEG7425B |
| Colour | Black |
| Dimensions (H x W x D) | 45.5 x 59.5 x 45.5 cm |
| Weight | 15 kg |
| Power Supply | 220-240 V, 50/60 Hz |
| Power Consumption | 1350 W |
| Water Tank Capacity | 1.8 L |
| Bean Hopper Capacity | 200 g |
| Ground Coffee Option | Yes (bypass doser) |
| Milk Frother | Integrated steam wand with automatic milk frothing |
| Grinder Settings | 13 adjustable levels |
| Drink Options | Espresso, Long Coffee, Cappuccino, Latte Macchiato, Hot Water |
| Control Type | Touch display |
| Display | 2.4-inch colour TFT |
| Cleaning and Descaling | Automatic cleaning and descaling programs with indicator |
| Safety Features | Child lock, auto shut-off, overheating protection |
| Accessories Included | Water hardness test strip, descaling agent (sample) |
| Warranty | 2 years |
Frequently Asked Questions - CEG7425B BEKO
User questions about CEG7425B BEKO
0 question about this device. Answer the ones you know or ask your own.
Ask a new question about this device
Download the instructions for your Coffee maker in PDF format for free! Find your manual CEG7425B - BEKO and take your electronic device back in hand. On this page are published all the documents necessary for the use of your device. CEG7425B by BEKO.
USER MANUAL CEG7425B BEKO
Fully Automatic Espresso Machine
User Manual
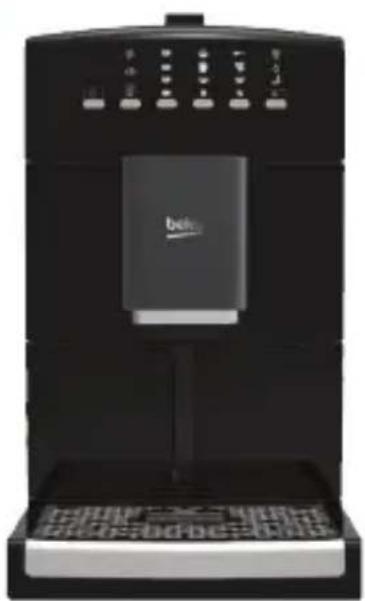
natural_image
Exterior view of a black and white coffee machine with control panel (no visible text or symbols)CEG7425B
EN FR DE CS SK
01M-8833023200-1518-01
Please read this user manual first!
Dear Customer,
Thank you for preferring a Beko product. We hope that you get the best results from your product which has been manufactured with high quality and state-of-the-art technology. Therefore, please read this entire user manual and all other accompanying documents carefully before using the product and keep it as a reference for future use. If you handover the product to someone else, give the user manual as well. Follow all warnings and information in the user manual.
Explanation of symbols
Throughout this user manual the following symbols are used:

Important information or useful hints about usage.

DANGER: Warning for hazardous situations with regard to life and property.

WARNING: Warning indicates a potentially dangerous situation.

CAUTION: Warning indicates potential material damage.

This product has been produced in environmentally friendly, modern facilities
CONTENTS
| ENGLISH | 4-74 |
| FRANÇAIS | 75-153 |
| DEUTSCH | 154-228 |
| ČESKY 229-300 | |
| SLOVENSKÝ 301-375 | |
1 Important instructions to safety and environment
This section includes the safety instructions that will help providing protection against personal injury and material loss risks. Failure to follow these instructions invalidates the granted warranty.
1.1 Danger of electric current
Danger to life by electric current!
Contact with live wires or components could lead to serious injury or even death!
Observe the following safety precautions to avoid electric shocks:
- Do not use the coffee machine if the connecting cable or mains plug are damaged.
- Before reusing the coffee machine, the mains cable must be renewed by a qualified electrician.
- Do not open the housing of the coffee machine. Danger of electric shock if live connections are touched and/or the electrical and mechanical configuration is changed.
- Before cleaning the bean container, pull the mains plug of the appliance out of the socket. Danger from rotating coffee mill!
1
Important instructions for safety and environment
1.2 Danger of burning or scalding
Parts of the coffee machine can become very hot during operation! Dispensed drinks and escaping steam are very hot!
Observe the following safety precautions to avoid burning/scalding yourself and/or others:
- Do not touch either of the metal sleeves on both coffee spouts.
- Avoid direct contact of the skin with escaping steam or hot rinsing, cleaning and descaling water.
1.3 Fundamental safety precautions
Observe the following safety precautions to ensure safe handling of the coffee machine:
- Never play with packaging material. Risk of suffocation.
- Inspect the coffee machine for visible signs of damage before use. Do not use a damaged coffee machine.
1 Important instructions to safety and environment
- If the connecting cable is damaged, it should only be replaced by a service agent recommended by the manufacturer in order to prevent any danger! Please contact the manufacturer or his customer service.
- Repairs to the coffee machine must only be carried out by an authorised specialist or by the works customer service. Unqualified repairs can lead to considerable danger for the user. They will also void the warranty.
- Repairs to the coffee machine during the warranty period may only be carried out by service centres authorised by the manufacturer, otherwise the warranty will become void in the event of subsequent damage.
- Defective parts may only be replaced with original spare parts. Only original spare parts guarantee that the safety requirements are met.
1 Important instructions for safety and environment
•This appliance can be used by children from the age of 8 up as well as by persons with reduced physical, sensory or mental abilities or with lacking experience and/or knowledge, if these persons are supervised or have been instructed how to use the appliance in a safe way and have understood the hazards which could arise from using it. Children must not play with the appliance. Cleaning and user maintenance shall not be made by children unless they are older than 8 and supervised.
• This appliance is intended to be used in household and similar applications such as:
- staff kitchen areas in shops, offices and other working environments,
- farm houses,
- by clients in hotels, motels and other residential type environments,
- bed and breakfast type environments.
- Protect the coffee machine against the effects of weather such as rain, frost and direct sunlight. Do not use the coffee machine outdoors.
1 Important instructions to safety and environment
- Never immerse the coffee machine itself, the mains cable or the mains plug into water or other liquids.
- Do not clean the coffee machine or accessories in a dish washer.
- Do not pour any other liquids apart from water or place foodstuffs into the water tank.
- Do not fill the water tank beyond the maximum mark (lower edge of the filling hole) (1.4 litres).
- Only operate the machine when the waste container, drip tray and the cup grate are fitted.
- Do not pull the cable to remove the plug from the mains socket or touch with wet hands.
- Do not hold the coffee machine with the mains cable.
- Keep the appliance and its cord out of reach of children aged less than 8 years.
1
Important instructions for safety and environment
1.4 Intended use
The fully automatic coffee machine Beko is intended for use in homes and similar applications, for instance in staff kitchens, shops, offices and similar areas or by customers in bed & breakfast, hotels, motels and other living accommodation. This coffee machine is not intended for commercial use. The machine is only intended for preparing coffee and heating milk and water. Any other use other than previously stated is considered as improper use.
Danger resulting from improper use!
If not used for its intended purpose or used in any other way, the coffee machine may be or become a source of danger.

WARNING:
Therefore, the coffee machine may only be used for its intended purpose.

WARNING:
Observe the procedures described in this user manual.
No claims of any kind will be accepted for damage or injury resulting from use of the coffee machine for other than its intended purpose.
The risk has to be borne solely by the machine owner.
1.5 Limitation of liability
All technical information, data and instructions on installation, operation and maintenance of the coffee machine contained in these operating instructions represent the current status at the time of printing and are based on the best possible knowledge gained by experience and knowhow.
No claims can be derived from the information, illustrations and descriptions in this user manual.
1
Important instructions for safety and environment
The manufacturer assumes no liability for damage or injury resulting from failure to observe the user manual, use for other than the intended purpose, unprofessional repairs, unauthorised modifications or use of non-approved spare parts.
1.6 Compliance with the WEEE Directive and Disposing of the Waste Product:
This product complies with EU WEEE Directive (2012/19/EU). This product bears a classification symbol for waste electrical and electronic equipment (WEEE).
This product has been manufactured with high quality parts and materials which can be reused and are suitable for recycling. Do not dispose of the waste product with normal domestic and other wastes at the end of its service life. Take it to the collection center for the recycling of electrical and electronic equipment.
Please consult your local authorities to learn about these collection centers.
1.7 Compliance with RoHS Directive
The product you have purchased complies with EU RoHS Directive (2011/65/EU). It does not contain harmful and prohibited materials specified in the Directive.
1.8 Package information

Packaging materials of the product are manufactured from recyclable materials in accordance with our National Environment Regulations. Do not dispose of the packaging materials together with the domestic or other wastes. Take them to the packaging material collection points designated by the local authorities.
2 Your coffee machine
2.1 Overview
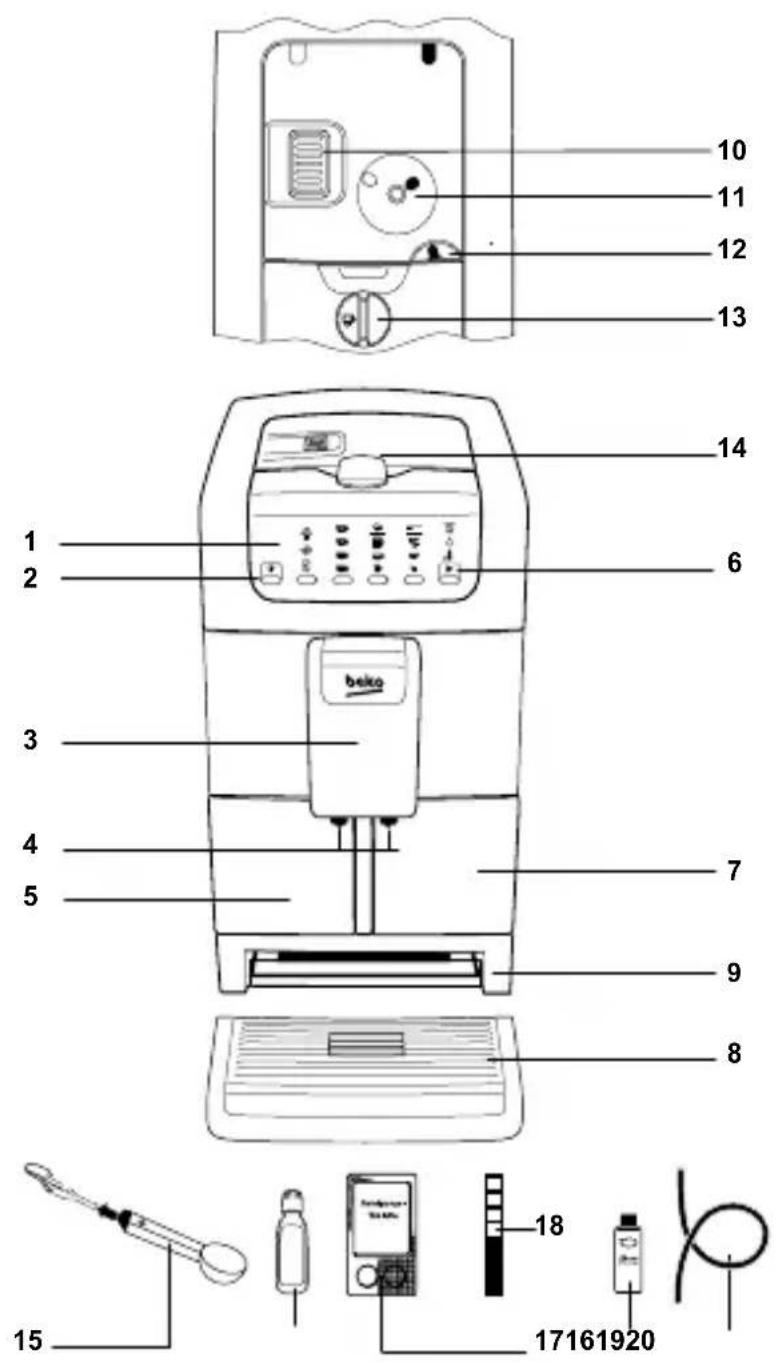
All declared values on the product and on the printed leaflets are picked up after laboratory measurements performed according to related standards. These values may differ upon usage and ambient conditions.
2 Your Coffee machine
- Function displays
- ON/OFF button
- Height-adjustable dispenser unit with integrated milk outlet
- Coffee spout
- Waste container (Grounds box)
- 5 x function/menu buttons
- Water tank
- Removable drip tray with stainless steel grid
- Plug-in card with quickstart instructions
- Coffee powder shaft for previously ground coffee
- Coffee bean container
- Lever for setting the grinding fineness
- Rotary switch for milk froth/hot water
- Cover for bean container
- Measuring spoon with cleaning brush and tool function
- Descaling agent
-
Cleaning tablets
-
Test strip for determining the water hardness
- Milk system cleaner
- Milk tube
2.2 Technical data
Power supply:
220-240 V\~, 50/60 Hz
Power: 1550 W
Water Tank:1.4 Litre
Technical and design modifications reserved.
3 Display
| Function displays | |||||||||
 | Cleaning 8 cup | Milk froth | Powder | Empty grounds box/Door open | |||||
 | Descaling | 4 cups | [502A] | Coffee mug |  | Instensive | Refill water | ||
| 2 cups | Coffee cup | Medium | Heating function | ||||||
| [HZBY] | Milk system cleaning | 1 cup | Espresso cup | Mild | Confirmation | ||||
| Program | Number of cups perdispensed quantity | Cup filling volume | Coffee grinding quantity | Messages | |||||
| Menu functions | |||||||||
 Button combination for the menu 2 + 3 for 3 sec Button combination for the menu 2 + 3 for 3 sec | |||||||||
| Water tank illumination 2 | Water hardness 3 | ||||||||
| Illumination off Illumination on | Hardness level 1 Soft | Hardness level 2 Medium hard | Hardness level 2 Hard | Hardness level 4 Very hard | |||||
| Water tank illumination | Water hardness | ||||
 |  |  |  |  |  |
 |  | ||||
 |  |  | |||
 | |||||
| Illumination off Illumination on | Hardness level 1Soft | Hardness level 2Medium hard | Hardnesslevel 2Hard | Hardnesslevel 4Very hard | |
3 Display
| Menu function | ||||||
| Coffee temperature 4 | Switch-off time 5 | |||||
| [X358] |  |  |  |  |  |  |
 |  |  |  | |||
 |  |  |  | |||
| Warm | Hot Extra hot 9 | min. | 1 hours 3 hours 8 hours | |||
| Exiting the menu 6 | ||||||
4 Setting up
4.1 Requirements for place of operation
For safe and trouble-free operation of the coffee machine, the place of operation must satisfy the following requirements:
- Place the coffee machine on a fixed horizontal, heat-resistant and waterresistant surface that is strong enough to hold it.
- Select the installation and connection location out of reach of children.
- The coffee machine is not intended for installation in enclosed spaces such as a built-in cupboard.
- The plug socket must be easily accessible so that the mains plug can be easily pulled out in an emergency.
- In order to assume a fault-free operation, the ambient temperature should be between 8 °C and 40 °C.

When the appliance has cooled under 0 °C, the appliance temperature must reach an area within the recommended ambient temperature, before switching on the appliance once again.
4.2 Electrical connection
For safe and trouble-free operation of the coffee machine, the following instructions on electrical connection must be observed:
- Before connecting the coffee machine, compare the connection data (voltage and frequency) on the rating plate with those of your mains power supply. This data must correspond in order to avoid damage to the coffee machine. If in doubt, consult a qualified electrician.
4 Setting up
- The socket must be secured at least 10A fuse breaker. Ensure that the connecting cable is undamaged and is not laid over hot surfaces or sharp edges.
- Connection the mains supply via an extension cable must not exceed a length of 3 metres and a cable cross-section of 1.5 mm^2 . For fire prevention reasons, the use of multiple adapters or power outlet strips is forbidden.
- The connecting cable must not be pulled tight.
- The electrical safety of the coffee machine is only assured when it is connected to a properly installed protective earth (PE) conductor system. Connection to a mains socket without PE conductor is forbidden. If in doubt, the electrical system must be checked by a qualified electrician. The manufacturer assumes no liability for injury or damage caused by a missing or interrupted protective earth conductor.
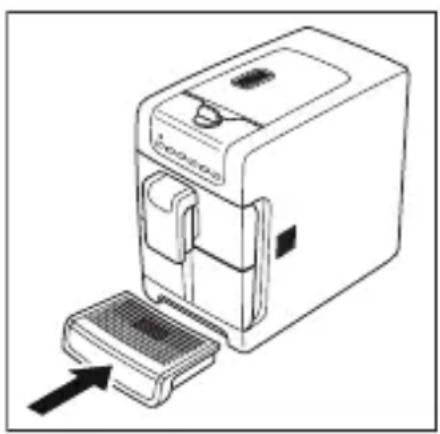
4.3 Mounting the drip tray
Position the drip tray with the stainless steel grid (8) centrally in front of the appliance. Then push it gently forwards against the bowl until it engages in the operating position.
natural_image
Line drawing of a desktop computer with an open access panel and a black arrow pointing to it (no text or symbols)4.4 Connecting the milk system
The milk system must be connected in order to dispense coffee specialities with milk/frothed milk. Proceed as follows:
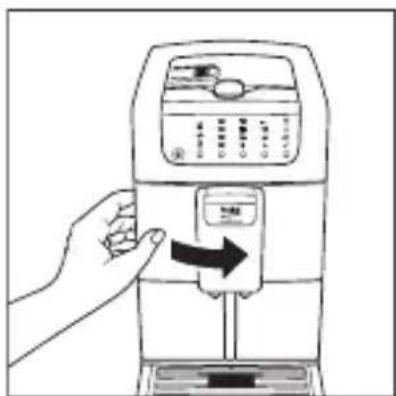
- Open the door with the coffee outlet unit by pulling it up on the left side.
4 Setting up

CAUTION: Before opening or closing the door, always push the outlet unit into the upper position, otherwise the milk tube on the inside could become pinched off.
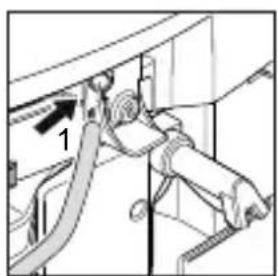
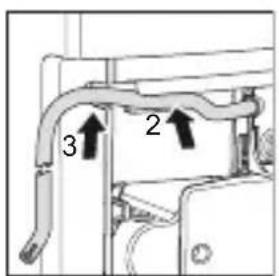
- Insert the end of the milk tube that is cut at an angle into the top left opening of the milk frother 1 to the stop, and press the milk tube into guides 2 and 3.

If you only wish to dispense hot water the hose may not be connected.
- Close the door with the coffee dispensing unit.

Before opening or closing the door, always push the outlet unit into the upper position, otherwise the milk tube on the inside could become pinched off.
-
Place a milk package to the left of the coffee machine.
-
Insert the milk hose into the opened milk package.

The tube end with the split end should reach all the way to the bottom of the milk container.
4 Setting up

In the case of newly opened, not yet completely filled milk packages, it is possible that milk will drip out of the dispenser unit after preparation of a coffee speciality.

Milk is a sensitive foodstuff. Always pay attention to cleanliness when dealing with milk. Open milk packages with clean hands and tools to prevent germs from getting into the milk.
4.5 Filling with water

CAUTION: Milk, mineral water or other liquids can damage the water tank or the coffee machine.

CAUTION: Only fill the water tank with fresh, cold water.

CAUTION:
Observe the maximum filling level of 1.4 litres.

CAUTION: During initial startup (or when the water tank was previously emptied completely), water intake can be slowed down. In this case, it is helpful to switch the device off and on again.
To fill the water tank, proceed as follows:
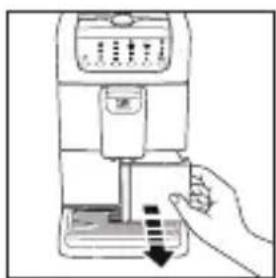
- Push the coffee dispensing unit (3) into the uppermost position.
- Remove the water tank (7) from the appliance.
- Fill the water tank with fresh water up to its maximum on the lower edge of the filling hole.
4 Setting up
- Replace the water tank. Push it until it snaps in.
natural_image
Line drawing of a hand pressing down on a device with a downward arrow (no text or symbols)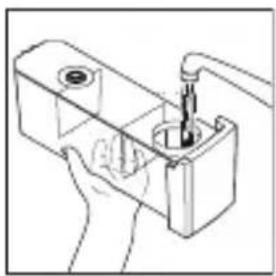
natural_image
Line drawing of a hand holding a small mechanical component with a tool inserted (no text or symbols) | If the following warning appears on the display, the water tank must topped up before the next drink is dispensed. Otherwise further function is not possible: |
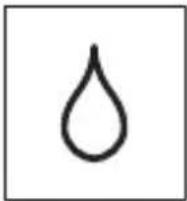 |
| Before inserting the water tank, make sure that it is dry on the outside. Wipe the water tank shaft dry also before inserting the water tank (see also section 6.2). |
4.6 Filling the coffee bean container

Every coffee machine is thoroughly checked before delivery. Therefore, there may be residual ground coffee in the grinder. Your coffee machine is definitely new.

CAUTION: Make sure that no foreign objects such as stones get into the coffee bean container. Damage caused by foreign objects in the grinder is excluded from the warranty. Damage to the grinding mechanism!
4 Setting up

CAUTION: Fill the coffee bean container only with pure coffee beans without sugar coatings or aromatised constituents. Damage to the grinding mechanism!
To fill the coffee bean container (11), proceed as follows:
- Fold back the lid of the coffee container.
- Fill the container with fresh coffee beans.
- Then close the container again.
5 Operation and use
This section contains important information on the operation and use of the coffee machine.
5.1 Safety precautions
Observe the following safety precautions to avoid danger and material damage:

WARNING: Only operate the machine when the waste container, drip tray and the cup grate are fitted.

WARNING: Do not leave the coffee machine unsupervised during operation.
5.2 Switching on the coffee machine

Before switching on, always check that the water tank and the coffee bean container are full. Every time the coffee machine is switched on or off, it requires water for the automatic rinsing cycle.

Small amounts of water can get into the waste container during each rinsing process. This is system-related and not a fault.
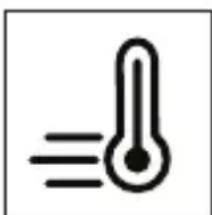
- Switch on the device by pressing the ON/OFF button and holding it down briefly. During the heating procedure (approx. 30 seconds) the following display flashes:
natural_image
Simple thermometer icon with cooling effect and tick marks (no text or symbols)5 Operation and use
- When the operating temperature has been reached, the coffee machine automatically performs a rinsing cycle. Water may flow here into the drip tray.
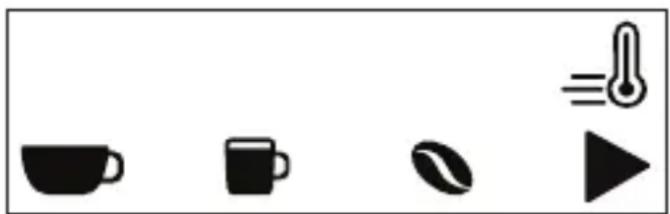
- When the rinsing cycle completed, the coffee machine is ready for operation. The following displays light up during initial start-up:
natural_image
Four black icons representing coffee cups, a coffee bean, a thermometer, and a play button (no text or symbols)5.3 Switching off the coffee machine
- Press the ON/OFF button to switch off the coffee machine. It will then perform a rinsing cycle.
| is | If you have also prepared a coffee speciality with milk/milk froth, the coffee machine will prompt you to also clean the milk system after rinsing. Details for this can be found in section (see section 6.3) system cleaning should be carried out otherwise time-consuming cleaning of the milk frother will become necessary (see section 6.11). |
| If the water tank is empty or the required milk system cleaning was not performed, the switch-off process will automatically be delayed for 15 minutes. |
5 Operation and use
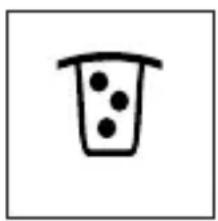
- The coffee machine subsequently prompts you to empty the waste container (5). The following appears on the display:
natural_image
Simple line drawing of a beaker with three dots inside, no text or symbols present.
CAUTION: Empty the waste container every time to prevent mould from building up.
- The coffee machine automatically switches itself off after 15 seconds.
5.4 Switching off the coffee machine in an emergency
In the event of an emergency, you can switch off the coffee machine at any time during operation by pressing the ON/OFF button 2 times.
Exception: during the rinsing procedure when switching the coffee machine on/off.
5.5 Determining the water hardness
Before using the coffee machine for the first time, it should be set to the appropriate water hardness for your region. You can determine the water hardness with the help of the test strip (18) supplied with the coffee machine. Proceed as follows:
- Dip the test strip into cold water for 1 second and shake off the excess water. After approximately 1 minute, the water hardness can read from the pink-coloured areas.
5 Operation and use
| Water hardness | 1 soft | 2 medium-hard | 3 very hard | 3 very hard |
| Water hardness mol/m3German hardnessFrench hardness | up to 1.24 up to 7°up to 12,6° | up to 2.5 up to 14°up to 25,2° | up to 3.7 up to 21°up to 37,8° | over 3.7 over 21° over 38° |
| Test strip | 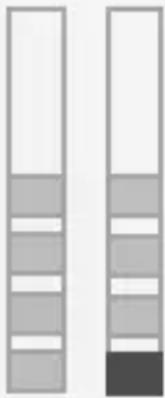 |  |  |  |
5.6 Menu settings
Themenufunctionmustbe accessed to undertake various settings - for example, to set the determined water hardness level.
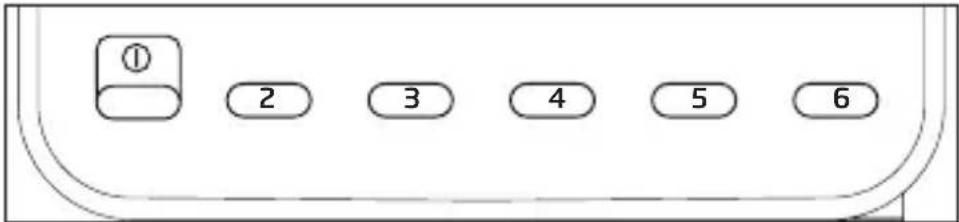
- To do this, press buttons 2 and 3 simultaneously for approx. 3 seconds.
- The symbol display will briefly light up as a blinking line, then the display will change to the current settings. The following parameters can be set:
Water tank
illumination via button 2
Water
hardness level via button 3
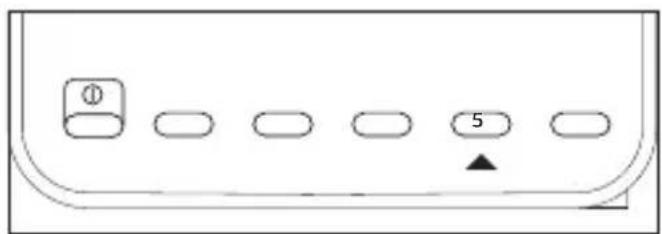
Coffee
temperature via button 4
Switch-off time via button 5.
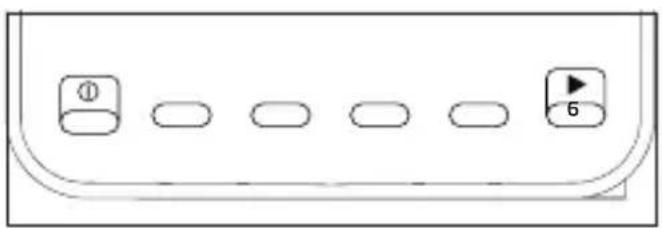
- Save the entries and quit the menu by confirming with “▶” (6). If you do not press “▶”, the program will automatically return to the operating mode after approx. 30 sec. without saving the new settings.
5 Operation and use
5.7 Setting and storing the water hardness
To set the previously determined water hardness, proceed as follows: Switch to the menu function by simultaneously pressing buttons 2 and 3 for approx. 3 seconds. The function displays of the menu will flash first in a blinking line, then the current settings will be displayed.
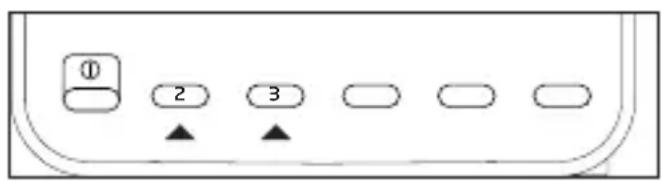
- Then press key 3 repeatedly until the required hardness degree is set.
The image below shows the displays for the 4 possible hardness degree settings.
| Hardness level 1Soft | Hardness level 2Medium hard | Hardness level 3Hard | Hardness level 4Very hard |
- Store the input by pressing "▶"(6). All function displays of the menu flash for approx. 3 seconds to confirm. The appliance then returns to the normal operating mode.
natural_image
Pure electrical circuit lines without any symbols5.8 Hot water preparation

5 Operation and use
To prepare hot water, proceed as follows:
- Set the appliance to one cup mode.
- Select the appropriate cup size on the appliance.
- Adjust the outlet height accordingly by pushing the outlet up or down and then place a container under the coffee outlet.
- Open the rotary switch for milk froth/hot water to obtain hot water.
- You can stop hot water output at any time by closing the rotary switch for milk froth/hot water.

The milk tube must not be connected when preparing hot water.

The "Milk froth" function must not be selected.
5.9 Setting the grinding fineness
You can set the the grinding fineness (12) with the help of the lever.

CAUTION: Setting the grinding fineness when the grinder is not running can lead to damage! Only set the grinding fineness when the grinder is running.
To set the grinding fineness, proceed as follows:
- Place a cup under the coffee dispensing spout.
- Press "▶" (6) to prepare the coffee.
natural_image
Pure electrical circuit lines without any symbols- Adjust the grinding fineness with the grinding fineness lever (12) while the grinder is running. The coffee is prepared and the grinding fineness is set.
5 Operation and use
The setting is implemented as follows:
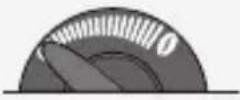 | fine ground for "intensive taste" |
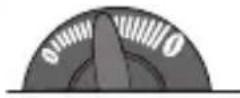 | medium ground for "normal taste" |
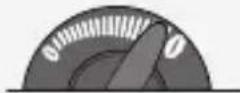 | coarse ground for "mild taste" |
 | For light roasted coffee beans, set the grinding mechanism to “fine”. If the grinding fineness is set too fine, the coffee will be dispensed a drop at a time. |
| For dark roasted coffee beans, set the grinding mechanism to “coarse”. If the grinding fineness is set too coarse, the coffee will be dispensed too quickly. |
5.10 Preparing coffee with whole coffee beans
To prepare coffee with whole coffee beans, proceed as follows:
- Set one or two cups, or if pots are selected, a pot with the appropriate volume (500 or 1000 ml) under the coffee outlet (4).
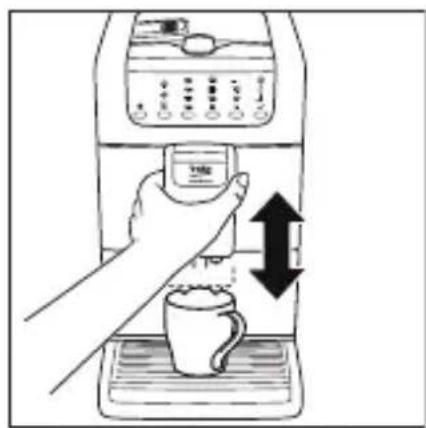
- In order to reduce heat loss and splashing, adjust the dispensing spout height to suit your cup size by moving it up or down.
natural_image
Illustration of a hand using a coffee machine to press coffee into a cup (no text or symbols visible)
If the height adjuster is difficult to move, clean it (see section 6.5).
5 Operation and use
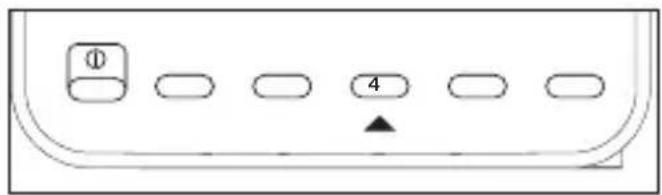
- Select the desired cup size by pressing the button 4.
natural_image
Pure diagram of a computer control panel with no text or symbolsThe following selections are possible:
| Coffee mug | approx. 190 ml | |
| Coffee cup | approx. 120 ml | |
| Espresso cup | approx. 40 ml |

The selection of cup size is only possible in one or two cup mode. The default factory setting (approx. 120 ml per cup) is set for the four or eight cup mode in the pot selection.
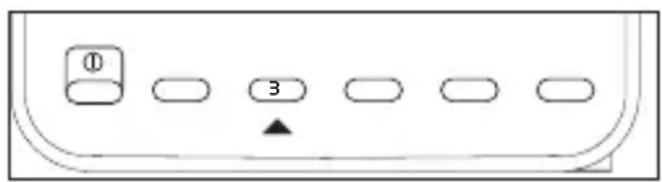
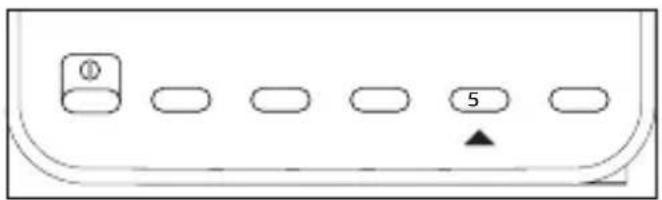
- Select the desired ground coffee quantity by pressing the button 5.
natural_image
Simple diagram of a device panel with six buttons and a triangular indicator (no text or symbols)The following selections are possible:
| Mild Medium | Intensive | Powder | |
5 Operation and use
 | An automatic grinding quantity correction measures the ground coffee quantity and adapts this gradually to the set value for the coffee strength. This compensates the differences between the grinder and various different coffee varieties. It may therefore be necessary to brew 5 times until the correction is perfect. |
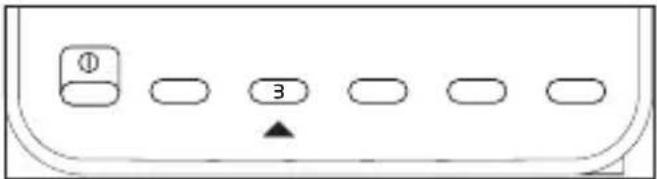
- Select the required number of cups or pot size by pressing button 3.
natural_image
Pure electrical circuit lines without any symbolsThe following selections are possible:
| 1 cup 2 cups pot | 4 | 8 | |
| (4 cups) | pot (8 cups) |

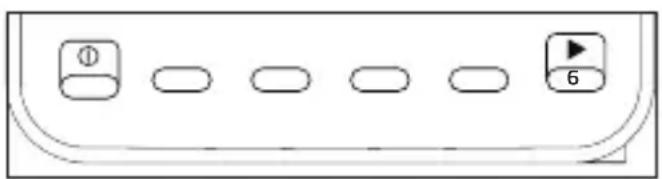
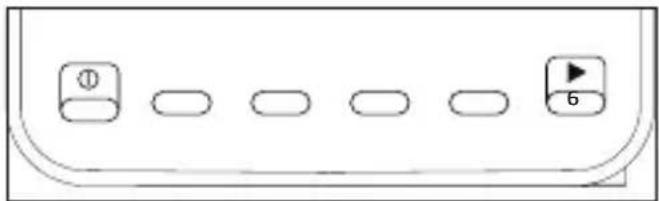
- Press "▶" (button 6) to heat the coffee.

natural_image
Simple line drawing of a computer monitor with two buttons and an arrow, no text or symbols present5 Operation and use

Remember that in two cup mode, two brewing operations are implemented in sequence and correspondingly, if a pot is selected for four/eight cup mode, 4 or 8 brewing operations are implemented. Only remove the cups or pot when all brewing operations are finished.

You can stop coffee dispensing prematurely by briefly pressing “▶” (button 6). In the case of strongly uneven or only one-sided cup filling during 2-cup operation, check whether one or both coffee dispensing spouts are blocked on the inside by foreign bodies (coffee bean or similar).

During coffee preparation, the coffee powder is moistened with a small amount of water first for prebrewing. The actual brewing process takes place after a short pause.
5.11 Changing and storing the cup filling level in bean mode
The coffee machine is set for standard quantities by default. However, you can set the cup filling level individually for each cup size. Proceed as follows:
5 Operation and use
-
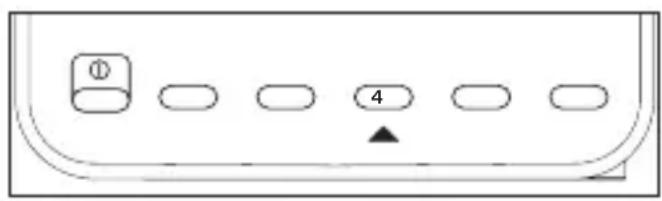
Press the button 4 repeatedly until the required cup symbol for the desired ground coffee quantity is displayed.
-
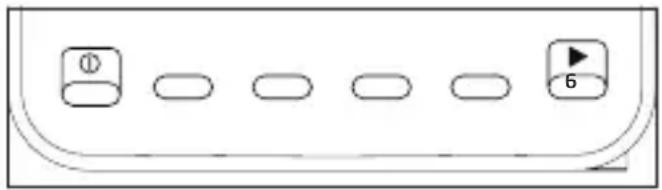
Press "▶" (button 6) and keep it pressed until the desired filling amount is reached.
natural_image
Simple diagram of a device panel with a numbered button and arrow, no text or symbols present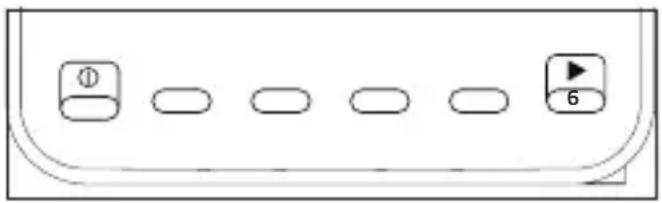
natural_image
Simple diagram of a device panel with labeled buttons (no text or symbols beyond numbers)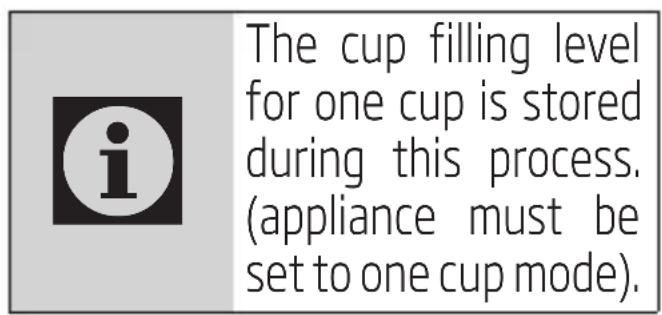
- Release the button. The new cup filling level is now stored.

natural_image
Simple black icon of a mug on white background (no text or symbols)| Repeat the procedure if you also wish to change the filling level for the other cup sizes. |
- Place an appropriate cup under the coffee delivery spout (espresso cup, coffee cup or coffee mug).
- Press key 5 repeatedly until the symbol for the required coffee grinding quantity lights up.
| All values remain stored even when the coffee machine is switched off. Should you change your cup size, you can adapt the cup filling level individually at any time. |
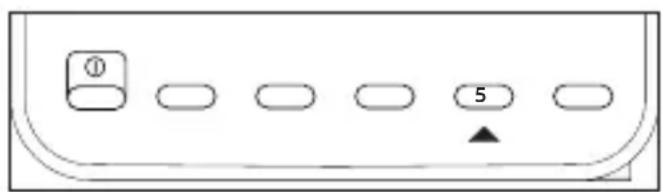
| The stored cup filling levels for each individual cup symbol only applies in bean mode. |
5 Operation and use
5.12 Preparing coffee with powdered coffee

CAUTION: Ensure that you only use the measuring spoon supplied and never fill than the container with more than one level measuring spoon (max. 8 g) of coffee powder.

CAUTION: Do not fill the container with water-soluble, freeze-dried instant products or other drink powders.

CAUTION: Too finely ground coffee powder can lead to faults.
To prepare coffee with powdered coffee, proceed as follows:
- Select the "Coffee powder" function by pressing the button 5.
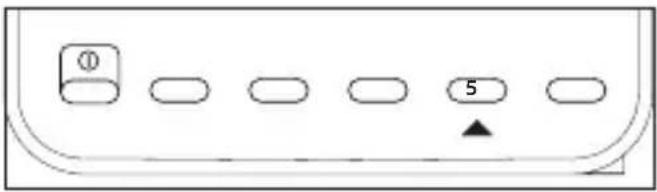
natural_image
Simple diagram of a device panel with labeled buttons and an arrow pointing to the number 5 (no text or symbols beyond basic labels)The following symbol lights up in the display:
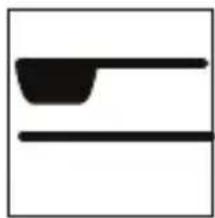
natural_image
Simple black-and-white diagram of two horizontal lines with a shaded top region (no text or symbols)
During preparation of coffee with powder, only one cup can be prepared with powdered coffee.

The "ground coffee quantity" function is deactivated. Therefore no information on the ground coffee quantity appears on the display.
5 Operation and use
- Select the desired cup size by pressing the button 4.
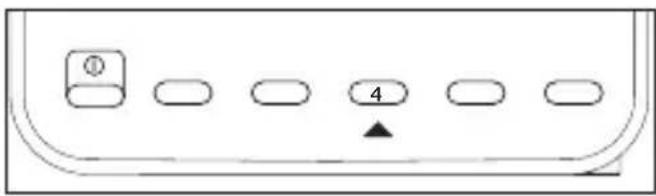
natural_image
Simple diagram of a device panel with labeled buttons and an arrow pointing to the number 4 (no text or symbols beyond basic labels)The following selections are possible:
 | Coffee mug | approx. 190 ml |
 | Coffee cup | approx. 120 ml |
 | Espresso cup | approx. 40 ml |
- Open the lid of the coffee bean container (14) and the coffee powder shaft (10).
- Pour in the fresh coffee powder.
- Then close both lids again.

CAUTION: Ensure that powder does not clog the container and that no foreign matter gets into the container.

CAUTION: Never fill the container with more than one level measuring spoon of coffee powder.

CAUTION: The filling container is not a storage container; the powder must be transported directly to the brewing unit.
- Place a cup under the coffee dispensing spout.

The standard filling quantities for each single cup symbol apply to bean, powder and hot water mode. If you wish to change the cup filling quantities, they only apply to powder mode. Instruction can be found in section (see section 5.13).
5 Operation and use
- In order to reduce heat loss and splashing, adjust the height of the dispenser to suit your cup size by moving it up or down.
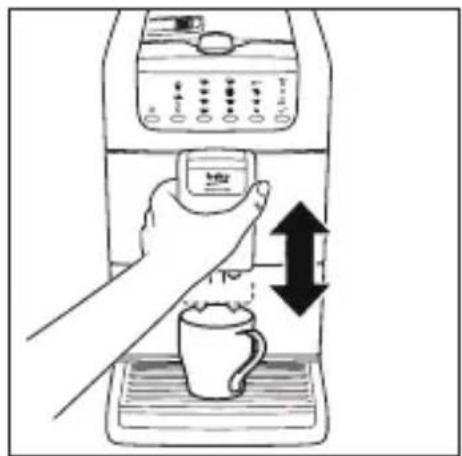

If the height adjuster is difficult to move, clean it. Proceed as described in section 6.5.
- Press "▶" (button 6) to dispense coffee.

You can stop coffee dispensing prematurely by briefly pressin "▶" (button 6).
5.13 Changing and storing the cup filling level in powder mode
The coffee machine is set for standard quantities by default. However, you can set the cup filling level individually for each cup size. Proceed as follows:
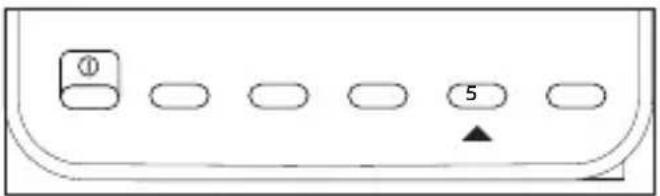
- Select the "Coffee powder" function by pressing the button 5.
natural_image
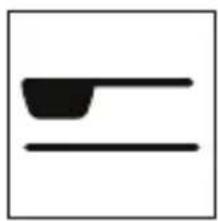
Pure electrical circuit lines without any symbolsThe following symbol lights up in the display:
natural_image
Simple black-and-white diagram of a bowl and two horizontal lines (no text or symbols)5 Operation and use
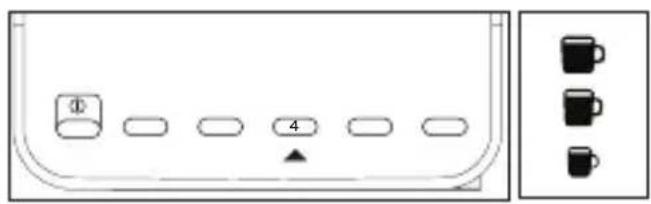
- Press the button 4 repeatedly until the required cup symbol for the desired ground coffee quantity is displayed.
- Place an appropriate cup under the coffee delivery spout (e.g. coffee mug).
- Fill the coffee powder shaft with fresh powdered coffee.
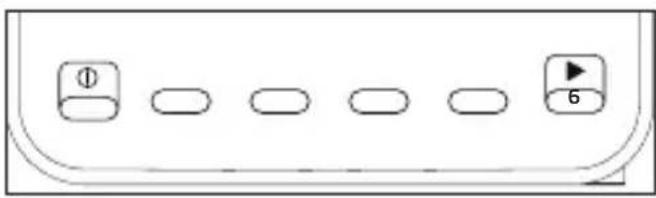
- Press "▶" (button 6) and keep it pressed until the desired cup filling amount is reached.
natural_image
Pure electrical circuit lines without any symbols- Release the button. The desired cup filling level is now stored.

Repeat the procedure if you also wish to change the filling level for the other cup sizes.

All values remain stored even when the coffee machine is switched off. Should you change your cup size, you can adapt the cup filling level individually at any time.

The stored cup filling levels for each individual cup symbol only applies in powder mode.
5.14 Preparing coffee specialities
The milk system must be connected in order to dispense coffee specialities.
More information can be found in chapter 4.4.

Do not use soya or rice milk because good frothing results are not possible with these products.
5 Operation and use

The milk froth quality is also influenced by the milk type, fat content and temperature.
- You can prepare both "Latte Macchiato" and "Cappuccino" with your appliance. These differ primarily in the mode of preparation.
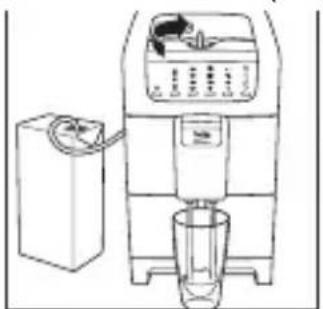
- When “Latte Macchiato” is prepared, the frothed milk is output first into a tall glass and the coffee is added subsequently.
The reverse is the case when "Cappuccino" is prepared, first of all the coffee is poured into the cup, followed by the hot milk froth on top of the coffee.
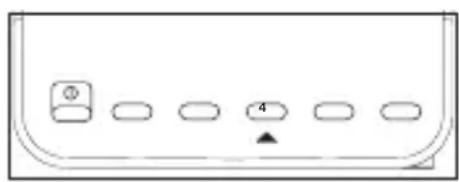
- To prepare a "Latte Macchiato", press button 4 repeatedly until the symbol for the "Coffee speciality" is selected.
natural_image
Simple line drawing of a device panel with buttons and a triangle indicator (no text or symbols)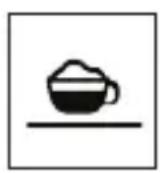

The appliance heats up to a higher temperature when "Coffee speciality" is selected. The temperature control lamp flashes during the heating process.

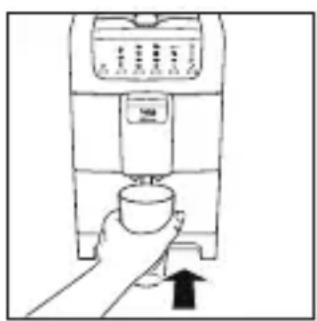
To prepare Latte Macchiato, first pull the drip tray (8) out of the appliance so that the taller Latte Macchiato glasses can fit under the coffee outlet.
- Put one or two glasses under the coffee outlet (4).
- In order to reduce heat loss and splashing, adjust the dispensing spout height to suit your cup/glass size by moving it up or down.
natural_image
Line drawing of a hand pressing a cup into a coffee maker (no text or symbols)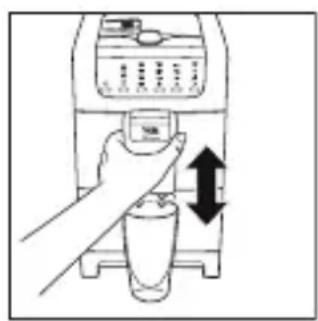
natural_image
Illustration of a hand pressing down on a small container with an arrow indicating downward motion (no text or symbols)5 Operation and use

If the height adjuster is difficult to move, clean it. Proceed as described in section 6.5.
- Open the rotary switch for milk froth/hot water (13).
- Put as much milk froth into the glass as required by taste and preparation mode.
- You can stop the milk froth output at any time by closing the rotary switch for milk froth/hot water (13).
natural_image
Line drawing of a coffee maker with a side arm and cup (no text or symbols)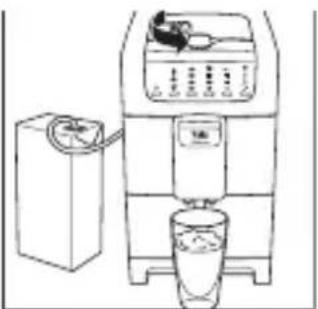
natural_image
Line drawing of a water dispenser with a side-mounted stand and a small container (no text or symbols)- In order to add the required quantity of coffee, select the corresponding cup symbol by pressing button 4.

If "Coffee powder" is selected, only one cup can be used.

The standard filling amounts or the individual filling amounts you set in Chapter 5.11 Changing and saving the cup filling level in bean mode or 5.13 Changing and saving the cup filling level in powder mode also apply in this mode. If you want to change the cup fill quantity, you can find the information in the chapters mentioned above.
- Press "▶" (button 6) to obtain coffee.

You can cancel coffee output at any time by pressing "▶" again (button 6).
5 Operation and use

Remember that two brewing operations take place in sequence in two cup mode. Only remove the cups/glasses when both brewing operations are finished.
- A "Cappuccino" is made in the reverse sequence.
- You need to use coffee cups, putting the coffee in first and then filling the cups up with milk froth.
5.15 Milk cleaning system after dispensing drink with milk
After using milk, you should rinse the milk system immediately.
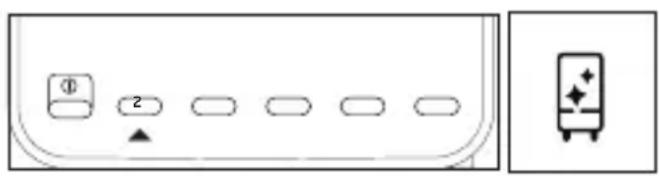
- Press button 2 repeatedly until the "Milk system cleaning" display isselected.
natural_image
Diagram showing a device panel with buttons and a battery icon, no text or symbols present- Press "▶" (button 6).

The “Milk system cleaning” symbol and the temperature control lamp flash while the heating switches on briefly.

After heating is complete, the symbols "Milk system cleaning" and "Milk froth" flash in the display.
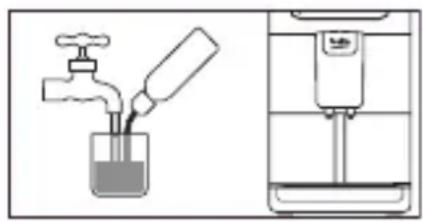
- Fill a container with 200 ml water and the appropriate quantity of milk system cleaner (see notes on the cleaning solution).
natural_image
Illustration of a laboratory setup with a beaker containing liquid and a funnel being inserted, next to a gas washing machine (no text or symbols)- Insert the milk tube down to the bottom of the container with the cleaning solution.
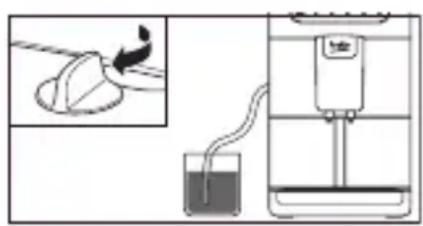
5 Operation and use
- After rinsing is complete, empty the container with the cleaning solution, rinse and fill with 200 ml fresh water to rinse the system.
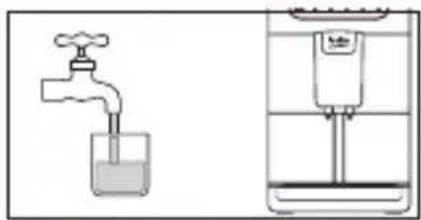
natural_image
Illustration of a faucet and a water dispenser in a container (no text or symbols)- Insert the milk tube down to the bottom of the container.
- Press "▶" (button 6).
- After rinsing is complete, close the milk froth/hot water rotary switch.
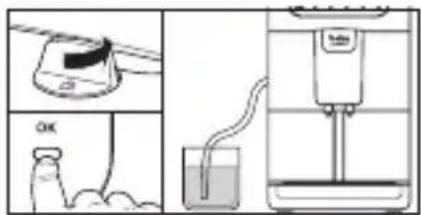
- The appliance switches back to operating mode after several seconds.

If several drinks are prepared with milk, the milksystem should be subsequently cleaned. Otherwise the program will prompt cleaning when the appliance is switched on again. It is then not possible to select a drink.
- Milk residue must also be cleaned from the outlets on the dispenser unit each time a milk coffee speciality is dispensed.
5 Operation and use
5.16 Setting and storing the coffee temperature
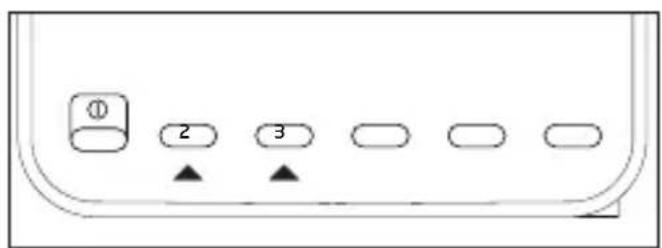
- In order to set the coffee temperature, proceed as follows: Switch to the menu function by simultaneously pressing buttons 2 and 3 for approx. 3 seconds. The function displays of the menu will flash first in a blinking line, then the current settings will be displayed.
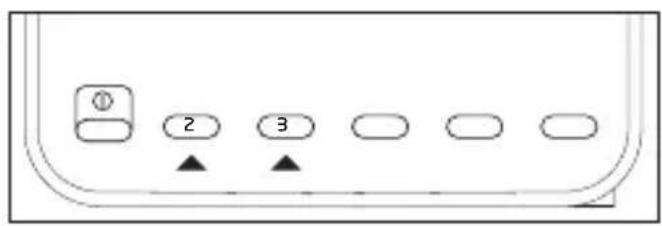
- Then press key 4 repeatedly until the required hardness coffee temperature is set.
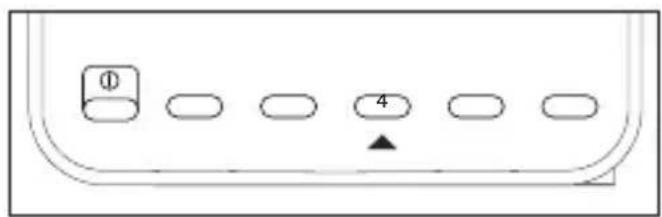
The image below shows the displays for the 3 possible coffee temperature settings.
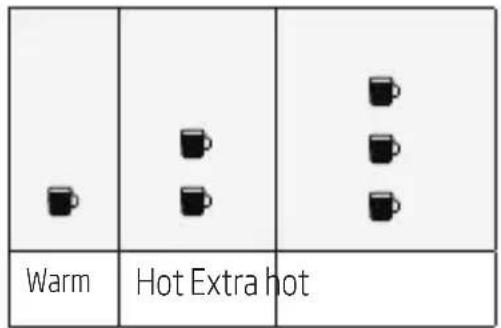
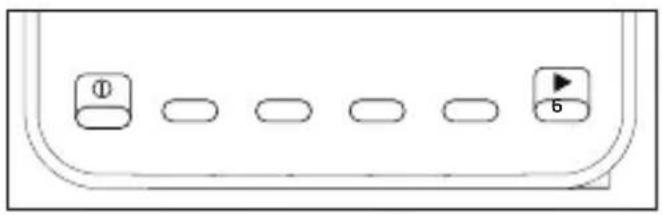
- Save the entries and quit the menu by confirming with "▶" (button 6). All function displays of the menu flash for approx. 3 seconds to confirm. The appliance then returns to the normal operating mode.
natural_image
Pure diagram of a device panel with labeled buttons (no text or symbols beyond basic labels)5 Operation and use
5.17 Setting and storing the shut-off time
- In order to set the switch-off time, proceed as follow: Switch to the menu function by simultaneously pressing buttons 2 and 3 for approx. 3 seconds. The function displays of the menu will flash first in a blinking line, then the current settings will be displayed.
- Then press key 5 repeatedly until the required switch-off time is set.
natural_image
Simple diagram of a device panel with labeled buttons and an arrow (no text or symbols)The image below shows the displays for the 4 possible switch-off times. The appliance is programmed for the highest possible saving of energy. The pre set shut-off time is 9 minutes.
| 9 min. | 1 hours 3 hours 8 hours |
- Save the entries and quit the menu by confirming with "▶" (button 6). All function displays of the menu flash for approx. 3 seconds to confirm. The appliance then returns to the normal operating mode.
natural_image
Pure diagram of a device panel with labeled buttons (no text or symbols beyond numbers)5 Operation and use
5.18 Setting the water tank illumination
- In order to set the water tank illumination, proceed as follows: Switch to the menu function by simultaneously pressing buttons 2 and 3 for approx. 3 seconds. The function displays of the menu will flash first in a blinking line, then the current settings will be displayed.
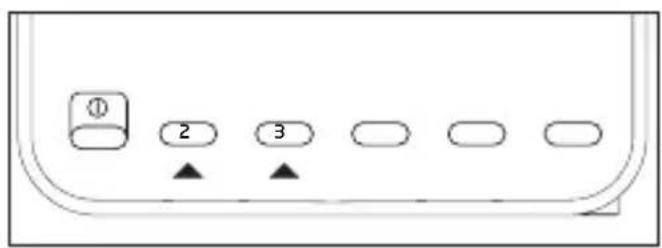
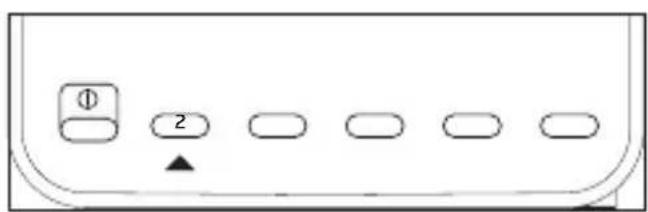
- Then press key 2 repeatedly until the required illumination is set.
natural_image
Simple diagram of a device panel with labeled buttons (no text or symbols beyond basic labels)The image below shows the displays for the 2 possible settings.
| Illumination off Illumination on |
- Save the entries and quit the menu by confirming with "▶" (button 6). All function displays of the menu flash for approx. 3 seconds to confirm. The appliance then returns to the normal operating mode.
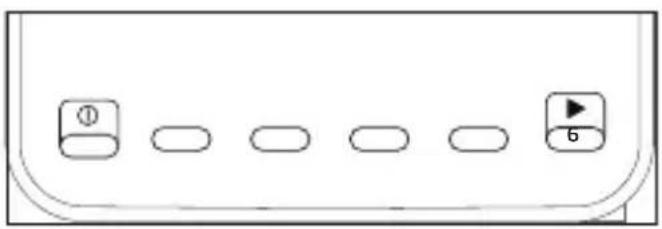
natural_image
Simple diagram of a device panel with labeled buttons (no text or symbols beyond basic labels)5 Operation and use
5.19 Resetting the unit to the factory settings (Reset)
This function resets all previously changed values to their original factory settings.
The following settings and stored values are affected:
- Water hardness
- Cup filling level
- Coffee grinding quantity
- Coffee temperature
- Shut-off time
• Water tank illumination
To reset the appliance to the factory settings, proceed as follow:
Switch to the menu function by simultaneously pressing buttons 2 and 3 for approx. 3 seconds. The function displays of the menu will flash first in a blinking line, the current settings will be displayed.
Press and hold buttons 2 and 4 for approx. 3 seconds.
The reset is confirmed by the symbols flashing several times. The appliance returns automatically to the normal operating mode.
6 Cleaning and maintenance
This section contains important information on cleaning and maintenance of the coffee machine. Keep your coffee machine clean at all times to ensure a consistently high coffee quality and trouble-free function.
6.1 Safety precautions
Observe the following safety precautions before starting to clean the coffee machine:

WARNING:
Switch off the coffee machine and pull the plug out of the mains socket before starting cleaning.

WARNING: Before cleaning, allow the coffee machine cool down.

WARNING: Do not use any scratching, abrasive or corrosive agents. Wipe the inside and outside of the housing with a soft damp cloth.

WARNING: Never immerse the coffee machine itself, the mains cable or the mains plug into water or other liquids.

WARNING: Do not clean housing parts such as the waste container, water tank or drip tray in the dishwasher. Otherwise, the high gloss surfaces will gradually become dull and matt.

WARNING: Never pour water into the coffee bean container or grinding mechanism as this could cause damage.
6 Cleaning and maintenance

WARNING:
Observe the cleaning and descaling instructions.
6.2 Regular cleaning
- Clean the outer surfaces of the appliance with a soft damp cloth, the display field can be cleaned e.g. with a lens cleaning cloth.
- Remove the waste container (5) and the water tank (7) and clean both with warm water and a mild washing-up liquid. Wipe both housings with a damp cloth.
- Empty the drip tray at regular intervals, but at least when the red filling level indicator becomes visible through the opening in the cup grate.
-
Clean the drip tray with the cup grate (8) with warm water and a mild washing-up liquid.
-
Wipe the coffee bean container with a dry lint-free cloth.
6.3 Milk system cleaning program
If you switch off the coffee machine with the ON/OFF button after dispensing a coffee speciality with milk, the coffee machine performs a rinsing cycle and then prompts you to clean the milk system.

If the coffee machine automatically switches itself off after dispensing a coffeespeciality with milk/froth, you are prompted to clean the milk system after 15 minutes.

If milk system cleaning is not performed, the coffee machine will prompt you again the next time it is switched on.
6 Cleaning and maintenance

You can only dispense coffee again when cleaning has been performed.

You can cancel the cleaning program at any time by pressing "▶" (button 6).

A milk system cleaning solution can be bought in specialist shops.
The symbols "Milk system cleaning" and "Milk froth" flash in the display.
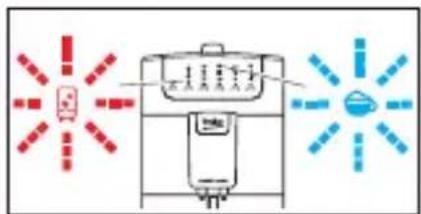
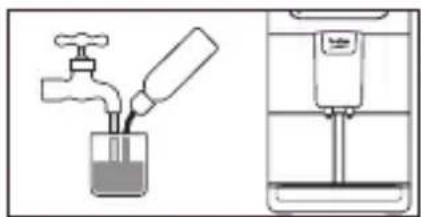
- Fill a receptacle with 200 ml of water and the appropriate quantity of cleaning solution for the milk system (refer to notes on the cleaning solution).
natural_image
Illustration of a gas collection setup with a tap and beaker, next to a hand pump (no text or symbols)- Insert the milk tube down to the bottom of the container with the cleaning solution. Open the rotary switch for milk froth/hot water.
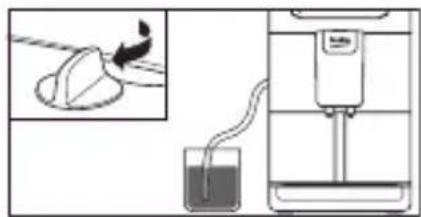

The cleaning solution is fed into the appliance via the milk tube and discharged via the outlet unit into the drip tray.
- After the run is complete, empty the container with the cleaning solution, rinse and fill with 200 ml fresh water to rinse the system.
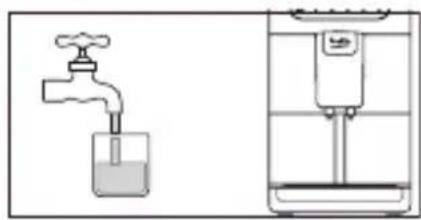
natural_image
Illustration of a faucet and a water dispenser with liquid, no text or symbols present-
Insert the milk tube down to the bottom of the container.
-
Push "▶" (button 6).
6 Cleaning and maintenance

The clear water is fed into the appliance via the milk tube and discharged via the outlet unit into the drip tray.
- After rinsing is complete, close the milk froth/hot water rotary switch.

If several beverages with milk have been prepared, the milk system should subsequently be cleaned. Otherwise, the program will request cleaning after the appliance is switched off and then back on again. Other beverages will not be able to be selected.
- The outlets on the outlet unit must also be cleaned of milk residues after a milky coffee speciality has been prepared.
6.4 Emptying the waste container (Grounds box)
The following appears on the display:
natural_image
Simple line drawing of a beaker with three dots inside, no text or symbols present.As soon as you are prompted to empty the waste container, no more coffee can be dispensed.
This display appears after at least 6 or at the latest 14 coffees have been dispensed. The maximum permitted number of dispensed coffees depends on various different settings (grinding fineness, ground coffee quantity, single/double cup).
- Push the coffee dispensing unit (3) into the uppermost position.
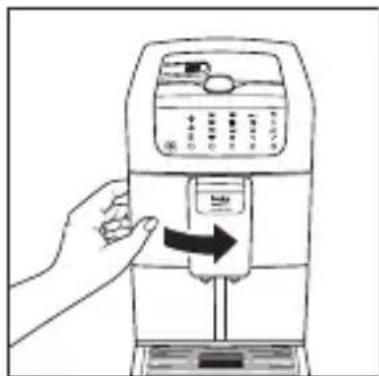
- Open the door with the coffee outlet unit by pulling it up on the left side. Pull the coffee grounds container out and clean the container thoroughly to prevent formation of mould. Insert the cleaned waste container back into the machine and push it until it stops.
6 Cleaning and maintenance
- Close the door with the coffee outlet.
- The coffee machine is now ready to dispense coffee again.

Only empty the waste container when the coffee machine is switched on. The coffee machine can only detect emptying when it is switched on. If you empty the waste container with the coffee machine switched off, this will not be detected. This may result in prompting to empty after dispensing the first coffee when the coffee machine is switched on again the next time

Generally, the waste container should be cleaned daily if the coffee machine is used every day. You will be reminded of this each time by the following display symbol:
6.5 Removing and cleaning the coffee dispensing unit
To clean the coffee dispensing unit, proceed as follows:
- Push the coffee dispensing unit (3) into the uppermost position.
- Open the door with the coffee outlet unit by pulling it up on the left side.
natural_image
Line drawing of a hand pressing down on a coffee maker's side panel with a black arrow indicating press direction (no text or symbols)6 Cleaning and maintenance
- Release the distribution hose on the door by pulling it lightly from the inside of the door towards the outside 2 and pressing to the left 3 so that it clicks out of the fastener. The dispensing unit can now be removed and the interior is easily accessible.
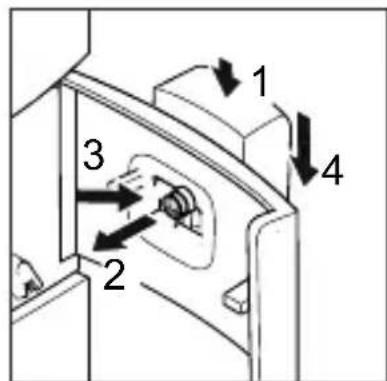
- Thoroughly clean the coffee dispensing unit from the inside and outside with warm water and a suitable brush to remove any coffee residue and prevent mould from forming.

Disconnect and clean the hose distribution system of the coffee dispensing unit (only if necessary, e.g, clogging), see section 6.6.
- Reinsert the coffee dispensing unit, see section 6.7.
6.6 Cleaning the hose distribution system
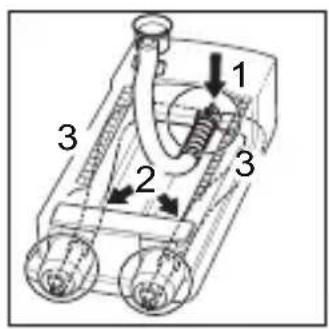
- Grip the loose hose end near to the spring and pull the cross shaped hose connector 1 out of its fixing. Subsequently pull both hose ends with the sleeve ends out of the dispensing tubes 2.
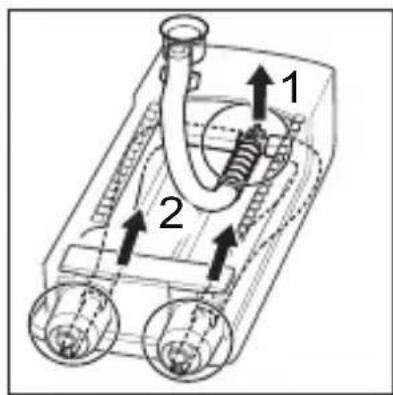
-
Pull the sleeves out of the hoses A and disconnect the hoses from the connecting piece C. Pull the hose together with the spring C from the connecting piece.
-
Leave the parts immersed in a milk cleaning solution for several hours. Refer to the instructions on the cleaning solution for the exact quantity.
6 Cleaning and maintenance
- Subsequently clean the parts with the solution and rinse them thoroughly with clean water.
- Push the hoses onto the connecting piece B and the sleeves into the hoses A. Insert the hose with the spring push the hose and spring auf onto the connector C.
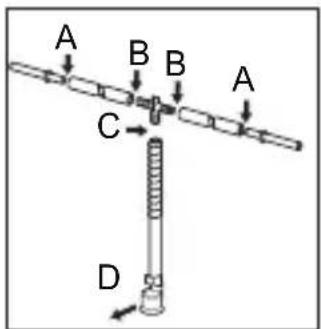
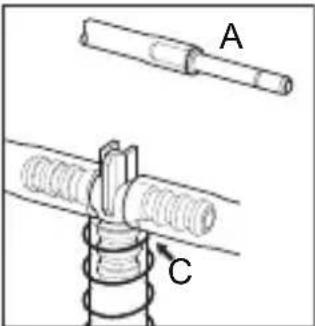

The spring must be evenly pulled over the half of the hose and the funnel shaped end of the hose D must face upwards.
- Now insert both sleeve ends (with the hoses) into the dispensing tubes 2 and press them in until they snap in properly. Push the connecting piece into the fixing slot 1 and subsequently push the hoses to the right and left under the frame 3.
6.7 Installing the coffee dispensing unit
- Place the coffee dispensing unit in the upper position back into the door and push the unit slightly 1 so that it audibly snaps in once.
6 Cleaning and maintenance
- Pull the hose from the inside through the door opening 2, press it to the right into the holder 3 and push the funnel-shaped part of the hose back into the collar until it fits perfectly.
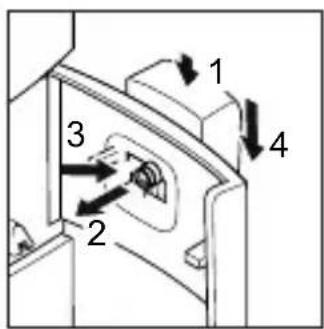
- Now you can attach the coffee dispensing unit 4 and close the door. When closing the door, the dispenser should be located at the upper position, otherwise the milk tube will be jammed.
6.8 Cleaning the brewing unit
Clean the brewing unit every day. If you do not intend to use your coffee machine for a longer period of time (e.g., holidays), it is necessary to empty the waste container (5) and the water tank (7) and to clean the brewing unit thoroughly.

WARNING:
Danger of burning! The dispensing unit may still be hot if you have recently prepared coffee. Always allow the brewing unit to cool down before cleaning.
To clean the brewing unit, proceed as follows:
- Push the coffee dispensing unit (3) into the uppermost position.
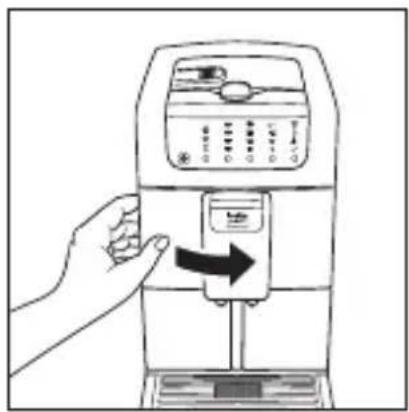
- Open the door with the coffee outlet unit by pulling it up on the left side.
natural_image
Line drawing of a hand pressing down on a coffee maker machine with a black arrow indicating the press (no text or symbols present)6 Cleaning and maintenance
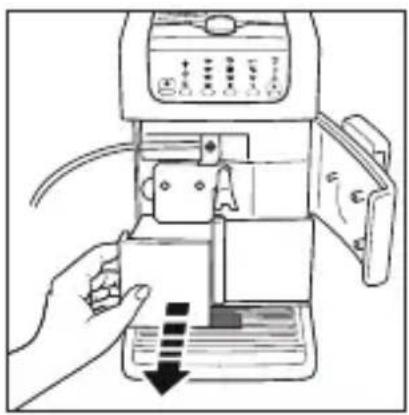
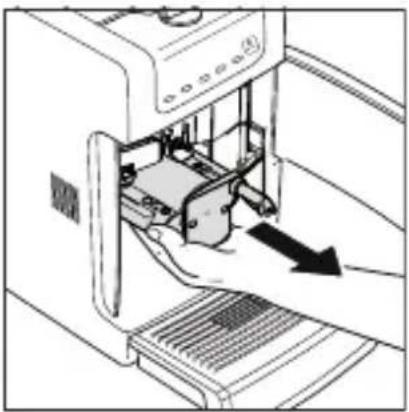
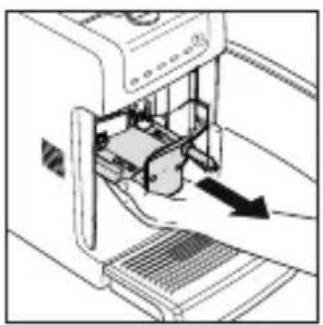
- Remove the coffee grounds container by pulling it out of the device.
natural_image
Illustration of a hand inserting a card into a device with a downward arrow indicating compression (no text or symbols present)
CAUTION: Risk of breaking! Do not pull or carrying the brewing unit at his spout.
- Grip the lower front part of the brewing unit and pull it out to the front. Use your other hand to stop it from falling out.
natural_image
Diagram of a printer's internal structure showing internal components and a downward arrow indicating motion (no text or symbols present)- Turn the brewing unit round. The brewing unit is open and the ejector folded down. The two stainless steel screens are now freely accessible.

If the brewing unit is closed, you can loosen it on the back with the help of the tool function on the measuring spoon (15). Push the toothed opening on the measuring spoon onto the pin and loosen it by turning completely at least 3 times.
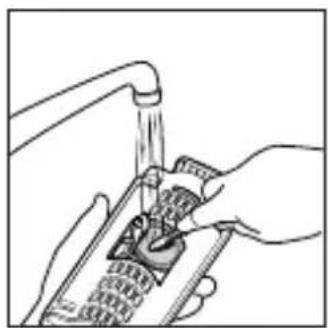
- Clean the opened brewing unit under warm running water. In particular, the stainless steel screens must be rinsed out well to remove any coffee residue.
6 Cleaning and maintenance
- Also rinse out the three designated openings by filling in sufficient water to rinse out any accumulated coffee residue.
natural_image
Illustration of hands using a shower drain to clean or install a shower (no text or symbols)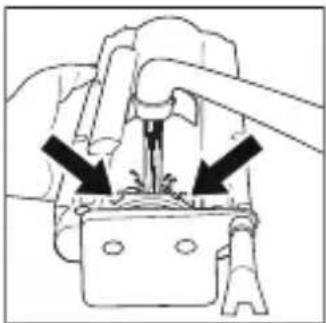
natural_image
Diagram of a mechanical device with arrows indicating force or movement (no text or symbols present)-
Soak the brewing unit from time to time (with constant use once a week) for approx. 30 minutes in hot water and a mild detergent. Shake the brewing unit lightly under water, then rinse all openings using a strong flow of water.
-
Dry the brewing unit.
-
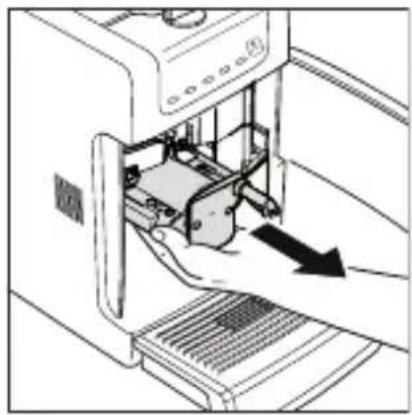
Replace the brewing unit by turning it into the right position (the outlet tube facing downwards and to the front), insert the brewing unit into the guide grooves and push it completely into the coffee machine.
natural_image
Diagram of a printer's internal structure showing paper feeding into a printer (no text or symbols visible)- Push the coffee grounds container back into the appliance and push the outlet unit into the upper position. Close the door.

After switching on, the brewing unit is adjusted and the normal heating process starts. During preparation of the first coffee after cleaning, an increased amount of water runs into the waste container.
6 Cleaning and maintenance
6.9 Running the cleaning program
The cleaning program enables intensive cleaning of otherwise inaccessible areas. The cleaning program must be started when the following symbol appears on the display:

natural_image
Simple line drawing of a flying saucer with stars and rays (no text or symbols)
The cleaning process takes approx. 8 minutes and should not be interrupted.

In case of power failure during the cleaning program, it has to be restarted.

Before running the cleaning program, the metal sieves in the brewing unit must be clean and wiped dry.
The cleaning water is collected in the drip tray. Alternatively, you can place a receptacle (>350 ml) under the spout. Only empty the receptacle when the coffee machine indicates that the drip tray must emptied.

CAUTION: Damage to the coffee machine and remnants left in the water by use of the wrong cleaner! Use only provided Beko cleaning tablets within warranty period. After 2 years of use or after provided tablets are finished, use only proper cleaning tablets with same size and chemical substance. If other cleaning solutions are used, Beko assumes no liability for any damage caused.
To run the cleaning program proceed as follows:
6 Cleaning and maintenance
- Press button 2 until the function display "Cleaning program" is selected.
- Then press "▶" (button 6).
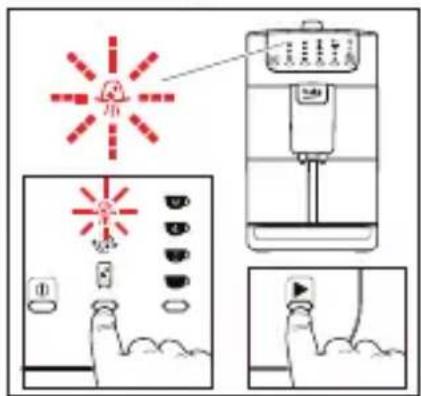
- The display "Cleaning program" flashes in the display, while the "Fill water tank" display is permanently lit.
- Remove the water tank (7) and fill with min. 1 litre fresh water. Insert the water tank again.
natural_image
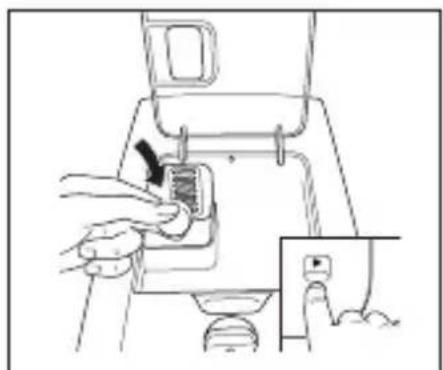
Line drawing of a hand inserting a small object into a device (no text or symbols visible)- Open the lid of the coffee bean container (14) and the coffee powder shaft (10).
-
Put a cleaning tablet into the coffee powder shaft.
-
Then press "▶" (button 6).
- The appliance will implement several cleaning cycles. After the cleaning phase is complete, the "▶" display will light up permanently.
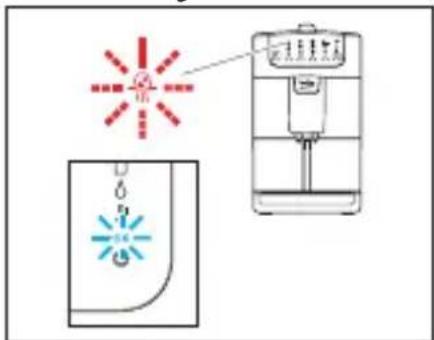
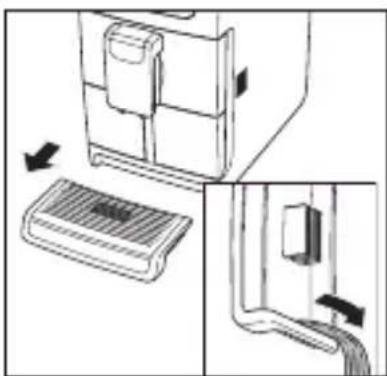
- Remove and empty the drip tray.
natural_image
Diagram showing a device with a ventilation grille and a close-up of its internal structure (no text or symbols)- Press the drip tray back onto the appliance until it audibly engages.

The drip tray serves as collecting container for the cleaning water. You can alternatively place a container (>350 ml) under the outlet.
6 Cleaning and maintenance
- Then push "▶" (button 6).
- The appliance then initiates the rinsing phase.
- The cleaning program is complete when the "Cleaning program" function display goes out.
- Remove the drip tray and empty it.
- Press the drip tray back onto the appliance until it audibly engages.
- Remove the water tank, fill it with clean water and push it back in.
- The appliance is now ready for operation again in the last selected coffee mode status.
- Now prepare a cup of coffee and pour it away in the sink to eliminate any remaining residues of the cleaning tablet.
6.10 Running the descaling program
The descaling program enables simple and effective descaling of your coffee machine. You should descale the appliance at regular intervals, but at the latest when the following indication is flashing on the display:
natural_image
Simple circular diagram with arrows indicating refresh or recycling (no text or symbols)
The descaling process runs in 2 phases, takes approx. 10 minutes and should not be interrupted.

In case of power failure during the descaling program, it has to be restarted.
6 Cleaning and maintenance

The frequency of descaling depends on the hardness of the water in your region. Therefore please do not forget to determine the water hardness and to set the corresponding hardness for the coffee machine! Please refer to sections 5.5 and 5.7 for instructions on this.

CAUTION:
Damage to the coffee machine and remnants still in the water by use of the wrong descaler! Use only "durgol swiss espresso" descaling solution. If other descaling solutions are used, Beko assumes no liability for any damage caused. "durgol" descaling solution is available from your retailer.

CAUTION:
Irritation to skin or eyes can occur if they come into contact with the descaling solution! Avoid skin and eye contact.
6 Cleaning and maintenance

CAUTION: Rinse off descaling solution with clean water. Obtain medical advice after eye contact.

CAUTION: Damage to delicate surfaces can occur after contact with the descaling solution! Remove any splashes immediately.
In order to implement the descaling program, proceed as follows:
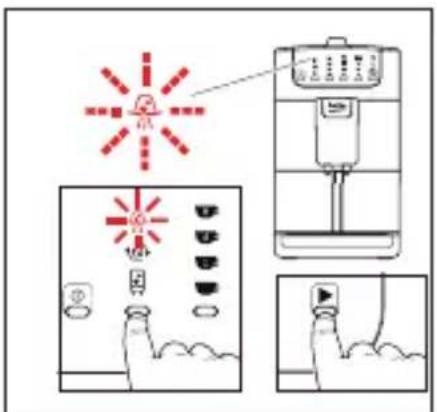
- Press button 2 until the function display "Descaling program" is selected.
- Then push "▶" (button 6). -The display "Descaling program" flashes in the display, while the indications "▶" and "Fill water tank" are permanently lit.
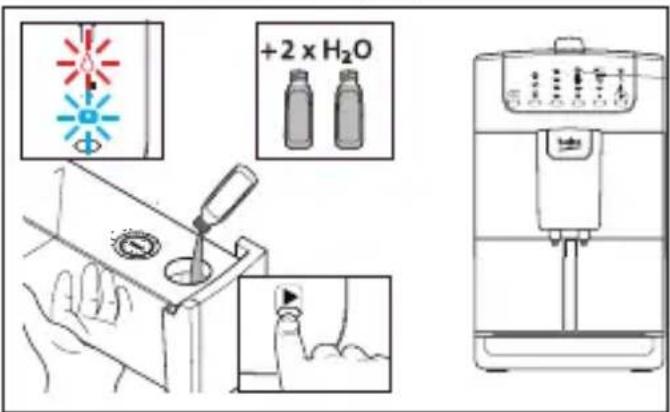
- Remove the water tank (7).
- Add 125 ml "durgol swiss espresso" descaling solution to the water tank.
- Then pour 250 ml of water into the water tank by filling the empty descaling solution bottle 2 times with fresh water.
- Replace the water tank.
- Ensure that grounds container is correctly positioned in the appliance
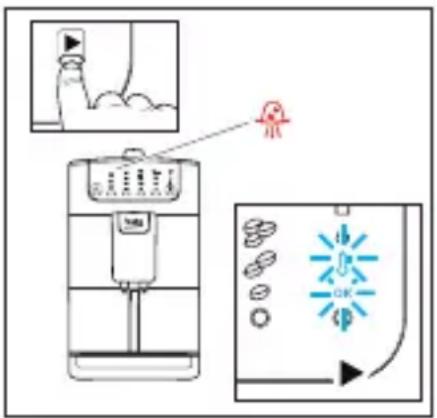
- Now press "▶" (button 6) to start the descaling process of the milk system.
- The "Milk froth" indication is flashing.
- Open the rotary switch for milk froth/hot water (13).
- The appliance will implement several descaling cycles. Pause times are for the descaling agent to take effect.
6 Cleaning and maintenance
- After completion of the 1st phase of the descaling process, the indication for "Milk froth" is flashing.
- Close the rotary switch for milk froth/hot water.
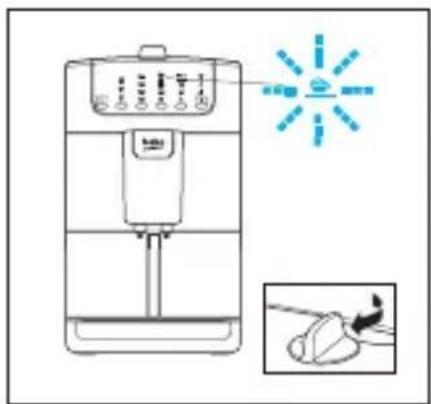
natural_image
Illustration of a water dispenser with control panel and indicator lights, showing a close-up of its internal components (no text or symbols present)- The indication "Descaling programme" is flashing quickly.
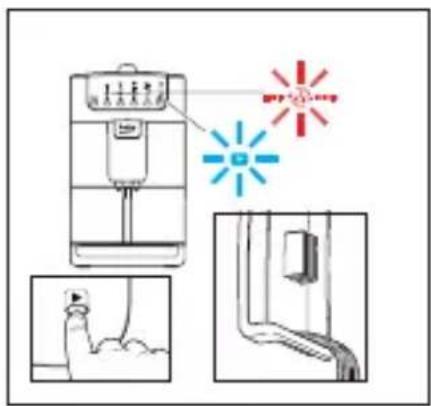
- Remove the drip tray and empty it.
- Press the drip tray back onto the appliance until it audibly engages.

The drip tray serves as collecting container for the cleaning water. You can alternatively place a container (>350 ml) under the outlet.
- The " ▶" display lights up permanently.
- Nowpress "▶" (button 6) to start the descaling process of the brewing unit.
- The appliance will implement addition descaling cycles. Pause times are for the descaling agent to take effect.
- After completion of the 2nd phase of the descaling cycles, the indication "Descaling programme" is flashing quickly.
- Remove the drip tray and empty it.
- Press the drip tray back onto the appliance until it audibly engages.
- The " ▶" display lights up permanently.
6 Cleaning and maintenance
- Then push "▶" (button 6).
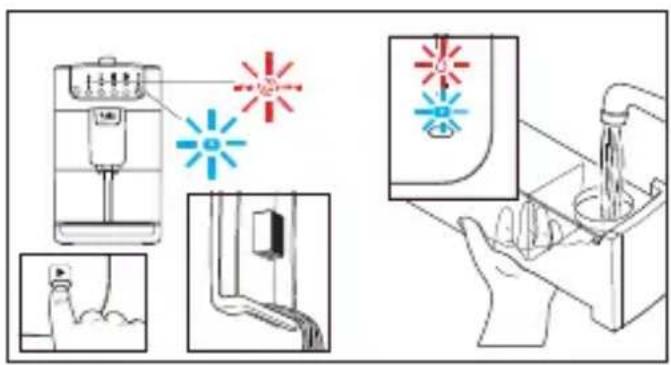
- The "Fill water tank" display lights up permanently.
- Remove the water tank (7) and rinse it.

WARNING:
Descaling solutions can be harmful to the health! For this reason it is imperative that you thoroughly clean the water tank after the descaling process.
- Fill the water tank with at least 1 litre of fresh water.
- Remove the water tank (7).
-
The "▶" display lights up permanently.
-
Then push "▶" (button 6).
-
The cleaning phase of the descaling process begins.
- The appliance carries out a rinse programme with 250 ml fresh water.
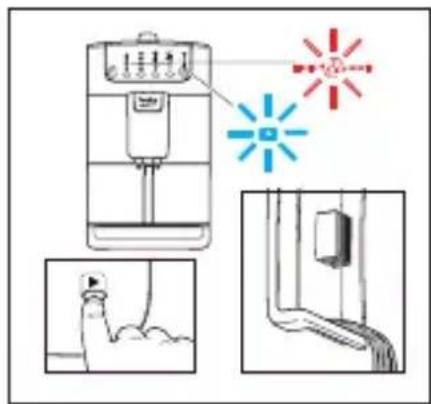
- The indication "Descaling programme" is flashing quickly.
- Remove the drip tray and empty it.
- Press the drip tray back onto the appliance until it audibly engages.
- The "▶" display lights up permanently.
- Then push "▶" (button 6).
-The "Milk froth" indication is flashing. - Open the rotary switch for milk froth/hot water.
- The appliance carries out a rinse programme of the milk system with 100 ml fresh water.
6 Cleaning and maintenance
- The "Milk froth" indication is28. Then push"▶" (button 6).
flashing.
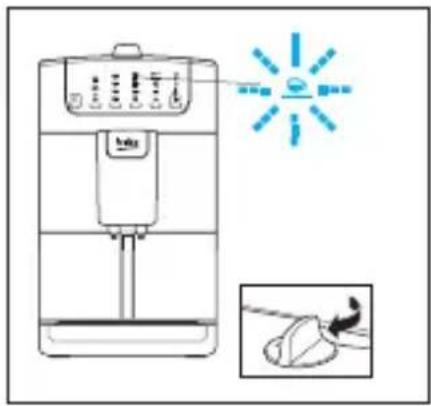
natural_image
Line drawing of a water leveler with control panel and indicator light, alongside an inset image showing a bird in flight (no text or symbols)- Close the rotary switch for milk froth/hot water.
- The indication "Descaling programme" is flashing quickly.
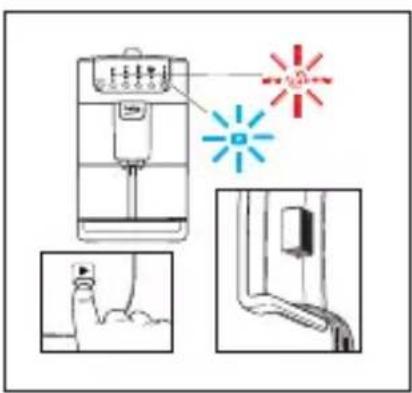
-
Remove the drip tray and empty it.
-
Press the drip tray back onto the appliance until it audibly engages.
- The "▶" display lights up permanently.
- The following message is displayed:
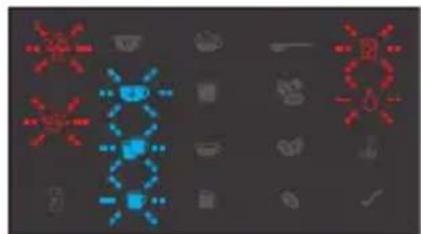
natural_image
Abstract pixelated graphic with red and blue shapes on dark background (no text or symbols)- Remove the brewing unit and clean it thoroughly from the inside and from the outside according to the instructions in chapter 6.8.
- After 10 seconds, the missing brewing unit is indicated by the following message:
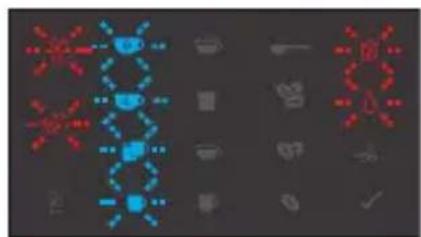
6 Cleaning and maintenance
- Replace the brewing unit by turning it into the right position (the outlet tube facing downwards and to the front), insert the brewing unit into the guide grooves and push it completely into the coffee machine.
natural_image
Diagram of a printer's internal structure with an arrow indicating motion (no text or symbols present)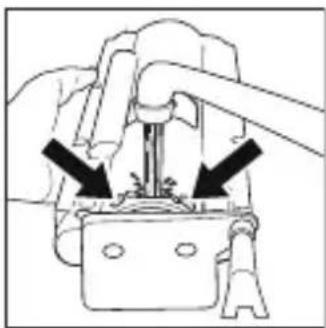
natural_image
Diagram of a mechanical assembly with arrows indicating force or movement (no text or symbols present)
CAUTION:
Residues of descaler may cause damage to the brewing unit in the long run! It is imperative that you rinse the brewing unit thoroughly after every descaling process.
6.11 Cleaning the nozzle of the milk frother
- Push the coffee grounds container back into the appliance and push the outlet unit into the upper position. Close the door.
- The descaling program complete when the "Descaling program" function display goes out.
- Remove the water tank (7) and fill it with minimum 1 litre fresh water. Replace the water tank.
- The coffee machine is now ready for operation again and returns to the last selected coffee mode.
;To clean the the nozzle of the milk frother, proceed as follows:
- Push the coffee dispensing unit (3) into the uppermost position.
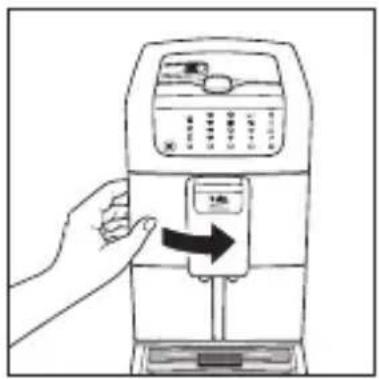
- Open the door with the coffee outlet unit (3) by pulling it up on the left side.
6 Cleaning and maintenance
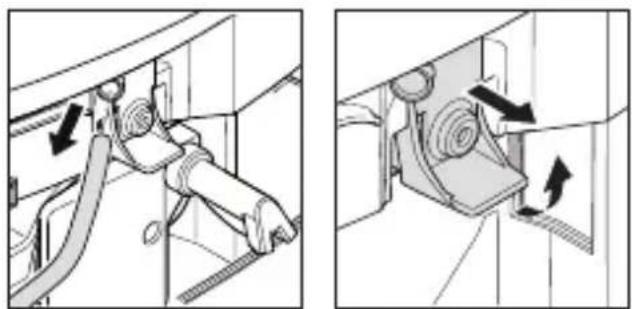
- Pull the milk hose out of the milk frother.
natural_image
Technical diagram showing two mechanical assembly states with directional arrows indicating motion (no text or symbols present)-
Fold the lever on the milk frother upwards and pull the milk frother out towards you.
-
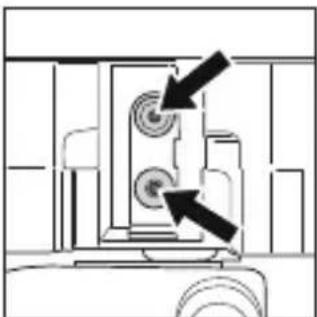
Clean both openings with a thin needle or with a thin brush (e.g. with a dental brush or the brush of the measuring spoon). Make sure that the openings are completely free after cleaning.
natural_image
Diagram of a mechanical device with two circular components and directional arrows indicating motion (no text or symbols)-
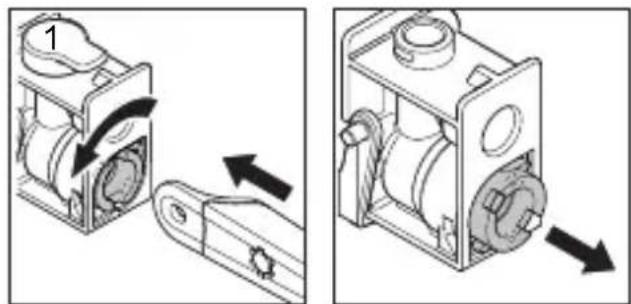
Remove the lid 1 from the milk frother.
-
Remove the milk frother nozzle from the milk frother by inserting the rounded end of the measuring spoon into the slot of the milk frother nozzle and turning 45° to pull it out. The nozzle is lifted up slightly during turning so that it can remove more easily.
natural_image
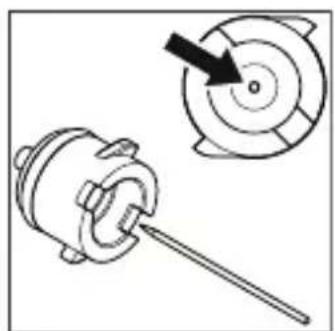
Mechanical assembly diagrams showing two views of a mechanical component with directional arrows indicating motion (no text or symbols present)- Clean the milk frother nozzle with a thin needle or with a thin brush (e.g. with a dental brush or with the brush of the measuring spoon). Pay attention that the opening is completely free after cleaning.
natural_image
Diagram of a mechanical device with a pointer and a magnified circular component (no text or symbols)6 Cleaning and maintenance
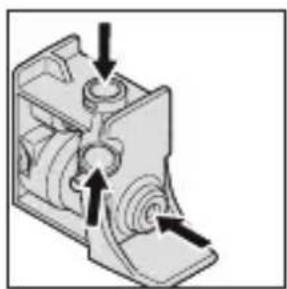
- Subsequently use the brush of the measuring spoon to clean all parts of the milk frother nozzle. Make sure that all vents of the milk frother and its nozzle are cleaned with the brush.
natural_image
Mechanical assembly diagram showing a rotating component with arrows indicating motion direction (no text or labels)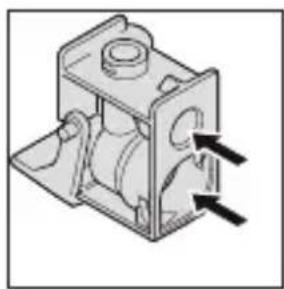
natural_image
Mechanical component diagram showing a housing with mounting holes and internal features (no text or symbols)- For removing tough soiling mix 200 ml of warm water with the corresponding quantity of milk cleaning solution. Refer to the instructions on the cleaning solution for the exact quantity.
- Leave all parts of the milk frother in the cleaning solution for 5 hours or over night.
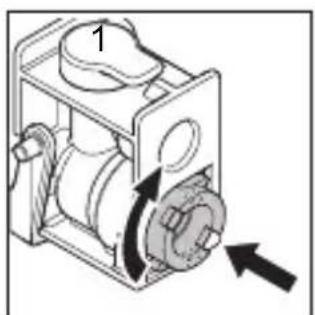
- Replace the frother nozzle in the milk frother and lock the nozzle by turning it 45^ with the rounded end of the measuring spoon.
natural_image
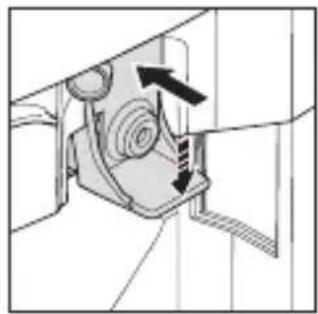
Mechanical device diagram showing a rotating housing with directional arrows indicating motion (no text or symbols)- Replace the lid 1 (pay attention to the direction).
- Replace the milk frother in the coffee machine and push the lever downwards to lock.
natural_image
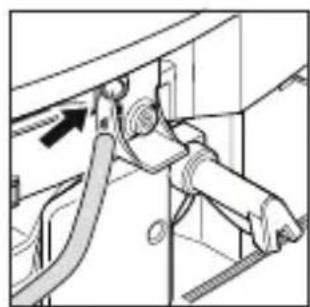
Technical diagram of a mechanical assembly with directional arrows indicating motion (no text or symbols)- Insert the end of the milk hose into the opening on the upper left of the milk frother until it stops and press the milk hose into the guide.
natural_image
Mechanical assembly diagram showing a lever mechanism with a black arrow indicating direction (no text or labels)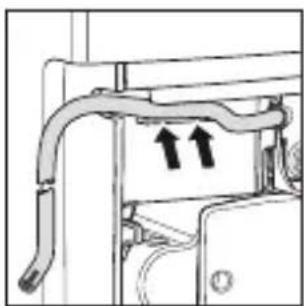
natural_image
Diagram of a mechanical device with two upward arrows indicating motion or force (no text or symbols present)- Close the door of the coffee dispensing unit. When closing the door, the dispenser should be located at the upper position, otherwise the milk tube will be jammed.
7 Troubleshooting
This section contains important information on localising and eliminating faults.
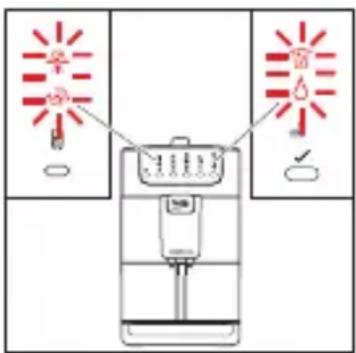
In case of failure, the lights "cleaning", "descaling", "empty grounds" and "refill water" always lights up permanently.
7.1 Safety precautions

WARNING:
Danger from unqualified repairs! Observe the following safety precautions to avoid danger and material damage: Do not open the coffee machine. Repairs to electrical coffee machines may only be carried out by qualified electricians. Unqualified repairs can lead to considerable danger for the user and cause serious damage to the coffee machine.
7 Troubleshooting
7.2 Coffee machine messages, possible causes and remedies
| Display Cause Remedy | ||
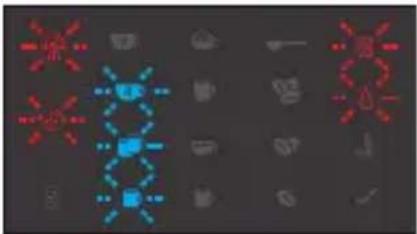 | • Brewing unit soiled | • Remove the brewing unit and rinse it thoroughly with flowing water. * |
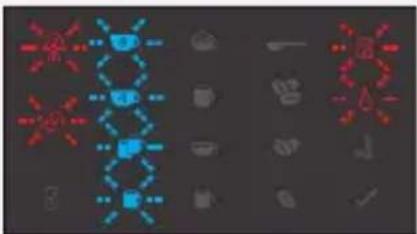 | • Brewing unit not/or not correctly fitted | • Insert the brewing unit into the appliance and close the door. * |
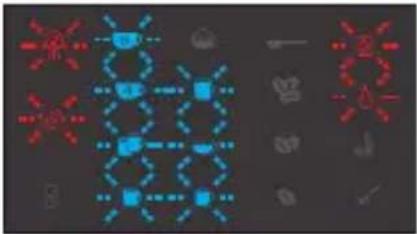 | • Brewing unit• overfilled | • Pré"s" button, the message "Brewing unit soiled" is displayed. Remove the brewing unit and rinse it thoroughly with flowing water. *• Check if coffee powder shaft is clogged and clean if necessary.* |
7 Troubleshooting
| Display Cause Remedy | ||
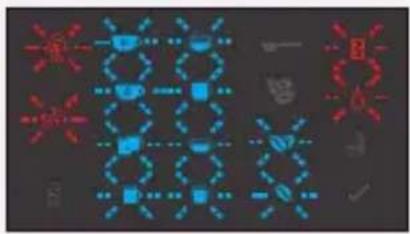 | Grinding fineness is set too fine or coffee powder used is too fine | Set a coarse grinding fineness or use different, coarser coffee powder. * |
| Water system is calcified | Run cleaning or descaling programme. * | |
| The adapter without filter cartridge is still in the water tank | Remove the adapter from the water tank. * | |
| The water tank has overflowed or is too damp | Dry the water tank and the water tank case thoroughly. * | |
| The water tank lid is missing | Remove the water tank and put the lid on. * | |
| Too much air in system | Refill the water tank. * |
7 Troubleshooting
| Display Cause Remedy | ||
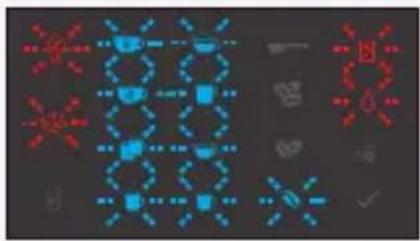 | • Communication failure | • If one of these messages are displayed, switch the device off. Switch back on again after a cooling down phase of approx. 30 minutes. If the message is displayed again, an error has occurred that may need a technical evaluation. Please contact the service hotline. If we cannot help you on the telephone, you will be instructed as to the further procedure. www.beko.com Beko call center 444 0 888 |
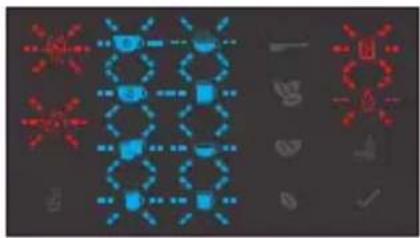 | • Input voltage error | |
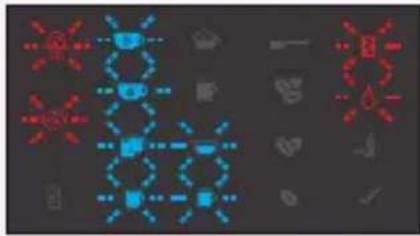 | • Main switch blocked | |
 | • Coffee temperature is incorrect | |
 | • Brewing unit is blocked (technical reason). | • Use the splined opening on the measuring spoon to open the back of the brewing unit with the splined journal (min. 3 turns).
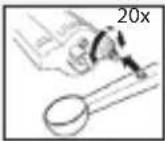 |
- If your own remedies should not be successful, please also contact the service hotline.
7 Troubleshooting
7.3 Problems, possible causes and remedies
| Problem Cause Remedy | ||
| Espresso/coffee not hot enough | • Cups too cold. | • Warm up cups with hot water. Increase the coffee temperature: see section 5.16. |
| Espresso/coffee too weak. | • Not enough coffee powder used. | • Measure coffee properly: top up with max. 1 measuring spoon of coffee beans. Set ground coffee quantity higher. Vary grinding fineness. Try a different coffee sort. |
| • Coffee type changed, setting changed. | • Take the automatic grinding quantity correction into consideration: see section 5.10 under Notes. | |
| Very loud noise during grinding. | • Grinding mechanism clogged by foreign matter. | • Send the coffee machine to Beko customer service for inspection. The coffee machine can still be operated with powder coffee. |
7 Troubleshooting
| Problem Cause Remedy | ||
| No milk froth or milk not dispensed. | • Milk system not correctly connected. | • Check milk system connection: see section 4.4, 6.5, 6.6 und 6.7. |
| • Milk frother is not completely inserted | • Checking the milk frother: see section 6.11. | |
| • Milk tube bent. | • Relocate the milk hose: see section 6.6. | |
| • Milk container is empty | • Fill milk container. | |
| • Milk system clogged | • Clean froth nozzle: see section 6.11. | |
| • Steam outlet of the coffee machine is blocked. | • Descaling the coffee machine: see section 6.10. |
7 Troubleshooting
| Problem Cause Remedy | ||
| Low quality froth. | · Milk too warm, too old or fat content too high. | · Use cold, low-fat milk. |
| · Froth nozzle is dirty. | · Clean froth nozzle: see section 6.11. | |
| · Milk system is dirty. | · Clean milk system: see section 6.3. | |
| · Steam outlet of the coffee machine is blocked. | · Descaling the coffee machine: see section 6.10. | |
| Display shows “Water tank empty” even though the tank is full | · Air in system. | · Dispense a little hot water: see section 5.8. |
| · Watersystem clogged. | · As a precautionary measure, run the cleaning or descaling program: see sections 6.9. and 6.10. |
7 Troubleshooting
| Problem Cause Remedy | ||
| "Empty grounds container" is displayed outside the allowed dispensed quantities (6 - 14). | · Waste container was emptied while the coffee machine was switched off | · Empty the waste container only when the coffee machine is switched on. |
| · Depending on grinding fineness and coffee filling level, different size coffee ground waste is formed, resulting in emptying cycles other than indicated. | ||
| Water in the waste container. | · Water leaks into the waste container during each rinsing process. | · No remedy necessary (technical reasons). |
| Coffee dispensing too slow. | · Grinding fineness set too fine. | · Set coarser grinding fineness. |
| · Grinding quantity set too high. | · Set ground coffee quantity lower. | |
| · Water system is calcified. | · Start the descaling program |
7 Troubleshooting
| Problem Cause Remedy | ||
| Water runs into the waste container instead of through the coffee spout during rinsing when switching the coffee machine on and off. | • Brewing unit blocked or maladjusted. | is • Remove and clean the brewing unit. If the brewing unit is closed, open before cleaning. Unscrew the brewing unit at the black tooth pin. An opened brewing unit is illustrated in section 6.8 Cleaning the brewing unit. |
| Coffee machine cannot be switched on. | • Not plugged in. | • Insert the mains plug. |
| Coffee dispensing is very uneven or only one-sided. | • Spout is clogged blocked by foreign bodies (e.g., coffee bean or similar). | or • Pull the coffee spout upwards and clean the inside or remove the foreign body (e.g., coffee bean). |

If you cannot resolve the problem with the steps described above, please contact customer service. Beko call center: 444 0 888
7 Troubleshooting
7.4 Proper packing of the coffee machine
In the event of a warranty claim, pack the coffee machine into the original carton using the original packing material and proceed as follows:
-
Empty the water tank (7), waste container (5), drip tray (8) and the coffee bean container (11). Clean the coffee machine and all parts. Insert the water tank and the waste container back into the coffee machine. Pack the coffee machine and the drip tray each into a plastic bag.
-
Put the lower styrofoam tray into the box. Place the coffee machine and the tray into the box, wrap the the connecting cable and insert it into the prescribed styrofoam tray.
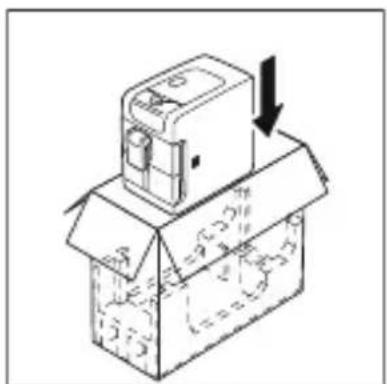
natural_image
Line drawing of a box with an open lid and a downward arrow indicating compression or disassembly (no text or symbols)- Place the upper styrofoam tray on top so that the coffee machine is so sitting correctly in its prescribed tray. Lay the drip tray in the prescribed tray and close the box.
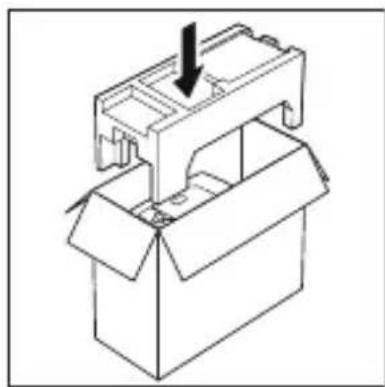
natural_image
Technical line drawing of a mechanical assembly with an arrow indicating a downward component (no text or symbols present)- Finally seal the carton with adhesive tape!
8. Storage
If you do not intend to use the coffee machine for a prolonged period, clean it as described in section 6 in order to prevent mould from building up. Mould is harmful to health. Store the coffee machine and all accessory parts in a dry, clean and frost-free place which is protected against direct sunlight.
natural_image
Line drawing of a desktop computer with an open access panel and a black arrow pointing to it (no text or symbols)natural_image
Line drawing of a hand pressing a button on a coffee maker machine (no text or symbols)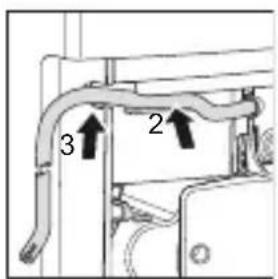

natural_image
Line drawing of a hand using a digital water dispenser to press or<|rotate_right|> (no text or symbols visible)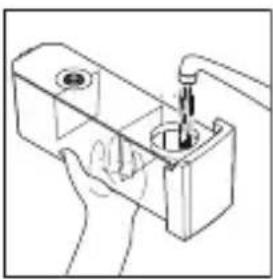
natural_image
Line drawing of a hand using a screwdriver to adjust or install a mechanical component (no text or symbols present)
natural_image
Simple thermometer icon with no text or symbolsnatural_image
Four black icons representing coffee, beer mug, coffee bean, and thermometer (no text or symbols)natural_image
Pure electrical circuit lines without any symbolsnatural_image
Pure electrical circuit lines without any symbolsnatural_image
Pure electrical circuit lines without any symbolsnatural_image
Illustration of a hand using a coffee machine to press coffee into a mug, with no text or symbols present.
natural_image
Pure electrical circuit lines without any symbolsnatural_image
Pure electrical circuit lines without any symbolsnatural_image
Pure electrical circuit lines without any symbols
natural_image
Simple diagram of a device panel with buttons and a triangle indicator (no text or symbols)
natural_image
Simple black icon of a mug on white background (no text or symbols)natural_image
Simple diagram of a device panel with numbered buttons and an arrow pointing to the bottom panel (no text or symbols)natural_image
Pure electrical circuit lines without any symbolsnatural_image
Simple black-and-white diagram of two horizontal lines with a shaded triangular shape between them (no text or symbols)
natural_image
Pure diagram of a device panel with labeled buttons and an arrow, no text or symbols presentnatural_image
Illustration of a hand using a coffee machine to press coffee into a mug, with no text or symbols present.
natural_image
Simple black-and-white diagram of two horizontal lines with a small bowl, no text or symbols present.natural_image
Simple diagram of a device panel with labeled buttons (no text or symbols beyond numbers)natural_image
Simple diagram of a device panel with labeled buttons (no text or symbols beyond basic labels)

natural_image
Line drawing of a hand pressing a cup into a coffee machine (no text or symbols)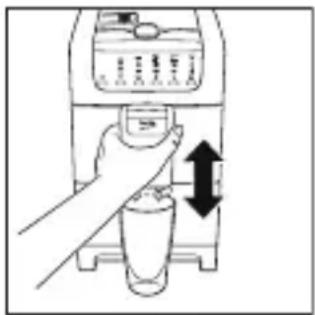
natural_image
Illustration of a hand pressing down on a small glass with an arrow indicating downward motion (no text or symbols)natural_image
Line drawing of a laboratory instrument with control panel and base unit (no text or symbols)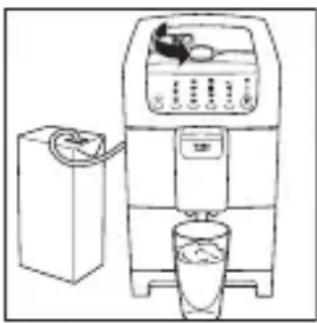
natural_image
Line drawing of a portable kitchen appliance with a side-mounted sink and control panel (no text or symbols)natural_image
Simple diagram of a device panel with labeled buttons and an arrow pointing to a button (no text or symbols beyond basic labels)
natural_image
Illustration of a laboratory setup with a beaker and a syringe, both without any text or symbols.natural_image
Two laboratory apparatus diagrams: a tap with liquid and a beaker with a submerged container (no text or symbols)natural_image
Simple diagram of a device panel with labeled buttons and a triangle indicator (no text or symbols beyond basic labels)natural_image
Simple diagram of a device panel with labeled buttons (no text or symbols beyond numbers)natural_image
Simple diagram of a device panel with labeled buttons and an arrow (no text or symbols)natural_image
Simple diagram of a device panel with labeled buttons (no text or symbols beyond numbers)natural_image
Simple diagram of a device panel with labeled buttons and a triangular indicator (no text or symbols)natural_image
Simple diagram of a device panel with labeled buttons (no text or symbols beyond basic labels)Never immerse the coffee machine itself, the mains cable or the mains plug into water or other liquids.

natural_image
Illustration of a gas collection setup with a water bottle and a hand pump, alongside a close-up of the same container (no text or symbols)
natural_image
Illustration of a faucet and a water dispenser (no text or symbols)natural_image
Simple line drawing of a beaker with three dots inside, no text or symbols present.natural_image
Simple line drawing of a beaker with three dots inside, no text or symbols present.natural_image
Line drawing of a hand pressing down on a coffee maker machine with a black arrow indicating the press (no text or symbols present)natural_image
Line drawing of a hand pressing down on a coffee maker machine with a black arrow indicating the press (no text or symbols present)natural_image
Illustration of a hand inserting a device into a machine, with no visible text or symbols
ATTENTION :
natural_image
Diagram of a printer or printer with an arrow indicating compression process (no text or symbols present)natural_image
Illustration of hands cleaning a kitchen sink with a faucet (no text or symbols)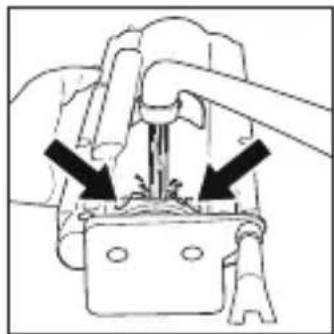
natural_image
Mechanical assembly diagram showing a valve or connector with arrows indicating direction (no text or symbols present)natural_image
Diagram of a printer's internal structure with an arrow indicating compression or disassembly (no text or symbols present)natural_image
Simple line drawing of a flying saucer with stars and rays (no text or symbols)natural_image
Illustration of a hand washing a water bottle with a drain, showing no text or symbolsnatural_image
Line drawing of a hand using a tool to interact with a device (no text or symbols visible)natural_image
Diagram showing a door handle mechanism with directional arrows indicating movement (no text or symbols present)natural_image
Simple circular diagram with arrows indicating rotation and particle arrangement (no text or symbols)
Damage to delicate surfaces can occur after contact with the descaling solution! Remove any splashes immediately.
natural_image
Diagram of a water dispenser with a blue light source and a close-up of its base (no text or symbols)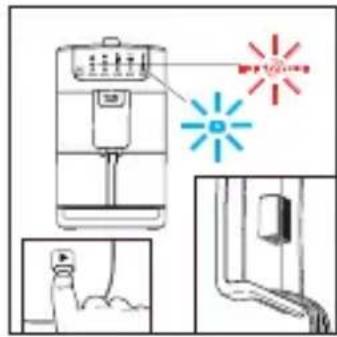
natural_image
Illustration of a water purifier with a warning light and an inset showing a person diving (no text or symbols)natural_image
Pure electrical circuit lines without any symbolsnatural_image
Pure electrical circuit lines without any symbolsnatural_image
Diagram of a printer's internal structure with an arrow indicating compression or disassembly (no text or symbols present)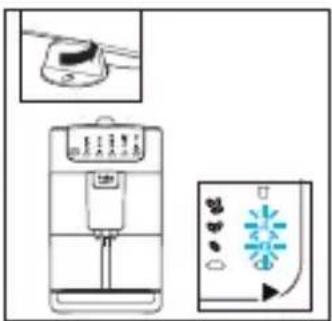
natural_image
Line drawing of a hand pressing a button on a vending machine (no text or symbols)natural_image
Mechanical assembly diagram showing a lever mechanism with a downward arrow indicating motion (no text or symbols present)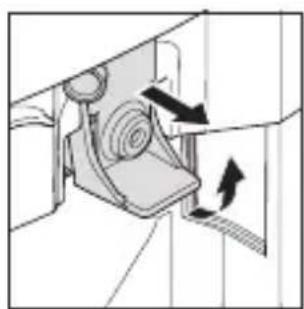
natural_image
Mechanical assembly diagram showing a sliding mechanism with directional arrows (no text or labels)natural_image
Technical diagram of a mechanical device with two circular components and directional arrows indicating motion (no text or symbols)natural_image
Mechanical assembly diagram showing a rotating component and a clamping mechanism (no text or symbols)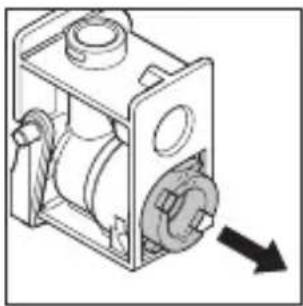
natural_image
Technical line drawing of a mechanical device with a rotating wheel and housing (no text or symbols)natural_image
Diagram of a mechanical device with a pointer and circular component, no text or symbols presentnatural_image
Mechanical assembly diagram showing internal components with arrows indicating motion (no text or labels)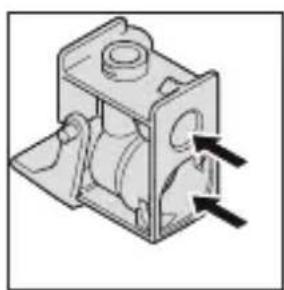
natural_image
Mechanical component diagram showing a housing with internal components and directional arrows (no text or symbols)natural_image
Mechanical assembly diagram showing a motor and gear mechanism with directional arrows (no text or labels)natural_image
Mechanical assembly diagram showing a valve mechanism with directional arrows (no text or labels)natural_image
Diagram of a mechanical assembly with a lever and pipe, no visible text or symbols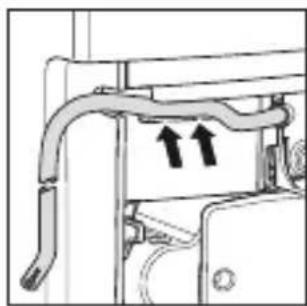
natural_image
Mechanical assembly diagram showing pipe connections and directional arrows (no text or symbols)natural_image
Illustration of a box with an open lid and a downward arrow, no text or symbols presentnatural_image
Line drawing of a mechanical assembly with an arrow indicating downward motion (no text or symbols)natural_image
Line drawing of a device with a base and top component, showing an arrow pointing to it (no text or symbols present)4 Inbetriebnahme
natural_image
Hand inserting a black arrow into a machine (no text or symbols visible)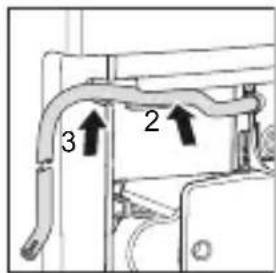

natural_image
Line drawing of a hand pressing down on a digital coffee machine (no text or symbols)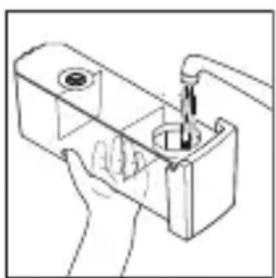
natural_image
Hand holding a mechanical component with a tool inserted, no visible text or symbols
natural_image
Simple line drawing of a thermometer with airflow lines (no text or symbols)natural_image
Row of black-and-white icons representing food and beverage concepts (no text or symbols)natural_image
Pure electrical circuit lines without any symbolsnatural_image
Simple diagram of a device panel with labeled buttons (no text or symbols beyond numbers)natural_image
Illustration of a hand using a coffee maker to press a cup, with no visible text or symbolsnatural_image
Pure diagram of a device panel with no text, numbers, or symbols visiblenatural_image
Simple diagram of a device panel with labeled buttons (no text or symbols beyond basic labels)natural_image
Pure electrical circuit lines without any symbols
natural_image
Simple black icon of a mug on white background (no text or symbols)natural_image
Pure electrical circuit lines without any symbolsnatural_image
Pure electrical circuit lines without any symbolsnatural_image
Pure electrical circuit lines without any symbolsnatural_image
Simple black-and-white diagram with two horizontal lines and a shaded rectangular area (no text or symbols)
natural_image
Illustration of a hand using a coffee machine to press coffee into a mug, with no visible text or symbols.
natural_image
Pure electrical circuit lines without any symbolsnatural_image
Simple black-and-white diagram with horizontal lines and a shaded rectangular area (no text or symbols)natural_image
Simple diagram of a device with four circular components and three separate mugs, no text or symbols present.natural_image
Simple diagram of a device panel with labeled buttons (no text or symbols beyond numbers)natural_image
Line drawing of a hand pressing a cup into a coffee maker (no text or symbols)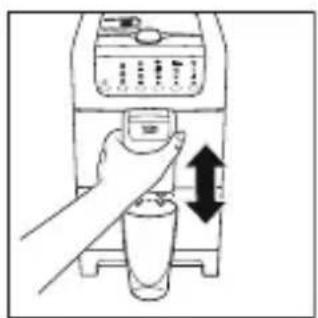
natural_image
Illustration of a hand pressing down on a coffee maker's side table with a double-headed arrow indicating compression (no text or symbols)
natural_image
Line drawing of a portable water dispenser with control panel and battery (no text or symbols)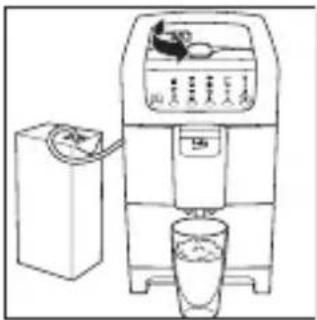
natural_image
Line drawing of a modern kitchen appliance with a side-mounted unit and a glass bowl (no text or symbols)natural_image
Simple line drawing of a computer monitor with control buttons and a scroll (no text or symbols)natural_image
Illustration of a laboratory setup with a water bottle and beaker, showing liquid being poured into it (no text or symbols present)natural_image
Illustration of a faucet and a water dispenser with liquid, no text or symbols presentnatural_image
Pure diagram of a device panel with labeled buttons (no text or symbols beyond basic labels)natural_image
Simple diagram of a device panel with labeled buttons and an arrow (no text or symbols)natural_image
Simple diagram of a device panel with labeled buttons (no text or symbols beyond numbers)natural_image
Simple diagram of a device panel with labeled buttons (no text or symbols beyond basic labels)natural_image
Simple diagram of a device panel with labeled buttons (① and 6) and oval shapes, no text or symbols present.natural_image
Illustration of a laboratory setup with a water tap and beaker, alongside a close-up of a digital device (no text or symbols present)
natural_image
Illustration of a faucet and a water dispenser (no text or symbols)natural_image
Simple line drawing of a beaker with three dots inside, no text or symbols present.natural_image
Illustration of a hand pressing down on a small electronic device with a black arrow indicating the process (no text or symbols present)natural_image
Line drawing of a hand pressing down on a vending machine with an arrow indicating left-hand motion (no text or symbols)natural_image
Illustration of a hand inserting a card into a device with a downward arrow indicating compression (no text or symbols present)
Achtung:
natural_image
Diagram of a 3D printer internal structure with an arrow indicating motion (no text or symbols present)natural_image
Illustration of hands cleaning a sink with a faucet (no text or symbols)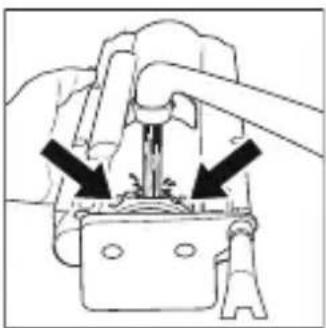
natural_image
Mechanical assembly diagram showing a valve or actuator with arrows indicating direction (no text or symbols present)natural_image
Diagram of a computer interface with an open door and a hand inserting a device into the chamber (no text or symbols visible)natural_image
Simple line drawing of a flying saucer with stars and rays (no text or symbols)
natural_image
Line drawing of a hand inserting a small component into a vehicle's seat, with no visible text or symbolsnatural_image
Diagram showing a device with a lid and a side panel, illustrating the process of adjustment or assembly (no text or symbols present)natural_image
Simple circular diagram with arrows indicating refresh or recycling (no text or symbols)
natural_image
Line drawing of a water purifier with a brightness light indicator and an inset showing the process (no text or symbols)natural_image
Abstract diagram with red and blue geometric shapes on dark background (no text or symbols)natural_image
Abstract diagram with blue and red pixelated shapes on dark background (no text or symbols)natural_image
Mechanical assembly diagram showing a lever mechanism with a downward arrow indicating motion (no text or symbols present)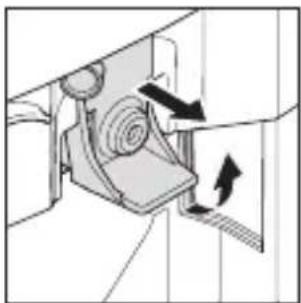
natural_image
Mechanical assembly diagram showing a rotating component with directional arrows indicating motion (no text or symbols)natural_image
Technical diagram of a mechanical device with two circular components and directional arrows indicating motion (no text or labels)natural_image
Mechanical assembly diagram showing a rotating component and a sliding mechanism (no text or symbols)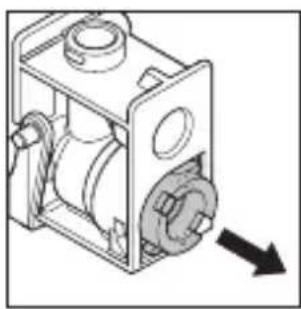
natural_image
Technical line drawing of a mechanical device with internal components and a directional arrow (no text or symbols)natural_image
Technical line drawing of a mechanical component with a pin and arrow indicator (no text or symbols)natural_image
Mechanical assembly diagram showing internal components with arrows indicating motion direction (no text or labels)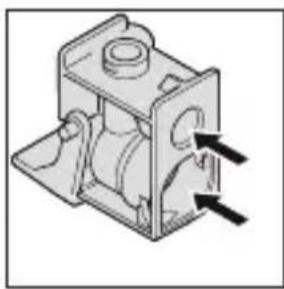
natural_image
Mechanical component diagram showing a housing with mounting flanges and internal components (no text or symbols)natural_image
Mechanical device diagram showing a housing with internal components and directional arrows indicating motion (no text or symbols)natural_image
Mechanical assembly diagram showing a rotating component with directional arrows indicating motion (no text or symbols)natural_image
Mechanical assembly diagram showing a lever mechanism with no visible text or symbols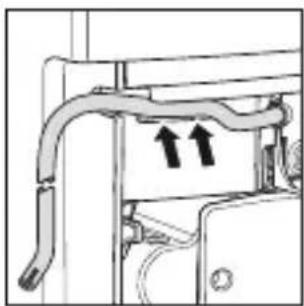
natural_image
Mechanical assembly diagram showing pipe connections with two upward arrows (no text or symbols)natural_image
Illustration of a box with an open lid and a downward arrow, no text or symbols presentnatural_image
Technical line drawing of a mechanical assembly with an arrow indicating a downward component (no text or symbols present)natural_image
Line drawing of a desktop computer with an open access panel and a black arrow pointing to it (no text or symbols)natural_image
Technical diagram of a mechanical assembly with labeled component '1' (no readable text or symbols)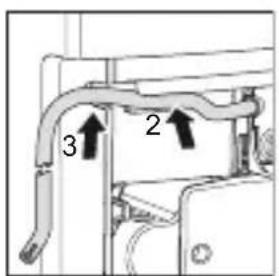

natural_image
Hand inserting a card into a digital device (no text or symbols visible)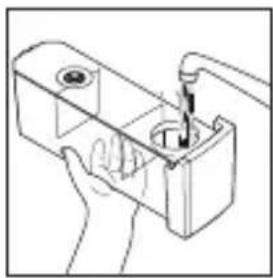
natural_image
Line drawing of a hand using a tool to adjust or install a mechanical component (no text or symbols present)natural_image
Simple thermometer icon with heat lines indicating temperature (no text or symbols)natural_image
Four black icons: a cup, a mug, coffee bean, and a thermometer with an exclamation mark (no text or symbols)natural_image
Simple line drawing of a beaker with three dots inside, no text or symbols present.
POZOR:
natural_image
Pure electrical circuit lines without any symbolsnatural_image
Pure electrical circuit lines without any symbolsnatural_image
Illustration of a hand using a coffee machine to press coffee into a cup, with no visible text or symbols.natural_image
Simple diagram of a device panel with buttons and a triangle indicator (no text or symbols)natural_image
Simple line drawing of a computer monitor with two buttons labeled ① and 6, no text or symbols present.natural_image
Simple diagram of a device panel with labeled buttons and an arrow pointing to the bottom panel (no text or symbols beyond basic labels)
natural_image
Simple black icon of a mug on white background (no text or symbols)natural_image
Pure electrical circuit lines without any symbolsnatural_image
Pure electrical circuit lines without any symbolsnatural_image
Simple black-and-white diagram of two horizontal lines with a shaded rectangular area between them (no text or symbols)
natural_image
Simple diagram of a device panel with labeled buttons and an arrow (no text or symbols)natural_image
Illustration of a hand using a coffee machine to press coffee into a mug, with no visible text or symbols.
natural_image
Pure electrical circuit lines without any symbolsnatural_image
Simple black-and-white diagram of two horizontal lines with a small bowl above them, no text or symbols present.natural_image
Simple diagram of a device panel with labeled buttons (no text or symbols beyond numbers)natural_image
Simple line drawing of a device panel with buttons and a triangular indicator (no text or symbols)

natural_image
Line drawing of a kitchen appliance with a side-mounted stand and a glass bowl (no text or symbols)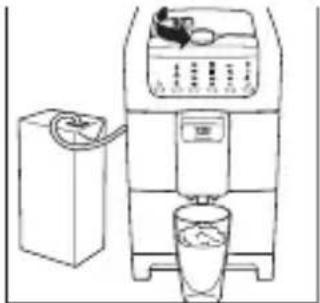
natural_image
Line drawing of a water purifier with control panel and side-mounted dish (no text or symbols)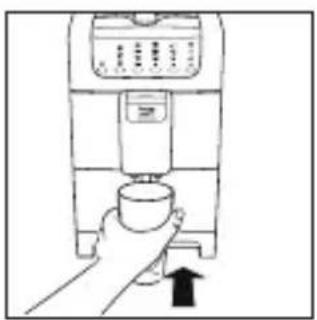
natural_image
Line drawing of a hand pressing a cup into a coffee machine (no text or symbols)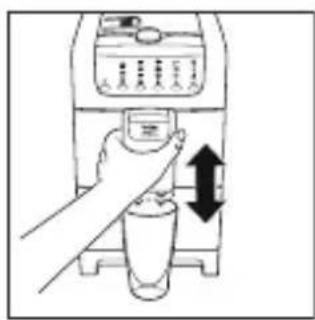
natural_image
Illustration of a hand pressing down on a small container with an arrow indicating motion (no text or symbols)natural_image
Pure electrical circuit lines without any symbolsnatural_image
Illustration of a laboratory setup with a beaker and a syringe, both without any text or symbols.natural_image
Illustration of a faucet and a water dispenser with liquid, no text or symbols presentnatural_image
Simple diagram of a device panel with labeled buttons (no text or symbols beyond basic labels)natural_image
Pure diagram of a device panel with labeled buttons (no text or symbols beyond basic labels)natural_image
Simple diagram of a device panel with labeled buttons (no text or symbols beyond numbers)natural_image
Simple diagram of a device panel with labeled buttons (no text or symbols beyond numbers)natural_image
Simple line drawing of a computer monitor front panel with control buttons (no text or symbols)natural_image
Diagram of a kitchen appliance with red and blue directional arrows indicating airflow or heat distribution (no text or symbols)natural_image
Illustration of a gas washing machine with a tap and liquid being poured into it, alongside its side view (no text or symbols)
natural_image
Illustration of a faucet and a water dispenser (no text or symbols)natural_image
Simple line drawing of a beaker with three dots inside, no text or symbols present.
natural_image
Line drawing of a hand pressing down on a coffee maker machine with a black arrow indicating the press (no text or symbols present)natural_image
Illustration of a hand inserting a card into a device with a downward arrow indicating compression (no text or symbols present)
natural_image
Diagram of a printer's internal structure with an arrow indicating compression or disassembly (no text or symbols present)natural_image
Diagram of a mechanical device with arrows indicating assembly or operation (no text or symbols present)natural_image
Illustration of hands cleaning a kitchen sink with a faucet (no text or symbols)natural_image
Diagram of a printer's internal structure with an arrow indicating compression or disassembly (no text or symbols present)natural_image
Simple line drawing of a flying saucer with stars and rays (no text or symbols)
natural_image
Line drawing of a hand inserting a small component into a device (no text or symbols)natural_image
Diagram showing a device with a lid and a curved pipe, no text or symbols presentnatural_image
Simple circular diagram with arrows indicating rotation and particle distribution (no text or symbols)
natural_image
Line drawing of a water dispenser with control panel and indicator light, shown in two views: one with an arrow pointing to a fish (no text or symbols)natural_image
Pure electrical circuit lines without any symbolsnatural_image
Abstract pattern of red and blue pixelated shapes on dark background (no text or symbols)6 Čištění a údržba
natural_image
Diagram of a printer or printer with an arrow indicating compression process (no text or symbols present)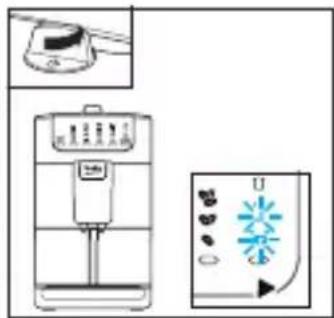
6 Čištění a údržba
natural_image
Mechanical assembly diagram showing a piston and lever mechanism (no text or labels)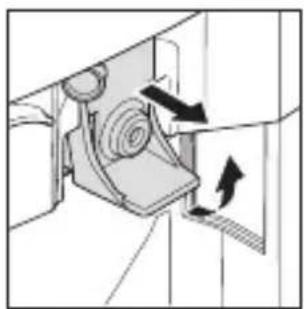
natural_image
Mechanical assembly diagram showing a rotating component with directional arrows indicating motion (no text or symbols)natural_image
Diagram of a mechanical device with two circular components and directional arrows indicating motion (no text or symbols)natural_image
Mechanical assembly diagram showing a rotating component and a sliding mechanism (no text or symbols)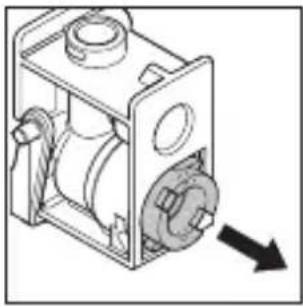
natural_image
Technical line drawing of a mechanical device with internal components and a directional arrow (no text or symbols)natural_image
Technical illustration of a mechanical component with a pointer and circular target, no text or symbols present6 Čištění a údržba
natural_image
Mechanical assembly diagram showing a rotating component with arrows indicating motion direction (no text or labels)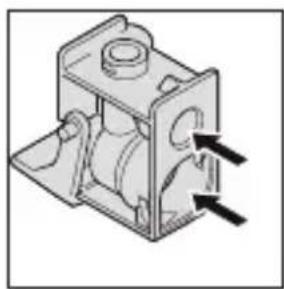
natural_image
Mechanical component diagram showing a housing with mounting holes and internal features (no text or symbols)natural_image
Mechanical assembly diagram showing a motor and gear mechanism with directional arrows (no text or labels)natural_image
Mechanical assembly diagram showing a valve mechanism with directional arrows (no text or labels)natural_image
Simple line drawing of a box with an open lid and a downward arrow indicating compression or disassembly (no text or symbols)natural_image
Isometric line drawing of a mechanical assembly with a downward arrow indicating a component (no text or symbols present)- Nakonec zalepte krabici lepicí páskou!
8. Skladování
natural_image
Line drawing of a device with a base and top component, showing an arrow pointing to it (no text or symbols present)natural_image
Diagram of a person climbing stairs with an arrow indicating direction (no text or symbols)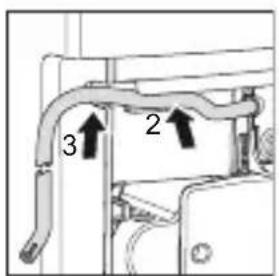

natural_image
Line drawing of a hand using a coffee maker to press or<|rotate_right|> (no text or symbols present)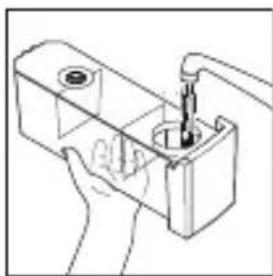
natural_image
Line drawing of a hand holding a small mechanical component with a tool inserted (no text or symbols)
natural_image
Simple thermometer icon with cooling effect and tick marks (no text or symbols)natural_image
Four black icons representing food and beverage items: cup, mug, coffee bean, and thermometer (no text or symbols)natural_image
Simple line drawing of a beaker with three dots inside, no text or symbols present.
POZOR:
natural_image
Pure electrical circuit lines without any symbolsnatural_image
Pure electrical circuit lines without any symbols- Nastavte jemnost mletia pomocou páky jemnosti mletia (12) počas chodu mlynčeka. Káva je pripravená a jemnost mletia je nastavená.
natural_image
Illustration of a hand using a coffee machine to press coffee into a cup, with no visible text or symbols.natural_image
Pure electrical circuit lines without any symbolsnatural_image
Simple diagram of a device panel with buttons and a triangle indicator (no text or symbols)natural_image
Simple line drawing of a device panel with two buttons labeled ① and 6, no text or symbols present.natural_image
Simple diagram of a device panel with buttons and a triangle indicator (no text or symbols)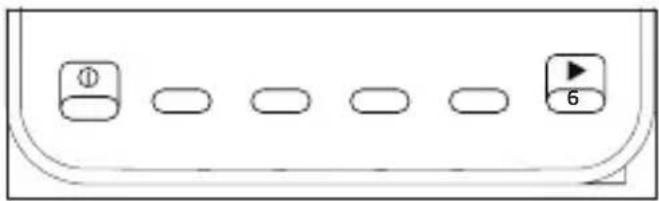
natural_image
Pure electrical circuit lines without any symbols
natural_image
Simple black icon of a mug on white background (no text or symbols)natural_image
Pure electrical circuit lines without any symbolsnatural_image
Simple black-and-white diagram of two horizontal lines with a shaded rectangular area between them (no text or symbols)natural_image
Pure diagram of a computer control panel with no text or symbolsnatural_image
Illustration of a hand using a coffee machine to press coffee into a cup, with no text or symbols present.
natural_image
Pure electrical circuit lines without any symbolsTento symbol sa rozsvieti na dis-pleji:
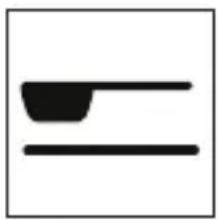
natural_image
Simple black-and-white diagram of a bowl and two horizontal lines (no text or symbols)natural_image
Pure electrical circuit lines without any symbols- Uvol'nite tlačidlo. Požadovaná úroveň naplnenia šálky je teraz uložená.

natural_image
Simple line drawing of a device panel with buttons and a triangular indicator (no text or symbols)

natural_image
Line drawing of a laboratory instrument with control panel and base unit (no text or symbols)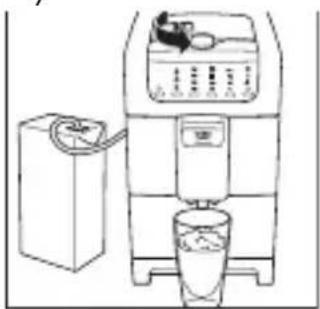
natural_image
Line drawing of a kitchen appliance with a refrigerator and a side dish (no text or symbols)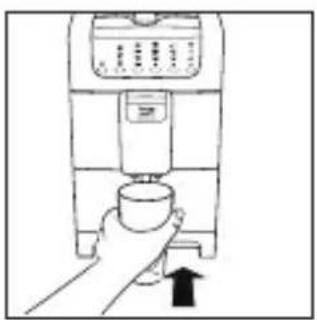
natural_image
Line drawing of a hand pressing a cup into a coffee maker machine (no text or symbols)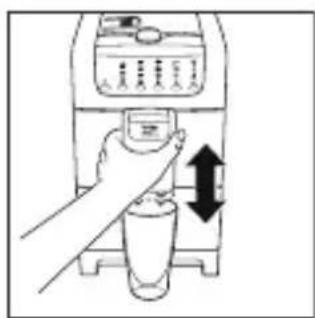
natural_image
Illustration of a hand pressing down on a coffee maker's side table with a double-headed arrow indicating compression (no text or symbols present)natural_image
Diagram showing a device panel with labeled buttons and a small icon, no readable text or symbols present.- Stlačte "" (tlačidlo 6).
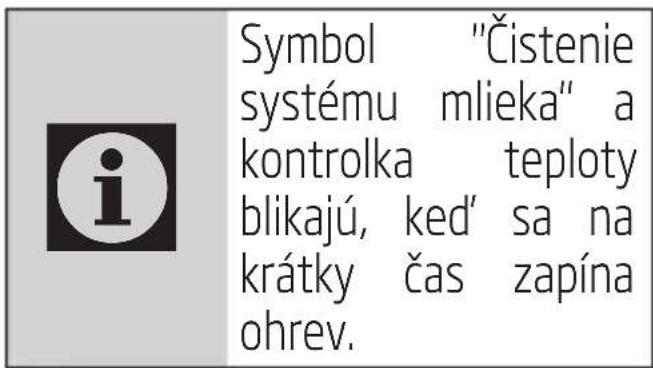
natural_image
Illustration of a water tap and a hand pump in different setups (no text or symbols)natural_image
Illustration of a faucet and a water dispenser with liquid, no text or symbols presentnatural_image
Pure diagram of a device panel with no text, numbers, or symbols visible5.16 Nastavenie a uloženie teploty kávy
natural_image
Pure diagram of a device panel with labeled buttons (no text or symbols beyond basic icons)natural_image
Simple diagram of a device panel with labeled buttons (no text or symbols beyond numbers)natural_image
Simple diagram of a device panel with labeled buttons (no text or symbols beyond basic labels)natural_image
Pure electrical circuit lines without any symbolsnatural_image
Simple diagram of a device panel with labeled buttons (no text or symbols beyond basic labels)natural_image
Simple line drawing of a device panel with two buttons and one play button (no text or symbols)natural_image
Illustration of a gas collection setup with a tap and bottle, alongside a hand pump device (no text or symbols)6 Čistenie a údržba

natural_image
Illustration of a faucet and a water dispenser with liquid, no text or symbols presentnatural_image
Simple line drawing of a beaker with three dots inside, no text or symbols present.natural_image
Line drawing of a hand pressing down on a coffee maker machine (no text or symbols)-
Vytiahnite puzdrá z hadičiek A a odpojte hadičky od spojovacieho kusa C. Vytiahnite hadičku spolu s pružinou C zo spojovacieho kusa.
-
Nechajte diely niekol'ko hodín ponorené v čistiacom roztoku mlieka. Presné množstvo čistiaceho roztoku je uvedené v pokynoch.
-
Následne očistite diely roztokom a opláchnite ich dôkladne čistou vodou.
- Nasuňte hadičky na spojovací kus B a puzdra do hadičiek A. Vložte hadičku s pružinou. Nasuňte hadičku a pružinu na spojku C.
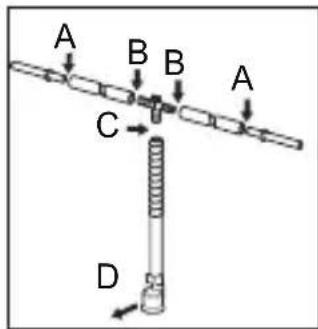
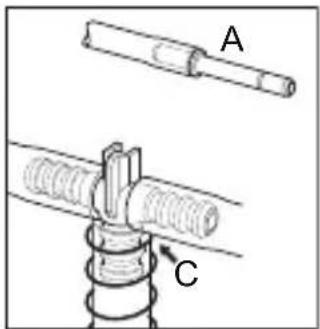

natural_image
Line drawing of a hand pressing down on a coffee maker machine with a black arrow indicating the press (no text or symbols present)natural_image
Illustration of a hand inserting a device into a machine, showing internal components and a downward arrow (no text or symbols)
POZOR:
Nebezpečenstvo prasknutia! Netahajte alebo neprenášajte naparovaciu jednotku za jej hubicu.
6 Čistenie a údržba
natural_image
Diagram of a printer's internal structure with an arrow indicating compression or disassembly (no text or symbols present)natural_image
Mechanical assembly diagram showing a valve or connector with arrows indicating direction (no text or symbols present)natural_image
Illustration of hands using a tool to clean or wash a surface, no text or symbols presentnatural_image
Diagram of a printer's internal structure with an arrow indicating motion (no text or symbols present)natural_image
Simple line drawing of a flying saucer with stars and rays (no text or symbols)
- Displej "Čistiaci program" bliká na displeji, zatial' čo displej "Naplňte nádržku na vodu" svieti trvalo.
natural_image
Line drawing of a hand inserting a small component into a device (no text or symbols)6 Čistenie a údržba
natural_image
Diagram showing a device with a ventilation grille and a close-up of its side panel (no text or symbols)- Čistiaci program je ukončený, ak zhasne displej funkcie "Čistiaci program".
natural_image
Simple circular diagram with arrows indicating refresh or recycling (no text or symbols)
natural_image
Illustration of a water dispenser with control panel and indicator light, plus a close-up of a mouse (no text or symbols)6 Čistenie a údržba
natural_image
Illustration of a water purifier with a light bulb emitting a light beam, accompanied by an inset image showing a person cleaning the surface (no text or symbols present)6 Čistenie a údržba
natural_image
Abstract geometric shapes with red and blue colors on a dark background, no text or symbols presentnatural_image
Diagram of a printer or printer with an arrow indicating compression process (no text or symbols present)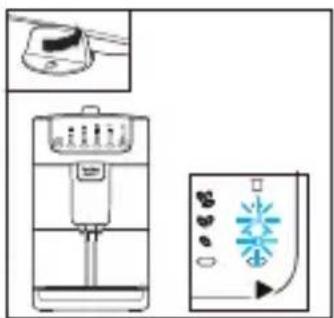
natural_image
Illustration of a kitchen water dispenser with control panel and side view (no text or symbols)natural_image
Mechanical assembly diagram showing a lever mechanism with a directional arrow (no text or labels)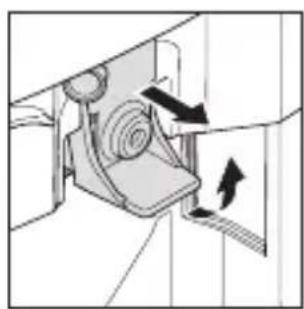
natural_image
Mechanical assembly diagram showing a gear mechanism with directional arrows (no text or labels)natural_image
Diagram of a mechanical device with two circular components and directional arrows indicating motion (no text or symbols)6 Čistenie a údržba
natural_image
Mechanical assembly diagram showing a rotating component and a sliding mechanism (no text or symbols)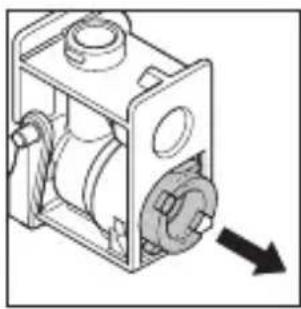
natural_image
Technical line drawing of a mechanical device with a rotating wheel and housing (no text or symbols)natural_image
Diagram showing a mechanical component with a pointer and an arrow pointing to a circular target (no text or symbols)natural_image
Mechanical component diagram showing internal gears and shafts with directional arrows (no text or labels)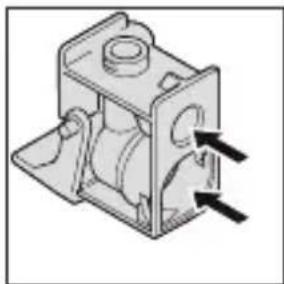
natural_image
Mechanical component diagram showing a housing with mounting holes and internal features (no text or symbols)natural_image
Mechanical assembly diagram showing a motor and gear mechanism with directional arrows (no text or labels)6 Čistenie a údržba
natural_image
Technical diagram of a mechanical assembly with directional arrows indicating motion (no text or symbols)natural_image
Diagram of a mechanical device with a lever and attached components, showing no text or symbols.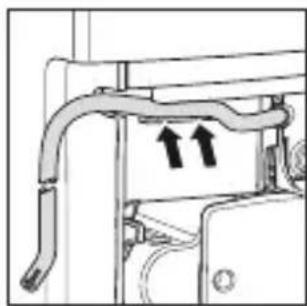
natural_image
Diagram of a mechanical or electrical component with two upward arrows indicating direction (no text or symbols present)natural_image
Diagram of a box with an open lid and a downward arrow indicating compression or disassembly (no text or symbols present)natural_image
Technical line drawing of a mechanical assembly with an arrow indicating a downward component (no text or symbols present)- Nakoniec zalepte škatul'u lepiacou páskou!
8. Skladovanie
natural_image
Abstract geometric design with blue triangular shapes on white background (no text or symbols)- Fully Automatic Espresso Machine
- Please read this user manual first!
- Explanation of symbols
- CONTENTS
- Important instructions to safety and environment
- Danger of electric current
- 1
- Important instructions for safety and environment
- Danger of burning or scalding
- Fundamental safety precautions
- Important instructions for safety and environment
- Intended use
- Danger resulting from improper use!
- WARNING:
- Limitation of liability
- Compliance with the WEEE Directive and Disposing of the Waste Product:
- Compliance with RoHS Directive
- Package information
- Your coffee machine
- Overview
- Technical data
- Power supply:
- Display
- Setting up
- Requirements for place of operation
- Electrical connection
- Mounting the drip tray
- Connecting the milk system
- Filling with water
- CAUTION:
- Filling the coffee bean container
- Operation and use
- Safety precautions
- Switching on the coffee machine
- Switching off the coffee machine
- Switching off the coffee machine in an emergency
- Determining the water hardness
- Menu settings
- Setting and storing the water hardness
- Hot water preparation
- Setting the grinding fineness
- Preparing coffee with whole coffee beans
- Changing and storing the cup filling level in bean mode
- Preparing coffee with powdered coffee
- Changing and storing the cup filling level in powder mode
- Preparing coffee specialities
- Milk cleaning system after dispensing drink with milk
- Setting and storing the coffee temperature
- Setting and storing the shut-off time
- Setting the water tank illumination
- Resetting the unit to the factory settings (Reset)
- Cleaning and maintenance
- Safety precautions
- Regular cleaning
- Milk system cleaning program
- Emptying the waste container (Grounds box)
- Removing and cleaning the coffee dispensing unit
- Cleaning the hose distribution system
- Installing the coffee dispensing unit
- Cleaning the brewing unit
- Running the cleaning program
- Running the descaling program
- Cleaning the nozzle of the milk frother
- Troubleshooting
- Safety precautions
- Coffee machine messages, possible causes and remedies
- Proper packing of the coffee machine
- Storage
- ATTENTION :
- Inbetriebnahme
- Achtung:
- POZOR:
- Čištění a údržba
- Skladování
- Nastavenie a uloženie teploty kávy
- Čistenie a údržba
- Skladovanie
Brand : BEKO
Model : CEG7425B
Category : Coffee maker