
BEC2.1SS - Coffee maker BAUMATIC - Free user manual and instructions
Find the device manual for free BEC2.1SS BAUMATIC in PDF.


| Type | Built-in espresso coffee machine |
| Height | 460 mm |
| Width | 596 mm |
| Depth | 245 mm |
| Aperture height | 450 mm |
| Aperture width | 600 mm |
| Aperture depth (min) | 560 mm |
| Power supply | 230 Vac 50 Hz, 13 A |
| Total power consumption | 1450 W |
| Coffee boiler power | 800 W |
| Steam boiler power | 650 W |
| Coffee pump pressure | 15 bar |
| Steam pump pressure | 2.50 bar |
| Water tank capacity | 2 litres |
| Control type | Push button with neon indicators |
| Water filling | Manual or automatic (plumbed) |
| Coffee options | Pods (44 mm Italian) or ground coffee |
| Steam function | Yes, for cappuccino, hot chocolate, tea |
| Included accessories | 1 cup filter, 2 cup filter, filter holder, milk jug, water softener, allen key |
| Materials | Stainless steel with mark resistant coating |
| Safety features | Empty water tank warning, automatic stop when water empty, child safety recommendations |
| Maintenance | Descaling every 6 months with citric acid/vinegar; clean steam pipe after each use |
| Guarantee | 12 months (extendable to 24 with registration), 5 years parts warranty |
Frequently Asked Questions - BEC2.1SS BAUMATIC
User questions about BEC2.1SS BAUMATIC
0 question about this device. Answer the ones you know or ask your own.
Ask a new question about this device
Download the instructions for your Coffee maker in PDF format for free! Find your manual BEC2.1SS - BAUMATIC and take your electronic device back in hand. On this page are published all the documents necessary for the use of your device. BEC2.1SS by BAUMATIC.
USER MANUAL BEC2.1SS BAUMATIC
User Manual for your Baumatic
BEC2.1
Built-in espresso coffee machine
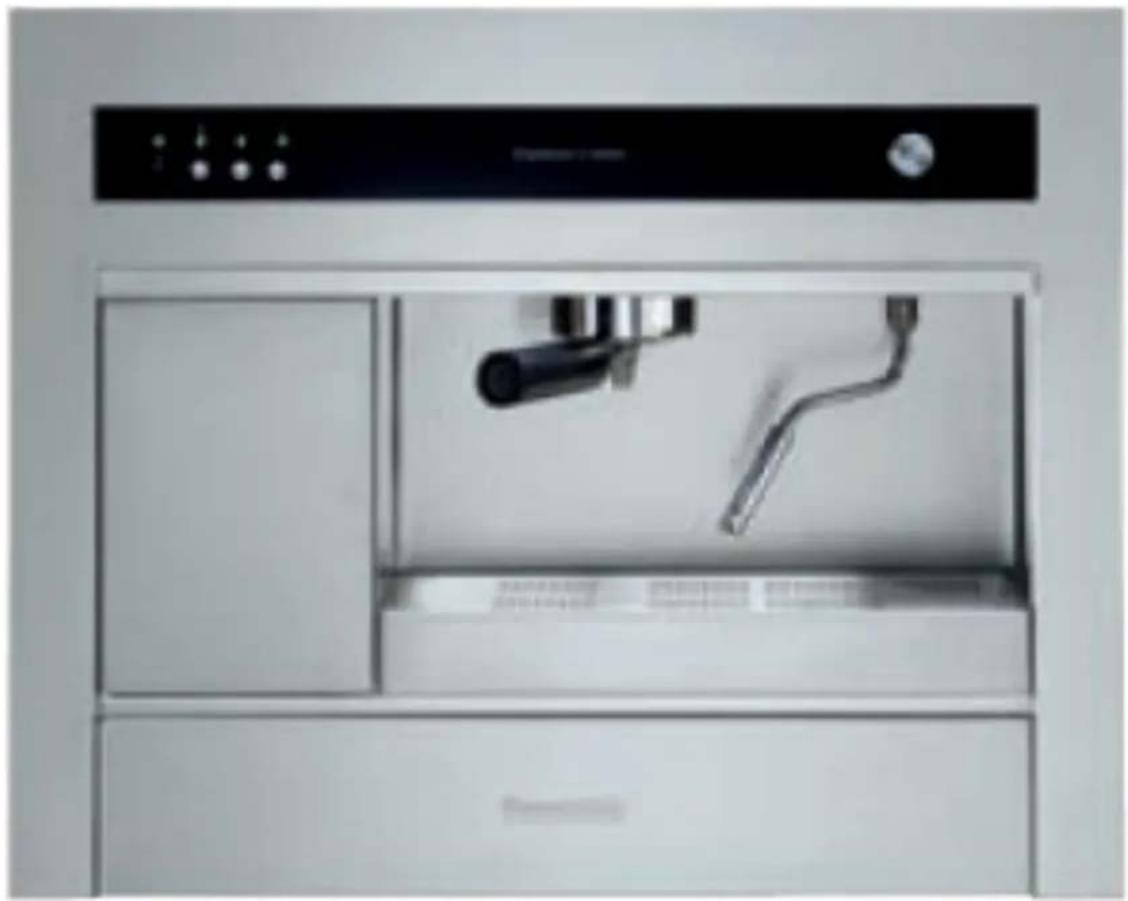
natural_image
Exterior view of a modern kitchen appliance with a double door and front panel (no visible text or symbols)
You will be mine ...
NOTE: This User Instruction Manual contains important information, including safety & installation points, which will enable you to get the most out of your appliance. Please keep it in a safe place so that it is easily available for future reference; for you or any person not familiar with the operation of the appliance.
DD 03/04/07
Contents
E n v i r o n m e n t a l
IMPORTANT SAFETY INFORMATION 5 - 6
Specifications
| Product and aperture dimensions | 7 | |||||||||||
| Product specifications | 7 | |||||||||||
| Standard accessories | 7 | |||||||||||
| Technical specifications | 8 | |||||||||||
| Description of the coffee machine | 9 | |||||||||||
| Standard accessories | 10 | |||||||||||
| C o n t r o l p a n e l | ||||||||||||
Using your coffee machine
| B | e | f | o | r | e | f | i | r | s | t | u | |
| Filling the reservoir (manually) | 11 | |||||||||||
| Filling the reservoir (automatically) | 12 - 13 | |||||||||||
| D | i | s | p | e | n | s | i | n | g | h | o | t |
| Adjusting the water fixed time dispensing period | 14 | |||||||||||
| Dispensing steam | 1 | 4 | ||||||||||
| Adjusting the steam fixed time dispensing period | 15 | |||||||||||
| The water tank | 15 | - | : | |||||||||
| Adjusting the flow of the water boiler | 16 | |||||||||||
M a k i n g d r i n k s
| Connecting a filter holder | 16 | |||||
| Using coffee pods | 17 | - | ||||
| Using ground coffee | 18 | - | ||||
| Tips on making an espresso | 20 | |||||
| Tips on making a cappuccino | 20 | |||||
| Method 1 (Using the steam pipe) | 20 - 21 | |||||
| Method 2 (Using the froth maker) | 21 | |||||
| Tips on making loose leaf tea | 22 - 23 | |||||
| Tips on making tea using steam | 23 | |||||
Cleaning and maintenance 23 - 25
I n s t a l l a t i o n
E l e c t r i c a l c o n
Installing the coffee machine into the kitchen cabinet 27 - 29
Connecting the coffee machine to the mains water supply 30
T r o u b l e s h o o t i n
Baumatic Ltd. Conditions of guarantee 32
C o n t a c t d e t a i l
Environmental note
This application is made for the use of a material and reactive 2002/96/EC on Waste electrical and Electronic Equipment (WEEE). By ensuring this product is disposed of correctly, you will help prevent potential negative consequences for the environment and human health, which could otherwise be caused by inappropriate waste handling of this product.
The symbol

on the product, or on the documents accompanying the product, indicates that this appliance may not be treated as household waste. Instead it shall be handed over to the applicable collection point for the recycling of electrical and electronic equipment.
Disposal must be carried out in accordance with local environmental regulations for waste disposal.
For more detailed information about treatment, recovery and recycling of this product, please contact your local city office, your household waste disposal service or the shop where you purchased the product.

natural_image
Symbol of a trash bin crossed with a diagonal line, no text or numbers present- The packaging materials that Baumatic uses are environmentally friendly and can be recycled.
- Please discard all packaging material with due regard for the environment.

natural_image
Warning symbol with exclamation mark inside a triangle (no text or numbers)Your safety is of the utmost importance to Baumatic. Please make sure that you read this instruction booklet before attempting to install or use the appliance. If you are unsure of any of the information contained in this booklet, please contact the Baumatic Technical Department.
General Information
- This appliance is designed for domestic household use. It can ONLY be built into a standard kitchen cabinet or housing unit, it should NOT be used as a freestanding appliance.
- The use of this appliance for any other purpose or in any other environment without the express agreement of Baumatic Ltd. will invalidate any warranty or liability claim.
- Your new appliance is guaranteed against electrical or mechanical defects, subject to certain exclusions that are noted in Baumatic's Conditions Of Guarantee. The foregoing does not affect your statutory rights.
- Repairs may only be carried out by Baumatic Service Engineers or their authorised service agent.
Warning and safety instructions
- This appliance complies with all current European safety legislation. Baumatic do wish to emphasise that this compliance does not remove the fact that the appliance surfaces will become hot during use and retain heat after operation.
Child Safety
○ Baumatic strongly recommend that babies and young children are prevented from being near to the appliance and not allowed to touch the appliance at any time.
- If it is necessary for younger family members to be in the kitchen, please ensure that they are kept under close supervision at all times.
General Safety
- Do not leave the coffee maker unattended.
- Do not allow electrical fittings or cables to come into contact with areas on the appliance that get hot.
- Do not install the appliance next to curtains or soft furnishings.
Cleaning
- Cleaning of the coffee machine should be carried out on a regular basis.
- Great care should be taken whilst using this appliance and when following the cleaning procedure.
- IMPORTANT: The appliance must be disconnected from the mains before following the cleaning procedure.
Installation

This appliance must be correctly installed by a suitably qualified person, strictly in accordance with the manufacturer's instructions.
○ Baumatic Ltd. declines any responsibility for injury or damage, to person or property, as a result of improper use or installation of this appliance.
- The manufacturer declares that the coffee maker is built using certified materials and requires the appliance to be installed in accordance with the standards currently in force. This appliance must be used by a trained person for domestic purposes only.
Specifications
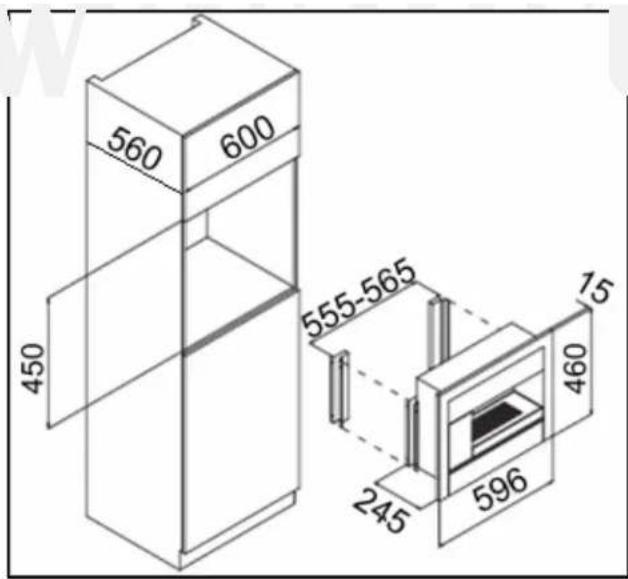
Product Dimensions
Height: 460 mm
Width: 596 mm
Depth: 245 mm
Aperture Dimensions
Height: 450 mm
Width: 600 mm
Depth: (min) 560 mm
Product specifications
- Push button control operation
○ Mark resistant coating
○ Choice of 1 or 2 cup filters - Suitable for sealed coffee pods or ground coffee
- Coffee regulation (extra strong - normal - weak)
- Steam spout for cappuccino, hot chocolate, tea and instant coffee
○ Pull-out drawer with a compartment for cups & saucers and a dish for coffee waste
Separate boiler and pump for coffee making & cappuccino/steam - Can be plumbed in or filled manually
- Removable water tank (capacity 2 litres)
○ Empty water tank warning light
o Pump stop on pump operation
o LED high density illumination light
Standard accessories
- Filter holder
○ 1 x one espresso cup filter
○ 1 x two espresso cup filter
○ 1 x milk jug - 2 x espresso cups with saucers
- Water softener
Technical specifications
○ Coffee pump pressure 15 bar
○ Steam pump pressure 2.50 bar
○ Total output 1450 W
○ Coffee boiler output 800 W
○ Steam boiler output 650 W
- Power supply 230 Vac 50 Hz
o Supply connection 13 A (double pole switched fused outlet with 3 mm contact gap)
○ Mains supply lead 3 × 1.5mm^2
For future reference please record the following information which can be found on the Rating Plate and the date of purchase which can be found on your sales invoice. The rating plate for your coffee machine can be located by opening the small door on the left hand side of the appliance, which houses the water reservoir.
Model Number
Serial Number
Date of Purchase ....
Description of the coffee machine

1) Storage compartment
2) Water reservoir
3) Water reservoir door
4) Control panel
5) Filter holder ring nut
6) Steam pipe holder nut
7) Pressing tool
8) Removable panel
9) Filter
10) Drip tray
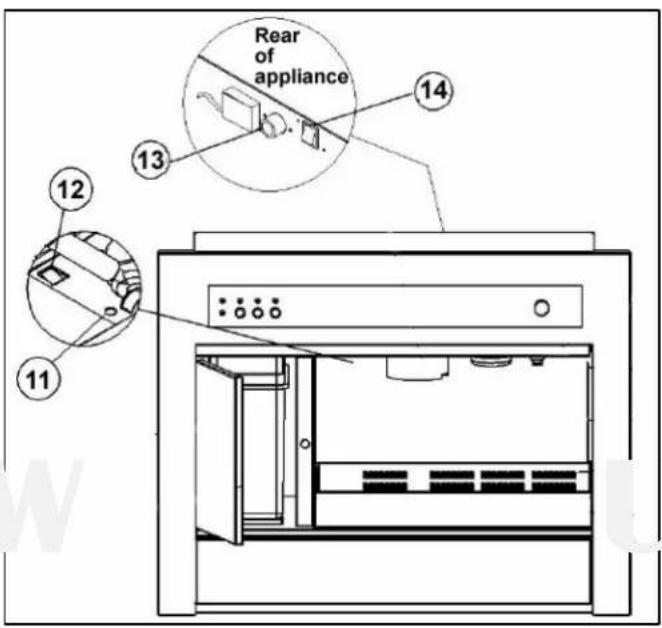
11) Operating light
12) ON/OFF switch
13) Inlet hose connection
14) Water filling switch
Standard accessories

15) Filter holder for coffee pods
16) Filter holder
17) Ground coffee adaptor
18) Steam pipe
19) Allen key for installation process
20) Water softener
21) 2 cup filter
22) 1 cup filter
23) Froth maker
Control panel

other
| Item | Value | |---|---| | 1 | 24 | | 2 | 28 | | 3 | 25 | | 4 | 26 | | 5 | 27 | | 6 | 29 | | 7 | 30 | | 8 | 31 | The gauge displays the total value 32, with the top circle containing the number 32 and the bottom circle containing the number 28. The icons above each circle correspond to specific items: pencil, washer, brush, tool, and triangle. No trend or correlation is present — this is a static comparison of discrete measurements.24) ON/OFF neon
25) Water boiler neon
26) Steam boiler neon
27) Steam dispensing neon
28) Water reservoir empty neon
29) Water boiler ON/OFF button
30) Steam boiler ON/OFF button
31) Steam dispensing ON/OFF button
32) Water flow control knob
Using your coffee machine
Before first use
○ Install the appliance as per the installation instructions contained within this booklet.
Filling the reservoir (manually)

IMPORTANT: If your coffee machine is not connected to your mains water supply, then you will need to fill the water reservoir manually before using your appliance.
- Push the water reservoir door (3) on the right hand side to open it.
- Remove the water reservoir (2) from the cabinet.
- Fill the water reservoir with cold water from a tap; you should fill it with water until it is two thirds full.

natural_image
Two-panel image showing hands inserting a plastic bag into a stainless steel appliance, with no visible text or symbols.- Connect the water softener (20) to the tube that hangs down inside the water reservoir compartment. IMPORTANT: You must connect the water softener to the left hand tube.
- Put the water reservoir back into the cabinet and immerse the water softener in water, the other tube must also be placed inside the reservoir.
○ IMPORTANT: Leave the water filter immersed in water for 5 minutes, before switching on the appliance and attempting to make a drink. You only need to do this before using the machine for the first time or if you have changed the water filter.
Filling the reservoir (automatically)

IMPORTANT: Make sure that your appliance has been connected to your mains water supply (see "Connecting the coffee machine to the mains water supply" section on page 30 of this booklet).
- Push the water reservoir door (3) on the right hand side to open it.
o Remove the water reservoir (2) from the cabinet.

natural_image
Two-panel image showing hands inserting a plastic bag into a stainless steel enclosure, with no visible text or symbols.- Connect the water softener (20) to the tube that hangs down inside the water reservoir compartment. IMPORTANT: You must connect the water softener to the left hand tube.
○ Switch the appliance on using the ON/OFF switch (12), the ON/OFF neon (24) will light. -
The red water reservoir empty neon (28) will flash to indicate that the water reservoir has no water in it.
○ After a few seconds the water reservoir will start to fill with water.
If the water reservoir empty neon (28) is still flashing after the appliance has stopped filling with water, you should switch the machine off using the ON/OFF switch (12). Then switch the machine back on to commence a further fill of the water reservoir.
When the water reservoir has filled sufficiently, the water reservoir empty neon (28) will go out. -
You should not touch any other button on the coffee machine until the water reservoir has finished filling.
- IMPORTANT: Leave the water softener immersed in water for 5 minutes before attempting to make a drink. You only need to do this the before using the machine for the first time or if you have changed the water filter.
Dispensing hot water
- Fill the water reservoir if your appliance is not connected to your mains water supply.
- Switch the machine on using the ON/OFF switch (12).
- Let the water reservoir fill with water automatically if it is connected to your mains water supply.
- The green water boiler neon (25) will start to flash, to indicate that the coffee boiler is heating up.
- The machine is ready to dispense water when the water boiler neon (25) stops flashing and remains lit.
- Place a cup underneath the filter holder ring nut (5) and then press the water boiler ON/OFF button.
It is possible to dispense water in two different ways:-
Manual dispensing- Press the water boiler ON/OFF button (29) for less than one second. After a few seconds the machine will start to dispense water. You should press the water boiler ON/OFF button again to stop it dispensing.
Automatic fixed time dispensing- Press and hold down the water boiler ON/OFF button (29) for longer than one second but less than four seconds. The machine will dispense water for a fixed length of time that you have programmed previously.

It is perfectly normal for there to be a noise and a small amount of water backfilling into the drip tray, after water has been dispensed.
Adjusting the water fixed time dispensing period
To set the period of time that the machine will automatically dispense water for, press and hold down the water boiler ON/OFF button (29) for longer than five seconds. You should continue to hold down the button, until you reach the period of time that you wish the water boiler to dispense for. You should then release it.
- The next time that you press and hold down the water boiler ON/OFF button (29) for longer than one second but less than four seconds, it will dispense for the period of time that you have set previously.
To change the length of time that you want the water boiler to automatically dispense for, you should repeat the above process.
Dispensing steam
- Connect the steam pipe (18) to the steam pipe holder nut (6) and place the other end of it into a cup.
- Fill the water reservoir if your appliance is not connected to your mains water supply.
- Switch the machine on using the ON/OFF switch (12).
- Let the water reservoir fill with water automatically if it is connected to your mains water supply.
- Press the steam boiler ON/OFF button (30).
- The steam boiler neon (26) will start to flash to indicate that the steam boiler is heating up.
- The machine is ready to dispense steam when the steam boiler neon (26) stops flashing and remains lit.
It is possible to dispense steam in two different ways:-
Manual dispensing- Press the steam dispensing ON/OFF button (31) for less than one second. After a few seconds the machine will start to dispense steam. You should press the steam dispensing ON/OFF button (31) again to stop it dispensing.
Automatic fixed time dispensing- Press and hold down the steam dispensing ON/OFF button (31) for longer than one second but less than four seconds. The machine will dispense coffee for the fixed length of time that you have programmed.

It is perfectly normal for there to be a noise and a small amount of water backfilling into the drip tray, after steam has been dispensed.
Adjusting the steam fixed time dispensing period
To set the period of time that the machine will automatically dispense for, press and hold down the steam dispensing ON/OFF button (31) for longer than five seconds. You should continue to hold down the button until you reach the period of time that you wish the steam boiler to dispense for. You should then release it.
- The next time that you press and hold down the steam dispensing ON/OFF button (31) for longer than one second but less than four seconds, it will dispense for the period of time that you have set previously.
To change the length of time that you want the steam boiler to automatically dispense for, you should repeat the above process.
The water tank
- If whilst dispensing water or steam the water tank empties, then all functions will stop automatically.
- If your coffee machine is connected to your mains water supply, then the water reservoir will refill automatically.
- You should wait until the red water reservoir empty neon (28) stops flashing, before trying to dispense water or steam again.
- See the "filling the reservoir (automatically)" section on pages 12 – 13 for more detailed information.
- If your coffee machine is not connected to your mains water supply, then you should open the water reservoir door (3) and fill the water reservoir from the tap.
- After filling the water reservoir, you should place it back inside the appliance. You should take care to make sure that the water softener sits back inside of the water reservoir and the other tube.
- See the "Filling the reservoir (manually)" section on page 12 for more detailed information.
Before trying to dispense water again, wait until the red water reservoir empty neon (28) stops flashing and the green water boiler neon (25) stops flashing and remains lit.
Before trying to dispense steam again, wait until the red water reservoir empty neon (28) stops flashing. Then press the steam boiler ON/OFF button (30). When the steam boiler neon (26) stops flashing and remains lit, press the steam dispensing ON/OFF button (31) to dispense steam.
Adjusting the flow of the water boiler
- It is possible to adjust the speed that water dispenses from the water boiler at.
To decrease the speed that water dispenses at, turn the water flow control knob (32) anti-clockwise towards the minus (-) symbol.
○ After decreasing the speed that water dispenses at, if you wish to increase it again. Turn the water flow control knob (32) clockwise, back towards the plus (+) symbol.
Making drinks
Connecting a filter holder


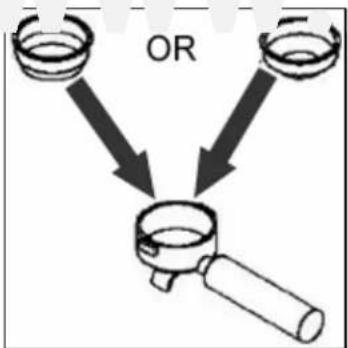
- Lift the appropriate holder towards the filter holder ring nut (5), making sure that it is in the position shown in the drawing above.
- Continue lifting the holder until it locates inside of the ring nut.
Turn the handle of the holder to the right, turning it fully so that the holder is securely fixed into the ring nut.
When you have finished using the holder, turn the handle to the left and then remove it from the filter holder ring nut.
Using coffee pods
○ Coffee pods are an easy, practical and hygienic way to make coffee. The packaging used in coffee pods, means that excess coffee cannot spill out and they can be easily removed after use.
○ IMPORTANT: For your coffee machine to function correctly, you MUST use coffee pods that are 44 ml Italian coffee pods.
- Ensure that the coffee pods are used prior to the sell by date as this will affect the performance of the coffee machine.

Insert one coffee pod into the filter holder (15) and place it into the filter holder ring nut (5).
- Place a suitably sized cup under the filter holder ring nut (5).
- Ensure the water flow control knob (32) is set to the maximum position, ie. 12 o'clock. This setting must be used when using coffee pods.
- Switch the appliance on using the ON/OFF switch (12), the ON/OFF neon (24) will light.
- Follow either the manual or automatic reservoir filling process.
- Check that the water boiler neon (25) is not flashing, if it is then the water boiler is not ready to dispense water.
- When the water boiler neon stays lit, press the water boiler ON/OFF button (29) to start dispensing coffee.
- Press the water boiler ON/OFF button (29) again to stop the coffee dispensing.
- Switch the appliance off using the ON/OFF switch (12).
- Take the filter holder (15) out of the filter holder ring nut (5).
- When the pod has cooled sufficiently, remove it from the filter holder (5).
- Wipe over the filter holder with a damp cloth to keep it in pristine condition.
- Remove the screw from the centre of the filter holder ring nut; clean the water filter thoroughly so that there are no traces of coffee left on it. Then refit the filter to the filter holder ring nut, making sure that the screw is securely tightened.
Using ground coffee
IMPORTANT: Make sure that the coffee maker is cool before attempting the following steps.

To use ground coffee, you must install an adapter so that the coffee machine will function correctly.
- Undo the screw and remove the coffee pod water filter.
- Place the ground coffee water filter inside of the filter holder ring nut. Retighten the screw through the centre of the ground coffee water filter.
- Place either the 1 cup filter (22) or 2 cup filter (21) inside of the filter holder (16) and then fill it with an appropriate amount of ground coffee.
- Use the pressing tool (7) to pack down the ground coffee in the filter holder and then connect it to the filter holder ring nut (5).
- Place a suitably sized cup under the filter holder ring nut (5).
- Switch the appliance on using the ON/OFF switch (12), the ON/OFF neon (24) will light.
- Follow either the manual or automatic reservoir filling process.
- Check that the water boiler neon (25) is not flashing, if it is then the water boiler is not ready to dispense water.
- When the water boiler neon stays lit, press the water boiler ON/OFF button (29) to start dispensing coffee.
- You can control how quickly the water dispenses by using the water flow control knob (32).
- If this control knob is turned towards the minus symbol, then the water will dispense more slowly and the coffee will taste stronger.
- If this control knob is turned towards the plus symbol, then the water will dispense more quickly and the coffee will taste weaker.
- Press the water boiler ON/OFF button (29) again to stop the water dispensing.
- Switch the appliance off using the ON/OFF switch (12).
- When the coffee machine has cooled sufficiently, take the filter holder (16) out of the filter holder ring nut (5).
- Wipe over the filter holder with a damp cloth to keep it in pristine condition.
- Remove the screw from the centre of the filter holder ring nut; clean the water filter thoroughly so that there are no traces of coffee left on it. Then refit the filter to the filter holder ring nut, making sure that the screw is securely tightened.
Tips on making an espresso
An espresso is a strong black coffee that is made by forcing under pressure hot water, through finely ground coffee beans.
○ Make sure that the filter holder for ground coffee (16) and the ground coffee water filter are completely clean.
- Approximately 7 grams of coffee are required for an espresso. After filling the filter holder with coffee, use the coffee pressing tool (7) to tap down the coffee in the filter holder.
Once the water boiler is ready to dispense, run a small amount of water through the machine to warm it up.
- You should dispense this hot water into your cup, to make sure that the cup is warm too.
- Wipe away any excess coffee from the rim of the filter holder before connecting it to the filter holder ring nut.
Tips on making a cappuccino
An espresso topped with steamed milk or cream.
There are two different ways to make a cappuccino with this appliance. After making a cup of espresso, you should follow one of these methods.
Method 1 (Using the steam pipe)
natural_image
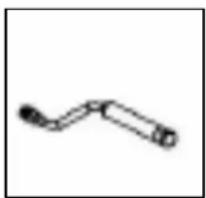
Simple line drawing of a bent pipe or tube with no text or symbols- Connect the steam pipe (18) to the steam pipe holder nut (6); making sure that it is securely attached.
- Immerse the spout of the steam pipe into a container of milk.
- Follow the "Dispensing steam" process on page 14.
- When steam starts to come out of the pipe, move the container of milk up and down slightly. You should do this until the milk is heated and makes the froth for the cappuccino.
- Every time the steam pipe is used, steam should be dispensed several times through the steam pipe and spout afterwards.
- Turn off the machine using the ON/OFF button (12).
- You can also use the steam pipe to heat up other beverages, such as water and punch etc.

A CLEANING PROCEDURE MUST BE CARRIED OUT EVERY TIME THE STEAM PIPE IS USED. SEE PAGE 24 FOR FURTHER DETAILS.
Method 2 (Using the froth maker)
natural_image
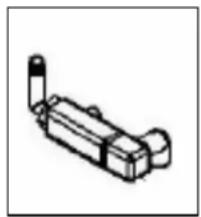
Simple line drawing of a mechanical component with no text or symbols- If the steam pipe (18) is connected to the steam pipe holder nut (6), then remove it.
- Connect the froth maker (23) to the steam pipe holder nut (6); making sure that it is securely attached.
- Immerse the plastic tube that runs off the froth maker into a container of milk.
- Follow the initial stages of the "Dispensing steam" process on page 14.
- When the steam boiler neon (27) stays on permanently, put the espresso under the dispensing spout and press the steam dispensing ON/OFF button (31).
- The milk will feed up the plastic tube, then after a period of time the froth will come out of the dispensing spout, making the cappuccino.
- Every time the froth maker is used, the plastic tube should be placed in clean water afterwards. You should then dispense clean water through the froth maker several times. This will prevent milk residue from blocking the dispensing spout.
- Turn off the machine using the ON/OFF button (12).

IMPORTANT- A CLEANING PROCEDURE MUST BE CARRIED OUT EVERY TIME THE FROTH MAKER IS USED. SEE PAGE 24 FOR FURTHER DETAILS.
Tips on making loose leaf tea
IMPORTANT: Make sure that the ground coffee water filter is fitted.
- Place either the 1 cup filter (22) or 2 cup filter (21) inside of the filter holder (16).
○ Insert loose tea leaves into the filter that you have loaded into the filter holder (16).
○ Use the pressing tool (7) to pack down the tea leaves in the filter holder and then connect it to the filter holder ring nut (5).
- Place a suitably sized cup under the filter holder ring nut (5).
○ Switch the appliance on using the ON/OFF switch (12), the ON/OFF neon (24) will light.
- Follow either the manual or automatic reservoir filling process.
- Check that the water boiler neon (25) is not flashing, if it is then the water boiler is not ready to dispense water.
- When the water boiler neon stays lit, press the water boiler ON/OFF button (29) to start dispensing water.
- You can control how quickly the water dispenses by using the water flow control knob (32).
- If this control knob is turned towards the minus symbol, then the water will dispense more slowly and the tea will taste stronger.
- If this control knob is turned towards the plus symbol, then the water will dispense more quickly and the tea will taste weaker.
- Press the water boiler ON/OFF button (29) again to stop the water dispensing.
○ Switch the appliance off using the ON/OFF switch (12).
When the coffee machine has cooled sufficiently, take the filter holder (16) out of the filter holder ring nut (5).
- Wipe over the filter holder and cup filter with a damp cloth to keep it in pristine condition.
- Remove the screw from the centre of the filter holder ring nut; clean the water filter thoroughly so that there are no traces of tea left on it. Then refit the filter to the filter holder ring nut, making sure that the screw is securely tightened.
Tips on making tea using steam
natural_image
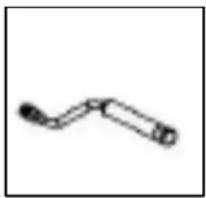
Simple line drawing of a bent pipe or tube with two ends (no text or symbols)- Connect the steam pipe (18) to the steam pipe holder nut (6); making sure that it is securely attached to the nut.
- Immerse the spout of the steam pipe into a cup of cold water.
- Follow the "Dispensing steam" process on page 14.
- Leave the steam pipe in position when steam starts to come out. You should leave the pipe in position until the water is boiling.
- Then place a tea bag into the cup of boiling water and leave it in the water until it reaches your desired strength.
- Turn off the machine using the ON/OFF button (12).
○ Make sure that the steam spout is cleaned thoroughly after use.
Cleaning and maintenance

Cleaning operations must only be carried out when the coffee maker is cool.
The appliance should be disconnected from your mains supply before commencing any cleaning process.
Stainless steel sections
- The stainless steel sections should be cleaned using warm soapy water. Dry the appliance afterwards thoroughly with a soft cloth.
- No abrasive detergents or cleaners should be used.
- No abrasive sponges or steel wool should be used on any area of the appliance.
Steam pipe
- You should flush the steam pipe through with steam after each use, see information on page 20.
- The steam pipe and spout must be cleaned each time that they are used. If left, milk residue may result in impurities which will block the steam discharge hole and cause the machine to function poorly.
natural_image
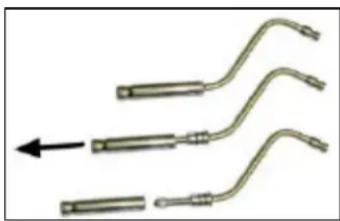
Three curved metallic tools with connectors, one with an arrow pointing to a specific tool (no text or symbols visible)○ Remove the steam pipe (18) from the steam pipe holder nut (6).
Separate the spout from the steam pipe, rinse both sections thoroughly in warm water and then wipe them
over using a cloth.
Froth maker
- Remove the froth maker (23) from the steam pipe holder nut (6).
- Rinse the froth maker and the tube that comes off it thoroughly in warm water and then wipe them over with a cloth.
Water reservoir
- If you are not going to use the appliance for a long period of time, you should drain the boiler by following the "Dispensing Water" section on page 13.
- Press the water boiler ON/OFF button (29) until the reservoir is empty.
- If your appliance is connected to your mains water supply, you should turn the machine off before it starts to refill the reservoir.
- Clean the water reservoir regularly using warm soapy water. Make sure that the water reservoir is rinsed thoroughly before being placed back in the machine.
The drip tray
o Pull forward the drip tray and then lift up the stainless steel cover.
- Wash the drip tray and cover in warm soapy water, using a cloth.
- Rinse the drip tray and cover in cold water and then dry them thoroughly.
Water boiler
- It is possible for limescale to form in the water boiler; therefore you should carry out the following process at least every six months.
- Manually fill the water reservoir with 2 litres of water, adding citric acid or half a glass of vinegar.
- Follow the "Dispensing water" section on page 13.
- When the water reservoir is empty, fill the reservoir with cold water (either manually or automatically) and then dispense water until the reservoir is empty again.
- You should do this twice to make sure that there is no trace of the citric acid or vinegar left in the water reservoir.
Water softener
- The water softener will need to be changed periodically, if you start to see white granules appearing in the softener, then you should replace it with a new one immediately.
- Only a Baumatic coffee machine water softener should be fitted, you can purchase one from the Baumatic Spares Department.
- When a new water softener is fitted, you should follow the "Filling the water reservoir" section on pages 11 - 13.
INSTALLATION

The installation must be carried out by a suitably qualified person, in accordance with the current version of the following.
- UK Regulations and Safety Standards or their European Norm Replacements.
○ Building Regulations (issued by the Department of the Environment).
○ Building Standards (issued by the Scottish Development Department).
○ IEE Wiring Regulations. - Electricity At Work Regulations.
Before connecting the appliance, make sure that the supply voltage marked on the Rating Plate corresponds with your mains supply voltage.
WARNING: THIS APPLIANCE MUST BE EARTHED.
- This appliance should be wired into a 13 A double pole switched fused spur outlet, having 3 mm contact separation and placed in an easily accessible position adjacent to the appliance. The spur outlet must still be accessible even when your coffee machine is located in its housing.

flowchart
graph LR
    A["MAINS"] --> B["LIVE"]
    A --> C["EARTH"]
    A --> D["NEUTRAL"]
    E["POWER"] --> F["BROWN"]
    E --> G["YELLOW/GREEN"]
    E --> H["BLUE"]
    I["SUPPLY"] --> J["POWER CORD"]
- If you have to change the coffee machine power cord, the earthing (yellow/green) conductor must always be 10 mm longer than the line conductors.
- Care must be taken to ensure that the temperature of the mains supply cable does not exceed 50°C.
- If the mains supply cable is damaged, then it must be replaced with a suitable cable.
Installing the coffee machine into the kitchen cabinet
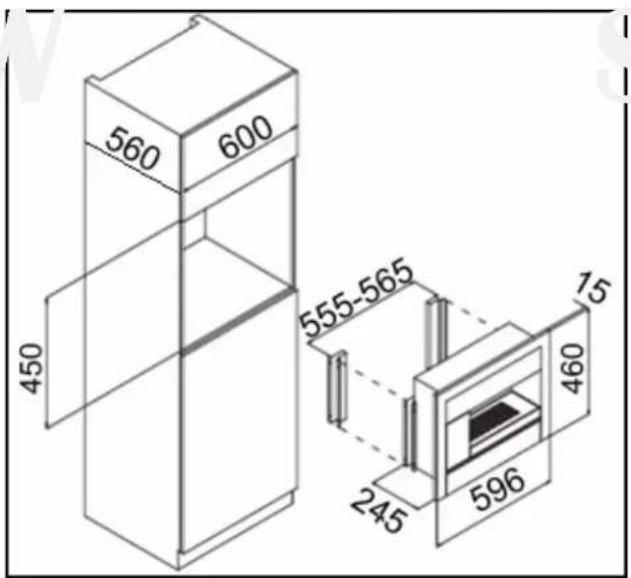
- Ensure that the aperture that you will be fitting the coffee machine into is of the size given in the above diagram.
- Ensure that the rear panel of the furniture housing unit has been removed.
- You must ensure that there is a hole to feed the electrical cable through. If you are going to connect the appliance to your mains water supply, then you must ensure that there is a hole to feed the inlet hose through too. These steps must be done before commencing the rest of the installation process.
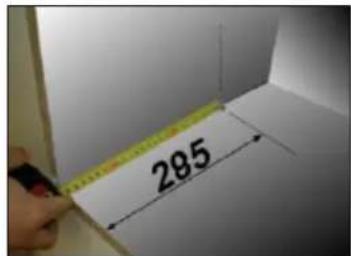
- On the base of the housing unit, measure out a distance of 285 ~mm from the front of it. You should mark this position on either side of the base and both sides of the housing unit.

natural_image
Hand holding a red object over a transparent cylindrical object, with partial 'WW' watermark visible (no readable text or symbols)- On the marks that you have just made, use the screws provided to fix a support piece to either side of the housing unit.

- Use a spirit level to make sure that the support pieces are vertically level.
natural_image
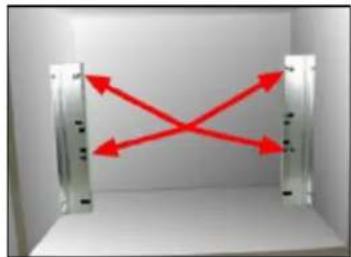
Diagram showing two vertical metal structures with red arrows pointing outward from each, enclosed in a transparent container (no text or symbols)- The housing unit should appear like it does in the picture opposite, when you have fixed both of the support pieces.
natural_image
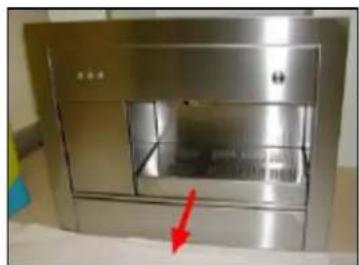
Exterior view of a stainless steel kitchen appliance with a red arrow pointing to a closed door (no visible text or symbols)- Slide the drip tray out of the coffee machine.
natural_image
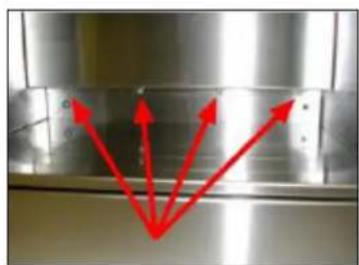
Close-up of a metallic panel with red arrows pointing outward, no visible text or symbols- The arrows in the picture opposite indicate the position of four screws that are located in the rear panel of the coffee machine.

natural_image
Close-up of a hand using a screwdriver to press or install a metallic component, with an arrow indicating upward motion (no text or symbols visible)- Unscrew the four screws in the rear panel of the coffee machine.
natural_image
Close-up of a hand pressing down on a metal surface with a curved arrow pointing downward (no text or symbols visible)-
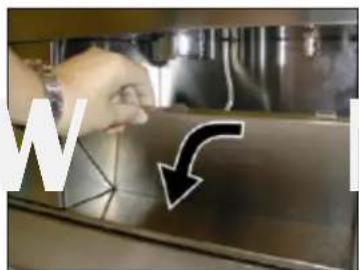
Drop down the backplate that was held in position by the four screws that you removed in step 7.
-
Sit the coffee machine in the housing unit. You must make sure that the coffee machine is flush with the housing unit, otherwise it will not line up properly with the support pieces.

IMPORTANT: You must complete the water connection at this stage, if you are going to connect the appliance to your mains water supply.
Do not proceed with the rest of the installation steps listed below, until you have completed the "Connecting the coffee machine to the mains water supply" section on page 30.
You should also feed the electrical cable through the hole that you have made for it in the housing unit. You should NOT connect the cable to the spur outlet at this stage.
natural_image
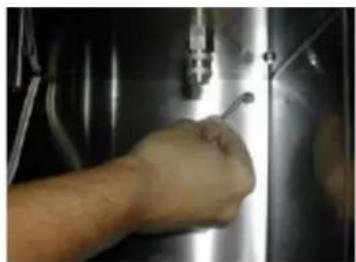
Close-up of a hand using a tool to adjust or install a metallic mechanical component (no visible text or symbols)- Locate the screw position in the top right hand corner of the rear panel.
natural_image
Close-up of a hand holding a metallic tool with an arrow indicating rotation (no text or symbols visible)-
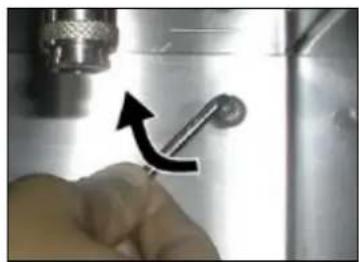
Using the Allen key provided, tighten a screw through the top right hand hole in the rear panel, into the support piece that is behind it.
-
Lift the backplate back into position and refit the screws that you removed in step 7.
- Use the Allen key to tighten a screw through the bottom right hand hole in the rear panel, into the support piece that is behind it.
- Open the reservoir door to locate the position of the left hand screw holes. Use the Allen key to tighten a screw through both of these holes, into the support piece that is behind them.
IMPORTANT: You must make sure that the four screws that go into the support pieces are fully tightened.
- Follow the electrical connection information on page 26 and then check that the appliance is functioning correctly.
Connecting the coffee machine to the mains water supply
Your coffee machine can be permanently connected to your mains water supply. IMPORTANT: Your coffee machine will not come supplied with an inlet hose; you should purchase a standard washing machine or dishwasher inlet hose from a D.I.Y. store.
natural_image
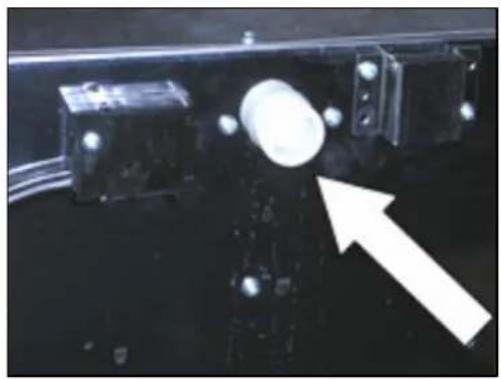
Close-up of a mechanical component with illuminated ports and a white arrow pointing to a specific part (no visible text or symbols)- Identify the inlet hose connection at the rear of the coffee machine. The position of the connection is indicated by the arrow in the picture opposite.

natural_image
Technical illustration of a mechanical connector with threaded shaft and connecting hose (no text or symbols)-
Connect the inlet hose to the inlet hose connection at the rear of the appliance. You should make sure this is securely tightened.
-
You must make sure that you depress the water filling switch to activate the water filling mechanism. The switch is to the right of the water inlet connection. The section of the switch with I on it, should be pressed down.
-
When you are lifting the coffee machine into the housing, you should feed the inlet hose through a hole that you have made in the housing cabinet.

natural_image
Technical line drawing of a mechanical component with two views: top shows a cylindrical assembly, bottom shows a flanged base (no text or symbols)-
Connect the other end of the inlet hose to your mains water supply. It must be connected to a tap than dispensed drinkable water. Tighten the inlet hose to your mains supply fully, but do not over tighten as this may distort the filter that sits in the end of the inlet hose.
-
Switch on the water tap and test for any leaks.

My coffee machine will not work at all.
- Check your mains supply and the electrical connection.

My coffee machine will not dispense water.
- Check that the water reservoir is filled with water.
-
If your appliance is connected to your mains water supply then check:-
-
That the water filing switch is pressed to the on position and your mains water tap is fully open.
- That the water inlet hose is not kinked or blocked.
- That the water softener and other tube is immersed in the water reservoir.

IMPORTANT: If your appliance appears not to be operating correctly, then you should disconnect it from your mains supply and then contact the Baumatic Service Department on telephone number (0118) 933 6911. DO NOT ATTEMPT TO REPAIR THE APPLIANCE YOURSELF.
Please note that if an engineer is asked to attend whilst the product is under guarantee and finds that the problem is not the result of an appliance fault, then you may be liable for the cost of the call out charge.
The appliance must be accessible for the engineer to perform any necessary repair. If your appliance is installed in such a way that an engineer is concerned that damage will be caused to the appliance or your kitchen, then he will not complete a repair.
This includes situations where appliances have been tiled in, sealed in with sealant, have wooden obstructions placed in front of the appliance, like plinths. Or any installation other than the one specified by Baumatic Ltd. has been completed.
Please refer to the conditions of guarantee document on page 32 of this instruction manual for clarification of this.
Baumatic Ltd. Conditions of guarantee
Dear Customer,
Your new Baumatic appliance comes complete with a free 12 month guarantee covering both parts and labour costs resulting from defective materials or workmanship.
Baumatic also gives you the opportunity to automatically extend the guarantee period for a further 12 months at no extra cost, giving an initial guarantee period of 24 months. The extended guarantee period applies to England, Scotland, Wales and Northern Ireland only.
To qualify for your full 24 months guarantee you must register your appliance within 28 days of purchase to be covered under this guarantee. This can be done online via: www.baumatic.co.uk or through returning the guarantee card which can be found in each new Baumatic appliance.
* In addition, your appliance is covered by a 5 year parts warranty. Baumatic Ltd will provide free of charge the parts required to repair the appliance, only if they are fitted by a Baumatic engineer, for any defect that arises due to faulty materials or workmanship within a period of 5 years from the original purchase date.
* An additional 1 to 3 year insurance scheme for labour is available should you wish to extend the warranty period.
Should any person other than an authorised representative of Baumatic Ltd interfere with the appliance, the policy is negated and Baumatic Ltd will be under no further liability.
The guarantee covers the appliance for normal domestic use only, unless otherwise stated.
Any claims made under the terms of the guarantee must be supported by the original invoice/bill of sale issued at the time of purchase.
This guarantee is transferable only with the written consent of Baumatic Ltd.
If the appliance fails and is considered either not repairable or uneconomical to repair between 12 months (2 years if registered) and five years, a free of charge replacement will not be offered.
The guarantee for any replacement will only be for the remainder of the guarantee on the original product purchased.
The guarantee does not cover:
- Sinks and taps
- Failure to comply with the manufacturers instructions for use.
- The replacement of cosmetic components of accessories
- Accidental damage or wilful abuse.
- Subsequent loss or damage owing to the failure of the appliance or electrical supply
- Incorrect installation
- Losses caused by Acts of God, civil war, failure to obtain spare parts, strikes or lockouts
- Filters, fuses, light bulbs, external hoses, damage to bodywork, paintwork, plastic items, covers, baskets, trays, shelves, burner bases, burner caps, decals, corrosion, rubber seals.
In the course of the work carried out it may be necessary to remove the appliance from it operating position. Whilst all reasonable care will be taken, Baumatic Ltd cannot accept responsibility for damage sustained to any property whatsoever in this process.
This guarantee is in addition to and does not diminish your statutory or legal rights.
Contacting Baumatic Ltd
Sales
Service
Spares
Technical/Advice
TEL: 0118 933 6900
TEL: 0118 933 6911
TEL: 0118 933 6922
0118 933 6933
FAX: 0118 931 0035
FAX: 0118 986 9124
FAX: 0118 933 6942
0118 933 6942
For ROI (Republic of Ireland), please contact one of the numbers below:
TEL: 01-6266798
FAX: 01 - 6266634
Thanks you for buying Baumatic.
* Applies to UK, Scotland, Wales & Northern Ireland only (Republic of Ireland has 1 year labour & 1 year parts warranty only)
Baumatic®
You will be mine ...
Headquarters
Baumatic Ltd.
Baumatic Buildings,
6 Bennet Road,
Reading,
Berkshire
RG2 0QX, United Kingdom
Sales Telephone
+44 118 933 6900
Sales Fax
+44 118 931 0035
Service Telephone
+44 118 933 6911
Service Fax
+44 118 986 9124
Spares Telephone
+44 118 933 6922
Technical / Advice Telephone
+44 118 933 6933
E-mail:
sales@baumatic.co.uk
technical@baumatic.co.uk
Http (Internet site):
www.baumatic.com
WWW.MANUALS.WS
WWW.MANUALS.WS
WWW.MANUALS.WS
WWW.MANUALS.WS
Baumatic
www.baumatic.com
- User Manual for your Baumatic
- BEC2.1
- Contents
- Environmental note
- The symbol
- General Information
- Warning and safety instructions
- Child Safety
- General Safety
- Cleaning
- Installation
- Specifications
- Product Dimensions
- Aperture Dimensions
- Product specifications
- Standard accessories
- Technical specifications
- Description of the coffee machine
- Control panel
- Using your coffee machine
- Before first use
- Filling the reservoir (manually)
- Filling the reservoir (automatically)
- Dispensing hot water
- Adjusting the water fixed time dispensing period
- Dispensing steam
- Adjusting the steam fixed time dispensing period
- The water tank
- Adjusting the flow of the water boiler
- Making drinks
- Connecting a filter holder
- Using coffee pods
- Using ground coffee
- Tips on making an espresso
- Tips on making a cappuccino
- Method 1 (Using the steam pipe)
- A CLEANING PROCEDURE MUST BE CARRIED OUT EVERY TIME THE STEAM PIPE IS USED. SEE PAGE 24 FOR FURTHER DETAILS.
- Method 2 (Using the froth maker)
- IMPORTANT- A CLEANING PROCEDURE MUST BE CARRIED OUT EVERY TIME THE FROTH MAKER IS USED. SEE PAGE 24 FOR FURTHER DETAILS.
- Tips on making loose leaf tea
- Tips on making tea using steam
- Cleaning and maintenance
- Stainless steel sections
- Steam pipe
- Froth maker
- Water reservoir
- The drip tray
- Water boiler
- Water softener
- The installation must be carried out by a suitably qualified person, in accordance with the current version of the following.
- WARNING: THIS APPLIANCE MUST BE EARTHED.
- Installing the coffee machine into the kitchen cabinet
- Do not proceed with the rest of the installation steps listed below, until you have completed the "Connecting the coffee machine to the mains water supply" section on page 30.
- Connecting the coffee machine to the mains water supply
- My coffee machine will not work at all.
- My coffee machine will not dispense water.
- Baumatic Ltd. Conditions of guarantee
- Contacting Baumatic Ltd
- Baumatic®
- Headquarters
- E-mail:
Brand : BAUMATIC
Model : BEC2.1SS
Category : Coffee maker