LBMULB13 - Oven Logik - Free user manual and instructions
Find the device manual for free LBMULB13 Logik in PDF.
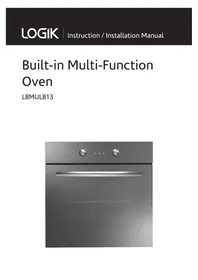


| Product Type | Freestanding Electric Oven |
| Brand | Logik |
| Model | LBMULB13 |
| Color | Stainless Steel |
| Dimensions (H x W x D) | 595 mm x 595 mm x 550 mm |
| Weight | 28 kg |
| Power Supply | 220-240 V ~ 50 Hz |
| Power Consumption | 2.0 kW (conventional), 2.5 kW (grill) |
| Energy Class | A |
| Oven Capacity | 65 liters |
| Number of Functions | 8 (including conventional, grill, fan oven, defrost, etc.) |
| Temperature Range | 50 °C to 250 °C |
| Control Type | Mechanical knobs with timer |
| Interior Light | Yes |
| Cleaning | Enamel interior, easy-clean door |
| Safety Features | Cool touch door, child lock, auto shut-off |
| Accessories Included | 1 wire shelf, 1 baking tray, 1 grill rack |
| Spare Parts Availability | Replaceable heating elements, door seals, knobs |
| Warranty | 2 years |
Frequently Asked Questions - LBMULB13 Logik
User questions about LBMULB13 Logik
0 question about this device. Answer the ones you know or ask your own.
Ask a new question about this device
Download the instructions for your Oven in PDF format for free! Find your manual LBMULB13 - Logik and take your electronic device back in hand. On this page are published all the documents necessary for the use of your device. LBMULB13 by Logik.
USER MANUAL LBMULB13 Logik
Built-in Multi-Function Oven
LBMULB13
Safety Warnings....4
Unpacking....7
Product Overview......8
Front View 8
Control Panel....8
Connecting to the Mains....9
Setting the Clock 9
First Time Use of the Oven 9
Using the Controls 10
Oven On and Off 10
Settings of the Function Control 11
Thermostat Control 12
Using the Grill 12
Use of Oven 13
Baking....13
Roasting Meat....13
Kitchen Timer 14
Automatic Standby Mode....14
Programming Your Duration Cooking Time 14
Programming Cooking Time 14
Full Automatic Programming....15
Resetting The Timer....15
Questions and Answers....16
Cleaning and Maintenance....16
Oven 16
Replacement of the Oven Lamp 17
Door Removal 17
Specifications....19
Installation....19
Electrical Connection 21
Fitting Guidelines 21
Locate The Terminal Box 21
Prise Off The Box Cover 21
Layout of The Terminal Box....21
Wiring Instructions....22
Installation
- The appliance must be installed by a competent person or a qualified electrician in compliance with the instructions provided. Incorrect installation may cause harm to persons, animals or may damage property.
- Before using the appliance, ensure that all packing materials are removed from the appliance.
- In order to avoid any potential hazard, the enclosed installation instructions must be followed.
- Ensure that all specified vents, openings and air spaces are not blocked.
• The panels adjacent to the oven must be made of heat-resistant material.
- Cabinets with a veneer exterior must be suitable for use with Built-in Ovens. If the built-in appliance is installed in a cabinet with a cabinet door, the cabinet door must be kept open while the appliance is in use.
- Keep combustible materials, such as: curtains, drapes, furniture, pillows, clothing, linens, bedding, paper, etc., at least 3 feet (0.9 meters) from the front sides and rear of the oven. Do not use this unit in areas where gasoline, paint or other flammable liquids or their associated vapours may be present.
- To reduce the risk of fire, do not place or install this unit in areas where the ventilation or circulation ducts may become blocked.
- The unit's mains power cable must be connected to a properly earthed and protected, 220-240V electrical outlet. Always use ground fault protection where required by the electrical regulations. To reduce the risk of fire, avoid running the mains cable under rugs, carpets, etc. Keep the mains cable away from high traffic areas where it may pose a tripping hazard.
- Do not use an extension cable, which may overheat and cause a fire.
- When transporting or storing the unit, keep it in a dry location, free from dust, excessive vibration or other factors, which may damage the unit.
- Do not operate any oven with a damaged mains cable or plug or after the heater malfunctions, has been dropped or damaged in any manner. Return the oven to an authorized service facility.
- Only authorized personnel should carry out servicing. (Certificate of Compliance to be retained)
• This appliance must be earthed.
• To maintain safe operation, it is recommended that the product be inspected every five years by a qualified technician.
General Warnings
- If the mains power cable is damaged, it must be replaced by a qualified electrician, manufacturer's service agent or similarly qualified persons in order to avoid a hazard.
- This product has not been designed for any uses other than those specified in this booklet.
• This appliance must not be used as a space heater.
- In order to avoid fire, the appliance must be kept clean and the vents unobstructed.
- Do not spray aerosols within the vicinity of the appliance during operation.
- Do not store flammable materials in or under the appliance, e.g. aerosols.
- Do not line the bottom of the oven with foil or cookware.
- Always use oven gloves when handling hot items inside the oven.
- Always turn the grill off immediately after use as fat left behind may catch fire.
- Do not leave the oven unattended when grilling. Oils and fats may catch fire due to overheating.
- Do not rest cookware, lean, or stand on the opened oven door.
- Do not use the oven in the event of a technical fault. Any faults must be repaired by an appropriately qualified and authorized person.
- In the event of any incident caused by a technical fault, disconnect the mains power and report the fault to a service centre to be repaired.
- The rules and provisions contained in this instruction manual should be strictly observed.
- Do not allow anybody who is not familiar with the contents of this instruction manual to operate the cooker.
- This appliance can be used by children aged 8 years and above and persons with reduced physical, sensory or mental capabilities, or lack of experience and knowledge if they have been given supervision or instruction concerning the use of the appliance in a safe way and understand the hazards involved. Children shall not play with the appliance. Cleaning and user maintenance shall not be made by children without supervision.
- Keep the iron and its cord out of reach of children less than 8 years of age when it is energized or cooling down.
- Children should be supervised to ensure that they do not play with the appliance.
- During use this appliance becomes hot. Care should be taken to avoid touching hot surfaces, e.g. oven door, heating elements. Keep children away.
- Accessible parts will also become hot when in use. Keep children away.
- To avoid burns and scalds children should be kept away. - Take care when handling parts with glass, knocks, chips, heavy handling and dropping could cause the glass to shatter. - The glass oven door uses toughened glass and is designed to break into many 'nugget' size pieces if it breaks. These pieces will still have sharp edges, please handle broken glass with care.
Oven
- During use the appliance becomes hot. Care should be taken to avoid touching the hot surfaces inside the oven. Keep children away.
- Switch the appliance off before removing the oven lamp protective cover for lamp replacement.
- To avoid an accident, ensure that oven shelves and fittings are always inserted into the appliance in accordance with the instructions. • Do not use the door as a shelf.
- Do not push down on the open oven door.
- Accessible parts may become hot during use. Keep children away.
- Do not use harsh abrasive cleaners or sharp metal scrapers to clean the oven door glass since they can scratch the surface, which may result in shattering of the glass.
- The glass oven door uses toughened glass and is designed to shatter into many ‘nugget’ sized pieces if it breaks. These pieces will have sharp edges, please handle broken glass with care.
Grill
- Do not cover the grill insert with foil, as fat left there may catch fire. • Always keep the tray clean as any fat there may catch fire. • Do not leave the grill on unattended.
- To avoid fire, ensure that grill pans and fittings are always inserted into the appliance in accordance with the instructions.
- Do not place thick portions of food on a grill that is using the top shelf position. Foods may curl, catch and ignite.
- Accessible parts may become hot when the grill is in use. Keep children away.
Remove all packaging from the unit. Retain the packaging. If you dispose of it please do so according to local regulations.
The following items are included:
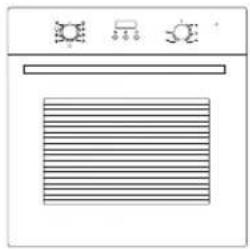
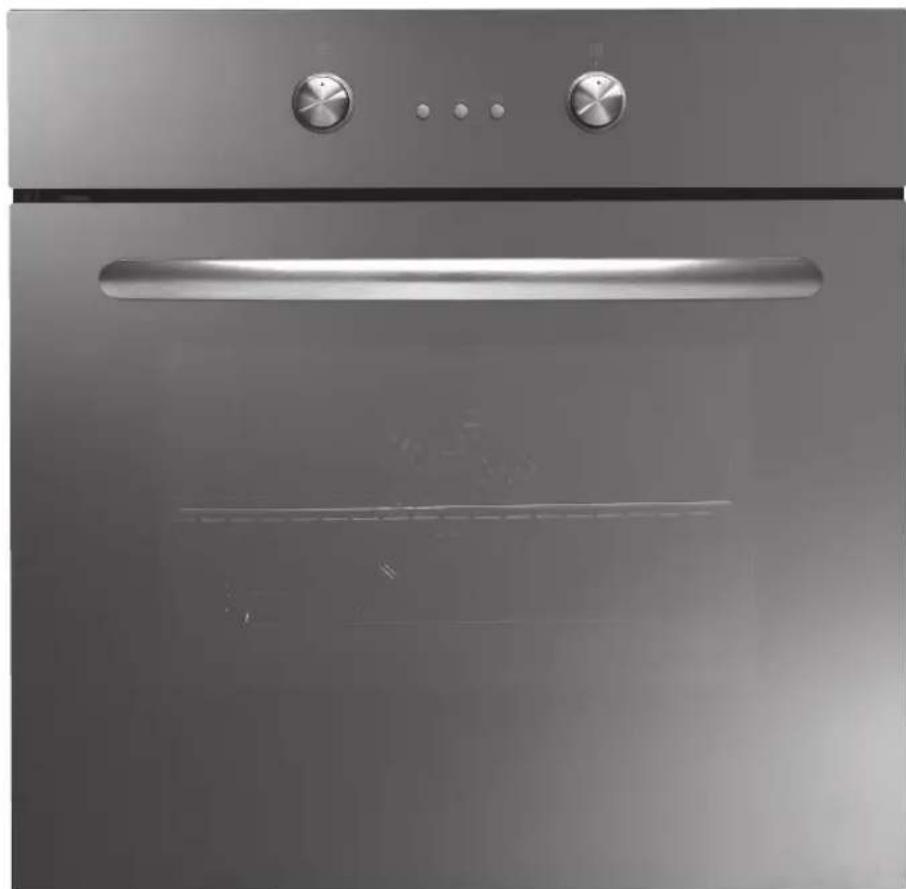
The Main Unit
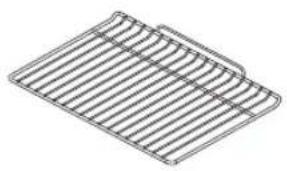
Grill/Oven Rack x 2
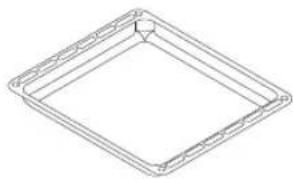
Baking Tray x 1
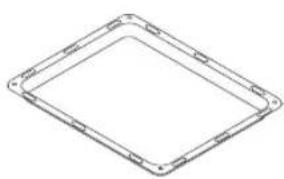
Grill Tray x 1
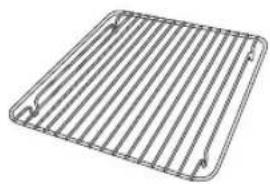
Grill Rack x 1
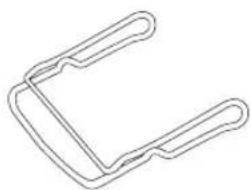
Grill Handle x 1
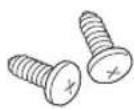
Fixing Screw hole, Cover Caps x 2 Fixing Screws x 2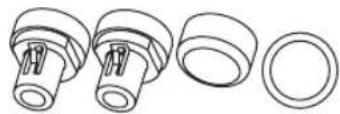

If items are missing, or damaged please contact Partmaster (UK only). Tel: 0844 800 3456 for assistance.
* All images are for indication only; please refer to your individual unit for actual item.
Front View
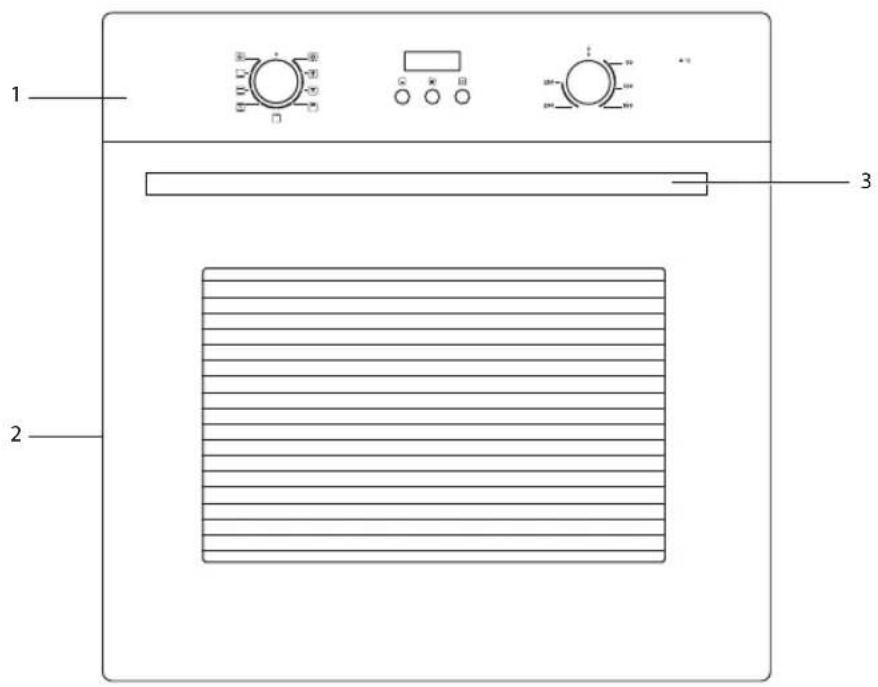
- Control Panel
- Oven Door Handle
- Oven Door
Control Panel
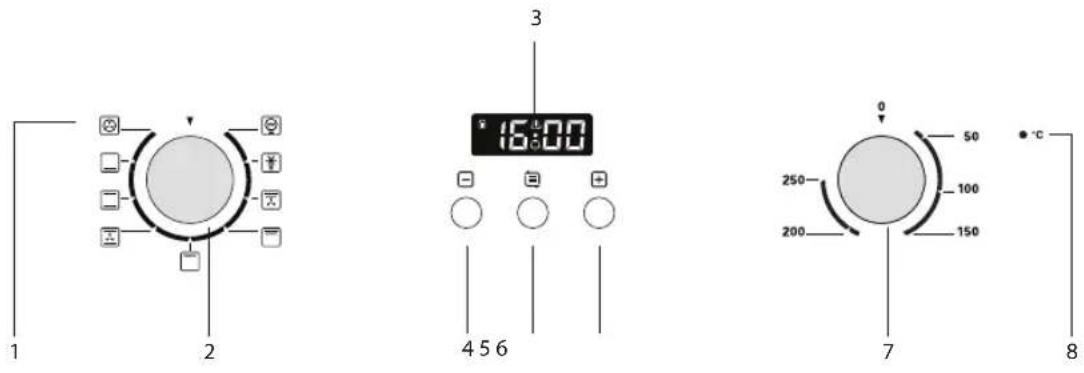
- Function Indicator
- Function Control Knob
- Display Panel
- Decrease Button
- Mode Button
- Increase Button
- Thermostat Control Knob
- Thermostat Indicator

Connecting to the Mains
When you first connect the oven to the mains supply, the unit will be in Standby Mode. In Standby Mode, the clock will blink but the oven cannot be used. Function symbols will also not be lit and dials will be inactive.

Setting the Clock
The time must be set before you can use the oven:
- On first connection to the mains supply, or just after reconnection from a power cut, the LED clock's hour digits will flash.
- Press the + / - buttons to set the hour. Press the MODE button to start the minutes digits flashing. Use the + / - buttons to set the minutes. Press the MODE button to confirm.
- If the display does not flash, adjust the time by pressing the + / - buttons at the same time for 3 seconds or more.
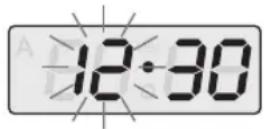

- This is a 24-hour clock. When the oven is connected to the mains for the first time or when power is resumed after a power interruption, the LED display will show "12:30". Re-set the clock by following Steps (2) and (3) above.

First Time Use of the Oven
- Unpack the oven. Remove any insert cards or plastic bags and all accessories. Use a damp cloth to carefully wipe the interior and exterior of the oven. Clean all the detachable parts in hot, soapy water before using.
- To set the clock or otherwise operate the oven, press and hold the MODE button for 3 seconds or more. This puts the oven in manual mode, giving you control of your oven.
- Turn the MODE dial to the Convection Oven mode. Set the temperature dial to 200°C.
- Heat the oven on maximum for 45 minutes (ensure the clock has been set). There may be a little smoke and odour upon initial start up (for about 15 minutes). This is normal. It is due to the protective substance on the heating elements which protects them from the effects of corrosion during shipping from the factory.
- To return to Standby mode, press the MODE and + buttons for 3 seconds or more.

Using the Controls
The oven can be warmed up using the bottom and top heaters, as well as the grill. Operation of the oven is controlled by the oven Function Control knob and the temperature regulator Thermostat Control knob as well.
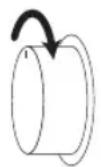
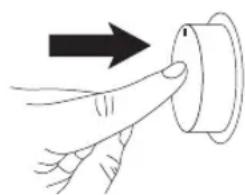
Press the Function Control and Temperature Control knobs to pop them out. Turn the knobs to select the function and/or temperature.
To stop the oven, turn both knobs to "0".

The oven has a cooling fan that will operate automatically to keep the door's glass cool.
![graph TD A["Input"] --> B((Process)) B --> C["Output"] C --> D["Feedback to Process"] D --> E["Output"] style A fill:#f9f,stroke:#333 style E fill:#bbf,stroke:#333](/content/2026/05/968455/images/8243bf55660622661d3c8627e9f1678b5c4f8620408bb0d6ecded3d0db3631b6.jpg)
Function Control Thermostat Control

Oven On and Off
In order to switch on the oven, ensure you have selected Manual mode by pressing the MODE button for 3 seconds or more. The ⬕ will illuminate on the display and you will be able to use the oven.
- Set the required cooking mode by turning the Function Control knob.
- Set the required temperature by turning the Thermostat Control knob. Both the function indicator and thermostat indicator will light up, and 🎩icon (always lit when the appliance is connected to the power supply) will be displayed on the screen. The oven will begin warming up.
- After cooking, turn the Thermostat Control knob and the Function Control knob to the "0" position. The thermostat indicator will turn off.
- Press the MODE and + buttons for 3 seconds or more to return to Standby mode (oven controls do not work and ### is no longer illuminated on the LED display).
This control is used to select the available cooking functions, which are:
| Symbol Function Description | |
| Oven LightSwitches on the top fan and the internal light. (During cooking the interior light will automatically turn on.) | |
| DefrostSwitches on the oven fan and light.Assists in defrosting food. | |
| ConvectionSwitches on the oven's thermostat, indicator lights, ring element and fan.Allows even distribution of heat inside the oven, making it possible to cook several foods at the same time. | |
| Bottom HeatingSwitches on the oven's thermostat, indicator lights, fan and the lower and upper heating elements.Oven conventionally heated. | |
| Upper & Lower Heating FunctionSwitches on the oven's thermostat, indicator lights, fan and lower and upper heating elements.Used for baking pastries. | |
| Convection OvenSwitches on the oven's thermostat, indicator lights, and both upper and lower heating elements.Used for baking, e.g., pizza. | |
| GrillSwitches on the oven's thermostat, indicator lights and the grill element. | |
| Double GrillSwitches on the upper outer and inner (ring) heating elements.Used for fast grilling, and for covering a larger surface area, e.g., meat dishes. | |
| Double Grill with FanSwitches on the fan and the upper outer and inner (ring) heating elements.Used for cooking spit roasted chicken and various roasts. | |
![graph TD A["User Input"] --> B((Node)) B --> C["Process Step"] C --> D["Output"] style A fill:#f9f,stroke:#333 style B fill:#ccf,stroke:#333 style C fill:#cfc,stroke:#333 style D fill:#fcc,stroke:#333](/content/2026/05/968455/images/b3dc2159ed1ce4ef50f7eb8a89c9c194028e3806c30dae97bafd8e75c7304e41.jpg)
Function Control

Thermostat Control
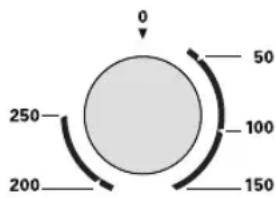
The temperature can be set from 50° C - 250° C. Select the desired temperature as needed. The table below contains suggestions only:
| To keep food warm and slow cook 50 - 100°C position | |
| For traditional oven cooking 50 - 250°C position | |
| For all types of grilling 190°C position | |
When the temperature LED lights up, the oven is heating up.
When the temperature LED goes out, the oven is at the correct temperature.
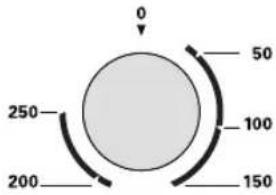
Thermostat Control

Using the Grill
In order to switch on the grill you need to:
- Set the Function Control knob to one of the following positions: Grill, Double Grill, Double Grill with Fan.
- Set the Thermostat Control to the desired temperature. Heat the oven for approximately 10 minutes (with the oven door shut).
- Move the wire shelf to the desired shelf position. Insert the grill pan with food onto the shelf, and if you are grilling on the wire shelf insert a tray to collect any drips on the level immediately below (under the shelf).
- Close the oven door.

Do not use the top shelf to grill, it is too hot and your food will overcook! The grill should be used with the oven door shut. Always place a tray beneath to catch any drips of oil or fat. Always turn the grill off immediately after use as fat left behind may catch fire. Bread may catch fire if the toasting time is too long. Close supervision is necessary during toasting. During use, this appliance becomes hot. Care should be taken to avoid touching hot surfaces, e.g., oven door, heating elements. Accessible parts may become hot when in use. Children should be kept away. Do not leave the handle in position when grilling. If the handle is left in position when grilling, it will get very hot.
The grill pan has a detachable handle. Ensure when using the grill pan handle that it is centralised and secured as shown below.
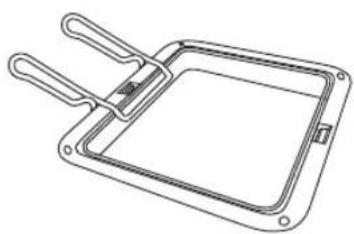
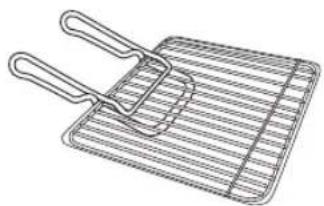
All images are for indication only; please refer to your individual unit for actual item.
To save energy and to help protect the environment, we recommend these hints:
Use the oven efficiently, by cooking multiple trays of food at the same time. Select the correct shelf location for the food being cooked. Do not open the oven door more than necessary. After the oven is turned off it retains heat for some time. Use this heat to finish custards or to dry bread.
Baking
We recommend using the baking tray provided with your cooker. It is also possible to bake in cake tins and trays bought elsewhere which should be put on the wire shelf; when baking it is better to use black trays which conduct heat better and shorten the baking time; Cooking containers with bright or shiny surfaces are not recommended when using the conventional heating method (top and bottom heaters), use of such tins can result in undercooking the cakes; Before the cake is taken out of the oven, check if it is ready using a skewer (if the cake is ready the skewer should come out dry and clean after being inserted into the cake);

When baking, follow the recipe. If it is required the oven is pre-heated, the oven has reached the recipe's recommended temperature when the thermostat indicator light goes out.
Roasting Meat
- Use heatproof ovenware for roasting with handles that are also resistant to high temperatures;
- When roasting on a shelf, we recommend that you place a baking tray with a small amount of water on the lowest level of the oven;
- It is advisable to turn the meat over at least once during the roasting time, and you should baste the meat with its juices. Do not pour cold water over the meat.

Kitchen Timer
While the oven is not in use and in Manual mode, this feature allows you to use the oven as a timer.
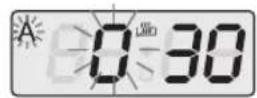
- Press the MODE button. The timer indicator "☐" will flash, and "0.30" will show on the display.
- Press the + / - buttons to set the hour.
- Press the ☐ to confirm the hour and select the minutes.
- Press + / - buttons to set the minutes.
- Press the MODE to confirm.
- After the timer is set, the " 🔔" will light up solidly. (You can check the alarm time by pressing 🔑.)
- When time is up, the oven will beep and " 🔒" will flash. Press any button to turn off the alarm.
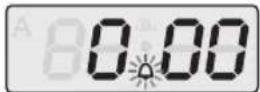

• The timer range is 0:00 – 23:59. - The kitchen timer is used only as an alarm. This function WILL NOT affect the oven.

Automatic Standby Mode
This oven features a power-saving and safety feature:
The unit will automatically switch to Standby Mode 10 hours after Manual Mode has been selected. This ensures the oven is not left on accidentally.
The safety feature will not interrupt the Full Automatic Programming function.
- Five (5) hours after activating Manual Mode, the clock will flash once a second to warn you the unit will enter Standby Mode.
- After a total of 10 hours, the unit will enter Standby Mode.
- Press any key to reset the timer, if you intend to continue using the oven.
- Or, press ☑ and "+" together for 3 secs or more to enter Standby Mode if the oven will not be used.

Programming Your Duration Cooking Time
Programming Cooking Time
You can use this function to set the cooking time. Ensure the oven is in manual mode.
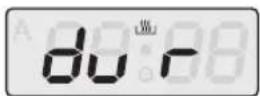
- Press MODE twice to display "dur".
- Press the + / - buttons to set the cooking time. The "A" symbol will flash on the LED display.
- Press MODE to confirm.
- Turn the Function Control knob to the desired cooking mode.
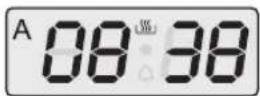
- Set to the required temperature by turning the Thermostat Control knob clockwise. Both the function indicator and thermostat indicator will light up, the symbol "A" and 🎨 icon will be displayed on the screen. The oven will then start to operate.
- Once the cooking time is reached, the oven will sound and stop cooking. The symbol "A" will begin to flash on the screen. Press any button to stop the beeping. The oven is now in Standby mode.
- After cooking, turn the Thermostat Control knob and the Function Control knob to the "0" position. Press MODE for 3 seconds or more to set the oven to Manual mode again to use the oven. * All images are for indication only; please refer to your individual unit for actual item.
Full Automatic Programming
You can use this function to time your cooking to end at a certain time. This allows you to programme a cooking duration time and an end time. The oven will calculate and switch on automatically when required. Ensure the oven is in manual mode.
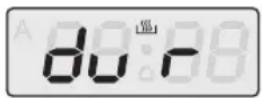
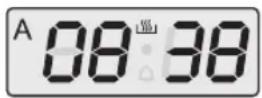
- Press the MODE button until "dur" displays.
- Press the + / - buttons to adjust the cooking time. Symbol "A" begins to flash on the screen.

The cooking duration time can be set between the time range of 0 and 10 hours.
- Set the required cooking mode by turning the Function Control knob.
- Set to the required temperature by turning the Thermostat Control knob.

The cooking end time can be set up to 23.59 hours after the time obtained or adding the cooking period to the day's time.
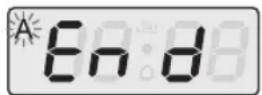
- Press the MODE button until "END" is displayed.
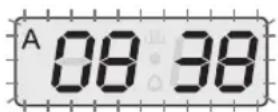
- Press the + / - buttons to set the cooking end time. The symbol "A" and the day's time will begin to flash on the screen. Press Mode to confirm.
- Once the cooking time is reached, the oven will sound and stop cooking. The symbol "A" will flash on the screen.
- After cooking, turn the Thermostat Control knob and the Function Control knob to the "0" position. Press any button to stop the sound.
- To operate the appliance again, press MODE for 3 seconds. This will reactivate the appliance after Automatic Mode has finished.
Example:
Cooking a casserole for when you want to eat:
- Assume the casserole will take 2 hours to cook and must be ready by 19:00 (7:00pm).
- Press the MODE button until "dur" displays. Press the + / - buttons to adjust the cooking time, e.g., 2:00 (2 hours). Symbol "A" will flash on the screen. (Step 1 and Step 2 above).
- Set your End Time:
a) Set the required cooking mode by turning the Function Control knob. b) Set to the required temperature by turning the Thermostat Control knob. c) Press the MODE button until "END" is displayed. The symbol "A" and the day's time will flash on the screen. d) Press the + / - buttons to set the cooking end time, e.g., 19:00 (7:00pm). Press Mode to confirm.
- The oven will begin cooking your casserole 2 hours before you want it to be ready, i.e., the oven will begin cooking at 17:00 (5:00pm) so your casserole will be ready by 19:00 (7:00pm) – 2 hours after cooking has started.
Resetting The Timer
Resetting the timer will put the unit in Standby mode. Press Mode for 3 seconds or more to enter manual mode.
- Press MODE and + together.
- Hold for 2 - 3 seconds.
- Release the buttons.
* All images are for indication only; please refer to your individual unit for actual item.
In the event of unexpected operation, you should:
- Switch off the oven and, if possible, disconnect it from the mains supply. Make sure all control knobs are set to the "0" position. Call the customer support centre.
- Some minor faults can be fixed by referring to the instructions given in the table below. Before calling the customer support centre, check the following points.
| Issue Reason Action | ||
| The appliance does not work. • | Break in power supply• Manual mode is not selected | • Check the household fuse box, if there is a blown fuse replace it with a new one.• Select manual mode |
| The oven lighting does not work. | The bulb is loose or damaged | Tighten up or replace the bulb. (See replacement of the oven lamp) |
| Appliance is on, but not responding. | Accidentally pressedMODEto turn off an oven function. | Disconnect and reconnect the power supply. |
| Appliance continues beeping for more than 1 minute. | Appliance is caught in a loop. | Disconnect and reconnect the power supply. |

Cleaning and Maintenance
By ensuring proper cleaning and maintenance of your cooker, you can have a significant influence on the continuing fault-free operation of your appliance.
Before you start cleaning, the cooker must be switched off and isolated from the mains supply, and you should ensure that all controls are set to the "0" position. Do not start cleaning until the cooker has completely cooled.
- It is advisable to use a solution of hot water with a little washing-up liquid or cleaning products suitable for cleaning stainless steel sinks. Steam cleaners must never be used.
- Do not use abrasive pads to clean any part of the oven. If using commercially available oven cleaners, ensure they are suitable for the type of oven and follow the manufacturer's instructions.
- When cleaning the fan guard, the oven must be switched off.

Take care when handling parts with glass; knocks and chips, heavy handling, and dropping could cause the glass to shatter.

Oven
The oven should be cleaned after every use. The oven chamber should only be washed with hot water and a small amount of washing-up liquid. After cleaning the oven chamber, wipe it down and leave the oven door open to allow the interior to completely dry. Wait for the oven to be completely dry before restoring power.

Do not use harsh abrasive cleaners or sharp metal scrapers to clean the oven door glass, since they can scratch the surface, which may result in the glass shattering.

Replacement of the Oven Lamp

Ensure that the oven is switched off from the mains socket before replacing the lamp to avoid the possibility of electric shock.
Set all control knobs to the "0" position.
- Allow the oven to completely cool down.
- Turn the lamp cover anti-clockwise to unscrew.
- Turn the lamp anti-clockwise to unscrew the lamp from the socket. Replace the lamp with a new one that is a high temperature lamp (300°C) with the following parameters:
- Voltage: 240V
- Power: 25W
- Thread: E14
- Screw the lamp in, making sure it is properly inserted.
- Screw in the lamp cover.

Door Removal

- Ensure the oven door is completely cool before removing.
- Take care when handling glass.
It is possible to remove the door. Follow the steps below to remove the door. This may be required if easier access to the cavity is needed or if you wish to clean the door parts.
- Open the door completely.
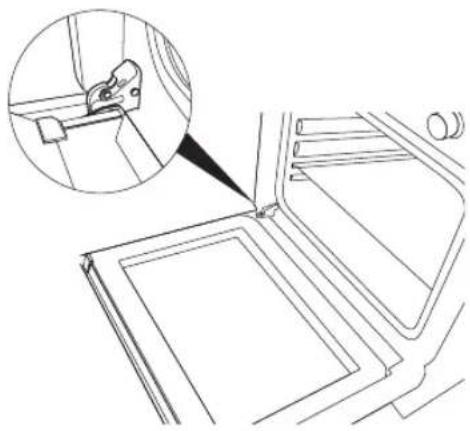
- The swivel retainers of the right hand and left hand hinges are hooked onto the metal bar above them. Lift the retainers as shown.
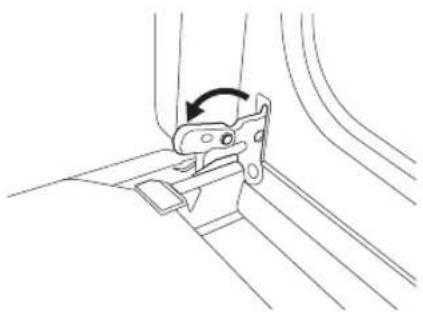
* All images are for indication only; please refer to your individual unit for actual item.
- Slightly close the door and lift. The notch on the bottom of the hinge will disengage.
- Now pull the door forward off the oven. Releasing both hinge sections from the slots.
To replace the door, repeat the above steps in reverse order. Ensure to locate the hinge correctly, place the groove of the hinge directly on the edge of the door frame. Push forward the swivel retainers to the original position and gently close the door. If the door does not close properly, repeat the steps again.
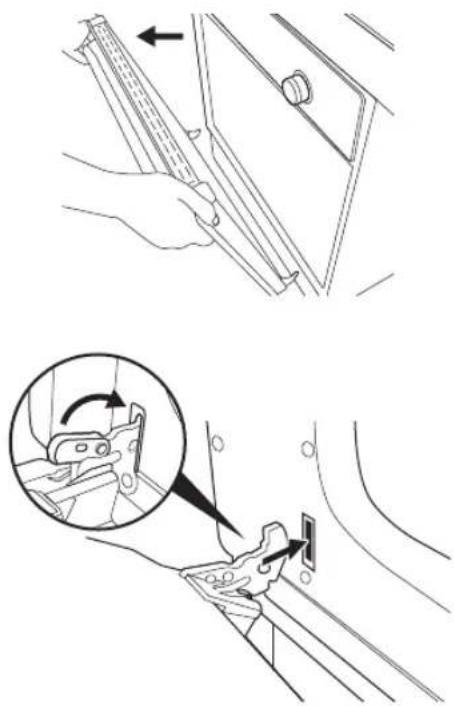
* All images are for indication only; please refer to your individual unit for actual item.
| Model LBMULB13 | |
| Voltage Rating 220 - 240V | |
| Power Rating 3000W (MAX) | |
| Cooker Dimensions H/W/D 59.5 (H) x 59.5 (W) x 57.5 (D) cm | |
| Usable Capacity of the Oven 65 L | |
| Energy Efficiency Class A | |
| Energy Consumption | Forced Air : 0.99kwhConvectional : 0.99kwh |
| Time For Heating The Standard Load | Forced Air : 46 minConvectional : 47min |
| Surface Area 3540cm | 2 |
| Noise Level 58db(A) | |
| Standby Power 0.71W | |
Features and specifications are subject to change without prior notice.

Installation

- The electrical connection of this oven should be carried out by a qualified electrician following the instructions in the installation section of this manual and in compliance with the current regulations. • The oven is intended for household use only.
• This oven must be installed in compliance with local regulations. - Wiring connections must be in accordance with Local Wiring Rules and any particular conditions of the local authority. - Refer to the data plate for rating information. The data plate is positioned behind the bottom of the oven door. The wiring diagram is positioned on the rear panel of the appliance. - A means of disconnection with a contact separation of at least 3mm must be supplied in the fixed wiring. • This appliance must be properly earthed. - Do not lift the appliance by the door handles. • Prepare the cupboard opening to match your appliance measurements. (See diagrams) - Slide appliance into the cupboard, ensuring that the mains cable (where fitted) does not kink. • To prevent tipping, secure your oven into the cupboard by fastening with the 4 screws supplied. - Ensure the cabinet is rated at a temperature suitable for built-in ovens. We cannot accept responsibility for damage caused by installation into low temperature tolerant cabinets. • After installation, test and ensure that the appliance operates correctly.

To avoid any potential hazard, you must follow these instructions when you install your appliance.
The mains connection for this product must have an all pole disconnection provided in the fixed wiring in accordance with the local wiring regulations.

To avoid any potential hazard, you must follow these instructions when you install your appliance.
- The kitchen area should be dry and equipped with sufficient ventilation.
- When installing the oven, easy access to all control elements should be ensured.
- This is a built-in oven. Coating or veneer used on fitted furniture must be applied with a heat-resistant adhesive (100°C). This prevents surface deformation or detachment of the coating.
- Ensure that the cabinet is designed to be used with built-in ovens.
- Ensure you have the dimensions given in the diagram for the oven to be fitted. You can use either cabinet 1 or cabinet 2 cut-out sizes.
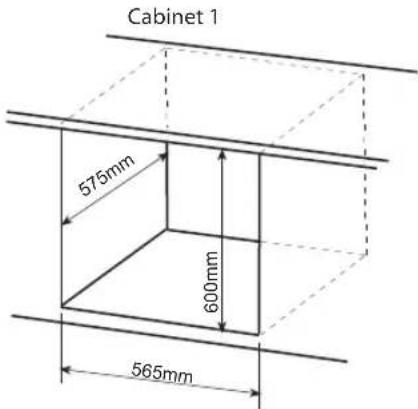
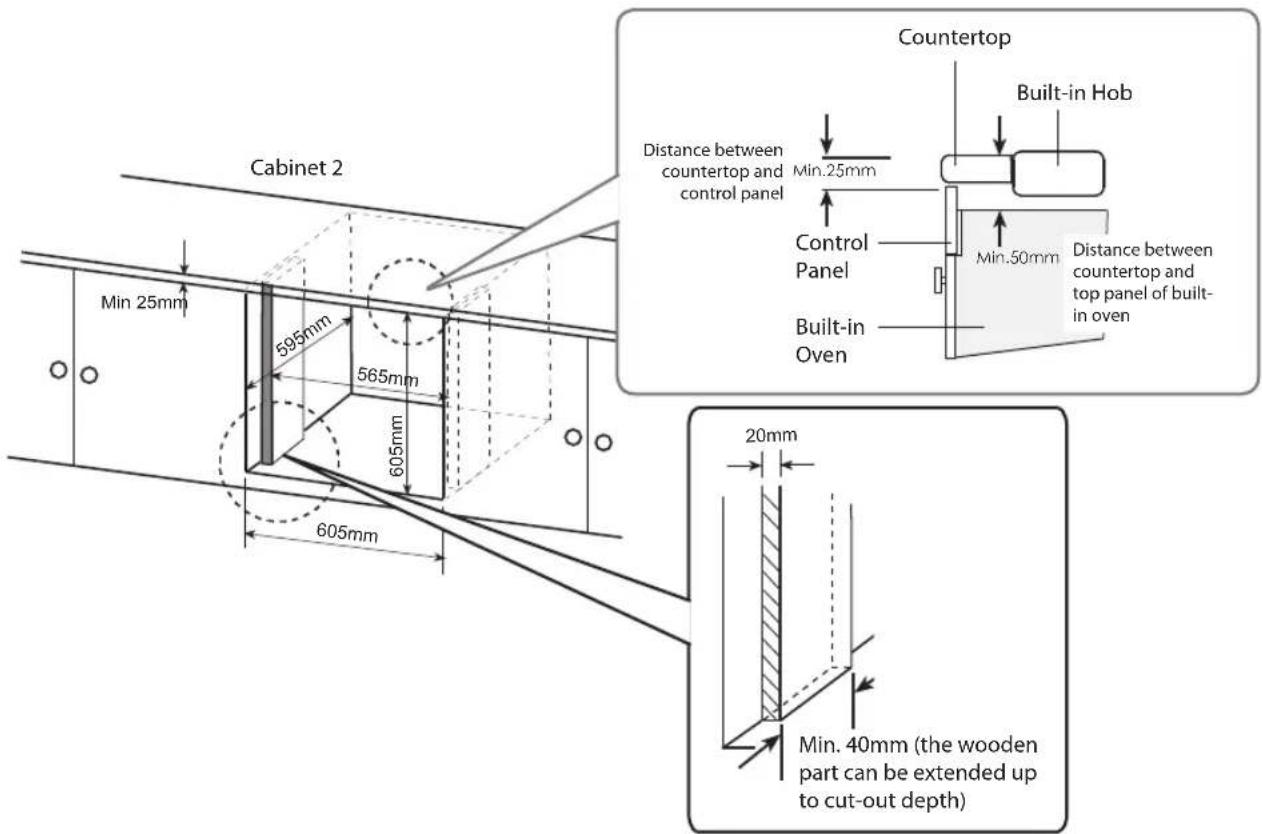
- Once the oven is installed, fix with the two screws in the places shown in the diagram.
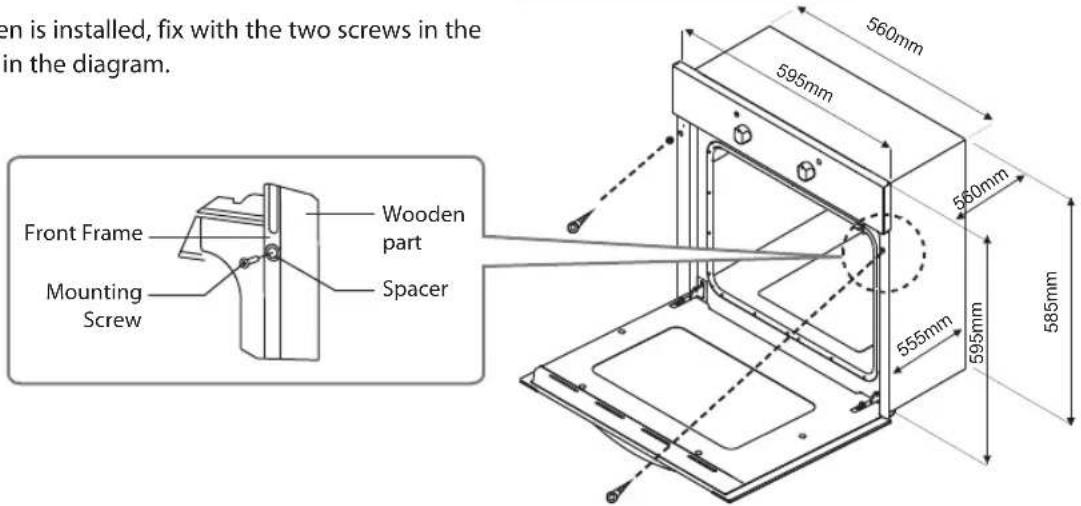
* All images are for indication only; please refer to your individual unit for actual item.
Fitting Guidelines
The oven is manufactured to work with single-phase alternating current (230V - 240V/50Hz). The connection diagram is also found next to the cover of the connection box.

- All electrical work should be carried out by a suitably qualified and authorised electrician.
- No alterations or wilful changes in the electricity supply should be carried out.
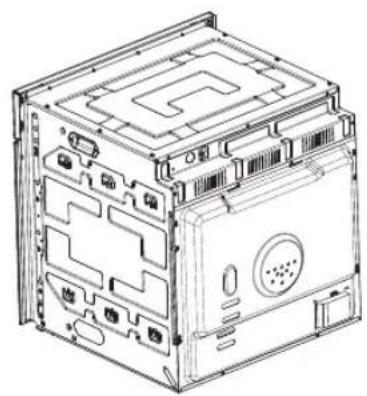
Locate The Terminal Box
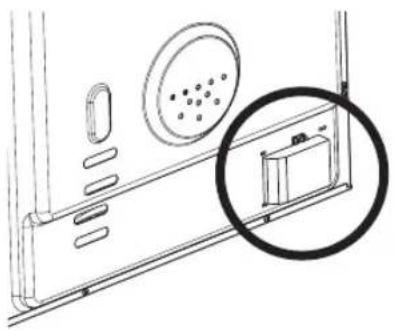
Prise Off The Box Cover
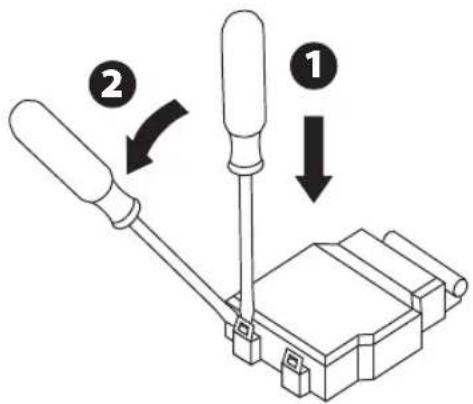
Layout of The Terminal Box

• Voltage of heating elements 220V – 240V. • This product must be earthed. - For this connection a power with a minimum specification of H05VV-F (PVC insulated and sheathed) 3 x 4mm 2 should be used.

This appliance must be earthed. For this connection, 'Twin and Earth 6242Y' type cable can be used.
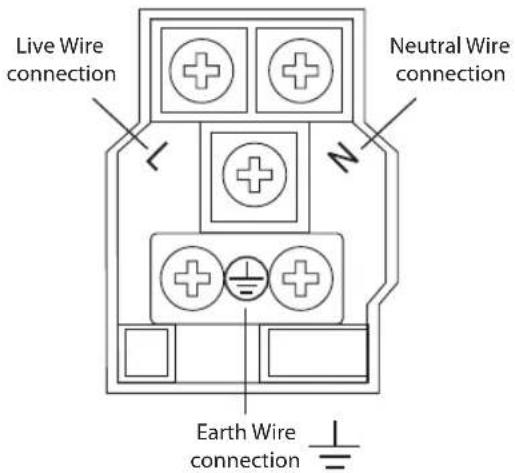

This connection is only for cables 4mm – 6mm thick.
- To connect to a mains power supply of 220-240 V, follow the instructions below:
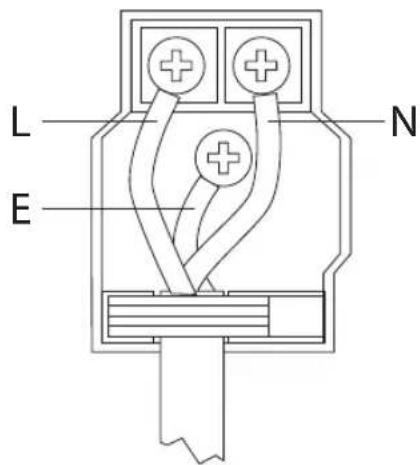
a) Unscrew the cable bracket. b) Connect the LIVE wire to L. c) Connect the NEUTRAL wire to N. d) Connect the EARTH wire (normally yellow/green) to the EARTHING connector. e) Replace the cable bracket and screw securely into place.

Always place the wire on the side of the screw which follows the tightening direction (clockwise).

- If the mains cable is damaged and needs to be replaced, this should be done by a qualified person using the proper tools, so as to avoid any accidents.
- If the ceramic hob is being connected directly to the mains supply, an omnipolar circuit breaker must be installed with a minimum gap of 3mm between the contacts.
- The installer must ensure that the correct electrical connection has been made and that it complies with safety regulations. • The mains cable must not be bent or compressed. • The mains cable must be checked regularly and only replaced by a qualified person.
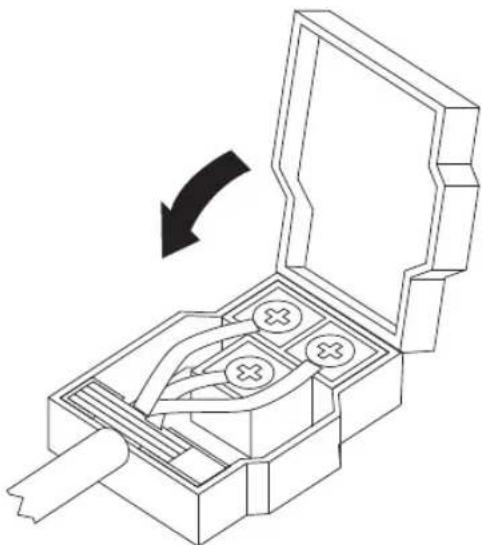
- After all connections are thoroughly checked and secure, replace the Terminal Box cover. Snap the cover back on. Ensure it is secure.

Visit Partmaster.co.uk today for the easiest way to buy electrical spares and accessories. With over 1 million spares and accessories available we can
deliver direct to your door the very next day. Visit www.partmaster.co.uk or call 0844 800 3456 (UK customers only) Calls charged at National Rate.
This symbol on the product or in the instructions means that your electrical and electronic equipment should be disposed at the end of its life separately from your household waste. There are separate collection systems for recycling in the EU.
For more information, please contact the local authority or your retailer where you purchased the product.
DSG Retail Ltd. (co. no. 504877)
Maylands Avenue, Hemel Hempstead, Herts., HP2 7TG, UK
- BUILT-IN MULTI-FUNCTION OVEN
- SAFETY WARNINGS
- UNPACKING
- PRODUCT OVERVIEW
- CONNECTING TO THE MAINS
- SETTING THE CLOCK
- FIRST TIME USE OF THE OVEN
- USING THE CONTROLS
- OVEN ON AND OFF
- SETTINGS OF THE FUNCTION CONTROL
- THERMOSTAT CONTROL
- USING THE GRILL
- USE OF OVEN
- KITCHEN TIMER
- AUTOMATIC STANDBY MODE
- PROGRAMMING YOUR DURATION COOKING TIME
- QUESTIONS AND ANSWERS
- CLEANING AND MAINTENANCE
- OVEN
- REPLACEMENT OF THE OVEN LAMP
- DOOR REMOVAL
- SPECIFICATIONS
- INSTALLATION
- ELECTRICAL CONNECTION
- WIRING INSTRUCTIONS
- GENERAL WARNINGS
- GRILL
- FRONT VIEW
- CONTROL PANEL
- BAKING
- ROASTING MEAT
- PROGRAMMING COOKING TIME
- FULL AUTOMATIC PROGRAMMING
- EXAMPLE
- COOKING A CASSEROLE FOR WHEN YOU WANT TO EAT
- RESETTING THE TIMER
- TO AVOID ANY POTENTIAL HAZARD, YOU MUST FOLLOW THESE INSTRUCTIONS WHEN YOU INSTALL YOUR APPLIANCE
- FITTING GUIDELINES
- LOCATE THE TERMINAL BOX
- PRISE OFF THE BOX COVER
- LAYOUT OF THE TERMINAL BOX
Brand : Logik
Model : LBMULB13
Category : Oven