LMF65SSTDN - Oven Logik - Free user manual and instructions
Find the device manual for free LMF65SSTDN Logik in PDF.
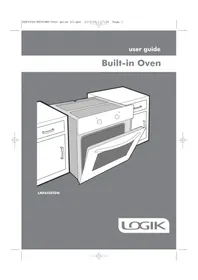


| Brand | Logik |
| Model | LMF65SSTDN |
| Product Type | Built-in Electric Oven |
| Oven Capacity | 56 Liters |
| Energy Efficiency Class | A |
| Rated Voltage | 230-240 V |
| Frequency | 50 Hz |
| Power Consumption | 3200-3500 W |
| Current | 13-14 A |
| Top Element Power | 1200 W |
| Bottom Element Power | 1100 W |
| Grill Element Power | 2000/3200 W |
| Ring Element Power | 2000 W |
| Net Weight | 30.2 kg |
| Product Dimensions (HxWxD) | 59.5 x 59 x 59 cm |
| Functions | Defrost, Static Cooking, Fan, Grilling, Faster Grilling, Turbo, Turbo Lower Heating, Double Grill and Fan |
| Timer Functions | Alarm/Time Setup, Cooking Period, Finish Time, Auto Cooking with Period and Finish Time |
| Oven Light | Yes, replaceable (300°C resistant bulb) |
| Door Type | Removable for cleaning, with detachable inner glass |
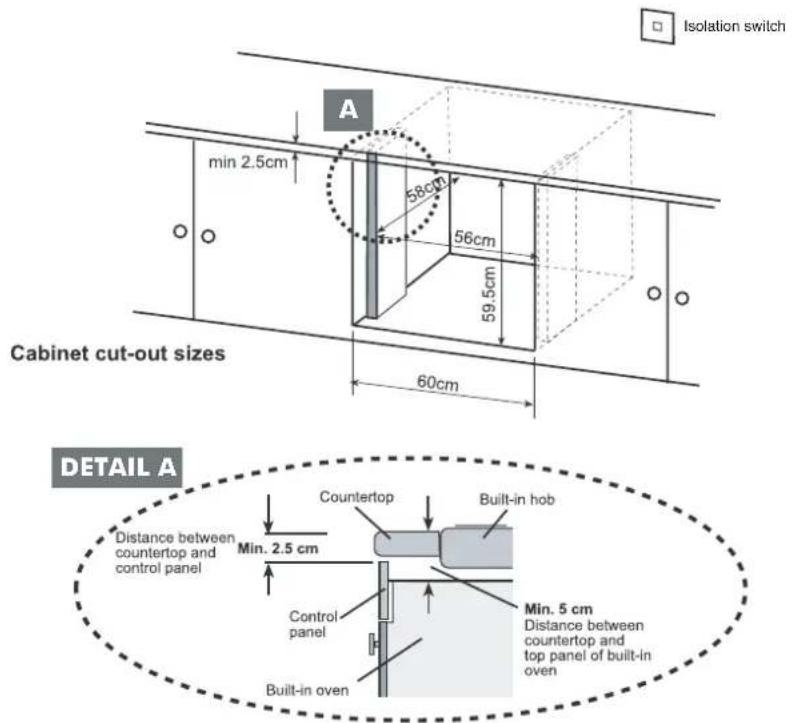
| Installation Requirements | Cutout min 60x58x59.5 cm, 2.5 cm gap below worktop, 5 cm above, connection by qualified electrician, 30A fuse/MCB, double-pole isolation switch |
| Safety Features | Thermostat cut-off, warning lights, earth connection required |
| Cleaning and Maintenance | Warm soapy water, non-abrasive cleaners, door and glass removable for cleaning |
| Warranty | Standard warranty, invalid if improperly installed |
Frequently Asked Questions - LMF65SSTDN Logik
User questions about LMF65SSTDN Logik
0 question about this device. Answer the ones you know or ask your own.
Ask a new question about this device
Download the instructions for your Oven in PDF format for free! Find your manual LMF65SSTDN - Logik and take your electronic device back in hand. On this page are published all the documents necessary for the use of your device. LMF65SSTDN by Logik.
USER MANUAL LMF65SSTDN Logik
LMF65SSTDN
LOGIK
contents
getting to know your built-in oven 3
important safety notes 5
control panel 6
instructions for use 8
hints and tips 10
installation instructions....13
specifications 16
troubleshooting 17
disposal 18
getting to know your built-in oven
Thank you for choosing this Matsui built-in oven. We hope the following information will help you to familiarise yourself with the features of the oven, and to use it successfully and safely.
Please read the instructions in this user guide before using the oven and keep it for future reference.
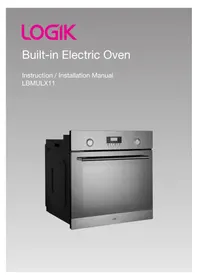
Built-in oven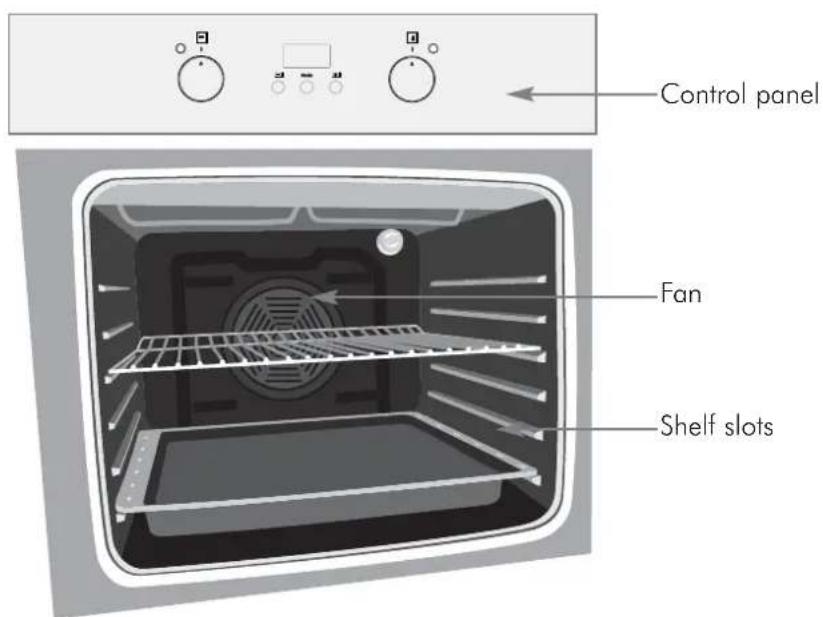
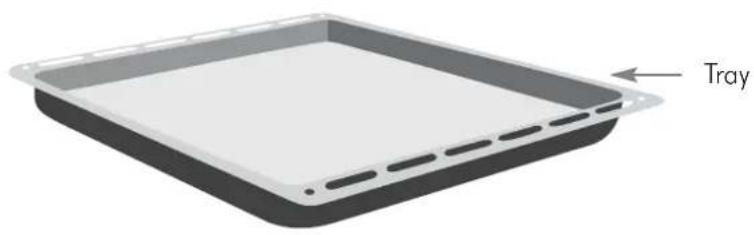
Getting to know your built-in oven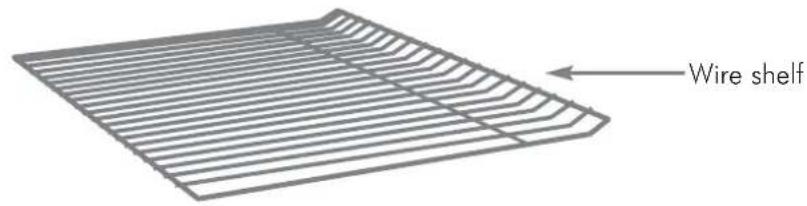
PLEASE NOTE: The electrical connection of this hob should be carried out by a qualified electrician, according to the instructions in this guide and in compliance with the current regulations. Give this guide to your electrician; the connection instructions are on page 14.
Important safety notes
We have included this section for your safety. Please read this information carefully before using your built-in oven.
WARNING:
It is hazardous for anyone other than authorized service personnel to carry out servicing or repairs that involve the removal of covers. To avoid the risk of electric shock, do not attempt repairs yourself. In the event of any damage that occurs as a result of improper connection or installation, the warranty will not be valid.
This oven has been designed for home use and should be built into a kitchen unit. After removing the packaging, check for any damage; if found, never attempt to use the oven, but contact your authorized service center immediately. Retain this user guide and your receipts for future reference. Do not operate the oven before it is fully installed. Some parts of the oven may retain heat for a long time; wait until they have cooled before touching them. Do not keep flammable items or substances near the oven while it is in use. When the oven is not in use, make sure the control dials are in the '0' (off) position. Your oven needs sufficient air circulation while operating; keep it well ventilated. Keep children away from the oven. Before replacing the internal light, turn off the power to the oven.
When using your oven
When you first use your oven, smells may come from the insulation materials and the heating elements. For this reason, before using your oven for the first time, switch it on while empty at its maximum temperature for 45 minutes. Do not touch the interior or the heating elements of the oven, as they will be hot. Do not put flammable or combustible materials into the oven. Be careful when using the oven, as the outer surface can be hot. While the door is open, do not let children climb on the door or sit on it.
Control panel
Oven controls - the function and temperature controls
To use an oven function, first select the function with the left-hand dial, then set the temperature of the function (if appropriate) with the right-hand dial. The light will illuminate. When the temperature inside your oven reaches the temperature you set, the thermostat will cut off the heating element and the thermostat light will go off. When the temperature falls below the set temperature, the heating element will again be turned on and the light will illuminate.
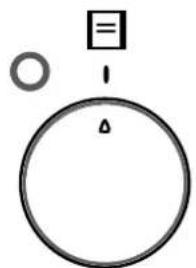
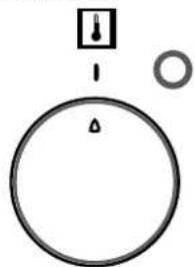
| SYMBOL | |
 | The oven light will be turned on. |
 | The oven light, the red warning light and the fan will be turned on.Perform she function of defrosting the frozen foods. |
 | Youroventhermostatandwarninglampsandturboheater,fan willbeswitchedon. |
 | The oven's thermostat and warning lights and the lower and upper heating elements will be switched on. |
 | Youroventhermostatandwarninglamps,lowerandupper heatingelementswillbeswitchedon. |
 | Youroventhermostatandwarninglamps,turboandlower heatingelementsandfanwillbeswitchedon. |
 | The oven's thermostat and warning lights, the grill heater willbeswitched on. |
 | The oven's thermostat and warning lights, the upper heating element and the grill heater will be switched on. |
 | Youroventhermostatandwarninglamps,grillandupper heatingelementsandfanwillbeswitchedon. |
Instructions for use
Using the oven
1 Select the oven function you require. Select the temperature you require. 2 Before placing food in the oven you may need to pre-heat the oven for 10 minutes. 3 The red temperature light will go out when the chosen temperature has been reached. 4 To switch the oven off turn the function control dial to the off position '0'.
Note: under no circumstances should the oven be lined with aluminium foil as overheating may occur. Do not place dishes or baking trays directly onto the base of the oven as it becomes very hot and damage may occur.
Using the elements
1 Defrost function
To use the defrost function, take your frozen food and place it in the oven on the third shelf/grill rack from the bottom. It is recommended that you place an oven tray under the defrosting food, to catch the water accumulated due to melting ice. This function will not cook or bake your food, it will only help to defrost it.
2 Static cooking function
The static cooking function emits heat, ensuring even cooking of the lower and upper food, this is an excellent function for making pastries, cakes, baked pasta, lasagne and pizza.
3 Fan function
This function is very good for obtaining results in baking pastry. Cooking is carried out by the lower and upper heating element within the oven and by the circulation device, which will give a slight grill effect to the food.
instructions for use
Using the elements
4 Grilling function
This function is used for grilling foods such as cheese on toast, always use the highest rack. Lightly brush the grill rack with oil to stop foods sticking and place the foods in the centre. The grill rack and oven tray should be used together to catch the drips of oil.
5 Faster grilling function
This function is used for faster grilling and for covering a larger surface area, such as grilling meats, which tend to take up more room on a grilling rack.
6 Turbo function
The turbo function evenly disperses the heat in the oven. All foods on all racks will be cooked evenly.
7 Turbo lower heating function
Turbo fan and lower heating function is ideal for baking pizza. While the turbo fan evenly disperses the heat of the oven, the lower heating element ensures the baking of the pizza dough.
8 Double grill and fan function
This function is ideal for faster grills, for grills on a larger surface, roast chicken. At this function; ensuring complete frying by working together, the fan, the grill and the upper heating element perform the operation.
Instructions for use
Using the Timer
Adjustment of Day Hour
"A" symbol will start to flash after it is connected to the electrical resource.
Press (+) and (-) keys at the same time. It is also possible to adjust (to increase or to reduce) the time by pressing to these keys.
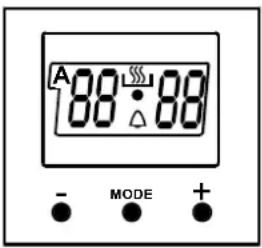
Alarm/Time Setup
This function can be used as time set up and alarm when wished. "Mode" key must be pressed until "△" led indicator lamp will start to light. The wished period interval is adjusted via "+" and "-" keys. The wished time remains on screen after it was adjusted and "△" sign that flashed in the past remains fixed. It is possible to make time set up between 0-23.59 hours. At the end of cooking period an alarm is heard and "△" symbol flashes. You can press any key to stop the alarm.
Programming as Determining the Cooking Period
This function is used to adjust to cook at wished period interval.
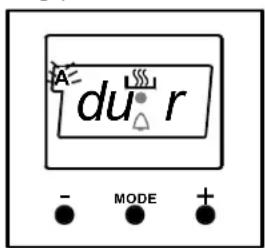
To adjust the cooking period, press the "Mode" key until the "Dur" indicator lamp starts to flash. Adjust the desired cooking period using the "+" and "-" keys. Once the time is adjusted, it is registered automatically within 5 seconds, and the "A" and "###" symbols start to light continuously. The screen returns to the current time. An alarm (sound) is heard when the cooking period ends, and the "A" and "###" symbols start to flash. Pressing any switch stops the signal and the lamp flashing.
It is possible to adjust the cooking period between 0-10 hours.
Instructions for use
Programming by determining the finish time
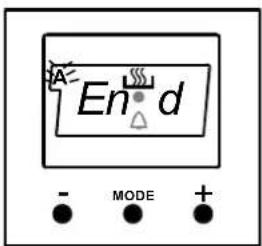
This function is used to adjust the finish time of the cooking period. To adjust the finish time of cooking, press the "Mode" key until the "End" indicator lamp starts to flash. Adjust the desired finish time using the "+" and "-" keys. When the finish time is reached, an alarm is heard, and you can press any key to stop the alarm.
Programming by determining the cooking period and finish time
This function is used to adjust the cooking period using the automatic cooking function.
Both the cooking period and the ending time have to be adjusted to set the end of the cooking period. The cooking period is adjusted as described above.
Press the "Mode" key until the "End" indicator lamp flashes to adjust the ending time. Use the "+" and "-" keys to set the desired cooking period. Once the time is adjusted, it is registered automatically within 5 seconds, and the "A" and "###" symbols start to light continuously. The screen returns to the current time. An alarm sound is heard at the end of the time, and the "A" symbol starts to flash. Pressing any switch stops the signal and the lamp flashing.
Hints and tips
Baking tips
1. Always place baking tins in the centre of the wire shelf. 2. Make sure you use bakeware that is oven proof. 3. Do not place bakeware too close to the rear of the oven wall. 4. You can influence the degree of browning by changing the temperature setting. 5. If a cake collapses after removing it from the oven: - Use less liquid on your next attempt. - Consider using a longer baking time or use a slightly lower temperature setting.
Energy saving
1. Preheat the oven only if expressly required by the recipe or guidelines. 2. Dark baking tins have a higher degree of heat absorption. 3. In the case of longer baking times, you can switch off the oven 5–10 minutes before the full baking time and use the residual heat.
Cleaning tips
1 Wait until the oven has cooled before removing the wire shelves, wash them separately in warm soapy water and dry thoroughly. 2 Wash the interior of the oven with hot soapy water and wipe down with a damp cloth. 3 Leave the door open until the interior has dried, before replacing the wire shelves. 4 Clean the oven after each use, especially after roasting or grilling, this will prevent spilt or splattered food debris burning and becoming difficult to remove. 5 Do not use abrasive pads to clean the interior of the oven as this may remove the enamel, which will affect the efficiency of your oven.
Hints and Tips
Cleaning the Outside of the Oven
1 You should regularly wipe over the control panel, oven door and oven sides using a soft cloth and liquid detergent as spilt liquids may damage the enamel. 2 Wash enameled or chrome plated parts of the oven with warm soapy water or with non-abrasive detergents. 3 Never use abrasive pads to clean enameled, chromed or stainless steel surfaces. 4 When using commercially available stainless steel cleaning products, avoid cleaning any lettering or symbols, as they can become damaged.
Replacing the Oven Light
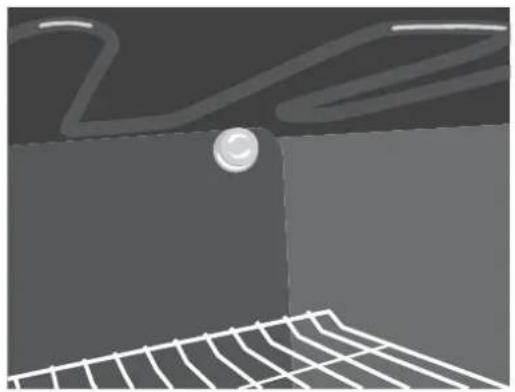
1 Turn off the oven and make sure that it is cold. Switch off its isolation switch. 2 After removing the cover in front of the light, take out the bulb. 3 Insert the new bulb, which should be resistant to 300°C. For replacement bulbs contact your local service centre or Partmaster Direct (details at the back of this guide). 4 Re-fit the cover. 5 If in any doubt, consult a qualified electrician for help.
Hints and Tips
Removing the Door for Easier Cleaning
We recommend you have someone to assist you during removal of the door.
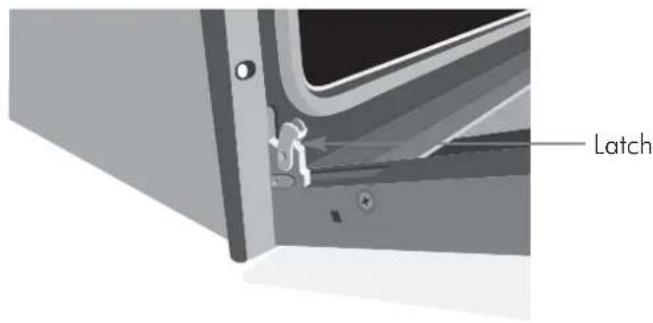
1 Open the door completely. 2 The door hinge has a small latch. Lift the latch on both hinges. 3 Lift the door slightly as if closing, and then with both hands supporting the door, pull it away from the oven. 4 To replace the door, hold the door in an open position and insert the latches on both hinges back into place. Open and close the door to make sure that it has been fitted correctly.
Taking Out the Glass from the Oven Door for Cleaning
1 Remove the oven door. 2 Undo the screws from the metal panel that holds the glass in place. 3 Lift the glass out of the frame. Clean it using appropriate glass cleaning products. 4 To replace the glass, place it back in, placing the securing caps over the top of the glass and screw it back into place.
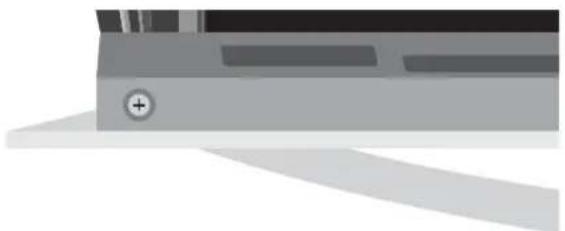
Note: It may require a little force due to the adhesive pads under glass.
Installation Instructions
WARNING:
The electrical connection of this oven should be carried out by a qualified electrician, according to the instructions in this guide and in compliance with the current regulations. In the event of any damage that occurs as a result of improper connection or installation, the warranty will not be valid. This appliance must be earthed.
Installing the built-in oven
1 The space cut out into the work surface where the oven will be placed needs to be at least 60cm wide, 58cm deep and 59.5cm high. A minimum gap of 2.5cm between the work surface and the control panel, and a distance of 5cm between the work surface and top of the oven is needed, in order to be able to get to the back of the oven if necessary and for easy access when sliding the oven out. (refer to detail A).
installation instructions
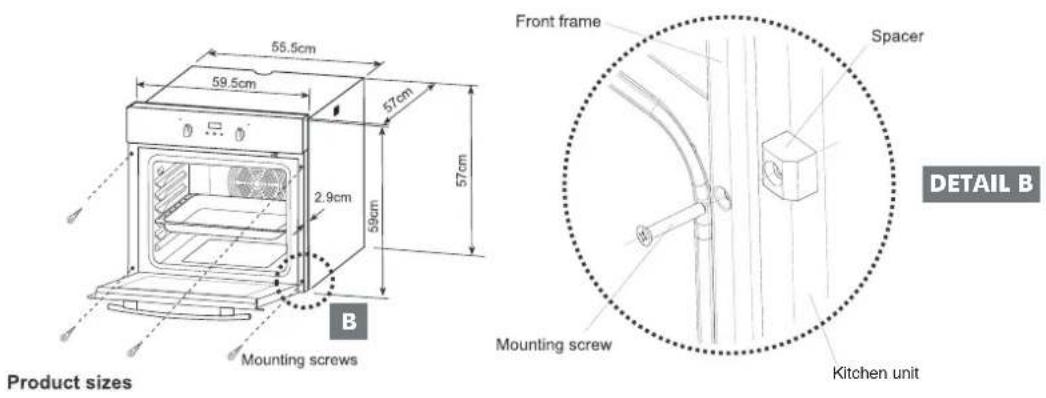
2 Once the oven has been positioned into the gap, the front frame of the oven can be fixed to the surrounding kitchen unit using the mounting screws and secured into place with the spacers. (refer to detail B).
Making an electrical connection
An approved suitable cable must be connected from the Consumer Unit (main fuse box) and be protected by its own 30amp fuse or Micro Circuit Breaker (MCB).
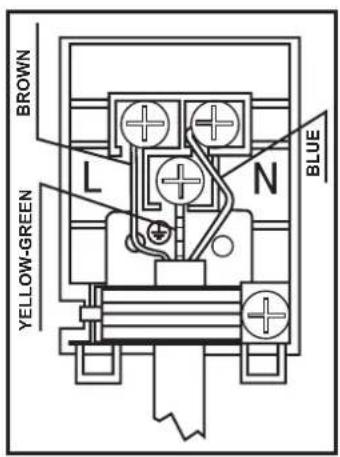
The electrician must provide a fused double-pole isolation switch, which disconnects both the line (live) and neutral conductors, with a contact separation of at least 3 mm. The fused switch should be fitted to the kitchen wall, and must be placed in an easy accessible position in accordance with IEE regulations. Connect the fused switch to a junction box which should be fitted on the wall. The ovens power supply cable can then be connected. Connect one end to the junction box and connect the other end to the ovens power connection box which is located at the back of the oven. Remove the cover of the power connection box and install the cable, in accordance with the connection diagram. The power supply cable must be positioned away from direct heat sources. It should not be subjected to a temperature rise of more than 50°C above room temperature.
installation instructions
Power connection box
For this oven, the cable type must be H05V V-F 3 x 1.5mm² and the connection should be made as in the diagram.
3X1.5 mm², H05VV-F type power supply cord must be used. Grounding lead must be connected to screw with ⊕ symbol.
specifications
Model LMF65SSTDN
Rated Voltage (V) 230-240
Rated Frequency (Hz) 50
Power (W) 3200-3500
Current (A) 13-14
Top element (W) 1200
Bottom element (W) 1100
Ring element (W) 2000
Grill (W) 2000/3200
Net Weight (kg) 30.2
Product Dimensions (cm) 59.5x59x59
Oven Capacity (lt) 56
Energy Efficiency class A
Troubleshooting
If the oven is not working:
Check that the fused switch is turned on at the wall switch. Check that the fuse in the wall switch has not blown, and that the mains lead is undamaged.
This occurs normally with moist cakes or with very large roasts. During baking or roasting open the door briefly several times and carefully wipe up any condensation.
If the cake bottom gets too dark:
Shorten the baking time or possibly use a lower baking temperature.
If the cake bottom is too light:
Increase the baking time or use a dark metal baking tin.
Disposal
Old ovens still have some residual value. An environmentally friendly method of disposal will ensure that valuable raw materials can be recovered and used again. Up to date information concerning options for disposing of your old oven and packaging from the new one can be obtained from your retailer or local council.
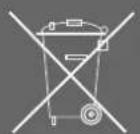
This symbol on the product or in the instructions means that your electrical and electronic equipment should be disposed at the end of its life separately from your household waste. There are separate collection systems for recycling in the EU. For more information, please contact the local authority or your retailer where you purchased the product.
- CONTENTS
- GETTING TO KNOW YOUR BUILT-IN OVEN
- IMPORTANT SAFETY NOTES
- WARNING
- WHEN USING YOUR OVEN
- CONTROL PANEL
- OVEN CONTROLS - THE FUNCTION AND TEMPERATURE CONTROLS
- INSTRUCTIONS FOR USE
- USING THE OVEN
- USING THE ELEMENTS
- DEFROST FUNCTION
- STATIC COOKING FUNCTION
- FAN FUNCTION
- GRILLING FUNCTION
- FASTER GRILLING FUNCTION
- TURBO FUNCTION
- TURBO LOWER HEATING FUNCTION
- DOUBLE GRILL AND FAN FUNCTION
- HINTS AND TIPS
- BAKING TIPS
- ENERGY SAVING
- CLEANING TIPS
- CLEANING THE OUTSIDE OF THE OVEN
- REPLACING THE OVEN LIGHT
- REMOVING THE DOOR FOR EASIER CLEANING
- TAKING OUT THE GLASS FROM THE OVEN DOOR FOR CLEANING
- INSTALLATION INSTRUCTIONS
- INSTALLING THE BUILT-IN OVEN
- MAKING AN ELECTRICAL CONNECTION
- POWER CONNECTION BOX
- SPECIFICATIONS
- TROUBLESHOOTING
- IF THE OVEN IS NOT WORKING
- IF THE CAKE BOTTOM GETS TOO DARK
- IF THE CAKE BOTTOM IS TOO LIGHT
- DISPOSAL
Brand : Logik
Model : LMF65SSTDN
Category : Oven