LFTG90W14 - Cooker Logik - Free user manual and instructions
Find the device manual for free LFTG90W14 Logik in PDF.


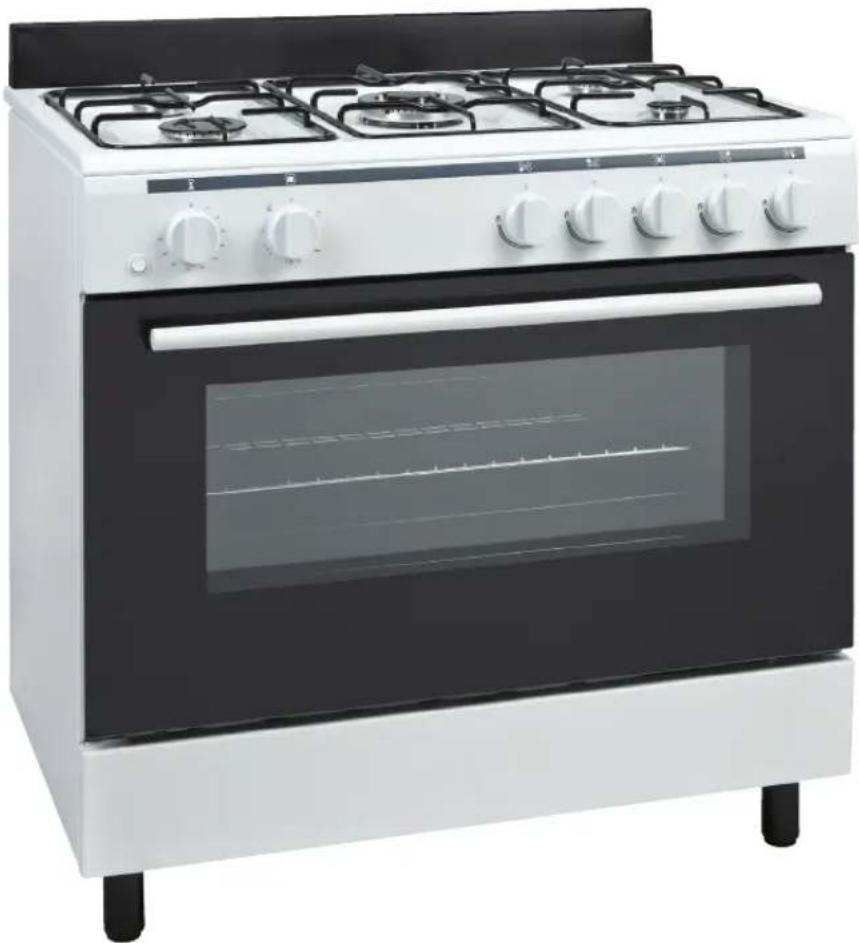
| Product Type | Freestanding Cooker |
| Brand | Logik |
| Model | LFTG90W14 |
| Width | 90 cm |
| Depth | 60 cm |
| Height | 90 cm |
| Weight | 65 kg |
| Energy Source (Hob) | Gas |
| Energy Source (Oven) | Electric |
| Number of Hob Burners | 5 |
| Oven Capacity | 70 liters |
| Oven Functions | Conventional, Grill, Fan |
| Control Type | Knobs for hob and oven |
| Safety Features | Flame failure device, child lock |
| Cleaning | Wipe with damp cloth, avoid abrasives |
| Spare Parts Availability | Yes, through Logik service centers |
| Warranty | 12 months |
| Installation Requirements | Proper ventilation, gas connection, electrical outlet |
Frequently Asked Questions - LFTG90W14 Logik
User questions about LFTG90W14 Logik
0 question about this device. Answer the ones you know or ask your own.
Ask a new question about this device
Download the instructions for your Cooker in PDF format for free! Find your manual LFTG90W14 - Logik and take your electronic device back in hand. On this page are published all the documents necessary for the use of your device. LFTG90W14 by Logik.
USER MANUAL LFTG90W14 Logik
90cm Dual Fuel Range Cooker
LFTG90W14
Contents
Safety Warnings....4
Unpacking....7
Product Overview......8
The Hob....8
Control Panel....8
Oven....9
Before Using the Hob 10
Lighting the Hob....10
Flame Failure Safety Feature 11
If the Burner Does Not Light....11
If the Flame is Irregular 11
Electricity Failure....11
Cookware Guidelines 12
Oven Control....13
Using the Oven 15
First Time Use of the Oven 15
Shelf Positions....15
Replacing the Anti-tilting Oven Shelf 15
Preheating....16
Cooking....16
Baking Tips....16
Cooking with the Grill 17
Using the Storage Compartment 19
Cleaning and Maintenance....20
Cleaning the Gas Hob....20
Burner Parts and Pan Supports 21
Replacing the Burners....21
Hob Controls 21
Cleaning Instructions 22
Cleaning the Ceramic Hob 22
Cleaning the Outside of the Cooker 22
Cleaning the Oven Door Glass 22
Cleaning the Inside of Your Cooker 23
Removing the Oven Door 23
Hints and Tips 24
Replacing the Oven Lamp 25
Installation 26
Adjusting the Feet 27
Moving the Cooker 27
Stability Bracket 27
Ventilation Requirements 28
Gas Installation 28
Installation and Service Regulations 28
Gas Connection....29
Installation Relevant to Natural Gas 29
Installation Relevant to Liquid Petroleum Gas (LPG)....29
To Connect the Gas Supply 29
Replacement of Burner Injectors 30
To Replace the Hob Injectors 30
Adjusting the Reduced Flame Position 30
Injector Size Table.... 31
Electrical Connection 32
Energy Saving Tips and Energy Label 33
Product Fiche and Specifications 34
IMPORTANT SAFETY INSTRUCTIONS READ CAREFULLY AND KEEP FOR FUTURE REFERENCE
- This appliance must be installed by a qualified Gas Safe registered engineer. The manufacturer is not responsible for any damage caused by incorrect installation.
- Check whether there is any damage to the appliance after you have unpacked it. If any damage is found, do not use the appliance and contact the store where you purchased it.
- This appliance is for indoor domestic use only.
- This appliance is for cooking purposes only. It must not be used for other purposes, for example room heating.
- For disconnection from the mains supply you must have a switch with a contact separation of at least 3.0 mm in all poles and rated 32 Amp that provides full disconnection, this must be incorporated in the fixed wiring in accordance with the local wiring rules.
- If the mains cable gets damaged, it should be replaced by an authorized service agent or qualified electrician in order to avoid a hazard.
- The cooker must be used in a well ventilated location and installed on flat / level surface.
- Only operate your appliance in a dry atmosphere.
- Keep the electrical cables of your other appliances away from hot areas; do not let them touch the appliance.
- Ensure that the appliance is switched off at the mains supply switch and allowed to completely cool down before cleaning, replacing the oven lamp or performing any maintenance to avoid the possibility of an electric shock or burns.
- The use of a gas cooking appliance results in the production of heat, moisture and products of combustion in the room in which it is installed. Ensure that the kitchen is well ventilated especially when the appliance is in use. Keep natural ventilation holes open or install a mechanical ventilation device (mechanical extractor hood).
- Prolonged intensive use of the appliance may call for additional ventilation, for example opening of a window, or more effective ventilation, for example increasing the level of mechanical ventilation where present.
- This appliance can be used by children aged from 8 years and above and persons with reduced physical, sensory or mental capabilities or lack of experience and knowledge if they have been given supervision or instruction concerning use of the appliance in a safe way and understand the hazards involved.
- Cleaning and user maintenance shall not be made by children without supervision.
- Children should be supervised to ensure that they do not play with the appliance.
- During use the appliance becomes hot. Care should be taken to avoid touching the parts inside the oven or the hob burners/pan stands.
- The appliance and its accessible parts may become hot during use. Young children should be kept away.
- Unattended cooking on a hob with fat or oil can be dangerous and may result in fire. NEVER try to extinguish a fire with water, but switch off the appliance and then cover the flame e.g. with a lid or a fire blanket.
- Danger of fire: Do not store items on the cooking surfaces.
- When the hob is hot never touch any parts that get hot. Allow the hob to cool before touching these parts.
- When the oven is hot never touch the oven glass or any other parts that get hot. Allow the oven to cool before touching these parts.
- Do not use harsh abrasives cleaners or sharp metal scrapers to clean the oven door glass since they can scratch the surface, which may result in the glass shattering.
- Before starting to use your appliance, keep curtains, tulle, paper or flammable materials away from your appliance.
- Do not keep combustible or flammable things in, on or near the appliance.
- Do not use steam cleaners for cleaning the appliance.
- Do not rest any items on the open door and do not let children climb on or stand on it.
• Take care when handling parts with glass, knocks, chips, heavy handling and dropping could cause the glass to shatter. - The glass doors use toughened glass and are designed to break into many 'nugget' size pieces if it breaks. These pieces will still have sharp edges, please handle broken glass with care. - The appliance is not intended to be operated by means of an external timer or separate remote-control system. - This appliance is not designed to be used with hob guards. Use of inappropriate hob guards can cause accidents. - The inside surface of storage compartment may be hot during use. Care should be taken to avoid touching inside surfaces.
Thank you on the purchase of your new Logik Dual Fuel Range Cooker.
You must read this manual in order to fully understand how to operate it correctly.
This unit MUST be installed by a competent and registered engineer (Gas Safe in the UK).
Please allow the installer to view the installation section of this manual.
Read all the safety warnings carefully before use and keep this manual for future reference.

Unpacking
Remove all packaging from the unit. Retain the packaging. If you dispose of it, please do so according to local regulations.
The following items are included:
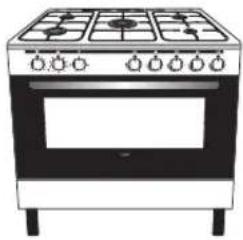
Main Unit
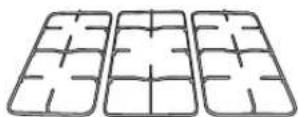
Pan Support (Left/Middle/Right) × 3, Grill Pan Handle set × 1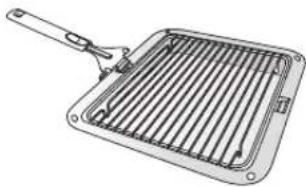
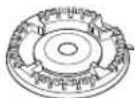
55 mm Burner Ring × 1, Multi Ring Burner Ring × 1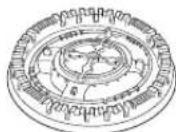
100 mm Burner Ring × 1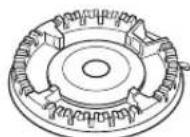
75 mm Burner Ring × 2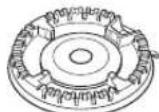
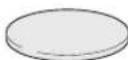
55 mm Burner Cap × 1, 60 mm & 130 mm Multi Ring Burner Cap × 1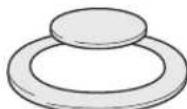
100 mm Burner Cap × 1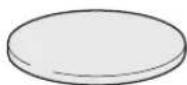
75 mm Burner Cap × 2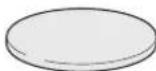
Stability Bracket × 1, Stability Bracket Screws × 2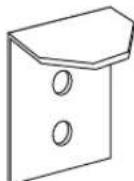
Stability Bracket Wall Plugs × 2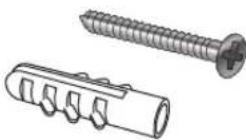
Splash Back × 1, Splash Back Screws × 2

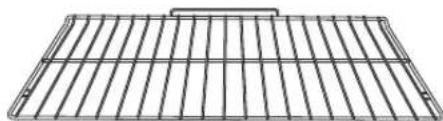
Shelf × 2
LPG Conversion Kit:
LPG Nozzle × 5
Type of gas
3+ G30/31 28-30/37 mbar
LPG Replacement Rating
Plate Sticker × 1
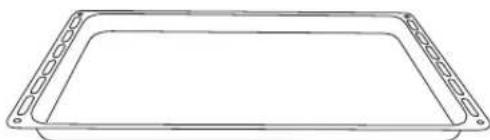
Baking Pan Shelf × 1

If items are missing or damaged, please contact Partmaster (UK only).
Tel: 0344 800 3456 for assistance.
* All images are for indication only; please refer to your individual unit for actual item.
The Hob
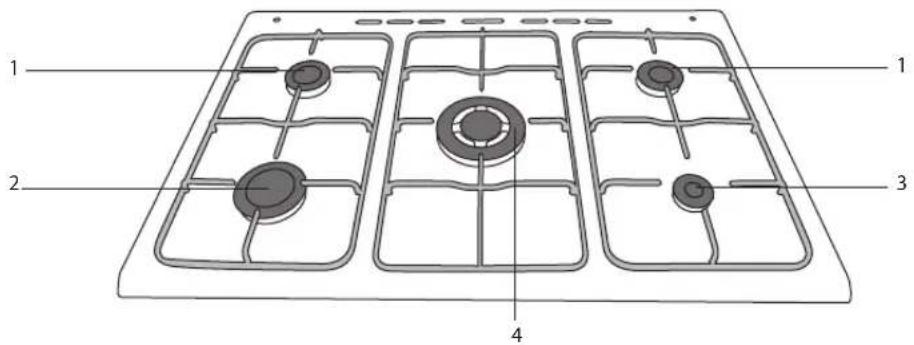
- Standard Burner (75 mm)
- Large Burner (100 mm)
- Small Burner (55 mm)
- Multi Ring Burner (middle 60mm, outer 130mm)
Control Panel
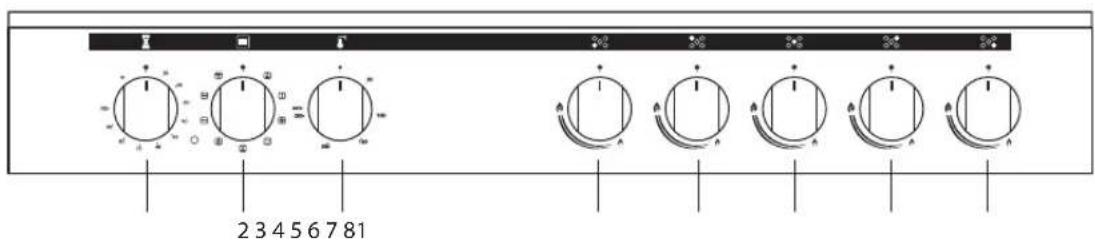
- Oven Timer Control 5. Back Left Hob Control
- Oven Functions Control 6. Multi Ring Hob Control
- Oven Temperature Control 7. Back Right Hob Control
- Front Left Hob Control 8. Front Right Hob Control
* All images are for indication only; please refer to your individual unit for actual item.
Oven
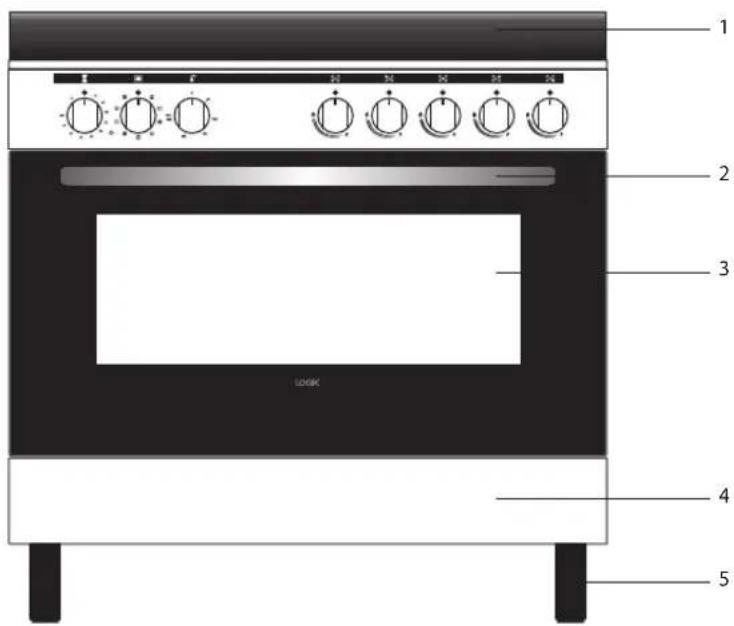
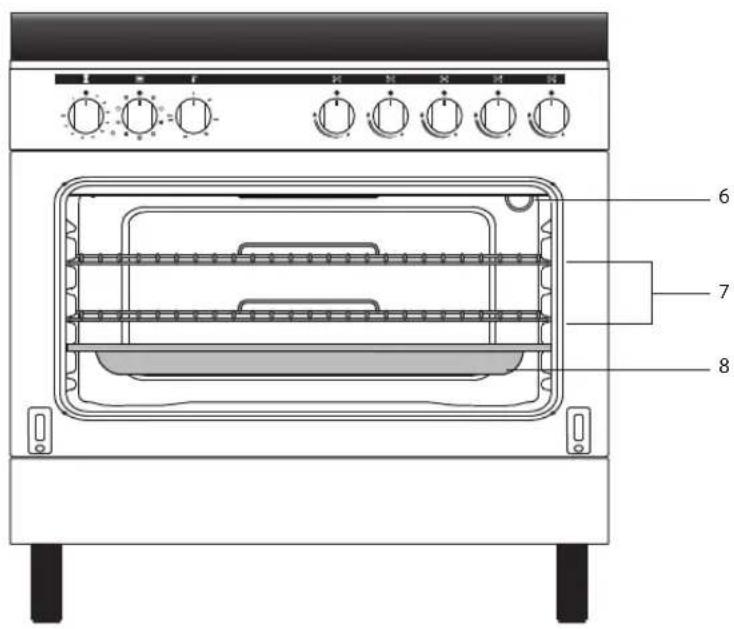
- Splash Back
- Adjustable Feet
- Oven Door Handle 6. Oven Light
- Oven Door
- Oven Shelves
- Storage Flap 8. Deep Baking Pan Shelf

The inside surface of storage compartment may be hot during use. Care should be taken to avoid touching inside surfaces.

Before Using the Hob
Before using your new hob, please:
- Read this manual fully, taking special note of the 'Safety Warnings' section.
- Make sure the cooker is connected to the mains supply so that the ignition circuit will work.

This appliance is for cooking purposes only. It must not be used for other purposes, e.g., room heating.

Lighting the Hob
- Choose the control for the burner you want to use.
- Press and hold the burner control in. The spark ignition will operate while you hold in the control. While pressing the burner control down, turn it anti-clockwise to the large flame symbol. Continue to hold the control in for approximately 5-10 seconds after the burner has lit. Releasing the control too soon will extinguish the flame due to the flame failure safety feature.
Manual Ignition (in case of electricity failure)
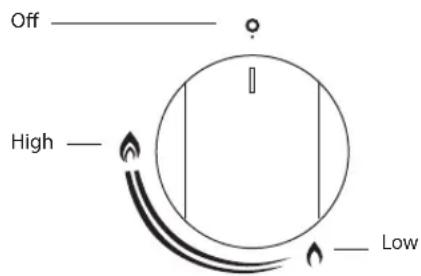
To ignite one of the burners, press and turn the control counter-clockwise so that the control is at the position. Hold an ignition source (e.g., candle lighter) close to the upper circumference of the burner. Move the ignition source away as soon as you see a stable flame. Continue holding the control in for approximately 5-10 seconds after the burner has lit. Releasing the control too soon will extinguish the flame due to the flame failure safety feature.
- Adjust the flame anywhere between the large flame and small flame positions. Do not adjust the flame between the small flame and Off position.
- After ignition, check the flames visually. If you see yellow-tipped, lifted, or unstable flames, turn the control off. Allow the burners to cool before touching, then check the assembly of the burner rings and caps. Also, make sure that no liquid has entered into the burner cups. If the burner flames go out accidentally, turn the burners off, and do not try to light them again for at least 60 seconds (to allow the gas to disperse).
- When turning the hob off, turn the control in a clockwise direction to the off mark, 'O'.

- If the burner does not light within 15 seconds, turn the control off and wait for at least 60 seconds before trying again.
- To switch the burner off, turn the control clockwise to the off 'O' position. After use, always turn the controls to the off position.

- This appliance is for cooking purposes only. It must not be used for other purposes, for example room heating.
- The use of a gas cooking appliance results in the production of heat, moisture and products of combustion in the room in which it is installed. Ensure that the kitchen is well ventilated especially when the appliance is in use: keep natural ventilation holes open or install a mechanical ventilation device (mechanical extractor hood). Prolonged intensive use of the appliance may call for additional ventilation, e.g. opening of a window, or more effective ventilation, e.g. increasing the level of mechanical ventilation where present.

Flame Failure Safety Feature
The flame supervision device (FSD) probe cuts off the gas supply to the burner within one minute if the flame is extinguished. Gas will flow out of the burner until the FSD cools down and activates, so you may notice the smell of gas, this is normal.
If the flames are accidentally extinguished, turn off the burner and do not try to light it again for at least one minute (to allow the gas to disperse).
When lighting the burner, hold down the control for approximately 5 – 10 seconds after the burner has lit. Releasing the control too soon will extinguish the flame.

If the Burner Does Not Light
If the burner does not light, check that:
- The hob is connected to the electrical supply and the supply is switched on. The gas is turned on.
- You have held down the control for at least 5 – 10 seconds after the flame has been lit.
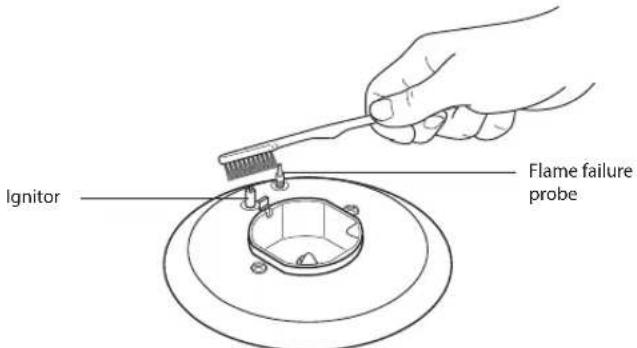
- The ignitors are sparking. If the ignitors are not sparking, they may be dirty or wet. Clean them gently with a small nylon brush such as a toothbrush as shown below. Ensure the electrical supply has been disconnected before cleaning.

To avoid damage to the ignition circuit NEVER light the hob when the burners are not in place.

If the Flame is Irregular
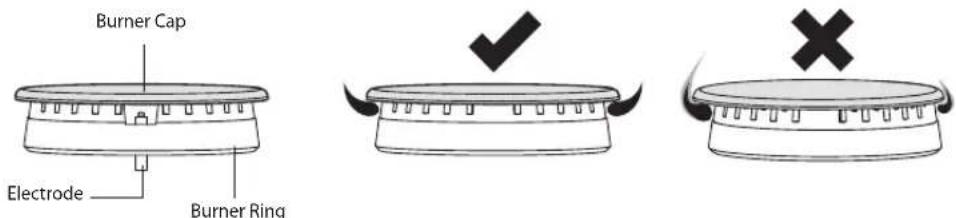
If the flame is yellow or irregular, check that the burner parts, including the burner cap (allow to cool before touching), are:
- Clean and dry.
- Positioned correctly. See 'Replacing the Burners'. • Also see 'Hints and Tips'.

Electricity Failure
If there is an electricity failure, you can still use your hob. Light the burners by holding an ignition source (e.g., candle lighter) close to the side of the burner and turning the control to the High position to light the gas. The controls must still be held down for 5–10 seconds after the burner has lit. Releasing the controls too soon will extinguish the flame. Adjust the controls as required.
* All images are for indication only; please refer to your individual unit for actual item.

Cookware Guidelines
To get the best out of your hob, follow these simple suggestions:
• Use saucepans with thick flat bottoms. Food in a saucepan with an uneven bottom will take longer to cook.
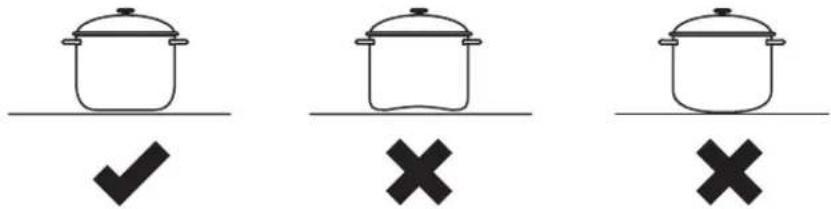
- Do not use large saucepans or frying pans that overlap the edges of your hob as this can deflect heat onto your worktop and damage the surface, and may also cause a hazard. • Always make sure saucepans are stable. Using very heavy saucepans may bend the trivet/pan support or deflect the flame. • Always lift the cookware when removing from the hob, do not drag.
- When you need to boil, simmer or fry food, first set the temperature to the High position. Once the liquid is boiling, reduce the temperature to maintain a steady heat to cook your food thoroughly. Doing this will reduce the cooking time and save energy.
- Pan sizes should be as per the table shown below.
| Burners Minimum Diameter Maximum Diameter | ||
| Large (100mm) 20 cm 24 cm | ||
| Standard (75mm) 14 cm 22 cm | ||
| Small (55 mm) 12 cm 18 cm | ||
| Multi Ring(middle 60mm, outer 130mm) | 24 cm 28 cm | |
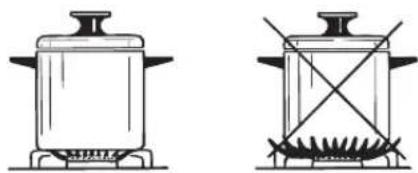

Do not use cooking vessels on the hob that overlap its edges.
• Using a lid will reduce cooking times and save energy. - When liquid comes to a boil, reduce the temperature setting to maintain the desired level of boiling. - Choose cookware of the proper size, material and construction. - Minimise the amount of liquid or fat to reduce cooking times. - Select the proper temperature setting for the cooking task.
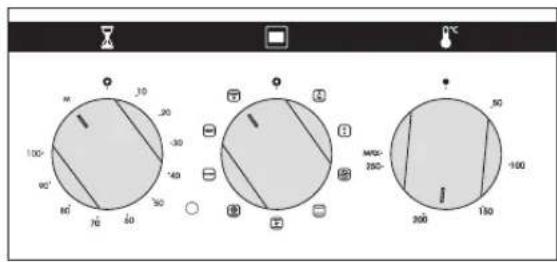
Either a cooking time has to be set or the timer has to be set to 'M' (manual) before your oven will operate. The oven will turn off when the timer reaches 'O'. The oven's thermostat light will switch on if the temperature is below the selected temperature on the dial, when you select any function other than the Oven Light function.
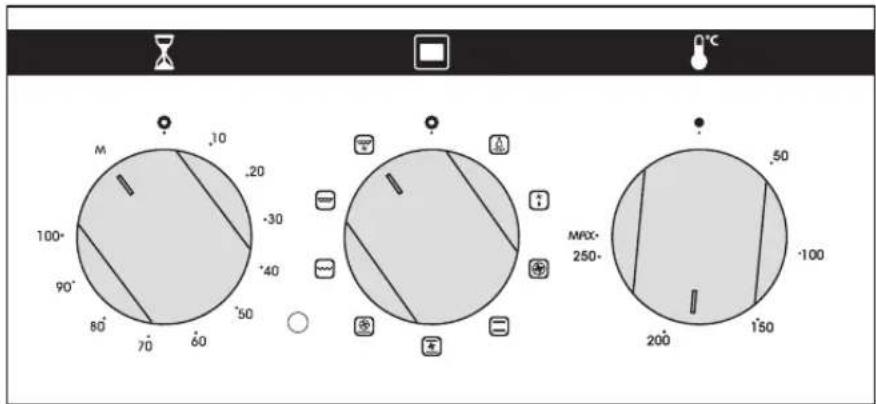
- Select a cooking time or set the timer to 'M' (manual)
- Select your oven function.
- Set your oven temperature.
| Function Description | |
 | Oven LightOnly the oven light will switch on. |
 | Defrost FunctionDefrost function can be started by placing the frozen food into your oven and turning the oven control to the defrost sign. Ensure the thermostat light does NOT illuminate by making sure the temperature dial is set to minimum (●) DO NOT set a temperature. This function will not cook the food as only the fan operates, this will help to defrost the food in a very short time. Put the food to be defrosted on the shelf in the third guide slot position and place a tray onto a shelf on the bottom guide slot position to collect the water during defrost. |
 | Turbo FunctionThe oven's light, ring heating element and fan will turn on.The turbo function evenly disperses the heat in the oven. All food on the shelves will be cooked evenly. Its recommended to pre-heat the oven for about 10 minutes. |
  | Top and Bottom Heating FunctionThe oven's light will turn on and the upper and lower elements will switch on.This function emits heat, ensuring even cooking of the food from the top and bottom. This is ideal for making pastries, cakes, baked pasta, lasagne and pizza. Preheating the oven for 10 minutes is recommended and it is best to cook on only one shelf at a time.Fan FunctionThe oven's light will turn on and the upper and lower elements and the fan will switch on.This function is very good for obtaining results in baking pastry. Cooking is carried out by the lower and upper heating elements within the oven and by the fan providing air circulation, which will give a slight grill effect to the food. Its recommended to pre-heat the oven for about 10 minutes. |
 | Pizza FunctionThe oven's light will turn on and the ring and lower elements and the fan will switch on.Fan and lower heating function is ideal for baking food, such as pizzas, equally in a short time.While the fan evenly disperses the heat of the oven, the lower heating element ensures the baking of food dough. |
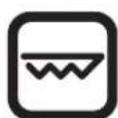
 | Grill FunctionThe oven's light and grill heating element will turn on.The grill function is used for grilling and toasting foods, use the upper shelves of the oven. Its recommended to pre-heat the grill for about 10 minutes. When using the grill the oven door must be closed and the oven temperature should be adjusted to 190°C.You must leave a gap of at least 30mm between the grill element and the top of the food that you are grilling when using the grill. When using the grill the oven door must be closed and the oven temperature should be adjusted to 190°C.You must leave a gap of at least 30mm between the grill element and the top of the food that you are grilling when using the grill. |
 | Double GrillThe oven's light, grill and top heating element will turn on.This function is used for faster grilling and for covering a larger surface area. Use the upper shelves of the oven. When using the grill the oven door must be closed and the oven temperature should be adjusted to 190°C.You must leave a gap of at least 30mm between the grill element and the top of the food that you are grilling when using the grill. When using the grill the oven door must be closed and the oven temperature should be adjusted to 190°C.You must leave a gap of at least 30mm between the grill element and the top of the food that you are grilling when using the grill. |
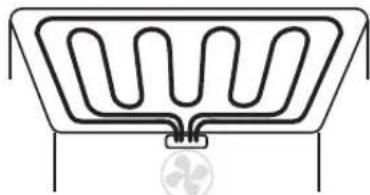
 | Double Grill with FanThe oven's light, grill and top heating element and fan will turn on.This function is used for faster grilling of thicker foods and for covering a larger surface area. The grill element and top element will be switched on as well as the fan to ensure even cooking. Use the upper shelves of the oven. When using the grill the oven door must be closed and the oven temperature should be adjusted to 190°C.You must leave a gap of at least 30mm between the grill element and the top of the food that you are grilling when using the grill. When using the grill the oven door must be closed and the oven temperature should be adjusted to 190°C.You must leave a gap of at least 30mm between the grill element and the top of the food that you are grilling when using the grill. |
First Time Use of the Oven
Ensure that nothing has been left in the oven and that the room is well ventilated. Remove any insert cards or plastic bags. Before connecting the power, use a damp cloth to carefully wipe the inner cavity wall and housing. Clean all the detachable parts in hot, soapy water before using.
Heat the appliance on maximum, making sure the room is well ventilated as there may be a little smoke and odour. This is normal, and is due to the protective substance on the appliance which protects it during shipping from the factory. Switch the appliance off once the smoke and odour has stopped. This can take up to 30 minutes.

• Under no circumstances should the oven be lined with aluminium foil as overheating may occur. - Do not place dishes or baking trays directly onto the base of the oven as it becomes very hot and damage may occur. - Bread may catch fire if the toasting time is too long. Close supervision is necessary during toasting. - During use, this appliance becomes hot. Care should be taken to avoid touching hot surfaces, e.g., oven door, heating elements. - Accessible parts may become hot when in use. Children should be kept away. - Do not leave the handle in position when grilling. If the handle is left in position when grilling, it will get very hot.
Shelf Positions
- On the wall of the inner cavity there are 5 different shelf guide slots in the oven. You can place the shelf at different heights to achieve the best cooking performance depending on the heat of the heating elements and the size of food. If only the top heating element is on, we suggest that you place the shelf on guide 5 (make sure that there is a minimum distance of 30 mm between the food and the top heating element).
- Always monitor the food during operation to ensure that you are not overcooking it.
- For heavy food, use a baking pan rather than the oven shelf.
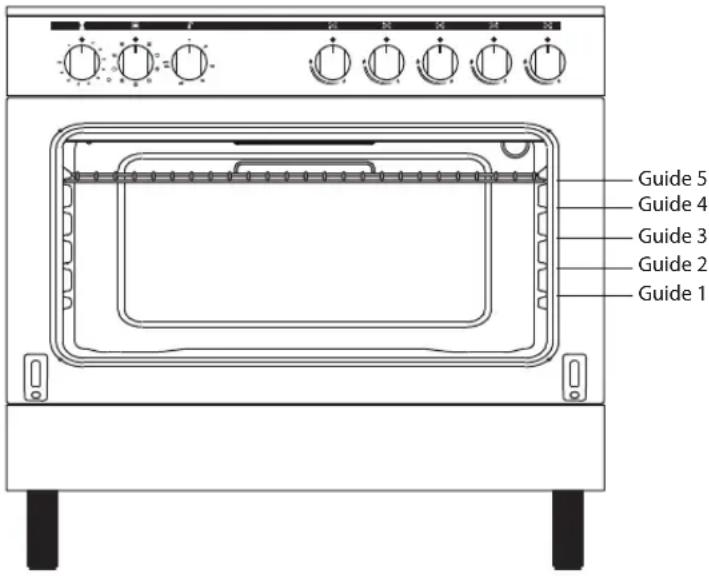
Replacing the Anti-tilting Oven Shelf
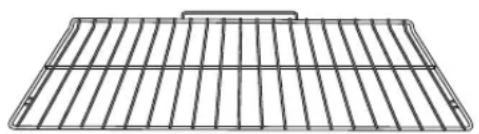
- Insert the shelf at an angle with the vertical section to the rear to clear the stops at either side of the guide slot. Once past this stop the shelf can be placed level again.
- To remove, completely angle the shelf upward so the shelf stop is cleared from the guide stop.
Preheating
When you need to preheat the oven, we recommend you do so for 10 minutes. For recipes needing high temperatures, e.g. bread, pastries, scones, soufflés etc., best results are achieved if the oven is preheated first. For best results when cooking frozen or cooked chilled ready meals always preheat the oven first, unless the cooking instructions advise you otherwise.
Cooking
- Ensure that food is placed centrally on the shelf and that there is sufficient room around the baking tray/dish to allow for maximum heat circulation.
- Stand dishes on a suitably sized baking tray on the shelf to prevent spillage onto the oven base and to help reduce cleaning.
- The material and finish of the baking tray and dishes used affect browning of the bottom of the food. Enamel-ware, dark, heavy or non-stick utensils increase browning of the bottom of the food. Shiny aluminium or polished steel trays reflect the heat away and give less browning of the bottom of the food.
- When cooking more than one dish in the oven, place dishes centrally on different shelves rather than cluster several dishes on one shelf, this will allow the heat to circulate freely for the best cooking results.
- If you are cooking more than one tray of similar items, for example cakes or biscuits, swap the trays during cooking or you can remove the top tray when the food is cooked and move the lower tray to the higher shelf to finish cooking.
- Do not place baking trays directly on the oven base as it interferes with the oven air circulation and can lead to burning of the food. Use the lower shelf position.
- During cooking, do not open the door unnecessarily as you will lose heat and your cooking results may change. Cooking times will be longer and energy use will be higher.
- At the end of cooking time, as in all other cooking processes; turn the control to the "0" position (off). Take the cooking tray out and put it onto a safe place (NOT on the oven door) as it will be hot. Keep children away from the hot oven during and after cooking, until it has completely cooled down.

- During use, the outer and inner surfaces of the oven get hot. While opening the oven door, step back to avoid the hot steam coming out of the oven. There may be a risk of burns. • Always use oven gloves to remove and replace food in the oven.
Baking Tips
- Always place baking tins in the centre of the wire shelf.
- Make sure you use bakeware that is oven proof and suitable for your recipe.
- Do not place bakeware too close to the rear of the oven wall.
- You can influence the degree of browning by changing the temperature setting.
- If a cake collapses after removing it from the oven:
- Use less liquid on your next attempt.
- Consider using a longer baking time or use a slightly lower temperature setting.

Cooking with the Grill
Before using the grill for the first time, switch the grill on for 15 to 20 minutes. Ensure that the room is well ventilated as there may be a little smoke and odour upon initial start up (for about 10 mins). This is normal. It is due to the protective substance on the heating elements which protects the cooker from the effects of corrosion during shipping from the factory.

The grill door must be kept closed when using the grill.
- Select a time between 0-100 minutes or set the timer to 'M' (manual).
- Select your desired grill option ( ☐, ☐ or )
- Set the temperature to 190°C.
with fan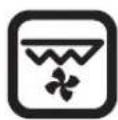
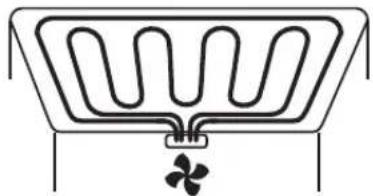
Grill & Top element and fan switch on Double grill
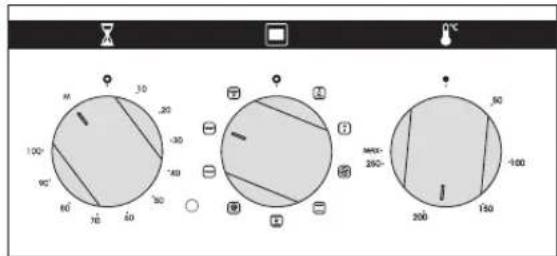
Grill & Top element switch on Double grill

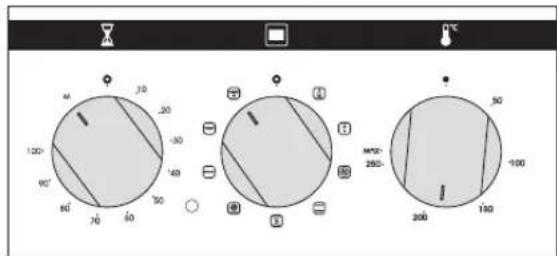
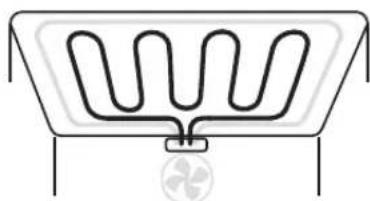
Grill element only switches on Grill
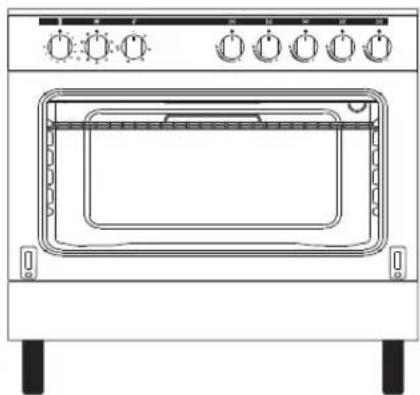
- Insert an oven shelf at your desired level, the closer to the elements the more intense the heat will be. There must be at least 30 mm between the food and the element.
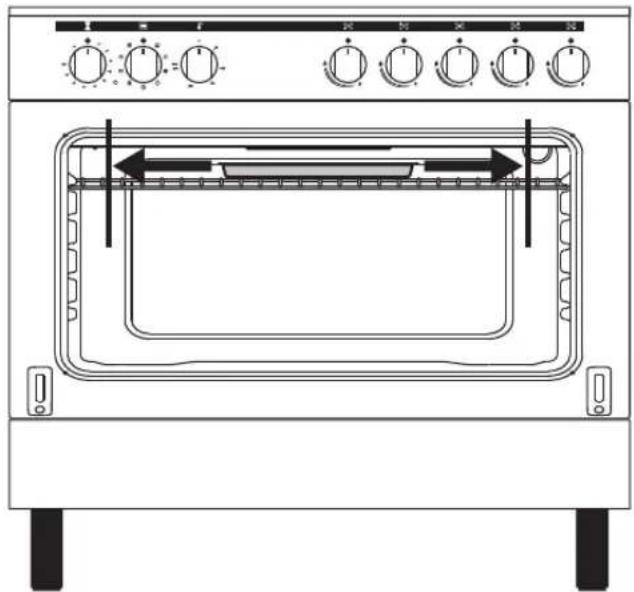
- Using the handle, insert the grill pan and rack onto the shelf. Make sure you leave at least 30mm of space between the top of the food and the grill element. You can position the grill pan anywhere on the oven shelf. The food to be cooked must be placed on the grill rack in the grill pan. The handle must be removed once the grill pan tray is in position. Close the oven door. Check the food regularly to ensure you do not overcook it.
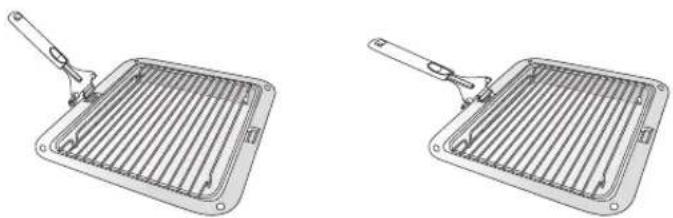
- The grill pan has a detachable handle. Ensure when using the grill pan handle that it is centralised and secure as shown below.
- At the end of grilling, as in all other cooking processes, turn the oven function control to the "0" position (off). Take the grill pan out by using the supplied handle and put the pan onto a safe place.

- Never cover the grill pan or grill rack with foil as this can lead to grill fires.
- Bread may catch fire if the toasting time is too long. Close supervision is necessary during toasting.
- During use this appliance becomes hot. Care should be taken to avoid touching hot surfaces, e.g. oven door.
- Accessible parts may become hot when in use. Children should be kept away.
- Do not leave the handle in position when grilling. If the handle is left in position when grilling, it will get very hot.

Using the Storage Compartment
Your oven has a convenient storage compartment for you to store your grill tray, shelves, small pots and pans. The compartment may become hot so do not store any food in this compartment.

- The inside surface of storage compartment may be hot during use. Care should be taken to avoid touching inside surfaces.
- The storage compartment is NOT a warming compartment.
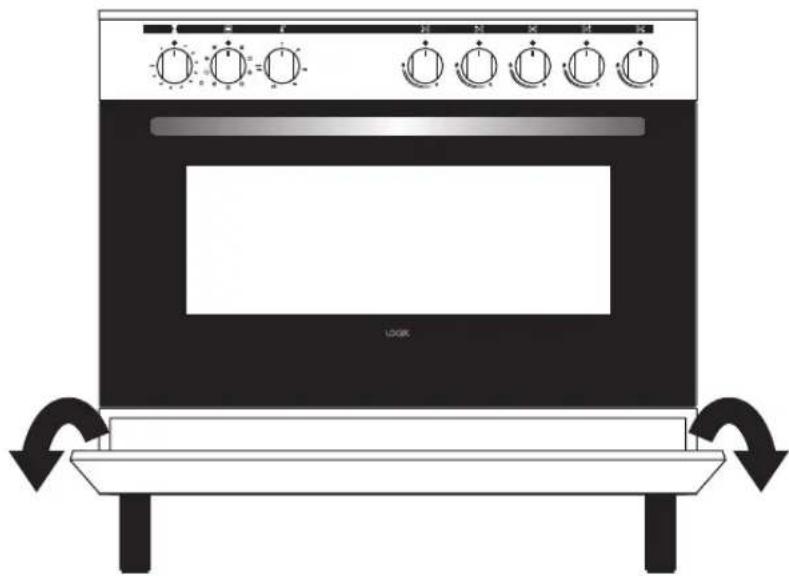
- Open the storage compartment from either side.
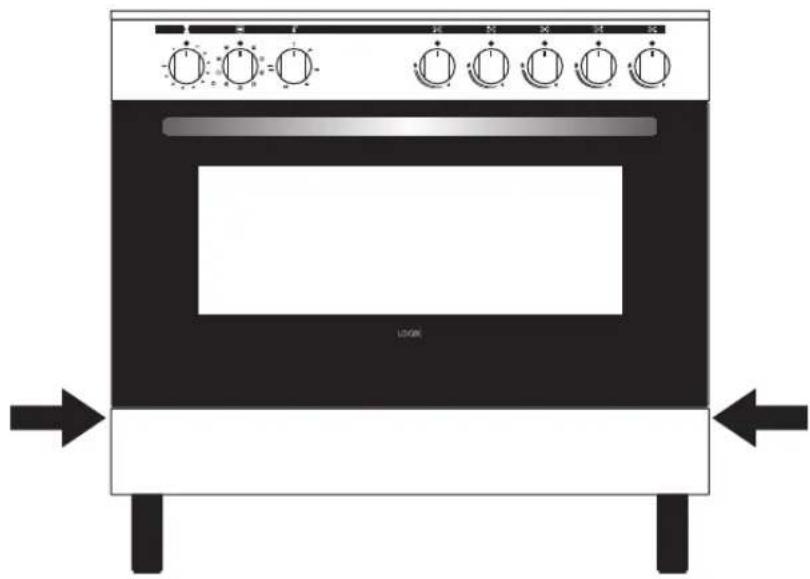
- The compartment door is sprung loaded so take care when opening and closing the door. It could snap closed and trap your fingers.

Cleaning and Maintenance

Steam Cleaners must not be used to clean this product.

To avoid shock hazard, always disconnect the hob from the electrical supply.
| Cooking Part Cleaning Important | ||
| Trivets/pan supports, burner caps and enamel surfaces | Hot soapy water and nylon scourer.Mild abrasive cream cleaners.Fume-free or heavy-duty oven cleaners (follow manufacturer's instructions). | Always allow hob parts to cool completely before cleaning them.Always apply minimal pressure with abrasive cleaners.Remove spills as soon as the hob is cool to avoid the spills becoming burnt on. |
| Burner parts • Hot soapy | water.To clear the holes use a stiff nylon brush.Mild abrasive cream cleaners. | Ensure burner parts are dry before refitting.Reassemble the burner parts correctly. |
| Controls | Hot soapy water and a soft cloth. | Care must be taken if removing the controls from the shafts.If cleaning the controls whilst they are attached to the shaft, ensure liquid does not enter the appliance. |
| Hob surfaces • Soak stains | under a hot soapy cloth, rinse and dry thoroughly.Hard water spots can be removed with household white vinegar.Non-abrasive hob surface cleaners. | Never use harsh/abrasive cleaning agents as they will damage the finish.Chlorine or chlorine compounds in some cleaners are corrosive to hob surface and may damage the appearance of your hob. Check the label on the cleaner before using. |
| Electrodes • Toothbrush. | A dirty or wet electrode will prevent | the burner lighting efficiently. Ensure the appliance has been disconnected from the electrical supply before cleaning or drying. |

Cleaning the Gas Hob
| Maintenance Period Description | |
| Daily • Clean gas hob as per the instructions. | |
| Monthly • Remove all | burner parts, and clean using a non-abrasive detergent. Rinse in cold water, dry thoroughly, and replace.• Clean the ignitor and probe carefully, using a toothbrush. |
| Every year | • Contact your local authorized gas Service Agent to perform a thorough check on all gas components on the gas hob. |

Burner Parts and Pan Supports
You can remove and clean these parts with hot soapy water or non-abrasive detergents. Clean spills regularly before they become burnt on. Do not wash these parts in a dishwasher.
After cleaning, check that the burner rings and burner caps are dry before replacing correctly.
It is very important to check that the burner rings and burner caps have been correctly positioned.
Failure to do so can cause serious problems.

To avoid damage to the ignition circuit NEVER light the hob when the burners are not in place.
The surface of the burner cover will gradually lose its gloss finish with time. This is quite normal and will not effect the efficiency of the hob.

Replacing the Burners
Check that:
• The ignitor is always clean to ensure trouble-free sparking.
- The FSD probe is always clean to ensure correct operation of the safety valves.

- Both the ignitor and probe must be very carefully cleaned using a toothbrush.
- When replacing the burner parts, ensure you do not damage the ignitor or temperature probes.
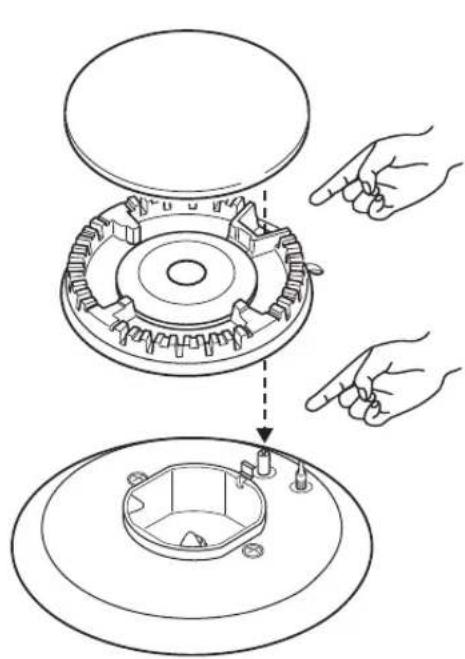
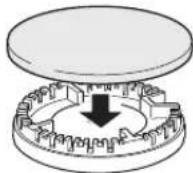
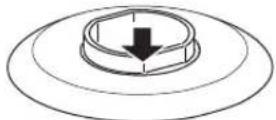
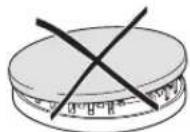
Burner parts Replacing the burner parts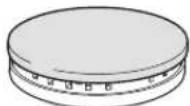

Hob Controls
If you have problems with the hob controls (gas taps), call your Authorised Service Centre.
These parts are not user serviceable.
* All images are for indication only; please refer to your individual unit for actual item.

Cleaning Instructions

Before you start cleaning your cooker, please:
- Read the cleaning instructions and the 'Safety Warnings' sections.
- Turn the cooker off at the mains socket.
- Allow the cooker to completely cool down before cleaning.
- Do not use a steam cleaner.
- Do not keep flammable substances in, on or near the cooker.
- Wipe the oven clean after every use.
- Wipe up spills. Avoid leaving alkaline or acidic substances (such as lemon juice or vinegar) on the oven surfaces.
- Do not use cleaning products with a chlorine or acidic base.
- Never clean the interior, panel, lid, trays and all other parts of the oven with tools like a hard brush, cleaning mesh or knife. Do not use abrasive, scratching agents and detergents.
- After cleaning the interior parts of the oven with a soapy cloth, rinse it and then dry thoroughly with a soft cloth. Leave the doors open to allow the cavities to completely dry.
- Never use flammable agents like acid, thinner or petrol when cleaning your oven.
- Do not wash any part of your oven in a dishwasher.
Cleaning the Outside of the Cooker
Wipe the outside surfaces often, using warm water and a mild household detergent. Any stainless steel parts may also be cleaned with a suitable cleaner.

- If you choose to use a commercial stainless steel cleaner, please read the label to make sure it does not contain chlorine compounds as these are corrosive and may damage the appearance of your cooker.
- Do not use abrasive cleaners, cloths or pads on the outside surfaces.
- Immediately wipe off any caustic cleaners if they are spilled onto the oven.
Cleaning the Oven Door Glass
Do not use harsh abrasive cleaners or sharp metal scrapers to clean the oven door glass since they may scratch the surface, which could result in the glass shattering.

Take care when handling parts with glass, knocks, chips, heavy handling and dropping could cause the glass to shatter.
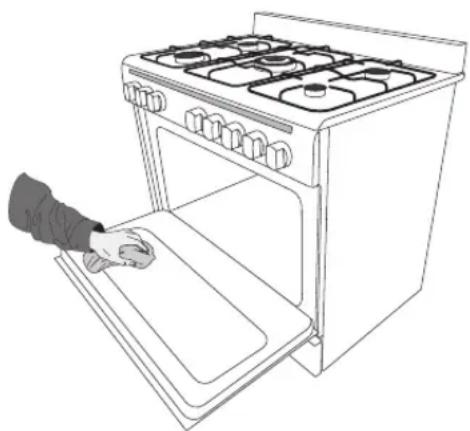
Cleaning the Inside of Your Cooker
- Do not use abrasive cleaners, cloths or pads to clean the enamel.
- Clean the enamel on the inside of the cooker when it has cooled down, using household detergents or an ammonia-based cleaner. You may use an 'off the shelf' oven cleaner, if you carefully follow the manufacturers' instructions.
- The oven door can be removed to allow easier access to the inside of your oven cavity. (See "Removing the Oven Door" section)
- Wipe the cooker after every use with a soft cloth that has been dampened in soapy water. Wipe it again with a wet cloth and then dry it. Do not clean with dry or powder cleansers.
- Do not clean the cooker while the glass panels are hot.
- Clean the cooker with a glass cleaner which is designed to be used with cookers. Then rinse and then dry it with a dry cloth.

Removing the Oven Door

- Ensure the door has cooled down. • Take care when handling parts with glass, knocks, chips, heavy handling and dropping could cause the glass to shatter.
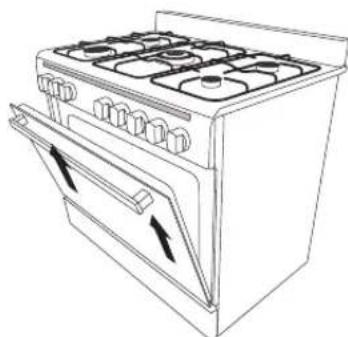
The top oven door can easily be removed as follows:
- Open the door completely.
- The swivel retainers of the right hand and left hand hinges are hooked onto the metal bar above them. Lift the retainers as shown.
- Lift the door slightly. The notch on the bottom of the hinge will disengage.
- Lift the door slightly. The notch on the bottom of the hinge will disengage.
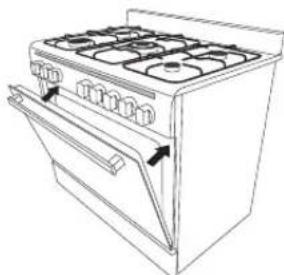
- Now pull the oven door forwards off the appliance. Releasing both hinge sections from the slots.
To replace the door, repeat the above steps in reverse order. Ensure to locate the hinge correctly, place the groove of the hinge directly on the edge of the door frame. Push forward the swivel retainers to the original position and gently close the door. If the door does not close properly, repeat the steps again.
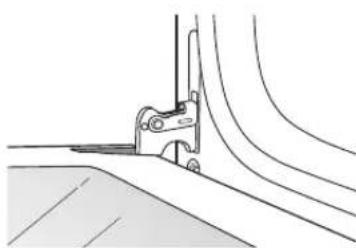
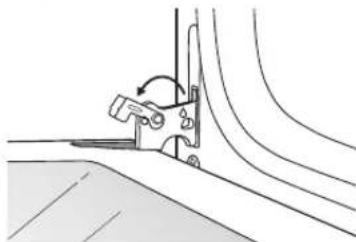
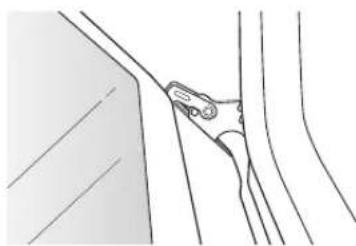
| Problem Possible Solutions | |
| My burner does not light | ·Check the electricity is switched on.·Check the gas supply valve is turned on and the gas supply to the house is working. You should hear the gas when you turn a burner on.·The ignitors may be dirty. Clean gently with a small nylon brush such as a toothbrush.·The burner parts may not be located properly. Check the assembly and make sure the burner cap is sitting flat. |
| My burner flames are yellow or hard to start | ·The burner parts may not be located properly. Check the assembly and make sure the burner cap is sitting flat.·If you use bottled gas this may indicate you are getting near the end of the bottle.·Check the burner parts are clean and dry.·The gas pressure may not be at the correct level. Check with your approved service agent.·Your hob may not be set up for the gas you are using. Check this with your approved service agent or installer. |
| One of my burners has an uneven flame | ·Check the burner parts are clean and dry. Check the assembly and make sure the burner cap is sitting flat. |
| My burner goes out when I let go of the control | ·The hob has a safety feature called ‘Flame Supervision Device (FSD)’. Hold down the control for approximately 5 – 10 seconds after the burner has lit. Releasing the control too soon will extinguish the flame. See the ‘Flame Failure Safety Feature’ section. |
| The flame goes out at low settings | ·The gas supply pressure may be low. Check this with your approved service agent.·The low setting may have been adjusted incorrectly. Check this with your approved service agent. |
| My burners do not turn down much (when running on bottled gas or LPG) | ·Your burners may not have been adjusted correctly. Check this with your approved service agent. |
| There are objectionable odours | ·Call your approved service agent.·Ensure the hob and burners are clean and dry. |
| The flame appears to lift off the burner | ·Call your approved service agent. |
| There is an electricity failure | ·If there is an electricity failure, you can still use your hob. Light the burners by holding a candle lighter close to the side of the burner and turning the control to the High position. Wait until the flame is burning evenly before adjusting. The control must still be held down for 5 – 10 seconds after the burner has lit. Releasing the control too soon will extinguish the flame. |
| There is no power to the oven | ·Ensure you have power to your house, you could be experiencing a power cut.·Ensure the timer is set to a time or ‘M’ (manual setting). |

Replacing the Oven Lamp
Let the oven cavity cool down.

Ensure that the cooker is switched off at the mains before replacing the lamp to avoid the possibility of an electric shock.
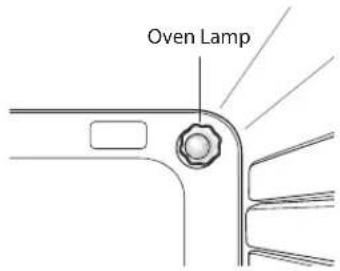
- Remove the protective cover.
- Unscrew and replace the bulb with a new one suitable for high temperatures (300°C). • Refit the protective cover.

Bulb specifications 230V~ 50 Hz, 25W, E14

Installation

- The cooker must be installed by a competent and Gas Safe Registered Engineer (in the UK) and in compliance with local safety and building regulation safety standards.
- The cooker may be located in a kitchen, a kitchen/diner or bed-sitting room in accordance with the latest editions of BS6172, BS5440-2 and BS6891, but not in a room containing a bath or shower. Please refer to the local legislation/regulations to ensure location is permitted.
- If the cooker is installed adjacent to furniture which is higher than the gas hob, a gap of at least 50 mm must be left between the side of the cooker and the furniture unless non-combustible materials (ceramic tiles, metal backsplash etc.) are used which then allows this distance to be reduced to 20 mm.
- Prior to installation, ensure that the local distribution conditions (nature of the gas and gas pressure) and the adjustment of the appliance are compatible. The adjustment conditions for this appliance are stated on the label (or data plate).
- The furniture walls adjacent to the cooker must be made of heat resistant material (check with your furniture supplier). The veneered synthetic material and the glue used must be resistant to a temperature of 100°C in order to avoid ungluing or deformations.
- Flammable materials such as curtains, wood, wallpaper etc. must not be fitted immediately behind the appliance or within 500 mm of the sides. We recommend not to place your appliance next to a refrigerator.
- This cooker must NOT be placed on a pedestal or base.
- It is essential that the cooker is positioned as stated or freestanding ensuring the distances to flammable materials etc. are still observed.
- Any cooker hoods must be installed according to the requirements of the cooker hood instruction/installation manual but no less than 650 mm above the cooker.
- Any cupboards placed directly above the cooker must be no less than 700 mm.
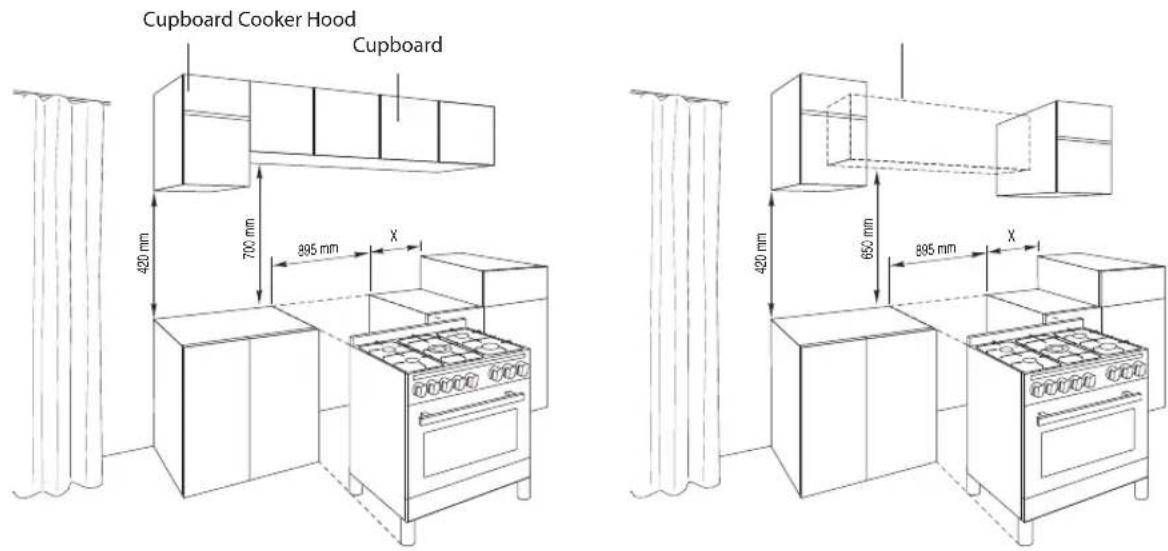

For all dimensions marked "X", please refer to the information below:
X : 50mm for combustible materials 20mm for non-combustible materials.

Adjusting the Feet

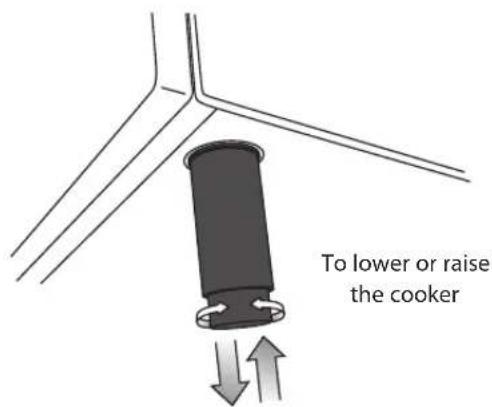
Using the fitted adjustable feet is MANDATORY. For safety reasons and to ensure adequate ventilation, the cooker chassis MUST NOT sit directly on the floor, a plinth, or other support surface.
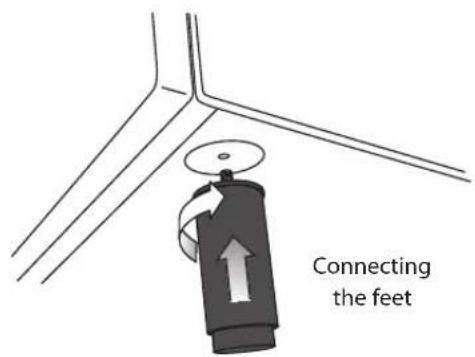
Your appliance must be level before use. The cooker has 4 levelling feet which can be adjusted by hand. Turn the feet anti-clockwise to lower the level or clockwise to raise the level as shown below. It is possible to raise the product a maximum of 60 mm via the levelling feet.

Moving the Cooker

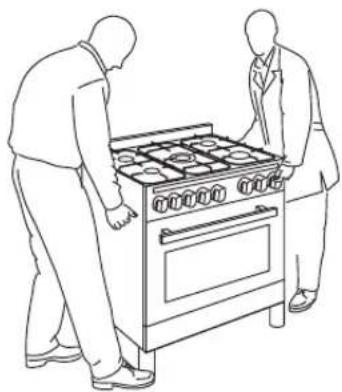
- Two people must always raise the cooker, as shown, to prevent damaging the adjustable feet.
- Do not lift the cooker by the door handles. DO NOT DRAG the cooker. Lift the feet clear of the floor.
The product must NOT be moved by dragging. The cooker must always be moved by lifting it up.

Stability Bracket
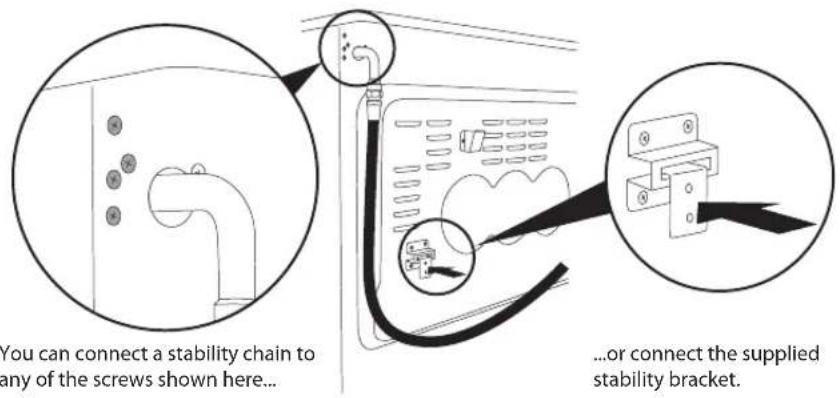
The supplied stability bracket or a recognized cooker stability device MUST be fitted.

Ventilation Requirements
This appliance is not connected to a combustion products evacuation device. It should be installed and connected in accordance with current installation regulations. Particular attention should be given to the relevant requirements regarding ventilation.
The appliance should be installed in a room or space with an air supply in accordance with the latest edition of BS5440-2. This appliance needs 2m3/h air per Kw input
For rooms with a volume of less than 5m3 — permanent ventilation of 100cm2 free area will be required.
For rooms with a volume of between 5m3 and 10m3 a permanent ventilation of 50cm2 free area will be required unless the room has a door which opens directly to the outside air in which case no permanent ventilation is required.
For rooms with a volume greater than 10m3 — no permanent ventilation is required.

- Regardless of room size, all rooms containing the appliance must have direct access to the outside air via a window that opens or equivalent.
- Where there are other fuel burning appliances in the same room, the latest edition of BS 5440-2 should be consulted to determine the correct amount of free area ventilation requirements.

Gas Installation

This cooker uses and is ready to use NATURAL GAS only and cannot be used with any other gas without modification. This appliance is manufactured for conversion to LPG after fitting new injectors (supplied) and making adjustments. Refer to “replacement of burner injectors” section for details.

Installation and Service Regulations

This appliance must be installed and serviced only by a suitably qualified and Gas Safe Registered engineer, and in accordance with the current editions of the following standards and regulations or other locally applicable regulations:
• Gas Safety (Installation and Use) Regulations • Building Regulations • British Standards (BS 5440, BS 6172 and BS 6891) • Regulations for Electrical Installation (BS 7671, (Latest Edition))

Gas Connection

- Only a suitably qualified and Gas Safe Registered Engineer may convert the appliance to a different gas type.
- When using Butane (G30) gas a supply pressure of 28 -30 mbar is required.
- When using Propane (G31) gas a supply pressure of 37 mbar is required.
- Flexible hoses must be manufactured in accordance with BS669 part 1 and be of the correct construction for the type of gas being used.
- Gas hoses designed for natural gas MUST NOT be used for supplying LPG gas (LPG gas hoses can be identified by a either a red band or stripe on the rubber outer coating of the hose).
- The hose should not be crushed or trapped or be in contact with sharp or abrasive edges. It should also not be subjected to corrosion by acidic cleansing agents.
The installation of the cooker to Natural Gas or LP Gas (using the LPG conversion kit supplied) must be carried out by a Gas Safe registered engineer. Installers must take account of the provisions of the relevant British Standards Code of Practice, the Gas Safety Regulations and the Building Regulations.
Note: It is recommended that the gas connection to the cooker is installed with a flexible connecting tube made to BS669.
Installation Relevant to Natural Gas
Installation to Natural Gas must conform to the Industry Standards, etc. The supply pressure for Natural Gas is 20 mbar.
Installation Relevant to Liquid Petroleum Gas (LPG)
This appliance must only be connected to LPG after the supplied LPG conversion kit has been fitted. The installation must conform to the relevant British Standards.
During gas connection and re-connection, a sealing material that is either
- PTFE tape approved to BS EN 751-3;
- Or jointing compound suitable for Natural Gas complying to BS 6956-5 or BS EN 751-1 should be used between connection surfaces.
To Connect the Gas Supply
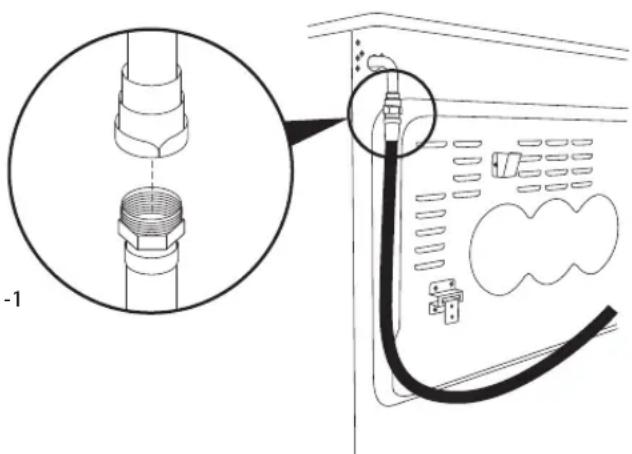
- Connect the gas supply to the gas inlet at the rear of the cooker. The gas hose must hang in a "U" shape behind the cooker.
- Undertake a full gas tightness test.
- To avoid damage to the appliance gas rail inlet pipe, tighten the fittings using two suitable spanners.
- Using a suitable leak detection fluid solution, check each gas connection one at a time by brushing the solution over the connection. The presence of bubbles will indicate a leak. If there is a leak, tighten the fitting and then recheck for leaks.

Do not use a naked flame to test for leaks.

Replacement of Burner Injectors

Only a suitably qualified and Gas Safe Registered Engineer may change the Hob Injectors. It is illegal to attempt to change the Hob Injectors yourself.
Select the injectors to be replaced according to the "Injector Size Table".
To Replace the Hob Injectors
- Turn off and isolate the Gas and Electric supplies to the cooker.
- Remove the burner ring and cap.
- Unscrew the injectors. For this, use a 7mm socket spanner.
- Replace the injector with the ones from the conversion set, with the corresponding diameters suitable to the type of gas that is going to be used, according to the information chart.
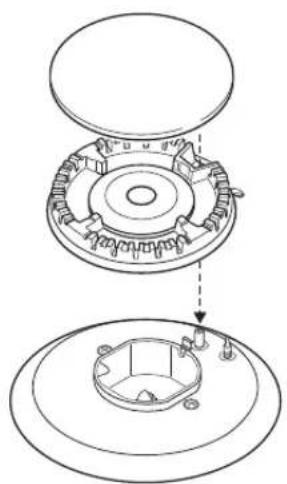
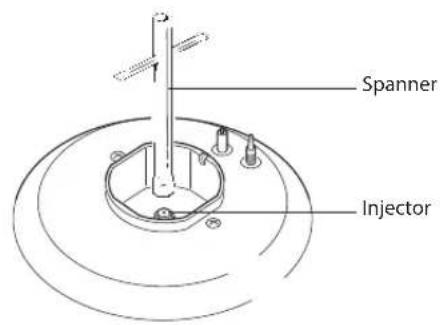
The gas flow adjustment is made by turning a small screw on the control valves.
Adjusting the Reduced Flame Position
The flame length in the minimum position is adjusted with the bypass screw located on the side of the valve spindle under the hob controls. The screw must be loosened when changing from LPG to NG. In changing from NG to LPG, the same screw must be tightened clockwise.
When the flame has a length of at least 4mm, the gas is well distributed. Make sure that the flame does not die out when passing from the maximum position to the minimum position. Create an artificial wind with your hand toward the flame to see if the flames are stable.

Injector Size Table
| Burner Injector Values According To The Gas Type. Destination: GB Gas Category II2H3+ | LPG Natural Gas | |||
| G 30/3128-30/37 mBar | G 2020 mBar | |||
| Large Burner (Fast) | Injector mm 0.85 | 0 1.150 | ||
| Gas Flow(15°C and 1013mbar) | 210.90 gr/h 276.20 lt/h | |||
| Power kW 2.90 2 | 90 | |||
| Standard Burner | Injector mm 0.65 | 0 0.970 | ||
| Gas Flow(15°C and 1013mbar) | 120.00 gr/h 166.70 lt/h | |||
| Power kW 1.65 1 | 75 | |||
| Small Burner (Simmer) | Injector mm 0.50 | 0 0.720 | ||
| Gas Flow(15°C and 1013mbar) | 65.40 gr/h 95.20 lt/h | |||
| Power kW 0.90 1 | 00 | |||
| Multi Burner | Injector mm 0.96 | 0 1.300 | ||
| Gas Flow(15°C and 1013mbar) | 261.70 gr/h 342.80 lt/h | |||
| Power kW 3.60 3 | 60 | |||
| Total Power kW 9.05 | 9.25 | |||

- All intervention regarding installation maintenance and conversion of the appliance must be fulfilled with original factory parts.
- The manufacturer declines any liability if these correct parts are not used.

Electrical Connection

The following installation procedure must be carried out by a competent person. If in doubt consult a qualified electrician. The electrical installation must comply with the IEE Regulations, Building & local By-Laws.
The cooker must be connected to the mains supply via a full disconnection switch, with a contact separation of at least 3mm in all poles, correctly fused with a capacity appropriate to that shown on the cooker Rating Plate and incorporated in the fixed wiring in accordance with the latest wiring regulations. All electrical wiring from the consumer unit to the cooker, via the full disconnection switch must be of the correct rating.
Electric cookers come without a power supply cable. If your supply is different from this specified value, contact your authorised service agent. Ensure that the electricity supply voltage on the machine is correct.
Electrical connection of the oven should only be made to connections/sockets with an earth system installed in compliance with the local regulations. If there are no connections/sockets with an earth system in place where the oven will be installed, immediately contact a qualified electrician to install one. The manufacturer is not responsible for damages that will arise because of the appliance not being connected to an earth system.
The cooker can be connected to the mains only after you complete the connection at the junction box.
For the installation of the supply cable carry out the following operations:
- Release both clips then open the junction box lid.
Colours of the wires in the mains lead should correspond with the markings identifying the terminals. Proceed as follows:
Green & Yellow wire to terminal marked "E" or ⊥.
Brown wire to terminal marked "L".
Blue wire to terminal marked "N".
Ensure all connections are adequately tightened. Do not over tighten as you may risk damaging the threads.
- Fix the supply cable in the cable clamp and then close the cover.
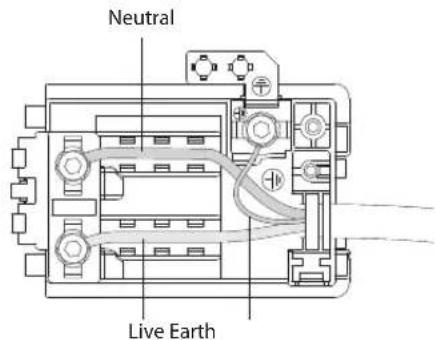

The power supply cable must have these minimum requirements:
- Type: H05VV-F (PVC insulated and sheathed flexible cable)
• Section: 1.5 mm². This appliance must be earthed.

- The mains cable must be positioned away from any hot parts at the rear of the cooker. If this cannot be done then another method of protecting the mains cable from the hot parts must be used i.e. Heat resistant sleeving or high temperature cables.
* All images are for indication only; please refer to your individual unit for actual item.

Energy Saving Tips and Energy Label
Main Oven
• Cook the meals together, if possible. - Keep the pre-heating time short. - Do not elongate cooking time. - Do not forget to turn off the oven at the end of cooking. - Do not open the oven door during cooking.
Hob
- Use cookware that has a flat base.
- Use the correct sized cookware for the cooking zone being used. • Use a lid on your cookware.
- Minimize the amount of liquid or fat used.
- When liquids start boiling reduce the heat.
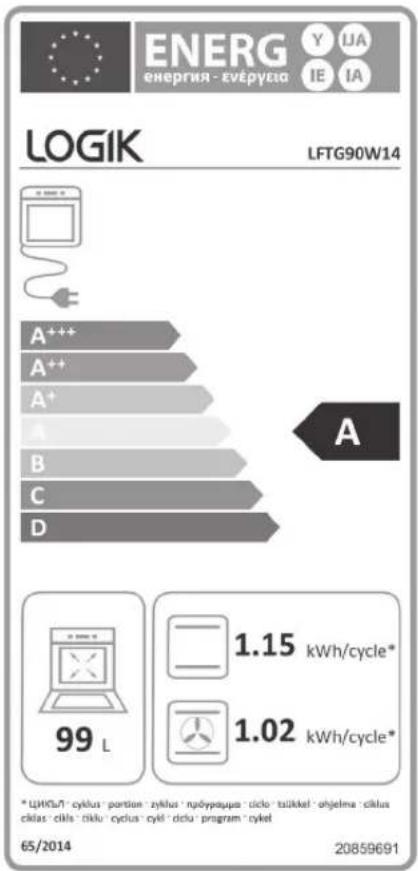
Product Fiche and Specifications
| Brand Logik | |
| Model LFTG90W14 | |
| Type of Oven Electric | |
| Mass 62 Kg | |
| Energy Efficiency Index - Conventional 119.1 | |
| Energy Efficiency Index - Fan Forced 105,6 | |
| Energy Class A | |
| Energy Consumption (electricity) - Conventional 1.15 kWh/cycle | |
| Energy Consumption (electricity) - Fan Forced 1.02 kWh/cycle | |
| Number of cavities 1 | |
| Heat Source Electric | |
| Volume 99 litres | |
| This product complies with EN 60350-1 | |
| Overall Dimension (WxDxH) | 895(W) x 655(D) x 856-916 + 80mm Splashback (H) mm |
| Oven Lamp | 25 W, E14, 300°C |
| Supply Voltage | 230V - 240V~ 50 Hz |
| Total Consumption (gas) | 1048 l/h |
| Total Power (electricity) | 3.3 kW |
| Hob | |
| Number of Cooking Zones (Hob) | 5 |
| Heating Zone(s) - Auxiliary | |
| Heating Technology | Gas |
| Energy Efficiency | N/A |
| Heating Zone(s) - Semi-Rapid x2 | |
| Heating Technology | Gas |
| Energy Efficiency | 59% |
| Heating Zone(s) - Rapid x1 | |
| Heating Technology | Gas |
| Energy Consumption | 57% |
| Heating Zone(s) - Multi Ring x1 | |
| Heating Technology | Gas |
| Energy Consumption | 56% |
| Energy Efficiency of Hob | 57.8% |
| The Hob complies with | EN 30-2-1 |
Features and specifications are subject to change without prior notice.

For general information about this appliance and handy hints and tips, please visit
www.knowhow.com/knowledgebank or call 0344 5611234.

Visit Partmaster.co.uk today for the easiest way to buy electrical spares and accessories. With over 1 million spares and accessories available we can deliver direct to your door the very next day. Visit www.partmaster.co.uk or call 0344 800 3456 (UK customers only). Calls charged at National Rate.
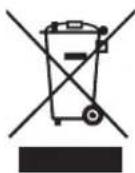
The symbol on the product or its packaging indicates that this product must not be disposed of with your other household waste. Instead, it is your responsibility to dispose of your waste equipment by handling it over to a designated collection point for the recycling of waste electrical and electronic equipment. The separate collection and recycling of your waste equipment at the time of disposal will help conserve natural resources and ensure that it is recycled in a manner that protects human health and the environment.
For more information about where you can drop off your waste for recycling, please contact your local authority, or where you purchased your product.
DSG Retail Limited (Registered in England No. 504877) Maylands Avenue, Hemel Hempstead, Hertfordshire HP2 7TG. UK
IB-LFTG90W14-150209V1
- CM DUAL FUEL RANGE COOKER
- CONTENTS
- SAFETY WARNINGS
- UNPACKING
- PRODUCT OVERVIEW
- BEFORE USING THE HOB
- LIGHTING THE HOB
- FLAME FAILURE SAFETY FEATURE
- IF THE BURNER DOES NOT LIGHT
- IF THE FLAME IS IRREGULAR
- ELECTRICITY FAILURE
- COOKWARE GUIDELINES
- OVEN CONTROL
- USING THE OVEN
- COOKING WITH THE GRILL
- USING THE STORAGE COMPARTMENT
- CLEANING AND MAINTENANCE
- CLEANING THE GAS HOB
- BURNER PARTS AND PAN SUPPORTS
- REPLACING THE BURNERS
- HOB CONTROLS
- CLEANING INSTRUCTIONS
- REMOVING THE OVEN DOOR
- HINTS AND TIPS
- REPLACING THE OVEN LAMP
- INSTALLATION
- ADJUSTING THE FEET
- MOVING THE COOKER
- STABILITY BRACKET
- IMPORTANT SAFETY INSTRUCTIONS READ CAREFULLY AND KEEP FOR FUTURE REFERENCE
- LPG CONVERSION KIT
- THE HOB
- CONTROL PANEL
- OVEN
- DO NOT USE COOKING VESSELS ON THE HOB THAT OVERLAP ITS EDGES
- FIRST TIME USE OF THE OVEN
- SHELF POSITIONS
- REPLACING THE ANTI-TILTING OVEN SHELF
- PREHEATING
- COOKING
- BAKING TIPS
- CHECK THAT
- CLEANING THE OUTSIDE OF THE COOKER
- CLEANING THE OVEN DOOR GLASS
- CLEANING THE INSIDE OF YOUR COOKER
- VENTILATION REQUIREMENTS
- GAS INSTALLATION
- INSTALLATION AND SERVICE REGULATIONS
- GAS CONNECTION
- INSTALLATION RELEVANT TO NATURAL GAS
- INSTALLATION RELEVANT TO LIQUID PETROLEUM GAS (LPG)
- TO CONNECT THE GAS SUPPLY
- REPLACEMENT OF BURNER INJECTORS
- TO REPLACE THE HOB INJECTORS
- ADJUSTING THE REDUCED FLAME POSITION
- INJECTOR SIZE TABLE
- ELECTRICAL CONNECTION
- ENERGY SAVING TIPS AND ENERGY LABEL
- MAIN OVEN
- HOB
Brand : Logik
Model : LFTG90W14
Category : Cooker