LDOC60W17 - Cooker Logik - Free user manual and instructions
Find the device manual for free LDOC60W17 Logik in PDF.
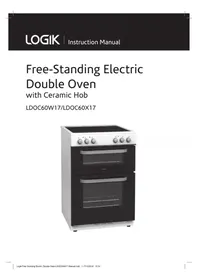


| Product Type | Freestanding Electric Cooker |
| Brand | Logik |
| Model | LDOC60W17 |
| Dimensions (Width x Depth x Height) | 60 cm x 60 cm x 90 cm |
| Weight | Approximately 50 kg |
| Power Supply | 230 V ~ 50 Hz, 13 A |
| Energy Class | A |
| Hob Type | Ceramic with 4 Cooking Zones |
| Oven Type | Electric Fan Oven |
| Oven Capacity | 65 Litres |
| Oven Functions | Fan Cooking, Grilling, Conventional Heating, Defrosting |
| Grill | Integrated Grill Element |
| Control Type | Knobs and Electronic Timer |
| Cleaning | Enamel Interior, Removable Glass Door |
| Safety Features | Child Lock, Automatic Shut-off, Cool Touch Door |
| Accessories Included | 2 Oven Shelves, 1 Baking Tray, 1 Grill Pan |
| Installation Type | Freestanding |
| Colour | White |
| Spare Parts Availability | Knobs, Heating Elements, Door Hinges, Thermocouple |
Frequently Asked Questions - LDOC60W17 Logik
User questions about LDOC60W17 Logik
0 question about this device. Answer the ones you know or ask your own.
Ask a new question about this device
Download the instructions for your Cooker in PDF format for free! Find your manual LDOC60W17 - Logik and take your electronic device back in hand. On this page are published all the documents necessary for the use of your device. LDOC60W17 by Logik.
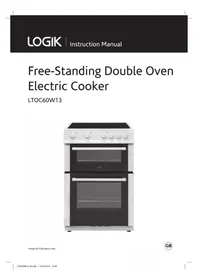
USER MANUAL LDOC60W17 Logik
Free-Standing Electric Double Oven
with Ceramic Hob
LDOC60W17/LDOC60X17
Contents
Safety Warnings....4
Unpacking....6
Product Overview....7
Front View ....7
Top View....7
Control Panel....8
Before Using Your Cooker 9
First Time Use of the Hob 9
Choosing the Right Cookware....9
Using Your Hob 10
First Time Use of the Oven 11
Using the Oven 11
Replacing the Anti-tilting Oven Shelf 11
Using the Oven Control....12
Energy Saving 12
Using the Grill/Top Oven....13
General Advice....15
Cleaning the Outside of the Cooker....15
Cleaning the Ceramic Hob 15
Cleaning the Cooker Door Glass....16
Cleaning the Inside of Your Cooker 16
Removing the Grill Door 16
Replacing the Oven Lamp 17
Hints and Tips 18
Product Fiche and Specifications 19
Energy Saving Tips and Energy Label 20
- Main Oven....20
- Hob 20
- New Energy Label February 2019....21
Installation 22
Adjusting the Feet 23
Moving the Cooker 23
Stability Bracket 24
Electrical Connection 25
IMPORTANT SAFETY INSTRUCTIONS READ CAREFULLY AND KEEP FOR FUTURE REFERENCE
- It is recommended that this appliance is installed by a qualified electrical engineer. The manufacturer is not responsible for any damage caused by incorrect installation.
- Check whether there is any damage to the appliance after you have unpacked it. If any damage is found, do not use the appliance and contact the store where you purchased it.
- This appliance is for indoor domestic use only.
- This appliance is for cooking purposes only. It must not be used for other purposes, for example room heating.
- For disconnection from the mains supply you must have a switch with a contact separation of at least 3.0 mm in all poles and rated 32 Amp that provides full disconnection, this must be incorporated in the fixed wiring in accordance with the local wiring rules.
- If the mains cable gets damaged, it should be replaced by an authorized service agent or qualified electrician in order to avoid a hazard.
- The oven must be used in a well-ventilated location and installed on a flat, level surface.
- Operate the appliance only in a dry atmosphere.
- Keep the electrical cords of other appliances away from hot areas; do not let them touch the appliance.
- Ensure the appliance is switched off at the mains supply and allowed to cool completely before cleaning, replacing the oven lamp, or performing any maintenance to avoid the risk of electric shock or burns.
- Using the appliance creates moisture in the room where it is placed; make sure your kitchen is well ventilated. Maintain the natural ventilation ducts properly.
- Cleaning and user maintenance should not be performed by children without supervision.
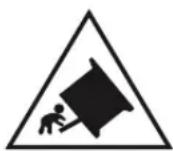
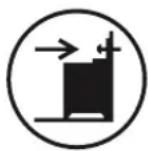
- To prevent the appliance from tipping, the stabilizing bracket must be installed.
- This appliance can be used by children aged 8 years and above and by persons with reduced physical, sensory, or mental capabilities, or lack of experience and knowledge, if they have been given supervision or instruction concerning use of the appliance in a safe way and understand the hazards involved. Cleaning and user maintenance should not be performed by children without supervision.
- Children should be supervised to ensure they do not play with the appliance.
- During use, the appliance becomes hot. Take care to avoid touching the heating elements inside the oven or the hotplates.
- The appliance and its accessible parts become hot during use. Keep young children away.
- Unattended cooking on a hob with fat or oil can be dangerous and may result in fire. NEVER try to extinguish a fire with water; instead, switch off the appliance and then cover the flame, e.g., with a lid or a fire blanket.
- Danger of fire: Do not store items on the cooking surfaces.
- When the oven is hot, never touch the oven glass or any other parts that get hot. Allow the oven to cool before touching these parts.
- Do not use harsh abrasive cleaners or sharp metal scrapers to clean the oven door glass, as they can scratch the surface, which may result in the glass shattering.
- Before starting to use your appliance, keep curtains, tulle, paper or flammable materials away from your appliance. Do not keep combustible or flammable things in or on the appliance.
- Do not use steam cleaners for cleaning the appliance.
- Do not rest any items on or stand on the open door.
- If the hob surface is cracked, switch off the appliance to avoid possibility of electric shock. • Take care when handling parts with glass, knocks, chips, heavy handling and dropping could cause the glass to shatter.
- The glass oven door uses toughened glass and is designed to break into many ‘nugget’ size pieces if it breaks. These pieces will still have sharp edges, please handle broken glass with care.
- The appliance is not intended to be operated by means of an external timer or separate remote-control system.
Thank you for purchasing your new Logik Free Standing Electric Double Oven with Induction Hob.
You must read this manual in order to fully understand how to operate it correctly.
This cooker must be installed by a competent engineer. Please allow the installer to view the installation section of this manual.
Read all the safety instructions carefully before use and keep this manual for future reference.

Unpacking
Remove all packaging from the unit. Retain the packaging. If you dispose of it please do so according to local regulations.
The following items are included:
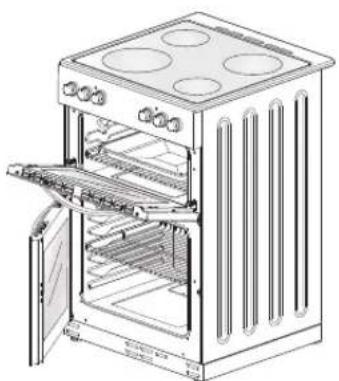
The Main Unit
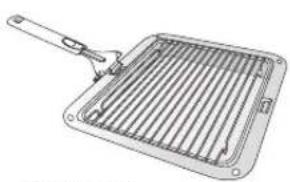
Grill Rack x 1, Grill Pan x 1, Grill Pan Handle x 1
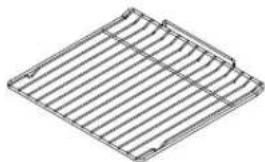
Oven Shelf x 3
Stability Bracket x 1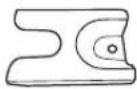

If items are missing, or damaged please contact Partmaster (UK only).
Tel: 0344 800 3456 for assistance.
* All images are for indication only; please refer to your individual unit for actual item.
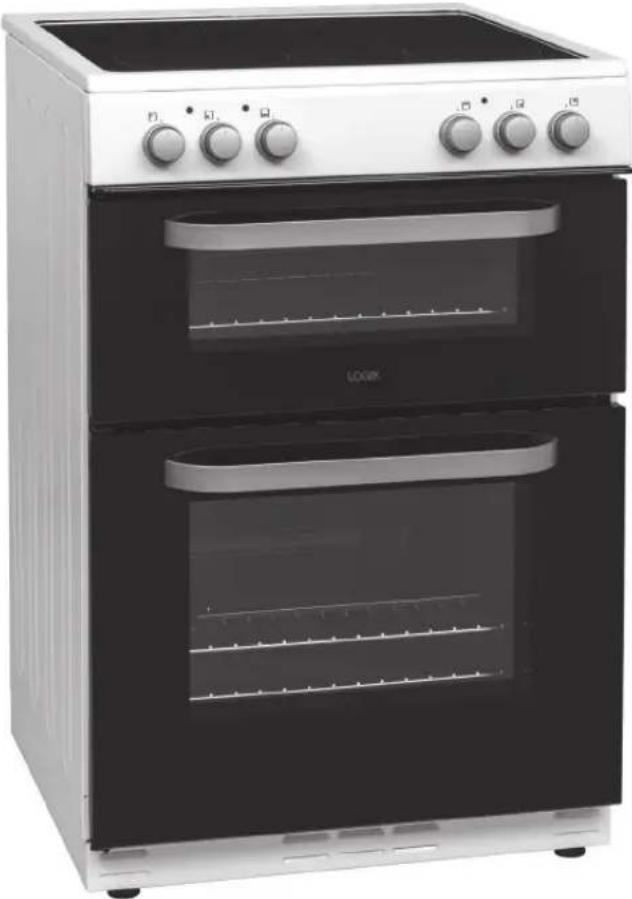
Front View
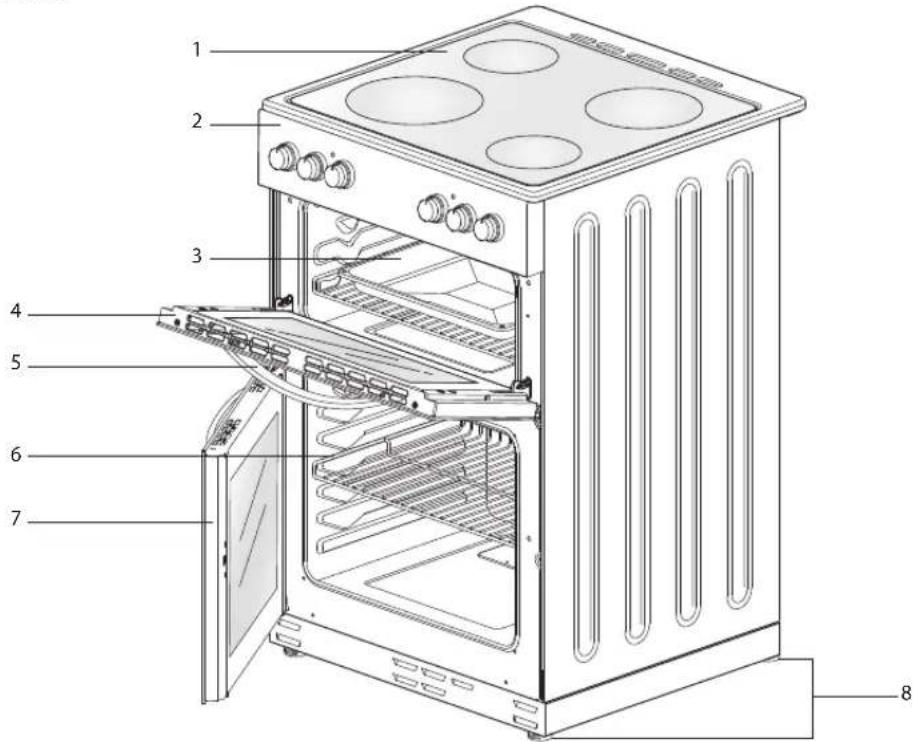
- Hob
- Control Panel
- Grill Tray
- Top Oven Door
- Top Oven Door Handle
- Oven Shelf
- Main Oven Door
- Adjustable Feet
Top View
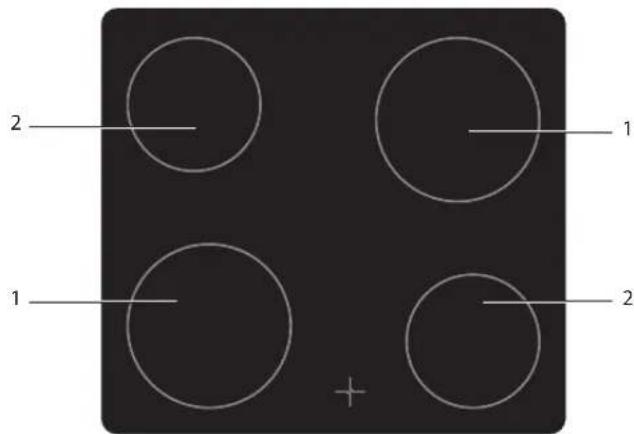
- Large cooking zone 14.5cm
- Small cooking zone 18cm
* All images are for indication only; please refer to your individual unit for actual item.
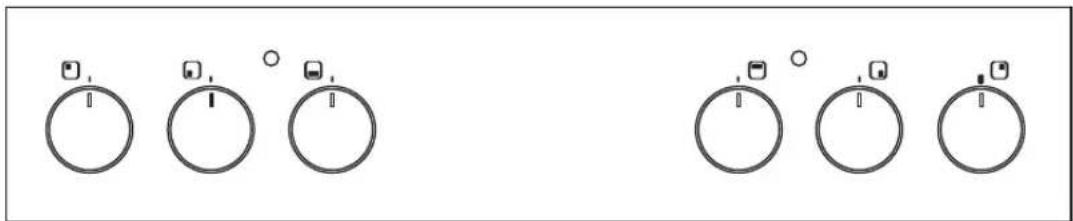
Control Panel
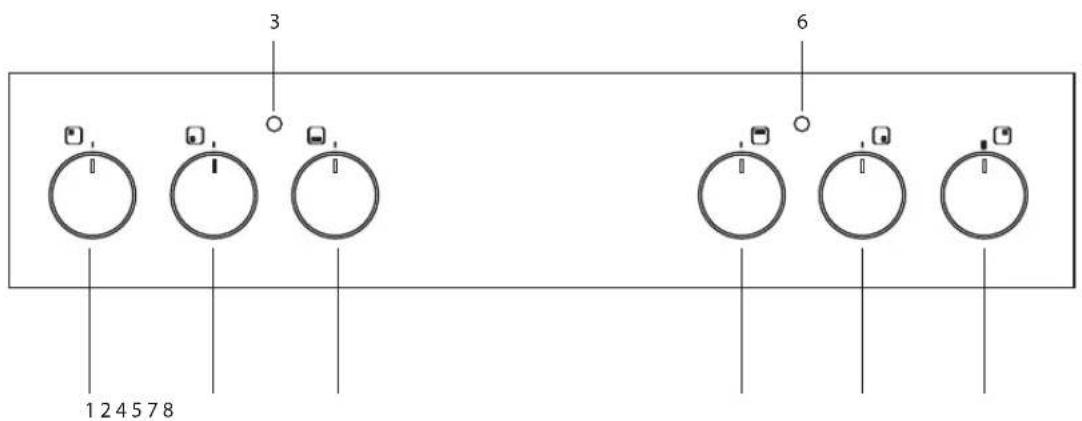
- Back Left Hob Control
- Front Left Hob Control
- Bottom Oven Thermostat Indicator
- Bottom Oven Control
- Bottom Oven Control
- Top Oven Thermostat Indicator
- Front Right Hob Control
- Back Right Hob Control

Before Using Your Cooker
Before using your new cooker, please:
- Make sure all the controls are turned off.
- Read this Instruction/Installation Manual, taking special note of the 'Safety Warnings' section.
- Turn the mains power on.

First Time Use of the Hob
Operate your vitro ceramic hobs at level 6 for 5 minutes. This will remove any manufacturing residues. There may be a small amount of smoke and a slight odour. This is normal and will stop after a few minutes.

Choosing the Right Cookware
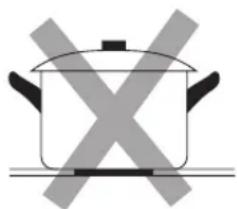
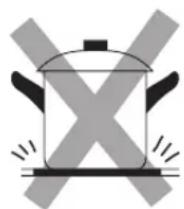
Do not use cookware with jagged edges or a curved base.
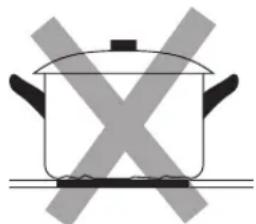
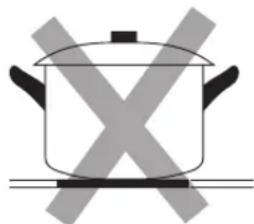
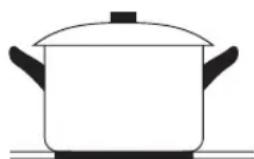
Make sure that the base of your pan is smooth, sits flat against the glass, and is the same size as the cooking zone. Always centre your pan on the cooking zone.
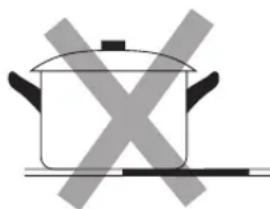
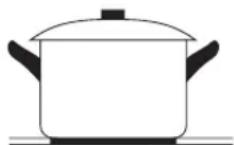
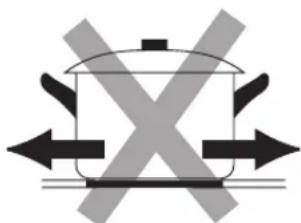
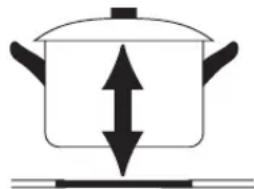
Always lift pans off the ceramic hob – do not slide, or they may scratch the glass.

- The heated areas will be seen to switch on and off even when higher heat settings are used. This is due to a safety device, which prevents the glass from overheating. Some switching on and off when cooking at high temperatures is quite normal, causes no damage to the hob and little delay in cooking times. Excessive switching may however be caused by the use of unsuitable cookware or a saucepan which is smaller than the heated area. If excessive switching occurs, discontinue the use of the cookware.
- To improve performance and reduce energy, always use pans with close-fitting lids.
- If the ceramic hob glass surface is cracked, switch off the appliance to avoid the possibility of electric shock. Contact an authorized repair agent.

Using Your Hob
- Rotate the control to the heat level (1-6) you wish to use for the selected cooking zone.
| LEVEL 0 LEVEL 1 LEVEL 2 LEVEL 3 LEVEL 4 LEVEL 5 LEVEL 6 | |||||
| OFF | Simmering (Low) | Cooking at medium temperature | Cooking, frying and boiling (High) | ||
- When the hob indicator lamp illuminates above the controls, this means that one or more of the hobs are switched on.
- When you are finished cooking, rotate the control back to the "0" position; the hob indicator lamp will turn off. The cooking zones will remain hot for some time.
Do not touch the hobs until they have completely cooled down.

First Time Use of the Oven
Ensure that nothing has been left in the top and bottom oven. Remove any insert cards or plastic bags. Before connecting the power, use a damp cloth to carefully wipe the inner cavity wall and housing. Clean all the detachable parts in hot, soapy water before using.
Cycle through all the elements on both ovens on maximum for 10 minutes. There may be a little smoke and odor upon initial start-up. This is normal. It is due to the protective substance on the heating elements which protects the cooker from the effects of corrosion during shipping from the factory.

• Under no circumstances should the oven be lined with aluminum foil as overheating may occur. - Do not place dishes or baking trays directly onto the base of the oven as it becomes very hot and damage may occur. - Bread may catch fire if the toasting time is too long. Close supervision is necessary during toasting. - During use, this appliance becomes hot. Care should be taken to avoid touching hot surfaces, e.g., oven door, heating elements. - Accessible parts may become hot when in use. Children should be kept away. - Do not leave the handle in position when grilling. If the handle is left in position when grilling, it will get very hot.

Using the Oven
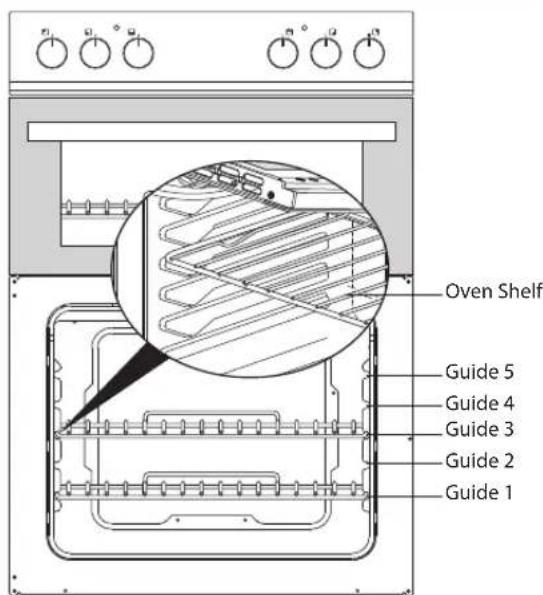
- On the wall of the inner cavity there are 5 different rack guide slots. You can place the rack at different heights to achieve the best cooking performance depending on the heat of the heating element and the size of the food. It is recommended to preheat the oven for 10 minutes.
- Always monitor the food during operation to ensure that you are not overcooking it.
- For heavy food, use a baking pan rather than the oven shelf.
- During cooking, do not open the door unnecessarily as you will lose heat and your cooking results may be affected. Cooking times will be longer and energy use will be higher.
- Using cake tins when cooking cakes will give better results.

Replacing the Anti-tilting Oven Shelf
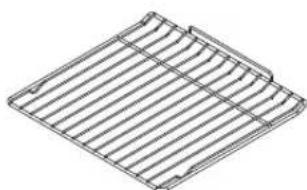
- Insert the shelf at an angle with the vertical section to the rear to clear the stops at either side of the guide slot. Once past this stop the shelf can be placed level again.
- To remove, completely angle the shelf upward so the shelf stop is cleared from the guide stop.

Accessible parts may become hot during use. Young children should be kept away.

Using the Oven Control
| Function Description | |
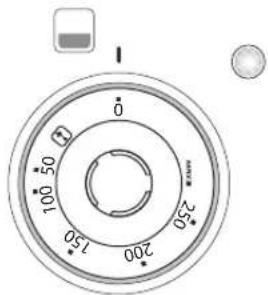
| Defrost FunctionDefrost function can be started by placing the frozen food into your oven and turning the oven control to the defrost sign or below. Ensure the oven light does not illuminate as this will activate the elements and start the cooking process. This function will not cook the food as only the fan operates, this will help to defrost the food in a very short time. Put the food to be defrosted on the shelf in the third guide slot position and place a tray onto a shelf on the bottom guide slot position to collect the water during defrost. | |
| 50100150200250MAX | Adjusting the temperatureThis design spreads the heated air equally in the oven and it is suitable for cooking with one or more trays.Turn the oven control to the desired temperature. It is recommended to preheat the oven for 10 minutes. Place the tray on the shelf.At the end of cooking time, as in all other cooking processes; turn the oven control to off. Take the cooking tray out and put it onto a safe place as it will be hot. Keep children away from the hot oven during and after cooking, until it has completely cooled down. |

Energy Saving
To save energy and to help protect the environment, we recommend these hints:
- Preheat the oven only if expressly required by the recipe or guidelines.
- Use dark baking tins because they have a higher degree of heat absorption.
- In the case of longer baking times, you can switch off the oven 5–10 minutes before the full baking time and use the residual heat. This will reduce energy usage.
- Use the oven efficiently, by cooking many trays of food at the same time.
- Select the correct shelf location for the food being cooked.
- Do not open the oven door more than necessary.

Using the Grill/Top Oven
Before using the grill for the first time, heat it on maximum for 15 to 20 minutes. There may be a little smoke and odor upon initial start-up (for about 10 minutes). This is normal. It is due to the protective substance on the heating elements that protects the cooker from corrosion during shipping from the factory.
| Function Description | |
 | Top and Bottom ElementTurn the oven control to the desired temperature 50 - 250°C It is recommended to preheat the oven for 10 minutes. Place the tray on the shelf.At the end of cooking time, as in all other cooking processes; turn the oven control to off. Take the cooking tray out and put it onto a safe place as it will be hot. Keep children away from the hot oven during and after cooking, until it has completely cooled down. |
 | Bottom ElementThe bottom element will be full on in this mode, to control cooking temperatures use different shelf positions. |
 | Top ElementThe top element will be full on in this mode, to control cooking temperatures use different shelf positions. |
 | Small GrillThis function is used for grilling. In order to grill, please use the grill pan supplied with your product. Turn your grill's control to the required setting.At the end of grilling, as in all other cooking processes; turn the control to the "0" position (off). Take the grill pan out by using the supplied handle and put the pan onto a safe place. Keep children away from the hot oven during and after grilling, until it has completely cooled down. |

- The grill door must be kept open during this function. The door has a position in which it is open at 30 degrees. This is the minimum the door can be closed during use.
- During use, the appliance becomes hot. Care should be taken to avoid touching the heating elements inside the grill.
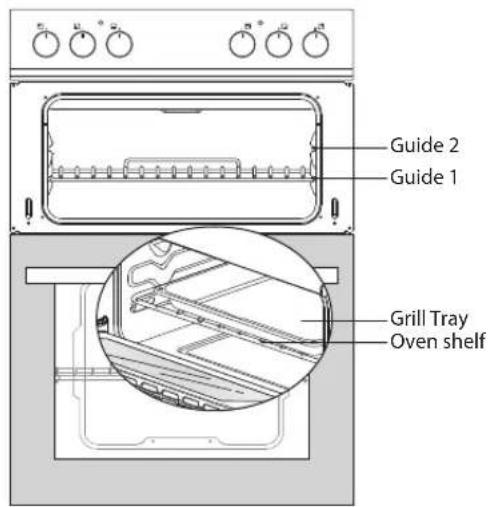
Place an oven shelf in either guide slot 1 or 2 position. There must be at least 30 mm between the food and the element.
Using the handle, insert the grill rack and tray onto the shelf in guide slot 1 or 2. The food to be cooked must be placed on the grill rack in the grill tray. The handle can be removed once the grill rack tray is in position. Check the food regularly to ensure you do not overcook it.
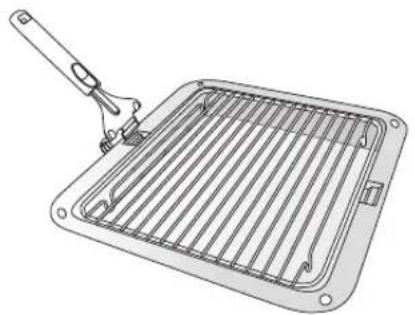
The grill pan has a detachable handle. Ensure when using the grill pan handle that it is centralised and secure as shown below.

Do not leave the handle in position when grilling. If the handle is left in position when grilling, it will get very hot.
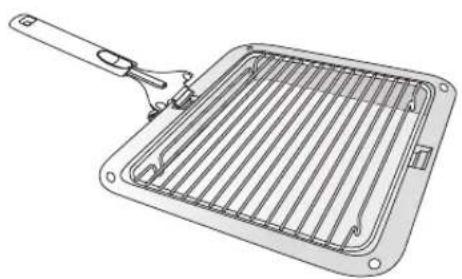
Preheat the grill element for approximately 5-10 minutes before cooking the food.
Ensure a minimum distance of 30 mm exists between the food and the elements. If necessary, use a lower guide slot. Check the food regularly to ensure you do not overcook the food. If slower cooking is required, use a lower guide slot or lower grill setting.

Bread may catch fire if the toasting time is too long. Close supervision is necessary during toasting.

General Advice

Before you start cleaning your cooker, please:
- Read the cleaning instructions and the 'Safety Warnings' sections.
- Turn the cooker off at the mains socket.
- Allow the cooker to completely cool down before cleaning and disconnect the appliance from the electrical supply.
- Do not use a steam cleaner.
- Do not keep flammable substances in, on or near the cooker.
- Wipe the oven clean after every use.
- Wipe up spills. Avoid leaving alkaline or acidic substances (such as lemon juice or vinegar) on the oven surfaces.
- Do not use cleaning products with a chlorine or acidic base.
- Never clean the interior, panel, lid, trays and all other parts of the oven with tools like a hard brush, cleaning mesh or knife. Do not use abrasive, scratching agents and detergents.
- After cleaning the interior parts of the oven with a soapy cloth, rinse it and then dry thoroughly with a soft cloth. Leave the doors open to allow the cavities to completely dry.
- Never use flammable agents like acid, thinner and petrol when cleaning your oven.
- Do not wash any part of your oven in a dishwasher.
- If you choose to use a commercial stainless steel cleaner, please read the label to make sure it does not contain chlorine compounds as these are corrosive and may damage the appearance of your cooker.
- Do not use abrasive cleaners, cloths or pads on the outside surfaces. Immediately wipe off any caustic cleaners if they are spilled onto the oven door handles.

Cleaning the Outside of the Cooker
Wipe the outside surfaces often, using warm water and a mild household detergent. Any stainless steel parts may also be cleaned with a suitable cleaner.

Cleaning the Ceramic Hob
- Ensure the cleaning material is designed for cleaning ceramic hobs and does not contain any particles which may cause it to scratch the glass.
- Spilt food must be cleaned right after the hob glass has cooled.
- Do not use steel cleaning material as it may damage the ceramic hob glass.
- Dust on the surface must be cleaned with a damp cloth and allowed to completely dry before use.
- The glass may discolour if the incorrect cleaning materials are used.

Cleaning the Cooker Door Glass
Do not use harsh abrasive cleaners or sharp metal scrapers to clean the oven door glass since they may scratch the surface, which could result in the glass shattering.

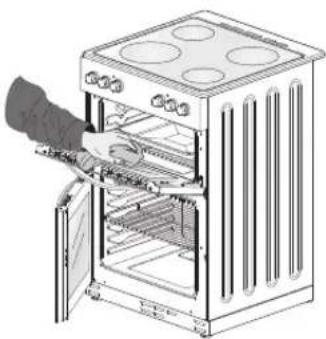
Take care when handling parts with glass; knocks, chips, heavy handling and dropping could cause the glass to shatter.

Cleaning the Inside of Your Cooker
- Do not use abrasive cleaners, cloths or pads to clean the enamel.
- Clean the enamel on the inside of the cooker when it has cooled down, using household detergents or an ammonia-based cleaner. You may use an 'off the shelf' oven cleaner, if you carefully follow the manufacturers' instructions.
- The grill door can be removed to allow easier access to the inside of your grill cavity. (See "Removing the Grill Door" section)
- Wipe the cooker after every use with a soft cloth that has been dampened in soapy water. Wipe it again with a wet cloth and then dry it. Do not clean with dry or powder cleansers.
- Do not clean the cooker while the glass panels are hot.
- Clean the cooker with a glass cleaner designed for use with cookers. Then rinse and dry it with a dry cloth.

Removing the Grill Door
The grill door can easily be removed as follows:
- Open the door completely.
- The swivel retainers of the right-hand and left-hand hinges are hooked onto the metal bar above them. Lift the retainers as shown.
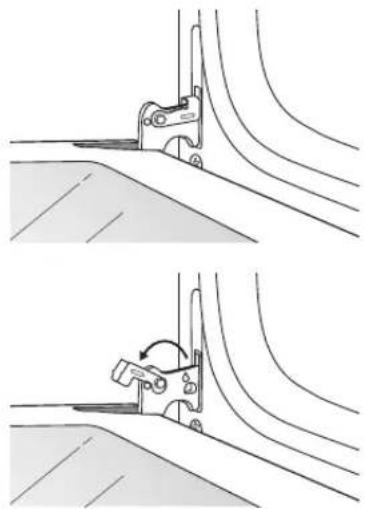
* All images are for indication only; please refer to your individual unit for the actual item.
- Lift the door slightly. The notch on the bottom of the hinge will disengage.
- Now pull the oven door forwards off the appliance, releasing both hinge sections from the slots.
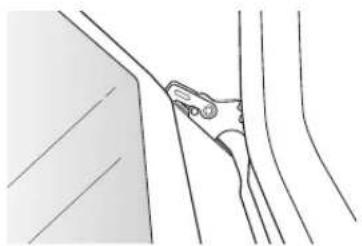
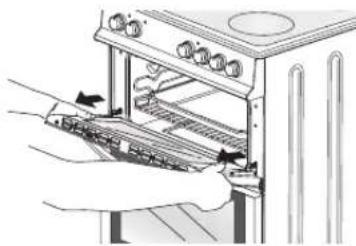
To replace the door, repeat the above steps in reverse order.

Replacing the Oven Lamp

Ensure that the cooker is switched off before replacing the lamp to avoid the possibility of an electric shock.
Let the oven cavity and the heating element cool down.
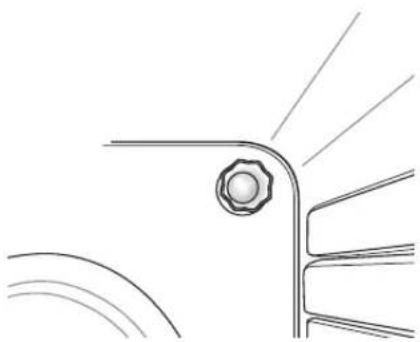
- Remove the protective cover by unscrewing.
- Unscrew and replace the bulb with a new one suitable for high temperatures (300°C).
- Refit the protective cover.

Bulb specifications 230V~ 50 Hz, 25W, E14
* All images are for indication only; please refer to your individual unit for actual item.
| Problem Possible Causes What To Do | ||
| The cooker cannot be turned on. | No power. Make sure the cooker is connected to the mains socket and the socket is switched on. Check whether there is a power outage in your home or area. If you've checked everything and the problem persists, call a qualified technician. | |
| The glass has been scratched. Unsuitable, abrasive scourer or cleaning products being used. | Do not use harsh abrasive cleaners or sharp metal scrapers to clean the glass. | |
| Some pans make crackling or clicking noises. | This may be caused by the construction of your cookware (layers of different metals expanding/shrinking differently). | This is normal for cookware and does not indicate a fault. |
| The oven temperature is too high or too low. | Wrong temperature selected / or the wrong shelf position was used. | Check that the recommended temperatures and shelf position are being used. Be prepared to adjust the temperature up or down. If the temperature needed is critical use an oven thermometer. |
| The interior lighting lamp does not light. | The oven must be on for the lamp to light. If the lamp is defective you can change it. (See "Replacing the Oven Lamp" section.) | |
Product Fiche and Specifications
| Brand Logik | ||
| Model LDOC60W17 / LDOC60X17 | ||
| Product Type Electric Cooker | ||
| Mass of the appliance 49 Kg | ||
| Grill ( upper cavity) | Regulations pre February 2019 | New regulations inforced from February 2019 |
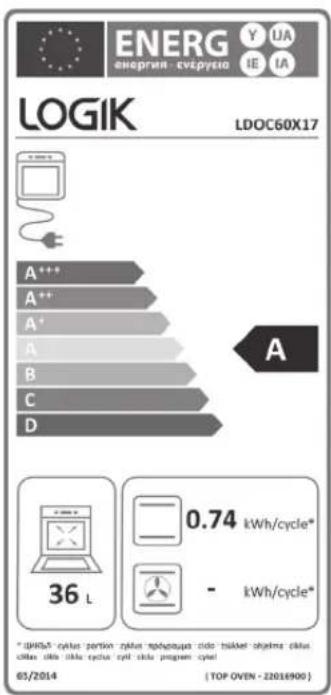
| Energy Efficiency Index - Conventional 118.4 105.5* | ||
| Energy Class B A* | ||
| Energy Consumption (electricity) - Conventional 0.83 kWh/cycle 0.74 kWh/cycle | ||
| Heat Source Electric | ||
| Volume 36 litres | ||
| Main Oven ( lower cavity) | ||
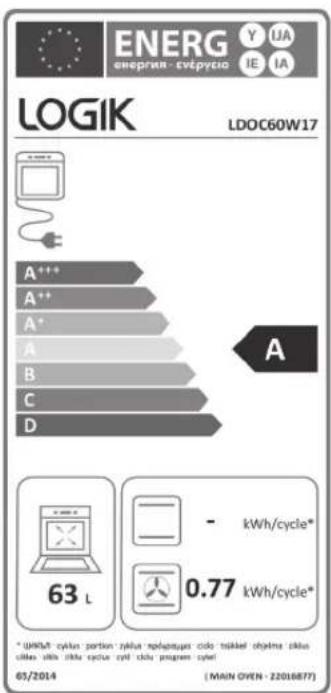
| Energy Efficiency Index - Fan Forced 103.3 | 94.5* | |
| Energy Class | A | A* |
| Energy Consumption (electricity) - Conventional | 0.82 kWh/cycle | 0.77 kWh/cycle* |
| Heat Source Electric | ||
| Volume | 58 litres | 63 litres |
| Number of Cavities | 2 | |
| This product complies with | EN 60350-1 | |
| Overall Dimension (W x D X H) | 600(W) x 600(D) HOB [640(D) MAX] x 900(H) mm(Not including Controls or Handles) | |
| Oven Lamp | 25W | |
| Thermostat | 50 - 285°C | |
| Top oven Grill Heating Element | 1500 - 1700 W | |
| Top oven Top Heating Element | 700 - 900 W | |
| Top oven Bottom Heating Element | 700 - 900 W | |
| Bottom Oven Fan Element | 2000 - 2400 W | |
| Supply Voltage | 230 - 240V ~ 50 Hz | |
| Radiant Heater 145 mm | 1200 W at 230V1400W at 240V | |
| Radiant Heater 180 mm | 1700 W at 230V1900W at 240V | |
| Type of Hob | Electric | |
| Number of Cooking Zones | 4 | |
| Heating Zone(s) Small | ||
| Heating Technology | Radiant | |
| Size | 14.5 cm diameter | |
| Energy Consumption | 192 Wh/Kg | |
| Heating Zone(s) Large | ||
| Heating Technology | Radiant - Ceramic | |
| Size 18 cm diameter | ||
| Energy Consumption | 192 Wh/Kg | |
| Energy Consumption of Hob | 192 Wh/Kg | |
| The Hob complies with | EN 60350-1 & EN 60350-2 | |
* States the figures calculated using the new regulations enforced from February 2019. Features and specifications are subject to change without prior notice.

Energy Saving Tips and Energy Label
Main Oven
• Cook the meals together, if possible. - Keep the pre-heating time short. - Do not elongate cooking time. - Do not forget to turn off the oven at the end of cooking. - Do not open the oven door during cooking.
Hob
- Use cookware that has a flat base.
- Use the correct sized cookware for the cooking zone being used.
- Use a lid on your cookware.
- Minimize the amount of liquid or fat used.
- When liquids start boiling, reduce the heat.
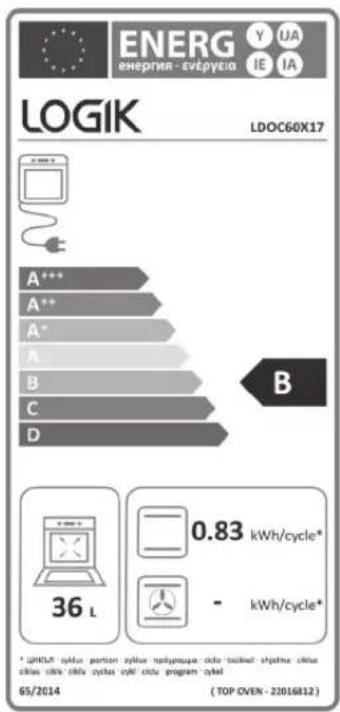
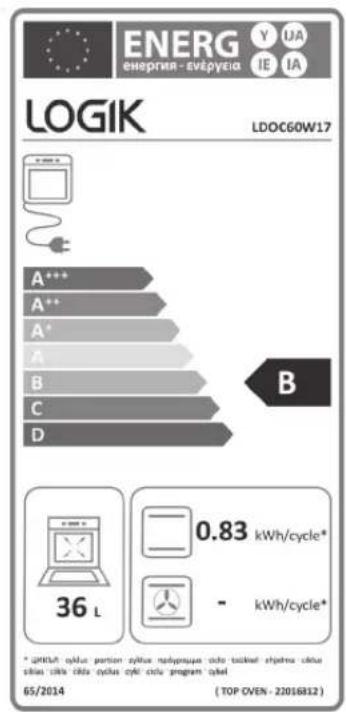
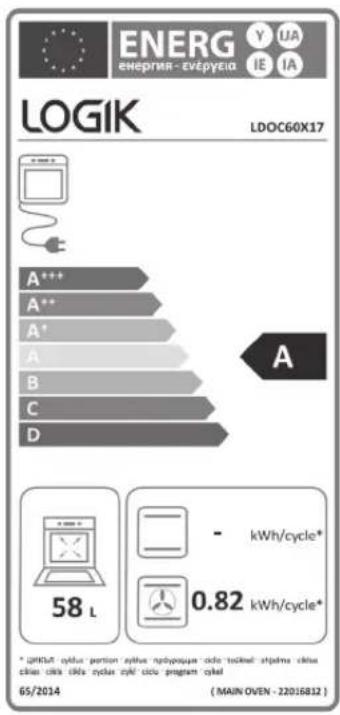
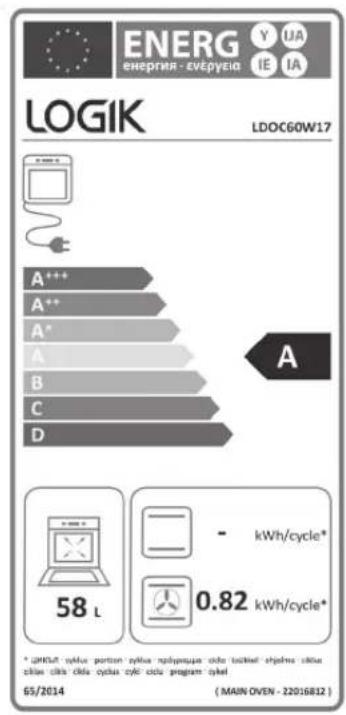
New Energy Label February 2019

Due to a legislation change, in force from February 2019, this will affect some of the product specifications. We would like to assure you that there is no physical difference in the appliance; the changes are a result of changes to the methods of measurement used.
![ENERGY UA energy - efficiency class IA LOGIK LDOC60W17 A A*** A++ A* A B C D 36 L 0.74 kWh/cycle* - kWh/cycle* * (UNIV) - cycle portion zylus *yloptusa cido - tiskel objekte zklus dMax dltks dltka zylus zyl cdo program cycle! 65/2014 [TOP OVEN - 22014876]](/content/2026/05/967125/images/de0d9643f10737cb77f4f50a7ea7d27197234fb9b708c06f8f62a9b1595e6c0e.jpg)
![ENERGY UA energy - efficiency class IA LOGIK LDOC60X17 A A++ A++ A* A B C D A - kWh/cycle* 63 L 0.77 kWh/cycle* * (INRIS® cycle portion zylus nélépaugar cido tükkel olysema ollus cikkis cikkis cikkis cyklus cpli ciko program cycle) 65/2014 [MAIN OVEN - 22016951]](/content/2026/05/967125/images/c7eb66c9e3ccd54220aa3da8c80e58df43d817186dcde543e782c65bfd78b892.jpg)

Installation
- The cooker must be installed by a competent person; if in doubt, consult a qualified technician, and in compliance with local electrical, safety, and building regulation standards.
- If the cooker is installed adjacent to furniture that is higher than the hob, a gap of at least 100 mm must be left between the side of the cooker and the furniture unless non-combustible materials (e.g., ceramic tiles, metal splashback, etc.) are used, which then allows this distance to be reduced to 20 mm.
- The furniture walls adjacent to the cooker must be made of heat-resistant material (check with your furniture supplier). The veneered synthetic material and the glue used must be resistant to a temperature of 100°C in order to avoid ungluing or deformations.
- The cooker may be located in a kitchen, a kitchen/diner, or bed-sitting room, but not in a room containing a bath or shower.
- Flammable materials such as curtains, wood, wallpaper, etc. must not be fitted immediately behind the appliance or within 500 mm of the sides.
- Do not place next to a refrigerator.
- This cooker must NOT be placed on a pedestal or base.
- It is essential that the cooker is positioned as stated or freestanding, taking into account the distances of any combustible materials detailed above.
- Any cooker hoods must be installed according to the requirements of the cooker hood instruction/installation manual, but no less than 650 mm.
- Any cupboards placed directly above the cooker must be no less than 700 mm.
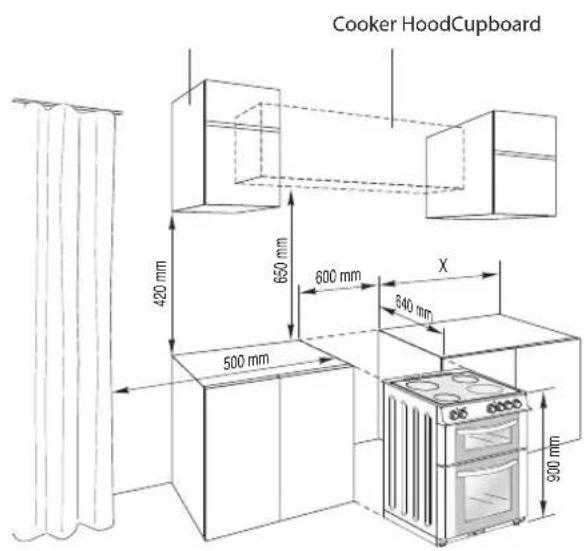
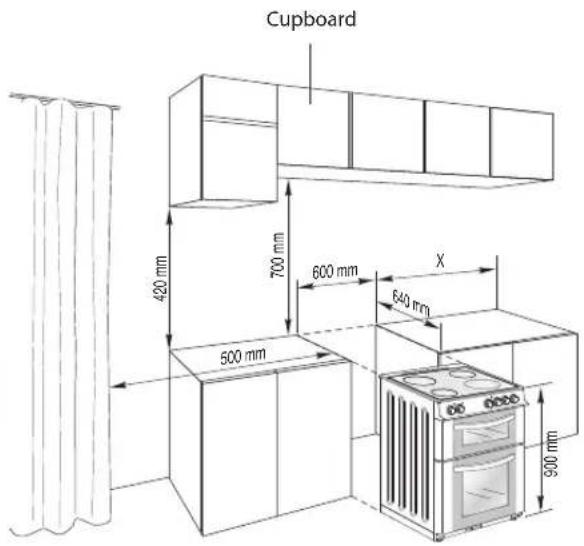

For all dimensions marked "X", please refer to the information below:
X : 100mm for combustible materials 20mm for non-combustible materials.
* All images are for indication only; please refer to your individual unit for actual item.

Adjusting the Feet

Using the fitted adjustable feet is MANDATORY. For safety reasons and to ensure adequate ventilation, the cooker chassis MUST NOT sit directly on the floor, a plinth, or other support surface.
The cooker stands on 4 levelling legs. As the levelling legs are adjusted at lower position, it is required to control whether the product is levelled before operating it. This adjustment can be made by turning the levelling leg clockwise to raise the cooker, if required. It is possible to raise the product a maximum of 30mm via the levelling leg. If the levelling legs are adjusted appropriately, the product must NOT be moved by dragging. The cooker must always be moved by lifting it up. The levelling leg can be adjusted by hand or a metal plate of the correct size to fit the slot.
Level the cooker by screwing the bottom of the feet in or out, as shown.
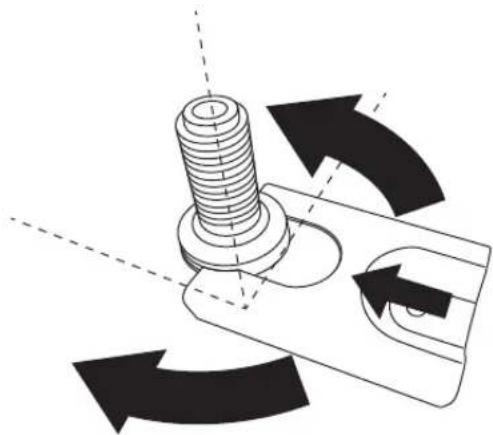
The Stability bracket can be used as a tool to adjust the levelling legs.

Moving the Cooker

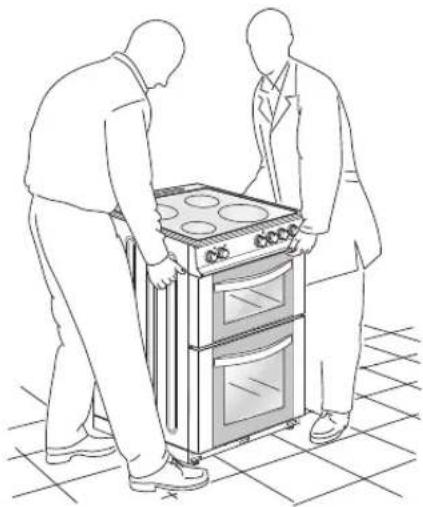
- Two people must always raise the cooker, as shown, to prevent damaging the adjustable feet.
- Do not lift the cooker by the door handles. • DO NOT DRAG the cooker. Lift the feet clear of the floor.

Stability Bracket
The supplied stability bracket or a recognized cooker stability device MUST be fitted.
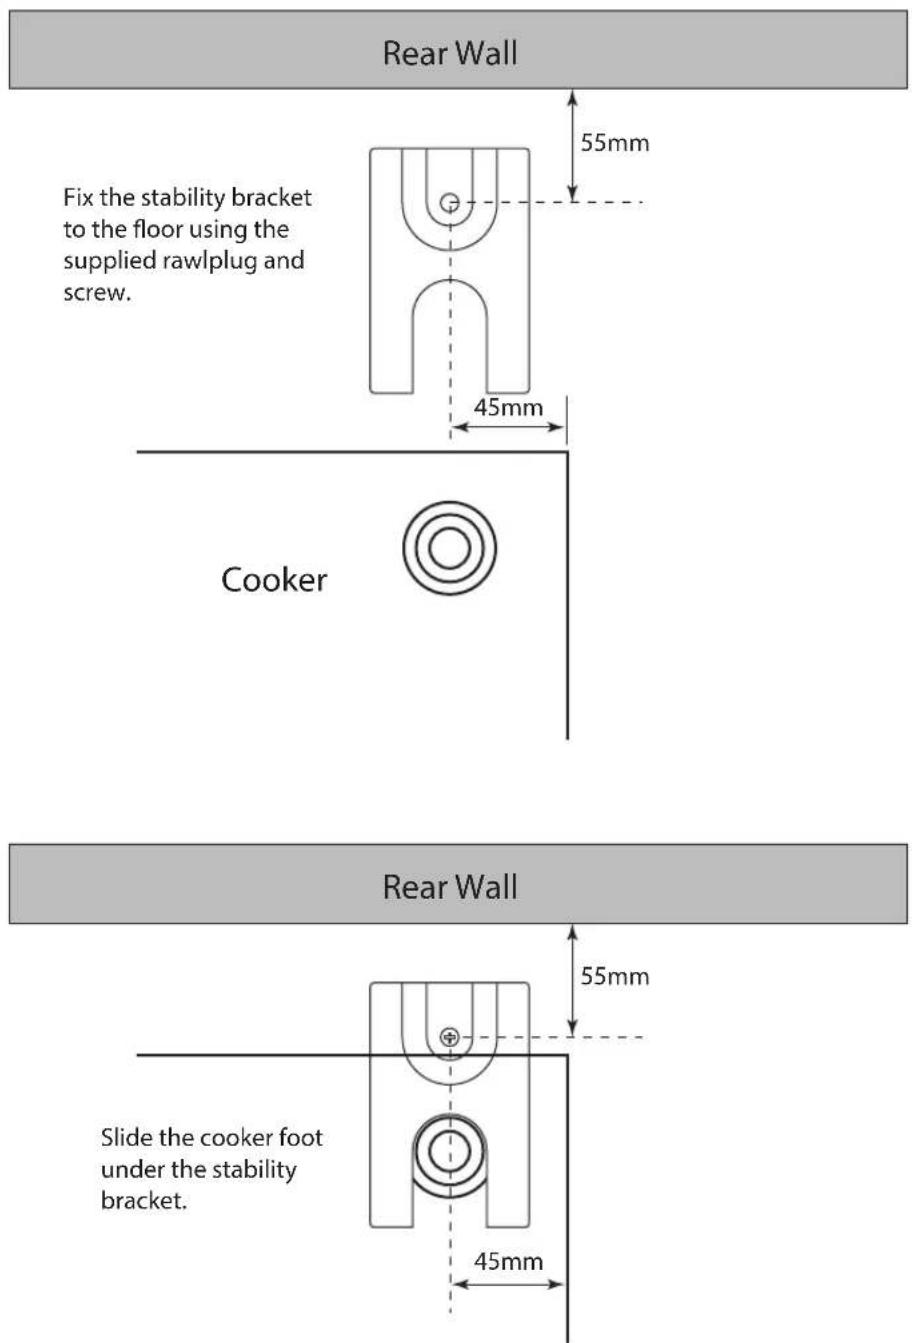

The stability bracket can be used on either of the rear feet.

Electrical Connection
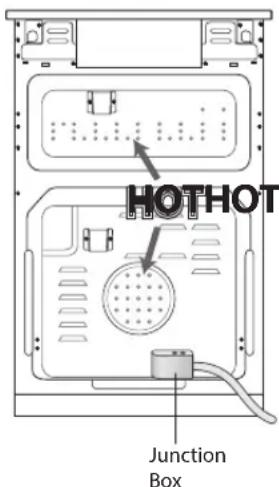
Electric cookers come without a power supply cable. The cooker is designed to operate on an electricity supply which conforms to the electrical data shown on the Rating Plate. The cooker can be connected to the mains only after you complete the connection at the junction box.

The following installation procedure must be carried out by a competent person. If in doubt consult a qualified electrician. The electrical installation must comply with the IEE Regulations, Building & local By-Laws.
For the installation of the supply cable carry out the following operations:
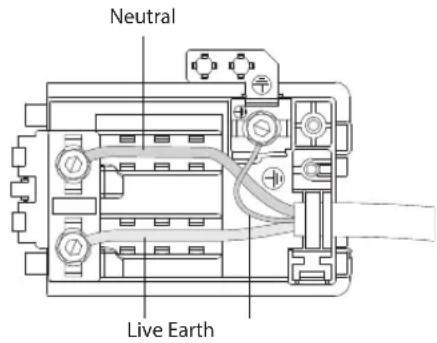
- Release both clips then open the junction box lid.
Colours of the wires in the mains lead should correspond with the markings identifying the terminals. Proceed as follows:
Green & Yellow wire to terminal marked "E" or
Brown wire to terminal marked "L".
Blue wire to terminal marked "N".
Ensure all screws are adequately tightened. Do not over tighten as you may risk damaging the screw threads.
- Fix the supply cable in the cable clamp and then close the cover.

The power supply cable must have these minimum requirements:
- Type: H05VV-F (PVC insulated and sheathed flexible cable)
• Section: 3 core x 4 mm²
This appliance must be earthed.

- The cooker must be connected to the mains supply via a switch providing full disconnection, correctly fused with a capacity appropriate to that shown on the cooker Rating Plate, and incorporated in the fixed wiring in accordance with the latest wiring regulations. All electrical wiring from the consumer unit to the cooker, via the full disconnection switch, must be of the correct rating.
- The mains cable must be positioned away from any hot parts at the rear of the cooker. If this cannot be done, then another method of protecting the mains cable from the hot parts must be used, i.e., heat-resistant sleeving or high-temperature cables.
For general information about this appliance and handy hints and tips, please visit
teamknowhow.com or call 0344 5611234.
Visit Partmaster.co.uk today for the easiest way to buy electrical spares and accessories. With over 1 million spares and accessories available, we can deliver direct to your door the very next day.
Visit www.partmaster.co.uk or call 0344 800 3456 (UK customers only). Calls charged at National Rate.
The symbol on the product or its packaging indicates that this product must not be disposed of with your other household waste. Instead, it is your responsibility to dispose of your waste equipment by handing it over to a designated collection point for the recycling of waste electrical and electronic equipment. The separate collection and recycling of your waste equipment at the time of disposal will help conserve natural resources and ensure that it is recycled in a manner that protects human health and the environment.
For more information about where you can drop off your waste for recycling, please contact your local authority, or where you purchased your product.
DSG Retail Ltd. (co. no. 504877)
1 Portal Way, London, W3 6RS, UK
IB-LDOC60W17/X17-181017V3
- FREE-STANDING ELECTRIC DOUBLE OVEN
- CONTENTS
- IMPORTANT SAFETY INSTRUCTIONS READ CAREFULLY AND KEEP FOR FUTURE REFERENCE
- UNPACKING
- FRONT VIEW
- TOP VIEW
- CONTROL PANEL
- BEFORE USING YOUR COOKER
- FIRST TIME USE OF THE HOB
- CHOOSING THE RIGHT COOKWARE
- USING YOUR HOB
- FIRST TIME USE OF THE OVEN
- USING THE OVEN
- REPLACING THE ANTI-TILTING OVEN SHELF
- USING THE OVEN CONTROL
- ENERGY SAVING
- USING THE GRILL/TOP OVEN
- GENERAL ADVICE
- CLEANING THE OUTSIDE OF THE COOKER
- CLEANING THE CERAMIC HOB
- CLEANING THE COOKER DOOR GLASS
- CLEANING THE INSIDE OF YOUR COOKER
- REMOVING THE GRILL DOOR
- REPLACING THE OVEN LAMP
- ENERGY SAVING TIPS AND ENERGY LABEL
- MAIN OVEN
- HOB
- NEW ENERGY LABEL FEBRUARY
- INSTALLATION
- FOR ALL DIMENSIONS MARKED "X", PLEASE REFER TO THE INFORMATION BELOW
- ADJUSTING THE FEET
- MOVING THE COOKER
- STABILITY BRACKET
- ELECTRICAL CONNECTION
Brand : Logik
Model : LDOC60W17
Category : Cooker