LHFCDC10 - Hi-Fi System Logik - Free user manual and instructions
Find the device manual for free LHFCDC10 Logik in PDF.
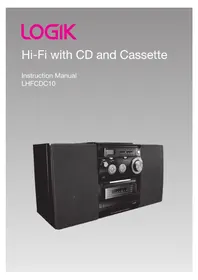


| Product Type | Hi-Fi System |
| Brand | Logik |
| Model | LHFCDC10 |
| Main Unit Dimensions (W x H x D) | Approx. 150 x 250 x 300 mm |
| Main Unit Weight | 3.5 kg |
| Power Supply | AC 230V, 50Hz |
| Power Consumption | 30W |
| Audio Output Power | 2 x 10W RMS |
| Playback Formats | CD, CD-R/RW, MP3 CD |
| Tuner Bands | FM/AM with preset stations |
| Inputs | Auxiliary (3.5mm), headphone jack |
| Speakers | Included passive speakers |
| Controls | Front panel buttons and remote control |
| Display | LCD with backlight |
| Additional Features | Clock, timer, sleep function |
| Cleaning Instructions | Wipe with a soft, dry cloth |
| Safety Precautions | Do not expose to moisture or direct sunlight |
Frequently Asked Questions - LHFCDC10 Logik
User questions about LHFCDC10 Logik
0 question about this device. Answer the ones you know or ask your own.
Ask a new question about this device
Download the instructions for your Hi-Fi System in PDF format for free! Find your manual LHFCDC10 - Logik and take your electronic device back in hand. On this page are published all the documents necessary for the use of your device. LHFCDC10 by Logik.
USER MANUAL LHFCDC10 Logik
Hi-Fi with CD and Cassette
Instruction Manual
LHFCDC10

Unpacking....5
Product Overview......6
Top View 6
Rear View....6
Control Panel (CD)....7
Control Panel (Cassette)....7
Connecting the Speakers....8
How to Insert Each Speaker Wire....8
Power Source 9
Mains Power....9
Using Earphones....9
General Operation....10
Switching the Unit ON/OFF and Selecting the Function....10
Adjusting the Volume....10
Radio Operation 10
AM / FM / FM-Stereo Reception....10
For Better Reception ....10
Cassette Operation....11
Playback....11
Fast Forwarding/Rewinding....11
General Information on Cassette Recording....11
Compatible Disc Types ....12
Recording from the Radio....12
Recording from a CD....12
CD Operation ....13
Playback....13
Selecting a Different Track....13
Finding a Passage within a Track 13
Programming Track Numbers....13
Erasing a Program....14
Reviewing the Program....14
Repeat Mode....14
Maintenance....15
Hints and Tips 16
Specifications....17
Safety Warnings....18
Thank you for purchasing your new Logik Hi-Fi with CD and Cassette.
We recommend that you spend some time reading this instruction manual in order that you fully understand all the operational features it offers. You will also find some hints and tips to help you resolve any issues.
Read all the safety instructions carefully before use and keep this instruction manual for future reference.

Unpacking
Remove all packaging from the unit. Retain the packaging. If you dispose of it please do so according to local regulations.
The following items are included:
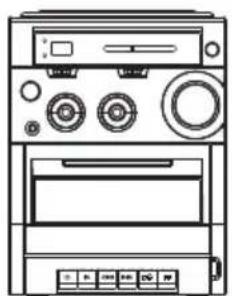
The Main Unit Speaker x 2
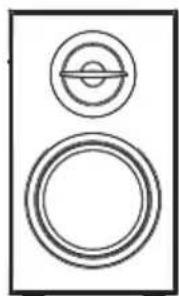
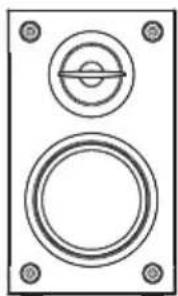
(P.N.: MCD600SC)
Instruction Manual (P.N.: LHFCDC10-IB-002)
Quick Start Guide (P.N.: LHFCDC10-QSG-002)

If items are missing or damaged, please contact Partmaster (UK only).
Tel: 0844 800 3456 for assistance.
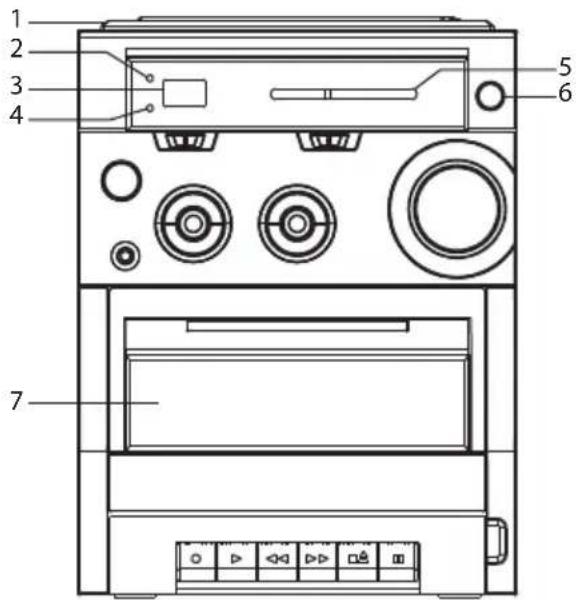
Top View
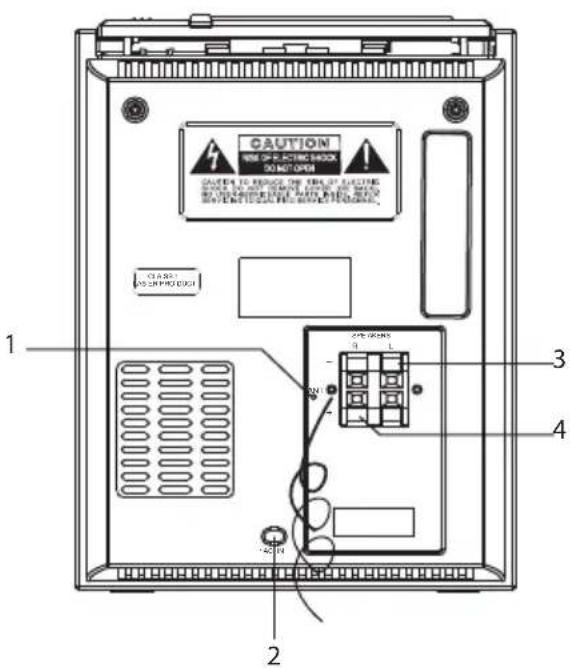
Rear View
- CD Door
• CD compartment door (PUSH/CLOSE).
- POWER INDICATOR
- DISPLAY
• Displays CD Playback Information
- FM STEREO INDICATOR
• Displays of FM stereo reception
• Shows AM/FM frequency.
- ON/OFF SWITCH
• To switch the unit ON/OFF.
- CASSETTE DOOR
- FM AERIAL
- MAINS CABLE
- SPEAKER SOCKETS (L)
- SPEAKER SOCKETS (R)
Control Panel (CD)
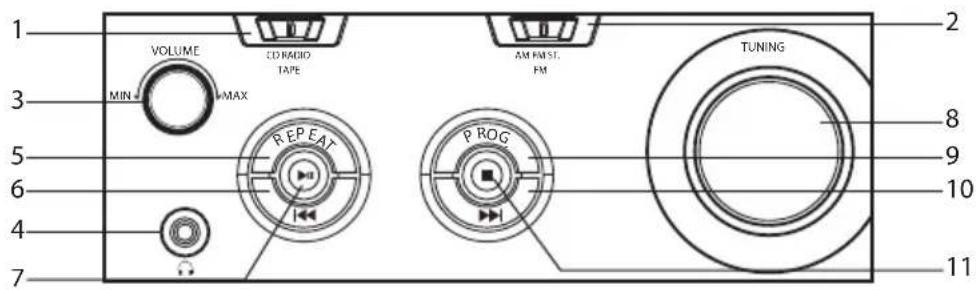
1. FUNCTION Selector
• To select source CD, TAPE or RADIO
2. BAND Selector
• To select frequency band (AM, FM or FM Stereo)
3. VOLUME Control
• To adjust volume level
4. EARPHONES Socket
• To connect 3.5mm stereo earphones
5. REPEAT Button
• To repeat a single track or entire tracks on a CD
6. ◀Button
• To skip CD tracks backward
7. ▶Button
• To start or pause CD playback
8. TUNING Control
• To tune the AM or FM radio station
9. PROG. Button
• To set programming playback
10. ▶▶|Button
• To skip CD tracks forward
11. ■Button
• To stop CD playback or a program
Control Panel (Cassette)
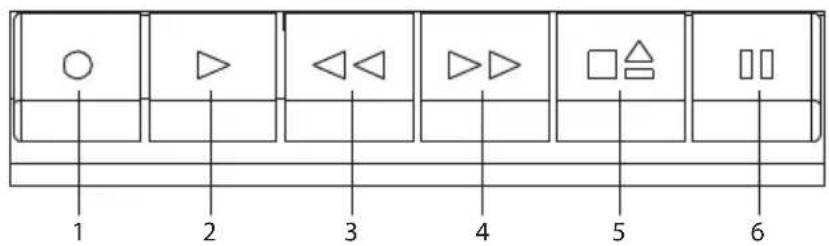
1. RECORD Button
• To start recording
2. ▶ PLAY Button
• To start playback
3. ◀ REW Button
• To fast rewind cassette
4. FWD Button
• To fast forward cassette
5. ■△STOP/EJECT Button
• To stop cassette and open the cassette compartment
6. IIPAUSE Button
• To interrupt recording or playback
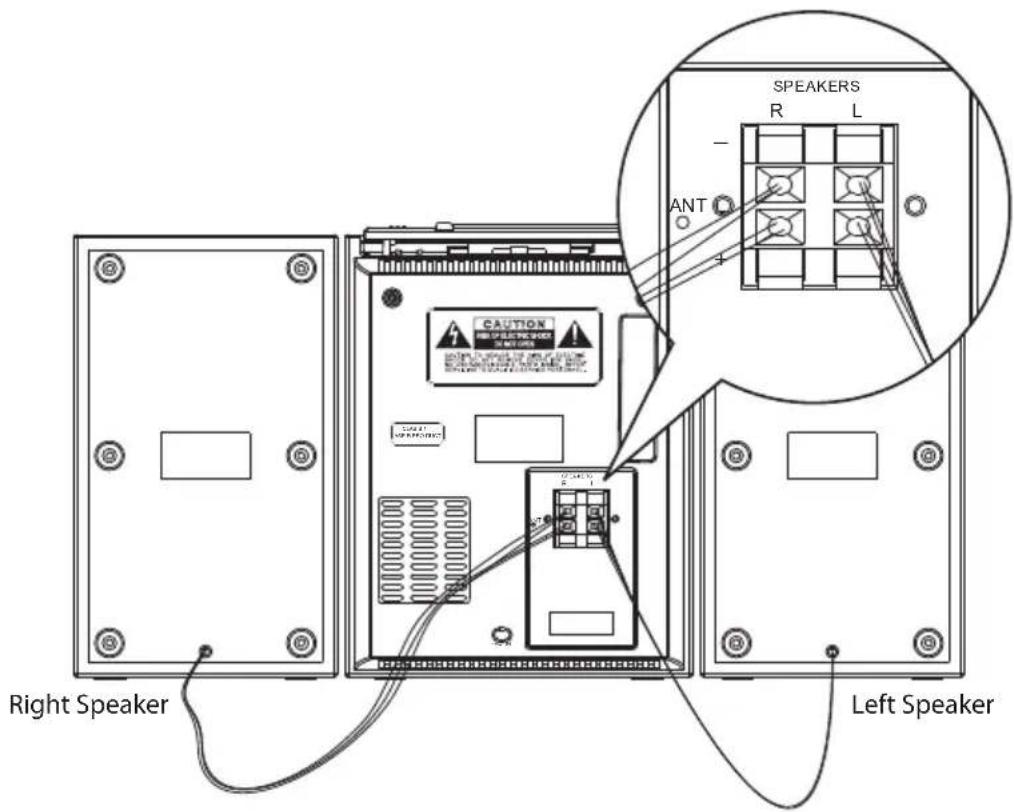
Connect the speaker cables at the back of the speakers to the speaker sockets (L/R) at the back of the main unit.
How to Insert Each Speaker Wire
Hold down the socket flap. Insert the speaker wire fully. Release the socket flap.
- For the right speaker, use the sockets on the main unit marked "R". • Insert the white wire into the red (+) socket.
- Insert the black wire into the black (-) socket.
- For the left speaker, use the sockets on the main unit marked "L". • Insert the white wire into the red (+) socket.
- Insert the black wire into the black (-) socket.
Mains Power
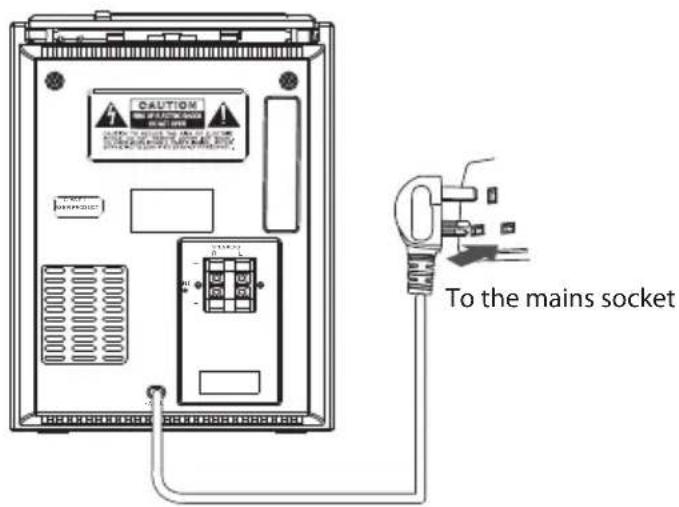
Check that the voltage marked on the rating label matches your mains voltage. Connect the mains cable at the back of the unit to a mains socket.

Using Earphones
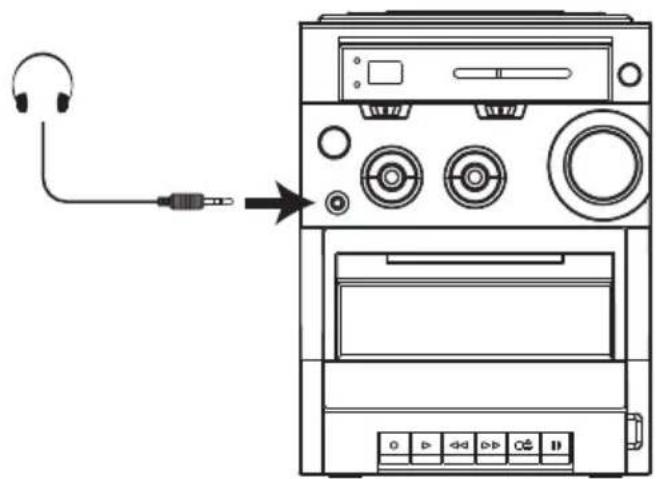
Turn down the volume before connecting the earphones. Slowly raise the volume with the earphones on until you reach your desired volume. When earphones are connected, the speakers are automatically disabled.

Long-term exposure to loud music may cause hearing damage. It is best to avoid extreme volume when using earphones, especially for extended periods.
Switching the Unit ON/OFF and Selecting the Function
- Press the ON/OFF switch to turn the unit on.
- To select your operation source, adjust the FUNCTION selector to CD, TAPE or RADIO position.
- To switch off the unit, press the ON/OFF switch once again.

To avoid unnecessary energy consumption, always turn the unit off by pressing the ON/OFF switch after using the unit.
Adjusting the Volume
Adjust the sound with the VOLUME control.

Radio Operation
- Set the FUNCTION selector to RADIO mode.
- Select the desired band by using the BAND selector.
- Adjust the radio frequency to your desired station by using the TUNING control.
- Adjust the VOLUME control to the desired level.
AM / FM / FM-Stereo Reception
- Set the BAND selector to AM mode for AM reception.
- Set the BAND selector to FM mode for FM MONO reception.
- Set the BAND selector to FM ST. mode for FM STEREO reception. The Stereo indicator will illuminate to indicate that the FM STEREO reception is good.
For Better Reception
FM - This unit has an FM aerial located at the rear of the main unit. This wire should be extended for better reception.
AM - This unit is equipped with a built-in directional ferrite AM aerial. Reorient the unit around to get a better reception.
Playback
- Set the FUNCTION selector to TAPE mode.
- Open the cassette door by pressing the ■ button. Place a tape into the cassette compartment.
- Close the cassette door.
- Press the button to start playing the tape.
- Adjust the VOLUME control to the desired level.
- To pause playback, press the II button. To resume playback, press the II button again.
- Press the ■ button to stop playback.
Fast Forwarding/Rewinding
Press the ◀ buttons until you reach your desired passage.
Press the ■ button to stop fast forwarding/rewinding.
General Information on Cassette Recording
- Recording is permissible in so far as copyright or other rights of third parties are not infringed.
- This cassette player is not suitable for recording on CHROME (IEC II) or METAL (IEC IV) type cassettes. For recording, use normal type cassettes (IEC I) on which the tabs have not been broken.
- The best recording level is set automatically. Altering the VOLUME control will not affect the recording in progress. • No recording will take place on the first 7 seconds and last 7 seconds of the cassette tape.
- To protect a tape from accidental erasure, have the tape in front of you and break out the left lab.
- Recording on this side is no longer possible. To record over this side again, cover the tabs with a piece of adhesive tape.
Recording from the Radio
- Tune to the desired radio station.
- Press the ☐ button to open the cassette door.
- Insert a suitable cassette into the cassette compartment and close the cassette door.
- Press the ● button and the ▶ button at the same time to start recording.
- To pause the recording, press the Cassette II button for cassette. To resume recording, press the II button again.
- To stop recording, press the Cassette ■▲ button.
Recording from a CD
- Set the FUNCTION selector to CD.
- Insert the CD you want to record.
- Insert a suitable cassette into the cassette compartment and close the cassette door.
- Press the ● button and the ▶ button at the same time to start recording.
- To pause the recording, press the CD ▶ II PLAY/PAUSE button. The recording level is set automatically.
- To stop recording, press the Cassette ■▲ button.

Compatible Disc Types
| Disc Types Disc Logo Recorded Content | ||
| CD-R (CD Recordable) AUDIO |  | |
| CD-RW (CD-Rewritable) AUDIO |  | |
| AUDIO-CD (Compact Disc Digital Audio) AUDIO |  | |
Playback
- Set the FUNCTION selector to CD mode.
- Open the CD door and place a CD with the label side facing up in the CD compartment.
- Close the CD door.
- Focus search is performed when the disc is inside. The total number of tracks will appear in the display.
- Press the PLAY/PAUSE button to start playing the CD disc.
- Adjust the VOLUME control to the desired level.
- Press the ▶ II PLAY/PAUSE button again when you want to stop playback temporarily. The display will show “ ▶ ” and flash, press the ▶ II PLAY/PAUSE button again to resume playback.
- Press the SHOP button to stop playback.
Selecting a Different Track
- Press the ◀◀ PREVIOUS or ▶▶ NEXT button once or repeatedly until the desired track number appears in the display.
- In the pause/stop mode, press the ▶ II PLAY/PAUSE button to start playback.
Finding a Passage within a Track
- During playback, press and hold the buttons. The CD is played at high speed and with reduced volume.
- When you recognise the passage you want, release the ◀◀ PREVIOUS or ▶▶ INEXT button to resume normal playback.
Programming Track Numbers
You may store up to 20 tracks in the desired sequence. Be sure to press the STOP button before use to ensure no prior program has been set.
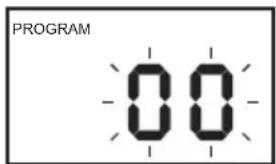
- In stop mode, press the PROG. button, the display will show "00" and it will flash in the display.
- Select the desired track by using the PREVIOUS or NEXT button.
- Press the PROG. button again to confirm entering the desired track into the program memory.
- Repeat steps 2 and 3 to enter additional tracks into the program memory. When "PROGRAM" indicator and "-" are flashing in the display, the program memory is full.
- When all the desired tracks have been programmed, press the ▶ II PLAY/PAUSE button to play the disc in the order you have programmed the tracks. The "PROGRAM" indicator will flash in the display.
- Press the STOP button once to terminate programmed play. The "PROGRAM" indicator will turn off.
Erasing a Program
In stop mode, you can erase the contents of the memory by opening the CD door. Select the RADIO or TAPE mode to erase the program.
Reviewing the Program
In stop mode, press the PROG. button to display your stored tracks.
Repeat Mode
Press the REPEAT button before or during CD playback. You can set a single track or all the tracks to play repeatedly.
- During the playback, press the REPEAT button once to repeat a single track. The "REPEAT" indicator will show in the display.
- Press the REPEAT button twice to repeat the whole disc. The "REPEAT ALL" indicator will show in the display.
- To return to normal playback, press the REPEAT button repeatedly until the "REPEAT" indicator disappears.
![graph TD A["REPEATREPEATALL\n01"] --> B["REPEAT 1 REPEAT ALL NORMAL"] B --> C["02"] C --> D["PLAYBACK"]](/content/2026/05/967118/images/61077cf6d8bafad45d0c1a0edfa76ed9c207ae498aa2e652e3f7ad6d2f00688d.jpg)
Handling Discs
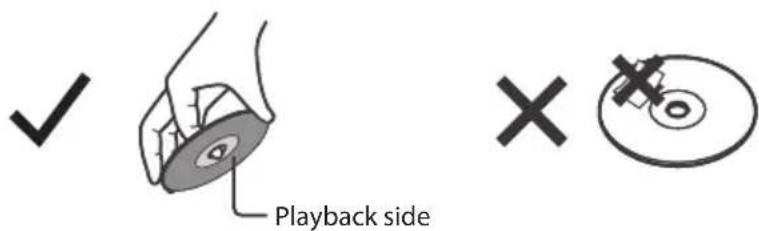
• Do not touch the playback side of the disc. • Do not attach paper or tape to the disc.
Cleaning Discs
- Fingerprints and dust on the disc cause picture and sound deterioration. Wipe the disc from the centre outwards with a soft cloth. Always keep the disc clean.
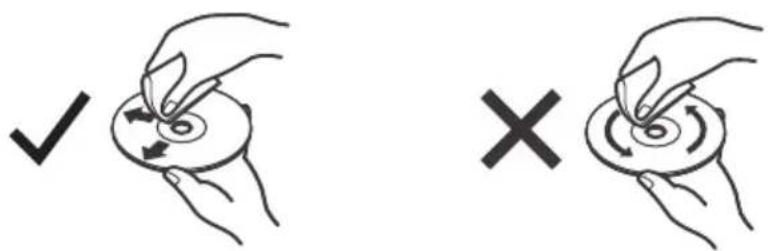
- If you cannot wipe off the dust with a soft cloth, wipe the disc lightly with a slightly moistened soft cloth and finish with a dry cloth.
- Do not use any type of solvent such as thinner, benzine, commercially available cleaners or antistatic spray. They may damage the disc.
Storing Discs
• Do not store discs in places subjected to direct sunlight or near heat sources. - Do not store discs in places subjected to moisture and dust such as a bathroom or near a humidifier. - Storing discs vertically in a case, stacking discs or placing objects on discs outside of their cases may cause warping.
| Problem Solution | |
| No power supply Check that the mains | ins cable is correctly connected to the mains. |
| No sound from the speakers • Check that the speaker cables are securely connected.• Check to see if the Volume control is set to minimum.• The system may be in pause mode. Press the ▶ button to resume normal playback. | |
| Poor radio reception Extend the aerial or move the unit around for better reception. | |
| The CD compartment cannot be closed | The disc is not correctly positioned in its compartment. |
| CD does not play • The disc is dirty.• The disc is placed upside down.• The PAUSE function is on. Press the ▶ II button to resume the playback.• It is a MP3 disc. Replace with an audio CD. | |
| Audio distortions or no audio during CD playback | The surface of the disc is dirty or scratched. |
| Poor Cassette Sound Quality • Dust or dirt on the heads, etc. Clean cassette compartment parts, see Maintenance.• Use of incompatible cassette types (METAL or CHROME). Only use NORMAL (IECI) for recording. | |
| Recording does not work • Cassette tab(s) may be broken. Apply adhesive tape over the missing tab space. | |
| General | |
| Power Supply 230V~ 50Hz | |
| Power Consumption 12W | |
| Output Power 2 x 1.2W | |
| Dimensions Main unit - 165 (L) x 2 | 15 (W) x 222 (H) mmSpeaker Box - 125 (L) x 174.5 (W) x 210 (H) mm |
| Receiving Band AM, FM | |
| FM Frequency Range 88 - 108 MHz | |
| AM Frequency Range 540 - 1600 KHz | |
| Speakers 8 Ohms | |
| Earphone 3.5 mm | |
| Weight 3.09 kgs | |
Features and specifications are subject to change without prior notice.
- Read all the instructions carefully before using the unit and keep them for future reference.
- Retain the manual. If you pass the unit onto a third party make sure to include this manual.
- Check that the voltage marked on the rating label matches your mains voltage.
Damage
- Please inspect the unit for damage after unpacking.
- Do not continue to operate the unit if you are in any doubt about it working normally, or if it is damaged in any way - switch off, withdraw the mains plug and consult your dealer.
Location of Unit
- The unit must be placed on a flat stable surface and should not be subjected to vibrations.
- Do not place the unit on sloped or unstable surfaces as the unit may fall off or tip over.
- The mains socket must be located near the unit and should be easily accessible. • This unit is designed for indoor use only.
Temperature
- Avoid extreme degrees of temperature, either hot or cold. Place the unit well away from heat sources such as radiators or gas/electric fires.
- Avoid exposure to direct sunlight and other sources of heat.
Naked Flames
Never place any type of candle or naked flame on the top of or near the unit.
Moisture
- To reduce the risk of fire, electric shock or product damage, do not expose this unit to rain, moisture, dripping or splashing. No objects filled with liquids, such as vases, should be placed on the unit.
- If you spill any liquid into the unit, it can cause serious damage. Switch it off at the mains immediately. Withdraw the mains plug and consult your dealer.
Ventilation
- To prevent the risk of electric shock or fire hazard due to overheating, ensure that curtains and other materials do not obstruct the ventilation vents.
- Do not install or place this unit in a bookcase, built-in cabinet or in another confined space. Ensure the unit is well ventilated.
Safety
- Always disconnect the unit from the mains supply before connecting/disconnecting other devices or moving the unit.
- Unplug the unit from the mains socket during a lightning storm.
Mains Cable
- Make sure the unit or unit stand is not resting on top of the mains cable, as the weight of the unit may damage the mains cable and create a safety hazard.
- If the mains cable is damaged it must be replaced by the manufacturer, its service agent, or similarly qualified persons in order to avoid a hazard.
Interference
Do not place the unit on or near appliances which may cause electromagnetic interference. If you do, it may adversely affect the operating performance of the unit, and cause a distorted picture or sound.
Earphones
- Listening to loud sounds for prolonged periods of time may permanently damage your hearing.
- Before putting on earphones, turn the volume down then put the earphones on and slowly increase the volume until you reach a comfortable listening level.
Supervision
• Children should be supervised to ensure that they do not play with the unit. - Never let anyone especially children push anything into the holes, slots or any other openings in the case - this could result in a fatal electric shock.
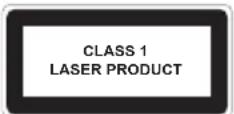
Class 1 Laser Product
- This unit utilises a laser. Use of controls, adjustments or performance of procedures other than those specified herein may result in hazardous radiation exposure.
- Before moving the unit, ensure the disc tray is empty. • Always remove the disc when the unit is not in use.
- Failure to do so will risk severely damaging the disc and the unit.
- Do not stack devices, heat from other devices may affect the performance of the unit.
CAUTION
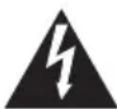
RISK OF ELECTRIC SHOCK DO NOT OPEN


The lightning flash with arrowhead symbol, within an equilateral triangle, is intended to alert the user to the presence of uninsulated “dangerous voltage” within the unit’s enclosure that may be of sufficient magnitude to constitute a risk of electric shock.

The exclamation point within an equilateral triangle is intended to alert the user to the presence of important operating and maintenance (servicing) instructions in the manual accompanying the unit.
Service
- To reduce the risk of electric shock, do not remove screws. The unit does not contain any user-serviceable parts. Please leave all maintenance work to qualified personnel.
- Do not open any fixed covers as this may expose dangerous voltages.
Maintenance
- Ensure to unplug the unit from the mains socket before cleaning.
- Do not use any type of abrasive pad or abrasive cleaning solutions as these may damage the unit's surface. • Do not use liquids to clean the unit.
| NOTE: If you require a replacement for any of the items listed below, please quote their corresponding part numbers: | |
| Replacement Part Part Number | |
| Speakers MCD600SC | |

Visit Partmaster.co.uk today for the easiest way to buy electrical spares and accessories. With over 1 million spares and accessories available we can deliver direct to your door
the very next day. Visit www.partmaster.co.uk or call 0844 800 3456 (UK customers only) Calls charged at National Rate.
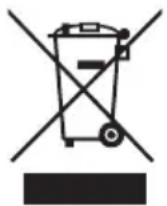
This symbol on the product or in the instructions means that your electrical and electronic equipment should be disposed at the end of its life separately from your household waste. There are separate collection systems for recycling in the EU.
For more information, please contact the local authority or your retailer where you purchased the product.
All trademarks are the property of their respective owners and all rights are acknowledged.


- HI-FI WITH CD AND CASSETTE
- UNPACKING
- PRODUCT OVERVIEW
- CONNECTING THE SPEAKERS
- POWER SOURCE
- USING EARPHONES
- GENERAL OPERATION
- RADIO OPERATION
- CASSETTE OPERATION
- COMPATIBLE DISC TYPES
- CD OPERATION
- MAINTENANCE
- HINTS AND TIPS
- SPECIFICATIONS
- SAFETY WARNINGS
- TOP VIEW
- REAR VIEW
- CONTROL PANEL (CD)
- FUNCTION SELECTOR
- BAND SELECTOR
- VOLUME CONTROL
- EARPHONES SOCKET
- REPEAT BUTTON
- ◀BUTTON
- BUTTON
- TUNING CONTROL
- PROG. BUTTON
- CONTROL PANEL (CASSETTE)
- RECORD BUTTON
- PLAY BUTTON
- ◀ REW BUTTON
- FWD BUTTON
- △STOP/EJECT BUTTON
- IIPAUSE BUTTON
- HOW TO INSERT EACH SPEAKER WIRE
- MAINS POWER
- SWITCHING THE UNIT ON/OFF AND SELECTING THE FUNCTION
- ADJUSTING THE VOLUME
- AM / FM / FM-STEREO RECEPTION
- FOR BETTER RECEPTION
- PLAYBACK
- FAST FORWARDING/REWINDING
- GENERAL INFORMATION ON CASSETTE RECORDING
- RECORDING FROM THE RADIO
- RECORDING FROM A CD
- SELECTING A DIFFERENT TRACK
- FINDING A PASSAGE WITHIN A TRACK
- PROGRAMMING TRACK NUMBERS
- ERASING A PROGRAM
- REVIEWING THE PROGRAM
- REPEAT MODE
- HANDLING DISCS
- CLEANING DISCS
- STORING DISCS
- DAMAGE
- LOCATION OF UNIT
- TEMPERATURE
- NAKED FLAMES
- MOISTURE
- VENTILATION
- SAFETY
- MAINS CABLE
- INTERFERENCE
- EARPHONES
- SUPERVISION
- CLASS 1 LASER PRODUCT
- CAUTION
- SERVICE
Brand : Logik
Model : LHFCDC10
Category : Hi-Fi System