C-DMM-118 - Car kit Havis - Free user manual and instructions
Find the device manual for free C-DMM-118 Havis in PDF.


| Product Type | Vehicle Mounting Kit |
| Brand | Havis |
| Model | C-DMM-118 |
| Compatible Devices | Laptops, tablets, or other mobile devices |
| Mounting Type | Console or floor mount |
| Material | Steel and aluminum construction |
| Dimensions (approx.) | 12 x 10 x 8 inches (30.5 x 25.4 x 20.3 cm) |
| Weight | 4.5 lbs (2.04 kg) |
| Power Supply | Not applicable (passive mount) |
| Main Functions | Secure device mounting in vehicle; adjustable viewing angle; vibration dampening |
| Installation Method | Bolt-on or clamp to existing vehicle console/floor |
| Adjustability | Swivel, tilt, and rotate adjustments |
| Compatibility with Vehicle | Universal fit for most vehicles with flat console/floor areas |
| Load Capacity | Up to 15 lbs (6.8 kg) |
| Maintenance | Clean with damp cloth; check screws periodically |
| Safety Features | Non-slip pads; locking mechanisms to prevent device dislodging |
| Spare Parts Availability | Replacement hardware kits available from Havis |
| Repairability | Modular design allows easy replacement of worn parts |
| Warranty | Limited lifetime warranty |
| Certifications | SAE J1455 compliant |
Frequently Asked Questions - C-DMM-118 Havis
User questions about C-DMM-118 Havis
0 question about this device. Answer the ones you know or ask your own.
Ask a new question about this device
Download the instructions for your Car kit in PDF format for free! Find your manual C-DMM-118 - Havis and take your electronic device back in hand. On this page are published all the documents necessary for the use of your device. C-DMM-118 by Havis.
USER MANUAL C-DMM-118 Havis
INSTALL INSTRUCTIONS
C-DMM-118
2006-2013 CHEVY VAN SWING-OUT DASH MONITOR MOUNT
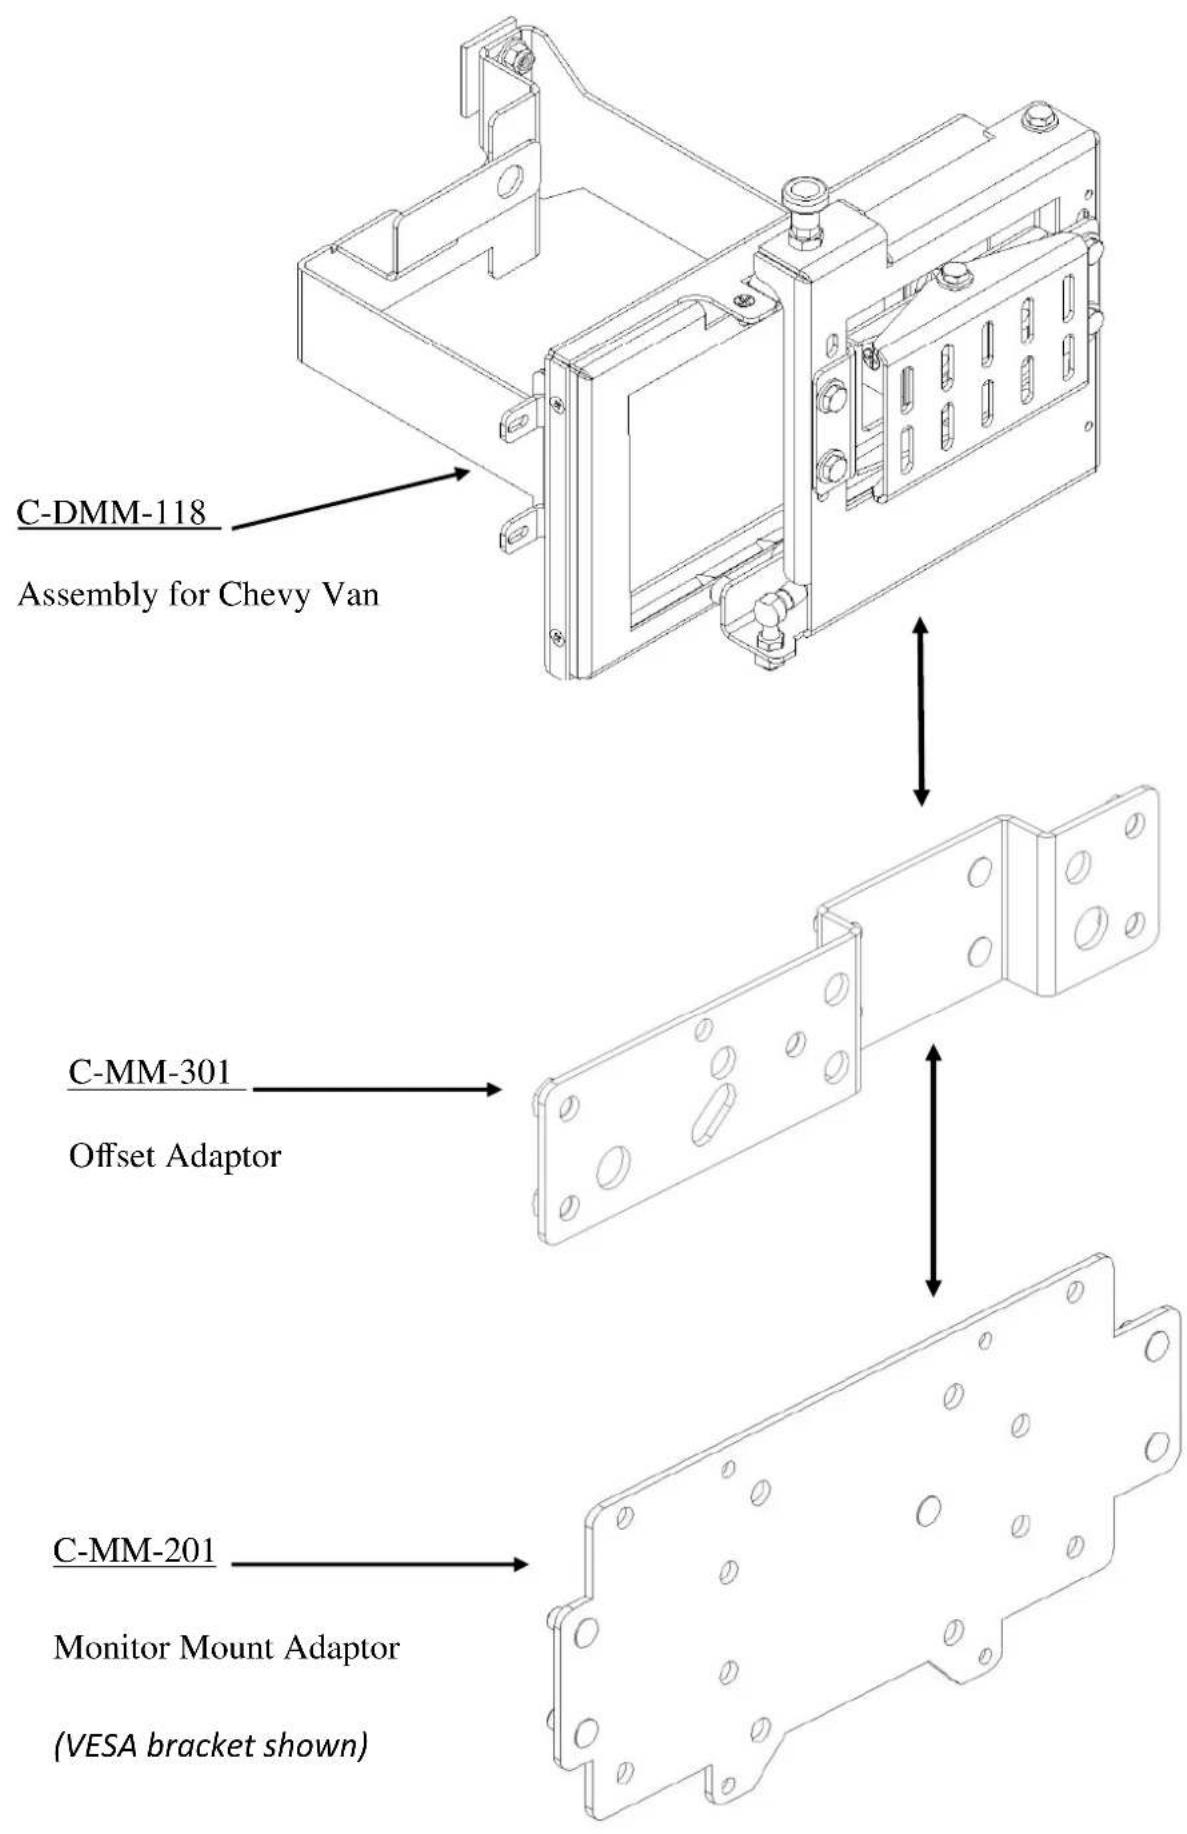
The Dash Monitor Mount bracket system requires two or three main parts that are Sold Separately. See web site Monitor Configurator for more detailed bracket information. http://www.havis.com/monitor_mounts.htm
• 1 - Vehicle Specific dash mount bracket. (C-DMM-118)
• 1 - Computer Specific Monitor adaptor bracket. (C-MM-200 series)
• 1 - Offset adaptor bracket. (C-MM-301)
The C-MM-301 offset adaptor goes between the C-DMM-118 and C-MM-2XX. It may not be required in some applications.
TOOLS REQUIRED:
- Ratchet Wrench
- Socket Set
- Open End Wrenches - 7/16", 1/2"
• Phillips Screwdriver (short)
HARDWARE:
QTY: DESCRIPTION: PART #:
4 8/32 x 1/4" Flat Head Machine Screw GSM33178
4 8/32 Keps nut GSM30027
4 10/32 x 1/2 Flat Head Machine Screw GSM33072
4 1/4-20 Hex Flange Serrated Nut GSM30023
1 Monitor Adapter Hardware Varies (monitor specific)
ALWAYS!
- Read all instructions before installing any Havis, Inc products.
- Use hardware provided with install kit
C-DMM-118_INST_11-12
INSTALLATION
Note: The C-DMM-118 is shipped assembled. It will need to be partially un-assembled prior to installation.
natural_image
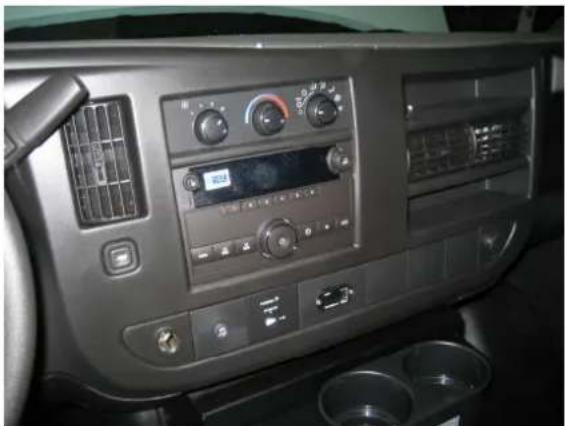
Interior view of a car dashboard with air conditioners and control panels (no visible text or symbols)OEM Dash Prior to installation.
natural_image
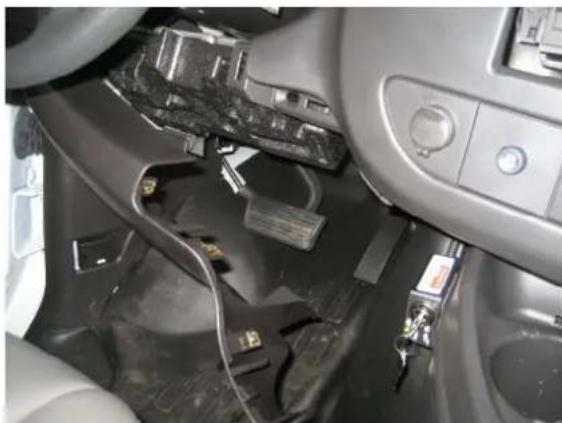
Interior view of a car showing the dashboard, steering wheel, and keyway (no visible text or symbols)Carefully remove driver side lower dash panel. It may not be necessary to be completely removed.
natural_image
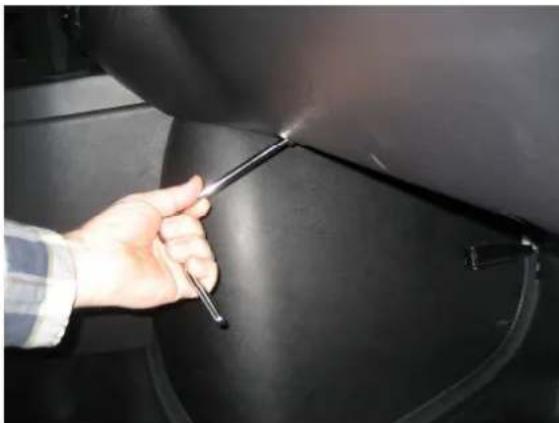
Hand holding a tool inside a car's hood, no visible text or symbolsCarefully remove passenger side lower dash panel. It may not be necessary to be completely removed. (7 mm socket)
natural_image
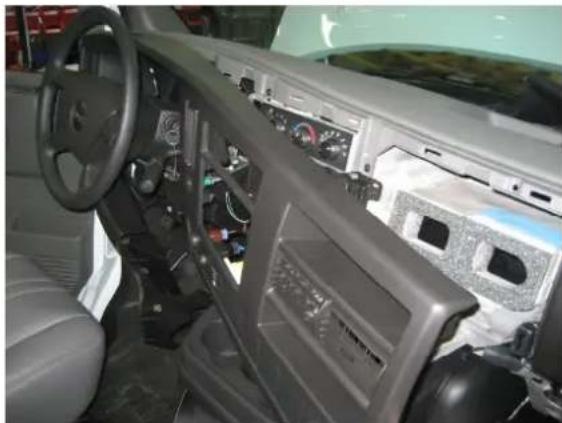
Interior view of a car cockpit with steering wheel, dashboard, and control panel (no visible text or symbols)Detach center dash panel and pull out passenger side only as far as needed to remove the AM/FM radio.
natural_image
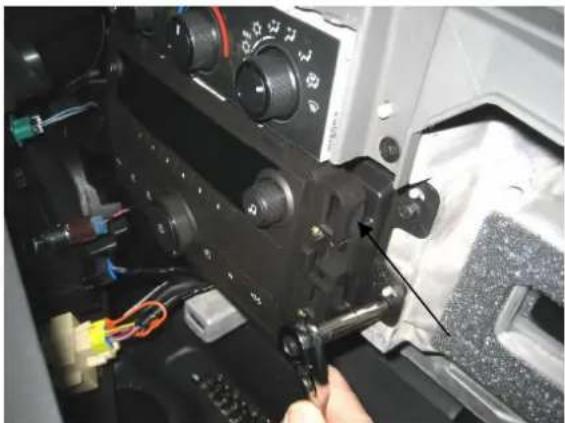
Close-up of a mechanical assembly with a hand adjusting a component, no visible text or symbolsUnscrew AM/FM radio from dash. Screws will be reused (7 mm socket)
natural_image
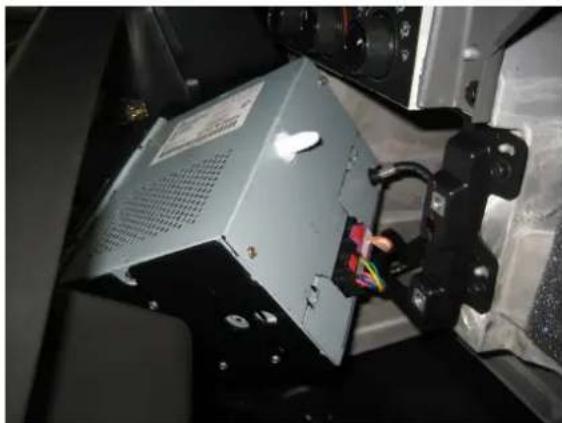
Interior view of a vehicle showing a power supply unit with attached cable and sensor (no visible text or symbols)Unplug and remove radio from dash.
natural_image
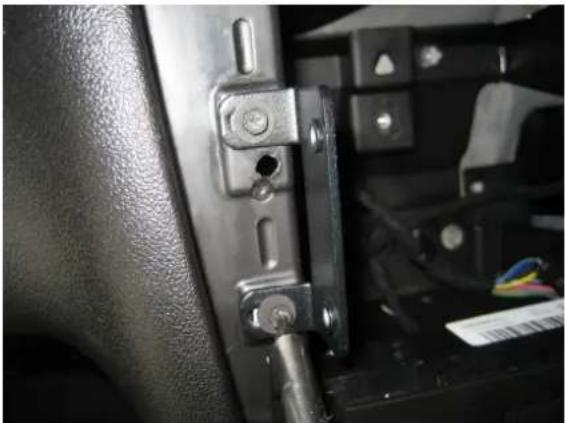
Close-up of a black leather car interior showing a metal hinge and cable connector (no text or symbols visible)Attach side support brackets to dash with previously removed OEM radio screws. One each side (7 mm socket)
natural_image
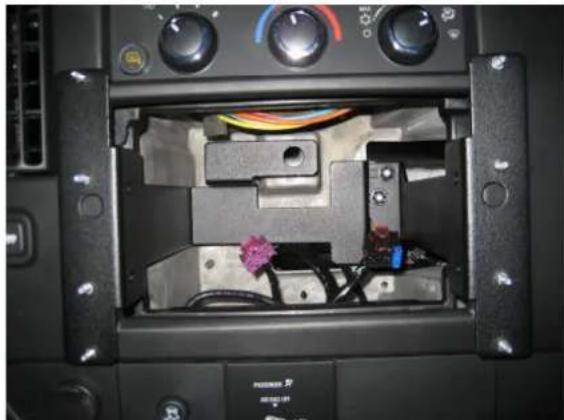
Interior view of a car air conditioning unit showing internal components and wiring (no visible text or symbols)Insert main bracket frame into dash cavity.
natural_image
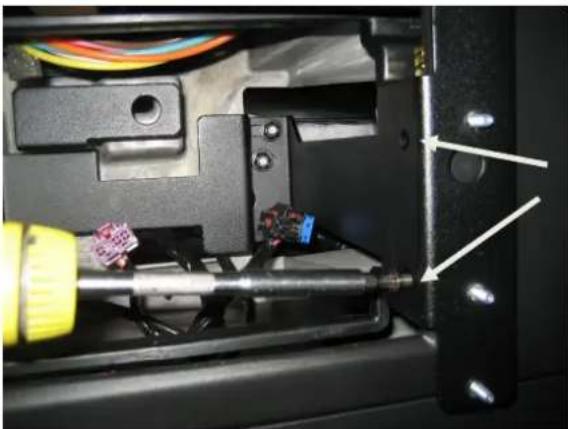
Close-up of a mechanical assembly with soldering and wiring, no visible text or symbolsLoosely attach frame to side support brackets with 10/32 x 1/2" machine screws provided. Tighten screws after next step. (Phillips screwdriver)
Make sure not to pinch wires.
natural_image
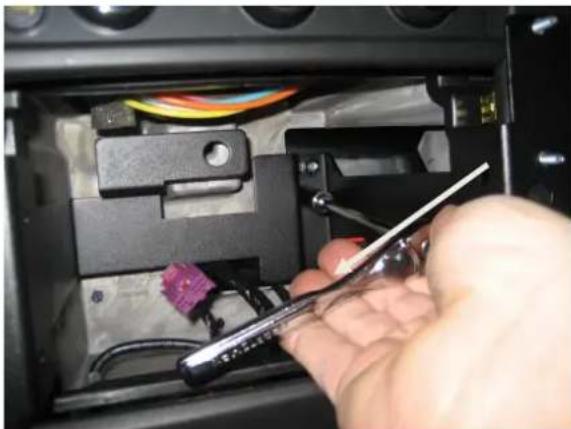
Close-up of a hand using a screwdriver to adjust cable wiring inside an electronic device (no visible text or symbols)Attach main bracket frame to forward OEMsupport with clamp provided. Tighten 1/4" nuts. (7/16" socket with extension)
natural_image
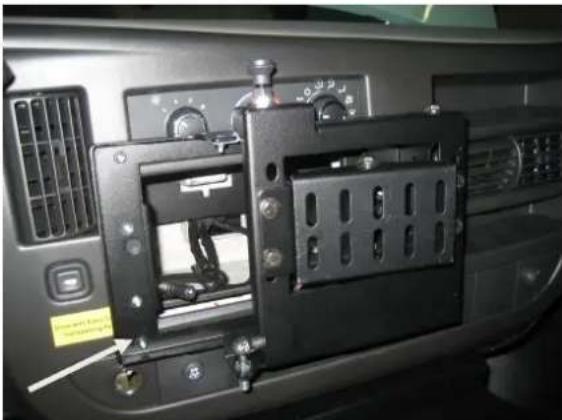
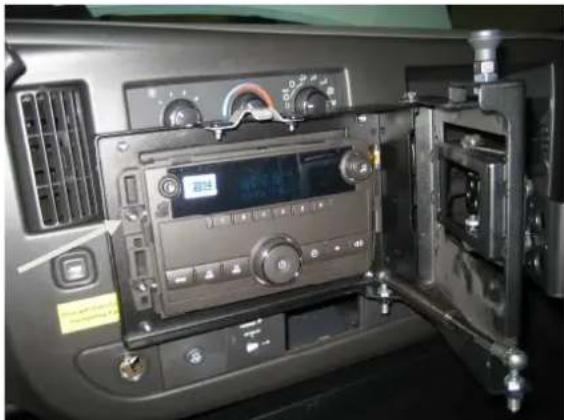
Interior view of a car dashboard with mounted electronic equipment (no visible text or symbols)Attach door frame assembly to main frame studs with four (4) 8/32 nuts provided. (11/32 socket)
natural_image
Interior view of a car dashboard with air conditioners and a digital display (no visible text or symbols)Plug wires into radio and mount radio to frame studs with four (4) 8/32 nuts provided. (11/32 socket)
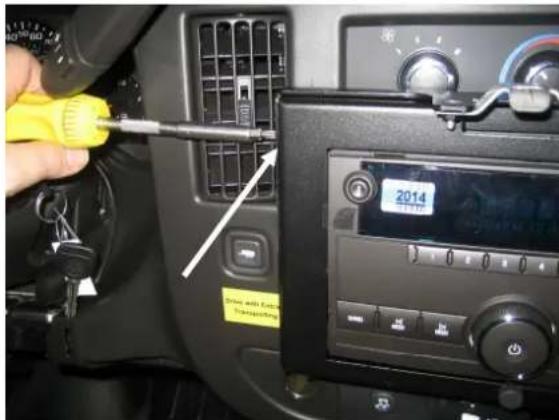
Attach Trim Bezel to frame with four (4) screws provided.
natural_image
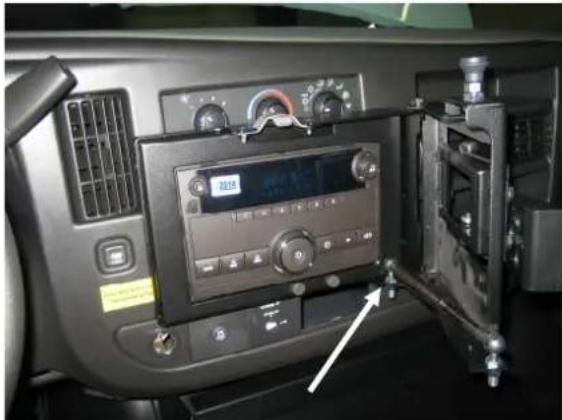
Interior view of a car dashboard with air conditioners and a digital display (no visible text or symbols)Note: The gas spring may need to be temporarily removed from frame in order to install Trim Bezel properly. (1/2 wrench and socket)
natural_image
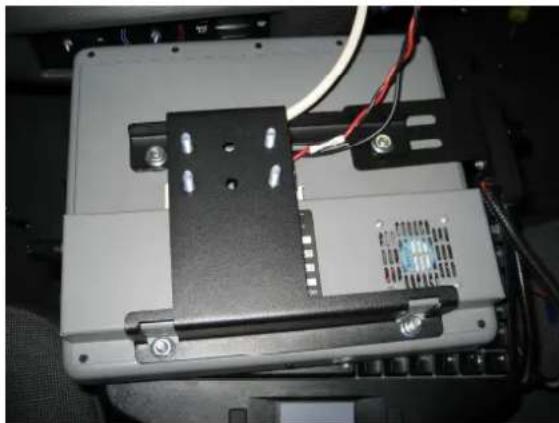
Close-up of a mechanical device with black components and wiring, no visible text or symbolsAttach C-MM-200 monitor adaptor bracket to the back of monitor. Also attach C-MM-301 adaptor if required.
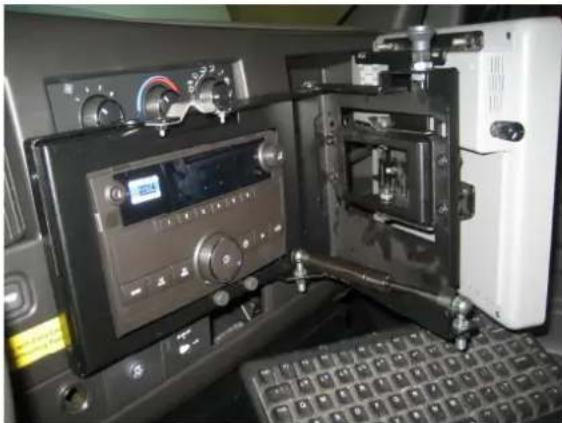
natural_image
Interior view of a vintage electronic device with control panel and keyboard (no visible text or symbols)Attach Monitor / bracket assembly to swing door with 1/4" nuts provided with the monitor adaptor brackets.
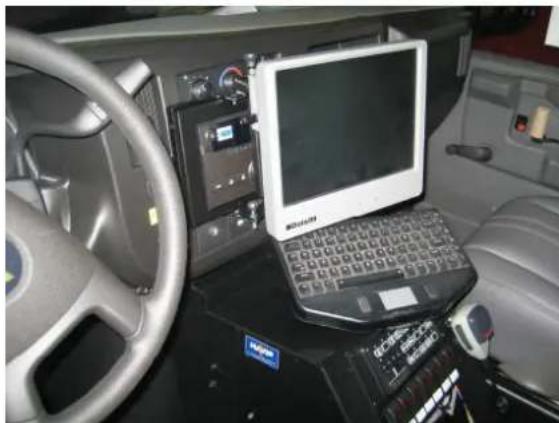
natural_image
Interior view of a vehicle's dashboard and steering wheel, featuring a laptop and control panel (no visible text or symbols)View of completed C-DMM-118 installation with a C-VS-1800-SAV console, C-MD-204 tilt swivel and C-KBM-102 keyboard mount.
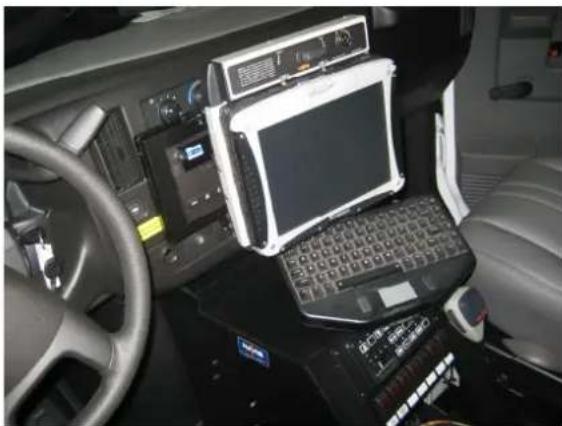
natural_image
Interior view of a car dashboard with a laptop and control panel (no visible text or symbols)View of completed C-DMM-118 installation with a DS-DA-211 docking station, C-VS-1800-SAV console, C-MD-204 tilt swivel and C-KBM-102 keyboard mount.
Brand : Havis
Model : C-DMM-118
Category : Car kit