
4606V - Car alarm Viper - Free user manual and instructions
Find the device manual for free 4606V Viper in PDF.


| Product Type | Car Alarm System |
| Brand | Viper |
| Model | 4606V |
| Category | Vehicle Security |
| Compatibility | 12V vehicles with negative ground systems |
| Control Module Dimensions | 3.5 x 2.5 x 1 inch (approx.) |
| Weight | 0.5 lb (approx.) |
| Power Supply | 12V DC (vehicle battery) |
| Voltage | 12V |
| Current Draw | 15 mA (standby), 1.5 A (alarm) |
| Remote Range | Up to 1 mile (line of sight) |
| Keyless Entry | Yes, with two 4-button remotes |
| Remote Start | Yes |
| Trunk Release | Yes |
| Panic Button | Yes |
| Arm/Disarm | Remote or valet switch |
| Shock Sensor | Dual-stage adjustable |
| Anti-Hijack | Yes, programmable |
| Battery Backup | Internal 9V battery (not included) |
| Siren Output | 130 dB |
| Installation Type | Professional recommended |
| Warranty | 1 year limited |
| Maintenance | Replace remote batteries yearly, backup battery every 2 years |
| Spare Parts | Replacement remotes, backup batteries, shock sensors available |
Frequently Asked Questions - 4606V Viper
User questions about 4606V Viper
0 question about this device. Answer the ones you know or ask your own.
Ask a new question about this device
Download the instructions for your Car alarm in PDF format for free! Find your manual 4606V - Viper and take your electronic device back in hand. On this page are published all the documents necessary for the use of your device. 4606V by Viper.
USER MANUAL 4606V Viper
natural_image
Close-up illustration of a snake's head with open mouth and large eyes, set against a yellow background (no text or symbols)OWNER'S GUIDE
M O D E L
4606V
Congratulations
Congratulations on the purchase of your state-of-the-art remote start and keyless entry system. Reading this Owner's Guide prior to using your system will help maximize the use of your system and its many features. For any additional questions please contact your authorized Directed dealer, or contact Directed at 1-800-753-0600. (U.S. only) or 1-800-361-7271 (Canada only). Additional support is also available at: http://support.directed.com.
Important information
Government Regulations and Safety Information

Read the "Government Regulations" and "Warning! Safety First" sections of this manual prior to operating this system.
Warning! Failure to heed this information can result in death, personal injury or property damage and may also result in the illegal use of the system beyond its intended purpose.
Your Warranty
Your system comes with a warranty. The warranty terms are detailed at the end of this guide. Make sure that you receive the proof of purchase from your dealer, indicating the product was installed by an authorized Directed dealer.
G4606 2016-02
Replacement remote controls
Please see your authorized dealer or visit us at www.directedstore.com to order additional remote controls. Remote control RPNs (Replacement Part Numbers) are found on the back of the device.
Contents
Congratulations .... iii
Important information .... iii
Government Regulations and Safety Information ....iii
Your Warranty....iii
Replacement remote controls iv
Getting Started....3
Keys to using this manual.... 3
Remote Control 4
Control Center 4
Using your System....5
Commanding the system....5
Performing Commands 5
Remote Control Command Table....6
Basic Commands (Direct Access) 7
Lock 7
Unlock....7
Remote Start....7
AUX/Trunk....7
Advanced Commands: (Level 1) 8
Silent Lock....8
Runtime Reset 8
AUX 1....8
Advanced Commands: (Level 2) 9
Remote Valet 9
Timer Start 9
AUX 2....9
Advanced Commands: (Level 3) 10
Car finder 10
Smart Start.... 10
AUX 3....10
Advanced Commands: (Level 4)....11
Defogger 11
AUX 4....11
Remote Control Configuration 12
Remote Programming 12
Remote Features 12
Remote Pairing Mode.... 13
Emergency Override....15
Remote Start Features 16
Key Takeover.... 16
Remote Start Safelock 16
Disabling Remote Start 16
Advanced Start 16
Pit Stop Mode 18
MTS Mode (Manual Transmission Start) 18
Turbo Timer Mode.... 19
Remote Start Faults....20
Remote and System Operations....21
Passive Locking 21
Auto Re-locking 21
Valet Mode 22
Power Save.... 22
Rapid Resume 22
Car Select....22
System Expansion Options....23
Battery Information....25
Low Battery Alerts 25
Battery Replacement.... 25
Battery Disposal 25
Patent Information 26
Glossary of Terms....27
Government Regulations 28
Warning! Safety First....30
Limited lifetime consumer warranty 32
Getting Started
Keys to using this manual
Specific actions (in bold type) and style conventions are used consistently throughout this manual, they are as follows:
- Press: implies pushing in and releasing a button.
- Hold: is used after Press actions when a button needs to be held in position for an extended period of time, typically several seconds.
- Italicized words denote section/sub headings in this guide and can be located through the table of contents.
- An asterisk (*) when used after a word or phrase denotes that additional details can be found in related sections usually noted at the bottom of the page or end of the section.
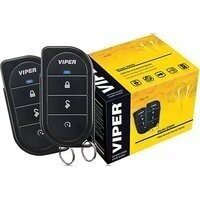
Remote Control
| Feature Description | |
| Internal Antenna Used for transmitting information | |
| Transmit LED Active when transmitting information | |
Command buttons (4) | Used to perform Locking, Unlocking, Auxiliary channel and Remote Start commands |
| Function button f | Used to access function levels for commands, configuration menus for programming and Car Selection |
Control Center

The Control Center, typically located on the upper part of the front windshield. It consists of:
• The In-vehicle system antenna.
- The Status LED, as a visual indicator of the system's status.
- The Control Center button, for placing the system into Valet Mode* and to perform the Emergency Override** operation.
* See "Remote and System Operations" on page 21 for details.
** See "Emergency Override" on page 15" for details
Using your System
Commanding the system
Commands, Basic or Advanced, are used to activate system features and are performed by pressing one of the Command buttons. Basic commands control the most often used keyless entry and remote start features while Advanced commands control more specialized features.
Confirmations for Basic or Advanced commands are indicated by horn honks* and parking light flashes. A description of each feature confirmation is found in the following Basic command and Advanced command sections.
Performing Commands
Perform Basic commands by pressing a Command button.
Perform Advanced Commands by first accessing Levels 1-4 using the f button and then by pressing a Command button while within a level.
Advanced command example: Silent Lock
- Press the f button once to access Function Level 1.
- Press the 📄 button to perform the Silent Lock command.
- The system will lock the doors and flash the parking lights, without horn honks.*
* The optional Horn Honk feature must be connected.
Remote Control Command Table
| Basic Commands | Advanced Commands | ||||
| Function Level 1 | Function Level 2 | Function Level 3 | Function Level 4 | ||
| Level Button | Direct Access | f × 1 | f × 2 | f × 3 | f × 4 |
| [STDK] | Lock Silent Lock | ||||
 | Unlock Silent Unlock Remote Valet Car Finder | ||||
| [T3Y2] | Remote Start Reset Runtime Timer Start Smart Start Defogger | ||||
| AUX | AUX/Trunk* AUX 1 AUX 2 AUX 3 AUX 4 | ||||
| [HSTC] | Advance Level, Change Car (3 sec), Enter programming (8 sec) | ||||
* This is an optional feature, see your authorized Directed dealer.
Basic Commands (Direct Access)
Lock
Press and release

Doors lock (if connected), the horn honks** once and the parking lights flash one time.
To Lock and Panic
Press and hold

To lock the system, then activate Panic. For Panic to be effective, the optional horn honk feature must be connected. Press the or 📄 button to stop Panic output.
Unlock
Press and release

The doors unlock (if connected), the horn honks ^** twice and the parking lights flash.
Remote Start\*
Press and release

Activates (or if On, deactivates) the remote starter. The engine turns On, or the engine turns Off accordingly. If a Remote start configuration issue prevents the engine from starting, the parking lights flash a Remote Start fault report to identify the fault.
AUX/Trunk\*\*
Press and hold AUX
The Trunk opens (if connected) when button is held for 2 seconds.
* For Manual transmission vehicles see "MTS Mode (Manual Transmission Start)" on page 18.
* *This is an optional feature, see your authorized Directed dealer.
Advanced Commands: (Level 1)
Press and release the f button one time first, before pressing one of the following command buttons. The transmit LED illuminates in sets of single flashes to indicate Level 1.
Silent Lock
Press and release

The doors lock (if connected), without horn honks.*
Silent Unlock
Press and release

Doors unlock (if connected), without horn honks.*
Runtime Reset
Press and release

If more time is needed while remote start is active, runtime reset will reset the runtime counter to the pre-programmed setting.
Note Remote Start must be ON to use this feature.
AUX 1
Press and release AUX
Activates (or if On, deactivates) the AUX 1 output.
* The optional Horn Honk feature must be connected.
Advanced Commands: (Level 2)
Press and release the f button two times first, before pressing one of the following command buttons. The transmit LED illuminates in sets of double flashes to indicate Level 2.
Remote Valet
Press and release

Enters (or if On, exits) Valet Mode. The Control Center LED turns on and off accordingly, and prevents doors from locking passively.
Timer Start\*
Press and release

Activates (or if On, deactivates) Timer Start. The parking lights flash quickly four times for On and slowly four times for Off.
Note
System needs to be locked with the remote or Timer Start will not start the engine.
AUX 2
Press and release AUX
Activates (or if On, deactivates) the AUX 2 output.
* See "Advanced Start" on page 16 for more details.
Advanced Commands: (Level 3)
Press and release the f button three times first, before pressing one of the following command buttons. The transmit LED illuminates in sets of triple flashes to indicate Level 3.
Car finder
Press and release

The horn emits one long honk and the parking lights flash for 10 seconds. The parking light flashes stop if locked or unlocked while Car Finder is in progress. Lock and Unlock cancels the parking light flash.
Smart Start\*
Press and release

Activates (or if On, deactivates) Smart Start. The parking lights flash quickly five times for On and slowly five times for Off.
Note
System needs to be locked or Smart Start will not start the engine.
AUX 3
Press and release AUX
Activates (or if On, deactivates) the AUX 3 output. See your authorized Directed dealer for details.
* See "Advanced Start" on page 16 for more details.
Advanced Commands: (Level 4)
Press and release the f button four times first, before pressing one of the following command buttons. The transmit LED illuminates in sets of quadruple flashes to indicate Level 4.
Defogger\*
Press and release

Activates the vehicle Defogger circuit (if connected) while Remote Start is activated and the parking lights flash three times. For convenience, the Defogger circuit will also automatically activate 10 seconds after remote starting if the temperature is below 55^ F.
Note Remote Start must be active to use this feature.
AUX 4
Press and release AUX
Activates (or if On, deactivates) the AUX 4 output.
* This feature must be installed and turned on by an authorized Directed dealer.
Remote Control Configuration
The remote controls have operations that can be configured to a user's personal preferences. The following instruction will direct you through the available programming options for both remote controls.
Remote Programming
To Enter Programming: Press and hold the f button for eight seconds, the transmit LED turns on to indicate the Main Menu is accessed.
To Exit Programming: Press and release the f button once then press and hold the f button again until the transmit LED shuts off.
Remote Features
Enter programming to access the main menu as previously explained, then from the Main Menu, press and hold the 📋 button to access the remote operation features, two transmit LED flashes indicate the remote features menu is accessed. Press the buttons indicated in the tables below to set the feature option.
The remote control will flash the Transmit LED to indicate the setting.
| Feature Button Press Single Flash Double Flash | |||
| Keypad Lock |  | Auto OFF * | |
| Button Beeps |  | ON* OFF | |
| Car 2 |  | Car 2 ON Car 2 OFF * | |
* Indicates default setting.
| Note | The remote control automatically exits the configuration mode if no buttons are pressed within 30 seconds. Feature changes are not saved if programming exits after this lapse. |
Keypad Lock
Options: OFF, Auto
When Off, the buttons do not lock and always perform a command when pressed. When set to Auto, the remote buttons lock after a 20 second lapse between button presses to prevent unintentional operations.
| Note | If a button is pressed when locked, a fault tone plays as an alert. To unlock the buttons, press the f button followed by the ⚫ button, tones are emitted to confirm unlocking. |
Car 2
Options: OFF, ON
The remote controls can control two systems independently. When set to Off, the Car Select feature is not available. When set to On the Car Select feature is enabled. See "Car Select" on page 22 for details on using a remote with two systems.
Remote Pairing Mode
The following instruction will step you through the remote pairing operation.
Prepare the vehicle system for pairing:
-
Tum the key to the ON position.
-
Within five seconds press and release the Control Center button one time.
- Within five seconds, press and hold the Control Center button. The status LED will flash one time and the horn (if connected) honks once to confirm the system is ready for remote pairing.
- Release the Control Center button and proceed to next step.
Prepare the remote control for pairing:
- Enter programming by pressing and holding the f button for eight seconds to access the Main Menu.
- Press and hold the 🔒 button for one second, 3 transmit LED flashes indicate the remote control is ready to pair.
- Press the 🔒 button.
- Wait several seconds as the remote generates a security encryption and sends it to the Control Center. The horn honks to indicate Pairing is complete.
If pairing is not successful press and release the f button once and then repeat steps 6 and 7.
Pairing will exit if:
- Step 7 is not completed within 60 seconds
- The doors are closed
- The ignition is turned off.
Emergency Override
The override feature allows you to select a specific number of presses needed to disable the system.
If the override button has been programmed to a new number of presses by your authorized dealer, that number should be indicated as follows. Number of presses____
- Turn the ignition On.
- Press the control button on the Control Center the correct number of times (the default is 1 press).
- After a few seconds the horn output ceases and the system is disabled.
| Note | As a precaution, if programmed for Passive Locking or Auto re-locking the system should be placed into Valet Mode until a remote is available. |
Remote Start Features
Key Takeover
When you are ready to drive.
The system keeps the engine running until the vehicle is ready to be driven. To perform Key Takeover:
- Unlock the system, and enter the vehicle, do not step on the foot brake.
- Insert the key, turn it to the run position, and then step on the foot brake, the remote start then turns off.
- The parking lights turn off to indicate remote start is off.
- The vehicle is ready to drive.
Remote Start Safelock
Remote Start Safelock makes sure the doors are locked while the engine is running and after, even if they are unlocked when remote start is activated. Door locks may require additional parts and labor.
Disabling Remote Start
Remote start can be disabled by moving the Toggle Switch to the Off position. If remote start is attempted while Off, the engine will not start (see "Remote Start Faults" on page 20). Move the switch back to the On position to resume normal operation.
Advanced Start
The Advanced start features; Timer Start and Smart Start will automatically start the engine to maintain battery charge or combat extreme cold when parked for an extended period of time.
Precautions for the Advanced Start features:
- Park the vehicle in a well ventilated area away from windows and doors that lead into inhabited spaces.
- Lock the vehicle, the engine will not start unless the doors are locked.
- Only one Advanced start feature can be enabled at any given time.
- For manual transmission vehicles, MTS mode must be enabled before Timer Start or Smart Start can be activated.
- Timer Start or Smart Start mode automatically exits when the vehicle is unlocked.
Timer Start operation
Activation begins a countdown timer as set by the installer (default three hours). When the timer expires the engine starts. When the Remote start runtime expires the engine shuts off, and the countdown timer restarts. This will repeat as many times as set by the installer (default is six starts). Timer Start is exited after the final start.
Smart Start operation
Smart Start uses the settings for Timer Start in addition to temperature and battery level to automatically start the engine. Activation begins the countdown timer. When the timer expires the vehicle interior temperature and battery level is checked and, if the Temperature is above 100°F, below 0°F, or the battery level is below 10.5V, the engine will start. When the Remote Start runtime expires the engine shuts off, and the countdown timer restarts. Smart Start is exited after the final start.
| Note | The temperature and battery thresholds can be changed by an authorized Directed dealer if a higher or lower threshold is desired. |
Pit Stop Mode
To exit vehicle with engine running.
The system keeps the engine running during short trips into the house or convenience store. To perform Pit Stop:
- With the engine running, set the parking brake and release the foot brake.
- Press the 📋 button, the parking lights will turn on to indicate remote start is on.
- Turn the key to OFF, and remove it from the ignition, the engine continues running for the programmed runtime.
- Exit the vehicle and lock the system.
| Note | For Pit Stop on manual transmission vehicles follow the directions in the “MTS Mode (Manual Transmission Start)” section with the door open. |
MTS Mode (Manual Transmission Start)
When installed into a manual transmission vehicle, the system requires that the MTS Mode is properly set when parking. If MTS mode is not properly set or is defeated after being properly set the system will not start the engine.
- With the engine running, press the foot brake, then set the parking brake and leave the engine running.
For Pit Stop Mode (to leave the engine running after locking), open the driver door.
- Release the foot brake. As long as the engine is running there is no time limit to perform this step.
- Within 20 seconds of foot brake release, press any command button on the remote, after 20 seconds return to Step 2 (For Turbo Timer Mode, press the optional dash mounted activation button or send the Timer Mode command.
- The parking lights flash several times to confirm MTS mode is enabled and the remote start activates the ignition outputs.
- Turn Off and remove the key from the ignition switch, the engine remains running.
- Exit the vehicle, close all the doors and lock the system.
- The engine turns off. If the door is opened in Step 1 then the engine continues to run.
Turbo Timer Mode
The system keeps the engine running for the Turbo Timer runtime and can be activated by remote control or optional dash mounted activation button.
- With the engine running, set the parking brake.
- Press the optional dash mounted activation button or perform the Timer Mode command.
- The parking lights turn on and the remote start activates the ignition outputs.
- Turn Off and remove the key from the ignition switch, the engine remains running.
- Exit the vehicle, close all the doors and lock the system.
- The engine runs for the Turbo Mode runtime.
| Note | Turbo Timer must be turned on by an authorized Directed dealer. |
| Note | For Turbo Timer mode on manual transmission vehicles follow the directions in the Manual Transmission Start (MTS mode) section with the door open and in step 3 send the Timer Mode command from the remote control. |
Remote Start Faults
For user safety, the system must be properly configured or remote start will not activate. A Remote Start Fault may be caused by any of several configuration issues. If the remote start fails to activate, refer to the table below for the command type and parking light flashes that will identify the configuration issue and solution.
| Flashes * Possible Fault Solution | ||
| 5 Brake on Release foot brake | ||
| 6 Hood open Close hood | ||
| 7 After performing Remote Start command - MTS not enabled | Enable MTS mode | |
| Check all Solutions | ||
| 8 Toggle Switch off Turn switch on | ||
* Refers to the number of parking light flashes.
Remote and System Operations
Passive Locking\*
Park and exit the vehicle, after the doors are closed the Passive locking countdown begins. The led flashes quickly and upon reaching 20 seconds the siren then chirps once. At 30 seconds the system activates itself. Anytime before the system locks you can re-enter the vehicle or open the trunk to load or unload items and, after closing passive locking resumes.
To stay secure in case of accidental unlocking the system, if a door is not opened within 30 seconds the system reactivates itself and locks the doors.
Auto Re-locking\*
Auto re- ensures the vehicle stays locked if it is not entered after unlocking by remote control. After unlocking by remote, the system automatically re-locks the doors (if programmed on) in 30 seconds. Open any point of entry to stop the re-lock until the next unlock by remote.
Onetime Bypass\*
Tum the ignition On for one to three seconds and then Off. The horn honks once to confirm one-time bypass is enabled.
One-time bypass can be used to temporarily bypass the Passive locking operation for one cycle. It also bypasses the comfort closure and auxiliary channel outputs if programmed to activate when locking. After the next unlock, all operations return to normal.
Valet Mode
Valet mode can be entered and exited by performing the Remote Valet command or manually using the vehicle key and the control button.
Use the following steps to manually enter and exit Valet Mode:
- Tum the ignition switch On and then Off
- Immediately press and release the control button once
- The control center LED turns on when entering and off when exiting.
Power Save
To reduce power consumption the control center status LED modifies its output if the vehicle is parked for an extended period. If Locked the flashing is reduced after 24 hours. When Valet mode is On the LED turns off after 1 hour and resets each time the ignition is turned off.
Rapid Resume
If power is ever disconnected by a mechanic or thief, the system will resume the state it was in at the time of disconnection, when power is reconnected.
Car Select
Car 2 remote control option must first be turned On (see under "Remote Control Configuration" on page 12 to turn on). Press and hold the f button for 3 seconds. The LED flashes once or twice to indicate the selected Car is 1 or 2, release the button for Car Select or continue to hold for programming.
Release the f button, then press and release while the LED flashes continue to perform Car Select. Once the car is selected a command can be performed by pressing one of the command buttons.
System Expansion Options
Controlling Two Vehicles (Car Select)
The remote controls can control systems in two different vehicles saving the need for multiple remote controls. This feature also allows for customized system configurations on each vehicle that has more than one driver. See Owner Recognition for details.
Owner Recognition \*
The system can be configured to recognize the remote used when unlocking and change selected features to match the remote users preferences. Memory seat adjustment, horn honks, passive locking, remote button auto unlocking, horn output duration can all be custom set for each remote user at the time of installation.
Comfort Closure \*
Comfort Closure emulates turning the key in the door cylinder or holding the lock button of an OEM keyless entry. It will automatically close the windows and sunroof on vehicles with this type of OEM convenience feature.
Driver Door Priority Unlocking \*
The door unlocking operation can be configured to emulate an OEM style of driver priority unlocking for added protection during unlocking.
AUX (Auxiliary) Channels
The auxiliary channel outputs of this system can activate many of the convenience features found in today's vehicles. The system installer can clarify if any of the following listed features are compatible with your vehicle.
- Trunk Release
- Windows open/close
- Left Sliding door open/close
• Right Sliding door open/close - Rear Hatch open/close
- Sunroof open/close
- Audio System
- Headlights
* These features must be turned on by an authorized Directed dealer.
Battery Information
The remote controls are powered by 1 coin cell battery (CR-2032) that can be purchased at most retailers. When the battery begins to weaken, the operating range will be reduced. The information and precautions in this section can help maximize your battery's life and usage in providing you with many years of trouble free operation.
Low Battery Alerts
When unlocking the system using a remote with a low battery the horn emits one additional honk as an alert. If confirmation honks are programmed off, the system will still emit one honk as an alert when unlocking. The optional horn honk feature must be installed.
Battery Replacement
- If present, remove the small screw on the back of the remote.
- Use a small flat blade screwdriver and insert it into the slot located along the bottom of the remote, near the key ring. Carefully pry open the case.
- Gently slide out the used battery to remove it from the holding clip. Orient the new battery for the correct polarity and insert into holding clip.
- Reposition case parts, and snap together by pressing firmly and evenly on the front and back. Reinstall screw (if applicable).
Battery Disposal

Directed cares about the environment. If you need to dispose of the battery, please do so in accordance with your municipal requirements for battery disposal.
Patent Information
This product is covered by one or more of the following United States patents:
Remote Start Patents:
5,349,931; 5,872,519; 5,914,667; 5,952,933; 5,945,936; 5,990,786; 6,028,372; 6,467,448; 6,561,151; 7,191,053; 7,483,783
Vehicle Security Patents:
5,467,070; 5,532,670; 5,534,845; 5,563,576; 5,646,591; 5,650,774; 5,673,017; 5,712,638; 5,872,519; 5,914,667; 5,952,933; 5,945,936; 5,990,786; 6,028,505; 6,452,484
Other patents pending.
Glossary of Terms
Document Terminology
Control Module The "brain" of your system. Usually hidden underneath the dash area of the vehicle. It houses the microprocessor which monitors your vehicle and controls all of the system's functions.
Remote Control A hand-held, remote control which operates the various functions of your system.
Control Center The control center contains the system's radio-frequency antenna, the control button, and the Status LED. For maximum remote-control range, the control center is usually located at the top of the windshield, centered near the rear-view mirror.
Status LED A light used to indicate the status of your system. It is located on your system's Control Center.
Control Button A small push button located on your system's control center. It is used to override (disarm) the alarm when a remote is not available or to enter or exit Valet Mode.
Government Regulations
This device complies with Part 15 of FCC rules. Operation is subject to the following two conditions: (1) This device may not cause harmful interference, and (2) This device must accept any interference received, including interference that may cause undesirable operation.
This equipment has been tested and found to comply with the limits for a class B digital device, pursuant to Part 15 of the FCC Rules. These limits are designed to provide reasonable protection against harmful interference in a residential installation. This equipment generates and can radiate radio frequency energy and, if not installed and used in accordance with the instruction manual, may cause harmful interference to radio communications. However, there is no guarantee that interference will not occur in a particular installation. If this equipment does cause harmful interference to radio or television, which can be determined by turning the equipment OFF and ON, the user is encouraged to try to correct the interference by one or more of the following measures:
- Reorient or relocate the receiving antenna.
- Increase the separation between the equipment and receiver.
- Connect the equipment into an outlet on a circuit different from that to which the receiver is connected.
- Consult the dealer or an experienced radio / TV technician for help.
Remote Controls
To satisfy FCC RF exposure compliance requirements, this device should be used in hand-held, hand operated configurations only. The device and its antenna must maintain a separation distance of 20 cm or more from the person's body, except for the hand and wrists, to satisfy RF exposure compliance. This device is designed to be used in a person's hands and its operating configurations do not support normal transmissions while it is carried in pockets or holsters next to a person's body.
Control Center
To satisfy FCC RF exposure compliance requirements, the device and its antenna must maintain a separation distance of 20 cm or more from the person's body, except for the hand and wrists, to satisfy RF exposure compliance.
This device complies with the Industry Canada Radio Standards Specification RSS 210. Its use is authorized only on a no-interference, no-protection basis; in other words, this device must not be used if it is determined that it causes harmful interference to services authorized by IC. In addition, the user of this device must accept any radio interference that may be received, even if this interference could affect the operation of the device.
WARNING! Changes or modifications not expressly approved by the party responsible for compliance could void the user's authority to operate this device.
Warning! Safety First

Please read the safety warnings below before proceeding. Improper use of the product may be dangerous or illegal.
Installation
Due to the complexity of this system, installation of this product must only be performed by an authorized Directed dealer. If you have any questions, ask your retailer or contact Directed directly at 1-800-753-0600.
Remote Start Capable
When properly installed, this system can start the vehicle via a command signal from the remote control transmitter. Therefore, never operate the system in an enclosed area or partially enclosed area without ventilation (such as a garage). When parking in an enclosed or partially enclosed area or when having the vehicle serviced, the remote start system must be disabled using the installed toggle switch. It is the user's sole responsibility to properly handle and keep out of reach from children all remote control transmitters to assure that the system does not unintentionally remote start the vehicle. THE USER MUST INSTALL A CARBON MONOXIDE DETECTOR IN OR ABOUT THE LIVING AREA ADJACENT TO THE VEHICLE. ALL DOORS LEADING FROM ADJACENT LIVING AREAS TO THE ENCLOSED OR PARTIALLY ENCLOSED VEHICLE STORAGE AREA MUST AT ALL TIMES REMAIN CLOSED. These precautions are the sole responsibility of the user.
Manual Transmission Vehicles
Remote starters on manual transmission vehicles operate differently than those with automatic transmission because you must leave your car in neutral. You must read this Owner's Guide to familiarize yourself with the proper procedures regarding manual transmission remote starters. If you have any questions, ask your authorized Directed dealer or contact Directed at 1-800-753-0600.
Before remote starting a manual transmission vehicle, be sure to:
- Leave the vehicle in neutral and be sure no one is standing in front or behind the vehicle.
- Only remote start on a flat surface.
- Have the parking brake fully engaged.
WARNING! It is the responsibility of the owner to ensure the parking/emergency brake properly functions. Failure to do so can result in personal injury or property damage. We recommend the owner have the parking / emergency brake system inspected and adjusted by a qualified automotive shop biannually.
Use of this product in a manner contrary to its intended mode of operation may result
in property damage, personal injury, or death. (1) Never remotely start the vehicle with the vehicle in gear, and (2) Never remotely start the vehicle with the keys in the ignition. The user must also have the neutral safety feature of the vehicle periodically checked, wherein the vehicle must not remotely start while the car is in gear. This testing should be performed by an authorized Directed dealer in accordance with the Safety Check outlined in the product installation guide. If the vehicle starts in gear, cease remote start operation immediately and consult with the authorized Directed dealer to fix the problem.
After the remote start module has been installed, contact your authorized dealer to have him or her test the remote start module by performing the Safety Check outlined in the product installation guide. If the vehicle starts when performing the Neutral Safety Shutdown Circuit test, the remote start unit has not been properly installed. The remote start module must be removed or the installer must properly reinstall the remote start system so that the vehicle does not start in gear. All installations must be performed by an authorized Directed dealer.
OPERATION OF THE REMOTE START MODULE IF THE VEHICLE STARTS IN GEAR IS CONTRARY TO ITS INTENDED MODE OF OPERATION. OPERATING THE REMOTE START SYSTEM UNDER THESE CONDITIONS MAY RESULT IN PROPERTY DAMAGE OR PERSONAL INJURY. YOU MUST IMMEDIATELY CEASE THE USE OF THE UNIT AND SEEK THE ASSISTANCE OF AN AUTHORIZED Directed DEALER TO REPAIR OR DISCONNECT THE INSTALLED REMOTE START MODULE. DIRECTED WILL NOT BE HELD RESPONSIBLE OR PAY FOR INSTALLATION OR REINSTALLATION COSTS.
This product is designed for fuel injected vehicles only. Use of this product in a standard transmission vehicle must be in strict accordance with this guide. This product should not be installed in any convertible vehicles, soft or hard top with a manual transmission. Installation in such vehicles may pose certain risk.
Interference
All radio devices are subject to interference which could affect proper performance.
Upgrades
Any upgrades to this product must be performed by an authorized Directed dealer. Do not attempt to perform any unauthorized modifications to this product.
Water/Heat Resistance
This product is not designed to be water and/or heat-resistant. Please take care to keep this product dry and away from heat sources. Any damage from water or heat will void the warranty.
Limited lifetime consumer warranty
Directed Electronics. ("Directed") promises to the original purchaser to repair or replace (at Directed's election) with a comparable reconditioned model any Directed unit (hereafter the "unit"), excluding without limitation the siren, the remote transmitters, the associated sensors and accessories, which proves to be defective in workmanship or material under reasonable use during the lifetime of the vehicle provided the following conditions are met: the unit was purchased from an authorized Directed dealer, the unit was professionally installed and serviced by an authorized Directed dealer; the unit will be professionally reinstalled in the vehicle in which it was originally installed by an authorized Directed dealer; and the unit is returned to Directed, shipping prepaid with a legible copy of the bill of sale or other dated proof of purchase bearing the following information: consumer's name, telephone number and address; the authorized dealers name, telephone number and address; complete product description, including accessories; the year, make and model of the vehicle; vehicle license number and vehicle identification number. All components other than the unit, including without limitation the siren, the remote transmitters and the associated sensors and accessories, carry a one-year warranty from the date of purchase of the same. ALL PRODUCTS RECEIVED BY DIRECTED FOR WARRANTY REPAIR WITHOUT PROOF OF PURCHASE FROM AN AUTHORIZED DEALER WILL BE DENIED. This warranty is non-transferable and is automatically void if: the unit's date code or serial number is defaced, missing or altered; the unit has been modified or used in a manner contrary to its intended purpose; the unit has been damaged by accident, unreasonable use, neglect, improper service, installation or other causes not arising out of defects in materials or construction. The warranty does not cover damage to the unit caused by installation or removal of the unit. Directed, in its sole discretion, will determine what constitutes excessive damage and may refuse the return of any unit with excessive damage. TO THE MAXIMUM EXTENT ALLOWED BY LAW, ALL WARRANTIES, INCLUDING BUT NOT LIMITED TO EXPRESS WARRANTY, IMPLIED WARRANTY, WARRANTY OF MERCHANTABILITY, FITNESS FOR PARTICULAR PURPOSE AND WARRANTY OF NON-INFRINGEMENT OF INTELLECTUAL PROPERTY, ARE EXPRESSLY EXCLUDED; AND DIRECTED NEITHER ASSUMES NOR AUTHORIZES ANY PERSON OR ENTITY TO ASSUME FOR IT ANY DUTY, OBLIGATION OR LIABILITY IN CONNECTION WITH ITS PRODUCTS. DIRECTED DISCLAIMS AND HAS ABSOLUTELY NO LIABILITY FOR ANY AND ALL ACTS OF THIRD PARTIES INCLUDING ITS AUTHORIZED DEALERS OR INSTALLERS. DIRECTED SECURITY SYSTEMS, INCLUDING THIS UNIT, ARE DETERRENTS AGAINST POSSIBLE THEFT. DIRECTED IS NOT OFFERING A GUARANTEE OR INSURANCE AGAINST VANDALISM, DAMAGE OR THEFT OF THE AUTOMOBILE, ITS PARTS OR CONTENTS; AND HEREBY EXPRESSLY DISCLAIMS ANY LIABILITY WHATSOEVER, INCLUDING WITHOUT LIMITATION, LIABILITY FOR THEFT, DAMAGE AND/OR VANDALISM. THIS WARRANTY DOES NOT COVER LABOR COSTS FOR MAINTENANCE, REMOVAL OR REINSTALLATION OF THE UNIT OR
ANY CONSEQUENTIAL DAMAGES OF ANY KIND. IN THE EVENT OF A CLAIM OR A DISPUTE INVOLVING DIRECTED OR ITS SUBSIDIARY, THE VENUE SHALL BE SAN DIEGO COUNTY IN THE STATE OF CALIFORNIA. CALIFORNIA STATE LAWS AND APPLICABLE FEDERAL LAWS SHALL APPLY AND GOVERN THE DISPUTE. THE MAXIMUM RECOVERY UNDER ANY CLAIM AGAINST DIRECTED SHALL BE STRICTLY LIMITED TO THE AUTHORIZED DIRECTED DEALER'S PURCHASE PRICE OF THE UNIT. DIRECTED SHALL NOT BE RESPONSIBLE FOR ANY DAMAGES WHATSOEVER, INCLUDING BUT NOT LIMITED TO, ANY CONSEQUENTIAL DAMAGES, INCIDENTAL DAMAGES, DAMAGE TO VEHICLE, DAMAGES FOR THE LOSS OF TIME, LOSS OF EARNINGS, COMMERCIAL LOSS, LOSS OF ECONOMIC OPPORTUNITY AND THE LIKE. NOTWITHSTANDING THE ABOVE, THE MANUFACTURER DOES OFFER A LIMITED WARRANTY TO REPLACE OR REPAIR THE CONTROL MODULE SUBJECT TO THE CONDITIONS AS DESCRIBED HEREIN. THIS WARRANTY IS VOID IF THE UNIT HAS NOT BEEN PURCHASED FROM DIRECTED, OR AN AUTHORIZED DIRECTED DEALER, OR IF THE UNIT HAS BEEN DAMAGED BY ACCIDENT, UNREASONABLE USE, NEGLIGENCE, ACTS OF GOD, NEGLECT, IMPROPER SERVICE, OR OTHER CAUSES NOT ARISING OUT OF DEFECT IN MATERIALS OR CONSTRUCTION.
Some states do not allow limitations on how long an implied warranty will last or the exclusion or limitation of incidental or consequential damages. This warranty gives you specific legal rights and you may also have other rights that vary from State to State.
This warranty is only valid for sale of product(s) within the United States of America and in Canada. Product(s) sold outside of the United States of America or Canada are sold "AS-IS" and shall have NO WARRANTY, express or implied.
For further details relating to warranty information of Directed products, please visit the support section of Directed's website at: www.directed.com
This product may be covered by a Guaranteed Protection Plan ("GPP"). See your authorized Directed dealer for details of the plan or call Directed Customer Service at 1-800-876-0800.
920-10011-01-2011-06




- Congratulations
- Important information
- Government Regulations and Safety Information
- Your Warranty
- Replacement remote controls
- Contents
- Getting Started
- Keys to using this manual
- Remote Control
- Control Center
- Using your System
- Commanding the system
- Performing Commands
- Advanced command example: Silent Lock
- Basic Commands (Direct Access)
- Lock
- To Lock and Panic
- Unlock
- Remote Start\*
- AUX/Trunk\*\*
- Press and hold AUX
- Advanced Commands: (Level 1)
- Silent Lock
- Silent Unlock
- Runtime Reset
- AUX 1
- Advanced Commands: (Level 2)
- Remote Valet
- Timer Start\*
- Note
- AUX 2
- Advanced Commands: (Level 3)
- Car finder
- Smart Start\*
- AUX 3
- Advanced Commands: (Level 4)
- Defogger\*
- AUX 4
- Remote Control Configuration
- Remote Programming
- Remote Features
- Keypad Lock
- Car 2
- Remote Pairing Mode
- Prepare the vehicle system for pairing:
- Prepare the remote control for pairing:
- Pairing will exit if:
- Emergency Override
- Remote Start Features
- Key Takeover
- Remote Start Safelock
- Disabling Remote Start
- Advanced Start
- Precautions for the Advanced Start features:
- Timer Start operation
- Smart Start operation
- Pit Stop Mode
- MTS Mode (Manual Transmission Start)
- Turbo Timer Mode
- Remote Start Faults
- Remote and System Operations
- Passive Locking\*
- Auto Re-locking\*
- Onetime Bypass\*
- Valet Mode
- Power Save
- Rapid Resume
- Car Select
- System Expansion Options
- Controlling Two Vehicles (Car Select)
- Owner Recognition \*
- Comfort Closure \*
- Driver Door Priority Unlocking \*
- AUX (Auxiliary) Channels
- Battery Information
- Low Battery Alerts
- Battery Replacement
- Battery Disposal
- Patent Information
- Glossary of Terms
- Document Terminology
- Government Regulations
- Remote Controls
- Warning! Safety First
- Installation
- Remote Start Capable
- Manual Transmission Vehicles
- Interference
- Upgrades
- Water/Heat Resistance
- Limited lifetime consumer warranty
Brand : Viper
Model : 4606V
Category : Car alarm