MPUB 330 - Portable audio player MPMAN - Free user manual and instructions
Find the device manual for free MPUB 330 MPMAN in PDF.


User questions about MPUB 330 MPMAN
0 question about this device. Answer the ones you know or ask your own.
Ask a new question about this device
Download the instructions for your Portable audio player in PDF format for free! Find your manual MPUB 330 - MPMAN and take your electronic device back in hand. On this page are published all the documents necessary for the use of your device. MPUB 330 by MPMAN.
USER MANUAL MPUB 330 MPMAN
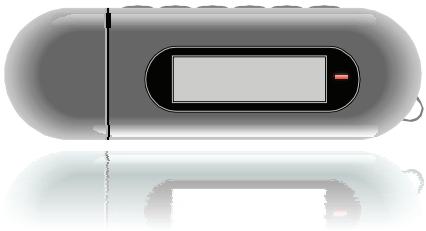
MPUB330 USB-Stick MP3 Player with LCD Display
natural_image
Illustration of a USB flash drive with a display screen and control panel (no text or symbols)INSTRUCTION MANUAL
Please read this manual carefully before operation.
TABLE OF CONTENTS
TABLE OF CONTENTS 2
PACKAGE CONTENTS.... 3
FEATURES 4
GETTING STARTED....5
Controls at a Glance....5
Connecting Headphones 7
Connecting Power 7
Loading a Battery....7
USB Power....7
Using the Player Controls....8
Power On/Off 8
Hold Switch....8
Reset Function....8
Navigating the Menu Interface 8
Main Menu 9
PLAY MUSIC 10
Play Music Controls....10
Repeat A-B Mode 11
SETTING 12
FOLDER 13
Folder Controls....13
USB CONNECTIONS 14
Minimum PC Requirements 14
USB Driver Installation (Windows 98SE Only)....14
Connecting to a Computer 14
Transferring Files....15
Disconnecting from a Computer 15
Microsoft Windows 15
Macintosh OS 16
MPMANAGER....17
TROUBLESHOOTING 18
SPECIFICATIONS....20
PACKAGE CONTENTS
Please make sure that the items listed below are included in the package. Should an item be missing, please contact the local retailer from which you purchased this product.
natural_image
Top-down view of a vehicle with a rectangular body and a side panel, enclosed in a rounded square frame (no text or symbols)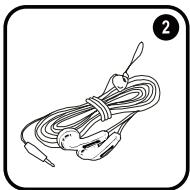
natural_image
Simple line drawing of a coiled cable with two connectors, no text or symbols present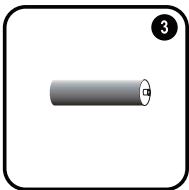
natural_image
Simple illustration of a cylindrical battery with a small square mark on its side, enclosed in a rounded square frame (no text or symbols)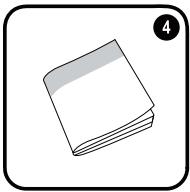
natural_image
Simple line drawing of a stack of papers or documents (no text or symbols)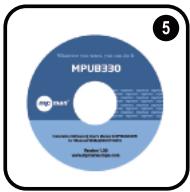
text_image
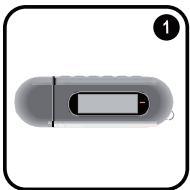
MPUB330 5- MPUB330
- Stereo Earphones
- 1 x "AAA" Battery
- Instruction Booklet
- Installation CD
FEATURES
✦ Integrated Flash Memory
✦ High-Contrast LCD Display with Backlight
◆ Plays MP3 and WMA Digital Music Files
ID3 and LRC support for song and synchronized lyric information display
✦ Mobile Data Storage Function
USB 2.0 for Ultra-Fast File Transfers (up to 40x faster than USB 1.0)
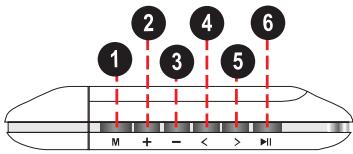
Controls at a Glance
Top View
- MENU button M
- Volume +
- Volume -
- Previous/Reverse
- Next/Forward
- Play/Pause/Stop
text_image
1 2 3 4 5 6 M + - < > HBottom View
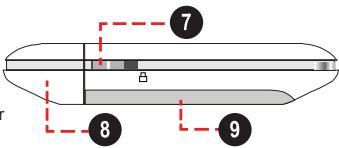
- HOLD Switch
- USB Cap
- Battery Compartment Cover
text_image
7 8 9Front View
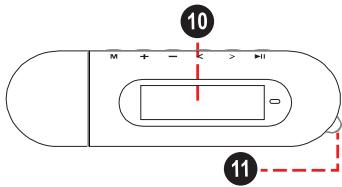
- LCD Display
- Neckstrap Hook
text_image
10 M + - < > H 11Right View
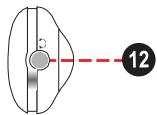
- Headphone Out Jack
natural_image
Pure diagram of a mechanical component with a dashed red line and circle marker (no text or symbols)Play Mode Display
text_image
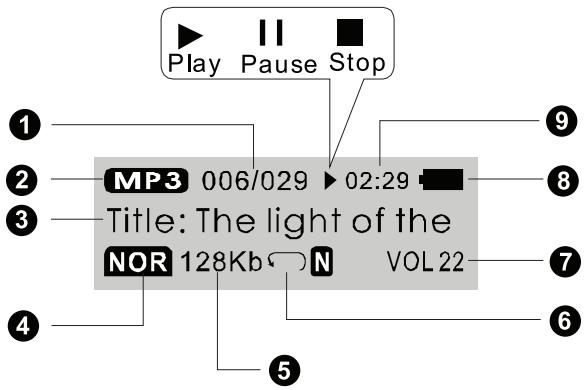
Play II Pause Stop MP3 006/029 ▶ 02:29 Title: The light of the NOR 128Kb N VOL22 ① ② ③ ④ ⑤ ⑥ ⑦ ⑧ ⑨- Current track / Total tracks
- File Type
- Song Title / File name
- Equalizer Indicator
- Bitrate
- Play Mode Indicator
- Volume Level
- Battery Level Indicator
- Elapsed Time
Connecting Headphones
Connect headphones/earphones to the Headphone Out jack for private listening.
- Lower the volume level before connecting headphones, then gradually increase the volume for comfortable listening.
- Hearing experts advise against the constant use of personal stereos played at high volume.
- Constant high-volume use can lead to hearing loss. If you experience ringing in your ears or hearing loss, discontinue use immediately and seek medical advice.
Connecting Power
The Player operates on 1 x "AAA" battery for music playback.
Loading a Battery
- Remove the USB Cap.
- Remove the Battery Cover.
- Insert 1 x "AAA" battery, taking care to match the "+" and "-" polarities of the battery with the markings inside the battery compartment.
- Replace the Battery Cover.
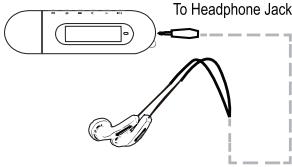
text_image
To Headphone Jack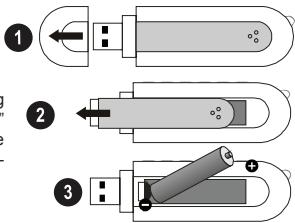
text_image
Diagram showing three-step battery shipment process with labeled arrows and componentsUSB Power
When the Player is connected to a computer's powered USB port, it will draw power over the USB connection.
Using the Player Controls
Power On/Off
To turn your player on, press 🏠. The LCD will light.
To turn your player off, hold ▶ for at least 3 seconds. The LCD will darken.
Hold Switch
The Hold feature locks (disables) your player's controls to prevent accidental key presses when it is in your pocket or bag.
To lock the player's controls, slide the HOLD switch to the right in the direction of the arrow. A Lock icon will be displayed on the screen.

To unlock the player's controls, slide the HOLD switch to the left.
Reset Function
You may reset your player if it should freeze or otherwise behave abnormally.
- Disconnect your player if it is connected to a computer.
- Remove the battery from the player. Wait 10 seconds, and then replace the battery.
- Power on your player. Your player has now been reset.
Navigating the Menu Interface
It is easy to use the Player controls to select menu options, items, and files on your player.
To move the selection cursor (highlight), press the arrow keys. To move quickly in any direction, press and hold the arrow keys.
To highlight the previous item to the left (or up), press <.
To highlight the next item to the right (or down), press >.
To confirm and enter the current selection, press 🖼️.
To return to the previous screen, press M.
Main Menu
The Main Menu gives you access to the different function modes of your player.
To enter the Main Menu, press and hold M. To exit the Main Menu, press and hold M.
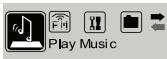
To select a function mode in the Main Menu, press < or > to highlight the mode, and then press ▶ to confirm.
text_image
Play MusicPlay Music
Play your digital MP3 or WMA music files.
text_image
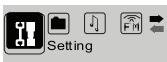
SettingSetting
Set your player's internal options.

text_image
FolderFolder
Play, view, or delete files from your player.
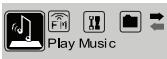
Enter PLAY MUSIC mode from the Main Menu to play digital MP3 or WMA music files.
text_image
Play Music
PLAY MUSIC mode will play all compatible audio files on your player, regardless of directory.
Play Music Controls
Use the following controls during music playback.
| Key | Function |
| Press ▶ | Start/Resume track playback.During playback, press ▶ to pause playback. |
| Press > | Play the next track. |
| Hold > | Fast-forward through the current track. |
| Press < | Play the previous track. |
| Hold < | Reverse through the current track. |
| Press - | Decrease the volume level. |
| Press + | Increase the volume level. |
| Press M | Start Repeat A-B Mode. |
| Hold M | Return to Main Menu. |

For more information about how to get music onto your player, please refer to the section "Getting Started > Connecting to a Computer > Transferring Music to Your Player".
For more information about digital MP3 and WMA music files, please refer to the section "About MP3/WMA Music Files".
Repeat A-B Mode
Set a segment of a music track to repeat in a continuous loop. During play-back:
To set the starting point "A" of the loop, press M.
To set the end point "B" of the loop, press M again. The loop will now play from point "A" to point "B".
To resume normal playback, press M again.
SETTING
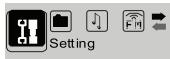
Enter SETTING mode from the Main Menu to change your player's internal option settings.
text_image
SettingThe Setting Menu contains 9 options.
To select an option, press < or >. To confirm and enter, press ▶.
To exit the Setting Menu, press M.
| Item | Description |
| Equalizer | Set a digital equalizer preset. The options are Normal, Pop, Rock, Classical, Jazz, and Bass. |
| Repeat Mode | Set a Repeat Mode option. The options are Normal, Repeat One, Repeat All, Shuffle Repeat, Dir Normal, Dir All Repeat, Dir Shuffle Repeat. |
| Contrast | Set the contrast level of the display. |
| Backlight | Set the backlight option to change the duration of time (in seconds) that the backlight will remain on after a key press. A setting of “Always Off” will disable the backlight completely. A setting of “Always On” will keep the backlight on continuously. |
| Backlight Color | Set the color of the backlight. A setting of “Color 8” will change the backlight color with each key press. |
| Power Set | Set the Power Set option to change the duration of time (in minutes) that the player will remain on when it is idle. A setting of “Disable” will turn this power saving feature off. |
| Langauge | Set the Language that the menus appear in. |
| Version | View your player’s firmware information. |
| Info | View your player’s memory information. |
Enter FOLDER mode to view, play, or delete files on your player.

text_image
FolderYou can also connect your player to a computer to easily manage your file library.
Folder Controls
A directory tree will be displayed on-screen upon entering FOLDER mode from the Main Menu.
Use the following controls in FOLDER mode.
| Key | Function |
| Press > | Select the next file or folder (down). |
| Press < | Select the previous file or folder (up). |
| Press ▶ | If a folder is selected, the folder's contents will be displayed.If a file is selected, an option box will be dis-played:+ Select "Play Now" to play the selected file.+ Select "Delete?" to delete the selected file, and then select "Yes" to confirm the deletion.If the ↑_ icon is selected, the previous folder's contents will be displayed. |
| Press M | Return to Main Menu. |
USB CONNECTIONS
Minimum PC Requirements
You can connect the Player to a computer with a USB port to transfer files to your player or to manage the files on your player. The minimum requirements listed below will allow you to perform basic file management functions; advanced features will require a faster PC and Windows configuration.
MS Windows 98SE (Service Pack 1) or ME [USB-MSC];
MS Windows 2000 (Service Pack 3 or above) with Windows Media Player 9 [USB-MSC];
MS Windows XP (Service Pack 1 or above) with Windows Media Player 10 or newer [USB-MTP]
♦ Pentium 166 MMX processor (or equivalent)
96MB RAM
✦ 50MB of available hard drive space
✦ Internet connection
✦ Video Display card
✦ Sound card
USB 1.0 port (a USB 2.0 Hi-Speed port will enable file transfers up to 40 times faster).
New versions of Windows Media Player may be downloaded from the Microsoft website at www.microsoft.com.
Connecting to a Computer
-
Make sure the player is turned off.
-
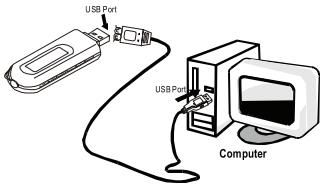
Remove the USB Cap and plug the player directly into your computer's USB port.
Your player will be detected as a "Removable Disk" when you open "My Computer".
You may choose to use a USB extension cable to connect to a computer.
Transferring Files
The USB 2.0 High-Speed connection makes it easy to transfer music files (or any other data files) quickly between the player and your computer. Simply use the player as you would a floppy disk using basic operating system commands.
If you need further assistance with transferring files, please refer to your operating system's instruction manual or on-screen help.
- Connect the player to a computer.
- Double-click the "My Computer" icon on your desktop and then double-click the player icon (Removable Disk).
- Drag the files to transfers and dray-and-drop then onto the "Removable Disk" icon that represents your player.
You may also transfer files from your player to a computer.
text_image
USB Port USB Port Computer
Don't disconnect the player or otherwise interrupt the file transfer process. Doing so may corrupt your files and/or the player's firmware.
Please refer to the documentation that came with your computer or opening system for more information and support regarding music transfer and file management over a USB connection.
Disconnecting from a Computer
Disconnect your player as instructed below to prevent data loss or file/firmware corruption.
Microsoft Windows
Disconnect your player as instructed below to prevent data loss or file/firmware corruption.
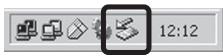
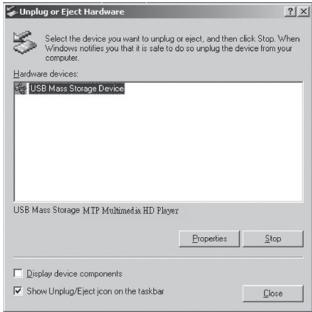
- Double-click the green arrow in the taskbar located on the lower-right side of the computer screen (Safely Remove Hardware).
text_image
12:12- Safely Remove Hardware: Select "USB Mass Storage Device" from the list that appears and then click on "Stop".
Stop a Hardware Device: Select "USB Mass Storage Device" from the list that appears and then click on "OK". Select "USB Mass Storage Device" from the list that appears and then click on "OK".
- When the "Safe to Remove Hardware" window appears, click the OK button and disconnect the USB cable from the player and your computer.
text_image
Unplug or Eject Hardware Select the device you want to unplug or eject. and then click Stop. When Windows notifies you that it is safe to do so unplug the device from your computer. Hardware devices: USB Mass Storage Device USB Mass Storage MTP Multimed as HD Player Properties Stop Display device components Show Unplug/Eject icon on the taskbar DoseMacintosh OS
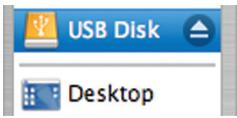
- On the left side of the Finder window, identify the appropriate Removable Disk icon.
- Click on the "Eject" arrow on the right of the Removable Disk icon.
- Disconnect the USB cable from the computer and your player.
text_image
USB Disk DesktopMPMANAGER
For music synchronisation and conversion, please use MPMANAGER software supplied in the CD ROM.
This software can be used also for UPDATE of your player
MPMANAGER manual is included in your CDROM
TROUBLESHOOTING
If you have a problem with this device, please read the troubleshooting guide below.
The player does not turn on.
- Ensure that the battery retains a charge. Try replacing the battery with a new one.
♦ Try resetting your player (remove and replace the battery).
◆ Ensure that the Hold switch is disengaged.
The buttons do not work.
- Ensure that the battery retains a charge. Try replacing the battery with a new one.
◆ Ensure that the Hold switch is disengaged.
I cannot transfer files to the player.
- Ensure that your computer is running a supported operating system.
If you are running Microsoft Windows 98 SE, ensure that the USB driver has been properly installed.
If using the supplied USB extension cable, ensure that it is securely attached to the player and the PC, or try using another USB cable.
If you have connected the player through a USB hub, try connecting the player directly to your computer.
Ensure that the player's memory capacity is not full.
◆ Ensure that the Hold switch is disengaged.
There is no sound during playback.
✦ Check the volume level.
- Ensure that the headphones are attached securely to the player.
The sound quality of the music is poor.
- Try playing the file on your computer. If the sound quality is still poor, try downloading the file again or re-encoding the file yourself.
TROUBLESHOOTING
- Ensure that the bit rate of the file is not too low. The higher the bit rate of the file, the better it will sound. The minimum recommended bitrate is 128kbps for MP3s and 96kbps for WMAs.
♦ Try lowering the volume of the player.
◆ Ensure that the headphones are attached securely to the player.
The player will not play my music file.
◆ Ensure that the file is in a compatible format.
The file may be copy-protected and you no longer have authorization to play this file. If you feel this is in error, please contact the service from which you downloaded the file.
The LCD characters are corrupted or something is wrong with the display.
◆ Ensure that the correct menu language has been set.
♦ Try resetting your player (remove and replace the battery).
The player has malfunctioned.
♦ Try resetting your player (remove and replace the battery).
SPECIFICATIONS
Display Type 128 x 32 Dot-Matrix LCD with Backlight
Memory Integrated Flash Memory
Audio Format Support MP3, WMA
DRM Support --
Song Info Support ID3, LRC
PC Interface USB 2.0 Hi-Speed
Plug and Play Support Windows 98SE/2000/ME/XP or newer Mac OS X
Audio Output 3.5mm Stereo (Headphone)
Menu Language Support English, French, German, Hebrew, Italian, Portuguese, Spanish, Chinese (Trad), Chinese (Simp)
Power Supply 1 x "AAA" Battery
Unit Dimensions 3.58" x 1.10" x 0.82" (WHD)
Specifications and manual are subject to change without prior notice.
NOTES
For more information please check our website
www.mpmaneurope.com
natural_image
Symbol of a trash bin crossed out by two crossed lines, with no text or labels present.CE