
MP-E2004 - Portable audio player MPMAN - Free user manual and instructions
Find the device manual for free MP-E2004 MPMAN in PDF.


User questions about MP-E2004 MPMAN
0 question about this device. Answer the ones you know or ask your own.
Ask a new question about this device
Download the instructions for your Portable audio player in PDF format for free! Find your manual MP-E2004 - MPMAN and take your electronic device back in hand. On this page are published all the documents necessary for the use of your device. MP-E2004 by MPMAN.
USER MANUAL MP-E2004 MPMAN
Battery installation 8
Operation
Basic Operation 9
Playing Music 12
Recording 15
EQ/Section Repeat Function 18
Listening Radio 19
Radio Record 21
Menu Setup 22
Connecting to PC
Installation of MP MAN Manager 24
Using MP MAN Manager 27
Downloading from PC 30
31
32
Firmware Upgrade 33
34
Appendix
Emergency Recovery 35
Button Tips 36
Menu Outline Table 39
Terminology 40
Customer Support
Cautions 41
Trouble shooting 43
Specifications 44
Product Warranty 46
The contents of this user's guide may change without prior notice due to the functional upgrade or modification.
1 Direct Encoding
The former MP3 player was a 'PC- depending audio device' that simply played mp3 files downloaded from a computer. Therefore, in absence of a computer, other music files could not be added, thus the device had limitation in usage.
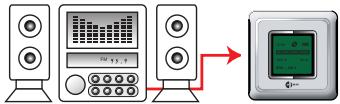
MP MAN supports Direct Encoding method that allows receiving audio signals from various A/V devices (TV, Audio, Radio, CD Player, MD and MP3 player) and storing the signal as MP3 file. From now on you can record music directly from you friend's music player.
2 WOW ON/OFF Function
This MP3 player supports WOW functions that allows the user to assign frequently used functions to one button for easier operation of the device. User can repeat one song (REPEAT ONE) and sound can be muted while listening to music (MUTE). Other functions needed by users will be provided through FIMWARE UPGRADE after converging users' opinions.
3 Voice Recording
In addition to the basic playing function, it also includes voice recording function so you can record meetings or lectures.
4 Replay Speed Adjust Function
MP-E2004 SERIES has SPEED MODE that allows adjusting the replay speed in four steps. The replay speed adjust function allows closer listening of uncertain sound in studying languages. Also, using section repeat function (A-B) the user can listen to specific sections repeatedly enhancing the efficiency of language study.
5 FM Stereo Radio
This device is FM radio enabled. FM broadcast is received as well as recorded that allows repeat listening.
6 Multi Codec
Most of music file is in mp3 format, however, WMA format that supports better compression rate than that of mp3 is growing nowadays. This device is a multi Codec player that supports MP3 and WMA format files by default. Ogg Vobis format files will be soon supported through Firmware Upgrade in near future.
7 Multi Language
This device supports multi language. The provided management software allows names to be displayed as it is shown on Windows. Since letters in various languages such as Korean, English, Chinese and Japanese are displayed with user assigned fonts, the user can easily personalize the player *When used as a portable saving device of direct flash drive, only ASCII code, such as English, numbers, etc., can be used.
Checking the components
Please check the box contents when this product is purchased.

MP3 Player
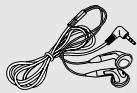
Earphone

Install CD
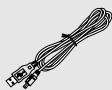
USB Extension Cable
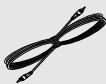
Encoding Cable

User's Manual

Battery (1.5V AAA)

Neck strap

Carrying case

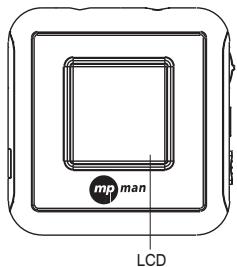
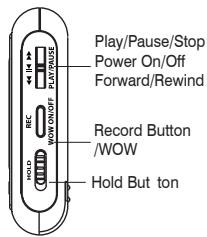
Front
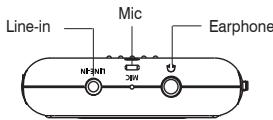
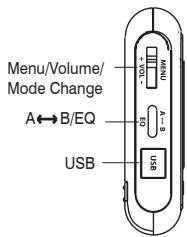
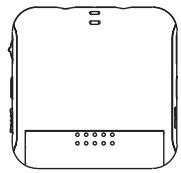
Back
Battery installation
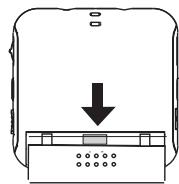
- Slide the battery cover to open.
- Check the (+) ,(-) ends of the battery.
- After installing battery, slide the battery cover back.

When inserting batteries, check polarity (+, -) first.
When they are inserted in an opposite way, it can cause a fatal problem to the product.

LCD display
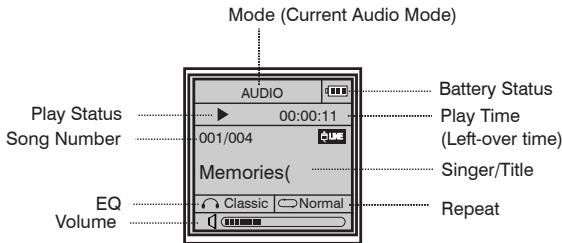
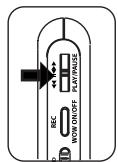
Power on
When PLAY button is pressed for a while, the logo is displayed on the screen and the device is turned on.
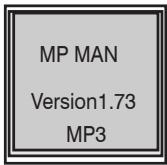

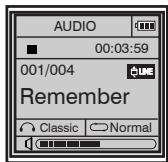
Ver 1.73 refers to the current version of MP-E2004 Series set. The version is continuously upgraded through firmware upgrade.
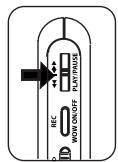
Power off
When PLAY button is long-pressed while the device is on, the power is turned off.
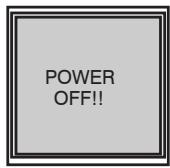
Mode Change
MP-E2004 Series has AUDIO, RECORD, and RADIO modes.
When the MENU button is long-pressed, the mode display on the upper LCD screen is changed to AUDIO, RECORD and RADIO modes in respective order.
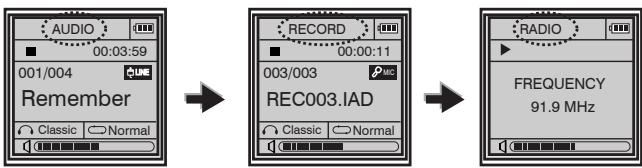
Detailed menu can be changed after the main menu is changed.
*Refer to page 22 and 23
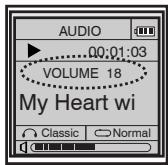
Volume Adjustment
Volume can be adjusted by moving the device's volume button up (+)/down (-).

Volume adjust range is from 0 to 40.

Short-press moves one volume step at a time. Long-press moves the volume continuously
Lock Function Setup
As HOLD button is pushed up, a padlock icon appears on the display
screen and the device is locked.
The lock is released when HOLD button is pushed down.
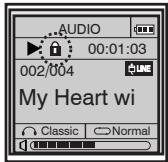

No button will work on Hold mode.
Play
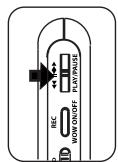
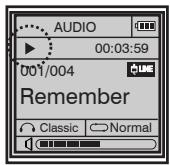
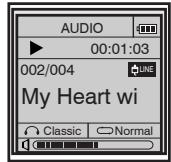
Change the mode to AUDIO by long- pressing the menu button. Music is played when PLAY button is pressed in AUDIO mode.
Stop
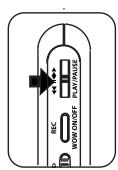
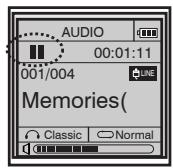
Music is stopped when PLAY button is pressed while music is being played. When PLAY button is pressed again, the music is played from the point where it stopped.
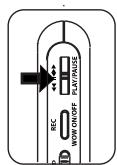

Browsing songs while in STOP status
While in STOP status of AUDIO mode, when the PLAY button is
moved up/down, the next/previous song is displayed respectively.
Once the desired song is displayed, pressing the PLAY button plays the selected song.
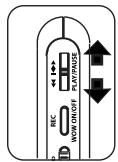
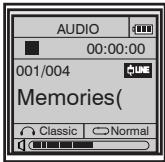
Files can be browsed faster by long-pushing the PLAY button up/downwards while the device is in AUDIO MODE STOP status

Browsing songs while playing
While the device is playing, when PLAY button is pushed up/down
the previous/next song is played respectively.
If the track is played more than 5 seconds, it plays from the start of the track.
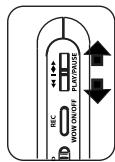

Moving to the particular part in the same track
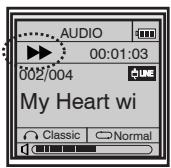
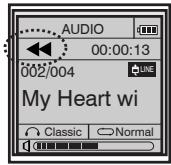
When PLAY button is long-pushed up/down while music is being played, fast forwarding/rewinding function is executed. The music resumes as the PLAY button is released at the desired part of music.

Voice Recording
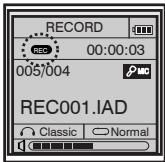
- Mode switching Long-press the menu button to select RECORD mode.
- Recording Press "REC" button to start voice recording.
- Stop To stop recording press "REC" button again.
During the recording, press PLAY button to pause recording, and press again to resume the recording.
- Play Press PLAY button to play the recorded file on RECORD mode stop status.


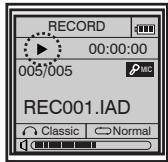

- For the voice recording, set Bit Rate from menu to 32kbps.
- If memory reaches to full, the recording automatically stops.
It's recorded in order of REC001.IAD,REC002.IAD,etc. - Recording consumes more power than playing.
- The recorded file is automatically saved in RECORD.

External Source Recording
The Encoding cable should be connected to the device's Line-in Jack.
- Long-press the menu button to select AUDIO mode.
- Press menu button once again to select BITRATE from the menu.
- Select desired recording quality.
- Connect the device to the music source (AV device, other MP3 player and etc.) with the Encoding cable.
5. Recording
Press the music source and the MP3 Player REC button simultaneously.
6. Stop
To stop recording press "REC" button again.
7. Play
Press PLAY button to play the recorded file on AUDIO mode stop status.
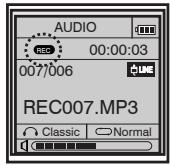

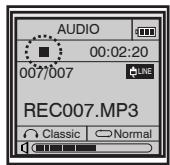

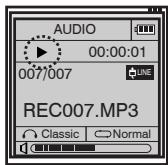

- If memory reaches to full, the recording automatically stops.
It's recorded in order of REC001.MP3,REC002.MP3,etc.
The recorded file is automatically saved in AUDIO
Finding Stored Record File
- Finding Recorded File in STOP Status
- Move PLAY button up/down in RECORD/AUDIO mode STOP status to search files. Move to the desired file and press PLAY button to play the file.
- Finding Recorded File In playing status
While a file is being played, pushing the PLAY button down/up moves to the next/previous file respectively.
- Moving to the particular part you want in the same file
When PLAY button is long-pushed up/down while a file is being played, fast forwarding/rewinding function is executed.
The file replay resumes as the PLAY button is released at the desired part of music.
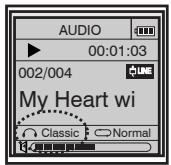
EQ Function
NORMAL - CLASSIC - LIVE - POP - ROCK
Long-pressing EQ button while music is being played in AUDIO mode, the EQ mode is changed in the above order.
Press the button to select desired mode. Once in the desired EQ mode, without additional button input, the EQ is set to the selected mode.
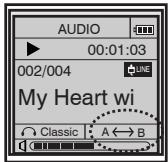
Section Repeat Function
While a file is being played in AUDIO/RECORD mode, when REPEAT button is pressed the section repeat beginning point is set.
Pressing REPEAT button again sets the end point of repeat section and repeats the selected section. To release the section repeat, press the section repeat button once again.
Listening to Radio
- Listening to Radio Long-Press MENU button to select RADIO MODE.
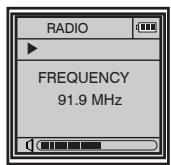
- Changing Channel Moving PLAY button up/down in RADIO mode changes the radio frequency respectively. Long-pushing PLAY button up/down automatically selects channel.
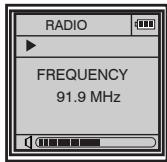
In case of having a difficulty in listening the radio.
- Move your MP3 player and earphone's direction or turn off the power of other machines near your MP3 player.
- Earphone has a role of an antenna so make sure that your earphone is put into collectively.
Storing Radio Frequency
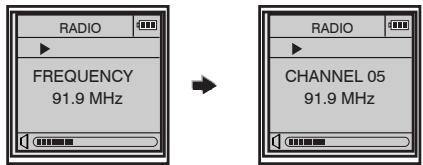
1. Frequency Mode
Push PLAY button up/down to select desired broadcasting channel and press PLAY button to move to CHANNEL SAVE screen. In the CHANNEL SAVE screen, move PLAY button up/down to select the number to be saved and press PLAY button to save the frequency to the selected CHANNEL number
2. Channel Mode
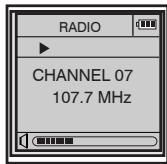
Press PLAY button up/down to search through pre-stored broadcasting channel
3. Auto Search Function
This function automatically searches for channels and saves. Press SECTION REPEAT button.
- 20 channels can be stored at most
- Short-press MENU button to change from FREQUENCY MODE to CHANNEL MODE.
Radio Record
1. Recording Radio
While listening to Radio in RADIO MODE, when RECORD button is pressed, the radio broadcasting is recorded.

2. Stopping Recording
Press RECORD button again to stop and complete recording.
1 Pressing PLAY button while recording pauses the recording process and pressing PLAY button again resumes recording.)
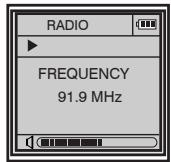
Playing the recorded broadcasting file is same as playing the recorded file. (* Refer to page 17)
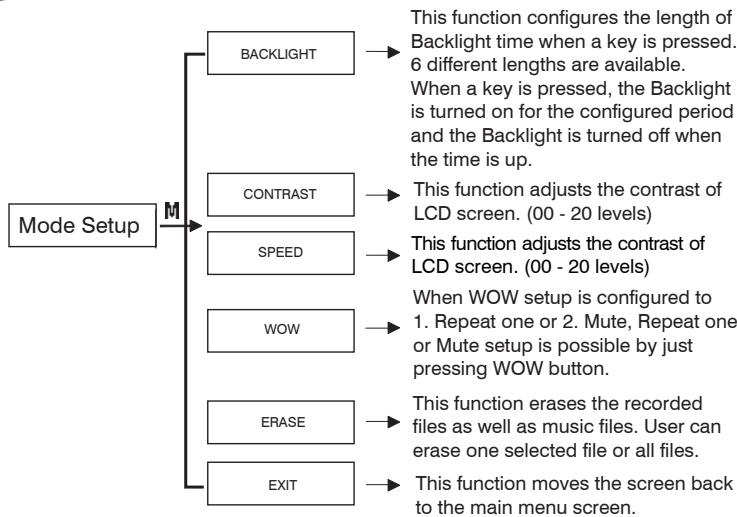
Menu Setup
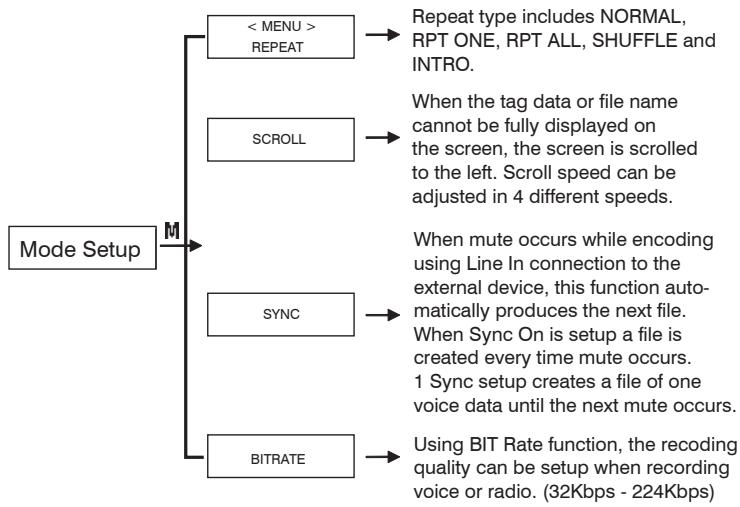
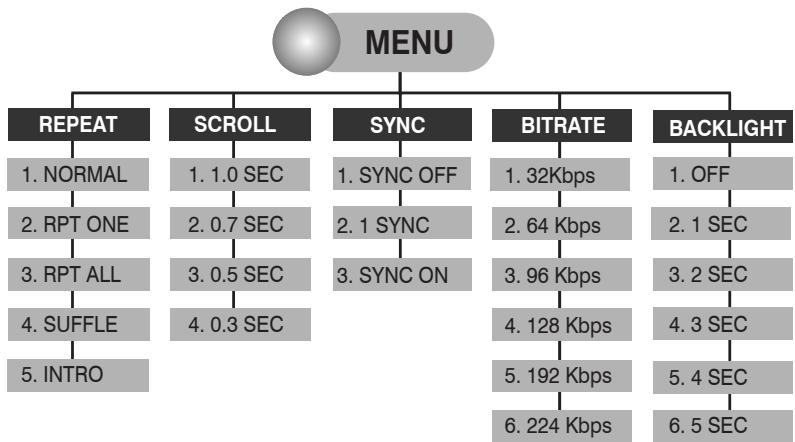
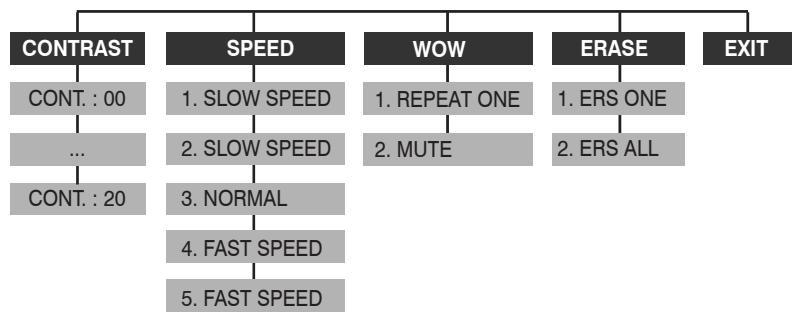
Long-press the menu key to select MODE (AUDIO/RECORD) and enter the menu. Menu includes functions such as Repeat type setup, Scroll setup, SYNC setup, BITRATE setup, BACK LIGHT Time Setup, Contrast Setup, Play Speed Setup, File Erase and Exit Menu.
Menu Setup
-
Menu item differs in each mode.
-
Push the menu key up/down to browse through menu.
- Short-press the menu key to configure the selected menu.
- Menu configuration and function are subject to change due to firmware upgrade and etc.)
Installation of MP MAN Manager
Since MP-E2004 series' MP MAN manger program includes the driver and other PC programs, extra PC drive does not need to be setup.
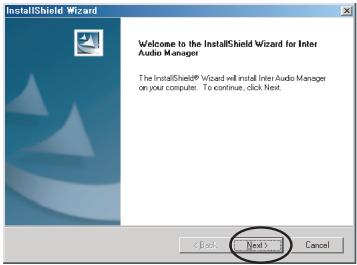
- The following screen is displayed when the provided CD is inserted into CD-ROM. Click NEXT button to start program installation. (When SETUP program does not start automatically, execute SETUP.exe file in the installation CD.)
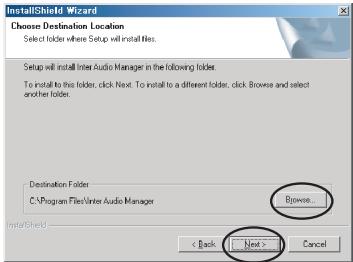
- Select a directory to install the software. Click NEXT button if you agree. If you want to install in different location, click Browser button and change directory.
Installation of MP MAN Manager
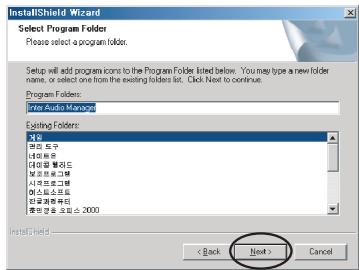
- In the next screen, enter the folder name to the program folder and click "NEXT" button.
- MP MAN Manager program installation is complete when "Finish" button is clicked.
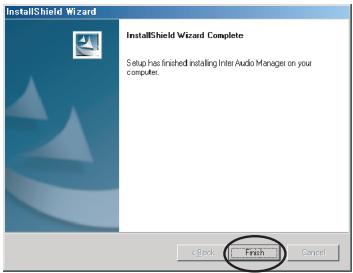
- When installing the PC driver, if any previous version driver is installed, PC can be rebooted.
-
When PC program is installed, the following folder is created in the PC program folder.
-
Driver: Driver is installed for PC driver or other necessary occasions.
- Language: Language file is located in this folder.
Installation of MP MAN Manager
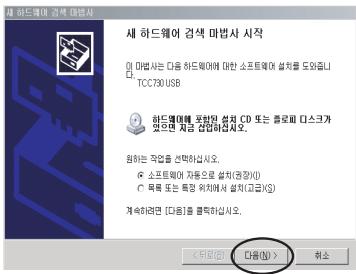
- After MP-E2004 manager program is completely installed, when MP3 player is connected to the computer for the first time, the computer starts operation for new hardware setup.
Click "NEXT" button.
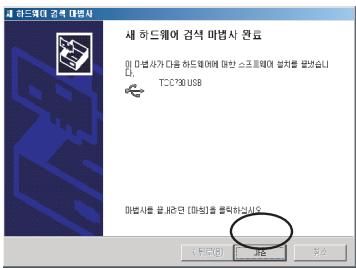
Click "FINISH" button to finish installation.
MP MAN Manager window is activated as following.
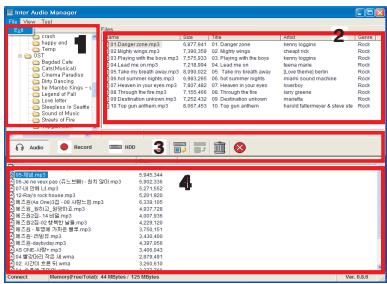
File Menu
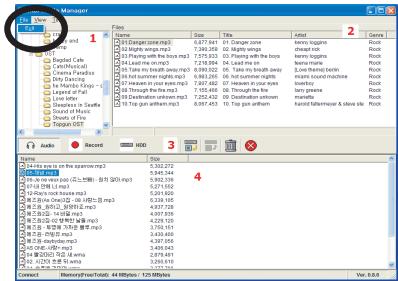
- 1: Music and recorded file folder explorer window on a PC
- 2: A list of files that located in the folder selected in Window "1" If the file is in MP3 format, ID3 TAG is automatically retrieved to display file size, song title, singer, genre and etc.
- 3: Toolbar that handles the player's file mode and download/upload/delete/ for rmat function
-
4: File Brower Window of MP3 Player
-
Exit: Exits MP MAN Manager program.
View Menu
When VIEW is selected in Menu, the following items are displayed.
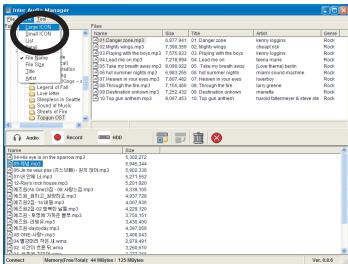
Large ICON : view in large icon
Small ICON : view in small icon
List : view list
Detail : view detailed list
File Name : In order of file name
File Size :in order of file size
Title : in order of ID3 Tag song
Artist : in order of ID3 Tag singer name
Tool Menu
When Tool is selected in Menu, the following items are displayed.
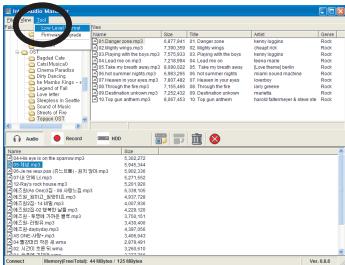
- Low Level Format : initializes the MP3 Player's storage memory
- Firmware Upgrade : this is used when a new enhanced program is available.
- Option : selects options (*Refer to page 38)
Option
Description on Option item of "Tool" menu
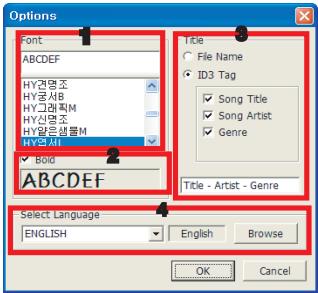
- 1 Font : assigns the font to be used on the player.
- 2 Bold : makes the font bold. The current selected font is displayed under Bold.
- 3 Title : selects information to be displayed on the player. File Name creates the file name. ID3 Tag reads and displays the ID3 Tag data when the file is in MP3 format .
-
4 Select Language : selects the language to be displayed on the Main Window. However, once the language is changed, the program needs to be exited and re-opened.
-
Even though the language is changed, Option is displayed only in English.
-
For multi lingual support of Main Window, once the program installation folder is selected, *.lng that is located in Language folder is created as the desired lng file.
When the file is created and placed in the appropriate folder, it is automatically added to the selected language when Option is executed.
Execute the program after connecting MP3 player to PC using USB cable.
- Click MP MAN Manager from the Start Program Menu.
- Select MP3 file to be transferred from the MP MAN Manager's file manage window.
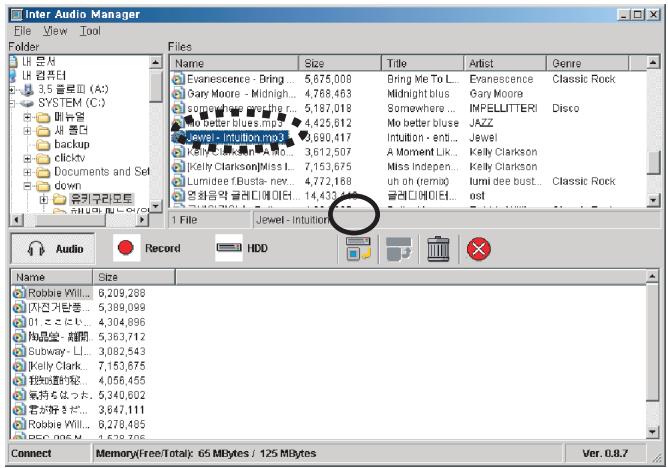
- Select the file to be downloaded and click the download icon.
- The selected file is transferred to MP3 player.
Execute the program after connecting MP3 player to PC using USB cable.
- Click MP MAN Manager from the Start Program Menu.
- Select a folder where the selected file is copied to.
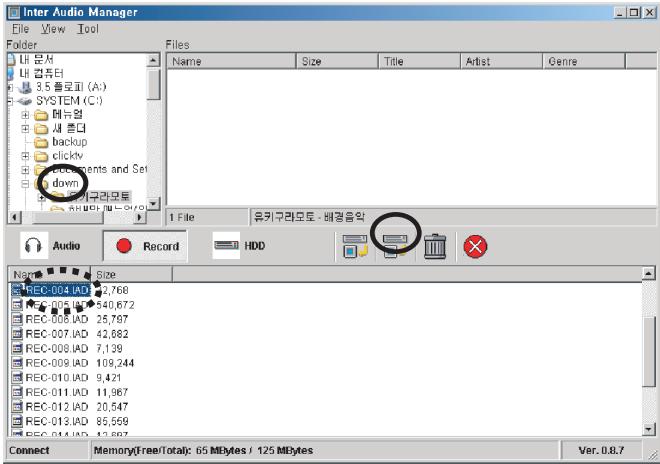
- Select a file to be uploaded and click the upload icon.
- The selected file is transferred from MP3 player to PC.
File upload to PC is only available with RECORD (*.*IAD) files.
Execute the program after connecting MP3 player to PC using USB cable.
- Click MP MAN Manager from the Start Program Menu.
- Select a file to be erased from MP MAN Manager's file manage window.
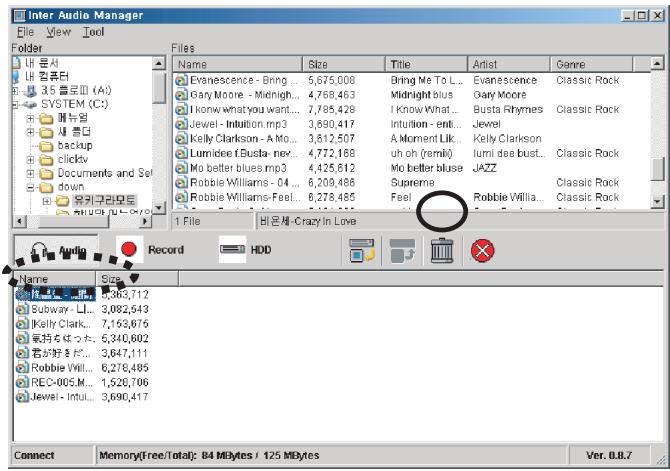
- Select a file to be erased and click the erase icon.
- The selected file is deleted.
Execute the program after connecting MP3 player to PC using USB cable.
- Download the new firmware file from Internet.
- Click MP MAN Manager from the Start Program Menu.
- From MP MAN Manager's menu select 'Tool - > Firmware Upgrade'
- Select MP3 file from MP MAN Manager's manage window.
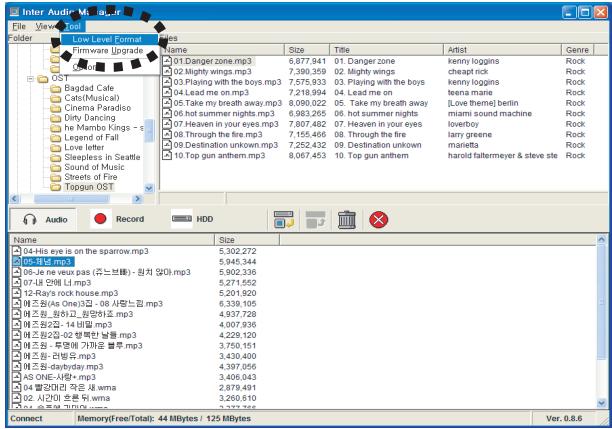
Execute the program after connecting MP3 player to PC using USB cable.
- Click MP MAN Manager from the Start Program Menu.
- From MP MAN Manager's menu select 'Tool -> Low Lever Format'
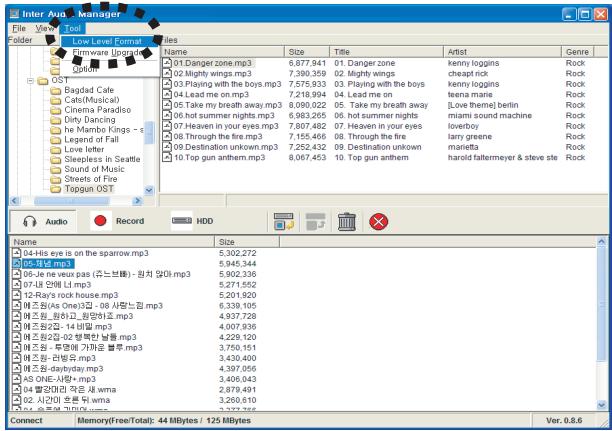

- When the flash memory is initialized, all stored data is erased.
- Even though the format icon (X) executes fast format, Tool of menu is recommended for a complete format.
The following is how to recover in emergency such as when a file is damaged or the system file is erased, causing product malfunction.
File Initialization
Press PLAY button while MP3 player's Section Repeat button is pressed.
MP MAN logo is displayed and a message asking whether to format or not is displayed. If you want to continue, push the PLAY button upwards, otherwise push the PLAY button downwards.
MP MAN Format?
YES = = > REW NO = = > FF
Emergency Recovery
This is a secret key mode in preparation of a worst scenario possible.
- Turn on the HOLD button while the MP3 player's power is off. Press PLAY button while MENU button is pressed.
- Even though it is not displayed on LCD, the device is in Upgrade preparation status. Connect the USB cable and release the pressed MENU and PLAY buttons.
- Execute MP MAN Manager and process the firmware upgrade. Refer to the Firmware Upgrade section of this manual for more details. (*page 33)
AUDIO Mode
| BUTTON | Key function | STOP | PLAY |
| PLAY/PAUSE(₹) | ● | PlayPower Off | Play/PausePower Off |
| ↓ | ● | Next FileFast Next File | Next FileFast Rewind |
| ▲ | ● | Previous FileFast Previous File | Previous FileFast Forward |
| VOL (+) | ● | Volume Step IncrementContinuous Increment | Volume Step IncrementContinuous Increment |
| VOL (-) | ● | Volume Step DecrementContinuous Decrement | Volume Step DecrementContinuous Decrement |
| MENU | ● | Menu ModeMode transition | Mode transition |
| A←B/EQ | ● | EQ | Section RepeatEQ |
| REC/WOW ON/OFF | ● | RecordingRecording | Section Repeat/Mute |

RECORD Mode
| BUTTON | Key function | STOP | PLAY | RECORD |
| PLAY/PAUSE(✓) | PlayPower Off | Play/PausePower Off | Pause RecordingPower Off | |
| ↓ | Next FileFast Next File | Next FileFast Rewind | Record in Next FileRecord in Next File | |
| ▲ | Previous FileFast Previous File | Previous FileFast Forward | ||
| VOL (+) | Volume Step IncrementContinuous Increment | Volume Step IncrementContinuous Increment | Volume Step IncrementContinuous Increment | |
| VOL (-) | Volume Step DecrementContinuous Decrement | Volume Step DecrementContinuous Decrement | Volume Step DecrementContinuous Decrement | |
| MENU | Menu ModeMode transition | Mode transition | ||
| A←B/EQ | File Delete Mode | Section Repeat | ||
| REC/WOW ON/OFF | Recording | Section Repeat/Mute | Stop Recording |
RADIO Mode
| BUTTON | Key function | ON AIR | RECORD |
| PLAY/PAUSE(Σ) | Channel Store Power Off | Pause Recording Power Off | |
| Frequency Decrease Previous Channel Search | |||
| A | Frequency Increase Next Channel Search | Record in the next file | |
| VOL (+) | Volume Step Increment Continuous Increment | Volume Step Increment Continuous Increment | |
| VOL (-) | Volume Step Decrement Continuous Decrement | Volume Step Decrement Continuous Decrement | |
| MENU | Radio Mode transition Mode transition | ||
| A←→B/EQ | Auto Search | ||
| REC/WOW ON/OFF | Radio Recording | Stop Recording |
Terminology
Bitrate
Bitrate: Data bit amount per unit time. Its unit is expressed as bps (bit/sec). Data bit means the data used in replaying the sound. As Bitrate becomes larger, the amount of data used for replaying the sound becomes larger resulting in better sound quality, however the file size becomes larger. On the other hand, as Bitrate is smaller the file size gets smaller while the sound quality is decreased. In general, Bitrate of 128kps in MP3 format and 64kps in WMA format are known to reproduce CD quality sound. In this case, the WMA file that is similar sound quality as MP3 is half the sizes of that MP3 file. When MP3 and WMA are created with same Bitrate, the sizes of the two files become same.
Sampling Rate
The voice or sound signals need to be evaluated per certain period of time to make voice or sound signal into a digital file such as MP3. The number of evaluation per unit time is called Sampling Rate. When the sampling rate is high, the sound quality becomes better. On the other hand, when the sampling rate is low, even though the sound quality is lowered, the data amount is reduced. In general audio CD, the sampling rate is 44.1KHz that means sampling occurs 44100 times per second to create 16 bit stereo data. On the other hand, when a person's voice is recorded, 8Khz 8bit mono sampling is used generally.
LCD Contrast
This adjusts the contrast between LCD screen and the letter. With high contrast the letter is more distinct from the background and with low contrast the letter is indistinct from the background. In general, contrast only adjusts clearness of the letter from the background, when the contrast of this product is set too higher the background gets darker along with the letter. The contrast can be optimized to the user's taste.
Cautions
-
Do not drop or place strong impact to the product.
-
Dropping or impact by heavy object can cause critical problems.
-
Avoid moisture or water.
-
If the product is flooded the internal parts could be damaged that causes malfunction of the product.
-
When water gets into the product remove battery and wipe the device with dry towel, then call service center.
-
Avoid moisture, strong magnetism and heat when storing the product.
- Do not disassemble the product.
- Do not clean the product with chemical solutions such as thinner, alcohol and benzene.
- Process recording when battery is fully charged. Since recording consumes more battery than playing files, when battery is not fully charged it might cause malfunction of the device.
- Remove battery when not using the device for long time.
Leaving the battery in unused device for long time causes battery leak that results in damaging the device.
Cautions
- Do not remove USB cable or turn off the device while copying files.
Also, do not connect and remove USB cable repeatedly in short amount of time.
Repeated USB cable connection may damage the product's file system or USB connection can no long be made. If file system malfunctions, initialize the system according to the emergency recovery method.
- Sometime even the system seems to be paused while copying files using USB, the product is functioning normally and the process will continue shortly.
- Do not use earphone while riding a bicycle, driving a car or motorcycle.
Using earphone loudly while walking, especially at a crosswalk can be dangerous.
- Do not use earphone in high volume.
Lower the volume or stop using the device when buzzing in the ear occurs.
When troubles occur, check the following items.
-
When MP3 files cannot be downloaded (connection to PC cannot be made)
-
Check if the device is turned on.
- Check whether the driver is properly installed.
-
Check the USB connection to the computer.
-
When device does not operate
-
Check if the battery is properly inserted.
- Check the voltage of the battery. (Device does not operate when battery is exhausted.)
-
Remove and re-insert battery.
-
When button does not operate
Check if the device is in HOLD mode status.
- When broadcasting channel cannot be found in FM Radio Mode
FM reception sensitivity differs depending on the location of the user or area resulting in unsatisfactory channel reception status.
- When checking firmware version
The firmware version can be check when the device is turned on.
We do not take any responsibility for any data loss.
- Main Device
| Memory | Default Memory | 128MB/256MB |
| Display | LCD display | Graphic Type (128X128), backlight, song title display (multi lingual), Battery status, mode, volume, play time (left-over time), repeat, EQ, song order, progress status |
| Function | Equalizer Supported File Format Play Speed Adjustment CD SYNC Repeat Firmware Upgrade | Normal, Classic, Live, Pop, Rock Reproduce(MP3, WMA) / Record(IAD) Slow 1, Slow 2, Normal, Fast1, Fast 2 Function that automatically divides file when recoding CD. Normal, One, All, Shuffle, Intro, Section Repeat(A-B) |
| Power | Battery Continuous Play Time | 1 AAA 1.5V 8 hours |
| Size | length X width X depth weight | 57 X 57 X 15 (mm) 30g(without battery) |
2. Accessories
| Earphone Output | 10mW+10mW(32Ω) |
| Neck Strap Type | Yes |
3. Connection
| Connection Type | USB Cable Connection |
| Download Speed | 4Mbps |
4. Etc
| System Requirement | Pentium 200MHz or Higher, 32MB Main Memory or Higher, 10MB Hard Disk Space or More, 256 bit Color or Higher, Windows 98/ME/2000/XP, USB Port, CD-ROM Drive |
| Recommendation Requirements | Windows 98/ME/2000/XP |