
ONST-11B - Car kit CRUX - Free user manual and instructions
Find the device manual for free ONST-11B CRUX in PDF.


| Product Type | Vehicle Integration Module (Kit voiture) |
| Brand | CRUX |
| Model | ONST-11B |
| Compatible Vehicles | Chevrolet Cobalt (2007-2010), HHR (2006-2011), Malibu (2008-2012); Pontiac G6 (2009) |
| Power Supply | 12V DC (vehicle battery) |
| Steering Wheel Control (SWC) Retention | Pre-programmed for factory SWC, supports aftermarket radio SWC with dip switch settings |
| OnStar Retention | Retains factory OnStar functionality |
| Chime Retention | Retains factory chime functions with adjustable volume (potentiometer) |
| Audio System Support | Non-Bose (non-amplified) and Bose (amplified) systems with built-in audio level adapter |
| Outputs Provided | Vehicle Speed Sensor (VSS), Parking Brake, Reverse |
| Wiring | EIA color-coded for easy installation |
| Included Parts | ONST-11B module, harness, SWC cables |
| Installation | Plug-and-play with factory harness; requires connection to aftermarket radio SWC input |
| Dip Switch Settings | Configurable for various radio brands: Alpine, Clarion, Kenwood, JVC, Pioneer, Sony, Boss, Dual, etc. |
| SWC Cable Options | Option A (Alpine/Clarion/JVC/Kenwood with Blue/Yellow wire) and Option B (most other brands with 3.5mm plug) |
| Pioneer SWC Compatibility | Supports old (5V) and new (3.3V) generation Pioneer radios via dip switch |
| Maintenance | Keep dry and clean; use a soft cloth for cleaning |
| Safety | Disconnect vehicle battery before installation; follow installation diagram |
| Reparability | Contact CRUX support for spare parts or repair assistance |
Frequently Asked Questions - ONST-11B CRUX
User questions about ONST-11B CRUX
0 question about this device. Answer the ones you know or ask your own.
Ask a new question about this device
Download the instructions for your Car kit in PDF format for free! Find your manual ONST-11B - CRUX and take your electronic device back in hand. On this page are published all the documents necessary for the use of your device. ONST-11B by CRUX.
USER MANUAL ONST-11B CRUX
- Retains factory features in select GM LAN 11 Bit vehicles while functioning with an aftermarket radio.
- Pre-programmed to retain factory Steering Wheel Controls.
- Supports Non-Bose and Bose amplified systems.
- Provides Vehicle Speed Sensor (VSS), Parking Brake and Reverse Outputs.
- Retains factory OnStar®
- Retains chime functions.
- EIA color coded wiring for easy installation.
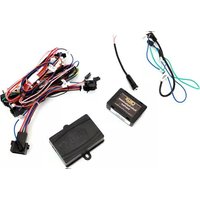
PARTS INCLUDED:

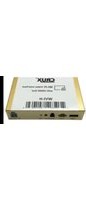
ONST-11B MODULE

natural_image
Close-up of black plastic electrical connectors with various colored wires (no visible text or symbols)ONST-11B HARNESS

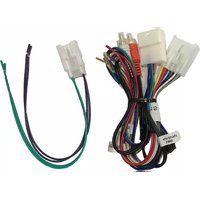
SWC CABLES
INSTALLATION DIAGRAM:

flowchart
graph TD
    A["16 & 14-Pin Connector Harness"] --> B["TO FACTORY HARNESS"]
    B --> C["Reverse Gear"]
    B --> D["Parking Brake"]
    B --> E["Illumination (+)"]
    B --> F["Amplifier Turn-on"]
    B --> G["Vehicle Speed Output"]
    B --> H["+12V Constant"]
    B --> I["Ground"]
    B --> J["Right Front (+)"]
    B --> K["Left Front (+)"]
    B --> L["Left Front (-)"]
    B --> M["Right Rear (+)"]
    B --> N["Right Rear (-)"]
    B --> O["Left Rear (+)"]
    B --> P["Left Rear (-)"]
    B --> Q["Green/Black"]
    B --> R["Blue/White"]
    B --> S["Orange"]
    B --> T["Red/Black"]
    B --> U["Yellow"]
    B --> V["Gray"]
    B --> W["Gray/Black"]
    B --> X["White"]
    B --> Y["White/Black"]
    B --> Z["Violet"]
    B --> AA["Violet/Black"]
    B --> AB["Green"]
    B --> AC["Green/Black"]

    AD["24-Pin Connector"] --> AE["To aftermarket radio SWC wire or 3.5mm port"]
    AF["10-Pin Connector"] --> AG["Cap or insulate if not being used"]
    AH["SWC DIP"] --> AI["JVC/Kenwood (Blue / Yellow)"]
    AJ["SWC"] --> AK["4-Pin Connector"]
    AL["BOSE NON BOSE"] --> AM["Chime Volume Adjustment"]
    AN["8-Pin Connector"] --> AO["TROUBLEshooting"]

    AP["AFTERMARKET RADIO"] --> AQ["LED LIGHT"]
    AP --> AR["Solid blue"]
    AP --> AS["Flashing blue"]
    AP --> AT["Solid red"]
    AP --> AU["Red off"]

    AV["TRELLATION"] --> AW["LLED MODULE FEEDBACK"]

    AX["TROUBLESHOOTING"] --> AY["LLED MODULE FEEDBACK"]

    AZ["TROUBLESHOOTING"] --> BA["LLED MODULE FEEDBACK"]

    BB["TROUBLESHOOTING"] --> BC["LLED MODULE FEEDBACK"]

    BD["TROUBLESHOOTING"] --> BE["LLED MODULE FEEDBACK"]

    BF["TROUBLESHOOTING"] --> BG["LLED MODULE FEEDBACK"]

    BH["TROUBLESHOOTING"] --> BH
DIP SWITCH SETTINGS:
AFTERMARKET RADIO DIP SWITCH SETTINGS:
NOTE: For Atoto, Blaupunkt, Dual, Farenheit, Power Acoustik, Soundstream, and most off-brand radios, check the aftermarket radio's manual to see if the SWC buttons need to be programmed.
4-PIN SWC CABLE
Use the proper 3.5MM to 4-Pin SWC cable for the aftermarket radio you are using.
OPTION A is used for ALPINE, CLARION, JVC, and KENWOOD units (Blue/Yellow wire is attached) OPTION B is used for BLAUPUNKT, BOSS, DUAL, FARENHEIT, JENSEN, POWER ACOUSTIK, PIONEER, SONY, SOUNDSTREAM and Most Off-Brand Radios.
NOTE: Cap or insulate the 3.5mm plug or Blue/Yellow wire if not being used.
Plug the SWC cable to the ONST-11B module and the 3.5mm plug to the aftermarket radio SWC port or use the Blue/Yellow wire for JVC and Kenwood radios.
SELECTING THE AUDIO SYSTEM:
If the vehicle is equipped with an amplified audio system, the ONST-11B has a built-in audio level adaptor that outputs the proper audio level from the aftermarket radio to the factory amplifier. To use this feature, plug in the male 8-pin connector on the ONST-11B harness to the GRAY female 8-pin connector on the ONST-11B module. The module is also labeled "Bose" and "Non Bose" to avoid confusion. (see picture below)
If the vehicle is NOT equipped with a factory amplified system, plug in the male 8-pin connector to the BLACK female 8-pin on the ONST-11B module.

natural_image
Close-up of a computer monitor rear panel showing internal connectors and a U-shaped connector (no text or symbols visible)NON BOSE (Non-Amplified) Connection
BOSE
(Amplified)
Connection
CHIME VOLUME ADJUSTMENT:
The ONST-11B has a potentiometer to adjust the chime volume. It is set at half way by default. To adjust the volume, simply use a suitable screw driver and turn the potentiometer clockwise to increase the volume and counter-clockwise to decrease the volume.

VEHICLE APPLICATIONS:
CHEVROLET
| 2007-2010 | Cobalt |
| 2006-2011 | HHR |
| 2008-2012 | Malibu |
PONTIAC
*NOTE: If the 2009 G6 has two knobs on the radio, please use part# ONST-11C instead.
Compatible Radio


2009 Pontiac G6 2009 Chevrolet Malibu
DIP switch settings for Pioneer receivers:

Location of the switch may vary on the interface (Corner or Middle).
Please note that interfaces with DIP at the end of the LOT# are installed with the switch.
- Set DIP switch to "3V3" position for support of NEW generation Pioneer steering wheel button control.
- Set DIP switch to "5V" position for support of OLD generation Pioneer steering wheel button control.

Brand : CRUX
Model : ONST-11B
Category : Car kit